

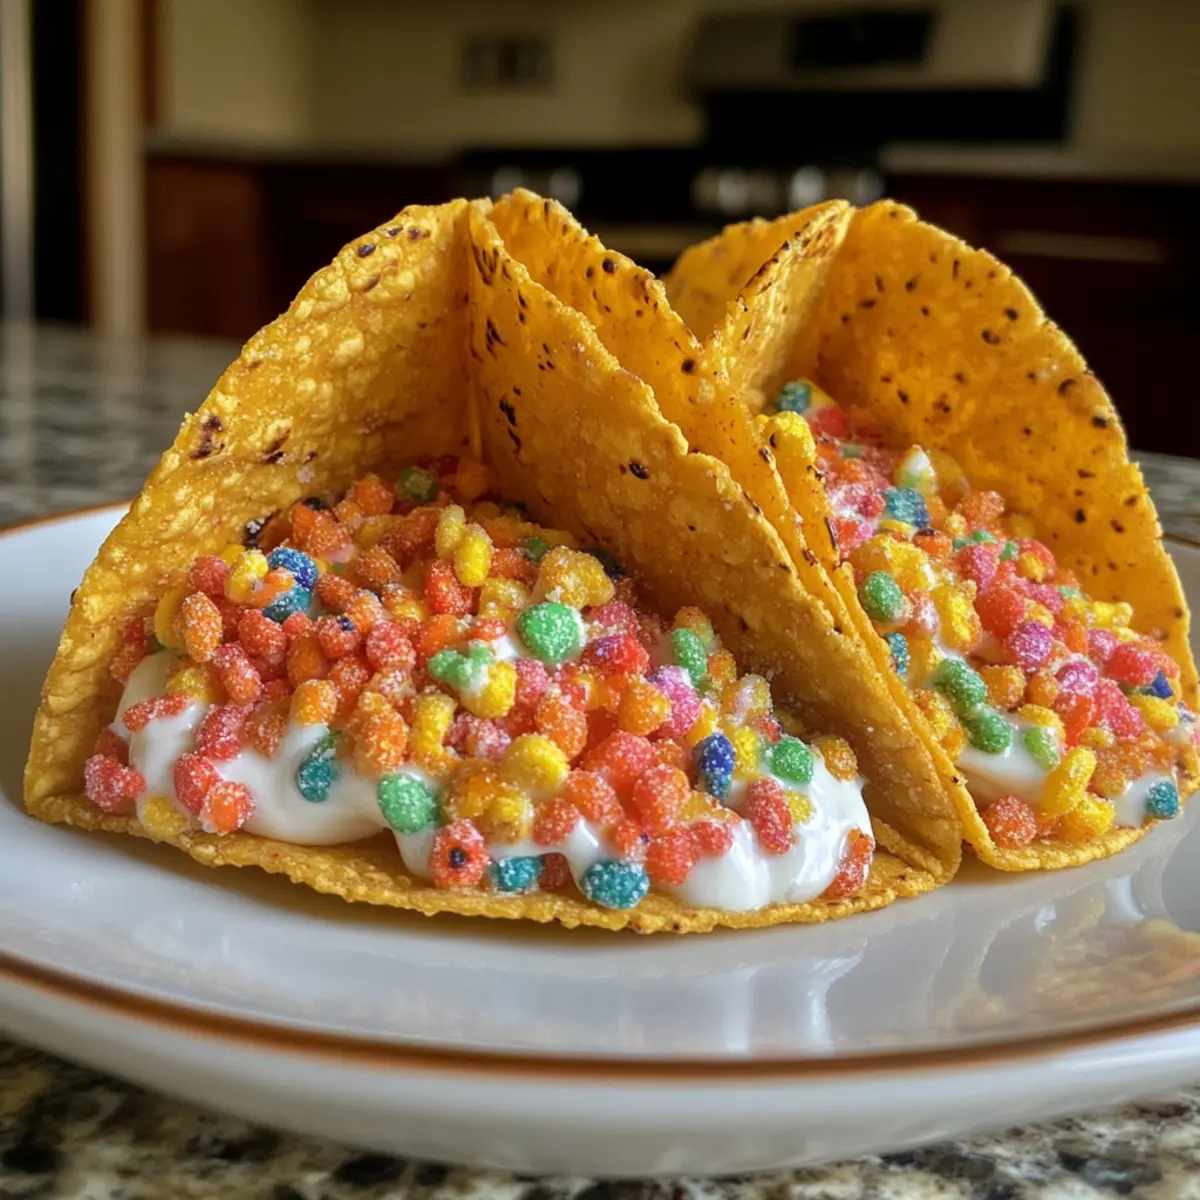
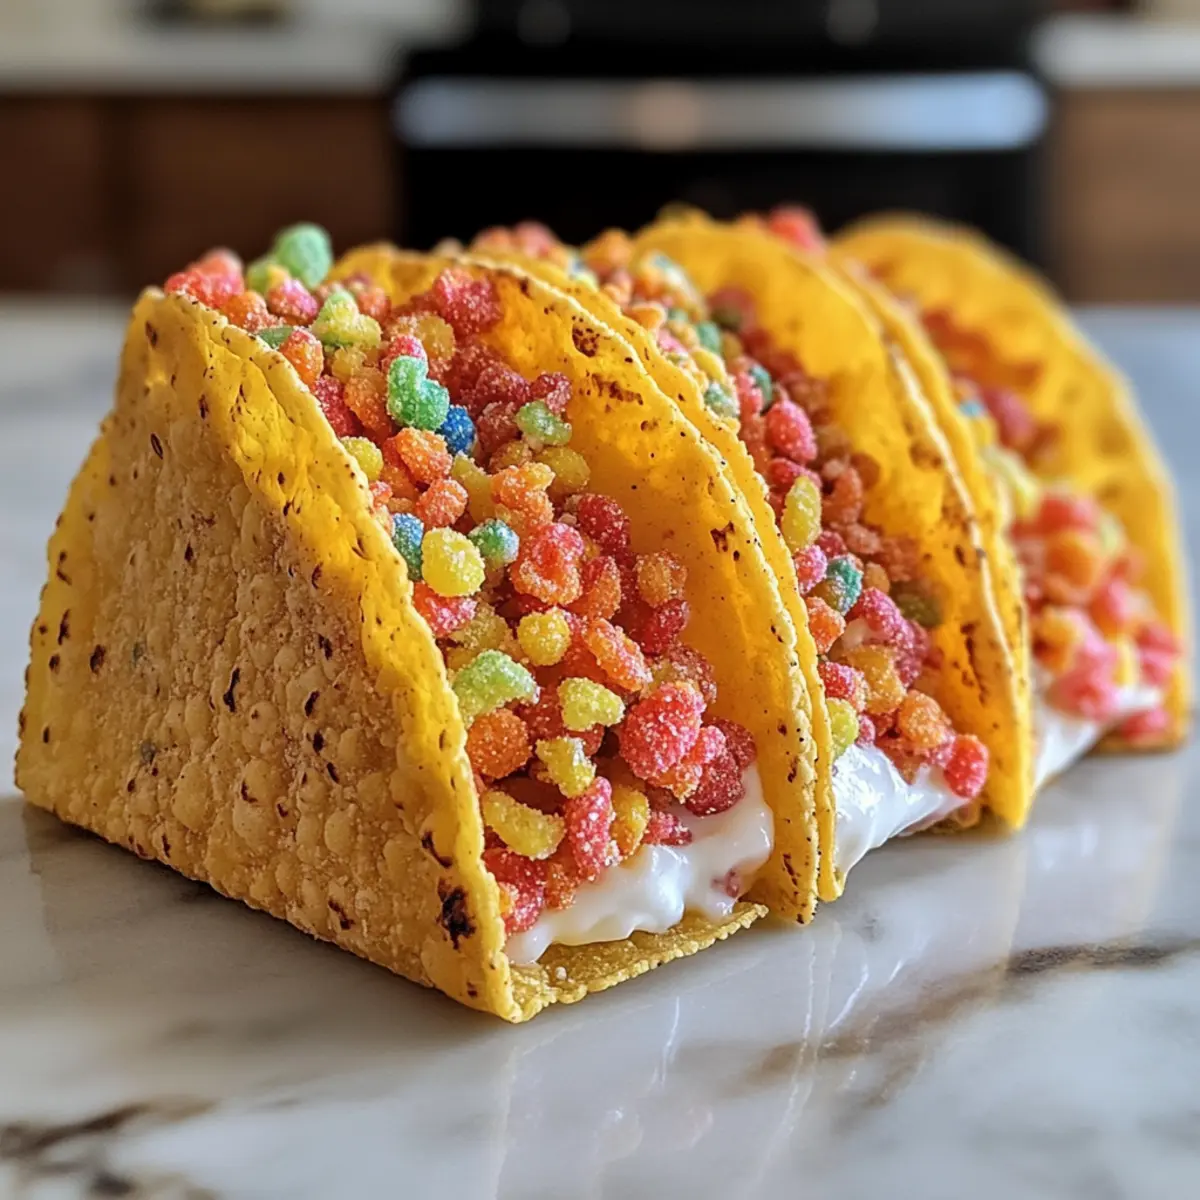
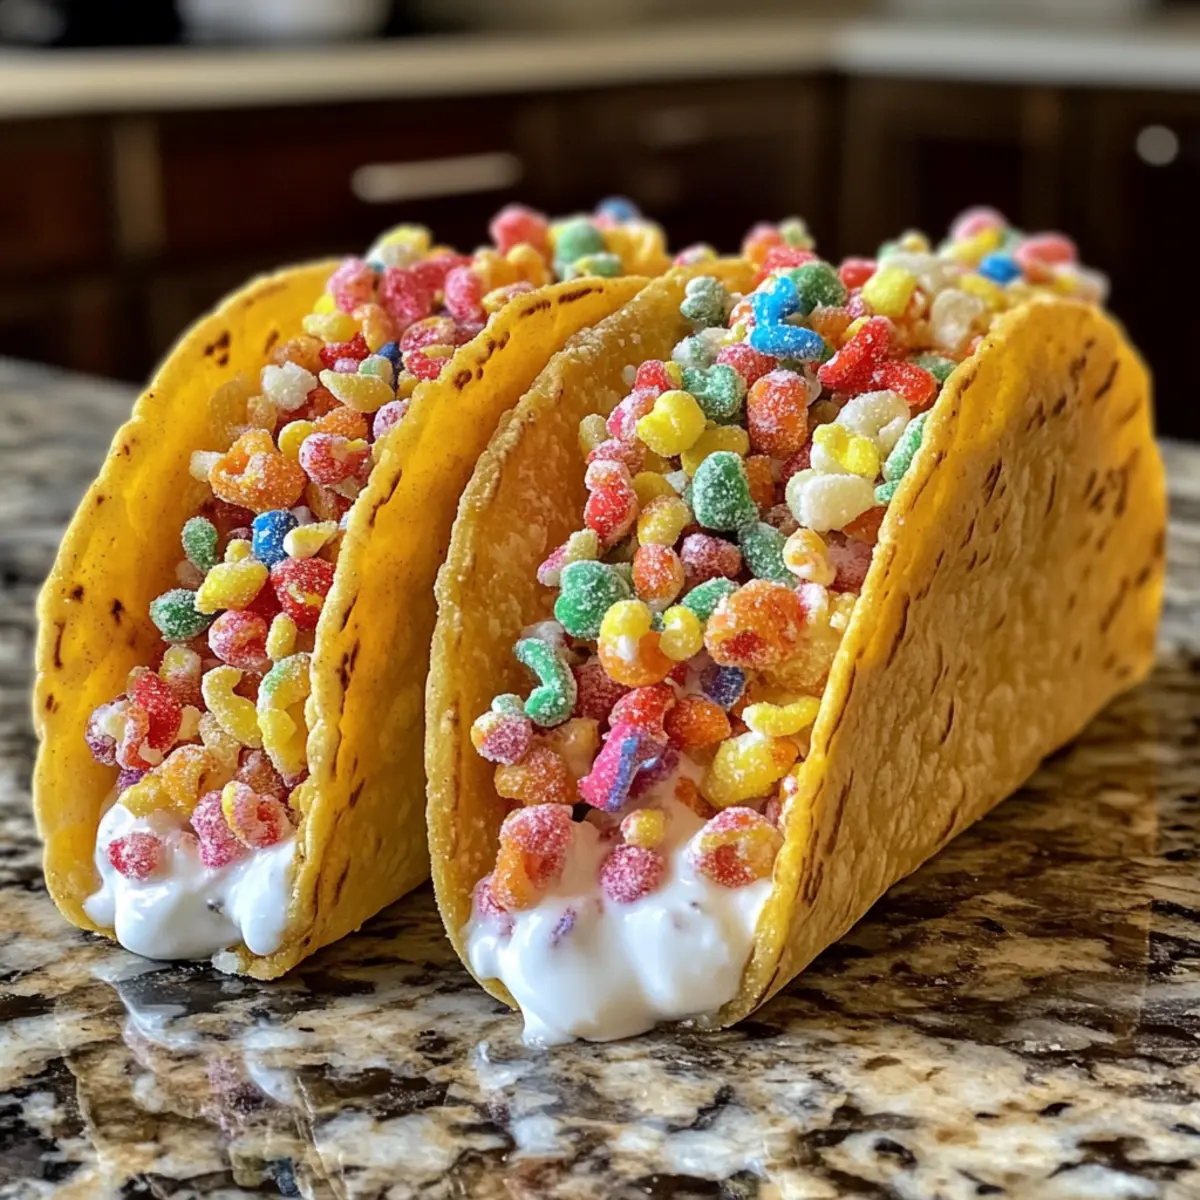
How did a simple taco shell become the star of this irresistible dessert? Enter Crispy Fruity Pebbles Cheesecake Tacos—a delightful mashup that brings together velvety cheesecake and playful, crunchy cereal in a way that feels nostalgic yet totally new. This no-bake recipe is not just a quick prep masterpiece, but it’s also a customizable treat that will have your family and friends clamoring for seconds. Whether it’s for a birthday bash or a cozy family night, these tasty tacos make dessert a fun and memorable experience. Curious how to create this sugary sensation? Let’s dive into the delightful details!
Why You’ll Crave These Tacos!
Unique Twist: The Crispy Fruity Pebbles Cheesecake Tacos combine two favorites—cheesecake and cereal—creating a playful dessert unlike any other!
No-Bake Convenience: With a simple no-bake process, you can whip these up quickly, making them perfect for unexpected cravings.
Customization Galore: Feel free to swap out the Fruity Pebbles with your favorite cereal or drizzle on chocolate sauce for extra decadence.
Crowd-Pleasing Treat: Whether for a birthday party or family gathering, these tacos are always a hit, bringing smiles and nostalgia. Why not pair them with some Cheesy Fries for an unforgettable meal?
Make-Ahead Friendly: Prepare the cheesecake filling a day in advance—just assemble before serving for optimal freshness and texture.
Crispy Fruity Pebbles Cheesecake Tacos Ingredients
For the Cheesecake Filling
• Cream Cheese – Be sure to soften it for easy mixing, creating that dreamy, smooth texture.
• Sugar – Sweeten the filling to taste; a sugar substitute can keep it lower-calorie if needed.
• Vanilla Extract – Use pure vanilla extract for the best flavor enhancement in your cheesecake.
For the Taco Shells
• Taco Shells – Choose sturdy taco shells for that perfect crunch and to keep the filling from leaking.
For the Topping
• Fruity Pebbles Cereal – These add vibrant color and a satisfying crunch, making your Crispy Fruity Pebbles Cheesecake Tacos a feast for the eyes and palate!
Feel free to mix and match ingredients to make this delightful dessert your own!
Step‑by‑Step Instructions for Crispy Fruity Pebbles Cheesecake Tacos
Step 1: Prepare the Cheesecake Filling
In a medium mixing bowl, combine 8 ounces of softened cream cheese, ½ cup of sugar, and 1 teaspoon of vanilla extract. Using an electric mixer, beat on medium speed for about 2-3 minutes until the mixture is smooth and creamy, with no lumps remaining. The filling should have a luscious texture, perfect for filling your tacos.
Step 2: Fill Taco Shells
Carefully take about 6 sturdy taco shells and gently spoon the cheesecake filling into each one, filling them generously while ensuring not to overstuff. Use a spatula to help push the filling into the corners of the shells for an even distribution. Aim for a nice, rounded fill that showcases the creamy goodness of your Crispy Fruity Pebbles Cheesecake Tacos.
Step 3: Add Fruity Pebbles
Once the taco shells are filled, take 1 cup of Fruity Pebbles cereal and generously sprinkle it over the cheesecake mixture in each shell. This adds a delightful crunch and vibrant color to your dessert. Don’t be shy—let the Fruity Pebbles layer spill over for an extra playful look that makes these tacos visually enticing and fun.
Step 4: Chill and Serve
After assembling the tacos, place them in an airtight container and refrigerate for at least 30 minutes to set. This chilling time helps the flavors meld together and allows the taco shells to remain crispy. Remember, to enjoy the best texture and flavor, assemble your Crispy Fruity Pebbles Cheesecake Tacos just before serving them to your guests.

Variations & Substitutions for Crispy Fruity Pebbles Cheesecake Tacos
Feel free to let your creativity shine! Customize these delightful tacos to match your taste and dietary needs.
-
Dairy-Free: Replace cream cheese with a dairy-free cream cheese alternative for a lactose-free option. Silken tofu blended with a bit of vanilla can also work beautifully!
-
Sugar-Free: Use a sugar substitute like erythritol or stevia to cater to a sugar-free lifestyle without sacrificing flavor. Your cheesecake filling will still taste sweet and delicious!
-
Gluten-Free: Opt for gluten-free taco shells to ensure everyone can enjoy. This simple swap allows you to keep things fun and inclusive!
-
Enhanced Flavor: Add a tablespoon of lemon juice or zest to the cheesecake filling for a zesty twist. The citrus notes will elevate the dessert to new heights!
-
Flavor Boost: Incorporate mini chocolate chips or crushed strawberries into the filling for added flavor and texture. Who can resist a bit of chocolate or fruity goodness?
-
Chocolatey Version: Swap in chocolate cereal for the Fruity Pebbles for a cocoa-inspired delight. Drizzle with chocolate sauce to make it ultra-decadent—perfect for chocolate lovers!
-
Crunchy Layer: For a textural twist, add crushed nuts or granola on top of the Fruity Pebbles. It adds delightful crunch while providing a nutritious component.
-
Tropical Twist: Introduce shredded coconut or diced pineapple to the filling for a refreshing tropical flavor. It’s like a vacation in every bite!
Ask your family to join in for a fun culinary experience that can create new, tasty memories together. These Crispy Fruity Pebbles Cheesecake Tacos are versatile—why not explore some of these variations to bring a new twist to your favorite dessert? And if you’re interested in different sweet options, don’t miss the delicious Strawberry Cheesecake Dump or Rainbow Fruity Tapioca recipes!
What to Serve with Crispy Fruity Pebbles Cheesecake Tacos
Satisfy your sweet tooth by creating the perfect accompaniment to these colorful dessert tacos that evoke nostalgia and joy.
-
Whipped Cream: A dollop of light, airy whipped cream enhances each bite, adding a creamy contrast to the playful crunch of the tacos.
-
Fresh Berries: Serve alongside mixed berries like strawberries and blueberries for a refreshing burst of tartness, balancing the sweetness.
-
Ice Cream: A scoop of vanilla or fruity sorbet brings a delightful chill to the table, turning your dessert into a delicious sundae experience.
-
Chocolate Sauce: Drizzle warm chocolate sauce over the tacos for an indulgent touch that complements the creamy cheesecake flavor.
-
Coconut Flakes: Sprinkle toasted coconut flakes on top for a tropical flair and chewy texture that pairs beautifully with colorful Fruity Pebbles.
-
Sparkling Lemonade: Refreshing and light, a glass of sparkling lemonade cleanses the palate and adds a zesty kick to your dessert experience.
-
Mini Fruit Tarts: Serve these alongside mini fruit tarts for a delightful assortment of flavors and textures that guests will adore.
-
Chocolate Dipped Strawberries: Treat your loved ones to these elegant bites of fruit, offering both sweetness and sophistication alongside the fun tacos.
-
Caramel Sauce: Provide a side of warm caramel sauce for drizzling, creating a decadent experience that tantalizes the taste buds.
-
Milkshakes: Craft a creamy milkshake in flavors like vanilla or strawberry to wash down that delightful sweetness and keep the fun rolling!
How to Store and Freeze Crispy Fruity Pebbles Cheesecake Tacos
Refrigerator: Store assembled tacos in an airtight container for up to 3 days. To maintain the taco shell’s crispiness, it’s best to assemble them just before serving.
Freezer: While it’s not ideal to freeze the assembled tacos due to the potential sogginess, you can freeze the cheesecake filling for up to 2 months. Thaw it in the fridge before refilling fresh taco shells.
Make-Ahead Tips: The cheesecake filling can be prepared up to 1 day in advance and kept in the refrigerator. Just remember to use fresh taco shells and add the Fruity Pebbles topping right before serving for optimal taste and texture.
Reheating: If you have leftover filled tacos, enjoy them cold or at room temperature. Avoid reheating in a microwave, as this might compromise the taco shell’s crunch!
Make Ahead Options
These Crispy Fruity Pebbles Cheesecake Tacos are perfect for busy home cooks seeking effortless meal planning! You can prepare the cheesecake filling up to 24 hours ahead of time—just blend the softened cream cheese, sugar, and vanilla, then store it in an airtight container in the refrigerator. Additionally, you can assemble your taco shells without the Fruity Pebbles up to 3 days in advance; this way, the shells stay crispy while the filling blends seamlessly with the flavors. When you’re ready to serve, simply fill the taco shells with the cheesecake mixture, top with the crunchy Fruity Pebbles, and enjoy a delightful dessert that’s just as delicious as if made fresh!
Expert Tips for Crispy Fruity Pebbles Cheesecake Tacos
-
Room Temperature Cream Cheese: Ensure cream cheese is softened to room temperature for a lump-free, creamy filling that blends beautifully.
-
Assemble Just Before Serving: To keep the taco shells crispy, fill them right before serving. This prevents them from becoming soggy.
-
Ingredient Substitutions: Get creative! Substitute Fruity Pebbles with other colorful cereals for a fun twist on the classic Crispy Fruity Pebbles Cheesecake Tacos.
-
Sweetener Options: Taste as you go! Adjust sugar levels according to preference, or try using a sugar alternative for a healthier option.
-
Storage Tips: Store any leftovers in the refrigerator for up to 3 days, but be mindful that the shells will soften over time; hence, it’s best to assemble fresh!
Crispy Fruity Pebbles Cheesecake Tacos Recipe FAQs
What is the best way to select ripe ingredients for my cheesecake filling?
Absolutely! For a luscious cheesecake filling, ensure your cream cheese is fully softened to room temperature. This is crucial as it helps the mixture blend smoothly without lumps. When selecting your cream cheese, opt for a high-quality brand for the best flavor. You want it creamy and rich, which makes all the difference in your Crispy Fruity Pebbles Cheesecake Tacos.
How should I store leftover tacos, and for how long will they last?
You can store assembled tacos in an airtight container in the refrigerator for up to 3 days. However, to maintain their delightful crunch, it’s best to fill the taco shells just before serving. If they do soften a bit, a quick crisp in the oven can help revive them. Just keep in mind that the quality is best within the first couple of days!
Can I freeze the cheesecake filling for later use?
Yes, indeed! You can freeze the cheesecake filling for up to 2 months. To do this, first scoop it into an airtight container or freezer bag, removing as much air as possible. When you’re ready to make more tacos, simply thaw the filling in the refrigerator overnight. After it’s fully thawed, give it a good stir to return its creamy consistency before refilling fresh taco shells.
What should I do if my taco shells become soggy?
The key is to assemble your Crispy Fruity Pebbles Cheesecake Tacos right before serving. If they do become soggy, you can re-crisp them. Simply place the shells in a preheated oven at 350°F (175°C) for a few minutes until they feel crispy again. Alternatively, avoid the filling reaching the edges of the shells to help maintain their integrity until it’s time to serve!
Are there any dietary considerations I should keep in mind?
Definitely! If you’re serving these tacos to guests with dietary restrictions, consider using a gluten-free cereal option or sugar substitutes for those watching their sugar intake. Always check for any allergies related to dairy and gluten in the ingredients used. These little adjustments will help ensure everyone can enjoy your delicious Crispy Fruity Pebbles Cheesecake Tacos!
Crispy Fruity Pebbles Cheesecake Tacos for Sweet Nostalgia
Ingredients
Equipment
Method
- In a medium mixing bowl, combine 8 ounces of softened cream cheese, ½ cup of sugar, and 1 teaspoon of vanilla extract. Using an electric mixer, beat on medium speed for about 2-3 minutes until the mixture is smooth and creamy, with no lumps remaining.
- Carefully take about 6 sturdy taco shells and gently spoon the cheesecake filling into each one, filling them generously while ensuring not to overstuff.
- Once the taco shells are filled, take 1 cup of Fruity Pebbles cereal and generously sprinkle it over the cheesecake mixture in each shell.
- After assembling the tacos, place them in an airtight container and refrigerate for at least 30 minutes to set.