How to Make the Perfect Chicken Alfredo: A Delicious Recipe You’ll Love

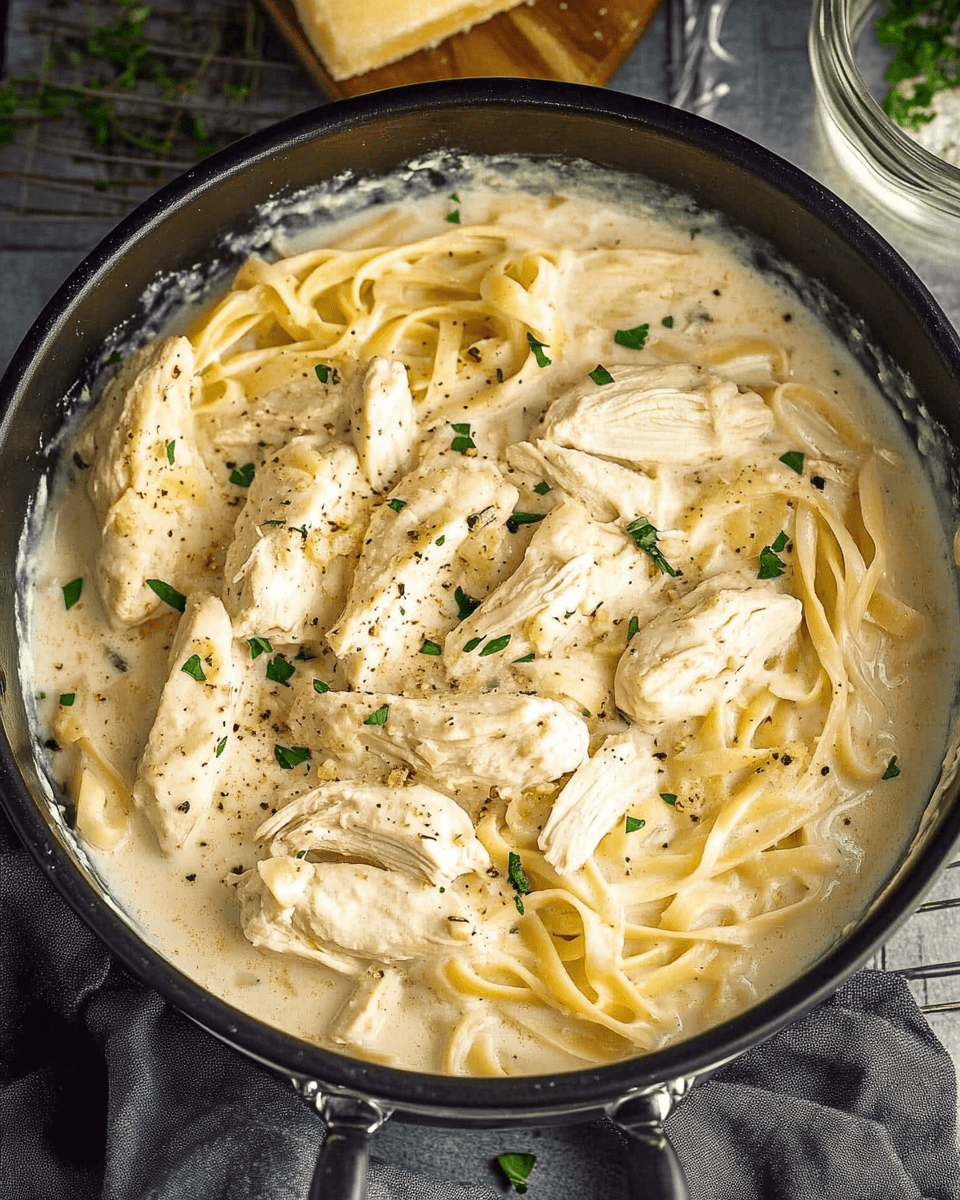
Chicken Alfredo is a timeless classic that never fails to impress. Its creamy, cheesy sauce paired with tender chicken and perfectly cooked fettuccine is a dish that feels luxurious yet approachable. Whether you’re cooking for your family, hosting a dinner party, or simply craving comfort food, Chicken Alfredo is the perfect choice. In this guide, you’ll learn exactly how to create this delicious meal, step by step.

Why You’ll Love This Recipe

There’s something magical about a well-made Chicken Alfredo. The creamy Alfredo sauce, seasoned chicken, and tender pasta come together to create a symphony of flavors. This recipe is simple, requires minimal ingredients, and delivers maximum flavor. Plus, it’s a guaranteed crowd-pleaser.

Ingredients You’ll Need

Here’s a breakdown of everything required for this recipe. These pantry staples and fresh ingredients make it easy to whip up a perfect Chicken Alfredo.

IngredientQuantity
Fettuccine1/2 pound (226.8 grams)
Chicken Breasts1 pound (453.6 grams)
Kosher Salt1 teaspoon + 1/4 teaspoon
Black Pepper1/4 teaspoon
Olive Oil2 tablespoons
Heavy Cream2 cups (454 grams or 473.2 ml)
Unsalted Butter2 tablespoons (28.3 grams)
Parmesan Cheese1 cup, shredded (100 grams)

Step-by-Step Guide to Making Chicken Alfredo

1. Cook the Fettuccine

Start by bringing a large pot of water to a rolling boil. Add 1 teaspoon of kosher salt to season the water. Drop the fettuccine into the pot and cook according to the time indicated on the package. Stir immediately after adding it to prevent sticking and occasionally while it boils.

  • Pro Tip: Reserve 1/4 cup of pasta water before draining. It can help adjust the sauce consistency later.

2. Prepare the Chicken

Season the chicken breasts with 1 teaspoon of kosher salt and 1/4 teaspoon of black pepper on both sides.

Cooking the Chicken

  1. Heat 2 tablespoons of olive oil in a large skillet over medium heat.
  2. Place the chicken cutlets in the skillet and cook for about 4 minutes per side, or until the internal temperature reaches 165°F (74°C).
  3. Remove the chicken from the skillet and tent loosely with foil to keep warm.

3. Make the Alfredo Sauce

Creating the Base

  1. In the same skillet (no need to clean it), add 2 cups of heavy cream and 2 tablespoons of unsalted butter.
  2. Whisk the ingredients together over medium heat until the butter has fully melted.

Simmer the Sauce

  • Reduce the heat to low and let the mixture simmer gently for about 15 minutes. Stir occasionally to prevent scorching.
  • You should notice small bubbles forming, but avoid a full boil.

Add Parmesan Cheese

  1. Gradually stir in 1 cup of shredded Parmesan cheese until it melts completely.
  2. Taste the sauce and adjust the seasoning with kosher salt and fresh black pepper. A little extra seasoning at this stage makes all the difference!

4. Combine Pasta and Sauce

  1. Add the drained fettuccine to the skillet with the Alfredo sauce. Toss until the pasta is evenly coated.
  2. If the sauce feels too thick, add a splash of the reserved pasta water to achieve your desired consistency.

5. Slice and Serve the Chicken

  1. Slice the chicken breasts into thin strips.
  2. Arrange them over the saucy fettuccine in the skillet or on serving plates.

Optional Garnish

  • Sprinkle freshly chopped parsley on top for a burst of color and flavor.

Tips for Success

  • Use Fresh Ingredients: Fresh Parmesan cheese and heavy cream make a significant difference in flavor and texture.
  • Don’t Overcook the Chicken: Keep a meat thermometer handy to ensure the chicken stays juicy.
  • Season Throughout: Building flavor in each step elevates the entire dish.

Nutritional Information (Per Serving)

NutrientAmount
Calories~650
Protein~38g
Carbohydrates~40g
Fat~38g
Sodium~950mg

FAQs About Chicken Alfredo

1. Can I make Chicken Alfredo ahead of time?

Yes! You can prepare the chicken and sauce ahead. Store them separately in airtight containers in the fridge. Reheat gently before combining with freshly cooked pasta.

2. Can I use pre-cooked chicken?

Absolutely! Rotisserie chicken or leftover grilled chicken works well. Just slice it and warm it up before adding it to the dish.

3. What can I add to my Chicken Alfredo?

You can customize your Alfredo with vegetables like broccoli, peas, or spinach. Shrimp is also a great addition.

4. Is there a dairy-free alternative?

Yes, you can substitute heavy cream with coconut milk and Parmesan with nutritional yeast for a dairy-free version.

5. How can I reheat leftovers?

Warm the pasta gently on the stovetop or in the microwave. Add a splash of milk or cream to loosen the sauce.

6. Can I freeze Chicken Alfredo?

While it’s best enjoyed fresh, you can freeze it. Allow the dish to cool completely, then store it in freezer-safe containers for up to 2 months.

Conclusion

There you have it! This Chicken Alfredo recipe is simple to make, incredibly flavorful, and perfect for any occasion. Whether you’re a seasoned cook or a beginner, this dish is sure to be a hit. So, roll up your sleeves, grab your ingredients, and get ready to enjoy a plate of creamy, comforting goodness.

Actionable Tip: Why not double the recipe and save some for later? Having homemade Chicken Alfredo ready to go is a lifesaver on busy nights.

Happy cooking! 😊

PAUL

How to Make the Perfect Chicken Alfredo: A Delicious Recipe You’ll Love

Creamy, cheesy, and utterly satisfying, Chicken Alfredo is a classic comfort food that’s surprisingly simple to make. Tender chicken, rich Alfredo sauce, and perfectly cooked fettuccine come together in a dish that feels indulgent yet approachable. Whether it’s a weeknight dinner or a special occasion, this recipe will leave everyone asking for seconds.
Prep Time 10 minutes
Cook Time 20 minutes
Total Time 30 minutes
Servings: 4 servings
Course: Main Course
Cuisine: American

Ingredients
  

  • 1/2 pound 226.8 grams fettuccine
  • 1 pound 453.6 grams chicken breasts
  • 1 teaspoon kosher salt plus 1/4 teaspoon
  • 1/4 teaspoon black pepper
  • 2 tablespoons olive oil
  • 2 cups 473.2 ml heavy cream
  • 2 tablespoons 28.3 grams unsalted butter
  • 1 cup 100 grams Parmesan cheese, shredded
  • Fresh parsley optional garnish

Method
 

Cook the Fettuccine:
  1. Bring a large pot of water to a boil. Add 1 teaspoon of kosher salt.
  2. Cook the fettuccine according to the package instructions until al dente.
  3. Reserve 1/4 cup of pasta water before draining.
Prepare and Cook the Chicken:
  1. Season chicken breasts with 1 teaspoon kosher salt and 1/4 teaspoon black pepper.
  2. Heat olive oil in a skillet over medium heat.
  3. Cook chicken for 4 minutes per side, or until the internal temperature reaches 165°F (74°C).
  4. Remove chicken from the skillet and cover loosely with foil.
Make the Alfredo Sauce:
  1. In the same skillet, add heavy cream and unsalted butter.
  2. Whisk over medium heat until the butter melts completely.
  3. Reduce heat to low and simmer gently for 15 minutes, stirring occasionally.
  4. Gradually stir in Parmesan cheese until fully melted.
  5. Taste and adjust seasoning with salt and pepper.
Combine Pasta and Sauce:
  1. Add the drained fettuccine to the Alfredo sauce in the skillet.
  2. Toss to coat evenly, adding reserved pasta water if needed for consistency.
Slice and Serve the Chicken:
  1. Slice chicken breasts into thin strips.
  2. Arrange over the saucy fettuccine or serve on the side.
  3. Garnish with fresh parsley if desired.

Notes

  • Fresh Ingredients Matter: Use high-quality Parmesan cheese and fresh cream for the best flavor.
  • Customize Your Dish: Add vegetables like broccoli or spinach for a nutritious twist, or swap chicken for shrimp.
  • Reheating Tips: Warm leftovers gently with a splash of milk or cream to maintain the sauce’s creamy texture.
  • Freezing Option: Freeze leftovers in airtight containers for up to 2 months. Thaw in the fridge before reheating.

Lebanese Lentil Soup: A Nutritious and Comforting Recipe

When it comes to hearty, wholesome meals, nothing beats a bowl of Lebanese Lentil Soup. This Middle Eastern classic is beloved for its earthy flavors, creamy texture, and nourishing ingredients. Whether you’re looking for a healthy weeknight dinner or a comforting dish on a chilly day, Lebanese lentil soup is the perfect choice.

With red lentils, warming spices, and a touch of lemon, this soup is easy to make and full of bold, satisfying flavors. Let’s explore how you can create this traditional dish and enjoy its incredible taste and health benefits.

Why Lebanese Lentil Soup Should Be on Your Table

Lebanese lentil soup isn’t just a meal—it’s a celebration of flavor and nutrition. Here’s why you’ll love it:

  • Nutritious: Packed with plant-based protein, fiber, and essential vitamins, it’s both healthy and filling.
  • Budget-Friendly: Made with affordable, pantry-friendly ingredients.
  • Quick and Easy: Ready in under an hour with minimal prep.
  • Vegan and Gluten-Free: Naturally suitable for various dietary preferences.

Whether you’re a lentil lover or new to this versatile legume, Lebanese lentil soup is bound to become a staple in your kitchen.

Ingredients for Lebanese Lentil Soup

Core Ingredients

IngredientQuantityDetails
Extra virgin olive oil2 tbspFor sautéing the vegetables.
Yellow onion1, dicedAdds sweetness and depth to the soup.
Carrot1, peeled and dicedBrings natural sweetness and color.
Potato2, peeled and dicedProvides a creamy, starchy base.
Red lentils1½ cupsCook quickly and create a smooth texture.
Salt½ tspEnhances the flavors.
Black pepper½ tspAdds a subtle, spicy warmth.
Cumin1 tspEarthy and aromatic, a hallmark of the dish.
Turmeric½ tspBrings color and anti-inflammatory benefits.
Vegetable stock8 cupsForms the flavorful base of the soup.
Lemon juice1, juicedBrightens the flavors with a citrusy zing.

Step-by-Step Instructions

1. Wash the Lentils

  • Place the red lentils in a strainer and rinse them under running water until the water runs clear.
  • Drain and set aside. This step removes excess starch and ensures a cleaner flavor.

2. Sauté the Vegetables

  • Heat the olive oil in a large stockpot over medium heat.
  • Add the diced onion and sauté for about 5 minutes until softened and translucent.
  • Stir in the carrot and potatoes, cooking for another 1–2 minutes while stirring continuously.

3. Add the Lentils and Spices

  • Add the rinsed lentils to the pot, followed by the cumin, turmeric, salt, and black pepper. Stir to coat the lentils and vegetables with the spices.

4. Pour in the Stock

  • Pour in the vegetable stock, stirring to combine all the ingredients.
  • Bring the mixture to a boil, then reduce the heat to low. Cover and let it simmer gently for 40 minutes.

5. Blend the Soup

  • Remove the pot from heat and let the soup cool slightly. This prevents burns while blending.
  • Use an immersion blender to puree the soup until it’s smooth and creamy. Alternatively, transfer the soup to a high-speed blender in batches and blend carefully.

6. Adjust and Serve

  • Taste the soup and adjust the seasoning as needed.
  • Serve hot with a squeeze of fresh lemon juice for a bright, tangy finish.

Tips for the Perfect Lebanese Lentil Soup

1. Choose the Right Lentils

  • Red lentils are ideal for this recipe as they cook quickly and create a creamy texture. Avoid green or brown lentils, which hold their shape and don’t blend as easily.

2. Don’t Skip the Lemon

  • Lemon juice is essential to balance the earthy flavors of the lentils and spices. Add it just before serving for the best flavor.

3. Use Homemade Stock

  • If possible, use homemade vegetable stock for a richer, more natural flavor.

4. Customize the Texture

  • If you prefer a chunkier soup, blend only half of the mixture or skip the blending step entirely.

Nutritional Benefits of Lebanese Lentil Soup

NutrientPer ServingHealth Benefits
Protein~12gSupports muscle repair and growth.
Fiber~10gPromotes digestion and keeps you full.
Iron~25% DVBoosts red blood cell production.
Vitamin A~20% DVSupports vision and immune health.
Vitamin C~15% DVBoosts immunity and aids collagen formation.
Calories~200A low-calorie, nutrient-dense option.

This soup is not only delicious but also a powerhouse of nutrients, making it an excellent choice for a balanced diet.

Creative Variations for Lebanese Lentil Soup

1. Spicy Lentil Soup

  • Add a pinch of red pepper flakes or diced green chilies for a spicy kick.

2. Add Greens

  • Stir in fresh spinach or kale during the last 5 minutes of cooking for added nutrients.

3. Coconut Twist

  • Replace half the vegetable stock with coconut milk for a creamy, tropical flavor.

4. Protein Boost

  • Top the soup with a dollop of Greek yogurt or sprinkle in roasted chickpeas for extra protein.

5. Serve with Bread

  • Pair with warm pita bread or crusty sourdough for a complete meal.

FAQs About Lebanese Lentil Soup

1. Can I make this soup ahead of time?

Yes! Lebanese lentil soup stores well in the fridge for up to 4 days. Reheat gently on the stovetop or in the microwave before serving.

2. Can I freeze lentil soup?

Absolutely. Let the soup cool completely, then transfer it to airtight containers. Freeze for up to 3 months. Thaw overnight in the fridge before reheating.

3. What can I use instead of red lentils?

While red lentils are best, yellow lentils or split mung beans are good substitutes.

4. Can I make this soup in a slow cooker?

Yes. Sauté the vegetables first, then transfer all ingredients to the slow cooker. Cook on low for 6–8 hours or high for 3–4 hours.

5. How do I thicken or thin the soup?

To thicken, simmer uncovered for a few extra minutes. To thin, add more vegetable stock or water until you reach your desired consistency.

6. Is Lebanese lentil soup spicy?

No, it’s mild with earthy flavors. If you like heat, you can add cayenne or red pepper flakes.

Conclusion: Try This Lebanese Lentil Soup Recipe Today!

There’s something incredibly comforting about a bowl of homemade Lebanese Lentil Soup. It’s creamy, flavorful, and packed with nutrients, making it a go-to meal for any day of the week. With just a few simple ingredients and easy steps, you can enjoy a taste of the Middle East right in your kitchen.

So grab your stockpot, prep those veggies, and savor the warmth and richness of this timeless dish. Your taste buds—and your body—will thank you! 🌿🍋


ating

Lebanese Lentil Soup: A Nutritious and Comforting Recipe

Lebanese Lentil Soup is a hearty, creamy, and nutritious Middle Eastern classic. Packed with red lentils, earthy spices, and a splash of lemon, this quick and easy soup is perfect for a comforting weeknight dinner or a healthy meal any day. It’s naturally vegan, gluten-free, and budget-friendly, making it a must-try dish!

Prep Time 10 minutes
Cook Time 40 minutes
Total Time 50 minutes
Servings: 6 servings
Course: Dinner, Soup
Cuisine: Middle Eastern

Ingredients
  

Core Ingredients:
  • 2 tablespoons extra virgin olive oil
  • 1 yellow onion diced
  • 1 carrot peeled and diced
  • 2 potatoes peeled and diced
  • cups red lentils rinsed and drained
  • ½ teaspoon salt
  • ½ teaspoon black pepper
  • 1 teaspoon cumin
  • ½ teaspoon turmeric
  • 8 cups vegetable stock
  • Juice of 1 lemon
Optional Toppings:
  • Fresh parsley chopped
  • Lemon wedges
  • Red pepper flakes

Method
 

  1. Wash the Lentils
  2. Rinse the red lentils in a strainer under running water until the water runs clear. Drain and set aside.
  3. Sauté the Vegetables
  4. Heat olive oil in a large stockpot over medium heat.
  5. Add the diced onion and sauté for about 5 minutes, until softened and translucent.
  6. Stir in the diced carrot and potatoes, cooking for another 1–2 minutes.
  7. Add Lentils and Spices
  8. Add the rinsed lentils to the pot, followed by cumin, turmeric, salt, and black pepper. Stir to coat the vegetables and lentils with the spices.
  9. Pour in the Stock
  10. Pour in the vegetable stock, stirring to combine all the ingredients.
  11. Bring the mixture to a boil, then reduce the heat to low. Cover and simmer for 40 minutes.
  12. Blend the Soup
  13. Remove the pot from heat and let the soup cool slightly.
  14. Use an immersion blender to puree the soup until smooth and creamy. Alternatively, transfer the soup to a high-speed blender in batches and blend carefully.
  15. Adjust and Serve
  16. Taste the soup and adjust the seasoning if needed.
  17. Serve hot with a squeeze of fresh lemon juice and optional garnishes like parsley, lemon wedges, or red pepper flakes.

Notes

  • Make It Ahead: Store the soup in an airtight container in the fridge for up to 4 days or freeze for up to 3 months.
  • Texture Options: For a chunkier soup, blend only half the mixture or skip blending entirely.
  • Variations: Add greens like spinach or kale, or replace half the vegetable stock with coconut milk for a creamier texture.

Turkey Chili Recipe: A Healthy and Flavorful Comfort Food

Nothing warms you up quite like a steaming bowl of chili. Whether it’s a chilly night or you’re craving something hearty, this Turkey Chili Recipe delivers bold flavors and satisfying textures in every bite. Packed with lean ground turkey, colorful vegetables, and warming spices, it’s a healthier twist on the classic comfort food you love.

If you’re looking for a meal that’s simple to make, full of nutrients, and perfect for leftovers, this recipe has it all.

Why You’ll Love This Turkey Chili Recipe

Chili is a dish that brings people together, and this turkey chili version offers so much to love:

  • Healthier Choice: Ground turkey is lean and packed with protein, making it a lighter alternative to traditional beef chili.
  • Easy to Make: A one-pot recipe that’s ready in under an hour.
  • Customizable: You can adjust the spice level and toppings to suit your taste.
  • Perfect for Meal Prep: Make a large batch and enjoy it throughout the week.

No matter how you serve it, this turkey chili will become a staple in your kitchen.

Ingredients for Turkey Chili

Core Ingredients

IngredientQuantityDetails
Olive oil2 tablespoonsFor sautéing the vegetables.
Yellow onion1, dicedAdds sweetness and depth to the chili.
Green bell pepper1, dicedProvides a mild, earthy flavor.
Garlic2 cloves, mincedBold and aromatic.
Chili powder2 tablespoonsBrings a smoky, spicy warmth.
Cumin1 tablespoonAdds a nutty, earthy flavor.
Kosher salt1 teaspoonEnhances all the other flavors.
Ground chipotle½ teaspoonAdds a smoky kick.
Cayenne pepper¼ teaspoonOptional, for extra heat.
Black pepper¼ teaspoonBalances the spices.
Ground turkey1 poundLean and high in protein.
Diced tomatoes28 ouncesUndrained, for a hearty tomato base.
Tomato sauce15 ouncesSmooth and rich.
Worcestershire sauce1 tablespoonAdds a savory depth.
Liquid smoke1 tablespoonFor a hint of smokiness.
Kidney beans14 ouncesDrained and rinsed, for texture and fiber.

Optional Toppings

  • Sour cream: Adds a cool, creamy contrast.
  • Red onions: Diced, for a sharp crunch.
  • Cheddar cheese: Shredded, for a rich, melty topping.
  • Fresh cilantro: Chopped, for a burst of freshness.

Step-by-Step Instructions

1. Sauté the Vegetables

  • Heat the olive oil in a large Dutch oven or heavy-bottomed pot over medium-high heat.
  • Add the diced onion, green bell pepper, and minced garlic. Sprinkle with kosher salt and black pepper.
  • Sauté for 5–7 minutes, stirring occasionally, until the vegetables are tender and aromatic.

2. Brown the Ground Turkey

  • Push the sautéed vegetables to one side of the pot.
  • Add the ground turkey and break it up with a wooden spoon or spatula.
  • Sprinkle in the chili powder, cumin, ground chipotle, and cayenne pepper.
  • Cook the turkey until it’s no longer pink, about 5 minutes. There’s no need to cook it all the way through—it will finish cooking as the chili simmers.

3. Add the Liquids and Beans

  • Stir in the diced tomatoes (with their juices), tomato sauce, Worcestershire sauce, and liquid smoke.
  • Add the kidney beans, ensuring they’re well mixed into the chili base.

4. Bring to a Simmer

  • Increase the heat to bring the chili to a roaring boil.
  • Once boiling, reduce the heat to low and let the chili simmer, uncovered, for 30 minutes. You should see only small, intermittent bubbles.

5. Adjust the Seasoning

  • Taste the chili and adjust the seasoning as needed with more salt, black pepper, or spices.

6. Serve and Garnish

  • Ladle the chili into bowls and top with your favorite garnishes, like sour cream, red onions, or shredded cheddar cheese.
  • Serve hot with a side of cornbread, tortilla chips, or a fresh green salad.

Tips for Making the Best Turkey Chili

1. Use Fresh Ingredients

  • Fresh garlic, onion, and bell peppers make a noticeable difference in flavor.

2. Balance the Spice

  • Adjust the amount of cayenne pepper and ground chipotle to control the heat level.

3. Let It Simmer

  • Simmering the chili allows the flavors to meld together beautifully. Don’t rush this step!

4. Make It Ahead

  • Chili often tastes better the next day as the flavors continue to develop in the fridge.

Nutritional Benefits of Turkey Chili

NutrientPer ServingHealth Benefit
Protein~30gSupports muscle growth and repair.
Fiber~7gAids digestion and helps keep you full.
Vitamin C~25% DVBoosts immune health (from bell peppers).
Iron~15% DVSupports healthy red blood cells.
Calories~300A balanced, satisfying meal.

Creative Variations for Turkey Chili

1. Vegetarian Option

  • Replace the ground turkey with plant-based meat or extra beans (such as black beans or pinto beans).

2. Spicy Turkey Chili

  • Add diced jalapeños or a splash of hot sauce for an extra kick.

3. Turkey Chili with Sweet Potatoes

  • Add diced sweet potatoes to the pot during the sauté step for a slightly sweet, hearty addition.

4. Slow Cooker Turkey Chili

  • Brown the turkey and sauté the vegetables first, then transfer everything to a slow cooker. Cook on low for 6–8 hours or high for 3–4 hours.

FAQs About Turkey Chili Recipe

1. Can I freeze turkey chili?

Yes! Let the chili cool completely, then transfer it to freezer-safe containers. It can be frozen for up to 3 months. Thaw overnight in the fridge before reheating.

2. How do I reheat leftovers?

Reheat the chili on the stovetop over medium heat or in the microwave in 1-minute intervals, stirring in between.

3. Can I use ground beef instead of turkey?

Absolutely! Ground beef works well, but turkey offers a leaner, healthier option.

4. What other beans can I use?

Black beans, pinto beans, or a mix of different beans can be used in place of kidney beans.

5. Can I make this recipe dairy-free?

Yes! Simply skip the cheese and sour cream garnishes or use dairy-free alternatives.

6. How can I make the chili thicker?

Let it simmer uncovered for a longer time or add a tablespoon of cornstarch mixed with water to the pot.

Conclusion: Try This Turkey Chili Recipe Tonight!

This Turkey Chili Recipe is everything you want in a comfort food—rich, flavorful, and nourishing. It’s easy to prepare, endlessly customizable, and perfect for feeding a crowd or meal prepping for the week. With just one pot and a handful of ingredients, you can whip up a dish that’s as good for you as it is delicious.

So grab your Dutch oven, gather your ingredients, and get ready to enjoy a warm, hearty bowl of turkey chili. Your taste buds will thank you! 🌶️🍲


ating

Turkey Chili Recipe: A Healthy and Flavorful Comfort Food

Warm up with a hearty bowl of Turkey Chili! This one-pot wonder is packed with lean ground turkey, colorful vegetables, and bold spices, making it a healthy twist on a classic comfort food. Perfect for weeknight dinners, meal prep, or gatherings, this dish is easy to make and endlessly customizable.

Prep Time 10 minutes
Cook Time 40 minutes
Total Time 50 minutes
Servings: 6 servings
Course: Comfort Food, Dinner
Cuisine: American

Ingredients
  

Core Ingredients:
  • 2 tablespoons olive oil
  • 1 yellow onion diced
  • 1 green bell pepper diced
  • 2 garlic cloves minced
  • 2 tablespoons chili powder
  • 1 tablespoon cumin
  • 1 teaspoon kosher salt
  • ½ teaspoon ground chipotle
  • ¼ teaspoon cayenne pepper optional
  • ¼ teaspoon black pepper
  • 1 pound ground turkey
  • 28 ounces diced tomatoes undrained
  • 15 ounces tomato sauce
  • 1 tablespoon Worcestershire sauce
  • 1 tablespoon liquid smoke
  • 14 ounces kidney beans drained and rinsed
Optional Toppings:
  • Sour cream
  • Diced red onions
  • Shredded cheddar cheese
  • Chopped fresh cilantro

Method
 

  1. Sauté the Vegetables
  2. Heat olive oil in a large Dutch oven or heavy-bottomed pot over medium-high heat.
  3. Add the onion, green bell pepper, and garlic. Sprinkle with kosher salt and black pepper.
  4. Sauté for 5–7 minutes, stirring occasionally, until tender and fragrant.
  5. Brown the Ground Turkey
  6. Push the vegetables to one side of the pot.
  7. Add the ground turkey, breaking it up with a wooden spoon.
  8. Sprinkle with chili powder, cumin, ground chipotle, and cayenne pepper.
  9. Cook for about 5 minutes, until the turkey is no longer pink.
  10. Add Liquids and Beans
  11. Stir in the diced tomatoes (with juices), tomato sauce, Worcestershire sauce, and liquid smoke.
  12. Add the kidney beans and mix well.
  13. Simmer the Chili
  14. Increase the heat to bring the chili to a boil.
  15. Reduce the heat to low and simmer uncovered for 30 minutes, stirring occasionally.
  16. Adjust Seasoning
  17. Taste the chili and adjust the seasoning with additional salt, pepper, or spices as needed.
  18. Serve and Garnish
  19. Ladle the chili into bowls and top with your favorite garnishes like sour cream, red onions, shredded cheddar cheese, or fresh cilantro.

Notes

  • Make It Ahead: Turkey chili often tastes better the next day as the flavors meld together.
  • Freeze Leftovers: Cool completely, then store in freezer-safe containers for up to 3 months. Thaw overnight before reheating.
  • Slow Cooker Option: Brown the turkey and sauté the vegetables first, then transfer everything to a slow cooker. Cook on low for 6–8 hours or high for 3–4 hours.
  • Spice Level: Adjust the cayenne pepper and ground chipotle for a milder or spicier dish.

Salmon Bowl with Vegetables and Quinoa: A Nutritious and Delicious Meal

Imagine sitting down to a vibrant bowl filled with perfectly cooked salmon, fluffy quinoa, and a colorful medley of fresh vegetables. A Salmon Bowl with Vegetables and Quinoa is more than just a meal; it’s a celebration of healthy, wholesome eating that’s as satisfying as it is nourishing. Whether you’re looking to fuel your day or prepare an impressive dish for guests, this recipe checks all the boxes.

Let’s explore how you can create this delicious, balanced dish step by step, and why it deserves a place in your regular meal rotation.

Why You’ll Love Salmon Bowl with Vegetables and Quinoa

This dish isn’t just a feast for the eyes; it’s packed with flavor and nutrition. Here’s why it’s worth trying:

  • Simple and Quick: You can prepare this wholesome meal in under 30 minutes.
  • Packed with Nutrients: Salmon provides protein and omega-3s, while quinoa and veggies bring fiber, vitamins, and minerals.
  • Customizable: Adjust the ingredients to suit your preferences or what’s in your fridge.
  • Perfect for Any Meal: Enjoy it for lunch, dinner, or even meal prep for the week ahead.

Ingredients for Salmon Bowl with Vegetables and Quinoa

Here’s everything you need to bring this flavorful dish to life:

Core Ingredients

IngredientQuantityDetails
Quinoa1 cup (170g)A gluten-free grain that’s light and fluffy.
Cumin1 tspAdds earthy warmth to the salmon.
Paprika½ tspEnhances the color and flavor of the salmon.
Olive oil1 tbsp + drizzleFor cooking and drizzling on top.
Salmon fillet20 oz (560g)Rich in protein and omega-3 fatty acids.
English cucumber½, dicedAdds refreshing crunch.
Cherry tomatoes1½ cups (225g), halvedJuicy and sweet.
Canned corn1 cup (155g), drainedAdds sweetness and texture.
Pitted olives½ cup (90g), slicedA savory, briny touch.
Red onion1 small, dicedAdds a sharp, tangy flavor.
Fresh parsleySmall bunch, choppedBrightens the dish.
Lime1, zestedAdds citrusy aroma.
Lime juice¼ cup (60ml)Balances the flavors with acidity.
Ground red pepper¼ tsp, or to tasteOptional, for a spicy kick.
Sea salt and black pepperTo tasteEnhances all the flavors.
Lime wedgesFor garnishOptional, for squeezing over the bowl.

Step-by-Step Instructions

1. Cook the Quinoa

  • In a small saucepan, bring 2 cups of water to a boil.
  • Add the quinoa and 1 tsp sea salt, then cover and reduce the heat to a simmer.
  • Cook for about 15 minutes, or until the water is absorbed and the quinoa is light and fluffy.
  • Remove from heat, fluff with a fork, and let it cool while you prepare the other components.

2. Season and Prepare the Salmon

  • Place the salmon fillet in a shallow dish.
  • Sprinkle it evenly with cumin, paprika, salt, and black pepper.
  • Drizzle with olive oil, then rub the spices into the salmon to coat it completely.

3. Cook the Salmon

  • Heat a grill pan over medium-high heat. Once hot, add the salmon fillet.
  • Cook for 5–7 minutes per side, or until the salmon flakes easily with a fork.
  • Alternatively, you can broil the salmon on high for 8–10 minutes, placing the rack on the lower third of the oven.

4. Prepare the Vegetables

  • Dice the cucumber and red onion, halve the cherry tomatoes, and slice the pitted olives.
  • Drain the canned corn and chop the fresh parsley.

5. Assemble the Bowls

  • Add ½ cup of cooked quinoa to each bowl as the base.
  • Arrange the cucumber, cherry tomatoes, corn, olives, and diced red onion in sections around the bowl.
  • Break the cooked salmon into chunks and place them on top.

6. Garnish and Serve

  • Sprinkle the bowls with fresh parsley and lime zest.
  • Drizzle with olive oil and lime juice, then season with ground red pepper, sea salt, and black pepper to taste.
  • Serve with lime wedges on the side for an extra burst of citrus.

Tips for Perfect Salmon Bowls

1. Use Fresh Ingredients

  • Fresh salmon and crisp vegetables will make all the difference in flavor and texture.

2. Don’t Overcook the Salmon

  • Check for doneness when the salmon flakes easily with a fork but is still moist. Overcooked salmon can become dry.

3. Cool the Quinoa

  • Allow the quinoa to cool slightly before assembling the bowls to avoid wilting the vegetables.

4. Customize Your Toppings

  • Swap out vegetables or add your favorites, such as avocado, spinach, or roasted sweet potatoes.

Nutritional Benefits of Salmon Bowl with Vegetables and Quinoa

NutrientHealth Benefit
ProteinSupports muscle repair and keeps you full.
Omega-3 Fatty AcidsPromotes heart health and brain function.
FiberAids digestion and regulates blood sugar.
Vitamins A & CBoosts immunity and supports skin health.
MagnesiumFound in quinoa, helps maintain energy levels.

This bowl is a balanced meal that nourishes your body while delighting your taste buds.

Creative Variations for Salmon Bowls

1. Spicy Salmon Bowl

  • Add Sriracha or a spicy mayo drizzle for an extra kick.

2. Mediterranean Twist

  • Replace quinoa with couscous, and add feta cheese and roasted red peppers.

3. Vegan Option

  • Substitute the salmon with grilled tofu or roasted chickpeas.

FAQs About Salmon Bowl with Vegetables and Quinoa

1. Can I make this dish ahead of time?

Yes! Cook the quinoa and salmon and chop the veggies in advance. Store them separately and assemble the bowls when ready to eat.

2. Can I use frozen salmon?

Absolutely. Thaw the salmon in the refrigerator overnight before seasoning and cooking.

3. What can I substitute for quinoa?

You can use rice, farro, or even cauliflower rice as a low-carb alternative.

4. How do I store leftovers?

Store the components separately in airtight containers in the fridge for up to 3 days. Assemble the bowls just before serving.

5. Can I grill the salmon outdoors?

Yes! Grilled salmon adds a smoky flavor that complements the dish beautifully.

6. Is this dish gluten-free?

Yes, it’s naturally gluten-free as long as all your ingredients are certified gluten-free.

Conclusion: Make Your Own Salmon Bowl Tonight!

A Salmon Bowl with Vegetables and Quinoa is the perfect blend of healthy and delicious. It’s easy to make, packed with nutrients, and completely customizable to your tastes. Whether you’re preparing a quick dinner or meal prepping for the week, this dish will leave you feeling satisfied and energized.

So gather your ingredients, follow the simple steps, and enjoy the vibrant flavors of this wholesome meal. Your taste buds (and your body) will thank you! 🌱🐟🍋

ating

Salmon Bowl with Vegetables and Quinoa: A Nutritious and Delicious Meal

The Salmon Bowl with Vegetables and Quinoa is a vibrant and nutritious dish that combines perfectly cooked salmon, fluffy quinoa, and fresh vegetables, all topped with a tangy lime drizzle. This wholesome meal is quick to prepare, packed with nutrients, and perfect for lunch, dinner, or meal prep.

Prep Time 10 minutes
Cook Time 20 minutes
Total Time 30 minutes
Servings: 4 servings
Course: Dinner, Lunch
Cuisine: Mediterranean

Ingredients
  

For the Quinoa:
  • 1 cup quinoa
  • 2 cups water
  • 1 teaspoon sea salt
For the Salmon:
  • 20 oz 560g salmon fillet
  • 1 teaspoon cumin
  • ½ teaspoon paprika
  • Sea salt and black pepper to taste
  • 1 tablespoon olive oil
For the Vegetables:
  • ½ English cucumber diced
  • cups 225g cherry tomatoes, halved
  • 1 cup 155g canned corn, drained
  • ½ cup 90g pitted olives, sliced
  • 1 small red onion diced
  • Small bunch fresh parsley chopped
For the Dressing:
  • Zest of 1 lime
  • ¼ cup 60ml lime juice
  • Drizzle of olive oil
  • ¼ teaspoon ground red pepper optional, for heat
For Garnish:
  • Lime wedges optional

Method
 

  1. Cook the Quinoa
  2. Bring 2 cups of water to a boil in a small saucepan.
  3. Add the quinoa and 1 teaspoon sea salt. Cover and reduce heat to a simmer.
  4. Cook for about 15 minutes, or until the water is absorbed and the quinoa is fluffy.
  5. Remove from heat, fluff with a fork, and let cool while preparing the other components.
  6. Prepare the Salmon
  7. Place the salmon fillet in a shallow dish.
  8. Sprinkle with cumin, paprika, sea salt, and black pepper. Drizzle with olive oil and rub to coat evenly.
  9. Cook the Salmon
  10. Heat a grill pan over medium-high heat.
  11. Add the salmon fillet and cook for 5–7 minutes per side, or until it flakes easily with a fork.
  12. Alternatively, broil on high for 8–10 minutes, placing the rack on the lower third of the oven.
  13. Prepare the Vegetables
  14. Dice the cucumber and red onion. Halve the cherry tomatoes and slice the olives.
  15. Drain the canned corn and chop the fresh parsley.
  16. Assemble the Bowls
  17. Add ½ cup of cooked quinoa to each bowl as the base.
  18. Arrange cucumber, cherry tomatoes, corn, olives, and diced red onion in sections around the bowl.
  19. Break the cooked salmon into chunks and place on top.
  20. Add Dressing and Garnish
  21. Sprinkle the bowls with fresh parsley and lime zest.
  22. Drizzle with olive oil and lime juice. Season with ground red pepper, sea salt, and black pepper to taste.
  23. Serve with lime wedges on the side.

Notes

  • Make It Ahead: Prepare the quinoa, salmon, and vegetables in advance. Assemble the bowls when ready to serve.
  • Variations: Swap quinoa for rice, farro, or cauliflower rice. Add avocado, spinach, or roasted sweet potatoes for extra variety.
  • Storage: Store components separately in airtight containers in the fridge for up to 3 days.

Chicken and Waffles with Mango Syrup: A Sweet and Savory Delight

Imagine the perfect combination of crispy fried chicken, fluffy golden waffles, and a tropical mango syrup that ties it all together. Chicken and Waffles with Mango Syrup isn’t just a meal—it’s an experience that blends comfort food with gourmet flair. Whether you’re making it for brunch, dinner, or a special gathering, this dish is guaranteed to wow everyone at the table.

Let’s dive into how you can create this masterpiece, one step at a time.

Why You’ll Love Chicken and Waffles with Mango Syrup

This dish is a symphony of flavors and textures. Here’s why it stands out:

  • Sweet Meets Savory: The contrast of crispy chicken and sweet mango syrup creates a taste explosion.
  • Fun and Unique: It’s a twist on the classic Southern favorite, elevated with tropical flavors.
  • Perfect for Any Occasion: Serve it for brunch, dinner, or even as a party centerpiece.
  • Customizable: Adjust the spice, sweetness, or toppings to make it your own.

Whether you’re a fan of fried chicken, waffles, or fruit-forward syrups, this dish brings them all together in harmony.

Ingredients for Chicken and Waffles with Mango Syrup

Here’s what you’ll need to create this iconic meal:

For the Fried Chicken

IngredientQuantityDetails
Chicken breasts3, cut into thirdsTender and juicy when fried.
Sour cream with chives1 cupActs as a flavorful marinade.
Flour2 cupsFor dredging the chicken.
Montreal chicken seasoning¼ cupAdds savory spice to the coating.
Black pepper1 tbspBalances the flavors with a mild kick.
Baking powder1 tbspHelps create a crisp coating.
Eggs3Binds the coating to the chicken.
Milk⅓ cupCombines with eggs for a smooth batter.
OilFor fryingUse a neutral oil like vegetable or canola.

For the Waffles

IngredientQuantityDetails
Milk2 cupsThe base for the waffle batter.
Sugar⅓ cupAdds subtle sweetness.
Olive oil⅓ cupMakes the waffles light and crisp.
Flour2½–3 cupsAdjust for desired batter consistency.
Salt2 tspEnhances the flavor.
Baking powder1 tbspCreates fluffiness in the waffles.

For the Mango Syrup

IngredientQuantityDetails
Frozen mango2 cupsUse ripe mango chunks for sweetness.
Water2 cupsBlends the mango for a smooth syrup.
Sugar2 cupsAdds sweetness and helps thicken the syrup.

Step-by-Step Instructions

1. Marinate the Chicken

  • Place the chicken pieces in a bowl and coat them with sour cream with chives.
  • Cover and refrigerate for 1 hour. This marinade keeps the chicken tender and flavorful.

2. Prepare the Coating

  • In a resealable plastic bag, combine flour, Montreal chicken seasoning, black pepper, and baking powder. Shake well to mix.

3. Make the Egg Wash

  • In a medium bowl, whisk together eggs and milk until smooth.

4. Fry the Chicken

  • Preheat oil in a deep skillet or fryer to 350°F.
  • Dredge the marinated chicken strips in the flour mixture, then dip them in the egg wash, and coat again in the flour.
  • Fry the chicken in batches, cooking until the internal temperature reaches 165°F.
  • To make the chicken extra crispy, heat the oil to 375°F and fry the pieces again for 1 minute.

5. Make the Waffles

  • In a large bowl, whisk together the milk, sugar, olive oil, flour, salt, and baking powder. Adjust the consistency with additional milk or flour as needed.
  • Preheat your waffle iron and cook the waffles according to the manufacturer’s instructions.

6. Prepare the Mango Syrup

  • Blend the frozen mango and water in a blender until smooth.
  • Pour the mango mixture into a saucepan, add sugar, and bring to a boil over medium heat.
  • Boil for 2–3 minutes until the syrup thickens slightly. Remove from heat and set aside.

7. Serve and Enjoy

  • Place a waffle on a plate, top it with crispy fried chicken, and drizzle with mango syrup. Add extra syrup on the side for dipping.

Tips for Perfect Chicken and Waffles

1. Achieve Crispy Chicken

  • Double-frying ensures a crunchy exterior.

2. Customize the Syrup

  • Add a splash of lime juice or a pinch of chili flakes to the mango syrup for added depth.

3. Keep Waffles Warm

  • Place cooked waffles in a low oven (200°F) to keep them warm and crisp until serving.

Nutritional Information

NutrientPer ServingHealth Benefit
Calories~550A balanced energy source.
Protein~30gSupports muscle repair and growth.
Carbohydrates~50gProvides fuel for your body.
Fats~25gAdds flavor and keeps you satisfied.

Creative Variations

1. Spicy Chicken and Waffles

  • Add cayenne pepper or hot sauce to the marinade for a fiery kick.

2. Tropical Syrup

  • Combine mango with pineapple or passion fruit for a tropical twist.

3. Gluten-Free Version

  • Use gluten-free flour for the waffles and chicken coating.

FAQs About Chicken and Waffles with Mango Syrup

1. Can I use bone-in chicken?

Yes, but adjust the cooking time to ensure the chicken is fully cooked.

2. How do I store leftovers?

Store chicken and waffles separately in airtight containers in the fridge for up to 3 days. Reheat in the oven to maintain crispness.

3. Can I use fresh mango for the syrup?

Absolutely! Use ripe mangoes and adjust the sugar based on their natural sweetness.

4. What type of waffle iron works best?

A Belgian waffle iron creates thicker waffles, which pair beautifully with the chicken and syrup.

5. Can I bake the chicken instead of frying?

Yes! Bake breaded chicken at 400°F for 20–25 minutes, flipping halfway through.

6. Can I make the syrup ahead of time?

Yes, store the syrup in a jar in the fridge for up to a week. Reheat before serving.

Conclusion: Make Chicken and Waffles with Mango Syrup Tonight!

Chicken and Waffles with Mango Syrup is a meal that blends comfort, sophistication, and incredible flavor into one unforgettable dish. From the crispy fried chicken to the fluffy waffles and tropical mango syrup, every bite is a celebration.

So grab your ingredients, heat up your skillet, and get ready to impress your family or guests with this culinary masterpiece. Happy cooking! 🍗🧇


ating

Chicken and Waffles with Mango Syrup: A Sweet and Savory Delight

Chicken and Waffles with Mango Syrup is the perfect harmony of crispy fried chicken, fluffy golden waffles, and tropical mango syrup. This sweet and savory dish is an unforgettable culinary experience, perfect for brunch, dinner, or any special occasion.

Prep Time 20 minutes
Cook Time 40 minutes
Total Time 1 hour
Servings: 6 servings
Course: Brunch, Dinner
Cuisine: Southern Fusion

Ingredients
  

For the Fried Chicken:
  • 3 chicken breasts cut into thirds
  • 1 cup sour cream with chives
  • 2 cups flour
  • ¼ cup Montreal chicken seasoning
  • 1 tablespoon black pepper
  • 1 tablespoon baking powder
  • 3 eggs
  • cup milk
  • Neutral oil e.g., vegetable or canola for frying
For the Waffles:
  • 2 cups milk
  • cup sugar
  • cup olive oil
  • –3 cups flour adjust for batter consistency
  • 2 teaspoons salt
  • 1 tablespoon baking powder
For the Mango Syrup:
  • 2 cups frozen mango chunks
  • 2 cups water
  • 2 cups sugar

Method
 

  1. Marinate the Chicken
  2. Place chicken pieces in a bowl and coat with sour cream with chives.
  3. Cover and refrigerate for 1 hour to tenderize and flavor the chicken.
  4. Prepare the Coating
  5. In a resealable plastic bag, combine flour, Montreal chicken seasoning, black pepper, and baking powder. Shake well to mix.
  6. Make the Egg Wash
  7. In a medium bowl, whisk together eggs and milk until smooth.
  8. Fry the Chicken
  9. Preheat oil in a deep skillet or fryer to 350°F.
  10. Dredge chicken in the flour mixture, dip in the egg wash, and coat again in flour.
  11. Fry chicken in batches until golden brown and internal temperature reaches 165°F.
  12. For extra crispiness, heat the oil to 375°F and fry chicken pieces again for 1 minute.
  13. Make the Waffles
  14. In a large bowl, whisk together milk, sugar, olive oil, flour, salt, and baking powder. Adjust the consistency with extra milk or flour if needed.
  15. Preheat your waffle iron and cook waffles according to the manufacturer’s instructions.
  16. Prepare the Mango Syrup
  17. Blend frozen mango chunks and water in a blender until smooth.
  18. Pour the mango mixture into a saucepan, add sugar, and bring to a boil over medium heat.
  19. Boil for 2–3 minutes until syrup thickens slightly. Remove from heat and set aside.
  20. Serve and Enjoy
  21. Place a waffle on a plate, top with crispy fried chicken, and drizzle generously with mango syrup. Add extra syrup on the side for dipping.

Notes

  • Double-Frying: For extra crispy chicken, double-fry at a higher temperature for 1 minute.
  • Syrup Variations: Add lime juice or chili flakes for a twist on the mango syrup.
  • Keep Waffles Warm: Place cooked waffles in a 200°F oven until serving.

Chicken Parmesan: The Ultimate Comfort Food

When you think of the ultimate comfort food, Chicken Parmesan is likely at the top of the list. With its crispy, golden breaded chicken, gooey melted mozzarella, and rich marinara sauce, it’s a dish that satisfies every craving. Whether you’re cooking for your family or hosting a dinner party, Chicken Parmesan is always a winner.

In this guide, you’ll learn everything you need to know about making this classic Italian-American dish. From creating the perfect marinara sauce to breading the chicken just right, you’ll have all the tips and tricks to make your Chicken Parmesan unforgettable.

Why Chicken Parmesan Is a Timeless Classic

Chicken Parmesan, also known as Chicken Parmigiana, is a dish that’s loved worldwide for its rich flavors and satisfying textures. Here’s why you’ll fall in love with it:

  • Hearty and Filling: The combination of chicken, cheese, and marinara sauce served over pasta is a complete meal.
  • Customizable: Adjust the spices, cheese, or sauce to suit your taste.
  • Perfect for Any Occasion: Whether it’s a weeknight dinner or a special celebration, Chicken Parmesan never disappoints.

Ingredients for Chicken Parmesan

Here’s everything you’ll need to make this iconic dish, broken down by components:

For the Marinara Sauce

IngredientQuantityDetails
Olive oil1 tbspFor sautéing the onion and garlic.
Onion1, finely dicedAdds sweetness and depth to the sauce.
Garlic1 clove, mincedFor a bold, aromatic base.
Passata400g (14 oz)Smooth tomato base for the marinara.
Dried oregano1 tspClassic Italian herb flavor.
Sugar1 tspBalances the acidity of the tomatoes.

For the Chicken

IngredientQuantityDetails
Chicken breasts2 largeButterflied or pounded thin for even cooking.
Plain flour3 tbspFor coating the chicken.
Eggs2Lightly beaten, acts as a binder.
Panko breadcrumbs75g (1½ cups)For a crispy breaded texture.
Paprika (optional)1 tspAdds color and a hint of smokiness.
Salt¼ tspEnhances flavor.
Black pepper¼ tspA touch of spice.
Parmesan cheese75g (¾ cup)Finely grated for extra flavor in the crust.
Olive oil2 tbspFor frying the breaded chicken.

To Finish

IngredientQuantityDetails
Mozzarella cheese1 ball (4.4 oz)Sliced, for melting on top.
Dried oregano¼ tspFor a final sprinkle of flavor.

To Serve

IngredientDetails
Cooked spaghettiClassic pairing for Chicken Parmesan.
Fresh basilSliced, for a fresh garnish.

Step-by-Step Instructions

1. Prepare the Marinara Sauce

  • Heat the olive oil in a medium saucepan over medium heat.
  • Add the diced onion and sauté until soft and translucent, about 5 minutes.
  • Stir in the minced garlic and cook for 1 minute, being careful not to burn it.
  • Add the passata, dried oregano, and sugar. Stir to combine.
  • Simmer the sauce on low heat for 15–20 minutes, stirring occasionally. Set aside.

2. Prepare the Chicken

  • Butterfly or pound the chicken breasts to an even thickness. This ensures they cook evenly.
  • In a shallow dish, mix the flour with salt and pepper.
  • In another shallow dish, beat the eggs.
  • In a third dish, combine the panko breadcrumbs, paprika (if using), and grated Parmesan cheese.

3. Bread the Chicken

  • Coat each chicken breast in the flour, shaking off excess.
  • Dip the chicken into the egg, ensuring it’s fully coated.
  • Press the chicken into the breadcrumb mixture, making sure it’s evenly coated.

4. Fry the Chicken

  • Heat 2 tablespoons of olive oil in a large skillet over medium heat.
  • Fry the breaded chicken breasts for 3–4 minutes on each side until golden brown and cooked through. Transfer to a paper towel-lined plate to drain any excess oil.

5. Assemble the Dish

  • Preheat your oven to 375°F (190°C).
  • Place the fried chicken breasts in a baking dish.
  • Spoon the marinara sauce over each piece of chicken.
  • Top with slices of mozzarella cheese and a sprinkle of dried oregano.

6. Bake the Chicken Parmesan

  • Bake for 15–20 minutes, or until the cheese is melted and bubbly.

7. Serve

  • Serve the Chicken Parmesan over cooked spaghetti and garnish with fresh basil.

Tips for the Perfect Chicken Parmesan

1. Use Fresh Ingredients

  • Fresh mozzarella, high-quality passata, and freshly grated Parmesan make a world of difference.

2. Don’t Overcrowd the Pan

  • When frying the chicken, cook in batches if necessary to maintain a crispy crust.

3. Let the Sauce Simmer

  • Simmering the marinara sauce allows the flavors to meld and deepen.

Variations of Chicken Parmesan

1. Gluten-Free Version

  • Use gluten-free breadcrumbs and flour. Serve with gluten-free pasta or zucchini noodles.

2. Spicy Chicken Parmesan

  • Add chili flakes to the marinara sauce for a spicy kick.

3. Low-Carb Option

  • Replace the breadcrumbs with almond flour and serve over cauliflower rice or steamed vegetables.

Nutritional Information

NutrientPer ServingBenefit
Calories~550Provides energy for your day.
Protein~40gSupports muscle repair and growth.
Calcium~20% DVStrengthens bones and teeth.
Vitamin A~15% DVBoosts immune system and vision.

FAQs About Chicken Parmesan

1. Can I make Chicken Parmesan ahead of time?

Yes! You can bread and fry the chicken in advance, then assemble and bake it just before serving.

2. Can I freeze Chicken Parmesan?

Absolutely. Assemble the dish without baking, cover tightly, and freeze for up to 3 months. Thaw in the fridge overnight before baking.

3. Can I use chicken thighs instead of breasts?

Yes, chicken thighs work well and add extra juiciness. Just adjust the cooking time as needed.

4. What side dishes go well with Chicken Parmesan?

Garlic bread, Caesar salad, roasted vegetables, or sautéed spinach are excellent choices.

5. How can I make the dish vegetarian?

Use breaded and fried eggplant slices instead of chicken for a delicious Eggplant Parmesan.

6. Can I air fry the chicken instead of pan-frying?

Yes! Air fry the breaded chicken at 375°F (190°C) for 12–15 minutes, flipping halfway through.

Conclusion: Make Chicken Parmesan Tonight!

Few dishes bring people together like Chicken Parmesan. Its crispy, cheesy, and saucy perfection makes it a go-to comfort food for any occasion. Whether you’re enjoying a quiet dinner at home or hosting a festive gathering, this recipe will leave everyone asking for seconds.

Gather your ingredients, follow these easy steps, and savor the joy of creating a classic dish that’s as satisfying to make as it is to eat. Happy cooking! 🍽️

ating

Chicken Parmesan: The Ultimate Comfort Food

Chicken Parmesan is the perfect blend of crispy, golden breaded chicken, rich marinara sauce, and gooey melted mozzarella cheese. Whether you’re cooking for family or entertaining guests, this classic Italian-American dish delivers hearty flavors and comfort in every bite.

Prep Time 20 minutes
Cook Time 40 minutes
Total Time 1 hour
Servings: 4 servings
Course: Dinner
Cuisine: Italian-American

Ingredients
  

For the Marinara Sauce:
  • 1 tablespoon olive oil
  • 1 onion finely diced
  • 1 garlic clove minced
  • 400 g 14 oz passata
  • 1 teaspoon dried oregano
  • 1 teaspoon sugar
For the Chicken:
  • 2 large chicken breasts butterflied or pounded thin
  • 3 tablespoons plain flour
  • ¼ teaspoon salt
  • ¼ teaspoon black pepper
  • 2 eggs lightly beaten
  • 75 g 1½ cups panko breadcrumbs
  • 1 teaspoon paprika optional
  • 75 g ¾ cup Parmesan cheese, finely grated
  • 2 tablespoons olive oil for frying
To Finish:
  • 1 ball 4.4 oz mozzarella cheese, sliced
  • ¼ teaspoon dried oregano
To Serve:
  • Cooked spaghetti
  • Fresh basil sliced

Method
 

  1. Prepare the Marinara Sauce
  2. Heat olive oil in a medium saucepan over medium heat.
  3. Add diced onion and sauté until soft and translucent, about 5 minutes.
  4. Stir in minced garlic and cook for 1 minute.
  5. Add passata, dried oregano, and sugar. Stir to combine.
  6. Simmer on low heat for 15–20 minutes, stirring occasionally. Set aside.
  7. Prepare the Chicken
  8. Butterfly or pound the chicken breasts to an even thickness.
  9. Mix the flour with salt and pepper in a shallow dish.
  10. Beat the eggs in a second shallow dish.
  11. In a third dish, combine panko breadcrumbs, paprika (if using), and Parmesan cheese.
  12. Bread the Chicken
  13. Coat each chicken breast in the flour, shaking off the excess.
  14. Dip the chicken into the beaten eggs, ensuring it’s fully coated.
  15. Press the chicken into the breadcrumb mixture, evenly coating it.
  16. Fry the Chicken
  17. Heat olive oil in a large skillet over medium heat.
  18. Fry the breaded chicken for 3–4 minutes on each side until golden brown and cooked through.
  19. Transfer to a paper towel-lined plate to drain excess oil.
  20. Assemble the Dish
  21. Preheat the oven to 375°F (190°C).
  22. Place fried chicken breasts in a baking dish.
  23. Spoon marinara sauce over each piece.
  24. Top with slices of mozzarella and a sprinkle of dried oregano.
  25. Bake the Chicken Parmesan
  26. Bake for 15–20 minutes, or until the cheese is melted and bubbly.
  27. Serve
  28. Serve hot over cooked spaghetti and garnish with fresh basil.

Notes

  • Make It Ahead: Bread and fry the chicken in advance, then assemble and bake just before serving.
  • Storage: Leftovers can be refrigerated for up to 3 days or frozen for up to 3 months.
  • Reheating: Bake at 350°F (175°C) until warmed through, or microwave in intervals.
  • Vegetarian Option: Replace chicken with breaded eggplant slices for Eggplant Parmesan.

Slow Cooker Mac and Cheese with Ham: A Creamy and Comforting One-Pot Meal

There’s something magical about mac and cheese. It’s the ultimate comfort food, and when you add tender, savory ham to the mix, it becomes an irresistible dish that satisfies everyone. Slow Cooker Mac and Cheese with Ham takes this classic to the next level by combining creamy, cheesy goodness with the convenience of a slow cooker.

Whether you’re looking for a family-friendly dinner or a crowd-pleasing potluck dish, this recipe is as easy as it is delicious. Just set it and forget it—your slow cooker does all the work while you sit back and relax!

Why You’ll Love Slow Cooker Mac and Cheese with Ham

  • Effortless Preparation: Toss everything into the slow cooker, stir occasionally, and let it cook to perfection.
  • Rich and Creamy: The blend of sharp cheddar and Velveeta creates an ultra-smooth, cheesy sauce.
  • A Complete Meal: With protein from the ham and carbs from the macaroni, this dish is satisfying and filling.
  • Perfect for Any Occasion: Great for weeknight dinners, holiday gatherings, or casual get-togethers.

Ingredients for Slow Cooker Mac and Cheese with Ham

Here’s what you’ll need to make this creamy and indulgent dish:

IngredientAmountNotes
Diced ham1 poundAdds a savory, smoky flavor.
Elbow macaroni noodles16 ounces (uncooked)Classic pasta shape for mac and cheese.
Whole milk4 cupsProvides creaminess and richness.
Evaporated milk24 ounces (2 cans)Helps create a thick, silky sauce.
Sharp cheddar cheese (shredded)4 cups, divided3 cups for mixing and 1 cup for topping.
Velveeta cheese (cubed)8 ouncesMelts smoothly for a velvety texture.
Unsalted butter (cubed)4 tablespoonsAdds richness and enhances the flavor.
Salt2 teaspoonsBalances the flavors.
Pepper½ teaspoonAdds a hint of spice.
Ground mustard¼ teaspoonComplements the cheese with a subtle tang.

Step-by-Step Instructions for Slow Cooker Mac and Cheese with Ham

1. Prepare Your Slow Cooker

  • Spray the basin of a 6–8 quart slow cooker with non-stick cooking spray to prevent sticking and make cleanup easier.

2. Add the Ingredients

  • Combine the diced ham, uncooked elbow macaroni, whole milk, evaporated milk, 3 cups of shredded cheddar cheese, cubed Velveeta, butter, salt, pepper, and ground mustard in the slow cooker. Stir well to distribute the ingredients evenly.

3. Start Cooking

  • Cover the slow cooker and set it to LOW. Cook for 2.5–3 hours, stirring every 30 minutes to prevent the edges from burning.

4. Add the Topping

  • About 30 minutes before the cook time is up, sprinkle the remaining 1 cup of shredded cheddar cheese over the top. Replace the cover and let the cheese melt.

5. Check for Doneness

  • The sauce should be slightly loose, and the noodles should be tender. If needed, cook for an additional 10–15 minutes.

6. Serve and Enjoy

  • Turn off the slow cooker and serve immediately. For an extra touch, garnish with fresh parsley or a sprinkle of black pepper.

Tips for the Best Slow Cooker Mac and Cheese with Ham

1. Choose the Right Pasta

  • Stick with elbow macaroni for the best texture. Avoid larger or thinner pasta shapes, as they may not cook evenly in the slow cooker.

2. Stir Regularly

  • Stirring every 30 minutes ensures the edges don’t burn and helps the cheese melt evenly.

3. Don’t Overcook

  • Keep an eye on the pasta, as overcooking can make it mushy. The goal is tender noodles and a creamy sauce.

4. Customize the Cheese Blend

  • While cheddar and Velveeta are a classic combo, feel free to experiment with other cheeses like Gruyère, Monterey Jack, or Colby.

5. Add Vegetables

  • For a nutritious twist, toss in frozen peas, diced bell peppers, or broccoli florets during the last 30 minutes of cooking.

Serving Suggestions for Slow Cooker Mac and Cheese with Ham

Perfect Pairings

  • Green Salad: A crisp, refreshing salad balances the richness of the mac and cheese.
  • Garlic Bread: Perfect for scooping up every bit of the cheesy sauce.
  • Steamed Vegetables: Add a side of lightly steamed broccoli or green beans for a complete meal.

Nutritional Information

NutrientPer Serving (1/8 of recipe)
Calories~450
Protein22g
Fat25g
Carbohydrates35g
Fiber1g

Why Slow Cooker Mac and Cheese with Ham Is a Crowd-Pleaser

This dish is more than just a meal; it’s a comforting, nostalgic experience. The creamy cheese sauce, tender pasta, and savory ham come together to create a recipe that feels indulgent yet easy to make. Perfect for both busy weeknights and special occasions, it’s a dish that everyone at the table will love.

FAQs About Slow Cooker Mac and Cheese with Ham

1. Can I use pre-cooked pasta?

No, it’s best to use uncooked pasta so it can absorb the flavors of the sauce as it cooks.

2. Can I make this recipe gluten-free?

Yes, substitute the macaroni with gluten-free pasta. Be sure to check the cooking time, as gluten-free pasta may cook faster.

3. What if I don’t have Velveeta?

You can use cream cheese or an additional cup of shredded cheddar as a substitute for Velveeta.

4. Can I freeze leftovers?

Yes, store leftovers in an airtight container and freeze for up to 3 months. Thaw in the refrigerator overnight and reheat on the stovetop or in the microwave.

5. How can I make this dish spicier?

Add a pinch of cayenne pepper, red pepper flakes, or diced jalapeños for a kick of heat.

6. Can I use a different type of milk?

Whole milk works best for creaminess, but you can substitute with 2% milk or a non-dairy alternative like unsweetened almond milk.

A Comforting Classic Made Easy

Slow Cooker Mac and Cheese with Ham is the ultimate comfort food, blending creamy cheese, savory ham, and tender pasta into a dish that’s both satisfying and simple to make. Whether you’re cooking for your family, hosting friends, or meal-prepping for the week, this recipe is a guaranteed hit.

So, grab your slow cooker, gather your ingredients, and get ready to enjoy a dish that’s as comforting as it is delicious. Don’t forget to top it with an extra sprinkle of cheddar for that perfect finishing touch.

Call to Action: Try this recipe today and share it with your loved ones—it’s too good to keep to yourself!

ating

Slow Cooker Mac and Cheese with Ham: A Creamy and Comforting One-Pot Meal

A creamy and comforting one-pot meal featuring tender pasta, savory ham, and a rich, cheesy sauce. Perfect for family dinners, potlucks, or anytime you crave indulgent comfort food.

Prep Time 10 minutes
Cook Time 3 hours
Total Time 3 hours 10 minutes
Servings: 8 servings
Course: Main Course
Cuisine: American

Ingredients
  

  • 1 pound diced ham
  • 16 ounces uncooked elbow macaroni
  • 4 cups whole milk
  • 24 ounces evaporated milk 2 cans
  • 4 cups shredded sharp cheddar cheese divided: 3 cups for mixing, 1 cup for topping
  • 8 ounces Velveeta cheese cubed
  • 4 tablespoons unsalted butter cubed
  • 2 teaspoons salt
  • ½ teaspoon ground black pepper
  • ¼ teaspoon ground mustard

Method
 

  1. Prepare the Slow Cooker: Spray the basin of a 6–8 quart slow cooker with non-stick cooking spray to prevent sticking.
  2. Combine Ingredients: In the slow cooker, mix together diced ham, uncooked macaroni, whole milk, evaporated milk, 3 cups of shredded cheddar cheese, Velveeta cheese, butter, salt, pepper, and ground mustard. Stir to distribute evenly.
  3. Cook on Low: Cover the slow cooker and cook on LOW for 2.5–3 hours, stirring every 30 minutes to prevent the edges from burning and to ensure even cooking.
  4. Add Topping: About 30 minutes before the cook time is up, sprinkle the remaining 1 cup of shredded cheddar cheese over the top. Cover and allow the cheese to melt.
  5. Check for Doneness: The pasta should be tender, and the sauce should be creamy and slightly loose. If needed, cook for an additional 10–15 minutes.
  6. Serve and Enjoy: Turn off the slow cooker and serve immediately. Garnish with fresh parsley or a sprinkle of black pepper for extra flavor.

Notes

  • Substitute Velveeta with cream cheese or an extra cup of shredded cheddar if preferred.
  • To make it gluten-free, use gluten-free pasta and ensure all other ingredients are gluten-free.
  • Add frozen peas, diced bell peppers, or broccoli florets during the last 30 minutes of cooking for a veggie-packed twist.
  • Store leftovers in an airtight container in the refrigerator for up to 3 days or freeze for up to 3 months.

Slow Cooker Beef Stew: A Comforting, Flavorful Classic

When the weather turns chilly, nothing warms you up like a hearty bowl of Slow Cooker Beef Stew. It’s the kind of meal that feels like a hug in a bowl—tender beef, perfectly cooked vegetables, and a rich, savory broth all come together to create a dish that’s satisfying and delicious.

What makes this recipe even better is that it’s easy to prepare. Your slow cooker does all the hard work, leaving you with a warm and comforting meal that’s ready when you need it. Whether you’re making dinner for your family or meal prepping for the week, this stew is a timeless choice.

Why You’ll Love Slow Cooker Beef Stew

  • Minimal Effort: Just prep your ingredients, toss them in the slow cooker, and let it do its magic.
  • Incredibly Tender Beef: Slow cooking makes the beef fall-apart tender.
  • Balanced Flavors: A perfect mix of savory, herby, and subtly sweet.
  • Perfect for Leftovers: The flavors deepen overnight, making it even better the next day.
  • One-Pot Wonder: Fewer dishes mean less cleanup!

Ingredients for Slow Cooker Beef Stew

Here’s what you’ll need to create this hearty, delicious dish:

For the Stew

IngredientAmountNotes
All-purpose flour¼ cupHelps thicken the stew.
Dried thyme2 tspAdds an earthy, herby flavor.
Kosher salt1 ½ tspEnhances the overall flavor.
Freshly ground black pepper1 tspAdds a subtle kick.
Garlic powder1 tspProvides a hint of garlic flavor.
Yellow onion1 medium, diced (~1 ½ cups)A base ingredient for flavor.
Carrots4 medium, sliced (~2 ½ cups)Adds sweetness and texture.
Celery2 medium stalks, sliced (~¾ cup)Brings crunch and balance.
Yukon gold or red potatoes1 lb (~3 medium), cubedHolds their shape during slow cooking.
Boneless beef chuck roast2 ¼ lbs, cut into chunksA rich, tender cut ideal for stewing.
Bay leaves2 driedInfuses a subtle depth of flavor.
Beef broth1 ½ cupsForms the savory base of the stew.
Tomato paste1 tbspAdds a rich umami depth.
Worcestershire sauce1 tbspEnhances the savory notes of the broth.

Optional Garnish

  • Chopped fresh parsley leaves
  • Additional black pepper

Step-by-Step Instructions for Slow Cooker Beef Stew

1. Prepare the Slow Cooker

  • In a 6-quart or larger slow cooker, combine the flour, dried thyme, kosher salt, black pepper, and garlic powder. Stir until evenly mixed.

2. Prep the Vegetables

  • Dice the onion.
  • Peel and slice the carrots into 1-inch-thick rounds.
  • Slice the celery into ½-inch-thick pieces.
  • Cube the potatoes into 1-inch pieces.

3. Cut and Coat the Beef

  • Trim off any large pieces of surface fat from the beef chuck roast.
  • Cut the beef into 1 to 1 ½-inch chunks.
  • Toss the beef in the flour mixture until evenly coated.

4. Add the Ingredients to the Slow Cooker

  • Place the beef in the slow cooker.
  • Add the diced onion, carrots, celery, potatoes, and bay leaves on top.

5. Mix the Broth

  • In a medium bowl or liquid measuring cup, whisk together the beef broth, tomato paste, and Worcestershire sauce.
  • Pour the mixture over the beef and vegetables. Stir gently to combine.

6. Slow Cook the Stew

  • Cover and cook on LOW for 6–8 hours or HIGH for 4 hours.
  • The beef should be tender, and the vegetables cooked through.

7. Taste and Adjust Seasoning

  • Taste the stew and season with additional salt and black pepper as needed.

8. Serve and Garnish

  • Ladle the stew into bowls, and garnish with chopped fresh parsley and a sprinkle of black pepper.

Serving Suggestions for Slow Cooker Beef Stew

Sides to Complement Your Stew

  • Crusty Bread: Perfect for soaking up the rich broth.
  • Mashed Potatoes: Serve the stew over creamy mashed potatoes for a hearty meal.
  • Rice or Quinoa: A lighter option to balance the rich flavors of the stew.

Tips for the Perfect Slow Cooker Beef Stew

1. Choose the Right Cut of Beef

  • Chuck Roast: This cut is marbled with fat, which breaks down during slow cooking, creating tender, flavorful pieces.
  • Other Options: Brisket or bottom round can also work well.

2. Don’t Skip the Flour

  • Tossing the beef in flour helps thicken the stew as it cooks.

3. Customize Your Vegetables

  • Add parsnips, mushrooms, or turnips for variety.

4. Adjust the Liquid

  • If you prefer a thicker stew, mix 1 tablespoon of cornstarch with 2 tablespoons of cold water and stir it in during the last 30 minutes of cooking.

5. Storage and Reheating

  • Refrigerator: Store leftovers in an airtight container for up to 3 days.
  • Freezer: Freeze the stew for up to 3 months. Thaw overnight in the refrigerator before reheating.

Nutritional Information

NutrientPer Serving (1/6 of recipe)
Calories~350
Protein25g
Fat10g
Carbohydrates30g
Fiber5g

Why Slow Cooker Beef Stew Is a Must-Try Dish

  • Perfect for Meal Prep: Make a large batch and enjoy it throughout the week.
  • Nutritious and Filling: Packed with protein, fiber, and vitamins, it’s a complete meal in a bowl.
  • Family-Friendly: Everyone loves the rich, comforting flavors of a classic beef stew.

FAQs About Slow Cooker Beef Stew

1. Can I use a different meat for this recipe?

Yes! Lamb, pork, or even chicken thighs can be substituted for beef.

2. What if I don’t have a slow cooker?

You can cook the stew in a Dutch oven or large pot on the stovetop over low heat for 2–3 hours.

3. How do I keep the potatoes from getting mushy?

Use Yukon gold or red potatoes, as they hold their shape better during slow cooking.

4. Can I add wine to this recipe?

Absolutely! Substitute ½ cup of the beef broth with red wine for extra depth of flavor.

5. Can I make this recipe gluten-free?

Yes, replace the all-purpose flour with gluten-free flour or cornstarch.

6. How do I reheat leftover stew?

Reheat on the stovetop over medium heat, stirring occasionally, or microwave individual portions.

A Dish That Feels Like Home

There’s nothing quite like the smell of Slow Cooker Beef Stew filling your home as it simmers away. With its tender beef, perfectly cooked vegetables, and savory broth, this dish is a true comfort classic.

So, grab your slow cooker and get started. Whether you’re feeding a crowd or meal-prepping for the week, this recipe is guaranteed to be a hit. Serve it with your favorite sides and enjoy every warm, hearty bite!

Pro Tip: Don’t forget to share your creation with friends and family—they’ll be begging you for the recipe! Happy cooking!

ating

Slow Cooker Beef Stew: A Comforting, Flavorful Classic

A warm and hearty classic featuring tender beef, perfectly cooked vegetables, and a rich, savory broth. Perfect for chilly nights, family dinners, or meal prep!

Prep Time 20 minutes
Total Time 6 hours 20 minutes
Servings: 6 servings
Course: Main Course
Cuisine: American

Ingredients
  

For the Stew:
  • ¼ cup all-purpose flour
  • 2 teaspoons dried thyme
  • 1 ½ teaspoons kosher salt
  • 1 teaspoon freshly ground black pepper
  • 1 teaspoon garlic powder
  • 1 medium yellow onion diced (~1 ½ cups)
  • 4 medium carrots sliced (~2 ½ cups)
  • 2 medium celery stalks sliced (~¾ cup)
  • 1 pound Yukon gold or red potatoes cubed (~3 medium)
  • 2 ¼ pounds boneless beef chuck roast cut into chunks
  • 2 dried bay leaves
  • 1 ½ cups beef broth
  • 1 tablespoon tomato paste
  • 1 tablespoon Worcestershire sauce
Optional Garnish:
  • Chopped fresh parsley
  • Additional black pepper

Method
 

Prepare the Slow Cooker:
  1. In a 6-quart or larger slow cooker, combine the flour, dried thyme, kosher salt, black pepper, and garlic powder. Stir to mix evenly.
Prep the Vegetables:
  1. Dice the onion.
  2. Peel and slice the carrots into 1-inch rounds.
  3. Slice the celery into ½-inch pieces.
  4. Cube the potatoes into 1-inch chunks.
Cut and Coat the Beef:
  1. Trim any large pieces of fat from the chuck roast and cut it into 1–1 ½-inch chunks. Toss the beef in the flour mixture until evenly coated.
Assemble the Ingredients:
  1. Place the coated beef into the slow cooker. Add the diced onion, carrots, celery, potatoes, and bay leaves on top.
Mix the Broth:
  1. In a medium bowl or measuring cup, whisk together the beef broth, tomato paste, and Worcestershire sauce. Pour over the beef and vegetables, stirring gently to combine.
Cook the Stew:
  1. Cover and cook on LOW for 6–8 hours or HIGH for 4 hours, until the beef is tender and the vegetables are cooked through.
Taste and Adjust Seasoning:
  1. Taste the stew and add additional salt or black pepper as needed.
Serve:
  1. Ladle the stew into bowls and garnish with chopped parsley and a sprinkle of black pepper, if desired. Serve warm with your favorite sides.

Notes

  • For gluten-free, substitute all-purpose flour with gluten-free flour or cornstarch.
  • Add variety by including parsnips, mushrooms, or turnips.
  • For a thicker stew, mix 1 tablespoon cornstarch with 2 tablespoons water and stir it in during the last 30 minutes of cooking.
  • Store leftovers in an airtight container in the refrigerator for up to 3 days or freeze for up to 3 months.

Creamy Tuscan Chicken: A Rich and Elegant One-Pan Dish

Picture this: a creamy, flavorful sauce filled with garlic, sun-dried tomatoes, and baby spinach, gently hugging tender, juicy chicken breasts. Creamy Tuscan Chicken is more than just a meal—it’s an experience. Perfect for a family dinner or a romantic night in, this one-pan dish brings restaurant-quality flavors straight to your kitchen.

The best part? It’s easy enough for a weeknight yet impressive enough for a special occasion. Let’s dive into everything you need to create this indulgent masterpiece.

Why You’ll Love Creamy Tuscan Chicken

  • Rich and Flavorful: The creamy sauce is packed with Italian-inspired ingredients that burst with flavor.
  • Quick and Easy: This dish comes together in under 30 minutes, making it perfect for busy evenings.
  • One-Pan Wonder: Minimal cleanup means more time to enjoy your meal.
  • Customizable: You can adapt it to suit your dietary needs or preferences.

Ingredients for Creamy Tuscan Chicken

Here’s what you’ll need to create this decadent dish:

For the Chicken

IngredientAmountNotes
Boneless, skinless chicken breasts4 (6 oz each)Pounded to an even thickness for even cooking.
Italian seasoning1 tspA blend of oregano, thyme, basil, and rosemary.
Kosher salt1 tspEnhances the natural flavors.
Freshly ground black pepper½ tspAdds a touch of spice.

For the Sauce

IngredientAmountNotes
Extra virgin olive oil3 tbspFor searing the chicken and sautéing aromatics.
Garlic4 cloves, mincedProvides a rich, aromatic base.
Yellow onion¼ cup, finely choppedAdds depth to the sauce.
Sun-dried tomatoes½ cup, thinly slicedSweet and tangy, they’re a star ingredient.
Baby spinach2 cupsAdds color, flavor, and nutrition.
Heavy cream1 ½ cupsCreates the luxurious sauce. Substitute with coconut cream for a dairy-free option.
Parmesan cheese¼ cup, freshly gratedInfuses the sauce with a savory richness.

Step-by-Step Instructions for Creamy Tuscan Chicken

1. Prepare the Chicken

  • Pat the chicken breasts dry with paper towels.
  • Sprinkle both sides with Italian seasoning, kosher salt, and black pepper.

2. Sear the Chicken

  • Heat 2 tablespoons of olive oil in a large skillet over medium-high heat.
  • Add the chicken breasts and cook for 4–5 minutes per side, until golden brown.
  • Remove the chicken from the skillet and set it aside.

3. Sauté the Aromatics

  • Add the remaining tablespoon of olive oil to the skillet.
  • Sauté the minced garlic and chopped onion for 2–3 minutes, until fragrant and softened.

4. Build the Sauce

  • Stir in the sun-dried tomatoes, letting them warm through for 1–2 minutes.
  • Lower the heat and pour in the heavy cream, stirring to combine.

5. Add the Spinach and Parmesan

  • Add the baby spinach, stirring gently until it wilts.
  • Stir in the grated Parmesan cheese, letting it melt into the sauce.

6. Return the Chicken to the Pan

  • Place the seared chicken breasts back into the skillet.
  • Simmer for 5–7 minutes, spooning the sauce over the chicken, until the chicken is fully cooked (internal temperature of 165°F).

7. Serve and Enjoy

  • Serve your Creamy Tuscan Chicken warm, with the sauce spooned generously over the top.

Serving Suggestions for Creamy Tuscan Chicken

Perfect Pairings

  • Pasta: Toss fettuccine, spaghetti, or penne in the sauce for a complete meal.
  • Mashed Potatoes: Creamy potatoes soak up the sauce beautifully.
  • Rice or Quinoa: A great option for a lighter side dish.
  • Crusty Bread: Use it to mop up every last drop of that delicious sauce.

Tips for the Perfect Creamy Tuscan Chicken

1. Choose the Right Pan

  • Use a large skillet with high sides to prevent the sauce from spilling over.

2. Don’t Skip the Sear

  • Searing the chicken creates a flavorful crust and locks in the juices.

3. Adjust the Consistency

  • If the sauce is too thick, add a splash of chicken broth to thin it out.

4. Make It Dairy-Free

  • Substitute heavy cream with coconut cream and Parmesan with nutritional yeast or a dairy-free cheese.

5. Amp Up the Flavor

  • Add a splash of white wine to deglaze the pan before adding the cream for a touch of acidity.

Nutritional Information

NutrientPer Serving (1/4 of recipe)
Calories~450
Protein32g
Fat32g
Carbohydrates6g

Why Creamy Tuscan Chicken Is Perfect for Any Occasion

This dish strikes the perfect balance between indulgence and simplicity. It’s elegant enough to serve at a dinner party yet quick enough for a busy weeknight. The creamy sauce, combined with the tender chicken, creates a dish that feels both comforting and luxurious.

FAQs About Creamy Tuscan Chicken

1. Can I use chicken thighs instead of breasts?

Yes! Chicken thighs are just as delicious and may even stay juicier. Adjust the cooking time as needed.

2. Can I make this recipe ahead of time?

You can prepare the sauce and sear the chicken in advance. Store them separately and combine them just before serving.

3. How do I store leftovers?

Store leftovers in an airtight container in the refrigerator for up to 3 days. Reheat gently on the stovetop or in the microwave.

4. Can I freeze Creamy Tuscan Chicken?

While the chicken freezes well, the cream-based sauce may separate when reheated. For best results, make it fresh.

5. What can I substitute for sun-dried tomatoes?

If you don’t have sun-dried tomatoes, roasted red peppers make a great alternative.

6. How can I make this dish spicier?

Add a pinch of red pepper flakes or a splash of hot sauce for extra heat.

Bring Restaurant-Quality Flavors to Your Kitchen

Ready to impress your family or guests with a dish that’s as stunning as it is delicious? Creamy Tuscan Chicken combines the best of creamy sauces, fresh ingredients, and bold flavors for a meal that’s truly unforgettable.

Pro Tip: Serve it with a crisp glass of white wine or a refreshing lemonade to complete your meal. Try it tonight, and let the compliments roll in!

ating

Creamy Tuscan Chicken: A Rich and Elegant One-Pan Dish

A rich and elegant one-pan dish featuring tender chicken breasts smothered in a creamy sauce with garlic, sun-dried tomatoes, and baby spinach. Perfect for a cozy dinner or a special occasion!

Prep Time 10 minutes
Cook Time 20 minutes
Total Time 30 minutes
Servings: 4 servings
Course: Main Course
Cuisine: Italian-inspired

Ingredients
  

For the Chicken:
  • 4 boneless skinless chicken breasts (6 oz each)
  • 1 teaspoon Italian seasoning
  • 1 teaspoon kosher salt
  • ½ teaspoon freshly ground black pepper
For the Sauce:
  • 3 tablespoons extra virgin olive oil divided
  • 4 garlic cloves minced
  • ¼ cup yellow onion finely chopped
  • ½ cup sun-dried tomatoes thinly sliced
  • 2 cups baby spinach
  • cups heavy cream or coconut cream for dairy-free
  • ¼ cup Parmesan cheese freshly grated

Method
 

Prepare the Chicken:
  1. Pat the chicken breasts dry and season both sides with Italian seasoning, kosher salt, and black pepper.
Sear the Chicken:
  1. Heat 2 tablespoons of olive oil in a large skillet over medium-high heat. Sear the chicken breasts for 4–5 minutes per side, until golden brown. Remove from the skillet and set aside.
Sauté Aromatics:
  1. Add the remaining tablespoon of olive oil to the skillet. Sauté minced garlic and chopped onion for 2–3 minutes, until fragrant and softened.
Build the Sauce:
  1. Stir in the sun-dried tomatoes and cook for 1–2 minutes. Reduce heat to low and pour in the heavy cream, stirring to combine.
Add Spinach and Parmesan:
  1. Add baby spinach and gently stir until wilted. Stir in grated Parmesan cheese until melted and incorporated into the sauce.
Return the Chicken:
  1. Place the seared chicken breasts back into the skillet. Simmer for 5–7 minutes, spooning the sauce over the chicken, until the chicken is fully cooked (internal temperature of 165°F).
Serve:
  1. Serve the chicken warm, generously topped with the creamy sauce.

Notes

  • Substitute chicken breasts with chicken thighs for a juicier option.
  • For a thinner sauce, add a splash of chicken broth.
  • Make it dairy-free by using coconut cream and nutritional yeast instead of Parmesan.
  • Add a splash of white wine to deglaze the pan before adding the cream for extra flavor.

Apple Crisp Pizza: A Sweet Twist on a Classic Dessert

Imagine combining two of your favorite desserts into one irresistible dish: the warm, spiced flavors of apple crisp paired with the fun and shareable format of pizza. Apple Crisp Pizza is the ultimate crowd-pleaser, perfect for family gatherings, holiday dinners, or just an indulgent treat on a cozy evening.

This dessert features a buttery pie crust, sweet caramel, tender spiced apples, and a crunchy oat crumble topping. It’s simple to make, fun to serve, and even more enjoyable to eat!

Why You’ll Love Apple Crisp Pizza

  • A Unique Twist: It combines the best of apple pie and apple crisp into a pizza-inspired dessert.
  • Customizable: You can use homemade or store-bought ingredients to suit your schedule.
  • Perfect for Sharing: It’s a fun and interactive dessert that everyone can enjoy.
  • Seasonal Favorite: A great way to celebrate fall or use up extra apples.

Ingredients for Apple Crisp Pizza

Here’s what you’ll need to make this mouthwatering dessert:

Base Ingredients

IngredientAmountNotes
Pie crust (homemade or store-bought)1 crustRolled to fit a pizza pan.
Caramel sauce½ cupAdds a rich, sweet flavor.

Apple Topping

IngredientAmountNotes
Apples1 lb (about 4 apples)Peeled and sliced into ½-inch portions.
Brown sugar⅛ cupEnhances the natural sweetness of the apples.
All-purpose flour2 tbspThickens the apple topping.
Cinnamon1 tspAdds warm spice to the apples.

Crisp Topping

IngredientAmountNotes
All-purpose flour¾ cupForms the base of the crumble.
Brown sugar¼ cupSweetens the crumble topping.
Old-fashioned oats¼ cupAdds a chewy texture.
Cinnamon1 tspInfuses warmth into the crumble.
Butter (room temperature)¼ cup + 2 tbspBinds the crumble ingredients.
Caramel sauce2 tbspAdds sweetness and a sticky texture.

Step-by-Step Instructions for Apple Crisp Pizza

1. Prepare Your Ingredients

  • Preheat your oven to 350°F (175°C).
  • Lightly grease a pizza pan with butter or nonstick spray.

2. Roll Out the Crust

  • Roll your pie crust into a circle large enough to fit your pizza pan (about 14 inches in diameter).
  • Fold the edges back slightly to form a crust.

3. Make the Apple Topping

  • In a mixing bowl, toss the sliced apples with brown sugar, flour, and cinnamon.
  • Spread the apples evenly over the crust in a single layer.

4. Prepare the Crisp Topping

  • In another bowl, combine the flour, brown sugar, oats, cinnamon, and salt.
  • Add the butter and caramel sauce. Use a fork or pastry blender to incorporate the butter until the mixture forms crumbs.

5. Assemble the Pizza

  • Sprinkle the crisp topping evenly over the apples, making sure to cover as much as possible.
  • Drizzle ¼–½ cup of caramel sauce over the top.

6. Bake the Apple Crisp Pizza

  • Place the pan in the oven and bake for 35–40 minutes.
  • The crust should be golden brown, and the apples should be tender.

7. Cool and Serve

  • Let the pizza cool for 10 minutes before slicing.
  • Serve warm or at room temperature, optionally with vanilla ice cream or extra caramel sauce.

Tips for the Perfect Apple Crisp Pizza

1. Choosing the Right Apples

  • Opt for firm, tart apples like Granny Smith, Honeycrisp, or Fuji for the best texture and flavor.

2. Make It Gluten-Free

  • Use a gluten-free pie crust and substitute gluten-free flour for the oat and all-purpose flour.

3. Keep the Crust Crispy

  • Bake on a pizza stone or a perforated pizza pan for a crispier crust.

4. Adding Nuts

  • For extra crunch, sprinkle chopped pecans or walnuts over the crisp topping before baking.

5. Adjust the Sweetness

  • Reduce the sugar in the apple and crisp toppings if your apples are naturally sweet.

Serving Suggestions

  • With Ice Cream: A scoop of vanilla ice cream makes this dessert even more indulgent.
  • Extra Drizzle: Warm caramel or chocolate sauce for added sweetness.
  • Seasonal Spices: Add a pinch of nutmeg or allspice to the apple topping for a festive twist.

Nutritional Information

NutrientPer Serving (1/8 of pizza)
Calories~320
Protein3g
Fat12g
Carbohydrates48g
Fiber3g

Why Apple Crisp Pizza Is Perfect for Any Occasion

This dessert is versatile, easy to make, and always a hit. Whether you’re hosting a holiday party or looking for a creative way to enjoy fall’s bounty of apples, Apple Crisp Pizza fits the bill. It’s a unique twist on classic desserts that’s sure to impress.

FAQs About Apple Crisp Pizza

1. Can I use a store-bought crust?

Yes! Store-bought crusts save time and work perfectly for this recipe.

2. What if I don’t have a pizza pan?

You can use a large baking sheet or a round cake pan instead.

3. Can I make this recipe vegan?

Absolutely! Use a vegan pie crust, plant-based butter, and vegan caramel sauce.

4. How do I store leftovers?

Store in an airtight container at room temperature for up to 2 days, or refrigerate for up to 5 days.

5. Can I freeze Apple Crisp Pizza?

Yes, freeze it unbaked. When ready to enjoy, bake directly from frozen, adding an extra 10–15 minutes to the baking time.

6. What other fruits can I use?

Try pears, peaches, or even a mix of berries for a fun variation.

Ready to Try Apple Crisp Pizza?

Now that you know how to make this sweet, shareable dessert, it’s time to roll up your sleeves and get baking! Whether you stick to the recipe or add your personal touch, Apple Crisp Pizza is sure to become a favorite in your household.

Pro Tip: Serve it warm with a drizzle of caramel and a scoop of ice cream for a dessert that’s impossible to resist. Share your creation with family and friends—they’ll be begging you for the recipe!

ating

Apple Crisp Pizza: A Sweet Twist on a Classic Dessert

A sweet and shareable dessert combining the warm, spiced flavors of apple crisp with the fun format of a pizza. Perfect for gatherings, holidays, or any time you crave something unique and delicious!

Prep Time 20 minutes
Cook Time 40 minutes
Total Time 1 hour
Servings: 8 servings
Course: Dessert
Cuisine: American

Ingredients
  

Base Ingredients:
  • 1 pie crust homemade or store-bought
  • ½ cup caramel sauce
Apple Topping:
  • 1 pound about 4 apples, peeled and sliced into ½-inch portions
  • cup brown sugar
  • 2 tablespoons all-purpose flour
  • 1 teaspoon cinnamon
Crisp Topping:
  • ¾ cup all-purpose flour
  • ¼ cup brown sugar
  • ¼ cup old-fashioned oats
  • 1 teaspoon cinnamon
  • ¼ cup + 2 tablespoons butter room temperature
  • 2 tablespoons caramel sauce

Method
 

  1. Preheat Oven: Preheat your oven to 350°F (175°C) and lightly grease a pizza pan with butter or nonstick spray.
  2. Prepare the Crust: Roll the pie crust into a circle large enough to fit a pizza pan (about 14 inches in diameter). Fold the edges back slightly to form a crust.
  3. Make the Apple Topping: In a mixing bowl, toss the sliced apples with brown sugar, flour, and cinnamon. Spread evenly over the pie crust.
  4. Prepare the Crisp Topping: Combine flour, brown sugar, oats, and cinnamon in a bowl. Add butter and caramel sauce. Use a fork or pastry blender to mix until crumbly.
  5. Assemble the Pizza: Sprinkle the crisp topping evenly over the apples. Drizzle ¼–½ cup of caramel sauce over the top.
  6. Bake: Bake in the preheated oven for 35–40 minutes, until the crust is golden brown and the apples are tender.
  7. Cool and Serve: Let the pizza cool for 10 minutes before slicing. Serve warm or at room temperature, optionally with vanilla ice cream or additional caramel sauce.

Notes

  • Use firm, tart apples like Granny Smith, Honeycrisp, or Fuji for the best results.
  • For a gluten-free version, use a gluten-free pie crust and substitute gluten-free flour.
  • Add chopped nuts like pecans or walnuts to the topping for extra crunch.
  • Store leftovers in an airtight container for up to 2 days at room temperature or 5 days in the refrigerator.