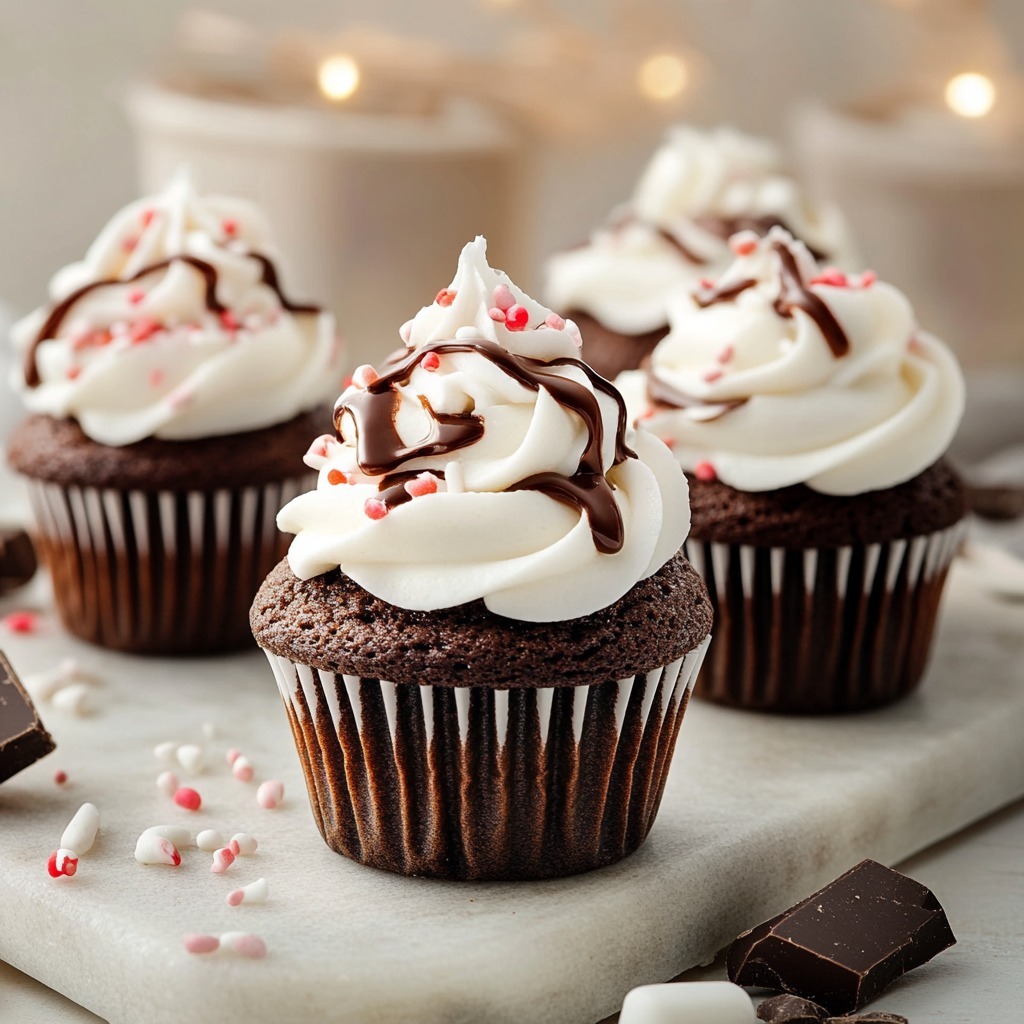
Decadent Hot Chocolate Cupcakes: A Cozy Dessert Treat

When the weather turns chilly, there’s nothing more comforting than a steaming mug of hot chocolate—except perhaps these luscious Hot Chocolate Cupcakes. Infused with rich cocoa, topped with a fluffy frosting, and adorned with mini marshmallows, these cupcakes are a delightful homage to the classic winter beverage. Perfect for holiday gatherings, a cozy night in, or as a sweet gift, these cupcakes are sure to bring warmth and cheer to your day.

Ingredients

Refrigerated

  • 2 large eggs

Condiments

  • 25 g agave syrup

Baking & Spices

  • 160 g all-purpose flour
  • 1/2 tsp baking powder
  • 1/2 tsp baking soda
  • 50 g unsweetened cocoa powder (for the batter)
  • 10 g cocoa powder (for dusting or garnish)
  • 250 g granulated sugar
  • 330 g powdered sugar
  • 1/2 tsp salt
  • 1 pinch salt
  • 100 g semi-sweet chocolate, melted
  • 4 tsp vanilla extract

Oils & Vinegars

  • 75 g vegetable oil

Drinks

  • 1 tsp instant espresso powder

Dairy

  • 215 g butter, softened
  • 120 g sour cream
  • 60 g whole milk (for the batter)
  • 1 tbsp whole milk (for the frosting)

Desserts

  • 1 candy stick (optional, for garnish)
  • Mini marshmallows (for garnish)

Liquids

  • 120 g water

Instructions

  1. Preheat and Prep: Preheat your oven to 350°F (175°C) and line a cupcake tin with paper liners.
  2. Prepare the Batter: In a medium bowl, sift together the flour, cocoa powder, baking powder, baking soda, and salt. In a large bowl, whisk together the granulated sugar, eggs, vegetable oil, vanilla extract, and sour cream until smooth. Dissolve the espresso powder in 120 g of hot water, then mix it into the wet ingredients. Gradually add the dry ingredients to the wet mixture, alternating with the 60 g of whole milk, mixing until just combined.
  3. Bake the Cupcakes: Fill the cupcake liners about two-thirds full with batter. Bake in the preheated oven for 18-20 minutes, or until a toothpick inserted into the center comes out clean. Remove from the oven and let the cupcakes cool in the pan for 5 minutes before transferring to a wire rack to cool completely.
  4. Make the Frosting: In a large bowl, beat the softened butter until fluffy. Gradually add the powdered sugar and 1 pinch of salt, mixing well after each addition. Add the vanilla extract, 1 tbsp of milk, and melted semi-sweet chocolate. Beat until smooth and fluffy.
  5. Assemble the Cupcakes : Pipe or spread the frosting onto the cooled cupcakes. Garnish with mini marshmallows and a light dusting of cocoa powder. For an extra festive touch, stick a candy stick into each cupcake.
  6. Serve and Enjoy: Serve the cupcakes at room temperature with a warm mug of hot chocolate for the ultimate cozy dessert experience.

Conclusion

These Hot Chocolate Cupcakes are the perfect winter indulgence, bringing together the flavors of your favorite hot drink in a sweet, portable form. The moist chocolate cake, rich frosting, and playful marshmallow topping make these cupcakes irresistible. Whether you’re making them for a party or simply to satisfy your own sweet tooth, they’re guaranteed to be a hit. Curl up with one of these decadent treats and enjoy the flavors of the season!
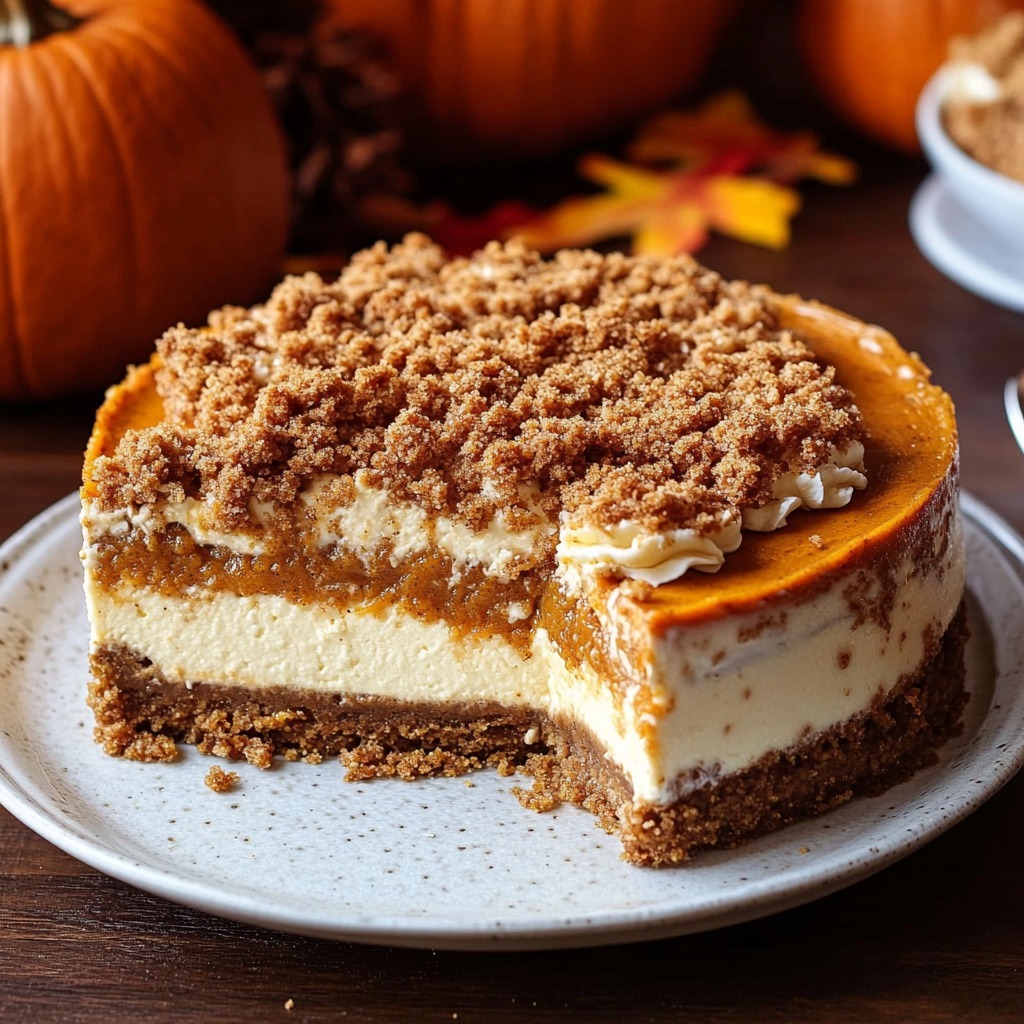
Decadent Pumpkin Streusel Cheesecake: A Fall-Inspired Dessert Delight

Indulge in the ultimate autumn treat with this Pumpkin Streusel Cheesecake. Creamy, spiced pumpkin cheesecake sits atop a crisp Biscoff cookie crust and is topped with a buttery streusel crumble that adds the perfect crunch. Whether it’s for a festive gathering or just to celebrate the season, this dessert combines classic fall flavors with a rich, luxurious texture that will have everyone asking for seconds.

Ingredients

Produce

  • 1 cup canned pumpkin puree (such as Libby’s)

Refrigerated

  • 2 egg yolks
  • 3 whole eggs

Baking & Spices

  • 3/4 cup all-purpose flour
  • 1 1/4 cups packed brown sugar
  • 1/4 cup cornstarch
  • 1/4 cup powdered sugar
  • 6 3/4 teaspoons pumpkin spice
  • 1 pinch of salt
  • 1 tablespoon vanilla extract
  • 22 tablespoons granulated white sugar

Snacks

  • 46 Biscoff cookies

Dairy

  • 16 tablespoons unsalted butter, melted
  • 32 ounces cream cheese, softened
  • 3/4 cup heavy cream
  • 1/3 cup sour cream

Instructions

  1. Prepare the Biscoff Cookie Crust: Preheat your oven to 350°F (175°C). Grease a 9-inch springform pan and line the bottom with parchment paper. Crush the Biscoff cookies into fine crumbs using a food processor or by placing them in a sealed bag and rolling with a pin. Mix the cookie crumbs with 8 tablespoons of melted butter until evenly combined. Press the mixture firmly into the bottom of the prepared pan. Bake for 8-10 minutes, then set aside to cool.
  2. Make the Streusel Topping: In a small bowl, combine 3/4 cup all-purpose flour, 1/2 cup brown sugar, 1/4 cup powdered sugar, 1 teaspoon pumpkin spice, and a pinch of salt. Cut in 8 tablespoons of cold butter using a pastry cutter or fork until the mixture forms coarse crumbs. Chill until ready to use.
  3. Prepare the Cheesecake Batter: In a large mixing bowl, beat the softened cream cheese and 22 tablespoons of granulated sugar until smooth and creamy. Add the pumpkin puree, 2 egg yolks, and 3 whole eggs one at a time, mixing well after each addition. Mix in the cornstarch, 1 teaspoon of pumpkin spice, sour cream, heavy cream, and vanilla extract until fully combined and smooth.
  4. Assemble the Cheesecake: Pour the cheesecake batter over the cooled crust in the springform pan. Smooth the top with a spatula.
  5. Bake the Cheesecake: Place the pan in a water bath by setting it in a larger baking dish and filling the dish with hot water until it reaches halfway up the sides of the springform pan. Bake in the preheated oven for 1 hour, then reduce the heat to 325°F (165°C) and bake for an additional 30 minutes. The cheesecake should be set with a slight jiggle in the center.
  6. Add the Streusel Topping: Remove the cheesecake from the oven and evenly sprinkle the chilled streusel topping over the surface. Return to the oven and bake for another 15 minutes, or until the streusel is golden brown.
  7. Cool and Chill: Turn off the oven and let the cheesecake cool inside with the door slightly ajar for 1 hour. Transfer to a refrigerator and chill for at least 4 hours, or overnight, to set completely.
  8. Serve and Enjoy: Carefully remove the cheesecake from the springform pan and transfer it to a serving plate. Slice and serve chilled for a delightful, spiced dessert perfect for fall gatherings.

Conclusion

This Pumpkin Streusel Cheesecake is the ultimate way to celebrate the cozy flavors of fall. With its smooth, creamy pumpkin filling, crunchy streusel topping, and spiced cookie crust, every bite is a delightful balance of textures and tastes. Perfect for Thanksgiving, Halloween parties, or simply as a treat to yourself, this cheesecake is destined to become a seasonal favorite. Enjoy the rich flavors and warm spices that make autumn truly special!

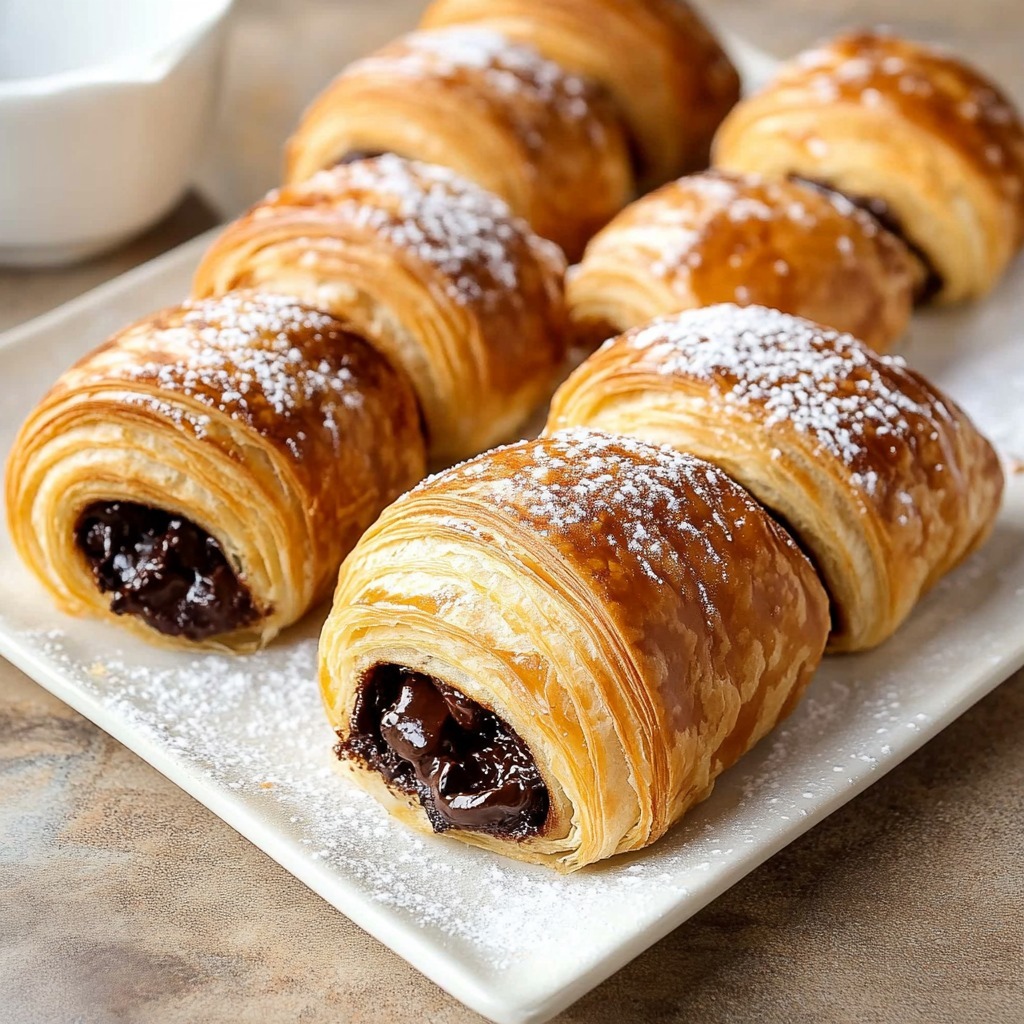
Quick and Easy Chocolate Croissants

Who says you need to spend hours in the kitchen to enjoy warm, flaky chocolate croissants? These Easy Chocolate Croissants are a shortcut version of the classic French treat, made with buttery puff pastry and rich chocolate. Perfect for a quick breakfast, brunch, or dessert, these croissants are a delightful way to enjoy a bakery-quality indulgence at home with minimal effort.

Ingredients

For the Croissants:

  • 2 packages (28 oz total) All-butter puff pastry, thawed but kept cold in the fridge (2 sheets)
  • 1 cup Chocolate chips or chopped dark chocolate (good quality)

For the Egg Wash:

  • 1 egg whisked with 1 tsp water

For Dusting:

  • Powdered sugar (optional, after baking)

Instructions

Step 1: Prepare the Puff Pastry

  1. Preheat your oven to 400°F (200°C) and line a baking sheet with parchment paper.
  2. On a lightly floured surface, unfold one sheet of puff pastry and roll it out gently to smooth the folds, keeping the edges even.

Step 2: Cut and Fill

  1. Cut the puff pastry sheet into 6 rectangles (or smaller if you prefer mini croissants).
  2. Place a few chocolate chips or a small amount of chopped chocolate at one short end of each rectangle.

Step 3: Roll and Shape

  1. Starting at the chocolate-filled end, roll each rectangle tightly into a cylinder, ensuring the seam is on the bottom to prevent unrolling during baking.
  2. Repeat with the second sheet of puff pastry.

Step 4: Brush with Egg Wash

  1. Arrange the rolled croissants on the prepared baking sheet, spacing them a few inches apart.
  2. Brush each croissant with the egg wash to give them a golden, glossy finish.

Step 5: Bake

  1. Bake in the preheated oven for 15-20 minutes, or until the croissants are puffed and golden brown.
  2. Remove from the oven and let them cool slightly on the baking sheet.

Step 6: Finish and Serve

  1. Once slightly cooled, dust the croissants with powdered sugar for a touch of sweetness (optional).
  2. Serve warm and enjoy!

Conclusion

These Easy Chocolate Croissants are proof that you don’t need to be a pastry chef to enjoy a luxurious treat at home. With just a few ingredients and simple steps, you can whip up a batch of buttery, flaky croissants filled with melty chocolate in no time. Perfect with a cup of coffee or tea, these croissants are sure to become a household favorite for any time of day. Bon appétit!

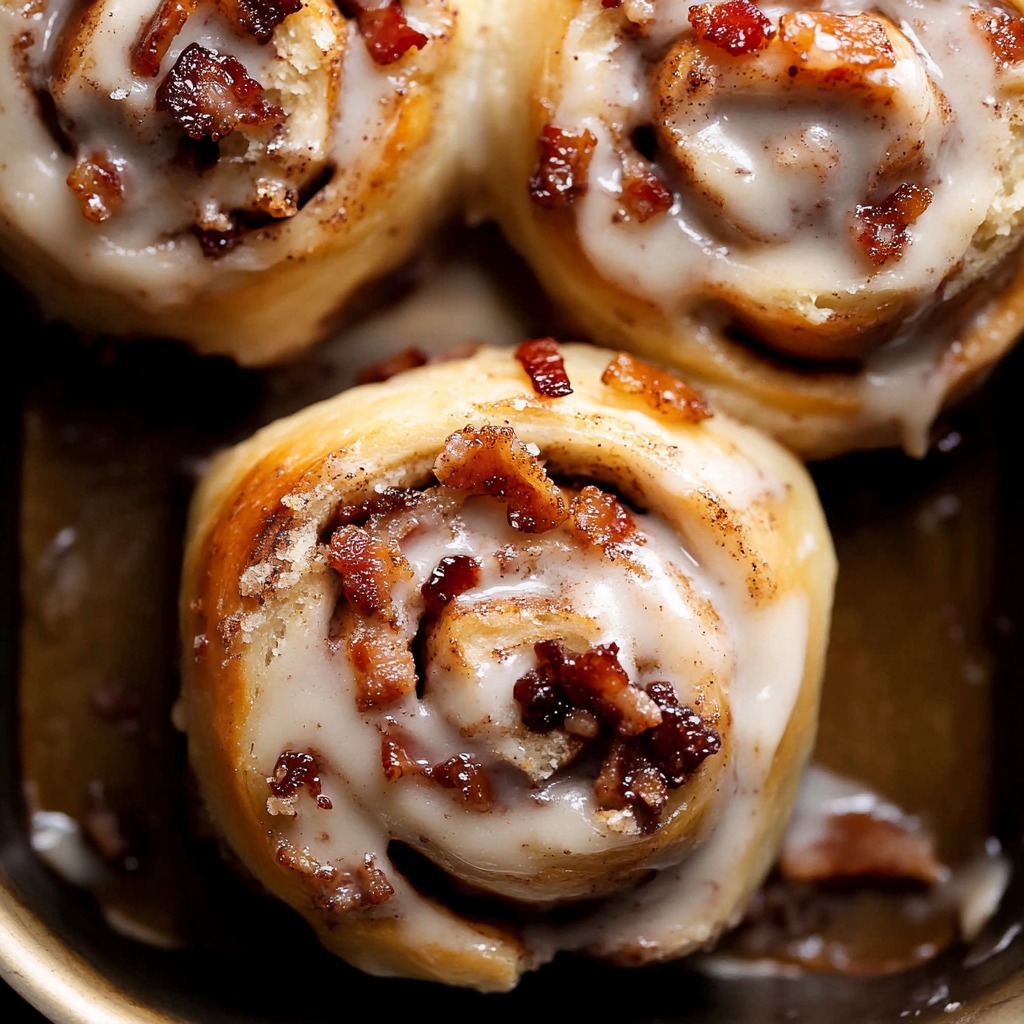
Indulgent Bourbon Maple Bacon Cinnamon Rolls

Take your cinnamon rolls to the next level with the irresistible combination of smoky candied bacon, sweet maple, and a touch of bourbon. These Bourbon Maple Bacon Cinnamon Rolls are the ultimate treat for brunch or dessert, blending savory and sweet flavors in perfect harmony. From the soft, pillowy dough to the gooey cinnamon filling and rich frosting, every bite is a luxurious experience.

Ingredients

For the Candied Bacon:

  • 1 pound Thick-cut bacon
  • ½ cup Brown sugar
  • 4 tbsp Maple syrup
  • 2 tbsp Bourbon
  • 1 tsp Cracked black pepper

For the Dough:

  • ¼ cup All-purpose flour
  • ¾ cup Water
  • 3 ½ cups All-purpose flour (measured properly, see notes)
  • ⅓ cup Granulated sugar
  • 2 tsp Instant yeast
  • ¾ tsp Fine sea salt
  • ½ cup Whole milk, room temperature
  • 1 large Egg, room temperature
  • Tangzhong (prepared from the water and flour above)
  • 4 tbsp Unsalted butter, softened

For the Cinnamon Sugar Filling:

  • ½ cup Unsalted butter, room temperature
  • ⅔ cup Light brown sugar
  • 2 tsp Ground cinnamon
  • 1 cup Candied bacon strips, chopped

For the Bourbon Maple Frosting:

  • 4 tbsp Unsalted butter, room temperature
  • 2 oz Cream cheese, room temperature
  • ¾ cup Powdered sugar
  • 2 tbsp Maple syrup
  • ½–1 tsp Bourbon (to taste)
  • ½ cup Candied bacon strips (for topping)

Instructions

Step 1: Prepare the Candied Bacon

  1. Preheat the oven to 375°F (190°C). Line a baking sheet with parchment paper.
  2. In a bowl, mix the brown sugar, maple syrup, bourbon, and cracked black pepper.
  3. Coat the bacon slices evenly with the mixture and lay them on the prepared baking sheet in a single layer.
  4. Bake for 15-20 minutes, flipping halfway through, until caramelized and crispy. Let cool, then chop into pieces for the filling and frosting.

Step 2: Make the Tangzhong Dough

  1. In a small saucepan, whisk together ¼ cup flour and ¾ cup water. Cook over medium heat, stirring continuously, until the mixture thickens into a paste. Let cool.
  2. In a large mixing bowl, combine the cooled tangzhong, flour, sugar, yeast, and salt. Mix in the milk and egg until a dough forms.
  3. Knead in the softened butter until smooth and elastic (about 8-10 minutes by hand or 5 minutes using a stand mixer with a dough hook).
  4. Cover the dough and let it rise in a warm place for 1–1 ½ hours, or until doubled in size.

Step 3: Assemble the Rolls

  1. Roll out the dough into a 12×18-inch rectangle on a floured surface.
  2. Spread the softened butter evenly over the dough.
  3. Mix the brown sugar and cinnamon, then sprinkle the mixture evenly over the butter. Top with the chopped candied bacon.
  4. Roll the dough tightly into a log, starting from the long edge, and slice it into 12 even pieces.
  5. Arrange the rolls in a greased 9×13-inch pan. Cover and let rise for another 30-45 minutes, or until puffed.

Step 4: Bake the Rolls

  1. Preheat the oven to 350°F (175°C).
  2. Bake the cinnamon rolls for 25-30 minutes, or until golden brown and cooked through. Let cool slightly.

Step 5: Make the Bourbon Maple Frosting

  1. Beat the butter and cream cheese together until smooth and creamy.
  2. Add powdered sugar, maple syrup, and bourbon, mixing until well combined.
  3. Spread the frosting over the warm cinnamon rolls and sprinkle with additional candied bacon pieces.

Conclusion

These Bourbon Maple Bacon Cinnamon Rolls are the perfect combination of sweet, savory, and indulgent. The rich bourbon-infused frosting, buttery dough, and crispy candied bacon create a flavor profile that’s truly unforgettable. Serve these rolls warm, and watch them disappear from the table as everyone savors this decadent delight. Perfect for weekend brunches or special occasions, this recipe is sure to become a household favorite!

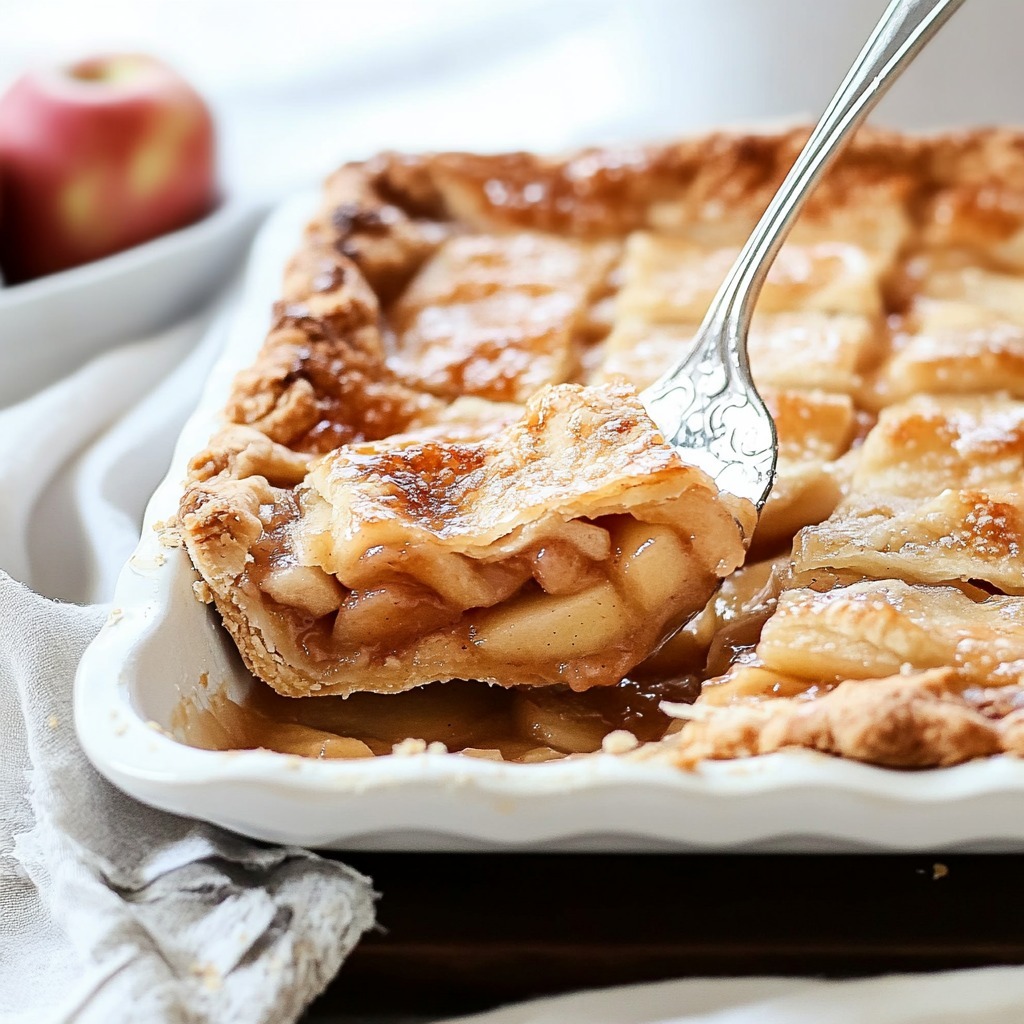
Heavenly Home-Baked Apple Slab Pie Recipe

If you love the comfort of a classic apple pie but need enough to feed a crowd, this Deliciously Home-Baked Apple Slab Pie is the perfect choice. With a buttery, flaky crust and a warmly spiced apple filling, this dessert is ideal for holidays, family gatherings, or any special occasion. Its rectangular shape makes it easy to slice and serve, ensuring every guest gets their share of this delightful treat.

Ingredients

For the Crust:

  • 3 ¾ cups (470 g) All-purpose flour
  • 1 ½ tbsp Sugar
  • 1 ½ tsp Table salt
  • 3 sticks (12 oz or 340 g) Unsalted butter, cubed and kept very cold
  • ¾ cup Very cold water

For the Apple Filling:

  • 3 ½ to 4 pounds Apples, peeled, cored, and chopped into ½-inch chunks (about 10 cups)
  • A squeeze of Lemon juice
  • ⅔ to ¾ cup Sugar (adjust to taste)
  • 3 tbsp Cornstarch
  • 1 tsp Ground cinnamon
  • ¼ tsp Ground nutmeg
  • ¼ tsp Ground allspice
  • ⅛ tsp Table salt

To Finish:

  • 2 tbsp Heavy cream or
  • 1 egg beaten with 1 tbsp water

Instructions

Step 1: Prepare the Crust

  1. In a large bowl, whisk together the flour, sugar, and salt.
  2. Add the cold, cubed butter and cut it into the dry ingredients using a pastry cutter or your fingertips until the mixture resembles coarse crumbs with pea-sized butter chunks.
  3. Gradually drizzle in the cold water, stirring with a fork until the dough comes together. Avoid overmixing.
  4. Divide the dough into two equal portions, shape them into rectangles, wrap them in plastic wrap, and chill in the refrigerator for at least 1 hour.

Step 2: Make the Apple Filling

  1. In a large bowl, toss the chopped apples with a squeeze of lemon juice to prevent browning.
  2. Add the sugar, cornstarch, cinnamon, nutmeg, allspice, and salt. Mix well to coat the apples evenly with the spices.

Step 3: Assemble the Pie

  1. Preheat your oven to 375°F (190°C).
  2. Roll out one portion of the chilled dough on a floured surface into a rectangle large enough to line a 10×15-inch baking sheet or jelly roll pan. Transfer the dough to the pan, pressing it into the corners and letting the excess hang over the edges.
  3. Pour the apple filling evenly over the crust.
  4. Roll out the second portion of dough into a rectangle and lay it over the apples. Trim the excess dough, leaving a small overhang, and pinch the edges together to seal.
  5. Cut slits or decorative vents into the top crust to allow steam to escape.

Step 4: Finish and Bake

  1. Brush the top crust with heavy cream or the egg wash for a golden finish.
  2. Bake the pie in the preheated oven for 40-50 minutes, or until the crust is golden brown and the filling is bubbling.
  3. Allow the pie to cool for at least 30 minutes before slicing and serving.

Conclusion

This apple slab pie is a versatile, crowd-pleasing dessert that captures the essence of homemade goodness. The flaky crust pairs beautifully with the spiced apple filling, creating a perfect balance of textures and flavors. Whether served warm with a scoop of vanilla ice cream or enjoyed on its own, this pie will have everyone reaching for seconds. Bake this once, and it’s sure to become a cherished family favorite!

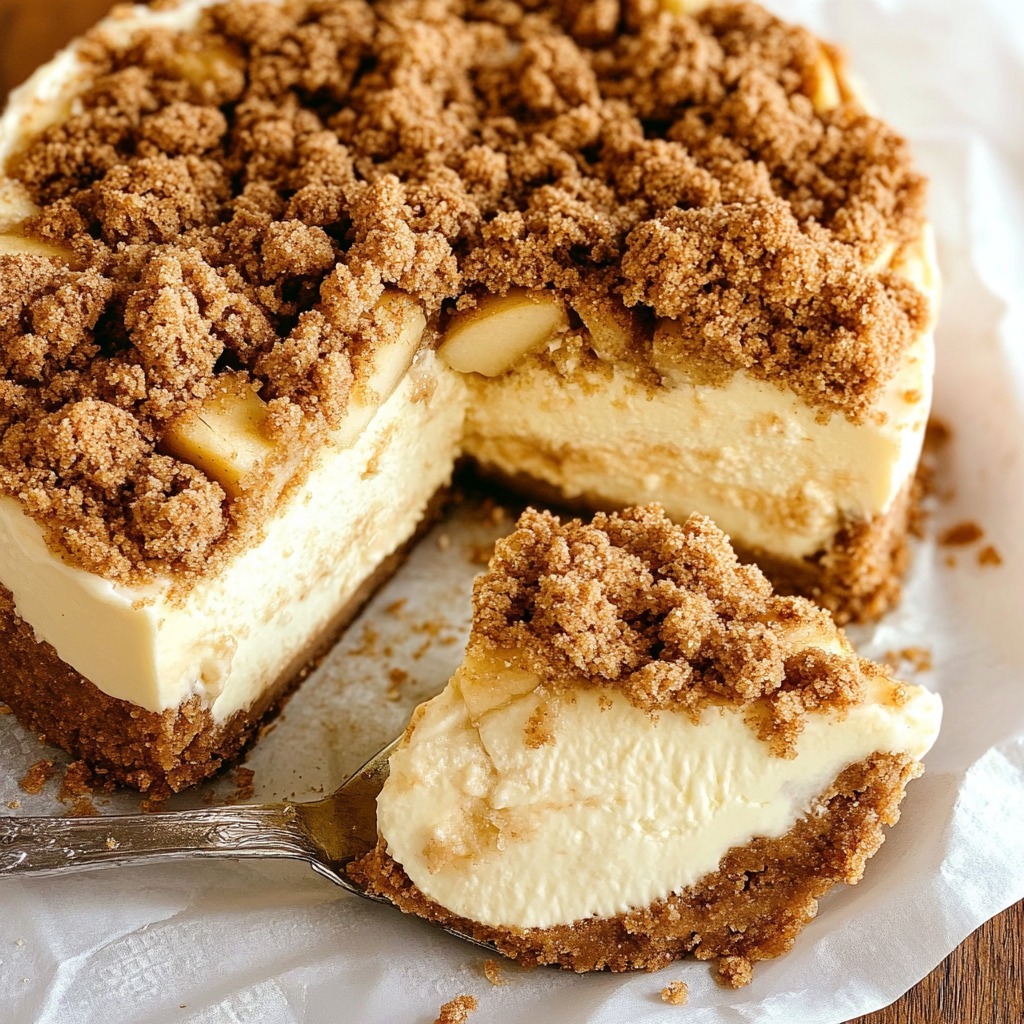
Decadent Apple Cinnamon Cheesecake with Cookie Crumble Base

Dive into the delightful fusion of creamy cheesecake and the warm flavors of spiced apples with a buttery cookie crumble base. This dessert combines the luscious richness of cream cheese, the comforting aroma of cinnamon and nutmeg, and the crunch of a cookie crust, creating a heavenly treat for any occasion. Perfect for autumn gatherings or an indulgent weekend dessert, this recipe is a must-try for cheesecake and apple lovers alike.

Ingredients

For the Cookie Crumble Base

  • 200 g Digestive or graham crackers, crushed
  • 80 g Dark brown sugar
  • 120 g Butter, melted

For the Creamy Cheesecake Layer

  • 600 g Full-fat cream cheese, softened
  • 150 g Sour cream
  • 200 g Granulated sugar
  • 3 large Eggs
  • 2 tsp Vanilla extract
  • 1 tbsp Cornstarch

For the Spiced Apple Topping

  • 150 g Apples, peeled and diced
  • 1.5 tbsp Dark brown sugar
  • 1 tsp Ground cinnamon
  • 1/2 tsp Ground nutmeg

For the Crumb Topping

  • 100 g All-purpose flour
  • 1 tbsp Granulated sugar
  • 1.5 tsp Ground cinnamon
  • 80 g Butter, chilled and diced

Instructions

Step 1: Prepare the Cookie Crumble Base

  1. Preheat your oven to 175°C (350°F) and grease a 9-inch springform pan.
  2. In a bowl, mix the crushed digestive or graham crackers with dark brown sugar and melted butter until the mixture resembles wet sand.
  3. Press the mixture firmly into the base of the pan to create an even layer. Bake for 10 minutes, then set aside to cool.

Step 2: Make the Cheesecake Filling

  1. In a large mixing bowl, beat the cream cheese and granulated sugar until smooth and creamy.
  2. Add sour cream, vanilla extract, and cornstarch, mixing well.
  3. Beat in the eggs one at a time, ensuring each is fully incorporated before adding the next.
  4. Pour the filling over the cooled crust and smooth the surface with a spatula.

Step 3: Prepare the Spiced Apple Topping

  1. In a small bowl, toss the diced apples with dark brown sugar, ground cinnamon, and nutmeg.
  2. Sprinkle the apple mixture evenly over the cheesecake batter.

Step 4: Make the Crumb Topping

  1. In a medium bowl, combine the flour, granulated sugar, ground cinnamon, and chilled butter. Use your fingertips to rub the butter into the dry ingredients until the mixture forms coarse crumbs.
  2. Sprinkle the crumb topping evenly over the apple layer.

Step 5: Bake the Cheesecake

  1. Bake the cheesecake in a preheated oven at 175°C (350°F) for 50-60 minutes, or until the center is set but still slightly jiggly.
  2. Turn off the oven and leave the cheesecake inside with the door ajar for an hour to cool gradually.
  3. Remove from the oven and refrigerate for at least 4 hours or overnight.

Conclusion

This apple cinnamon cheesecake with a cookie crumble base is a dessert masterpiece that brings the best of autumn flavors to your plate. The creamy cheesecake, spiced apple topping, and buttery crumble come together to create an unforgettable treat. Serve it chilled and savor every indulgent bite! Whether it’s for a family dinner or a festive celebration, this cheesecake is sure to be the star of the table. Enjoy!

Decadent Cookie Dough Cake: A Sweet Fusion of Flavors

Imagine combining the irresistible flavors of cookie dough with the moistness of a fluffy cake—this Cookie Dough Cake does exactly that. With layers of cookie dough-flavored buttercream, a tender chocolate chip cake, and a rich ganache topping, this dessert is a dream come true for cookie dough lovers. Perfect for birthdays, celebrations, or any day that calls for something indulgent, this cake is sure to impress.

Ingredients

Cookie Dough:

  • ½ cup (110g) unsalted butter, room temperature
  • ½ cup (100g) granulated sugar
  • ⅔ cup (130g) light brown sugar, packed
  • ¼ cup (60ml) milk
  • 2 teaspoons vanilla extract
  • 2 cups (260g) all-purpose flour heat-treated for safety
  • ½ teaspoon salt
  • 1 cup (180g) mini chocolate chips

Cake:

  • 1½ cups (330g) unsalted butter, room temperature
  • 2 cups (400g) granulated sugar
  • 3 large eggs
  • 2 teaspoons vanilla extract
  • 3 cups (400g) all-purpose flour
  • 2 teaspoons baking powder
  • 1 teaspoon salt
  • 1 cup (240ml) whole milk
  • ½ cup (125g) 2% Greek yogurt (or sour cream)
  • 1 cup (180g) mini chocolate chips

Cookie Dough Buttercream:

  • 1½ cups (330g) unsalted butter, room temperature
  • 5 cups (550g) powdered sugar
  • 1 cup (130g) all-purpose flour heat-treated for safety
  • ¾ cup (140g) light brown sugar, packed
  • ¼ cup (60ml) milk
  • 2 teaspoons vanilla extract
  • ½ teaspoon salt
  • ½ cup (90g) mini chocolate chips

Chocolate Ganache:

  • 4 ounces bittersweet chocolate, chopped
  • 4 ounces (½ cup) heavy cream
  • 2–3 teaspoons vegetable oil

Instructions

Step 1: Prepare the Cookie Dough

  1. In a large bowl, cream the butter, granulated sugar, and brown sugar until fluffy.
  2. Mix in the milk and vanilla extract.
  3. Gradually add the heat-treated flour and salt, mixing until combined. Fold in the mini chocolate chips.
  4. Shape small balls of cookie dough to use as decorations and set aside.

Step 2: Bake the Cake Layers

  1. Preheat the oven to 350°F (175°C). Grease and line three 8-inch round cake pans.
  2. In a bowl, cream the butter and sugar until light and fluffy. Add the eggs one at a time, mixing well after each addition. Mix in the vanilla extract.
  3. In a separate bowl, whisk together the flour, baking powder, and salt. Gradually add the dry ingredients to the wet mixture, alternating with the milk and Greek yogurt, starting and ending with the dry ingredients. Fold in the mini chocolate chips.
  4. Divide the batter evenly among the prepared pans and bake for 25–30 minutes, or until a toothpick inserted in the center comes out clean. Cool completely.

Step 3: Make the Buttercream

  1. Beat the butter until creamy. Add the powdered sugar, one cup at a time, mixing well after each addition.
  2. Beat in the flour, brown sugar, milk, vanilla extract, and salt until smooth. Fold in the mini chocolate chips.

Step 4: Assemble the Cake

  1. Place one cake layer on a serving plate. Spread a thick layer of cookie dough buttercream over the top. Repeat with the second and third layers. Frost the outside of the cake with the remaining buttercream.

Step 5: Prepare the Ganache

  1. Heat the heavy cream in a saucepan until just simmering. Pour it over the chopped chocolate in a bowl and let sit for 2 minutes. Stir until smooth. Mix in the vegetable oil for a glossy finish.
  2. Drizzle the ganache over the cake, letting it drip down the sides.

Step 6: Decorate and Serve

  1. Top the cake with the reserved cookie dough balls and additional mini chocolate chips, if desired. Chill the cake for 1–2 hours before serving for easier slicing.

Conclusion

This Cookie Dough Cake is a showstopper, combining the nostalgia of raw cookie dough with the elegance of a layered cake. Each bite offers a perfect balance of sweetness, texture, and indulgence. Whether you’re celebrating a special occasion or treating yourself, this cake is a guaranteed hit!

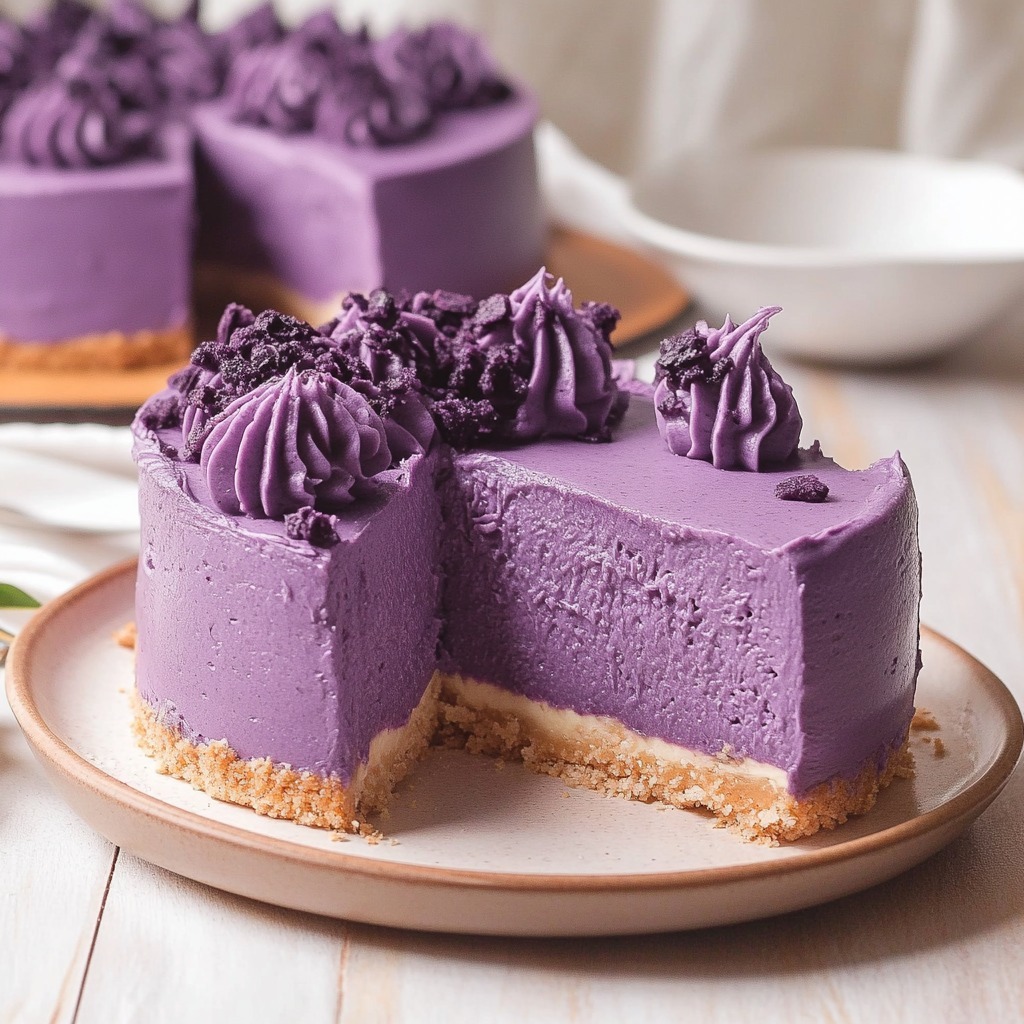
Velvety Ube Cheesecake: A Sweet and Creamy Delight

Give your cheesecake a vibrant twist with the exotic flavors of ube, a purple yam that adds a stunning color and unique flavor to this creamy dessert. This Ube Cheesecake is a rich combination of velvety cream cheese, sweet ube halaya, and a hint of coconut for tropical flair. Perfect for special occasions or as a standout centerpiece, this dessert will captivate everyone at first bite.

Ingredients

For the Crust:

  • 1½ cups graham cracker crumbs
  • 2 tablespoons light brown sugar
  • 7 tablespoons unsalted butter, melted

For the Cheesecake Filling:

  • 32 ounces cream cheese, softened
  • 1 cup granulated sugar
  • ½ cup sour cream
  • 1 cup heavy whipping cream
  • 4 large eggs
  • ½ tablespoon vanilla extract
  • ¼ teaspoon ube extract
  • ½ cup ube halaya (purple yam jam)
  • ¾ teaspoon salt

For the Topping:

  • ½ cup coconut flakes, toasted
  • ½ cup powdered sugar

Instructions

Step 1: Prepare the Crust

  1. Preheat your oven to 325°F (163°C) and grease a 9-inch springform pan.
  2. In a medium bowl, mix the graham cracker crumbs, brown sugar, and melted butter until evenly combined.
  3. Press the mixture firmly into the bottom of the prepared pan to form an even crust. Bake for 10 minutes, then set aside to cool.

Step 2: Make the Cheesecake Filling

  1. In a large bowl, beat the cream cheese and granulated sugar with an electric mixer until smooth and creamy.
  2. Add the sour cream, heavy whipping cream, and vanilla extract, and mix until combined.
  3. Beat in the eggs one at a time, ensuring each is fully incorporated before adding the next.
  4. Stir in the ube extract, ube halaya, and salt, and mix until the batter is smooth and evenly purple.

Step 3: Assemble and Bake

  1. Pour the cheesecake filling over the cooled crust, smoothing the top with a spatula.
  2. Place the springform pan on a baking sheet and bake in the preheated oven for 60–70 minutes, or until the center is set but still slightly jiggly.
  3. Turn off the oven and leave the cheesecake inside with the door slightly ajar for 1 hour to cool gradually.

Step 4: Chill and Decorate

  1. Remove the cheesecake from the oven and let it cool to room temperature. Cover and refrigerate for at least 4 hours, or overnight for the best flavor.
  2. Before serving, sprinkle the top with toasted coconut flakes and dust with powdered sugar for a decorative touch.

Conclusion

This Velvety Ube Cheesecake combines the creamy richness of classic cheesecake with the unique and vibrant flavors of ube. The graham cracker crust adds a delightful crunch, while the coconut topping enhances its tropical appeal. Perfect for both ube enthusiasts and cheesecake lovers, this dessert is sure to impress at any gathering. Slice in, and enjoy the magic of ube!

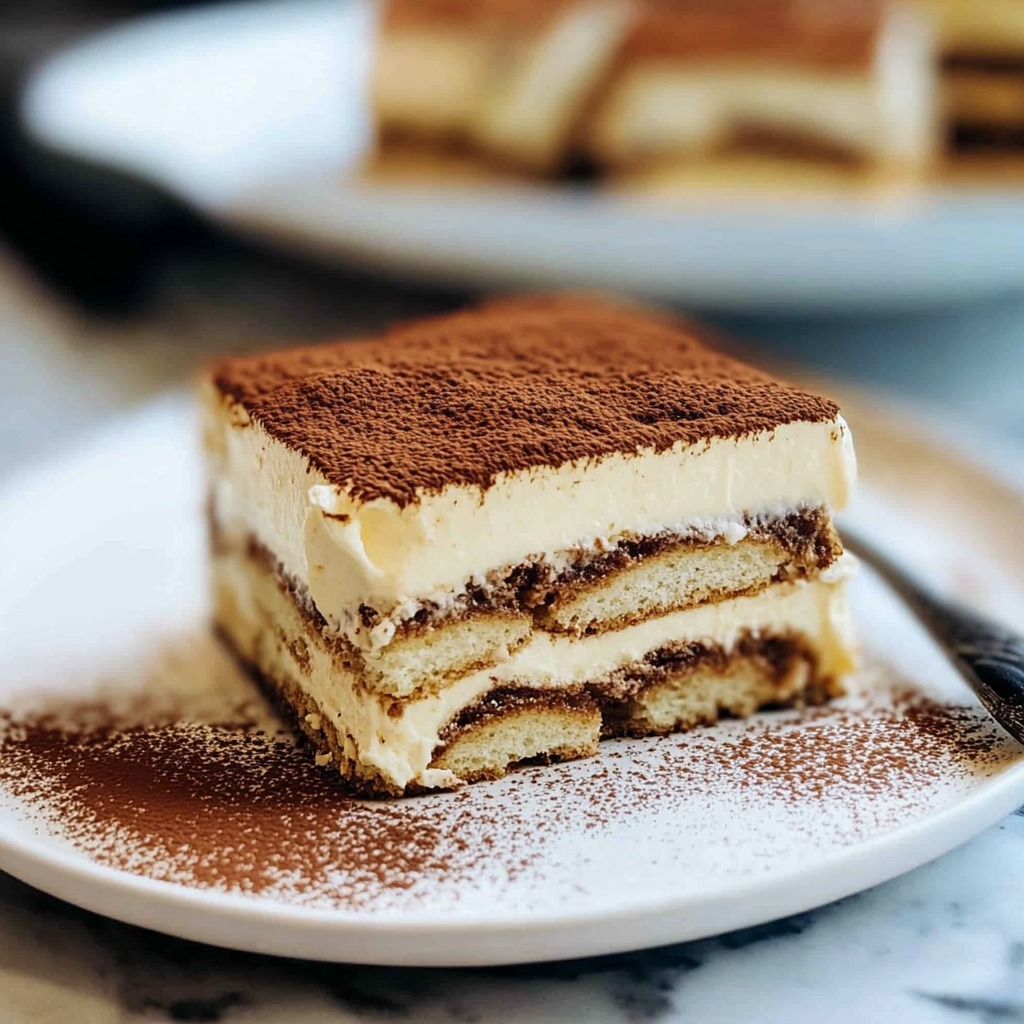
Classic Tiramisu: A Timeless Italian Dessert

Tiramisu is the epitome of Italian elegance, combining creamy layers of mascarpone with coffee-soaked ladyfingers and a touch of cocoa. This no-bake dessert is rich yet light, making it perfect for any occasion, from family dinners to special celebrations. With its balanced flavors of coffee, cream, and a hint of liqueur, this Classic Tiramisu will surely become a favorite in your dessert repertoire.

Ingredients

For the Coffee Mixture:

  • 6 tablespoons instant espresso powder
  • 1½ cups hot water
  • 2 tablespoons amaretto

For the Mascarpone Cream Layer:

  • 5 large egg yolks
  • 9 tablespoons granulated sugar
  • ¾ cup heavy cream
  • 16 ounces mascarpone cheese
  • 2 teaspoons vanilla bean paste
  • ¼ teaspoon kosher salt

For Assembly and Garnish:

  • 1 (7-ounce) package crispy ladyfingers (regular or gluten-free)
  • Unsweetened cocoa powder (for dusting)

Instructions

Step 1: Prepare the Coffee Mixture

  1. In a medium bowl, dissolve the espresso powder in hot water. Stir in the amaretto and set aside to cool to room temperature.

Step 2: Make the Mascarpone Cream

  1. Fill a saucepan with 1–2 inches of water and bring it to a gentle simmer. In a heatproof bowl, whisk together the egg yolks and granulated sugar. Place the bowl over the simmering water, ensuring it doesn’t touch the water, and whisk constantly for about 5–7 minutes until the mixture thickens and turns pale yellow. Remove from heat and let it cool slightly.
  2. In a separate bowl, whip the heavy cream until soft peaks form.
  3. In another bowl, beat the mascarpone cheese until smooth. Add the vanilla bean paste, salt, and the cooled egg yolk mixture, then fold in the whipped cream until fully incorporated.

Step 3: Assemble the Tiramisu

  1. Quickly dip each ladyfinger into the cooled coffee mixture, ensuring they are soaked but not soggy. Line the bottom of a 9×9-inch dish with a single layer of soaked ladyfingers.
  2. Spread half of the mascarpone cream over the ladyfingers, smoothing it out evenly with a spatula.
  3. Add another layer of soaked ladyfingers on top, followed by the remaining mascarpone cream. Smooth the top layer.

Step 4: Chill and Garnish

  1. Cover the dish with plastic wrap and refrigerate for at least 4 hours, or overnight for the best flavor.
  2. Just before serving, dust the top generously with unsweetened cocoa powder.

Conclusion

Classic Tiramisu is a dessert that never fails to impress. Its creamy layers and bold coffee flavor are perfectly balanced, making it a beloved choice for dessert lovers worldwide. Whether you’re savoring it with a cup of espresso or serving it as the grand finale of a dinner party, this tiramisu is guaranteed to leave a lasting impression. Buon appetito!

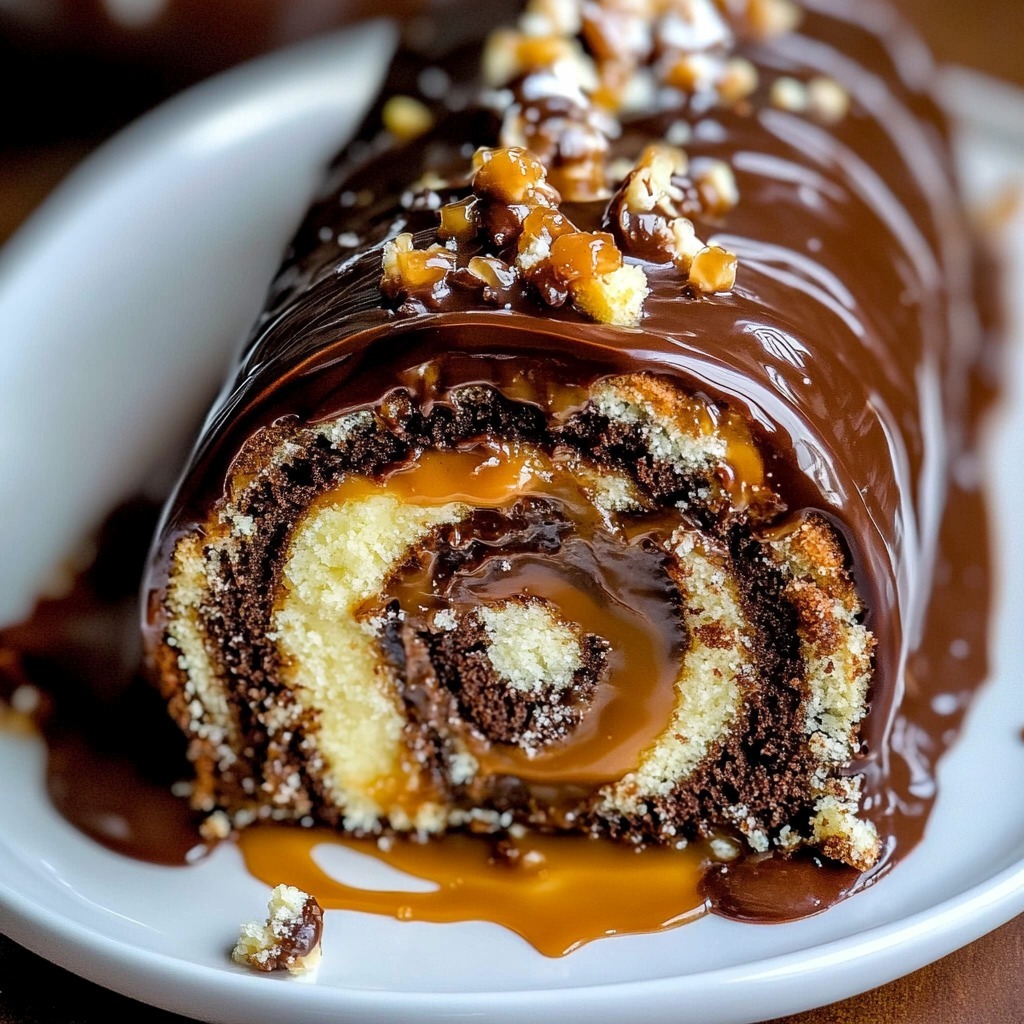
Decadent Chocolate Caramel Turtle Cake Roll

Indulge in the luxurious combination of chocolate, caramel, and toasted pecans with this show-stopping Chocolate Caramel Turtle Cake Roll. Perfect for celebrations or as a special treat, this dessert combines the richness of a moist chocolate cake with gooey caramel and crunchy pecans, all rolled into a stunning masterpiece. Let’s dive into this irresistible recipe that’s sure to impress!

Ingredients

For the Cake

  • 1¾ cups chocolate cake mix
  • 3 large eggs
  • ⅓ cup water
  • 2 tablespoons vegetable oil
  • 3 tablespoons powdered sugar (for dusting)

For the Filling and Topping

  • ½ cup unsalted butter, softened
  • 1 cup powdered sugar
  • ½ teaspoon vanilla extract
  • 1 cup heavy whipping cream
  • ¼ cup caramel sauce
  • 1 cup toasted pecans, chopped
  • 1 cup chocolate chips

Instructions

Make the Cake Roll

  1. Prepare the Cake Batter
    • Preheat your oven to 350°F (175°C) and line a 10×15-inch jelly roll pan with parchment paper. Lightly grease the paper to prevent sticking.
    • In a mixing bowl, combine the chocolate cake mix, eggs, water, and vegetable oil. Beat until smooth and well combined.
  2. Bake the Cake
    • Pour the batter evenly into the prepared pan and spread it to the edges. Bake for 10–12 minutes, or until the cake springs back when gently touched.
  3. Roll the Cake
    • Lay a clean kitchen towel on a flat surface and dust it generously with powdered sugar. While the cake is still warm, carefully invert it onto the prepared towel. Remove the parchment paper and gently roll the cake with the towel, starting at the short end. Let it cool completely.

Prepare the Filling

  1. Whip the Filling
    • In a large mixing bowl, beat the butter and powdered sugar until light and fluffy. Add the vanilla extract and 2 tablespoons of caramel sauce, then mix until smooth.
  2. Unroll and Fill the Cake
    • Carefully unroll the cooled cake and spread the filling evenly over the surface. Sprinkle half of the toasted pecans over the filling. Roll the cake back up tightly (without the towel) and place it seam-side down on a serving platter.

Make the Ganache Topping

  1. Prepare the Ganache
    • Heat the heavy whipping cream in a saucepan over medium heat until it just begins to simmer. Remove from heat and pour it over the chocolate chips in a bowl. Let sit for 2 minutes, then stir until smooth.
  2. Decorate the Cake Roll
    • Pour the ganache over the rolled cake, spreading it evenly. Drizzle the remaining caramel sauce over the ganache and sprinkle with the remaining pecans.

Conclusion

The Chocolate Caramel Turtle Cake Roll is a dessert that’s as beautiful as it is delicious. Each bite delivers a symphony of flavors and textures: the soft chocolate cake, creamy filling, gooey caramel, and crunchy pecans. Whether served as a holiday centerpiece or a weekend indulgence, this cake roll will be a highlight of your dessert repertoire. Enjoy the sweetness!