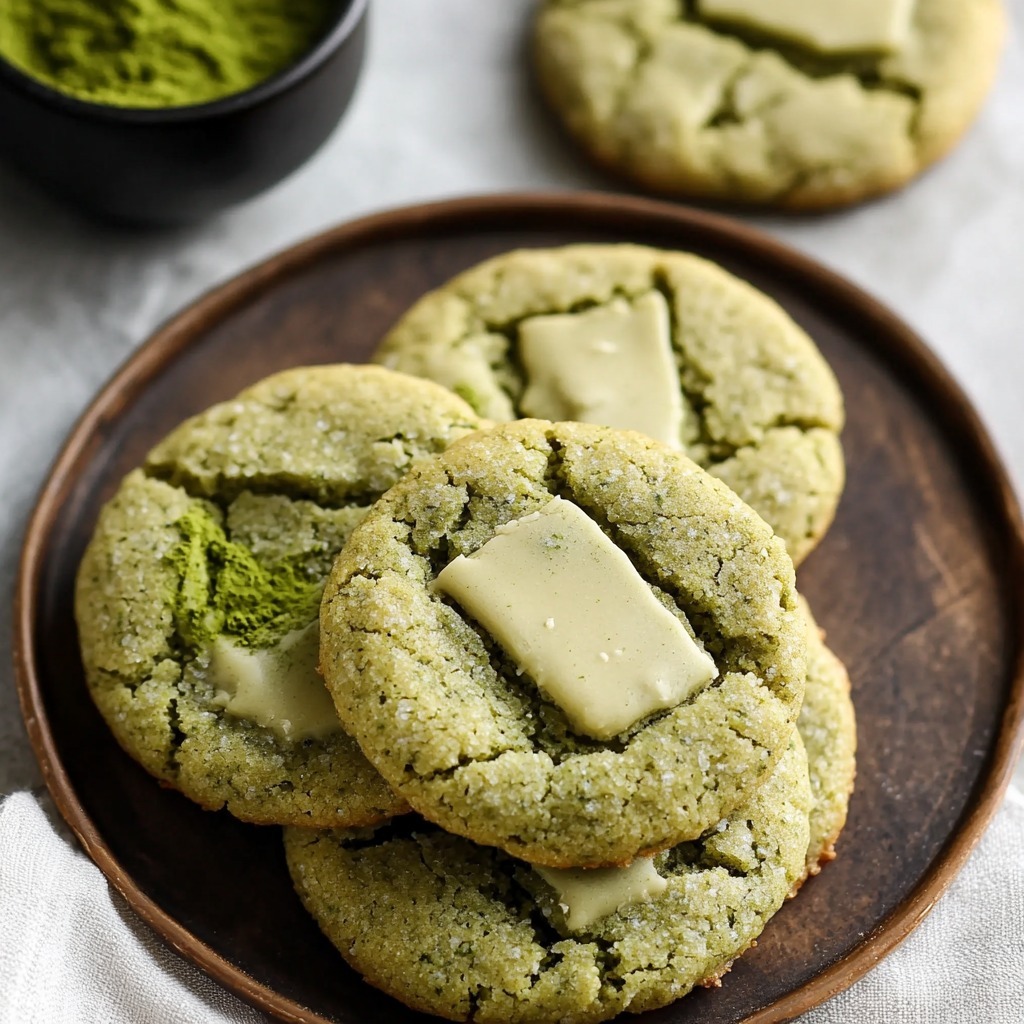
These Brown Butter Matcha White Chocolate Cookies bring a sophisticated twist to your cookie repertoire. The nutty aroma of browned butter pairs beautifully with earthy matcha, while pockets of creamy white chocolate add a sweet and indulgent finish. Perfect with tea or coffee, these cookies are a delightful treat for matcha lovers and dessert enthusiasts alike.
Ingredients:
Produce:
10 g matcha powder
Refrigerated:
1 large egg
Baking & Spices:
153 g all-purpose flour
1/4 tsp baking soda
1/4 tsp salt
70 g white sugar
50 g raw or light brown sugar
Dairy:
100 g butter
120 g white chocolate (chopped or chips)
Instructions:
Brown the Butter : Melt the butter in a saucepan over medium heat. Cook, stirring occasionally, until the butter foams, then turns golden brown and emits a nutty aroma (about 5–7 minutes). Remove from heat and transfer the browned butter to a heat-safe bowl to cool slightly.
Prepare the Dough : In a large bowl, whisk together the browned butter, white sugar, and brown sugar until smooth. Add the egg and whisk until fully combined and creamy.
Combine Dry Ingredients : In a separate bowl, sift together the flour, matcha powder, baking soda, and salt. Gradually add the dry ingredients to the wet mixture, stirring until just combined. Avoid overmixing.
Fold in White Chocolate : Gently fold the chopped white chocolate or chocolate chips into the dough.
Chill the Dough : Cover the dough with plastic wrap and refrigerate for at least 30 minutes, or until firm.
Shape and Bake : Preheat your oven to 350°F (175°C) and line a baking sheet with parchment paper. Scoop out dough portions (about 1.5 tablespoons each) and roll them into balls. Place them on the prepared baking sheet, spacing them about 2 inches apart. Bake for 10–12 minutes, or until the edges are set and slightly golden. The centers will remain soft.
Cool and Serve : Let the cookies cool on the baking sheet for 5 minutes before transferring them to a wire rack to cool completely. Serve warm or store in an airtight container for up to a week.
Conclusion:
These Brown Butter Matcha Cookies deliver a perfect balance of nutty, earthy, and sweet flavors in every bite. Ideal for gifting or savoring with friends, this recipe is a must-try for any cookie connoisseur.
Brown Butter Matcha White Chocolate Cookies
Chewy matcha cookies with browned butter, sweetwhite chocolate chunks, and an elegant green hue. Perfect for tea time or as aunique dessert.
Brown the Butter : Melt the butter in a saucepan over medium heat. Cook, stirring occasionally, until the butter foams, then turns golden brown and emits a nutty aroma (about 5–7 minutes). Remove from heat and transfer the browned butter to a heat-safe bowl to cool slightly.
Prepare the Dough : In a large bowl, whisk together the browned butter, white sugar, and brown sugar until smooth. Add the egg and whisk until fully combined and creamy.
Combine Dry Ingredients : In a separate bowl, sift together the flour, matcha powder, baking soda, and salt. Gradually add the dry ingredients to the wet mixture, stirring until just combined. Avoid overmixing.
Fold in White Chocolate : Gently fold the chopped white chocolate or chocolate chips into the dough.
Chill the Dough : Cover the dough with plastic wrap and refrigerate for at least 30 minutes, or until firm.
Shape and Bake : Preheat your oven to 350°F (175°C) and line a baking sheet with parchment paper. Scoop out dough portions (about 1.5 tablespoons each) and roll them into balls. Place them on the prepared baking sheet, spacing them about 2 inches apart. Bake for 10–12 minutes, or until the edges are set and slightly golden. The centers will remain soft.
Cool and Serve : Let the cookies cool on the baking sheet for 5 minutes before transferring them to a wire rack to cool completely. Serve warm or store in an airtight container for up to a week.
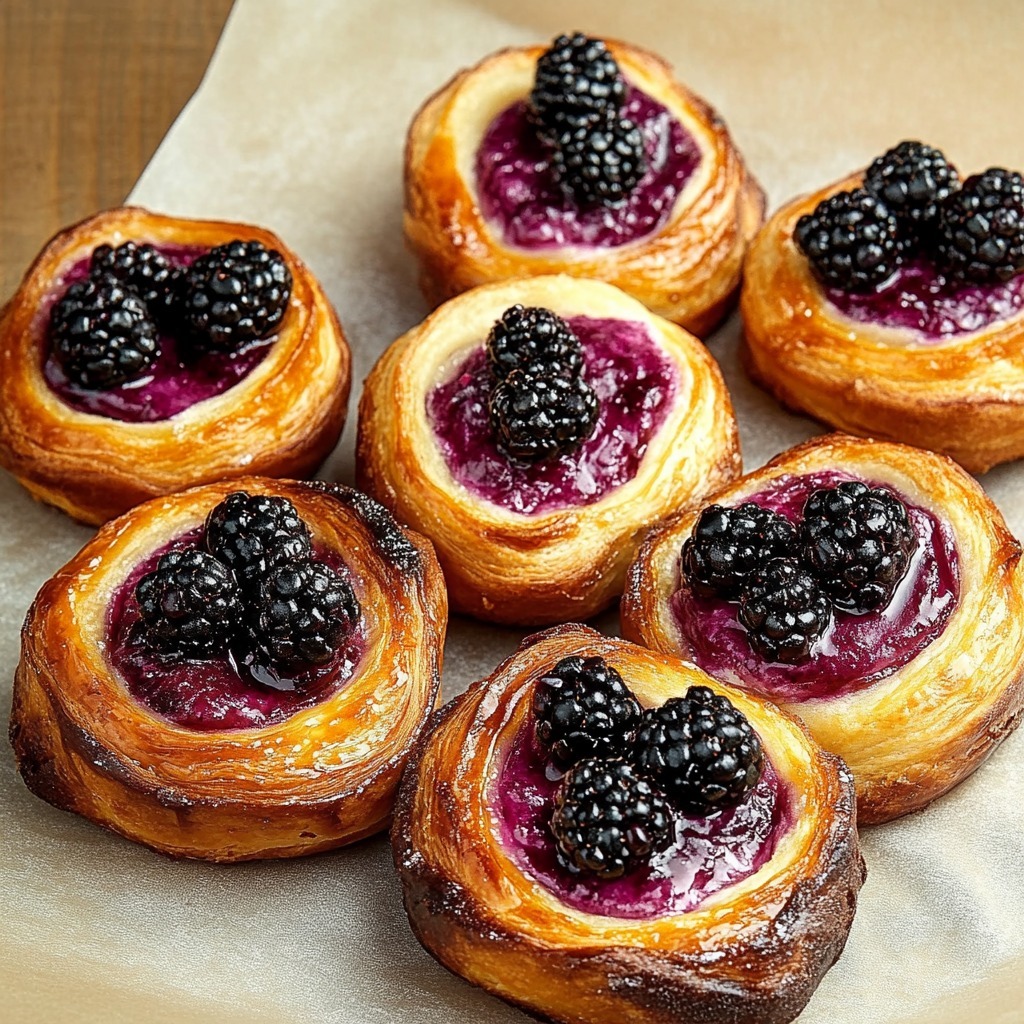
This Blackberry Cream Cheese Danish is a delightful pastry combining the buttery layers of puff pastry with the richness of a cream cheese filling and the sweet-tart burst of blackberry curd. Perfect for brunch, dessert, or a special treat, this recipe will elevate any occasion with its elegant presentation and unforgettable flavor.
Ingredients:
Blackberry Curd:
12 ounces blackberries (fresh or frozen)
½ cup granulated sugar (100 grams)
1 large egg
2 large egg yolks
1 tablespoon lemon juice
2 tablespoons butter (28 grams)
Cream Cheese Filling:
8 ounces cream cheese, softened at room temperature
½ cup granulated sugar (100 grams)
1 large egg yolk
2 teaspoons vanilla extract
Remaining Ingredients:
2 sheets puff pastry, thawed
1 large egg, beaten with 1 tablespoon water (egg wash)
⅓ cup turbinado sugar (73 grams)
6 ounces fresh blackberries, for garnish
Powdered sugar, for garnish
Instructions:
Make the Blackberry Curd: In a saucepan over medium heat, combine blackberries and granulated sugar. Cook, stirring occasionally, until the berries break down and release their juices (about 5 minutes). Press the mixture through a fine-mesh sieve to remove seeds, returning the smooth puree to the saucepan.Whisk in the egg, egg yolks, and lemon juice. Cook over low heat, stirring constantly, until thickened (about 5–7 minutes). Remove from heat and stir in the butter until melted and smooth. Cover and chill the curd in the refrigerator for at least 30 minutes.
Prepare the Cream Cheese Filling: In a medium bowl, beat the cream cheese and sugar until smooth. Add the egg yolk and vanilla extract, mixing until combined.
Assemble the Danishes: Preheat the oven to 400°F (200°C). Line two baking sheets with parchment paper. Roll out the puff pastry sheets slightly and cut each into 4 equal squares (8 total). Place the squares on the prepared baking sheets. Score a smaller square about ½ inch from the edge of each puff pastry piece, being careful not to cut all the way through. Dock the center square with a fork to prevent it from puffing too much.
Fill the Pastry: Spoon a dollop of cream cheese filling into the center of each square and spread gently within the scored area. Top with a teaspoon of chilled blackberry curd.
Bake the Danishes: Brush the edges of the puff pastry with the egg wash and sprinkle with turbinado sugar. Bake for 18–22 minutes, or until the pastries are golden brown and puffed.
Garnish and Serve: Once cooled slightly, top each Danish with a fresh blackberry and dust with powdered sugar. Serve warm or at room temperature.
Conclusion:
These Blackberry Cream Cheese Danishes are a show-stopping pastry with a balance of buttery, tangy, and sweet flavors. Perfect for impressing guests or indulging in a homemade treat, they’re as versatile as they are delicious.
Decadent Blackberry Cream Cheese Danish
Flaky puff pastry filled with creamy cream cheeseand luscious blackberry curd, topped with fresh blackberries and powdered sugarfor an elegant finish.
1large eggbeaten with 1 tablespoon water (egg wash)
⅓cupturbinado sugar73 grams
6ouncesfresh blackberriesfor garnish
Powdered sugarfor garnish
Method
Make the Blackberry Curd: In a saucepan over medium heat, combine blackberries and granulated sugar. Cook, stirring occasionally, until the berries break down and release their juices (about 5 minutes). Press the mixture through a fine-mesh sieve to remove seeds, returning the smooth puree to the saucepan. Whisk in the egg, egg yolks, and lemon juice. Cook over low heat, stirring constantly, until thickened (about 5–7 minutes). Remove from heat and stir in the butter until melted and smooth. Cover and chill the curd in the refrigerator for at least 30 minutes.
Prepare the Cream Cheese Filling: In a medium bowl, beat the cream cheese and sugar until smooth. Add the egg yolk and vanilla extract, mixing until combined.
Assemble the Danishes: Preheat the oven to 400°F (200°C). Line two baking sheets with parchment paper. Roll out the puff pastry sheets slightly and cut each into 4 equal squares (8 total). Place the squares on the prepared baking sheets. Score a smaller square about ½ inch from the edge of each puff pastry piece, being careful not to cut all the way through. Dock the center square with a fork to prevent it from puffing too much.
Fill the Pastry: Spoon a dollop of cream cheese filling into the center of each square and spread gently within the scored area. Top with a teaspoon of chilled blackberry curd.
Bake the Danishes: Brush the edges of the puff pastry with the egg wash and sprinkle with turbinado sugar. Bake for 18–22 minutes, or until the pastries are golden brown and puffed.
Garnish and Serve: Once cooled slightly, top each Danish with a fresh blackberry and dust with powdered sugar. Serve warm or at room temperature.
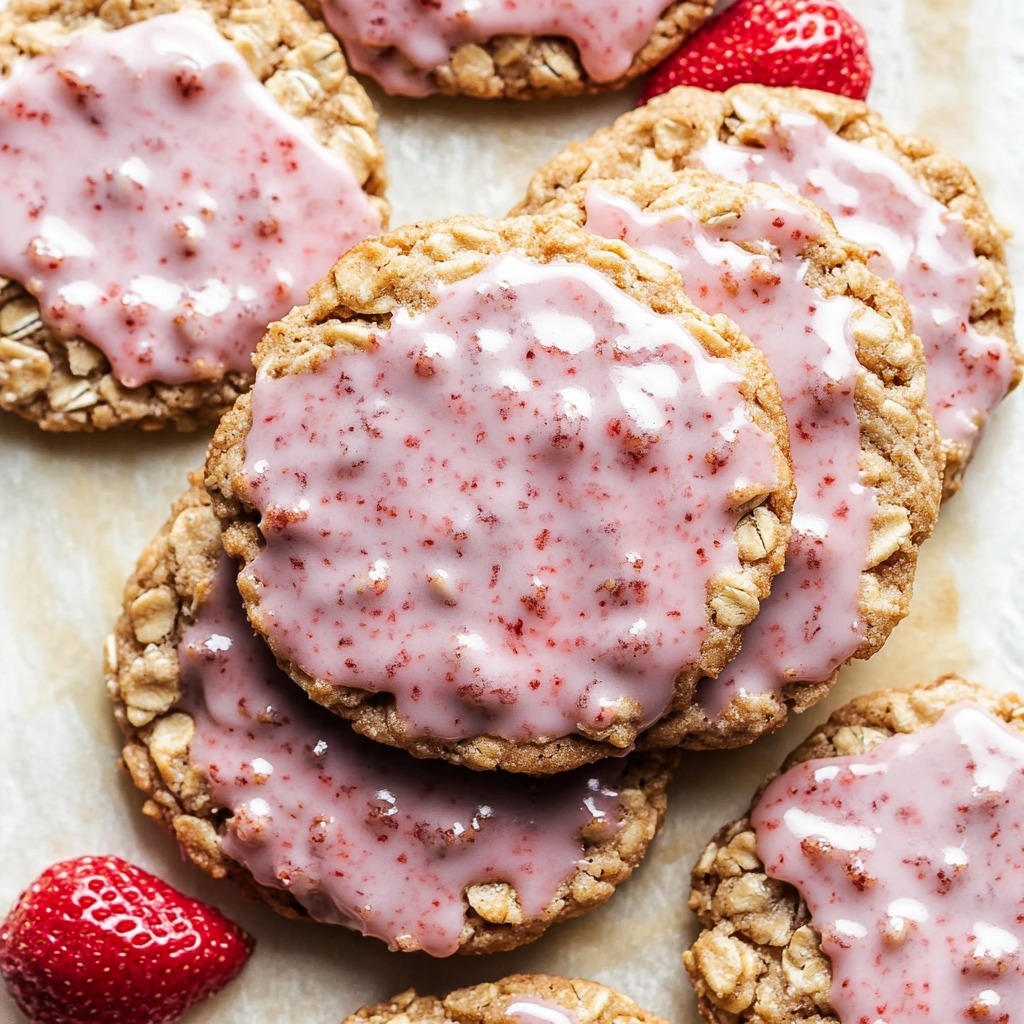
These Strawberry Glazed Oatmeal Cookies bring together the comforting texture of oatmeal and the sweet, fruity touch of strawberries. With a gorgeous pink icing made from freeze-dried strawberries, these cookies are as delightful to look at as they are to eat. Perfect for tea parties, holiday treats, or any day you need a little sweetness.
Ingredients:
Produce:
2 tbsp freeze-dried strawberry powder
Refrigerated:
1 large egg
Condiments:
1 tbsp molasses
Pasta & Grains:
1 cup old-fashioned oats
Baking & Spices:
1 1/8 cups all-purpose flour
1 tsp baking soda
1/2 cup light brown sugar
1/2 cup granulated sugar
1 tsp ground cinnamon
1/2 tsp salt
1 tsp vanilla extract
1 cup powdered sugar
1 drop pink gel food coloring (optional)
Dairy:
10 tbsp unsalted butter, softened
2 tbsp whole milk
Instructions:
Prepare the Dough: In a large bowl, cream together the butter, granulated sugar, and brown sugar until light and fluffy. Beat in the egg, vanilla extract, and molasses until well combined.
Mix Dry Ingredients: In a separate bowl, whisk together the flour, oats, baking soda, cinnamon, and salt. Gradually add the dry ingredients to the wet ingredients, mixing until a dough forms.
Chill: Cover the dough and refrigerate for 30 minutes to make it easier to handle.
Preheat and Shape: Preheat the oven to 350°F (175°C). Line a baking sheet with parchment paper. Roll the dough into small balls (about 1.5 tablespoons each) and place them on the sheet, spacing them 2 inches apart.
Bake: Bake for 10–12 minutes, or until the cookies are golden around the edges. Allow them to cool on the baking sheet for 5 minutes before transferring them to a wire rack to cool completely.
Make the Strawberry Glaze: In a medium bowl, whisk together the powdered sugar, freeze-dried strawberry powder, milk, and food coloring (if using) until smooth. Adjust the milk to achieve your desired consistency.
Ice the Cookies: Dip the tops of the cooled cookies into the glaze or drizzle the glaze over them. Let the glaze set for about 20 minutes before serving.
Conclusion:
These Strawberry Glazed Oatmeal Cookies are the perfect blend of fruity sweetness and hearty oats. With their charming pink glaze and chewy texture, they’ll quickly become a family favorite. Share them with loved ones or keep them all for yourself—either way, they’ll be enjoyed to the last crumb!
Strawberry Glazed Oatmeal Cookies
Chewy oatmeal cookies topped with a strawberryglaze made from freeze-dried strawberries. A delightful twist on a classictreat.
Prepare the Dough: In a large bowl, cream together the butter, granulated sugar, and brown sugar until light and fluffy. Beat in the egg, vanilla extract, and molasses until well combined.
Mix Dry Ingredients: In a separate bowl, whisk together the flour, oats, baking soda, cinnamon, and salt. Gradually add the dry ingredients to the wet ingredients, mixing until a dough forms.
Chill: Cover the dough and refrigerate for 30 minutes to make it easier to handle.
Preheat and Shape: Preheat the oven to 350°F (175°C). Line a baking sheet with parchment paper. Roll the dough into small balls (about 1.5 tablespoons each) and place them on the sheet, spacing them 2 inches apart.
Bake: Bake for 10–12 minutes, or until the cookies are golden around the edges. Allow them to cool on the baking sheet for 5 minutes before transferring them to a wire rack to cool completely.
Make the Strawberry Glaze: In a medium bowl, whisk together the powdered sugar, freeze-dried strawberry powder, milk, and food coloring (if using) until smooth. Adjust the milk to achieve your desired consistency.
Ice the Cookies: Dip the tops of the cooled cookies into the glaze or drizzle the glaze over them. Let the glaze set for about 20 minutes before serving.
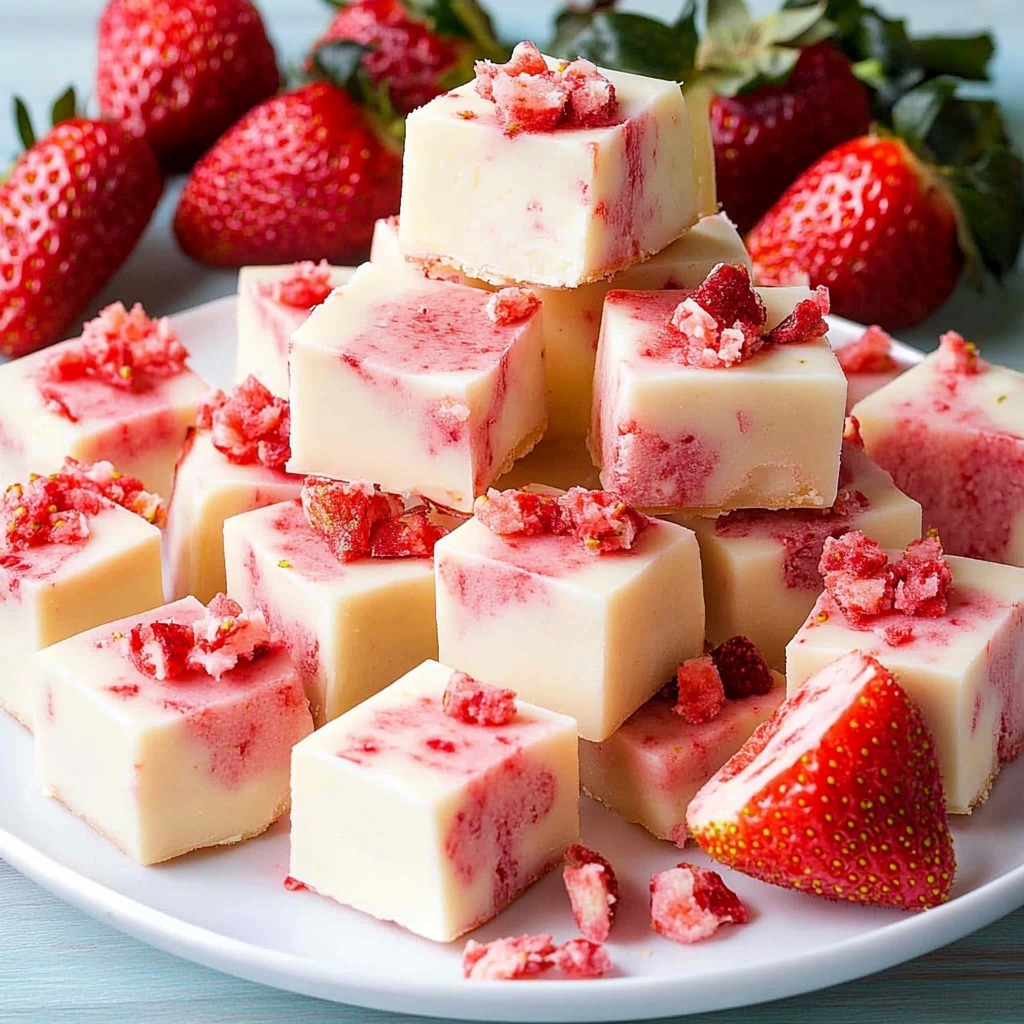
Transform your dessert table into a symphony of flavors with this luscious Strawberry Bliss Fudge. Combining the sweetness of white chocolate, the tang of strawberries, and the creamy richness of condensed milk, this treat is a show-stopper for any occasion. Simple to make, yet undeniably elegant, it’s a dessert that speaks love in every bite.
Ingredients:
Produce:
1 handful freeze-dried strawberries
Condiments:
23 g (approximately 2 tbsp) powdered strawberry jelly mix
Baking & Spices:
600 g white chocolate
Dairy:
397 g condensed milk
Instructions:
Prepare the Pan: Line an 8×8-inch square baking pan with parchment paper, leaving overhang for easy removal.
Melt the Base Ingredients: In a medium saucepan over low heat, combine the condensed milk and white chocolate. Stir continuously until smooth and completely melted.
Incorporate the Strawberry Flavor: Stir in the powdered strawberry jelly mix until well blended. This will give the fudge its strawberry flavor and delightful pink hue.
Add Freeze-Dried Strawberries: Crush the freeze-dried strawberries lightly and fold them into the mixture, reserving a few pieces for garnish.
Pour and Set: Pour the fudge mixture into the prepared pan, spreading it evenly. Sprinkle the reserved freeze-dried strawberries on top for a decorative touch.
Chill: Refrigerate the fudge for at least 3 hours, or until firm.
Slice and Serve: Remove the fudge from the pan using the parchment paper overhang, and slice it into bite-sized squares. Serve chilled for the best texture and flavor.
Conclusion:
This Strawberry Bliss Fudge is a perfect combination of ease and indulgence. Whether you’re gifting it, serving it at a party, or savoring it yourself, this recipe ensures a deliciously sweet moment with every bite.
Luscious Strawberry Bliss Fudge
A creamy and fruity strawberry fudge made withwhite chocolate and a burst of freeze-dried strawberries. Perfect forcelebrations or as a sweet gift.
Prepare the Pan: Line an 8×8-inch square baking pan with parchment paper, leaving overhang for easy removal.
Melt the Base Ingredients: In a medium saucepan over low heat, combine the condensed milk and white chocolate. Stir continuously until smooth and completely melted.
Incorporate the Strawberry Flavor: Stir in the powdered strawberry jelly mix until well blended. This will give the fudge its strawberry flavor and delightful pink hue.
Add Freeze-Dried Strawberries: Crush the freeze-dried strawberries lightly and fold them into the mixture, reserving a few pieces for garnish.
Pour and Set: Pour the fudge mixture into the prepared pan, spreading it evenly. Sprinkle the reserved freeze-dried strawberries on top for a decorative touch.
Chill: Refrigerate the fudge for at least 3 hours, or until firm.
Slice and Serve: Remove the fudge from the pan using the parchment paper overhang, and slice it into bite-sized squares. Serve chilled for the best texture and flavor.
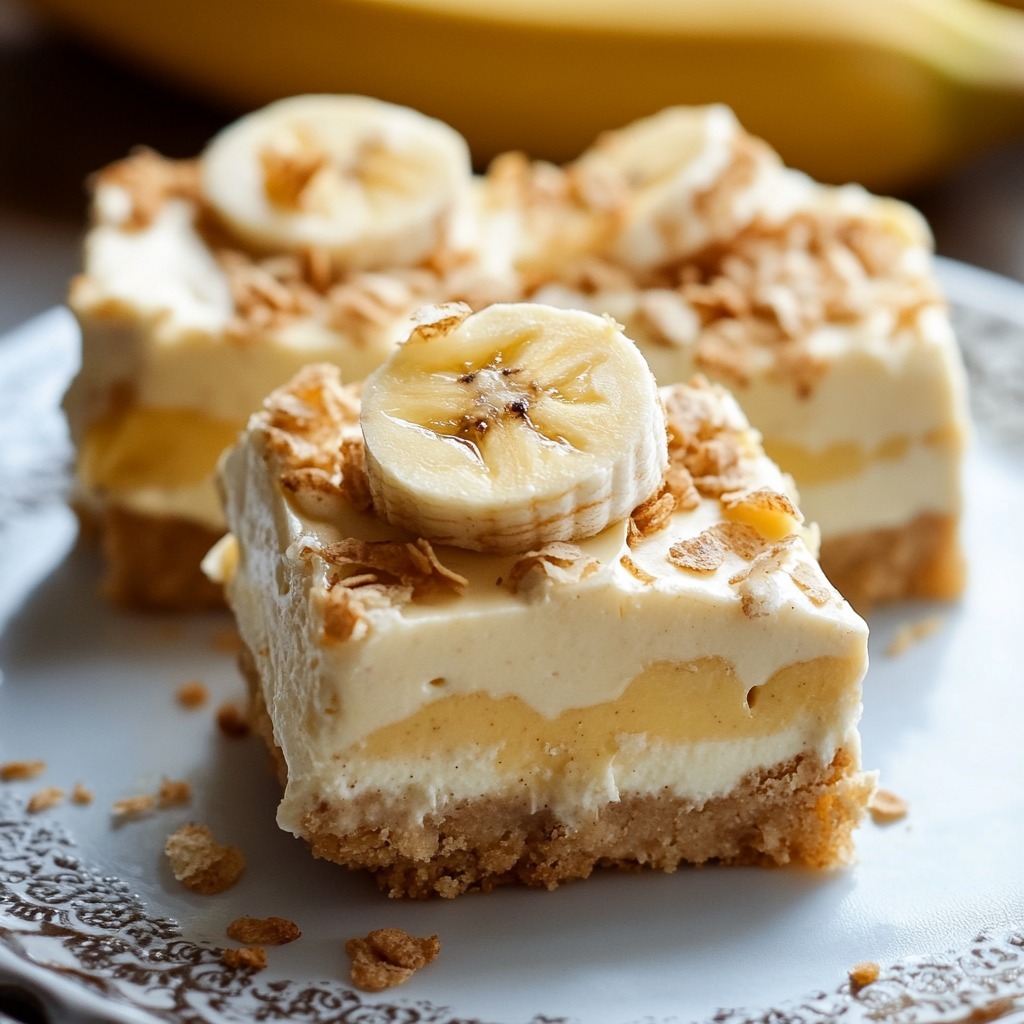
Indulge in the perfect blend of two classic desserts with these Banana Pudding Cheesecake Squares. Featuring a buttery graham cracker crust, a creamy banana-infused cheesecake filling, and the nostalgic flavor of banana pudding, these squares are an easy-to-make treat that’s perfect for any occasion. Enjoy them as a sweet end to a family meal or a delightful addition to your dessert table.
Ingredients:
For the Crust:
1½ cups (150g) gluten-free graham cracker crumbs
¼ cup (50g) firmly packed light brown sugar
6 tablespoons (85g) melted unsalted butter
For the Filling:
16 ounces cream cheese, softened to room temperature
14 ounces sweetened condensed milk
½ cup (113g) sour cream, at room temperature
½ teaspoon vanilla extract
1 cup (227g) mashed bananas
Instructions:
Make the Crust : Preheat your oven to 350°F (175°C) and line an 8×8-inch baking pan with parchment paper, leaving a slight overhang for easy removal. In a bowl, combine the graham cracker crumbs, brown sugar, and melted butter. Mix until the texture resembles wet sand. Press the mixture evenly into the bottom of the prepared pan to form the crust. Bake for 10 minutes, then remove from the oven and let it cool while you prepare the filling.
Prepare the Filling : In a large mixing bowl, beat the cream cheese until smooth and creamy. Add the sweetened condensed milk and mix until fully combined. Stir in the sour cream, vanilla extract, and mashed bananas, mixing until smooth.
Assemble and Bake : Pour the banana cheesecake filling over the cooled crust, spreading it evenly. Bake in the preheated oven for 30 minutes, or until the edges are set and the center has a slight jiggle. Remove from the oven and allow to cool at room temperature for about 30 minutes.
Chill and Serve : Transfer the cheesecake to the refrigerator and chill for at least 2 hours, or until fully set. Use the parchment paper overhang to lift the cheesecake out of the pan. Cut into squares. Serve as is, or garnish with whipped cream, banana slices, or crushed graham crackers for extra flair.
Conclusion:
Banana Pudding Cheesecake Squares are the ultimate comfort dessert, combining creamy textures with sweet, fruity flavors. They’re an easy way to elevate traditional cheesecake with the nostalgic charm of banana pudding. Perfect for sharing, or keeping all to yourself, this dessert is a guaranteed crowd-pleaser!
Banana Pudding Cheesecake Squares
Creamy banana cheesecake squares on a butterygraham cracker crust, blending the best of banana pudding and cheesecake.
Make the Crust : Preheat your oven to 350°F (175°C) and line an 8×8-inch baking pan with parchment paper, leaving a slight overhang for easy removal. In a bowl, combine the graham cracker crumbs, brown sugar, and melted butter. Mix until the texture resembles wet sand. Press the mixture evenly into the bottom of the prepared pan to form the crust. Bake for 10 minutes, then remove from the oven and let it cool while you prepare the filling.
Prepare the Filling : In a large mixing bowl, beat the cream cheese until smooth and creamy. Add the sweetened condensed milk and mix until fully combined. Stir in the sour cream, vanilla extract, and mashed bananas, mixing until smooth.
Assemble and Bake : Pour the banana cheesecake filling over the cooled crust, spreading it evenly. Bake in the preheated oven for 30 minutes, or until the edges are set and the center has a slight jiggle. Remove from the oven and allow to cool at room temperature for about 30 minutes.
Chill and Serve : Transfer the cheesecake to the refrigerator and chill for at least 2 hours, or until fully set. Use the parchment paper overhang to lift the cheesecake out of the pan. Cut into squares. Serve as is, or garnish with whipped cream, banana slices, or crushed graham crackers for extra flair.
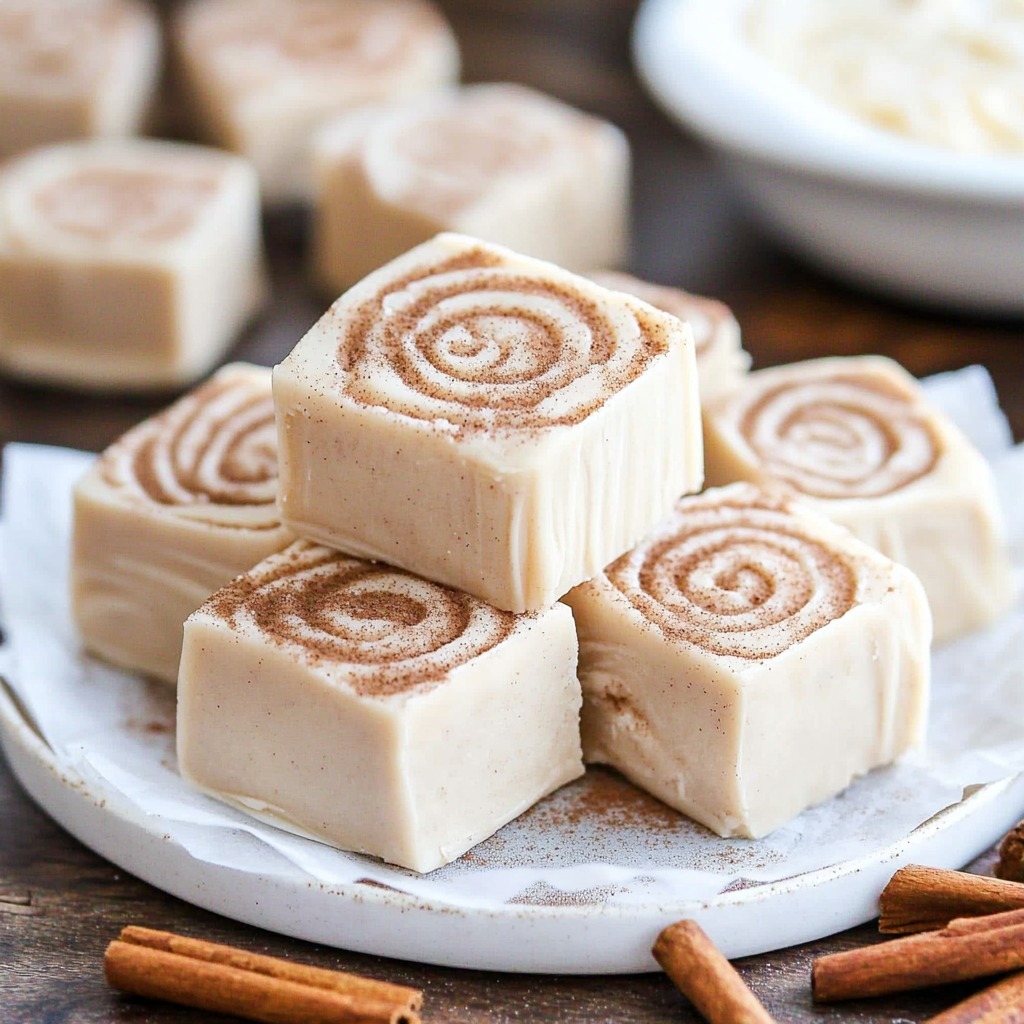
Transform the beloved flavors of cinnamon rolls into a delightful and creamy fudge! This Cinnamon Roll Fudge features a rich base infused with cinnamon sugar, balanced by the sweetness of white chocolate and marshmallow cream. Topped with a luscious maple-cinnamon drizzle, it’s a perfect treat for holidays, gifting, or satisfying your sweet tooth.
Ingredients:
For the Fudge:
2¾ cups granulated sugar
¾ cup unsalted butter
¼ cup + 2 tablespoons cinnamon sugar mix
Pinch of kosher salt
1 cup heavy cream
3 cups white chocolate morsels
7-ounce jar marshmallow cream
For the Drizzle:
1 cup powdered sugar
2 tablespoons maple syrup
2 tablespoons heavy cream
1 teaspoon cinnamon sugar mix
Instructions:
Make the Fudge Base : Grease and line a 9×9-inch pan with parchment paper, leaving overhang for easy removal. In a large saucepan, combine the sugar, butter, cinnamon sugar mix, salt, and heavy cream. Heat over medium, stirring until the butter is melted and the mixture is smooth. Bring the mixture to a boil, stirring constantly. Let it boil for 5 minutes, then remove from heat. Stir in the white chocolate morsels until fully melted and smooth. Quickly mix in the marshmallow cream until evenly incorporated.
Pour and Cool : Pour the fudge mixture into the prepared pan and smooth the top with a spatula. Allow it to cool at room temperature for 30 minutes, then transfer to the refrigerator to set for 2–3 hours.
Prepare the Drizzle : In a small bowl, whisk together the powdered sugar, maple syrup, heavy cream, and cinnamon sugar mix until smooth. Adjust the consistency by adding a few drops of cream if needed.
Drizzle and Serve : Once the fudge is set, remove it from the pan and cut it into squares. Drizzle the maple-cinnamon mixture over each piece for a decorative finish. Let the drizzle set before serving.
Conclusion:
Cinnamon Roll Fudge is a perfect fusion of creamy fudge and the warm, cozy flavors of cinnamon rolls. The maple drizzle adds a delightful finishing touch, making it a standout treat for any occasion. Share these squares of sweetness with loved ones or savor them yourself—they’re irresistible either way!
Cinnamon Roll Fudge with Maple Drizzle
A rich, creamy fudge with the comforting flavors ofcinnamon rolls, topped with a maple-cinnamon drizzle for a delectable finish.
Make the Fudge Base : Grease and line a 9×9-inch pan with parchment paper, leaving overhang for easy removal. In a large saucepan, combine the sugar, butter, cinnamon sugar mix, salt, and heavy cream. Heat over medium, stirring until the butter is melted and the mixture is smooth. Bring the mixture to a boil, stirring constantly. Let it boil for 5 minutes, then remove from heat. Stir in the white chocolate morsels until fully melted and smooth. Quickly mix in the marshmallow cream until evenly incorporated.
Pour and Cool : Pour the fudge mixture into the prepared pan and smooth the top with a spatula. Allow it to cool at room temperature for 30 minutes, then transfer to the refrigerator to set for 2–3 hours.
Prepare the Drizzle : In a small bowl, whisk together the powdered sugar, maple syrup, heavy cream, and cinnamon sugar mix until smooth. Adjust the consistency by adding a few drops of cream if needed.
Drizzle and Serve : Once the fudge is set, remove it from the pan and cut it into squares. Drizzle the maple-cinnamon mixture over each piece for a decorative finish. Let the drizzle set before serving.
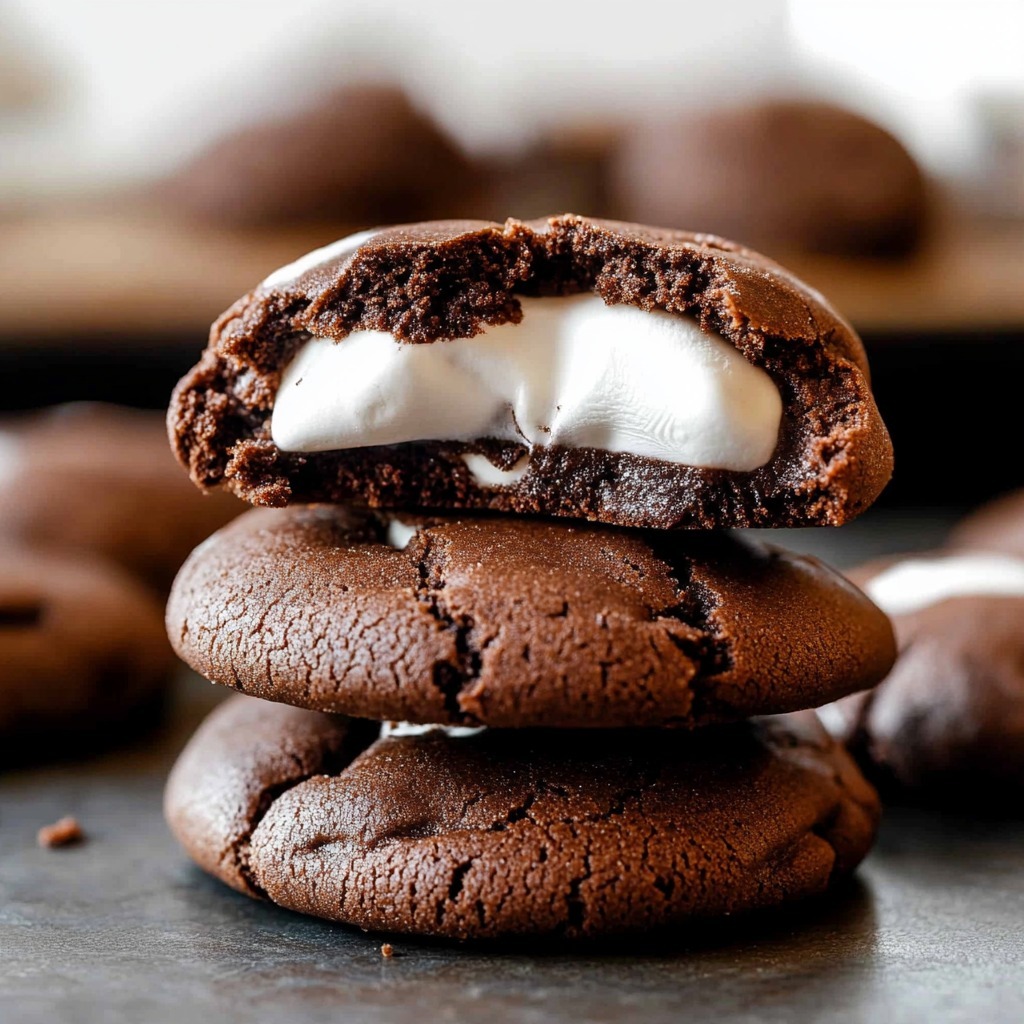
These Marshmallow Surprise Hot Cocoa Cookies are a delightful treat that combines the comforting flavors of hot chocolate with the gooey joy of marshmallows. Each bite reveals a melty marshmallow center, surrounded by a rich and chewy chocolate cookie. Perfect for cozy winter evenings or as a fun dessert to share, these cookies are guaranteed to surprise and delight.
Ingredients:
For the Cookie Dough:
½ cup (113g) unsalted butter, softened
½ cup (100g) granulated sugar
½ cup (100g) packed light or dark brown sugar
1 large egg, at room temperature
1 teaspoon pure vanilla extract
1½ cups (188g) all-purpose flour, spooned and leveled
Prepare the Dough : Preheat the oven to 350°F (177°C) and line two baking sheets with parchment paper. In a large bowl, beat the softened butter, granulated sugar, and brown sugar together until light and creamy. Mix in the egg and vanilla extract until fully combined. In a separate bowl, whisk together the flour, cocoa powder, hot cocoa mix, baking soda, and salt. Gradually add the dry ingredients to the wet mixture, mixing until a thick dough forms. Add the milk and mix until the dough is smooth.
Shape and Bake : Roll the dough into 1.5-inch balls and place them on the prepared baking sheets, spacing them about 2 inches apart. Bake for 10 minutes.
Add Marshmallows : Remove the cookies from the oven and press a marshmallow half, cut side down, into the center of each cookie. Return the cookies to the oven for 2–3 minutes, or until the marshmallows are puffed but not browned.
Melt and Drizzle Chocolate : While the cookies cool slightly, melt the chopped semi-sweet chocolate in a microwave-safe bowl in 20-second increments, stirring after each, until smooth. Spoon or drizzle the melted chocolate over the top of each cookie, covering the marshmallow.
Cool and Serve : Allow the cookies to cool on the baking sheet for 5 minutes, then transfer them to a wire rack to cool completely. Serve and enjoy these warm, gooey delights!
Conclusion:
These Marshmallow Surprise Hot Cocoa Cookies bring the joy of sipping hot chocolate into cookie form. Perfectly chewy and topped with melty chocolate, these cookies are a cozy treat that’s sure to become a family favorite. Share them with friends, or enjoy them with a steaming mug of cocoa for the ultimate indulgence.
Marshmallow Surprise Hot Cocoa Cookies
Chewy chocolate cookies with a gooey marshmallowcenter, topped with melted chocolate for the ultimate hot cocoa-inspireddessert.
Prepare the Dough : Preheat the oven to 350°F (177°C) and line two baking sheets with parchment paper. In a large bowl, beat the softened butter, granulated sugar, and brown sugar together until light and creamy. Mix in the egg and vanilla extract until fully combined. In a separate bowl, whisk together the flour, cocoa powder, hot cocoa mix, baking soda, and salt. Gradually add the dry ingredients to the wet mixture, mixing until a thick dough forms. Add the milk and mix until the dough is smooth.
Shape and Bake : Roll the dough into 1.5-inch balls and place them on the prepared baking sheets, spacing them about 2 inches apart. Bake for 10 minutes.
Add Marshmallows : Remove the cookies from the oven and press a marshmallow half, cut side down, into the center of each cookie. Return the cookies to the oven for 2–3 minutes, or until the marshmallows are puffed but not browned.
Melt and Drizzle Chocolate : While the cookies cool slightly, melt the chopped semi-sweet chocolate in a microwave-safe bowl in 20-second increments, stirring after each, until smooth. Spoon or drizzle the melted chocolate over the top of each cookie, covering the marshmallow.
Cool and Serve : Allow the cookies to cool on the baking sheet for 5 minutes, then transfer them to a wire rack to cool completely. Serve and enjoy these warm, gooey delights!
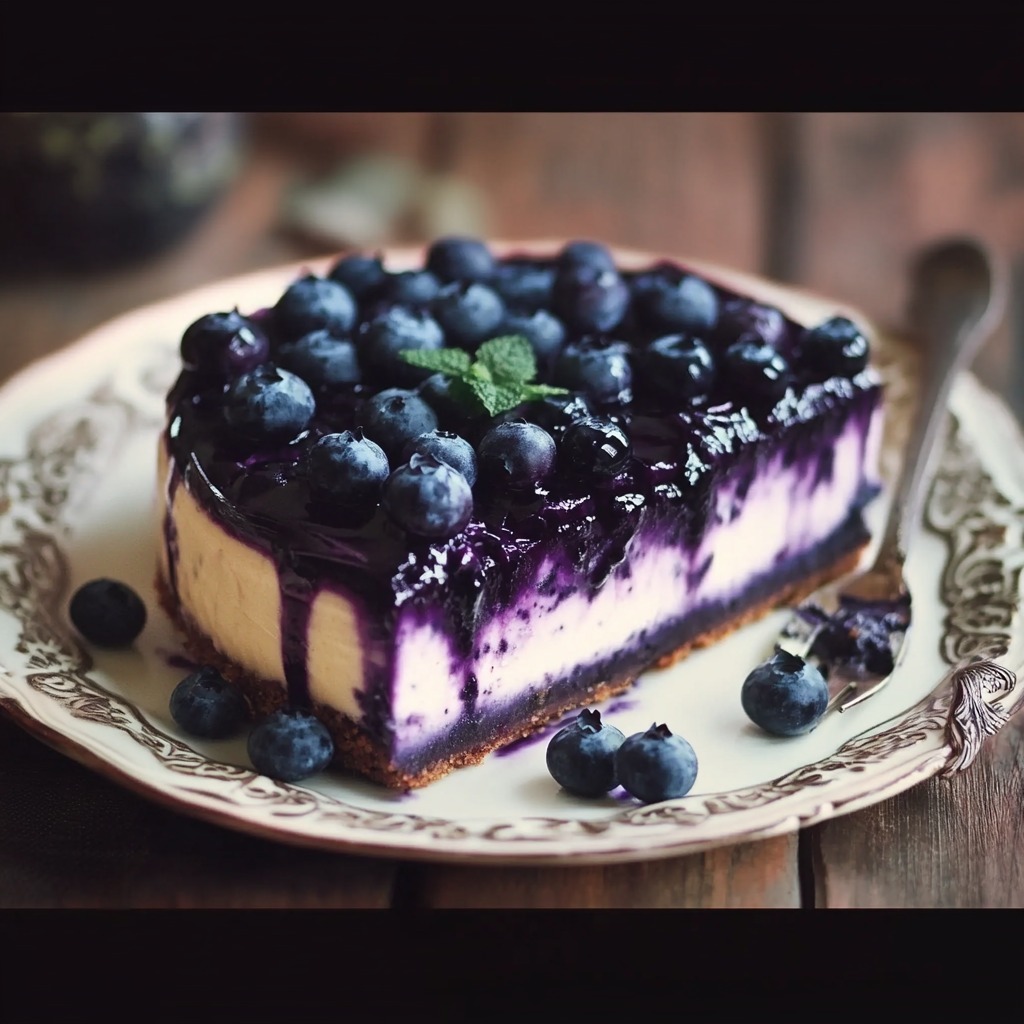
Step into a world of culinary enchantment with the Midnight Magic Blueberry Cheesecake. This dark and velvety dessert brings a gothic twist to the classic cheesecake, featuring a creamy filling swirled with luscious blueberry compote and an irresistible black hue that adds a dramatic flair. Perfect for themed gatherings or simply indulging in something extraordinary, this cheesecake is as mesmerizing as it is delicious.
Ingredients:
For the Crust:
1 cup graham cracker crumbs
¼ cup melted butter
For the Filling:
1 (8-ounce) package cream cheese, softened
½ cup sour cream
2 large eggs
1¾ cups sugar
1 tbsp vanilla extract
¼ cup black food coloring
For the Blueberry Swirl:
1 (12-ounce) package frozen blueberries
¼ cup water
1 tbsp cornstarch
¼ cup sugar
Instructions:
Prepare the Crust : Preheat the oven to 325°F (165°C). Grease a 9-inch springform pan. Combine graham cracker crumbs and melted butter in a bowl until well mixed. Press the mixture firmly into the bottom of the pan to form the crust. Set aside.
Make the Blueberry Swirl : In a small saucepan over medium heat, combine blueberries, water, and sugar. Stir occasionally until the mixture simmers. Dissolve cornstarch in 1 tablespoon of water and add it to the blueberry mixture. Stir until thickened. Remove from heat and allow to cool.
Prepare the Filling : In a mixing bowl, beat the cream cheese and sugar until smooth and fluffy. Add sour cream, eggs, and vanilla extract, mixing until fully incorporated. Stir in black food coloring until the mixture reaches a rich, deep hue.
Assemble the Cheesecake : Pour the filling over the crust in the springform pan.Spoon dollops of the cooled blueberry mixture onto the filling and swirl gently with a toothpick or knife for a marbled effect.
Bake and Cool : Bake for 50 minutes, or until the edges are set and the center jiggles slightly when shaken. Turn off the oven and leave the cheesecake inside with the door slightly ajar for 1 hour to cool gradually. Transfer to the refrigerator to chill for at least 4 hours or overnight.
Serve and Enjoy : Carefully remove the cheesecake from the pan and slice it into portions. Garnish with fresh blueberries or a drizzle of the remaining blueberry compote for added flair.
Conclusion:
The Midnight Magic Blueberry Cheesecake is more than just a dessert—it’s a statement. With its bold colors and decadent flavors, it’s sure to impress guests or delight your inner culinary adventurer. Unleash your creative side and serve this gothic masterpiece to enchant everyone who takes a bite.
Midnight Magic Blueberry Cheesecake
A gothic-inspired blueberry cheesecake with a rich,creamy texture and a dramatic black hue, perfect for any occasion.
Prepare the Crust : Preheat the oven to 325°F (165°C). Grease a 9-inch springform pan. Combine graham cracker crumbs and melted butter in a bowl until well mixed. Press the mixture firmly into the bottom of the pan to form the crust. Set aside.
Make the Blueberry Swirl : In a small saucepan over medium heat, combine blueberries, water, and sugar. Stir occasionally until the mixture simmers. Dissolve cornstarch in 1 tablespoon of water and add it to the blueberry mixture. Stir until thickened. Remove from heat and allow to cool.
Prepare the Filling : In a mixing bowl, beat the cream cheese and sugar until smooth and fluffy. Add sour cream, eggs, and vanilla extract, mixing until fully incorporated. Stir in black food coloring until the mixture reaches a rich, deep hue.
Assemble the Cheesecake : Pour the filling over the crust in the springform pan. Spoon dollops of the cooled blueberry mixture onto the filling and swirl gently with a toothpick or knife for a marbled effect.
Bake and Cool : Bake for 50 minutes, or until the edges are set and the center jiggles slightly when shaken. Turn off the oven and leave the cheesecake inside with the door slightly ajar for 1 hour to cool gradually. Transfer to the refrigerator to chill for at least 4 hours or overnight.
Serve and Enjoy : Carefully remove the cheesecake from the pan and slice it into portions. Garnish with fresh blueberries or a drizzle of the remaining blueberry compote for added flair.
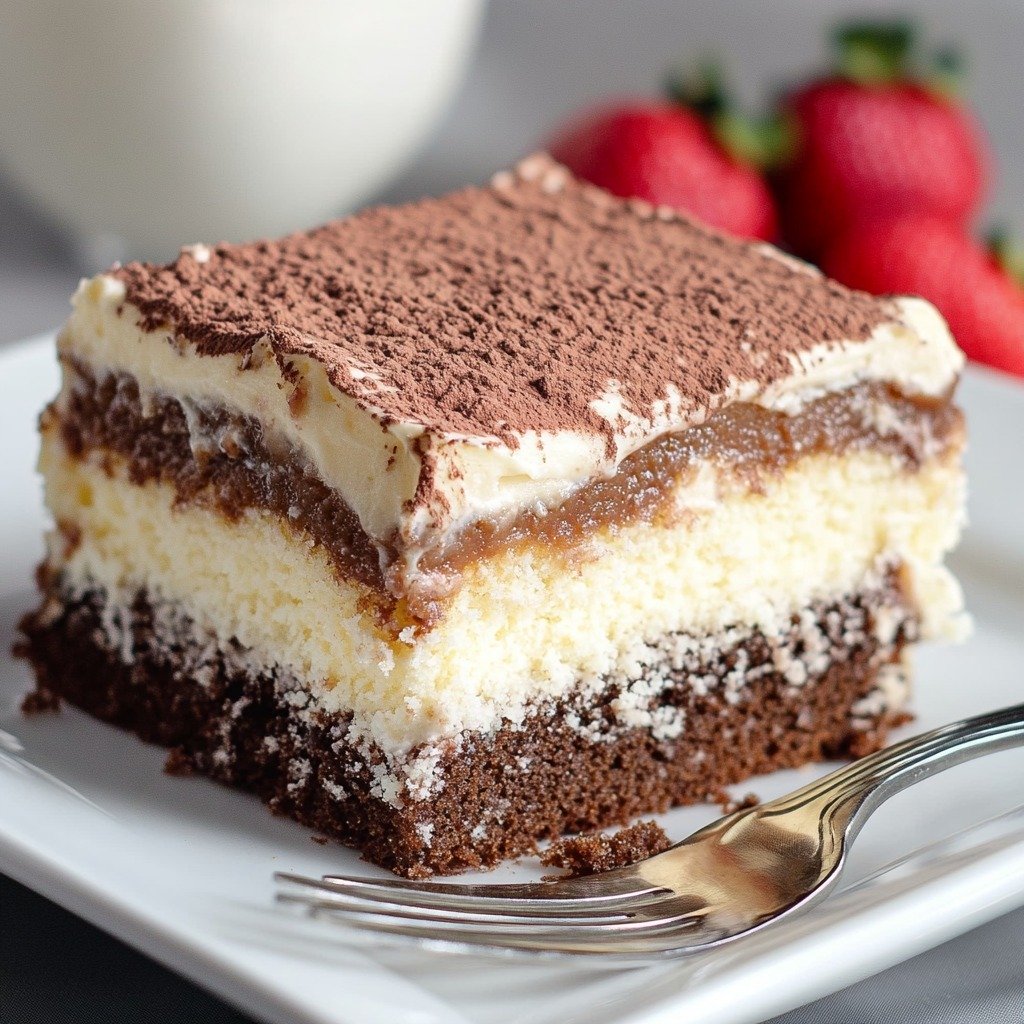
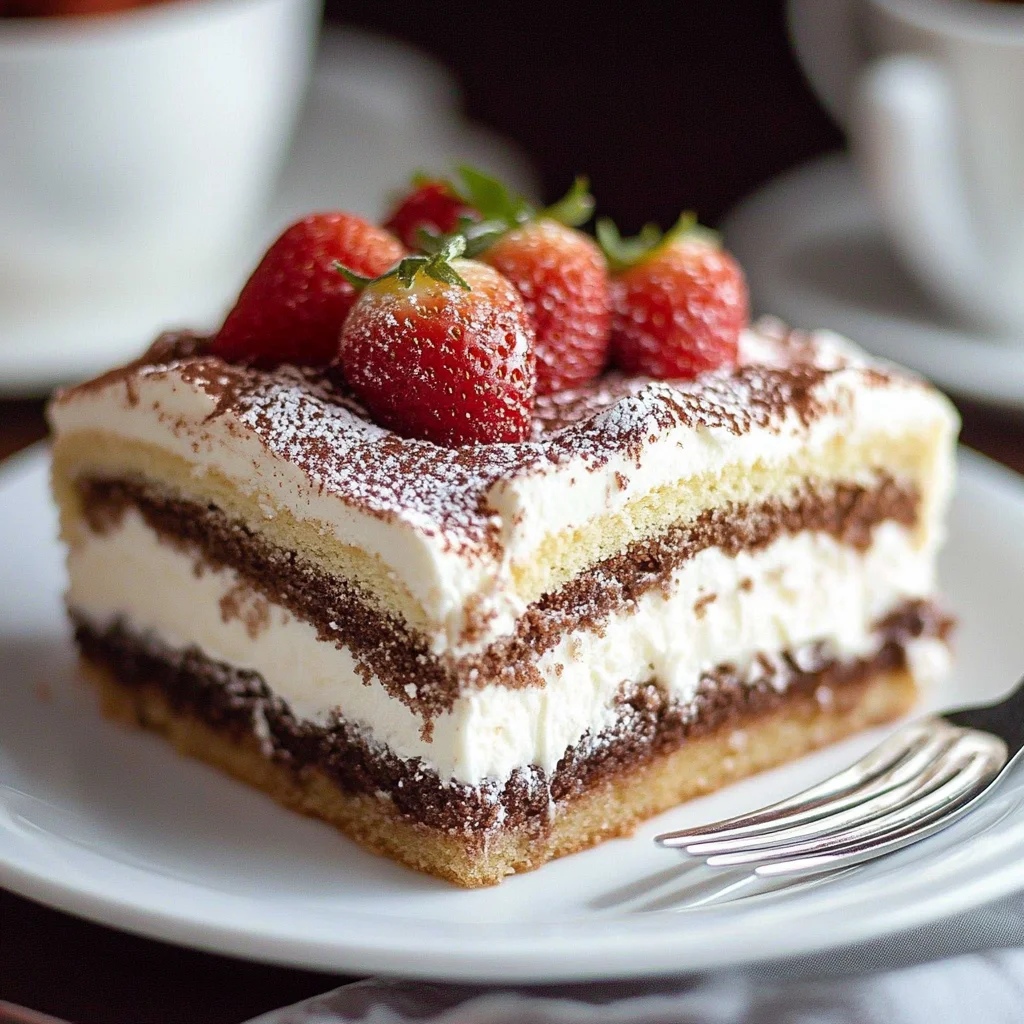
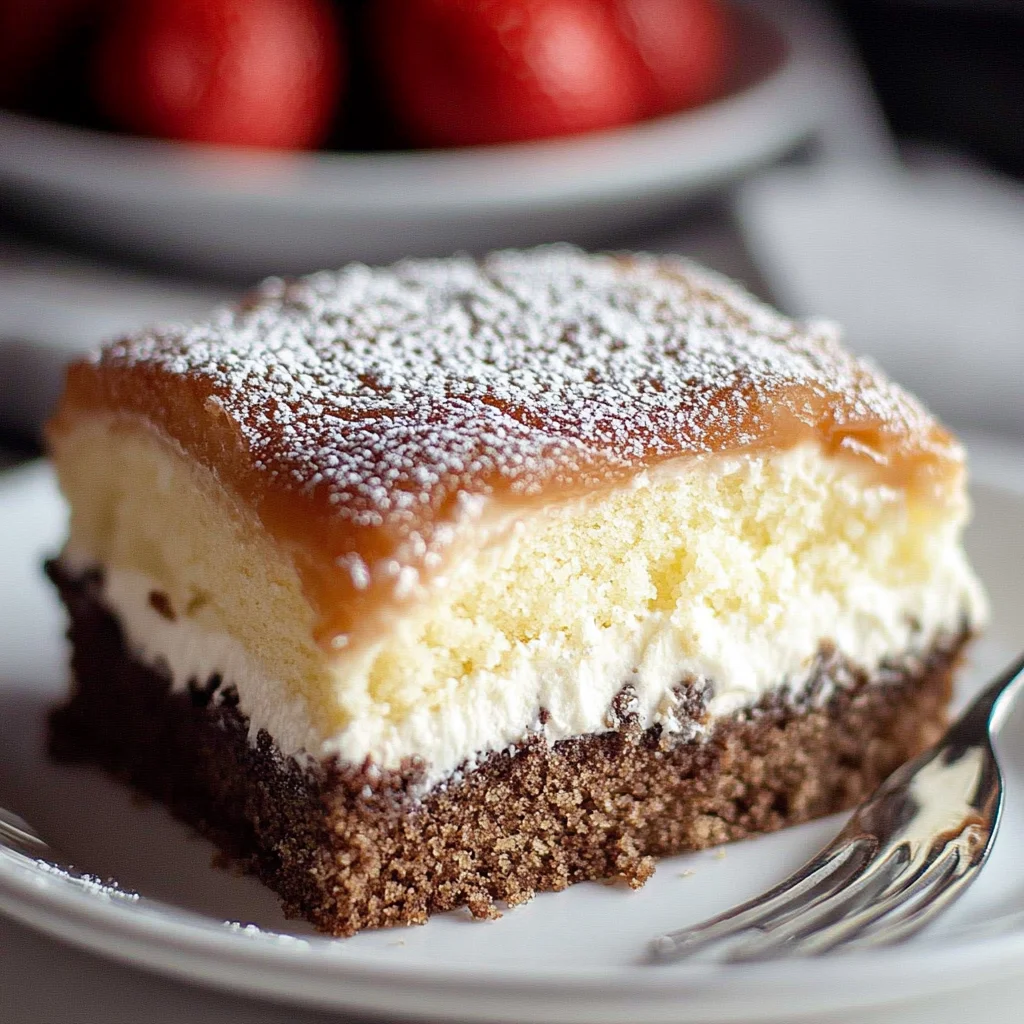
Ah, the Decadent Italian Love Cake—just the name alone makes my heart flutter! Imagine a dessert that wraps you in a warm, chocolatey embrace, perfect for those moments when you need a little indulgence. As a busy mom or professional, finding time to bake can feel like a luxury, but this cake is your quick ticket to culinary bliss. It’s a delightful blend of chocolate cake, creamy ricotta, and fluffy whipped cream, making it an irresistible treat for any occasion. Whether you’re impressing guests or treating yourself, this cake is a love letter to your taste buds.
Why You’ll Love This Decadent Italian Love Cake
This Decadent Italian Love Cake is a dream come true for anyone craving a sweet escape. It’s not just about the rich, chocolatey layers; it’s the simplicity that steals the show. With minimal prep and maximum flavor, this cake fits perfectly into a busy schedule. Plus, the ricotta adds a creamy surprise that elevates every bite. It’s a dessert that loves you back!
Ingredients for Decadent Italian Love Cake
Creating this Decadent Italian Love Cake is like assembling a symphony of flavors. You’ll need some pantry staples and a few special ingredients to make this dessert sing. Let’s dive into what you’ll need:
All-purpose flour: The backbone of our cake, providing structure and texture.
Granulated sugar: Sweetens the cake and balances the cocoa’s bitterness.
Unsweetened cocoa powder: The star of the show, giving our cake its rich chocolate flavor.
Baking powder: Helps the cake rise to fluffy perfection.
Salt: Enhances all the flavors, making them pop.
Whole milk: Adds moisture and richness to the batter.
Vegetable oil: Keeps the cake tender and moist.
Eggs: Bind everything together and add richness.
Vanilla extract: A hint of warmth and depth to the cake and ricotta layer.
Boiling water: Intensifies the cocoa flavor and creates a smooth batter.
Ricotta cheese: The creamy layer that makes this cake unique.
Powdered sugar: Sweetens the ricotta and whipped cream layers.
Lemon zest: Adds a fresh, zesty note to the ricotta.
Heavy cream: Whipped to perfection for a light, airy topping.
Chocolate shavings or cocoa powder: Optional, but they add a touch of elegance to the final presentation.
For exact measurements, scroll to the bottom of the article where you can print the full recipe. Feel free to substitute mascarpone for a richer twist or add fresh berries for a fruity flair!
How to Make Decadent Italian Love Cake
Preparing the Cake Batter
First things first, preheat your oven to 350°F (175°C). This ensures your cake bakes evenly. Grease and flour a 9×13 inch baking pan to prevent sticking. In a large mixing bowl, whisk together the all-purpose flour, granulated sugar, unsweetened cocoa powder, baking powder, and salt. This dry mix is the foundation of our chocolate cake.
Next, add the whole milk, vegetable oil, eggs, and vanilla extract to the dry ingredients. Mix until smooth. The batter should be thick and luscious. Gradually stir in the boiling water. This step might seem odd, but trust me, it makes the batter silky and enhances the cocoa flavor. Pour the batter into your prepared pan, and you’re ready for the next layer.
Creating the Ricotta Layer
In a separate bowl, combine the ricotta cheese, powdered sugar, lemon zest, and a teaspoon of vanilla extract. Mix until smooth and creamy. This ricotta mixture is the heart of our Decadent Italian Love Cake, adding a delightful surprise in every bite.
Carefully spoon the ricotta mixture over the chocolate batter in the baking pan. Don’t worry about spreading it evenly; it will sink and create a beautiful layer during baking. This is where the magic happens, and your cake starts to take shape.
Baking the Cake
Place the pan in your preheated oven and bake for 40-45 minutes. You’ll know it’s done when a toothpick inserted in the center comes out clean. The aroma of chocolate and vanilla will fill your kitchen, making it hard to wait!
Once baked, allow the cake to cool completely in the pan. Patience is key here, as cooling helps the layers set beautifully. This step is crucial for achieving that perfect slice later on.
Finishing Touches with Whipped Cream
In a medium bowl, whip the heavy cream with two tablespoons of powdered sugar until stiff peaks form. This whipped cream is the crowning glory of our cake, adding a light, airy finish.
Once the cake is cool, spread the whipped cream over the top. For an extra touch of elegance, garnish with chocolate shavings or a dusting of cocoa powder. If you’re feeling adventurous, add some fresh berries for a pop of color and flavor.
Slice and serve this Decadent Italian Love Cake with pride. For the best flavor, chill the cake in the refrigerator for at least an hour before serving. This allows the flavors to meld together, creating a dessert that’s truly irresistible.
Tips for Success
Use room temperature ingredients for a smoother batter and even baking.
Don’t skip the boiling water; it enhances the chocolate flavor beautifully.
Ensure the cake is completely cool before adding whipped cream to prevent melting.
For a firmer ricotta layer, drain excess liquid from the cheese before mixing.
Chill the cake for at least an hour for the best flavor and texture.
Equipment Needed
9×13 inch baking pan: Essential for even baking; a glass or metal pan works well.
Mixing bowls: At least two, for the cake batter and ricotta mixture.
Whisk or electric mixer: For smooth batter and whipped cream.
Spatula: Handy for spreading layers evenly.
Measuring cups and spoons: For accurate ingredient portions.
Cooling rack: Speeds up the cooling process.
Variations
Gluten-Free Option: Substitute all-purpose flour with a gluten-free flour blend for a celiac-friendly treat.
Vegan Twist: Use almond milk, flax eggs, and coconut cream to create a plant-based version.
Nutty Delight: Add a handful of chopped nuts like almonds or walnuts for a crunchy texture.
Spiced Up: Sprinkle a pinch of cinnamon or nutmeg into the batter for a warm, spiced flavor.
Berry Burst: Fold in fresh raspberries or blueberries into the ricotta layer for a fruity surprise.
Serving Suggestions
Pair with Coffee: A rich espresso or cappuccino complements the cake’s chocolatey notes beautifully.
Wine Match: Serve with a glass of sweet dessert wine like Moscato for a luxurious treat.
Elegant Presentation: Dust with cocoa powder and add a sprig of mint for a restaurant-quality look.
Fruit Garnish: Top with fresh strawberries or raspberries for a burst of color and flavor.
FAQs about Decadent Italian Love Cake
Can I make the Decadent Italian Love Cake ahead of time?
Absolutely! This cake is perfect for making ahead. Prepare and bake the cake a day in advance, then store it in the refrigerator. Add the whipped cream topping just before serving for the freshest taste.
What can I use instead of ricotta cheese?
If you’re out of ricotta or prefer a different flavor, mascarpone cheese is a fantastic substitute. It adds a richer, creamier texture to the cake, enhancing its decadent appeal.
How do I store leftover Decadent Italian Love Cake?
Store any leftovers in an airtight container in the refrigerator. The cake will stay fresh for up to three days. For best results, keep the whipped cream separate and add it just before serving.
Can I freeze the Decadent Italian Love Cake?
Yes, you can freeze the cake without the whipped cream topping. Wrap it tightly in plastic wrap and aluminum foil, then freeze for up to two months. Thaw in the refrigerator overnight before adding the whipped cream.
Is it possible to make this cake gluten-free?
Indeed! Simply replace the all-purpose flour with a gluten-free flour blend. Ensure all other ingredients are gluten-free, and you’ll have a delicious, celiac-friendly dessert.
Final Thoughts
Creating this Decadent Italian Love Cake is like crafting a love letter to your taste buds. Each layer tells a story of indulgence, from the rich chocolate base to the creamy ricotta surprise, all crowned with a cloud of whipped cream. It’s a dessert that transforms ordinary moments into celebrations, perfect for sharing with loved ones or savoring in solitude. Whether you’re a seasoned baker or a kitchen novice, this cake invites you to experience the joy of baking and the delight of a truly irresistible treat. So go ahead, indulge a little—your taste buds will thank you!
Paul
Decadent Italian Love Cake: Discover This Irresistible Dessert
Decadent Italian Love Cake is a rich and indulgent dessert featuring layers of chocolate cake, creamy ricotta, and whipped cream, perfect for special occasions.
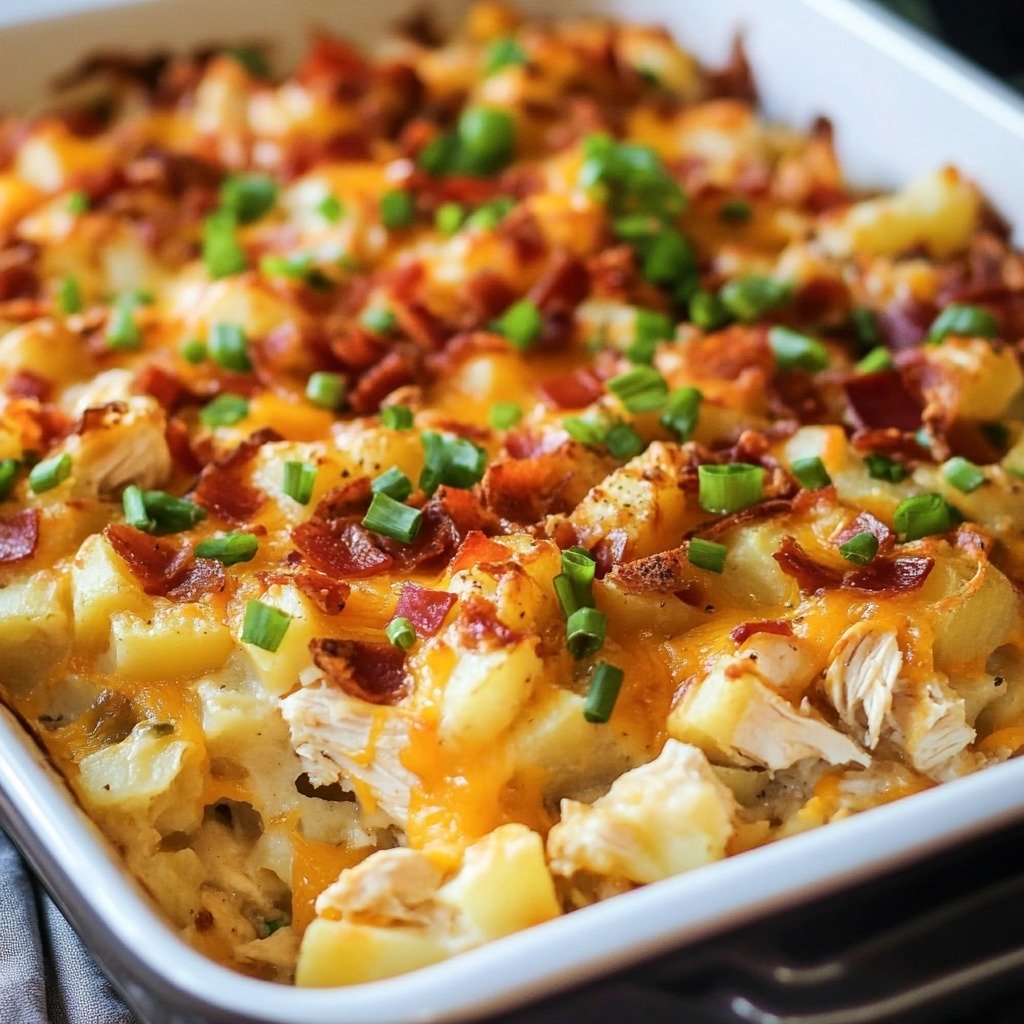
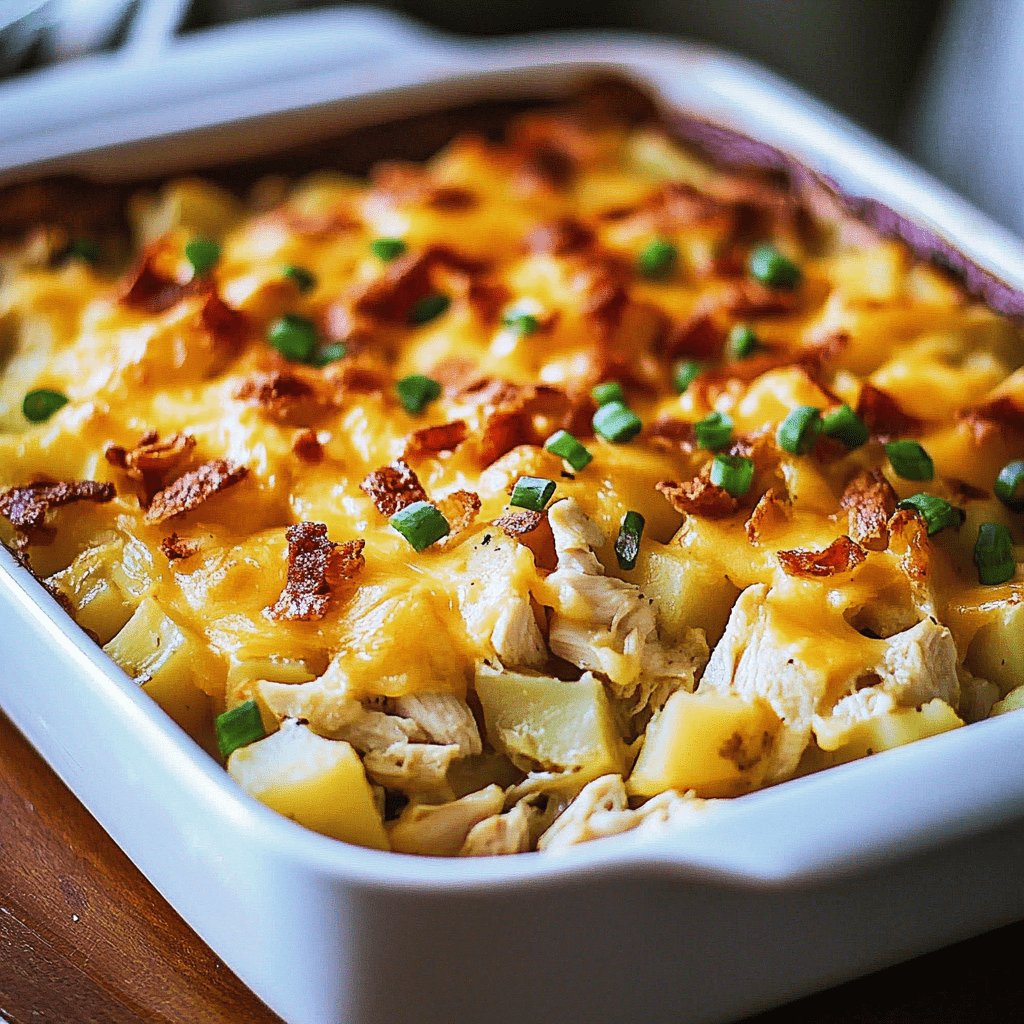
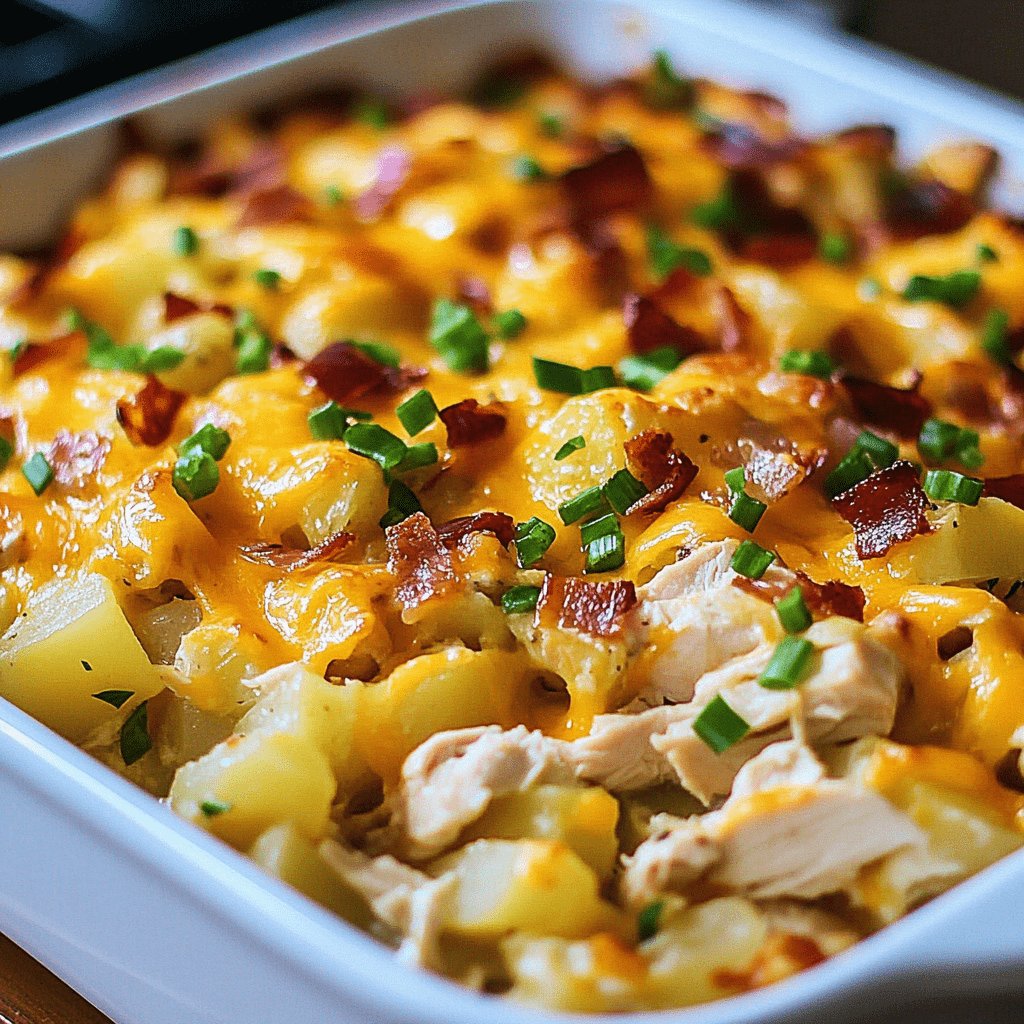
Oh, the joy of a Cheesy Chicken and Potato Bake! Just saying it makes my taste buds do a little happy dance. If you’re anything like me, juggling a million things at once, this dish is your new best friend. It’s the kind of comfort food that wraps you in a warm hug after a long day. Imagine tender chicken, creamy potatoes, and gooey cheese all mingling together in perfect harmony. Whether you’re looking to impress your family or simply need a quick solution for dinner, this recipe is your ticket to culinary bliss. Let’s dive in!
Why You’ll Love This Cheesy Chicken and Potato Bake
This Cheesy Chicken and Potato Bake is a lifesaver for busy nights. It’s quick to prepare, with minimal fuss, and delivers maximum flavor. The creamy, cheesy goodness is a hit with picky eaters, while the hearty ingredients keep everyone satisfied. Plus, it’s versatile enough to adapt to your family’s tastes. Trust me, once you try it, this dish will become a staple in your dinner rotation!
Ingredients for Cheesy Chicken and Potato Bake
Let’s talk about the stars of this Cheesy Chicken and Potato Bake. First up, we have potatoes, the ultimate comfort food, bringing a creamy texture to the dish. Chicken breasts are next, offering lean protein and a tender bite. Cheddar cheese adds that irresistible gooeyness we all crave.
Milk and sour cream create a luscious sauce that ties everything together. Green onions add a pop of color and a mild oniony flavor. Garlic and onion powders, along with paprika, infuse the dish with warmth and depth. A dash of salt and pepper enhances all the flavors.
Olive oil helps everything cook evenly, while optional frozen mixed vegetables can sneak in some extra nutrients. For those who like a bit of heat, consider adding cayenne pepper or jalapeños. Remember, exact quantities are listed at the bottom of the article for easy printing!
How to Make Cheesy Chicken and Potato Bake
Preheat and Prepare
First things first, let’s get that oven ready. Preheat it to 375°F. While it’s warming up, grab a 9×13-inch baking dish and give it a good greasing with cooking spray or a drizzle of olive oil. This will prevent our delicious creation from sticking.
Mix Ingredients
In a large bowl, toss together the diced potatoes and chicken pieces. Sprinkle in the garlic powder, onion powder, paprika, salt, and pepper. Give it a good mix until everything is well-coated. This step ensures every bite is packed with flavor.
Combine and Bake
In another bowl, whisk together the milk and sour cream until smooth. Pour this creamy mixture over the chicken and potatoes, stirring gently to combine. If you’re feeling adventurous, fold in some frozen mixed vegetables for added color and nutrition. Spread the mixture evenly in your prepared baking dish.
Add Cheese and Finish Baking
Cover the dish with aluminum foil and pop it into the oven. Let it bake for 30 minutes. Then, remove the foil and sprinkle the shredded cheddar cheese on top. Return it to the oven for another 15-20 minutes, or until the chicken is cooked through and the potatoes are tender. Let it cool for a few minutes before serving, and garnish with chopped green onions if you like. Enjoy!
Tips for Success
Cut potatoes and chicken into uniform pieces for even cooking.
Use a sharp knife to make prep work quicker and safer.
For extra crispy edges, broil the dish for a few minutes after baking.
Let the bake rest for 5 minutes before serving to set the flavors.
Adjust seasoning to taste, especially if adding extra vegetables.
Equipment Needed
9×13-inch baking dish – a must for even cooking.
Large mixing bowl – perfect for combining ingredients.
Whisk – to blend milk and sour cream smoothly.
Aluminum foil – helps retain moisture during baking.
Sharp knife – essential for dicing potatoes and chicken.
Cutting board – a sturdy surface for prep work.
Variations
Swap chicken for turkey or tofu for a different protein option.
Use sweet potatoes instead of regular potatoes for a sweeter twist.
Try adding broccoli or spinach for extra greens and nutrients.
Replace cheddar with gouda or Swiss cheese for a unique flavor.
Incorporate a dash of smoked paprika for a smoky depth.
Make it dairy-free by using almond milk and vegan cheese.
Add a sprinkle of crispy bacon bits for a savory crunch.
Serving Suggestions
Pair with a crisp green salad for a refreshing contrast.
Serve alongside a warm, crusty bread to soak up the creamy sauce.
Complement with a glass of chilled white wine or sparkling water.
Garnish with fresh herbs like parsley or chives for a pop of color.
Present in individual ramekins for a charming, personal touch.
FAQs about Cheesy Chicken and Potato Bake
Curious minds often have questions, and I’m here to help! Let’s dive into some common queries about this delightful Cheesy Chicken and Potato Bake.
Can I make this dish ahead of time?
Absolutely! You can prepare the bake up to the point of adding cheese, then cover and refrigerate it. When you’re ready to serve, simply add the cheese and bake as directed. It’s a great way to save time on busy days.
What can I use as a substitute for sour cream?
If you’re out of sour cream, plain Greek yogurt is a fantastic alternative. It offers a similar creamy texture and tangy flavor, keeping the dish just as delicious.
How do I store leftovers?
Leftovers can be stored in an airtight container in the refrigerator for up to three days. To reheat, simply pop it in the oven at 350°F until warmed through, or use the microwave for a quicker option.
Can I freeze this Cheesy Chicken and Potato Bake?
Yes, you can freeze it! Allow the bake to cool completely, then wrap it tightly in aluminum foil or place it in a freezer-safe container. It can be frozen for up to three months. Thaw overnight in the fridge before reheating.
Is there a way to make this dish spicier?
For those who love a bit of heat, try adding diced jalapeños or a pinch of cayenne pepper to the chicken mixture. It adds a delightful kick that complements the cheesy goodness perfectly.
Final Thoughts
There’s something truly magical about a Cheesy Chicken and Potato Bake. It’s like a warm embrace on a chilly evening, bringing comfort and joy to the table. This dish is more than just a meal; it’s a celebration of flavors and textures that come together in perfect harmony. Whether you’re sharing it with family or savoring it solo, each bite is a reminder of the simple pleasures in life. So, gather your loved ones, set the table, and let this delightful bake be the star of your next dinner. Here’s to creating delicious memories, one cheesy bite at a time!
Paul
Cheesy Chicken and Potato Bake: Indulge Your Taste Buds Now!
A delicious and comforting dish featuring tender chicken, creamy potatoes, and melted cheese, perfect for a family dinner.
1poundbonelessskinless chicken breasts, cut into bite-sized pieces
1cupshredded cheddar cheese
1cupmilk
1/2cupsour cream
1/2cupchopped green onions
1teaspoongarlic powder
1teaspoononion powder
1teaspoonpaprika
Salt and pepper to taste
1tablespoonolive oil
1cupfrozen mixed vegetablesoptional
Method
Preheat the oven to 375°F. Grease a 9×13-inch baking dish with cooking spray or olive oil.
In a large bowl, combine the diced potatoes, chicken pieces, garlic powder, onion powder, paprika, salt, and pepper. Mix well to coat the chicken and potatoes evenly.
In a separate bowl, whisk together the milk and sour cream until smooth. Pour this mixture over the chicken and potatoes, stirring to combine.
If using, fold in the frozen mixed vegetables. Spread the mixture evenly in the prepared baking dish.
Cover the dish with aluminum foil and bake for 30 minutes. Remove the foil and sprinkle the shredded cheddar cheese on top. Bake for an additional 15-20 minutes, or until the chicken is cooked through and the potatoes are tender.
Let the dish cool for 5 minutes before serving. Garnish with chopped green onions if desired.
Notes
For a spicier kick, add 1/2 teaspoon of cayenne pepper or diced jalapeños to the chicken mixture.
Swap out the cheddar cheese for mozzarella or pepper jack for a different flavor profile.