Transport yourself to the romantic streets of Paris with every bite of these delightful Vanilla Beignets. Light, fluffy, and kissed with a hint of vanilla, these traditional French pastries are perfect for breakfast, brunch, or a sweet indulgence any time of the day. Whether you’re savoring them fresh out of the fryer with a dusting of powdered sugar or pairing them with your favorite coffee, this recipe will make your kitchen feel like a Parisian café. Best of all, they’re easy to make, so let’s get started!
Ingredients
Dry Ingredients
2 teaspoons active dry yeast
2 ½ cups all-purpose flour
¼ cup granulated sugar
½ teaspoon salt
Wet Ingredients
1 tablespoon unsalted butter, melted
1 cup warm milk (not too hot, about 100°F/38°C)
1 tablespoon pure vanilla extract
For Frying & Topping
Vegetable oil (for frying)
Powdered sugar (for dusting)
Instructions
1. Prepare the Dough
In a small bowl, combine the warm milk and yeast. Stir gently and let it sit for about 5 minutes until frothy.
In a large mixing bowl, whisk together the flour, granulated sugar, and salt.
Gradually add the yeast mixture to the dry ingredients, followed by the melted butter and vanilla extract. Mix until a soft dough forms.
2. Knead and Rest
Transfer the dough to a floured surface and knead for 8–10 minutes until smooth and elastic. Alternatively, use a stand mixer with a dough hook for 5–7 minutes.
Place the dough in a lightly oiled bowl, cover it with a clean kitchen towel, and let it rise in a warm spot for 1–2 hours, or until it doubles in size.
3. Roll and Shape
Once risen, punch down the dough and turn it out onto a floured surface.
Roll the dough to about ¼-inch thickness. Using a sharp knife or pastry cutter, cut into squares or rectangles (about 2 inches each).
Cover the cut dough with a towel and let it rest for another 30 minutes.
4. Fry the Beignets
Heat about 2 inches of vegetable oil in a deep pot or fryer to 350°F (175°C).
Fry the dough squares in batches, 2–3 minutes per side, until they are golden brown and puffed. Use a slotted spoon to remove them from the oil and place them on a plate lined with paper towels.
5. Finish and Serve
Generously dust the beignets with powdered sugar while they are still warm.
Serve immediately and enjoy them fresh, warm, and irresistibly delicious!
Conclusion
Making Vanilla Beignets at home is not only a rewarding culinary experience but also a delightful way to bring the flavors of France to your table. With their golden exterior, airy interior, and a touch of sweetness, these pastries are sure to become a household favorite. Pair them with a steaming cup of coffee or a scoop of ice cream for a truly indulgent treat. Bon appétit!
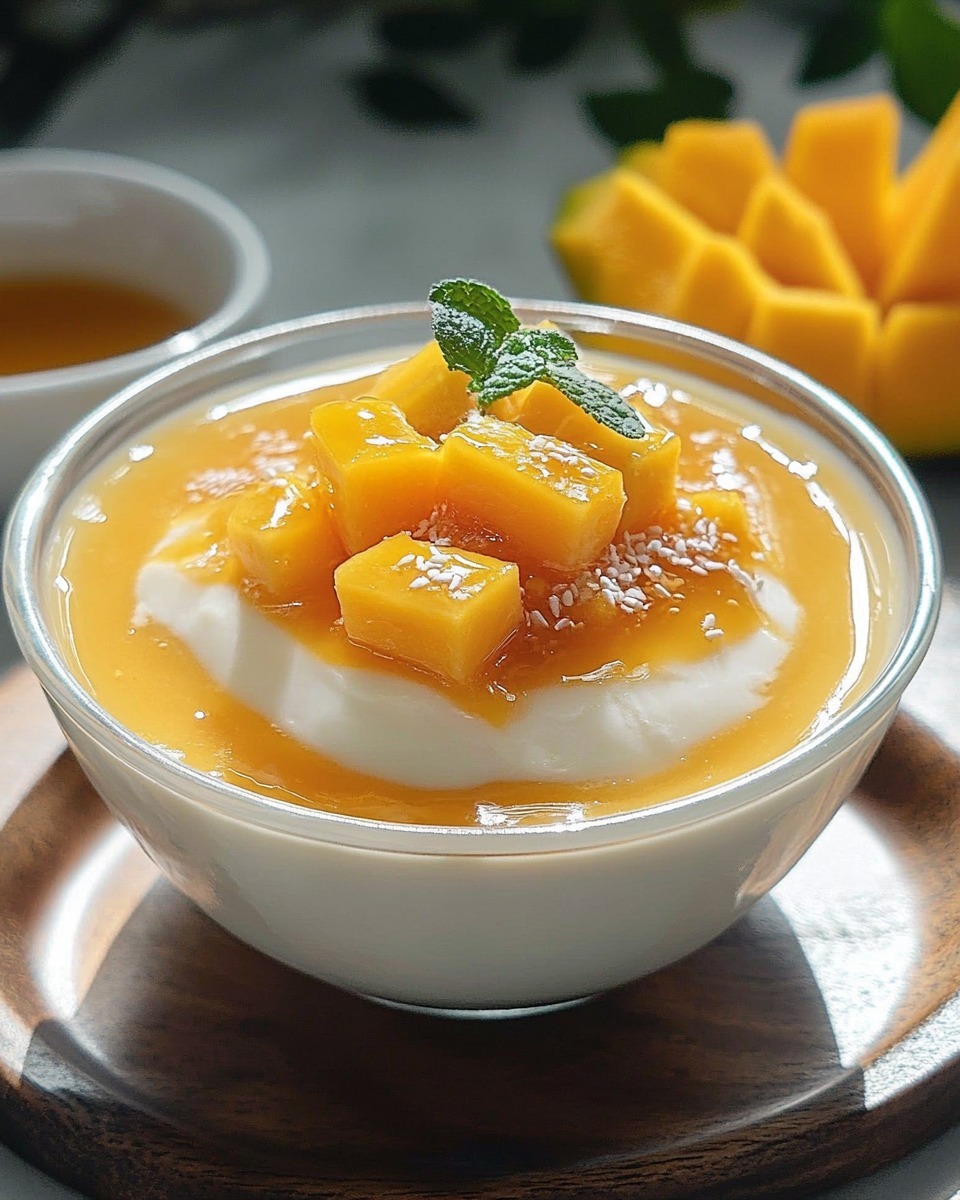
Transport yourself to a tropical paradise with this silky Chinese Mango Pudding. This beloved dessert features the natural sweetness of ripe mangoes combined with the creamy richness of coconut milk. Simple yet elegant, it’s the perfect refreshing treat for hot summer days or to end a delicious meal on a sweet note.
Ingredients:
Produce:
2 ripe yellow mangoes (about 1 ½ cups puréed mango)
Baking & Spices:
½ tbsp sugar (adjust based on mango sweetness)
Dairy:
½ cup coconut milk or half & half
1 tbsp condensed milk
Desserts:
2 ½ tsp unflavored gelatin
Liquids:
¾ cup water
Instructions:
1. Prepare the Mangoes:
Peel the mangoes, remove the pits, and cut the flesh into chunks.
Reserve a few pieces for garnish and purée the rest in a blender or food processor until smooth. You should have about 1 ½ cups of mango purée.
2. Dissolve the Gelatin:
In a small bowl, sprinkle the gelatin over ¼ cup of water and let it bloom for about 5 minutes.
Heat the remaining ½ cup of water in a small saucepan over low heat. Add the bloomed gelatin and stir until completely dissolved.
3. Mix the Pudding Base:
In a large bowl, combine the mango purée, sugar, coconut milk (or half & half), and condensed milk. Mix well until smooth.
Add the dissolved gelatin mixture to the mango mixture and whisk until fully incorporated.
4. Pour into Molds:
Pour the mixture into individual serving cups or ramekins. Use a fine sieve to strain the mixture if you prefer a smoother texture.
Tap the molds gently on the counter to release any air bubbles.
5. Chill and Set:
Refrigerate the puddings for at least 4 hours or until fully set.
6. Serve and Garnish:
Once set, garnish with reserved mango chunks or a drizzle of coconut milk. For an extra touch, add a sprig of mint or a sprinkle of toasted coconut flakes. Serve chilled.
Conclusion:
This Chinese Mango Pudding is a luscious dessert that perfectly balances the tropical sweetness of mango with creamy coconut milk. Easy to make and irresistibly refreshing, it’s a crowd-pleaser that’s sure to brighten any occasion. With just a handful of ingredients, you’ll have a silky, melt-in-your-mouth treat that captures the essence of summer in every bite!
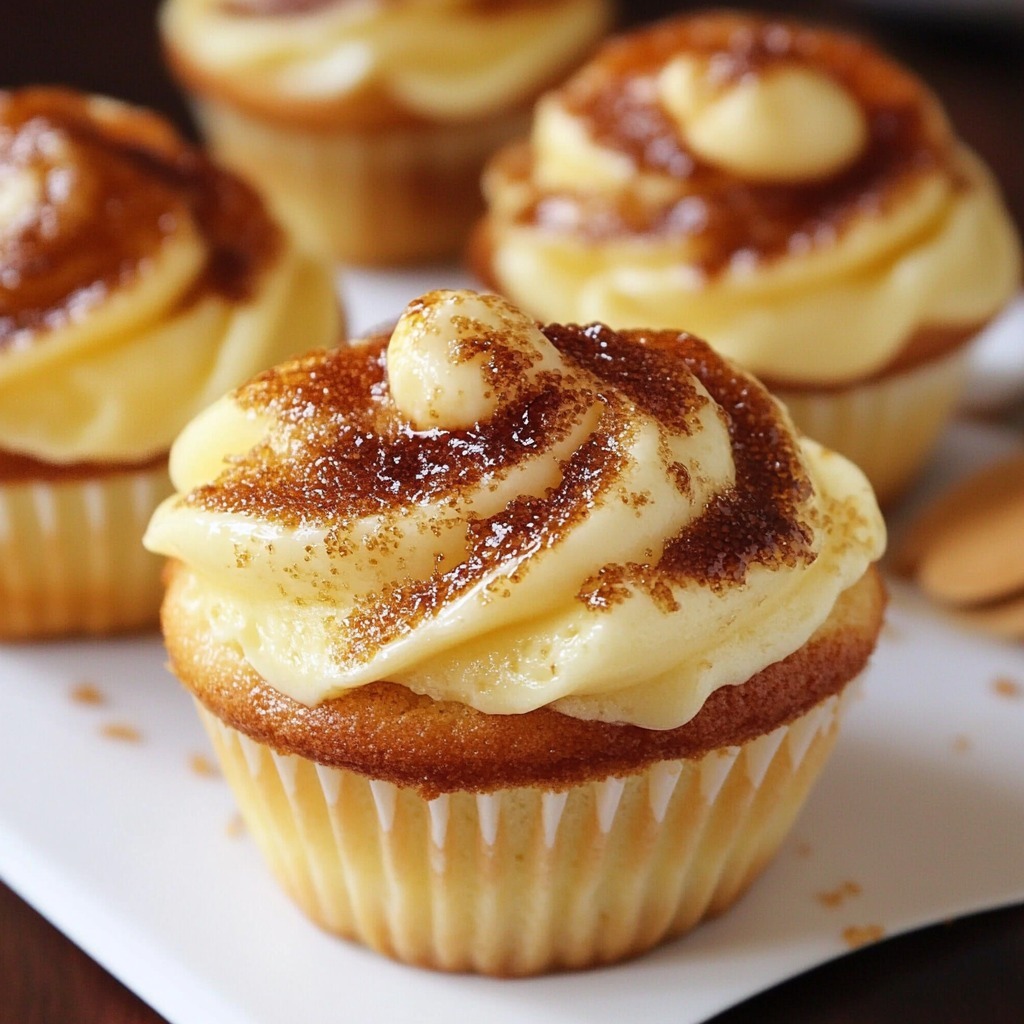
Love the creamy, caramelized allure of crème brûlée? Now you can enjoy this sophisticated dessert in cupcake form! These Crème Brûlée Cupcakes feature moist vanilla cupcakes filled with luscious vanilla pastry cream, topped with a crisp, caramelized sugar layer. Perfect for special occasions or as a unique treat, these cupcakes are sure to impress.
Ingredients:
Pastry Cream Filling & Topping:
1 batch Easy One Pot Vanilla Pastry Cream (follow your preferred recipe)
½ cup (100g) coarse sugar (such as raw, turbinado, or sanding sugar)
Follow your recipe for Easy One Pot Vanilla Pastry Cream. Let it cool completely in the refrigerator.
2. Make the Cupcakes:
Preheat your oven to 350°F (175°C) and line a cupcake tin with paper liners.
In a large bowl, cream together the softened butter and sugar until light and fluffy, about 2–3 minutes.
Mix in the vanilla extract and eggs, one at a time, beating well after each addition.
In a separate bowl, sift together the flour, cornstarch, baking powder, and salt.
Gradually add the dry ingredients to the butter mixture in three additions, alternating with the milk and oil, starting and ending with the dry ingredients. Mix until just combined.
Divide the batter evenly among the cupcake liners, filling each about 2/3 full.
Bake for 18–22 minutes or until a toothpick inserted into the center comes out clean. Let the cupcakes cool completely on a wire rack.
3. Fill the Cupcakes:
Use a small knife or a cupcake corer to remove a small portion from the center of each cupcake. Fill the hollow with the prepared vanilla pastry cream. Smooth the tops to ensure the filling is flush with the surface.
4. Top with Pastry Cream:
Spoon or pipe a layer of pastry cream on top of each cupcake, spreading it evenly.
5. Caramelize the Sugar:
Sprinkle a generous layer of coarse sugar over the pastry cream topping. Use a kitchen torch to carefully caramelize the sugar until it melts and forms a golden, glassy layer. Allow the caramel to harden before serving.
6. Serve and Enjoy:
Serve the Crème Brûlée Cupcakes immediately to enjoy the crispy caramel topping. These cupcakes are best eaten fresh but can be stored in the refrigerator for up to 2 days.
Conclusion:
These Crème Brûlée Cupcakes transform the elegance of crème brûlée into a fun, handheld treat. With their moist vanilla base, creamy filling, and crispy caramel topping, they deliver a luxurious dessert experience in every bite. Whether for a celebration or an indulgent afternoon treat, these cupcakes are guaranteed to delight!
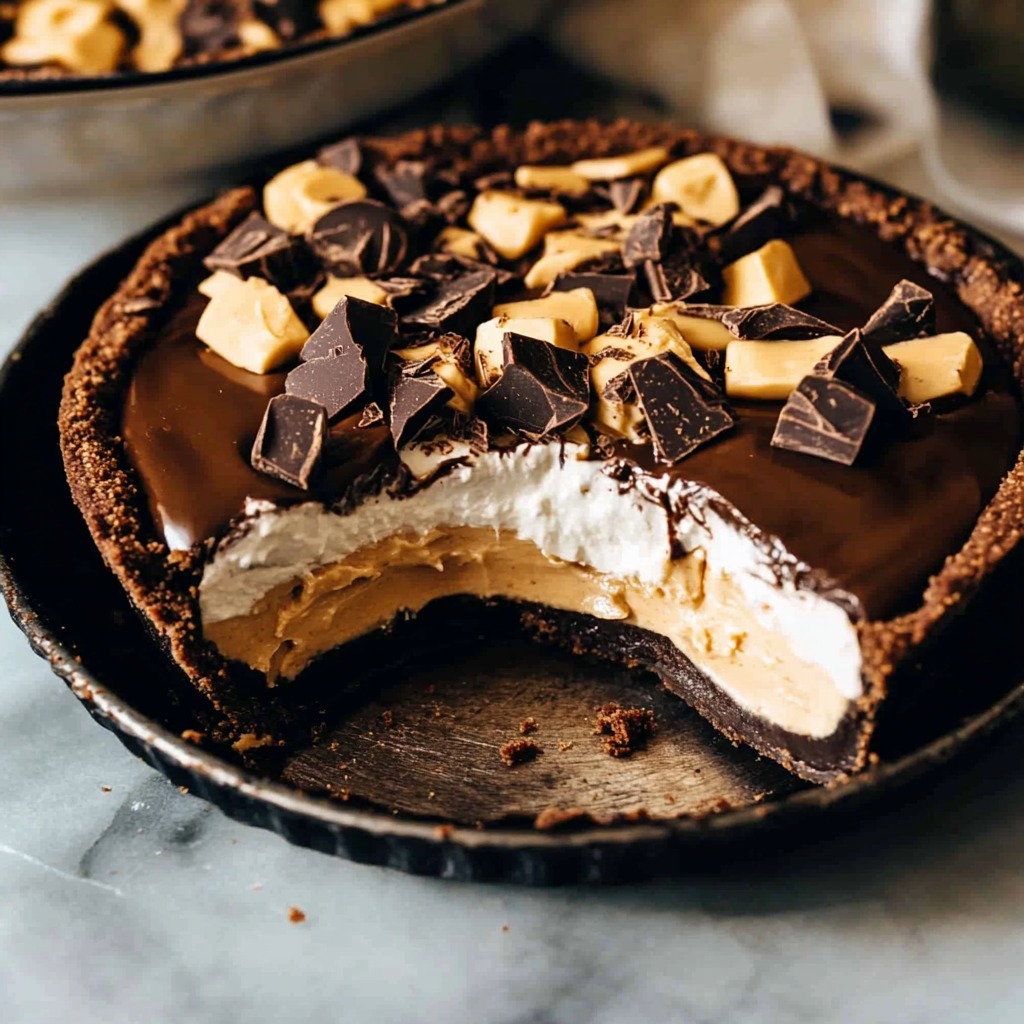
Indulge in the perfect marriage of chocolate and peanut butter with this luxurious Chocolate Peanut Butter Pie. With a crunchy Oreo crust, velvety chocolate pudding, and creamy peanut butter mousse, every bite is a symphony of textures and flavors. Topped with chopped peanut butter cups, this dessert is a guaranteed crowd-pleaser that’s surprisingly simple to make.
Ingredients:
Oreo Crust:
20 Oreo sandwich cookies, finely ground (regular or gluten-free)
1/4 cup (55g) unsalted butter, melted
Chocolate Pudding Layer:
1/4 cup (50g) granulated sugar
2 tbsp cornstarch
2 tbsp unsweetened cocoa powder
1/2 tsp instant espresso powder (optional)
1/4 tsp kosher salt
1 cup (240g) whole milk
2 large egg yolks
3.5 oz dark chocolate, chopped (use milk chocolate for a sweeter flavor)
1 tbsp unsalted butter
1 tsp vanilla extract
Peanut Butter Mousse:
4 oz cream cheese, room temperature
2 cups (480g) heavy whipping cream
1/4 cup (45g) powdered sugar
1 tsp vanilla extract
1 cup (250g) creamy peanut butter
Topping:
Chopped peanut butter cups (gluten-free if needed)
Instructions:
1. Make the Oreo Crust:
Preheat your oven to 350°F (175°C).
In a bowl, combine crushed Oreo cookies with melted butter, stirring until the mixture is uniform.
Press the mixture into the base and up the sides of a 9-inch pie dish, using a glass or your hands to press it down firmly.
Bake for 8 to 10 minutes, then allow the crust to cool completely before using.
2. Prepare the Chocolate Pudding Layer:
In a medium saucepan, whisk together the sugar, cornstarch, cocoa powder, espresso powder (if using), and salt. Gradually whisk in the milk until smooth.
Heat the mixture over medium heat, stirring constantly until it thickens and begins to simmer.
In a separate bowl, beat the egg yolks. Slowly pour about 1/4 cup of the hot mixture into the yolks while whisking to gently warm them. Then, add this egg mixture back into the saucepan.
Continue cooking for 1–2 minutes, stirring until the pudding becomes thick and glossy. Remove from the heat.
Stir in chopped chocolate, butter, and vanilla extract until fully combined and smooth.
Pour the pudding into the chilled Oreo crust and smooth it out evenly.
Refrigerate until set, about 1–2 hours.
3. Make the Peanut Butter Mousse:
In a large bowl, beat the cream cheese until smooth.
Add the heavy whipping cream, powdered sugar, and vanilla extract. Beat until soft peaks form.
Fold in the creamy peanut butter until the mixture is smooth and fluffy.
4. Assemble the Pie:
Once the pudding layer is set, spread the peanut butter mousse over the top, smoothing it out with a spatula.
5. Add the Toppings:
Sprinkle chopped peanut butter cups generously over the mousse layer for a finishing touch.
6. Chill and Serve:
Refrigerate the pie for at least 2–3 hours to allow all layers to firm up.
Slice and serve this rich, irresistible dessert chilled.
Conclusion:
This Chocolate Peanut Butter Pie is a decadent dessert that effortlessly combines the richness of chocolate, the creaminess of peanut butter, and the crunch of an Oreo crust. With its beautiful layers and irresistible toppings, it’s the perfect showstopper for any special occasion—or simply to treat yourself!
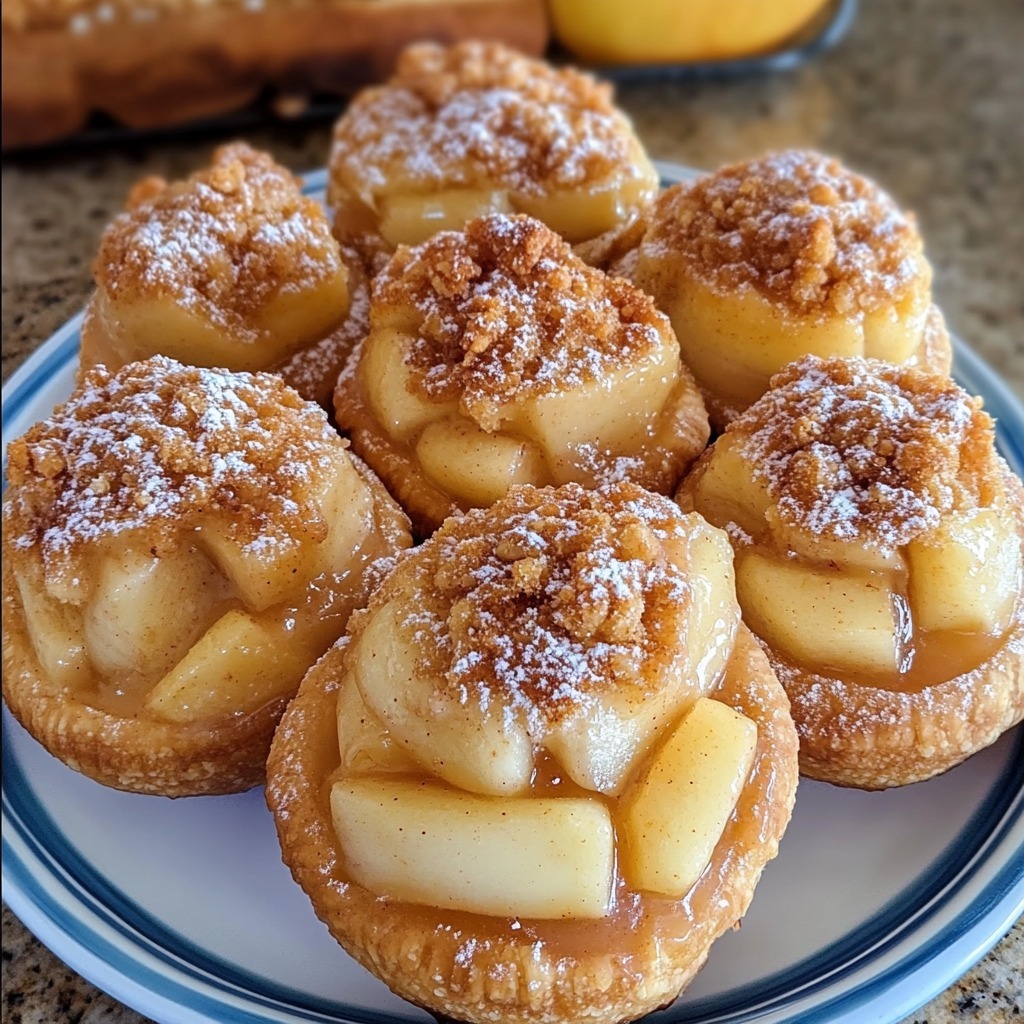
Craving a bite-sized version of classic apple pie? These Apple Pie Bombs are the answer! With a golden, flaky biscuit exterior and a gooey, cinnamon-infused apple filling, they’re a quick and fun twist on the traditional dessert. Perfect for gatherings, snacking, or satisfying those sweet cravings, these little treats are simple to prepare and impossible to resist.
Ingredients:
For the Filling and Bombs:
1 (21-ounce) can Apple pie filling or caramel apple pie filling
1 (16.3-ounce) can Grands “Big” biscuits, flaky
1 cup Granulated sugar
1 tbsp Ground cinnamon
For Frying:
Vegetable oil (enough to fill a skillet or deep fryer by 2 inches)
Instructions:
1. Prepare the Filling:
Open the apple pie filling can and cut the apple slices into smaller, bite-sized pieces. This will make it easier to fill the biscuits.
2. Prep the Dough:
Open the biscuit can and separate the dough into individual biscuits.
3. Fill the Bombs:
Place about a tablespoon of apple pie filling in the center of each flattened biscuit. Be careful not to overfill.
Pinch the edges of the dough together to seal, forming a ball. Make sure the seams are tightly closed to prevent leaks during frying.
4. Heat the Oil:
Heat vegetable oil in a deep pan or fryer over medium-high heat, bringing it to a temperature of around 350°F (175°C).
5. Fry the Bombs:
Carefully lower a few dough balls into the hot oil, seam-side down. Fry in batches to avoid overcrowding.
Cook for 2–3 minutes on each side, or until the bombs are golden brown and puffed.
Use a slotted spoon to lift the items from the oil and set them on a plate lined with paper towels to absorb any extra oil.
6. Coat in Cinnamon Sugar:
In a separate bowl, combine the sugar and cinnamon.
While still warm, gently toss the treats in the cinnamon-sugar mixture, ensuring they are evenly coated.
7. Serve and Enjoy:
Serve these Apple Pie Bombs warm for the ultimate indulgence. They pair perfectly with a scoop of vanilla ice cream or a drizzle of caramel sauce!
Conclusion:
These Explosive Apple Pie Bombs are a quick and delightful way to enjoy the flavors of apple pie in a fun, handheld form. Crispy on the outside, gooey on the inside, and coated in irresistible cinnamon sugar, they’re a treat that will disappear as fast as you can make them. Whether you’re hosting a party or enjoying a cozy night in, these little delights are guaranteed to impress!
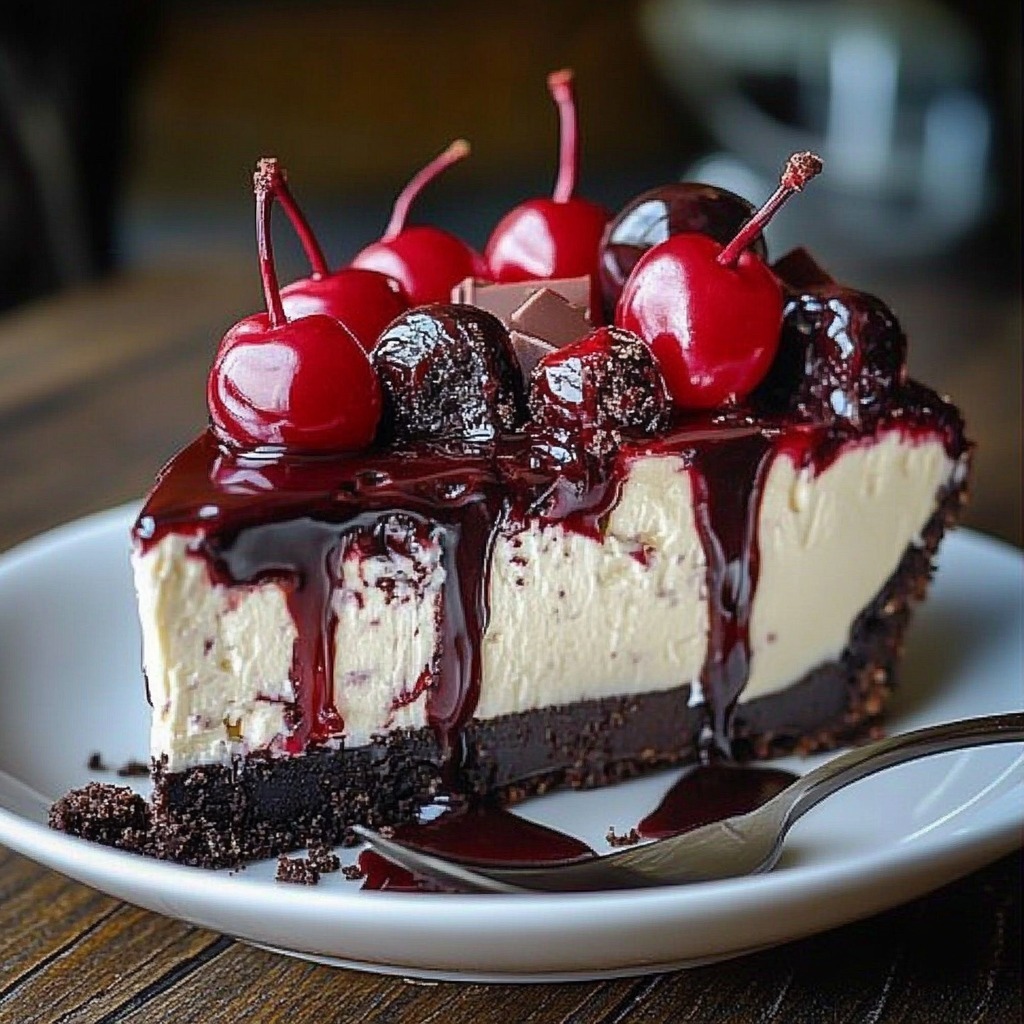
Indulge in the luscious harmony of chocolate, cream cheese, and berries with this no-bake Black Forest Berry Cheesecake. Combining the classic flavors of Black Forest desserts with a refreshing twist, this cheesecake is an effortless dessert perfect for any occasion. It features layers of creamy goodness atop a crunchy biscuit base, topped with a medley of berries and rich cherry fruit filling. Ready to wow your taste buds? Let’s dive into this culinary delight!
Ingredients:
Base:
150 g Bourbon biscuits
45 g Unsalted butter, melted
Cheesecake Filling:
300 g Soft cream cheese
150 ml Double cream (heavy cream)
60 g Caster sugar
2 tbsp Kirsch (optional, for a boozy twist)
Topping:
410 g Black cherry fruit filling (tinned)
150 g Blackberries
125 g Blueberries
Zest and juice of 1 lime
60 g Dark chocolate (for shavings or drizzle)
Instructions:
1. Prepare the Biscuit Base:
Crush the Bourbon biscuits into fine crumbs using a food processor or by sealing them in a ziplock bag and rolling with a pin.
Combine the crushed crumbs with melted butter, stirring until well incorporated.
Firmly press the mixture into the bottom of a tart pan or springform pan, using a spoon to smooth and pack it down. Place the pan in the fridge for 30 minutes to set.
2. Whip Up the Cheesecake Filling:
In a spacious mixing bowl, blend the cream cheese with the sugar until the mixture becomes velvety and free of lumps.
Gradually add the double cream, whisking until thickened and fully incorporated.
Stir in the Kirsch if using, for a hint of cherry liqueur.
Spoon the filling over the chilled biscuit base, smoothing the top with a spatula. Return to the refrigerator for at least 4 hours or overnight to set completely.
3. Prepare the Topping:
In a bowl, gently mix the black cherry fruit filling with the blackberries and blueberries. Add the lime juice and zest for a tangy kick.
Once the cheesecake is set, spread the berry mixture over the top.
4. Add the Finishing Touches:
Grate or shave the dark chocolate over the berry topping for a rich, indulgent garnish. Alternatively, melt the chocolate and drizzle it over the top for a dramatic effect.
5. Serve and Enjoy:
Remove the cheesecake from the tin carefully and place it on a serving plate. Slice and serve this stunning dessert chilled.
Conclusion:
This No-Bake Black Forest Berry Cheesecake is a dessert that strikes the perfect balance between rich indulgence and fruity freshness. With its silky-smooth filling, crunchy base, and vibrant berry topping, it’s destined to become a showstopper at your next gathering. The best part? No oven required! So why wait? Treat yourself and your loved ones to this unforgettable dessert today!
Introduction to White Chocolate Raspberry Dream Cake
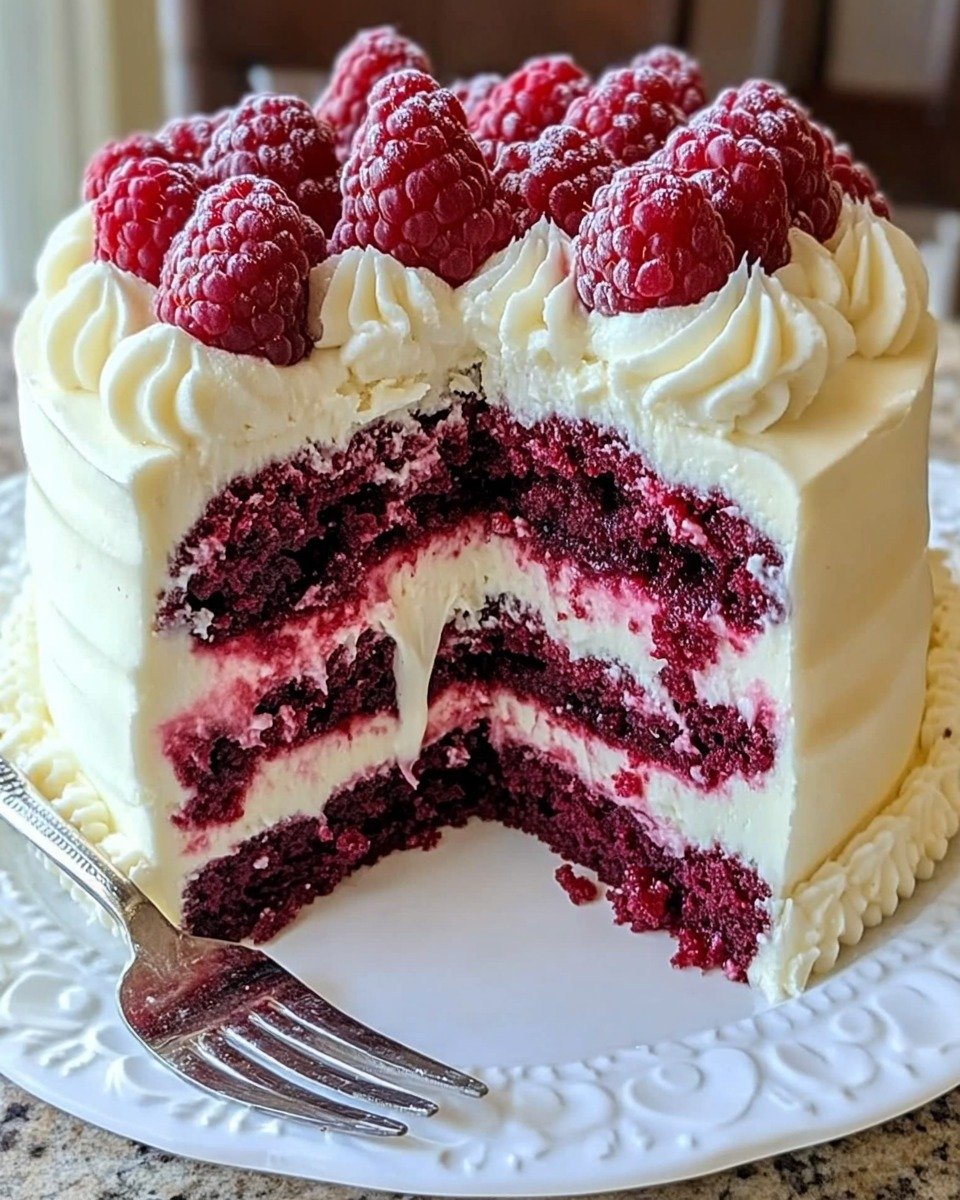
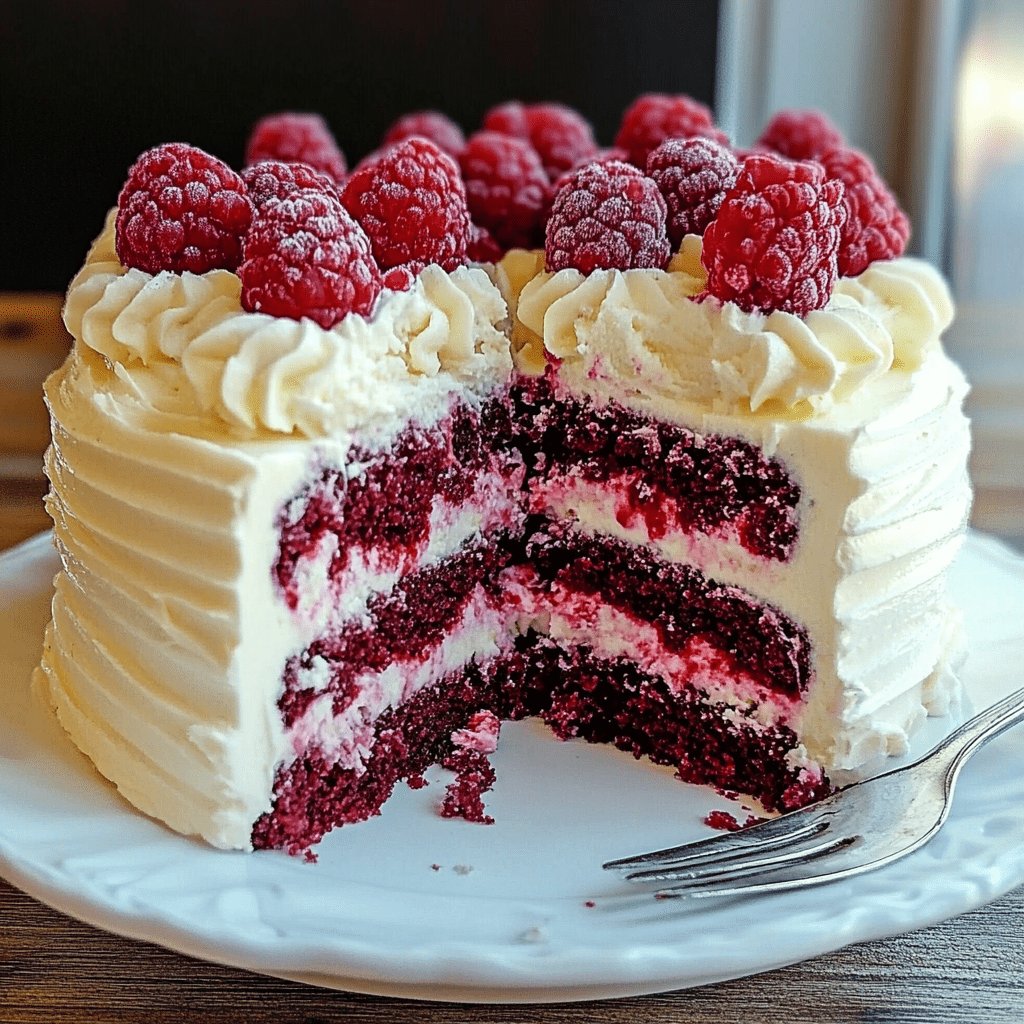
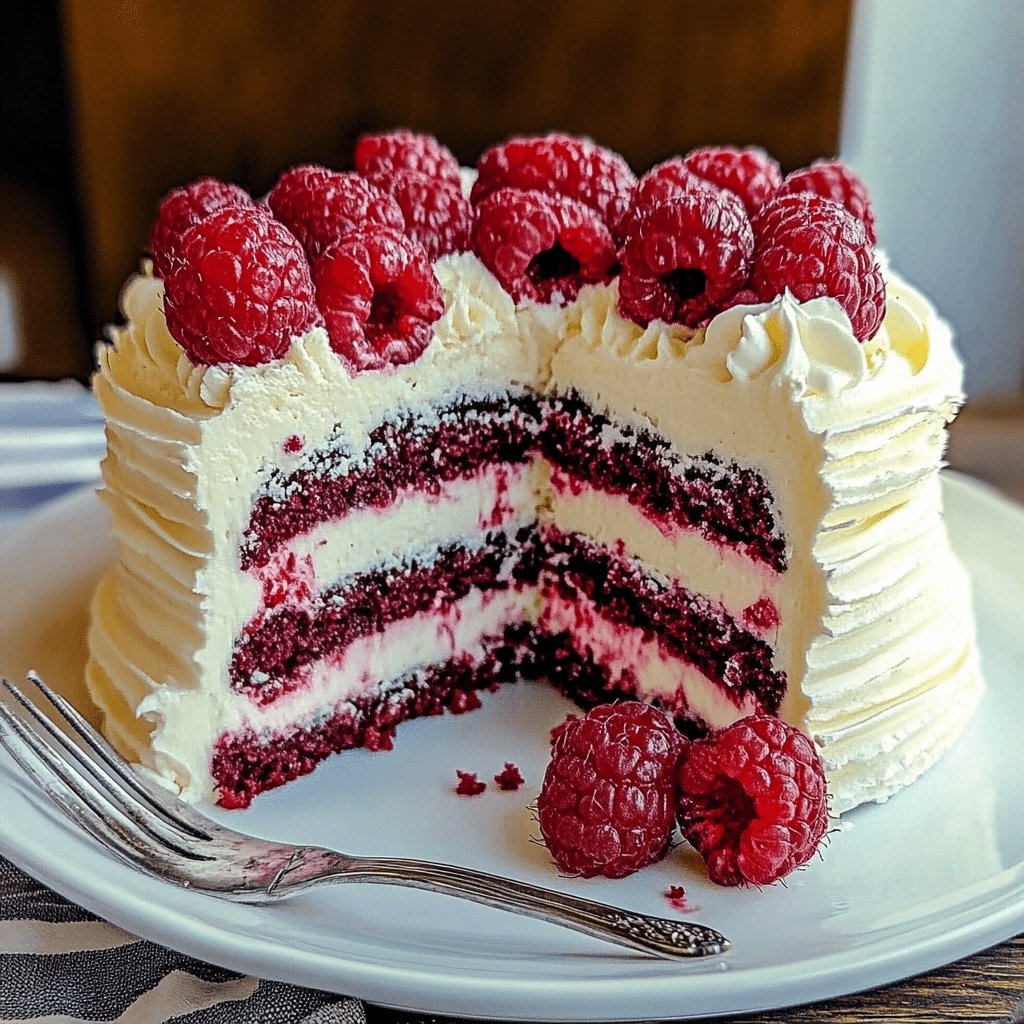
Oh, the sweet symphony of flavors that is the White Chocolate Raspberry Dream Cake! Imagine a dessert that feels like a warm hug on a chilly day. This cake is your go-to for those moments when you need a quick solution to impress your loved ones or simply indulge yourself. With its creamy white chocolate and tangy raspberries, it’s a delightful treat that brings joy to any occasion. Whether you’re a busy mom juggling a million things or a professional seeking a sweet escape, this cake is your ticket to a little slice of heaven.
Why You’ll Love This White Chocolate Raspberry Dream Cake
This White Chocolate Raspberry Dream Cake is a breeze to make, even on the busiest of days. Its luscious blend of creamy white chocolate and fresh raspberries creates a taste sensation that dances on your palate. Perfect for any occasion, this cake is not only a feast for the eyes but also a delight for the taste buds. It’s a sweet escape that everyone will adore!
Ingredients White Chocolate Raspberry Dream Cake
Creating this White Chocolate Raspberry Dream Cake is like painting a masterpiece with flavors. Let’s dive into the ingredients that make this cake a dream come true. Remember, the exact quantities are at the bottom of the article for easy printing.
All-purpose flour: The foundation of our cake, providing structure and texture.
Granulated sugar: Adds sweetness and helps achieve that perfect golden crust.
Unsalted butter: Brings richness and moisture, making each bite melt in your mouth.
Milk: Keeps the cake tender and moist, balancing the flavors beautifully.
Large eggs: Essential for binding the ingredients and adding fluffiness.
Baking powder: Our leavening agent, ensuring the cake rises to perfection.
Vanilla extract: Infuses the cake with a warm, aromatic essence.
Salt: Enhances the flavors, making the sweetness pop.
White chocolate chips: The star of the show, offering creamy, sweet bursts in every bite.
Fresh raspberries: Provide a tangy contrast to the sweetness, adding a pop of color and flavor.
Heavy whipping cream: Whipped to perfection for a light, airy frosting.
Powdered sugar: Sweetens the whipped cream without weighing it down.
Vanilla extract (for whipped cream): Adds a hint of vanilla to the frosting, tying all the flavors together.
Feel free to experiment with substitutions like strawberries or blueberries for a fruity twist. Now, let’s get baking!
How to Make White Chocolate Raspberry Dream Cake
Preparing the Cake Batter
First, preheat your oven to 350°F (175°C). This ensures your cake bakes evenly. Grease and flour two 9-inch round cake pans to prevent sticking. In a large mixing bowl, cream together the softened butter and granulated sugar until light and fluffy. This step is crucial for a tender cake texture.
Next, add the eggs one at a time, mixing well after each addition. This helps incorporate air, making the cake light. Stir in the vanilla extract for that aromatic touch. In a separate bowl, whisk together the flour, baking powder, and salt. Gradually add this dry mixture to the wet ingredients, alternating with the milk. Mix until just combined to avoid overworking the batter.
Gently fold in the white chocolate chips and fresh raspberries. This step ensures even distribution without crushing the berries. Your batter is now ready to transform into a dreamy cake!
Baking the Cake Layers
Divide the batter evenly between the prepared cake pans. This ensures both layers bake uniformly. Place the pans in the preheated oven and bake for 25-30 minutes. You’ll know they’re done when a toothpick inserted in the center comes out clean.
Once baked, allow the cakes to cool in the pans for about 10 minutes. This helps them set and makes them easier to handle. Then, transfer them to a wire rack to cool completely. Patience here is key; frosting a warm cake can lead to a melty mess!
Making the Whipped Cream Frosting
While the cakes cool, it’s time to whip up the frosting. In a mixing bowl, beat the heavy whipping cream, powdered sugar, and vanilla extract until soft peaks form. This means the cream holds its shape but is still soft and luscious.
Be careful not to overbeat, as this can turn your cream into butter. The result should be a light, airy frosting that complements the cake’s richness perfectly.
Assembling the Cake
Once the cakes are completely cool, place one layer on a serving plate. Spread a generous layer of whipped cream on top. This acts as a delicious glue for the second layer.
Place the second cake layer on top, pressing gently to secure. Frost the top and sides of the cake with the remaining whipped cream. For a finishing touch, garnish with additional raspberries and white chocolate shavings if desired. This not only adds flavor but also makes your cake look like a showstopper!
And there you have it, your White Chocolate Raspberry Dream Cake is ready to impress and delight!
Tips for Success
Ensure all ingredients are at room temperature for a smoother batter.
Use fresh raspberries for the best flavor and texture.
Fold the raspberries gently to avoid breaking them.
Chill the mixing bowl and beaters before whipping the cream for better results.
Let the cake cool completely before frosting to prevent melting.
Equipment Needed
Mixing bowls: Essential for combining ingredients. Any large bowl will do.
Electric mixer: Speeds up the creaming process. A whisk can work in a pinch.
9-inch round cake pans: For baking the layers. Substitute with any similar-sized pans.
Wire rack: Cools the cake evenly. A clean, flat surface can be used instead.
Spatula: For folding ingredients and spreading frosting. A butter knife can also work.
Variations
Berry Swap: Substitute raspberries with strawberries or blueberries for a different fruity twist.
Gluten-Free Option: Use a gluten-free flour blend to accommodate dietary needs without sacrificing taste.
Dark Chocolate Delight: Replace white chocolate chips with dark chocolate for a richer, more intense flavor.
Vegan Version: Use plant-based milk and butter, and replace eggs with flaxseed meal mixed with water.
Nutty Addition: Add a handful of chopped almonds or walnuts for a delightful crunch.
Serving Suggestions
Pair with Coffee: A hot cup of coffee complements the cake’s sweetness beautifully.
Chilled Prosecco: Serve with a glass of chilled Prosecco for a touch of elegance.
Fresh Mint Garnish: Add a sprig of fresh mint for a pop of color and refreshing aroma.
Berry Medley: Serve with a side of mixed berries for added freshness and color.
Elegant Plating: Use a cake stand to elevate the presentation and impress your guests.
FAQs about White Chocolate Raspberry Dream Cake
Curious minds often have questions, and I’m here to help! Let’s dive into some common queries about the White Chocolate Raspberry Dream Cake.
Can I use frozen raspberries instead of fresh ones?
Absolutely! Frozen raspberries can be a convenient alternative. Just make sure to thaw and drain them well to prevent excess moisture from affecting the cake’s texture.
How do I store the cake to keep it fresh?
To keep your cake fresh, store it in an airtight container in the refrigerator. It should stay delicious for up to three days. If you want to prepare it in advance, consider freezing the unfrosted layers and assembling the cake closer to serving time.
Can I make this cake gluten-free?
Yes, you can! Substitute the all-purpose flour with a gluten-free flour blend. Ensure it’s a 1:1 replacement to maintain the cake’s texture and structure.
What if I don’t have white chocolate chips?
No worries! You can chop a white chocolate bar into small pieces as a substitute. This will still give you those delightful creamy bursts in every bite.
Is there a way to make the cake less sweet?
If you prefer a less sweet cake, reduce the granulated sugar by a quarter cup. You can also use unsweetened whipped cream for the frosting to balance the sweetness.
Final Thoughts
Baking this White Chocolate Raspberry Dream Cake is like embarking on a delightful culinary journey. Each step, from creaming the butter to folding in those vibrant raspberries, is a labor of love that culminates in a masterpiece. The joy of slicing into this cake and savoring its creamy, tangy layers is truly unparalleled. It’s a dessert that not only satisfies the sweet tooth but also warms the heart. Whether you’re sharing it with loved ones or indulging in a quiet moment of bliss, this cake is a testament to the simple pleasures of life. Enjoy every bite!
Paul
White Chocolate Raspberry Dream Cake Recipe Revealed
A delightful and elegant cake featuring the sweet and creamy combination of white chocolate and fresh raspberries, topped with a light whipped cream frosting.
Preheat your oven to 350°F (175°C). Grease and flour two 9-inch round cake pans.
In a large mixing bowl, cream together the softened butter and granulated sugar until light and fluffy.
Add the eggs one at a time, mixing well after each addition. Stir in the vanilla extract.
In a separate bowl, whisk together the flour, baking powder, and salt. Gradually add this dry mixture to the wet ingredients, alternating with the milk. Mix until just combined.
Gently fold in the white chocolate chips and fresh raspberries.
Divide the batter evenly between the prepared cake pans. Bake for 25-30 minutes, or until a toothpick inserted in the center comes out clean.
Allow the cakes to cool in the pans for 10 minutes before transferring them to a wire rack to cool completely.
While the cakes are cooling, prepare the whipped cream by beating the heavy whipping cream, powdered sugar, and vanilla extract in a mixing bowl until soft peaks form.
Once the cakes are completely cool, place one layer on a serving plate. Spread a layer of whipped cream on top, then place the second layer on top.
Frost the top and sides of the cake with the remaining whipped cream. Garnish with additional raspberries and white chocolate shavings if desired.
Notes
For a richer flavor, try adding a tablespoon of raspberry puree between the layers.
You can also substitute the raspberries with strawberries or blueberries for a different fruit flavor.
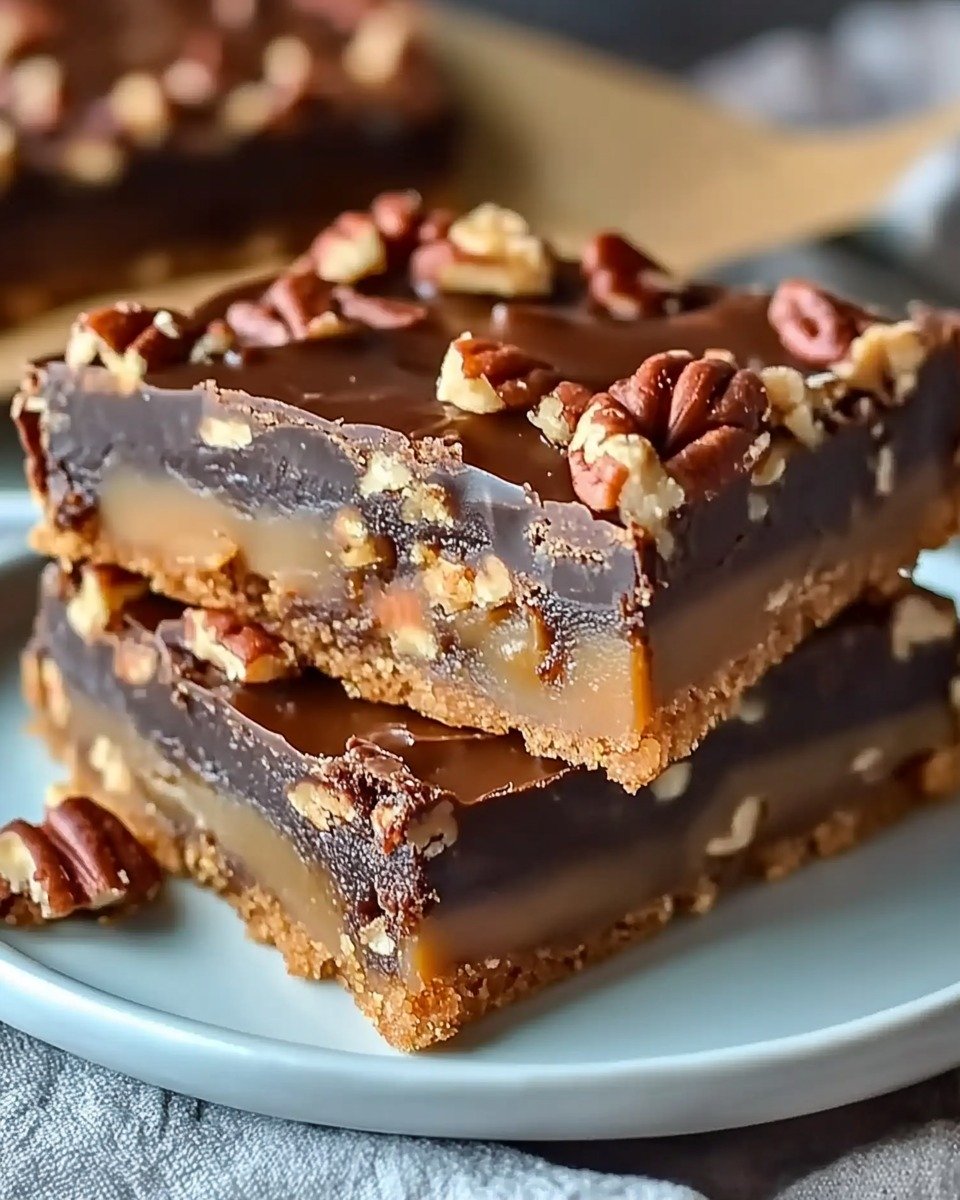
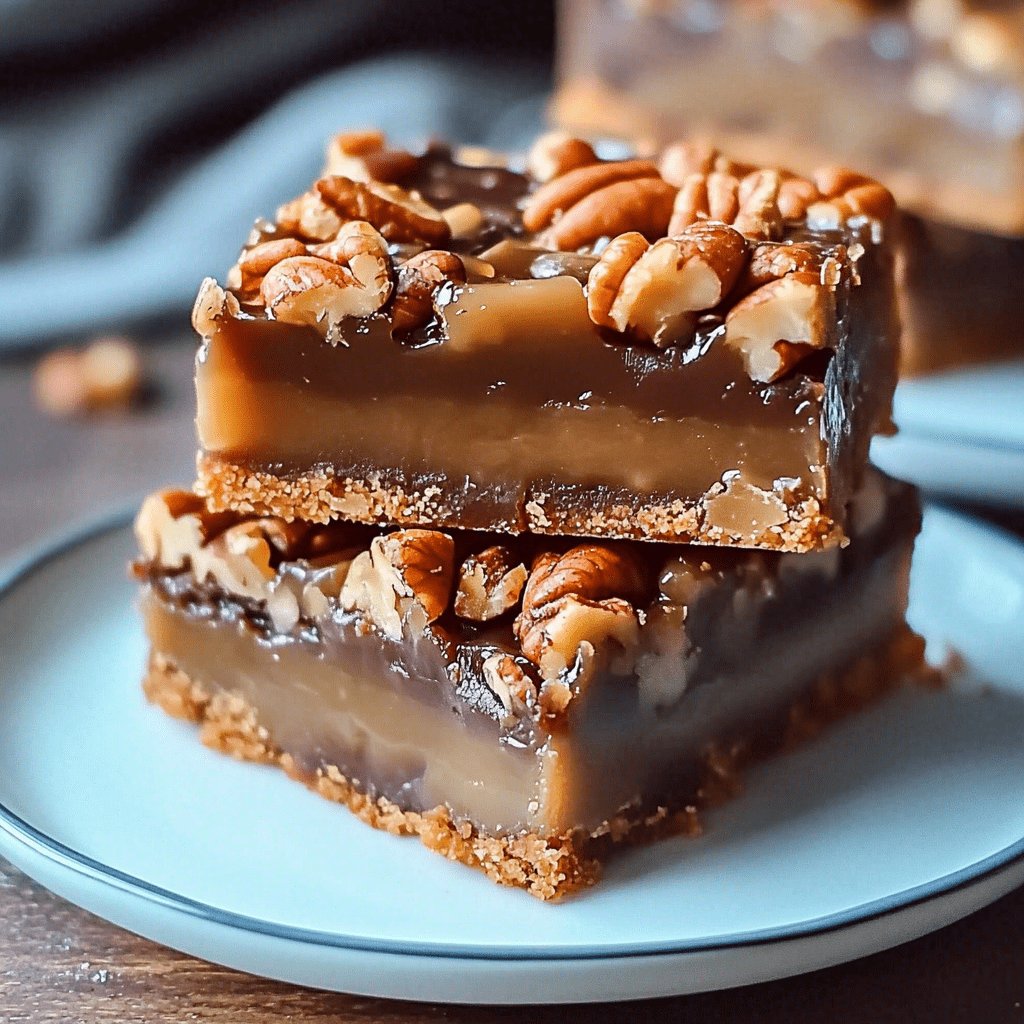
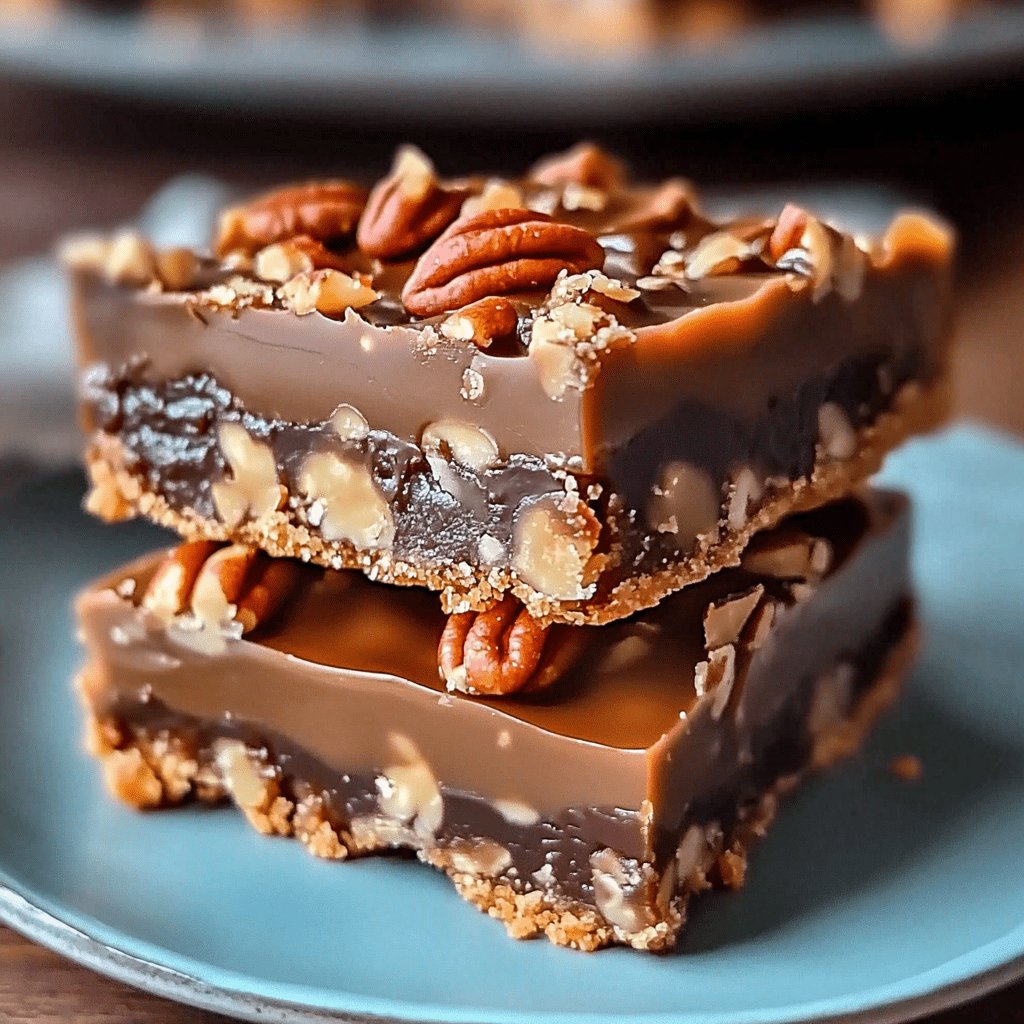
Oh, the joy of biting into a Decadent Pecan Turtle Bar! Imagine the rich, buttery goodness mingling with the sweet embrace of caramel and chocolate. It’s like a warm hug on a chilly day. As a busy mom or professional, I know how precious time is, and these bars are a lifesaver. They’re quick to whip up and perfect for impressing guests or treating yourself after a long day. Whether you’re a seasoned baker or a newbie, this recipe is your ticket to dessert heaven. Let’s dive into this delightful culinary adventure together!
Why You’ll Love This Decadent Pecan Turtle Bars
These Decadent Pecan Turtle Bars are a dream come true for anyone craving a sweet escape. With their irresistible combination of flavors, they offer a delightful balance of crunchy pecans, gooey caramel, and rich chocolate. Plus, they’re a breeze to make, saving you precious time without sacrificing taste. Perfect for busy days or when you need a quick, indulgent treat to brighten your mood!
Ingredients for Decadent Pecan Turtle Bars
Let’s gather the essentials for our Decadent Pecan Turtle Bars. First, you’ll need some unsalted butter, which gives these bars their rich, creamy texture. Granulated sugar and brown sugar add sweetness and a hint of molasses flavor. Eggs are crucial for binding everything together, while vanilla extract infuses a warm, aromatic note.
All-purpose flour forms the base, with baking powder providing a gentle lift. A pinch of salt enhances all the flavors. Chopped pecans bring a delightful crunch, and chocolate chips melt into gooey pockets of bliss. Finally, caramel sauce drizzles its golden magic throughout.
For those who love experimenting, consider adding a sprinkle of sea salt for a savory twist or swapping pecans for walnuts. You can even toss in some shredded coconut for a tropical flair. Remember, the exact quantities are listed at the bottom of the article, ready for printing!
How to Make Decadent Pecan Turtle Bars
Preparing the Batter
Start by preheating your oven to 350°F (175°C). This ensures a warm welcome for our Decadent Pecan Turtle Bars. Next, grab a large mixing bowl and cream together the softened butter, granulated sugar, and brown sugar. Mix until the blend is light and fluffy, like a cloud of sweetness.
Now, add the eggs one at a time, mixing well after each addition. This step is crucial for a smooth batter. Stir in the vanilla extract, letting its aroma fill the air. In a separate bowl, whisk together the flour, baking powder, and salt. Gradually add these dry ingredients to the wet mixture, mixing until just combined. Be gentle; overmixing can make the bars tough.
Layering the Ingredients
With the batter ready, it’s time to layer the magic. Spread half of the batter evenly into a greased 9×13-inch baking dish. This forms the foundation of our delicious creation. Drizzle half of the caramel sauce over the batter, letting it weave its golden threads.
Next, fold in the chopped pecans and chocolate chips into the remaining batter. Spoon this mixture over the caramel layer, spreading it gently. Finish with a final drizzle of the remaining caramel sauce on top. This layering creates a symphony of flavors in every bite.
Baking to Perfection
Place the dish in your preheated oven and bake for 25-30 minutes. Keep an eye on it; the bars are ready when a toothpick inserted into the center comes out with a few moist crumbs. This ensures a chewy, not dry, texture.
Once baked, let the bars cool in the pan for at least 15 minutes. This patience pays off, making cutting into squares a breeze. Now, you’re ready to enjoy the fruits of your labor. These bars are a testament to the joy of baking, offering a sweet escape with every bite.
Tips for Success
Ensure your butter is softened for easy mixing and a smooth batter.
Use room temperature eggs to help the batter blend evenly.
Don’t overmix the batter; it should be just combined for a tender texture.
For easy cutting, let the bars cool completely before slicing.
Store leftovers in an airtight container to keep them fresh and chewy.
Equipment Needed
Large mixing bowl – or use a stand mixer for convenience.
Whisk – a fork can work in a pinch.
9×13-inch baking dish – a similar-sized pan will do.
Spatula – or a large spoon for spreading batter.
Oven – preheated to 350°F (175°C) for perfect baking.
Variations
For a nut-free version, replace pecans with sunflower seeds or omit them entirely.
Swap chocolate chips for white chocolate or butterscotch chips for a different flavor profile.
Use gluten-free flour to make these bars suitable for those with gluten sensitivities.
Add a teaspoon of cinnamon to the batter for a warm, spiced twist.
Incorporate dried cranberries or cherries for a fruity contrast to the caramel and chocolate.
Serving Suggestions
Pair these bars with a scoop of vanilla ice cream for an extra indulgent treat.
Serve alongside a hot cup of coffee or tea to balance the sweetness.
For a festive touch, dust with powdered sugar before serving.
Arrange on a decorative platter for a stunning dessert table centerpiece.
Wrap individually in parchment paper for a delightful homemade gift.
FAQs about Decadent Pecan Turtle Bars
Can I make these Decadent Pecan Turtle Bars ahead of time?
Absolutely! These bars are perfect for making ahead. Simply bake them, let them cool completely, and store in an airtight container. They’ll stay fresh and chewy for up to a week, making them a convenient treat for busy days.
What can I use if I don’t have caramel sauce?
No worries! You can make a quick homemade caramel sauce using sugar, butter, and cream. Alternatively, a store-bought dulce de leche works beautifully as a substitute, adding a rich, creamy layer to your bars.
How do I prevent the bars from sticking to the pan?
To ensure easy removal, grease your baking dish well with butter or non-stick spray. For extra assurance, line the bottom with parchment paper, leaving some overhang to lift the bars out effortlessly once cooled.
Can I freeze Decadent Pecan Turtle Bars?
Yes, you can! Wrap individual bars in plastic wrap and place them in a freezer-safe bag. They’ll keep for up to three months. When you’re ready to enjoy, thaw them at room temperature or warm them slightly in the oven.
Are there any dietary adaptations for these bars?
Indeed! For a gluten-free version, substitute the all-purpose flour with a gluten-free blend. You can also use dairy-free butter and chocolate chips to accommodate those with dairy sensitivities, ensuring everyone can savor these delightful treats.
Final Thoughts
As I reflect on the joy these Decadent Pecan Turtle Bars bring, I can’t help but smile. They’re more than just a dessert; they’re a little slice of happiness, a sweet escape from the hustle and bustle of daily life. Whether you’re sharing them with loved ones or savoring a quiet moment alone, these bars are a testament to the magic of home baking. The combination of pecans, chocolate, and caramel creates a symphony of flavors that dance on your taste buds. So, go ahead, indulge yourself, and let these bars be your delicious reward for a day well-lived.
Paul
Decadent Pecan Turtle Bars: Discover the Ultimate Treat!
Decadent Pecan Turtle Bars are a delicious treat combining the flavors of pecans, chocolate, and caramel in a soft, chewy bar.
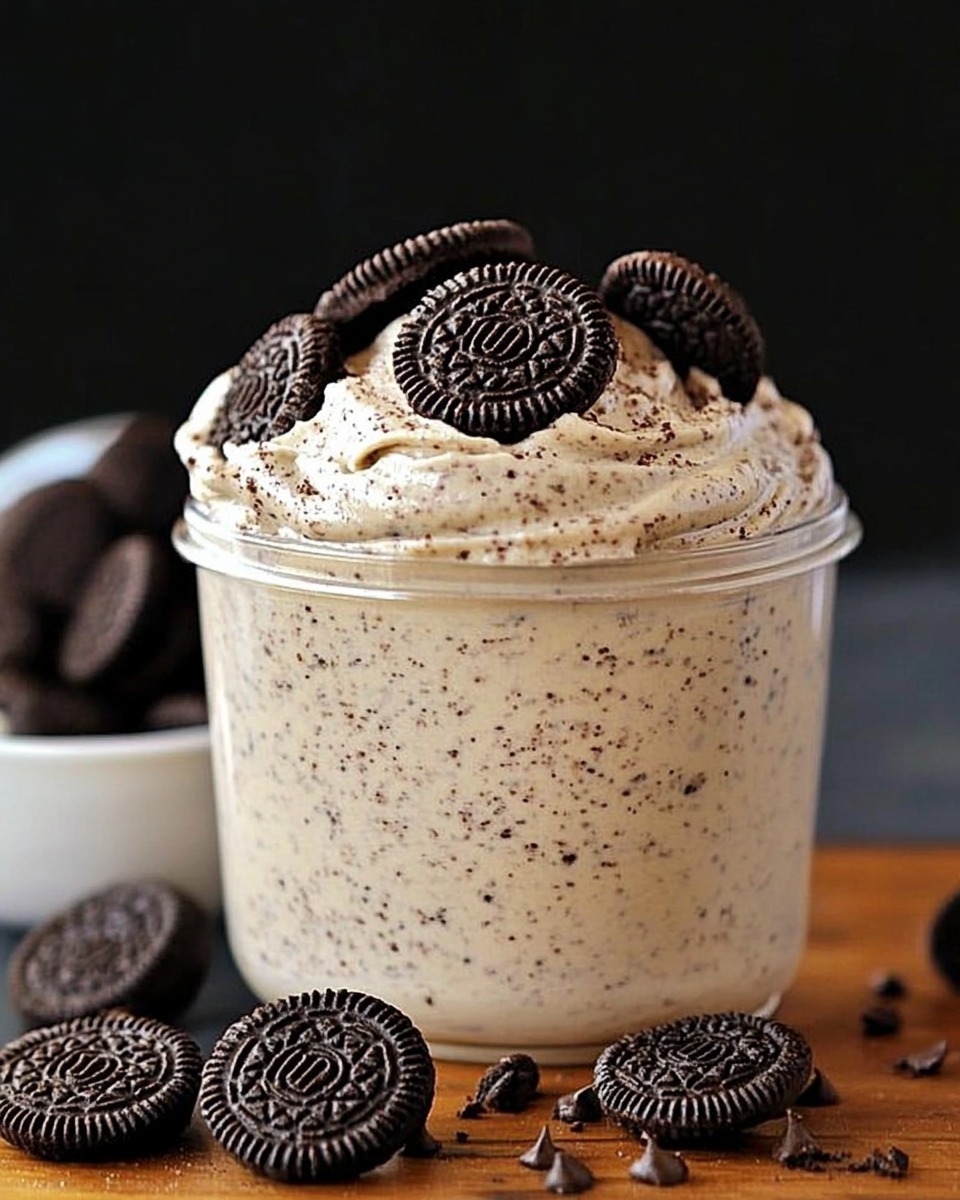
If you’re looking for a quick and indulgent dessert, this Creamy Oreo Mousse is your answer! Combining the rich flavor of Oreos with a luscious, airy texture, this no-bake treat is perfect for parties, potlucks, or a cozy night in. With simple ingredients and an easy process, this recipe is a surefire way to satisfy your sweet cravings.
Ingredients
Refrigerated
3 large egg yolks
Condiments
3 tablespoons butter (or vegan butter)
Baking & Spices
2 tablespoons cornstarch
¼ teaspoon salt
⅓ cup sugar
1 tablespoon vanilla extract
Snacks
26 Oreos (regular or gluten-free)
Dairy
1 ¼ cups milk
1 9 oz tub whipped topping
Instructions
Step 1: Create the Oreo Crumble
Place 20 Oreos in a food processor and pulse until fine crumbs form.
Reserve 2-3 tablespoons of the crumbs for garnish. Set the rest aside for layering.
Step 2: Make the Cream Base
In a medium saucepan, whisk together the sugar, cornstarch, and salt.
Gradually whisk in the milk and egg yolks until smooth.
Cook over medium heat, stirring constantly, until the mixture thickens and bubbles. This should take about 5-7 minutes.
Remove the saucepan from heat and stir in the butter and vanilla until fully incorporated.
Transfer the mixture to a bowl and cover with plastic wrap, pressing it directly onto the surface to prevent a skin from forming. Let it cool completely.
Step 3: Fold in the Whipped Topping
Once the cream base has cooled, gently fold in the whipped topping until smooth and fluffy. Be careful not to overmix to keep the mousse light and airy.
Step 4: Assemble the Mousse
In serving glasses or bowls, layer the Oreo crumbs and mousse alternately, starting with a layer of crumbs.
Repeat until the glasses are filled, finishing with a mousse layer on top.
Step 5: Garnish and Chill
Crumble the remaining 6 Oreos and sprinkle them on top of the mousse.
Add the reserved Oreo crumbs for an extra decorative touch.
Chill in the refrigerator for at least 2 hours to allow the flavors to meld and the mousse to set.
Conclusion
This Creamy Oreo Mousse is the perfect blend of crunchy and creamy, with the iconic flavor of Oreos taking center stage. It’s a crowd-pleasing dessert that requires minimal effort yet delivers maximum satisfaction. Serve it chilled and watch it disappear in seconds! Whether you’re entertaining guests or treating yourself, this Oreo Mousse is sure to become a favorite. Enjoy every spoonful!
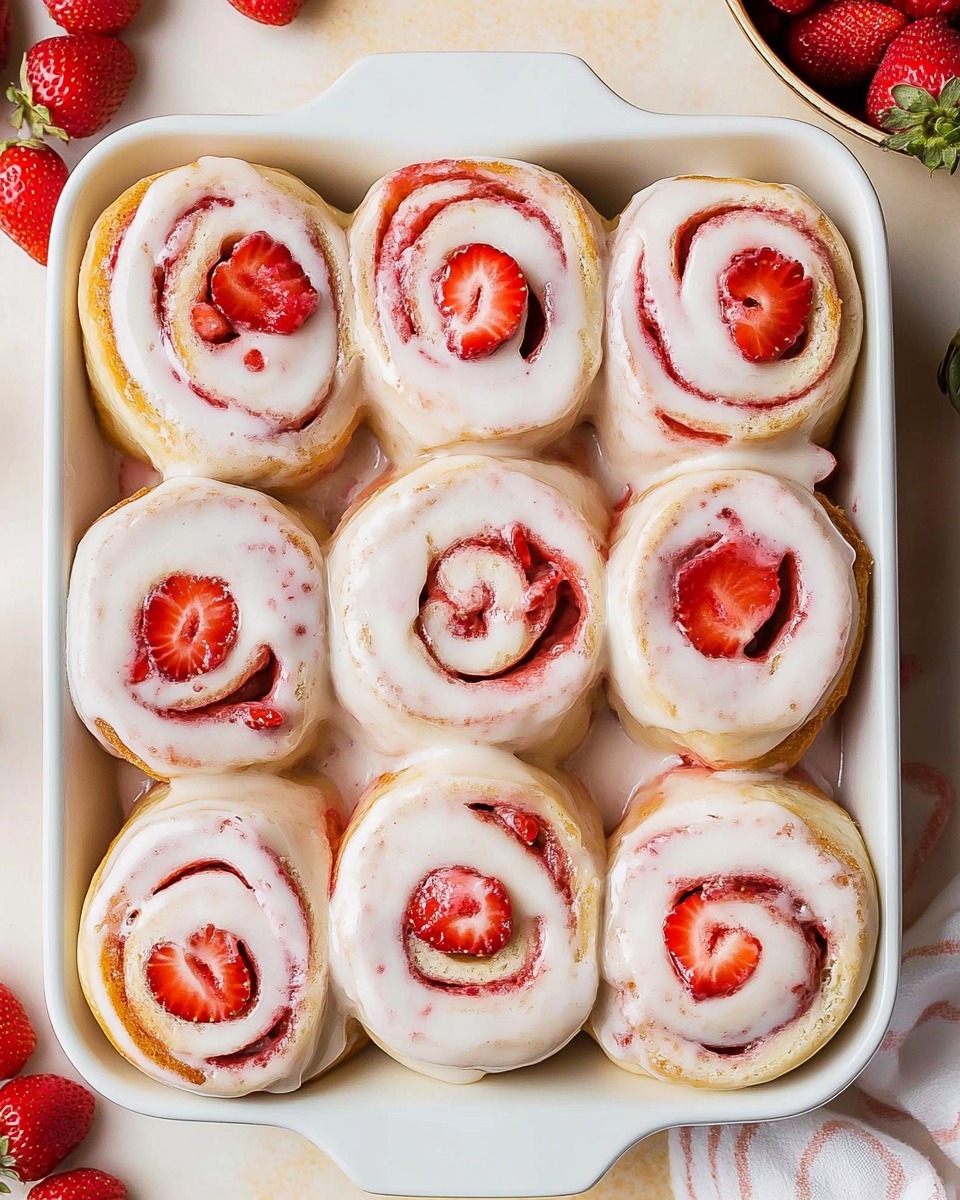
Indulge in the delightful combination of soft, pillowy dough and sweet, tangy strawberry jam with these Fresh Strawberry Rolls. Topped with a zesty lemon cream cheese icing, these rolls are a perfect treat for breakfast, brunch, or dessert. Bursting with fresh flavors, this recipe is a fruity twist on a classic cinnamon roll, sure to impress family and friends.
Ingredients
For the Dough
1 cup whole milk, warmed (105°-110°F)
2 ¼ teaspoons active dry yeast
¼ teaspoon sugar (to activate the yeast)
6 tablespoons unsalted butter, melted
2 large eggs, room temperature
½ cup white granulated sugar
4 cups all-purpose flour (add more if dough is sticky)
1 teaspoon salt
For the Strawberry Jam
2 cups fresh strawberries, washed, hulled, and sliced
1 teaspoon fresh lemon juice
⅓ cup white granulated sugar
1 tablespoon water
2 tablespoons cornstarch
For the Lemon Cream Cheese Icing
4 oz cream cheese, softened
2 tablespoons butter, softened
1 cup powdered sugar
Zest of 1 lemon
2 tablespoons whole milk
Instructions
Step 1: Prepare the Dough
In a small bowl, combine the warmed milk, yeast, and ¼ teaspoon sugar. Let sit for 5-10 minutes until frothy.
In a spacious bowl, whisk together the melted butter, eggs, and ½ cup of sugar. Stir in the yeast mixture and blend until well incorporated.
Slowly add the flour and salt, stirring until a soft dough begins to form. Knead the dough for about 5-7 minutes until it becomes smooth and elastic. If the dough feels too sticky, incorporate extra flour, one tablespoon at a time.
Place the dough in a greased bowl, cover, and let rise in a warm place for 1-2 hours, or until doubled in size.
Step 2: Make the Strawberry Jam
In a medium saucepan, combine the strawberries, lemon juice, sugar, and water. Heat over medium heat, stirring occasionally, until the strawberries soften and release their juices, about 5-7 minutes.
In a small bowl, dissolve the cornstarch in a little water to form a slurry, then stir it into the saucepan.
Cook, stirring constantly, until the mixture thickens.
Step 3: Assemble the Rolls
After the dough has fully risen, turn it out onto a floured surface and roll it into a large rectangle, approximately 12×16 inches in size.
Spread the cooled strawberry jam evenly over the dough, leaving a small border around the edges.
Roll the dough tightly from one long edge to the other, creating a log. Slice into 12 even pieces.
Arrange the rolls in a greased 9×13-inch baking dish. Cover them and allow to rise for an additional 30-45 minutes, or until they become light and puffy.
Step 4: Bake the Rolls
Preheat your oven to 350°F (175°C).
Bake the rolls for 25-30 minutes, or until golden brown. Remove from the oven and let cool slightly.
Step 5: Prepare the Lemon Cream Cheese Icing
In a bowl, blend the softened cream cheese and butter together until smooth and creamy.
Gradually add the powdered sugar, lemon zest, and milk, mixing until the frosting reaches a smooth and spreadable consistency.
Step 6: Frost and Serve
Spread the lemon cream cheese icing generously over the warm rolls.
Serve and enjoy the fruity, zesty goodness!
Conclusion
These Fresh Strawberry Rolls are the perfect combination of sweetness and tanginess, wrapped in a soft, fluffy dough. The homemade strawberry jam and lemon-infused cream cheese icing elevate this classic treat into a gourmet delight. Perfect for weekend mornings, celebrations, or just because, these rolls are sure to become a new favorite in your baking repertoire.