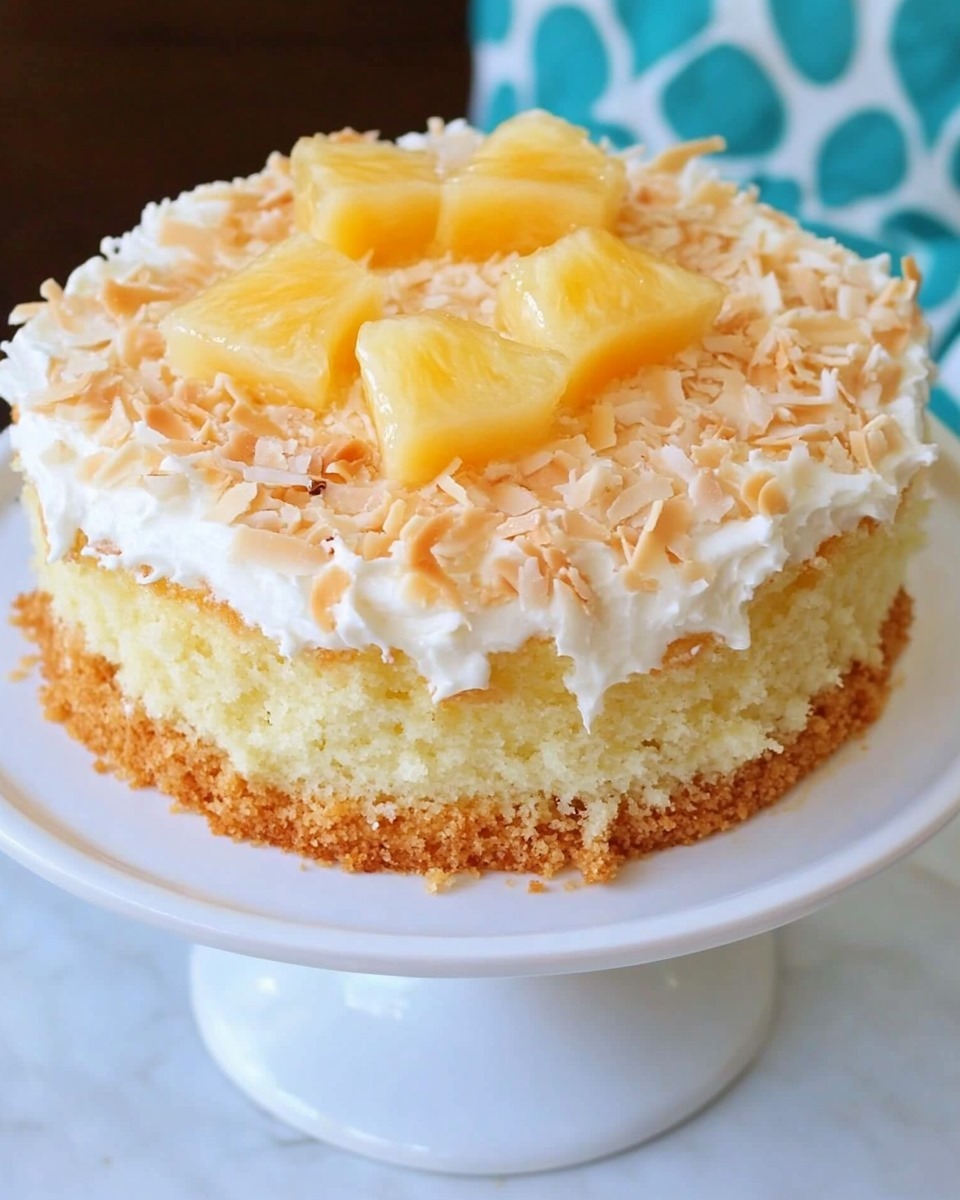
Tropical Pineapple Coconut Bliss Cake

Transport your taste buds to a tropical paradise with this luscious Pineapple Coconut Bliss Cake. A decadent combination of pineapple, creamy coconut, and velvety pudding layers, this poke cake is perfect for any celebration or as a special treat to brighten your day. With its delightful flavors and vibrant presentation, it’s bound to be a hit at your table.

Ingredients

  • 1 (15.25 oz) box of French vanilla or yellow cake mix (prepare according to the instructions, using eggs and oil, and substitute pineapple juice for the water)
  • 1 (20 oz) can of crushed pineapple, drained (save the juice for the cake mix)
  • 1 (3.4 oz) package coconut cream instant pudding mix
  • 1 (3.4 oz) package vanilla instant pudding mix
  • 4 cups milk
  • ½ cup sweetened coconut flakes (toasted for extra flavor)
  • 1 (16 oz) container frozen whipped topping (or 3 cups freshly whipped cream)
  • Maraschino cherries and/or pineapple slices (optional, for garnish)

Instructions

  1. Prepare the Cake Base:
    Set your oven to the temperature specified on the cake mix package. Lightly grease a 9×13-inch baking pan. Follow the cake mix directions, replacing the water with the reserved pineapple juice to enhance the flavor. Bake as instructed, then let the cake cool completely before serving.
  2. Poke and Infuse:
    Once the cake is cooled, use the handle of a wooden spoon or a similar utensil to poke evenly spaced holes throughout the cake. Aim for about 1-inch intervals to allow the pudding mixture to seep in nicely.
  3. Prepare the Creamy Pudding Layers:
    In a large mixing bowl, whisk together the coconut cream pudding mix, vanilla pudding mix, and milk until smooth and slightly thickened. Pour this pudding mixture evenly over the cake, ensuring it fills the holes for a moist and flavorful texture.
  4. Add Pineapple and Chill:
    Evenly spread the drained crushed pineapple over the pudding layer. Cover the cake with plastic wrap and refrigerate for at least 2–3 hours, allowing the flavors to meld and the pudding to set.
  5. Top with Cream and Coconut:
    Once chilled, spread the whipped topping (or fresh whipped cream) evenly over the entire cake. Sprinkle the toasted coconut flakes generously on top for a crunchy, nutty flavor contrast.
  6. Decorate and Serve:
    If desired, garnish the cake with maraschino cherries and pineapple slices for a festive and tropical flair. Serve chilled and enjoy the burst of island-inspired flavors in every bite!

Conclusion

Tropical Pineapple Coconut Bliss Cake is the perfect dessert to bring sunshine to any occasion. Its rich layers of fruity and creamy goodness combined with the toasty coconut topping make it irresistibly indulgent yet light enough to enjoy a second slice. Whether you’re hosting a party or treating yourself, this poke cake promises to deliver a slice of paradise every time.
Zesty Lemon Cloud Delight

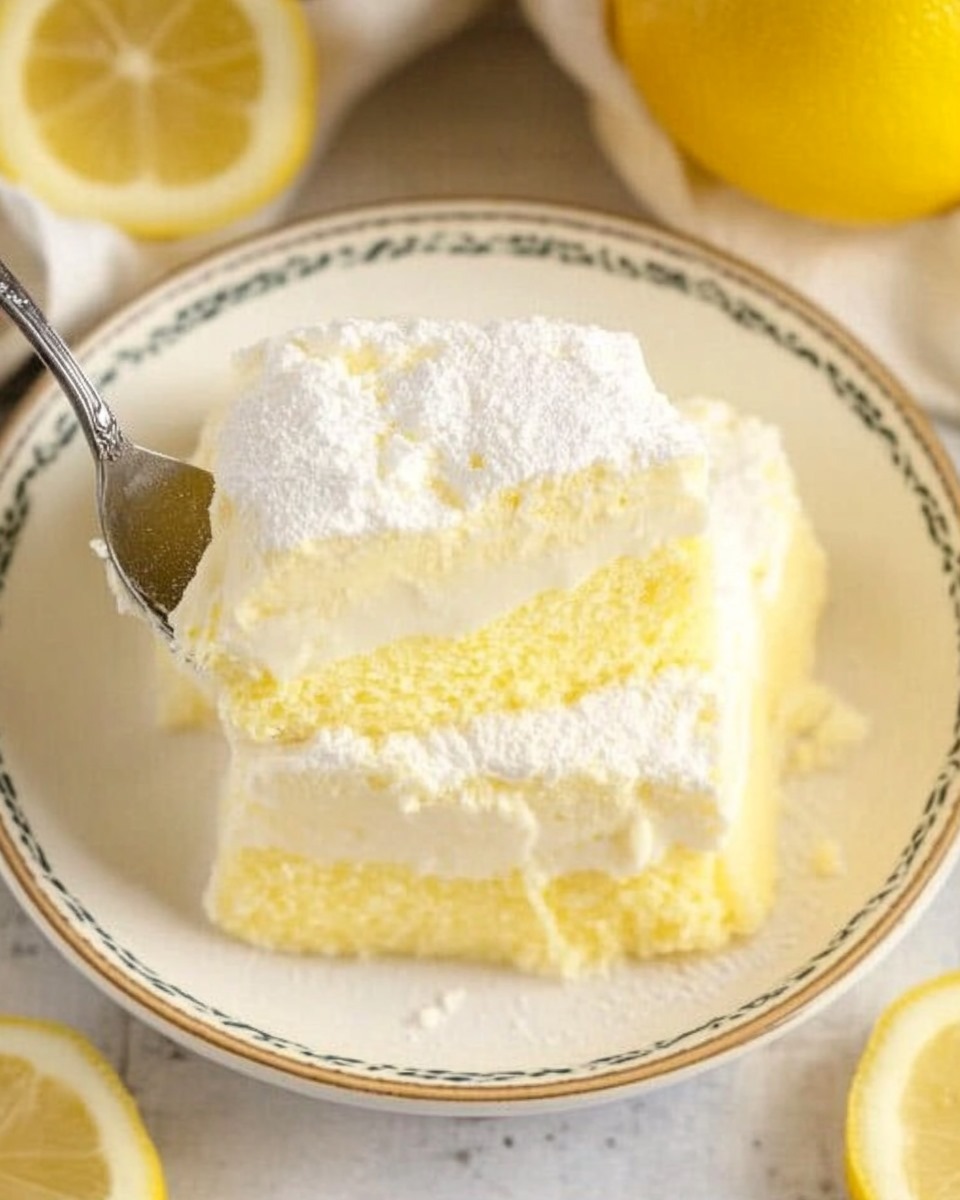
When you’re craving a dessert that’s light, refreshing, and perfect for any occasion, this Zesty Lemon Cloud Delight is your answer. With a burst of citrus, a creamy texture, and just the right hint of sweetness, this dish is a crowd-pleaser that’s both elegant and easy to make. Let this zesty treat transport you to a sunny paradise with every bite.

Ingredients

  • 2 packs (3 oz each) lemon-flavored gelatin
  • 2 cups boiling water
  • 8 oz cream cheese, softened
  • 20 oz canned crushed pineapple (with juice)
  • 16 oz whipped topping (use 12 oz for the mixture, save 4 oz for garnish)

Instructions

  1. Prepare the Base:
    In a large mixing bowl, dissolve the lemon gelatin in the boiling water. Stir thoroughly until all the crystals are completely dissolved, ensuring a smooth consistency. Set the mixture aside to cool slightly, but do not allow it to set.
  2. Create the Creamy Blend:
    In a separate bowl, beat the softened cream cheese using either a hand or stand mixer until it becomes light and smooth. Gradually incorporate the cooled lemon gelatin mixture into the cream cheese, ensuring to mix constantly. This process ensures a silky, smooth texture without any lumps.
  3. Add Fruity Sweetness:
    Gently fold in the crushed pineapple, including its juice, to infuse the mixture with a natural sweetness and a bit of texture.
  4. Incorporate Whipped Topping:
    Carefully fold in 12 ounces of the whipped topping, reserving the remaining 4 ounces for garnish. This step will give your dessert a light, airy consistency that lives up to its name.
  5. Chill and Set:
    Transfer the mixture into a large serving dish or individual dessert cups. Cover and refrigerate for at least 4 hours, or until fully set and firm.
  6. Finish with a Flourish:
    Just before serving, add the reserved whipped topping to the cooled dessert. For an elegant finishing touch, garnish with a light dusting of lemon zest or a thin slice of fresh lemon.

Conclusion

Zesty Lemon Cloud Delight is a perfect fusion of bright citrus flavor and velvety texture, making it a versatile dessert for gatherings, holidays, or simply when you need a treat that feels special. Not only is it incredibly simple to prepare, but its vibrant flavor and light-as-air consistency will leave everyone asking for seconds. Give this recipe a try, and bask in the delight of a dessert that’s as delightful to look at as it is to eat!

Decadent Black Velvet Cake

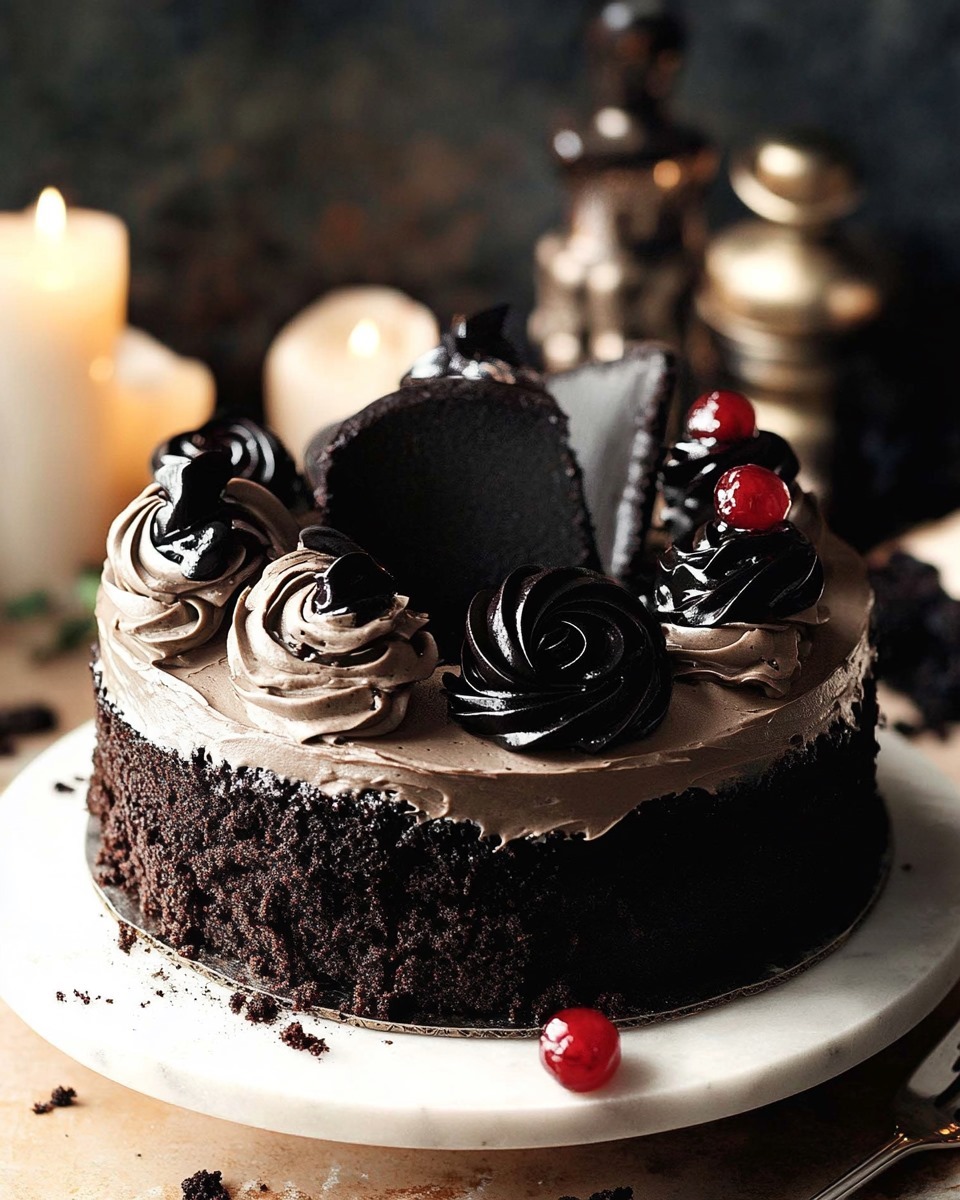
Elevate your dessert repertoire with this Decadent Black Velvet Cake, a rich, dark, and intensely chocolatey treat that’s perfect for any occasion. The cake’s unique black cocoa flavor is enhanced by espresso and a hint of coffee, while its fluffy texture pairs beautifully with a luscious Oreo frosting. This dessert is a show-stopper for celebrations or a decadent indulgence for yourself.

Ingredients

For the Black Velvet Cake:

  • 1½ cups black cocoa powder
  • ⅔ cup hot coffee
  • ⅔ cup hot whole milk
  • 2 teaspoons espresso powder
  • ⅔ cup vegetable oil
  • ½ cup salted butter, melted
  • 2 cups granulated sugar
  • ¼ cup brown sugar
  • 2½ cups all-purpose flour
  • 2 teaspoons baking powder
  • ½ teaspoon baking soda
  • 1 teaspoon kosher salt
  • 3 large eggs, room temperature
  • 2 egg yolks, room temperature
  • 2½ teaspoons vanilla extract
  • ½ cup sour cream, room temperature
  • ½ cup milk, room temperature

For the Oreo Frosting:

  • 1½ cups butter, room temperature
  • 7 cups powdered sugar
  • 2 teaspoons vanilla extract
  • Pinch of salt
  • 16 oz cream cheese, cold
  • 8 Oreo cookies, crushed

Instructions

Step 1: Prepare the Cake Batter

  1. Prepare the Oven: Set your oven to 350°F (175°C) and grease three 8-inch round cake pans. Line the bottoms with parchment paper for easy removal.
  2. Combine Cocoa and Liquids: In a medium bowl, whisk together the black cocoa powder, hot coffee, hot milk, and espresso powder until smooth. Let the mixture cool slightly.
  3. Mix the Wet Ingredients: In a large bowl, whisk together the vegetable oil, melted butter, granulated sugar, and brown sugar. Add the eggs and egg yolks one at a time, mixing well after each addition. Stir in the vanilla extract.
  4. Mix Dry Ingredients: In a separate bowl, whisk together the flour, baking powder, baking soda, and salt, ensuring everything is evenly combined.
  5. Incorporate Dry and Wet: Gradually mix the dry ingredients into the wet mixture, alternating with the cocoa mixture. Begin and end with the dry ingredients.
  6. Add Dairy: Fold in the sour cream and room-temperature milk until the batter is smooth and well combined.

Step 2: Bake the Cakes

  1. Divide the Batter: Evenly distribute the batter among the prepared pans.
  2. Bake: Bake for 25–30 minutes, or until a toothpick inserted into the center of the cakes comes out clean.
  3. Cool: Allow the cakes to cool in the pans for 10 minutes, then transfer them to a wire rack to cool completely.

Step 3: Make the Oreo Frosting

  1. Beat the Butter: In a large mixing bowl, beat the room-temperature butter until creamy.
  2. Add Sugar and Vanilla: Gradually add the powdered sugar, one cup at a time, beating well between each addition.
  3. Incorporate Cream Cheese: Add the cold cream cheese and beat until the frosting is smooth and fluffy.
  4. Fold in Crushed Oreos: Gently fold in the crushed Oreo cookies until evenly distributed.

Step 4: Assemble the Cake

  1. Layer the Cakes: Place one cake layer on a serving plate or cake stand. Spread a generous layer of Oreo frosting on top. Repeat with the second and third layers.
  2. Frost the Exterior: Spread the remaining frosting over the top and sides of the cake, smoothing it with a spatula.
  3. Decorate: Garnish with additional crushed Oreos or whole cookies for a stunning finish.

Conclusion

This Decadent Black Velvet Cake is a feast for the eyes and the taste buds. Its moist, chocolate-rich layers and creamy Oreo frosting make it a dessert to remember. Whether served at a party or enjoyed as a decadent treat, this cake is guaranteed to impress and satisfy any chocolate lover’s cravings.

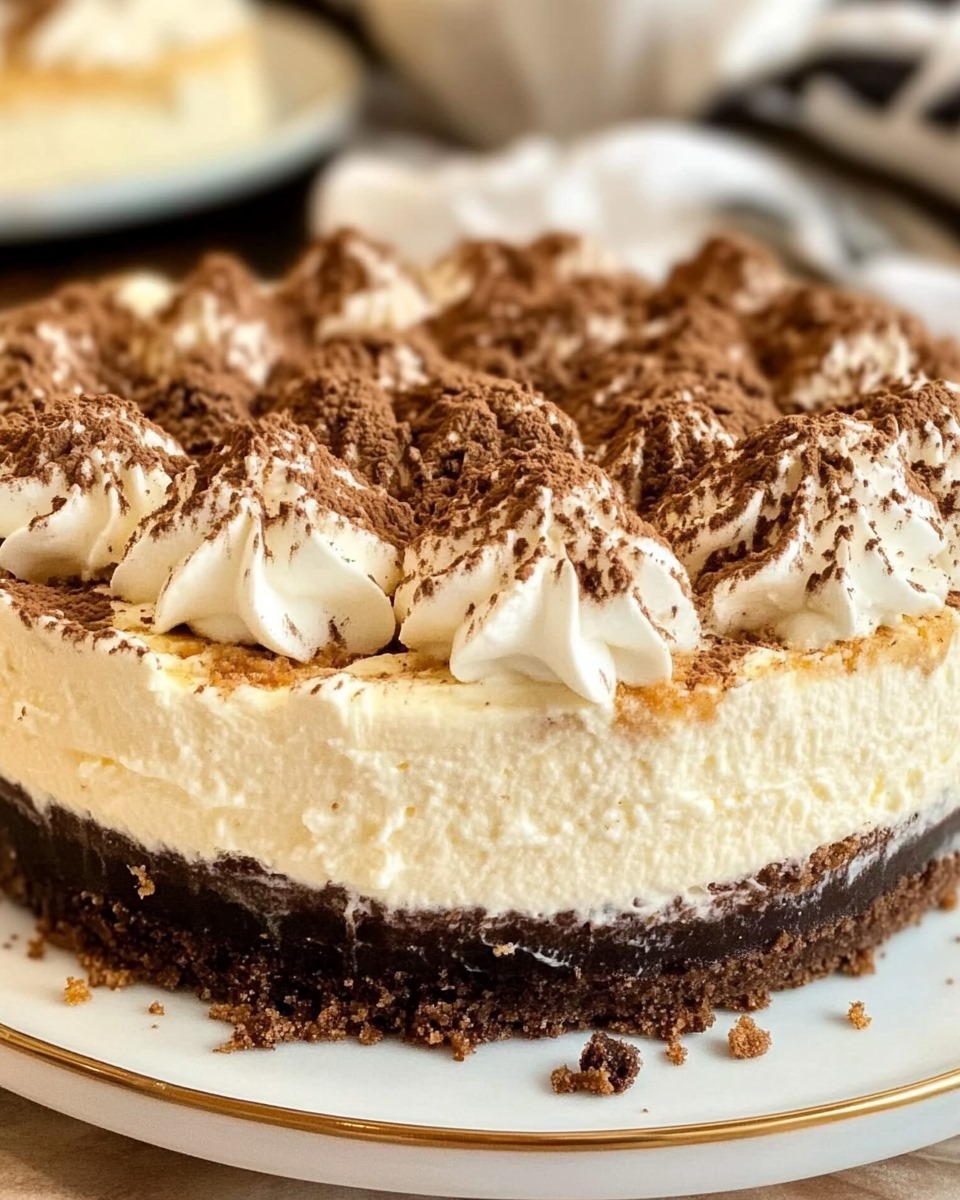
Creamy Tiramisu Cheesecake

Indulge in the best of both worlds with this Decadent Tiramisu Cheesecake, blending the classic flavors of tiramisu with the smoothness of cheesecake. The creamy filling sits atop a coffee-flavored crust, complemented by layers of espresso-dipped ladyfingers for that signature tiramisu taste. Finished with a light sprinkle of cocoa powder, this luxurious dessert is an exquisite treat that will elevate any occasion.

Ingredients

For the Crust:

  • 30 Oreo cookies (crumbs)
  • 7 tablespoons unsalted butter, melted
  • ½ teaspoon espresso powder

For the Cheesecake Filling:

  • 20.1 oz cream cheese, room temperature, full fat
  • 10.5 oz mascarpone cheese, room temperature
  • 1¼ cup heavy cream, cold
  • 1⅓ cup powdered sugar
  • 2 teaspoons vanilla extract
  • 2 tablespoons instant vanilla pudding mix
  • ⅓ cup sour cream

For Assembly:

  • 10 ladyfingers
  • 1–2 tablespoons cocoa powder (for dusting)
  • 1 cup brewed espresso, cooled
  • 1 tablespoon Kahlua (optional)

Instructions

Step 1: Prepare the Crust

  1. Preheat the Oven: Preheat your oven to 325°F (165°C). Grease the bottom of a 9-inch springform pan and line it with parchment paper if desired.
  2. Make the Crust Mixture: In a bowl, combine the Oreo crumbs, melted butter, and espresso powder. Mix until the crumbs are evenly moistened.
  3. Form the Crust: Press the mixture firmly into the bottom of the prepared springform pan. Bake for 8–10 minutes, then set aside to cool completely.

Step 2: Make the Cheesecake Filling

  1. Beat the Cream Cheese and Mascarpone: In a large mixing bowl, beat the cream cheese and mascarpone together until smooth and creamy, about 2–3 minutes.
  2. Add Sweeteners and Flavorings: Mix in the powdered sugar, vanilla extract, and sour cream until fully combined.
  3. Incorporate Heavy Cream: In a separate bowl, whip the cold heavy cream with the instant vanilla pudding mix until soft peaks form.

Step 3: Assemble the Cheesecake

  1. Layer the Ladyfingers: Dip each ladyfinger briefly into the cooled espresso (mixed with Kahlua, if using). Arrange them in a single layer over the cooled crust.
  2. Add the Cheesecake Filling: Pour half of the cheesecake filling over the ladyfingers, spreading it evenly. Add another layer of dipped ladyfingers, then top with the remaining cheesecake filling. Smooth the surface with a spatula.

Step 4: Chill the Cheesecake

  1. Chill: Wrap the cheesecake tightly in plastic wrap and refrigerate for a minimum of 6 hours, or overnight, to ensure it sets completely.

Step 5: Decorate and Serve

  1. Sprinkle with Cocoa: Just before serving, sift a generous layer of cocoa powder over the top of the cheesecake using a fine mesh strainer.
  2. Slice and Serve: Use a warm knife for clean slices, and serve chilled.

Conclusion

This Creamy Tiramisu Cheesecake is a fusion of two classic desserts, delivering bold espresso flavors and a silky cheesecake texture. The Oreo crust, layers of espresso-soaked ladyfingers, and mascarpone-rich filling create a truly luxurious treat. Perfect for gatherings, holidays, or as a special indulgence, this cheesecake will impress your guests and satisfy your cravings for a decadent dessert.

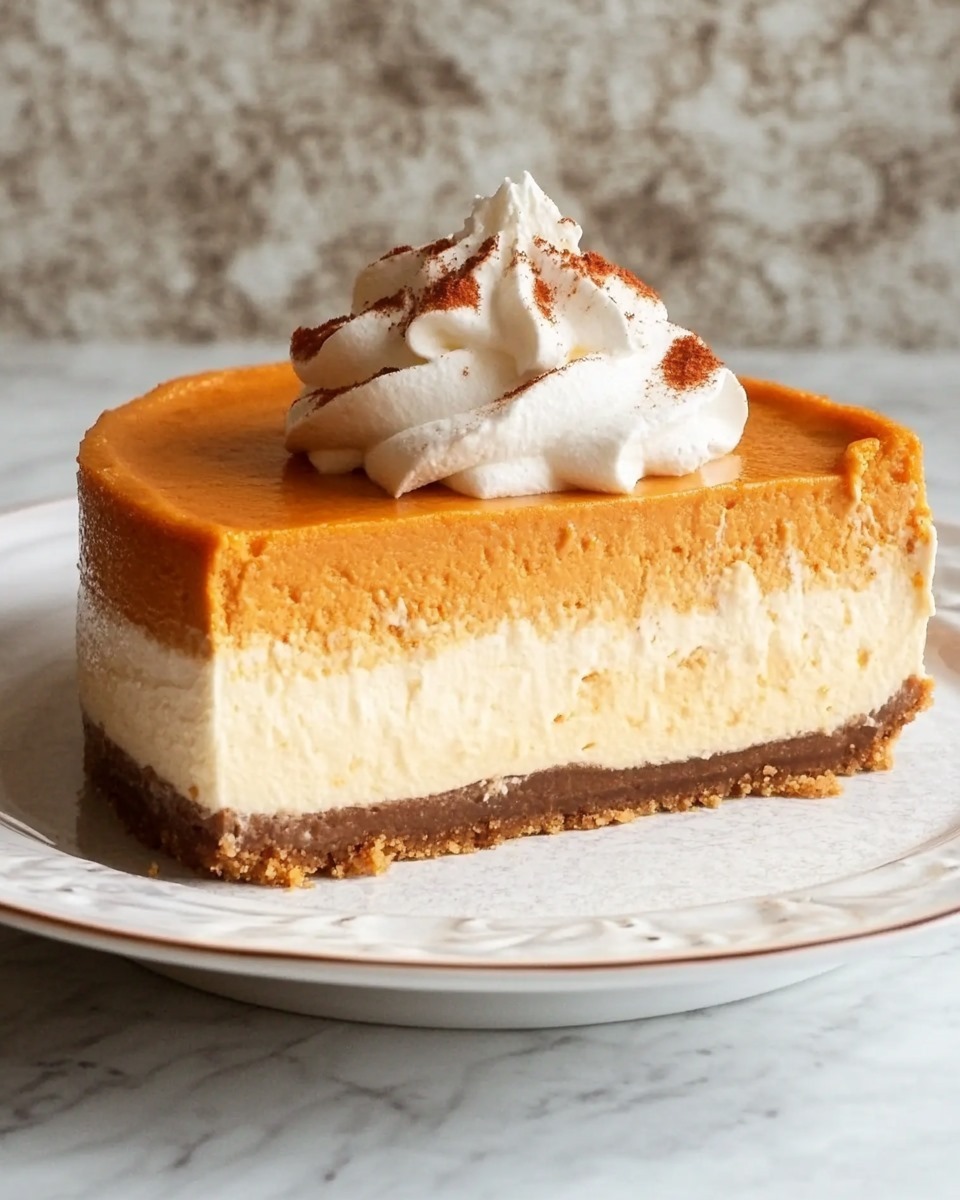
Best Roasted Sweet Potato Cheesecake

Elevate your dessert repertoire with this Best Roasted Sweet Potato Cheesecake. Combining the natural sweetness of roasted sweet potatoes with a creamy, spiced cheesecake filling, and a crunchy gingersnap crust, this dessert is a delightful twist on a classic favorite. Topped with honey vanilla whipped cream and a drizzle of caramel sauce, it’s a show-stopper for any holiday gathering or special occasion.

Ingredients

For the Gingersnap Crust:

  • 14 ounces gingersnap cookies
  • 2 tablespoons granulated sugar
  • ½ cup (1 stick) unsalted butter, melted

For the Sweet Potato Cheesecake Batter:

  • 3 medium sweet potatoes, roasted, peeled, and pureed (about 2 cups)
  • 32 ounces full-fat cream cheese, room temperature
  • 1 cup packed dark brown sugar
  • ¾ cup granulated sugar
  • 4 large eggs, room temperature
  • 1 cup full-fat sour cream, room temperature
  • 1 tablespoon vanilla bean paste (or vanilla extract)
  • 1 teaspoon maple flavor (or maple extract)
  • 2 teaspoons ground cinnamon
  • 1 teaspoon ground nutmeg
  • 1 teaspoon ground ginger
  • 1 teaspoon ground cardamom
  • ½ teaspoon kosher salt
  • 2 tablespoons cornstarch (or all-purpose flour)

For the Cheesecake Topping (Optional):

  • 1 cup heavy whipping cream
  • 1 tablespoon honey
  • 1 tablespoon vanilla bean paste
  • Homemade or store-bought caramel sauce

Instructions

Step 1: Prepare the Gingersnap Crust

  1. Prepare the Oven: Set your oven to 350°F (175°C) and allow it to fully heat up.Grease a 9-inch springform pan and line the bottom with parchment paper.
  1. Crush the Cookies: In a food processor, pulse the gingersnap cookies into fine crumbs.
  2. Combine the Crust Ingredients: In a mixing bowl, stir together the gingersnap crumbs, sugar, and melted butter until the mixture has a moist, sandy texture.
  3. Press into the Pan: Firmly press the crumb mixture into the bottom of the springform pan, extending it slightly up the sides.
  4. Bake: Bake the crust for 8–10 minutes, then allow it to cool completely while you prepare the cheesecake filling.

Step 2: Prepare the Sweet Potato Cheesecake Batter

  1. Roast the Sweet Potatoes: Roast the sweet potatoes at 400°F (200°C) for about 45 minutes or until soft. Peel and puree the sweet potatoes in a food processor or blender until smooth.
  2. Cream the Cheese: In a large bowl, beat the cream cheese for 2-3 minutes until it’s smooth and creamy.
  3. Combine the Sugars: Add the dark brown sugar and granulated sugar, mixing until the blend is completely smooth.
  4. Add the Eggs: Incorporate the eggs one at a time, ensuring each one is fully mixed before adding the next.
  5. Mix in Sweet Potato Puree: Add the sweet potato puree, sour cream, vanilla bean paste, maple flavor, spices, kosher salt, and cornstarch. Beat until smooth and evenly mixed.

Step 3: Assemble and Bake the Cheesecake

  1. Add the Batter: Gently pour the cheesecake mixture onto the prepared crust, using a spatula to spread it evenly across the top.
  2. Set Up a Water Bath: Wrap the outside of the springform pan with aluminum foil to prevent any leakage. Place the pan in a larger baking dish, then fill the outer dish with hot water, ensuring it reaches about halfway up the sides of the springform.
  3. Bake: Bake at 325°F (165°C) for 1 hour and 15 minutes, or until the edges are set and the center jiggles slightly.
  4. Cool: Turn off the oven and let the cheesecake cool in the oven with the door slightly ajar for 1 hour.

Step 4: Prepare the Topping (Optional)

  1. Make the Whipped Cream: In a bowl, beat the heavy whipping cream, honey, and vanilla bean paste until soft peaks form.
  2. Drizzle with Caramel: If desired, drizzle the cheesecake with caramel sauce just before serving.

Step 5: Serve and Enjoy

  1. Decorate: Top the cheesecake with the honey vanilla whipped cream and a drizzle of caramel sauce for an elegant presentation.
  2. Slice and Serve: Slice with a warm knife for clean cuts and serve chilled.

Conclusion

This Best Roasted Sweet Potato Cheesecake is the ultimate dessert for anyone looking to blend the comforting flavors of fall with the elegance of cheesecake. The creamy filling, spiced to perfection, paired with the crunchy gingersnap crust and indulgent toppings, creates a dessert that’s as beautiful as it is delicious. Make this show-stopper for your next event, and watch as everyone falls in love at first bite!

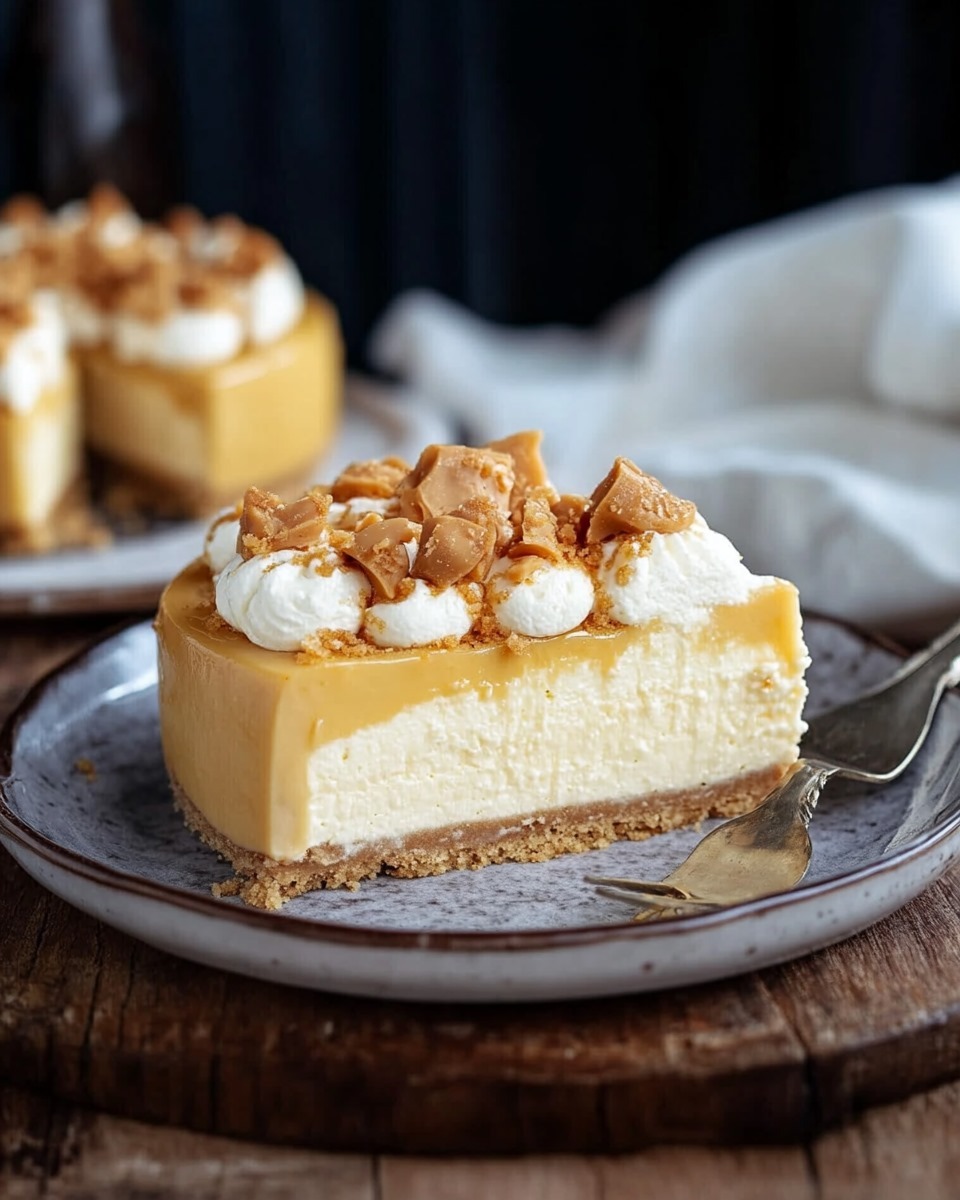
Velvety Butterscotch Cheesecake

Delight in the irresistible flavor of this Velvety Butterscotch Cheesecake. Combining a rich and creamy cheesecake filling with a luscious butterscotch swirl, this dessert is pure indulgence. Topped with a silky butterscotch sauce and a dollop of Crème Chantilly, it’s perfect for special occasions or as a decadent treat for yourself. With a buttery graham cracker crust as its foundation, every bite is a harmonious blend of flavors and textures.

Ingredients

Crust:

  • 1¾ cups graham cracker crumbs
  • 6 tablespoons unsalted butter, melted

Cheesecake Filling:

  • 3 blocks (8 oz each) of cream cheese, brought to room temperature for easy mixing.
  • 1 cup granulated sugar
  • 3 large eggs
  • 1 cup sour cream
  • 1 tablespoon vanilla extract
  • 1⅓ cups butterscotch morsels
  • ½ cup milk

Butterscotch Sauce:

  • ½ cup butterscotch morsels
  • 3 tablespoons milk

Topping (Optional):

  • Crème Chantilly

Instructions

Step 1: Prepare the Crust

  1. Preheat the Oven: Preheat your oven to 325°F (165°C). Grease the bottom and sides of a 9-inch springform pan and line with parchment paper if desired.
  2. Make the Crust Mixture: In a bowl, combine the graham cracker crumbs with melted butter. Mix until evenly moistened.
  3. Press Into Pan: Firmly press the mixture into the bottom of the prepared springform pan to form an even crust.

Step 2: Prepare the Cheesecake Filling

  1. Melt the Butterscotch: In a small saucepan, add the butterscotch chips and milk. Heat over low, stirring continuously until the chips melt and the mixture becomes smooth. Remove from heat and let it cool slightly.
  1. Beat the Cream Cheese: In a large mixing bowl, beat the softened cream cheese and sugar until light and creamy, about 2–3 minutes.
  2. Incorporate Eggs and Vanilla: Beat in the eggs one by one, ensuring each is fully combined before adding the next. Then, mix in the vanilla extract.
  3. Incorporate the Sour Cream: Gently mix in the sour cream until just combined.
  4. Swirl in Butterscotch: Pour the melted butterscotch into the batter and gently swirl it through with a knife or spatula, creating ribbons of flavor.

Step 3: Bake the Cheesecake

  1. Prepare the Cheesecake: Pour the cheesecake batter into the prepared crust, using a spatula to smooth the surface evenly.
  2. Set Up a Water Bath: Wrap the springform pan’s outer edge with aluminum foil to avoid leaks. Place the pan in a larger roasting pan and carefully fill the outer pan with hot water, reaching halfway up the sides of the springform.
  3. Bake: Bake for 60–70 minutes, or until the edges are firm and the center remains slightly wobbly.
  4. Let Cool: Turn off the oven and leave the cheesecake inside with the door cracked open for an hour. Afterward, transfer it to the refrigerator to chill for at least 4 hours, or preferably overnight.

Step 4: Make the Butterscotch Sauce

  1. Melt the Morsels: In a small saucepan, melt the butterscotch morsels with milk over low heat, stirring constantly until smooth. Allow to cool slightly before using.

Step 5: Assemble and Serve

  1. Top the Cheesecake: Remove the cheesecake from the springform pan and drizzle the butterscotch sauce over the top.
  2. Add Crème Chantilly: Pipe or dollop Crème Chantilly on top for an elegant finishing touch, if desired.
  3. Serve: Slice and serve chilled for the best flavor and texture.

Conclusion

This Velvety Butterscotch Cheesecake is a dessert lover’s dream come true. Its creamy texture and rich butterscotch flavor create a luxurious treat that’s perfect for impressing guests or indulging your sweet tooth. Whether topped with Crème Chantilly or enjoyed on its own, every bite offers a perfect balance of sweetness and sophistication. Give this recipe a try and add a touch of elegance to your dessert table!

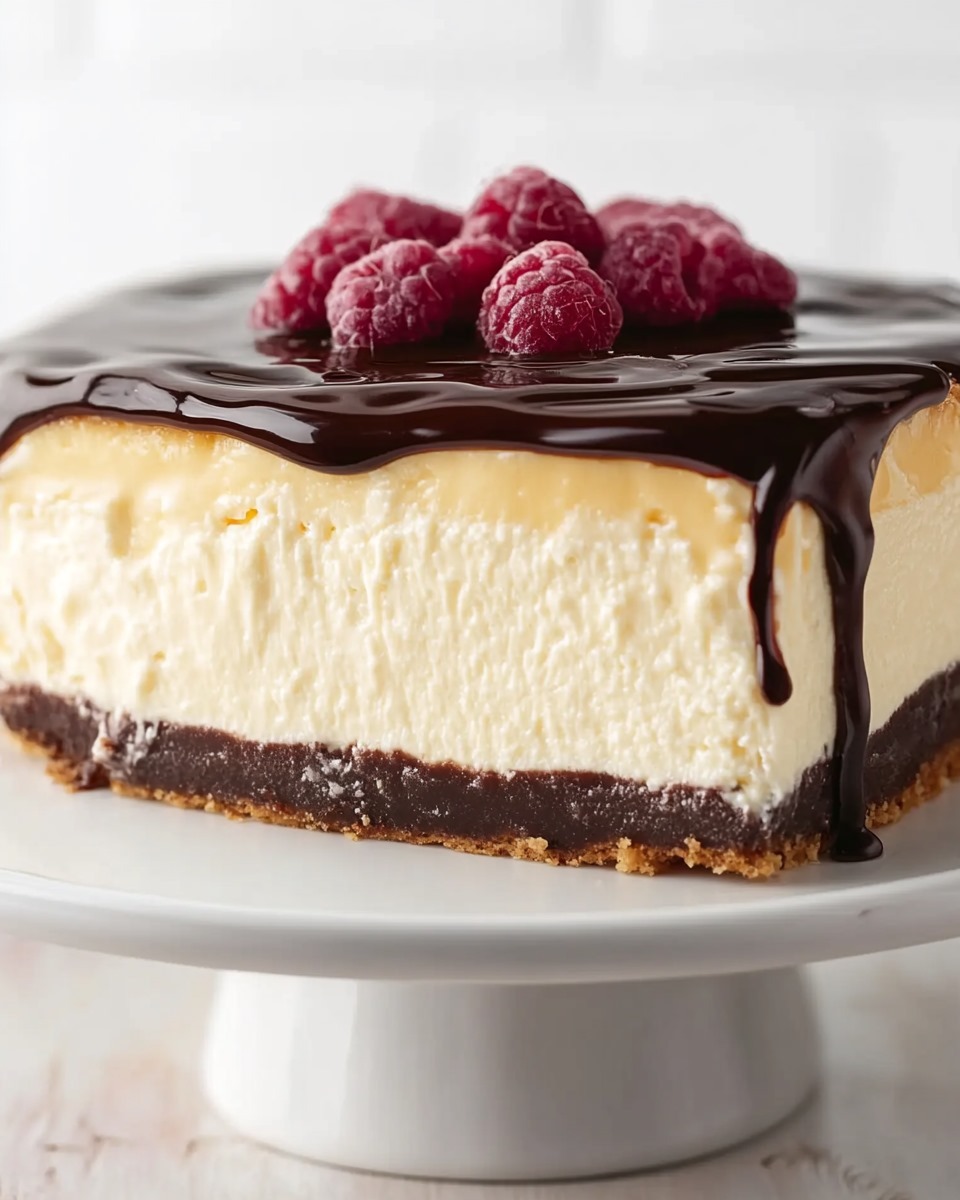
Decadent Millionaire’s Cheesecake

Take your dessert game to the next level with this Decadent Millionaire’s Cheesecake. Combining a buttery shortbread base, creamy cheesecake filling, rich caramel layer, and silky chocolate ganache, this dessert is the epitome of indulgence. Whether it’s a dinner party or a special occasion, this cheesecake will leave your guests in awe and craving more.

Ingredients

For the Shortbread Base:

  • 1 cup all-purpose flour (125g)
  • 1 stick (114g) butter, softened
  • ¼ cup white sugar (50g)
  • ¼ teaspoon salt

For the Cheesecake:

  • 3 ¼ cups cream cheese (740g), room temperature
  • ½ cup white sugar (100g)
  • 3 tablespoons powdered sugar
  • 1 cup heavy whipping cream (240ml, 33% fat or higher)
  • 1 teaspoon vanilla extract

For the Caramel Layer:

  • 1 cup light brown sugar (200g)
  • 2 sticks (227g) butter
  • ⅓ cup golden corn syrup (100g)
  • 1 can condensed milk (397g)
  • 1 teaspoon salt

For the Chocolate Ganache:

  • 1 cup dark chocolate (175g), chopped
  • ½ cup whipping cream (120ml)

Instructions

Step 1: Prepare the Shortbread Base

  1. Preheat the Oven: Set your oven to 350°F (175°C) and line the base of a 9-inch springform pan with parchment paper.
  2. Prepare the Dough: In a mixing bowl, combine the flour, softened butter, sugar, and salt. Stir until the mixture forms coarse crumbs. Press the dough evenly into the base of the prepared pan.
  3. Bake: Place the pan in the oven and bake for 15–20 minutes, or until the shortbread turns golden brown. Let it cool completely before removing from the pan.

Step 2: Make the Cheesecake Filling

  1. Beat the Cream Cheese: In a large mixing bowl, beat the cream cheese until smooth and creamy. Add the white sugar and powdered sugar, mixing well
  2. Whip the Cream: In a clean bowl, beat the heavy cream until it forms stiff peaks. Carefully fold the whipped cream into the cream cheese mixture, adding the vanilla extract, and mix until smooth and fully combined.
  3. Layer the Cheesecake: Spread the cheesecake filling evenly over the cooled shortbread crust. Place the dish in the refrigerator for a minimum of 2 hours, or until the filling is fully set.

Step 3: Prepare the Caramel Layer

  1. Melt the Butter and Sugar: In a saucepan over medium heat, combine the light brown sugar, butter, and golden corn syrup. Stir until melted and smooth.
  2. Add the Condensed Milk: Stir in the condensed milk and bring the mixture to a gentle boil. Cook for 5–7 minutes, stirring constantly, until thickened and golden.
  3. Add Salt: Stir in the salt and let the caramel cool slightly.
  4. Pour Over the Cheesecake: Pour the caramel layer over the set cheesecake filling. Refrigerate again for at least 1 hour, or until firm.

Step 4: Make the Chocolate Ganache

  1. Heat the Cream: In a small saucepan, heat the whipping cream until it just begins to simmer.
  2. Melt the Chocolate: Pour the hot cream over the chopped dark chocolate in a heatproof bowl. Let it sit for 1–2 minutes, then stir until smooth and glossy.
  3. Add the Ganache: Gently pour the ganache over the caramel layer, spreading it into an even coat. Refrigerate the cheesecake for at least 30 minutes, allowing the ganache to firm up.

Conclusion

This Decadent Millionaire’s Cheesecake is a dessert that truly lives up to its name. With layers of buttery shortbread, luscious cheesecake, rich caramel, and velvety chocolate ganache, it’s a luxurious treat that’s perfect for any celebration. Make it ahead of time for an effortless yet show-stopping dessert that will leave everyone talking. One bite, and you’ll feel like a dessert millionaire!

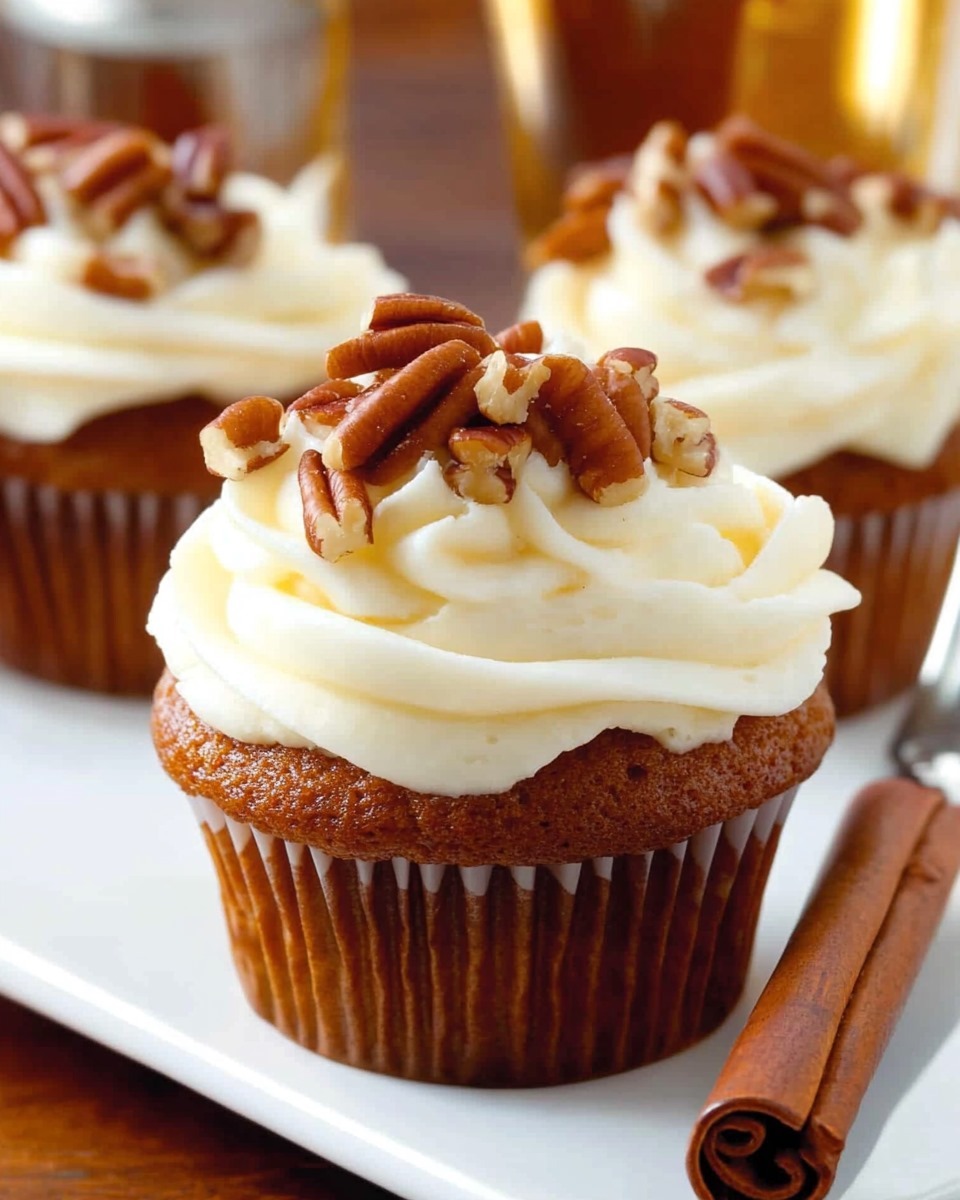
Decadent Whiskey Pecan Cupcakes

Indulge in a dessert that perfectly balances rich chocolate, crunchy pecans, and the warm, smoky notes of whiskey. These Decadent Whiskey Pecan Cupcakes bring together bold flavors with a touch of sophistication, making them a standout choice for celebrations or special occasions. Complete with a luxurious whiskey-infused frosting and a fun pipette garnish, this recipe is as impressive as it is delicious.

Ingredients

For the Cupcakes:

  • 1 box triple chocolate cake mix
  • 3 large eggs
  • 1¼ cups water
  • ½ cup canola oil

For the Pecan Topping:

  • ¼ cup granulated sugar
  • ¼ cup brown sugar
  • 2 Tbsp cornstarch (cornflour)
  • ¾ cup light corn syrup
  • 4 Tbsp unsalted butter, melted
  • ½ tsp kosher salt
  • 2 large eggs, lightly beaten
  • 3 Tbsp whiskey
  • 1½ cups chopped pecans
  • 1 tsp pure vanilla extract

For the Whiskey Frosting:

  • 1 cup unsalted butter, softened
  • 2½ cups powdered sugar (icing sugar)
  • 1 tsp pure vanilla extract
  • 1 Tbsp whiskey
  • 3–5 Tbsp heavy whipping cream (double cream)

To Decorate:

  • 18 mini pipettes filled with whiskey (optional)

Instructions

Step 1: Prepare the Cupcakes

  1. Preheat the Oven: Preheat your oven to 350°F (175°C) and line a muffin tin with 18 cupcake liners.
  2. Prepare the Batter: In a spacious bowl, whisk together the triple chocolate cake mix, eggs, water, and canola oil. Mix until the batter is smooth and fully blended.
  3. Fill the Liners: Divide the batter evenly among the cupcake liners, filling each about two-thirds full.
  4. Bake: Bake for 18–20 minutes or until a toothpick inserted into the center comes out clean. Cool completely on a wire rack.

Step 2: Make the Pecan Topping

  1. Combine the Sugars: In a medium saucepan, mix the granulated sugar, brown sugar, and cornstarch.
  2. Heat the Mixture: Stir in the corn syrup, melted butter, and kosher salt. Cook over medium heat, stirring constantly, until the mixture starts to bubble.
  3. Incorporate the Eggs and Whiskey: Gradually stir in the lightly beaten eggs and cook for 1–2 minutes, ensuring the mixture thickens slightly. Remove from heat and stir in the whiskey, chopped pecans, and vanilla extract. Allow to cool to room temperature.

Step 3: Prepare the Whiskey Frosting

  1. Beat the Butter: Using an electric mixer, beat the softened butter until creamy and fluffy.
  2. Incorporate Sugar and Flavoring: Slowly add the powdered sugar, one cup at a time, ensuring it’s fully combined before adding the next. Once incorporated, beat in the vanilla extract and whiskey.
  3. Adjust the Consistency: Add the heavy whipping cream, one tablespoon at a time, until the frosting reaches your desired consistency for piping or spreading.

Step 4: Assemble the Cupcakes

  1. Top the Cupcakes: Spoon a generous amount of the pecan topping onto each cupcake, letting it settle naturally on the surface.
  2. Frost the Cupcakes: Pipe or spread the whiskey frosting over the pecan topping, ensuring a beautiful, layered presentation.
  3. Add the Whiskey Pipettes: For a fun and interactive garnish, insert a mini whiskey-filled pipette into each cupcake.

Conclusion

These Decadent Whiskey Pecan Cupcakes are the ultimate indulgence for whiskey lovers and dessert enthusiasts alike. The moist chocolate base, rich pecan topping, and smooth whiskey frosting combine for a symphony of textures and flavors. Perfect for dinner parties, holidays, or any event that calls for a memorable dessert, these cupcakes are sure to impress. Serve them with a sip of whiskey on the side for a truly elevated experience!

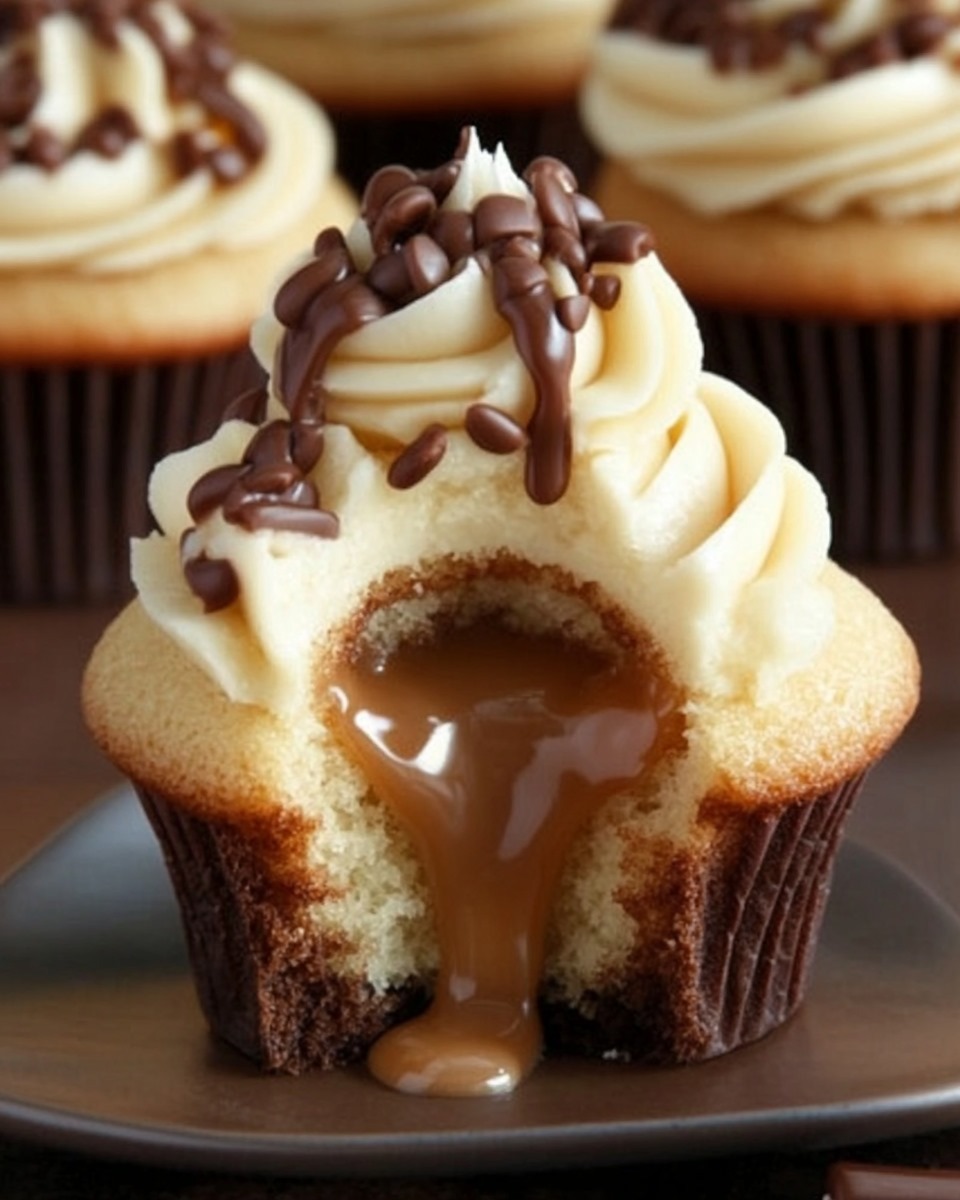
Heavenly Salted Caramel Bliss Cupcakes

Dive into the decadence of sweet and salty with these Heavenly Salted Caramel Bliss Cupcakes. With a light, fluffy base, a luscious homemade salted caramel filling, and a creamy buttercream topping, these cupcakes are the epitome of indulgence. Perfect for celebrations or as a treat for yourself, these cupcakes will leave everyone begging for the recipe. Let’s embark on this journey of creating a dessert masterpiece that balances richness and sophistication in every bite.

Ingredients

For the Cupcakes:

  • 175g butter, softened
  • 175g light brown sugar
  • 3 large eggs
  • 1 tsp vanilla extract
  • 175g self-raising flour

For the Salted Caramel Sauce (Filling and Topping):

  • 200g granulated sugar
  • 90g butter
  • 120ml heavy cream
  • 1 tsp sea salt

For the Buttercream Frosting:

  • 200g butter, softened
  • 400g icing sugar
  • 2 tsp salted caramel flavoring
  • 1 tbsp milk

Instructions

Step 1: Prepare the Cupcakes

  1. Preheat the Oven: Preheat your oven to 180°C (350°F) and line a cupcake tray with 12 cupcake liners.
  2. Cream Butter and Sugar: In a large mixing bowl, beat the softened butter and light brown sugar until pale and fluffy.
  3. Incorporate Eggs and Vanilla: Slowly add the eggs, one by one, beating them in thoroughly, followed by the rich vanilla extract.
  4. Incorporate the Flour: Gently fold in the self-raising flour until just combined. Do not overmix, as this can affect the cupcakes’ fluffiness.
  5. Bake: Spoon the batter into the cupcake liners, ensuring an even distribution. Place them in the oven and bake for 18-20 minutes, or until a toothpick inserted in the center comes out clean. Let the cupcakes cool completely on a wire rack.

Step 2: Make the Salted Caramel Sauce

  1. Melt the Sugar: Heat the granulated sugar in a medium saucepan over medium heat, stirring constantly until melted and amber-colored.
  2. Mix in Butter: Gradually fold in the butter, stirring until it’s fully melted and incorporated. Be careful, as the mixture may bubble up rapidly.
  3. Pour in Cream: Slowly add the heavy cream, stirring continuously. Let the mixture come to a boil and cook for about 1 minute.
  4. Stir in Salt: Remove from the heat and blend in the sea salt. Allow the mixture to cool to room temperature before using.

Step 3: Prepare the Buttercream

  1. Cream the Butter: In a spacious bowl, beat the softened butter until it becomes smooth and fluffy.
  2. Add Sugar and Flavoring: Gradually add the icing sugar, beating until smooth. Mix in the salted caramel flavoring and a tablespoon of milk to achieve a spreadable consistency.

Step 4: Assemble the Cupcakes

  1. Core the Cupcakes: Use a small knife or cupcake corer to cut out a small hole in the center of each cupcake.
  2. Fill with Salted Caramel: Spoon or pipe a small amount of the salted caramel sauce into the center of each cupcake.
  3. Frost the Cupcakes: Pipe or spread the buttercream frosting over the cupcakes.
  4. Drizzle with Caramel: Drizzle the remaining salted caramel sauce over the top for a stunning finish.

Conclusion

These Heavenly Salted Caramel Bliss Cupcakes are the perfect combination of buttery sweetness and a touch of salty elegance. The soft cupcakes, filled with gooey caramel and topped with a rich, flavorful buttercream, offer a gourmet treat that will impress every palate. Whether you’re hosting a party or simply satisfying your sweet tooth, these cupcakes will always steal the show. Share them with loved ones or savor them yourself, and enjoy a moment of pure caramel bliss!

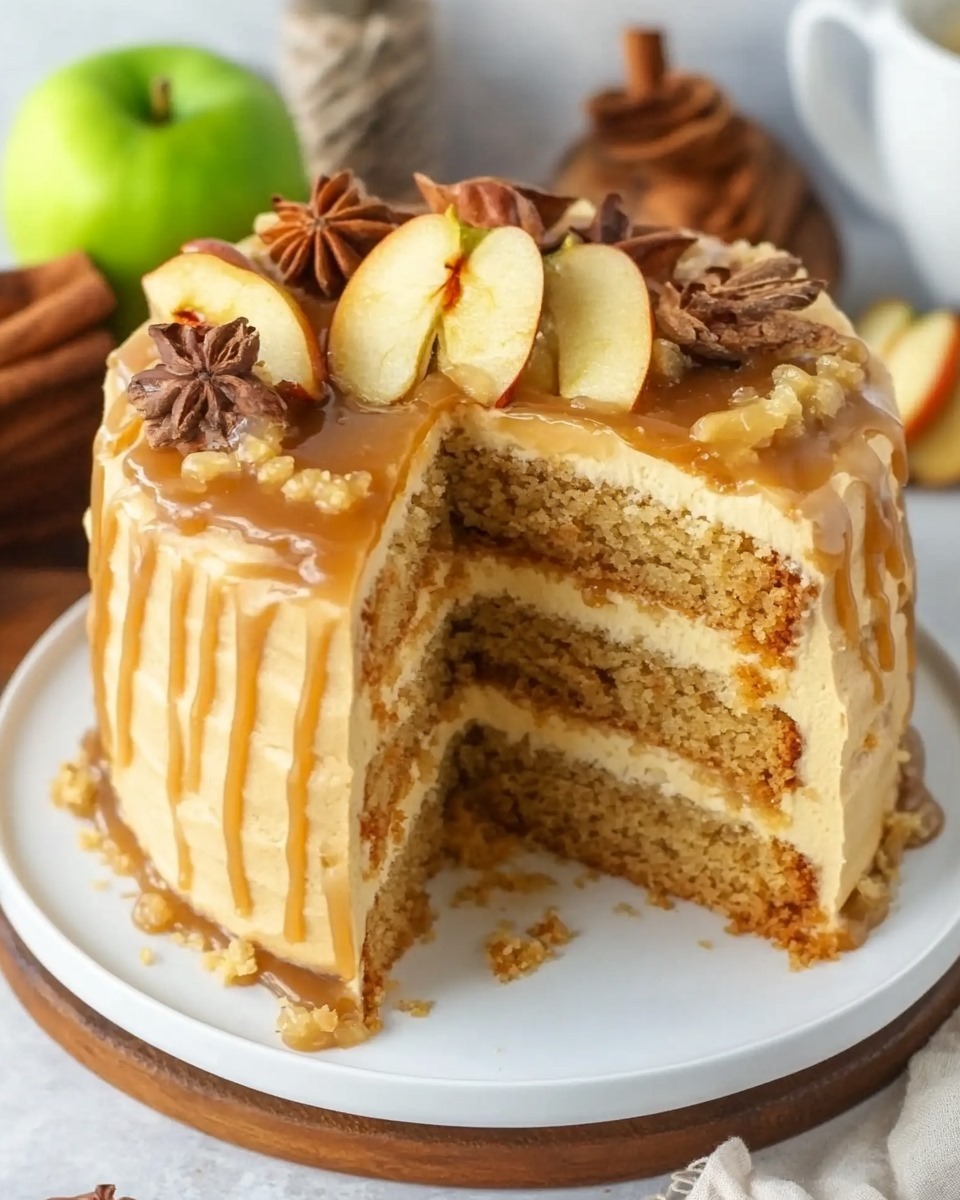
Irresistible Caramel Apple Harvest Cake

Autumn is the season of rich, warm flavors, and nothing embodies the cozy charm of fall better than this Irresistible Caramel Apple Harvest Cake. A delightful combination of spiced apples, tender cake layers, and a luscious caramel buttercream frosting, this dessert will have your family and friends savoring every bite. Perfect for holiday gatherings or a casual afternoon treat, this cake brings the comforting taste of caramel-dipped apples into a dessert masterpiece.

Ingredients

For the Apple Spice Cake:

  • Dry Ingredients:
    • 3 cups all-purpose flour
    • 1 tablespoon baking powder
    • ½ teaspoon salt
    • 2 ½ teaspoons ground cinnamon
    • 1 teaspoon ground nutmeg
    • ¼ teaspoon ground cloves
    • ¼ teaspoon ground ginger
  • Wet Ingredients:
    • ½ cup unsalted butter, softened
    • ½ cup vegetable oil
    • 1 ½ cups granulated sugar
    • ½ cup applesauce
    • 4 large eggs
    • 1 tablespoon vanilla extract
    • 1 cup milk
  • Filling:
    • 3 cups chopped apples

For the Caramel Buttercream Frosting:

  • 2 cups unsalted butter, softened
  • 2 teaspoons vanilla extract
  • ½ cup caramel sauce
  • 2 teaspoons ground cinnamon
  • 3 cups powdered sugar

For Decoration:

  • Extra caramel sauce for drizzling
  • Fresh apple slices

Instructions

Step 1: Prepare the Cake Batter

  1. Preheat the Oven: Set your oven to 350°F (175°C) and grease three 8-inch round cake pans.
  2. Mix the Dry Ingredients: In a large bowl, sift together the flour, baking powder, salt, cinnamon, nutmeg, cloves, and ginger. Set aside.
  3. Cream the Butter and Sugar: Using a mixer, beat the softened butter, vegetable oil, and sugar until light and fluffy, about 2–3 minutes.
  4. Incorporate Wet Ingredients: Add the applesauce, eggs, and vanilla extract one at a time, mixing well after each addition.
  5. Alternate Wet and Dry: Gradually mix the dry ingredients into the wet ingredients, alternating with milk. Begin and end with the dry mixture.
  6. Fold in Apples: Gently fold in the chopped apples, ensuring they are evenly distributed throughout the batter.

Step 2: Bake the Cakes

  1. Divide the batter evenly among the prepared pans.
  2. Bake for 30–35 minutes or until a toothpick inserted in the center comes out clean.
  3. Allow the cakes to cool in the pans for 10 minutes, then transfer them to a wire rack to cool completely.

Step 3: Make the Caramel Buttercream

  1. Beat the Butter: In a large mixing bowl, beat the softened butter until creamy and smooth.
  2. Add Flavorings: Mix in the vanilla extract, caramel sauce, and cinnamon until fully incorporated.
  3. Incorporate Sugar: Gradually add the powdered sugar, one cup at a time, beating until the frosting is fluffy and spreadable.

Step 4: Assemble the Cake

  1. Start by setting the first cake layer onto your serving platter. Spread a smooth, even layer of rich caramel buttercream across the top.
  2. Layer the second and third cake rounds on top, ensuring each layer is generously coated with the creamy frosting, covering both the top and sides of the cake.
  3. Gently pour warm caramel sauce over the edges, letting it elegantly cascade down the sides for a luscious finish.

Step 4: Garnish

  1. Delicately arrange thin slices of fresh apples on the top, fanning them out to create a beautiful display.
  2. Complete the cake with a final swirl of caramel sauce, drizzling it across the apples for a stunning touch.

Conclusion

This Irresistible Caramel Apple Harvest Cake combines the nostalgic flavors of fall into a show-stopping dessert. The spiced apple cake layers paired with velvety caramel buttercream create a flavor explosion in every bite. Whether you’re celebrating a special occasion or simply indulging in the season, this cake is guaranteed to become a family favorite. Embrace the essence of autumn with this irresistible treat and share the joy with loved ones!