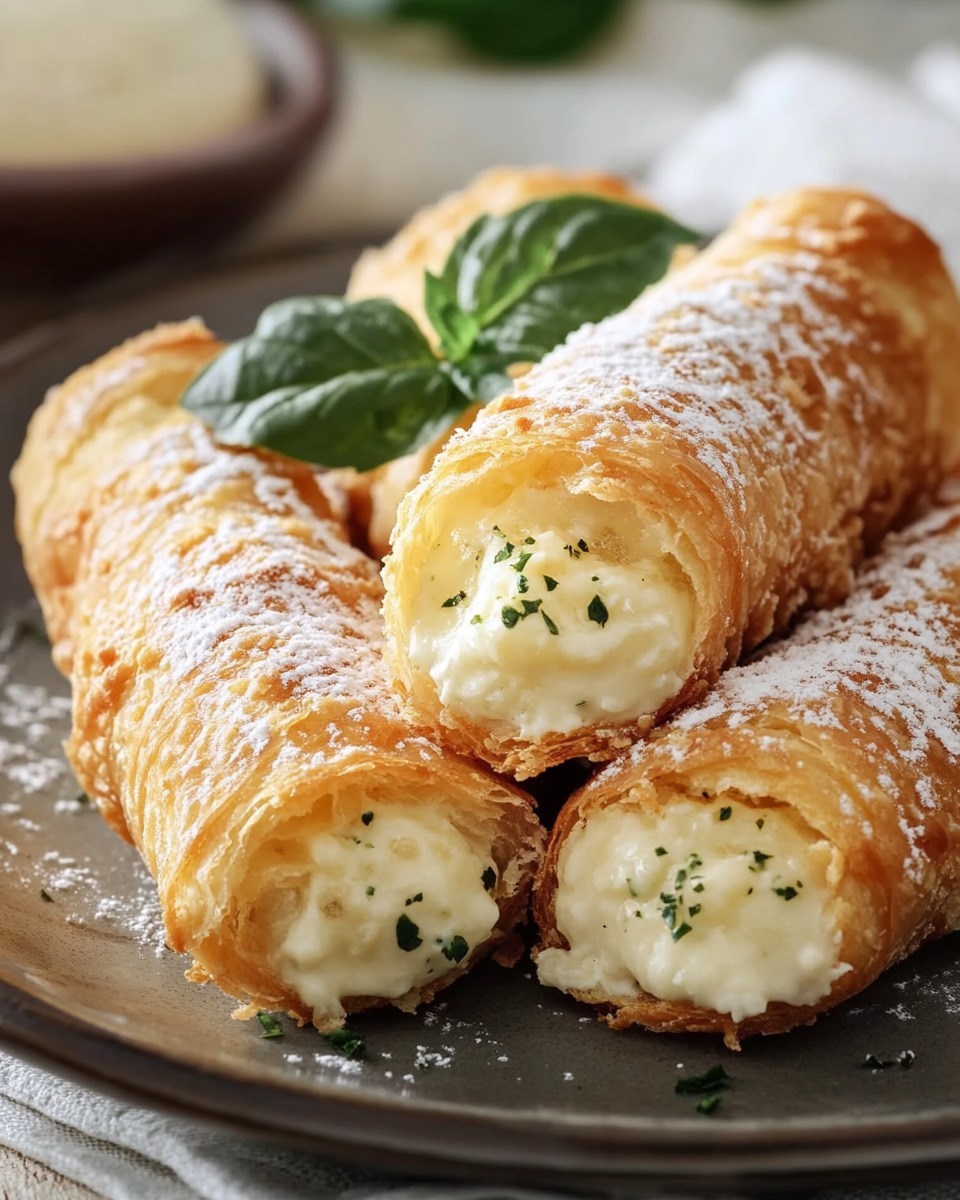
Italian Cream-Stuffed Cannoncini: A Flaky, Creamy Delight

Cannoncini, also known as cream horns, are a beloved Italian pastry featuring crisp, flaky puff pastry filled with a luscious custard cream. These elegant treats are perfect for special occasions, coffee breaks, or whenever you crave a touch of Italian sweetness. Easy to prepare yet impressively delicious, this recipe will transport you straight to an Italian bakery with every bite.

Ingredients

For the Custard Cream:

  • Egg Yolks: 3
  • All-Purpose Flour: 3 tablespoons (30 grams)
  • Sugar: ½ cup (100 grams)
  • Vanilla Extract: 1 teaspoon
  • Milk: 8 ounces (235 ml)

For the Cannoncini:

  • Puff Pastry: 1 sheet, defrosted (about 8 ounces, 225 grams)
  • Sugar: ¼ cup (50 grams)
  • Egg: 1, for egg wash
  • Powdered Sugar: For decoration

Instructions

Step 1: Make the Custard Cream

  1. In a medium saucepan, whisk together the egg yolks and sugar until smooth and pale.
  2. Gradually add the flour, whisking to combine.
  3. Slowly pour in the milk, stirring continuously to avoid lumps.
  4. Place the saucepan over medium heat, stirring constantly until the mixture thickens into a smooth custard (about 5-7 minutes).
  5. Transfer the custard to a bowl, cover with plastic wrap (pressed directly onto the surface to prevent a skin from forming), and let it cool completely.

Step 2: Prepare the Cannoncini Shells

  1. Preheat the oven to 400°F (200°C) and prepare a baking sheet by lining it with parchment paper.
  2. Roll out the defrosted puff pastry sheet and lightly sprinkle it with sugar. Gently press the sugar into the pastry with a rolling pin.
  3. Using a sharp knife or pizza cutter, cut the pastry into 1-inch wide strips.
  4. Carefully wrap each strip around a metal cream horn mold, overlapping the edges slightly to prevent any gaps. Arrange the wrapped molds on the prepared baking sheet.
  5. Brush the pastry with beaten egg for a golden finish.
  6. Bake in the preheated oven for 15-18 minutes, or until golden brown and puffed. Remove from the oven and allow to cool before carefully removing the molds.

Step 3: Assemble the Cannoncini

  1. After the pastry shells have fully cooled, spoon the custard cream into a piping bag fitted with a round or star-shaped tip.
  2. Pipe the custard into each pastry shell, filling it generously.

Step 4: Decorate and Serve

  1. Lightly dust the filled cannoncini with powdered sugar for an elegant finish.
  2. Serve immediately for the best texture, or refrigerate for up to 24 hours for a chilled treat.

Conclusion

These Italian Cream-Stuffed Cannoncini are a stunning combination of flaky pastry and rich, velvety custard. Whether served at a gathering or enjoyed as a personal indulgence, they’re sure to impress with their delicate flavor and beautiful presentation. Buon appetito!
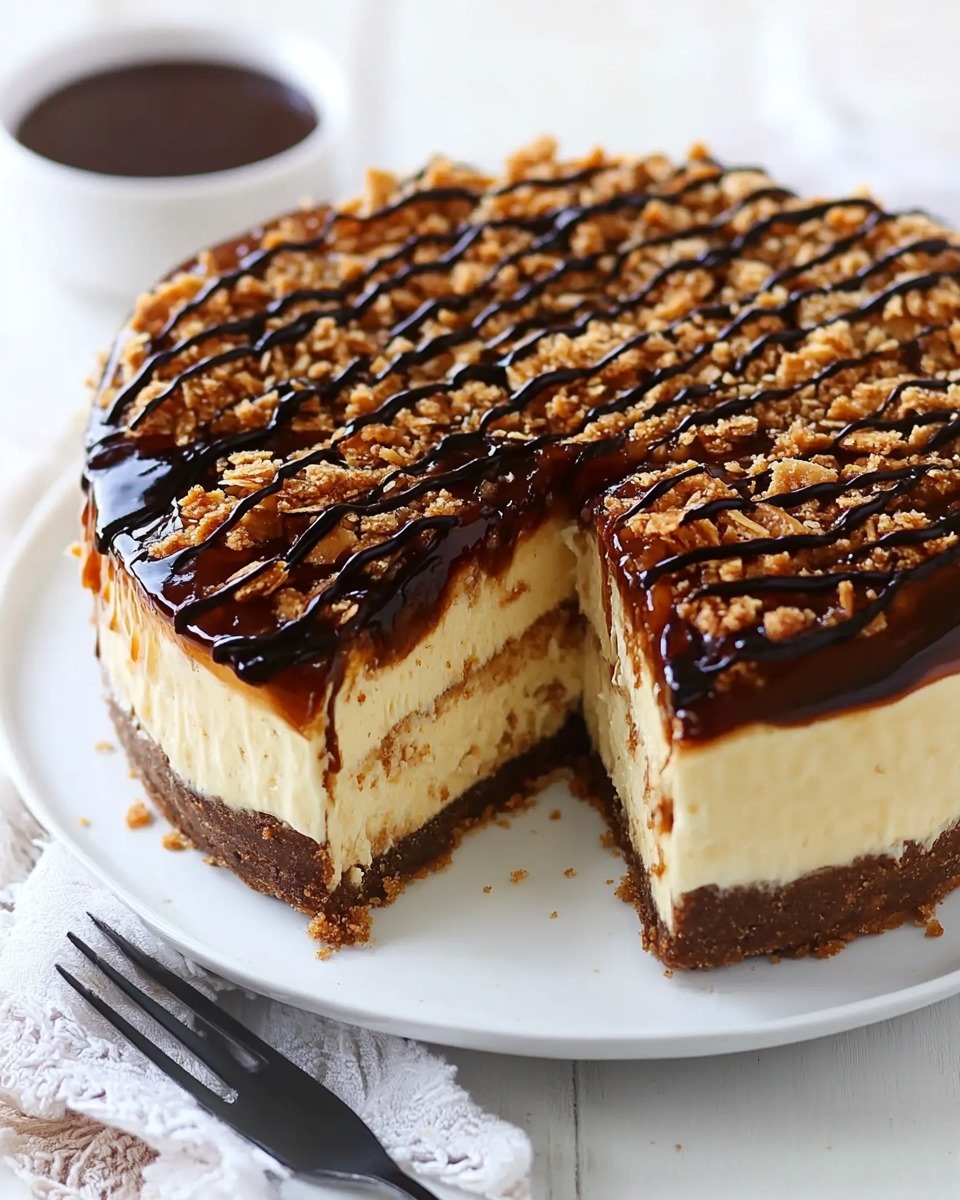
Decadent Samoa Cheesecake: A Heavenly Dessert

Inspired by the beloved Samoa cookie, this Samoa Cheesecake is a rich, indulgent dessert that combines creamy cheesecake, sweet caramel, toasted coconut, and luscious chocolate ganache. With a cookie crust and a caramel-coconut topping, every bite is a delightful tribute to this iconic flavor combination. Whether you’re celebrating a special occasion or satisfying a sweet craving, this cheesecake is sure to impress.

Ingredients

For the Crust:

  • Samoa Cookies: 1 ½ cups (crushed)
  • Unsalted Butter: 5 tablespoons (melted)

For the Cheesecake Filling:

  • Cream Cheese: 24 oz (3 blocks), softened
  • Sugar: 1 cup
  • Eggs: 3 large
  • Vanilla Extract: 2 teaspoons

For the Topping:

  • Sweetened Shredded Coconut: 2 cups (toasted)
  • Caramel Sauce: 1 cup (store-bought or homemade)
  • Chocolate Ganache: ½ cup (prepared with equal parts chocolate and heavy cream)

Instructions

Step 1: Prepare the Crust

  1. Preheat your oven to 350°F (175°C).
  2. Crush the Samoa cookies into fine crumbs either by pulsing them in a food processor or placing them in a zip-top bag and rolling over them with a pin.
  3. Mix the crushed cookies with melted butter until evenly combined.
  4. Press the mixture firmly into the bottom of a 9-inch springform pan to create an even crust layer.
  5. Bake the crust for 8-10 minutes, then take it out of the oven and let it cool while you prepare the filling.

Step 2: Make the Cheesecake Filling

  1. In a large bowl, beat the softened cream cheese and sugar together until smooth and creamy.
  2. Incorporate the eggs one by one, ensuring each is fully blended before adding the next.
  3. Stir in the vanilla extract.
  4. Pour the cheesecake mixture onto the prepared crust and spread it evenly with a spatula.

Step 3: Bake the Cheesecake

  1. Place the springform pan on a baking sheet and bake in the preheated oven for 45-50 minutes, or until the center is set but slightly jiggly.
  2. Turn off the oven and leave the door ajar just a bit. Allow the cheesecake to cool in the oven for 30 minutes to help prevent cracks.
  3. Take the cheesecake out of the oven and let it reach room temperature, then chill it in the refrigerator for at least 4 hours or overnight.

Step 4: Toast the Coconut

  1. As the cheesecake chills, toast the shredded coconut in a dry skillet over medium heat, stirring often, until it turns golden brown. Remove from heat and let it cool.

Step 5: Assemble the Topping

  1. Once the cheesecake is chilled, spread the caramel sauce evenly over the top.
  2. Sprinkle the toasted coconut over the caramel layer, pressing gently to adhere.
  3. Drizzle the chocolate ganache in a decorative pattern over the coconut layer.

Step 6: Serve

  1. Carefully remove the springform pan ring.
  2. Slice the cheesecake and serve chilled for the best flavor and texture.

Conclusion

This Samoa Cheesecake takes all the flavors of the classic cookie and transforms them into a stunning dessert. The creamy cheesecake base pairs perfectly with the buttery crust, gooey caramel, toasted coconut, and rich chocolate ganache. It’s a dessert guaranteed to wow your family and friends while satisfying your sweet tooth. Enjoy every decadent bite!

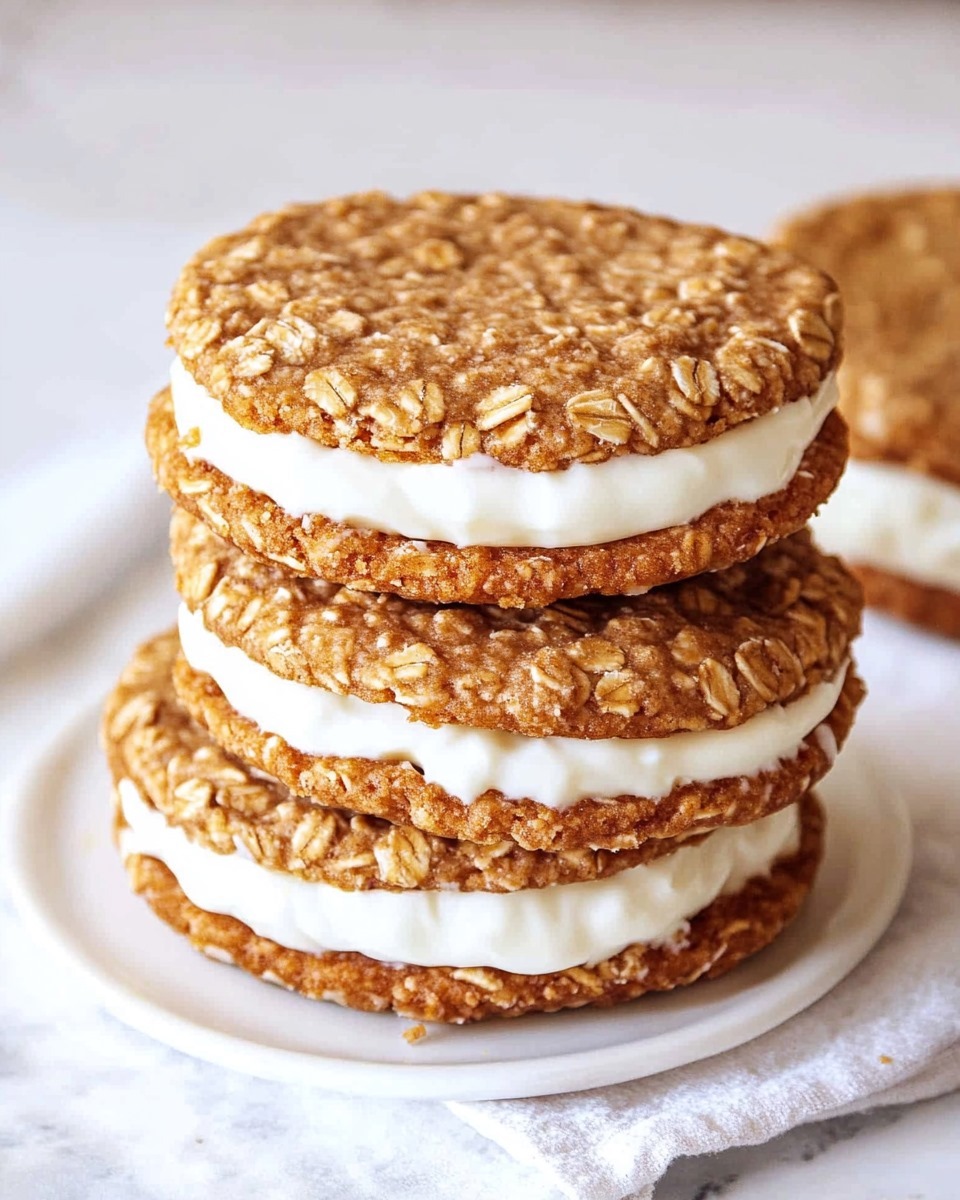
Homemade Oatmeal Cream Pies: A Nostalgic Treat

Bring back childhood memories with these soft and chewy Homemade Oatmeal Cream Pies. These delightful cookies are packed with the warm flavors of cinnamon and molasses, sandwiched around a creamy, fluffy filling that melts in your mouth. Perfect for lunchboxes, tea time, or a nostalgic indulgence, these homemade treats are far superior to the store-bought version and surprisingly simple to make.

Ingredients

For the Oatmeal Cookies:

  • Unsalted Butter: 1 cup (226 grams), softened
  • Brown Sugar: 1 cup (200 grams), packed
  • Granulated Sugar: ½ cup (100 grams)
  • Molasses: 1 tablespoon
  • Vanilla Extract: 2 teaspoons
  • Eggs: 2 large
  • All-Purpose Flour: 2 cups (250 grams)
  • Ground Cinnamon: ½ teaspoon
  • Baking Soda: 1 teaspoon
  • Salt: ¼ teaspoon
  • Quick Oats: 3 cups

For the Cream Filling:

  • Unsalted Butter: ¾ cup (168 grams), softened
  • Cream Cheese: 2 ounces (57 grams), full-fat, brick style
  • Powdered Sugar: 3-4 cups (330-440 grams)
  • Vanilla Extract: 1 teaspoon
  • Salt: ¼ teaspoon
  • Cream: 1 tablespoon, if needed

Instructions

Step 1: Make the Oatmeal Cookie Dough

  1. Preheat the oven to 350°F (175°C) and line your baking sheets with parchment paper or silicone mate.
  2. In a large bowl, beat the softened butter, brown sugar, and granulated sugar until the mixture is light and fluffy, about 2-3 minutes.
  3. Add the molasses, vanilla extract, and eggs. Beat until fully combined.
  4. In another bowl, combine the flour, cinnamon, baking soda, and salt. Slowly incorporate the dry mixture into the wet ingredients, stirring until just combined.
  5. Fold in the quick oats until evenly distributed throughout the dough.

Step 2: Bake the Cookies

  1. Using a cookie scoop or tablespoon, drop rounded balls of dough onto the prepared baking sheets, leaving about 2 inches of space between each cookie.
  2. Bake for 8-10 minutes, or until the edges are slightly golden and the centers appear firm.
  3. Allow the cookies to cool on the baking sheet for 5 minutes, then transfer them to a wire rack to cool completely.

Step 3: Prepare the Cream Filling

  1. In a medium bowl, beat the softened butter and cream cheese together until smooth and creamy.
  2. Gradually add the powdered sugar, 1 cup at a time, beating until fluffy. Adjust the consistency by adding cream if needed.
  3. Stir in the vanilla extract and salt. Beat until the filling is smooth and pipeable.

Step 4: Assemble the Oatmeal Cream Pies

  1. Match the cookies by size. Spread or pipe a thick layer of cream filling onto the flat side of one cookie.
  2. Place another cookie on top, flat side down, gently pressing to create a sandwich. Repeat with the remaining cookies.

Conclusion

These Homemade Oatmeal Cream Pies are a perfect blend of soft, chewy cookies and luscious cream filling. The touch of molasses and cinnamon in the cookies elevates their flavor, making each bite warm and comforting. Ideal for sharing (or keeping all to yourself), this recipe is a guaranteed hit for kids and adults alike. Enjoy the homemade goodness!

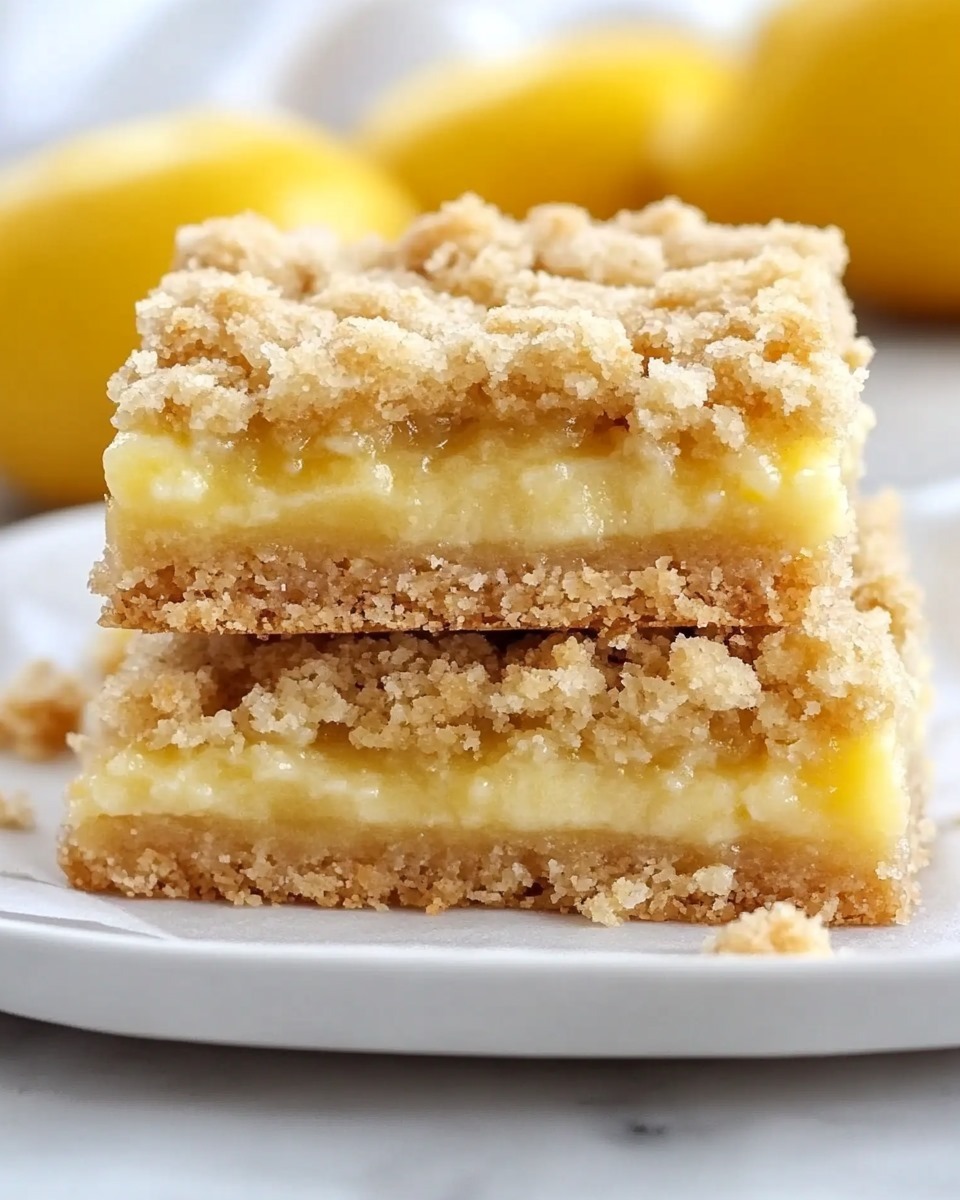
Zesty Lemon Crumb Bars: A Perfect Balance of Sweet and Tangy

These Bright Lemon Crumble Bars offer the perfect harmony of sweet and tangy flavors. With a rich, buttery crust that crumbles delicately and a smooth, zesty lemon filling, these bars are perfect for any event—whether it’s a midday snack or a refreshing dessert. The vibrant freshness of lemon juice elevates the flavor, making them both simple to prepare and utterly irresistible.

Ingredients

For the Crust:

  • All-Purpose Flour: 2 1/3 cups
  • Granulated Sugar: ½ cup
  • Light Brown Sugar: ½ cup, packed
  • Salt: ¾ teaspoon
  • Baking Powder: ¼ teaspoon
  • Unsalted Butter: 12 tablespoons, melted and cooled

For the Lemon Filling:

  • Sweetened Condensed Milk: 1 can (14 oz)
  • Egg Yolks: 4 large, room temperature
  • Heavy Cream: 2 tablespoons
  • Salt: ⅛ teaspoon
  • Fresh Lemon Juice: ⅔ cup (about 4-5 lemons)

Instructions

Step 1: Preheat and Prepare

  1. Preheat your oven to 350°F (175°C).
  2. Line a 9×9-inch baking pan with parchment paper, leaving an overhang on the sides for easy removal.

Step 2: Make the Crust

  1. In a large bowl, whisk together the flour, granulated sugar, brown sugar, salt, and baking powder.
  2. Add the melted butter and mix until the texture resembles wet sand and clumps form.
  3. Press two-thirds of the mixture firmly into the prepared pan to form an even crust. Set the remaining crust mixture aside for the crumb topping.
  4. Bake the crust for 12-15 minutes, or until it turns a light golden brown. Let it cool for a few minutes while you prepare the filling.

Step 3: Prepare the Lemon Filling

  1. In a medium bowl, combine the sweetened condensed milk, egg yolks, heavy cream, salt, and fresh lemon juice. Whisk until the mixture is smooth and well blended.

Step 4: Assemble and Bake

  1. Pour the lemon filling over the baked crust, spreading it evenly.
  2. Crumble the reserved crust mixture over the top of the filling.
  3. Bake for 20-25 minutes, or until the topping is golden brown and the filling is set but slightly jiggly in the center.

Step 5: Cool and Chill

  1. Allow the bars to cool to room temperature in the pan.
  2. Once cooled, refrigerate for at least 2 hours or until fully chilled.

Step 6: Slice and Serve

  1. Lift the bars out of the pan using the parchment paper overhang.
  2. Cut into squares or rectangles, then refrigerate before serving for optimal flavor and texture.

Conclusion

These Tangy Lemon Crumble Bars are a bright and refreshing dessert, ideal for any event. With a rich, buttery crust and a smooth, citrusy filling, they’re sure to wow your guests. Whether enjoyed on their own or with a cup of tea, these bars are destined to become a staple in your recipe repertoire. Enjoy every bite!

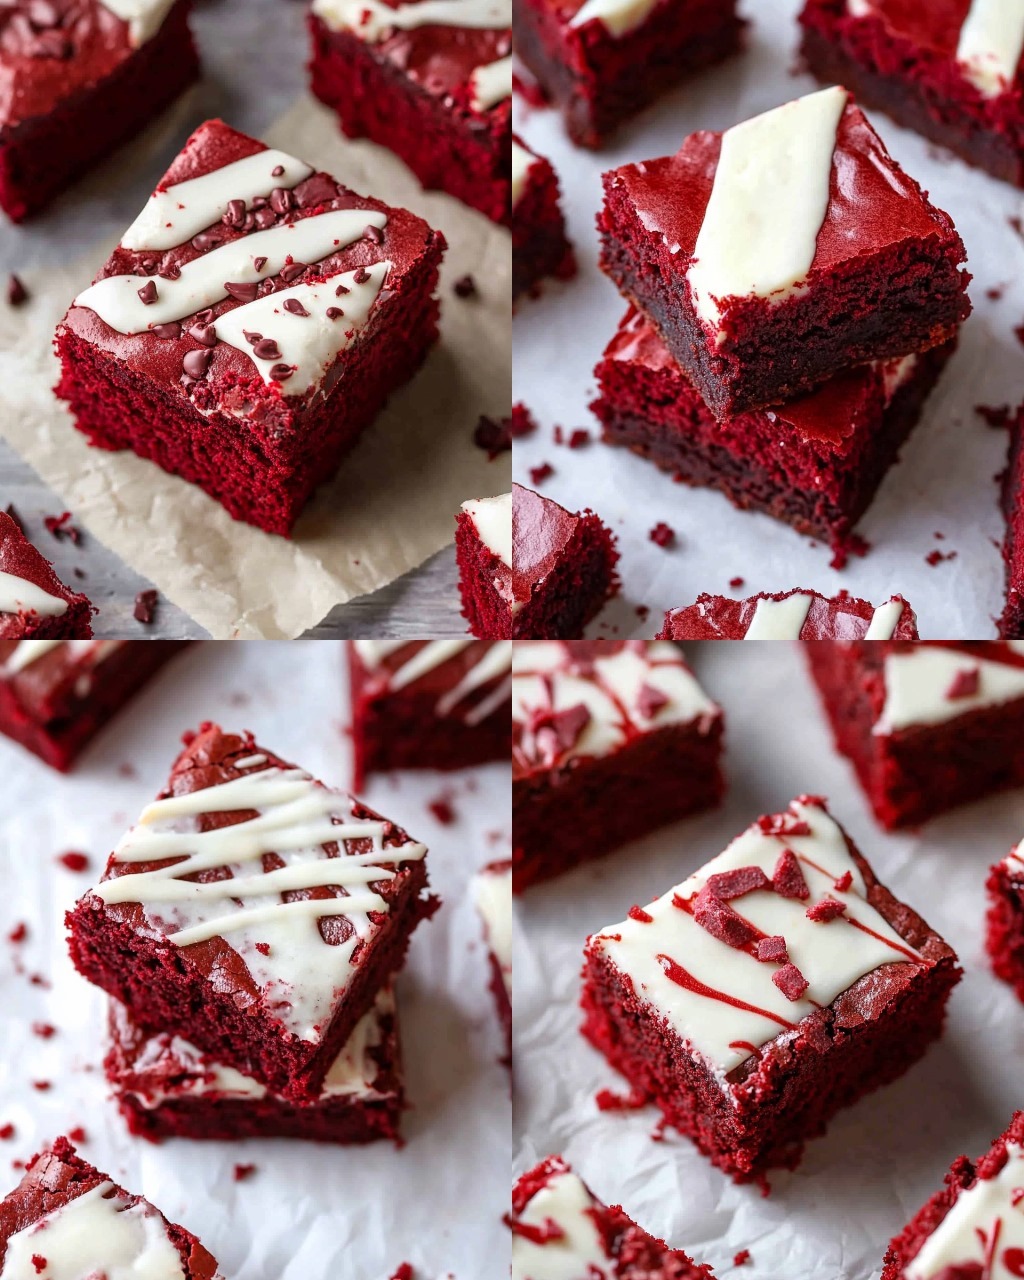
Decadent Red Velvet Brownies: A Show-Stopping Dessert

Red Velvet Brownies combine the luscious richness of a brownie with the distinct flavor and vibrant hue of red velvet cake. With a moist, fudgy texture and subtle cocoa undertones, these treats are as delicious as they are visually stunning. Perfect for any celebration or as a sweet indulgence, these brownies can be customized with white chocolate chips for an added creamy touch. Let’s dive into making this crowd-pleasing dessert!

Ingredients

  • Unsalted Butter: ¾ cup, melted
  • Semi-Sweet Chocolate Bar: 2 oz, chopped
  • Granulated Sugar: 1 ¼ cups
  • Eggs: 2 large
  • Vanilla Extract: 2 teaspoons
  • White Vinegar: 1 teaspoon
  • Red Gel Food Coloring: ½ tablespoon
  • Unsweetened Cocoa Powder: 2 tablespoons
  • All-Purpose Flour: 1 ¼ cups
  • Salt: ¼ teaspoon
  • White Chocolate Chips (Optional): ½ cup (mixed into the batter or melted and drizzled on top)

Instructions

Step 1: Prepare the Baking Pan and Oven

  1. Preheat your oven to 350°F (175°C).
  2. Prepare an 8×8-inch baking pan by lining it with parchment paper, allowing some overhang for easy removal. Lightly spray the paper with non-stick spray.

Step 2: Melt Butter and Chocolate

  1. In a microwave-safe bowl, combine the melted butter and chopped semi-sweet chocolate bar.
  2. Microwave in 20-second intervals, stirring in between, until the chocolate is fully melted and smooth. Allow the mixture to cool slightly.

Step 3: Mix the Wet Ingredients

  1. In a large mixing bowl, whisk together the granulated sugar and eggs until well combined and slightly frothy.
  2. Add the vanilla extract, white vinegar, and red gel food coloring. Mix until the color is evenly distributed.

Step 4: Incorporate Dry Ingredients

  1. Sift together the cocoa powder, all-purpose flour, and salt in a separate bowl.
  2. Slowly incorporate the dry ingredients into the wet mixture, gently stirring to combine without overworking the batter.

Step 5: Combine the Chocolate Mixtures

  1. Gently fold the melted butter and chocolate mixture into the batter until smooth.
  2. If desired, fold in the white chocolate chips for added texture and flavor.

Step 6: Bake

  1. Transfer the batter into the prepared baking pan, using a spatula to spread it out evenly.
  2. Place the pan in the preheated oven and bake for 30-35 minutes, or until a toothpick inserted in the center comes out with a few moist crumbs. Be sure not to overbake.

Step 7: Cool and Add Toppings

  1. Let the brownies cool fully in the pan. Once cooled, lift them out using the overhanging parchment paper for easy removal.
  2. If desired, drizzle melted white chocolate over the top for a decorative finish.

Step 8: Slice and Serve

  1. Cut into squares or rectangles, and enjoy the decadent, vibrant red velvet brownies!

Conclusion

These Decadent Red Velvet Brownies are a perfect blend of bold red velvet flavor and brownie richness. They’re easy to make, visually striking, and utterly delicious, making them ideal for holidays, birthdays, or any day you want a special treat. Add your personal touch with white chocolate chips or drizzle to make them even more indulgent. Happy baking!

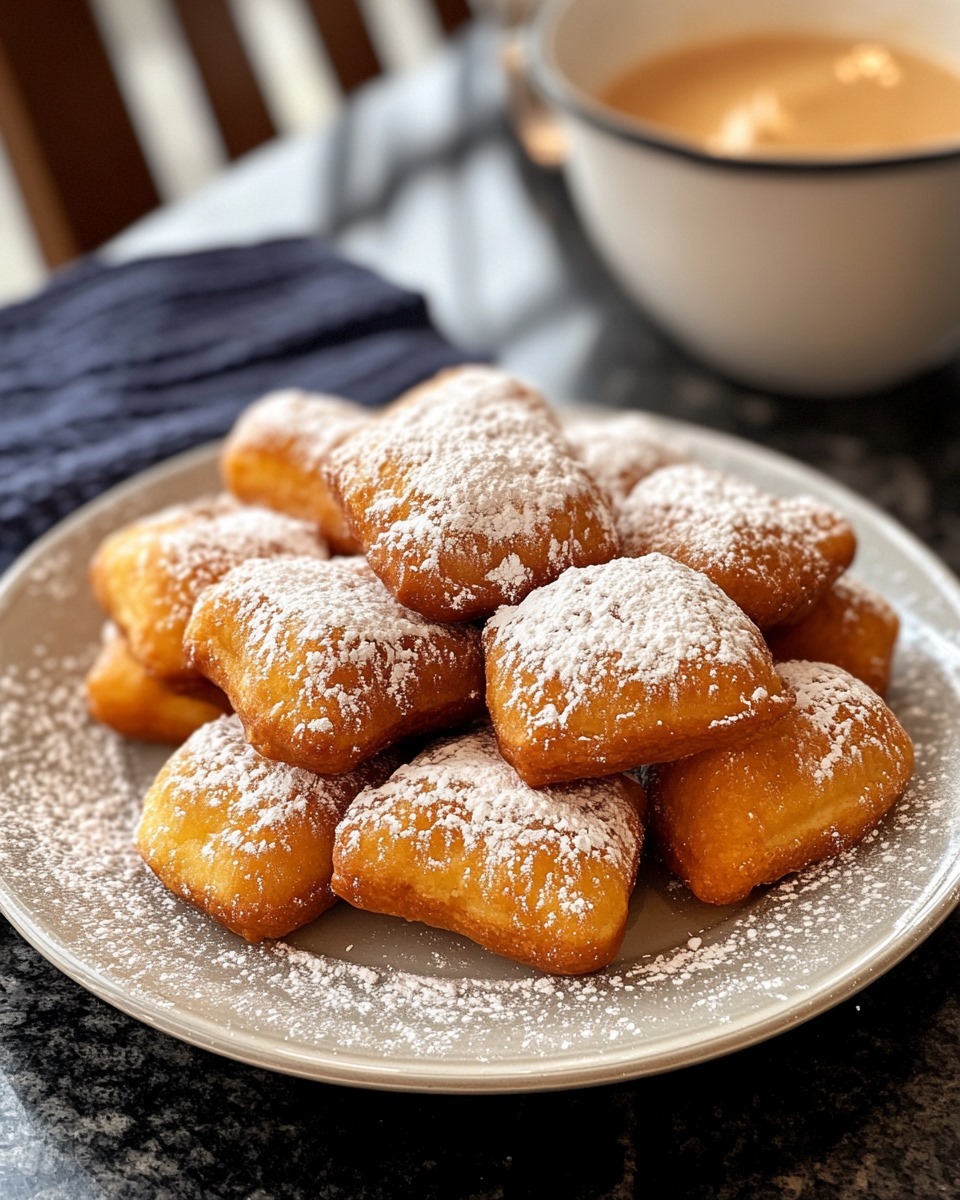
Classic Vanilla French Beignets: A Timeless Treat

Experience the magic of French patisseries in your own kitchen with these light, airy, and irresistible Vanilla French Beignets. These golden, pillow-soft pastries are delicately flavored with vanilla and dusted generously with powdered sugar. Perfect for breakfast, brunch, or a sweet snack, beignets are best enjoyed fresh, paired with a cup of coffee or tea for an authentic taste of Parisian charm.

Ingredients

For the Dough:

  • All-Purpose Flour: 2 ½ cups
  • Granulated Sugar: ¼ cup
  • Active Dry Yeast: 2 teaspoons
  • Salt: ½ teaspoon
  • Warm Milk: 1 cup (110°F/43°C)
  • Unsalted Butter: 1 tablespoon, melted
  • Pure Vanilla Extract: 1 tablespoon

For Frying and Topping:

  • Vegetable Oil: For deep frying
  • Powdered Sugar: For dusting

Instructions

Step 1: Prepare the Dough

  1. In a large mixing bowl, combine the warm milk and active dry yeast. Let it sit for 5-10 minutes until the yeast is foamy.
  2. Add the granulated sugar, melted butter, vanilla extract, and salt to the yeast mixture. Stir to combine.
  3. Gradually mix in the flour, about ½ cup at a time, until a soft dough forms.
  4. Transfer the dough to a lightly floured surface and knead for about 5-7 minutes, or until smooth and elastic.
  5. Transfer the dough to a lightly oiled bowl, cover it with a clean kitchen towel, and let it rise in a warm spot for 1-2 hours, or until it has doubled in volume.

Step 2: Shape the Beignets

  1. Once the dough has risen, punch it down and roll it out on a floured surface to about ¼-inch thickness.
  2. Use a sharp knife or pizza cutter to cut the dough into 2- to 3-inch squares.

Step 3: Fry the Beignets

  1. Heat vegetable oil in a deep pot or fryer to 350°F (175°C). Ensure there is enough oil for the beignets to float while frying.
  2. Fry a few dough squares at a time, turning occasionally, until they are puffed and golden brown on both sides (about 1-2 minutes per side).
  3. Using a slotted spoon, carefully transfer the fried beignets onto a plate lined with paper towels to absorb any excess oil.

Step 4: Dust with Powdered Sugar

  1. While the beignets are still warm, generously dust them with powdered sugar using a fine-mesh sieve.
  2. Serve immediately for the best flavor and texture.

Conclusion

These Classic Vanilla French Beignets are a delightful way to bring a touch of French sophistication to your table. Their melt-in-your-mouth texture, paired with the fragrant vanilla aroma and sweet powdered sugar, makes them impossible to resist. Whether you’re sharing them with loved ones or savoring them solo, these beignets are guaranteed to make any day feel special. Bon appétit!

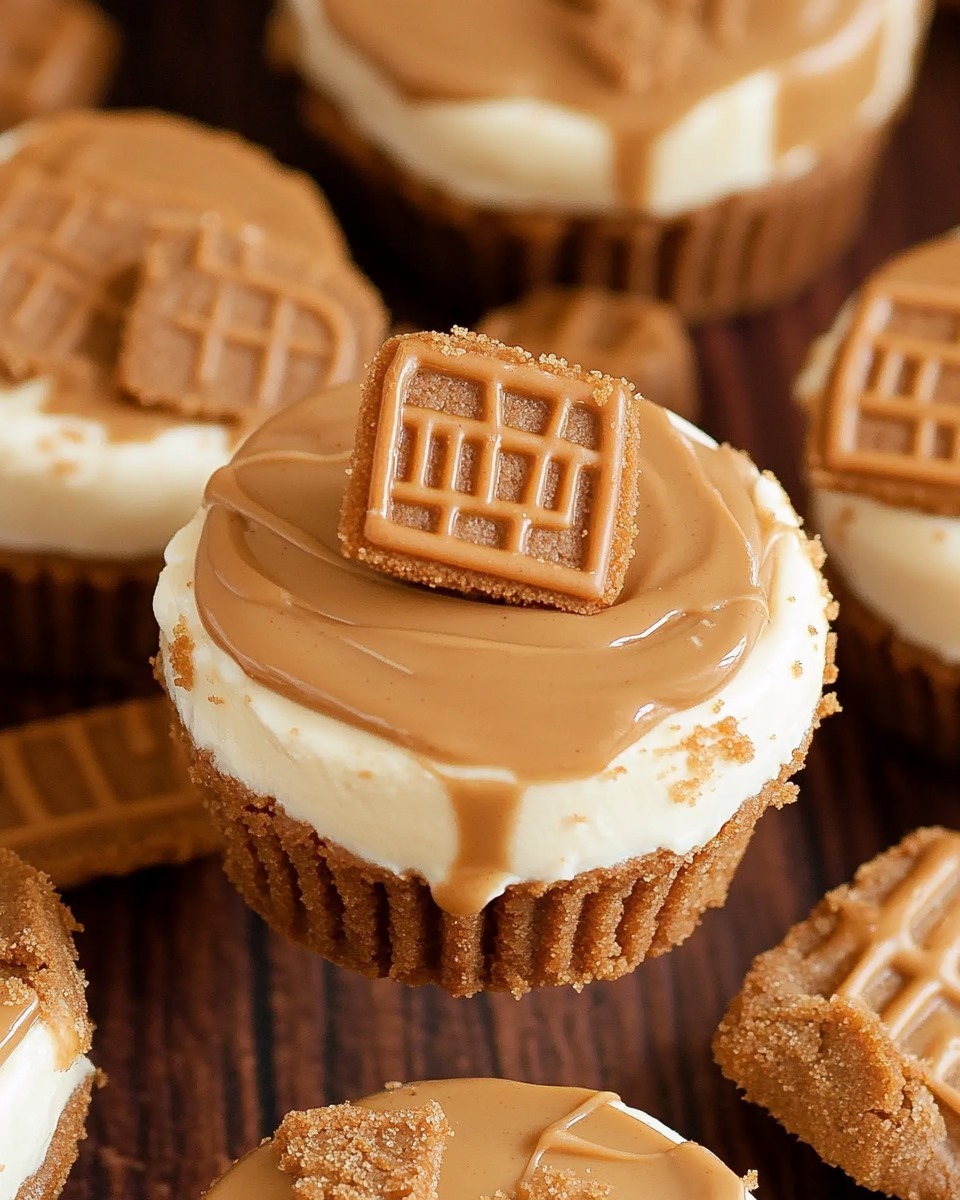
Mini Biscoff Bliss Cheesecakes: A Perfect Bite-Sized Treat

Get ready to indulge in pure decadence with Mini Biscoff Bliss Cheesecakes! These luscious treats combine the warm spiced flavor of Biscoff cookies with the creamy, tangy richness of cheesecake, all packed into a perfect single-serving size. Topped with a smooth layer of cookie butter, these cheesecakes are the ultimate dessert for Biscoff lovers and a delightful addition to any gathering.

Ingredients

For the Crust:

  • Biscoff Cookies: 4 ounces (113 grams; about 15 cookies)
  • Light Brown Sugar: 1 teaspoon (4 grams)
  • Unsalted Butter: 3 Tablespoons (42 grams), melted

For the Cheesecake:

  • Cream Cheese: 12 ounces (340 grams), full-fat block, room temperature
  • Biscoff Cookie Butter: ½ cup (118 grams)
  • Granulated Sugar: ⅜ cup (75 grams)
  • Sour Cream: ¼ cup (58 grams), room temperature
  • Heavy Cream: 2 Tablespoons (30 grams), room temperature
  • Vanilla Extract: 2 teaspoons (8 grams)
  • Salt: ⅛ teaspoon (0.75 grams)
  • Eggs: 1 large egg plus 1 large egg yolk, room temperature

For the Topping:

  • Biscoff Cookie Butter: ¼ cup (59 grams), melted

Instructions

Step 1: Make the Crust

  1. Preheat your oven to 325°F (160°C) and line a 12-cup muffin tin with paper liners.
  2. Using a food processor, pulse the Biscoff cookies into fine crumbs.
  3. Mix the cookie crumbs with the brown sugar and melted butter until evenly combined.
  4. Divide the mixture evenly among the muffin cups, pressing firmly to create a compact crust layer.

Step 2: Prepare the Cheesecake Filling

  1. In a large bowl, beat the cream cheese on medium speed until smooth and creamy.
  2. Mix in the Biscoff cookie butter and granulated sugar, beating until fully incorporated.
  3. Mix in the sour cream, heavy cream, vanilla extract, and salt, scraping down the sides of the bowl as needed.
  4. Add the egg and egg yolk, beating on low speed until just combined. Avoid overmixing to prevent air bubbles.

Step 3: Assemble and Bake

  1. Distribute the cheesecake filling evenly across the prepared crusts, filling each cup nearly to the brim.
  2. Bake in the preheated oven for 18-22 minutes, or until the centers are set but still slightly jiggly.
  3. Switch off the oven and leave the door ajar just a little. Allow the cheesecakes to cool in the oven for 15 minutes before moving them to a wire rack to cool completely.
  4. Chill the cheesecakes in the refrigerator for at least 2 hours or overnight for best results.

Step 4: Add the Biscoff Topping

  1. Once the cheesecakes are fully chilled, melt the Biscoff cookie butter in the microwave for 20-30 seconds until pourable.
  2. Spoon or drizzle the melted cookie butter over each cheesecake, spreading it into an even layer.
  3. Allow the topping to set for a few minutes before serving.

Conclusion

Mini Biscoff Bliss Cheesecakes deliver all the indulgence of a classic cheesecake with the added allure of Biscoff’s signature spiced flavor. These bite-sized desserts are easy to make, visually stunning, and irresistibly delicious. Serve them at your next party or enjoy them as a sweet personal treat—they’re guaranteed to impress!

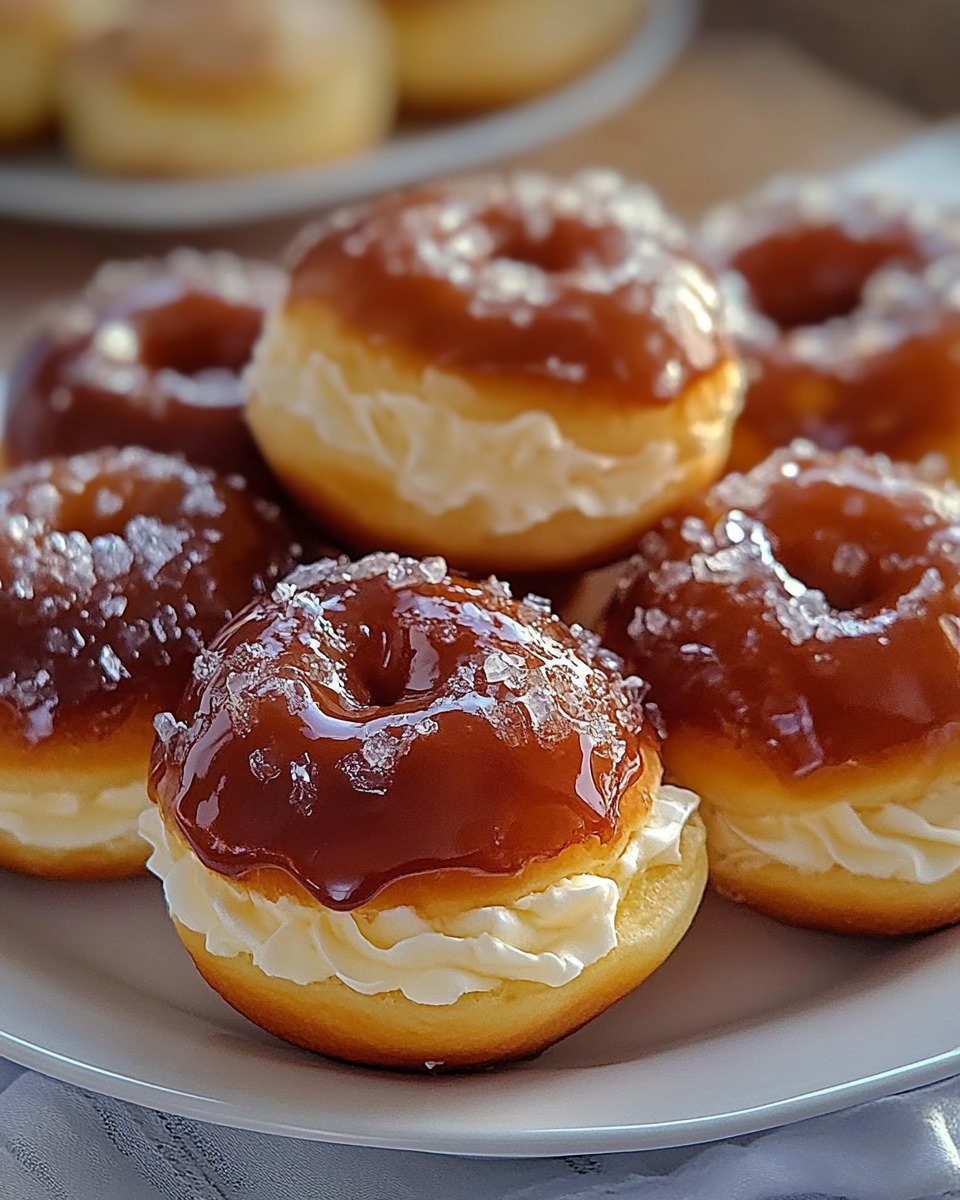
Heavenly Cream Delight Donuts: A Modern Twist on an Irresistible Classic

Indulge in the ultimate fusion of textures and flavors with Heavenly Cream Delight Donuts. These golden pastries boast a pillowy, airy interior encased in a crisp, caramelized sugar shell. Inspired by the elegant crème brûlée but crafted with a playful twist, these donuts will delight your taste buds and impress your guests. Perfect for weekend brunches, celebrations, or whenever you need a touch of decadence, this recipe brings together the artistry of baking with the luxurious taste of custard.

Ingredients

For the Donut Dough:

  • Flour: 360g (All-purpose; adjust quantity for desired texture: 500g for firmer, 270g for softer)
  • Instant Yeast: 7g
  • Sugar: 50g
  • Salt: 5g
  • Eggs: 2 large
  • Butter: 80g (Unsalted, softened)
  • Warm Milk or Water: 120ml (Choose milk for richness or water for a lighter texture)
  • Optional Additions:
    • Lemon Zest: Zest of 1 lemon for a citrusy hint
    • Vanilla Extract: 1 teaspoon for added depth

For the Custard Filling:

  • Egg Yolks: 4 large
  • Sugar: 60g
  • Cornstarch: 30g
  • Milk: 500ml (Whole milk recommended)
  • Vanilla Bean or Extract: 1 bean (split) or 2 teaspoons extract

For the Caramelized Sugar Topping:

  • Sugar: 100g (For sprinkling and caramelizing)

Instructions

Step 1: Prepare the Donut Dough

  1. In a large mixing bowl, combine the flour, sugar, yeast, and salt. Mix well.
  2. Incorporate the eggs and gently warm milk or water. Mix and knead the ingredients until the dough starts to form a cohesive ball.
  3. Gradually incorporate the softened butter and knead until the dough is smooth and elastic (about 8-10 minutes by hand or 5 minutes using a mixer).
  4. If desired, mix in the lemon zest or vanilla extract for additional flavor.
  5. Cover the dough and let it rise in a warm place until it doubles in size (about 1-2 hours).

Step 2: Shape and Fry the Donuts

  1. Once risen, punch down the dough and roll it out to about 1-inch thickness.
  2. Shape the dough into donuts using a round cutter. Arrange the cut pieces on a tray lined with parchment paper. Cover them and allow the dough to rise for an additional 30-45 minutes.
  3. Heat oil in a deep pan to 180°C (350°F). Fry the donuts in small batches, turning them until they are golden and crisp on each side. Transfer them to paper towels to drain and cool.

Step 3: Make the Custard Filling

  1. In a bowl, whisk together the egg yolks, sugar, and cornstarch until smooth.
  2. Heat the milk with the vanilla bean or extract in a saucepan over medium heat until it just begins to simmer. Remove the vanilla bean if used.
  3. Gradually add the hot milk to the egg mixture, whisking continuously to ensure it doesn’t curdle.
  4. Return the mixture to the saucepan and cook over low heat, stirring continuously, until it thickens into a smooth custard.
  5. Take off the heat and pour into a bowl. Cover with plastic wrap, pressing it onto the surface to avoid a skin from forming. Let it cool completely.

Step 4: Assemble the Donuts

  1. Use a piping bag fitted with a narrow tip to inject the custard filling into each donut. Be generous to ensure a creamy surprise in every bite!

Step 5: Create the Caramelized Topping

  1. Sprinkle sugar evenly on the tops of the filled donuts.
  2. Using a kitchen torch, caramelize the sugar until it forms a crisp, golden shell. If you don’t have a torch, place the sugared donuts under a broiler, watching carefully to avoid burning.

Conclusion

These Heavenly Cream Delight Donuts are a masterpiece of culinary creativity, combining the silky indulgence of custard with the crunch of caramelized sugar. With their stunning presentation and unforgettable flavor, they’re sure to become a favorite in your repertoire. Whether shared with loved ones or enjoyed as a solo treat, each bite offers a taste of bliss.