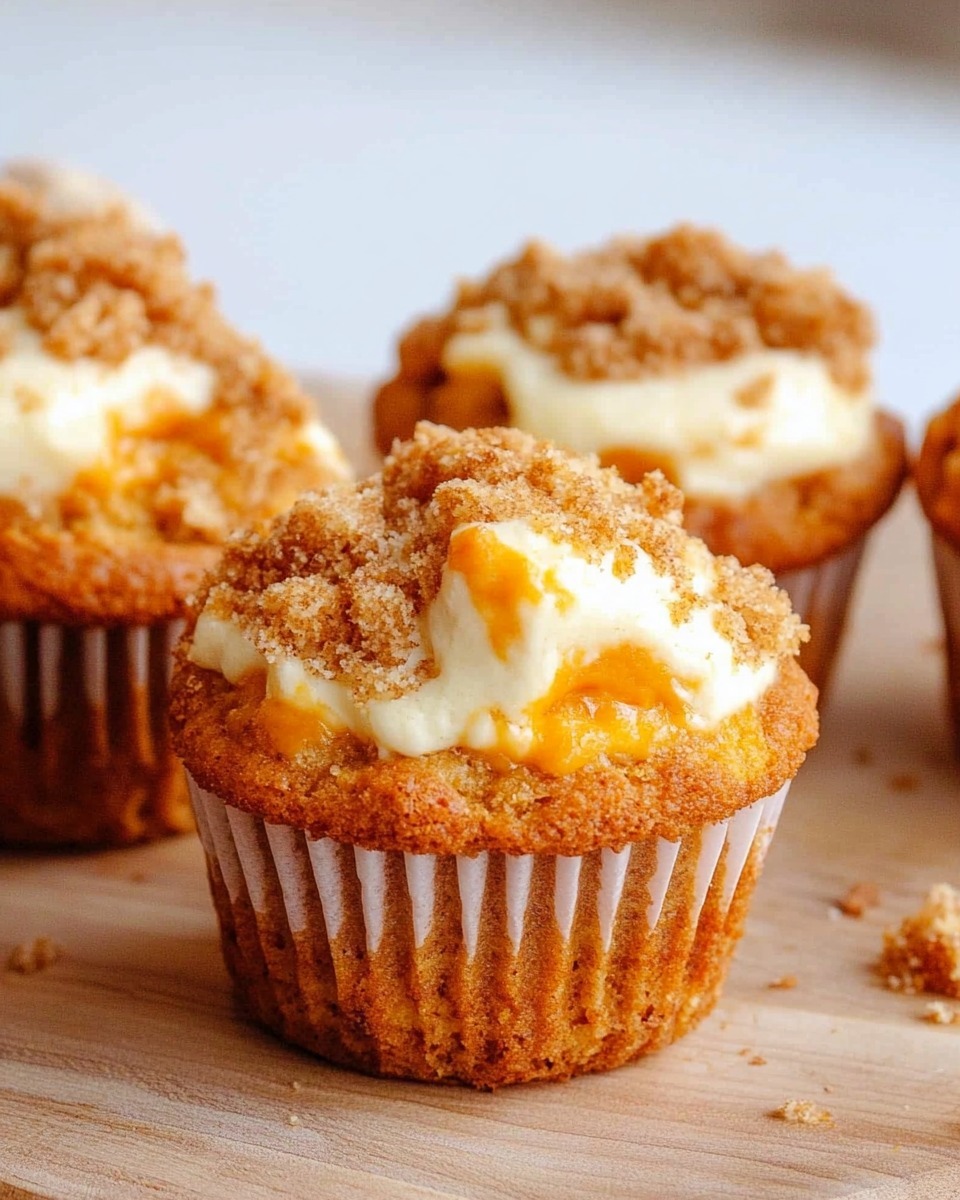
Pumpkin Cheesecake Muffins: Fall’s Favorite Flavor in Every Bite

Warm pumpkin spice, creamy cheesecake filling, and a crunchy cinnamon streusel topping make these Pumpkin Cheesecake Muffins an irresistible treat. Perfect for cozy mornings, holiday gatherings, or anytime you want a seasonal indulgence, these muffins are packed with autumn’s best flavors. Every bite offers layers of texture and taste, from the tender pumpkin muffin base to the creamy, tangy cheesecake center.

Ingredients

Cream Cheese Filling

  • 6 ounces (170.1 g) cream cheese, room temperature
  • ¼ cup (50 g) granulated sugar
  • 1 tablespoon of Lifeway Plain Organic Whole Milk Kefir, at room temperature

Cinnamon Streusel Topping

  • 4 tablespoons (56 g) unsalted butter, measured and then melted
  • ⅔ cup (83.33 g) all-purpose flour
  • ½ cup (100 g) brown sugar, packed (light or dark)
  • 1 teaspoon ground cinnamon

Pumpkin Muffins

  • 2 cups (250 g) all-purpose flour
  • 1 teaspoon baking soda
  • 1 teaspoon baking powder
  • ¾ teaspoon salt
  • 1 teaspoon ground cinnamon
  • 1½ teaspoons pumpkin pie spice
  • ½ cup (120 g) vegetable oil
  • ½ cup (100 g) granulated sugar
  • ½ cup (100 g) brown sugar (light or dark, packed)
  • 2 large eggs, room temperature
  • 1½ teaspoons vanilla extract
  • ¼ cup (60 g) Lifeway Plain Organic Whole Milk Kefir, room temperature
  • 1 cup (245 g) pumpkin puree

Instructions

1. Prepare the Cream Cheese Filling

  1. In a small mixing bowl, beat the cream cheese, granulated sugar, and kefir until smooth and creamy. Set aside.

2. Make the Cinnamon Streusel Topping

  1. In another bowl, combine the melted butter, flour, brown sugar, and cinnamon. Mix until crumbly. Set aside.

3. Mix the Dry Ingredients for the Muffins

  1. In a large mixing bowl, combine the flour, baking soda, baking powder, salt, cinnamon, and pumpkin pie spice, whisking until evenly blended.

4. Combine the Wet Ingredients

  1. In a separate bowl, whisk together the vegetable oil, granulated sugar, brown sugar, eggs, vanilla extract, kefir, and pumpkin puree until well combined.

5. Make the Muffin Batter

  1. Gradually add the wet ingredients to the dry ingredients, folding gently until just combined. Be careful not to overmix to keep the muffins tender.

6. Assemble the Muffins

  1. Preheat the oven to 350°F (175°C) and line a muffin tin with paper liners or grease with cooking spray.
  2. Fill each muffin cup about two-thirds full with the pumpkin batter.
  3. Add a dollop (about 1–2 teaspoons) of the cream cheese filling to the center of each cup.
  4. Sprinkle the cinnamon streusel topping generously over the muffins.

7. Bake

  1. Bake for 20–25 minutes, or until a toothpick inserted into the pumpkin batter (not the cream cheese center) comes out clean.
  2. Let the muffins cool in the tin for 5 minutes before transferring them to a wire rack to cool completely.

Conclusion:

These Pumpkin Cheesecake Muffins capture the essence of fall with their warm pumpkin spice, velvety cheesecake center, and delightful streusel topping. Ideal for breakfast, a sweet treat after dinner, or paired with an afternoon coffee, they’re a perfect indulgence. Whether shared with loved ones or enjoyed solo, these muffins are sure to brighten your day!
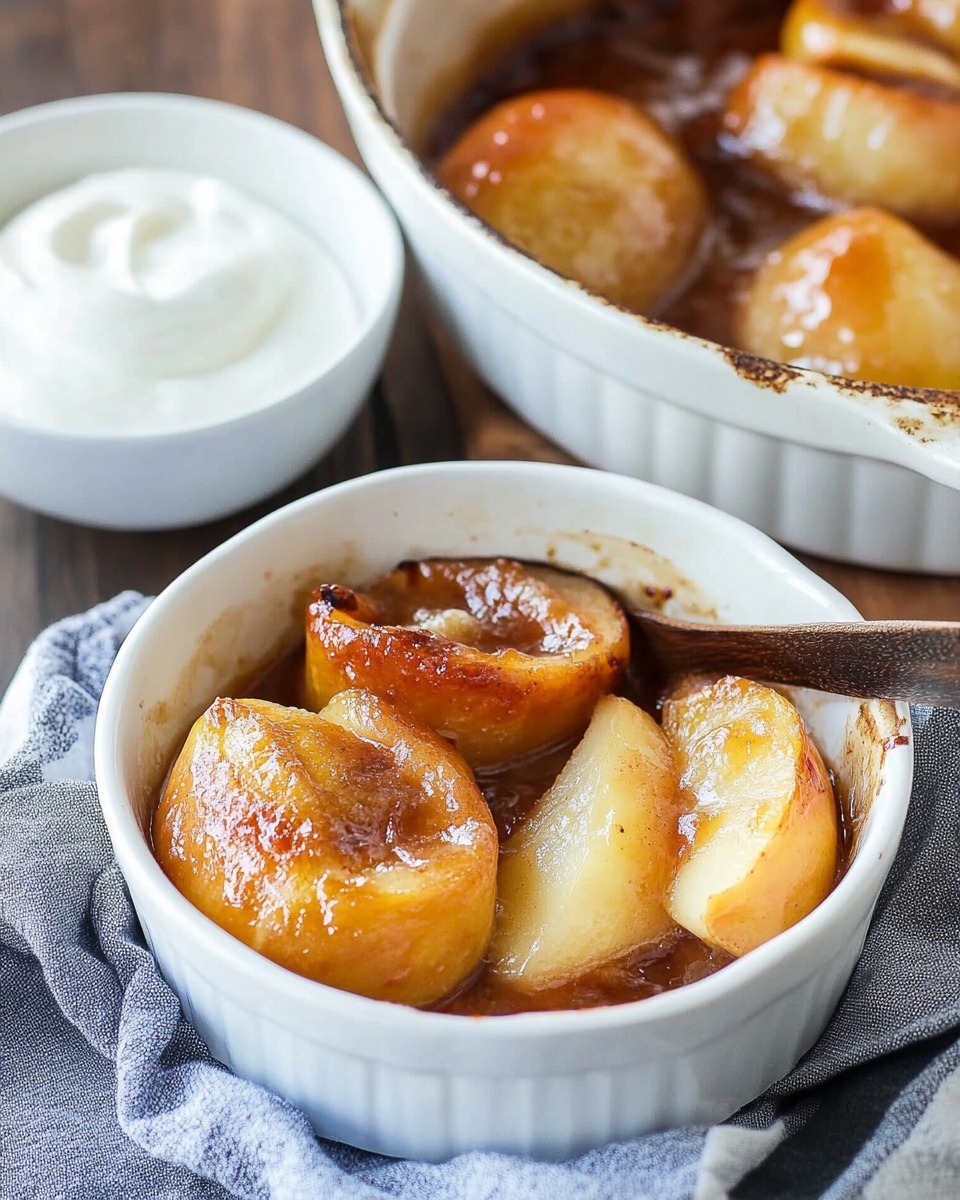
Cinnamon-Spiced Baked Apples: A Warm and Cozy Treat

When the crisp air of fall sets in, there’s nothing more comforting than the sweet aroma of baked apples wafting through your home. This Cinnamon-Spiced Baked Apples recipe combines tender, caramelized apples with a touch of cinnamon and brown sugar for a simple yet satisfying dessert. Perfect on its own or topped with a dollop of whipped cream or vanilla ice cream, this recipe is sure to become a seasonal favorite.

Ingredients

  • Cooking spray
  • 5–6 large apples (a mix of Granny Smith and Red Delicious for balance)
  • ¼ cup light brown sugar
  • 1 tablespoon lemon juice
  • 2 teaspoons ground cinnamon
  • 2 teaspoons cornstarch
  • 2 tablespoons unsalted butter, sliced into pats

Instructions

1. Preheat and Prepare

  1. Preheat your oven to 375°F (190°C).
  2. Lightly spray a baking dish with cooking spray to prevent sticking.

2. Core and Slice the Apples

  1. Wash the apples and remove the cores using an apple corer or a sharp knife.
  2. Slice the apples into thick wedges, about ½-inch wide, for even cooking.

3. Make the Cinnamon Sugar Mixture

  1. In a large mixing bowl, combine the brown sugar, cinnamon, and cornstarch.
  2. Add the lemon juice to the mix for a hint of tartness and to prevent the apples from browning.

4. Coat the Apples

  1. Toss the apple slices in the cinnamon sugar mixture, ensuring they are evenly coated.

5. Assemble in the Baking Dish

  1. Arrange the coated apple slices in the prepared baking dish in an even layer.
  2. Dot the top with the butter pats, evenly spacing them over the apples.

6. Bake to Perfection

  1. Place the dish in the preheated oven and bake for 30–35 minutes, stirring gently halfway through.
  2. The apples should be tender but not mushy, with a bubbly, caramelized sauce forming in the dish.

7. Serve and Enjoy

  1. Let the baked apples cool for 5–10 minutes before serving.
  2. Serve warm, either on their own or with a scoop of vanilla ice cream, a dollop of whipped cream, or a sprinkle of granola for added crunch.

Conclusion:

This Cinnamon-Spiced Baked Apples recipe is a celebration of cozy flavors and easy preparation. With a balance of sweet and tart apples, warm spices, and a buttery finish, it’s the perfect way to enjoy the bounty of the season. Whether served as a weeknight dessert or a holiday side dish, these baked apples are sure to leave everyone craving seconds.

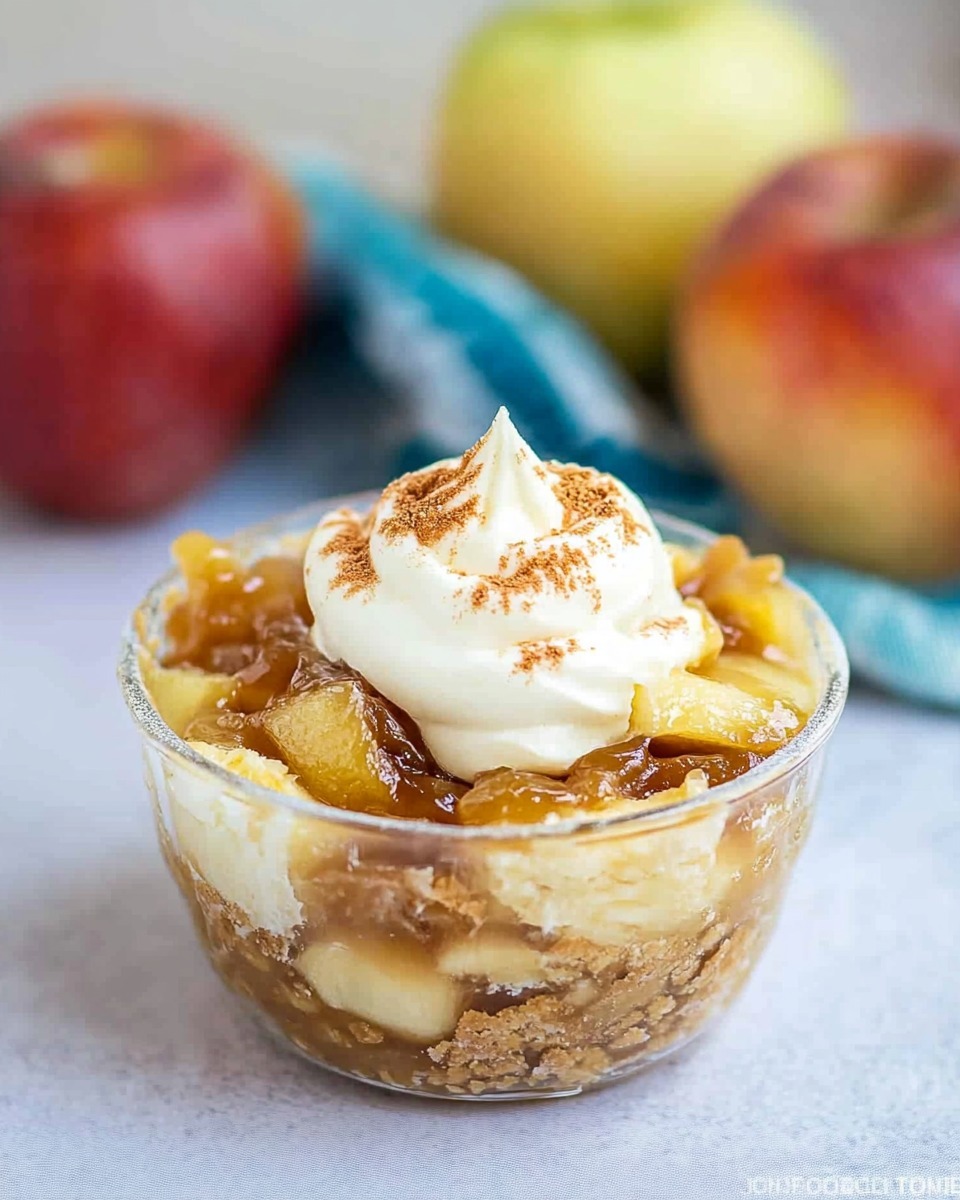
Apple Caramel Dump Cake: A Quick and Cozy Dessert

When you’re craving a warm, gooey dessert but don’t want to spend hours in the kitchen, this Apple Caramel Dump Cake is your go-to recipe. Packed with the classic flavors of spiced apples, buttery cake, and rich caramel, it’s a treat that feels homemade with minimal effort. Perfect for family dinners, potlucks, or just because, this dump cake is as easy as it is delicious.

Ingredients

  • 1 (15.25-ounce) package cake mix (yellow or spice works best)
  • 2 (20-ounce) cans apple pie filling
  • ½ cup butter, thinly sliced (8 tablespoons or 1 stick)
  • 1 teaspoon cinnamon
  • 1 (12-ounce) jar caramel topping
  • Optional: 8 scoops vanilla ice cream for serving

Instructions

1. Preheat and Prepare

  1. Preheat your oven to 350°F (175°C).
  2. Lightly grease a 9×13-inch baking dish to prevent sticking.

2. Layer the Ingredients

  1. Pour the apple pie filling into the prepared baking dish, spreading it out evenly.
  2. Sprinkle the cinnamon evenly over the apples for a touch of spice.
  3. Drizzle half of the caramel topping over the apple pie filling.

3. Add the Cake Mix

  1. Open the cake mix and evenly sprinkle the dry mix over the apple layer. Do not stir! The magic of a dump cake is in its layers.

4. Top with Butter

  1. Lay the thin slices of butter across the top of the cake mix, ensuring most of the surface is covered. This will create a golden, crispy topping as it bakes.

5. Bake

  1. Place the dish in the preheated oven and bake for 45–50 minutes, or until the top is golden brown and the apple filling is bubbling at the edges.

6. Serve and Enjoy

  1. Let the cake cool slightly before serving. Drizzle the remaining caramel topping over each slice for added indulgence.
  2. For an extra treat, top with a scoop of vanilla ice cream and watch it melt into the warm cake.

Conclusion:

This Apple Caramel Dump Cake is proof that simplicity can be delicious. With its gooey apple filling, buttery cake layer, and ribbons of caramel, it’s a dessert that tastes like you spent hours in the kitchen. Pair it with ice cream for a dessert that’s sure to become a family favorite. Whether it’s for a holiday table or a casual night at home, this cake promises smiles all around—one effortless bite at a time!

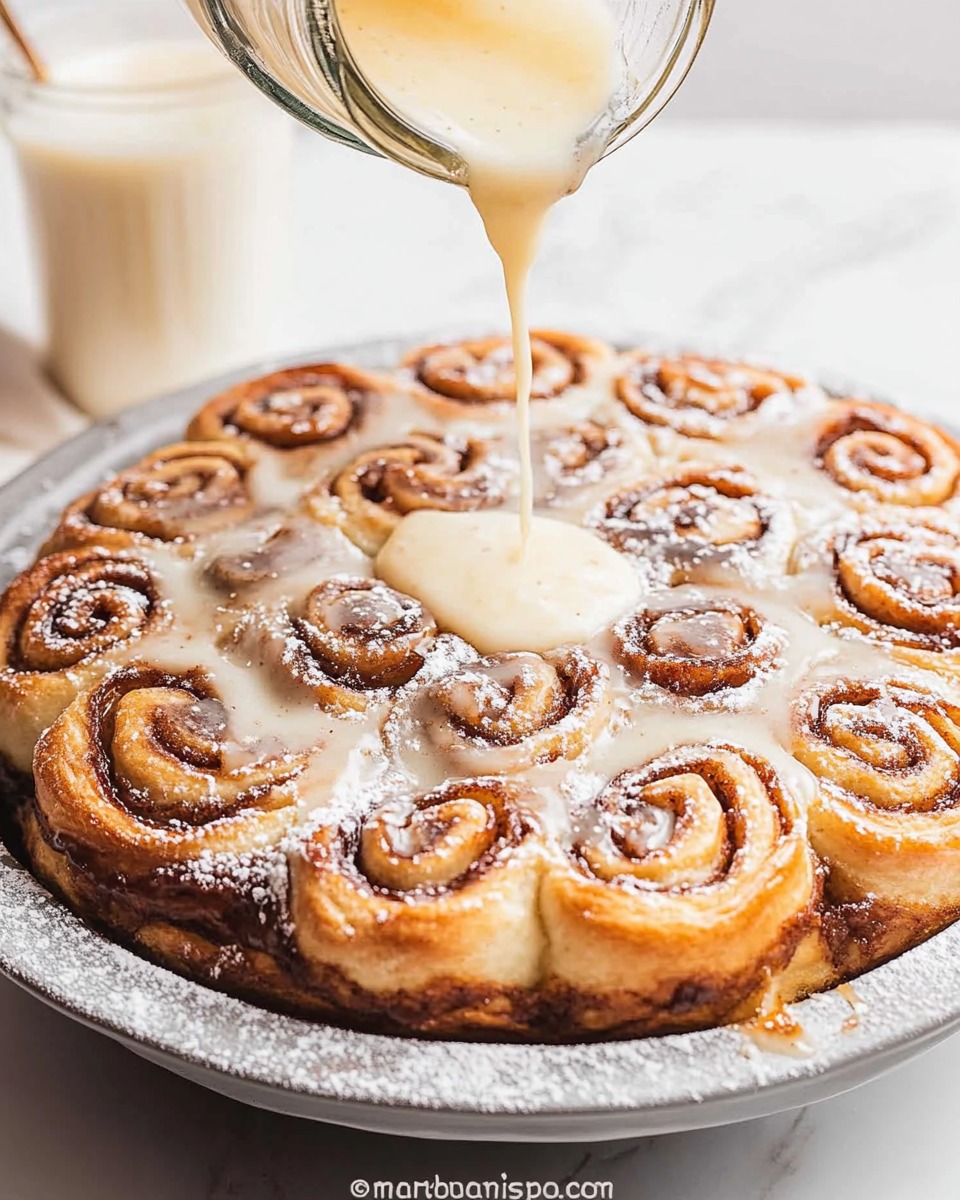
Golden Maple Cinnamon Rolls: A Sweet Morning Indulgence

Imagine the comforting aroma of warm cinnamon and sweet maple syrup wafting through your kitchen—a scent that promises soft, gooey perfection in every bite. These Golden Maple Cinnamon Rolls are a breakfast favorite reinvented, combining the classic cinnamon swirl with the rich, earthy sweetness of maple. Perfect for a cozy weekend brunch or a special treat, this recipe guarantees a crowd-pleaser that’s as delightful to make as it is to eat.

Ingredients

For the Dough

  • 2 ¾ cups all-purpose flour
  • 2 tablespoons granulated sugar
  • 2 ¼ teaspoons instant yeast
  • ½ teaspoon salt
  • ½ cup milk
  • ¼ cup unsalted butter
  • ¼ cup water
  • 1 teaspoon vanilla extract
  • 2 large eggs

For the Filling

  • ¼ cup unsalted butter, softened
  • ½ cup packed brown sugar
  • 2 teaspoons ground cinnamon
  • ¼ cup pure maple syrup

For the Maple Glaze

  • 1 cup powdered sugar
  • 2 tablespoons pure maple syrup
  • 1–2 tablespoons milk (adjust for desired consistency)

Instructions

1. Prepare the Dough

  1. In a large mixing bowl, combine the flour, sugar, yeast, and salt.
  2. Heat the milk, butter, and water together until warm (not hot). Stir in the vanilla extract.
  3. Slowly combine the wet ingredients with the dry ingredients, adding the eggs one by one. Stir until a soft, cohesive dough comes together.
  4. Turn the dough out onto a floured surface and knead for 8–10 minutes until it becomes smooth and elastic. Alternatively, use a stand mixer fitted with a dough hook for about 5 minutes.
  5. Transfer the dough to a greased bowl, cover it with a damp cloth, and set it in a warm spot to rise for 1–2 hours, or until it has doubled in size.

2. Make the Filling

  1. In a small bowl, combine the softened butter, brown sugar, and cinnamon, stirring until the mixture forms a smooth, spreadable paste.
  2. Stir in the maple syrup to combine, creating a luscious filling.

3. Roll and Assemble

  1. Roll the risen dough into a large rectangle, about 12×16 inches.
  2. Spread the cinnamon-maple filling evenly over the dough, leaving a ½-inch border around the edges.
  3. Roll the dough tightly from the longer side into a log. Pinch the edges to seal.
  4. Cut the dough log into 12 equal rolls and arrange them in a greased baking dish with the cut sides facing up. Cover the dish and let the rolls rise for 30–45 minutes.

4. Bake to Perfection

  1. Preheat the oven to 375°F (190°C).
  2. Bake the rolls for 20–25 minutes, or until golden brown and cooked through. Let them cool slightly before glazing.

5. Glaze and Serve

  1. In a small bowl, whisk together powdered sugar, maple syrup, and milk until smooth. Adjust the consistency with more milk if necessary.
  2. Drizzle the glaze generously over the warm cinnamon rolls.
  3. Serve fresh and enjoy the gooey, maple-infused goodness!

Conclusion:

Golden Maple Cinnamon Rolls bring together the best of both worlds—pillowy soft dough and a rich, caramelized maple-cinnamon swirl. Whether you enjoy them fresh out of the oven or as an indulgent snack later in the day, these rolls are sure to elevate any moment. With a straightforward recipe and simple ingredients, you’re just steps away from creating a bakery-style masterpiece at home. Why not make today a little sweeter?

Lychee Jelly Cream Puffs: A Delicate Pastry Delight

Lychee Jelly Cream Puffs are a unique and elegant twist on traditional cream puffs, pairing the airy choux pastry with a luscious lychee-infused cream. Topped with a crisp craquelin for extra texture and sweetness, these treats are perfect for celebrations, afternoon tea, or any occasion where you want to impress with a refined dessert.

Ingredients

For the Craquelin (Crispy Topping):

  • 50 g butter, softened
  • 50 g all-purpose flour
  • 50 g sugar
  • Optional: Food coloring for a decorative touch

For the Pâte à Choux (Choux Pastry):

  • 70 g water
  • 50 g butter
  • 60 g all-purpose flour
  • 2 medium eggs

For the Lychee Cream Filling:

  • 400 g cold heavy whipping cream
  • 2 tablespoons sugar (or to taste)
  • Powdered sugar (for dusting, optional)

Instructions

1. Prepare the Craquelin:

  1. In a bowl, mix the softened butter, sugar, and flour until a dough forms. Add food coloring if desired for a decorative effect.
  2. Roll out the dough between two sheets of parchment paper to about 2 mm thickness. Freeze for at least 30 minutes.
  3. Once firm, cut the craquelin into small circles slightly smaller than the diameter of your cream puffs.

2. Make the Pâte à Choux:

  1. Preheat your oven to 180°C (350°F). Line a baking sheet with parchment paper.
  2. In a saucepan, bring the water and butter to a boil. Once boiling, lower the heat and quickly add the flour. Stir quickly and continuously until the dough comes together, pulling away from the sides of the pan.
  3. Move the dough to a mixing bowl and allow it to cool for around 5 minutes.
  4. Add the eggs one by one, beating well after each addition. The dough should be smooth, glossy, and have a consistency that can be piped easily.
  5. Transfer the choux pastry into a piping bag fitted with a round tip. Pipe small mounds (about 1½ inches in diameter) onto the prepared baking sheet, spacing them 2 inches apart.
  6. Place a frozen craquelin circle on top of each mound.

3. Bake the Cream Puffs:

  1. Bake for 25–30 minutes or until the puffs are golden brown and crisp. Do not open the oven during baking to prevent them from collapsing.
  2. Once baked, remove the puffs and let them cool completely on a wire rack.

4. Prepare the Lychee Cream Filling:

  1. In a chilled mixing bowl, beat the heavy whipping cream and sugar together until stiff peaks form.
  2. Add a few teaspoons of lychee juice or puree for a subtle lychee flavor (optional).

5. Assemble the Cream Puffs:

  1. Slice each puff horizontally or use a piping nozzle to create a hole at the bottom.
  2. Pipe the lychee cream into each puff until full.
  3. Dust the tops with powdered sugar for a decorative finish, if desired.

Conclusion

Lychee Jelly Cream Puffs are a harmonious balance of textures and flavors, combining the delicate lychee cream with the crispness of the craquelin and the lightness of the choux pastry. These elegant pastries are perfect for any occasion, bringing a touch of sophistication and delight to your dessert table. Try them today and elevate your baking repertoire!

Strawberry Eclairs: A Delightful Pastry Treat

Strawberry Eclairs are a whimsical twist on the classic French pastry, filled with a luscious strawberry custard and topped with a charming pink chocolate glaze. Perfect for special occasions or when you want to impress your guests with a delicate yet indulgent dessert, these eclairs are as delightful to look at as they are to eat.

Ingredients

For the Eclair Pastry:

  • 1 cup water
  • 8 tablespoons unsalted butter
  • ¼ teaspoon salt
  • 2 teaspoons white sugar
  • 1 cup all-purpose flour
  • 3 eggs, plus 1 extra if needed

For the Egg Wash:

  • 1 egg
  • 2 teaspoons water

For the Filling:

  • Strawberry Custard (see note below)

For the Pink Chocolate Glaze:

  • 8 oz white chocolate, coarsely chopped
  • Pink gel food coloring

Instructions

1. Prepare the Eclair Pastry (Pâte à Choux):

  1. Preheat your oven to 375°F (190°C). Line a baking sheet with parchment paper.
  2. In a medium saucepan, mix together the water, butter, salt, and sugar. Heat over medium until it reaches a boil, making sure the butter melts completely.
  3. Reduce the heat to low and add the flour all at once, stirring vigorously with a wooden spoon until the mixture forms a smooth ball and pulls away from the sides of the pan.
  4. Transfer the dough to a mixing bowl and let it cool slightly for 5 minutes.
  5. Add the eggs one at a time, beating well after each addition. Add the fourth egg if needed to achieve the right consistency.
  6. Transfer the dough to a piping bag fitted with a large round or star tip. Pipe 3–4 inch long strips onto the prepared baking sheet, spacing them about 2 inches apart.

2. Apply the Egg Wash and Bake:

  1. In a small bowl, whisk together the egg and water for the egg wash. Lightly brush it over the eclairs to give them a golden, glossy finish.
  2. Bake for 25 to 30 minutes, or until the dish is puffed up and golden brown. Do not open the oven during baking.
  3. Remove from the oven and pierce each eclair with a skewer to release steam. Let them cool completely on a wire rack.

3. Make the Strawberry Custard Filling:

Prepare a strawberry custard by combining milk, egg yolks, sugar, cornstarch, and pureed strawberries. Cook over medium heat until thickened, then let it cool. Chill before using.

4. Fill the Eclairs:

  1. Using a small piping tip, poke holes into the ends or bottom of each eclair.
  2. Fill a piping bag with the chilled strawberry custard and pipe the filling into the eclairs until full.

5. Prepare the Pink Chocolate Glaze:

  1. Melt the white chocolate in a heatproof bowl over a pot of simmering water or in the microwave in 30-second intervals, stirring until smooth.
  2. Add a small amount of pink gel food coloring to the melted chocolate and mix until the desired shade is achieved.

6. Glaze the Eclairs:

  1. Dip the top of each eclair into the pink chocolate glaze, allowing any excess to drip off. Place them on a wire rack to set.
  2. For extra flair, decorate with sprinkles, edible glitter, or a drizzle of contrasting chocolate.

Conclusion

Strawberry Eclairs are a delightful fusion of vibrant strawberry flavor and classic French pastry elegance. The airy choux pastry, creamy strawberry filling, and sweet pink glaze create a dessert that’s as beautiful as it is delicious. Perfect for celebrations or a touch of indulgence, these eclairs are sure to impress everyone at the table!

Decadent Apple Crumble Cheesecake

This Decadent Apple Crumble Cheesecake combines two classic desserts—cheesecake and apple crumble—for a dessert that’s truly unforgettable. Featuring a buttery cookie crust, a rich and creamy cheesecake layer, and a topping of spiced apples and buttery crumble, this treat is the perfect way to celebrate the flavors of fall or to impress at any gathering.

Ingredients

For the Cookie Crust:

  • 200 g digestive or graham crackers (about 1½ cups)
  • ½ teaspoon nutmeg
  • 1½ teaspoons cinnamon
  • 1½ tablespoons brown sugar
  • 50 g butter, melted

For the Apples and Crumble Topping:

  • 150 g apples, diced small (about 1–2 apples)
  • 1 tablespoon granulated sugar
  • 1 teaspoon cinnamon
  • 100 g all-purpose flour (¾ cup)
  • 80 g brown sugar (about ½ cup)
  • 70 g butter, room temperature (about 5 tablespoons)

For the Cheesecake:

  • 600 g cream cheese, full fat, room temperature (about 2½ cups)
  • 200 g granulated sugar (about 1 cup)
  • 150 g sour cream, 18% fat, room temperature (about ⅔ cup)
  • 1 tablespoon cornstarch
  • 2 teaspoons vanilla extract
  • 3 large eggs, room temperature

Instructions

  1. Prepare the Cookie Crust : Preheat your oven to 180°C (350°F). Grease and line the base of a 9-inch springform pan with parchment paper. In a food processor, pulse the digestive or graham crackers into fine crumbs. Add a pinch of nutmeg, cinnamon, and brown sugar, then mix in the melted butter until the texture resembles damp sand.  Evenly press the crumb mixture into the bottom of the prepared pan to create the crust. Bake for 8–10 minutes, then let it cool while you prepare the remaining layers.
  2. Make the Apple and Crumble Topping : In a bowl, toss the diced apples with granulated sugar and cinnamon. Set aside.In another bowl, mix the flour, brown sugar, and room-temperature butter with your fingers or a pastry cutter until the mixture forms coarse crumbs.
  3. Prepare the Cheesecake Filling : In a large mixing bowl, beat the cream cheese and granulated sugar together until smooth and creamy. Add the sour cream, cornstarch, and vanilla extract, mixing until fully combined. Beat in the eggs one at a time, ensuring each is incorporated before adding the next. Be careful not to overmix, as this can add air and cause cracking.
  4. Assemble the Cheesecake : Pour the cheesecake filling over the cooled crust and spread evenly. Evenly distribute the spiced apple mixture on top of the cheesecake layer. Evenly distribute the crumble topping over the apples, ensuring they are fully covered.
  5. Bake and Cool : Place the springform pan on a baking sheet and bake at 160°C (320°F) for 50–60 minutes, or until the cheesecake is set but still slightly wobbly in the center. Turn off the oven and leave the cheesecake inside with the door slightly ajar for about 1 hour to cool gradually. Take the cheesecake out of the oven and let it chill in the refrigerator for a minimum of 4 hours, or overnight for optimal texture.
  6. Serve and Enjoy :  Gently remove the cheesecake from the springform pan and place it onto a serving platter. Dust with powdered sugar or drizzle with caramel sauce if desired. Slice and serve chilled.

Conclusion

This Decadent Apple Crumble Cheesecake is a perfect harmony of textures and flavors, with its buttery crust, creamy cheesecake, and sweet spiced apples topped with a crumbly, buttery streusel. It’s a dessert that’s as beautiful as it is delicious and perfect for holidays, celebrations, or cozy evenings with family and friends. Try it today, and enjoy the best of both worlds!

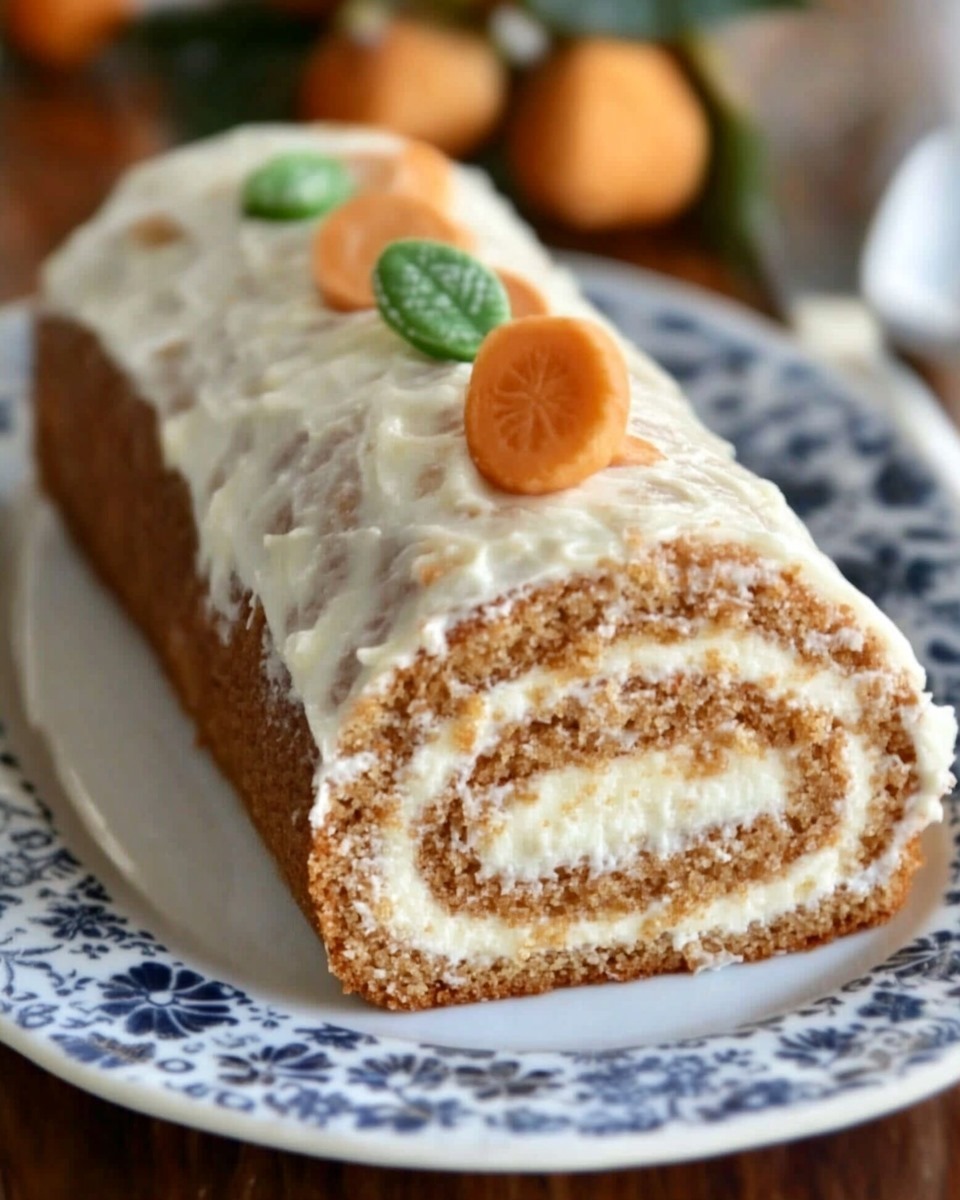
Spiced Carrot Cake Roll with Cream Cheese Filling

For a twist on the classic carrot cake, this Spiced Carrot Cake Roll combines the warm flavors of cinnamon, ginger, and nutmeg with a rich and creamy filling. Rolled to perfection, this dessert is as elegant as it is delicious. Perfect for holidays or any special occasion, it’s a show-stopping treat that’s surprisingly easy to make!

Ingredients

For the Cake:

  • 3 large eggs
  • 2/3 cup granulated sugar
  • 1 teaspoon vanilla extract
  • ½ teaspoon salt
  • 1 teaspoon baking powder
  • 1 teaspoon ground ginger
  • ¼ teaspoon ground nutmeg
  • 2 teaspoons ground cinnamon
  • ¾ cup all-purpose flour
  • 2 cups shredded carrots (about 2 medium carrots)
  • Powdered sugar (for rolling)

For the Filling:

  • 6 ounces cream cheese, at room temperature
  • 4 tablespoons butter, at room temperature
  • 2 cups powdered sugar
  • 1 teaspoon vanilla extract
  • Powdered sugar (for dusting)

Instructions

Prepare the Cake:

  1. Preheat the Oven: Preheat your oven to 375°F (190°C). Prepare a 10×15-inch jelly roll pan by lining it with parchment paper and giving it a light greasing.
  2. Mix the Batter: In a large bowl, beat the eggs and granulated sugar until thick and pale, about 2–3 minutes. Stir in the vanilla extract.
  3. Combine Dry Ingredients: In a separate bowl, whisk together the salt, baking powder, ginger, nutmeg, cinnamon, and flour.
  4. Add Carrots: Gently fold in the shredded carrots, ensuring they are evenly distributed throughout the batter.
  5. Bake the Cake: Pour the batter into the prepared pan and spread it evenly. Bake for 10 to 12 minutes, or until the cake bounces back when gently pressed.

Roll the Cake:

  1. Get Ready to Roll: While the cake is still warm, carefully flip it onto a kitchen towel that’s been generously sprinkled with powdered sugar. Gently remove the parchment paper.
  2. Roll the Cake: Starting from the short end, roll the cake tightly (with the towel inside) to form a spiral.

Prepare the Filling:

  1. Make the Cream Cheese Filling: In a medium bowl, beat the cream cheese and butter together until smooth and creamy. Gradually add the powdered sugar and vanilla extract, beating until well combined.

Assemble the Cake Roll:

  1. Unwrap the Cake: After the cake has cooled, gently unroll it. Evenly spread the cream cheese filling across the cake, leaving a slight border at the edges.
  2. Roll it Back Up: Slowly roll the cake back up, this time without the towel. Wrap the cake tightly in plastic wrap and chill in the refrigerator for at least one hour to firm up.

Serve and Enjoy:

  1. Dust and Slice: Before serving, dust the cake roll with powdered sugar for an elegant finish. Slice into rounds and serve chilled.

Conclusion

This Spiced Carrot Cake Roll is the perfect combination of cozy spices, tender cake, and creamy filling. It’s a beautiful and delicious dessert that’s surprisingly easy to make and sure to impress your guests. Whether you’re celebrating a special occasion or just indulging in a sweet treat, this cake roll will leave everyone asking for seconds!

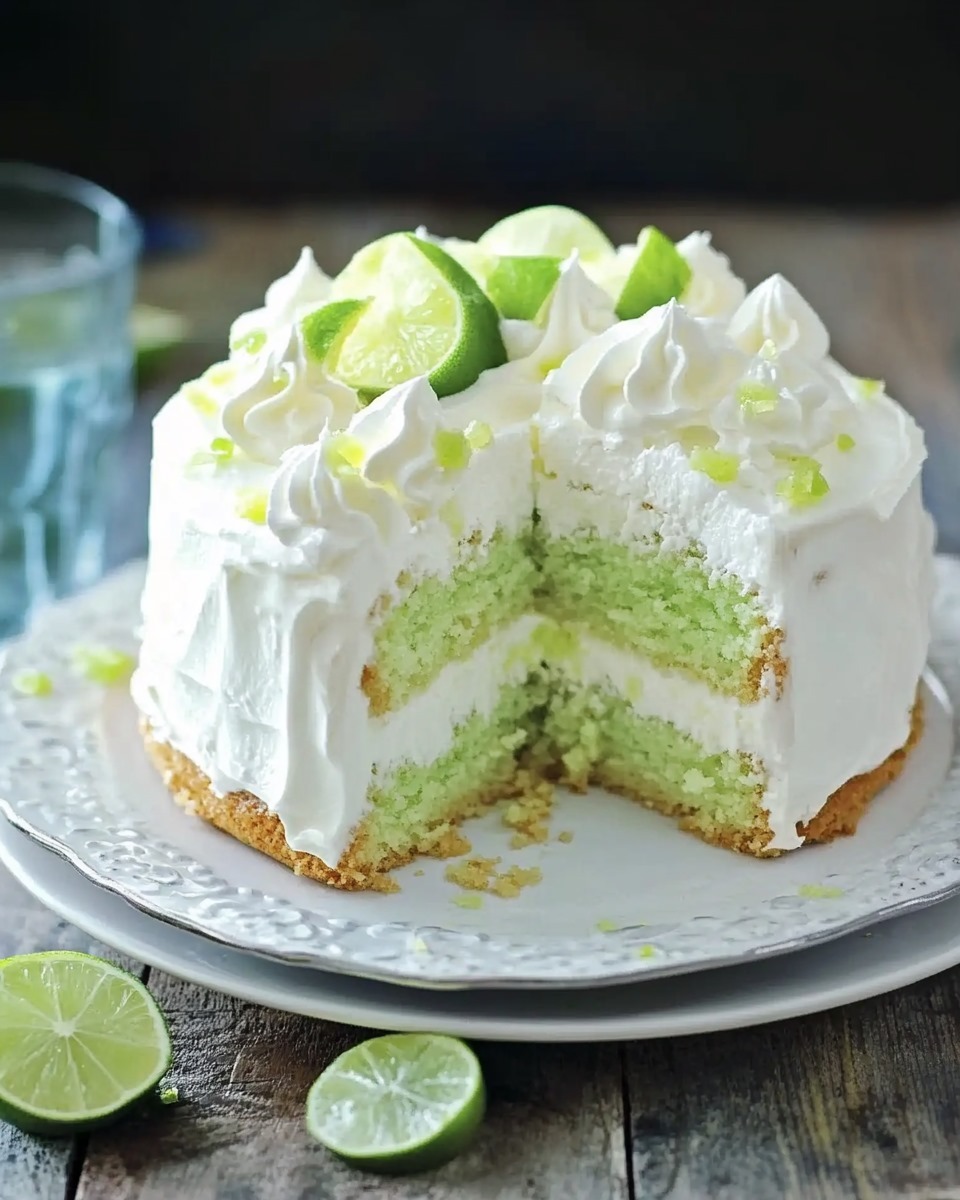
Zesty Key Lime Crème Poke Cake

Infuse your dessert menu with a burst of tropical citrus with this Zesty Key Lime Crème Poke Cake. A delightful blend of tangy lime and creamy goodness, this cake is moist, flavorful, and irresistibly light. Perfect for summer gatherings or when you want to add a refreshing twist to your dessert spread, this cake will keep your guests coming back for more!

Ingredients

  • 1 (16.25 oz) box white cake mix (prepared as per package instructions)
  • 1 (3 oz) box lime-flavored gelatin
  • 1 cup boiling water
  • ½ cup cold water
  • 1 (22 oz) can of Key Lime Pie filling and topping
  • 1 (8 oz) container whipped topping (Cool Whip) or homemade stabilized whipped cream
  • Fresh lime zest (for garnish)

Instructions

  1. Prepare the Cake:
    Set your oven to the temperature recommended on the cake mix package. Grease and prepare a 9×13-inch baking dish.
    Follow the package instructions to prepare the white cake batter, then pour it into the prepared dish. Bake as directed and allow the cake to cool completely.
  2. Add the Lime Gelatin:
    As the cake cools, prepare the lime gelatin by dissolving the mix in 1 cup of hot water, stirring until fully dissolved. Then, stir in ½ cup of cold water and mix thoroughly.
  3. Poke and Soak:
    Use the handle of a wooden spoon or a skewer to poke holes evenly across the cake. Pour the prepared lime gelatin mixture over the cake, ensuring it seeps into the holes for a vibrant burst of lime flavor.
  4. Top with Key Lime Crème:
    Spread the Key Lime Crème pie filling evenly over the top of the chilled cake, creating a luscious lime layer.
  5. Add the Whipped Topping:
    Spread the whipped topping evenly over the Key Lime Crème layer, ensuring the entire cake is covered with a smooth, fluffy layer.
  6. Garnish and Serve:
    Sprinkle fresh lime zest on top of the whipped topping for a pop of color and added citrus aroma. Slice and serve chilled for the ultimate refreshing dessert.

Conclusion

Zesty Key Lime Crème Poke Cake is the perfect dessert for those who love bold citrus flavors paired with creamy textures. The tang of the lime, combined with the moistness of the cake and the smooth whipped topping, makes this dessert a standout treat. Whether you’re serving it at a party or indulging in a sweet craving, this cake promises to deliver sunshine on a plate!

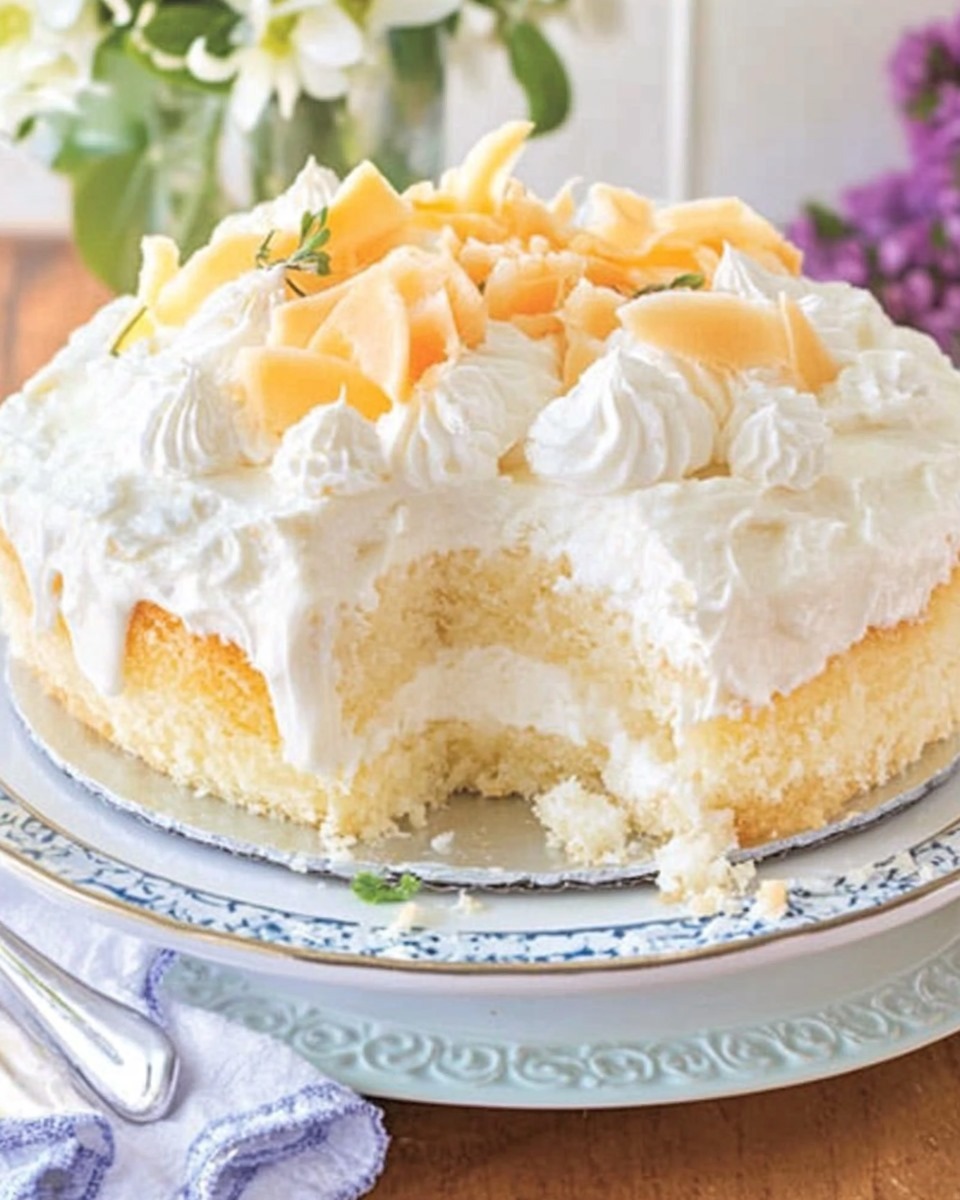
Creamy Coconut Paradise Cake

Dive into the dreamy flavors of coconut with this Creamy Coconut Paradise Cake. Perfectly moist and drenched in cream of coconut, this poke cake is a delightful blend of tropical sweetness and creamy texture. Topped with fluffy whipped cream and sprinkled with sweetened coconut flakes, this dessert is simple to make yet impressively delicious. It’s ideal for family gatherings, holidays, or just to satisfy your sweet tooth!

Ingredients

  • 1 (15.25 oz) box white cake mix
  • Ingredients required to prepare the cake (egg whites, oil, and water, as specified on the box)
  • 1 (15 oz) can cream of coconut
  • 1 (8 oz) tub of whipped topping, thawed
  • 1 (8 oz) package sweetened flaked coconut

Instructions

  1. Bake the Cake:
    Preheat your oven to the temperature indicated on the cake mix package. Lightly grease a 9×13-inch baking pan. Prepare the white cake batter following the package instructions, using egg whites, oil, and water. Pour the batter into the prepared pan and bake according to the directions. Once baked, let the cake cool for a few minutes before serving.
  2. Add the Cream of Coconut:
    While the cake is still warm, take a wooden spoon handle or a skewer and gently create holes across the entire surface, spacing them out evenly for a uniform look. Pour the cream of coconut over the cake, letting it seep into the holes for a moist, flavorful base. Allow the cake to cool completely.
  3. Top with Whipped Cream:
    After the cake has cooled, evenly spread the thawed whipped topping across the top. This creates a light, creamy layer that perfectly complements the cake’s rich flavor.
  4. Add the Finishing Touch:
    Generously sprinkle the sweetened flaked coconut over the whipped topping. This adds texture and enhances the tropical coconut flavor.
  5. Chill and Serve:
    Cover the cake with plastic wrap and refrigerate for at least 2 hours, or until fully chilled. Slice and serve this coconut-filled delight to your guests or enjoy a slice yourself!

Conclusion

The Creamy Coconut Paradise Cake is a celebration of coconut in its most delightful form. Every bite is a symphony of tropical flavors and velvety textures, making it an unforgettable dessert that’s as easy to make as it is to enjoy. Whether for a festive occasion or a simple indulgence, this cake is sure to be the star of your dessert table.