Cashew Chicken Stir-Fry is a quick and tasty meal.

Introduction to Cashew Chicken Stir-Fry Recipe

What Makes Cashew Chicken Stir-Fry Special?

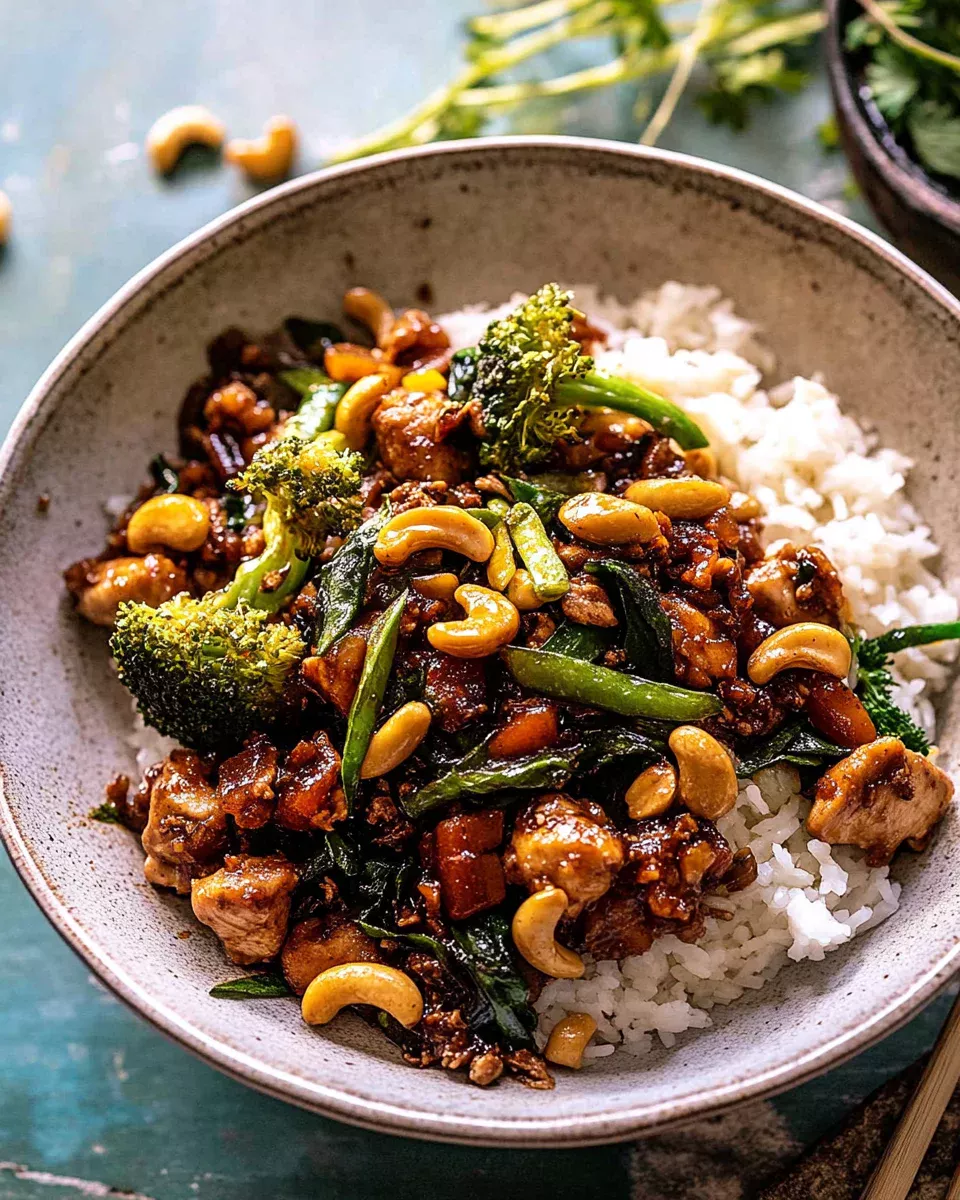
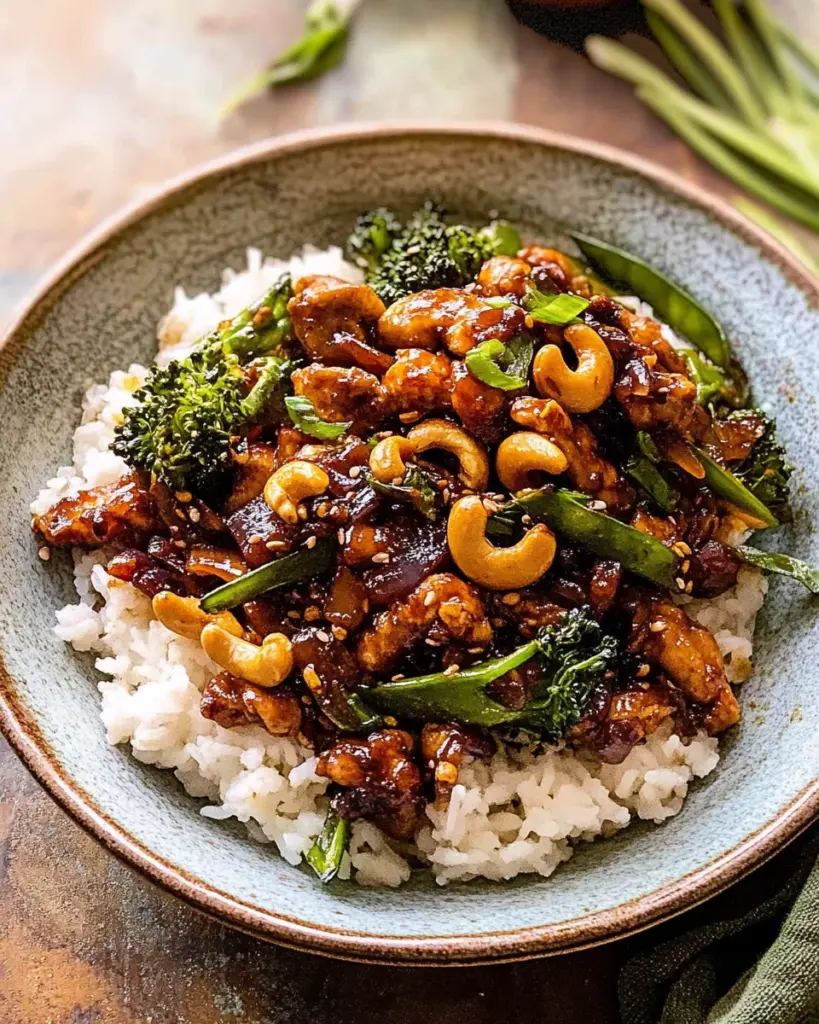
Cashew Chicken Stir-Fry is a delightful dish that brings together tender chicken, crunchy vegetables, and the rich flavor of cashews. This recipe is not just about taste; it’s also about texture. The combination of crispy veggies and juicy chicken creates a satisfying meal that pleases the palate. The savory soy sauce, sweet honey, and nutty sesame oil blend perfectly, making each bite a burst of flavor. Plus, it’s quick to prepare, making it an ideal choice for busy weeknights.

The Origins of Cashew Chicken Stir-Fry

Cashew Chicken has roots in Chinese cuisine, but it has become popular worldwide, especially in American Chinese restaurants. The dish is believed to have originated in the 20th century, with its first known recipes appearing in the 1950s. It showcases the use of cashews, which are native to Brazil but are now widely used in Asian cooking. The stir-fry method allows for quick cooking, preserving the nutrients and flavors of the ingredients. This dish has evolved over time, with many variations emerging, but the core elements remain the same: chicken, cashews, and vibrant vegetables.

Ingredients for Cashew Chicken Stir-Fry Recipe

Essential Ingredients

To create a delicious Cashew Chicken Stir-Fry, you’ll need a few key ingredients. These essentials ensure that your dish is flavorful and satisfying. Here’s what you’ll need:

  • 1 pound boneless, skinless chicken breasts: Cut into bite-sized pieces for quick cooking.
  • 1/4 cup soy sauce: This adds a savory depth to the dish.
  • 2 tablespoons cornstarch: Helps to tenderize the chicken and create a nice coating.
  • 2 tablespoons vegetable oil: Used for stir-frying the chicken and vegetables.
  • 1 cup cashews: These provide a crunchy texture and nutty flavor.
  • 1 red bell pepper: Sliced for sweetness and color.
  • 1 cup broccoli florets: Adds nutrition and a vibrant green color.
  • 1 cup snap peas: These add a crisp texture and sweetness.
  • 3 green onions: Chopped for garnish and flavor.
  • 2 cloves garlic: Minced for aromatic flavor.
  • 1 tablespoon fresh ginger: Grated for a zesty kick.
  • 1 tablespoon honey: Balances the savory flavors with sweetness.
  • 1 tablespoon rice vinegar: Adds a tangy note to the dish.
  • 1 teaspoon sesame oil: Enhances the nutty flavor profile.
  • Salt and pepper: To taste, for seasoning.
  • Cooked rice or noodles: For serving, making the meal complete.

Optional Ingredients for Customization

While the essential ingredients create a fantastic dish, you can customize your Cashew Chicken Stir-Fry to suit your taste. Here are some optional ingredients you might consider:

  • Red pepper flakes: For those who enjoy a spicy kick.
  • Sriracha: A great addition for heat and flavor.
  • Tofu or shrimp: Substitute for chicken to cater to different dietary preferences.
  • Other vegetables: Feel free to add carrots, bell peppers, or zucchini for variety.
  • Peanut butter: A spoonful can add creaminess and depth to the sauce.

These optional ingredients allow you to make the dish your own while still keeping the essence of the Cashew Chicken Stir-Fry Recipe intact. Enjoy experimenting!

Preparation of Cashew Chicken Stir-Fry Recipe

Step 1: Preparing the Chicken

First, you need to prepare the chicken. Start by cutting the boneless, skinless chicken breasts into bite-sized pieces. This helps them cook evenly and quickly. Next, place the chicken pieces in a medium bowl. Add the soy sauce and cornstarch to the bowl. Mix everything well until the chicken is fully coated. Let it marinate for at least 15 minutes. This step is crucial as it enhances the flavor and tenderness of the chicken.

Step 2: Chopping the Vegetables

While the chicken is marinating, it’s time to chop the vegetables. Slice the red bell pepper into thin strips. This adds a pop of color and sweetness to your dish. Next, cut the broccoli into small florets. Make sure they are bite-sized for easy eating. Then, rinse the snap peas and set them aside. Finally, chop the green onions, separating the white parts from the green tops. The white parts will be used in the stir-fry, while the green tops will be for garnish later.

Step 3: Making the Stir-Fry Sauce

Now, let’s make the stir-fry sauce. In a small bowl, combine the honey, rice vinegar, and sesame oil. Stir well until the honey is fully dissolved. This sauce will add a wonderful balance of sweet and tangy flavors to your dish. You can also add a pinch of salt and pepper to enhance the taste. Set this sauce aside for later use.

Step 4: Cooking the Chicken

Next, it’s time to cook the chicken. Heat 1 tablespoon of vegetable oil in a large skillet or wok over medium-high heat. Once the oil is hot, add the marinated chicken pieces. Cook them for about 5-7 minutes, stirring occasionally. You want the chicken to be browned and cooked through. Once done, remove the chicken from the skillet and set it aside. This step ensures that the chicken remains juicy and flavorful.

Step 5: Adding Vegetables and Sauce

In the same skillet, add the remaining tablespoon of vegetable oil. Then, toss in the minced garlic and grated ginger. Stir-fry for about 30 seconds until fragrant. Next, add the sliced red bell pepper and cook for 2-3 minutes until they are tender-crisp. After that, add the broccoli florets and snap peas. Stir everything together and cook for another 2-3 minutes. Finally, return the cooked chicken to the skillet and pour in the stir-fry sauce. Mix everything well, ensuring that the chicken and vegetables are coated in the sauce.

Step 6: Final Touches with Cashews

For the final touch, add the cashews to the skillet. Stir everything together for another minute or two, allowing the cashews to warm up. This step adds a delightful crunch to your dish. Once everything is heated through, taste and adjust the seasoning with salt and pepper if needed. Your Cashew Chicken Stir-Fry is now ready to be served!

Variation of Cashew Chicken Stir-Fry Recipe

Vegetarian Alternatives

If you’re looking for a vegetarian option, you can easily adapt the Cashew Chicken Stir-Fry Recipe. Instead of chicken, use tofu or tempeh. Both options provide a great source of protein and absorb flavors well. Start by pressing the tofu to remove excess moisture, then cut it into bite-sized cubes. Marinate the tofu in soy sauce and cornstarch just like you would with chicken. This will help it develop a nice texture when cooked.

In addition to tofu, you can add more vegetables to enhance the dish. Consider using mushrooms, bell peppers, or even zucchini. These vegetables not only add flavor but also increase the nutritional value of your meal. The cooking process remains the same, ensuring that your vegetarian stir-fry is just as delicious and satisfying as the original.

Gluten-Free Options

For those who need a gluten-free version of the Cashew Chicken Stir-Fry Recipe, it’s simple to make adjustments. Start by substituting regular soy sauce with gluten-free soy sauce or tamari. This will maintain the savory flavor without the gluten. Additionally, ensure that the cornstarch you use is certified gluten-free, as some brands may contain traces of gluten.

You can also explore using rice noodles instead of traditional noodles, which are often made with wheat. Rice noodles are a fantastic gluten-free alternative that pairs well with stir-fry dishes. By making these small changes, you can enjoy a delicious and safe meal that everyone can savor.

Cooking Note for Cashew Chicken Stir-Fry Recipe

Tips for Perfect Stir-Frying

Stir-frying is a quick cooking method that requires some attention to detail. Here are some tips to ensure your Cashew Chicken Stir-Fry turns out perfectly every time:

  • Prep Everything First: Before you start cooking, make sure all your ingredients are prepped and ready. This includes chopping vegetables, marinating the chicken, and measuring out sauces. Stir-frying happens fast, so having everything on hand is crucial.
  • Use High Heat: Stir-frying works best at high temperatures. This helps to sear the ingredients quickly, locking in flavors and moisture. Make sure your skillet or wok is hot before adding oil.
  • Don’t Overcrowd the Pan: If you add too many ingredients at once, they will steam instead of fry. Cook in batches if necessary to ensure even cooking and a nice sear.
  • Keep It Moving: Stir-frying requires constant movement. Use a spatula to toss the ingredients frequently. This ensures even cooking and prevents burning.
  • Finish with a Sauce: Adding the sauce at the end allows the flavors to coat the ingredients without overcooking them. This keeps your vegetables crisp and vibrant.

Common Mistakes to Avoid

Even the best cooks can make mistakes. Here are some common pitfalls to watch out for when making your Cashew Chicken Stir-Fry:

  • Not Marinating Long Enough: Marinating the chicken for at least 15 minutes is essential. This step enhances flavor and tenderness. Don’t skip it!
  • Using Cold Ingredients: Cold chicken or vegetables can lower the temperature of the pan, leading to uneven cooking. Make sure your ingredients are at room temperature before cooking.
  • Ignoring the Order of Cooking: Always cook proteins first, followed by vegetables. This ensures that everything is cooked properly and maintains the right texture.
  • Overcooking the Vegetables: Vegetables should be tender-crisp, not mushy. Keep an eye on them and remove them from the heat as soon as they are bright and tender.
  • Skipping the Cashews: Cashews add a delightful crunch and flavor. Don’t forget to include them in your stir-fry for that perfect finish!

Serving Suggestions for Cashew Chicken Stir-Fry Recipe

Best Side Dishes to Pair

When serving your Cashew Chicken Stir-Fry, consider pairing it with side dishes that complement its flavors and textures. Here are some excellent options:

  • Steamed Rice: A classic choice, steamed white or brown rice absorbs the savory sauce beautifully, making each bite delightful.
  • Fried Rice: For a twist, serve your stir-fry with fried rice. The added vegetables and eggs in fried rice enhance the meal’s flavor.
  • Noodles: Lo mein or rice noodles can be a great alternative. They add a different texture and soak up the sauce well.
  • Spring Rolls: These crispy rolls filled with vegetables or shrimp make a great appetizer or side, adding crunch to your meal.
  • Asian Slaw: A fresh slaw made with cabbage, carrots, and a tangy dressing can provide a refreshing contrast to the warm stir-fry.

These side dishes not only enhance the overall dining experience but also add variety to your plate, making your meal more enjoyable.

Presentation Tips

Presentation plays a key role in making your Cashew Chicken Stir-Fry appealing. Here are some tips to elevate your dish:

  • Use a Colorful Plate: Choose a vibrant plate to make the colors of your stir-fry pop. A white plate can also work well to highlight the dish’s colors.
  • Garnish Generously: Sprinkle chopped green onions or sesame seeds on top of the stir-fry for a fresh look. This adds a nice touch and enhances flavor.
  • Layer Your Ingredients: When serving, layer the rice or noodles first, then top with the stir-fry. This creates height and visual interest.
  • Serve in Bowls: Consider serving the stir-fry in individual bowls. This makes it easy for guests to enjoy and adds a cozy feel to the meal.
  • Include a Lime Wedge: A lime wedge on the side not only adds a pop of color but also allows guests to squeeze fresh juice over their dish for added flavor.

By following these presentation tips, you can turn your Cashew Chicken Stir-Fry into a feast for the eyes as well as the taste buds. Enjoy your delicious creation!

Tips for Making Cashew Chicken Stir-Fry Recipe

Ingredient Substitutions

Making the Cashew Chicken Stir-Fry Recipe is flexible, allowing you to swap ingredients based on your preferences or what you have on hand. Here are some great substitutions:

  • Chicken: If you don’t have chicken, try using turkey or even beef. Both options will work well with the stir-fry method.
  • Cashews: If you’re allergic to nuts, sunflower seeds or pumpkin seeds can provide a similar crunch without the allergens.
  • Vegetables: Feel free to use any vegetables you enjoy. Carrots, bell peppers, or even spinach can add flavor and nutrition.
  • Honey: Maple syrup or agave nectar can be used as a sweetener if you prefer a different taste.
  • Rice Vinegar: Apple cider vinegar or white vinegar can be good alternatives if you don’t have rice vinegar on hand.

These substitutions can help you create a dish that suits your taste while still keeping the essence of the Cashew Chicken Stir-Fry Recipe intact.

Storage and Reheating Tips

After enjoying your Cashew Chicken Stir-Fry, you might have some leftovers. Here’s how to store and reheat them properly:

  • Storage: Allow the stir-fry to cool completely before transferring it to an airtight container. It can be stored in the refrigerator for up to 3 days.
  • Freezing: If you want to keep it longer, consider freezing the stir-fry. Place it in a freezer-safe container, and it can last for up to 2 months.
  • Reheating: To reheat, simply warm it in a skillet over medium heat until heated through. You can also use the microwave, but be sure to cover it to prevent drying out.
  • Adding Freshness: When reheating, consider adding a splash of soy sauce or a sprinkle of fresh green onions to revive the flavors.

By following these storage and reheating tips, you can enjoy your Cashew Chicken Stir-Fry even after the first serving!

Breakdown of Time for Cashew Chicken Stir-Fry Recipe

Prep Time

Preparing your Cashew Chicken Stir-Fry is quick and easy. The prep time typically takes about 20 minutes. This includes cutting the chicken into bite-sized pieces, marinating it, and chopping all the vegetables. Having everything ready before you start cooking is essential for a smooth cooking experience. So, take your time during this step to ensure you have all your ingredients prepped and organized.

Cooking Time

The cooking time for the Cashew Chicken Stir-Fry is approximately 15 minutes. This includes cooking the marinated chicken until it’s browned and cooked through, stir-frying the vegetables, and combining everything with the sauce. Stir-frying is a fast cooking method, so be prepared to keep an eye on your ingredients to avoid overcooking. The quick cooking time helps retain the vibrant colors and nutrients of the vegetables.

Total Time

In total, you can expect the entire process of making Cashew Chicken Stir-Fry to take about 35 minutes. This includes both the prep and cooking times. With such a short time commitment, this dish is perfect for busy weeknights when you want a delicious and nutritious meal without spending hours in the kitchen. Enjoy the process and the delightful flavors that come together in this quick stir-fry!

Nutritional Information for Cashew Chicken Stir-Fry Recipe

Calories and Macronutrients

Understanding the nutritional content of your meals is essential for maintaining a balanced diet. The Cashew Chicken Stir-Fry is not only delicious but also provides a good mix of macronutrients. Here’s a breakdown of the nutritional information per serving:

  • Calories: 400
  • Net Carbs: 20g
  • Protein: 30g
  • Fat: 22g

This dish offers a healthy balance of protein, fats, and carbohydrates, making it a great option for a satisfying meal. The protein from chicken and cashews helps in muscle repair and growth, while the healthy fats provide energy and support overall health.

Health Benefits of Ingredients

The ingredients in Cashew Chicken Stir-Fry not only contribute to its delicious flavor but also offer numerous health benefits:

  • Chicken: A lean source of protein, chicken is low in fat and rich in essential nutrients like B vitamins, which are vital for energy production.
  • Cashews: These nuts are packed with healthy fats, protein, and minerals like magnesium and zinc. They support heart health and can help lower cholesterol levels.
  • Broccoli: This green vegetable is high in vitamins C and K, fiber, and antioxidants. It promotes healthy digestion and boosts the immune system.
  • Red Bell Pepper: Rich in vitamin A and antioxidants, red bell peppers help improve eye health and reduce inflammation.
  • Garlic: Known for its immune-boosting properties, garlic can help lower blood pressure and improve heart health.
  • Ginger: This spice is known for its anti-inflammatory effects and can aid in digestion and reduce nausea.
  • Green Onions: These add flavor and are a good source of vitamins A and C, as well as antioxidants.

By incorporating these nutritious ingredients, your Cashew Chicken Stir-Fry not only satisfies your taste buds but also supports your overall health. Enjoy this meal knowing it’s good for you!

FAQs about Cashew Chicken Stir-Fry Recipe

Can I use other nuts instead of cashews?

Absolutely! While cashews are a key ingredient in this dish, you can easily substitute them with other nuts. Almonds, peanuts, or even walnuts can work well. Each nut brings its unique flavor and texture, so feel free to experiment. Just remember to adjust the cooking time slightly, as different nuts may toast at different rates. Enjoy the variety!

How can I make this dish spicier?

If you love a bit of heat, there are several ways to spice up your Cashew Chicken Stir-Fry. You can add red pepper flakes or sriracha to the stir-fry sauce for an extra kick. Another option is to include sliced fresh chili peppers during the cooking process. Start with a small amount and adjust to your taste. This way, you can enjoy a flavorful dish that suits your spice preference!

Is it possible to make Cashew Chicken Stir-Fry Recipe ahead of time?

Yes, you can prepare parts of the Cashew Chicken Stir-Fry ahead of time! You can marinate the chicken and chop the vegetables a few hours in advance. Just store them separately in the refrigerator until you’re ready to cook. However, for the best taste and texture, it’s recommended to cook the stir-fry fresh. If you have leftovers, they can be stored in an airtight container for up to three days.

What can I serve with Cashew Chicken Stir-Fry Recipe?

Cashew Chicken Stir-Fry pairs wonderfully with various side dishes. Steamed rice or fried rice is a classic choice, as it complements the flavors perfectly. You can also serve it with noodles, like lo mein or rice noodles, for a different twist. For a refreshing contrast, consider adding a side of Asian slaw or spring rolls. These options will enhance your meal and make it even more enjoyable!

Conclusion on Cashew Chicken Stir-Fry Recipe

Recap of Key Points

In summary, the Cashew Chicken Stir-Fry is a delightful dish that combines tender chicken, crunchy vegetables, and the rich flavor of cashews. With its quick preparation and cooking time, it’s perfect for busy weeknights. The essential ingredients, such as soy sauce, honey, and fresh vegetables, create a harmonious blend of flavors that is both satisfying and nutritious. Additionally, the recipe offers flexibility, allowing for various substitutions and adaptations to suit different dietary needs. Whether you choose to make it vegetarian or gluten-free, the essence of this dish remains intact, ensuring a delicious meal every time.

Encouragement to Try the Recipe

We encourage you to try making the Cashew Chicken Stir-Fry at home. It’s not only a fun cooking experience but also a chance to enjoy a meal that is both healthy and flavorful. Gather your ingredients, follow the steps, and watch as your kitchen fills with delightful aromas. Whether you’re cooking for yourself, family, or friends, this dish is sure to impress. So, roll up your sleeves and get ready to create a delicious stir-fry that will have everyone asking for seconds!

Creamy Tikka Masala Rice Bake Recipe is a must-try!

Introduction to Creamy Tikka Masala Rice Bake Recipe

Are you looking for a delicious and comforting dish that’s easy to prepare? Look no further than the Creamy Tikka Masala Rice Bake Recipe! This dish combines the rich flavors of tikka masala with the heartiness of rice, making it a perfect meal for any occasion. Whether you’re cooking for family or friends, this recipe is sure to impress.

What is Tikka Masala?

Tikka masala is a popular Indian dish known for its creamy tomato-based sauce and aromatic spices. Traditionally, it features marinated meat, often chicken, cooked in a spiced sauce. However, this recipe takes a delightful twist by incorporating chickpeas and rice, making it vegetarian-friendly. The blend of spices, including cumin, coriander, and garam masala, creates a warm and inviting flavor profile that tantalizes the taste buds. With its vibrant colors and rich taste, tikka masala has become a favorite in many households around the world.

Why Choose a Rice Bake?

Rice bakes are a fantastic choice for several reasons. First, they are incredibly versatile. You can easily customize them with your favorite ingredients, making them suitable for various dietary preferences. Second, they are perfect for meal prep. You can make a large batch and enjoy leftovers throughout the week. Lastly, rice bakes are simple to prepare. Just mix your ingredients, pop them in the oven, and let the magic happen! This Creamy Tikka Masala Rice Bake Recipe is not only easy to make but also a comforting dish that brings warmth to your table.

Ingredients for Creamy Tikka Masala Rice Bake Recipe

To create the delightful Creamy Tikka Masala Rice Bake, you’ll need a variety of fresh and pantry ingredients. Each component plays a crucial role in building the rich flavors and creamy texture that make this dish so special. Here’s what you’ll need:

  • 2 cups cooked basmati rice: This fluffy rice serves as the base of the dish, soaking up all the delicious flavors.
  • 1 tablespoon olive oil: Used for sautéing the vegetables, olive oil adds a healthy fat and enhances the overall taste.
  • 1 medium onion, diced: Onions provide a sweet and savory foundation for the dish.
  • 3 cloves garlic, minced: Garlic adds a fragrant aroma and depth of flavor.
  • 1 tablespoon fresh ginger, grated: Ginger brings a warm, spicy note that complements the tikka masala.
  • 1 bell pepper, diced (any color): Bell peppers add a pop of color and sweetness.
  • 1 can (15 oz) chickpeas, drained and rinsed: Chickpeas are a great source of protein and add a hearty texture.
  • 1 can (14 oz) coconut milk: Coconut milk provides creaminess and a subtle sweetness.
  • 1 cup tomato sauce: This forms the base of the tikka masala sauce, adding acidity and richness.
  • 2 tablespoons tikka masala spice blend: This blend is essential for achieving that authentic tikka masala flavor.
  • 1 teaspoon salt: Salt enhances all the flavors in the dish.
  • 1/2 teaspoon black pepper: Black pepper adds a hint of heat.
  • 1 cup frozen peas: Peas add a burst of color and sweetness, making the dish more vibrant.
  • 1/2 cup fresh cilantro, chopped (for garnish): Cilantro adds freshness and a lovely finishing touch.
  • 1/2 cup shredded vegan cheese (optional): For those who enjoy a cheesy topping, this is a great addition.

Gathering these ingredients will set you on the path to creating a delicious and satisfying meal. Each item contributes to the overall flavor and texture, making this Creamy Tikka Masala Rice Bake a dish you’ll want to make again and again!

Step-by-Step Preparation of Creamy Tikka Masala Rice Bake Recipe

Now that you have all your ingredients ready, it’s time to dive into the preparation of your Creamy Tikka Masala Rice Bake. This step-by-step guide will help you create a delicious dish that’s sure to impress. Let’s get started!

Step 1: Prepping the Ingredients

First things first, you need to prep your ingredients. Start by dicing the onion and bell pepper. Mince the garlic and grate the ginger. Having everything ready will make the cooking process smooth and enjoyable. Remember, fresh ingredients make a big difference in flavor!

Step 2: Cooking the Rice

If you haven’t cooked your basmati rice yet, now is the time! Rinse the rice under cold water until the water runs clear. This helps remove excess starch. Then, cook it according to the package instructions. Once done, fluff it with a fork and set it aside. The fluffy rice will soak up all the delicious tikka masala flavors later.

Step 3: Making the Tikka Masala Sauce

In a large skillet, heat the olive oil over medium heat. Add the diced onion and sauté for about 5 minutes until it becomes translucent. Next, stir in the minced garlic and grated ginger, cooking for an additional minute until fragrant. Then, toss in the diced bell pepper and chickpeas, cooking for another 3-4 minutes until the bell pepper softens. Now, pour in the coconut milk and tomato sauce. Add the tikka masala spice blend, salt, and black pepper. Stir well and let it simmer for 5 minutes. This sauce is where all the magic happens!

Step 4: Combining Ingredients

In a large mixing bowl, combine the cooked basmati rice with the chickpea-tikka masala mixture. Gently fold in the frozen peas, ensuring everything is well mixed. This step is crucial as it allows the rice to absorb the flavors of the sauce. The combination of textures and tastes will make your dish truly delightful!

Step 5: Baking the Dish

Now it’s time to transfer the rice mixture to a greased 9×13 inch baking dish. If you’re using shredded vegan cheese, sprinkle it on top for a cheesy finish. Cover the dish with aluminum foil and bake it in a preheated oven at 375°F for 25 minutes. After that, remove the foil and bake for an additional 10-15 minutes until it’s heated through and slightly golden on top. The aroma will fill your kitchen, making it hard to wait!

Once baked, garnish with fresh cilantro before serving. Your Creamy Tikka Masala Rice Bake is now ready to be enjoyed!

Variations of Creamy Tikka Masala Rice Bake Recipe

The Creamy Tikka Masala Rice Bake is a versatile dish that can be easily adapted to suit different tastes and dietary needs. Whether you’re looking to switch things up or cater to specific preferences, there are plenty of variations to explore. Let’s dive into some exciting options!

Vegetarian Options

If you want to keep your dish vegetarian, there are many delicious alternatives to consider. Instead of chickpeas, you can use cooked lentils, which provide a similar texture and protein content. Another great option is to add a variety of vegetables, such as zucchini, spinach, or mushrooms. These veggies not only enhance the flavor but also add nutritional value. You can also experiment with different grains, like quinoa or farro, for a unique twist on the classic rice bake.

Protein Additions

For those who want to boost the protein content, consider adding cooked chicken, tofu, or tempeh. If you choose chicken, make sure to cook it thoroughly before mixing it with the tikka masala sauce. Tofu and tempeh can be marinated in the tikka masala spices before cooking to infuse them with flavor. These protein additions will make your Creamy Tikka Masala Rice Bake even heartier and satisfying!

Spice Level Adjustments

Do you love a little heat in your dishes? You can easily adjust the spice level of your Creamy Tikka Masala Rice Bake. For a milder flavor, simply reduce the amount of tikka masala spice blend. If you prefer a spicier kick, add chopped green chilies or a pinch of cayenne pepper to the skillet while cooking. You can also serve the dish with a side of spicy chutney for an extra burst of flavor. Tailoring the spice level to your liking will make this dish even more enjoyable!

With these variations, you can create a Creamy Tikka Masala Rice Bake that suits your taste and dietary preferences. Feel free to get creative and make it your own!

Cooking Note for Creamy Tikka Masala Rice Bake Recipe

When preparing the Creamy Tikka Masala Rice Bake, there are a few important cooking notes to keep in mind. These tips will help ensure that your dish turns out perfectly every time, enhancing both flavor and texture.

First, always use fresh ingredients whenever possible. Fresh vegetables, herbs, and spices can significantly elevate the taste of your dish. For instance, using fresh ginger instead of powdered ginger will provide a more vibrant flavor. Similarly, fresh cilantro as a garnish adds a burst of freshness that complements the creamy sauce.

Next, be mindful of the cooking time. Overcooking the rice can lead to a mushy texture, which is not ideal for a bake. Make sure to cook the basmati rice according to the package instructions, and fluff it gently with a fork once it’s done. This will help maintain its light and fluffy texture, allowing it to absorb the tikka masala sauce beautifully.

Additionally, when combining the ingredients, be gentle. Folding the rice into the sauce mixture should be done carefully to avoid breaking the grains. This will help keep the dish looking appealing and ensure that each bite is filled with flavor.

Lastly, if you’re using frozen peas, there’s no need to thaw them before adding them to the mixture. They will cook perfectly in the oven, adding a lovely pop of color and sweetness to your bake. Just remember to mix them in gently to distribute them evenly throughout the dish.

By following these cooking notes, you’ll create a Creamy Tikka Masala Rice Bake that is not only delicious but also visually appealing. Enjoy the process and savor the delightful flavors that come together in this comforting dish!

Serving Suggestions for Creamy Tikka Masala Rice Bake Recipe

Once your Creamy Tikka Masala Rice Bake is ready, it’s time to think about how to serve it. This dish is not only delicious on its own, but it also pairs wonderfully with various sides and beverages. Here are some suggestions to elevate your meal experience!

Ideal Side Dishes

To complement the rich flavors of the Creamy Tikka Masala Rice Bake, consider serving it with some delightful side dishes. Here are a few ideas:

  • Garlic Naan: This soft, pillowy bread is perfect for scooping up the creamy rice bake. The garlic flavor adds an extra layer of taste.
  • Simple Green Salad: A fresh salad with mixed greens, cucumbers, and a light vinaigrette can balance the richness of the bake. The crunchiness of the veggies adds a nice contrast.
  • Raita: This yogurt-based side dish, often mixed with cucumber and mint, provides a cooling effect that pairs well with the spices in the tikka masala.
  • Roasted Vegetables: A medley of roasted seasonal vegetables can add color and nutrition to your meal. The caramelized flavors will enhance the overall dining experience.

These side dishes not only enhance the meal but also add variety to your plate, making it visually appealing and satisfying.

Pairing with Beverages

Choosing the right beverage can elevate your dining experience even further. Here are some beverage options that pair beautifully with the Creamy Tikka Masala Rice Bake:

  • Mango Lassi: This sweet and creamy yogurt drink is a classic Indian beverage. Its fruity flavor complements the spices in the dish perfectly.
  • Chai Tea: A warm cup of spiced chai tea can enhance the meal’s flavors. The aromatic spices in chai echo the tikka masala spices.
  • Light Beer: A light lager or wheat beer can be refreshing and help cleanse the palate between bites.
  • Sparkling Water: For a non-alcoholic option, sparkling water with a slice of lemon or lime can be a refreshing choice that doesn’t overpower the dish.

By thoughtfully selecting side dishes and beverages, you can create a well-rounded meal that highlights the deliciousness of your Creamy Tikka Masala Rice Bake. Enjoy the delightful flavors and the company of your loved ones!

Tips for Perfecting Your Creamy Tikka Masala Rice Bake Recipe

To ensure your Creamy Tikka Masala Rice Bake turns out perfectly every time, consider these helpful tips. They will enhance the flavors and textures, making your dish even more delightful!

First, always taste as you go. This is key to achieving the perfect balance of flavors. After adding the tikka masala spice blend, take a moment to taste the sauce. If you feel it needs more seasoning, don’t hesitate to adjust with a pinch of salt or extra spices. Remember, everyone’s palate is different!

Next, consider the texture of your rice. For the best results, use freshly cooked basmati rice. If you have leftover rice, make sure it’s not too dry. You can add a splash of water or coconut milk to moisten it before mixing it with the sauce. This will help the rice absorb the flavors better.

Another tip is to let the dish rest for a few minutes after baking. This allows the flavors to meld together and makes serving easier. If you cut into the bake right away, it may fall apart. A little patience goes a long way!

Don’t forget about garnishing! Fresh cilantro adds a burst of color and flavor. You can also sprinkle some toasted nuts or seeds on top for added crunch. This not only enhances the presentation but also adds a delightful texture contrast.

Lastly, experiment with different toppings. If you’re feeling adventurous, try adding a dollop of vegan yogurt or a drizzle of tahini before serving. These additions can elevate the dish and provide a unique twist to your Creamy Tikka Masala Rice Bake.

By following these tips, you’ll create a Creamy Tikka Masala Rice Bake that’s not only delicious but also visually stunning. Enjoy the process and the wonderful flavors that come together in this comforting dish!

Breakdown of Time for Creamy Tikka Masala Rice Bake Recipe

Understanding the time required for each step of the Creamy Tikka Masala Rice Bake Recipe can help you plan your cooking efficiently. Here’s a detailed breakdown of the time you’ll need for preparation and cooking.

Prep Time

The prep time for this delicious dish is approximately 15-20 minutes. During this time, you will gather all your ingredients, dice the vegetables, and prepare the rice. Having everything ready before you start cooking will make the process smoother and more enjoyable. Remember, the fresher your ingredients, the better your dish will taste!

Cooking Time

The cooking time for the Creamy Tikka Masala Rice Bake is about 40-45 minutes. This includes:

  • Sautéing the vegetables and making the tikka masala sauce: Approximately 10-15 minutes.
  • Baking the dish: 25 minutes covered with foil, followed by an additional 10-15 minutes uncovered to achieve a golden top.

During this time, your kitchen will fill with the wonderful aroma of spices, making it hard to resist!

Total Time

In total, you can expect to spend about 55-65 minutes from start to finish. This includes both prep and cooking time. With this manageable time frame, you can easily whip up a comforting and flavorful meal that serves six people. It’s perfect for a weeknight dinner or a gathering with friends and family!

Nutritional Information for Creamy Tikka Masala Rice Bake Recipe

Understanding the nutritional content of your meals is essential for maintaining a balanced diet. The Creamy Tikka Masala Rice Bake is not only delicious but also provides a good mix of nutrients. Here’s a breakdown of the nutritional information per serving:

Calories

Each serving of the Creamy Tikka Masala Rice Bake contains approximately 320 calories. This makes it a satisfying meal option without being overly heavy. The combination of basmati rice, chickpeas, and coconut milk contributes to the calorie count while providing essential energy for your day.

Protein

In terms of protein, this dish offers about 10 grams per serving. The chickpeas are a fantastic source of plant-based protein, making this recipe a great choice for vegetarians and vegans. If you choose to add additional protein, such as chicken or tofu, you can easily increase the protein content to meet your dietary needs.

Sodium

The sodium content in each serving is around 500 milligrams. This amount is reasonable for a flavorful dish, but if you are watching your sodium intake, consider using low-sodium tomato sauce and coconut milk. Adjusting the salt in the recipe can also help you manage the sodium levels while still enjoying the rich flavors of the tikka masala.

Overall, the Creamy Tikka Masala Rice Bake is a nutritious and balanced meal option. It provides a good mix of carbohydrates, protein, and healthy fats, making it a great choice for lunch or dinner. Enjoy this delightful dish while being mindful of your nutritional goals!

FAQs about Creamy Tikka Masala Rice Bake Recipe

Can I make this dish ahead of time?

Absolutely! The Creamy Tikka Masala Rice Bake is perfect for making ahead of time. You can prepare the entire dish, cover it tightly, and store it in the refrigerator for up to 2 days before baking. When you’re ready to enjoy it, simply pop it in the oven. You may need to add a few extra minutes to the baking time if it’s coming straight from the fridge. This makes it a great option for busy weeknights or meal prepping for the week!

What can I substitute for rice?

If you’re looking for alternatives to rice, there are several options you can try! Quinoa is a fantastic substitute, offering a nutty flavor and extra protein. Cauliflower rice is another great low-carb option that will still soak up the delicious tikka masala sauce. You can also use farro or barley for a hearty texture. Each of these substitutes will give your Creamy Tikka Masala Bake a unique twist while maintaining the dish’s comforting essence.

Is this recipe suitable for meal prep?

Yes, this recipe is excellent for meal prep! The Creamy Tikka Masala Rice Bake can be made in advance and stored in individual portions. Just divide the baked dish into meal prep containers and refrigerate. It will stay fresh for up to 4 days. When you’re ready to eat, simply reheat in the microwave or oven. This makes it a convenient and delicious option for lunches or quick dinners throughout the week!

How can I make it spicier?

If you love a spicy kick, there are several ways to amp up the heat in your Creamy Tikka Masala Rice Bake. You can add chopped green chilies or a pinch of cayenne pepper to the skillet while cooking the vegetables. Another option is to use a spicier tikka masala spice blend. If you want to take it up a notch, serve the dish with a side of spicy chutney or hot sauce. Adjusting the spice level to your preference will make this dish even more enjoyable!

Conclusion on Creamy Tikka Masala Rice Bake Recipe

In conclusion, the Creamy Tikka Masala Rice Bake is a delightful dish that brings together the rich flavors of tikka masala with the comforting texture of rice. This recipe is not only easy to prepare but also offers a wonderful opportunity to customize it according to your taste preferences. Whether you choose to keep it vegetarian, add protein, or adjust the spice level, the possibilities are endless!

This dish is perfect for family dinners, gatherings with friends, or even meal prep for busy weekdays. With its vibrant colors and mouthwatering aroma, it’s sure to impress anyone who tries it. Plus, the nutritional benefits make it a wholesome choice for any meal.

As you embark on your cooking journey, remember to enjoy the process. Cooking is not just about the final dish; it’s about the love and creativity you put into it. So gather your ingredients, follow the steps, and savor the delightful flavors of your Creamy Tikka Masala Rice Bake. Happy cooking!

Pho Ga Vietnamese Chicken Noodle Soup is a must-try dish!

Introduction to Pho Ga Vietnamese Chicken Noodle Soup

What is Pho Ga Vietnamese Chicken Noodle Soup?

Pho Ga Vietnamese Chicken Noodle Soup is a delightful dish that warms the heart and soul. This traditional Vietnamese soup features tender chicken, aromatic herbs, and flavorful rice noodles. The broth is the star of the show, simmered to perfection with spices like star anise and cinnamon. Each bowl is a comforting blend of flavors that brings a taste of Vietnam right to your kitchen.

Pho Ga is not just a meal; it’s an experience. The combination of fresh ingredients and fragrant spices creates a dish that is both nourishing and satisfying. Whether enjoyed for breakfast, lunch, or dinner, Pho Ga is a beloved staple in Vietnamese cuisine. It’s often served with a variety of garnishes, allowing each person to customize their bowl to their liking.

The Cultural Significance of Pho Ga

Pho Ga holds a special place in Vietnamese culture. It is more than just food; it represents family, tradition, and community. Many families have their own recipes passed down through generations, making it a cherished dish during gatherings and celebrations. In Vietnam, you can find Pho Ga at street stalls, restaurants, and homes alike, showcasing its popularity and versatility.

This soup is often enjoyed during special occasions, but it is also a comfort food for everyday life. The act of sharing a bowl of Pho Ga brings people together, fostering connections and creating memories. As you savor each spoonful, you’re not just tasting a delicious meal; you’re partaking in a rich cultural heritage that celebrates the joy of food and togetherness.

Ingredients for Pho Ga Vietnamese Chicken Noodle Soup

To create a delicious bowl of Pho Ga Vietnamese Chicken Noodle Soup, you’ll need a variety of fresh and flavorful ingredients. Each component plays a vital role in building the rich taste of this beloved dish. Here’s what you’ll need:

  • 3 quarts chicken broth: This serves as the base of your soup, providing depth and flavor.
  • 1 whole chicken (about 3-4 pounds): The star of the dish, offering tender meat and enhancing the broth.
  • 1 medium onion, halved: Adds sweetness and aroma to the broth.
  • 1 piece of ginger (about 2 inches), sliced: Infuses the soup with a warm, spicy flavor.
  • 4 star anise: A key spice that gives Pho Ga its distinctive taste.
  • 3 cloves: Adds a hint of warmth and sweetness.
  • 1 cinnamon stick: Provides a comforting, aromatic flavor.
  • 2 tablespoons fish sauce: Enhances the umami flavor of the broth.
  • 1 tablespoon sugar: Balances the savory and spicy notes.
  • 1 teaspoon salt: Essential for seasoning the broth.
  • 8 ounces rice noodles: The perfect vehicle for the broth and chicken.
  • Fresh herbs (basil, cilantro, mint): For garnishing and adding freshness.
  • Lime wedges: A zesty addition that brightens the flavors.
  • Sliced jalapeños: For those who enjoy a spicy kick.

Gathering these ingredients will set you on the right path to making a delightful Pho Ga. Each item contributes to the overall flavor profile, ensuring that your soup is both authentic and satisfying. Now that you have everything ready, you can move on to the preparation steps!

Step-by-Step Preparation of Pho Ga Vietnamese Chicken Noodle Soup

Step 1: Preparing the Broth

To start, you’ll want to create a rich and flavorful broth. In a large pot, combine the chicken broth, whole chicken, halved onion, sliced ginger, star anise, cloves, and cinnamon stick. Add the fish sauce, sugar, and salt to enhance the taste. Bring this mixture to a boil over medium-high heat. Once it reaches a boil, reduce the heat to low and cover the pot. Let it simmer for about 30-40 minutes. This slow cooking allows the flavors to meld beautifully, creating a delicious base for your Pho Ga.

Step 2: Cooking the Chicken

After the broth has simmered, it’s time to focus on the chicken. Carefully remove the chicken from the pot and set it aside to cool. This step is crucial as it allows the chicken to be shredded easily later. While the chicken cools, strain the broth through a fine-mesh sieve to remove the solids. This will leave you with a clear, aromatic broth that is perfect for your soup.

Step 3: Preparing the Noodles

While the broth is simmering, you can prepare the rice noodles. Follow the package instructions for cooking them. Typically, this involves boiling them in water for a few minutes until they are tender. Once cooked, drain the noodles and set them aside. This step ensures that your noodles are ready to soak up the delicious broth when it’s time to serve.

Step 4: Assembling the Soup

Now comes the fun part—assembling your Pho Ga! In a bowl, place a portion of the cooked rice noodles. Top it with the shredded chicken, which you can prepare by pulling apart the cooled chicken into bite-sized pieces. Finally, ladle the hot, fragrant broth over the noodles and chicken. This step brings everything together, creating a warm and inviting dish.

Step 5: Garnishing the Pho Ga

To finish off your Pho Ga, it’s time to add some fresh garnishes. Sprinkle a handful of fresh herbs like basil, cilantro, and mint on top. These herbs not only add color but also enhance the flavor of the soup. Serve with lime wedges and sliced jalapeños on the side, allowing everyone to customize their bowl to their liking. The bright lime juice and spicy jalapeños elevate the dish, making it even more enjoyable.

Variations of Pho Ga Vietnamese Chicken Noodle Soup

Regional Variations

Pho Ga is a beloved dish across Vietnam, and each region has its own unique twist on this classic soup. In the north, the broth tends to be lighter and more aromatic, focusing on the natural flavors of the chicken and spices. Here, you might find a more pronounced taste of ginger and a simpler garnish of herbs.

In contrast, southern Vietnam offers a richer and bolder version of Pho Ga. This variation often includes a wider array of garnishes, such as bean sprouts, lime, and even fried shallots. The southern style embraces a more robust flavor profile, making it a favorite among those who enjoy a heartier meal.

Central Vietnam also adds its flair to Pho Ga. Here, you may encounter a spicier broth, with more chili peppers and a variety of local herbs. This regional twist highlights the diverse culinary landscape of Vietnam, showcasing how Pho Ga can adapt to local tastes and ingredients.

Alternative Ingredients for Pho Ga

While the traditional recipe for Pho Ga is delicious, there are many ways to customize it to suit your preferences. For instance, if you’re looking for a lighter option, consider using boneless, skinless chicken breasts instead of a whole chicken. This will reduce the cooking time and make the dish a bit healthier.

Vegetarians can also enjoy a version of Pho Ga by substituting chicken with tofu or mushrooms. Use vegetable broth instead of chicken broth, and add extra spices to enhance the flavor. This alternative allows everyone to savor the comforting essence of Pho Ga, regardless of dietary preferences.

Additionally, feel free to experiment with different herbs and spices. Some people enjoy adding a splash of hoisin sauce or sriracha for an extra kick. Others might include fresh bean sprouts or sliced radishes for added crunch. The beauty of Pho Ga lies in its versatility, allowing you to create a bowl that is uniquely yours.

Cooking Note for Pho Ga Vietnamese Chicken Noodle Soup

When preparing Pho Ga Vietnamese Chicken Noodle Soup, attention to detail can make all the difference. Here are some essential cooking notes to ensure your soup turns out perfectly every time.

First, the quality of your chicken broth is crucial. If possible, use homemade chicken broth for the best flavor. Store-bought broth can work in a pinch, but it may lack the depth and richness that homemade offers. If you have time, consider simmering chicken bones with water, onions, and spices to create a flavorful base.

Next, the cooking time for the chicken is important. Overcooking can lead to dry meat, while undercooking can be unsafe. Aim for a cooking time of 30-40 minutes, checking the chicken for doneness. The meat should be tender and easily shred with a fork.

Another tip is to let the broth cool slightly before straining. This allows the flavors to settle, making it easier to separate the solids from the liquid. Use a fine-mesh sieve to ensure a clear broth, free from any bits of spices or chicken.

When it comes to the rice noodles, be careful not to overcook them. They should be tender but still have a slight bite. If you’re preparing the noodles ahead of time, rinse them under cold water after draining to stop the cooking process. This will help maintain their texture when added to the hot broth.

Lastly, don’t rush the garnishing process. Fresh herbs, lime, and jalapeños are not just for decoration; they enhance the overall flavor of the soup. Encourage your guests to customize their bowls with their favorite toppings, making each serving a personal experience.

By following these cooking notes, you’ll create a delicious and authentic Pho Ga that captures the essence of Vietnamese cuisine. Enjoy the process, and savor the delightful flavors that come together in this comforting bowl of soup!

Serving Suggestions for Pho Ga Vietnamese Chicken Noodle Soup

Serving Pho Ga Vietnamese Chicken Noodle Soup is an art in itself. The way you present this dish can enhance the overall dining experience. Here are some delightful serving suggestions to make your Pho Ga even more enjoyable.

First, consider using large, shallow bowls. These allow for ample space for the noodles, chicken, and broth, making it easy to mix everything together. The presentation is important, and a wide bowl showcases the vibrant colors of the fresh herbs and garnishes.

Next, serve the soup hot. Pho Ga is best enjoyed steaming, as the warmth brings out the flavors of the broth and the spices. You can keep the broth hot in a separate pot on the stove, allowing guests to ladle it over their noodles and chicken as they serve themselves.

For a complete meal, pair your Pho Ga with a side of crispy spring rolls or banh mi sandwiches. These dishes complement the soup beautifully and add variety to the meal. The crunch of the spring rolls contrasts nicely with the soft noodles, creating a delightful texture experience.

Don’t forget about beverages! A refreshing drink can elevate your dining experience. Iced Vietnamese coffee or a light herbal tea pairs wonderfully with Pho Ga. These drinks balance the flavors of the soup and provide a refreshing contrast.

Lastly, encourage your guests to customize their bowls. Provide a variety of garnishes, such as bean sprouts, sliced radishes, and hoisin sauce. This allows everyone to tailor their Pho Ga to their taste, making the meal more interactive and enjoyable.

By following these serving suggestions, you’ll create a memorable dining experience centered around your delicious Pho Ga Vietnamese Chicken Noodle Soup. Enjoy the warmth, flavors, and the joy of sharing this wonderful dish with family and friends!

Tips for Making the Perfect Pho Ga Vietnamese Chicken Noodle Soup

Creating the perfect Pho Ga Vietnamese Chicken Noodle Soup is an art that combines fresh ingredients, careful preparation, and a touch of love. Here are some valuable tips to help you achieve a delicious and authentic bowl of Pho Ga every time.

First, always start with high-quality ingredients. Fresh herbs, a good chicken, and flavorful broth are essential. If you can, opt for organic chicken. This will enhance the taste of your soup significantly. Fresh herbs like basil, cilantro, and mint should be vibrant and fragrant, as they add a burst of flavor to your dish.

Next, don’t rush the simmering process. Allow the broth to simmer gently for at least 30-40 minutes. This slow cooking extracts the flavors from the chicken and spices, resulting in a rich and aromatic broth. If you have time, consider simmering the broth even longer for an even deeper flavor.

Another tip is to roast the onion and ginger before adding them to the broth. This simple step adds a smoky depth to the flavor, making your Pho Ga even more delicious. Just place them in the oven until they are slightly charred, then add them to the pot.

When it comes to the rice noodles, be mindful of the cooking time. Overcooked noodles can become mushy and lose their texture. Follow the package instructions closely, and rinse them under cold water after draining to stop the cooking process. This will help them maintain their firmness when served in the hot broth.

Lastly, don’t forget the garnishes! Fresh herbs, lime wedges, and sliced jalapeños are not just for decoration; they elevate the flavors of your Pho Ga. Encourage everyone to customize their bowls with their favorite toppings. This interactive element makes the meal more enjoyable and personal.

By following these tips, you’ll be well on your way to making a perfect Pho Ga Vietnamese Chicken Noodle Soup that will impress your family and friends. Enjoy the process, and savor the delightful flavors that come together in this comforting dish!

Breakdown of Time for Pho Ga Vietnamese Chicken Noodle Soup

Prep Time

Preparing Pho Ga Vietnamese Chicken Noodle Soup is a delightful process that requires some initial setup. The prep time typically takes about 15-20 minutes. During this time, you will gather all your ingredients, chop the onion and ginger, and measure out the spices. This step is essential for ensuring a smooth cooking experience. Having everything ready will make the cooking process much more enjoyable and efficient.

Cooking Time

The cooking time for Pho Ga is where the magic happens! Once you start simmering the broth, it usually takes around 30-40 minutes for the chicken to cook through and for the flavors to meld beautifully. After removing the chicken, you’ll need an additional 5-10 minutes to strain the broth and prepare the rice noodles. Overall, the cooking time will be approximately 40-50 minutes, depending on how long you let the broth simmer for maximum flavor.

Total Time

In total, you can expect to spend about 1 hour to 1 hour and 10 minutes from start to finish when making Pho Ga Vietnamese Chicken Noodle Soup. This includes both the prep and cooking times. It’s a relatively quick dish to prepare, especially considering the rich flavors you’ll achieve. Once you’ve mastered the process, you’ll find that making this comforting soup can easily fit into your busy schedule!

Nutritional Information for Pho Ga Vietnamese Chicken Noodle Soup

Calories

When it comes to enjoying Pho Ga Vietnamese Chicken Noodle Soup, you can feel good about its nutritional profile. Each serving contains approximately 350 calories. This makes it a satisfying yet light meal option. The balance of ingredients ensures that you’re not just filling up on empty calories. Instead, you’re nourishing your body with wholesome ingredients that provide energy and comfort.

Protein

Protein is an essential part of any diet, and Pho Ga delivers on this front. Each serving offers around 30 grams of protein. The chicken is the primary source of this protein, making it a great choice for those looking to maintain or build muscle. Additionally, the rice noodles contribute a small amount of protein, rounding out the dish. This high protein content helps keep you feeling full and satisfied for longer.

Sodium

Sodium is an important consideration when it comes to any soup. Pho Ga contains about 800 milligrams of sodium per serving. While this is a reasonable amount for a flavorful broth, it’s always good to be mindful of your sodium intake. If you’re watching your salt consumption, consider using low-sodium chicken broth or adjusting the amount of fish sauce and salt in the recipe. This way, you can enjoy your Pho Ga without compromising your dietary needs.

FAQs about Pho Ga Vietnamese Chicken Noodle Soup

What is the best type of chicken to use for Pho Ga?

When it comes to making Pho Ga Vietnamese Chicken Noodle Soup, the best type of chicken to use is a whole chicken. A whole chicken, typically weighing between 3 to 4 pounds, provides the most flavor and richness to the broth. The bones and skin contribute to a deeper, more aromatic broth, which is essential for an authentic Pho Ga experience. If you prefer a leaner option, you can also use bone-in chicken thighs or breasts, but keep in mind that the flavor may not be as robust.

Can I make Pho Ga in advance?

Absolutely! Pho Ga can be made in advance, making it a convenient option for meal prep. You can prepare the broth and cook the chicken ahead of time. Once the soup is ready, let it cool and store it in the refrigerator for up to 3 days. When you’re ready to serve, simply reheat the broth and add freshly cooked rice noodles. This way, you can enjoy a delicious bowl of Pho Ga without the hassle of starting from scratch each time.

What are the traditional garnishes for Pho Ga?

Traditional garnishes for Pho Ga include a variety of fresh herbs and condiments that enhance the soup’s flavor. Common garnishes are fresh basil, cilantro, and mint, which add a burst of freshness. Lime wedges are also essential, as a squeeze of lime juice brightens the dish. For those who enjoy a bit of heat, sliced jalapeños are a popular addition. Some people also like to add bean sprouts or hoisin sauce for extra texture and flavor. These garnishes allow each person to customize their bowl to their liking.

Is Pho Ga gluten-free?

Yes, Pho Ga can be gluten-free, but it depends on the ingredients you use. The rice noodles are naturally gluten-free, making them a great choice for those with gluten sensitivities. However, be cautious with the fish sauce, as some brands may contain gluten. Always check the label to ensure it is gluten-free. Additionally, if you choose to add any sauces or condiments, verify that they are also gluten-free. By selecting the right ingredients, you can enjoy a delicious and safe bowl of Pho Ga!

Conclusion on Pho Ga Vietnamese Chicken Noodle Soup

Pho Ga Vietnamese Chicken Noodle Soup is more than just a meal; it’s a celebration of flavors, culture, and togetherness. This comforting dish brings warmth to the table, making it a favorite for many. With its rich broth, tender chicken, and fresh herbs, Pho Ga offers a delightful experience that can be enjoyed any time of the day.

As you embark on your journey to create this delicious soup, remember that the key lies in the quality of your ingredients and the love you put into the preparation. Each step, from simmering the broth to garnishing the final bowl, contributes to the overall experience. Whether you’re sharing it with family or enjoying a quiet moment alone, Pho Ga has a way of bringing joy and comfort.

Don’t hesitate to explore the variations and personal touches that make this dish your own. From regional twists to alternative ingredients, Pho Ga can adapt to your tastes and preferences. The beauty of this soup lies in its versatility, allowing you to create a bowl that reflects your culinary style.

So, gather your ingredients, follow the steps, and savor the delightful flavors of Pho Ga Vietnamese Chicken Noodle Soup. With each spoonful, you’ll not only nourish your body but also connect with a rich cultural heritage that celebrates the joy of food and community. Enjoy your cooking adventure, and may your Pho Ga bring warmth and happiness to your table!

Chocolate-Covered Coffee Banana Pops are a must-try!

Introduction to Chocolate-Covered Coffee Banana Pops

Are you looking for a delightful treat that combines the rich flavors of chocolate and coffee with the natural sweetness of bananas? Look no further! Chocolate-Covered Coffee Banana Pops are the perfect snack for any time of the day. These pops are not only delicious but also easy to make, making them a great choice for both kids and adults.

Imagine biting into a creamy banana, perfectly coated in smooth, melted chocolate, with a hint of coffee flavor that awakens your taste buds. This treat is a fantastic way to enjoy a healthy dessert while satisfying your sweet tooth. Plus, they are a fun and creative way to incorporate fruit into your diet.

Whether you’re hosting a party, looking for a quick snack, or simply want to indulge yourself, these Chocolate-Covered Coffee Banana Pops are sure to impress. They are also customizable, allowing you to add your favorite toppings or try different flavor combinations. So, let’s dive into the ingredients and preparation steps to create this delightful treat!

Ingredients for Chocolate-Covered Coffee Banana Pops

To create your own Chocolate-Covered Coffee Banana Pops, you’ll need a few simple ingredients. These items are easy to find and will help you whip up this delicious treat in no time. Here’s what you’ll need:

  • 2 ripe bananas
  • 1 cup dark chocolate chips
  • 1 tablespoon coconut oil
  • 1 teaspoon instant coffee granules
  • 1/4 teaspoon sea salt
  • Popsicle sticks

Each ingredient plays a vital role in creating the perfect balance of flavors. The ripe bananas provide natural sweetness and creaminess, while the dark chocolate chips add a rich, indulgent taste. Coconut oil helps the chocolate melt smoothly and gives a slight tropical flavor. Instant coffee granules enhance the chocolate’s richness, and sea salt brings out all the flavors beautifully.

Gather these ingredients, and you’ll be ready to start making your Chocolate-Covered Coffee Banana Pops. They are not only tasty but also a fun way to enjoy a healthy snack. Now, let’s move on to the preparation steps!

Preparation of Chocolate-Covered Coffee Banana Pops

Now that you have all your ingredients ready, it’s time to prepare your Chocolate-Covered Coffee Banana Pops! This process is simple and fun, making it a great activity for the whole family. Follow these easy steps to create your delicious treats.

Step 1: Gather Your Ingredients

Before you start, make sure you have everything you need. Gather your ripe bananas, dark chocolate chips, coconut oil, instant coffee granules, sea salt, and popsicle sticks. Having everything in one place will make the process smoother and more enjoyable.

Step 2: Prepare the Bananas

First, peel the bananas and cut them in half. This will create the perfect size for your pops. Next, insert a popsicle stick into the cut end of each banana half. This step is crucial, as it allows you to easily dip and enjoy your pops later. Once you’ve done this, place the banana pops on a baking sheet lined with parchment paper. Now, it’s time to freeze them!

Step 3: Melt the Chocolate

In a microwave-safe bowl, combine the dark chocolate chips and coconut oil. Microwave the mixture in 30-second intervals. Be sure to stir in between each interval until the chocolate is completely melted and smooth. This method helps prevent the chocolate from burning, ensuring a perfect coating for your banana pops.

Step 4: Add Coffee Flavor

Once your chocolate is melted, it’s time to enhance the flavor! Stir in the instant coffee granules and sea salt until everything is well combined. The coffee will add a delightful richness to the chocolate, making your pops even more delicious. This step is what truly makes your Chocolate-Covered Coffee Banana Pops stand out!

Step 5: Dip the Bananas

Now comes the fun part! Remove the banana pops from the freezer. Dip each banana half into the melted chocolate mixture, ensuring it is fully coated. Allow any excess chocolate to drip off before placing them back on the baking sheet. This step is essential for achieving that perfect chocolate layer.

Step 6: Freeze the Pops

After dipping, return the chocolate-covered banana pops to the baking sheet. Place them back in the freezer for an additional 30 minutes. This will allow the chocolate to set properly, giving you a deliciously firm coating. Once they’re ready, you can serve them immediately or store them for later!

Variation of Chocolate-Covered Coffee Banana Pops

While the classic Chocolate-Covered Coffee Banana Pops are already a delightful treat, there are many ways to switch things up! You can experiment with alternative coatings and different flavor combinations to create your own unique version. Let’s explore some fun variations that will keep your taste buds excited!

Alternative Coatings

If you want to try something different, consider using various coatings for your banana pops. Here are a few ideas:

  • White Chocolate: Swap dark chocolate for white chocolate for a sweeter, creamier taste. The contrast with the banana is simply divine!
  • Milk Chocolate: For those who prefer a milder flavor, milk chocolate is a great option. It adds a nice sweetness that pairs well with the banana.
  • Yogurt Coating: For a healthier twist, use Greek yogurt. Simply dip the banana pops in yogurt and freeze. This gives a tangy flavor that complements the sweetness of the banana.
  • Nut Butter: Instead of chocolate, try coating the bananas in almond or peanut butter. This adds a nutty flavor and a creamy texture that’s hard to resist!

Different Flavor Combinations

In addition to alternative coatings, you can also play around with flavors. Here are some exciting combinations to consider:

  • Mint Chocolate: Add a few drops of peppermint extract to the melted chocolate for a refreshing minty flavor.
  • Spicy Chocolate: Mix in a pinch of cayenne pepper or chili powder to the chocolate for a surprising kick!
  • Coconut Delight: Add shredded coconut to the melted chocolate or sprinkle it on top after dipping for a tropical twist.
  • Caramel Drizzle: After the chocolate sets, drizzle some caramel sauce over the pops for an extra layer of sweetness.

These variations not only enhance the flavor but also make your Chocolate-Covered Coffee Banana Pops visually appealing. So, don’t hesitate to get creative and make these treats your own!

Cooking Note for Chocolate-Covered Coffee Banana Pops

When making Chocolate-Covered Coffee Banana Pops, a few cooking notes can help ensure your treats turn out perfectly every time. These tips will guide you through the process and enhance your overall experience.

First, choose ripe bananas. They should be yellow with a few brown spots. Ripe bananas are sweeter and creamier, making them ideal for this recipe. If your bananas are too green, they may not have the desired flavor and texture.

Next, when melting the chocolate, be patient. Microwaving in short intervals is key. Stirring between intervals helps prevent overheating. If the chocolate gets too hot, it can seize up and become unusable. If you notice this happening, try adding a little more coconut oil to help smooth it out.

Also, consider using a double boiler if you prefer a stovetop method. This technique allows for gentle heating, reducing the risk of burning the chocolate. Just make sure the bowl doesn’t touch the water, as steam can cause the chocolate to seize.

When dipping the bananas, ensure they are completely coated. This not only enhances the flavor but also helps the chocolate set better. If you want a thicker coating, dip them twice, allowing the first layer to set before dipping again.

Lastly, remember to store your Chocolate-Covered Coffee Banana Pops properly. If you plan to keep them for a while, wrap each pop in plastic wrap before placing them in an airtight container. This will help prevent freezer burn and keep them fresh for longer.

By following these cooking notes, you’ll create delicious Chocolate-Covered Coffee Banana Pops that are sure to impress your family and friends. Enjoy the process and have fun experimenting with different flavors and toppings!

Serving Suggestions for Chocolate-Covered Coffee Banana Pops

Once your Chocolate-Covered Coffee Banana Pops are ready, it’s time to think about how to serve them! These delightful treats can be enjoyed in various ways, making them perfect for any occasion. Here are some serving suggestions to elevate your experience:

  • Party Platter: Arrange the banana pops on a colorful platter for a fun party treat. You can add some fresh fruit, like strawberries or blueberries, around the pops for a vibrant display.
  • Ice Cream Sundae: For a decadent dessert, serve the banana pops alongside a scoop of your favorite ice cream. Drizzle some chocolate or caramel sauce over the top for an extra indulgent touch.
  • Garnish with Toppings: Before serving, sprinkle some crushed nuts, shredded coconut, or colorful sprinkles on top of the chocolate coating. This adds texture and makes the pops visually appealing.
  • On a Stick: Serve the banana pops directly on the popsicle sticks for a fun, handheld treat. This is especially great for kids or outdoor gatherings!
  • With Coffee: Pair your Chocolate-Covered Coffee Banana Pops with a cup of coffee or espresso. The flavors complement each other beautifully, making for a delightful afternoon snack.

These serving suggestions not only enhance the presentation of your Chocolate-Covered Coffee Banana Pops but also make them more enjoyable. Whether you’re hosting a gathering or simply treating yourself, these ideas will surely impress your guests and satisfy your cravings!

Tips for Making the Perfect Chocolate-Covered Coffee Banana Pops

Creating the perfect Chocolate-Covered Coffee Banana Pops is all about attention to detail and a little creativity. Here are some helpful tips to ensure your pops turn out delicious every time. With these tricks, you’ll impress your family and friends with your culinary skills!

First, always use ripe bananas. They should be yellow with a few brown spots. Ripe bananas are sweeter and creamier, making them ideal for this recipe. If your bananas are too green, they may not have the desired flavor and texture.

Next, when melting the chocolate, be patient. Microwaving in short intervals is key. Stirring between intervals helps prevent overheating. If the chocolate gets too hot, it can seize up and become unusable. If you notice this happening, try adding a little more coconut oil to help smooth it out.

Consider using a double boiler if you prefer a stovetop method. This technique allows for gentle heating, reducing the risk of burning the chocolate. Just make sure the bowl doesn’t touch the water, as steam can cause the chocolate to seize.

When dipping the bananas, ensure they are completely coated. This not only enhances the flavor but also helps the chocolate set better. If you want a thicker coating, dip them twice, allowing the first layer to set before dipping again.

For added fun, get creative with toppings! Before the chocolate sets, sprinkle crushed nuts, shredded coconut, or colorful sprinkles on top. This not only adds flavor but also makes your pops visually appealing.

Lastly, remember to store your Chocolate-Covered Coffee Banana Pops properly. If you plan to keep them for a while, wrap each pop in plastic wrap before placing them in an airtight container. This will help prevent freezer burn and keep them fresh for longer.

By following these tips, you’ll create delicious Chocolate-Covered Coffee Banana Pops that are sure to impress your family and friends. Enjoy the process and have fun experimenting with different flavors and toppings!

Breakdown of Time for Chocolate-Covered Coffee Banana Pops

Understanding the time required to make Chocolate-Covered Coffee Banana Pops can help you plan your cooking session better. Here’s a simple breakdown of the time involved in each step of the process. This way, you can enjoy your delicious treats without any rush!

Prep Time

The prep time for Chocolate-Covered Coffee Banana Pops is quite short. You’ll need about 15 minutes to gather your ingredients and prepare the bananas. This includes peeling, cutting, and inserting the popsicle sticks. It’s a quick and easy process that anyone can handle!

Cooking Time

Once your bananas are ready, the cooking time mainly involves melting the chocolate and freezing the pops. Melting the chocolate takes about 5 minutes, depending on your microwave. After dipping the bananas, you’ll need to freeze them for at least 1 hour to ensure they are firm. This step is crucial for achieving that perfect chocolate coating.

Total Time

In total, you can expect to spend around 1 hour and 20 minutes to make your Chocolate-Covered Coffee Banana Pops. This includes 15 minutes of prep time and 1 hour of freezing time. If you want the chocolate to set perfectly, consider adding an extra 30 minutes for a total of 1 hour and 50 minutes. This way, you can enjoy your pops at their best!

With this time breakdown, you can easily fit making these delightful treats into your day. Whether it’s a quick snack or a fun dessert for a gathering, Chocolate-Covered Coffee Banana Pops are worth the wait!

Nutritional Information for Chocolate-Covered Coffee Banana Pops

Understanding the nutritional content of your treats is essential, especially when you want to enjoy them guilt-free. Chocolate-Covered Coffee Banana Pops are not only delicious but also provide a good balance of nutrients. Here’s a breakdown of the nutritional information per serving:

Calories

Each serving of Chocolate-Covered Coffee Banana Pops contains approximately 180 calories. This makes them a satisfying snack without being overly indulgent. The combination of bananas, chocolate, and coffee provides a delightful energy boost, perfect for a mid-afternoon pick-me-up!

Protein

In terms of protein, each serving offers about 2 grams. While this may not seem like a lot, it contributes to your daily intake, especially when combined with other meals throughout the day. The protein content helps keep you feeling full and satisfied after enjoying these tasty pops.

Sodium

When it comes to sodium, Chocolate-Covered Coffee Banana Pops contain around 50 milligrams per serving. This is a relatively low amount, making them a heart-healthy option. The sea salt used in the recipe enhances the flavors without adding excessive sodium, allowing you to enjoy your treat without worry.

Overall, Chocolate-Covered Coffee Banana Pops are a nutritious and delicious snack. They provide a good balance of calories, protein, and sodium, making them a great choice for anyone looking to satisfy their sweet tooth while still being mindful of their health. Enjoy these pops as part of a balanced diet, and feel good about treating yourself!

FAQs about Chocolate-Covered Coffee Banana Pops

Can I use dark chocolate for Chocolate-Covered Coffee Banana Pops?

Absolutely! In fact, dark chocolate is the star ingredient in this recipe. It adds a rich, deep flavor that pairs wonderfully with the sweetness of the bananas. Dark chocolate also contains antioxidants, making your Chocolate-Covered Coffee Banana Pops a healthier treat. If you love the taste of dark chocolate, you’ll enjoy these pops even more!

How long do Chocolate-Covered Coffee Banana Pops last in the freezer?

Chocolate-Covered Coffee Banana Pops can last in the freezer for up to one week. To keep them fresh, store them in an airtight container. If you want to keep them for longer, consider wrapping each pop in plastic wrap before placing them in the container. This will help prevent freezer burn and maintain their delicious flavor!

Can I make Chocolate-Covered Coffee Banana Pops without coffee?

Yes, you can! If you prefer not to use coffee, simply omit the instant coffee granules from the recipe. Your Chocolate-Covered Banana Pops will still be delicious and sweet. You can also experiment with other flavors, such as vanilla extract or almond extract, to add a unique twist to your pops!

What is the best way to store Chocolate-Covered Coffee Banana Pops?

The best way to store your Chocolate-Covered Coffee Banana Pops is in an airtight container in the freezer. If you plan to keep them for a while, wrap each pop in plastic wrap to prevent freezer burn. This will help maintain their taste and texture, ensuring you can enjoy them whenever you like!

Conclusion on Chocolate-Covered Coffee Banana Pops

In conclusion, Chocolate-Covered Coffee Banana Pops are a delightful treat that combines the best of both worlds: the sweetness of ripe bananas and the rich flavors of chocolate and coffee. They are not only easy to make but also offer a fun way to enjoy a healthy snack. Whether you’re preparing them for a party, a family gathering, or just for yourself, these pops are sure to impress.

With their simple ingredients and straightforward preparation, you can whip up a batch in no time. Plus, the variations and creative toppings allow you to customize each pop to suit your taste. From crunchy nuts to colorful sprinkles, the possibilities are endless!

Moreover, the nutritional benefits of these pops make them a guilt-free indulgence. With a balance of calories, protein, and low sodium, you can enjoy them without worry. They provide a quick energy boost, making them perfect for a midday snack or a post-workout treat.

So, why not give these Chocolate-Covered Coffee Banana Pops a try? Gather your ingredients, follow the steps, and enjoy the deliciousness that awaits. You’ll be amazed at how a simple treat can bring so much joy. Happy snacking!

Creamy Tuscan Ravioli is a must-try Italian dish!

Introduction to Creamy Tuscan Ravioli Recipe

Creamy Tuscan Ravioli recipe is a perfect blend of rich cream, fresh vegetables, and tender pasta. This dish is not only delicious but also easy to prepare, making it ideal for both weeknight dinners and special occasions.

Imagine biting into a perfectly cooked ravioli filled with creamy cheese, surrounded by a luscious sauce made from fresh spinach and juicy cherry tomatoes. The combination of flavors is simply irresistible! Plus, this recipe allows for plenty of creativity. You can easily customize it to suit your taste preferences or dietary needs.

Creamy Tuscan Ravioli and discover how to make this delightful dish!

Ingredients for Creamy Tuscan Ravioli Recipe

Creamy Tuscan Ravioli, you’ll need a selection of fresh and flavorful ingredients. Each component plays a vital role in bringing this dish to life. Here’s what you’ll need:

  • 8 ounces refrigerated cheese ravioli: This is the star of the dish. You can choose any cheese-filled ravioli you like.
  • 2 tablespoons olive oil: This adds richness and helps sauté the garlic and vegetables.
  • 3 cloves garlic, minced: Garlic brings a wonderful aroma and flavor to the sauce.
  • 1 cup cherry tomatoes, halved: These sweet tomatoes add a burst of freshness and color.
  • 1 cup fresh spinach: Spinach not only adds nutrition but also a lovely green hue.
  • 1 cup heavy cream: This is the key ingredient for a rich and creamy sauce.
  • 1 teaspoon Italian seasoning: A blend of herbs that enhances the overall flavor.
  • Salt and pepper to taste: Essential for seasoning and balancing flavors.
  • ¼ cup grated Parmesan cheese: This adds a salty, nutty flavor that complements the dish.
  • Fresh basil for garnish (optional): A sprinkle of basil adds a pop of color and freshness.

Creamy Tuscan Ravioli. Each item contributes to the overall taste, making this dish a delightful experience for your taste buds!

Step-by-Step Preparation of Creamy Tuscan Ravioli Recipe

Creamy Tuscan Ravioli. This step-by-step guide will help you create this delicious dish with ease. Let’s get started!

Step 1: Preparing the Ravioli Dough

If you’re feeling adventurous, you can make your own ravioli dough. Start by mixing 2 cups of all-purpose flour with 3 large eggs and a pinch of salt. Knead the dough until it’s smooth and elastic. Wrap it in plastic wrap and let it rest for 30 minutes. This resting time allows the gluten to relax, making it easier to roll out.

Step 2: Making the Filling for Creamy Tuscan Ravioli

While the dough rests, prepare the filling. In a bowl, combine 1 cup of ricotta cheese, ½ cup of grated Parmesan cheese, and a pinch of salt and pepper. You can also add some chopped herbs like basil or parsley for extra flavor. Mix everything until well combined. This creamy filling will be the heart of your ravioli!

Step 3: Assembling the Ravioli

Once your dough has rested, roll it out on a floured surface until it’s thin. Cut the dough into squares or circles, depending on your preference. Place a small spoonful of the filling in the center of each piece. Moisten the edges with water, then fold the dough over to create a pocket. Press the edges firmly to seal. Repeat this process until all the dough and filling are used.

Step 4: Cooking the Ravioli

Bring a large pot of salted water to a boil. Carefully drop the ravioli into the boiling water. Cook them for about 3-4 minutes or until they float to the surface. This indicates they are done. Use a slotted spoon to remove the ravioli and set them aside on a plate. Be gentle to avoid breaking them!

Step 5: Preparing the Creamy Sauce

In a large skillet, heat 2 tablespoons of olive oil over medium heat. Add 3 cloves of minced garlic and sauté for about 1 minute until fragrant. Next, toss in 1 cup of halved cherry tomatoes and cook for 3-4 minutes until they soften. Stir in 1 cup of fresh spinach and let it wilt for about 2 minutes. This colorful mixture will be the base of your creamy sauce.

Step 6: Combining Ravioli with the Sauce

Creamy Tuscan Ravioli is now ready to serve!

Variations of Creamy Tuscan Ravioli Recipe

Creamy Tuscan Ravioli recipe lies in its versatility. You can easily adapt it to suit different dietary preferences or simply to mix things up. Here are some delicious variations to consider:

Vegetarian Options

If you want to keep your dish vegetarian, there are plenty of ways to enhance the flavors without adding meat. Consider incorporating a variety of vegetables. For instance, you can add sautéed mushrooms, zucchini, or bell peppers to the sauce. These veggies not only add texture but also bring a burst of color to your plate.

Creamy Tuscan Ravioli even more delightful!

Protein Additions

If you’re looking to boost the protein content of your meal, adding grilled chicken or shrimp is a fantastic choice. Simply cook the protein separately and toss it into the creamy sauce along with the ravioli. This not only enhances the dish but also makes it more filling.

Creamy Tuscan Ravioli will be a satisfying meal that everyone will love!

Cooking Note for Creamy Tuscan Ravioli Recipe

Creamy Tuscan Ravioli, there are a few important cooking notes to keep in mind. These tips will help ensure that your dish turns out perfectly every time.

First, always check the cooking instructions on the ravioli package. Different brands may have varying cooking times. Cooking them until they are al dente is crucial. This means they should be firm to the bite, as they will continue to cook slightly when combined with the sauce.

Next, when sautéing the garlic, be careful not to burn it. Garlic can turn bitter if overcooked. Just a minute or so is usually enough to release its wonderful aroma. If you notice it starting to brown too quickly, lower the heat.

Additionally, when adding the heavy cream, make sure to stir continuously. This helps to create a smooth and creamy sauce without any lumps. If you prefer a lighter sauce, consider using half-and-half or a dairy-free alternative, as mentioned earlier.

Creamy Tuscan Ravioli truly shine!

By following these cooking notes, you’ll be well on your way to creating a delicious and satisfying meal that everyone will enjoy. Happy cooking!

Serving Suggestions for Creamy Tuscan Ravioli Recipe

Creamy Tuscan Ravioli is ready, it’s time to think about how to serve it. Presentation can elevate your dish and make it even more enjoyable. Here are some delightful serving suggestions to consider:

  • Garnish with Fresh Herbs: A sprinkle of fresh basil or parsley on top adds a pop of color and freshness. It also enhances the overall flavor of the dish.
  • Pair with a Side Salad: A light side salad with mixed greens, cherry tomatoes, and a simple vinaigrette complements the richness of the ravioli. This adds a refreshing contrast to your meal.
  • Serve with Garlic Bread: Warm, crusty garlic bread is perfect for soaking up the creamy sauce. It’s a classic pairing that everyone loves!
  • Wine Pairing: Consider serving your ravioli with a glass of white wine, such as Pinot Grigio or Chardonnay. These wines enhance the flavors of the dish and make for a lovely dining experience.
  • Top with Extra Cheese: For cheese lovers, adding more grated Parmesan or even a sprinkle of mozzarella on top before serving can make the dish even more indulgent.

Creamy Tuscan Ravioli but also create a well-rounded meal that is sure to impress your guests. Enjoy your culinary creation!

Tips for Perfecting Your Creamy Tuscan Ravioli Recipe

Creamy Tuscan Ravioli is all about attention to detail and a few helpful tips. With these suggestions, you can elevate your dish and impress everyone at the dinner table. Let’s explore some essential tips for perfecting your ravioli!

  • Use Fresh Ingredients: Fresh ingredients make a significant difference in flavor. Opt for fresh spinach, ripe cherry tomatoes, and high-quality cheese. The fresher the ingredients, the tastier your Creamy Tuscan Ravioli will be!
  • Don’t Overcook the Ravioli: Keep an eye on the cooking time for the ravioli. Overcooking can lead to mushy pasta. Aim for al dente, which means the ravioli should be firm yet tender.
  • Adjust the Creaminess: If you prefer a lighter sauce, feel free to adjust the amount of heavy cream. You can start with half a cup and add more if needed. This way, you can control the richness of the dish.
  • Experiment with Seasonings: While Italian seasoning is a great base, don’t hesitate to experiment. Add a pinch of red pepper flakes for heat or a squeeze of lemon juice for brightness. These small tweaks can enhance the overall flavor.
  • Let the Sauce Simmer: Allowing the sauce to simmer for a few extra minutes can deepen the flavors. Just be sure to stir occasionally to prevent sticking.
  • Serve Immediately: Ravioli is best enjoyed fresh. Serve it right after combining with the sauce to maintain the perfect texture. If you need to wait, keep it warm on low heat, but avoid prolonged cooking.
  • Store Leftovers Properly: If you have leftovers, store them in an airtight container in the fridge. Reheat gently on the stove with a splash of cream to restore the sauce’s creaminess.

Creamy Tuscan Ravioli. Each step you take will bring you closer to a delicious and satisfying meal that everyone will love!

Breakdown of Time for Creamy Tuscan Ravioli Recipe

Creamy Tuscan Ravioli recipe can help you plan your cooking efficiently. Here’s a breakdown of the time required for preparation and cooking:

Prep Time

The prep time for this delightful dish is approximately 15-20 minutes. This includes gathering your ingredients, chopping the garlic, halving the cherry tomatoes, and washing the spinach. If you decide to make your own ravioli dough and filling, you may need an additional 30 minutes for that process. However, using store-bought ravioli can significantly cut down on your prep time.

Cooking Time

Creamy Tuscan Ravioli is about 15-20 minutes. This includes boiling the ravioli, sautéing the garlic and vegetables, and simmering the creamy sauce. The ravioli typically take around 3-4 minutes to cook, while the sauce requires about 10-15 minutes to prepare and combine with the ravioli.

Total Time

Creamy Tuscan Ravioli a quick and satisfying meal option, perfect for busy weeknights or when you want to impress guests without spending hours in the kitchen. With this time breakdown, you can easily plan your cooking and enjoy a delicious Italian dish in no time!

Nutritional Information for Creamy Tuscan Ravioli Recipe

Creamy Tuscan Ravioli is not only delicious but also provides a good mix of nutrients. Here’s a breakdown of the nutritional information per serving:

Calories

Creamy Tuscan Ravioli contains approximately 400 calories. This makes it a satisfying meal that can fit into a variety of dietary plans. The calorie count comes from the combination of the ravioli, cream, and other ingredients, providing a rich and fulfilling dish.

Protein

In terms of protein, this dish offers about 12 grams per serving. The protein primarily comes from the cheese in the ravioli and the added Parmesan cheese. Protein is essential for muscle repair and growth, making this dish a great option for those looking to maintain a healthy lifestyle.

Sodium

The sodium content in each serving is around 600 milligrams. This amount can vary based on the specific ingredients used, especially if you add salt or use pre-seasoned ravioli. While sodium is necessary for bodily functions, it’s important to monitor your intake, especially if you are watching your salt consumption.

Creamy Tuscan Ravioli is a delicious and nutritious option for dinner. With its balance of calories, protein, and sodium, it can be enjoyed as part of a healthy diet. Just remember to pair it with fresh vegetables or a side salad for a well-rounded meal!

FAQs about Creamy Tuscan Ravioli Recipe

Can I use store-bought ravioli for this recipe?

Creamy Tuscan Ravioli without the hassle of making the dough from scratch. Just choose a high-quality cheese ravioli, and follow the cooking instructions on the package. This way, you can focus on preparing the creamy sauce and enjoy a delightful meal in no time!

What can I substitute for heavy cream in the sauce?

Creamy Tuscan Ravioli rich and flavorful while accommodating different dietary needs.

How can I make this recipe gluten-free?

Creamy Tuscan Ravioli gluten-free, simply use gluten-free ravioli. Many grocery stores offer gluten-free pasta options made from rice, quinoa, or other gluten-free grains. Just ensure that all other ingredients, like sauces and seasonings, are also gluten-free. This way, everyone can enjoy this delicious dish without worry!

Can I freeze the ravioli?

Creamy Tuscan Ravioli whenever you crave it!

Conclusion on Creamy Tuscan Ravioli Recipe

Creamy Tuscan Ravioli recipe is a delightful dish that brings the essence of Italian cuisine right to your table. With its rich flavors and creamy texture, it’s sure to become a favorite among family and friends. Whether you choose to make your own ravioli or opt for store-bought, this recipe is designed to be simple and enjoyable.

As you’ve seen, the versatility of this dish allows for endless variations. You can easily customize it to fit your dietary preferences, whether you’re looking for vegetarian options or adding protein for a heartier meal. The tips and serving suggestions provided will help you create a beautiful presentation that enhances the dining experience.

Creamy Tuscan Ravioli is not just a meal; it’s an experience. So, gather your ingredients, follow the steps, and enjoy the process of cooking this delicious dish.

Creamy Tuscan Ravioli in your kitchen. It’s a wonderful way to share a taste of Italy with your loved ones. Happy cooking, and enjoy every creamy bite!

Honey Garlic Salmon Bites Recipe is a must-try dish!

Introduction to Honey Garlic Salmon Bites Recipe

Honey Garlic Salmon Bites Recipe is a perfect choice. This dish combines the rich flavors of honey and garlic with tender salmon, creating a delightful treat that is both healthy and satisfying. Whether you’re hosting a dinner party or just want a quick weeknight meal, these salmon bites are sure to please.

What Makes Honey Garlic Salmon Bites Special?

What sets this recipe apart is its simplicity and versatility. The marinade is quick to prepare, using common ingredients that you likely already have in your kitchen. Honey adds a natural sweetness, while garlic provides a savory kick. Together, they create a mouthwatering glaze that enhances the salmon’s flavor.

Moreover, these salmon bites are not only tasty but also packed with nutrients. Salmon is an excellent source of protein and omega-3 fatty acids, which are beneficial for heart health. Plus, the recipe is adaptable! You can easily swap out salmon for chicken or tofu, making it suitable for various dietary preferences.

In just a short time, you can whip up a dish that looks and tastes gourmet. So, let’s dive into the ingredients and preparation steps to create your own Honey Garlic Salmon Bites!

Ingredients for Honey Garlic Salmon Bites Recipe

Honey Garlic Salmon Bites Recipe, you’ll need a few simple ingredients. Each component plays a vital role in building the flavor profile of this dish. Here’s what you’ll need:

  • 1 pound salmon fillet: Make sure the skin is removed and cut into 1-inch cubes for even cooking.
  • 1/4 cup honey: This natural sweetener adds a rich flavor and helps caramelize the salmon.
  • 1/4 cup soy sauce: This ingredient brings a savory depth to the marinade.
  • 2 cloves garlic: Minced garlic provides a fragrant and bold taste.
  • 1 tablespoon olive oil: This oil helps to keep the salmon moist during cooking.
  • 1 teaspoon sesame oil: A little goes a long way in adding a nutty flavor.
  • 1/2 teaspoon red pepper flakes (optional): For those who enjoy a bit of heat, this ingredient can spice things up!
  • 1 tablespoon chopped green onions: This will be used for garnish, adding a fresh touch.
  • Sesame seeds: These seeds are perfect for garnishing and add a nice crunch.

Gathering these ingredients is the first step toward making your Honey Garlic Salmon Bites. Each one contributes to the overall taste and texture of the dish. Now that you have everything ready, let’s move on to the preparation steps!

Step-by-Step Preparation of Honey Garlic Salmon Bites Recipe

Honey Garlic Salmon Bites Recipe. This section will guide you through each step, ensuring that your salmon bites turn out perfectly delicious. Let’s get started!

Step 1: Preparing the Salmon

First, you need to prepare the salmon. Start by selecting a fresh salmon fillet. Make sure it’s skinless, as this will allow the marinade to soak in better. Cut the salmon into 1-inch cubes. This size is perfect for even cooking and easy eating. If you have any leftover pieces, you can save them for another recipe or snack!

Step 2: Making the Honey Garlic Sauce

Next, it’s time to whip up the honey garlic sauce. In a medium bowl, combine the honey, soy sauce, minced garlic, olive oil, sesame oil, and red pepper flakes (if you’re using them). Whisk these ingredients together until they are well blended. The mixture should be smooth and fragrant, with a perfect balance of sweet and savory. This sauce is what makes your salmon bites so special!

Step 3: Combining Ingredients

Now, add the salmon cubes to the bowl with the honey garlic sauce. Gently toss the salmon in the marinade, ensuring each piece is evenly coated. This step is crucial for flavor! Once coated, let the salmon marinate for about 15-20 minutes. This allows the flavors to penetrate the fish, making it even tastier.

Step 4: Cooking the Salmon Bites

After marinating, it’s time to cook the salmon bites. Preheat your oven to 400°F and line a baking sheet with parchment paper. Arrange the marinated salmon cubes in a single layer on the baking sheet. This helps them cook evenly. Bake in the preheated oven for 12-15 minutes. You’ll know they’re done when the salmon flakes easily with a fork. Once cooked, remove them from the oven and let them cool for a few minutes.

Now, your Honey Garlic Salmon Bites are ready to be garnished and served! With these simple steps, you’ve created a dish that’s not only delicious but also visually appealing. Let’s explore some variations and serving suggestions next!

Variation of Honey Garlic Salmon Bites Recipe

Honey Garlic Salmon Bites Recipe is already a hit, there are many ways to switch things up! Whether you want to try different ingredients or explore various cooking methods, these variations can add a unique twist to your dish. Let’s take a look at some alternative ingredients and cooking methods you can use.

Alternative Ingredients to Try

Experimenting with different ingredients can lead to exciting new flavors. Here are some alternatives you might consider:

  • Chicken: Swap out salmon for chicken breast cut into bite-sized pieces. The marinade works wonderfully with chicken, too!
  • Tofu: For a vegetarian option, use firm tofu. Press it to remove excess moisture, then cut it into cubes and marinate.
  • Maple Syrup: If you want a different sweetener, try using maple syrup instead of honey. It adds a unique flavor!
  • Ginger: Add freshly grated ginger to the marinade for an extra zing. It pairs well with garlic and honey.
  • Vegetables: Toss in some vegetables like bell peppers or zucchini. They can roast alongside the salmon for a complete meal.

These alternatives can help you customize the recipe to your taste or dietary needs. Feel free to mix and match!

Different Cooking Methods

Honey Garlic Salmon Bites Recipe. Each method brings out different textures and flavors:

  • Grilling: For a smoky flavor, grill the marinated salmon bites on skewers. Just be sure to soak wooden skewers in water first to prevent burning.
  • Pan-Seering: Heat a skillet over medium-high heat and add a little oil. Cook the salmon bites for about 3-4 minutes on each side until golden brown.
  • Air Frying: If you have an air fryer, this method is quick and gives a crispy texture. Cook at 375°F for about 8-10 minutes.
  • Broiling: For a caramelized finish, broil the salmon bites for the last few minutes of cooking. Keep a close eye to avoid burning!

Trying out these different cooking methods can add variety to your meals. Each method enhances the flavors in its own way, making your Honey Garlic Salmon Bites even more enjoyable!

Cooking Note for Honey Garlic Salmon Bites Recipe

Honey Garlic Salmon Bites Recipe, there are a few important cooking notes to keep in mind. These tips will help ensure that your salmon bites turn out perfectly every time. Let’s explore some key points to consider during the cooking process.

First, always choose fresh salmon. Fresh fish not only tastes better but also has a firmer texture, which is essential for achieving that perfect bite. If you can, buy your salmon from a trusted fishmonger or grocery store that specializes in seafood.

Next, marinating the salmon is crucial. Allowing the salmon to soak in the honey garlic marinade for at least 15-20 minutes enhances the flavor significantly. If you have the time, consider marinating it overnight in the refrigerator. This extra time allows the flavors to penetrate deeper into the fish, making it even more delicious.

When baking, ensure that your oven is fully preheated to 400°F. This temperature is ideal for cooking salmon quickly while keeping it moist. If your oven has hot spots, rotate the baking sheet halfway through cooking. This will help the salmon cook evenly.

Keep an eye on the cooking time. Salmon can go from perfectly cooked to overdone quickly. The fish is done when it flakes easily with a fork and has an opaque appearance. If you’re unsure, use a meat thermometer; the internal temperature should reach 145°F.

Lastly, let the salmon bites rest for a few minutes after removing them from the oven. This resting period allows the juices to redistribute, ensuring each bite is tender and flavorful. With these cooking notes in mind, you’re well on your way to creating mouthwatering Honey Garlic Salmon Bites!

Serving Suggestions for Honey Garlic Salmon Bites Recipe

Honey Garlic Salmon Bites Recipe, it’s time to think about how to serve them. The right side dishes and presentation can elevate your meal, making it even more enjoyable. Let’s explore some fantastic side dishes to pair with your salmon bites and some tips for presenting them beautifully.

Best Side Dishes to Pair

Choosing the right side dishes can enhance the flavors of your salmon bites. Here are some excellent options to consider:

  • Steamed Vegetables: Broccoli, asparagus, or green beans make a healthy and colorful addition. Their freshness complements the sweet and savory salmon.
  • Rice: Serve your salmon bites over a bed of fluffy white rice, brown rice, or even jasmine rice. The rice absorbs the delicious honey garlic sauce.
  • Quinoa: For a nutritious twist, try quinoa. It’s packed with protein and adds a nutty flavor that pairs well with the salmon.
  • Salad: A light salad with mixed greens, cherry tomatoes, and a citrus vinaigrette can provide a refreshing contrast to the rich salmon.
  • Mashed Potatoes: Creamy mashed potatoes can be a comforting side. They balance the flavors and add a hearty element to the meal.

Honey Garlic Salmon Bites but also create a well-rounded meal that is both satisfying and nutritious.

Presentation Tips

Honey Garlic Salmon Bites Recipe. Here are some tips to make your dish look as good as it tastes:

  • Use a Colorful Plate: Choose a vibrant plate to make the colors of the salmon and garnishes pop. A white plate can also work well to highlight the dish.
  • Garnish Generously: Sprinkle chopped green onions and sesame seeds over the salmon bites just before serving. This adds a fresh touch and visual appeal.
  • Arrange Neatly: Place the salmon bites in a neat row or a circular pattern on the plate. This organized look makes the dish more inviting.
  • Add a Sauce Drizzle: Drizzle some extra honey garlic sauce around the plate for an artistic touch. It enhances the flavor and looks beautiful.
  • Include a Side: If you’re serving rice or vegetables, arrange them alongside the salmon bites. This creates a balanced and appealing plate.

Honey Garlic Salmon Bites will not only taste amazing but also look stunning on the table. Enjoy your meal!

Tips for Perfecting Your Honey Garlic Salmon Bites Recipe

Honey Garlic Salmon Bites Recipe turns out perfectly every time, it’s essential to be aware of common pitfalls and how to store leftovers properly. Here are some helpful tips to guide you through the process.

Common Mistakes to Avoid

Even the best recipes can go awry if certain mistakes are made. Here are some common errors to watch out for:

  • Using Frozen Salmon: While it’s possible to use frozen salmon, fresh salmon yields the best flavor and texture. If you must use frozen, ensure it’s fully thawed and patted dry before marinating.
  • Skipping the Marinade Time: Don’t rush the marinating process! Allowing the salmon to soak in the honey garlic sauce for at least 15-20 minutes is crucial for flavor. If time permits, marinate overnight for even better results.
  • Overcooking the Salmon: Salmon can dry out quickly if overcooked. Keep a close eye on the cooking time. The fish should flake easily and appear opaque when done.
  • Not Preheating the Oven: Always preheat your oven to the correct temperature before baking. This ensures even cooking and helps achieve that perfect flaky texture.
  • Ignoring the Garnish: Garnishes like green onions and sesame seeds not only enhance the dish’s appearance but also add flavor. Don’t skip this step!

Storage Tips for Leftovers

Honey Garlic Salmon Bites, proper storage is key to maintaining their deliciousness. Here are some tips:

  • Cool Before Storing: Allow the salmon bites to cool completely before placing them in a storage container. This prevents condensation, which can make them soggy.
  • Use an Airtight Container: Store the salmon bites in an airtight container to keep them fresh. This helps prevent any unwanted odors from affecting the flavor.
  • Refrigerate: Leftover salmon can be stored in the refrigerator for up to 3 days. Make sure to consume it within this time frame for the best taste and safety.
  • Reheat Gently: When reheating, do so gently in the oven or microwave. Avoid high heat, as this can dry out the salmon. A quick reheat at a low temperature will keep it moist.
  • Freeze for Longer Storage: If you want to keep leftovers longer, consider freezing them. Place the salmon bites in a freezer-safe container or bag. They can last up to 2 months in the freezer.

Honey Garlic Salmon Bites at their best, whether fresh or reheated. Now, let’s move on to the breakdown of time for this delightful recipe!

Breakdown of Time for Honey Garlic Salmon Bites Recipe

Honey Garlic Salmon Bites Recipe can help you plan your cooking efficiently. Here’s a detailed breakdown of the time you’ll need for preparation and cooking.

Prep Time

The prep time for this recipe is quite manageable. You’ll need about 10-15 minutes to gather your ingredients and prepare the salmon. This includes:

  • Removing the skin from the salmon (if not already done).
  • Cutting the salmon into 1-inch cubes.
  • Measuring and mixing the marinade ingredients.

In total, you can expect to spend around 15 minutes on prep work.

Cooking Time

Once your salmon is marinated, the cooking time is relatively quick. Here’s how it breaks down:

  • Preheating the oven: 5 minutes.
  • Baking the salmon bites: 12-15 minutes.

So, the total cooking time will be approximately 20 minutes.

Total Time

Honey Garlic Salmon Bites Recipe is about 35-40 minutes. This makes it a perfect option for a weeknight dinner or a quick meal when you’re short on time. With just a little effort, you can enjoy a delicious and healthy dish that’s sure to impress!

Nutritional Information for Honey Garlic Salmon Bites Recipe

Honey Garlic Salmon Bites Recipe not only delights your taste buds but also provides valuable nutrients. Let’s break down the nutritional information for this delicious dish.

Calories

Honey Garlic Salmon Bites contains approximately 250 calories. This makes it a great option for those looking to enjoy a flavorful meal without consuming excessive calories. The combination of salmon and the honey garlic marinade offers a satisfying dish that fits well into a healthy eating plan.

Protein Content

One of the standout features of this recipe is its high protein content. Each serving provides about 22 grams of protein. Salmon is an excellent source of protein, which is essential for muscle repair and growth. Including protein-rich foods like these salmon bites in your diet can help keep you feeling full and energized throughout the day.

Sodium Levels

Honey Garlic Salmon Bites contains around 800 milligrams. While this is a moderate amount, it’s important to be mindful of your overall sodium intake, especially if you are watching your salt consumption. Using low-sodium soy sauce can help reduce the sodium levels in this recipe without sacrificing flavor.

Honey Garlic Salmon Bites Recipe is not only delicious but also packed with nutrients. With a good balance of calories, protein, and sodium, it makes for a healthy meal option that you can enjoy guilt-free!

FAQs about Honey Garlic Salmon Bites Recipe

Can I use frozen salmon for this recipe?

Honey Garlic Salmon Bites Recipe. However, it’s essential to thaw the salmon completely before cooking. To do this, place the frozen salmon in the refrigerator overnight or submerge it in cold water for a quicker thaw. Once thawed, pat the salmon dry with paper towels to remove excess moisture. This step is crucial for ensuring the marinade adheres well and the salmon cooks evenly.

How can I make the sauce spicier?

If you want to add some heat to your honey garlic sauce, there are several ways to do so. One simple method is to increase the amount of red pepper flakes in the marinade. Start with an extra 1/4 teaspoon and adjust according to your taste. You can also add a splash of sriracha or chili sauce for a different flavor profile. For a fresh kick, consider incorporating minced jalapeños or a dash of hot sauce. These additions will elevate the spice level while complementing the sweetness of the honey.

What are some good substitutes for honey?

Honey Garlic Salmon Bites Recipe, there are several options. Maple syrup is a popular substitute that provides a similar sweetness with a unique flavor. Agave nectar is another great choice, as it has a mild taste and is vegan-friendly. For a lower-calorie option, consider using a sugar-free honey substitute or a blend of brown sugar and water. Each of these alternatives will work well in the marinade, so feel free to choose based on your dietary preferences.

How long can I store leftovers?

Honey Garlic Salmon Bites can be stored in the refrigerator for up to 3 days. To keep them fresh, place the salmon bites in an airtight container once they have cooled completely. If you want to enjoy them later, you can also freeze the leftovers. When properly stored in a freezer-safe container or bag, they can last for up to 2 months. Just remember to thaw them in the refrigerator before reheating for the best texture and flavor!

Conclusion on Honey Garlic Salmon Bites Recipe

Honey Garlic Salmon Bites Recipe is a delightful dish that combines simplicity with rich flavors. This recipe is not only easy to prepare but also offers a healthy option for any meal. With its sweet and savory marinade, these salmon bites are sure to impress your family and friends.

Whether you choose to serve them as an appetizer or a main course, the versatility of this dish allows for endless possibilities. You can easily customize the ingredients and cooking methods to suit your taste preferences. From grilling to baking, each method brings out unique flavors that enhance the overall experience.

Moreover, the nutritional benefits of salmon make this recipe a smart choice for those looking to maintain a balanced diet. With high protein content and essential omega-3 fatty acids, these salmon bites contribute to your overall health while satisfying your taste buds.

Honey Garlic Salmon Bites Recipe a try? Gather your ingredients, follow the steps, and enjoy a delicious meal that is sure to become a favorite in your household. Happy cooking!

Savory Brown Sugar Bourbon Steak Recipe is a must-try!

Introduction to Savory Brown Sugar Bourbon Steak Recipe

Savory Brown Sugar Bourbon Steak Recipe is here to impress! This dish combines the rich flavors of brown sugar and bourbon, creating a mouthwatering marinade that tenderizes the steak while adding a delightful sweetness. Whether you’re hosting a barbecue or enjoying a cozy night in, this recipe is sure to be a hit.

Flank steak is the star of this dish, known for its bold flavor and tenderness when cooked correctly. The marinade, made with simple ingredients, infuses the meat with a unique taste that balances sweetness and savory notes. Plus, it’s easy to prepare, making it perfect for both novice cooks and seasoned chefs.

In this article, we’ll guide you through the ingredients, preparation steps, and tips to ensure your steak turns out perfectly every time. With just a few hours of marinating and a quick grill, you’ll have a delicious meal that serves four. So, let’s dive into the world of flavors and get started on this delightful culinary adventure!

Ingredients for Savory Brown Sugar Bourbon Steak Recipe

Savory Brown Sugar Bourbon Steak Recipe, you’ll need a handful of simple yet flavorful ingredients. Each component plays a vital role in enhancing the taste of the steak. Here’s what you’ll need:

  • 1 pound flank steak: This cut is perfect for marinating and grilling, offering a rich flavor.
  • 1/4 cup brown sugar: Adds sweetness and helps caramelize the steak when cooked.
  • 1/4 cup bourbon: Provides a unique depth of flavor that complements the sweetness of the brown sugar.
  • 2 tablespoons soy sauce: Adds a savory umami taste that balances the sweetness.
  • 2 tablespoons olive oil: Helps to keep the steak moist and adds richness.
  • 2 cloves garlic, minced: Infuses the marinade with a fragrant aroma and enhances the overall flavor.
  • 1 teaspoon black pepper: Adds a touch of heat and depth to the dish.
  • 1 teaspoon salt: Essential for seasoning the steak and enhancing its natural flavors.
  • 1/2 teaspoon red pepper flakes (optional): For those who enjoy a bit of spice, this adds a nice kick.
  • Fresh parsley, chopped (for garnish): Adds a pop of color and freshness to the finished dish.

Gather these ingredients, and you’re on your way to creating a delicious meal that will impress your family and friends. The combination of sweet and savory flavors in this recipe is sure to make your taste buds dance!

Preparation of Savory Brown Sugar Bourbon Steak Recipe

Savory Brown Sugar Bourbon Steak Recipe. This process is simple and straightforward, ensuring that your steak is packed with flavor. Let’s break it down into easy steps.

Step 1: Marinating the Steak

The first step in preparing your steak is marinating it. This is where the magic happens! In a small bowl, combine the brown sugar, bourbon, soy sauce, olive oil, minced garlic, black pepper, salt, and red pepper flakes. Whisk these ingredients together until they are well blended.

Next, take your flank steak and place it in a shallow dish or a resealable plastic bag. Pour the marinade over the steak, making sure it is fully coated. Seal the bag or cover the dish tightly. For the best flavor, refrigerate the steak for at least 1 hour. If you have more time, marinating it for up to 8 hours will enhance the taste even further.

Step 2: Preparing the Bourbon Sauce

While your steak is marinating, you can prepare the bourbon sauce. This sauce is essentially the marinade you just made, but it’s important to note that you will not use the marinade directly on the cooked steak. Instead, you can reserve a small amount of the marinade before adding the steak to it. This will be your sauce for drizzling over the finished dish.

To do this, simply set aside about 1/4 cup of the marinade before you add the steak. You can heat this reserved marinade in a small saucepan over medium heat for a few minutes to enhance the flavors. Just remember to bring it to a boil and then let it simmer for a couple of minutes to ensure it’s safe to eat.

Step 3: Cooking the Steak

Once your steak has marinated and the sauce is ready, it’s time to cook! Preheat your grill or grill pan over medium-high heat. This step is crucial for achieving that perfect sear on your steak.

Remove the flank steak from the marinade, allowing any excess marinade to drip off. Discard the leftover marinade, as it should not be reused. Place the steak on the hot grill and cook for about 4-5 minutes on each side for medium-rare. Adjust the cooking time based on your desired level of doneness. Use a meat thermometer if you want to be precise!

Step 4: Resting the Steak

After cooking, it’s important to let the steak rest. This allows the juices to redistribute throughout the meat, making it more tender and flavorful. Remove the steak from the grill and let it rest for about 5 minutes. During this time, you can prepare your garnishes or side dishes.

Savory Brown Sugar Bourbon Steak!

Variation of Savory Brown Sugar Bourbon Steak Recipe

Savory Brown Sugar Bourbon Steak Recipe is delicious as is, there are many ways to switch things up! You can experiment with alternative ingredients and different cooking methods to create a unique dish that suits your taste. Let’s explore some exciting variations!

Alternative Ingredients for Different Flavors

Changing a few ingredients can lead to a whole new flavor profile. Here are some ideas:

  • Honey instead of brown sugar: For a different sweetness, try using honey. It adds a floral note that pairs beautifully with bourbon.
  • Maple syrup: This can replace brown sugar for a rich, earthy sweetness. It’s perfect for those who love a hint of maple flavor.
  • Different cuts of steak: While flank steak is great, you can also use sirloin or ribeye for a richer taste. Each cut has its own unique texture and flavor.
  • Fresh herbs: Add fresh thyme or rosemary to the marinade for an aromatic twist. These herbs can elevate the dish with their fragrant notes.
  • Spicy mustard: Incorporating a tablespoon of spicy mustard can add a tangy kick to the marinade, balancing the sweetness of the brown sugar.

Savory Brown Sugar Bourbon Steak Recipe that you love!

Cooking Methods: Grilling vs. Pan-Seering

While grilling is a popular method for cooking steak, pan-searing is another fantastic option. Each method has its benefits, and you can choose based on your preference or available equipment.

  • Grilling: This method gives the steak a smoky flavor and beautiful grill marks. It’s perfect for outdoor cooking and allows excess fat to drip away, resulting in a leaner dish.
  • Pan-searing: If you’re cooking indoors, pan-searing is a great alternative. Use a cast-iron skillet for the best results. Heat the skillet until it’s very hot, then add a little oil before placing the steak in. This method creates a delicious crust and keeps the steak juicy.

Savory Brown Sugar Bourbon Steak that will impress anyone at your dinner table!

Cooking Note for Savory Brown Sugar Bourbon Steak Recipe

Savory Brown Sugar Bourbon Steak Recipe, there are a few important cooking notes to keep in mind. These tips will help you achieve the best results and ensure your steak is flavorful and tender.

First, always start with a high-quality flank steak. Look for meat that is bright red with a good amount of marbling. This marbling is the fat within the meat that melts during cooking, adding flavor and juiciness.

Next, make sure your grill or pan is preheated properly. A hot cooking surface is essential for creating a nice sear on the steak. This sear locks in the juices and enhances the overall flavor. If you’re using a grill, you should hear a satisfying sizzle when the steak hits the grates.

Another key point is to avoid flipping the steak too often. Let it cook undisturbed for the recommended time on each side. This allows for even cooking and helps develop a beautiful crust.

Using a meat thermometer can be very helpful. For medium-rare, aim for an internal temperature of about 130°F (54°C). If you prefer your steak more well-done, adjust the cooking time accordingly. Remember, the steak will continue to cook slightly while resting.

Lastly, don’t skip the resting step! Allowing the steak to rest for about 5 minutes after cooking is crucial. This step ensures that the juices redistribute throughout the meat, making each bite tender and juicy.

Savory Brown Sugar Bourbon Steak that will impress your family and friends!

Serving Suggestions for Savory Brown Sugar Bourbon Steak Recipe

Savory Brown Sugar Bourbon Steak Recipe, it’s time to think about how to serve it. The right side dishes and beverages can elevate your meal, making it even more enjoyable. Here are some fantastic serving suggestions to complement your delicious steak!

Ideal Side Dishes

Savory Brown Sugar Bourbon Steak:

  • Grilled Vegetables: A mix of bell peppers, zucchini, and asparagus adds color and nutrition. The smoky flavor from grilling complements the steak perfectly.
  • Garlic Mashed Potatoes: Creamy mashed potatoes with a hint of garlic provide a comforting side that balances the sweetness of the steak.
  • Fresh Salad: A light salad with mixed greens, cherry tomatoes, and a tangy vinaigrette can refresh your palate between bites of steak.
  • Roasted Brussels Sprouts: These crispy, caramelized sprouts add a delightful crunch and a slightly bitter flavor that pairs well with the sweet marinade.
  • Rice Pilaf: Fluffy rice pilaf with herbs and spices can soak up the delicious juices from the steak, making every bite flavorful.

Feel free to mix and match these sides based on your preferences and what you have on hand. Each option brings its own unique flavor to the table!

Wine Pairing Recommendations

Savory Brown Sugar Bourbon Steak Recipe:

  • Cabernet Sauvignon: This full-bodied red wine has bold flavors that complement the richness of the steak and the sweetness of the bourbon.
  • Malbec: With its dark fruit flavors and smooth finish, Malbec pairs well with grilled meats, making it an excellent choice for this dish.
  • Zinfandel: This wine offers a fruity profile with a hint of spice, which can enhance the flavors of the marinade.
  • Pinot Noir: If you prefer a lighter wine, Pinot Noir’s acidity and fruitiness can balance the sweetness of the steak without overpowering it.

When selecting a wine, consider your personal taste and the overall flavor profile of your meal. Enjoying a glass of wine with your steak can make the dining experience even more special!

Tips for Perfecting Your Savory Brown Sugar Bourbon Steak Recipe

Savory Brown Sugar Bourbon Steak Recipe, a few tips can make all the difference. These simple yet effective suggestions will help you achieve a steak that is not only delicious but also perfectly cooked every time. Let’s explore some essential tips!

First, always allow your steak to come to room temperature before cooking. This step helps the meat cook more evenly. Take the steak out of the refrigerator about 30 minutes before grilling. This way, you’ll avoid a cold center while the outside cooks too quickly.

Next, don’t skip the marinating time! While an hour is the minimum, letting the steak marinate for several hours or overnight will deepen the flavors. The longer the steak sits in the marinade, the more tender and flavorful it becomes.

When grilling, make sure your grill is preheated to the right temperature. A hot grill is key to achieving those beautiful grill marks and a nice sear. If you’re using a charcoal grill, let the coals burn until they are covered with white ash. For gas grills, preheat for about 10-15 minutes.

Another important tip is to use a meat thermometer. This tool takes the guesswork out of cooking steak. For medium-rare, aim for an internal temperature of 130°F (54°C). If you prefer it more well-done, adjust accordingly. Remember, the steak will continue to cook slightly while resting.

Lastly, don’t forget to let your steak rest after cooking. This crucial step allows the juices to redistribute throughout the meat, ensuring each bite is juicy and tender. Cover the steak loosely with foil and let it rest for about 5 minutes before slicing.

Savory Brown Sugar Bourbon Steak that will impress everyone at your table!

Breakdown of Time for Savory Brown Sugar Bourbon Steak Recipe

Savory Brown Sugar Bourbon Steak Recipe is essential for planning your meal. Here’s a detailed breakdown of the time required for preparation, cooking, and the total time needed to enjoy this delicious dish.

Prep Time

The prep time for this recipe is quite manageable. You’ll need about 15 minutes to gather your ingredients and prepare the marinade. This includes:

  • Measuring out the ingredients
  • Minced garlic
  • Whisking the marinade together
  • Coating the steak in the marinade

After this initial prep, remember to allow for marinating time, which can range from 1 hour to 8 hours, depending on how much flavor you want to infuse into the steak.

Cooking Time

Once your steak has marinated, the cooking time is relatively quick. Here’s what to expect:

  • Preheating the grill or grill pan: about 5 minutes
  • Grilling the steak: approximately 8-10 minutes (4-5 minutes on each side for medium-rare)
  • Resting the steak: 5 minutes

In total, the cooking time will take around 15-20 minutes, making it a quick option for dinner!

Total Time

Savory Brown Sugar Bourbon Steak Recipe can vary significantly based on marinating. Here’s a quick summary:

  • Minimum Total Time: 1 hour 15 minutes (15 minutes prep + 1 hour marinating + 15-20 minutes cooking)
  • Maximum Total Time: 8 hours 15 minutes (15 minutes prep + 8 hours marinating + 15-20 minutes cooking)

With this breakdown, you can easily plan your cooking schedule. Whether you’re in a hurry or have time to let the flavors develop, this recipe fits into your day perfectly!

Nutritional Information for Savory Brown Sugar Bourbon Steak Recipe

Savory Brown Sugar Bourbon Steak Recipe is essential for those who are health-conscious or following specific dietary plans. This section will break down the key nutritional components of the dish, helping you make informed choices while enjoying this delicious meal.

Calories

Savory Brown Sugar Bourbon Steak contains approximately 350 calories. This makes it a satisfying option for dinner without being overly heavy. The balance of protein and fat in the dish contributes to its calorie content, ensuring you feel full and satisfied after your meal.

Protein Content

One of the standout features of this recipe is its high protein content. Each serving provides about 30 grams of protein. This is excellent for muscle repair and growth, making it a great choice for those who are active or looking to maintain a healthy diet. The flank steak is a lean source of protein, which means you get the benefits without excessive fat.

Sodium Levels

The sodium content in this recipe is approximately 800 milligrams per serving. This includes the sodium from soy sauce and added salt. While this is a moderate level of sodium, it’s important to consider if you are watching your salt intake. You can reduce the sodium by using low-sodium soy sauce or adjusting the amount of salt added to the marinade.

Savory Brown Sugar Bourbon Steak Recipe offers a delicious and nutritious meal option. With its balanced macronutrients, it can fit well into a variety of dietary plans. Enjoy this flavorful dish while being mindful of your nutritional needs!

FAQs about Savory Brown Sugar Bourbon Steak Recipe

What type of steak is best for this recipe?

Savory Brown Sugar Bourbon Steak Recipe is flank steak. This cut is known for its rich flavor and tenderness when marinated and cooked properly. However, you can also use other cuts like sirloin or ribeye if you prefer a different texture or flavor. Each cut has its unique qualities, so feel free to experiment and find your favorite!

Can I make the bourbon sauce ahead of time?

Yes, you can definitely make the bourbon sauce ahead of time! Simply prepare the marinade as directed, and reserve a portion before adding the steak. Store the reserved marinade in an airtight container in the refrigerator for up to 3 days. When you’re ready to use it, just heat it in a saucepan until it reaches a simmer. This will enhance the flavors and make it safe to eat!

How do I know when the steak is cooked to my liking?

To ensure your steak is cooked to your liking, using a meat thermometer is the best method. For medium-rare, aim for an internal temperature of about 130°F (54°C). If you prefer medium, look for around 140°F (60°C). Remember, the steak will continue to cook slightly while resting, so it’s a good idea to remove it from the heat just before it reaches your desired temperature. This way, you’ll enjoy a perfectly cooked steak every time!

What can I substitute for bourbon in this recipe?

If you prefer not to use bourbon, there are several substitutes you can try. Apple cider vinegar or apple juice can add a sweet and tangy flavor that works well in the marinade. Alternatively, you can use non-alcoholic bourbon or whiskey-flavored extracts for a similar taste without the alcohol. Just keep in mind that the flavor may vary slightly, but it will still be delicious!

Conclusion on Savory Brown Sugar Bourbon Steak Recipe

Savory Brown Sugar Bourbon Steak Recipe is a delightful dish that brings together the perfect balance of sweet and savory flavors. With its simple ingredients and straightforward preparation, this recipe is accessible for cooks of all skill levels. Whether you’re preparing a special dinner for loved ones or just looking to enjoy a delicious meal at home, this steak is sure to impress.

The marinating process not only enhances the flavor but also tenderizes the meat, making each bite juicy and satisfying. Plus, the versatility of this recipe allows you to experiment with different ingredients and cooking methods, ensuring that you can tailor it to your taste preferences.

As you serve this mouthwatering steak, don’t forget to pair it with your favorite sides and a nice glass of wine. The right accompaniments can elevate your dining experience, making it even more enjoyable. Remember to follow the tips provided to achieve the best results, and you’ll be well on your way to mastering this delicious dish.

Savory Brown Sugar Bourbon Steak Recipe. Happy cooking!

Sheet Pan Gnocchi and Roasted Vegetables is easy!

Introduction to Sheet Pan Gnocchi and Roasted Vegetables

Are you looking for a quick and delicious meal that’s both satisfying and colorful? Look no further! Sheet Pan Gnocchi and Roasted Vegetables is the perfect dish for busy weeknights or lazy weekends. This recipe combines the delightful texture of gnocchi with a medley of vibrant vegetables, all roasted to perfection on a single sheet pan. Not only does this make for easy cleanup, but it also allows the flavors to meld beautifully.

Gnocchi, those little potato dumplings, are a favorite in many households. They are soft, pillowy, and soak up flavors wonderfully. When paired with roasted vegetables like cherry tomatoes, bell peppers, and zucchini, you create a dish that is not only tasty but also packed with nutrients. Plus, the bright colors of the vegetables make the meal visually appealing, which is always a bonus!

This recipe is incredibly versatile. You can easily customize it based on your preferences or what you have in your pantry. Whether you’re a vegetarian or looking to add some protein, this dish can adapt to your needs. With just a few simple ingredients and minimal prep time, you can have a wholesome meal ready in no time.

So, roll up your sleeves and get ready to enjoy a delightful culinary experience with Sheet Pan Gnocchi and Roasted Vegetables. Let’s dive into the ingredients you’ll need to create this mouthwatering dish!

Ingredients for Sheet Pan Gnocchi and Roasted Vegetables

To create a delicious batch of Sheet Pan Gnocchi and Roasted Vegetables, you’ll need a handful of simple ingredients. These items are easy to find at your local grocery store, making this recipe accessible for everyone. Here’s what you’ll need:

  • 2 cups store-bought gnocchi
  • 1 cup cherry tomatoes, halved
  • 1 cup bell peppers, diced (any color)
  • 1 cup zucchini, diced
  • 1/2 cup red onion, sliced
  • 3 tablespoons olive oil
  • 1 teaspoon garlic powder
  • 1 teaspoon Italian seasoning
  • Salt and pepper to taste
  • 1/4 cup grated Parmesan cheese (optional)
  • Fresh basil for garnish (optional)

These ingredients come together to create a delightful dish that is both hearty and healthy. The gnocchi serves as a wonderful base, while the roasted vegetables add flavor and nutrition. The olive oil helps to enhance the taste and ensures everything roasts evenly. Garlic powder and Italian seasoning bring a burst of flavor, making each bite enjoyable.

If you want to elevate your dish, consider adding some grated Parmesan cheese during the last few minutes of roasting. This adds a creamy, savory touch that complements the vegetables beautifully. Fresh basil can also be sprinkled on top for a pop of color and freshness.

Now that you have your ingredients ready, let’s move on to the preparation steps to bring this delightful meal to life!

Preparation of Sheet Pan Gnocchi and Roasted Vegetables

Now that you have gathered all your ingredients, it’s time to prepare your Sheet Pan Gnocchi and Roasted Vegetables. This process is simple and straightforward, making it perfect for cooks of all skill levels. Let’s break it down step by step!

Step 1: Preheat the Oven

First things first, preheat your oven to 425°F (220°C). This step is crucial as it ensures that your gnocchi and vegetables roast evenly. A hot oven helps to achieve that golden-brown color and crispy texture we all love. While the oven heats up, you can move on to the next steps.

Step 2: Prepare the Vegetables

Next, it’s time to prepare your vegetables. Start by washing them thoroughly. Then, chop the bell peppers, zucchini, and red onion into bite-sized pieces. Halve the cherry tomatoes. The goal is to have all the vegetables roughly the same size so they cook evenly. Once they are ready, set them aside.

Step 3: Combine Gnocchi and Vegetables

Now, grab a large sheet pan. In this pan, combine the store-bought gnocchi with your prepared vegetables. Make sure to spread them out evenly. This allows for proper roasting and prevents them from steaming. You want them to get that nice roasted flavor!

Step 4: Seasoning the Mixture

After combining the gnocchi and vegetables, it’s time to add some flavor. Drizzle 3 tablespoons of olive oil over the mixture. Then, sprinkle in the garlic powder, Italian seasoning, salt, and pepper. Toss everything together until all the ingredients are well coated. This step is essential as it ensures that every bite is packed with flavor!

Step 5: Roasting in the Oven

Finally, it’s time to roast your dish! Spread the mixture out in an even layer on the sheet pan. Place it in the preheated oven and roast for 20-25 minutes. Be sure to stir halfway through to ensure even cooking. You’ll know it’s done when the vegetables are tender and the gnocchi are golden brown. If you’re using Parmesan cheese, sprinkle it on top during the last 5 minutes of roasting for a delicious cheesy finish.

Once everything is roasted to perfection, remove the pan from the oven. Your kitchen will smell amazing, and you’ll be ready to enjoy a delightful meal!

Variation of Sheet Pan Gnocchi and Roasted Vegetables

One of the best things about Sheet Pan Gnocchi and Roasted Vegetables is its versatility. You can easily switch up the ingredients to suit your taste or to use what you have on hand. Let’s explore some alternative vegetables and ways to add protein to your dish!

Alternative Vegetables to Use

While the original recipe calls for cherry tomatoes, bell peppers, zucchini, and red onion, feel free to get creative! Here are some alternative vegetables that work wonderfully:

  • Asparagus: Cut into bite-sized pieces, asparagus adds a nice crunch and earthy flavor.
  • Broccoli: This nutrient-packed vegetable roasts beautifully and adds a lovely green color.
  • Carrots: Sliced or diced, carrots bring a hint of sweetness and vibrant color to the dish.
  • Cauliflower: This versatile veggie can be cut into florets and adds a unique texture.
  • Mushrooms: Sliced mushrooms add a savory depth of flavor that complements the gnocchi.

Mix and match these vegetables based on your preferences or what’s in season. The key is to ensure they are cut into similar sizes for even cooking. This way, you’ll enjoy a colorful and nutritious meal every time!

Adding Proteins to Your Dish

If you want to make your Sheet Pan Gnocchi and Roasted Vegetables even heartier, consider adding some protein. Here are a few options:

  • Cooked Chicken: Diced or shredded chicken can be tossed in with the gnocchi and vegetables for a filling meal.
  • Chickpeas: Canned or cooked chickpeas are a great plant-based protein option. They add a nice texture and flavor.
  • Sausage: Sliced Italian sausage can bring a savory kick to the dish. Just make sure to cook it beforehand.
  • Tofu: For a vegetarian option, cubed and marinated tofu can be added for extra protein and flavor.

Adding protein not only enhances the dish but also makes it more satisfying. Feel free to experiment with different combinations to find your favorite mix!

Cooking Note for Sheet Pan Gnocchi and Roasted Vegetables

When preparing your Sheet Pan Gnocchi and Roasted Vegetables, there are a few cooking notes to keep in mind. These tips will help ensure that your dish turns out perfectly every time. Let’s dive into some important points to consider!

First, always check the cooking instructions on your gnocchi package. Some brands may have specific recommendations for cooking times and temperatures. While this recipe works well for store-bought gnocchi, following the package instructions can help you achieve the best results.

Next, the size of your vegetable pieces matters. Cutting them into uniform sizes ensures they cook evenly. If some pieces are larger than others, they may take longer to roast, leading to uneven textures. Aim for bite-sized pieces to promote even cooking.

Another important note is to avoid overcrowding the sheet pan. If you add too many ingredients, they may steam instead of roast. This can result in a soggy texture rather than the desired crispy finish. If you have a lot of vegetables or gnocchi, consider using two pans to give everything enough space.

Additionally, keep an eye on the roasting time. Ovens can vary, so it’s a good idea to check on your dish a few minutes before the suggested cooking time. You want the vegetables to be tender and the gnocchi to be golden brown. If they need a little more time, feel free to leave them in for a few extra minutes.

Lastly, don’t forget to let your dish cool slightly before serving. This allows the flavors to settle and makes it easier to plate. Plus, it helps prevent burns from hot ingredients. Once cooled, you can garnish with fresh basil or additional cheese for an extra touch of flavor.

By keeping these cooking notes in mind, you’ll be well on your way to creating a delicious and satisfying Sheet Pan Gnocchi and Roasted Vegetables dish that everyone will love!

Serving Suggestions for Sheet Pan Gnocchi and Roasted Vegetables

Once your Sheet Pan Gnocchi and Roasted Vegetables are perfectly roasted, it’s time to serve this delightful dish! The way you present your meal can enhance the dining experience, making it even more enjoyable. Here are some serving suggestions to consider:

  • Garnish with Fresh Herbs: A sprinkle of fresh basil or parsley adds a burst of color and freshness. It also enhances the flavor, making each bite more aromatic.
  • Pair with a Side Salad: A light side salad with mixed greens, cucumbers, and a simple vinaigrette complements the hearty gnocchi. This adds a refreshing crunch to your meal.
  • Serve with Crusty Bread: A slice of warm, crusty bread is perfect for soaking up any leftover olive oil and juices from the roasted vegetables. It makes for a satisfying addition to your plate.
  • Top with Extra Cheese: If you love cheese, consider adding more grated Parmesan or a sprinkle of mozzarella on top just before serving. This adds a creamy texture that pairs beautifully with the dish.
  • Drizzle with Balsamic Glaze: A light drizzle of balsamic glaze over the top can elevate the flavors. The sweetness of the glaze contrasts nicely with the savory roasted vegetables.

These serving suggestions not only enhance the visual appeal of your dish but also add layers of flavor. Feel free to mix and match based on your preferences or what you have available. The goal is to create a meal that is not only delicious but also inviting and enjoyable for everyone at the table!

Tips for Perfecting Your Sheet Pan Gnocchi and Roasted Vegetables

To make your Sheet Pan Gnocchi and Roasted Vegetables truly shine, consider these helpful tips. They will guide you in achieving the best flavors and textures, ensuring a delightful meal every time!

  • Use Quality Ingredients: Fresh, high-quality vegetables make a big difference. Choose vibrant, firm produce for the best flavor. Organic options can also enhance the taste.
  • Don’t Skip the Oil: Olive oil is essential for roasting. It helps the gnocchi and vegetables brown nicely while adding flavor. Make sure to coat everything evenly.
  • Experiment with Seasonings: While garlic powder and Italian seasoning are great, feel free to add your favorite spices. A pinch of red pepper flakes can add a nice kick!
  • Adjust Cooking Time: Keep an eye on your dish as it roasts. Depending on your oven, you may need to adjust the cooking time slightly. Look for golden-brown gnocchi and tender vegetables.
  • Let It Rest: After removing the pan from the oven, let it sit for a few minutes. This allows the flavors to meld and makes serving easier.
  • Serve Immediately: Sheet pan meals are best enjoyed fresh. The gnocchi will stay soft, and the vegetables will retain their vibrant colors and textures.
  • Store Leftovers Properly: If you have leftovers, store them in an airtight container in the fridge. They can be reheated in the oven or microwave, but the texture may change slightly.

By following these tips, you’ll elevate your Sheet Pan Gnocchi and Roasted Vegetables to new heights. Enjoy the process of cooking and savor the delicious results!

Breakdown of Time for Sheet Pan Gnocchi and Roasted Vegetables

Understanding the time needed for each step in preparing your Sheet Pan Gnocchi and Roasted Vegetables can help you plan your meal better. Here’s a simple breakdown of the time involved in this delicious recipe.

Prep Time

The prep time for this dish is quite minimal. You’ll spend about 10-15 minutes gathering your ingredients and preparing the vegetables. This includes washing, chopping, and measuring everything you need. If you have your ingredients ready, you can get started quickly!

Cooking Time

Once everything is prepped, the cooking time is approximately 20-25 minutes. This is when the gnocchi and vegetables roast in the oven. Remember to stir the mixture halfway through to ensure even cooking. Keep an eye on them, as cooking times can vary slightly based on your oven.

Total Time

In total, you can expect to spend about 30-40 minutes from start to finish. This includes both prep and cooking time. It’s a quick and easy meal that fits perfectly into a busy schedule. Plus, the best part is that you only need one sheet pan, making cleanup a breeze!

With this time breakdown, you can easily fit Sheet Pan Gnocchi and Roasted Vegetables into your weeknight dinner plans. Enjoy the process and the delicious results!

Nutritional Information for Sheet Pan Gnocchi and Roasted Vegetables

Understanding the nutritional content of your meals is essential for maintaining a balanced diet. Sheet Pan Gnocchi and Roasted Vegetables not only offers a delightful taste but also provides valuable nutrients. Let’s break down the nutritional information for this delicious dish.

Calories

Each serving of Sheet Pan Gnocchi and Roasted Vegetables contains approximately 320 calories. This makes it a satisfying option for lunch or dinner without overwhelming your daily caloric intake. The combination of gnocchi and vegetables provides a hearty meal that keeps you feeling full and energized.

Protein

In terms of protein, this dish offers about 10 grams per serving. While gnocchi is primarily a carbohydrate source, the addition of vegetables contributes some protein as well. If you choose to add protein-rich ingredients like chicken, chickpeas, or tofu, you can easily boost the protein content of your meal, making it even more nutritious.

Sodium

The sodium content in each serving is around 400 milligrams. This amount can vary based on the specific ingredients you use, especially if you add cheese or use pre-seasoned products. To keep sodium levels in check, consider using low-sodium options for any added ingredients and adjust the salt to your taste. This way, you can enjoy your meal while being mindful of your sodium intake.

Overall, Sheet Pan Gnocchi and Roasted Vegetables is a well-rounded dish that provides a good balance of calories, protein, and sodium. It’s a great choice for anyone looking to enjoy a flavorful meal while keeping their nutritional goals in mind!

FAQs about Sheet Pan Gnocchi and Roasted Vegetables

Can I use frozen gnocchi for this recipe?

Absolutely! You can use frozen gnocchi for your Sheet Pan Gnocchi and Roasted Vegetables. Just toss the frozen gnocchi directly onto the sheet pan with your vegetables. There’s no need to thaw them first. However, keep in mind that frozen gnocchi may take a few extra minutes to cook. Check for doneness by ensuring they are golden brown and heated through. This makes it a convenient option for a quick meal!

What vegetables pair well with gnocchi?

Gnocchi is quite versatile and pairs well with a variety of vegetables. Some great options include:

  • Spinach: Fresh or wilted spinach adds a lovely color and nutrients.
  • Eggplant: Diced eggplant brings a unique texture and flavor.
  • Green Beans: Crisp green beans add a nice crunch and freshness.
  • Sweet Potatoes: Diced sweet potatoes offer a sweet contrast to the savory gnocchi.
  • Brussels Sprouts: Halved Brussels sprouts roast beautifully and add a hearty element.

Feel free to mix and match based on your preferences or what’s in season. The key is to choose vegetables that roast well and complement the soft texture of the gnocchi.

How do I store leftovers of Sheet Pan Gnocchi and Roasted Vegetables?

Storing leftovers is easy! Allow your Sheet Pan Gnocchi and Roasted Vegetables to cool completely before transferring them to an airtight container. Store them in the refrigerator for up to 3 days. When you’re ready to enjoy them again, you can reheat the dish in the oven or microwave. If reheating in the oven, place it on a baking sheet at 350°F (175°C) for about 10-15 minutes, or until heated through. This helps maintain the texture of the gnocchi and vegetables. Enjoy your delicious leftovers!

Conclusion on Sheet Pan Gnocchi and Roasted Vegetables

In conclusion, Sheet Pan Gnocchi and Roasted Vegetables is a delightful dish that brings together the comforting texture of gnocchi with the vibrant flavors of roasted vegetables. This recipe is not only easy to prepare but also offers a wonderful opportunity to customize based on your preferences. Whether you’re a busy parent, a student, or simply someone who enjoys good food, this meal fits perfectly into any lifestyle.

The beauty of this dish lies in its versatility. You can mix and match vegetables, add proteins, or even experiment with different seasonings to create a meal that suits your taste. Plus, the one-pan cooking method means less cleanup, allowing you to enjoy your meal without the hassle of washing multiple pots and pans.

As you gather your ingredients and follow the simple steps, you’ll find that cooking can be a joyful experience. The aroma of roasting vegetables and the golden-brown gnocchi will fill your kitchen, making it a warm and inviting space. And when you finally sit down to enjoy your creation, you’ll appreciate the delicious flavors and the satisfaction of a home-cooked meal.

So, why not give Sheet Pan Gnocchi and Roasted Vegetables a try? It’s a dish that promises to please your taste buds while providing a nutritious option for you and your loved ones. Enjoy the process, savor the flavors, and make this recipe a staple in your cooking repertoire!

Caramel Brownie Cheesecake Recipe is a must-try delight!

Introduction to the Caramel Brownie Cheesecake Recipe

What Makes This Dessert Special?

The Caramel Brownie Cheesecake is a delightful fusion of flavors and textures. Imagine biting into a rich, creamy cheesecake layered atop a fudgy brownie base, all drizzled with luscious caramel. This dessert is not just a treat for the taste buds; it’s a feast for the eyes too! The combination of chocolate, cream cheese, and caramel creates a symphony of sweetness that is hard to resist. Each slice offers a perfect balance of creaminess and chewiness, making it a standout dessert for any occasion.

What truly sets this dessert apart is its versatility. You can customize it to suit your taste. Whether you prefer a nutty crunch with pecans or a smooth finish with a hint of espresso, the options are endless. This Caramel Brownie Cheesecake is perfect for celebrations, family gatherings, or simply as a sweet indulgence after dinner. It’s a dessert that brings people together, sparking joy and creating lasting memories.

A Brief History of Cheesecake and Brownies

Cheesecake has a rich history that dates back to ancient Greece. The earliest known cheesecake was made with simple ingredients like cheese, honey, and flour. Over the centuries, this dessert evolved, with various cultures adding their unique twists. Today, cheesecake is loved worldwide, with countless variations, including the creamy New York style and the light and fluffy Japanese version.

On the other hand, brownies emerged in the United States in the late 19th century. They are believed to have been created by accident when a baker forgot to add baking powder to a chocolate cake recipe. The result was a dense, fudgy treat that quickly gained popularity. Brownies have since become a beloved dessert, often enjoyed on their own or as a base for other desserts, like our Caramel Brownie Cheesecake.

Combining these two classic desserts into one creates a unique experience that celebrates their rich histories while offering a modern twist. The Caramel Brownie Cheesecake is not just a dessert; it’s a delicious journey through time, blending tradition with innovation.

Ingredients for the Caramel Brownie Cheesecake Recipe

Essential Ingredients

To create the perfect Caramel Brownie Cheesecake, you’ll need a selection of essential ingredients. These components work together to form the rich, creamy, and decadent layers that make this dessert so special. Here’s what you’ll need:

  • 1 cup graham cracker crumbs: This forms the base of your cheesecake, providing a crunchy texture.
  • 1/4 cup unsweetened cocoa powder: This adds a deep chocolate flavor to the crust.
  • 1/4 cup granulated sugar: Sweetens the crust and balances the flavors.
  • 1/2 cup unsalted butter, melted: Binds the crust ingredients together.
  • 2 (8-ounce) packages cream cheese, softened: The star of the cheesecake filling, giving it a creamy texture.
  • 1 cup granulated sugar: Sweetens the cheesecake filling.
  • 1 teaspoon vanilla extract: Enhances the overall flavor of the cheesecake.
  • 3 large eggs: Provides structure and richness to the filling.
  • 1 cup semi-sweet chocolate chips: Adds a delicious chocolate flavor to the cheesecake.
  • 1/2 cup caramel sauce: Drizzled throughout the cheesecake for a sweet, gooey finish.

Optional Ingredients for Customization

While the essential ingredients create a fantastic Caramel Brownie Cheesecake, you can also customize it to suit your taste. Here are some optional ingredients to consider:

  • 1/4 cup chopped pecans: Adds a delightful crunch and nutty flavor. You can also use walnuts if you prefer.
  • 1 teaspoon espresso powder: For a richer flavor, this can enhance the chocolate notes in the cheesecake.
  • Different flavored extracts: Such as almond or hazelnut, can be used instead of vanilla for a unique twist.
  • Fruit toppings: Fresh berries or sliced bananas can be added for a fruity contrast to the rich cheesecake.

Feel free to mix and match these optional ingredients to create a Caramel Brownie Cheesecake that’s uniquely yours. The possibilities are endless, and your creativity will make this dessert even more special!

Step-by-Step Preparation of the Caramel Brownie Cheesecake Recipe

Step 1: Preparing the Brownie Base

To start, you’ll want to prepare the brownie base. In a medium bowl, combine the graham cracker crumbs, unsweetened cocoa powder, and granulated sugar. Mix these dry ingredients well. Next, pour in the melted unsalted butter. Stir until everything is evenly coated and resembles wet sand. This mixture will form the crust of your cheesecake.

Now, take your prepared springform pan and press the crumb mixture firmly into the bottom. Make sure it’s packed tightly to create a solid base. This step is crucial, as it will hold the cheesecake layers together. Once done, set the pan aside while you prepare the cheesecake filling.

Step 2: Making the Cheesecake Filling

In a large mixing bowl, beat the softened cream cheese using an electric mixer. Mix until it’s smooth and creamy, which should take about 2-3 minutes. Gradually add in the granulated sugar and vanilla extract, mixing until well combined. It’s important to scrape down the sides of the bowl to ensure everything is mixed evenly.

Next, add the eggs one at a time. Mix on low speed just until combined after each addition. Be careful not to overmix, as this can lead to cracks in your cheesecake. Once all the eggs are incorporated, it’s time to add the melted chocolate chips. Make sure they have cooled slightly before folding them into the cream cheese mixture. This will give your cheesecake a rich chocolate flavor.

Step 3: Combining Brownie and Cheesecake Layers

Now that your brownie base and cheesecake filling are ready, it’s time to combine them. Pour half of the cheesecake batter over the prepared crust in the springform pan. Use a spatula to spread it evenly. Then, drizzle half of the caramel sauce over this layer. This will create a delicious caramel swirl in the cheesecake.

Next, pour the remaining cheesecake batter on top. Again, spread it evenly. To finish, take the remaining caramel sauce and drizzle it over the top layer of the batter. Use a knife or toothpick to gently swirl the caramel into the cheesecake. This adds a beautiful marbled effect and enhances the flavor.

Step 4: Adding the Caramel Topping

If you’re using chopped pecans, sprinkle them on top of the cheesecake now. This step is optional but adds a nice crunch and flavor. The pecans will toast slightly during baking, enhancing their taste. If you prefer a nut-free version, feel free to skip this step. Your cheesecake is now ready for the oven!

Step 5: Baking the Cheesecake

Preheat your oven to 325°F (163°C). Place the springform pan in the oven and bake for 55-60 minutes. The cheesecake is done when the center is set but still slightly jiggly. This is important, as overbaking can lead to a dry cheesecake. Once baked, turn off the oven and crack the door open. Let the cheesecake cool in the oven for about 1 hour. This gradual cooling helps prevent cracks.

Step 6: Cooling and Setting

After an hour, remove the cheesecake from the oven. Allow it to cool completely at room temperature. Once cooled, cover it with plastic wrap and refrigerate for at least 4 hours, or overnight if possible. Chilling the cheesecake allows the flavors to meld and the texture to set perfectly. When you’re ready to serve, carefully remove the sides of the springform pan. Your Caramel Brownie Cheesecake is now ready to be enjoyed!

Variations of the Caramel Brownie Cheesecake Recipe

Gluten-Free Options

If you or your guests are following a gluten-free diet, you can easily adapt the Caramel Brownie Cheesecake recipe. Start by using gluten-free graham cracker crumbs for the crust. Many brands offer gluten-free options that taste just as delicious. Additionally, ensure that the chocolate chips and caramel sauce you choose are labeled gluten-free. This way, you can enjoy the same rich flavors without any gluten concerns. Your gluten-free version will still be creamy, decadent, and utterly satisfying!

Vegan Alternatives

For those who prefer a vegan dessert, you can make a delightful vegan Caramel Brownie Cheesecake. Replace the cream cheese with a vegan cream cheese alternative, which is widely available in stores. Instead of eggs, use flaxseed meal or chia seeds mixed with water as a binding agent. For the crust, ensure that your graham cracker crumbs are vegan-friendly. You can also substitute the butter with coconut oil or a vegan butter alternative. With these simple swaps, you can create a delicious vegan cheesecake that everyone will love!

Flavor Variations (e.g., Chocolate, Nutty)

One of the best parts of making a Caramel Brownie Cheesecake is the ability to customize the flavors. For a richer chocolate experience, consider adding more cocoa powder to the crust or using dark chocolate chips in the filling. If you enjoy nutty flavors, you can incorporate almond or hazelnut extracts into the cheesecake batter. Additionally, try adding crushed nuts like walnuts or almonds into the batter for extra texture. You can even swirl in some fruit purees, like raspberry or strawberry, for a fruity twist. The possibilities are endless, allowing you to create a cheesecake that perfectly suits your taste!

Cooking Note for the Caramel Brownie Cheesecake Recipe

Tips for Perfect Baking

Baking a Caramel Brownie Cheesecake can be a delightful experience, but a few tips can help ensure your dessert turns out perfectly every time. First, always use room temperature ingredients. This includes the cream cheese and eggs. Room temperature ingredients blend more smoothly, resulting in a creamier filling.

Next, avoid overmixing the batter. When you add the eggs, mix just until combined. Overmixing can introduce too much air, leading to cracks in your cheesecake. Also, consider using a water bath while baking. This method helps maintain moisture in the oven, preventing the cheesecake from drying out. To do this, wrap the outside of your springform pan with aluminum foil and place it in a larger pan filled with hot water.

Lastly, remember to let your cheesecake cool gradually. After baking, turn off the oven and crack the door open. This gradual cooling process helps prevent sudden temperature changes that can cause cracks. Patience is key, so allow your cheesecake to cool completely before refrigerating it. Following these tips will help you achieve a smooth, creamy, and crack-free Caramel Brownie Cheesecake!

Common Mistakes to Avoid

Even the best bakers can make mistakes, so here are some common pitfalls to watch out for when making your Caramel Brownie Cheesecake. One frequent error is not greasing the springform pan properly. This can lead to sticking, making it difficult to remove the cheesecake later. Always grease the pan well to ensure easy release.

Another mistake is not allowing the cheesecake to set long enough in the refrigerator. Chilling is crucial for the flavors to meld and the texture to firm up. If you cut into it too soon, you may end up with a gooey mess instead of clean slices.

Additionally, be cautious with the baking time. Every oven is different, so keep an eye on your cheesecake as it bakes. If it looks too jiggly in the center, it may need a few more minutes. However, be careful not to overbake, as this can lead to a dry texture.

Lastly, don’t skip the cooling step in the oven. Cracking can occur if you take the cheesecake out of the oven too quickly. By following these tips and avoiding common mistakes, you’ll be well on your way to creating a stunning Caramel Brownie Cheesecake that will impress everyone!

Serving Suggestions for the Caramel Brownie Cheesecake Recipe

Ideal Pairings

When it comes to serving your Caramel Brownie Cheesecake, the right accompaniments can elevate the experience. Here are some delightful pairings to consider:

  • Vanilla Ice Cream: A scoop of creamy vanilla ice cream complements the rich flavors of the cheesecake beautifully. The cold ice cream contrasts perfectly with the warm caramel, creating a delightful balance.
  • Whipped Cream: Light and fluffy whipped cream adds a touch of elegance. You can even sweeten it with a hint of vanilla or a sprinkle of cocoa powder for an extra flavor boost.
  • Fresh Berries: Raspberries, strawberries, or blueberries provide a refreshing tartness that cuts through the sweetness of the cheesecake. They also add a pop of color to your dessert plate.
  • Chocolate Sauce: For chocolate lovers, a drizzle of chocolate sauce can enhance the dessert’s richness. It’s a simple way to add an extra layer of indulgence.
  • Coffee: A cup of freshly brewed coffee pairs wonderfully with the cheesecake. The bitterness of the coffee balances the sweetness, making each bite even more enjoyable.

Feel free to mix and match these pairings to create a dessert experience that suits your taste and impresses your guests!

Presentation Tips

Presentation is key when serving your Caramel Brownie Cheesecake. Here are some tips to make your dessert look as good as it tastes:

  • Use a Cake Stand: Elevate your cheesecake on a decorative cake stand. This adds height and makes it the centerpiece of your dessert table.
  • Garnish with Caramel Drizzle: Before serving, drizzle additional caramel sauce over the top. This not only enhances the flavor but also creates an eye-catching design.
  • Add Fresh Fruit: Scatter fresh berries around the cheesecake on the serving plate. This adds color and freshness, making the dessert more inviting.
  • Chocolate Shavings: For a touch of elegance, sprinkle chocolate shavings on top. This adds a sophisticated look and a hint of extra chocolate flavor.
  • Slice Neatly: Use a sharp knife to cut clean slices. Wipe the knife with a damp cloth between cuts for perfectly shaped pieces.

With these serving suggestions and presentation tips, your Caramel Brownie Cheesecake will not only taste amazing but also look stunning on any table!

Tips for the Perfect Caramel Brownie Cheesecake Recipe

Storage Tips

Storing your Caramel Brownie Cheesecake properly is essential to maintain its delicious flavor and creamy texture. Here are some helpful storage tips:

  • Refrigeration: Always store your cheesecake in the refrigerator. Cover it with plastic wrap or aluminum foil to prevent it from absorbing any odors from other foods. This will keep it fresh for up to 5 days.
  • Freezing: If you want to keep your cheesecake for a longer period, you can freeze it. Wrap individual slices in plastic wrap and then place them in an airtight container. This way, you can enjoy a slice whenever you crave it! Frozen cheesecake can last for up to 2 months.
  • Thawing: To thaw frozen cheesecake, simply transfer it to the refrigerator for several hours or overnight. Avoid thawing at room temperature, as this can affect the texture.
  • Serving After Storage: If you’ve stored your cheesecake in the fridge, let it sit at room temperature for about 15-20 minutes before serving. This will enhance the flavors and make it easier to slice.

Reheating Instructions

While cheesecake is typically enjoyed cold, you may want to warm it slightly for a different experience. Here’s how to reheat your Caramel Brownie Cheesecake:

  • Microwave: Place a slice of cheesecake on a microwave-safe plate. Heat it in the microwave for about 10-15 seconds. Check to see if it’s warm enough; if not, heat in additional 5-second intervals. Be careful not to overheat, as this can change the texture.
  • Oven: Preheat your oven to 250°F (120°C). Place the cheesecake on a baking sheet and cover it loosely with aluminum foil. Heat for about 10-15 minutes, or until warmed through. This method helps maintain the creamy texture.
  • Serving Warm: Warm cheesecake pairs wonderfully with a scoop of ice cream or a drizzle of hot caramel sauce. It creates a delightful contrast of temperatures that enhances the overall dessert experience.

By following these storage and reheating tips, you can enjoy your Caramel Brownie Cheesecake at its best, whether it’s fresh out of the oven or after a few days in the fridge!

Breakdown of Time for the Caramel Brownie Cheesecake Recipe

Prep Time

Preparing your Caramel Brownie Cheesecake is a fun and engaging process. The prep time for this recipe is approximately 30 minutes. During this time, you will gather all your ingredients, prepare the brownie base, and mix the cheesecake filling. Make sure to have everything ready before you start, as this will make the process smoother and more enjoyable. Remember, taking your time during prep can lead to a better final product!

Cooking Time

The cooking time for the Caramel Brownie Cheesecake is about 55-60 minutes. This is when the cheesecake bakes in the oven, allowing it to set perfectly. Keep an eye on it as it bakes, ensuring the center remains slightly jiggly. After baking, you will also need to let it cool in the oven for an additional hour. This gradual cooling helps prevent cracks and ensures a smooth texture.

Total Time

In total, you should expect to spend around 6 hours to make your Caramel Brownie Cheesecake. This includes the prep time, cooking time, and the necessary chilling time in the refrigerator. Chilling is crucial, as it allows the flavors to meld and the cheesecake to set properly. For the best results, consider making it a day ahead of when you plan to serve it. This way, you can enjoy a deliciously rich dessert without any last-minute stress!

Nutritional Information for the Caramel Brownie Cheesecake Recipe

Calories and Macronutrients

Understanding the nutritional content of your Caramel Brownie Cheesecake can help you enjoy it mindfully. Each serving of this delicious dessert contains approximately 350 calories. Here’s a breakdown of the macronutrients per serving:

  • Calories: 350
  • Net Carbs: 25g
  • Protein: 6g
  • Fat: 25g

These values can vary slightly based on the specific brands of ingredients you use. For instance, using low-fat cream cheese can reduce the overall fat content. Additionally, if you choose to add nuts or other toppings, this will also affect the nutritional profile. Keeping track of these details can help you enjoy your cheesecake while being aware of your dietary choices.

Health Considerations

While the Caramel Brownie Cheesecake is a delightful treat, it’s important to consider its nutritional aspects. The dessert is rich in calories and fat, primarily due to the cream cheese and butter. However, it also provides some protein from the eggs and cream cheese, which can be beneficial in moderation.

If you’re watching your sugar intake, you might want to enjoy this cheesecake as an occasional indulgence rather than a regular dessert. For those with dietary restrictions, there are options to modify the recipe. For example, using sugar substitutes can lower the sugar content, and gluten-free ingredients can accommodate those with gluten sensitivities.

Ultimately, enjoying a slice of Caramel Brownie Cheesecake can be part of a balanced diet. Just remember to savor each bite and share it with friends and family for a truly delightful experience!

FAQs About the Caramel Brownie Cheesecake Recipe

Can I make this cheesecake ahead of time?

Absolutely! In fact, making the Caramel Brownie Cheesecake ahead of time is a great idea. This dessert benefits from chilling, as it allows the flavors to meld beautifully. You can prepare it a day or two in advance. Just make sure to cover it well with plastic wrap or aluminum foil to keep it fresh in the refrigerator. When you’re ready to serve, simply remove it from the fridge and let it sit at room temperature for a bit before slicing. This will enhance the flavors and make it easier to cut.

How do I store leftovers?

Storing leftovers properly is key to enjoying your Caramel Brownie Cheesecake later. First, make sure the cheesecake is completely cooled. Then, cover it tightly with plastic wrap or aluminum foil. You can also place it in an airtight container. Store it in the refrigerator, where it will stay fresh for up to 5 days. If you have individual slices, you can wrap them separately for easy access. Just remember to let them sit at room temperature for about 15-20 minutes before serving for the best taste!

Can I freeze the Caramel Brownie Cheesecake?

Yes, you can freeze the Caramel Brownie Cheesecake! Freezing is a great way to preserve this delicious dessert for later enjoyment. To freeze, wrap the cheesecake tightly in plastic wrap, then place it in an airtight container. If you prefer, you can also freeze individual slices. The cheesecake can be frozen for up to 2 months. When you’re ready to enjoy it, transfer it to the refrigerator to thaw overnight. Avoid thawing at room temperature, as this can affect the texture.

What can I substitute for cream cheese?

If you need a substitute for cream cheese, there are several options available. For a similar texture, you can use mascarpone cheese or ricotta cheese. Both will give you a creamy consistency, though the flavor may vary slightly. If you’re looking for a dairy-free option, consider using a vegan cream cheese alternative, which is widely available in stores. You can also make your own by blending soaked cashews with a bit of lemon juice and nutritional yeast for flavor. These substitutes will help you create a delicious cheesecake without compromising on taste!

Conclusion on the Caramel Brownie Cheesecake Recipe

Final Thoughts and Encouragement to Try the Recipe

The Caramel Brownie Cheesecake is more than just a dessert; it’s a celebration of flavors and textures that brings joy to any occasion. With its rich layers of creamy cheesecake, fudgy brownie base, and sweet caramel drizzle, this recipe is sure to impress your family and friends. Whether you’re hosting a gathering or simply treating yourself, this cheesecake is a delightful choice that will leave everyone wanting more.

As you embark on your baking journey, remember that the key to a successful Caramel Brownie Cheesecake lies in the details. From using room temperature ingredients to allowing the cheesecake to cool gradually, each step contributes to the final result. Don’t hesitate to experiment with flavors and toppings to make this recipe your own. The possibilities are endless, and your creativity will shine through in every bite.

So, gather your ingredients, roll up your sleeves, and dive into the world of baking! We encourage you to try this Caramel Brownie Cheesecake recipe and share it with your loved ones. The smiles and compliments you receive will be worth every moment spent in the kitchen. Happy baking!

Mediterranean Chicken Bowls with Feta are deliciously healthy.

Introduction to Mediterranean Chicken Bowls with Feta

If you’re looking for a delicious and healthy meal, Mediterranean Chicken Bowls with Feta are a fantastic choice. These bowls are not only colorful and vibrant but also packed with flavors that transport you straight to the sunny shores of the Mediterranean. Imagine tender chicken, fluffy quinoa, and fresh vegetables all topped with a creamy feta sauce. It’s a dish that’s sure to please everyone at the table!

What makes these bowls so special? First, they are incredibly versatile. You can easily customize them to suit your taste or dietary needs. Whether you prefer a vegetarian option or want to switch up the protein, the possibilities are endless. Plus, they are quick to prepare, making them perfect for busy weeknights or meal prep for the week ahead.

In addition to being tasty, Mediterranean Chicken Bowls with Feta are also nutritious. They are loaded with protein from the chicken and quinoa, while the fresh vegetables add essential vitamins and minerals. The feta sauce not only enhances the flavor but also provides a creamy texture that ties everything together beautifully.

So, gather your ingredients and get ready to create a meal that’s not only satisfying but also good for you. Let’s dive into the ingredients you’ll need to whip up these delightful Mediterranean Chicken Bowls with Feta!

Ingredients for Mediterranean Chicken Bowls with Feta

To create your Mediterranean Chicken Bowls with Feta, you’ll need a variety of fresh and wholesome ingredients. Each component plays a vital role in building flavor and nutrition. Here’s what you’ll need:

  • 2 cups cooked quinoa: This serves as the hearty base of your bowl, providing protein and fiber.
  • 1 pound boneless, skinless chicken breasts: A lean protein source that keeps the dish filling and satisfying.
  • 1 tablespoon olive oil: This adds richness and helps in cooking the chicken to perfection.
  • 1 teaspoon garlic powder: A must-have for that aromatic flavor.
  • 1 teaspoon paprika: This spice gives a warm color and a hint of smokiness.
  • 1 teaspoon dried oregano: A classic Mediterranean herb that enhances the overall taste.
  • Salt and pepper to taste: Essential for seasoning your chicken and vegetables.
  • 1 cup cherry tomatoes, halved: These add a burst of sweetness and freshness.
  • 1 cucumber, diced: A crunchy element that balances the dish.
  • 1 cup baby spinach: This leafy green boosts the nutritional value.
  • 1/2 red onion, thinly sliced: For a sharp, zesty flavor.
  • 1/2 cup feta cheese, crumbled: The star of the show, adding creaminess and tang.
  • 1/4 cup plain Greek yogurt: This makes the feta sauce smooth and rich.
  • 2 tablespoons lemon juice: A splash of acidity that brightens the dish.
  • 1 tablespoon fresh dill, chopped (or 1 teaspoon dried dill): This herb adds a refreshing touch.

With these ingredients, you’re well on your way to creating a delightful meal. Each item contributes to the overall flavor and texture, making your Mediterranean Chicken Bowls with Feta a feast for both the eyes and the palate. Now, let’s move on to the step-by-step preparation!

Step-by-Step Preparation of Mediterranean Chicken Bowls with Feta

Now that you have gathered all the ingredients, it’s time to dive into the preparation of your Mediterranean Chicken Bowls with Feta. This process is straightforward and can be broken down into four simple steps. Let’s get started!

Step 1: Marinating the Chicken

First, you’ll want to marinate the chicken to infuse it with flavor. In a small bowl, mix together the garlic powder, paprika, oregano, salt, and pepper. This spice blend is key to achieving that delicious Mediterranean taste. Rub this mixture all over the chicken breasts, ensuring they are well-coated. For even better flavor, consider letting the chicken marinate for at least 30 minutes. This allows the spices to penetrate the meat, making it more flavorful.

Step 2: Cooking the Chicken

Next, heat the olive oil in a skillet over medium-high heat. Once the oil is hot, carefully place the marinated chicken breasts in the skillet. Sear them for about 2-3 minutes on each side until they turn golden brown. This step not only adds color but also locks in the juices. After searing, transfer the chicken to a prepared baking sheet lined with parchment paper. Bake the chicken in a preheated oven at 400°F for 15-20 minutes. You’ll know it’s done when the internal temperature reaches 165°F. Once cooked, let the chicken rest for 5 minutes before slicing it into strips.

Step 3: Preparing the Vegetables

While the chicken is baking, it’s time to prepare the fresh vegetables. Start by halving the cherry tomatoes and dicing the cucumber. Then, thinly slice the red onion. Finally, rinse the baby spinach under cold water and pat it dry. These fresh ingredients will add crunch and color to your bowls, making them visually appealing and nutritious.

Step 4: Assembling the Mediterranean Chicken Bowls with Feta

Now comes the fun part—assembling your Mediterranean Chicken Bowls with Feta! In serving bowls, layer the cooked quinoa as the base. Next, add the sliced chicken on top. Then, arrange the cherry tomatoes, diced cucumber, baby spinach, and red onion around the chicken. Finally, drizzle the creamy feta sauce over the top. To make the feta sauce, simply combine the crumbled feta cheese, Greek yogurt, lemon juice, and dill in a bowl. Mix until smooth and creamy. This sauce will tie all the flavors together beautifully!

And there you have it! Your Mediterranean Chicken Bowls with Feta are ready to be enjoyed. They are not only delicious but also packed with nutrients, making them a perfect meal for any occasion.

Variations of Mediterranean Chicken Bowls with Feta

While the classic Mediterranean Chicken Bowls with Feta are delightful, there are many ways to switch things up! Whether you’re looking for vegetarian options or different protein choices, these variations will keep your meals exciting and flavorful. Let’s explore some tasty alternatives!

Vegetarian Options

If you want to enjoy a meat-free version, there are plenty of delicious vegetarian options. One great substitute for chicken is roasted chickpeas. They add a nice crunch and are packed with protein. Simply toss canned chickpeas with olive oil and your favorite spices, then roast them in the oven until crispy.

Another option is to use grilled or roasted vegetables. Bell peppers, zucchini, and eggplant work wonderfully. Just season them with olive oil, salt, and pepper, then grill or roast until tender. You can also add falafel for a fun twist. These little balls of ground chickpeas are full of flavor and pair perfectly with the feta sauce.

Lastly, consider using tofu or tempeh. Marinate them in the same spice blend as the chicken, then cook until golden. This will give you a hearty and satisfying vegetarian bowl that everyone will love!

Different Protein Choices

If you’re looking to switch up the protein in your Mediterranean Chicken Bowls with Feta, there are many delicious options. For a seafood twist, try using shrimp or salmon. Season them with the same spices and cook until they are just done. Seafood adds a light and fresh flavor that complements the other ingredients beautifully.

You can also use turkey breast as a lean alternative to chicken. It cooks similarly and absorbs flavors well. Just follow the same cooking instructions as you would for chicken.

For a unique flavor, consider using lamb. Ground lamb or lamb chops can bring a rich taste to your bowls. Just remember to adjust the cooking time based on the cut you choose. Each of these protein options will create a delightful Mediterranean Chicken Bowl with Feta that’s sure to impress!

Cooking Note for Mediterranean Chicken Bowls with Feta

When preparing Mediterranean Chicken Bowls with Feta, a few cooking notes can help ensure your dish turns out perfectly every time. First, always use a meat thermometer to check the chicken’s internal temperature. This guarantees that your chicken is cooked through and safe to eat. Remember, the ideal temperature is 165°F.

Next, consider the quality of your ingredients. Fresh vegetables and high-quality feta cheese can significantly enhance the flavor of your bowls. Whenever possible, opt for organic produce and artisanal feta for the best taste. Additionally, if you have access to fresh herbs, such as dill or oregano, use them instead of dried. Fresh herbs provide a vibrant flavor that dried herbs simply can’t match.

Another tip is to let the chicken rest after baking. This step allows the juices to redistribute throughout the meat, making it more tender and juicy. If you slice the chicken too soon, you may end up with dry pieces.

Lastly, feel free to adjust the spice levels to your liking. If you enjoy a bit of heat, consider adding a pinch of cayenne pepper or red pepper flakes to the spice mix. This will give your Mediterranean Chicken Bowls with Feta an extra kick!

By keeping these cooking notes in mind, you’ll create a delicious and satisfying meal that everyone will love. Now, let’s move on to some serving suggestions to elevate your Mediterranean Chicken Bowls with Feta even further!

Serving Suggestions for Mediterranean Chicken Bowls with Feta

Once your Mediterranean Chicken Bowls with Feta are beautifully assembled, it’s time to think about how to serve them. Presentation can elevate your meal, making it even more enjoyable. Here are some delightful serving suggestions to enhance your dining experience:

  • Garnish with Fresh Herbs: A sprinkle of fresh herbs, like parsley or extra dill, can add a pop of color and freshness. This simple touch makes your bowls look more appealing and adds an aromatic flavor.
  • Serve with Pita Bread: Pair your bowls with warm pita bread or pita chips. This adds a fun, crunchy element and is perfect for scooping up the delicious feta sauce.
  • Add a Side Salad: Consider serving a light side salad alongside your bowls. A simple mix of greens, cucumbers, and a lemon vinaigrette complements the flavors of the Mediterranean Chicken Bowls with Feta beautifully.
  • Include Hummus: A small serving of hummus can be a great addition. It pairs well with the chicken and veggies, providing a creamy texture that enhances the overall meal.
  • Offer Lemon Wedges: A squeeze of fresh lemon juice over the bowls just before serving can brighten the flavors. It adds a zesty kick that balances the richness of the feta sauce.
  • Customize with Extra Toppings: Encourage your guests to customize their bowls with additional toppings. Options like sliced olives, avocado, or roasted nuts can add unique flavors and textures.

These serving suggestions not only enhance the visual appeal of your Mediterranean Chicken Bowls with Feta but also provide a variety of flavors and textures. Whether you’re hosting a dinner party or enjoying a family meal, these ideas will make your dining experience even more delightful. Now that you have your bowls ready to serve, let’s explore some tips for perfecting your Mediterranean Chicken Bowls with Feta!

Tips for Perfect Mediterranean Chicken Bowls with Feta

Creating the perfect Mediterranean Chicken Bowls with Feta is all about attention to detail. With a few simple tips, you can elevate your dish and impress your family or guests. Here are some helpful suggestions to ensure your bowls turn out delicious every time:

  • Use Fresh Ingredients: Fresh vegetables and herbs make a big difference in flavor. Always choose ripe cherry tomatoes, crisp cucumbers, and vibrant greens. Fresh herbs like dill and oregano will enhance the taste of your feta sauce.
  • Cook Quinoa Properly: Rinse your quinoa before cooking to remove any bitterness. Use a 2:1 water-to-quinoa ratio for fluffy results. This will ensure your quinoa is light and airy, making it a perfect base for your bowls.
  • Don’t Overcook the Chicken: Keep an eye on the chicken while it bakes. Overcooking can lead to dry meat. Use a meat thermometer to check for doneness, aiming for 165°F. This will keep your chicken juicy and tender.
  • Customize the Spice Blend: Feel free to adjust the spice blend to suit your taste. If you love heat, add some cayenne pepper or chili powder. For a milder flavor, reduce the paprika or oregano.
  • Layer Ingredients Thoughtfully: When assembling your bowls, layer the ingredients thoughtfully. Start with quinoa, then add chicken, followed by vegetables. This not only looks appealing but also ensures every bite is balanced.
  • Make Extra Feta Sauce: If you love the creamy feta sauce, consider making extra. It can be used as a dip for pita bread or drizzled over salads. This versatile sauce adds flavor to many dishes!
  • Serve Immediately: For the best experience, serve your Mediterranean Chicken Bowls with Feta immediately after assembling. This keeps the ingredients fresh and the flavors vibrant.

By following these tips, you’ll create Mediterranean Chicken Bowls with Feta that are not only delicious but also visually stunning. Enjoy the process of cooking and savor the delightful flavors of the Mediterranean!

Breakdown of Time for Mediterranean Chicken Bowls with Feta

When preparing Mediterranean Chicken Bowls with Feta, it’s helpful to know how much time you’ll need for each step. This way, you can plan your cooking efficiently and enjoy a delicious meal without feeling rushed. Here’s a breakdown of the time required for each part of the process:

Prep Time

The prep time for Mediterranean Chicken Bowls with Feta is approximately 20-30 minutes. This includes gathering your ingredients, marinating the chicken, and preparing the vegetables. If you choose to marinate the chicken for longer, you may want to add an extra 30 minutes to an hour. This will enhance the flavor even more!

Cooking Time

Cooking the chicken takes about 15-20 minutes. After searing the chicken in the skillet, you’ll bake it in the oven until it reaches the perfect internal temperature of 165°F. While the chicken is cooking, you can prepare the feta sauce, which only takes about 5 minutes. So, overall, the cooking time is around 20-25 minutes.

Total Time

In total, you can expect to spend about 40-55 minutes from start to finish when making Mediterranean Chicken Bowls with Feta. This includes both prep and cooking time. If you marinate the chicken ahead of time, you can cut down on the active cooking time, making it even quicker to enjoy this delightful meal!

With this time breakdown, you can easily fit Mediterranean Chicken Bowls with Feta into your busy schedule. Whether it’s a weeknight dinner or a weekend meal prep, you’ll have a delicious and nutritious dish ready in no time!

Nutritional Information for Mediterranean Chicken Bowls with Feta

Understanding the nutritional content of your meals is essential for maintaining a balanced diet. Mediterranean Chicken Bowls with Feta not only taste great but also provide a variety of nutrients. Here’s a closer look at the nutritional information for this delicious dish:

Calories

450 calories. This makes it a satisfying meal that can fit well into a healthy eating plan. The combination of protein, healthy fats, and carbohydrates ensures that you feel full and energized after enjoying this dish.

Protein

35 grams of protein. This high protein content comes primarily from the chicken and quinoa, making it an excellent choice for those looking to build muscle or maintain a healthy weight. Protein is essential for repairing tissues and keeping you feeling satiated throughout the day.

Sodium

600 milligrams per serving. While this is a reasonable amount, it’s always a good idea to monitor your sodium intake, especially if you are watching your salt consumption. You can reduce sodium levels by using low-sodium feta cheese or adjusting the amount of salt you add during cooking.

Overall, Mediterranean Chicken Bowls with Feta are a nutritious option that provides a well-rounded meal. With a good balance of calories, protein, and moderate sodium, they can be a delightful addition to your weekly meal plan. Now that you know the nutritional benefits, let’s address some frequently asked questions about this tasty dish!

FAQs about Mediterranean Chicken Bowls with Feta

Can I make Mediterranean Chicken Bowls with Feta ahead of time?

Absolutely! Mediterranean Chicken Bowls with Feta can be prepared ahead of time, making them perfect for meal prep. You can cook the chicken and quinoa in advance, then store them in the refrigerator. When you’re ready to eat, simply reheat the chicken and quinoa, and assemble your bowls with fresh vegetables and feta sauce. This way, you’ll have a delicious meal ready in minutes!

What can I substitute for feta cheese in Mediterranean Chicken Bowls with Feta?

If you’re looking for a substitute for feta cheese, there are several options. Goat cheese is a great alternative, offering a similar creamy texture and tangy flavor. For a dairy-free option, try using crumbled tofu mixed with a bit of lemon juice and nutritional yeast. This will give you a cheesy flavor without the dairy. Additionally, you can use ricotta cheese or even a vegan feta if you prefer a plant-based option.

Are Mediterranean Chicken Bowls with Feta healthy?

Yes, Mediterranean Chicken Bowls with Feta are a healthy meal choice! They are packed with lean protein from the chicken, fiber from the quinoa, and a variety of vitamins and minerals from the fresh vegetables. The feta sauce adds flavor without excessive calories. Overall, this dish provides a balanced mix of nutrients, making it a wholesome option for any meal.

How can I customize Mediterranean Chicken Bowls with Feta for dietary restrictions?

Customizing Mediterranean Chicken Bowls with Feta for dietary restrictions is easy! For gluten-free options, ensure you use gluten-free grains like quinoa or brown rice. If you’re vegetarian, replace the chicken with roasted chickpeas or grilled vegetables. For a low-carb version, you can use cauliflower rice instead of quinoa. Additionally, if you have dairy restrictions, simply swap out the feta cheese for a dairy-free alternative. These adjustments will help you enjoy this delicious meal while accommodating your dietary needs!

Conclusion on Mediterranean Chicken Bowls with Feta

In conclusion, Mediterranean Chicken Bowls with Feta are a delightful and nutritious meal option that brings the vibrant flavors of the Mediterranean right to your table. With their colorful ingredients and creamy feta sauce, these bowls are not only visually appealing but also packed with essential nutrients. They offer a perfect balance of protein, healthy fats, and carbohydrates, making them a satisfying choice for lunch or dinner.

Whether you’re preparing a quick weeknight meal or planning for a gathering, these bowls are versatile and easy to customize. You can switch up the proteins, add more vegetables, or even create a vegetarian version to suit your preferences. The possibilities are endless, allowing you to enjoy this dish in various ways.

Moreover, the step-by-step preparation makes it simple for anyone to create this delicious meal at home. With just a few fresh ingredients and some basic cooking techniques, you can whip up a dish that’s sure to impress family and friends alike.

So, why not give Mediterranean Chicken Bowls with Feta a try? You’ll not only enjoy a tasty meal but also nourish your body with wholesome ingredients. Embrace the flavors of the Mediterranean and make this dish a regular part of your meal rotation. Happy cooking!