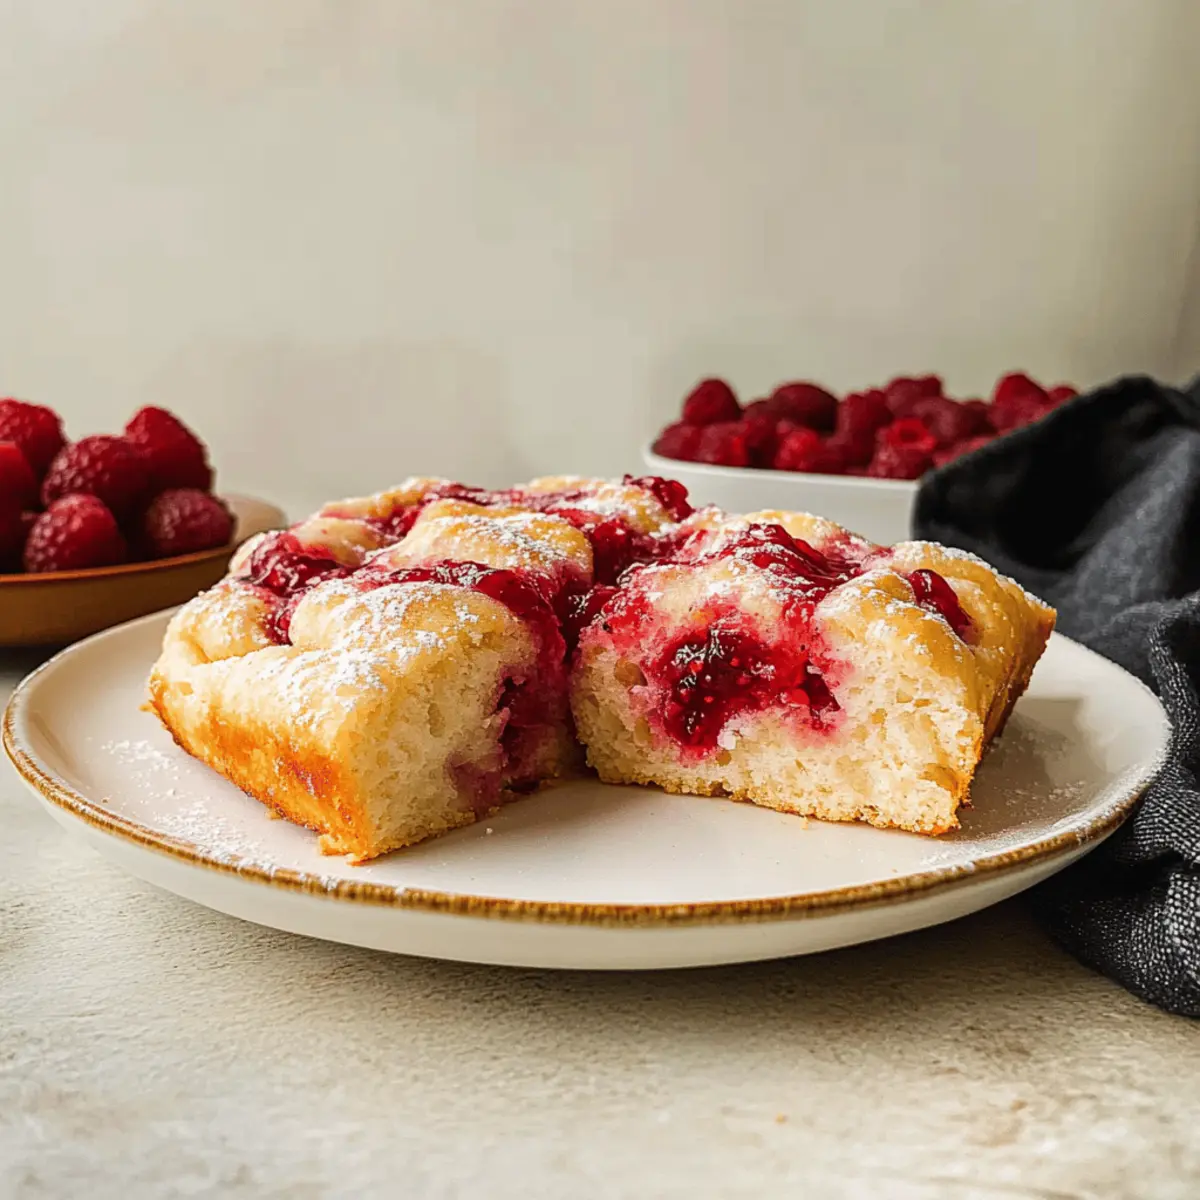
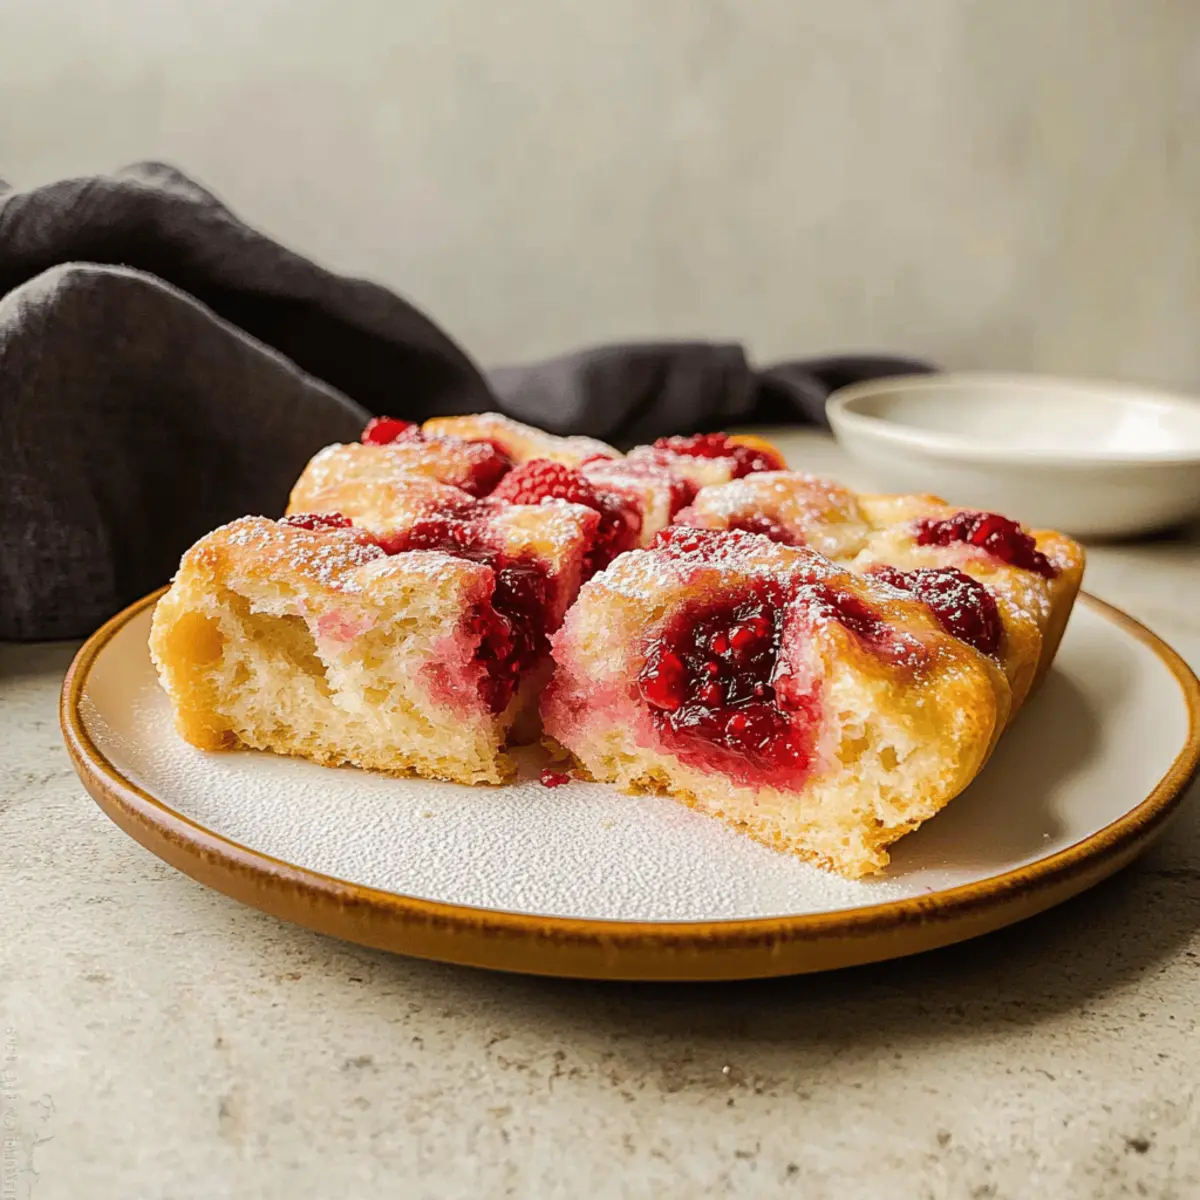
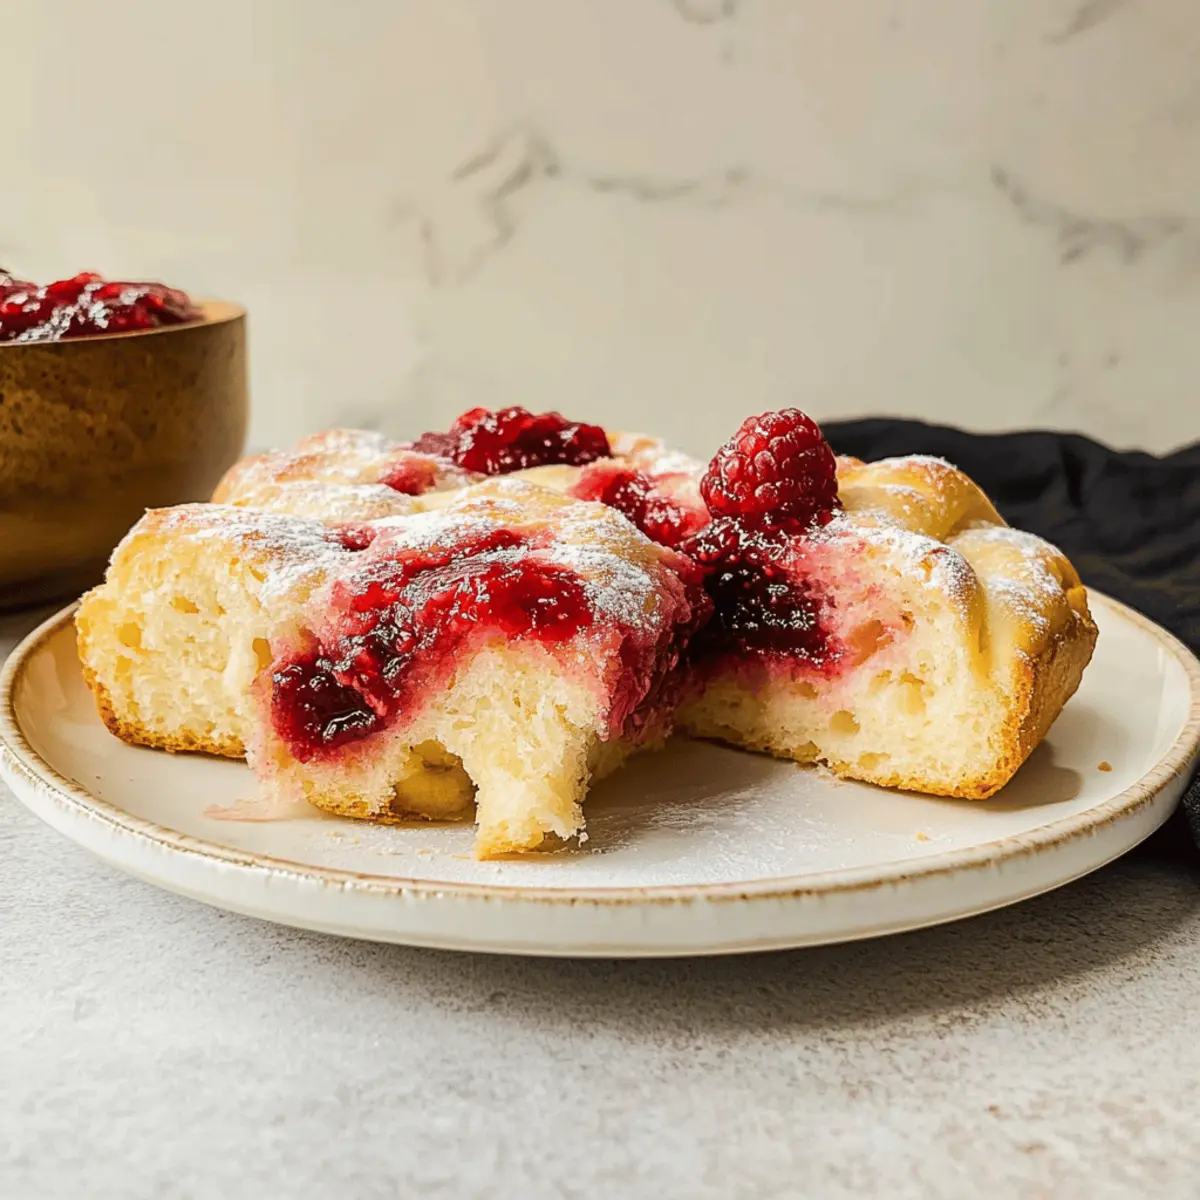
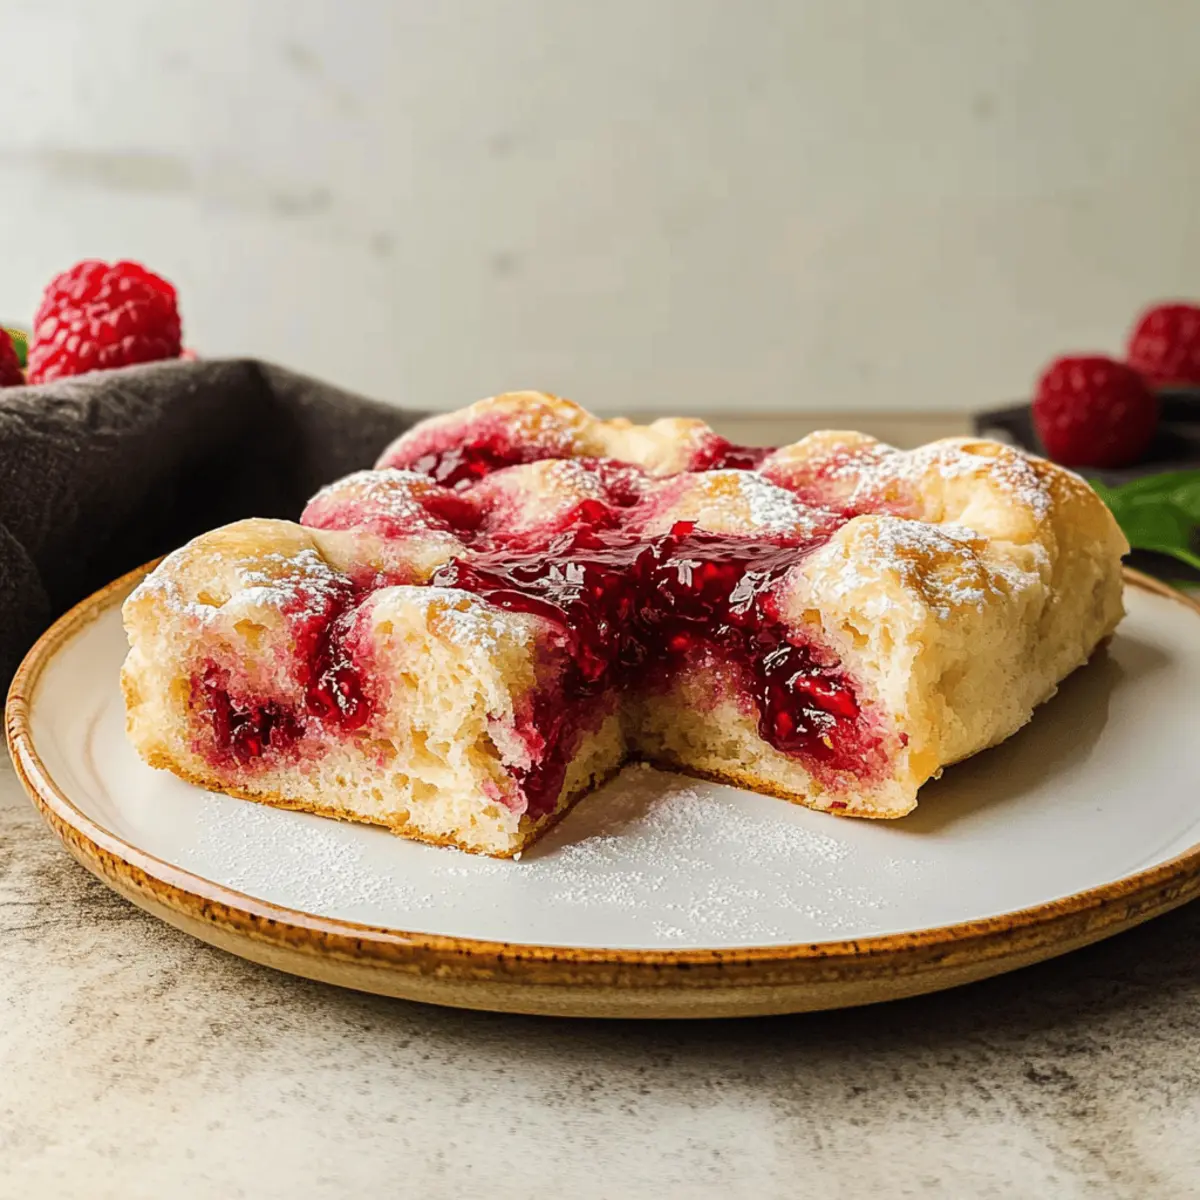
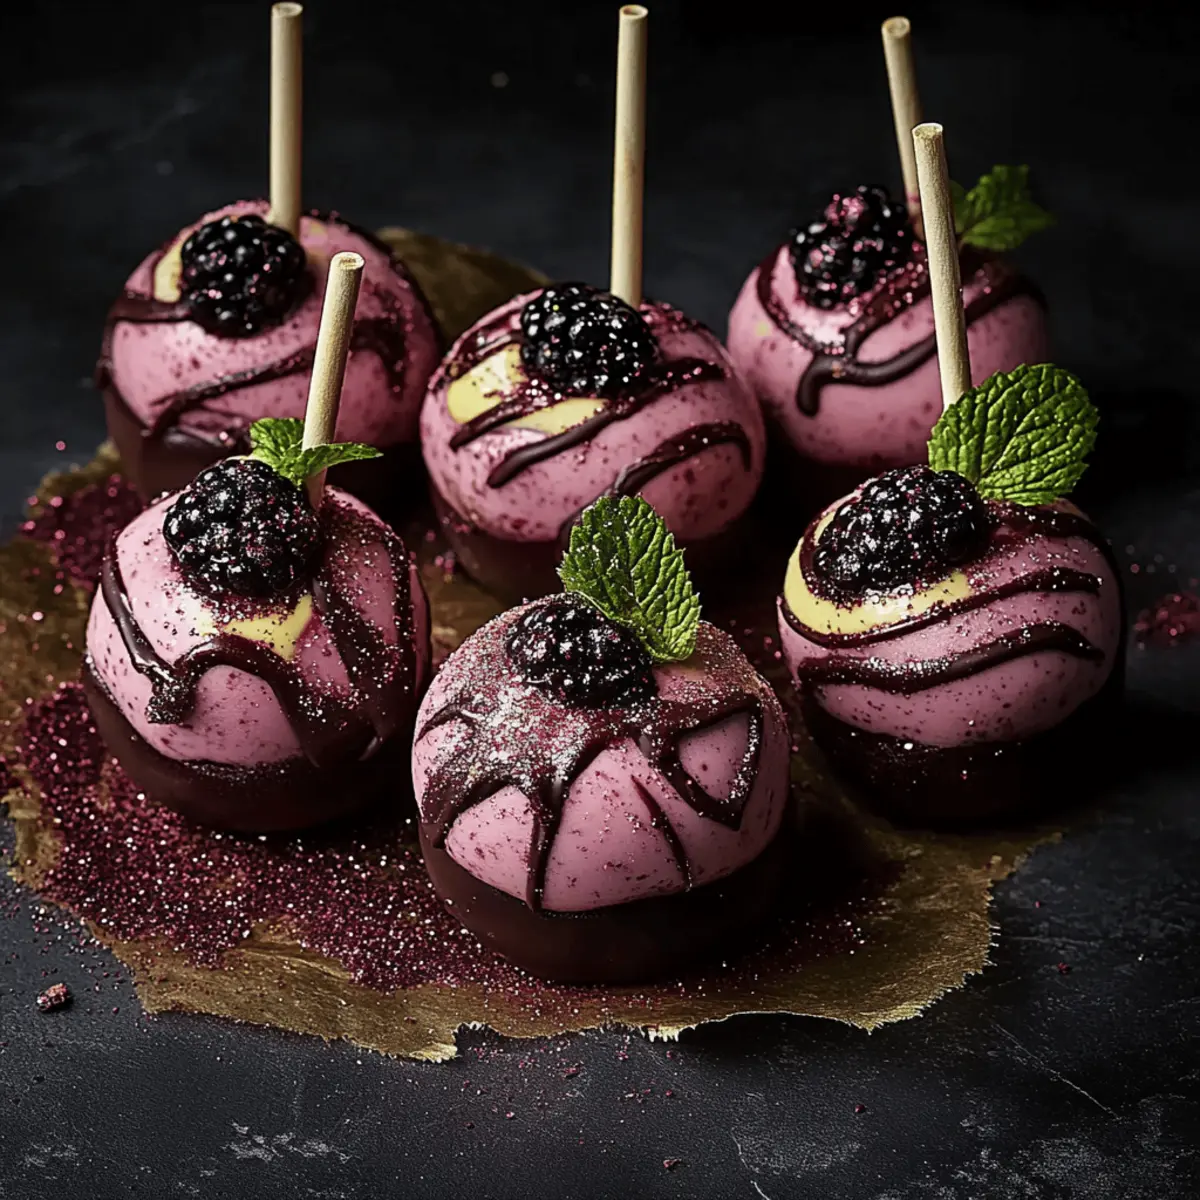
Forbidden Forest Blackberry Cheesecake Pops for Magical Treats

As I stood in my kitchen, the sweet aroma of blackberries simmering on the stove whisked me away to a whimsical realm. Enter the Forbidden Forest Blackberry Cheesecake Pops—a delightfully enchanting dessert that brings a touch of the Harry Potter universe right to your countertop. These creamy treats are not just visually stunning; they offer a delightful balance of rich cheesecake, tangy berry swirls, and a satisfying chocolatey crunch that’s perfect for any occasion. With quick prep and a customizable flair, these pops are ideal for themed parties, gifting, or simply indulging in a well-deserved magical escape. Curious how to bring a little magic into your kitchen? Let’s dive into the recipe!
Why are These Cheesecake Pops Magical?

Irresistible Charm: Each bite of the Forbidden Forest Blackberry Cheesecake Pops transports you to a whimsical realm, blending flavors like creamy cheesecake and tart blackberries for a delightful treat.
Easy to Customize: Whether you prefer raspberries or strawberries, this recipe welcomes endless flavor variations. You can even swap dark chocolate for white for a sweet twist!
Perfect for Any Occasion: With their enchanting appearance, these pops are ideal for themed parties or thoughtful gifting, making you the star of any celebration.
Quick Prep Time: Simple to whip up with minimal fuss, these cheesecake pops fit seamlessly into your busy baking schedule.
Fun for Everyone: Kids and adults alike will love these fun treats—great for bringing smiles and sweet moments to gatherings! You may also want to check out our delightful Strawberry Cheesecake Dump for another charming dessert option.

Forbidden Forest Blackberry Cheesecake Pops Ingredients

Dive into the magical world of dessert with these delightful pops!

For the Cheesecake Base

  • Cream Cheese – Provides the creamy base for cheesecake; ensure it’s softened for easy mixing.
  • Granulated Sugar – Sweetens the cheesecake base and blackberry mix; can be substituted with a sweetener of choice.
  • Vanilla Extract – Adds depth of flavor to the cheesecake; use pure vanilla for the best results.
  • Whipped Topping – Contributes lightness and creaminess; substitute with homemade whipped cream if desired.
  • Graham Cracker Crumbs – Provides a crust-like texture; can replace with gluten-free graham crackers for a gluten-free version.

For the Blackberry Mixture

  • Fresh/Frozen Blackberries – Integral for making the blackberry swirl; substitute with other berries like raspberries or strawberries if desired.
  • Lemon Juice – Enhances the flavor of the blackberry mixture; freshly squeezed is recommended.

For the Chocolate Coating

  • Dark Chocolate Melting Wafers – Coating for the pops; use chocolate chips if melting wafers are unavailable.
  • Edible Glitter or Luster Dust – Decorative element to evoke the magical theme; optional for added visual appeal.

For Toppings

  • Crushed Graham Crackers or Nuts – Optional toppings for added texture and flavor.
  • Candy Eyes or Small Edible Decorations – Optional for enhancing the whimsical presentation.

With these Forbidden Forest Blackberry Cheesecake Pops ingredients, you’ll be well on your way to crafting a delightful, magical treat!

Step‑by‑Step Instructions for Forbidden Forest Blackberry Cheesecake Pops

Step 1: Prepare the Blackberry Compote
In a small saucepan over medium heat, combine 1 cup of blackberries, 2 tablespoons of sugar, and 1 teaspoon of lemon juice. Cook the mixture for 5 to 7 minutes, stirring occasionally until it thickens and becomes syrupy. Remove from heat and strain if desired to eliminate seeds, then allow it to cool completely before using it in the cheesecake filling.

Step 2: Make the Cheesecake Filling
In a large mixing bowl, beat 16 ounces of softened cream cheese and ½ cup of granulated sugar with an electric mixer until the mixture is smooth and creamy. Add in 1 teaspoon of pure vanilla extract and 8 ounces of whipped topping, gently mixing until well combined. Stir in 1 cup of graham cracker crumbs and fold in half of the cooled blackberry compote, ensuring an even swirl throughout.

Step 3: Shape the Cheesecake Pops
Using a cookie scoop or tablespoon, portion the cheesecake mixture into tablespoon-sized balls and arrange them on a parchment-lined baking sheet. Carefully insert lollipop sticks into the center of each ball, ensuring they are securely placed. Transfer the baking sheet to the freezer and let the cheesecake pops freeze for at least 1 hour, or until firm enough to handle.

Step 4: Coat with Chocolate
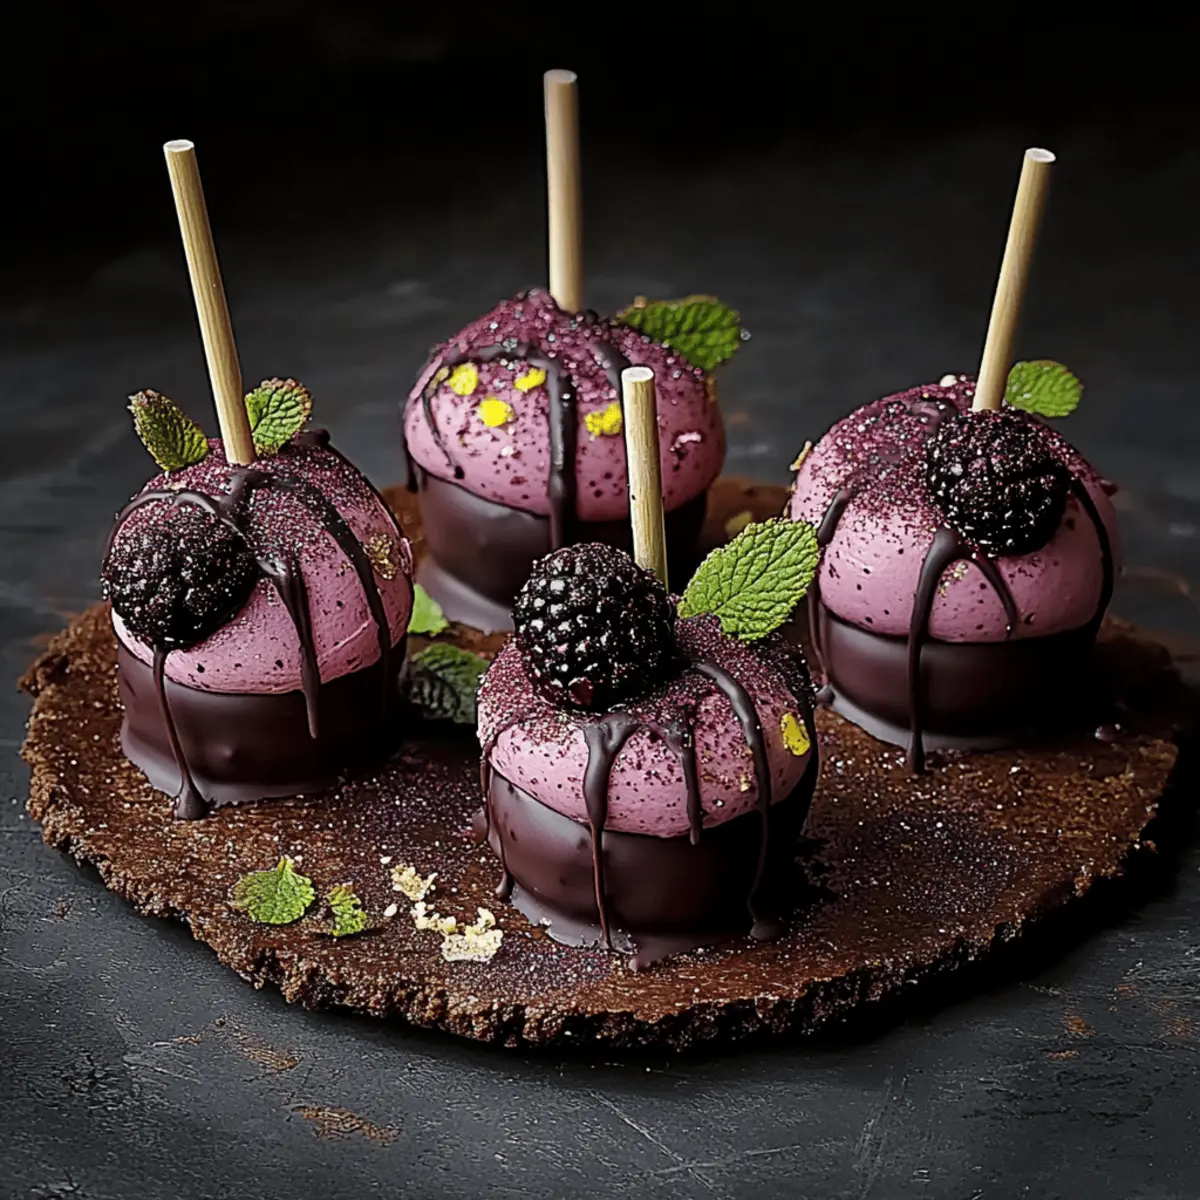
Once the cheesecake pops are frozen, melt 12 ounces of dark chocolate melting wafers in a microwave-safe bowl, heating in 30-second intervals and stirring until smooth. Dip each frozen cheesecake pop into the melted chocolate, coating them evenly and tapping gently to remove any excess. Immediately sprinkle with edible glitter or crushed graham crackers before the chocolate sets, and drizzle with the remaining blackberry compote.

Step 5: Set and Chill
Place the coated cheesecake pops back on the parchment-lined baking sheet and refrigerate them to set the chocolate for about 15 to 20 minutes. Keep an eye on them until the chocolate hardens and the pops are ready to serve. Once set, your Forbidden Forest Blackberry Cheesecake Pops will be magically delicious and ready to wow your friends and family!
What to Serve with Forbidden Forest Blackberry Cheesecake Pops?

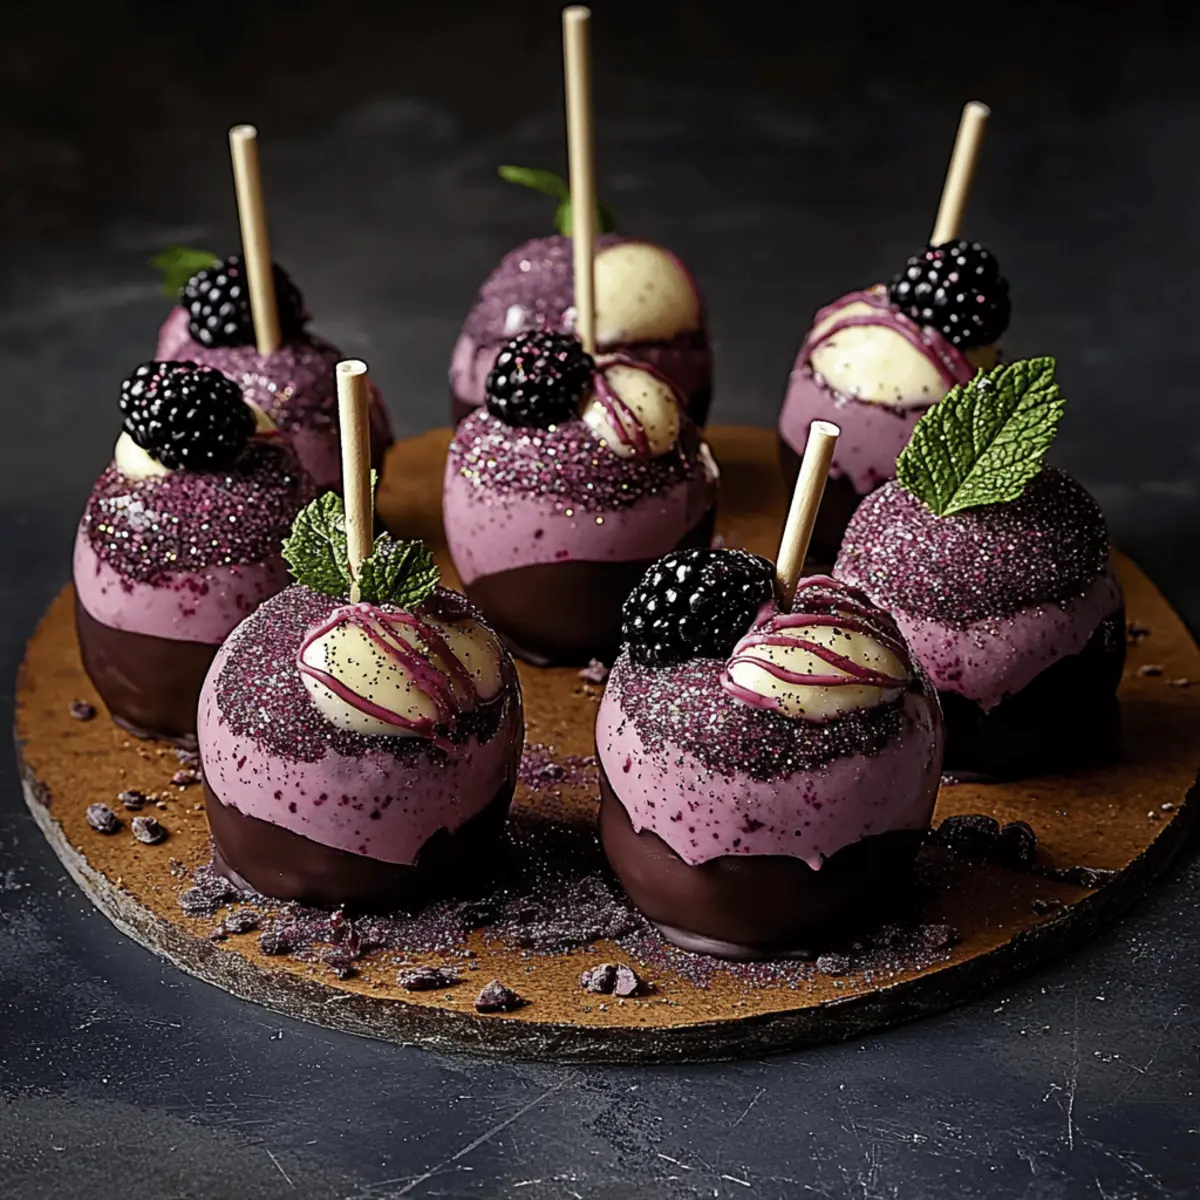
Imagine the thrill of creating a whimsical dessert table featuring these delightful pops that transport you straight to the enchanting world of Harry Potter.

  • Butterbeer: This iconic drink pairs perfectly with the pops, giving a magical touch with its sweet, frothy flavor that complements the cheesecake’s richness.
  • Chocolate-Dipped Strawberries: Enhance the chocolate experience! These juicy bites provide a contrasting freshness that balances the creamy cheesecake.
  • Creamy Vanilla Ice Cream: A scoop of vanilla ice cream offers a cool, sweet creaminess that beautifully offsets the pop’s tangy blackberry swirl.
  • Mini Fruit Tarts: Bring in a vibrant splash of color and texture. These tarts add freshness and a delightful crunch that meshes well with the pops’ softness.
  • Whipped Cream with Berries: Serve a dollop of whipped cream topped with mixed berries for a luscious addition that highlights the cheesecake’s flavors.
  • Sparkling Water with Mint: Quench your thirst with refreshing sparkling water! Infusing mint adds a burst of brightness that invigorates the palate.
  • Hot Cocoa: Warm, rich hot cocoa not only comforts but is also a cozy drink that wraps around the dessert theme wonderfully.
  • Peanut Butter Chocolate Cupcakes: For the chocolate lover, these cupcakes create a perfect sweet harmony alongside the cheesecake pops, satisfying any sweet tooth.
  • Edible Glitter Mocktails: Serve up some sparkling mocktails adorned with edible glitter for a playful, whimsical drink that will dazzle your guests just like the pops!

Expert Tips for Forbidden Forest Blackberry Cheesecake Pops

  • Choose the Right Cream Cheese: Use full-fat, softened cream cheese for a rich, creamy texture. Low-fat options may lead to a less satisfying consistency.

  • Folding Technique: Gently fold the blackberry compote into the cheesecake mixture. Overmixing can cause it to lose its lightness, so keep that delightful swirl intact!

  • Temperature Matters: Ensure the cheesecake pops are completely frozen before dipping in chocolate. This prevents cracking and helps the chocolate adhere better.

  • Melting Chocolate: If using chocolate chips instead of melting wafers, add a little vegetable oil to achieve a smoother coating. This tip ensures a beautiful finish on your pops.

  • Storage Smartly: Uncoated cheesecake pops can be stored in the freezer for up to a month. Coat them only after thawing to keep the texture just right!

  • Experiment with Decorations: Feel free to get creative! Use colorful sprinkles, nuts, or different edible decorations to make your Forbidden Forest Blackberry Cheesecake Pops truly magical!

Make Ahead Options

These Forbidden Forest Blackberry Cheesecake Pops are perfect for meal prep enthusiasts! You can prepare the cheesecake filling and shape the pops up to 24 hours in advance, ensuring you have a delightful treat ready for a busy day. Simply follow the first three steps of the recipe, then place the formed pops in the freezer to set. For optimal quality, wrap them tightly in plastic wrap to prevent freezer burn. When you’re ready to serve, melt the chocolate and coat the pops—this final step takes only a few minutes and will leave you with enchanting desserts that taste just as delicious as if made fresh!

How to Store and Freeze Forbidden Forest Blackberry Cheesecake Pops

Fridge: Store the cheesecake pops in an airtight container for up to 4 days. This keeps them fresh for your next magical treat or gathering.

Freezer: Uncoated cheesecake pops can be stored in the freezer for up to 1 month. For best results, wrap each pop individually in plastic wrap before placing them in a freezer bag.

Reheating: No need to reheat! Simply let the frozen pops thaw in the fridge for a few hours before indulging. Avoid dipping them in chocolate until they’ve been thawed to maintain texture.

Airtight Storage: Ensure all pops are covered tightly with plastic wrap or stored in an airtight container to prevent freezer burn and preserve their delightful flavors.

Forbidden Forest Blackberry Cheesecake Pops Variations

Make these enchanting cheesecake pops uniquely yours with a few delightful twists!

  • Berry Swaps: Replace blackberries with raspberries or strawberries for a completely new flavor profile. Each berry adds its own charm and sweetness!

  • Chocolate Choices: Use white chocolate instead of dark for a sweeter treat. The creamy contrast pairs beautifully with the tart blackberry filling.

  • Minty Freshness: Add mint extract to the cream cheese mixture for a refreshing twist. This will make your pops taste like a cool summer day!

  • Nutty Touch: Mix in ** chopped nuts** like walnuts or pecans for an added crunch. This brings a lovely texture that complements the creamy cheesecake beautifully.

  • Festive Flavors: Incorporate pumpkin spice during the fall for a seasonal spin. This warm flavor will evoke cozy autumn memories while enjoying your pops.

  • Fruity Compote: Create a swirl with mixed berry preserves instead of homemade compote for a faster prep. This twist enhances berry explosion in every bite!

  • Heated Up: Spice things up by adding a pinch of cayenne pepper or chili powder to the chocolate coating. This unique kick will surprise and delight your taste buds!

  • Decorative Options: Get creative with themed toppings like candy eyes or edible glitter. They’ll elevate the presentation, making them perfect for parties or gifting inspiration.

Feel free to combine any of these variations while keeping the essence of the Forbidden Forest Blackberry Cheesecake Pops intact. As you unleash your creativity, you might also want to explore our whimsical recipe for a Strawberry Cheesecake Dump that could inspire your next baking adventure!
Forbidden Forest Blackberry Cheesecake Pops Recipe FAQs

How do I choose the best blackberries for the cheesecake pops?
Absolutely! Look for plump blackberries that are dark purple-black in color with a slight sheen. Avoid any that have dark spots all over, as they might be overripe. Fresh blackberries should have a sweet scent and be firm to the touch. If you’re opting for frozen, ensure they are unsweetened and without added preservatives for the best flavor.

What’s the best way to store leftover cheesecake pops?
Very! Store the cheesecake pops in an airtight container in the refrigerator for up to 4 days. Make sure they’re kept chilled to maintain their creamy texture. If you’ve any uncoated pops, wrap each individually in plastic wrap and place them in a freezer bag to keep in the freezer. They will last up to 1 month this way!

Can I freeze the cheesecake pops, and how is it done?
Absolutely, you can freeze them! First, make sure the cheesecake pops are fully frozen after shaping. Then, wrap each one individually in plastic wrap before placing them in a freezer-safe bag. This prevents freezer burn. When you’re ready to enjoy them, simply thaw them in the refrigerator for a few hours before dipping in chocolate or enjoying as is.

What if my chocolate coating is cracking?
No worries, happens to the best of us! If your chocolate is cracking, it could be that the cheesecake pops weren’t fully frozen before dipping. Make sure they are solid before coating them. Additionally, try melting your chocolate gently and consider adding a teaspoon of vegetable oil to make it smoother—it helps with the coating!

Can I make these cheesecake pops gluten-free?
Absolutely! To make your Forbidden Forest Blackberry Cheesecake Pops gluten-free, simply replace the graham cracker crumbs in the recipe with gluten-free graham crackers or another suitable gluten-free crumb mixture. This way, everyone can enjoy this magical treat without worry!

Are there any common allergens to be aware of in this recipe?
Yes, it’s crucial to keep allergies in mind! The primary allergen here is dairy, present in cream cheese and whipped topping. If you’re making these for someone with allergies, consider using dairy-free cream cheese and whipped topping alternatives. Check labels to ensure all ingredients meet dietary needs, and remember to inform anyone who might enjoy them about potential allergens!
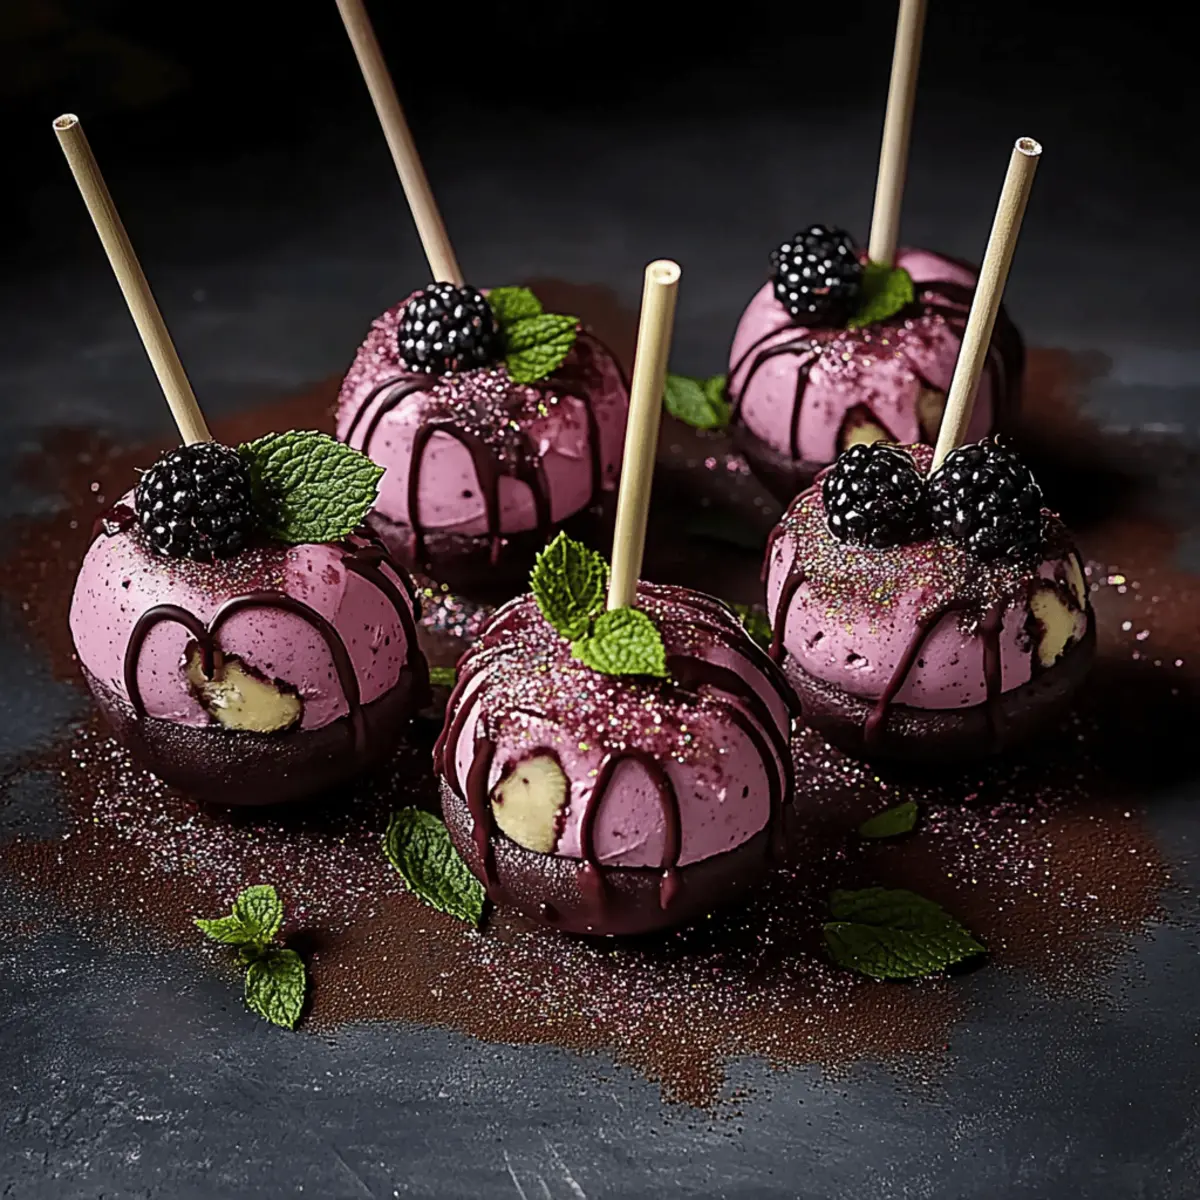
Forbidden Forest Blackberry Cheesecake Pops

Forbidden Forest Blackberry Cheesecake Pops for Magical Treats

Indulge in delicious Forbidden Forest Blackberry Cheesecake Pops, a whimsical treat blending rich cheesecake and tangy blackberries.
Prep Time 30 minutes
Cook Time 10 minutes
Freezing Time 1 hour
Total Time 1 hour 40 minutes
Servings: 12 pops
Course: Dessert
Cuisine: American
Calories: 150

Ingredients
  

Cheesecake Base
  • 16 ounces Cream Cheese softened
  • 0.5 cups Granulated Sugar substitutable
  • 1 teaspoon Vanilla Extract pure for best results
  • 8 ounces Whipped Topping or homemade whipped cream
  • 1 cup Graham Cracker Crumbs could use gluten-free
Blackberry Mixture
  • 1 cup Fresh/Frozen Blackberries or substitute with other berries
  • 1 teaspoon Lemon Juice freshly squeezed recommended
Chocolate Coating
  • 12 ounces Dark Chocolate Melting Wafers or chocolate chips
  • Edible Glitter or Luster Dust optional decorative element
Toppings
  • Crushed Graham Crackers or Nuts optional toppings
  • Candy Eyes or Small Edible Decorations optional for presentation

Equipment

  • Saucepan
  • mixing bowl
  • electric mixer
  • Cookie scoop
  • parchment paper
  • microwave-safe bowl

Method
 

Step-by-Step Instructions
  1. Prepare the Blackberry Compote: In a small saucepan over medium heat, combine blackberries, sugar, and lemon juice. Cook for 5-7 minutes until thickened. Remove from heat, strain if desired, and cool completely.
  2. Make the Cheesecake Filling: Beat cream cheese and sugar until smooth. Add vanilla extract and whipped topping, mixing well. Stir in graham cracker crumbs and fold in half of the cooled blackberry compote.
  3. Shape the Cheesecake Pops: Portion the cheesecake mixture into balls on a lined baking sheet, insert lollipop sticks, and freeze for at least 1 hour.
  4. Coat with Chocolate: Melt dark chocolate wafers, dip frozen pops, and sprinkle with edible glitter or crushed graham crackers before chocolate sets.
  5. Set and Chill: Refrigerate the coated pops until chocolate sets for about 15-20 minutes before serving.
Notes

Use full-fat cream cheese for best results. Experiment with berry flavors and toppings for a unique twist.

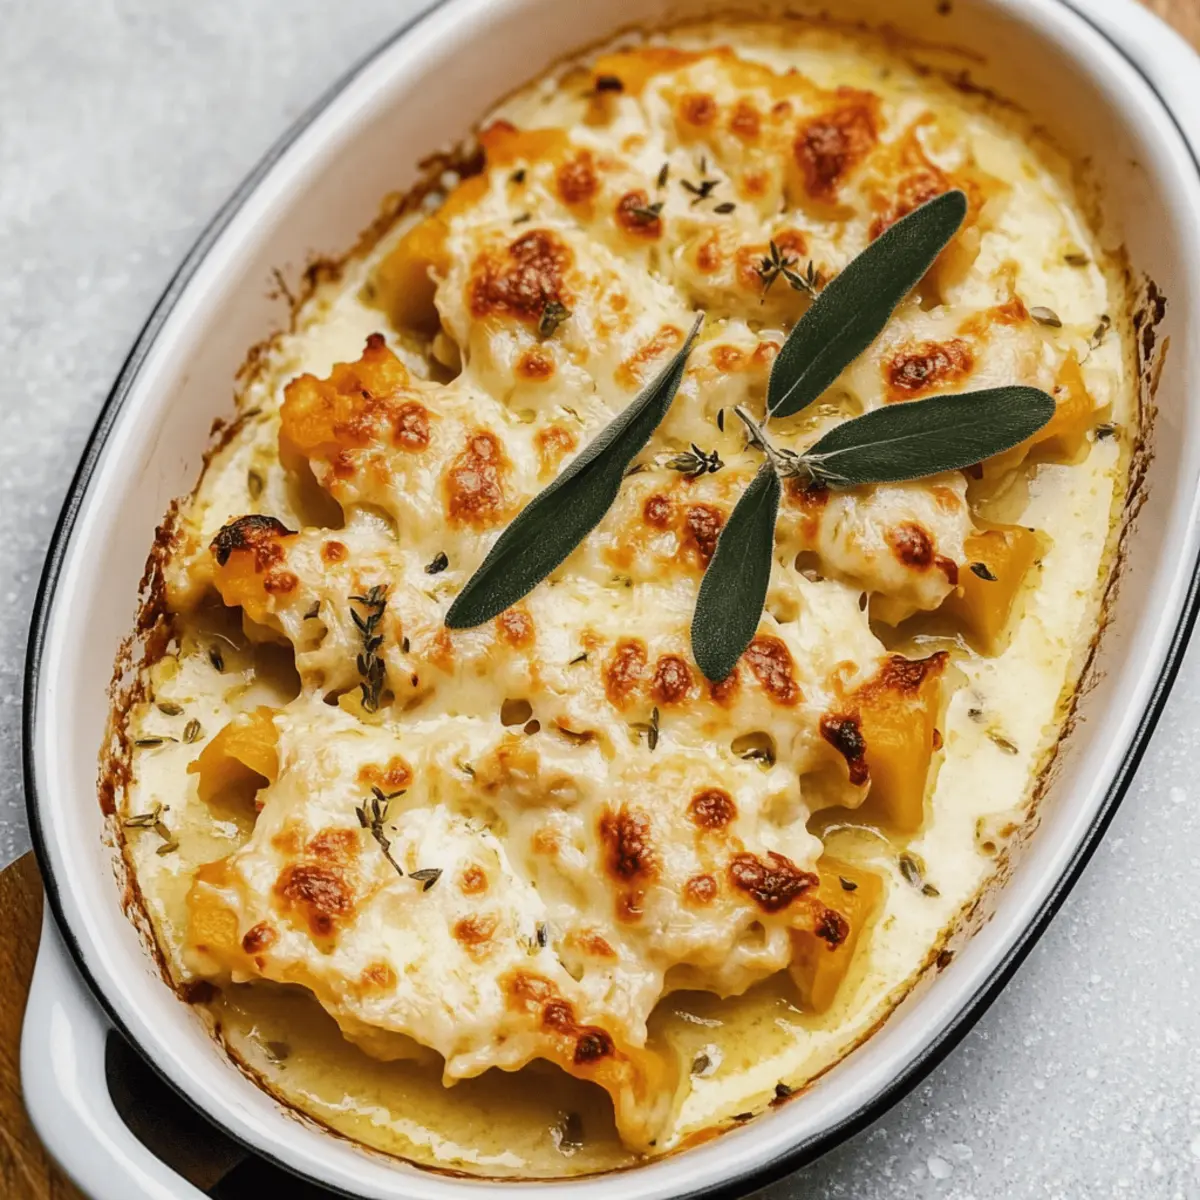
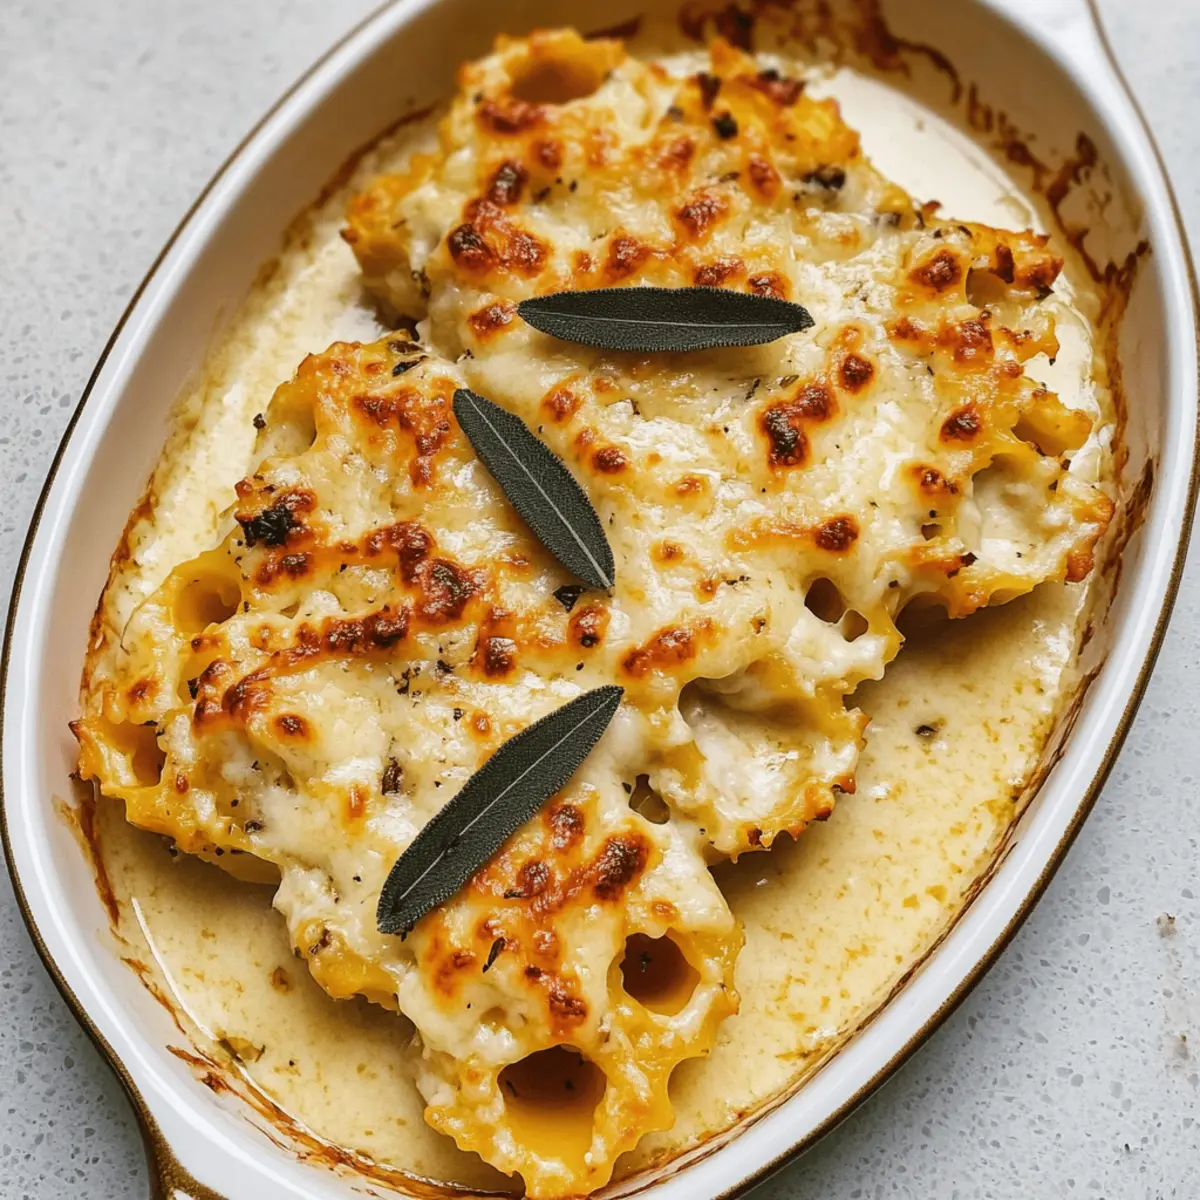
Creamy Butternut Squash Lasagna Roll Ups for Cozy Fall Nights

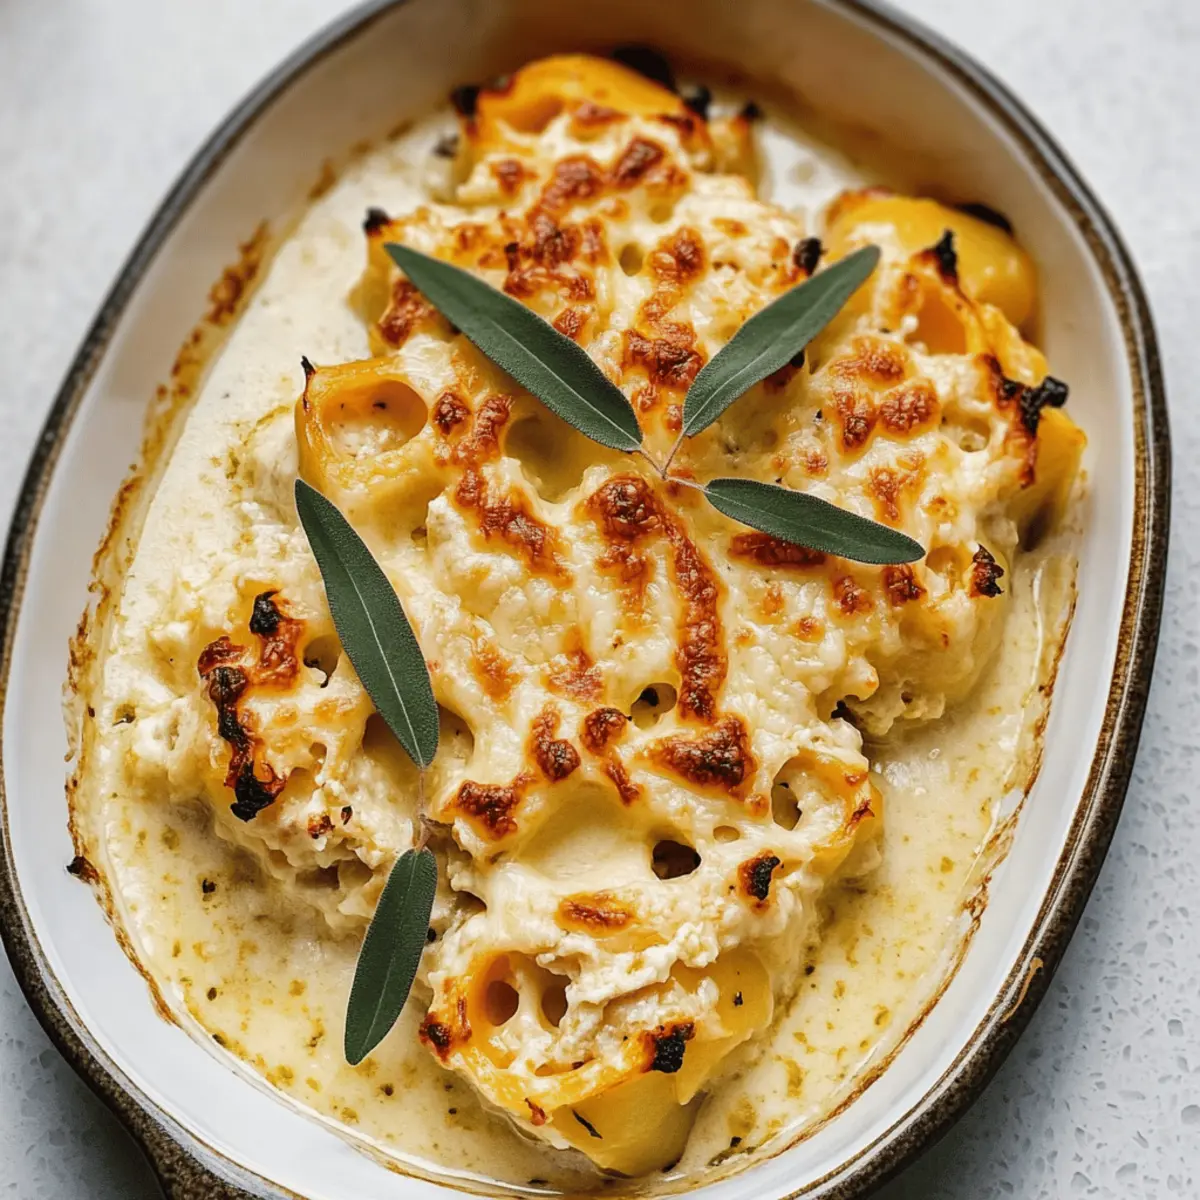
The first hint of autumn whispers through the air, and suddenly, there’s a craving for warmth and comfort. That’s where my Creamy Butternut Squash Lasagna Roll Ups come in—an inviting dish that brings the cozy feels of fall right to your table. Imagine tender lasagna noodles encasing velvety mashed butternut squash and creamy ricotta, all blanketed in rich béchamel sauce. Not only are these roll-ups a feast for the eyes, but they also transform a busy weeknight into a delightful cooking escapade, making them an ideal choice for gatherings with friends or family. Plus, they are a perfect vegetarian option, ensuring everyone can indulge without a second thought. Ready to dive into a dish that’s as nourishing as it is delicious? Let’s whip up some magic together!

Why Make Creamy Butternut Squash Rolls?

Comforting, Cozy Experience: With the first bite, the holiday vibes come alive—it’s like a warm hug from the inside!

Unique Flavor Profile: The rich béchamel contrasts beautifully with the sweetness of the butternut squash, making every mouthful a delightful experience.

Family-Friendly Fun: Involve your loved ones in assembling these rolls; it’s a memorable activity that sparks laughter and connection.

Versatile Options: Whether you’re hosting a gathering or enjoying a quiet dinner, these vegetarian rolls fit seamlessly into any occasion.

Make-Ahead Friendly: Prepare them in advance and pop them in the oven when it’s time to eat! Ideal for busy weeknights or last-minute dinner parties.

Serve with a side of garlic bread or a simple green salad for a complete meal that’s sure to impress. Feel free to explore variations and make this dish your own with suggestions like Homemade Chicken Rolls or add a delightful touch of Vanilla Pudding for dessert!

Creamy Butternut Squash Lasagna Roll Ups Ingredients

For the Lasagna

  • Lasagna Noodles – Provide structure for the roll-ups; gluten-free options work well too!
  • Mashed Butternut Squash – Adds a sweet and creamy base; you can substitute with canned pumpkin purée if needed.
  • Ricotta Cheese – Contributes creaminess and richness; feel free to adjust the mixture with leftover ricotta if required.
  • Grated Parmesan Cheese – Enhances the overall flavor of the filling; consider using extra for a beautiful garnish.
  • Large Egg – Binds the filling ingredients together to create a cohesive mix.
  • Chopped Sage – Infuses the dish with its aromatic qualities; fresh or dried options work wonderfully.
  • Kosher Salt & Black Pepper – Essential seasonings that bring balance to the flavors.
  • Shredded Mozzarella Cheese – Delivers gooey, melty goodness when baked; save some for the topping.

For the Béchamel Sauce

  • Unsalted Butter & All-Purpose Flour – These form the base for a rich béchamel sauce that thickens beautifully.
  • Milk – A key ingredient for the béchamel; warm milk ensures a smoother texture.
  • Grated Nutmeg & Cayenne Pepper – These spices add depth and a soft warmth to the sauce.
  • Garlic Cloves – Use to infuse the béchamel with flavor; you can skip it for a simpler taste.

Optional Garnish

  • Fresh Sage Leaves & Neutral Oil – Fry sage leaves for a crispy garnish that takes the visual and flavor profile up a notch.

Dive into the world of Creamy Butternut Squash Lasagna Roll Ups and bring the essence of fall to your dining table!

Step‑by‑Step Instructions for Creamy Butternut Squash Lasagna Roll Ups

Step 1: Cook Lasagna Noodles
Begin by boiling a large pot of salted water. Once bubbling, add your lasagna noodles and cook until al dente, about 8-10 minutes. Drain and lay the noodles flat on a greased baking sheet to cool, making sure they don’t stick together. The goal is tender but not too soft noodles, as they will hold the filling for your Creamy Butternut Squash Lasagna Roll Ups.

Step 2: Prepare Filling
In a mixing bowl, combine the mashed butternut squash, ricotta cheese, grated Parmesan, and the egg. Add chopped sage, salt, and black pepper, stirring well until the mixture is smooth and creamy. If the filling appears too thick, adjust by incorporating a bit more ricotta to achieve the desired consistency. This delicious filling will be the star inside your lasagna roll ups.

Step 3: Make Béchamel Sauce
In a medium saucepan, melt 4 tablespoons of unsalted butter over medium heat. Whisk in an equal amount of all-purpose flour, cooking for about 2 minutes until lightly golden. Gradually add warm milk, continuing to whisk until the sauce thickens, about 5-7 minutes. Stir in grated nutmeg, cayenne pepper, and minced garlic for flavor. Your rich béchamel sauce is now ready to complement the Creamy Butternut Squash Lasagna Roll Ups.

Step 4: Assemble Roll Ups
Lay each cooked lasagna noodle on a flat surface. Spread a generous layer of the butternut squash filling along each noodle, sprinkling some shredded mozzarella on top. Carefully roll each noodle from one end to the other, creating neat rolls. Place the assembled roll ups seam-side down in a greased baking dish, ensuring they fit snugly together to keep them intact while baking.

Step 5: Bake
Preheat your oven to 375°F (190°C). Pour the remaining béchamel sauce evenly over the lasagna roll ups, ensuring each roll is well coated. Top with the remaining shredded mozzarella and a sprinkle of extra Parmesan cheese for a golden finish. Bake uncovered for 30 minutes or until the dish is bubbling and the cheese is lightly golden. The aroma will fill your kitchen, signaling it’s time to enjoy your Creamy Butternut Squash Lasagna Roll Ups!

Make Ahead Options

These Creamy Butternut Squash Lasagna Roll Ups are a fantastic meal prep solution for busy home cooks! You can prepare the filling and sauce up to 24 hours in advance by storing them separately in airtight containers in the refrigerator. Additionally, you can assemble the roll-ups entirely and refrigerate them for up to 3 days before baking. To maintain quality, ensure the noodles are cooked al dente and prevent moisture buildup by covering the dish loosely with foil. When you’re ready to enjoy, simply bake directly from the fridge at 375°F for about 30-45 minutes until heated through and bubbly, saving you time while still delivering delicious, cozy fall flavors!

Storage Tips for Creamy Butternut Squash Lasagna Roll Ups

Fridge: Store leftover roll ups in an airtight container for up to 3 days. Reheat in the oven at 375°F for 20–30 minutes until heated through.

Freezer: These delicious roll ups can be frozen for up to 3 months. Tightly wrap each roll in plastic wrap and then place in a freezer-safe container.

Reheating: When ready to enjoy, bake from frozen at 375°F for 30-45 minutes without thawing. This ensures they stay creamy and flavorful.

Make-Ahead: Assemble the Creamy Butternut Squash Lasagna Roll Ups in advance and refrigerate for up to a day before baking. A great timesaver for busy weeknights!

Expert Tips for Creamy Butternut Squash Lasagna Roll Ups

  • Al Dente Noodles: Cook your lasagna noodles al dente to avoid overly soft pasta. This ensures they hold their shape when rolled and baked.

  • Warm Milk: Always use warm milk when making the béchamel sauce. It helps achieve a smooth, lump-free consistency that coats your Creamy Butternut Squash Lasagna Roll Ups beautifully.

  • Filling Consistency: If the filling feels too thick, don’t hesitate to add a bit more ricotta. The right texture will make stuffing and rolling simpler.

  • Don’t Rush Baking: Allow your roll ups to bake uncovered for the full time. This ensures a bubbling béchamel and a lovely golden-brown cheese topping.

  • Garnish Wisely: Consider frying fresh sage leaves in a bit of oil for garnish. They not only add a stunning visual touch but also an extra burst of flavor that complements the dish perfectly.

Variations & Substitutions for Creamy Butternut Squash Lasagna Roll Ups

Feel encouraged to let your creativity shine with these delightful twists on your Creamy Butternut Squash Lasagna Roll Ups!

  • Gluten-Free: Use gluten-free lasagna noodles for a lighter alternative that everyone can enjoy without sacrificing taste.
  • Pumpkin Delight: Swap butternut squash for canned pumpkin purée, bringing a subtly different flavor while maintaining creaminess.
  • Goat Cheese Twist: Substitute ricotta cheese with tangy goat cheese for a delightful zing in your filling; it pairs beautifully with the sweetness of the squash.
  • Spinach Add-In: For an added nutritional boost, mix in fresh or sautéed spinach to the filling for extra color and flavor.
  • Herb Variation: Switch out sage for fresh thyme or rosemary to bring a whole new aromatic character to your dish.
  • Spicy Kick: Add a pinch of red pepper flakes to the béchamel sauce for those who enjoy a touch of heat—an unexpected but delightful surprise!
  • Layered Version: For a different presentation, layer the fillings and noodles like a traditional lasagna rather than rolling them; this is an excellent option for family gatherings.
  • Nutty Crunch: Sprinkle toasted pine nuts or walnuts on top before serving for a satisfying crunch that complements the creamy texture beautifully.

Experiment with these variations and feel free to create something uniquely yours! Perhaps serve your roll-ups alongside a refreshing salad or some garlic bread for a complete, scrumptious meal. And if you’re in the mood for dessert, a slice of Nutty Vanilla Cake with Creamy Filling makes for a sweet ending!

What to Serve With Creamy Butternut Squash Lasagna Roll Ups?

Elevate your dining experience with delightful sides that enhance the cozy flavors of the creamy roll ups on your table.

  • Garlic Bread: The buttery, toasted goodness of garlic bread provides a crunchy contrast to the soft lasagna, making each bite even more satisfying.
  • Simple Green Salad: A vibrant salad with mixed greens and a light vinaigrette balance the richness of the lasagna, adding freshness and crunch.
  • Roasted Vegetables: Seasonal roasted veggies like Brussels sprouts and carrots add a pop of color and earthy flavors that perfectly complement the sweetness of butternut squash.
  • Crusty Italian Bread: Serve warm, crusty bread for mopping up the luscious béchamel sauce, turning the meal into an interactive and enjoyable experience.
  • Crispy Sage Leaves: Frying sage adds a delightful crunch and a burst of flavor, elevating the dish’s presentation and aroma.
  • Sparkling Cider: A refreshing sparkling cider provides a festive touch, enhancing the flavors of fall and bringing a celebratory spirit to the table.
  • Apple Crisp: For dessert, an apple crisp offers a comforting, fruity finish that echoes the warmth of the lasagna, rounding out your meal beautifully.
  • Chai Tea: Sipping on warm chai tea introduces aromatic spices that harmonize with the flavors in the roll ups and adds a cozy touch to your dining experience.
  • Baked Parmesan Zucchini: A savory side like baked zucchini sprinkled with Parmesan brings a delightful crunch and contracts nicely with the creamy filling of the lasagna.
  • Homemade Pesto: A dollop of fresh basil pesto brings a burst of herbaceous flavor that contrasts beautifully with the creamy butternut squash filling.

Creamy Butternut Squash Lasagna Roll Ups Recipe FAQs

What type of lasagna noodles should I use?
You can use regular lasagna noodles for this recipe, but gluten-free lasagna noodles work wonderfully as well! Just ensure they are cooked al dente to maintain the right texture for rolling.

How should I store leftover Creamy Butternut Squash Lasagna Roll Ups?
Store any leftovers in an airtight container in the fridge for up to 3 days. When you’re ready to enjoy them, simply reheat in the oven at 375°F for 20-30 minutes until heated through.

Can I freeze these lasagna roll ups?
Absolutely! You can freeze the Creamy Butternut Squash Lasagna Roll Ups for up to 3 months. Wrap each roll tightly in plastic wrap, then place them in a freezer-safe container. When you’re ready to eat, just bake them from frozen at 375°F for 30-45 minutes without thawing to maintain that creamy goodness.

How can I prevent my béchamel sauce from getting lumpy?
To avoid lumps, always whisk in warm milk gradually after cooking the flour and butter. Stir continuously while adding the milk and allow it to cook for about 5-7 minutes until thickened. If lumps do form, a quick blend with an immersion blender can save your sauce!

Are there any dietary considerations for this recipe?
Yes! The lasagna roll ups are vegetarian, making them a great choice for meat-free meals. You can also use dairy-free ricotta and mozzarella alternatives if allergies or dietary preferences are a concern. Just be sure to check all ingredient labels to adhere to specific dietary needs.

How can I make the filling smoother?
If you find the filling too thick, you can add more ricotta until you reach your desired creaminess. Mixing in a splash of milk can also help to achieve a smoother texture. Just remember to taste along the way for that perfectly balanced flavor!

Creamy Butternut Squash Lasagna Roll Ups Recipe FAQs

Creamy Butternut Squash Lasagna Roll Ups

Creamy Butternut Squash Lasagna Roll Ups for Cozy Fall Nights

Indulge in Creamy Butternut Squash Lasagna Roll Ups, a perfect vegetarian dish for cozy fall nights that combines comfort and unique flavors.
Prep Time 30 minutes
Cook Time 30 minutes
Total Time 1 hour
Servings: 4 rolls
Course: Dinner
Cuisine: Italian
Calories: 350

Ingredients
  

For the Lasagna
  • 8 pieces Lasagna Noodles gluten-free options work well too
  • 2 cups Mashed Butternut Squash or substitute with canned pumpkin purée
  • 1 cup Ricotta Cheese can adjust with leftover ricotta
  • 0.5 cup Grated Parmesan Cheese consider using extra for garnish
  • 1 large Egg binds the filling ingredients together
  • 2 tablespoons Chopped Sage fresh or dried options work well
  • 1 teaspoon Kosher Salt
  • 0.5 teaspoon Black Pepper
  • 1 cup Shredded Mozzarella Cheese save some for topping
For the Béchamel Sauce
  • 4 tablespoons Unsalted Butter
  • 4 tablespoons All-Purpose Flour
  • 2 cups Milk warm for smoother texture
  • 0.25 teaspoon Grated Nutmeg
  • 0.25 teaspoon Cayenne Pepper
  • 2 cloves Garlic minced
Optional Garnish
  • 10 leaves Fresh Sage Leaves fry for crispy garnish
  • 2 tablespoons Neutral Oil for frying sage leaves

Equipment

  • Large pot
  • baking sheet
  • mixing bowl
  • Medium saucepan
  • whisk
  • Baking Dish

Method
 

Step-by-Step Instructions
  1. Boil a large pot of salted water. Cook lasagna noodles until al dente, about 8-10 minutes. Drain and lay flat on a greased baking sheet to cool.
  2. In a mixing bowl, combine the mashed butternut squash, ricotta cheese, grated Parmesan, and egg. Add chopped sage, salt, and black pepper. Stir until smooth and creamy.
  3. In a medium saucepan, melt unsalted butter over medium heat. Whisk in an equal amount of flour, cooking for about 2 minutes. Gradually add warm milk and whisk until thickened, about 5-7 minutes. Stir in nutmeg, cayenne, and garlic.
  4. Lay each cooked noodle on a flat surface. Spread butternut squash filling along each noodle, sprinkle shredded mozzarella, and roll carefully. Place seam-side down in a greased baking dish.
  5. Preheat oven to 375°F (190°C). Pour remaining béchamel over roll ups, top with shredded mozzarella and extra Parmesan. Bake uncovered for 30 minutes until bubbling and golden.

Notes

Serve with garlic bread or a green salad for a complete meal. Can prepare in advance and pop in the oven when ready.

Irresistibly Soft Pumpkin Chocolate Chip Whoopie Pies Recipe

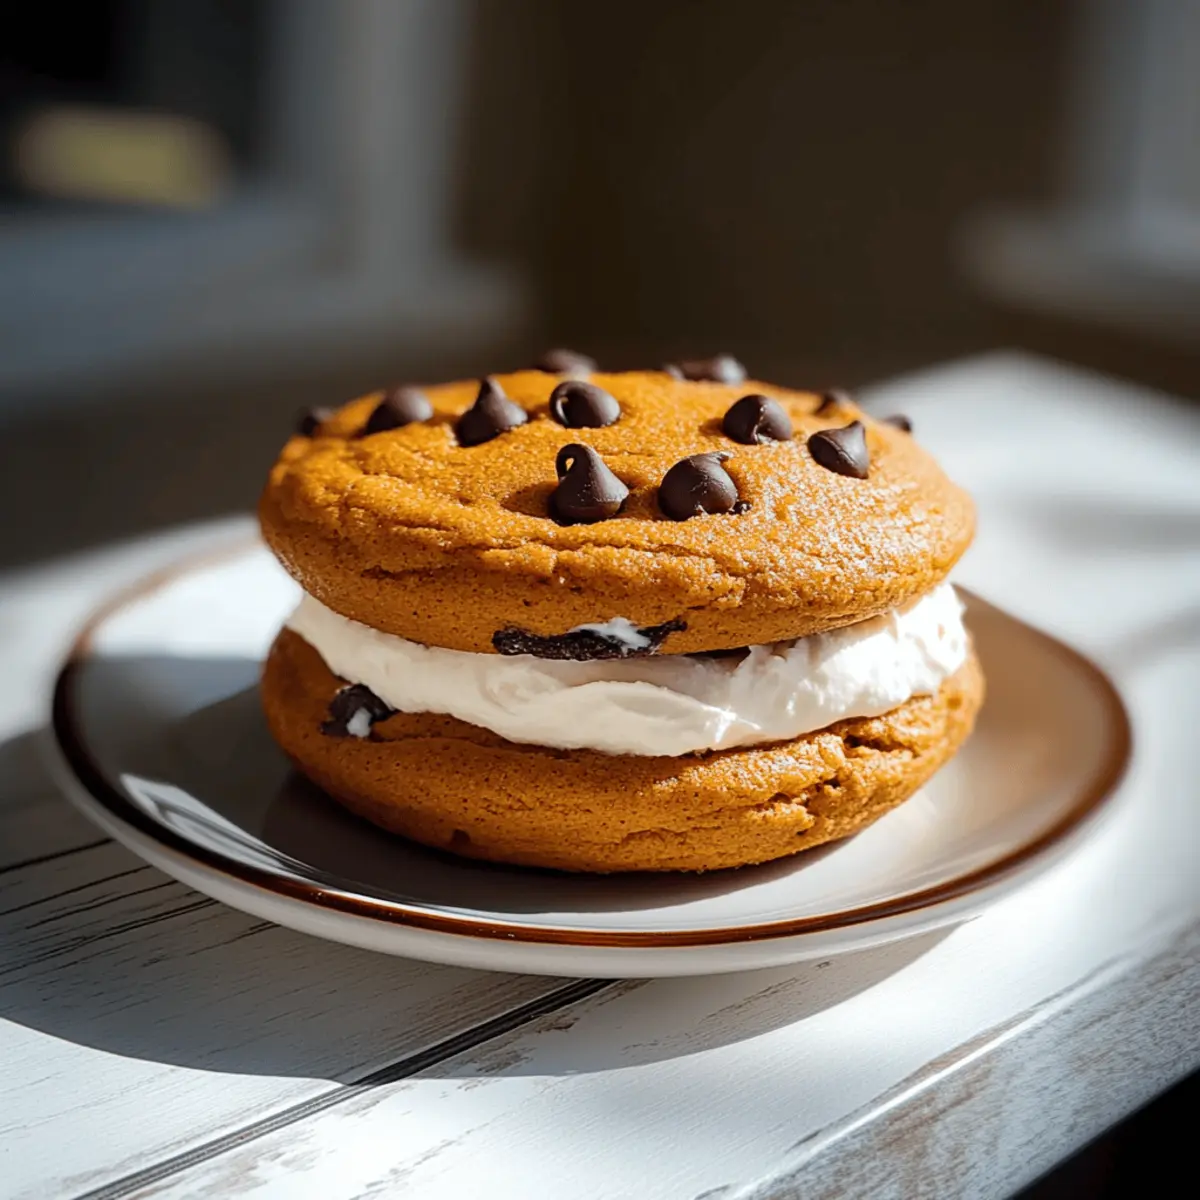
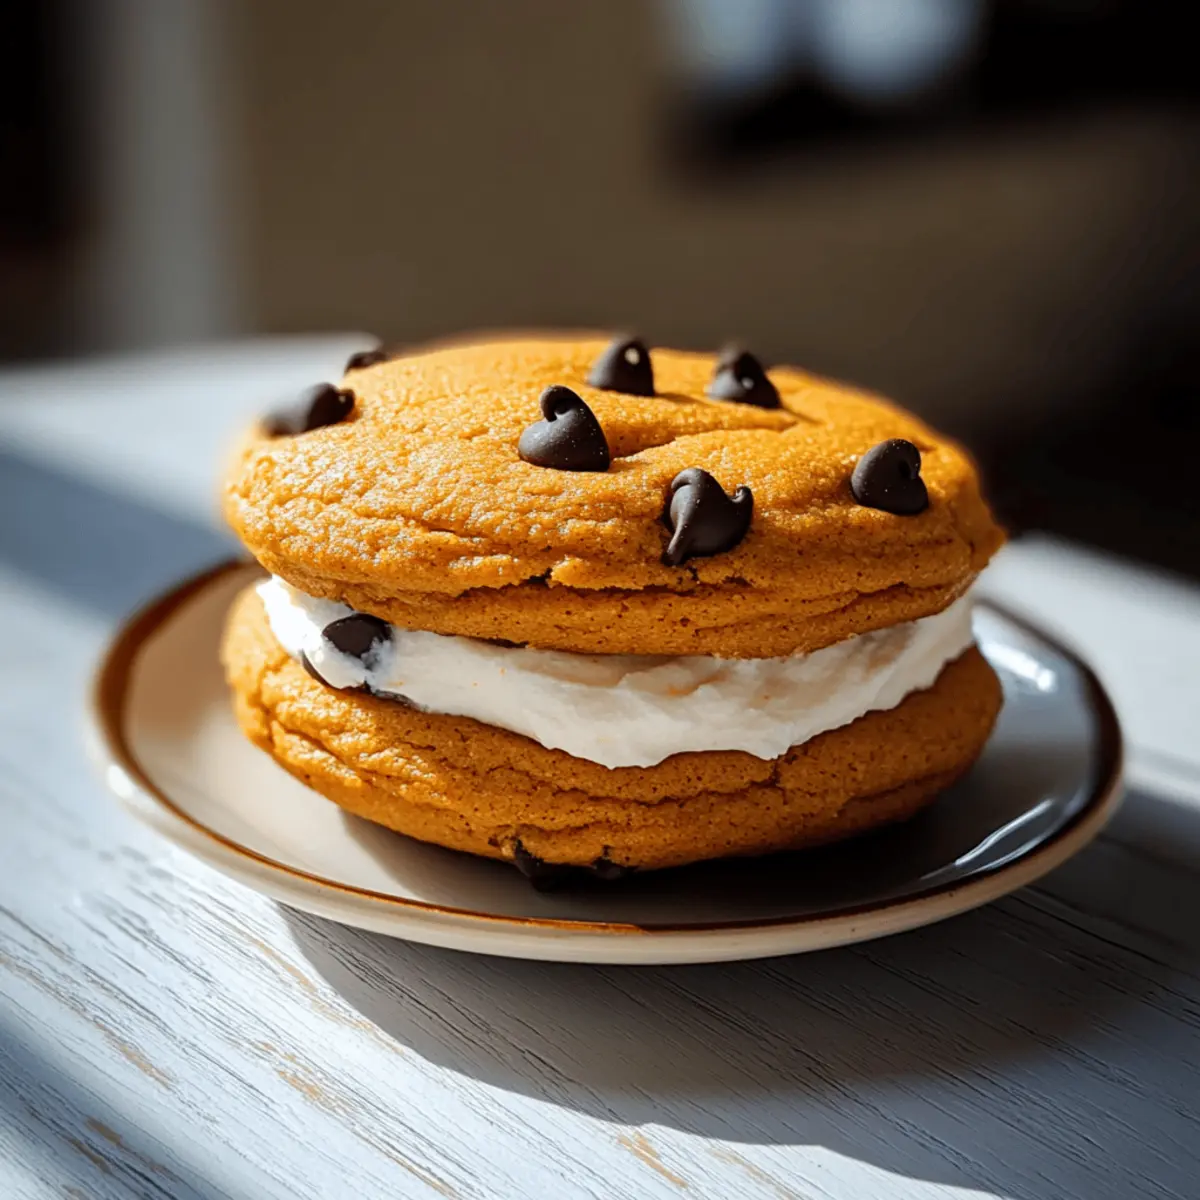
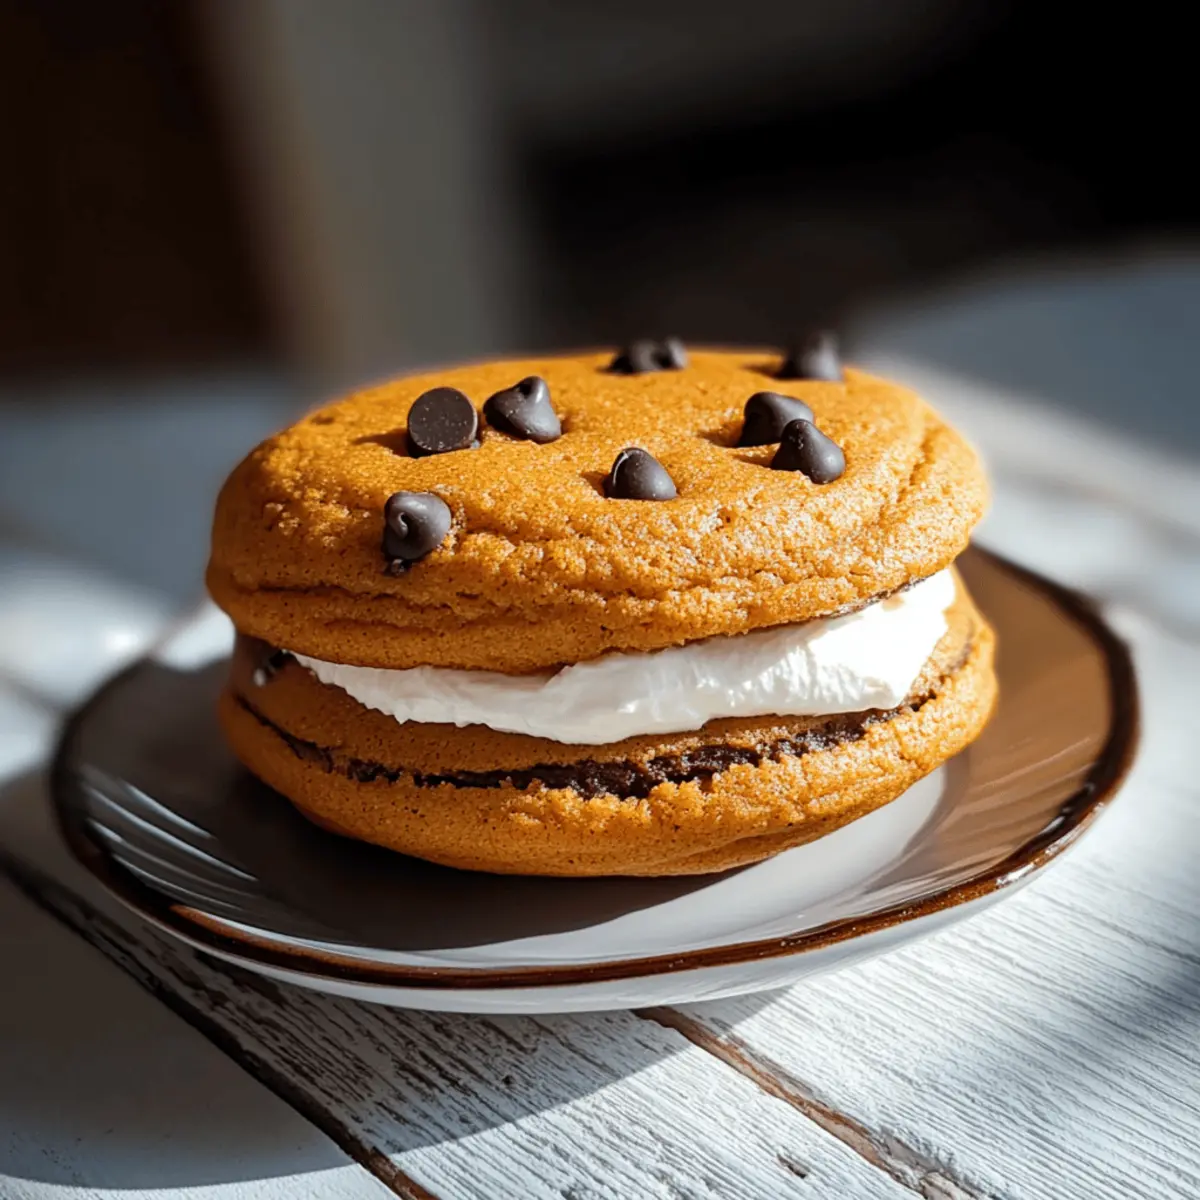
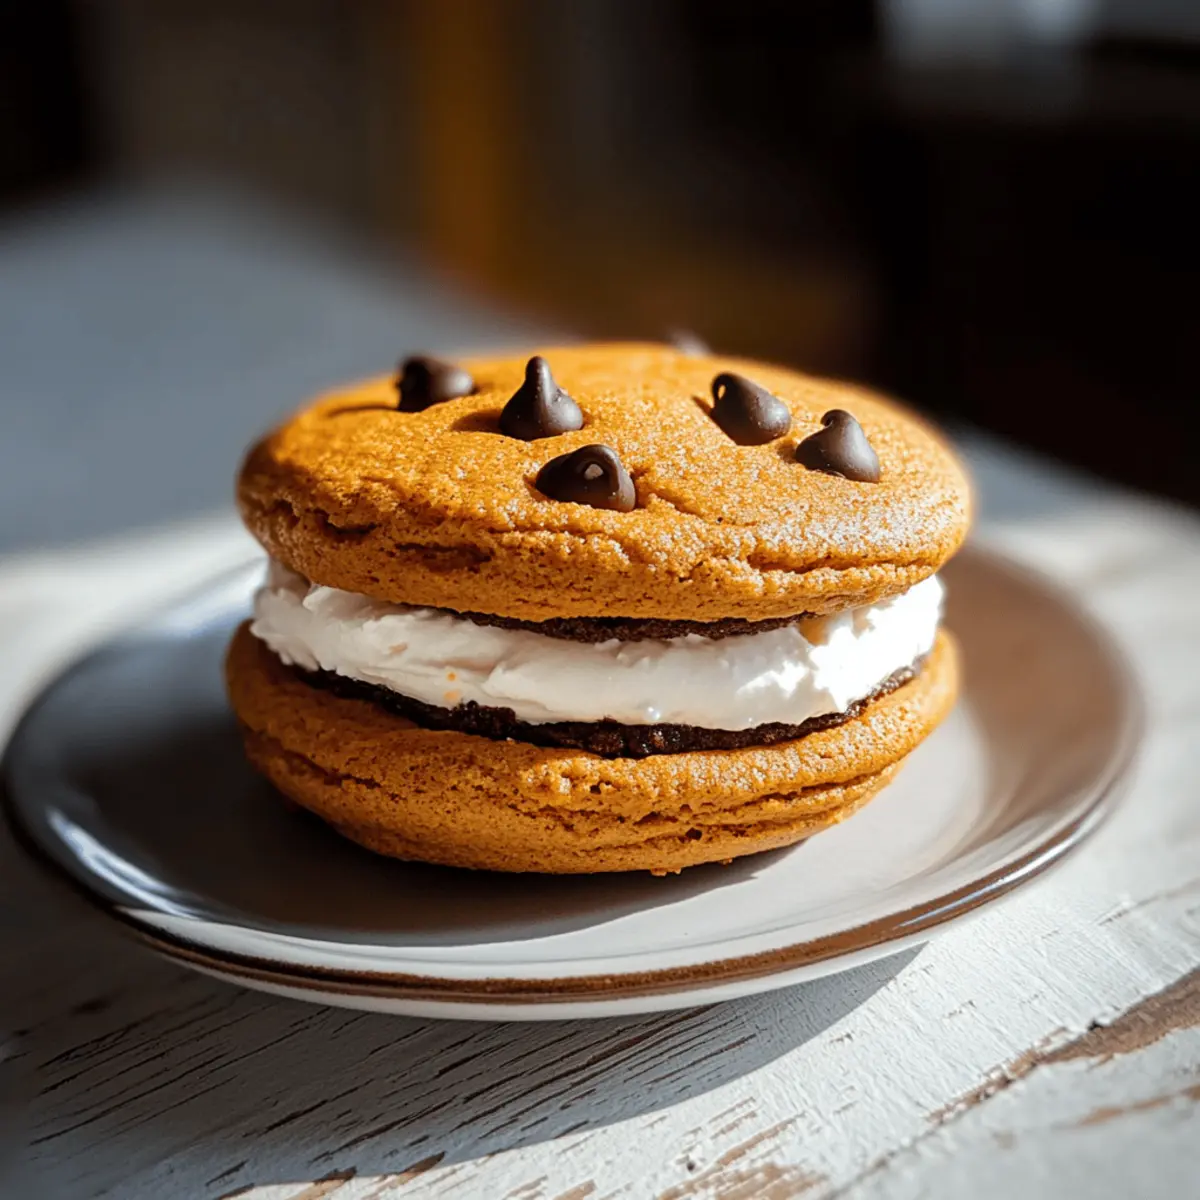
As I took my first bite, the soft, spiced pumpkin cake hugged the creamy filling, and I was instantly transported to a cozy autumn afternoon. These Pumpkin Chocolate Chip Whoopie Pies are my go-to dessert for any occasion, blending the comforting flavors of fall with a playful twist that everyone loves. Not only are they incredibly easy to whip up, but they also offer a delightful way to enjoy pumpkin’s natural sweetness paired with rich chocolate. Whether you’re hosting a gathering or just craving a sweet treat, these whoopie pies are a must-try that will leave your friends and family eagerly asking for more. Ready to dive into this scrumptious recipe? Let’s get baking!

Why are Pumpkin Whoopie Pies a must-try?

Irresistible Comfort: With their fluffy, cake-like structure, these whoopie pies deliver a warm, nostalgic taste that feels like a hug in dessert form.
Easy Baking: You don’t need to be a pro in the kitchen to create these delightful treats; they’re simple enough for bakers of all levels.
Versatile Flavor: The combination of pumpkin and chocolate is a marriage made in heaven, perfect for any season. If you’re looking for more pumpkin goodness, check out our Nutty Chocolate Date recipe!
Crowd-Pleaser: Whether at a party or a cozy family dinner, these pies will have everyone coming back for seconds.
Quick to Make: You’ll have these exquisite treats ready in about 30 minutes, making them a great last-minute dessert option.
Nut-Free Delight: Perfect for school lunches or gatherings, these whoopie pies cater to nut-sensitive eaters while still delivering big flavor.

Pumpkin Chocolate Chip Whoopie Pie Ingredients

For the Cookie

  • Pumpkin Puree – Moisture and flavor base; use canned or homemade pumpkin puree for consistency.
  • Unsalted Butter – Adds richness and moisture; melt before mixing to improve batter texture.
  • Light Brown Sugar – Sweetness and notes of caramel; can substitute with brown sugar or coconut sugar for a deeper flavor.
  • Egg – Acts as a binder, providing structure; ensure it’s at room temperature for better incorporation.
  • Vanilla Extract – Enhances flavor; substitute with almond extract for a different aroma.
  • All-Purpose Flour – Provides structure for the cookies; use gluten-free flour for a gluten-free version.
  • Baking Powder – A leavening agent for a fluffy texture; double-check freshness for optimal results.
  • Ground Cinnamon – Adds warmth; can substitute with pumpkin pie spice for a more complex flavor.
  • Ground Ginger – Complements the pumpkin flavor; omit or reduce if you prefer less spice.
  • Ground Nutmeg – Enhances the spice profile; freshly grated nutmeg offers more depth.
  • Salt – Balances sweetness and enhances flavors.
  • Semi-Sweet Chocolate Chips – Adds sweet, rich bursts of chocolate; mini chocolate chips create a more chocolatey experience per bite.

For the Cream Cheese Filling

  • Cream Cheese – Forms the luscious filling; can replace with mascarpone for a different taste.
  • Powdered Sugar – Sweetens and thickens the filling; adjust quantity based on desired sweetness.

Enjoy baking these irresistible Pumpkin Chocolate Chip Whoopie Pies that are sure to delight family and friends!

Step‑by‑Step Instructions for Pumpkin Chocolate Chip Whoopie Pies

Step 1: Preheat the Oven
Start by preheating your oven to 350°F (175°C). While it warms up, grab a baking sheet and line it with parchment paper for easy cleanup later. This will ensure your Pumpkin Chocolate Chip Whoopie Pies bake evenly and don’t stick.

Step 2: Prepare the Batter
In a large mixing bowl, combine 1 cup of pumpkin puree, ½ cup of melted unsalted butter, 1 cup of light brown sugar, 1 egg (at room temperature), and 1 teaspoon of vanilla extract. Mix these ingredients well until smooth and creamy, taking about 2-3 minutes. This rich base is crucial for the moist texture of your whoopie pies.

Step 3: Whisk Dry Ingredients
In another bowl, whisk together 2 cups of all-purpose flour, 1 teaspoon of baking powder, 1 teaspoon of ground cinnamon, ½ teaspoon of ground ginger, ½ teaspoon of ground nutmeg, and ½ teaspoon of salt. This step ensures your dry ingredients are evenly distributed, contributing to the fluffy structure of the Pumpkin Chocolate Chip Whoopie Pies.

Step 4: Combine Wet and Dry Ingredients
Gradually fold the dry mixture into the pumpkin batter using a spatula, being careful not to overmix—this will maintain the lovely texture. Once incorporated, stir in 1 cup of semi-sweet chocolate chips for those delightful bursts of sweetness. The batter should be thick yet smooth, perfect for shaping.

Step 5: Bake the Cookies
Using a tablespoon or cookie scoop, drop heaping mounds of the batter onto the lined baking sheet, spacing them about 2 inches apart. Slide them into your preheated oven and bake for 10-12 minutes. You’ll know they’re done when the edges are set and the tops spring back when touched gently.

Step 6: Cool the Cookies
Once baked, remove the whoopie pies from the oven and allow them to cool on the baking sheet for about 5 minutes. Then transfer them to a wire rack to cool completely. This cooling step is essential, as it prevents the filling from melting when you assemble your delicious treats.

Step 7: Make the Cream Cheese Filling
While the cookies cool, prepare the filling. In a mixing bowl, beat together 8 ounces of softened cream cheese and ¼ cup of unsalted butter until fluffy, which should take about 2-3 minutes. Gradually add 2 cups of powdered sugar and 1 teaspoon of vanilla extract, mixing until it reaches a smooth, creamy consistency.

Step 8: Assemble the Whoopie Pies
Once the cookies are completely cool, spread a generous amount of the cream cheese filling on the flat side of half the cookies. Top with the remaining cookies, pressing down gently to form sandwiches. These Pumpkin Chocolate Chip Whoopie Pies are best served immediately or can be chilled until you’re ready to treat your family and friends!

Storage Tips for Pumpkin Chocolate Chip Whoopie Pies

Room Temperature: Store your whoopie pies in an airtight container at room temperature for up to 3 days, ensuring they remain soft and delicious.

Fridge: If you prefer a chilled treat, keep them in the refrigerator for about a week. Just make sure they are well-covered to avoid drying out.

Freezer: For long-term storage, individually wrap the whoopie pies in plastic wrap and place them in a freezer-safe bag. They can be frozen for up to 3 months without losing flavor.

Reheating: When you’re ready to enjoy your frozen Pumpkin Chocolate Chip Whoopie Pies, simply thaw them in the fridge overnight. For a warm treat, pop them in the microwave for a few seconds before serving!

Pumpkin Chocolate Chip Whoopie Pies Variations

Feel free to customize these whoopie pies with delightful twists that cater to your taste buds!

  • Nut-Free Option: Leave out the nuts entirely or replace with sunflower seeds to ensure a nut-free treat. Perfect for school lunches!
  • Gluten-Free: Substitute all-purpose flour with a 1:1 gluten-free baking blend for a delicious gluten-free version everyone can enjoy. No one will miss the gluten!
  • Syrup Sweetened: Instead of powdered sugar in the filling, use maple syrup for a natural sweet touch that complements the pumpkin beautifully. This adds a rich flavor that feels like a cozy hug.
  • Spice Boost: Add a teaspoon of pumpkin pie spice to the cookie batter for an extra punch of warmth, perfect if you’re a spice lover. It amps up the comforting fall flavors!
  • Cocoa Swirl: Mix in a few tablespoons of cocoa powder into half the batter to create a marbled effect for a chocolatey twist. This adds both flavor and aesthetic appeal.
  • Flavor Infusion: Use flavored extracts like orange or almond instead of vanilla for a unique taste twist that brightens each whoopie pie bite. Experiment and see what you love best!
  • Mini Versions: Create mini whoopie pies for bite-sized treats, adjusting the baking time to about 8-10 minutes. Perfect for sharing at parties or gatherings!
  • Zesty Cream Cheese: Add a splash of fresh lemon juice or zest to the cream cheese filling for a refreshing contrast to the sweetness. This zesty kick will surprise and delight!

These variations can transform your Pumpkin Chocolate Chip Whoopie Pies into a brand-new dessert experience every time you bake! For a little more inspiration, try pairing them with a comforting Homemade Bake Chocolate treat or whip up our delectable Coconut Chocolate Rolls. Let your creativity flow and enjoy the baking journey!

Make Ahead Options

These Pumpkin Chocolate Chip Whoopie Pies are perfect for meal prep enthusiasts! You can prepare the cookie batter up to 24 hours in advance; simply cover and refrigerate it to keep it fresh and prevent browning. The baked cookies can also be made up to 3 days ahead—just store them in an airtight container at room temperature. For the cream cheese filling, whip it up and refrigerate for a delectable taste boost. When you’re ready to assemble, let the filling sit at room temperature for about 15 minutes to soften, then spread it between the cookies for a delightful treat that is just as delicious as if it were freshly made!

What to Serve with Pumpkin Chocolate Chip Whoopie Pies

As you revel in the delightful flavors of these whoopie pies, consider pairing them with complementary dishes that elevate your dessert experience.

  • Creamy Vanilla Ice Cream: A scoop of creamy vanilla ice cream alongside your whoopie pies enhances their flavors, offering a delightful contrast in temperature and texture. Imagine the cool creaminess melting into each bite of sweet pumpkin and rich chocolate!

  • Rich Coffee or Chai Tea: The warmth of a steaming cup of coffee or spiced chai tea creates a cozy atmosphere, perfectly balancing the sweetness of the whoopie pies. Your taste buds will thank you for this delightful duo!

  • Fresh Cranberry Sauce: A small dollop of tart cranberry sauce adds a burst of freshness that cuts through the richness of the cream cheese filling. It’s an elegant touch that brightens the overall flavor profile.

  • Spiced Apple Cider: Serve these whoopie pies with warm spiced apple cider for an extra autumnal vibe. The inviting spices harmonize beautifully with the pumpkin, making each bite feel like a festive celebration.

  • Chocolate Dipped Pretzels: For a fun and crunchy contrast, offer chocolate dipped pretzels. The salty-sweet combination enhances the flavor of the whoopie pies, taking your dessert experience to the next level.

  • Pumpkin Spice Latte: Embrace the season with a seasonal pumpkin spice latte that syncs with your whoopie pies perfectly. This combination will envelop you in the warmth of fall, making every moment feel special.

  • Caramel Sauce Drizzle: Add a drizzle of warm caramel sauce on top of whoopie pies for a luxurious finish. The sweet, sticky richness pairs beautifully with the spiced flavors of pumpkin and chocolate.

  • Honey Sweetened Yogurt: For a lighter option, serve the whoopie pies with honey sweetened yogurt. Its creamy texture and mild sweetness offer a refreshing complement without overpowering the delightful flavors of your baked treat.

Expert Tips for Pumpkin Chocolate Chip Whoopie Pies

  • Stick to Room Temperature: Make sure your egg and cream cheese are at room temperature before use. This helps achieve a smooth batter and filling for these delightful Pumpkin Chocolate Chip Whoopie Pies.

  • Don’t Overmix: When combining the wet and dry ingredients, mix just until incorporated. Overmixing can lead to denser whoopie pies instead of the fluffy texture you want.

  • Spacing Matters: When dropping the batter onto the baking sheet, ensure enough space (about 2 inches apart) between mounds. This allows the whoopie pies to spread and bake evenly without merging.

  • Cool Before Assembling: Allow the cookies to cool completely before adding the cream cheese filling. If they’re warm, the filling may melt, ruining the whoopie pie’s delightful structure.

  • Adjust Sweetness: Feel free to customize the sweetness of your filling by adjusting the amount of powdered sugar. This way, you can create the perfect balance for your taste!

  • Perfect Chocolate Balance: Using mini chocolate chips not only distributes chocolate better but also offers a more intense chocolate flavor in every bite of your Pumpkin Chocolate Chip Whoopie Pies.

Pumpkin Chocolate Chip Whoopie Pies Recipe FAQs

What type of pumpkin puree should I use?
Absolutely! You can use either canned pumpkin puree or homemade. Canned is convenient and consistent, while homemade adds a personal touch. Just be sure it’s pure pumpkin and not pumpkin pie filling, which contains added sugars and spices.

How should I store my whoopie pies?
Store your Pumpkin Chocolate Chip Whoopie Pies in an airtight container at room temperature for up to 3 days to keep them soft and fresh. If you want them to last longer, place them in the refrigerator, where they can stay good for about a week.

Can I freeze whoopie pies for later?
Yes! Individually wrap your whoopie pies in plastic wrap and place them in a freezer-safe bag for up to 3 months. To enjoy them, let them thaw in the fridge overnight. If you prefer a warm treat, you can microwave them for a few seconds after thawing.

What should I do if my batter is too sticky?
If you find your batter too sticky to manage, no worries! Chill the batter in the fridge for 10-15 minutes. This should make it easier to drop spoonfuls on your baking sheet. Remember, the colder your dough, the better your cookies will hold their shape!

Are these whoopie pies suitable for people with nut allergies?
Yes! The Pumpkin Chocolate Chip Whoopie Pies are nut-free, making them perfect for gatherings with nut-sensitive eaters. However, if you’re avoiding chocolate altogether, you can substitute mini chocolate chips with white chocolate or butterscotch chips to keep the dessert delicious!

Pumpkin Chocolate Chip Whoopie Pies

Irresistibly Soft Pumpkin Chocolate Chip Whoopie Pies Recipe

Discover the delightful blend of soft pumpkin cake and rich chocolate in these Pumpkin Chocolate Chip Whoopie Pies.
Prep Time 15 minutes
Cook Time 12 minutes
Cooling Time 5 minutes
Total Time 30 minutes
Servings: 12 pies
Course: Dessert
Cuisine: American
Calories: 250

Ingredients
  

For the Cookie
  • 1 cup pumpkin puree Use canned or homemade
  • ½ cup unsalted butter Melted
  • 1 cup light brown sugar Can substitute with brown or coconut sugar
  • 1 large egg At room temperature
  • 1 teaspoon vanilla extract Can substitute with almond extract
  • 2 cups all-purpose flour Use gluten-free flour for a gluten-free version
  • 1 teaspoon baking powder Check freshness
  • 1 teaspoon ground cinnamon Can substitute with pumpkin pie spice
  • ½ teaspoon ground ginger Omit or reduce if preferred
  • ½ teaspoon ground nutmeg Freshly grated is preferable
  • ½ teaspoon salt Balances sweetness
  • 1 cup semi-sweet chocolate chips Can use mini chocolate chips for more chocolatey bites
For the Cream Cheese Filling
  • 8 ounces cream cheese Softened, can substitute with mascarpone
  • ¼ cup unsalted butter Softened
  • 2 cups powdered sugar Adjust based on desired sweetness
  • 1 teaspoon vanilla extract

Equipment

  • mixing bowl
  • baking sheet
  • parchment paper
  • spatula
  • Cookie scoop

Method
 

Baking Instructions
  1. Preheat the oven to 350°F (175°C) and line a baking sheet with parchment paper.
  2. In a large mixing bowl, combine pumpkin puree, melted unsalted butter, light brown sugar, egg, and vanilla extract. Mix well until smooth, about 2-3 minutes.
  3. In another bowl, whisk together all-purpose flour, baking powder, ground cinnamon, ground ginger, ground nutmeg, and salt.
  4. Gradually fold the dry mixture into the pumpkin batter, then stir in semi-sweet chocolate chips.
  5. Drop heaping mounds of batter onto the prepared baking sheet, spacing them about 2 inches apart. Bake for 10-12 minutes until edges are set.
  6. After baking, cool on the sheet for 5 minutes before transferring to a wire rack to cool completely.
  7. While the cookies cool, beat together cream cheese and unsalted butter until fluffy. Gradually add powdered sugar and vanilla extract.
  8. Spread the cream cheese filling on the flat side of half the cookies, then top with the remaining cookies.

Notes

For best results, ensure all ingredients are at room temperature before use. Allow cookies to cool completely before assembling to avoid melting the filling.

Delightful Rice Krispie Treat Pumpkins for Halloween Fun

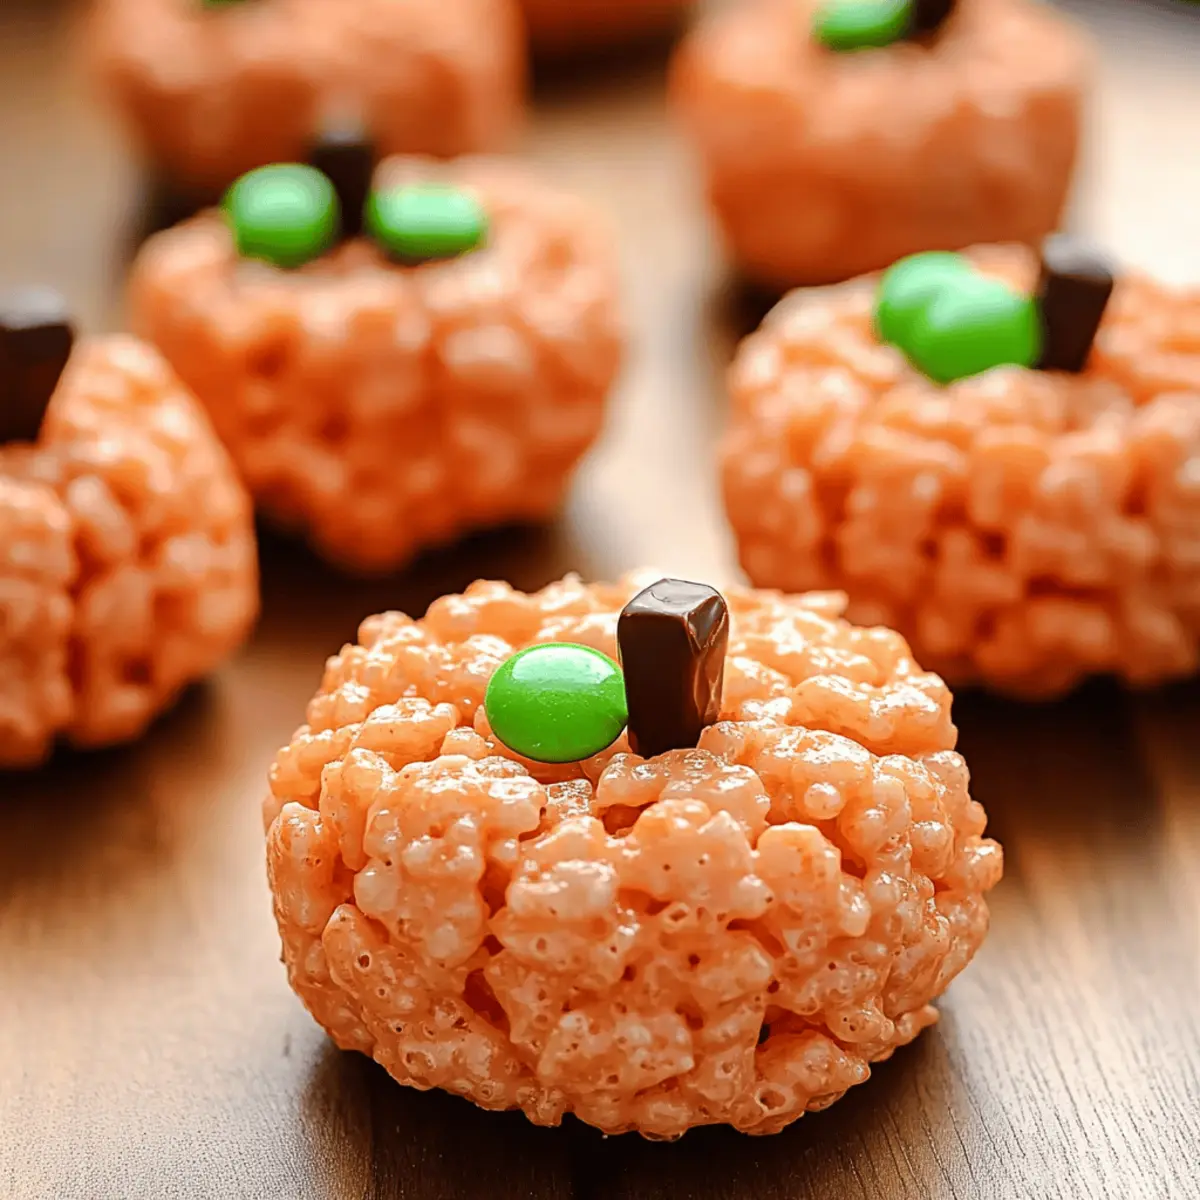
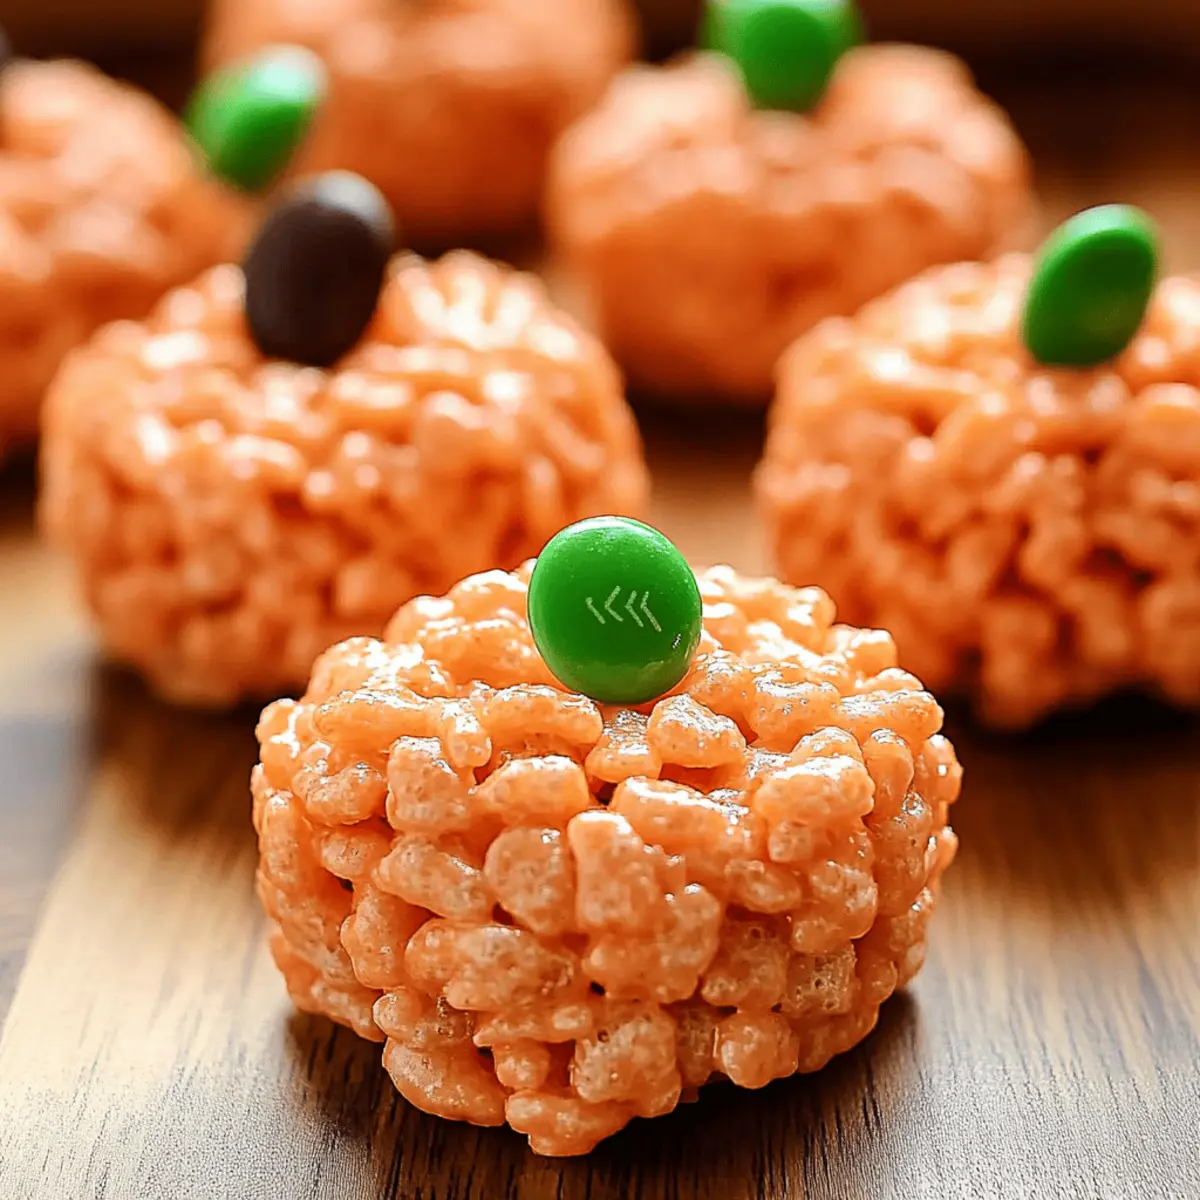
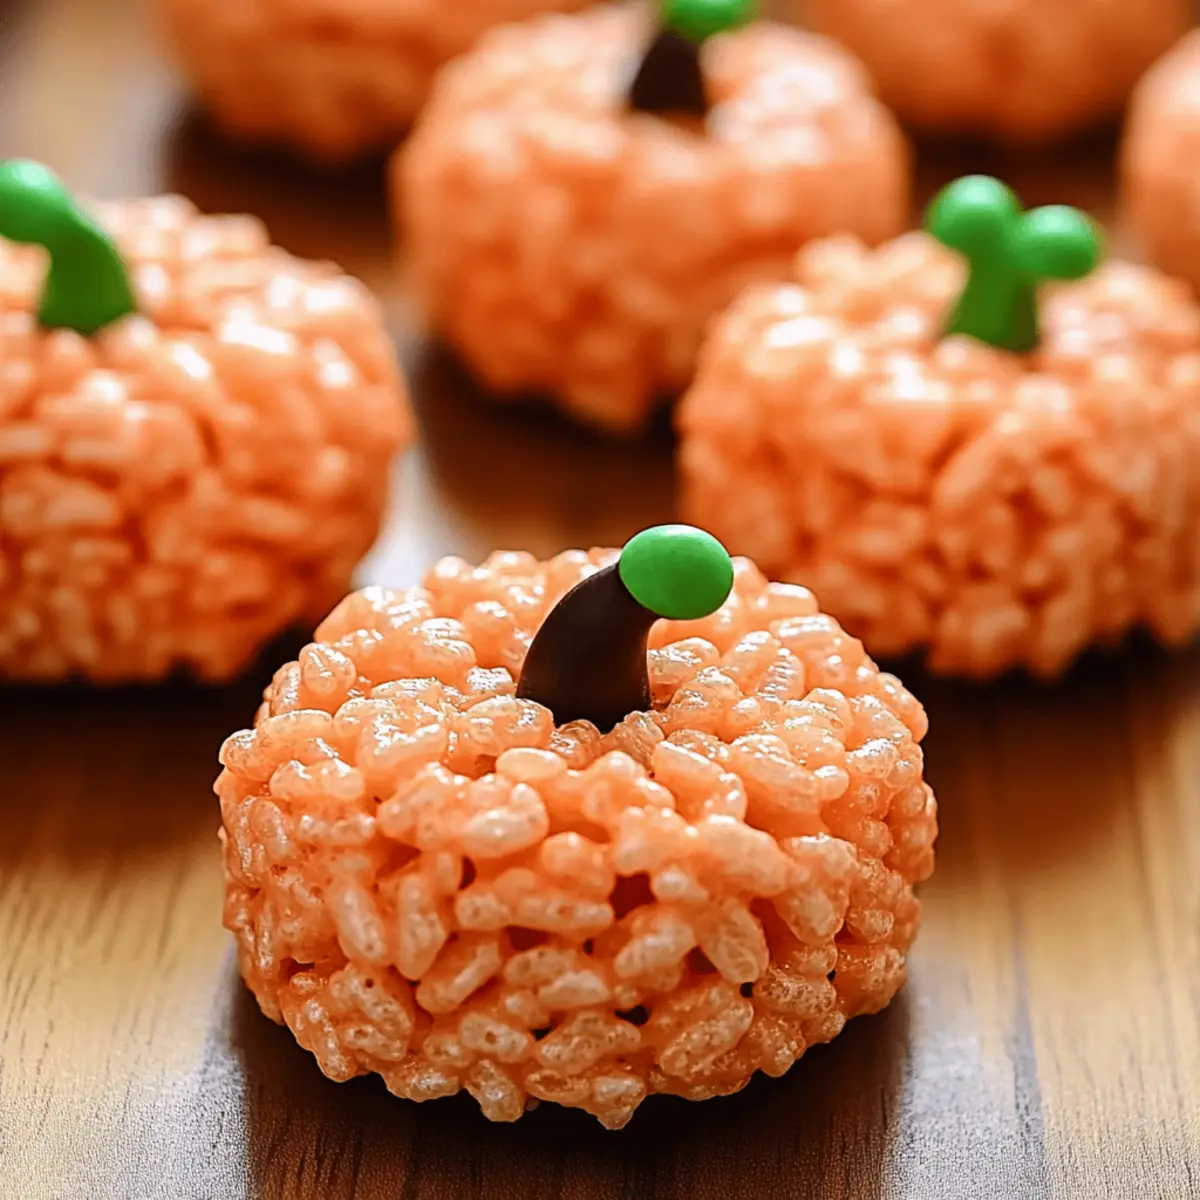
As I sifted through my fall decorations, I stumbled upon a bag of mini chocolate candies and a heap of cereal, igniting a wave of nostalgia for childhood Halloween treats. This year, I decided to channel that spark into making Rice Krispie Treat Pumpkins! These delightful no-bake treats aren’t just adorable but also super easy to whip up, allowing you to squeeze in some festive fun even on a busy day. With their colorful, chewy exterior and playful design, they promise to be a crowd-pleaser at any gathering or a fun activity for the kids to join in on. Plus, they make for a perfect last-minute Halloween dessert! Who could resist a homemade treat that brings both satisfaction and a smile? Ready to create some pumpkin magic in your kitchen?

Why Are Rice Krispie Treat Pumpkins Perfect?

Simplicity: This no-bake recipe is incredibly easy, making it perfect for busy schedules or last-minute celebrations.

Colorful Fun: Bright orange pumpkins bring a festive spirit that delights kids and adults alike, adding cheer to any Halloween gathering.

Crowd-Pleaser: Everyone loves the classic taste of Rice Krispie treats, so these pumpkin shapes are sure to impress guests at your next party.

Family Activity: Involve the kids in rolling and decorating these treats – it’s a fun way to create lasting memories together.

Customizable: Play around with various candy toppings to make your creations unique and let your creativity shine! For more festive ideas, check out Sizzling Rice Wrapped treats too!

Rice Krispie Treat Pumpkins Ingredients

For the Treats

  • Butter – Adds richness and moisture to the treats; margarine works for a dairy-free option.
  • Large Marshmallows (40 count) – The main binding agent that provides sweetness and texture; you can use mini marshmallows to simplify melting.
  • Rice Krispies (6 cups) – Gives the treats their signature crunchy texture; any crisped rice cereal will do if you want to switch things up.

For the Color

  • Red & Yellow Liquid Food Coloring – Achieves that festive orange hue; consider gel food coloring for more vibrant results.

For Decoration

  • Mini Rolos – Serve as adorable stems for the pumpkins, adding a sweet chocolate touch; Tootsie Rolls are a great alternative.
  • Green M&Ms – Perfect for leaves on your pumpkins; other options include green Skittles if you prefer.

For Easy Handling

  • Cooking Oil (1/4 cup) – Prevents sticky hands when shaping the treats; melted butter is a fine substitute if you like.

Step‑by‑Step Instructions for Rice Krispie Treat Pumpkins

Step 1: Melt the Butter
In a large pot, melt 1/4 cup of butter over low heat. This should take about 2–3 minutes, and you’ll know it’s ready when the butter is fully melted and bubbling gently. Keep stirring to prevent burning and ensure an even melt.

Step 2: Combine Marshmallows
Add 40 large marshmallows to the melted butter, stirring constantly for another 3–4 minutes. Continue to cook until the marshmallows are thoroughly melted and have blended into a smooth mixture. This ooey-gooey base is essential for your Rice Krispie Treat pumpkins!

Step 3: Add Color
Remove the pot from heat and stir in drops of yellow food coloring until you reach your desired brightness. Next, add red food coloring gradually, mixing until you achieve a vibrant orange hue. Keep in mind that you’ll need about a minute of mixing to ensure the color is even throughout.

Step 4: Mix in Rice Krispies
Once the color is perfect, fold in 6 cups of Rice Krispies cereal. This will require gentle stirring to ensure all the cereal is fully coated with the marshmallow mixture. Continue mixing for about 2 minutes, until the Rice Krispies are completely incorporated and no dry cereal remains.

Step 5: Shape the Pumpkins
Coat your hands with cooking oil to prevent sticking, then take a handful of the mixture and roll it into a ball about the size of a small orange – approximately 2–3 inches in diameter. Place each pumpkin on a sheet of parchment paper, ensuring they are spaced apart to avoid sticking.

Step 6: Add Decorations
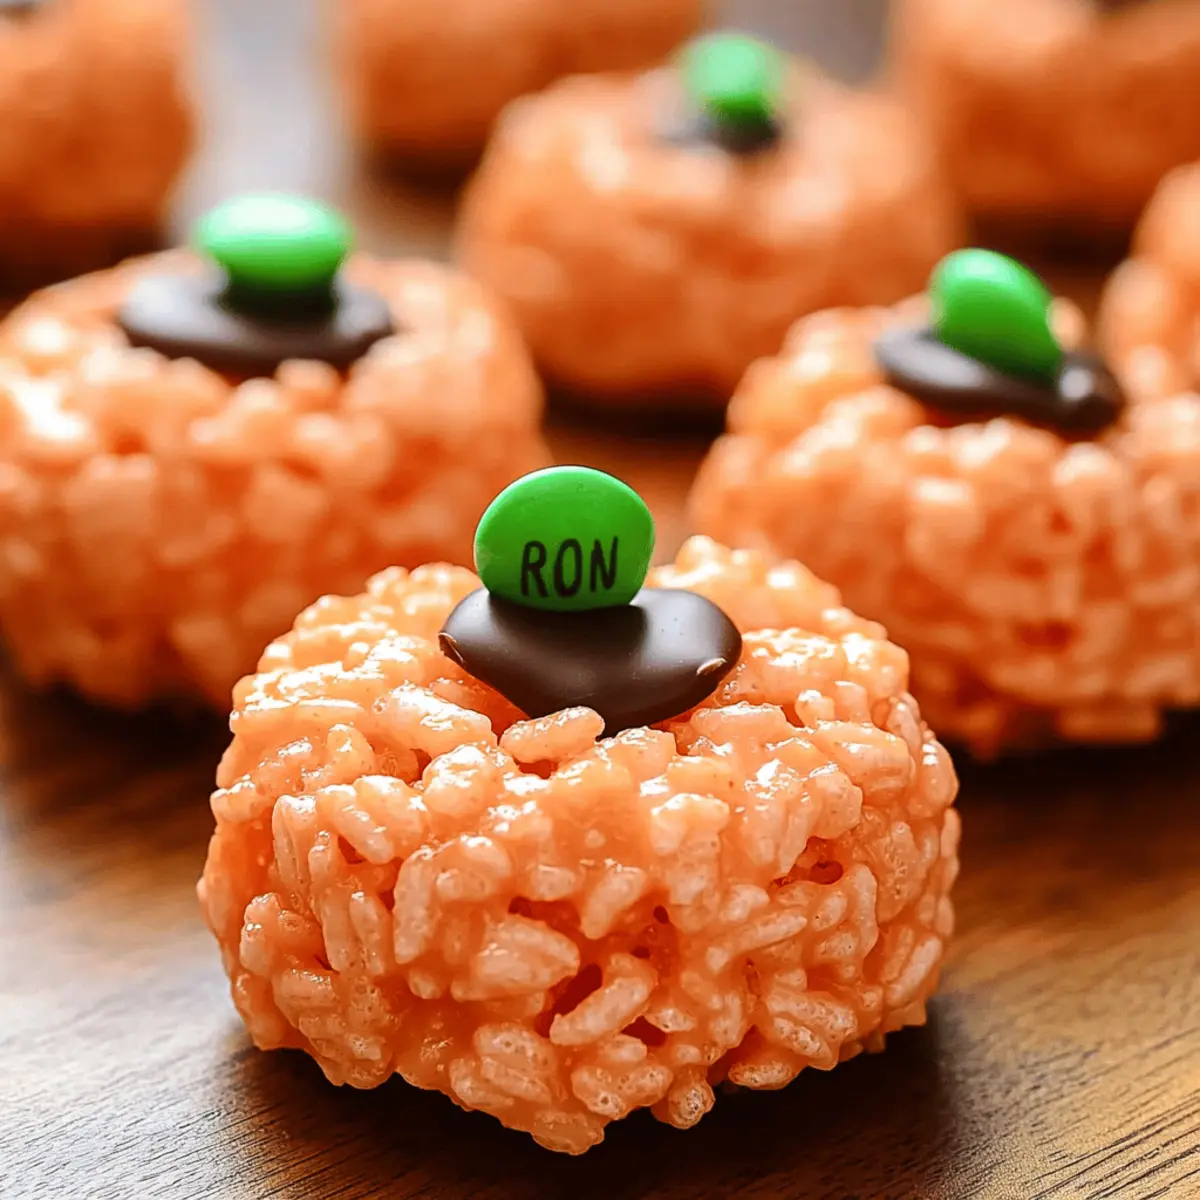
While the treats are still warm, gently press a Mini Rolo into the top of each pumpkin to serve as the stem. Add a green M&M next to the Rolo for a cute leaf. If the mixture has cooled too much, use a thick marker to create an indent for placing the candies.

Step 7: Cool and Serve
Allow the Rice Krispie Treat pumpkins to cool completely at room temperature for about 30 minutes. Once they are firm and set, they’re ready to be served. You can store any leftovers in an airtight container for up to a week, but these festive treats are likely to disappear quickly!

Make Ahead Options

These Rice Krispie Treat Pumpkins are a fantastic option for meal prep, making your Halloween festivities a breeze! You can prepare the base mixture up to 24 hours in advance; just follow steps 1-4 and roll the treats into balls. Once shaped, store them in an airtight container at room temperature to maintain their chewy texture. To keep them fresh, recoat your hands with a little oil or melted butter if they feel sticky before the final touch of decorating with Mini Rolos and green M&Ms. When you’re ready to serve, simply add the candy decorations, and you’ll have delightful treats that are just as scrumptious as when freshly made!

Expert Tips for Rice Krispie Treat Pumpkins

  • Oil Your Hands: Prevent sticking by coating your hands with cooking oil or melted butter. This is crucial when rolling the treats into pumpkins.

  • Coloring Caution: If using gel food coloring, start with a small amount. A little goes a long way for achieving the perfect orange hue in your Rice Krispie Treat pumpkins.

  • Perfect Mixing: Ensure the marshmallow mixture is smooth before adding Rice Krispies. Any unmelted marshmallows can lead to uneven texture in your treats.

  • Warm Decorations: Press the candies into the treats while they are still warm to help them stick better. If the mixture cools too much, create small indents first.

  • Storage Solutions: Store any leftover Rice Krispie Treat pumpkins in an airtight container at room temperature to maintain their chewy texture.

Storage Tips for Rice Krispie Treat Pumpkins

Room Temperature: Keep your Rice Krispie Treat pumpkins in an airtight container at room temperature for up to a week. This helps maintain their delightful chewiness and flavor.

Fridge: If you prefer a slightly firmer texture, you can store them in the fridge. However, it’s best enjoyed at room temperature, so allow them to sit out for a few minutes before serving.

Freezer: For longer storage, you can freeze the pumpkin treats. Place them in a single layer on a baking sheet for a couple of hours until hard, then transfer them to a freezer-safe container or bag for up to 3 months.

Reheating: If frozen, simply let them thaw at room temperature for about an hour before enjoying, and rediscover the joy of these festive Rice Krispie Treat pumpkins!

Rice Krispie Treat Pumpkins Variations

Feel free to get creative with your Rice Krispie Treat pumpkins for a special twist that delights the senses!

  • Chocolate Twist: Substitute chocolate-flavored Rice Krispies instead of the original for a deliciously rich take on the pumpkins. The extra cocoa flavor adds depth, making it a hit for chocolate lovers!

  • Spooky Faces: Use black icing to draw jack-o-lantern faces on the pumpkins. This adds a fun, spooky element that is sure to entertain kids and adults alike.

  • Colorful Sprinkles: Add colorful Halloween-themed sprinkles on top for a festive crunch. The extra texture will not only look appealing but also enrich each bite with sweetness.

  • Gummy Toppers: Use gummy worms or jelly beans as stems and leaves for a playful twist. This makes the treats even more fun, inviting everyone to dig in!

  • Nutty Crunch: Incorporate crushed nuts like pecans or almonds into the mix for added crunch and flavor. This twist brings a delightful texture to your pumpkins!

  • Fruity Flavor: Switch it up by adding dried fruits like cranberries or apricots for a natural sweetness. This can give a chewy surprise that pairs wonderfully with the classic treat.

  • Coconut Coating: Roll the finished pumpkins in shredded coconut for a tropical vibe. It adds a unique texture while enhancing the appearance of your festive treats.

Experimenting with variations can lead to delightful surprises, just as I did with Sizzling Rice Wrapped treats that offer another fun culinary experience for family gatherings. Enjoy!

What to Serve with Rice Krispie Treat Pumpkins

Creating a memorable Halloween gathering is all about the delightful combinations of flavors and textures.

  • Spooky Sips: Serve with witch’s brew punch for a fun, fizzy drink that complements the sweetness of the treats. Kids will love the bubbly excitement!

  • Candy Corn Cupcakes: These festive cupcakes bring together colors and flavors that tie in perfectly with your treats, adding a tasty and decorative touch.

  • Chocolate-Dipped Pretzels: The salty-sweet combination of these crunchy delights provides a lovely contrast to the chewy Rice Krispie pumpkins.

  • Autumn Salad: A fresh mix of greens with apples, walnuts, and cranberries adds a delightful crunch and balances the rich flavor of the treats.

  • Creamy Hot Chocolate: Warm, velvety hot chocolate with whipped cream offers a cozy pairing, making it the perfect comforting drink for chilly October nights.

  • Pumpkin Pie Bites: For a full Halloween experience, mini pumpkin pie bites add a touch of tradition and celebrate the season.

  • Ginger Snap Cookies: These spicy treats will enhance the fall flavors of your pumpkin creations, providing an inviting and nostalgic taste.

  • Caramel Apple Slices: Sweet and tart, these slices add a refreshing crunch to balance the sweetness of your Rice Krispie Treat pumpkins, completing your dessert table perfectly.

Rice Krispie Treat Pumpkins Recipe FAQs

How do I choose ripe ingredients for Rice Krispie Treat pumpkins?
Absolutely! For this recipe, freshness mainly revolves around the marshmallows and butter. Choose large marshmallows that are soft and pliable without any hard spots. If using butter, look for a fatty, creamy texture. When selecting food coloring, check that the bottles are not expired and that the liquid is smooth for seamless mixing.

What is the best way to store Rice Krispie Treat pumpkins?
I often store my Rice Krispie Treat pumpkins in an airtight container at room temperature. They maintain their chewy texture and can last up to a week. If you prefer them chilled, the fridge is fine, but be sure to let them sit out for a few minutes before serving for optimal texture.

Can I freeze Rice Krispie Treat pumpkins, and how?
Yes, you absolutely can! To freeze your Rice Krispie Treat pumpkins, place them on a baking sheet lined with parchment paper and put them in the freezer for about 2 hours, until they’re hard. Then, transfer them into a freezer-safe container or zip-top bag, separating layers with parchment paper if stacking, and they can stay good for up to 3 months. When you’re ready to eat them, just let them thaw at room temperature for about an hour.

What should I do if my Rice Krispie Treat mixture is too sticky?
Very good question! If you find your mixture is too sticky, it might be due to over-melting the marshmallows. If that happens, spray your hands with cooking oil before handling the treat mixture to prevent it from sticking. You could also let the mixture cool slightly for easier handling without compromising the shape when rolling into pumpkins.

Are there any dietary considerations for Rice Krispie Treat pumpkins?
Absolutely! If you’re making these treats for children or guests with allergies, be mindful of the ingredients. Marshmallows and some chocolate candies may contain gluten, nuts, or dairy. You can easily make substitutions like using dairy-free margarine, gluten-free cereals, and allergen-free chocolates to create a safe and delicious Halloween treat!

Rice Krispie Treat Pumpkins

Delightful Rice Krispie Treat Pumpkins for Halloween Fun

Delightful Rice Krispie Treat Pumpkins are a nostalgic, no-bake Halloween treat perfect for festive fun.
Prep Time 15 minutes
Cook Time 10 minutes
Cooling Time 30 minutes
Total Time 55 minutes
Servings: 12 treats
Course: Dessert
Cuisine: American
Calories: 120

Ingredients
  

For the Treats
  • 1/4 cup Butter Margarine can be used for a dairy-free option.
  • 40 count Large Marshmallows Mini marshmallows can be used for easier melting.
  • 6 cups Rice Krispies Any crisped rice cereal can be used.
For the Color
  • Red & Yellow Liquid Food Coloring Gel food coloring is preferable for vibrant results.
For Decoration
  • Mini Rolos Can substitute with Tootsie Rolls.
  • Green M&Ms Green Skittles can also be used.
For Easy Handling
  • 1/4 cup Cooking Oil Melted butter is a fine substitute.

Equipment

  • Large pot
  • parchment paper

Method
 

Step-by-Step Instructions
  1. Melt the butter in a large pot over low heat for 2–3 minutes, stirring continually.
  2. Add the large marshmallows to the melted butter and stir constantly for 3–4 minutes until fully melted.
  3. Remove from heat and mix in the yellow food coloring, then add the red food coloring slowly until desired orange hue is achieved.
  4. Gently fold in the Rice Krispies until fully coated, mixing for about 2 minutes.
  5. Coat your hands with cooking oil and roll the mixture into pumpkin-sized balls (2–3 inches in diameter).
  6. While still warm, press a Mini Rolo into the top of each pumpkin and place a green M&M next to it.
  7. Allow the pumpkins to cool for about 30 minutes before serving.
Notes

Store leftovers in an airtight container at room temperature for up to a week.

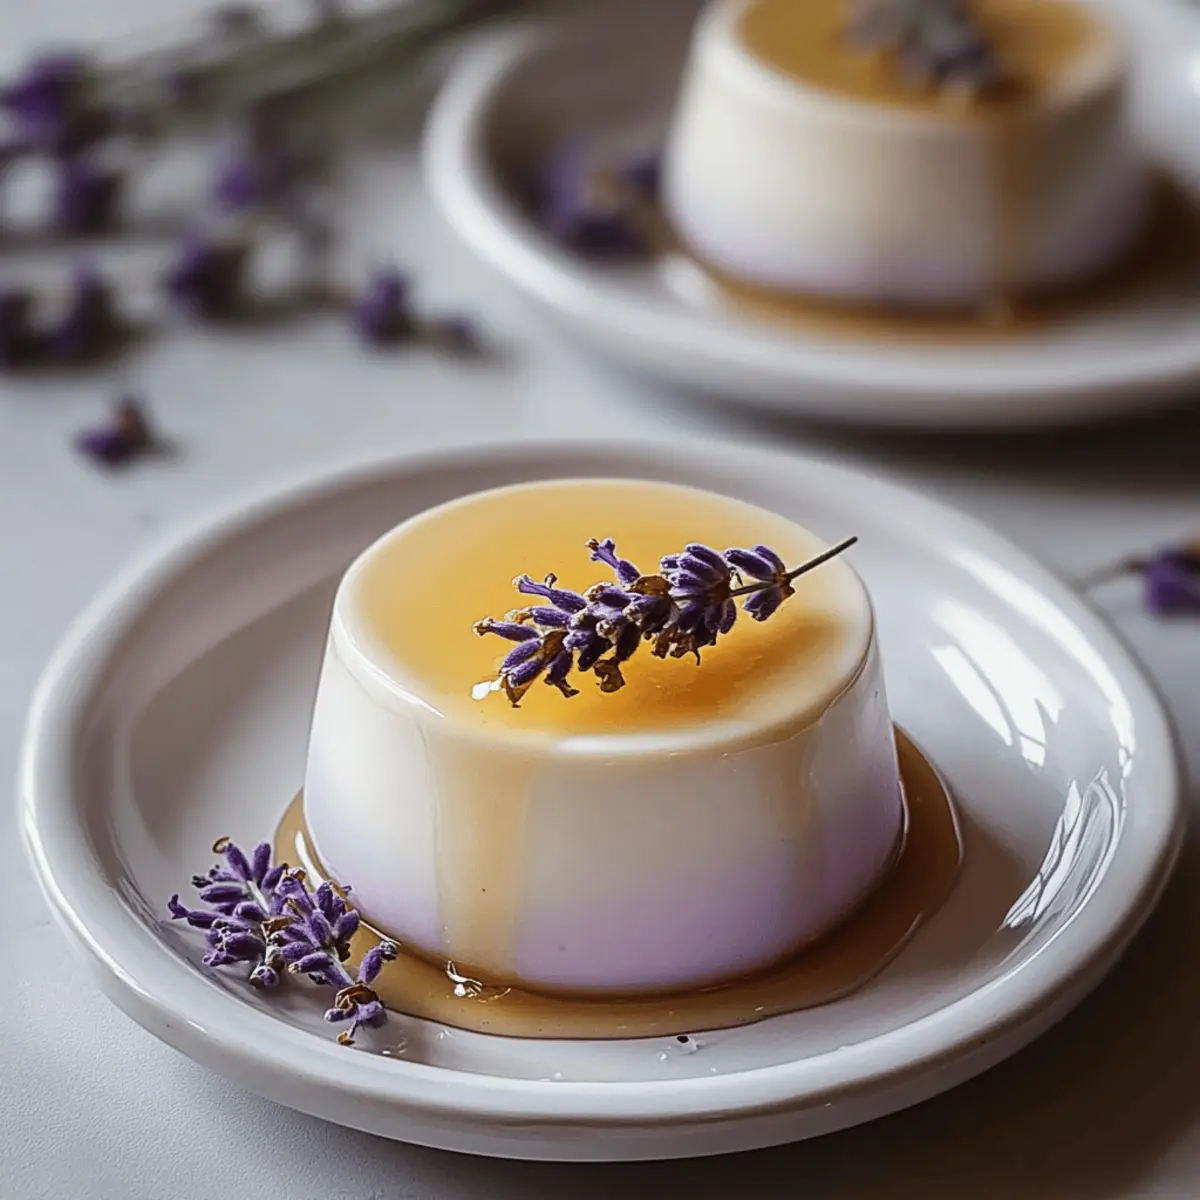
Lavender Honey Panna Cotta: A Dreamy Dessert to Impress

As I walked through the vibrant lavender fields, the air was thick with that sweet floral aroma, instantly transporting me to a serene dreamland. Inspired by this enchanting experience, I set out to create my own twist on a traditional Italian delicacy: Lavender Honey Panna Cotta. This elegant dessert not only boasts a creamy, silky texture that melts in your mouth but also brings the soothing essence of lavender and the natural sweetness of honey to your table. What’s more, this make-ahead treat offers a stress-free way to impress friends and family after dinner—or to savor all by yourself. Are you ready to elevate your dessert game with this delightful dish? Let’s dive into the recipe!

Why is Lavender Honey Panna Cotta Unique?

Creamy, Silky Texture: This panna cotta is a luxurious dessert, boasting a smooth consistency that melts in the mouth, showcasing the ideal balance of richness and elegance.

Floral Elegance: The delightful infusion of lavender offers a distinct floral flavor that elevates this classic Italian dessert, making it a standout choice for special occasions.

Make-Ahead Convenience: Prepare it in advance for effortless entertaining! With an overnight chill, you can enjoy a stress-free experience when hosting dinner parties or gatherings.

Versatile Pairings: Whether drizzled with a touch of extra honey or paired with a vibrant fruit compote, this panna cotta can adapt to your taste preferences, ensuring every bite is delightful.

Impressive Presentation: Unmolding this dessert reveals a glossy finish and stunning shape, guaranteed to wow your dinner guests, making it perfect for those “wow” moments.

With its unique twist, this Lavender Honey Panna Cotta deserves a special spot in your dessert repertoire—just like our delicious Honey Chili Chicken and the soothing Honey Garlic Slow Cooked Ribs will enhance your main courses!

Lavender Honey Panna Cotta Ingredients

For the Panna Cotta

  • Heavy Cream – Provides richness and creaminess; use full-fat cream for the best texture.
  • Whole Milk – Balances the richness and helps achieve a smooth consistency.
  • Sugar – Sweetens the panna cotta; substitute with honey or a sugar alternative if desired.
  • Gelatin – Sets the panna cotta, giving it structure and the signature wobble; use unflavored powdered gelatin for best results.
  • Dried Lavender Buds – Infuses a floral aroma; substitute with lavender extract for a more intense flavor (adjust quantity).
  • Honey – Adds natural sweetness and enhances floral notes; different types of honey (like acacia or clover) can provide unique tastes.

For the Optional Syrup

  • Water – Base for the syrup.
  • Sugar – Sweetens the syrup.
  • Lemon Juice – Adds acidity to brighten the flavor.
  • Rose Water/Orange Blossom Water (optional) – Adds floral complexity to the syrup.

This Lavender Honey Panna Cotta recipe is sure to impress with its elegant floral notes and creamy texture!

Step‑by‑Step Instructions for Lavender Honey Panna Cotta

Step 1: Heat the Cream
In a medium saucepan over medium heat, combine 2 cups of heavy cream, 1 cup of whole milk, 1/2 cup of sugar, and 2 tablespoons of dried lavender buds. Gently heat the mixture until it begins to steam, about 5-7 minutes, stirring occasionally. Be careful not to let it boil, as you want to preserve the creamy texture and floral flavor for the Lavender Honey Panna Cotta.

Step 2: Bloom the Gelatin
While the cream mixture heats, gather a small bowl and sprinkle 2 1/4 teaspoons of unflavored powdered gelatin over 1/4 cup of cold water. Allow the gelatin to sit undisturbed for 5 minutes, letting it bloom. This essential step ensures a smooth texture in your Lavender Honey Panna Cotta, as properly bloomed gelatin will dissolve seamlessly into the warm cream.

Step 3: Combine Ingredients
Once the cream mixture is heated and fragrant, remove it from the heat. Stir in the bloomed gelatin and 1/4 cup of honey until both are completely dissolved, about 1-2 minutes. The warmth of the cream will activate the gelatin, setting the stage for your silky Lavender Honey Panna Cotta as it cools down.

Step 4: Strain Mixture
To ensure a velvety finish, pour the mixture through a fine-mesh sieve into a large bowl or measuring jug. This step will remove the dried lavender buds, leaving you with a smooth and refined mixture for your Lavender Honey Panna Cotta. Discard the solids and give the strained mixture a gentle stir.

Step 5: Pour into Molds
Divide the smooth Lavender Honey Panna Cotta mixture equally among 6 to 8 ramekins or serving dishes. Carefully pour to avoid splashing, and cover each mold with plastic wrap. Refrigerate for at least 4 hours, or ideally overnight, allowing the panna cotta to set perfectly into a creamy delight.

Step 6: Serve
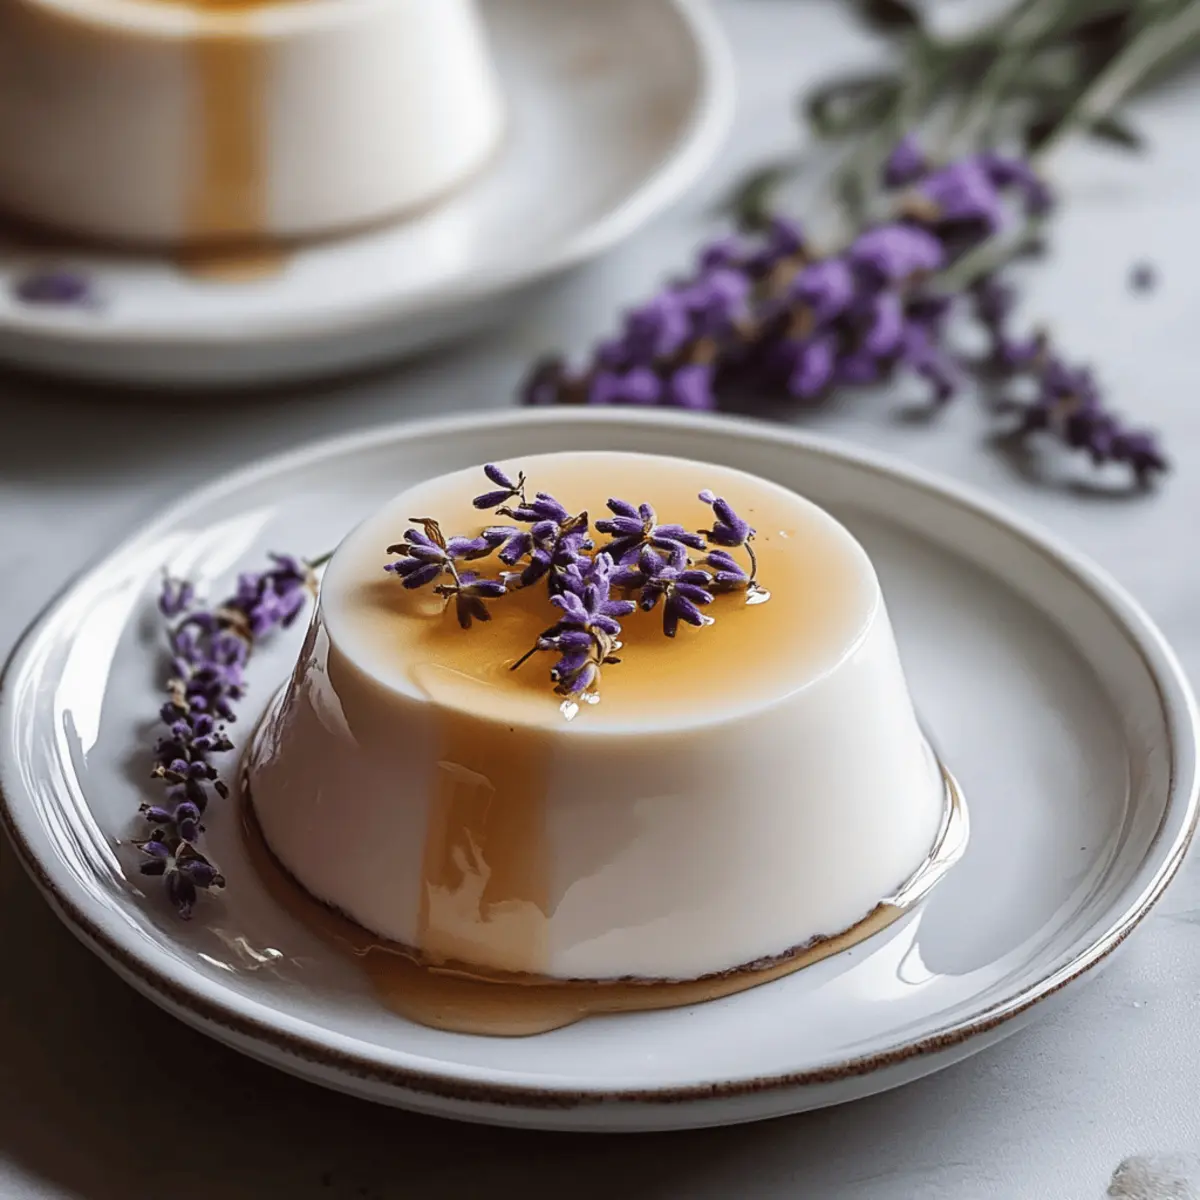
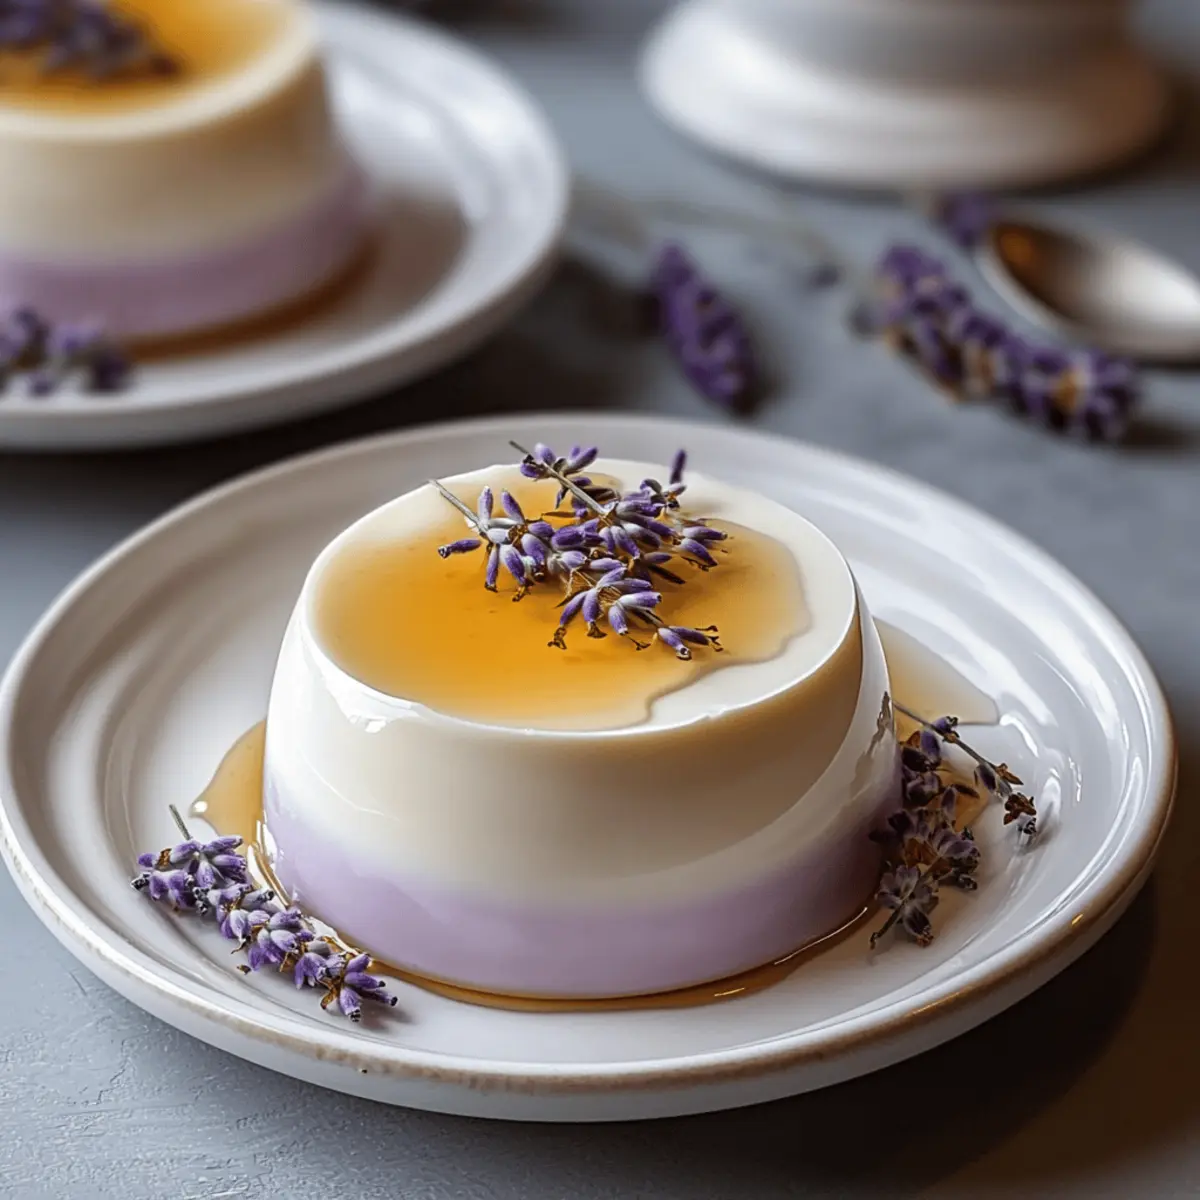
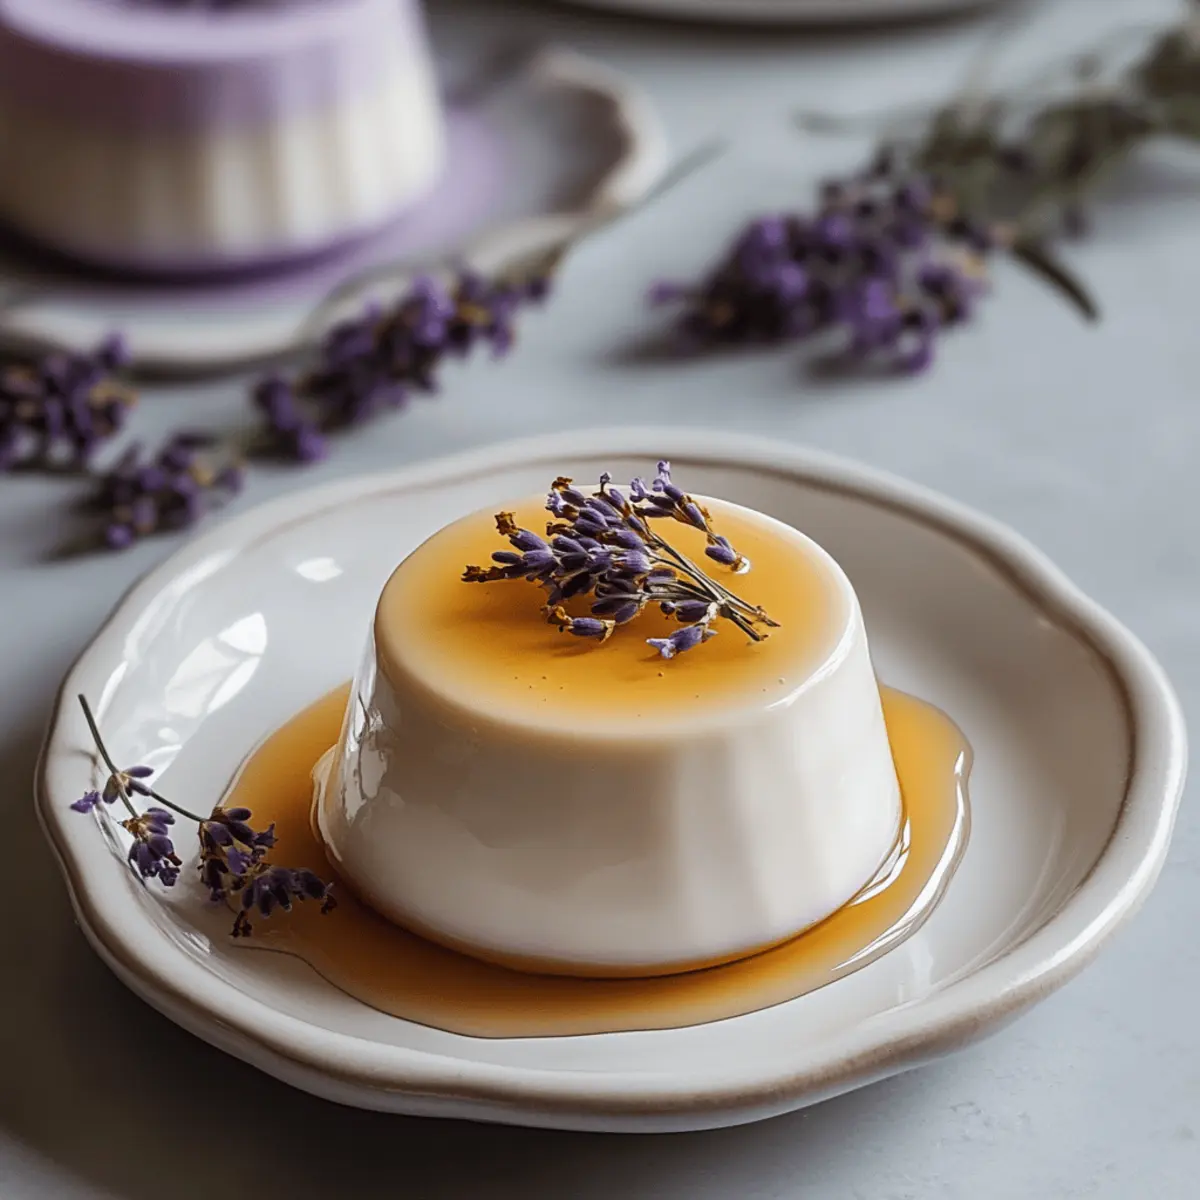
When ready to serve, gently loosen each Panna Cotta around the edges using a small knife. Invert the molds onto plates, tapping gently if necessary. Drizzle with extra honey and, if desired, garnish with fresh lavender flowers for an elegant touch. Your Lavender Honey Panna Cotta is now ready to impress both in flavor and presentation!

Make Ahead Options

Lavender Honey Panna Cotta is perfect for busy home cooks looking to save time, as it can easily be prepared up to 2 days in advance! To make ahead, simply follow the recipe instructions to heat, bloom the gelatin, and combine ingredients. Once strained and poured into molds, cover the ramekins with plastic wrap and refrigerate overnight to set. This way, you can enjoy a stress-free serving experience when guests arrive. To maintain the creamy texture, avoid unmolding the panna cotta until just before serving. When it’s time to impress, simply drizzle with honey and garnish for a stunning presentation, ensuring your elegant dessert is just as delightful as if you made it fresh!
Lavender Honey Panna Cotta Variations

Invite your culinary creativity to flourish, as you can easily twist this elegant dessert into something uniquely yours!

  • Vanilla Twist: Replace dried lavender with 1-2 teaspoons of vanilla extract for a classic flavor that complements the creaminess beautifully. A comforting and familiar taste, this variation is always a crowd-pleaser.

  • Citrus Zest: Add the zest of an orange or lemon in place of lavender for a refreshing, zesty touch. The citrus notes brighten the panna cotta, making it a vibrant summer treat.

  • Dairy-Free Delight: Use coconut milk and coconut cream to make a dairy-free version that’s equally luscious. The tropical flavor of coconut pairs beautifully with honey, creating a dreamy dessert.

  • Maple Sweetness: Substitute honey with pure maple syrup for a warm, earthy sweetness. This swap gives a cozy twist, especially delightful in the autumn months.

  • Berry Blast: Top with fresh berries or a berry compote for an explosion of color and flavor. The tartness of berries contrasts wonderfully with the creamy panna cotta, adding texture and vibrancy.

  • Chocolate Indulgence: Drizzle with a rich chocolate sauce for a decadent twist that’s perfect for chocolate lovers. This combination transforms your panna cotta into an extraordinary dessert experience.

  • Heated Kick: Incorporate a pinch of cayenne pepper or ground ginger for a subtle spicy warmth. This unexpected addition provides a delightful depth to the panna cotta’s flavor profile.

  • Rose Water Infusion: For a floral twist, add a splash of rose water in place of lavender. This offers a romantic touch that elevates the panna cotta to an exotic delight, perfect for special occasions.

Feel free to explore these variations, much like you would with our comforting Berry Banana Cottage Cheese Bread, and create a dessert that will surely leave a lasting impression!

What to Serve with Lavender Honey Panna Cotta

Elevate your dessert experience with delightful pairings that enhance the creamy sweetness of this beautiful treat.

  • Fresh Berries: Juicy raspberries, blueberries, or strawberries add a tart contrast that beautifully complements the floral notes of the panna cotta.

  • Citrus Salad: A refreshing medley of orange segments and grapefruit zest brightens the palate, providing a zesty counterpoint to the creamy dessert.

  • Honey Drizzle: A light drizzle of honey enhances the natural sweetness of the panna cotta, emphasizing its rich flavors while adding a touch of elegance.

  • Almond Biscotti: These crunchy, nutty cookies offer a delightful textural contrast, making them a perfect accompaniment for dipping into the silky panna cotta.

  • Lavender Syrup: A simple lavender-infused syrup adds an additional layer of floral flavor, creating a harmonious harmony with the panna cotta’s essence.

  • Sparkling Wine: A glass of well-chilled Prosecco or other dry sparkling wine provides a bubbly celebration, cutting through the richness and enhancing the dessert experience.

  • Lemon Sorbet: This bright and tangy dessert refreshes the palate after the panna cotta and serves as a lovely palate cleanser between bites.

  • Dark Chocolate Shavings: A sprinkle of bittersweet chocolate shavings adds a touch of luxury, balancing the sweetness with its rich and robust flavor.

Expert Tips for Lavender Honey Panna Cotta

  • Bloom Gelatin Properly: Ensure gelatin is evenly sprinkled over cold water and allowed to sit for 5 minutes. This step is crucial for seamless incorporation into your Lavender Honey Panna Cotta.

  • Quality Ingredients Matter: Use high-quality heavy cream and dried lavender to enhance the flavor. Fresh ingredients create a more aromatic and delightful dessert.

  • Controlled Heating: Heat the cream mixture gently and avoid boiling. Boiling can alter the texture and flavor of your Lavender Honey Panna Cotta, leading to a less desirable result.

  • Strain for Smoothness: Always strain the mixture through a fine-mesh sieve to remove any lavender solids. This ensures a silky, refined texture that melts in your mouth.

  • Chill for Success: Allow the panna cotta to set in the refrigerator for at least 4 hours, or overnight for best results. A longer chilling time enhances the texture and flavor.

  • Presentation Counts: Unmold the panna cotta just before serving for the best visual impact. Garnishing with honey and fresh lavender will elevate both flavor and aesthetics.

How to Store and Freeze Lavender Honey Panna Cotta

Fridge: Store the Lavender Honey Panna Cotta covered in the refrigerator for up to 2 days. Unmold only right before serving to maintain the dessert’s structure and elegance.

Freezer: While not ideal, you can freeze panna cotta for up to 1 month. Allow it to thaw in the fridge overnight before enjoying, as freezing may alter its creamy texture.

Reheating: If you prefer to serve it warm, place the panna cotta in a microwave-safe dish. Heat gently in 10-second intervals until just warmed through, but avoid overheating to maintain its delicate consistency.

Serving Suggestion: Drizzle with extra honey or top with fresh fruit compote just before serving for an added flourish to this creamy dessert.

Lavender Honey Panna Cotta Recipe FAQs

How do I choose the best lavender for this recipe?
Absolutely! Look for high-quality, culinary-grade dried lavender buds, which should have a fragrant, sweet aroma. Avoid lavender that appears discolored or has strong, synthetic fragrances, as this can indicate poor quality. If you can’t find dried lavender, lavender extract is a great alternative, but use it sparingly, starting with just a teaspoon and adjusting to taste.

How long can I store Lavender Honey Panna Cotta in the fridge?
You can store the Lavender Honey Panna Cotta covered in the refrigerator for up to 2 days. Remember, it’s best to unmold it just before serving to maintain its beautiful structure and presentation. Keeping it covered helps lock in moisture and preserves its creamy texture.

Can I freeze Lavender Honey Panna Cotta? If so, how?
Yes, you can freeze Lavender Honey Panna Cotta! To do so, allow it to set completely in the fridge for at least 4 hours. Once set, cover each ramekin tightly with plastic wrap and then aluminum foil to prevent freezer burn. It can be stored for up to 1 month. To enjoy, move the panna cotta to the fridge to thaw overnight, as this gradual defrosting helps preserve its creaminess.

What should I do if my panna cotta doesn’t set properly?
If your Lavender Honey Panna Cotta doesn’t set, it may be due to insufficient gelatin blooming. To fix this, gently reheat the panna cotta mixture in a saucepan, stirring continually until it’s warm (but not boiling), and then add more bloomed gelatin. To bloom, use 1 teaspoon of gelatin mixed with a couple of tablespoons of cold water, letting it sit for 5 minutes. Stir well until fully dissolved before redistributing into molds to refrigerate.

Is Lavender Honey Panna Cotta safe for pets or people with allergies?
While lavender is generally safe for humans in culinary uses, some pets like cats and dogs should avoid lavender due to potential gastrointestinal discomfort. If you have allergies, be mindful of the ingredients, particularly honey or any substitutes you may use. Always consult a medical professional if you’re uncertain about any specific allergies.

Can I make substitutions for sugar in the recipe?
Very much so! You can substitute the sugar with honey for a more pronounced floral sweetness in your Lavender Honey Panna Cotta. Alternatively, agave syrup or maple syrup are great options if you’re looking for a vegan alternative. Just remember that each sweetener may slightly alter the flavor and texture, so adjust the quantities based on your taste preferences.

Lavender Honey Panna Cotta

Lavender Honey Panna Cotta: A Dreamy Dessert to Impress

Lavender Honey Panna Cotta is a creamy Italian dessert infused with floral notes, perfect for impressing guests.
Prep Time 15 minutes
Cook Time 10 minutes
Chilling Time 4 hours
Total Time 6 hours 5 minutes
Servings: 8 servings
Course: Dessert
Cuisine: Italian
Calories: 250

Ingredients
  

For the Panna Cotta
  • 2 cups heavy cream full-fat for best texture
  • 1 cup whole milk balances richness
  • 1/2 cup sugar can substitute with honey
  • 2 1/4 teaspoons unflavored powdered gelatin for best results
  • 2 tablespoons dried lavender buds substitute with extract as needed
  • 1/4 cup honey adds natural sweetness
For the Optional Syrup
  • 1 cup water base for the syrup
  • 1/2 cup sugar sweetens the syrup
  • 2 tablespoons lemon juice adds acidity
  • 1 teaspoon rose water or orange blossom water optional for complexity

Equipment

  • Medium saucepan
  • Small bowl
  • Fine Mesh Sieve
  • ramekins

Method
 

Instructions
  1. In a medium saucepan over medium heat, combine heavy cream, whole milk, sugar, and dried lavender buds. Heat until steaming, about 5-7 minutes, without boiling.
  2. In a small bowl, sprinkle unflavored gelatin over cold water and let sit for 5 minutes to bloom.
  3. Remove cream mixture from heat, stir in bloomed gelatin and honey until dissolved.
  4. Strain the mixture through a fine-mesh sieve into a bowl to remove lavender buds.
  5. Pour mixture into 6 to 8 ramekins, cover with plastic wrap, and refrigerate for at least 4 hours or overnight.
  6. To serve, loosen edges with a knife and invert onto plates. Drizzle with honey and garnish with fresh lavender.

Notes

Ensure gelatin is bloomed properly and strain for a smooth texture. Chill overnight for best results.

Sweet Focaccia with Raspberry Jam: Your New Favorite Brunch Treat

The moment I took my first bite of Sweet Focaccia with Raspberry Jam, a wave of nostalgia swept over me, invoking those cherished Sunday brunches filled with laughter and warmth. This recipe captures that essence with its light, airy dough perfectly swirled with luscious raspberry jam, making it not just a breakfast treat but a delightful centerpiece for any gathering. Not only is it impressively easy to prepare, but it also invites you to unleash your creativity by choosing your favorite jam or adding a sprinkle of nuts for that extra crunch. Whether you enjoy it fresh from the oven or as a sweet addition to your afternoon tea, this focaccia is sure to impress. Ready to experience that bliss in your kitchen? Let’s dive in!

Why is Sweet Focaccia a Must-Try?

Deliciously Unique: This Sweet Focaccia combines the softness of traditional focaccia with the sweetness of raspberry jam, creating a unique dessert that stands apart. Effortless Prep: With just a few simple ingredients and steps, you’ll have a stunning dish ready in no time. Versatile Options: Customize it easily by swapping out the raspberry jam for your favorite flavors, like peach or strawberry. Crowd-Pleasing Appeal: Perfect for brunches or gatherings, it’s sure to be a hit alongside a cup of coffee or with a side of Spinach and Feta Quiche. Irresistibly Soft Texture: The airy dough, enhanced by a touch of olive oil, promises a delightful bite that’s simply comforting. Don’t miss out on the experience of making this luscious treat!

Sweet Focaccia with Raspberry Jam Ingredients

For the Dough

  • Warm Water – Activates yeast for leavening; ensure it’s between 105-115°F for best results.
  • Sugar – Feeds yeast to help dough rise; can be replaced with honey for a unique flavor.
  • Active Dry Yeast – Essential for leavening; always check that it’s fresh for optimal rising.
  • Bread Flour – Provides structure and chewiness; all-purpose flour can be used for a softer end product.
  • All-Purpose Flour – Adds tenderness; consider mixing with whole wheat flour for a healthier alternative.
  • Salt – Enhances flavor and controls yeast action; fine sea salt blends better into mixes.
  • Olive Oil – Adds moisture and flavor; essential for high hydration dough; melted butter works as a substitute for richness.

For the Filling and Glaze

  • Raspberry Jam – Sweet filling that enhances both flavor and moisture; feel free to swap with other jams like strawberry for a different twist.
  • Powdered Sugar – Makes the glaze sweet and appealing; icing sugar substitutes can lower the calorie count.
  • Milk – Adjusts the glaze’s consistency; whole milk gives a richer flavor, while almond milk makes it lighter.

Creating your own Sweet Focaccia with Raspberry Jam is an adventure into baking that combines the lightness of dough with sweet indulgence. It’s not just a recipe; it’s a way to bring warmth to your kitchen and joy to your gatherings!

Step‑by‑Step Instructions for Sweet Focaccia with Raspberry Jam

Step 1: Activate the Yeast
In a small bowl, combine warm water and sugar, stirring gently. Allow this mixture to sit for about 5 minutes until it becomes foamy on top—this indicates the yeast is active. This essential first step for your Sweet Focaccia with Raspberry Jam sets the foundation for a perfectly risen dough.

Step 2: Prepare the Dough
In a stand mixer, mix together both bread flour and all-purpose flour with salt until well combined. Slowly pour in the activated yeast mixture while mixing on low speed, allowing the ingredients to come together to form a sticky dough. This process should take approximately 2-3 minutes, ensuring a well-mixed batter for your focaccia.

Step 3: First Rise
Transfer the sticky dough to a clean bowl that has been lightly coated with olive oil, ensuring all sides are covered. Cover the bowl with a damp cloth or plastic wrap and let it rise in a warm spot for about 1 hour, or until it has doubled in size. You’ll know it’s ready when it looks puffed and airy, indicating it’s time to shape your Sweet Focaccia.

Step 4: Shape the Dough
After the dough has risen, gently deflate it and transfer it to a greased 9×13 inch pan. With lightly oiled hands, stretch and fold the dough over itself a few times. Brush the surface with olive oil, cover it again, and let it rise for another hour or until it visibly puffs up, ensuring that your focaccia will be delightfully fluffy.

Step 5: Preheat the Oven
While the dough finishes its second rise, preheat your oven to 425°F (220°C). This step is crucial for achieving a perfectly golden crust on your Sweet Focaccia with Raspberry Jam. The oven should be fully preheated before the dough goes in to help lock in a beautiful texture as it bakes.

Step 6: Add the Toppings
Once the dough is puffed up, use your fingers to create dimples all over the surface. Gently spread raspberry jam evenly across these dimples, ensuring you’re covering the dough without pulling it apart. This layer of jam will infuse luscious sweetness into your focaccia while baking.

Step 7: Bake the Focaccia
Place your focaccia in the preheated oven and bake for about 18-22 minutes, or until it turns golden brown and fully cooked through. Keep an eye on it! The edges should be slightly crisped while the center remains soft and airy—this is the look you want for your Sweet Focaccia.

Step 8: Fill with More Jam
Once baked, remove the focaccia from the oven and immediately poke numerous holes throughout the surface using a skewer or chopstick. Fill each hole with additional raspberry jam, allowing it to seep into the warm dough for an extra burst of flavor. This step ensures every bite is deliciously jam-filled.

Step 9: Prepare the Glaze
In a small bowl, mix powdered sugar and milk to create a smooth icing. Adjust the milk to achieve your desired consistency, then drizzle this glaze over the warm focaccia once it has cooled slightly. To achieve a beautifully iced surface, flip the focaccia after the first glaze layer and repeat.

Step 10: Cut and Serve
Finally, slice your Sweet Focaccia with Raspberry Jam into squares and serve warm. This delightful treat is perfect for brunch or as a sweet snack, inviting everyone to enjoy the fluffy, jam-filled goodness you’ve created.

Storage Tips for Sweet Focaccia with Raspberry Jam

  • Room Temperature: Enjoy the focaccia fresh for the best taste, but it can be stored at room temperature for up to 1 day in an airtight container to keep it soft.

  • Fridge: If you need to extend storage, you can refrigerate it for up to 3 days. Wrap it tightly in plastic wrap to prevent it from drying out.

  • Freezer: For longer storage, freeze your Sweet Focaccia with Raspberry Jam. Slice it before freezing for convenience, and it can last up to 3 months. Thaw at room temperature before enjoying.

  • Reheating: To revive the texture, reheat slices in the oven at 350°F (175°C) for about 10 minutes or briefly in the microwave, ensuring they’re still moist and delightful.

Expert Tips for Sweet Focaccia

  • Oil Generously: Always coat the dough with olive oil at each stage of preparation. This high hydration dough needs ample moisture for the best results in your Sweet Focaccia with Raspberry Jam.

  • Fresh Yeast: Ensure your yeast is fresh and properly activated. Using expired yeast can result in a dense focaccia that won’t rise, melting away your hopes for a fluffy treat.

  • Dimples Matter: Don’t be shy when making dimples in the dough! These pockets are essential for the raspberry jam to seep throughout, creating that delightful sweetness in every bite.

  • Cool Before Glazing: Allow the focaccia to cool adequately before icing it. If the dough is too warm, the glaze will melt away, losing that lovely finish.

  • Substitute Wisely: While raspberry jam is a star in this recipe, feel free to experiment with other jam flavors! Just make sure they’re equally thick to maintain the integrity of the focaccia.

Variations & Substitutions for Sweet Focaccia with Raspberry Jam

Feel free to get creative with your Sweet Focaccia, adding your personal twist to make every bite an unforgettable experience!

  • Different Jam: Switch raspberry jam for your favorite fruit jam, like strawberry or apricot, to explore new flavors. Each alternative brings its own unique sweetness and vibrancy, keeping your brunch exciting.

  • Nutty Surprise: Add a handful of chopped nuts, like walnuts or pecans, before baking for a delightful crunch. This adds a lovely texture contrast, enhancing every flavorful bite.

  • Savory Option: For a savory twist, omit the jam and top the dough with fresh rosemary and sea salt instead. This creates a deliciously fragrant focaccia that pairs perfectly with cheeses or soups.

  • Cinnamon Sugar Bliss: Before baking, sprinkle the top with cinnamon sugar for a sweet, aromatic crust. The warm spices infuse wonderful flavor while the sugar caramelizes to a golden finish.

  • Gluten-Free Twist: Use a gluten-free flour blend for a gluten-free version of this focaccia. Just be sure to add a xanthan gum substitute to maintain the dough’s texture.

  • Dairy-Free Glaze: Replace milk in the glaze with almond or oat milk to create a dairy-free icing that still delivers a sweet finish.

  • Citrus Zing: Add zest from lemon or orange to the dough for a refreshing citrus flavor that beautifully complements the sweetness of the jam.

  • Fruit Topping: Add fresh berries or sliced fruit on top along with the jam before baking for an extra fruity burst. Blueberries or thinly sliced peaches work wonderfully!

With these variations in your back pocket, your Sweet Focaccia can easily transform from a classic treat to an exciting culinary adventure. Whether you’re pairing it with a cup of coffee or serving alongside a comforting dish like Spinach and Feta Quiche, the possibilities are endless!

What to Serve with Sweet Focaccia with Raspberry Jam

Elevate your brunch experience with delightful pairings that enhance the flavors of this sweet treat!

  • Fresh Fruit Salad: Bright and vibrant, a mix of seasonal fruits provides a refreshing contrast to the dreamy sweetness of the focaccia.

  • Spinach and Feta Quiche: The savory, earthy flavors of this quiche complement the sweet raspberry jam beautifully, creating a well-rounded meal.

  • Café Style Coffee: A robust cup of coffee balances the sweetness of the focaccia, creating a perfect atmosphere for a relaxing brunch.

  • Herbal Iced Tea: The refreshing notes of herbal iced tea can cleanse the palate between bites, making your brunch experience even more enjoyable.

  • Creamy Mashed Potatoes: For a unique twist, serve alongside creamy mashed potatoes to blend sweet with hearty, creating an unexpected but delightful contrast.

  • Yogurt Parfait: Layered with granola and fresh berries, a yogurt parfait adds creaminess and a cool texture that plays nicely with the focaccia’s warmth.

  • Lemon Bars: The tangy brightness of lemon bars provides a zesty finish to your meal, harmonizing with the raspberry flavors and keeping the table lively.

  • Sparkling Water: Lightly flavored sparkling water keeps your palate refreshed without overwhelming the sweetness, providing an effervescent touch.

Make Ahead Options

These Sweet Focaccia with Raspberry Jam are perfect for busy home cooks looking to save time during hectic mornings! You can prepare the dough up to 24 hours in advance. Simply make the dough, let it rise, and then cover it tightly with plastic wrap before refrigerating. The next day, allow it to come to room temperature for about 30 minutes before shaping and proceeding with the second rise. The raspberry jam can also be spread onto the focaccia before baking and kept in the fridge, ensuring it retains its quality until you’re ready to bake. When you’re ready to serve, just bake, fill with more jam, and glaze as instructed for delicious results, just as fresh and delightful!

Sweet Focaccia with Raspberry Jam Recipe FAQs

How do I select ripe ingredients for Sweet Focaccia with Raspberry Jam?
Absolutely! When selecting your ingredients, ensure that the raspberry jam is luscious and vibrant. If you’re opting for fresh fruits, go for those with bright colors and no signs of bruising. Additionally, the yeast should be fresh; check for expiration dates! This ensures your dough rises beautifully, resulting in that perfect fluffy texture.

What is the best way to store Sweet Focaccia with Raspberry Jam?
For optimal freshness, enjoy the focaccia the day it’s made. If you need to store it, keep it in an airtight container at room temperature for up to 1 day. For longer storage, consider refrigerating it for up to 3 days, wrapping it tightly to maintain moisture.

Can I freeze Sweet Focaccia with Raspberry Jam?
Yes, indeed! To freeze, slice the focaccia into squares and wrap each piece tightly in plastic wrap or aluminum foil, then place them in a freezer-safe bag. This way, you can enjoy it whenever a craving strikes! It will keep well for up to 3 months. When you’re ready, simply thaw at room temperature or reheat it in a preheated oven at 350°F (175°C) for about 10 minutes to restore its delightful texture.

What are common troubleshooting tips if my focaccia is dense?
Very! If you find your focaccia turns out dense, it could be due to expired yeast or not allowing enough rising time. Ensure your yeast is fresh and ensure the dough rises in a warm environment. You want it to double in size before baking. Moreover, gentle handling during shaping helps maintain its airy structure. If it doesn’t rise adequately in the oven, it may be worth checking your oven temperature with a thermometer for accuracy.

What should I consider for dietary restrictions when making Sweet Focaccia?
If you’re baking for someone with allergies, note that this focaccia contains gluten and dairy. However, you can easily adapt the recipe; use gluten-free flour blends for a gluten-free version and almond or coconut milk for a dairy-free option. For pets, always ensure that no toxic ingredients, like certain nuts or sugars, are involved if you think they might sneak a bite!

What’s the best way to keep my Sweet Focaccia from getting too dry?
To keep your focaccia moist and delightful, make sure to generously coat the dough with olive oil at each stage. Additionally, avoid overbaking; once it’s golden brown, take it out! Preventing excessive exposure to air during storage is crucial as well. Always wrap it up straight after it cools to lock in that luscious moisture that makes every bite a joy.

Sweet Focaccia with Raspberry Jam

Sweet Focaccia with Raspberry Jam

Sweet Focaccia with Raspberry Jam is a delightful dessert that combines airy dough with luscious raspberry jam, perfect for brunch.
Prep Time 30 minutes
Cook Time 22 minutes
Rising Time 2 hours
Total Time 2 hours 52 minutes
Servings: 12 slices
Course: Dessert
Cuisine: Italian
Calories: 200

Ingredients
  

Dough Ingredients
  • 1 cup Warm Water Between 105-115°F
  • 2 tablespoons Sugar Can be replaced with honey
  • 2 teaspoons Active Dry Yeast Ensure it's fresh
  • 2 cups Bread Flour Provides structure
  • 1 cup All-Purpose Flour Can use whole wheat for a healthier option
  • 1 teaspoon Salt Fine sea salt preferred
  • 3 tablespoons Olive Oil Adds moisture and flavor
Filling and Glaze Ingredients
  • 1 cup Raspberry Jam Can substitute with other jams
  • 1 cup Powdered Sugar For glaze
  • 3 tablespoons Milk Adjust for desired consistency

Equipment

  • Stand mixer
  • 9x13 inch pan
  • mixing bowls
  • spoon
  • oven
  • Skewer or Chopstick

Method
 

Preparation Steps
  1. In a small bowl, combine warm water and sugar, stirring gently. Allow this mixture to sit for about 5 minutes until it becomes foamy on top.
  2. In a stand mixer, mix together both bread flour and all-purpose flour with salt until well combined. Slowly pour in the activated yeast mixture while mixing on low speed, forming a sticky dough.
  3. Transfer the sticky dough to a lightly oiled bowl, cover, and let it rise in a warm spot for about 1 hour until doubled in size.
  4. Gently deflate the dough and transfer it to a greased 9x13 inch pan. Stretch and fold the dough, brush with olive oil, cover, and let it rise for another hour.
  5. Preheat your oven to 425°F (220°C) while the dough rises.
  6. Create dimples in the dough, spread raspberry jam evenly, covering all the dimples.
  7. Bake for about 18-22 minutes or until golden brown and cooked through.
  8. Poke holes in the baked focaccia and fill with additional raspberry jam.
  9. Mix powdered sugar and milk for the glaze, drizzle over the focaccia, and flip to ice the other side.
  10. Slice into squares and serve warm.

Notes

Allow the focaccia to cool before glazing. Store at room temperature for up to 1 day, in the fridge for up to 3 days, or freeze for up to 3 months.

Vegan Pumpkin Spice Doughnuts that Melt in Your Mouth

As I stood in my kitchen, the aroma of spices swirling around me, I couldn’t help but smile at the cozy vibes of autumn. Those cravings for comfort food always seem to strike just as the leaves begin to change, and what better way to embrace the season than with these Vegan Pumpkin Spice Doughnuts? These soft, pillowy treats are not only quick to whip up but also a guilt-free indulgence that feels like a warm hug from your oven. With a rich pumpkin flavor balanced by the warm spices of fall, they offer a delightful homemade taste that leaves store-bought options in the dust. Whether you’re a seasoned home-chef or simply seeking a healthier dessert alternative, I promise these doughnuts will be a crowd-pleaser. Curious how to make this seasonal sensation? Let’s dive in!

Why are these doughnuts a must-try?

Irresistible Flavors: The warm pumpkin spice and creamy filling create a rich taste that will elevate your dessert game.

Vegan Delight: These doughnuts are completely vegan, ensuring everyone can indulge without guilt, making them perfect for gatherings.

Quick and Easy: With minimal prep time and straightforward steps, you’ll have homemade deliciousness in no time, ideal for busy bakers.

Cellophane-Wrapped Memories: Serve fresh out of the fryer with a side of warm apple cider for an unforgettable fall treat.

Versatile Creations: Customize to your heart’s content by experimenting with fillings or toppings, from maple cream to delightful chocolate chips.

Don’t miss out on creating this seasonal sensation that embodies the essence of fall!

Vegan Pumpkin Spice Doughnut Ingredients

Here’s everything you need to create these delightful Vegan Pumpkin Spice Doughnuts!

For the Dough

  • All-Purpose Flour – Provides structure; use gluten-free flour blends for a gluten-free option.
  • Pumpkin Purée – Adds moisture and rich pumpkin flavor; ensure it’s pure pumpkin without additives.
  • Sugar – Sweetener for the dough and coating; coconut sugar can be substituted for a lower glycemic index.
  • Active Yeast – Acts as a leavening agent for fluffy texture. Ensure freshness for best results.
  • Flax Egg – Serves as a vegan binder; can substitute with a regular egg if not vegan.
  • Pumpkin Spice – Flavoring blend of warm spices; feel free to make your own blend if preferred.
  • Melted Vegan Butter – Adds richness; replace it with oil or applesauce for a lower-fat alternative.
  • Non-Dairy Milk – Hydrates the dough; any plant milk like almond, soy, or oat works beautifully.

For the Filling

  • Vegan Cream Cheese – Provides a creamy filling; swap with blended nuts for a different texture.

For the Coating

  • Pumpkin Spice Sugar – For coating; combine sugar with pumpkin spice to enhance the flavor; adjust to taste.

Enjoy making these Vegan Pumpkin Spice Doughnuts, where warm flavors and textures come together for an unforgettable treat!

Step‑by‑Step Instructions for Vegan Pumpkin Spice Doughnuts

Step 1: Activate Yeast
Begin by gently warming ¾ cup of non-dairy milk to about 110°F (43°C). Stir in 2 tablespoons of sugar and 2 teaspoons of active yeast, then let it sit for 5–10 minutes until frothy. This step is crucial for ensuring your Vegan Pumpkin Spice Doughnuts rise beautifully, so keep an eye out for bubbles forming on the surface.

Step 2: Prepare Dough
In a large mixing bowl, whisk together 2 cups of all-purpose flour and 2 teaspoons of pumpkin spice. Once your yeast mixture is frothy, add it to the dry ingredients along with 1 flax egg (made from mixing a tablespoon of ground flaxseed with 2.5 tablespoons of water), ¼ cup of melted vegan butter, and ½ cup of pumpkin purée. Mix until combined and then knead the dough until it becomes smooth and elastic, about 5 minutes.

Step 3: First Proving
Place the kneaded dough into a lightly greased bowl and cover it with a clean kitchen towel. Let the dough rise in a warm area for 1 to 2 hours, or until it has doubled in size. You’ll know it’s ready when you gently press your finger into the dough and the indentation remains, indicating proper fermentation for your Vegan Pumpkin Spice Doughnuts.

Step 4: Shape Doughnuts
After the dough has risen, transfer it to a floured surface and roll it out to about ½-inch thick. Use a cookie cutter to cut out doughnut shapes, then create a pumpkin shape by gently using kitchen string as a guide. Place the formed doughnuts on a baking sheet lined with parchment paper, cover them, and let them rise again until puffed, about 30 minutes.

Step 5: Fry Doughnuts
Heat about 2 inches of oil in a large, deep pan over medium heat to around 350°F (175°C). Carefully place a few doughnuts in the hot oil, frying them for 2–4 minutes on each side until golden brown. Use a slotted spoon to remove the doughnuts from the oil, letting the excess drip off. This frying step is essential for achieving that soft, pillowy texture in your Vegan Pumpkin Spice Doughnuts.

Step 6: Coat in Sugar
In a shallow bowl, mix ½ cup of sugar with 1 teaspoon of pumpkin spice for coating. While the doughnuts are still warm, roll each one in the sugar mixture until evenly coated. This adds a delightful sweet crunch to your Vegan Pumpkin Spice Doughnuts, enhancing their fall-inspired flavors.

Step 7: Fill Doughnuts
Using a piping bag fitted with a round tip, fill each doughnut with vegan cream cheese. Inject the filling into the center of each doughnut slowly to avoid bursting them. If desired, you can top the filled doughnuts with a decorative cinnamon stick for a festive presentation that captures the autumn spirit beautifully.

Storage Tips for Vegan Pumpkin Spice Doughnuts

Room Temperature: Keep Vegan Pumpkin Spice Doughnuts in an airtight container for up to 2 days. Enjoy them fresh for the best taste and texture.

Fridge: If you need to store them longer, place them in the fridge in an airtight container for up to a week. Reheat slightly in the oven or microwave before serving to restore softness.

Freezer: For extended storage, freeze the doughnuts individually wrapped in plastic wrap, then place in a freezer-safe bag for up to 3 months. Reheat directly from the freezer in the oven.

Reheating: To reheat, place the frozen doughnuts in a preheated oven at 350°F (175°C) for about 10-15 minutes. This helps create that fresh-out-of-the-fryer experience again!

Make Ahead Options

These Vegan Pumpkin Spice Doughnuts are perfect for busy home cooks looking to save time! You can prepare the dough (steps 1-4) up to 24 hours in advance; just cover the shaped doughnuts and refrigerate them. This will allow the flavors to meld beautifully while keeping them fresh. When you’re ready to fry them, let the doughnuts sit at room temperature for about 30 minutes before proceeding with frying (step 5). To maintain their fluffy texture, be sure to keep them covered as they rise. Once fried and cooled, coat them in sugar (step 6) and fill with the vegan cream cheese (step 7) just before serving for that delightful fresh taste. Enjoy your fall baking without the rush!

Expert Tips for Vegan Pumpkin Spice Doughnuts

  • Fresh Ingredients: Ensure your yeast is fresh and active; old yeast can lead to dense, flat doughnuts that won’t rise properly.

  • Perfect Temperature: Monitor the oil temperature carefully when frying; too hot can burn the outside while leaving the inside raw.

  • Adjusting Sweetness: If the doughnuts are too sweet for your taste, reduce the sugar in the dough, while still achieving a delightful coating with pumpkin spice sugar.

  • Allow to Cool: Let the doughnuts cool slightly after frying before coating them in sugar; this prevents the sugar from melting and ensures a lovely finish.

  • Creative Fillings: Don’t hesitate to experiment with different fillings for your Vegan Pumpkin Spice Doughnuts, such as flavored jams or custards that complement the pumpkin spice.

Vegan Pumpkin Spice Doughnut Variations

Feel free to give your vegan pumpkin spice doughnuts a personal touch with these delightful twists!

  • Sweet Potato Swap: Replace pumpkin purée with sweet potato purée for a subtly different flavor. The sweetness and texture will still create a comforting treat.

  • Chocolate Chip Delight: Add vegan chocolate chips to the dough for an exciting flavor contrast. Each bite will surprise you with gooey richness, bringing joy to your autumn indulgence.

  • Nutty Crunch: Incorporate chopped walnuts or pecans into the dough for an added crunchy texture. This variation lends a lovely surprise within each bite, enhancing the loving warmth of fall flavors.

  • Maple Cream Filling: Swap the vegan cream cheese filling for a maple cream filling for a unique twist. The sweetness of maple combined with pumpkin spice creates an irresistible harmony.

  • Spicy Kick: Add a pinch of cayenne pepper to the dough for a subtle heat that enhances the pumpkin spice flavor. It’s a wonderful way to awaken your taste buds while keeping that cozy vibe intact!

  • Baked Version: Rather than frying, bake the doughnuts for a healthier option. Adjust baking time to about 15-20 minutes at 350°F (175°C), yielding a deliciously soft texture without the oil.

  • Dairy-Free Chocolate Glaze: Drench the warm doughnuts in a melted dairy-free chocolate glaze instead of the sugar coating for a rich dessert experience. It’s a luxurious upgrade that chocolate lovers will adore.

Feel free to mix and match these variations to tailor your vegan pumpkin spice doughnuts. If you’re looking for more inspiration, check out how to make your doughnuts gluten-free or try filling them with a creamy vegan custard!

What to Serve with Vegan Pumpkin Spice Doughnuts

Nothing warms the heart quite like a delightful array of flavors that complements the cozy essence of autumn.

  • Creamy Apple Cider: Perfectly spiced for fall, warm apple cider enhances the pumpkin flavors while inviting cozy vibes to your table. It’s like a hug in a mug!

  • Rich Chocolate Ganache: Dip your doughnuts in silky, vegan chocolate ganache for an indulgent twist. The contrast of rich chocolate and warm spices sings with every bite.

  • Maple Drizzle: A light drizzle of maple syrup adds sweetness and extra depth. It beautifully elevates the flavors of pumpkin and warms the soul during chilly evenings.

  • Coconut Whipped Cream: Light and airy, coconut whipped cream provides a luscious contrast to your doughnuts. This dairy-free delight is a perfect way to crown your treats!

  • Fresh Fruit Salad: A vibrant medley of fall fruits like pears and pomegranates adds freshness and crunch, balancing the sweet, hearty flavors of the doughnuts.

  • Hazelnut Coffee: The nutty notes of hazelnut coffee enhance the warm spices, making each sip a delightful companion for your decadent doughnuts.

  • Spiced Tea: A hot cup of spiced chai brings a warming kick that pairs perfectly with the comforting flavors of the doughnuts. Sip while savoring each treat!

  • Caramel Sauce: For the sweet tooth, a drizzle of vegan caramel sauce over your doughnuts invites an unforgettable sticky sweetness that’ll keep everyone coming back for more.

Vegan Pumpkin Spice Doughnuts Recipe FAQs

How do I choose the right pumpkin purée?
Absolutely! When selecting pumpkin purée, make sure to choose 100% pure pumpkin without any additives or preservatives on the label. Freshly made pumpkin purée from roasted pumpkins is an excellent option if you’re feeling adventurous. Just remember, consistency is key for that perfect doughnut texture!

What is the best way to store Vegan Pumpkin Spice Doughnuts?
You can store your Vegan Pumpkin Spice Doughnuts in an airtight container at room temperature for up to 2 days. If you want to keep them longer, refrigerate them for up to a week in a sealed container. Reheating them slightly before enjoying ensures they retain their soft and fluffy texture.

Can I freeze these doughnuts?
For sure! To freeze your Vegan Pumpkin Spice Doughnuts, wrap each one individually in plastic wrap and place them into a freezer-safe bag. They will stay fresh for up to 3 months. When you’re ready to enjoy, reheat directly from the freezer in a preheated oven at 350°F (175°C) for about 10-15 minutes for a warm, delectable treat!

What if my dough doesn’t rise?
Very! If your dough isn’t rising as expected, there could be a few factors at play. First, ensure your yeast is fresh; old or expired yeast won’t activate. Additionally, the warmth of your environment is crucial; if it’s too cold, the yeast may struggle. Try placing the dough in a warm, draft-free area or near a warm oven. If stuck, you can also extend the proving time to give it a better chance to rise.

Are these doughnuts safe for those with nut allergies?
Absolutely! If you need to avoid nuts, make sure to use a nut-free plant milk like oat or rice milk in your dough. For the filling, opt for a nut-free cream cheese substitute that fits your dietary needs. It’s always great to check the labels of all ingredients to ensure they meet your allergy requirements.

Vegan Pumpkin Spice Doughnuts

Vegan Pumpkin Spice Doughnuts that Melt in Your Mouth

Delight in these Vegan Pumpkin Spice Doughnuts, a cozy autumn treat filled with rich pumpkin flavor and warm spices.
Prep Time 30 minutes
Cook Time 15 minutes
Rising Time 2 hours
Total Time 2 hours 45 minutes
Servings: 12 doughnuts
Course: Dessert
Cuisine: Vegan
Calories: 150

Ingredients
  

For the Dough
  • 2 cups All-Purpose Flour Use gluten-free flour blends for a gluten-free option.
  • ¾ cup Non-Dairy Milk Warm to about 110°F (43°C).
  • 2 tablespoons Sugar Coconut sugar can be substituted for a lower glycemic index.
  • 2 teaspoons Active Yeast Ensure freshness for best results.
  • 1 unit Flax Egg Made from mixing a tablespoon of ground flaxseed with 2.5 tablespoons of water.
  • 2 teaspoons Pumpkin Spice Feel free to make your own blend if preferred.
  • ¼ cup Melted Vegan Butter Replace with oil or applesauce for a lower-fat alternative.
  • ½ cup Pumpkin Purée Ensure it's pure pumpkin without additives.
For the Filling
  • 1 cup Vegan Cream Cheese Swap with blended nuts for a different texture.
For the Coating
  • ½ cup Pumpkin Spice Sugar Combine sugar with pumpkin spice to enhance the flavor.

Equipment

  • mixing bowl
  • whisk
  • Cookie cutter
  • Piping bag
  • Deep Pan

Method
 

Step-by-Step Instructions
  1. Begin by gently warming ¾ cup of non-dairy milk to about 110°F (43°C). Stir in 2 tablespoons of sugar and 2 teaspoons of active yeast, then let it sit for 5–10 minutes until frothy.
  2. In a large mixing bowl, whisk together 2 cups of all-purpose flour and 2 teaspoons of pumpkin spice. Once your yeast mixture is frothy, add it to the dry ingredients along with 1 flax egg, ¼ cup of melted vegan butter, and ½ cup of pumpkin purée. Mix until combined and then knead the dough until smooth and elastic, about 5 minutes.
  3. Place the kneaded dough into a lightly greased bowl and cover it with a clean kitchen towel. Let the dough rise in a warm area for 1 to 2 hours, or until it has doubled in size.
  4. After the dough has risen, transfer it to a floured surface and roll it out to about ½-inch thick. Use a cookie cutter to cut out doughnut shapes, then shape them as desired.
  5. Heat about 2 inches of oil in a large, deep pan over medium heat to around 350°F (175°C). Carefully place a few doughnuts in the hot oil, frying them for 2–4 minutes on each side until golden brown.
  6. In a shallow bowl, mix ½ cup of sugar with 1 teaspoon of pumpkin spice for coating. While the doughnuts are still warm, roll each one in the sugar mixture until evenly coated.
  7. Using a piping bag fitted with a round tip, fill each doughnut with vegan cream cheese.

Notes

Serve fresh out of the fryer with a side of warm apple cider for an unforgettable fall treat.

Spooky Halloween Pasta Salad Your Kids Will Go Crazy For

As the leaves turn and the air gets crisp, Halloween creeps closer with its delightful spookiness. This year, I’m excited to share my Halloween Pasta Salad, a fun dish that combines vibrant colors with eerie shapes, perfect for both kids and adults alike. Featuring spooky mushroom skulls and mozzarella eyeballs, this recipe is not only a crowd-pleaser but also completely customizable to suit your family’s tastes and dietary preferences. What I love most is how it transforms classic pasta salad into a festive centerpiece for any gathering. It’s a balance of playful presentation and delicious flavor, making it as enjoyable to prepare as it is to eat. Ready to conjure up some culinary magic this Halloween? Let’s jump into the fun!

Why is this Halloween Pasta Salad a must-try?

Festive Fun: This Halloween Pasta Salad is a delightful fusion of spooky visuals and appetizing flavors that will enchant kids and adults alike.
Easily Customizable: With various ingredients, you can tailor it to fit every dietary need, making it flexible for all guests.
Quick to Prepare: Whip up this masterpiece in no time—perfect for last-minute party planning!
Crowd-Pleasing Appeal: Its unique presentation garners attention and sparks conversation, making it an enticing novelty at gatherings.
Creative Culinary Experience: Transform traditional cooking into an enchanting activity by involving little chefs in crafting their own creepy pasta creations!
Check out some other playful yet nutritious salads like Crunch Cucumber Salad and Cabbage Apple Salad to complete your spooky feast!

Halloween Pasta Salad Ingredients

Creating your spooky Halloween Pasta Salad is a breeze with these simple ingredients!

For the Pasta Base

  • Dry Pasta – Use rotini or cellantani for the best texture in your salad.
  • Water – Enough to fully submerge the pasta while boiling.
  • Kosher Salt – Generously season the boiling water to enhance flavor.

For the Creepy Decorations

  • White Button Mushrooms – Clean and fresh mushrooms serve as the skulls, adding delightful umami.
  • Butter – Sauté the mushrooms in unsalted butter for a rich flavor.
  • Olive Oil – Prevents the pasta from sticking and enhances overall flavor.
  • Marinated Mini Mozzarella Balls (bocconcini) – These create the eyeballs and contribute a creamy texture to the salad.
  • Pitted Black Olives – Provide pupils for the mozzarella eyeballs, adding a salty bite.
  • Large Orange Bell Pepper – Adds vibrant color and can be cut into shapes for decoration.

For the Magical Touch

  • Super Black Gel Food Coloring (optional) – Create a spooky black pasta effect; skip it if using naturally dark pasta.
  • Basil Pesto – Enhances the flavor of the mozzarella eyeballs; thin with olive oil for easy spreading.
  • Italian Dressing – A flavor-packed version ties everything together; drizzle generously over the salad to finish.

Let your imagination run wild as you create this Halloween pasta salad that’s perfect for any spooky celebration!

Step‑by‑Step Instructions for halloween pasta salad

Step 1: Prepare Mushroom Skulls
Begin by cleaning the white button mushrooms thoroughly. Using a straw, carefully create eye sockets in each mushroom, then carve out tiny nostrils and teeth designs. Slice each mushroom in half and sauté them in a pan with unsalted butter and a drizzle of olive oil over medium heat, stirring occasionally until they turn golden brown—around 5-7 minutes.

Step 2: Cook Pasta
In a large pot, bring water to a rolling boil, adding a generous amount of kosher salt. If desired, mix in super black gel food coloring to create a spooky effect on your pasta. Cook the rotini or cellantani until al dente, about 8-10 minutes. Once cooked, drain the pasta and rinse it briefly under cold water to prevent sticking, then set aside.

Step 3: Make Mozzarella Eyeballs
Grab your marinated mini mozzarella balls and carefully cut each olive in half for the pupils. Using a small knife, carve wells into the mozzarella balls and fill them with basil pesto, adding the olive halves on top to create creepy eyeballs. These mozzarella eyeballs will add a fun and tasty touch to your halloween pasta salad.

Step 4: Cut Bell Peppers
Take your large orange bell pepper and slice it in half. Use mini cookie cutters to create fun shapes, such as ghosts or bats, making sure to remove any seeds and white membranes. These colorful pieces will add a festive flair to your salad, so keep them handy for the final assembly.

Step 5: Assemble Salad
In a large mixing bowl, combine the cooked pasta with the sautéed mushroom skulls and the fun bell pepper shapes. Drizzle a generous amount of Italian dressing over the mixture, then toss everything together gently until evenly coated. Finally, arrange the mozzarella eyeballs on top to enhance the spooky appearance of your halloween pasta salad. Serve immediately or chill for a bit to allow the flavors to meld.

How to Store and Freeze Halloween Pasta Salad

Fridge: Store assembled Halloween pasta salad in an airtight container for up to 2-3 days, ensuring ingredients maintain freshness and flavor.

Separate Components: To avoid sogginess, keep the mushroom skulls, mozzarella eyeballs, and dressing stored separately until you’re ready to serve the salad.

Freezer: Freezing is not recommended for this Halloween pasta salad since the texture of the pasta and cheese may be adversely affected upon thawing.

Reheating: Serve chilled or at room temperature for the best taste. If you prefer warm pasta, briefly reheat the pasta before assembling, but avoid reheating the assembled salad.

What to Serve with Spooky Halloween Pasta Salad

Imagine delighting your guests with a vibrant spread that perfectly complements this whimsically spooky dish while enchanting them with flavors of the season.

  • Garlic Breadsticks: Warm, buttery breadsticks add a comforting crunch, perfectly balancing the creamy textures of the pasta salad.

  • Crispy Apple Slices: Their refreshing crunch and hint of sweetness contrast the savory dish, providing a crisp bite that kids will adore.

  • Pumpkin Soup: A velvety, spiced pumpkin soup creates a delightful autumnal pairing, echoing the Halloween theme and warming the heart.

  • Fruit Skewers: Colorful fruit skewers are an easy, kid-friendly addition that offers a light and sweet counterpoint to the savory pasta salad.

  • Spooky Mocktails: Serve a fun, themed drink like “Witch’s Brew” made with green grape juice and lemon-lime soda, adding fizz and flair to the feast.

  • Chocolaty Spider Cupcakes: Cap off the meal with these cute desserts, combining chocolatey goodness with a Halloween fun factor that kids won’t be able to resist.

Ultimately, these pairings will elevate your Halloween gathering, ensuring that both the main event and dessert are memorable delights!

Halloween Pasta Salad Variations

Feel free to get creative with this Halloween pasta salad and design it to suit your family’s tastes or dietary needs!

  • Gluten-Free: Substitute regular pasta with gluten-free chickpea or lentil pasta for a delicious option everyone can enjoy.
  • Creamy Twist: Use ranch or creamy Caesar dressing instead of Italian for a rich and tangy flavor. It enhances the overall creaminess while keeping it festive!
  • Extra Protein: Add shredded rotisserie chicken or diced turkey for a heartier salad that’s perfect as a filling meal.
  • Veggie Boost: Toss in some cherry tomatoes or diced cucumbers for a refreshing crunch that will balance the creamy elements. A colorful addition to the spooky theme!
  • Nutty Crunch: Include toasted pumpkin seeds or walnuts for a delightful crunch that complements the textures beautifully.
  • Herb Infusion: Enhance the flavor with fresh herbs like parsley or cilantro, providing a fresh twist to the classic flavors.
  • Spicy Kick: Add a sprinkle of red pepper flakes for a fiery surprise that contrasts with the creaminess of the mozzarella eyeballs. This little heat can take the dish to the next level!
  • Swap Cheeses: Use feta cheese or vegan cheese alternatives in place of mozzarella for different flavor profiles that cater to dietary preferences.

And if you’re looking for more wholesome salads to accompany your Halloween celebrations, try out this Cabbage Apple Salad or the delicious Crunch Cucumber Salad. The possibilities are endless, so let your culinary creativity shine!

Expert Tips for Halloween Pasta Salad

  • Prep Ahead: Prepare the mushroom skulls, mozzarella eyeballs, and bell pepper shapes in advance to streamline assembly and maintain freshness.

  • Pasta Perfection: Avoid overcooking the pasta; aim for al dente for a satisfying bite. This is crucial for the overall texture of your Halloween pasta salad.

  • Color Choices: If you opt for super black gel food coloring, use it sparingly to avoid overpowering the dish. Alternatively, choose naturally dark pasta for a unique spin without the artificial hues.

  • Storing Leftovers: Store any assembled salad in an airtight container in the fridge. To prevent sogginess, keep the mozzarella eyeballs separate until serving.
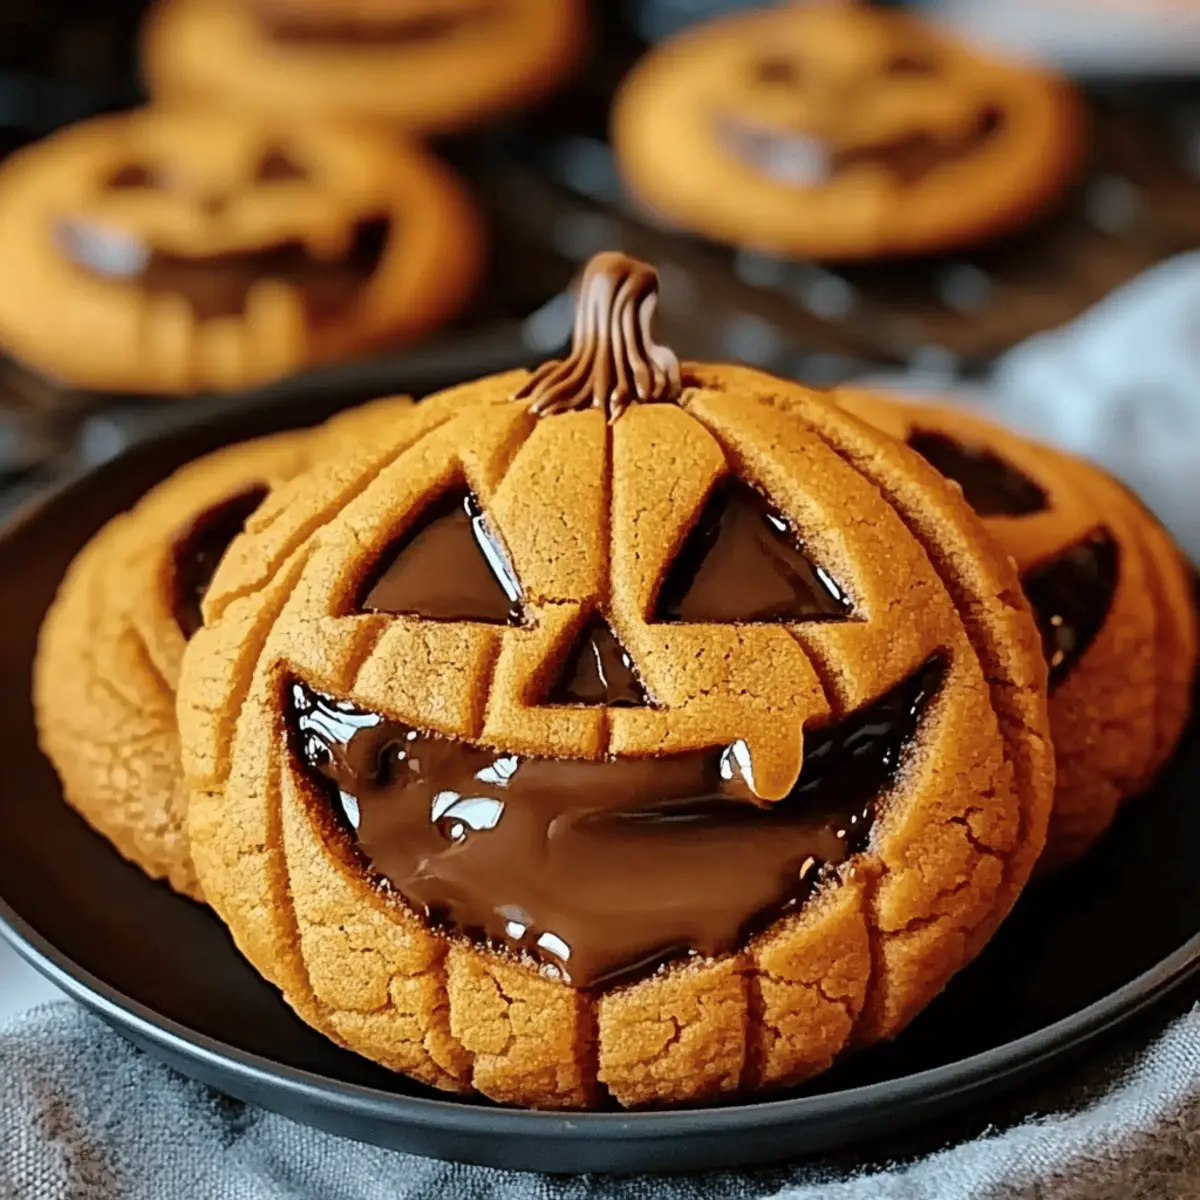
  • Kid-Friendly Customization: Involve kids in creating their spooky pasta salad decorations. This makes preparation fun and allows them to choose their own favorite ingredients!

Make Ahead Options

Preparing this Halloween Pasta Salad in advance is a game-changer for busy cooks! You can cook the pasta and sauté the mushroom skulls up to 24 hours in advance; just ensure to refrigerate them in airtight containers to keep them fresh. The mozzarella eyeballs can also be made early (1-2 days prior) and stored upright to prevent leaking. Assemble all components shortly before serving to maintain texture, ideally within 3 days of prep. Simply combine the pasta, mushroom skulls, and bell peppers with the Italian dressing when ready to serve, and top with mozzarella eyeballs for a spooky finish. This way, you’ll enjoy maximum flavor without the last-minute rush!

Halloween Pasta Salad Recipe FAQs

What type of pasta should I use for Halloween Pasta Salad?
Absolutely! For the best texture, I recommend using rotini or cellantani. Their curly shapes hold onto the dressing and other ingredients beautifully, making each bite a delight!

How do I store leftover Halloween Pasta Salad?
To keep your Halloween pasta salad fresh, store it in an airtight container in the fridge for up to 2-3 days. To prevent sogginess, it’s best to keep the mushroom skulls and mozzarella eyeballs separate from the pasta until serving time.

Can I freeze Halloween Pasta Salad?
Unfortunately, freezing this Halloween pasta salad is not recommended. The texture of the pasta and cheese may become mushy after thawing. This salad is best enjoyed fresh! If you need to prepare in advance, keep the components stored separately until ready to serve.

What should I do if the mushrooms are slimy or discolored?
Great question! Always choose fresh white button mushrooms for your skulls. If you notice any dark spots or a slimy texture, it’s best to discard them. Look for firm, smooth mushrooms that have no dark spots.

Are there any allergy considerations for this recipe?
Yes! If you’re catering to guests with dietary restrictions, you can easily customize this Halloween pasta salad. Use gluten-free pasta alternatives like chickpea or lentil pasta and check labels for allergens in your dressings, pesto, and mozzarella. Always inform diners of ingredients to ensure everyone enjoys safely!

Can I customize the decorations in this Halloween Pasta Salad?
Very much so! You can swap in different vegetables or cheeses to create your spooky decorations. Try adding cherry tomatoes, crumbled feta for a new twist, or even using vegan mozzarella if you’re catering to specific dietary needs. The more the merrier when it comes to creativity!

halloween pasta salad

Spooky Halloween Pasta Salad Your Kids Will Go Crazy For

This Halloween Pasta Salad is a delightful combination of spooky visuals and appetizing flavors, guaranteed to enchant both kids and adults alike.
Prep Time 15 minutes
Cook Time 15 minutes
Chilling Time 30 minutes
Total Time 1 hour
Servings: 6 servings
Course: Lunch
Cuisine: American
Calories: 350

Ingredients
  

For the Pasta Base
  • 8 ounces Dry Pasta (rotini or cellantani)
  • 4 quarts Water Enough to fully submerge the pasta while boiling.
  • 1 tablespoon Kosher Salt Generously season the boiling water.
For the Creepy Decorations
  • 8 ounces White Button Mushrooms Clean and fresh mushrooms.
  • 2 tablespoons Unsalted Butter For sautéing the mushrooms.
  • 1 tablespoon Olive Oil Prevents pasta from sticking.
  • 8 ounces Marinated Mini Mozzarella Balls (bocconcini)
  • 10 pieces Pitted Black Olives Provide pupils for the mozzarella eyeballs.
  • 1 large Orange Bell Pepper Cut into fun shapes.
For the Magical Touch
  • 1 drop Super Black Gel Food Coloring (optional) For spooky black pasta effect.
  • 1 cup Basil Pesto Enhances flavor of mozzarella eyeballs.
  • 1/2 cup Italian Dressing Drizzle generously over the salad.

Equipment

  • Large pot
  • Pan
  • mixing bowl
  • Straw
  • Mini cookie cutters

Method
 

Step‑by‑Step Instructions for Halloween Pasta Salad
  1. Prepare Mushroom Skulls: Clean the mushrooms, then create eye sockets and carve nostrils and teeth. Sauté in butter and olive oil for 5-7 minutes until golden brown.
  2. Cook Pasta: Bring water to a boil, add kosher salt and optional gel food coloring, then cook pasta until al dente for 8-10 minutes. Drain and rinse with cold water.
  3. Make Mozzarella Eyeballs: Cut olives in half for pupils, carve wells in mozzarella balls, fill with basil pesto and add olive halves.
  4. Cut Bell Peppers: Slice the orange bell pepper, use mini cookie cutters for fun shapes.
  5. Assemble Salad: Combine cooked pasta, sautéed mushrooms, and bell pepper shapes. Drizzle with Italian dressing and toss gently. Top with mozzarella eyeballs.

Notes

Prepare decorations ahead of time to streamline assembly. Avoid overcooking pasta for ideal texture. Store leftovers in an airtight container, keeping dressing separate until serving.
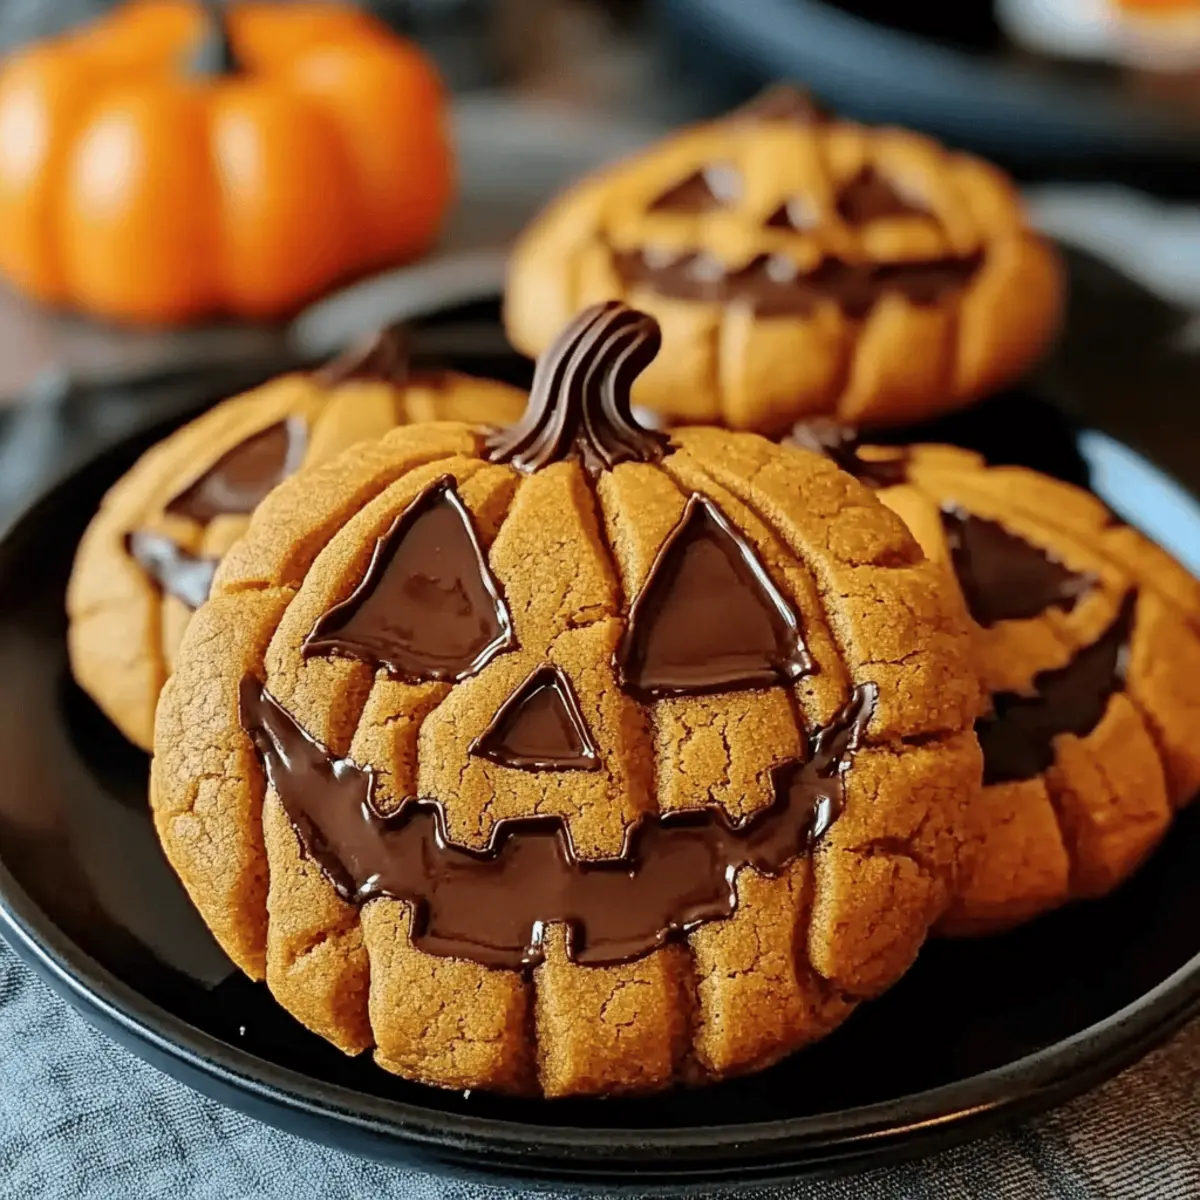
Spooky and Sweet Chocolate Filled Jack Lantern Cookies to Delight

As I scrolled through my favorite recipe sites, the sight of adorable pumpkin-shaped cookies caught my eye, instantly transporting me to the heart of Halloween. My version, these Spooky and Sweet Chocolate Filled Jack Lantern Cookies, merge buttery goodness with rich melting chocolate for an irresistible treat. They’re not only a joyful activity to bake with kids but also bring a festive touch to any gathering. Imagine the smiles when you present these charming jack lantern cookies adorned with cheeky grins! Whether you’re solidifying your reputation as the neighborhood’s Halloween baking queen or simply craving a sweet escape, these cookies promise a delightful blend of creativity and flavor. Ready to make your kitchen the most enchanting spot this Halloween?
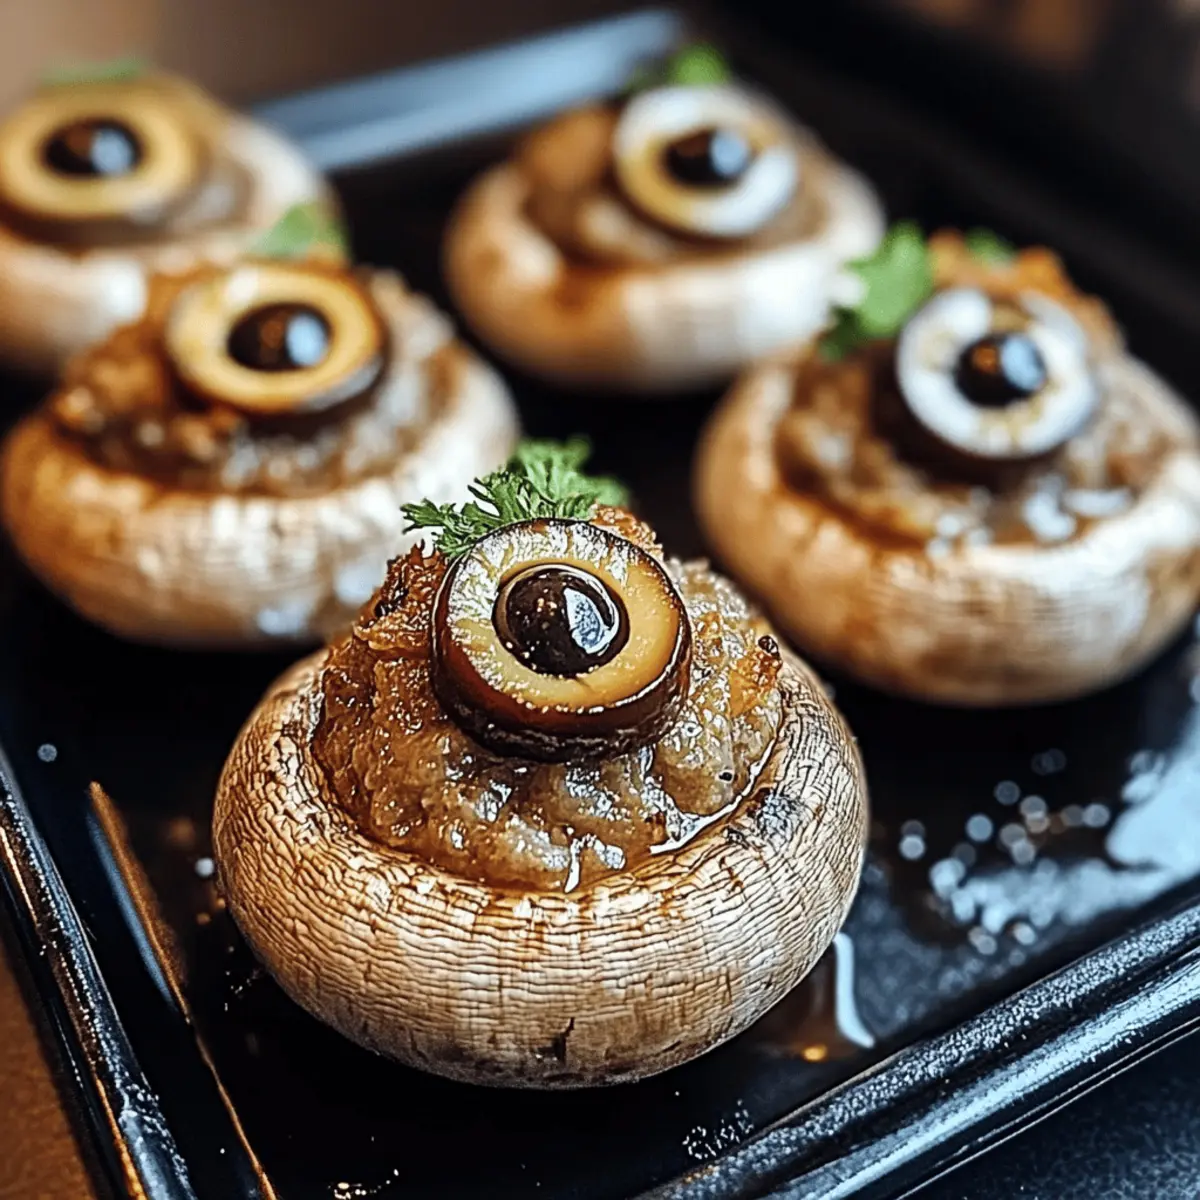
Why Are These Cookies So Fun to Make?

Creativity Shines: Each cookie is a sweet canvas for your artistic flair, allowing you to carve out playful jack lantern faces that will evoke smiles.
Perfect for Everyone: Kids and adults alike will love joining in this fun baking project, making it an ideal family activity.
Flavorful Twist: Rich chocolate filling complements the buttery pumpkin-shaped cookies, creating a delightful balance of sweet and savory.
Versatile Options: Feel free to experiment with chocolate types; swap milk chocolate for dark or even white chocolate for a unique twist!
Crowd-Pleasing Treats: Whether it’s a Halloween party or a festive gathering, these cookies are guaranteed to be a hit!
Pair them with other Halloween-themed treats, like Grandma’s Homemade No-Bake Chocolate Oat Bites or Coconut Chocolate Rolls for an unforgettable dessert spread!

Chocolate Filled Jack Lantern Cookies Ingredients

For the Cookie Dough
All-Purpose Flour – Provides structure to the cookies; you can use gluten-free flour for a different texture.
Baking Powder – A leavening agent that helps the cookies rise; make sure it’s fresh for the best results.
Salt – Enhances flavor; swap for sea salt for a touch of gourmet flair.
Unsalted Butter – Adds richness; it must be softened for easy creaming. Coconut oil or vegan butter works great for a dairy-free version.
Granulated Sugar – Sweetens the dough and contributes to that tender texture; using brown sugar will add a deeper flavor kick.
Large Egg – Binds the ingredients together and enhances texture; for a vegan option, a flax egg can do the trick.
Vanilla Extract – Infuses flavor and aroma; always opt for pure vanilla for the best taste.
Orange Gel Food Coloring – Gives that vibrant pumpkin hue to your dough; recommended for a visual pop, but optional.

For the Chocolate Filling
Milk Chocolate – The star filling for that rich taste; feel free to swap with dark chocolate or white chocolate if you prefer.
Heavy Cream – Helps melt the chocolate smoothly; use coconut cream for a delightful dairy-free alternative.

For Decorating
Green Icing or Candy – Optional but perfect for crafting adorable pumpkin stems on your cookies!

Embrace the magic of these Chocolate Filled Jack Lantern Cookies as you prepare to delight friends and family this Halloween season!

Step‑by‑Step Instructions for Spooky and Sweet Chocolate Filled Jack Lantern Cookies

Step 1: Make Dough
In a large mixing bowl, whisk together the all-purpose flour, baking powder, and salt to blend dry ingredients. In a separate bowl, cream the softened unsalted butter and granulated sugar until light and fluffy, about 3-5 minutes. Beat in the large egg and vanilla extract, adding the orange gel food coloring for a vibrant hue. Gradually stir in the dry ingredients until just combined.

Step 2: Chill Dough
Divide the cookie dough into two equal disks and wrap them tightly in plastic wrap. Refrigerate the dough for at least 30 minutes to allow it to firm up. This cooling step is crucial for achieving the perfect cookie shape when baking your Spooky and Sweet Chocolate Filled Jack Lantern Cookies.

Step 3: Preheat Oven
While the dough chills, preheat your oven to 350°F (175°C) and prepare two baking sheets by lining them with parchment paper. The lined sheets will prevent the cookies from sticking and ensure even baking, leading to delightful jack lantern cookies that hold their shape while they bake.

Step 4: Roll and Cut
Once chilled, remove the dough from the refrigerator and roll it out on a lightly floured surface to a thickness of about ¼ inch. Use a pumpkin-shaped cookie cutter to cut out cookies, and on half of them, carefully carve jack lantern faces using a small knife or toothpick to bring your spooky creations to life.

Step 5: Bake
Transfer the dough shapes onto the lined baking sheets, spacing them about an inch apart. Bake in the preheated oven for 8-10 minutes, or until the edges are lightly golden yet the centers remain soft and tender. Allow them to cool on the sheets for a few minutes before transferring to a wire rack to cool completely.

Step 6: Prepare Filling
In a microwave-safe bowl, combine the milk chocolate and heavy cream. Microwave in 20-second intervals, stirring in between, until the mixture is smooth and melted. This creamy filling will be the heart of your Spooky and Sweet Chocolate Filled Jack Lantern Cookies, offering a rich contrast to the tender cookies.

Step 7: Assemble
Once the cookies are completely cooled, spread a generous amount of the melted chocolate filling on the flat side of the solid pumpkin cookies. Top with the carved jack lantern cookies to create delightful sandwiches. Gently press them together, allowing the chocolate to ooze out just a bit for an enticing look.

Step 8: Decorate
If desired, use green icing or candies to add cute pumpkin stems to your jack lantern cookie tops. This final touch brings personality and fun to your Spooky and Sweet Chocolate Filled Jack Lantern Cookies, making them even more festive for Halloween gatherings!

Make Ahead Options

These Spooky and Sweet Chocolate Filled Jack Lantern Cookies are ideal for busy home cooks looking to save time during the festive season! You can prepare the cookie dough up to 24 hours in advance by wrapping it in plastic wrap and refrigerating it; this helps the flavors meld beautifully. In addition, the unfilled cookies can be baked and stored in an airtight container at room temperature for up to 4 days. To finish, simply melt the chocolate filling and assemble the cookies just before serving to ensure they remain fresh and delicious. With these prep tips, you’ll enjoy the delights of homemade treats without the last-minute rush!

What to Serve with Spooky and Sweet Chocolate Filled Jack Lantern Cookies

Treat your loved ones with a festive spread that heightens the joy of Halloween!

  • Creamy Pumpkin Soup: Warm and velvety, this soup adds a seasonal touch, making a cozy pairing with sweet treats.

  • Spooky Cheese Platter: A selection of spooky-shaped cheeses and crackers creates a fun balance of savory and sweet for guests.

  • Cinnamon Sugar Donuts: Soft, sweet, and dusted with warm cinnamon, these donuts echo autumn flavors, perfectly complementing the chocolate cookies.

  • Apple Cider: A glass of spiced apple cider brings a lovely autumn flair, enhancing the sweetness of your spooky cookies.

  • Chocolate Dipped Strawberries: For a light, fruity element, these add a fresh crunch and contrast beautifully to the rich chocolate filling.

  • Ghostly Meringues: Light as air, these ethereal treats add whimsy and a delightful crispness that balances the cookies’ softness.

  • Pumpkin Pie Bites: Bite-sized pumpkin treats echo the festive spirit, creating a delightful dessert table that celebrates Halloween.

Enchant your fall gatherings with these pairings, all designed to make your Spooky and Sweet Chocolate Filled Jack Lantern Cookies the star of the show!

How to Store and Freeze Chocolate Filled Jack Lantern Cookies

Airtight Container: Store your assembled chocolate filled jack lantern cookies in an airtight container at room temperature for up to 4 days to maintain their fresh taste and soft texture.

Freezer: If you want to keep them longer, freeze the unfilled cookies for up to 1 month. Assemble with chocolate filling after thawing for best results.

Reheating: If you prefer your cookies warm, microwave a filled sandwich cookie for about 10-15 seconds. This will soften the chocolate filling, giving you that freshly made experience.

Layering: When stacking in a container, place parchment paper between layers to prevent sticking and preserve the adorable jack lantern faces.

Spooky and Sweet Chocolate Filled Jack Lantern Cookies Variations

Feel free to play with these variations and make this recipe your own while delighting your taste buds!

  • Dairy-Free: Substitute unsalted butter with coconut oil or vegan butter, ensuring rich flavor without dairy.
  • Gluten-Free: Use a gluten-free flour blend to enjoy these spooky delights while accommodating gluten sensitivities.
  • Spicy Twist: Add a teaspoon of pumpkin spice or cinnamon to the dough for a warm, inviting flavor that perfectly complements Halloween.
  • Nutty Delight: Fill the cookies with peanut butter or hazelnut spread instead of chocolate for a delicious nutty surprise inside.
  • Mini Cookies: Roll out smaller cookie shapes for bite-sized treats. Perfect for parties and kids’ hands!
  • Fruit-Infused: Swirl some orange or raspberry jam into the chocolate filling for a fruity surprise in every bite.
  • Decorative Icing: Get creative! Use royal icing in festive colors to create unique designs on your jack lantern faces.
  • Hot & Spicy: Mix in a pinch of cayenne pepper into the filling for an unexpected spicy kick that contrasts beautifully with the sweetness.

These variations open up a world of flavors, enhancing the joy of baking and sharing these charming cookies. Pair these delicious treats with a batch of Nut Seed Cookies or some Homemade Sweet Orange Jam for delightful homemade gifts! Enjoy the baking adventure!

Expert Tips for Spooky and Sweet Chocolate Filled Jack Lantern Cookies

  • Chill Thoroughly: Chilling the dough is essential to maintain the shape of your Spooky and Sweet Chocolate Filled Jack Lantern Cookies and prevent spreading.
  • Fresh Ingredients: Always check that your baking powder is fresh; old leavening agents can lead to flat cookies.
  • Careful Carving: When cutting jack lantern faces, take your time. A small knife or toothpick will help achieve clean, fun designs without tearing the cookie.
  • Watch the Bake: Keep an eye on your cookies while they bake; they should be soft in the center when you take them out to preserve that delightful melt-in-your-mouth texture.
  • Easy Filling: Melt the chocolate just before spreading to avoid it hardening again and ensure a luxurious filling between cookies.
  • Storage Solutions: For best results, store your assembled cookies in an airtight container to keep them fresh and delicious for up to four days!

Spooky and Sweet Chocolate Filled Jack Lantern Cookies Recipe FAQs

What type of chocolate works best for the filling?
Absolutely! Milk chocolate is the classic choice for a rich, creamy filling, but I often swap in dark or white chocolate for a fun twist. Just keep in mind that darker chocolate can give a less sweet flavor, while white chocolate is sweeter and creamier. Choose what suits your taste!

How should I store the assembled cookies?
For sure! Keep your assembled Spooky and Sweet Chocolate Filled Jack Lantern Cookies in an airtight container at room temperature for up to 4 days. This will help them retain their freshness and soft texture. If you stack them, consider placing parchment paper between layers to avoid any sticking!

Can I freeze leftover cookies?
Very much! You can freeze unfilled cookies for up to 1 month. Just be sure they’re completely cool before wrapping them tightly in plastic wrap or placing them in a freezer-safe container. When you’re ready to enjoy, just thaw them and assemble with the chocolate filling for the best experience!

What are some common mistakes to avoid?
Definitely, here’s what to watch out for:

  1. Chilling the dough: If you skip chilling, your cookies may spread too much while baking, leading to less attractive jack lantern shapes.
  2. Overbaking: Keep an eye on your cookies and take them out when they’re still soft in the center. They will continue to cook slightly as they cool, ensuring that melt-in-your-mouth texture.
  3. Carving clean faces: Take your time when cutting the jack lantern faces to avoid tearing the cookie. Use a small knife or a toothpick for more control.

Can I use this recipe for other occasions?
Absolutely! While these cookies are perfect for Halloween, you can easily adapt them for other events. Just change the cookie shape and decorations—like using Christmas-themed cookie cutters and festive colors for holiday gatherings. The base recipe is versatile and so delicious that it can suit any celebration!

Are these cookies pet-friendly?
Oh no, unfortunately! They contain ingredients like chocolate, which is toxic to pets. It’s best to keep these delightful Spooky and Sweet Chocolate Filled Jack Lantern Cookies away from furry friends and ensure they stick to their pet-approved treats.

Spooky and Sweet Chocolate Filled Jack Lantern Cookies

Spooky and Sweet Chocolate Filled Jack Lantern Cookies to Delight

Delight in these Spooky and Sweet Chocolate Filled Jack Lantern Cookies, perfect for Halloween gatherings and fun baking with kids.
Prep Time 30 minutes
Cook Time 10 minutes
Chilling Time 30 minutes
Total Time 1 hour 10 minutes
Servings: 12 cookies
Course: Dessert
Cuisine: American
Calories: 150

Ingredients
  

For the Cookie Dough
  • 2 cups All-Purpose Flour can substitute with gluten-free flour
  • 1 tbsp Baking Powder ensure it's fresh
  • 1/2 tsp Salt can swap for sea salt
  • 1 cup Unsalted Butter softened, can use coconut oil or vegan butter
  • 3/4 cup Granulated Sugar can use brown sugar for deeper flavor
  • 1 large Egg can substitute with a flax egg for vegan version
  • 1 tbsp Vanilla Extract pure vanilla preferred
  • 1 tbsp Orange Gel Food Coloring optional for visual pop
For the Chocolate Filling
  • 1 cup Milk Chocolate can swap with dark or white chocolate
  • 1/2 cup Heavy Cream can use coconut cream for dairy-free
For Decorating
  • Green Icing or Candy optional for pumpkin stems

Equipment

  • mixing bowls
  • whisk
  • Cookie cutter
  • parchment paper
  • microwave-safe bowl

Method
 

Make Dough
  1. In a large mixing bowl, whisk together the all-purpose flour, baking powder, and salt.
  2. In a separate bowl, cream the softened unsalted butter and granulated sugar until light and fluffy for 3-5 minutes.
  3. Beat in the large egg and vanilla extract, then add the orange gel food coloring.
  4. Gradually stir in the dry ingredients until just combined.
Chill Dough
  1. Divide the cookie dough into two equal disks and wrap tightly in plastic wrap. Refrigerate for at least 30 minutes.
Preheat Oven
  1. Preheat your oven to 350°F (175°C) and line baking sheets with parchment paper.
Roll and Cut
  1. Roll out the chilled dough on a floured surface to about ¼ inch thick and cut with a pumpkin-shaped cookie cutter.
  2. Carve jack lantern faces on half of the cookies with a small knife or toothpick.
Bake
  1. Bake for 8-10 minutes until edges are golden and centers are soft. Cool on sheets for a few minutes before transferring to a wire rack.
Prepare Filling
  1. Combine milk chocolate and heavy cream in a microwave-safe bowl and microwave in 20-second intervals until smooth.
Assemble
  1. Spread melted chocolate filling on the flat side of solid cookies and top with carved cookies to make sandwiches.
Decorate
  1. Use green icing or candies to add pumpkin stems on jack lantern cookie tops if desired.

Notes

Chill the dough thoroughly to maintain shape and prevent spreading. Check that baking powder is fresh for best results.

Spooky Stuffed Mushroom Eyeballs for a Ghoulish Gathering

As Halloween approached, I found myself yearning for a spooky twist on my usual appetizers. That’s when I stumbled upon the idea of Spooky Stuffed Mushroom Eyeballs. These delightful little bites are not only visually startling with their whimsical olive “pupils,” but they boast an incredible savory filling that effortlessly satisfies. Whether you’re hosting a hauntingly fun gathering or simply want to impress your taste buds, this easy-to-make recipe promises minimal prep time, making it a fantastic addition to your Halloween feast. Plus, they’re naturally gluten-free—just double-check your ingredients! Ready to scare up some culinary creativity? Let’s dive into this thrilling recipe that’ll have your guests talking long after the final bite.

Why are Stuffed Mushroom Eyeballs a must-try?

Irresistible Presentation: These Spooky Stuffed Mushroom Eyeballs are sure to turn heads at your Halloween gathering with their eerie appearance and delightful olive “pupils.”

Savory Flavor: The combination of creamy cheese, savory sausage, and aromatic garlic creates a filling that is bursting with flavor, making every bite a delicious surprise.

Quick Preparation: With simple steps and minimal prep time, you can easily whip these up for unexpected guests or a last-minute party snack.

Crowd-Pleasing Appeal: Perfect for all ages, these mushroom eyeballs are not only delicious but also a playful conversation starter at any event. For more appetizer inspiration, check out our Savory Potato Mushroom recipe!

Versatile Options: Feel free to swap the filling with vegetarian alternatives or add a variety of spices for a unique twist, ensuring even the pickiest eaters are satisfied!

Stuffed Mushroom Eyeballs Ingredients

For the Mushrooms
Large white or cremini mushrooms – The perfect canvas for stuffing, providing a sturdy base for those delightful eyeballs.

For the Filling
Cream cheese (8 oz, softened) – This creamy ingredient binds the filling together and adds a delicious richness.
Cooked sausage (1/2 cup) or crumbled bacon – Provides a savory depth to the filling; feel free to switch it up with your favorite cooked meat.
Grated Parmesan cheese (1/4 cup) – Enhances the flavor with a salty, cheesy element that complements the other ingredients.
Garlic (1 clove, minced) – A must-have for that aromatic essence, bringing wonderful depth to the dish.
Fresh parsley (1 tablespoon, chopped) – Brightens the filling with freshness, adding a burst of color and flavor.
Salt (1/4 teaspoon) and black pepper (1/4 teaspoon) – Essential for seasoning and enhancing the overall taste of your stuffed mushroom eyeballs.

For the Spooky Touch
Small olives (16, pitted) – These fun little treats create the eerie “pupil” effect that perfectly complements the theme.

For Cooking
Cooking spray or olive oil – Keeps those mushrooms from sticking to the baking sheet for easy clean-up.

Ensure that you check for gluten-free labels if you’re preparing the Stuffed Mushroom Eyeballs for those with dietary restrictions!

Step‑by‑Step Instructions for Stuffed Mushroom Eyeballs

Step 1: Preheat Oven
Start by preheating your oven to 375°F (190°C). This temperature ensures that the stuffed mushroom eyeballs bake evenly and turn golden brown. While the oven heats up, you can gather your ingredients and prepare your workspace for easy access.

Step 2: Prepare Mushrooms
Carefully clean the large white or cremini mushrooms by wiping them with a damp cloth. Remove the stems and finely chop them, setting aside for the filling. This preparation step is crucial, as it creates space for the savory stuffing while utilizing every part of the mushrooms for maximum flavor.

Step 3: Make Filling
In a mixing bowl, combine the chopped mushroom stems, softened cream cheese, cooked sausage or crumbled bacon, grated Parmesan, minced garlic, chopped parsley, salt, and pepper. Blend these ingredients until they form a creamy, cohesive filling. This delightful mixture will give your stuffed mushroom eyeballs a robust and savory flavor that everyone will love.

Step 4: Stuff Mushrooms
Now, take each mushroom cap and generously fill it with the prepared filling, pressing down gently to ensure they are well-packed. Each one should be brimming with that delicious mixture. This step is where the magic happens, transforming ordinary mushrooms into your spooky stuffed mushroom eyeballs.

Step 5: Arrange on Baking Sheet
Lightly grease a baking sheet with cooking spray or olive oil to prevent sticking. Place the stuffed mushrooms on the sheet, spacing them evenly apart. This allows for proper heat circulation, ensuring that the stuffed mushroom eyeballs cook uniformly and achieve that perfect golden finish.

Step 6: Add Olive Pupils
For a whimsical touch, press a small pitted olive into the center of each stuffed mushroom. This simple addition creates the iconic “pupil” effect, making your stuffed mushroom eyeballs truly eye-catching and perfect for a spooky gathering. Step back and admire your ghoulish creations!

Step 7: Bake
Carefully transfer the baking sheet to the preheated oven and bake the stuffed mushroom eyeballs for 20-25 minutes. Look for the mushrooms to be tender and the filling to bubble and turn golden brown. This is the perfect moment to invite friends and family to share in the Halloween fun!

Step 8: Serve
Once baked, remove the stuffed mushroom eyeballs from the oven and let them cool slightly on the baking sheet. Once cool enough to handle, arrange them on a festive platter and serve to your eager guests. These savory, spooky bites are sure to be a hit at your Halloween celebration!

What to Serve with Spooky Stuffed Mushroom Eyeballs

Elevate your Halloween feast with vibrant sides and drinks that will perfectly complement your deliciously spooky appetizers.

  • Crispy Garlic Bread:
    The buttery, garlicky goodness pairs wonderfully with the creaminess of the mushrooms, creating a delightful contrast that everyone will love.

  • Roasted Vegetable Medley:
    A colorful assortment of seasonal veggies not only boosts nutrition but also adds a pop of color to your table, making your spread visually inviting.

  • Chilled Cucumber Soup:
    Refreshing and light, this cold soup balances the richness of the stuffed mushrooms, providing a cooling effect on your palate.

  • Hummus and Veggie Platter:
    Serve a variety of fresh vegetables with classic hummus for a crunchy, healthy addition that adds a fun dip option for guests.

  • Spooky Sangria:
    A fruity, red sangria with slices of orange and apple will keep the festive mood high. It’s a delightful accompaniment that complements the savory flavors of your dishes.

  • Cheesy Pesto Stuffed Breadsticks:
    These ooey-gooey treats offer a satisfying chewiness that pairs perfectly with your stuffed mushroom eyeballs, making for an indulgent bite.

  • Pumpkin Spice Dessert Shooters:
    These mini desserts lend a seasonal touch and a sweet finish to your meal, inviting everyone to enjoy just one more treat after the main course.

Feel free to mix and match these suggestions to create a feast fit for all the ghouls and goblins in your life!

Make Ahead Options

These Spooky Stuffed Mushroom Eyeballs are perfect for meal prep enthusiasts looking to save time on busy nights! You can prepare the filling (combining the cream cheese, sausage, Parmesan, garlic, parsley, salt, and pepper) up to 24 hours in advance; simply store it in an airtight container in the refrigerator. To keep the mushrooms fresh, clean and stuff them right before baking, ideally no more than an hour before serving to prevent them from becoming soggy. When you’re ready to impress your guests, just fill the mushroom caps, add the olives, and bake them in a preheated oven for 20-25 minutes. This way, you’ll achieve just as delicious results with minimal effort!

How to Store and Freeze Stuffed Mushroom Eyeballs

Fridge: Store leftovers in an airtight container for up to 2 days to maintain freshness and flavor.

Freezer: For longer storage, freeze the stuffed mushroom eyeballs before baking. Wrap tightly in plastic wrap and foil for up to 1 month; bake straight from frozen, adding 5-10 minutes to the cooking time.

Reheating: To reheat, place the stuffed mushroom eyeballs on a baking sheet and bake at 350°F (175°C) for about 10-15 minutes until heated through, ensuring the filling stays creamy and delicious.

Make-Ahead: You can prepare these stuffed mushroom eyeballs a few hours in advance and refrigerate unbaked. Just pop them in the oven when ready to serve!

Helpful Tricks for Stuffed Mushroom Eyeballs

Baking Tip: Ensure the filling is bubbly: Baking until the filling is bubbling helps keep the mushrooms from becoming soggy, preserving that delightful texture.

Gluten-Free Check: Read labels carefully: If you’re preparing these stuffed mushroom eyeballs for gluten-sensitive guests, always double-check that your sausage and other ingredients are labeled gluten-free.

Herb Variations: Experiment with herbs: Don’t hesitate to substitute or add herbs to the filling, like thyme or basil, for additional layers of flavor and a personal touch.

Storage Insight: Make ahead option: You can prepare the stuffed mushroom eyeballs a few hours before the party and bake them just before serving to save time.

Dipping Delight: Pair with sauces: Consider serving these delicious morsels with a selection of dips or sauces to complement the rich flavors of your stuffed mushroom eyeballs.

Stuffed Mushroom Eyeballs Variations

Feel free to unleash your creativity with these spooky bites by customizing the flavors and ingredients!

  • Vegetarian: Use a mix of sautéed mushrooms, spinach, and cream cheese for a hearty vegetarian version. They’ll be just as delightful and satisfying!
  • Cheesy Twist: Swap in cheddar or goat cheese for a different cheesy flavor that makes each bite more exciting. The tanginess of goat cheese pairs perfectly with the mushrooms!
  • Spicy Kick: Add diced jalapeños or a dash of cayenne pepper to the filling for a zesty, fiery option that will wake up your taste buds.
  • Herb Infusion: Incorporate fresh herbs like thyme, basil, or chives to elevate the flavor profile and add some freshness. This versatile addition can change the whole vibe of your dish.
  • Pesto Delight: Mix in some basil pesto with your filling for an herby, flavorful twist; it will add a lovely depth and pairs beautifully with the mushrooms. For more pesto inspiration, check out our Savory Potato Mushroom recipe!
  • Nutty Crunch: Stir in some finely chopped walnuts or pecans into the filling for added texture and a nutty flavor. They offer a delightful crunch that complements the creamy filling wonderfully.
  • Seafood Surprise: Try adding crab meat or shrimp for a luscious seafood variation; the combination of flavors is simply divine and adds a touch of elegance to your Halloween spread.
  • Gluten-Free Assurance: Double-check labels on all ingredients and consider using gluten-free sausage to cater to dietary restrictions while keeping the dish delicious!

Mix and match these ideas to create your perfect spooky stuffed mushroom eyeballs!

Stuffed Mushroom Eyeballs Recipe FAQs

How do I select the best mushrooms for my Stuffed Mushroom Eyeballs?
Absolutely! When choosing mushrooms, look for large, firm white or cremini mushrooms without dark spots or blemishes. They should feel heavy for their size and have a fresh, earthy smell. If you see any dark spots all over, it’s best to avoid those, as they may affect the flavor and texture of your dish.

What is the best way to store leftovers?
Very! To keep your leftovers fresh, store them in an airtight container in the refrigerator for up to 2 days. Make sure to let the mushrooms cool completely before sealing. This will help maintain their delicious flavor and prevent sogginess.

Can I freeze Stuffed Mushroom Eyeballs?
Definitely! For longer storage, freeze the stuffed mushroom eyeballs before baking. Wrap them tightly in plastic wrap and then aluminum foil to prevent freezer burn. You can keep them for up to 1 month. When you’re ready to bake, just pop them in the oven straight from frozen, adding an additional 5-10 minutes to the cooking time.

What should I do if the filling turns out too runny?
If you find your filling is too runny, it may be due to excess moisture from mushrooms or other ingredients. To fix this, try adding a tablespoon of breadcrumbs or extra cream cheese to bulk it up and create a thicker consistency. Another tip is to bake the filling separately for a few minutes before stuffing the mushrooms, which helps evaporate any excess moisture.

Are these Stuffed Mushroom Eyeballs suitable for gluten-free diets?
Certainly! Just make sure that all your ingredients, especially the sausage, cream cheese, and any seasoning, are labeled as gluten-free. This way, your stuffed mushroom eyeballs can be enjoyed by everyone at your gathering!

Can I make these ahead of time?
Oh, absolutely! You can prepare the stuffing and fill the mushrooms a few hours in advance. Just place them in the fridge until you’re ready to bake. This makes it super convenient for hosting parties, allowing you more time to mingle with your guests!

Stuffed Mushroom Eyeballs

Spooky Stuffed Mushroom Eyeballs for a Ghoulish Gathering

These Spooky Stuffed Mushroom Eyeballs are a visually startling appetizer with savory fillings, perfect for Halloween gatherings.
Prep Time 15 minutes
Cook Time 25 minutes
Total Time 40 minutes
Servings: 16 eyeballs
Course: Other
Cuisine: American
Calories: 100

Ingredients
  

For the Mushrooms
  • 16 pieces Large white or cremini mushrooms The perfect canvas for stuffing
For the Filling
  • 8 oz Cream cheese softened
  • 1/2 cup Cooked sausage or crumbled bacon
  • 1/4 cup Grated Parmesan cheese
  • 1 clove Garlic minced
  • 1 tablespoon Fresh parsley chopped
  • 1/4 teaspoon Salt
  • 1/4 teaspoon Black pepper
For the Spooky Touch
  • 16 pieces Small olives pitted
For Cooking
  • 1 splash Cooking spray or olive oil to prevent sticking

Equipment

  • baking sheet
  • mixing bowl

Method
 

Step-by-Step Instructions for Stuffed Mushroom Eyeballs
  1. Preheat your oven to 375°F (190°C).
  2. Carefully clean the mushrooms by wiping them with a damp cloth. Remove the stems and finely chop them.
  3. In a mixing bowl, combine chopped mushroom stems, cream cheese, sausage or bacon, Parmesan, garlic, parsley, salt, and pepper. Blend until creamy.
  4. Fill each mushroom cap with the prepared filling, pressing down gently.
  5. Grease a baking sheet and arrange the stuffed mushrooms on it, spacing them evenly.
  6. Press a small olive into the center of each stuffed mushroom.
  7. Bake the stuffed mushroom eyeballs for 20-25 minutes until tender and golden brown.
  8. Remove from the oven and let cool slightly before serving on a festive platter.

Notes

Double-check ingredients for gluten-free options when serving guests with dietary restrictions.