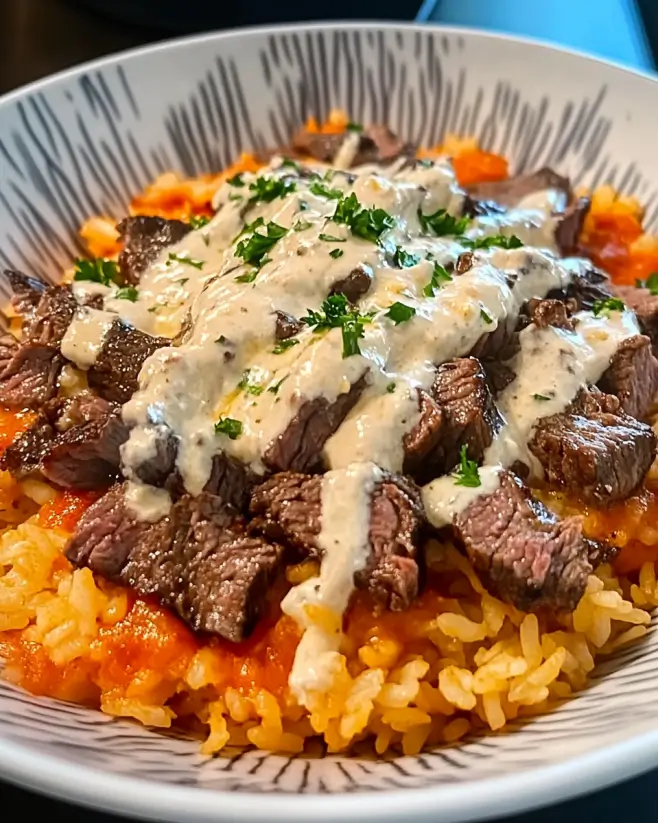
Introduction to Steak Queso Rice Bowl
After a long day, the last thing I want is to spend hours in the kitchen. That’s where my go-to dish, the Steak Queso Rice Bowl, comes in. It’s a delightful blend of tender flank steak, creamy queso, and fresh toppings that come together in just 25 minutes. Perfect for busy weeknights or impressing friends at a casual gathering, this recipe is a crowd-pleaser. With its vibrant flavors and hearty ingredients, it’s not just a meal; it’s a celebration of good food and great company. Let’s dive into this delicious adventure!
Why You’ll Love This Steak Queso Rice Bowl
This Steak Queso Rice Bowl is a game-changer for anyone craving a quick, satisfying meal. It’s not just about speed; it’s about flavor, too. The combination of juicy steak and creamy queso creates a taste explosion that’ll have you coming back for seconds. Plus, it’s versatile enough to please picky eaters and adventurous foodies alike. Trust me, this dish will become a staple in your kitchen!
Ingredients for Steak Queso Rice Bowl
Gathering the right ingredients is the first step to creating a mouthwatering Steak Queso Rice Bowl. Here’s what you’ll need:
- Cooked white rice: This serves as the hearty base of your bowl, providing a satisfying texture.
- Flank steak: Tender and flavorful, it’s the star protein that brings richness to the dish.
- Olive oil: A splash of this helps to sear the steak perfectly, adding a hint of healthy fat.
- Chili powder: This spice adds warmth and depth, giving your steak a kick.
- Cumin: Earthy and aromatic, cumin enhances the overall flavor profile.
- Garlic powder: A must-have for that savory punch, it elevates the taste of the steak.
- Onion powder: This adds sweetness and complexity without the hassle of chopping onions.
- Salt and pepper: Essential for seasoning, these enhance all the flavors in your bowl.
- Queso cheese sauce: Creamy and indulgent, it’s the gooey goodness that ties everything together.
- Black beans: Packed with protein and fiber, they add a nutritious element to your meal.
- Corn: Sweet and crunchy, corn brings a pop of color and flavor.
- Diced tomatoes: Fresh and juicy, they add brightness and balance to the dish.
- Avocado: Creamy and rich, it’s the perfect topping for a luxurious finish.
- Fresh cilantro: This herb adds a burst of freshness and a hint of citrus.
- Lime wedges: A squeeze of lime brightens the flavors and adds a zesty kick.
For those looking to spice things up, consider adding diced jalapeños or a splash of hot sauce to the rice mixture. If you prefer a different protein, grilled chicken or shrimp can be excellent substitutes. You can find the exact quantities for each ingredient at the bottom of the article, ready for printing!
How to Make Steak Queso Rice Bowl
Creating a Steak Queso Rice Bowl is a straightforward process that anyone can master. Follow these simple steps, and you’ll have a delicious meal ready in no time!
Step 1: Prepare the Flank Steak
Start by heating a large skillet over medium-high heat. Add a tablespoon of olive oil, letting it shimmer. Next, toss in the sliced flank steak. Season it generously with chili powder, cumin, garlic powder, onion powder, salt, and pepper. This blend of spices will elevate the flavor of the steak.
Cook the steak for about 5-7 minutes, stirring occasionally. You want it browned and cooked to your liking. Remember, a little pink in the center is perfectly fine for flank steak. Once done, remove it from the heat and set it aside. This step is crucial; the right doneness ensures your steak remains tender and juicy.
Step 2: Warm the Queso Cheese Sauce
While the steak rests, grab a separate pot and pour in your queso cheese sauce. Heat it over low heat, stirring gently. This slow warming allows the cheese to become creamy and smooth, avoiding any lumps. Trust me, a well-heated queso makes all the difference in your Steak Queso Rice Bowl!
Step 3: Combine the Rice and Vegetables
In a large bowl, combine your cooked white rice, black beans, corn, and diced tomatoes. Mix everything together until well combined. This colorful mixture serves as the flavorful base of your bowl. The beans and corn add texture, while the tomatoes bring a refreshing burst of flavor. It’s a simple yet satisfying combination!
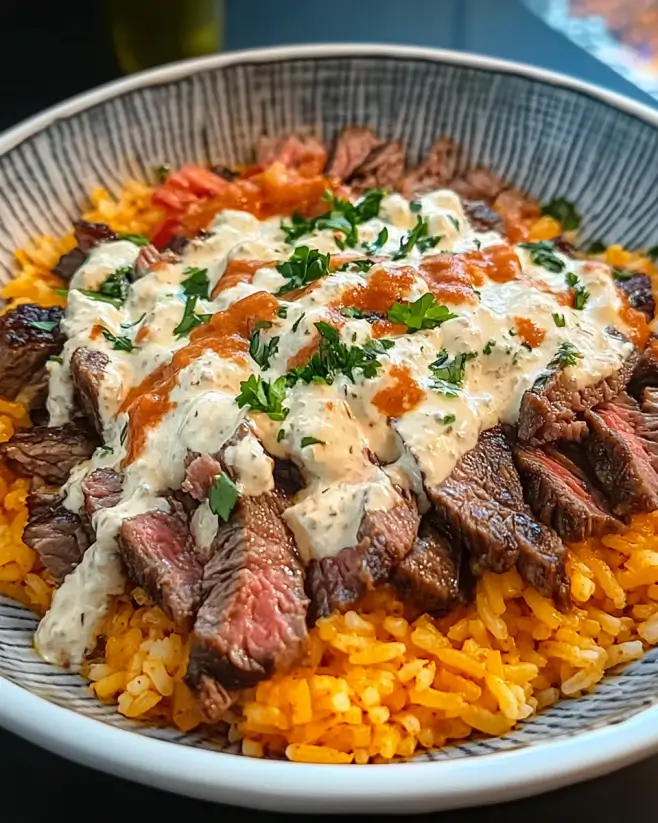
Step 4: Assemble the Bowls
Now comes the fun part! Divide the rice mixture among serving bowls. Top each bowl with the cooked flank steak, followed by a generous drizzle of warm queso cheese sauce. Don’t forget to add diced avocado for that creamy touch. Finally, sprinkle chopped cilantro on top and serve with lime wedges on the side. A squeeze of lime will brighten up all those rich flavors!
Tips for Success
- Let the steak rest for a few minutes after cooking to retain its juices.
- Use day-old rice for better texture; it holds up well in the bowl.
- Don’t rush the queso; warming it slowly ensures a creamy consistency.
- Feel free to customize toppings based on your preferences—get creative!
- For extra flavor, marinate the steak for a few hours before cooking.
Equipment Needed
- Large skillet: A non-stick skillet works wonders for easy cooking and cleanup.
- Pot: Any medium-sized pot will do for warming the queso cheese sauce.
- Mixing bowl: A large bowl is essential for combining the rice and veggies.
- Cooking utensils: Use a spatula or tongs for flipping the steak and mixing ingredients.
Variations
- Vegetarian Option: Swap the flank steak for grilled portobello mushrooms or sautéed bell peppers for a hearty, meat-free alternative.
- Spicy Kick: Add diced jalapeños or a splash of your favorite hot sauce to the rice mixture for an extra layer of heat.
- Different Proteins: Try using grilled chicken, shrimp, or even tofu for a protein-packed twist on this classic dish.
- Whole Grain Base: Substitute white rice with brown rice or quinoa for a healthier, fiber-rich option.
- Cheese Variations: Experiment with different cheese sauces, like pepper jack or a homemade cheese blend, for unique flavor profiles.
Serving Suggestions
- Pair your Steak Queso Rice Bowl with crispy tortilla chips for a satisfying crunch.
- A refreshing side salad with lime vinaigrette complements the rich flavors beautifully.
- For drinks, consider a cold Mexican lager or a zesty margarita.
- Garnish with extra cilantro and lime wedges for a vibrant presentation.
FAQs about Steak Queso Rice Bowl
Can I make the Steak Queso Rice Bowl ahead of time?
Absolutely! You can prepare the rice and steak in advance. Just store them separately in the fridge. When you’re ready to eat, reheat everything and assemble your bowl. It’s a great way to save time on busy nights!
What can I substitute for flank steak?
If flank steak isn’t your thing, don’t worry! Grilled chicken, shrimp, or even tofu work wonderfully in this Steak Queso Rice Bowl. Each option brings its own unique flavor and texture.
Is this recipe gluten-free?
Yes, this Steak Queso Rice Bowl is gluten-free! Just ensure that your queso cheese sauce and any additional toppings are also gluten-free. It’s a delicious option for those with dietary restrictions.
How can I make this dish spicier?
For a spicy kick, add diced jalapeños or a splash of your favorite hot sauce to the rice mixture. You can also use spicy queso cheese sauce for an extra layer of heat!
What toppings can I add to my Steak Queso Rice Bowl?
The possibilities are endless! Consider adding sliced jalapeños, sour cream, or even pickled onions. Fresh toppings like diced red onion or radishes can also add a nice crunch and flavor contrast.
Final Thoughts
Cooking the Steak Queso Rice Bowl is more than just preparing a meal; it’s about creating a moment of joy. The vibrant colors, the rich aromas, and the satisfying flavors come together to make every bite a celebration. Whether you’re sharing it with family or enjoying it solo after a long day, this dish brings comfort and satisfaction. Plus, the ease of preparation means you can whip it up anytime the craving strikes. So, roll up your sleeves, gather your ingredients, and let this delicious bowl of goodness become a cherished part of your culinary repertoire!
PrintSteak Queso Rice Bowl: Mouthwatering Recipe to Try Today!
- Total Time: 25 minutes
- Yield: 4 servings 1x
- Diet: Gluten Free
Description
A delicious and hearty Steak Queso Rice Bowl featuring tender flank steak, creamy queso cheese, and a variety of fresh toppings.
Ingredients
- 2 cups cooked white rice
- 1 pound flank steak, sliced into thin strips
- 1 tablespoon olive oil
- 1 teaspoon chili powder
- 1 teaspoon cumin
- 1 teaspoon garlic powder
- 1 teaspoon onion powder
- Salt and pepper to taste
- 1 cup queso cheese sauce
- 1 cup black beans, drained and rinsed
- 1 cup corn, frozen or canned
- 1 cup diced tomatoes
- 1 avocado, diced
- 1/4 cup chopped fresh cilantro
- Lime wedges for serving
Instructions
- In a large skillet, heat olive oil over medium-high heat. Add the sliced flank steak and season with chili powder, cumin, garlic powder, onion powder, salt, and pepper. Cook for about 5-7 minutes, or until the steak is browned and cooked to your desired doneness. Remove from heat and set aside.
- In a separate pot, warm the queso cheese sauce over low heat until smooth.
- In a large bowl, combine the cooked white rice, black beans, corn, and diced tomatoes. Mix well to combine.
- To assemble, divide the rice mixture among serving bowls. Top each bowl with the cooked steak, a generous drizzle of warm queso cheese sauce, and diced avocado.
- Garnish with chopped cilantro and serve with lime wedges on the side for squeezing over the top.
Notes
- For a spicier kick, add diced jalapeños or a splash of hot sauce to the rice mixture.
- Substitute the flank steak with grilled chicken or shrimp for a different protein option.
- Prep Time: 10 minutes
- Cook Time: 15 minutes
- Category: Main Dish
- Method: Skillet and Pot
- Cuisine: Mexican
Nutrition
- Serving Size: 1 bowl
- Calories: 550
- Sugar: 3g
- Sodium: 800mg
- Fat: 25g
- Saturated Fat: 10g
- Unsaturated Fat: 15g
- Trans Fat: 0g
- Carbohydrates: 45g
- Fiber: 8g
- Protein: 30g
- Cholesterol: 70mg