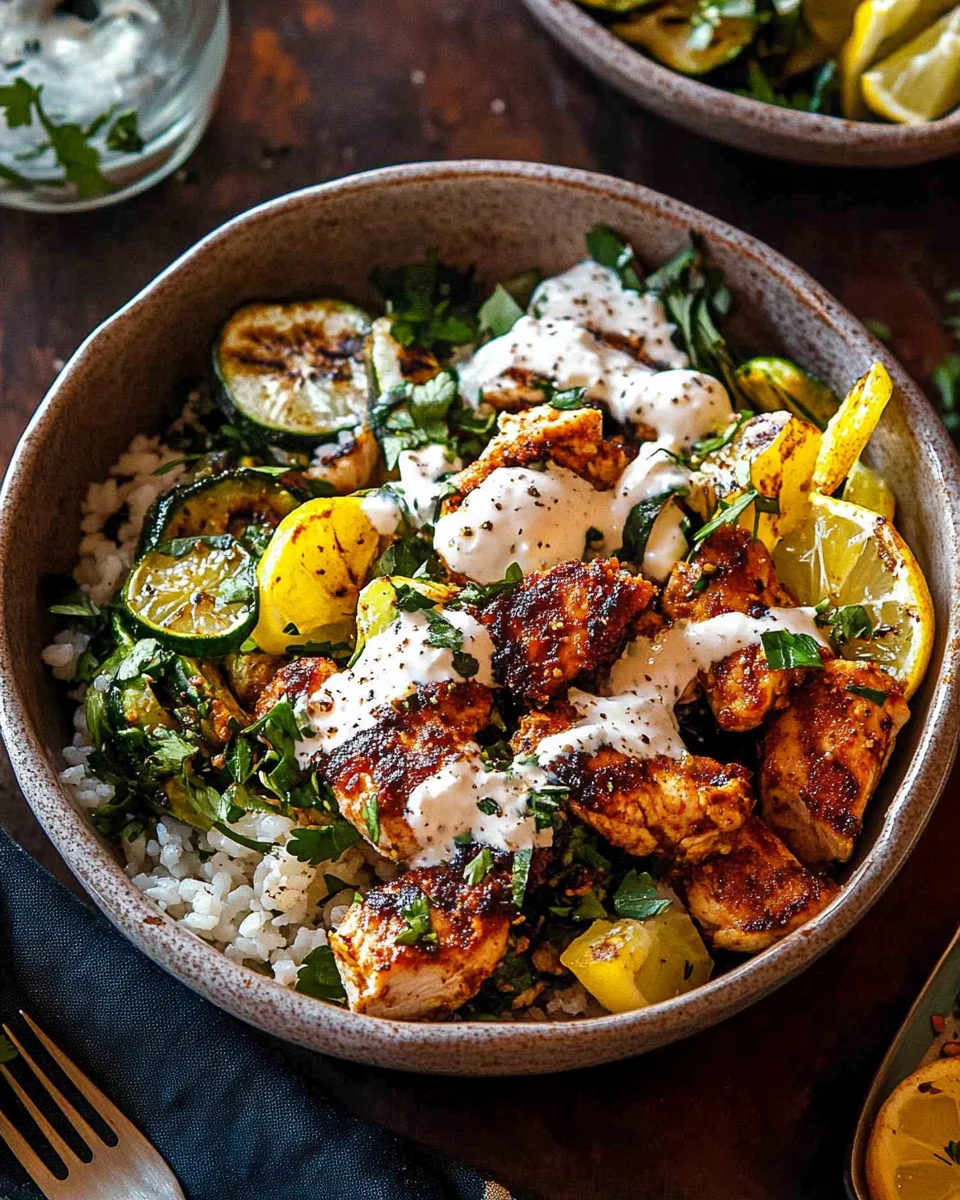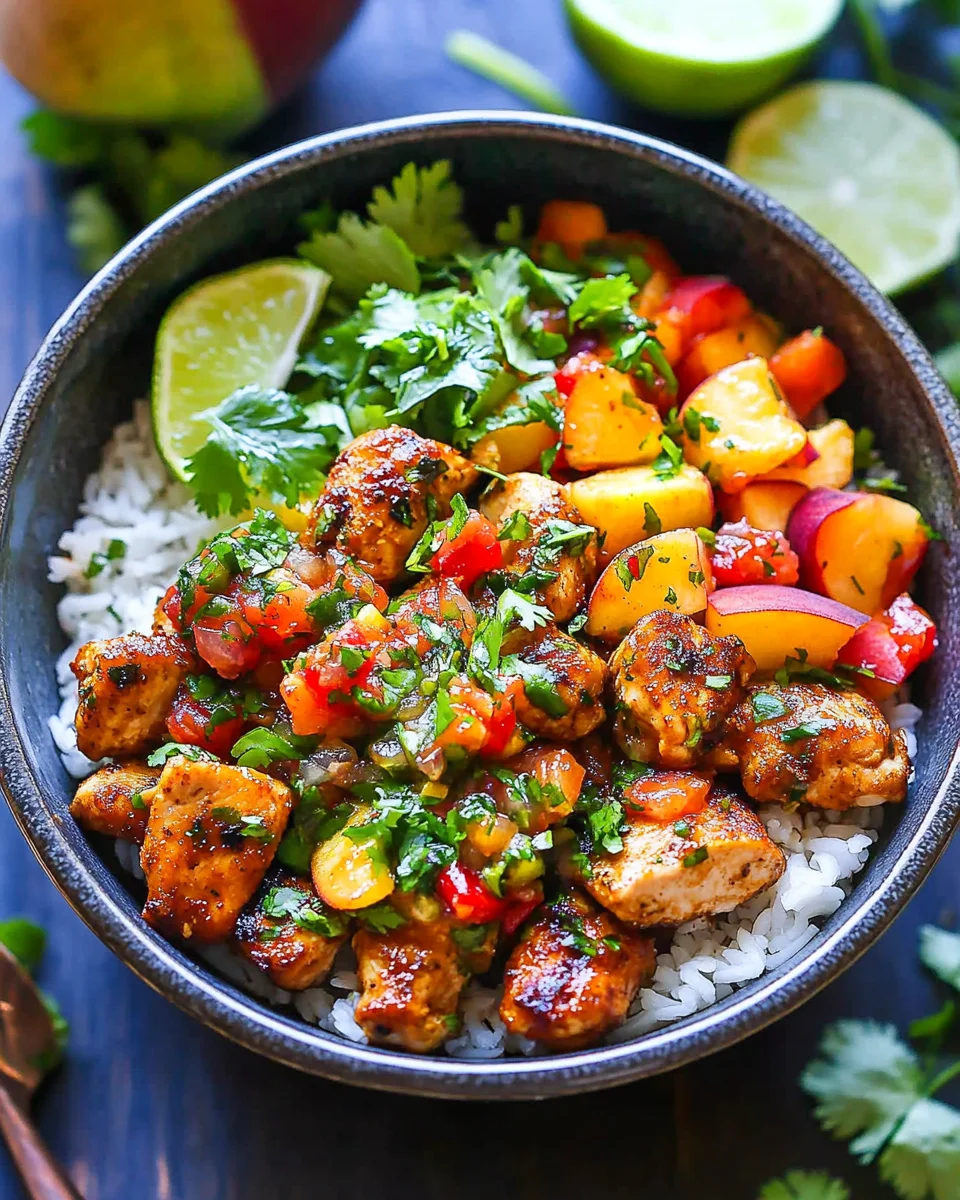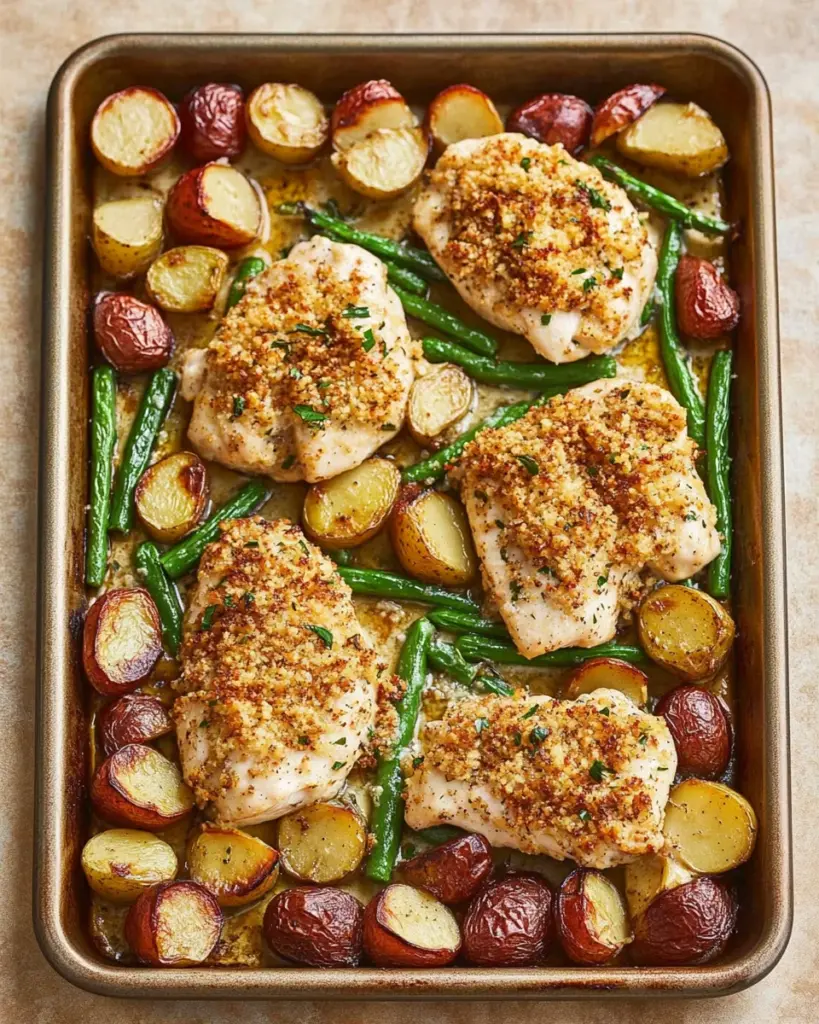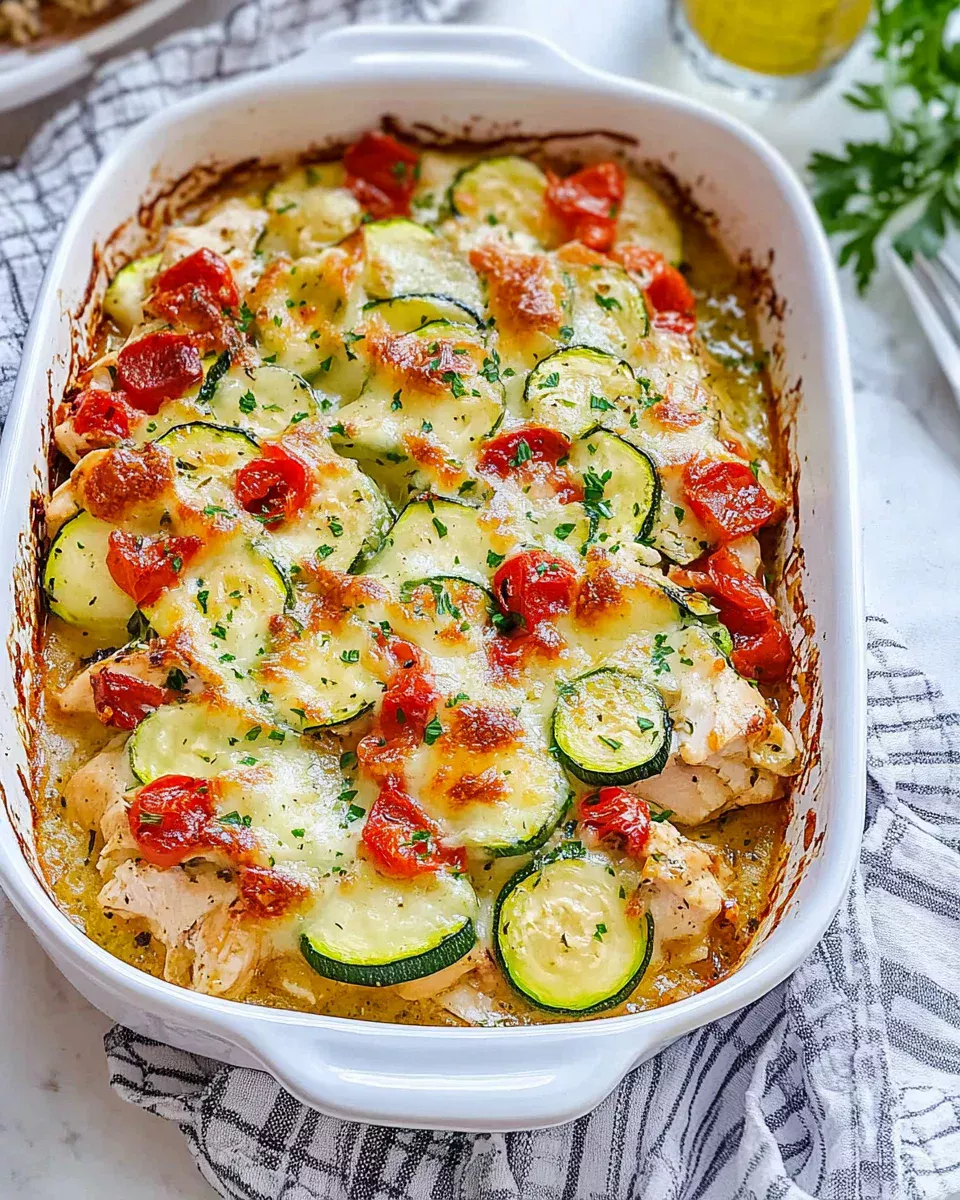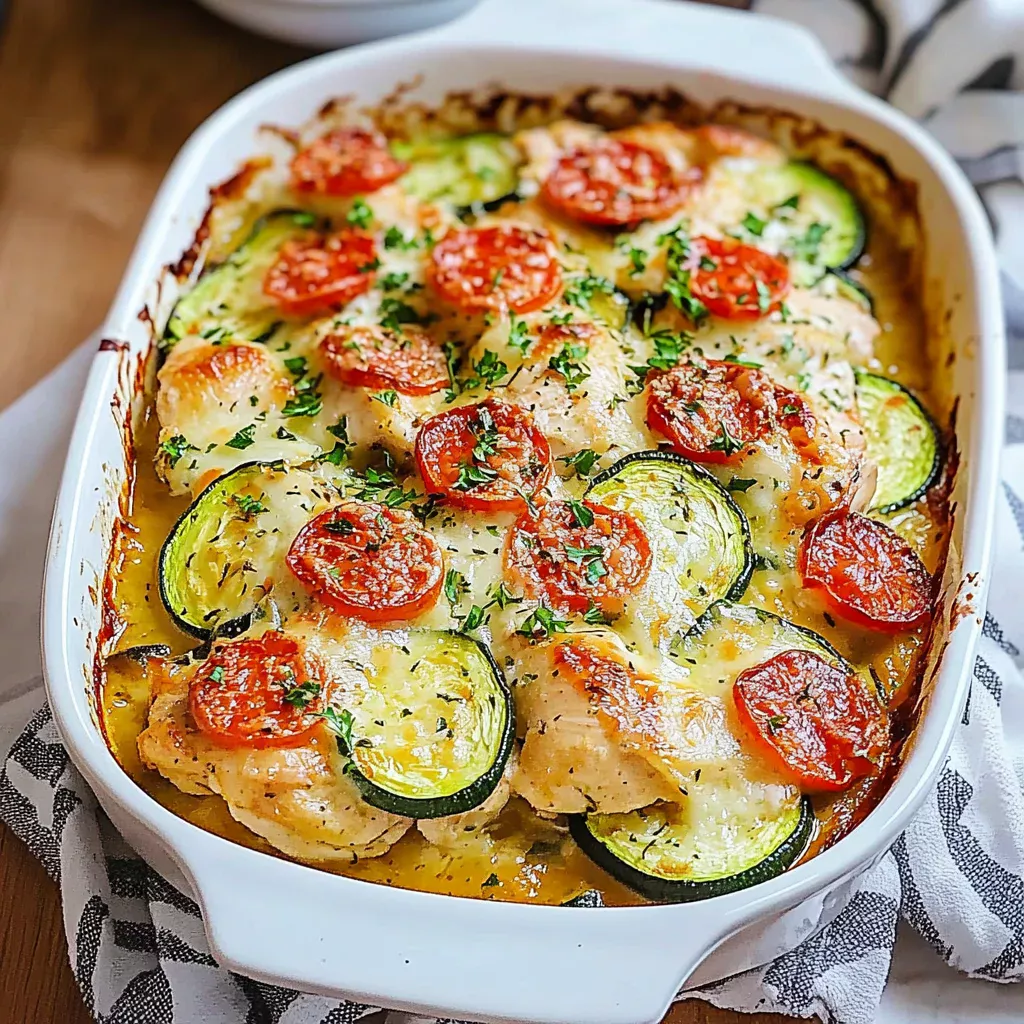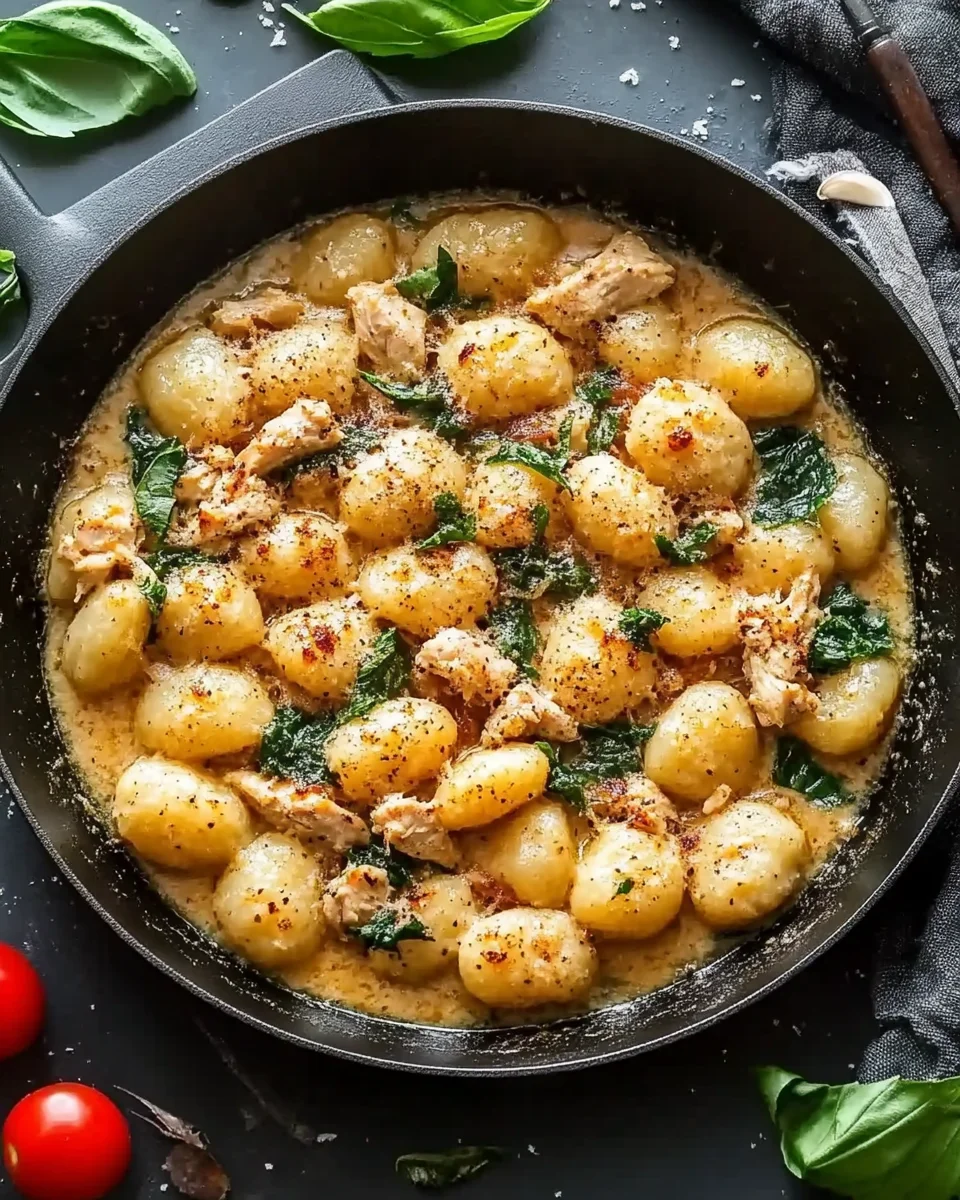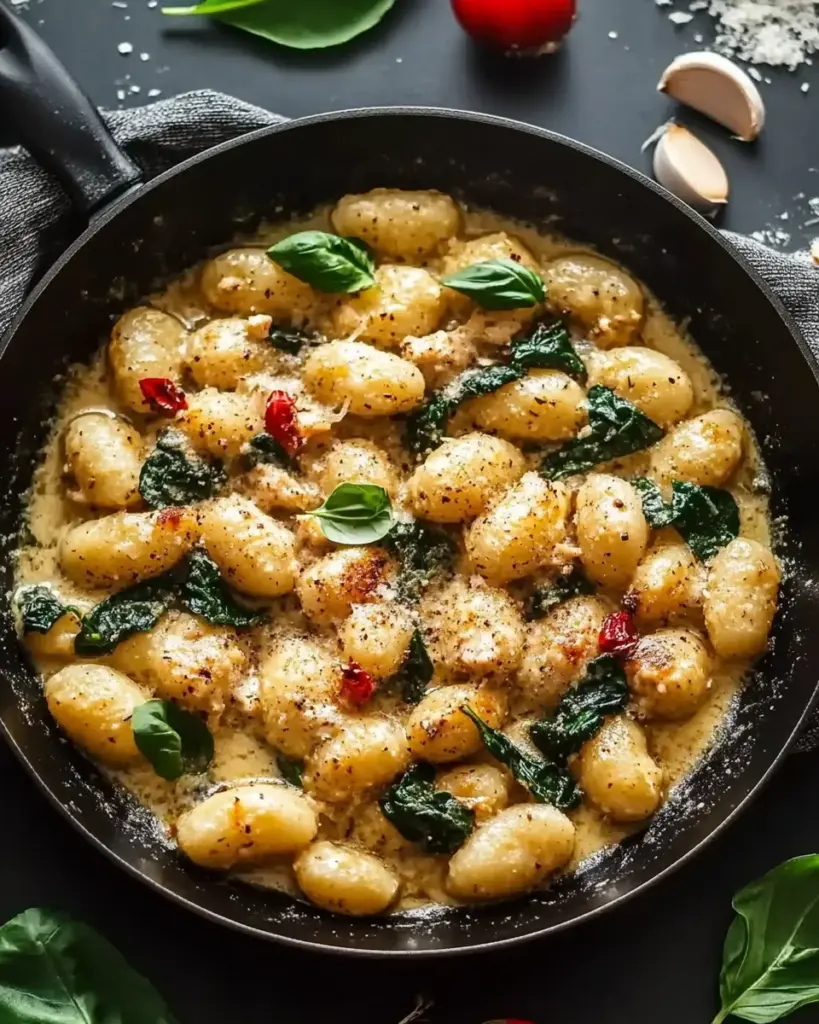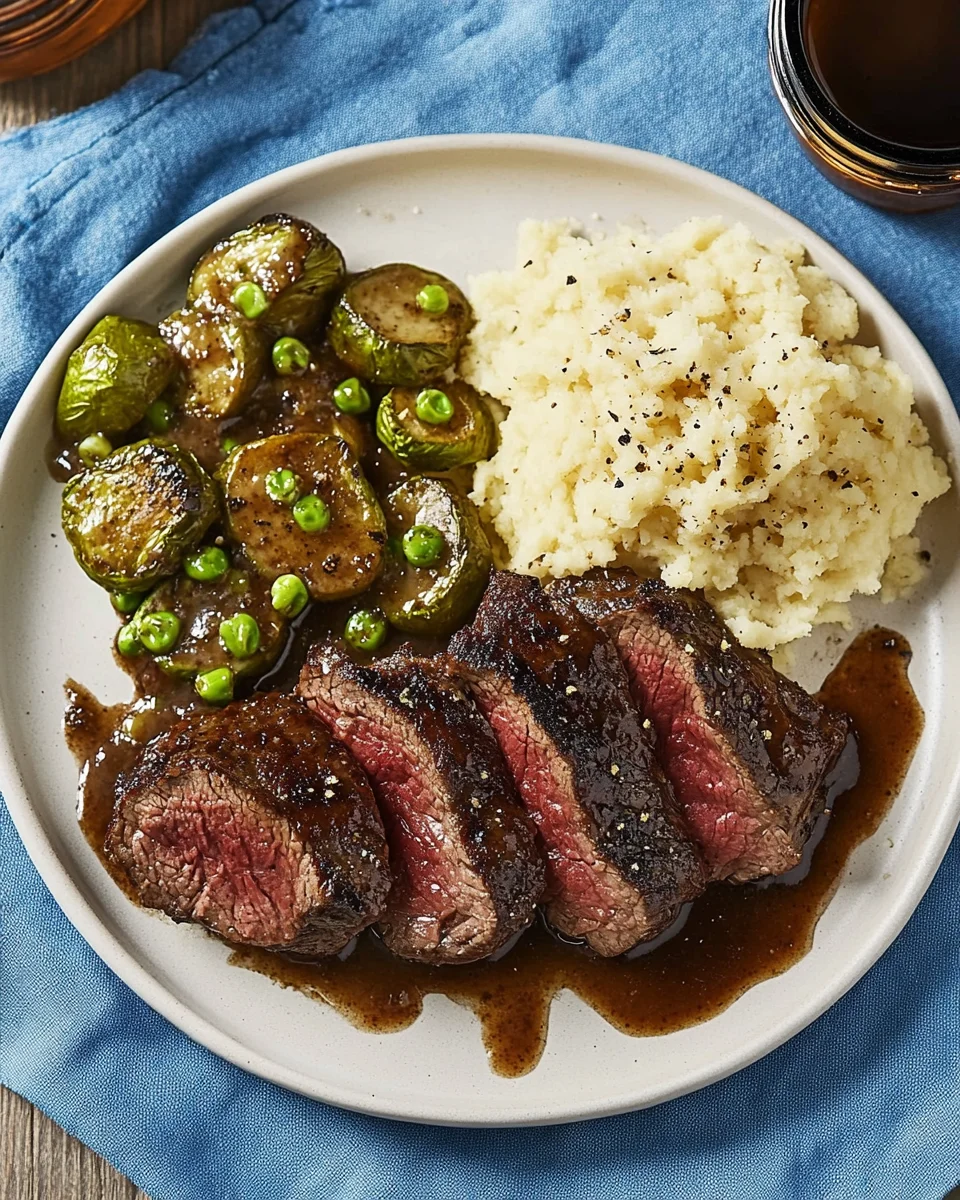
Savory Brown Sugar Bourbon Steak Recipe is a must-try!

Introduction to Savory Brown Sugar Bourbon Steak Recipe

Savory Brown Sugar Bourbon Steak Recipe is here to impress! This dish combines the rich flavors of brown sugar and bourbon, creating a mouthwatering marinade that tenderizes the steak while adding a delightful sweetness. Whether you’re hosting a barbecue or enjoying a cozy night in, this recipe is sure to be a hit.

Flank steak is the star of this dish, known for its bold flavor and tenderness when cooked correctly. The marinade, made with simple ingredients, infuses the meat with a unique taste that balances sweetness and savory notes. Plus, it’s easy to prepare, making it perfect for both novice cooks and seasoned chefs.

In this article, we’ll guide you through the ingredients, preparation steps, and tips to ensure your steak turns out perfectly every time. With just a few hours of marinating and a quick grill, you’ll have a delicious meal that serves four. So, let’s dive into the world of flavors and get started on this delightful culinary adventure!

Ingredients for Savory Brown Sugar Bourbon Steak Recipe

Savory Brown Sugar Bourbon Steak Recipe, you’ll need a handful of simple yet flavorful ingredients. Each component plays a vital role in enhancing the taste of the steak. Here’s what you’ll need:

  • 1 pound flank steak: This cut is perfect for marinating and grilling, offering a rich flavor.
  • 1/4 cup brown sugar: Adds sweetness and helps caramelize the steak when cooked.
  • 1/4 cup bourbon: Provides a unique depth of flavor that complements the sweetness of the brown sugar.
  • 2 tablespoons soy sauce: Adds a savory umami taste that balances the sweetness.
  • 2 tablespoons olive oil: Helps to keep the steak moist and adds richness.
  • 2 cloves garlic, minced: Infuses the marinade with a fragrant aroma and enhances the overall flavor.
  • 1 teaspoon black pepper: Adds a touch of heat and depth to the dish.
  • 1 teaspoon salt: Essential for seasoning the steak and enhancing its natural flavors.
  • 1/2 teaspoon red pepper flakes (optional): For those who enjoy a bit of spice, this adds a nice kick.
  • Fresh parsley, chopped (for garnish): Adds a pop of color and freshness to the finished dish.

Gather these ingredients, and you’re on your way to creating a delicious meal that will impress your family and friends. The combination of sweet and savory flavors in this recipe is sure to make your taste buds dance!

Preparation of Savory Brown Sugar Bourbon Steak Recipe

Savory Brown Sugar Bourbon Steak Recipe. This process is simple and straightforward, ensuring that your steak is packed with flavor. Let’s break it down into easy steps.

Step 1: Marinating the Steak

The first step in preparing your steak is marinating it. This is where the magic happens! In a small bowl, combine the brown sugar, bourbon, soy sauce, olive oil, minced garlic, black pepper, salt, and red pepper flakes. Whisk these ingredients together until they are well blended.

Next, take your flank steak and place it in a shallow dish or a resealable plastic bag. Pour the marinade over the steak, making sure it is fully coated. Seal the bag or cover the dish tightly. For the best flavor, refrigerate the steak for at least 1 hour. If you have more time, marinating it for up to 8 hours will enhance the taste even further.

Step 2: Preparing the Bourbon Sauce

While your steak is marinating, you can prepare the bourbon sauce. This sauce is essentially the marinade you just made, but it’s important to note that you will not use the marinade directly on the cooked steak. Instead, you can reserve a small amount of the marinade before adding the steak to it. This will be your sauce for drizzling over the finished dish.

To do this, simply set aside about 1/4 cup of the marinade before you add the steak. You can heat this reserved marinade in a small saucepan over medium heat for a few minutes to enhance the flavors. Just remember to bring it to a boil and then let it simmer for a couple of minutes to ensure it’s safe to eat.

Step 3: Cooking the Steak

Once your steak has marinated and the sauce is ready, it’s time to cook! Preheat your grill or grill pan over medium-high heat. This step is crucial for achieving that perfect sear on your steak.

Remove the flank steak from the marinade, allowing any excess marinade to drip off. Discard the leftover marinade, as it should not be reused. Place the steak on the hot grill and cook for about 4-5 minutes on each side for medium-rare. Adjust the cooking time based on your desired level of doneness. Use a meat thermometer if you want to be precise!

Step 4: Resting the Steak

After cooking, it’s important to let the steak rest. This allows the juices to redistribute throughout the meat, making it more tender and flavorful. Remove the steak from the grill and let it rest for about 5 minutes. During this time, you can prepare your garnishes or side dishes.

Savory Brown Sugar Bourbon Steak!

Variation of Savory Brown Sugar Bourbon Steak Recipe

Savory Brown Sugar Bourbon Steak Recipe is delicious as is, there are many ways to switch things up! You can experiment with alternative ingredients and different cooking methods to create a unique dish that suits your taste. Let’s explore some exciting variations!

Alternative Ingredients for Different Flavors

Changing a few ingredients can lead to a whole new flavor profile. Here are some ideas:

  • Honey instead of brown sugar: For a different sweetness, try using honey. It adds a floral note that pairs beautifully with bourbon.
  • Maple syrup: This can replace brown sugar for a rich, earthy sweetness. It’s perfect for those who love a hint of maple flavor.
  • Different cuts of steak: While flank steak is great, you can also use sirloin or ribeye for a richer taste. Each cut has its own unique texture and flavor.
  • Fresh herbs: Add fresh thyme or rosemary to the marinade for an aromatic twist. These herbs can elevate the dish with their fragrant notes.
  • Spicy mustard: Incorporating a tablespoon of spicy mustard can add a tangy kick to the marinade, balancing the sweetness of the brown sugar.

Savory Brown Sugar Bourbon Steak Recipe that you love!

Cooking Methods: Grilling vs. Pan-Seering

While grilling is a popular method for cooking steak, pan-searing is another fantastic option. Each method has its benefits, and you can choose based on your preference or available equipment.

  • Grilling: This method gives the steak a smoky flavor and beautiful grill marks. It’s perfect for outdoor cooking and allows excess fat to drip away, resulting in a leaner dish.
  • Pan-searing: If you’re cooking indoors, pan-searing is a great alternative. Use a cast-iron skillet for the best results. Heat the skillet until it’s very hot, then add a little oil before placing the steak in. This method creates a delicious crust and keeps the steak juicy.

Savory Brown Sugar Bourbon Steak that will impress anyone at your dinner table!

Cooking Note for Savory Brown Sugar Bourbon Steak Recipe

Savory Brown Sugar Bourbon Steak Recipe, there are a few important cooking notes to keep in mind. These tips will help you achieve the best results and ensure your steak is flavorful and tender.

First, always start with a high-quality flank steak. Look for meat that is bright red with a good amount of marbling. This marbling is the fat within the meat that melts during cooking, adding flavor and juiciness.

Next, make sure your grill or pan is preheated properly. A hot cooking surface is essential for creating a nice sear on the steak. This sear locks in the juices and enhances the overall flavor. If you’re using a grill, you should hear a satisfying sizzle when the steak hits the grates.

Another key point is to avoid flipping the steak too often. Let it cook undisturbed for the recommended time on each side. This allows for even cooking and helps develop a beautiful crust.

Using a meat thermometer can be very helpful. For medium-rare, aim for an internal temperature of about 130°F (54°C). If you prefer your steak more well-done, adjust the cooking time accordingly. Remember, the steak will continue to cook slightly while resting.

Lastly, don’t skip the resting step! Allowing the steak to rest for about 5 minutes after cooking is crucial. This step ensures that the juices redistribute throughout the meat, making each bite tender and juicy.

Savory Brown Sugar Bourbon Steak that will impress your family and friends!

Serving Suggestions for Savory Brown Sugar Bourbon Steak Recipe

Savory Brown Sugar Bourbon Steak Recipe, it’s time to think about how to serve it. The right side dishes and beverages can elevate your meal, making it even more enjoyable. Here are some fantastic serving suggestions to complement your delicious steak!

Ideal Side Dishes

Savory Brown Sugar Bourbon Steak:

  • Grilled Vegetables: A mix of bell peppers, zucchini, and asparagus adds color and nutrition. The smoky flavor from grilling complements the steak perfectly.
  • Garlic Mashed Potatoes: Creamy mashed potatoes with a hint of garlic provide a comforting side that balances the sweetness of the steak.
  • Fresh Salad: A light salad with mixed greens, cherry tomatoes, and a tangy vinaigrette can refresh your palate between bites of steak.
  • Roasted Brussels Sprouts: These crispy, caramelized sprouts add a delightful crunch and a slightly bitter flavor that pairs well with the sweet marinade.
  • Rice Pilaf: Fluffy rice pilaf with herbs and spices can soak up the delicious juices from the steak, making every bite flavorful.

Feel free to mix and match these sides based on your preferences and what you have on hand. Each option brings its own unique flavor to the table!

Wine Pairing Recommendations

Savory Brown Sugar Bourbon Steak Recipe:

  • Cabernet Sauvignon: This full-bodied red wine has bold flavors that complement the richness of the steak and the sweetness of the bourbon.
  • Malbec: With its dark fruit flavors and smooth finish, Malbec pairs well with grilled meats, making it an excellent choice for this dish.
  • Zinfandel: This wine offers a fruity profile with a hint of spice, which can enhance the flavors of the marinade.
  • Pinot Noir: If you prefer a lighter wine, Pinot Noir’s acidity and fruitiness can balance the sweetness of the steak without overpowering it.

When selecting a wine, consider your personal taste and the overall flavor profile of your meal. Enjoying a glass of wine with your steak can make the dining experience even more special!
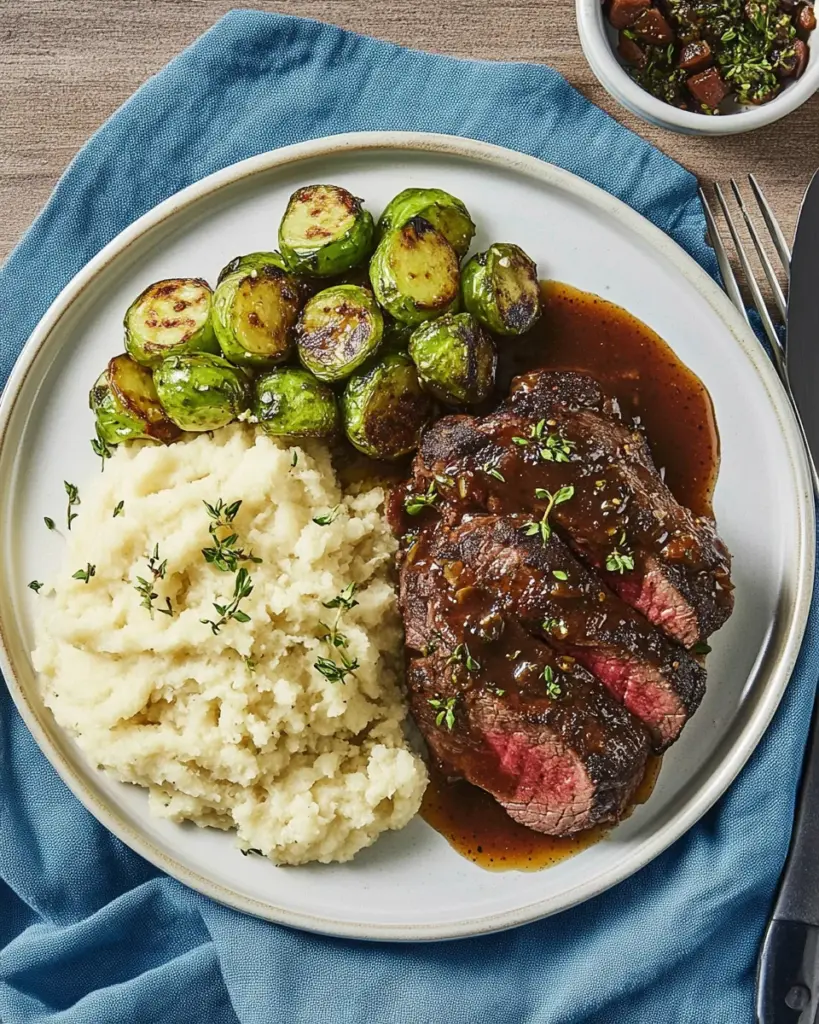
Tips for Perfecting Your Savory Brown Sugar Bourbon Steak Recipe

Savory Brown Sugar Bourbon Steak Recipe, a few tips can make all the difference. These simple yet effective suggestions will help you achieve a steak that is not only delicious but also perfectly cooked every time. Let’s explore some essential tips!

First, always allow your steak to come to room temperature before cooking. This step helps the meat cook more evenly. Take the steak out of the refrigerator about 30 minutes before grilling. This way, you’ll avoid a cold center while the outside cooks too quickly.

Next, don’t skip the marinating time! While an hour is the minimum, letting the steak marinate for several hours or overnight will deepen the flavors. The longer the steak sits in the marinade, the more tender and flavorful it becomes.

When grilling, make sure your grill is preheated to the right temperature. A hot grill is key to achieving those beautiful grill marks and a nice sear. If you’re using a charcoal grill, let the coals burn until they are covered with white ash. For gas grills, preheat for about 10-15 minutes.

Another important tip is to use a meat thermometer. This tool takes the guesswork out of cooking steak. For medium-rare, aim for an internal temperature of 130°F (54°C). If you prefer it more well-done, adjust accordingly. Remember, the steak will continue to cook slightly while resting.

Lastly, don’t forget to let your steak rest after cooking. This crucial step allows the juices to redistribute throughout the meat, ensuring each bite is juicy and tender. Cover the steak loosely with foil and let it rest for about 5 minutes before slicing.

Savory Brown Sugar Bourbon Steak that will impress everyone at your table!

Breakdown of Time for Savory Brown Sugar Bourbon Steak Recipe

Savory Brown Sugar Bourbon Steak Recipe is essential for planning your meal. Here’s a detailed breakdown of the time required for preparation, cooking, and the total time needed to enjoy this delicious dish.

Prep Time

The prep time for this recipe is quite manageable. You’ll need about 15 minutes to gather your ingredients and prepare the marinade. This includes:

  • Measuring out the ingredients
  • Minced garlic
  • Whisking the marinade together
  • Coating the steak in the marinade

After this initial prep, remember to allow for marinating time, which can range from 1 hour to 8 hours, depending on how much flavor you want to infuse into the steak.

Cooking Time

Once your steak has marinated, the cooking time is relatively quick. Here’s what to expect:

  • Preheating the grill or grill pan: about 5 minutes
  • Grilling the steak: approximately 8-10 minutes (4-5 minutes on each side for medium-rare)
  • Resting the steak: 5 minutes

In total, the cooking time will take around 15-20 minutes, making it a quick option for dinner!

Total Time

Savory Brown Sugar Bourbon Steak Recipe can vary significantly based on marinating. Here’s a quick summary:

  • Minimum Total Time: 1 hour 15 minutes (15 minutes prep + 1 hour marinating + 15-20 minutes cooking)
  • Maximum Total Time: 8 hours 15 minutes (15 minutes prep + 8 hours marinating + 15-20 minutes cooking)

With this breakdown, you can easily plan your cooking schedule. Whether you’re in a hurry or have time to let the flavors develop, this recipe fits into your day perfectly!

Nutritional Information for Savory Brown Sugar Bourbon Steak Recipe

Savory Brown Sugar Bourbon Steak Recipe is essential for those who are health-conscious or following specific dietary plans. This section will break down the key nutritional components of the dish, helping you make informed choices while enjoying this delicious meal.

Calories

Savory Brown Sugar Bourbon Steak contains approximately 350 calories. This makes it a satisfying option for dinner without being overly heavy. The balance of protein and fat in the dish contributes to its calorie content, ensuring you feel full and satisfied after your meal.

Protein Content

One of the standout features of this recipe is its high protein content. Each serving provides about 30 grams of protein. This is excellent for muscle repair and growth, making it a great choice for those who are active or looking to maintain a healthy diet. The flank steak is a lean source of protein, which means you get the benefits without excessive fat.

Sodium Levels

The sodium content in this recipe is approximately 800 milligrams per serving. This includes the sodium from soy sauce and added salt. While this is a moderate level of sodium, it’s important to consider if you are watching your salt intake. You can reduce the sodium by using low-sodium soy sauce or adjusting the amount of salt added to the marinade.

Savory Brown Sugar Bourbon Steak Recipe offers a delicious and nutritious meal option. With its balanced macronutrients, it can fit well into a variety of dietary plans. Enjoy this flavorful dish while being mindful of your nutritional needs!

FAQs about Savory Brown Sugar Bourbon Steak Recipe

What type of steak is best for this recipe?

Savory Brown Sugar Bourbon Steak Recipe is flank steak. This cut is known for its rich flavor and tenderness when marinated and cooked properly. However, you can also use other cuts like sirloin or ribeye if you prefer a different texture or flavor. Each cut has its unique qualities, so feel free to experiment and find your favorite!

Can I make the bourbon sauce ahead of time?

Yes, you can definitely make the bourbon sauce ahead of time! Simply prepare the marinade as directed, and reserve a portion before adding the steak. Store the reserved marinade in an airtight container in the refrigerator for up to 3 days. When you’re ready to use it, just heat it in a saucepan until it reaches a simmer. This will enhance the flavors and make it safe to eat!

How do I know when the steak is cooked to my liking?

To ensure your steak is cooked to your liking, using a meat thermometer is the best method. For medium-rare, aim for an internal temperature of about 130°F (54°C). If you prefer medium, look for around 140°F (60°C). Remember, the steak will continue to cook slightly while resting, so it’s a good idea to remove it from the heat just before it reaches your desired temperature. This way, you’ll enjoy a perfectly cooked steak every time!

What can I substitute for bourbon in this recipe?

If you prefer not to use bourbon, there are several substitutes you can try. Apple cider vinegar or apple juice can add a sweet and tangy flavor that works well in the marinade. Alternatively, you can use non-alcoholic bourbon or whiskey-flavored extracts for a similar taste without the alcohol. Just keep in mind that the flavor may vary slightly, but it will still be delicious!

Conclusion on Savory Brown Sugar Bourbon Steak Recipe

Savory Brown Sugar Bourbon Steak Recipe is a delightful dish that brings together the perfect balance of sweet and savory flavors. With its simple ingredients and straightforward preparation, this recipe is accessible for cooks of all skill levels. Whether you’re preparing a special dinner for loved ones or just looking to enjoy a delicious meal at home, this steak is sure to impress.

The marinating process not only enhances the flavor but also tenderizes the meat, making each bite juicy and satisfying. Plus, the versatility of this recipe allows you to experiment with different ingredients and cooking methods, ensuring that you can tailor it to your taste preferences.

As you serve this mouthwatering steak, don’t forget to pair it with your favorite sides and a nice glass of wine. The right accompaniments can elevate your dining experience, making it even more enjoyable. Remember to follow the tips provided to achieve the best results, and you’ll be well on your way to mastering this delicious dish.

Savory Brown Sugar Bourbon Steak Recipe. Happy cooking!
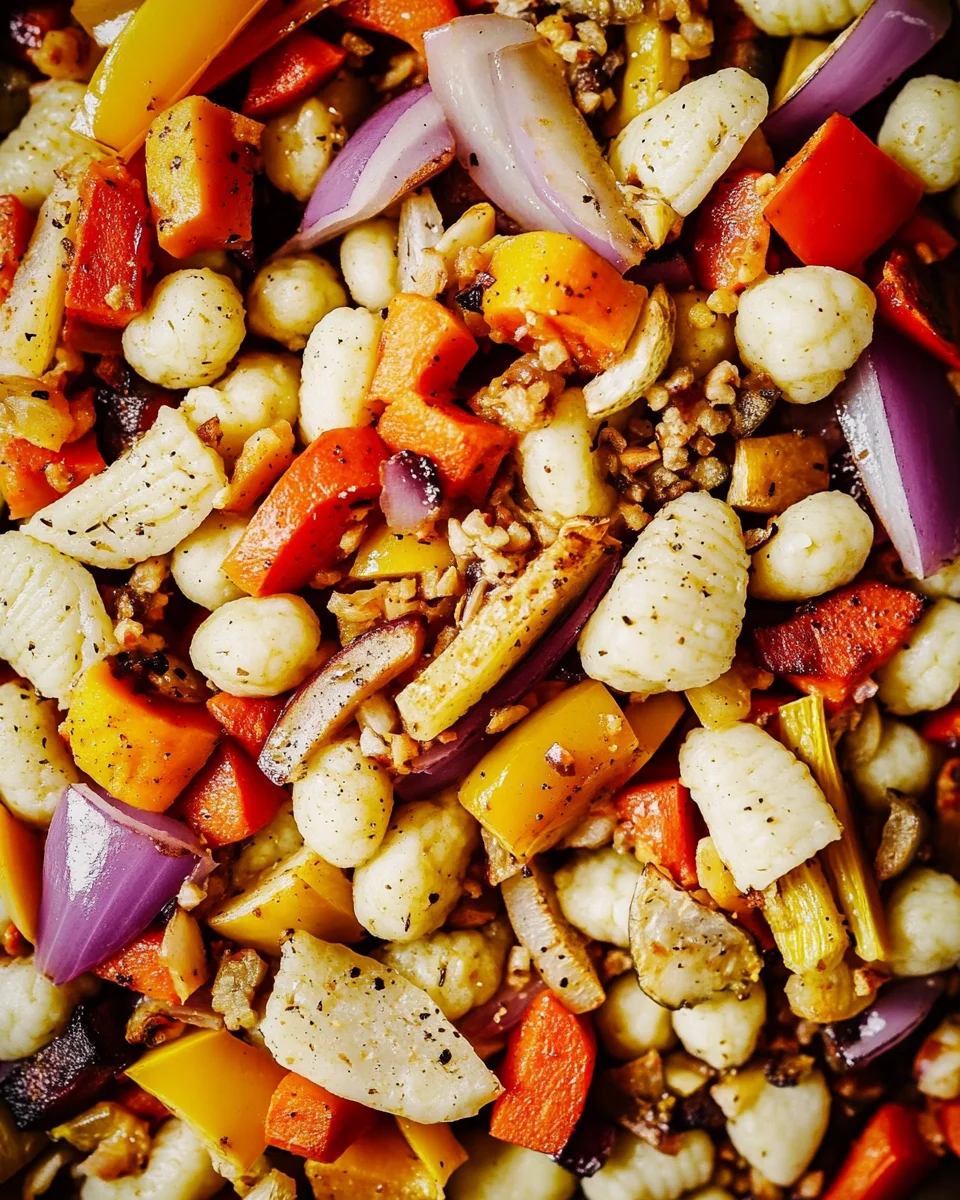
Sheet Pan Gnocchi and Roasted Vegetables is easy!

Introduction to Sheet Pan Gnocchi and Roasted Vegetables

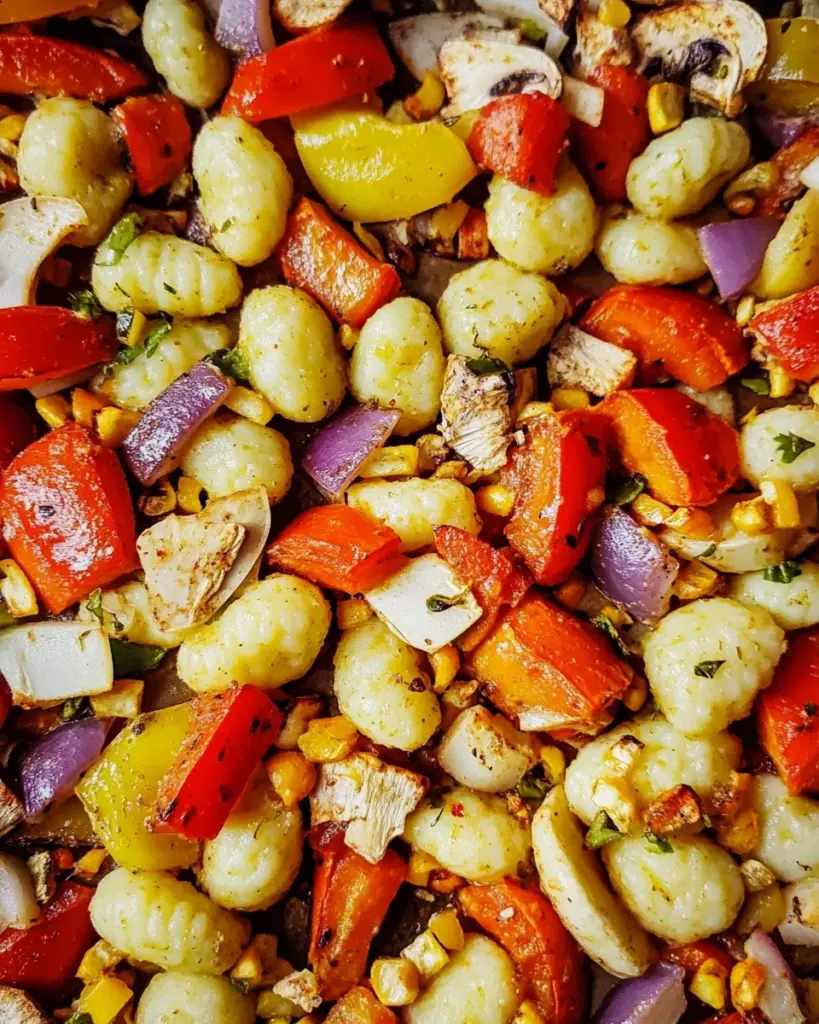
Are you looking for a quick and delicious meal that’s both satisfying and colorful? Look no further! Sheet Pan Gnocchi and Roasted Vegetables is the perfect dish for busy weeknights or lazy weekends. This recipe combines the delightful texture of gnocchi with a medley of vibrant vegetables, all roasted to perfection on a single sheet pan. Not only does this make for easy cleanup, but it also allows the flavors to meld beautifully.

Gnocchi, those little potato dumplings, are a favorite in many households. They are soft, pillowy, and soak up flavors wonderfully. When paired with roasted vegetables like cherry tomatoes, bell peppers, and zucchini, you create a dish that is not only tasty but also packed with nutrients. Plus, the bright colors of the vegetables make the meal visually appealing, which is always a bonus!

This recipe is incredibly versatile. You can easily customize it based on your preferences or what you have in your pantry. Whether you’re a vegetarian or looking to add some protein, this dish can adapt to your needs. With just a few simple ingredients and minimal prep time, you can have a wholesome meal ready in no time.

So, roll up your sleeves and get ready to enjoy a delightful culinary experience with Sheet Pan Gnocchi and Roasted Vegetables. Let’s dive into the ingredients you’ll need to create this mouthwatering dish!

Ingredients for Sheet Pan Gnocchi and Roasted Vegetables

To create a delicious batch of Sheet Pan Gnocchi and Roasted Vegetables, you’ll need a handful of simple ingredients. These items are easy to find at your local grocery store, making this recipe accessible for everyone. Here’s what you’ll need:

  • 2 cups store-bought gnocchi
  • 1 cup cherry tomatoes, halved
  • 1 cup bell peppers, diced (any color)
  • 1 cup zucchini, diced
  • 1/2 cup red onion, sliced
  • 3 tablespoons olive oil
  • 1 teaspoon garlic powder
  • 1 teaspoon Italian seasoning
  • Salt and pepper to taste
  • 1/4 cup grated Parmesan cheese (optional)
  • Fresh basil for garnish (optional)

These ingredients come together to create a delightful dish that is both hearty and healthy. The gnocchi serves as a wonderful base, while the roasted vegetables add flavor and nutrition. The olive oil helps to enhance the taste and ensures everything roasts evenly. Garlic powder and Italian seasoning bring a burst of flavor, making each bite enjoyable.

If you want to elevate your dish, consider adding some grated Parmesan cheese during the last few minutes of roasting. This adds a creamy, savory touch that complements the vegetables beautifully. Fresh basil can also be sprinkled on top for a pop of color and freshness.

Now that you have your ingredients ready, let’s move on to the preparation steps to bring this delightful meal to life!

Preparation of Sheet Pan Gnocchi and Roasted Vegetables

Now that you have gathered all your ingredients, it’s time to prepare your Sheet Pan Gnocchi and Roasted Vegetables. This process is simple and straightforward, making it perfect for cooks of all skill levels. Let’s break it down step by step!

Step 1: Preheat the Oven

First things first, preheat your oven to 425°F (220°C). This step is crucial as it ensures that your gnocchi and vegetables roast evenly. A hot oven helps to achieve that golden-brown color and crispy texture we all love. While the oven heats up, you can move on to the next steps.

Step 2: Prepare the Vegetables

Next, it’s time to prepare your vegetables. Start by washing them thoroughly. Then, chop the bell peppers, zucchini, and red onion into bite-sized pieces. Halve the cherry tomatoes. The goal is to have all the vegetables roughly the same size so they cook evenly. Once they are ready, set them aside.

Step 3: Combine Gnocchi and Vegetables

Now, grab a large sheet pan. In this pan, combine the store-bought gnocchi with your prepared vegetables. Make sure to spread them out evenly. This allows for proper roasting and prevents them from steaming. You want them to get that nice roasted flavor!

Step 4: Seasoning the Mixture

After combining the gnocchi and vegetables, it’s time to add some flavor. Drizzle 3 tablespoons of olive oil over the mixture. Then, sprinkle in the garlic powder, Italian seasoning, salt, and pepper. Toss everything together until all the ingredients are well coated. This step is essential as it ensures that every bite is packed with flavor!

Step 5: Roasting in the Oven

Finally, it’s time to roast your dish! Spread the mixture out in an even layer on the sheet pan. Place it in the preheated oven and roast for 20-25 minutes. Be sure to stir halfway through to ensure even cooking. You’ll know it’s done when the vegetables are tender and the gnocchi are golden brown. If you’re using Parmesan cheese, sprinkle it on top during the last 5 minutes of roasting for a delicious cheesy finish.

Once everything is roasted to perfection, remove the pan from the oven. Your kitchen will smell amazing, and you’ll be ready to enjoy a delightful meal!

Variation of Sheet Pan Gnocchi and Roasted Vegetables

One of the best things about Sheet Pan Gnocchi and Roasted Vegetables is its versatility. You can easily switch up the ingredients to suit your taste or to use what you have on hand. Let’s explore some alternative vegetables and ways to add protein to your dish!

Alternative Vegetables to Use

While the original recipe calls for cherry tomatoes, bell peppers, zucchini, and red onion, feel free to get creative! Here are some alternative vegetables that work wonderfully:

  • Asparagus: Cut into bite-sized pieces, asparagus adds a nice crunch and earthy flavor.
  • Broccoli: This nutrient-packed vegetable roasts beautifully and adds a lovely green color.
  • Carrots: Sliced or diced, carrots bring a hint of sweetness and vibrant color to the dish.
  • Cauliflower: This versatile veggie can be cut into florets and adds a unique texture.
  • Mushrooms: Sliced mushrooms add a savory depth of flavor that complements the gnocchi.

Mix and match these vegetables based on your preferences or what’s in season. The key is to ensure they are cut into similar sizes for even cooking. This way, you’ll enjoy a colorful and nutritious meal every time!

Adding Proteins to Your Dish

If you want to make your Sheet Pan Gnocchi and Roasted Vegetables even heartier, consider adding some protein. Here are a few options:

  • Cooked Chicken: Diced or shredded chicken can be tossed in with the gnocchi and vegetables for a filling meal.
  • Chickpeas: Canned or cooked chickpeas are a great plant-based protein option. They add a nice texture and flavor.
  • Sausage: Sliced Italian sausage can bring a savory kick to the dish. Just make sure to cook it beforehand.
  • Tofu: For a vegetarian option, cubed and marinated tofu can be added for extra protein and flavor.

Adding protein not only enhances the dish but also makes it more satisfying. Feel free to experiment with different combinations to find your favorite mix!

Cooking Note for Sheet Pan Gnocchi and Roasted Vegetables

When preparing your Sheet Pan Gnocchi and Roasted Vegetables, there are a few cooking notes to keep in mind. These tips will help ensure that your dish turns out perfectly every time. Let’s dive into some important points to consider!

First, always check the cooking instructions on your gnocchi package. Some brands may have specific recommendations for cooking times and temperatures. While this recipe works well for store-bought gnocchi, following the package instructions can help you achieve the best results.

Next, the size of your vegetable pieces matters. Cutting them into uniform sizes ensures they cook evenly. If some pieces are larger than others, they may take longer to roast, leading to uneven textures. Aim for bite-sized pieces to promote even cooking.

Another important note is to avoid overcrowding the sheet pan. If you add too many ingredients, they may steam instead of roast. This can result in a soggy texture rather than the desired crispy finish. If you have a lot of vegetables or gnocchi, consider using two pans to give everything enough space.

Additionally, keep an eye on the roasting time. Ovens can vary, so it’s a good idea to check on your dish a few minutes before the suggested cooking time. You want the vegetables to be tender and the gnocchi to be golden brown. If they need a little more time, feel free to leave them in for a few extra minutes.

Lastly, don’t forget to let your dish cool slightly before serving. This allows the flavors to settle and makes it easier to plate. Plus, it helps prevent burns from hot ingredients. Once cooled, you can garnish with fresh basil or additional cheese for an extra touch of flavor.

By keeping these cooking notes in mind, you’ll be well on your way to creating a delicious and satisfying Sheet Pan Gnocchi and Roasted Vegetables dish that everyone will love!

Serving Suggestions for Sheet Pan Gnocchi and Roasted Vegetables

Once your Sheet Pan Gnocchi and Roasted Vegetables are perfectly roasted, it’s time to serve this delightful dish! The way you present your meal can enhance the dining experience, making it even more enjoyable. Here are some serving suggestions to consider:

  • Garnish with Fresh Herbs: A sprinkle of fresh basil or parsley adds a burst of color and freshness. It also enhances the flavor, making each bite more aromatic.
  • Pair with a Side Salad: A light side salad with mixed greens, cucumbers, and a simple vinaigrette complements the hearty gnocchi. This adds a refreshing crunch to your meal.
  • Serve with Crusty Bread: A slice of warm, crusty bread is perfect for soaking up any leftover olive oil and juices from the roasted vegetables. It makes for a satisfying addition to your plate.
  • Top with Extra Cheese: If you love cheese, consider adding more grated Parmesan or a sprinkle of mozzarella on top just before serving. This adds a creamy texture that pairs beautifully with the dish.
  • Drizzle with Balsamic Glaze: A light drizzle of balsamic glaze over the top can elevate the flavors. The sweetness of the glaze contrasts nicely with the savory roasted vegetables.

These serving suggestions not only enhance the visual appeal of your dish but also add layers of flavor. Feel free to mix and match based on your preferences or what you have available. The goal is to create a meal that is not only delicious but also inviting and enjoyable for everyone at the table!

Tips for Perfecting Your Sheet Pan Gnocchi and Roasted Vegetables

To make your Sheet Pan Gnocchi and Roasted Vegetables truly shine, consider these helpful tips. They will guide you in achieving the best flavors and textures, ensuring a delightful meal every time!

  • Use Quality Ingredients: Fresh, high-quality vegetables make a big difference. Choose vibrant, firm produce for the best flavor. Organic options can also enhance the taste.
  • Don’t Skip the Oil: Olive oil is essential for roasting. It helps the gnocchi and vegetables brown nicely while adding flavor. Make sure to coat everything evenly.
  • Experiment with Seasonings: While garlic powder and Italian seasoning are great, feel free to add your favorite spices. A pinch of red pepper flakes can add a nice kick!
  • Adjust Cooking Time: Keep an eye on your dish as it roasts. Depending on your oven, you may need to adjust the cooking time slightly. Look for golden-brown gnocchi and tender vegetables.
  • Let It Rest: After removing the pan from the oven, let it sit for a few minutes. This allows the flavors to meld and makes serving easier.
  • Serve Immediately: Sheet pan meals are best enjoyed fresh. The gnocchi will stay soft, and the vegetables will retain their vibrant colors and textures.
  • Store Leftovers Properly: If you have leftovers, store them in an airtight container in the fridge. They can be reheated in the oven or microwave, but the texture may change slightly.

By following these tips, you’ll elevate your Sheet Pan Gnocchi and Roasted Vegetables to new heights. Enjoy the process of cooking and savor the delicious results!

Breakdown of Time for Sheet Pan Gnocchi and Roasted Vegetables

Understanding the time needed for each step in preparing your Sheet Pan Gnocchi and Roasted Vegetables can help you plan your meal better. Here’s a simple breakdown of the time involved in this delicious recipe.

Prep Time

The prep time for this dish is quite minimal. You’ll spend about 10-15 minutes gathering your ingredients and preparing the vegetables. This includes washing, chopping, and measuring everything you need. If you have your ingredients ready, you can get started quickly!

Cooking Time

Once everything is prepped, the cooking time is approximately 20-25 minutes. This is when the gnocchi and vegetables roast in the oven. Remember to stir the mixture halfway through to ensure even cooking. Keep an eye on them, as cooking times can vary slightly based on your oven.

Total Time

In total, you can expect to spend about 30-40 minutes from start to finish. This includes both prep and cooking time. It’s a quick and easy meal that fits perfectly into a busy schedule. Plus, the best part is that you only need one sheet pan, making cleanup a breeze!

With this time breakdown, you can easily fit Sheet Pan Gnocchi and Roasted Vegetables into your weeknight dinner plans. Enjoy the process and the delicious results!

Nutritional Information for Sheet Pan Gnocchi and Roasted Vegetables

Understanding the nutritional content of your meals is essential for maintaining a balanced diet. Sheet Pan Gnocchi and Roasted Vegetables not only offers a delightful taste but also provides valuable nutrients. Let’s break down the nutritional information for this delicious dish.

Calories

Each serving of Sheet Pan Gnocchi and Roasted Vegetables contains approximately 320 calories. This makes it a satisfying option for lunch or dinner without overwhelming your daily caloric intake. The combination of gnocchi and vegetables provides a hearty meal that keeps you feeling full and energized.

Protein

In terms of protein, this dish offers about 10 grams per serving. While gnocchi is primarily a carbohydrate source, the addition of vegetables contributes some protein as well. If you choose to add protein-rich ingredients like chicken, chickpeas, or tofu, you can easily boost the protein content of your meal, making it even more nutritious.

Sodium

The sodium content in each serving is around 400 milligrams. This amount can vary based on the specific ingredients you use, especially if you add cheese or use pre-seasoned products. To keep sodium levels in check, consider using low-sodium options for any added ingredients and adjust the salt to your taste. This way, you can enjoy your meal while being mindful of your sodium intake.

Overall, Sheet Pan Gnocchi and Roasted Vegetables is a well-rounded dish that provides a good balance of calories, protein, and sodium. It’s a great choice for anyone looking to enjoy a flavorful meal while keeping their nutritional goals in mind!

FAQs about Sheet Pan Gnocchi and Roasted Vegetables

Can I use frozen gnocchi for this recipe?

Absolutely! You can use frozen gnocchi for your Sheet Pan Gnocchi and Roasted Vegetables. Just toss the frozen gnocchi directly onto the sheet pan with your vegetables. There’s no need to thaw them first. However, keep in mind that frozen gnocchi may take a few extra minutes to cook. Check for doneness by ensuring they are golden brown and heated through. This makes it a convenient option for a quick meal!

What vegetables pair well with gnocchi?

Gnocchi is quite versatile and pairs well with a variety of vegetables. Some great options include:

  • Spinach: Fresh or wilted spinach adds a lovely color and nutrients.
  • Eggplant: Diced eggplant brings a unique texture and flavor.
  • Green Beans: Crisp green beans add a nice crunch and freshness.
  • Sweet Potatoes: Diced sweet potatoes offer a sweet contrast to the savory gnocchi.
  • Brussels Sprouts: Halved Brussels sprouts roast beautifully and add a hearty element.

Feel free to mix and match based on your preferences or what’s in season. The key is to choose vegetables that roast well and complement the soft texture of the gnocchi.

How do I store leftovers of Sheet Pan Gnocchi and Roasted Vegetables?

Storing leftovers is easy! Allow your Sheet Pan Gnocchi and Roasted Vegetables to cool completely before transferring them to an airtight container. Store them in the refrigerator for up to 3 days. When you’re ready to enjoy them again, you can reheat the dish in the oven or microwave. If reheating in the oven, place it on a baking sheet at 350°F (175°C) for about 10-15 minutes, or until heated through. This helps maintain the texture of the gnocchi and vegetables. Enjoy your delicious leftovers!

Conclusion on Sheet Pan Gnocchi and Roasted Vegetables

In conclusion, Sheet Pan Gnocchi and Roasted Vegetables is a delightful dish that brings together the comforting texture of gnocchi with the vibrant flavors of roasted vegetables. This recipe is not only easy to prepare but also offers a wonderful opportunity to customize based on your preferences. Whether you’re a busy parent, a student, or simply someone who enjoys good food, this meal fits perfectly into any lifestyle.

The beauty of this dish lies in its versatility. You can mix and match vegetables, add proteins, or even experiment with different seasonings to create a meal that suits your taste. Plus, the one-pan cooking method means less cleanup, allowing you to enjoy your meal without the hassle of washing multiple pots and pans.

As you gather your ingredients and follow the simple steps, you’ll find that cooking can be a joyful experience. The aroma of roasting vegetables and the golden-brown gnocchi will fill your kitchen, making it a warm and inviting space. And when you finally sit down to enjoy your creation, you’ll appreciate the delicious flavors and the satisfaction of a home-cooked meal.

So, why not give Sheet Pan Gnocchi and Roasted Vegetables a try? It’s a dish that promises to please your taste buds while providing a nutritious option for you and your loved ones. Enjoy the process, savor the flavors, and make this recipe a staple in your cooking repertoire!

Caramel Brownie Cheesecake Recipe is a must-try delight!

Introduction to the Caramel Brownie Cheesecake Recipe

What Makes This Dessert Special?

The Caramel Brownie Cheesecake is a delightful fusion of flavors and textures. Imagine biting into a rich, creamy cheesecake layered atop a fudgy brownie base, all drizzled with luscious caramel. This dessert is not just a treat for the taste buds; it’s a feast for the eyes too! The combination of chocolate, cream cheese, and caramel creates a symphony of sweetness that is hard to resist. Each slice offers a perfect balance of creaminess and chewiness, making it a standout dessert for any occasion.

What truly sets this dessert apart is its versatility. You can customize it to suit your taste. Whether you prefer a nutty crunch with pecans or a smooth finish with a hint of espresso, the options are endless. This Caramel Brownie Cheesecake is perfect for celebrations, family gatherings, or simply as a sweet indulgence after dinner. It’s a dessert that brings people together, sparking joy and creating lasting memories.

A Brief History of Cheesecake and Brownies

Cheesecake has a rich history that dates back to ancient Greece. The earliest known cheesecake was made with simple ingredients like cheese, honey, and flour. Over the centuries, this dessert evolved, with various cultures adding their unique twists. Today, cheesecake is loved worldwide, with countless variations, including the creamy New York style and the light and fluffy Japanese version.

On the other hand, brownies emerged in the United States in the late 19th century. They are believed to have been created by accident when a baker forgot to add baking powder to a chocolate cake recipe. The result was a dense, fudgy treat that quickly gained popularity. Brownies have since become a beloved dessert, often enjoyed on their own or as a base for other desserts, like our Caramel Brownie Cheesecake.

Combining these two classic desserts into one creates a unique experience that celebrates their rich histories while offering a modern twist. The Caramel Brownie Cheesecake is not just a dessert; it’s a delicious journey through time, blending tradition with innovation.

Ingredients for the Caramel Brownie Cheesecake Recipe

Essential Ingredients

To create the perfect Caramel Brownie Cheesecake, you’ll need a selection of essential ingredients. These components work together to form the rich, creamy, and decadent layers that make this dessert so special. Here’s what you’ll need:

  • 1 cup graham cracker crumbs: This forms the base of your cheesecake, providing a crunchy texture.
  • 1/4 cup unsweetened cocoa powder: This adds a deep chocolate flavor to the crust.
  • 1/4 cup granulated sugar: Sweetens the crust and balances the flavors.
  • 1/2 cup unsalted butter, melted: Binds the crust ingredients together.
  • 2 (8-ounce) packages cream cheese, softened: The star of the cheesecake filling, giving it a creamy texture.
  • 1 cup granulated sugar: Sweetens the cheesecake filling.
  • 1 teaspoon vanilla extract: Enhances the overall flavor of the cheesecake.
  • 3 large eggs: Provides structure and richness to the filling.
  • 1 cup semi-sweet chocolate chips: Adds a delicious chocolate flavor to the cheesecake.
  • 1/2 cup caramel sauce: Drizzled throughout the cheesecake for a sweet, gooey finish.

Optional Ingredients for Customization

While the essential ingredients create a fantastic Caramel Brownie Cheesecake, you can also customize it to suit your taste. Here are some optional ingredients to consider:

  • 1/4 cup chopped pecans: Adds a delightful crunch and nutty flavor. You can also use walnuts if you prefer.
  • 1 teaspoon espresso powder: For a richer flavor, this can enhance the chocolate notes in the cheesecake.
  • Different flavored extracts: Such as almond or hazelnut, can be used instead of vanilla for a unique twist.
  • Fruit toppings: Fresh berries or sliced bananas can be added for a fruity contrast to the rich cheesecake.

Feel free to mix and match these optional ingredients to create a Caramel Brownie Cheesecake that’s uniquely yours. The possibilities are endless, and your creativity will make this dessert even more special!

Step-by-Step Preparation of the Caramel Brownie Cheesecake Recipe

Step 1: Preparing the Brownie Base

To start, you’ll want to prepare the brownie base. In a medium bowl, combine the graham cracker crumbs, unsweetened cocoa powder, and granulated sugar. Mix these dry ingredients well. Next, pour in the melted unsalted butter. Stir until everything is evenly coated and resembles wet sand. This mixture will form the crust of your cheesecake.

Now, take your prepared springform pan and press the crumb mixture firmly into the bottom. Make sure it’s packed tightly to create a solid base. This step is crucial, as it will hold the cheesecake layers together. Once done, set the pan aside while you prepare the cheesecake filling.

Step 2: Making the Cheesecake Filling

In a large mixing bowl, beat the softened cream cheese using an electric mixer. Mix until it’s smooth and creamy, which should take about 2-3 minutes. Gradually add in the granulated sugar and vanilla extract, mixing until well combined. It’s important to scrape down the sides of the bowl to ensure everything is mixed evenly.

Next, add the eggs one at a time. Mix on low speed just until combined after each addition. Be careful not to overmix, as this can lead to cracks in your cheesecake. Once all the eggs are incorporated, it’s time to add the melted chocolate chips. Make sure they have cooled slightly before folding them into the cream cheese mixture. This will give your cheesecake a rich chocolate flavor.

Step 3: Combining Brownie and Cheesecake Layers

Now that your brownie base and cheesecake filling are ready, it’s time to combine them. Pour half of the cheesecake batter over the prepared crust in the springform pan. Use a spatula to spread it evenly. Then, drizzle half of the caramel sauce over this layer. This will create a delicious caramel swirl in the cheesecake.

Next, pour the remaining cheesecake batter on top. Again, spread it evenly. To finish, take the remaining caramel sauce and drizzle it over the top layer of the batter. Use a knife or toothpick to gently swirl the caramel into the cheesecake. This adds a beautiful marbled effect and enhances the flavor.

Step 4: Adding the Caramel Topping

If you’re using chopped pecans, sprinkle them on top of the cheesecake now. This step is optional but adds a nice crunch and flavor. The pecans will toast slightly during baking, enhancing their taste. If you prefer a nut-free version, feel free to skip this step. Your cheesecake is now ready for the oven!

Step 5: Baking the Cheesecake

Preheat your oven to 325°F (163°C). Place the springform pan in the oven and bake for 55-60 minutes. The cheesecake is done when the center is set but still slightly jiggly. This is important, as overbaking can lead to a dry cheesecake. Once baked, turn off the oven and crack the door open. Let the cheesecake cool in the oven for about 1 hour. This gradual cooling helps prevent cracks.

Step 6: Cooling and Setting

After an hour, remove the cheesecake from the oven. Allow it to cool completely at room temperature. Once cooled, cover it with plastic wrap and refrigerate for at least 4 hours, or overnight if possible. Chilling the cheesecake allows the flavors to meld and the texture to set perfectly. When you’re ready to serve, carefully remove the sides of the springform pan. Your Caramel Brownie Cheesecake is now ready to be enjoyed!

Variations of the Caramel Brownie Cheesecake Recipe

Gluten-Free Options

If you or your guests are following a gluten-free diet, you can easily adapt the Caramel Brownie Cheesecake recipe. Start by using gluten-free graham cracker crumbs for the crust. Many brands offer gluten-free options that taste just as delicious. Additionally, ensure that the chocolate chips and caramel sauce you choose are labeled gluten-free. This way, you can enjoy the same rich flavors without any gluten concerns. Your gluten-free version will still be creamy, decadent, and utterly satisfying!

Vegan Alternatives

For those who prefer a vegan dessert, you can make a delightful vegan Caramel Brownie Cheesecake. Replace the cream cheese with a vegan cream cheese alternative, which is widely available in stores. Instead of eggs, use flaxseed meal or chia seeds mixed with water as a binding agent. For the crust, ensure that your graham cracker crumbs are vegan-friendly. You can also substitute the butter with coconut oil or a vegan butter alternative. With these simple swaps, you can create a delicious vegan cheesecake that everyone will love!

Flavor Variations (e.g., Chocolate, Nutty)

One of the best parts of making a Caramel Brownie Cheesecake is the ability to customize the flavors. For a richer chocolate experience, consider adding more cocoa powder to the crust or using dark chocolate chips in the filling. If you enjoy nutty flavors, you can incorporate almond or hazelnut extracts into the cheesecake batter. Additionally, try adding crushed nuts like walnuts or almonds into the batter for extra texture. You can even swirl in some fruit purees, like raspberry or strawberry, for a fruity twist. The possibilities are endless, allowing you to create a cheesecake that perfectly suits your taste!

Cooking Note for the Caramel Brownie Cheesecake Recipe

Tips for Perfect Baking

Baking a Caramel Brownie Cheesecake can be a delightful experience, but a few tips can help ensure your dessert turns out perfectly every time. First, always use room temperature ingredients. This includes the cream cheese and eggs. Room temperature ingredients blend more smoothly, resulting in a creamier filling.

Next, avoid overmixing the batter. When you add the eggs, mix just until combined. Overmixing can introduce too much air, leading to cracks in your cheesecake. Also, consider using a water bath while baking. This method helps maintain moisture in the oven, preventing the cheesecake from drying out. To do this, wrap the outside of your springform pan with aluminum foil and place it in a larger pan filled with hot water.

Lastly, remember to let your cheesecake cool gradually. After baking, turn off the oven and crack the door open. This gradual cooling process helps prevent sudden temperature changes that can cause cracks. Patience is key, so allow your cheesecake to cool completely before refrigerating it. Following these tips will help you achieve a smooth, creamy, and crack-free Caramel Brownie Cheesecake!

Common Mistakes to Avoid

Even the best bakers can make mistakes, so here are some common pitfalls to watch out for when making your Caramel Brownie Cheesecake. One frequent error is not greasing the springform pan properly. This can lead to sticking, making it difficult to remove the cheesecake later. Always grease the pan well to ensure easy release.

Another mistake is not allowing the cheesecake to set long enough in the refrigerator. Chilling is crucial for the flavors to meld and the texture to firm up. If you cut into it too soon, you may end up with a gooey mess instead of clean slices.

Additionally, be cautious with the baking time. Every oven is different, so keep an eye on your cheesecake as it bakes. If it looks too jiggly in the center, it may need a few more minutes. However, be careful not to overbake, as this can lead to a dry texture.

Lastly, don’t skip the cooling step in the oven. Cracking can occur if you take the cheesecake out of the oven too quickly. By following these tips and avoiding common mistakes, you’ll be well on your way to creating a stunning Caramel Brownie Cheesecake that will impress everyone!

Serving Suggestions for the Caramel Brownie Cheesecake Recipe

Ideal Pairings

When it comes to serving your Caramel Brownie Cheesecake, the right accompaniments can elevate the experience. Here are some delightful pairings to consider:

  • Vanilla Ice Cream: A scoop of creamy vanilla ice cream complements the rich flavors of the cheesecake beautifully. The cold ice cream contrasts perfectly with the warm caramel, creating a delightful balance.
  • Whipped Cream: Light and fluffy whipped cream adds a touch of elegance. You can even sweeten it with a hint of vanilla or a sprinkle of cocoa powder for an extra flavor boost.
  • Fresh Berries: Raspberries, strawberries, or blueberries provide a refreshing tartness that cuts through the sweetness of the cheesecake. They also add a pop of color to your dessert plate.
  • Chocolate Sauce: For chocolate lovers, a drizzle of chocolate sauce can enhance the dessert’s richness. It’s a simple way to add an extra layer of indulgence.
  • Coffee: A cup of freshly brewed coffee pairs wonderfully with the cheesecake. The bitterness of the coffee balances the sweetness, making each bite even more enjoyable.

Feel free to mix and match these pairings to create a dessert experience that suits your taste and impresses your guests!

Presentation Tips

Presentation is key when serving your Caramel Brownie Cheesecake. Here are some tips to make your dessert look as good as it tastes:

  • Use a Cake Stand: Elevate your cheesecake on a decorative cake stand. This adds height and makes it the centerpiece of your dessert table.
  • Garnish with Caramel Drizzle: Before serving, drizzle additional caramel sauce over the top. This not only enhances the flavor but also creates an eye-catching design.
  • Add Fresh Fruit: Scatter fresh berries around the cheesecake on the serving plate. This adds color and freshness, making the dessert more inviting.
  • Chocolate Shavings: For a touch of elegance, sprinkle chocolate shavings on top. This adds a sophisticated look and a hint of extra chocolate flavor.
  • Slice Neatly: Use a sharp knife to cut clean slices. Wipe the knife with a damp cloth between cuts for perfectly shaped pieces.

With these serving suggestions and presentation tips, your Caramel Brownie Cheesecake will not only taste amazing but also look stunning on any table!

Tips for the Perfect Caramel Brownie Cheesecake Recipe

Storage Tips

Storing your Caramel Brownie Cheesecake properly is essential to maintain its delicious flavor and creamy texture. Here are some helpful storage tips:

  • Refrigeration: Always store your cheesecake in the refrigerator. Cover it with plastic wrap or aluminum foil to prevent it from absorbing any odors from other foods. This will keep it fresh for up to 5 days.
  • Freezing: If you want to keep your cheesecake for a longer period, you can freeze it. Wrap individual slices in plastic wrap and then place them in an airtight container. This way, you can enjoy a slice whenever you crave it! Frozen cheesecake can last for up to 2 months.
  • Thawing: To thaw frozen cheesecake, simply transfer it to the refrigerator for several hours or overnight. Avoid thawing at room temperature, as this can affect the texture.
  • Serving After Storage: If you’ve stored your cheesecake in the fridge, let it sit at room temperature for about 15-20 minutes before serving. This will enhance the flavors and make it easier to slice.

Reheating Instructions

While cheesecake is typically enjoyed cold, you may want to warm it slightly for a different experience. Here’s how to reheat your Caramel Brownie Cheesecake:

  • Microwave: Place a slice of cheesecake on a microwave-safe plate. Heat it in the microwave for about 10-15 seconds. Check to see if it’s warm enough; if not, heat in additional 5-second intervals. Be careful not to overheat, as this can change the texture.
  • Oven: Preheat your oven to 250°F (120°C). Place the cheesecake on a baking sheet and cover it loosely with aluminum foil. Heat for about 10-15 minutes, or until warmed through. This method helps maintain the creamy texture.
  • Serving Warm: Warm cheesecake pairs wonderfully with a scoop of ice cream or a drizzle of hot caramel sauce. It creates a delightful contrast of temperatures that enhances the overall dessert experience.

By following these storage and reheating tips, you can enjoy your Caramel Brownie Cheesecake at its best, whether it’s fresh out of the oven or after a few days in the fridge!

Breakdown of Time for the Caramel Brownie Cheesecake Recipe

Prep Time

Preparing your Caramel Brownie Cheesecake is a fun and engaging process. The prep time for this recipe is approximately 30 minutes. During this time, you will gather all your ingredients, prepare the brownie base, and mix the cheesecake filling. Make sure to have everything ready before you start, as this will make the process smoother and more enjoyable. Remember, taking your time during prep can lead to a better final product!

Cooking Time

The cooking time for the Caramel Brownie Cheesecake is about 55-60 minutes. This is when the cheesecake bakes in the oven, allowing it to set perfectly. Keep an eye on it as it bakes, ensuring the center remains slightly jiggly. After baking, you will also need to let it cool in the oven for an additional hour. This gradual cooling helps prevent cracks and ensures a smooth texture.

Total Time

In total, you should expect to spend around 6 hours to make your Caramel Brownie Cheesecake. This includes the prep time, cooking time, and the necessary chilling time in the refrigerator. Chilling is crucial, as it allows the flavors to meld and the cheesecake to set properly. For the best results, consider making it a day ahead of when you plan to serve it. This way, you can enjoy a deliciously rich dessert without any last-minute stress!

Nutritional Information for the Caramel Brownie Cheesecake Recipe

Calories and Macronutrients

Understanding the nutritional content of your Caramel Brownie Cheesecake can help you enjoy it mindfully. Each serving of this delicious dessert contains approximately 350 calories. Here’s a breakdown of the macronutrients per serving:

  • Calories: 350
  • Net Carbs: 25g
  • Protein: 6g
  • Fat: 25g

These values can vary slightly based on the specific brands of ingredients you use. For instance, using low-fat cream cheese can reduce the overall fat content. Additionally, if you choose to add nuts or other toppings, this will also affect the nutritional profile. Keeping track of these details can help you enjoy your cheesecake while being aware of your dietary choices.

Health Considerations

While the Caramel Brownie Cheesecake is a delightful treat, it’s important to consider its nutritional aspects. The dessert is rich in calories and fat, primarily due to the cream cheese and butter. However, it also provides some protein from the eggs and cream cheese, which can be beneficial in moderation.

If you’re watching your sugar intake, you might want to enjoy this cheesecake as an occasional indulgence rather than a regular dessert. For those with dietary restrictions, there are options to modify the recipe. For example, using sugar substitutes can lower the sugar content, and gluten-free ingredients can accommodate those with gluten sensitivities.

Ultimately, enjoying a slice of Caramel Brownie Cheesecake can be part of a balanced diet. Just remember to savor each bite and share it with friends and family for a truly delightful experience!

FAQs About the Caramel Brownie Cheesecake Recipe

Can I make this cheesecake ahead of time?

Absolutely! In fact, making the Caramel Brownie Cheesecake ahead of time is a great idea. This dessert benefits from chilling, as it allows the flavors to meld beautifully. You can prepare it a day or two in advance. Just make sure to cover it well with plastic wrap or aluminum foil to keep it fresh in the refrigerator. When you’re ready to serve, simply remove it from the fridge and let it sit at room temperature for a bit before slicing. This will enhance the flavors and make it easier to cut.

How do I store leftovers?

Storing leftovers properly is key to enjoying your Caramel Brownie Cheesecake later. First, make sure the cheesecake is completely cooled. Then, cover it tightly with plastic wrap or aluminum foil. You can also place it in an airtight container. Store it in the refrigerator, where it will stay fresh for up to 5 days. If you have individual slices, you can wrap them separately for easy access. Just remember to let them sit at room temperature for about 15-20 minutes before serving for the best taste!

Can I freeze the Caramel Brownie Cheesecake?

Yes, you can freeze the Caramel Brownie Cheesecake! Freezing is a great way to preserve this delicious dessert for later enjoyment. To freeze, wrap the cheesecake tightly in plastic wrap, then place it in an airtight container. If you prefer, you can also freeze individual slices. The cheesecake can be frozen for up to 2 months. When you’re ready to enjoy it, transfer it to the refrigerator to thaw overnight. Avoid thawing at room temperature, as this can affect the texture.

What can I substitute for cream cheese?

If you need a substitute for cream cheese, there are several options available. For a similar texture, you can use mascarpone cheese or ricotta cheese. Both will give you a creamy consistency, though the flavor may vary slightly. If you’re looking for a dairy-free option, consider using a vegan cream cheese alternative, which is widely available in stores. You can also make your own by blending soaked cashews with a bit of lemon juice and nutritional yeast for flavor. These substitutes will help you create a delicious cheesecake without compromising on taste!

Conclusion on the Caramel Brownie Cheesecake Recipe

Final Thoughts and Encouragement to Try the Recipe

The Caramel Brownie Cheesecake is more than just a dessert; it’s a celebration of flavors and textures that brings joy to any occasion. With its rich layers of creamy cheesecake, fudgy brownie base, and sweet caramel drizzle, this recipe is sure to impress your family and friends. Whether you’re hosting a gathering or simply treating yourself, this cheesecake is a delightful choice that will leave everyone wanting more.

As you embark on your baking journey, remember that the key to a successful Caramel Brownie Cheesecake lies in the details. From using room temperature ingredients to allowing the cheesecake to cool gradually, each step contributes to the final result. Don’t hesitate to experiment with flavors and toppings to make this recipe your own. The possibilities are endless, and your creativity will shine through in every bite.

So, gather your ingredients, roll up your sleeves, and dive into the world of baking! We encourage you to try this Caramel Brownie Cheesecake recipe and share it with your loved ones. The smiles and compliments you receive will be worth every moment spent in the kitchen. Happy baking!

Mediterranean Chicken Bowls with Feta are deliciously healthy.

Introduction to Mediterranean Chicken Bowls with Feta

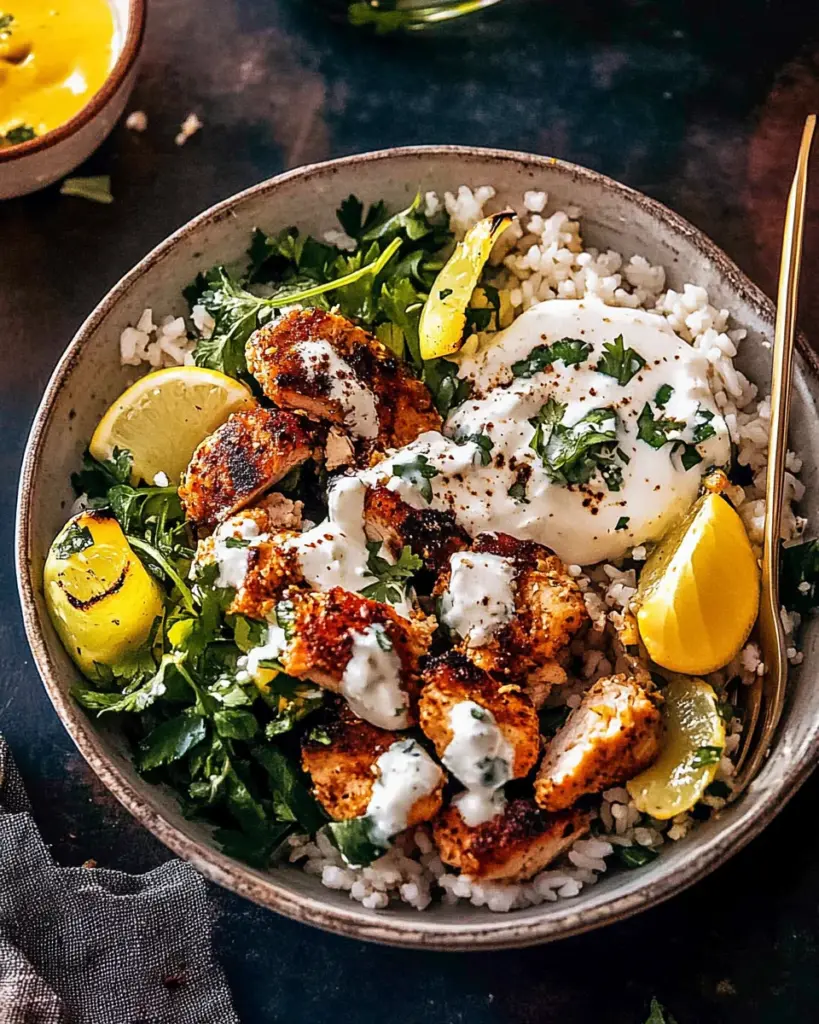
If you’re looking for a delicious and healthy meal, Mediterranean Chicken Bowls with Feta are a fantastic choice. These bowls are not only colorful and vibrant but also packed with flavors that transport you straight to the sunny shores of the Mediterranean. Imagine tender chicken, fluffy quinoa, and fresh vegetables all topped with a creamy feta sauce. It’s a dish that’s sure to please everyone at the table!

What makes these bowls so special? First, they are incredibly versatile. You can easily customize them to suit your taste or dietary needs. Whether you prefer a vegetarian option or want to switch up the protein, the possibilities are endless. Plus, they are quick to prepare, making them perfect for busy weeknights or meal prep for the week ahead.

In addition to being tasty, Mediterranean Chicken Bowls with Feta are also nutritious. They are loaded with protein from the chicken and quinoa, while the fresh vegetables add essential vitamins and minerals. The feta sauce not only enhances the flavor but also provides a creamy texture that ties everything together beautifully.

So, gather your ingredients and get ready to create a meal that’s not only satisfying but also good for you. Let’s dive into the ingredients you’ll need to whip up these delightful Mediterranean Chicken Bowls with Feta!

Ingredients for Mediterranean Chicken Bowls with Feta

To create your Mediterranean Chicken Bowls with Feta, you’ll need a variety of fresh and wholesome ingredients. Each component plays a vital role in building flavor and nutrition. Here’s what you’ll need:

  • 2 cups cooked quinoa: This serves as the hearty base of your bowl, providing protein and fiber.
  • 1 pound boneless, skinless chicken breasts: A lean protein source that keeps the dish filling and satisfying.
  • 1 tablespoon olive oil: This adds richness and helps in cooking the chicken to perfection.
  • 1 teaspoon garlic powder: A must-have for that aromatic flavor.
  • 1 teaspoon paprika: This spice gives a warm color and a hint of smokiness.
  • 1 teaspoon dried oregano: A classic Mediterranean herb that enhances the overall taste.
  • Salt and pepper to taste: Essential for seasoning your chicken and vegetables.
  • 1 cup cherry tomatoes, halved: These add a burst of sweetness and freshness.
  • 1 cucumber, diced: A crunchy element that balances the dish.
  • 1 cup baby spinach: This leafy green boosts the nutritional value.
  • 1/2 red onion, thinly sliced: For a sharp, zesty flavor.
  • 1/2 cup feta cheese, crumbled: The star of the show, adding creaminess and tang.
  • 1/4 cup plain Greek yogurt: This makes the feta sauce smooth and rich.
  • 2 tablespoons lemon juice: A splash of acidity that brightens the dish.
  • 1 tablespoon fresh dill, chopped (or 1 teaspoon dried dill): This herb adds a refreshing touch.

With these ingredients, you’re well on your way to creating a delightful meal. Each item contributes to the overall flavor and texture, making your Mediterranean Chicken Bowls with Feta a feast for both the eyes and the palate. Now, let’s move on to the step-by-step preparation!

Step-by-Step Preparation of Mediterranean Chicken Bowls with Feta

Now that you have gathered all the ingredients, it’s time to dive into the preparation of your Mediterranean Chicken Bowls with Feta. This process is straightforward and can be broken down into four simple steps. Let’s get started!

Step 1: Marinating the Chicken

First, you’ll want to marinate the chicken to infuse it with flavor. In a small bowl, mix together the garlic powder, paprika, oregano, salt, and pepper. This spice blend is key to achieving that delicious Mediterranean taste. Rub this mixture all over the chicken breasts, ensuring they are well-coated. For even better flavor, consider letting the chicken marinate for at least 30 minutes. This allows the spices to penetrate the meat, making it more flavorful.

Step 2: Cooking the Chicken

Next, heat the olive oil in a skillet over medium-high heat. Once the oil is hot, carefully place the marinated chicken breasts in the skillet. Sear them for about 2-3 minutes on each side until they turn golden brown. This step not only adds color but also locks in the juices. After searing, transfer the chicken to a prepared baking sheet lined with parchment paper. Bake the chicken in a preheated oven at 400°F for 15-20 minutes. You’ll know it’s done when the internal temperature reaches 165°F. Once cooked, let the chicken rest for 5 minutes before slicing it into strips.

Step 3: Preparing the Vegetables

While the chicken is baking, it’s time to prepare the fresh vegetables. Start by halving the cherry tomatoes and dicing the cucumber. Then, thinly slice the red onion. Finally, rinse the baby spinach under cold water and pat it dry. These fresh ingredients will add crunch and color to your bowls, making them visually appealing and nutritious.

Step 4: Assembling the Mediterranean Chicken Bowls with Feta

Now comes the fun part—assembling your Mediterranean Chicken Bowls with Feta! In serving bowls, layer the cooked quinoa as the base. Next, add the sliced chicken on top. Then, arrange the cherry tomatoes, diced cucumber, baby spinach, and red onion around the chicken. Finally, drizzle the creamy feta sauce over the top. To make the feta sauce, simply combine the crumbled feta cheese, Greek yogurt, lemon juice, and dill in a bowl. Mix until smooth and creamy. This sauce will tie all the flavors together beautifully!

And there you have it! Your Mediterranean Chicken Bowls with Feta are ready to be enjoyed. They are not only delicious but also packed with nutrients, making them a perfect meal for any occasion.

Step-by-Step Preparation of Mediterranean Chicken Bowls with Feta

Now that you have gathered all the ingredients, it’s time to dive into the preparation of your Mediterranean Chicken Bowls with Feta. This process is straightforward and can be broken down into four simple steps. Let’s get started!

Step 1: Marinating the Chicken

First, you’ll want to marinate the chicken to infuse it with flavor. In a small bowl, mix together the garlic powder, paprika, oregano, salt, and pepper. This spice blend is key to achieving that delicious Mediterranean taste. Rub this mixture all over the chicken breasts, ensuring they are well-coated. For even better flavor, consider letting the chicken marinate for at least 30 minutes. This allows the spices to penetrate the meat, making it more flavorful.

Step 2: Cooking the Chicken

Next, heat the olive oil in a skillet over medium-high heat. Once the oil is hot, carefully place the marinated chicken breasts in the skillet. Sear them for about 2-3 minutes on each side until they turn golden brown. This step not only adds color but also locks in the juices. After searing, transfer the chicken to a prepared baking sheet lined with parchment paper. Bake the chicken in a preheated oven at 400°F for 15-20 minutes. You’ll know it’s done when the internal temperature reaches 165°F. Once cooked, let the chicken rest for 5 minutes before slicing it into strips.

Step 3: Preparing the Vegetables

While the chicken is baking, it’s time to prepare the fresh vegetables. Start by halving the cherry tomatoes and dicing the cucumber. Then, thinly slice the red onion. Finally, rinse the baby spinach under cold water and pat it dry. These fresh ingredients will add crunch and color to your bowls, making them visually appealing and nutritious.

Step 4: Assembling the Mediterranean Chicken Bowls with Feta

Now comes the fun part—assembling your Mediterranean Chicken Bowls with Feta! In serving bowls, layer the cooked quinoa as the base. Next, add the sliced chicken on top. Then, arrange the cherry tomatoes, diced cucumber, baby spinach, and red onion around the chicken. Finally, drizzle the creamy feta sauce over the top. To make the feta sauce, simply combine the crumbled feta cheese, Greek yogurt, lemon juice, and dill in a bowl. Mix until smooth and creamy. This sauce will tie all the flavors together beautifully!

And there you have it! Your Mediterranean Chicken Bowls with Feta are ready to be enjoyed. They are not only delicious but also packed with nutrients, making them a perfect meal for any occasion.

Variations of Mediterranean Chicken Bowls with Feta

While the classic Mediterranean Chicken Bowls with Feta are delightful, there are many ways to switch things up! Whether you’re looking for vegetarian options or different protein choices, these variations will keep your meals exciting and flavorful. Let’s explore some tasty alternatives!

Vegetarian Options

If you want to enjoy a meat-free version, there are plenty of delicious vegetarian options. One great substitute for chicken is roasted chickpeas. They add a nice crunch and are packed with protein. Simply toss canned chickpeas with olive oil and your favorite spices, then roast them in the oven until crispy.

Another option is to use grilled or roasted vegetables. Bell peppers, zucchini, and eggplant work wonderfully. Just season them with olive oil, salt, and pepper, then grill or roast until tender. You can also add falafel for a fun twist. These little balls of ground chickpeas are full of flavor and pair perfectly with the feta sauce.

Lastly, consider using tofu or tempeh. Marinate them in the same spice blend as the chicken, then cook until golden. This will give you a hearty and satisfying vegetarian bowl that everyone will love!

Different Protein Choices

If you’re looking to switch up the protein in your Mediterranean Chicken Bowls with Feta, there are many delicious options. For a seafood twist, try using shrimp or salmon. Season them with the same spices and cook until they are just done. Seafood adds a light and fresh flavor that complements the other ingredients beautifully.

You can also use turkey breast as a lean alternative to chicken. It cooks similarly and absorbs flavors well. Just follow the same cooking instructions as you would for chicken.

For a unique flavor, consider using lamb. Ground lamb or lamb chops can bring a rich taste to your bowls. Just remember to adjust the cooking time based on the cut you choose. Each of these protein options will create a delightful Mediterranean Chicken Bowl with Feta that’s sure to impress!

Cooking Note for Mediterranean Chicken Bowls with Feta

When preparing Mediterranean Chicken Bowls with Feta, a few cooking notes can help ensure your dish turns out perfectly every time. First, always use a meat thermometer to check the chicken’s internal temperature. This guarantees that your chicken is cooked through and safe to eat. Remember, the ideal temperature is 165°F.

Next, consider the quality of your ingredients. Fresh vegetables and high-quality feta cheese can significantly enhance the flavor of your bowls. Whenever possible, opt for organic produce and artisanal feta for the best taste. Additionally, if you have access to fresh herbs, such as dill or oregano, use them instead of dried. Fresh herbs provide a vibrant flavor that dried herbs simply can’t match.

Another tip is to let the chicken rest after baking. This step allows the juices to redistribute throughout the meat, making it more tender and juicy. If you slice the chicken too soon, you may end up with dry pieces.

Lastly, feel free to adjust the spice levels to your liking. If you enjoy a bit of heat, consider adding a pinch of cayenne pepper or red pepper flakes to the spice mix. This will give your Mediterranean Chicken Bowls with Feta an extra kick!

By keeping these cooking notes in mind, you’ll create a delicious and satisfying meal that everyone will love. Now, let’s move on to some serving suggestions to elevate your Mediterranean Chicken Bowls with Feta even further!

Serving Suggestions for Mediterranean Chicken Bowls with Feta

Once your Mediterranean Chicken Bowls with Feta are beautifully assembled, it’s time to think about how to serve them. Presentation can elevate your meal, making it even more enjoyable. Here are some delightful serving suggestions to enhance your dining experience:

  • Garnish with Fresh Herbs: A sprinkle of fresh herbs, like parsley or extra dill, can add a pop of color and freshness. This simple touch makes your bowls look more appealing and adds an aromatic flavor.
  • Serve with Pita Bread: Pair your bowls with warm pita bread or pita chips. This adds a fun, crunchy element and is perfect for scooping up the delicious feta sauce.
  • Add a Side Salad: Consider serving a light side salad alongside your bowls. A simple mix of greens, cucumbers, and a lemon vinaigrette complements the flavors of the Mediterranean Chicken Bowls with Feta beautifully.
  • Include Hummus: A small serving of hummus can be a great addition. It pairs well with the chicken and veggies, providing a creamy texture that enhances the overall meal.
  • Offer Lemon Wedges: A squeeze of fresh lemon juice over the bowls just before serving can brighten the flavors. It adds a zesty kick that balances the richness of the feta sauce.
  • Customize with Extra Toppings: Encourage your guests to customize their bowls with additional toppings. Options like sliced olives, avocado, or roasted nuts can add unique flavors and textures.

These serving suggestions not only enhance the visual appeal of your Mediterranean Chicken Bowls with Feta but also provide a variety of flavors and textures. Whether you’re hosting a dinner party or enjoying a family meal, these ideas will make your dining experience even more delightful. Now that you have your bowls ready to serve, let’s explore some tips for perfecting your Mediterranean Chicken Bowls with Feta!

Tips for Perfect Mediterranean Chicken Bowls with Feta

Creating the perfect Mediterranean Chicken Bowls with Feta is all about attention to detail. With a few simple tips, you can elevate your dish and impress your family or guests. Here are some helpful suggestions to ensure your bowls turn out delicious every time:

  • Use Fresh Ingredients: Fresh vegetables and herbs make a big difference in flavor. Always choose ripe cherry tomatoes, crisp cucumbers, and vibrant greens. Fresh herbs like dill and oregano will enhance the taste of your feta sauce.
  • Cook Quinoa Properly: Rinse your quinoa before cooking to remove any bitterness. Use a 2:1 water-to-quinoa ratio for fluffy results. This will ensure your quinoa is light and airy, making it a perfect base for your bowls.
  • Don’t Overcook the Chicken: Keep an eye on the chicken while it bakes. Overcooking can lead to dry meat. Use a meat thermometer to check for doneness, aiming for 165°F. This will keep your chicken juicy and tender.
  • Customize the Spice Blend: Feel free to adjust the spice blend to suit your taste. If you love heat, add some cayenne pepper or chili powder. For a milder flavor, reduce the paprika or oregano.
  • Layer Ingredients Thoughtfully: When assembling your bowls, layer the ingredients thoughtfully. Start with quinoa, then add chicken, followed by vegetables. This not only looks appealing but also ensures every bite is balanced.
  • Make Extra Feta Sauce: If you love the creamy feta sauce, consider making extra. It can be used as a dip for pita bread or drizzled over salads. This versatile sauce adds flavor to many dishes!
  • Serve Immediately: For the best experience, serve your Mediterranean Chicken Bowls with Feta immediately after assembling. This keeps the ingredients fresh and the flavors vibrant.

By following these tips, you’ll create Mediterranean Chicken Bowls with Feta that are not only delicious but also visually stunning. Enjoy the process of cooking and savor the delightful flavors of the Mediterranean!

Breakdown of Time for Mediterranean Chicken Bowls with Feta

When preparing Mediterranean Chicken Bowls with Feta, it’s helpful to know how much time you’ll need for each step. This way, you can plan your cooking efficiently and enjoy a delicious meal without feeling rushed. Here’s a breakdown of the time required for each part of the process:

Prep Time

The prep time for Mediterranean Chicken Bowls with Feta is approximately 20-30 minutes. This includes gathering your ingredients, marinating the chicken, and preparing the vegetables. If you choose to marinate the chicken for longer, you may want to add an extra 30 minutes to an hour. This will enhance the flavor even more!

Cooking Time

Cooking the chicken takes about 15-20 minutes. After searing the chicken in the skillet, you’ll bake it in the oven until it reaches the perfect internal temperature of 165°F. While the chicken is cooking, you can prepare the feta sauce, which only takes about 5 minutes. So, overall, the cooking time is around 20-25 minutes.

Total Time

In total, you can expect to spend about 40-55 minutes from start to finish when making Mediterranean Chicken Bowls with Feta. This includes both prep and cooking time. If you marinate the chicken ahead of time, you can cut down on the active cooking time, making it even quicker to enjoy this delightful meal!

With this time breakdown, you can easily fit Mediterranean Chicken Bowls with Feta into your busy schedule. Whether it’s a weeknight dinner or a weekend meal prep, you’ll have a delicious and nutritious dish ready in no time!

Nutritional Information for Mediterranean Chicken Bowls with Feta

Understanding the nutritional content of your meals is essential for maintaining a balanced diet. Mediterranean Chicken Bowls with Feta not only taste great but also provide a variety of nutrients. Here’s a closer look at the nutritional information for this delicious dish:

Calories

450 calories. This makes it a satisfying meal that can fit well into a healthy eating plan. The combination of protein, healthy fats, and carbohydrates ensures that you feel full and energized after enjoying this dish.

Protein

35 grams of protein. This high protein content comes primarily from the chicken and quinoa, making it an excellent choice for those looking to build muscle or maintain a healthy weight. Protein is essential for repairing tissues and keeping you feeling satiated throughout the day.

Sodium

600 milligrams per serving. While this is a reasonable amount, it’s always a good idea to monitor your sodium intake, especially if you are watching your salt consumption. You can reduce sodium levels by using low-sodium feta cheese or adjusting the amount of salt you add during cooking.

Overall, Mediterranean Chicken Bowls with Feta are a nutritious option that provides a well-rounded meal. With a good balance of calories, protein, and moderate sodium, they can be a delightful addition to your weekly meal plan. Now that you know the nutritional benefits, let’s address some frequently asked questions about this tasty dish!

FAQs about Mediterranean Chicken Bowls with Feta

Can I make Mediterranean Chicken Bowls with Feta ahead of time?

Absolutely! Mediterranean Chicken Bowls with Feta can be prepared ahead of time, making them perfect for meal prep. You can cook the chicken and quinoa in advance, then store them in the refrigerator. When you’re ready to eat, simply reheat the chicken and quinoa, and assemble your bowls with fresh vegetables and feta sauce. This way, you’ll have a delicious meal ready in minutes!

What can I substitute for feta cheese in Mediterranean Chicken Bowls with Feta?

If you’re looking for a substitute for feta cheese, there are several options. Goat cheese is a great alternative, offering a similar creamy texture and tangy flavor. For a dairy-free option, try using crumbled tofu mixed with a bit of lemon juice and nutritional yeast. This will give you a cheesy flavor without the dairy. Additionally, you can use ricotta cheese or even a vegan feta if you prefer a plant-based option.

Are Mediterranean Chicken Bowls with Feta healthy?

Yes, Mediterranean Chicken Bowls with Feta are a healthy meal choice! They are packed with lean protein from the chicken, fiber from the quinoa, and a variety of vitamins and minerals from the fresh vegetables. The feta sauce adds flavor without excessive calories. Overall, this dish provides a balanced mix of nutrients, making it a wholesome option for any meal.

How can I customize Mediterranean Chicken Bowls with Feta for dietary restrictions?

Customizing Mediterranean Chicken Bowls with Feta for dietary restrictions is easy! For gluten-free options, ensure you use gluten-free grains like quinoa or brown rice. If you’re vegetarian, replace the chicken with roasted chickpeas or grilled vegetables. For a low-carb version, you can use cauliflower rice instead of quinoa. Additionally, if you have dairy restrictions, simply swap out the feta cheese for a dairy-free alternative. These adjustments will help you enjoy this delicious meal while accommodating your dietary needs!

Conclusion on Mediterranean Chicken Bowls with Feta

In conclusion, Mediterranean Chicken Bowls with Feta are a delightful and nutritious meal option that brings the vibrant flavors of the Mediterranean right to your table. With their colorful ingredients and creamy feta sauce, these bowls are not only visually appealing but also packed with essential nutrients. They offer a perfect balance of protein, healthy fats, and carbohydrates, making them a satisfying choice for lunch or dinner.

Whether you’re preparing a quick weeknight meal or planning for a gathering, these bowls are versatile and easy to customize. You can switch up the proteins, add more vegetables, or even create a vegetarian version to suit your preferences. The possibilities are endless, allowing you to enjoy this dish in various ways.

Moreover, the step-by-step preparation makes it simple for anyone to create this delicious meal at home. With just a few fresh ingredients and some basic cooking techniques, you can whip up a dish that’s sure to impress family and friends alike.

So, why not give Mediterranean Chicken Bowls with Feta a try? You’ll not only enjoy a tasty meal but also nourish your body with wholesome ingredients. Embrace the flavors of the Mediterranean and make this dish a regular part of your meal rotation. Happy cooking!

Cilantro Lime Chicken Bowls with Peach Salsa Recipe delight!

Introduction to Cilantro Lime Chicken Bowls with Peach Salsa Recipe

Cilantro Lime Chicken Bowls with Peach Salsa Recipe is a delightful dish that combines zesty flavors with wholesome ingredients. This recipe is perfect for busy weeknights or casual gatherings with friends and family.

Imagine tender chicken breasts marinated in a blend of spices, grilled to perfection, and served over a bed of fluffy rice. The addition of creamy avocado, sweet corn, and juicy cherry tomatoes creates a colorful and nutritious bowl. But the star of the show is the homemade peach salsa, which adds a refreshing twist that will tantalize your taste buds.

Not only is this dish packed with flavor, but it also offers a balanced meal with protein, healthy fats, and fiber. Plus, it’s versatile! You can easily customize it to suit your dietary preferences or use whatever ingredients you have on hand. Whether you’re a seasoned cook or a kitchen novice, this recipe is straightforward and rewarding.

So, roll up your sleeves and get ready to whip up a meal that’s sure to impress. Let’s dive into the ingredients you’ll need to create these scrumptious bowls!

Ingredients for Cilantro Lime Chicken Bowls with Peach Salsa Recipe

Cilantro Lime Chicken Bowls with Peach Salsa Recipe, you’ll need a variety of fresh and flavorful ingredients. Here’s a complete list to help you gather everything you need:

  • For the Chicken:
    • 2 boneless, skinless chicken breasts (about 1 pound)
    • 1 teaspoon chili powder
    • 1 teaspoon cumin
    • 1 teaspoon garlic powder
    • 1 teaspoon onion powder
    • Salt and pepper, to taste
    • 2 tablespoons olive oil
    • Juice of 2 limes
  • For the Bowls:
    • 1 cup cooked rice (white or brown)
    • 1 cup canned black beans, rinsed and drained
    • 1 cup corn (fresh, frozen, or canned)
    • 1 avocado, diced
    • 1 cup cherry tomatoes, halved
    • 1/4 cup fresh cilantro, chopped
  • For the Peach Salsa:
    • 2 ripe peaches, diced
    • 1/4 red onion, finely chopped
    • 1 jalapeño, seeded and minced (optional)
    • Juice of 1 lime
    • Salt, to taste

These ingredients come together to create a colorful and nutritious meal that’s bursting with flavor. The combination of spices on the chicken, paired with the sweetness of the peach salsa, makes for a delightful experience. Now that you have your ingredients ready, let’s move on to the preparation steps!

Preparation of Cilantro Lime Chicken Bowls with Peach Salsa Recipe

Cilantro Lime Chicken Bowls with Peach Salsa Recipe. This process is simple and straightforward, making it easy for anyone to follow. Let’s break it down into four easy steps!

Step 1: Marinating the Chicken

First, we need to marinate the chicken to infuse it with flavor. In a small bowl, mix together the chili powder, cumin, garlic powder, onion powder, salt, and pepper. This spice blend will give the chicken a delicious kick. Once mixed, rub the spice mixture all over the chicken breasts. Make sure to coat them evenly for the best flavor. After that, drizzle the chicken with lime juice and let it marinate for at least 15 minutes. This step is crucial as it helps tenderize the chicken and enhances the taste.

Step 2: Preparing the Peach Salsa

While the chicken is marinating, it’s the perfect time to prepare the peach salsa. In a medium bowl, combine the diced peaches, finely chopped red onion, and minced jalapeño if you’re using it. The jalapeño adds a nice heat, but feel free to skip it if you prefer a milder salsa. Squeeze in the juice of one lime and sprinkle with salt. Mix everything well and set it aside. Letting the salsa sit for a bit allows the flavors to meld together, making it even tastier!

Step 3: Cooking the Chicken

Once the chicken has marinated, it’s time to cook it. Heat the olive oil in a skillet over medium-high heat. When the oil is hot, add the chicken breasts. Cook them for about 6-7 minutes on each side, or until they are fully cooked and no longer pink in the center. To ensure they are cooked through, you can use a meat thermometer; the internal temperature should reach 165°F (75°C). After cooking, remove the chicken from the skillet and let it rest for about 5 minutes before slicing. This resting period helps keep the chicken juicy.

Step 4: Assembling the Bowls

Now comes the fun part—assembling your bowls! Start by dividing the cooked rice among four bowls. On top of the rice, add a generous scoop of black beans, corn, diced avocado, and halved cherry tomatoes. Next, slice the rested chicken and place it on top of the veggies. Finally, add a generous scoop of your homemade peach salsa. For an extra touch, garnish with chopped cilantro and a squeeze of lime juice if desired. Your vibrant and delicious bowls are now ready to be enjoyed!

Variation of Cilantro Lime Chicken Bowls with Peach Salsa Recipe

Cilantro Lime Chicken Bowls with Peach Salsa Recipe is already a delightful dish, there are many ways to switch things up! Whether you want to try different proteins or explore various salsa options, these variations can add a new twist to your meal. Let’s take a look at some exciting alternatives!

Alternative Proteins

If you’re looking to change the protein in your bowls, there are plenty of delicious options. Here are a few ideas:

  • Grilled Shrimp: Shrimp cooks quickly and adds a lovely seafood flavor. Marinate them in the same spices as the chicken for a seamless transition.
  • Tofu: For a vegetarian option, use firm tofu. Press it to remove excess moisture, then cube and marinate it in the spice mix before cooking.
  • Steak: Thinly sliced steak can bring a hearty touch to your bowls. Season it with the same spices and grill or pan-sear it to your liking.
  • Turkey: Ground turkey is a lean alternative. Cook it in a skillet with the spices until browned and fully cooked.

These alternative proteins not only change the flavor profile but also cater to different dietary preferences. Feel free to experiment and find your favorite!

Different Salsa Options

The peach salsa is a star in this recipe, but you can easily switch it up for variety. Here are some tasty salsa alternatives:

  • Mango Salsa: Swap peaches for ripe mangoes for a tropical twist. Combine diced mango, red onion, lime juice, and cilantro for a sweet and tangy flavor.
  • Pineapple Salsa: Use diced pineapple instead of peaches. Add jalapeños for heat and red onion for crunch. This salsa pairs wonderfully with chicken!
  • Tomato Salsa: A classic option! Mix diced tomatoes, onion, cilantro, lime juice, and jalapeños for a fresh and zesty salsa.
  • Avocado Salsa: For a creamy alternative, mash ripe avocados with lime juice, diced tomatoes, and onions. This adds a rich texture to your bowls.

These salsa variations can enhance your bowls and keep things exciting. Feel free to mix and match proteins and salsas to create your perfect meal!

Cooking Note for Cilantro Lime Chicken Bowls with Peach Salsa Recipe

Cilantro Lime Chicken Bowls with Peach Salsa Recipe, there are a few cooking notes to keep in mind. These tips will help ensure that your meal turns out perfectly every time. Let’s explore some essential points to consider!

First, always ensure your chicken is at room temperature before cooking. This helps it cook evenly. If you take the chicken straight from the fridge, it may take longer to cook through, leading to uneven results.

Next, don’t rush the marinating process. Allowing the chicken to marinate for at least 15 minutes is crucial. If you have more time, consider marinating it for up to an hour. This extra time allows the spices to penetrate the meat, enhancing the flavor.

When cooking the chicken, avoid overcrowding the skillet. If you have more than two chicken breasts, consider cooking them in batches. Overcrowding can cause the chicken to steam instead of sear, resulting in a less desirable texture.

Additionally, using a meat thermometer is a great way to ensure your chicken is cooked perfectly. The internal temperature should reach 165°F (75°C). This guarantees that the chicken is safe to eat while remaining juicy and tender.

Lastly, let the chicken rest after cooking. This step is often overlooked but is essential for juicy chicken. Resting allows the juices to redistribute throughout the meat, preventing them from spilling out when you slice it.

Cilantro Lime Chicken Bowls with Peach Salsa Recipe to a whole new level. Enjoy the process and savor the delicious results!

Serving Suggestions for Cilantro Lime Chicken Bowls with Peach Salsa Recipe

Cilantro Lime Chicken Bowls with Peach Salsa Recipe, it’s time to think about how to serve them. Presentation can elevate your meal, making it even more enjoyable. Here are some delightful serving suggestions to enhance your dining experience:

  • Colorful Bowls: Use vibrant bowls to serve your chicken bowls. Bright colors can make the meal more appealing and fun. Consider using bowls in shades of blue or green to complement the fresh ingredients.
  • Family Style: For a casual gathering, serve the ingredients in separate bowls. This allows everyone to customize their own bowls, choosing their favorite toppings and portions.
  • Garnish: Don’t forget to garnish! A sprinkle of extra cilantro or a few lime wedges on the side can add a fresh touch. You can also add a dollop of sour cream or Greek yogurt for creaminess.
  • Pair with Drinks: Consider serving your bowls with refreshing drinks. A chilled limeade or iced tea pairs wonderfully with the zesty flavors of the dish. For adults, a light beer or a fruity cocktail can complement the meal nicely.
  • Side Dishes: If you want to make the meal more filling, consider adding side dishes. A simple green salad with a light vinaigrette or tortilla chips with guacamole can be great additions.
  • Leftover Lunch: If you have leftovers, pack them in a container for lunch the next day. The flavors will meld together, making for a delicious meal that’s easy to take on the go.

Cilantro Lime Chicken Bowls with Peach Salsa Recipe. Whether you’re hosting a dinner party or enjoying a quiet meal at home, these tips will make your meal memorable!

Tips for Perfecting Your Cilantro Lime Chicken Bowls with Peach Salsa Recipe

Cilantro Lime Chicken Bowls with Peach Salsa Recipe, consider these helpful tips. They will ensure that every bite is bursting with flavor and that your meal is a hit with family and friends!

  • Use Fresh Ingredients: Fresh ingredients make a big difference in flavor. Choose ripe peaches, fresh cilantro, and high-quality chicken. The better the ingredients, the tastier your dish will be!
  • Adjust Spice Levels: If you love heat, feel free to increase the amount of chili powder or add more jalapeño to the salsa. On the other hand, if you prefer milder flavors, reduce the spices to suit your taste.
  • Experiment with Marinades: While the spice blend is delicious, you can also try marinating the chicken in lime juice and olive oil alone. This will give it a zesty flavor without the spices.
  • Let the Salsa Chill: For the best flavor, let your peach salsa chill in the fridge for at least 30 minutes before serving. This allows the flavors to meld together beautifully.
  • Mix Up the Grains: While rice is a great base, consider using other grains like quinoa or farro. These options add different textures and flavors to your bowls.
  • Top with Cheese: For an extra layer of flavor, sprinkle some crumbled feta or cotija cheese on top of your bowls. The creaminess pairs well with the other ingredients.
  • Make it a Meal Prep Option: This recipe is perfect for meal prep! Cook a larger batch and store the components separately in the fridge. This way, you can enjoy fresh bowls throughout the week.
  • Garnish Creatively: Besides cilantro, consider garnishing with lime zest or a sprinkle of chili flakes for added color and flavor. A little creativity goes a long way!

Cilantro Lime Chicken Bowls with Peach Salsa Recipe. Enjoy the process and have fun experimenting with flavors!

Breakdown of Time for Cilantro Lime Chicken Bowls with Peach Salsa Recipe

Cilantro Lime Chicken Bowls with Peach Salsa Recipe can help you plan your cooking efficiently. Here’s a breakdown of the time required for preparation and cooking, so you can enjoy your meal without any rush!

Prep Time

The prep time for this recipe is approximately 20 minutes. This includes:

  • Gathering all your ingredients.
  • Marinating the chicken, which takes about 15 minutes.
  • Preparing the peach salsa, which should take around 5 minutes.

By organizing your ingredients and following the steps, you can make the most of this time. It’s a great way to get everything ready while the chicken absorbs those delicious flavors!

Cooking Time

Cilantro Lime Chicken Bowls with Peach Salsa Recipe is about 15 minutes. This includes:

  • Cooking the chicken in the skillet for about 12-14 minutes.
  • Allowing the chicken to rest for 5 minutes before slicing.

During the cooking time, you can also prepare your rice or any other base you choose. This multitasking can help you save time and keep everything on track!

Total Time

In total, you can expect the entire process to take around 35 minutes. This includes both prep and cooking time. Here’s a quick summary:

  • Prep Time: 20 minutes
  • Cooking Time: 15 minutes
  • Total Time: 35 minutes

Cilantro Lime Chicken Bowls with Peach Salsa Recipe perfect for busy weeknights or when you want to impress guests without spending hours in the kitchen. Enjoy your cooking adventure!

Nutritional Information for Cilantro Lime Chicken Bowls with Peach Salsa Recipe

Cilantro Lime Chicken Bowls with Peach Salsa Recipe not only delights your taste buds but also provides a nutritious option for your meals. Let’s break down the key nutritional components of this delicious dish!

Calories

Cilantro Lime Chicken Bowls with Peach Salsa Recipe contains approximately 450 calories. This makes it a satisfying meal that won’t weigh you down. The combination of protein from the chicken, healthy fats from the avocado, and carbohydrates from the rice ensures you get a well-rounded meal.

Protein

Protein is vital for muscle repair and overall health. In this recipe, you’ll find about 30 grams of protein per serving. The chicken breasts are the primary source of protein, making this dish an excellent choice for those looking to increase their protein intake. Pairing it with black beans also adds to the protein content, making it a filling option.

Sodium

When it comes to sodium, this recipe contains around 600 milligrams per serving. While sodium is necessary for bodily functions, it’s essential to monitor your intake. To reduce sodium levels, consider using low-sodium black beans and adjusting the amount of salt you add during cooking. This way, you can enjoy the flavors without overdoing it on sodium.

Cilantro Lime Chicken Bowls with Peach Salsa Recipe offers a balanced meal that is not only delicious but also nutritious. With its combination of calories, protein, and sodium, it’s a great option for anyone looking to enjoy a healthy and satisfying dish!

FAQs about Cilantro Lime Chicken Bowls with Peach Salsa Recipe

Can I use frozen chicken for this recipe?

Cilantro Lime Chicken Bowls with Peach Salsa Recipe. However, it’s important to thaw the chicken completely before marinating and cooking. You can thaw it overnight in the refrigerator or use the defrost setting on your microwave. Once thawed, follow the marinating and cooking steps as usual. Just remember that cooking times may vary slightly, so ensure the chicken reaches an internal temperature of 165°F (75°C) for safety.

What can I substitute for peaches in the salsa?

If you don’t have peaches on hand, there are several delicious substitutes for the salsa. Mango is a fantastic option, offering a similar sweetness and texture. Pineapple can also work well, adding a tropical flair. For a more traditional salsa, you can use diced tomatoes or even avocados for a creamy twist. Each of these alternatives will bring its unique flavor to the dish, so feel free to experiment!

How can I make this recipe spicier?

Cilantro Lime Chicken Bowls with Peach Salsa Recipe, there are a few easy ways to do so. First, you can increase the amount of chili powder in the spice mix. Additionally, consider adding more jalapeño to the salsa or using a spicier variety, like serrano peppers. For an extra kick, drizzle some hot sauce over the assembled bowls. Adjust the spice levels to suit your taste, and enjoy the fiery flavors!

Can I prepare the chicken ahead of time?

Absolutely! Preparing the chicken ahead of time can save you valuable minutes during busy weeknights. You can marinate the chicken in advance and store it in the refrigerator for up to 24 hours. When you’re ready to cook, simply take it out, let it come to room temperature, and cook as directed. This not only saves time but also allows the flavors to deepen, making your meal even more delicious!

Conclusion on Cilantro Lime Chicken Bowls with Peach Salsa Recipe

Cilantro Lime Chicken Bowls with Peach Salsa Recipe is a delightful and nutritious meal that brings together vibrant flavors and wholesome ingredients. This dish is not only easy to prepare but also offers endless possibilities for customization. Whether you’re cooking for yourself, your family, or hosting friends, these bowls are sure to impress.

The combination of marinated chicken, fresh vegetables, and the sweet and tangy peach salsa creates a harmonious balance that tantalizes the taste buds. Plus, with the option to switch up proteins and salsas, you can keep this recipe exciting and fresh every time you make it.

Cilantro Lime Chicken Bowls with Peach Salsa Recipe is a perfect way to explore new flavors and techniques. So gather your ingredients, roll up your sleeves, and get ready to create a meal that’s not only delicious but also nourishing.

We hope you enjoy making and sharing this recipe as much as we do. Happy cooking!

Sheet Pan Thai Chicken Recipe for a Quick Dinner Delight

Introduction to Sheet Pan Thai Chicken Recipe

Sheet Pan Thai Chicken Recipe is just what you need! This recipe combines tender chicken thighs with vibrant vegetables, all cooked on one pan. It’s not only easy to prepare but also packed with flavor. Plus, cleanup is a breeze!

What Makes the Sheet Pan Thai Chicken Recipe Special?

What sets this recipe apart is its unique blend of Thai flavors. The marinade features soy sauce, fish sauce, and honey, creating a perfect balance of sweet and savory. The addition of red curry paste gives it a delightful kick, making every bite exciting. Moreover, using a sheet pan means you can cook everything together, allowing the flavors to meld beautifully.

This recipe is also versatile. You can easily swap out the vegetables or proteins based on your preferences. Whether you’re cooking for a family or just for yourself, this dish is sure to impress. It’s a wholesome meal that’s ready in under an hour, making it perfect for busy weeknights.

Sheet Pan Thai Chicken Recipe. Your taste buds will thank you!

Ingredients for Sheet Pan Thai Chicken Recipe

Sheet Pan Thai Chicken Recipe, you’ll need a variety of fresh ingredients. Each component plays a vital role in delivering that authentic Thai flavor. Here’s what you’ll need:

  • 2 pounds boneless, skinless chicken thighs: These are juicy and flavorful, making them perfect for this dish.
  • 2 tablespoons vegetable oil: This helps to keep the chicken moist and aids in cooking the vegetables.
  • 1 tablespoon soy sauce: Adds a savory depth to the marinade.
  • 1 tablespoon fish sauce: A staple in Thai cooking, it enhances the umami flavor.
  • 1 tablespoon honey: This brings a touch of sweetness to balance the savory elements.
  • 1 tablespoon lime juice: Fresh lime juice adds brightness and acidity.
  • 2 teaspoons red curry paste: This is where the magic happens! It gives the dish its signature flavor.
  • 1 teaspoon garlic powder: For a hint of garlic without the fuss of fresh cloves.
  • 1 teaspoon ground ginger: Adds warmth and a slight spiciness.
  • 1 teaspoon salt: Enhances all the flavors in the dish.
  • 1/2 teaspoon black pepper: A little kick to round out the seasoning.
  • 1 red bell pepper, sliced: Sweet and crunchy, it adds color and texture.
  • 1 yellow bell pepper, sliced: Another layer of sweetness and vibrant color.
  • 1 cup snap peas: These add a delightful crunch and freshness.
  • 1 cup broccoli florets: Packed with nutrients, they complement the other veggies.
  • 1/4 cup chopped fresh cilantro: For garnish, it adds a fresh, herbal note.
  • Lime wedges: Serve on the side for an extra burst of flavor.

Sheet Pan Thai Chicken Recipe. So, let’s get cooking!

Step-by-Step Preparation of Sheet Pan Thai Chicken Recipe

Sheet Pan Thai Chicken Recipe. This step-by-step guide will help you create a flavorful meal with ease. Let’s get started!

Step 1: Marinating the Chicken

First, you’ll want to marinate the chicken. In a large bowl, combine the vegetable oil, soy sauce, fish sauce, honey, lime juice, red curry paste, garlic powder, ground ginger, salt, and black pepper. Whisk these ingredients together until they form a smooth marinade.

Next, add the boneless, skinless chicken thighs to the bowl. Toss them gently in the marinade, ensuring each piece is well coated. This step is crucial as it infuses the chicken with all those delicious flavors. For the best results, let the chicken marinate for at least 15 minutes. If you have more time, marinating for up to an hour in the refrigerator will enhance the taste even further.

Step 2: Preparing the Vegetables

While the chicken is marinating, it’s time to prepare the vegetables. Start by washing and slicing the red and yellow bell peppers into thin strips. Next, rinse the snap peas and broccoli florets under cold water. Make sure to remove any tough stems from the broccoli.

Sheet Pan Thai Chicken Recipe. Plus, they’ll soak up some of that tasty marinade during cooking!

Step 3: Assembling the Sheet Pan

Now, it’s time to assemble your sheet pan. Preheat your oven to 425°F (220°C) if you haven’t done so already. Line a large baking sheet with parchment paper for easy cleanup. This will also help prevent sticking.

Arrange the marinated chicken thighs on one side of the prepared baking sheet. On the other side, spread out the sliced bell peppers, snap peas, and broccoli florets. Make sure to leave some space between the chicken and vegetables for even cooking. Drizzle any remaining marinade over the vegetables to enhance their flavor.

Step 4: Cooking the Chicken and Vegetables

With everything in place, it’s time to cook! Place the sheet pan in the preheated oven and bake for 25-30 minutes. You’ll know it’s done when the chicken reaches an internal temperature of 165°F (74°C) and the vegetables are tender.

Once cooked, remove the sheet pan from the oven and let it rest for about 5 minutes. This allows the juices to redistribute in the chicken, making it even juicier. After resting, garnish your dish with chopped fresh cilantro and serve with lime wedges for an extra burst of flavor.

Sheet Pan Thai Chicken Recipe that’s sure to impress. Enjoy your meal!

Variation of Sheet Pan Thai Chicken Recipe

Sheet Pan Thai Chicken Recipe is its versatility. You can easily customize it to suit your taste or dietary needs. Let’s explore some alternative proteins and vegetable substitutions that can make this dish even more exciting!

Alternative Proteins to Use

If you want to switch things up, consider using different proteins. Here are some great alternatives:

  • Chicken Breasts: If you prefer a leaner option, chicken breasts work well. Just remember to adjust the cooking time, as they may cook faster than thighs.
  • Tofu: For a vegetarian or vegan option, tofu is a fantastic choice. Use firm tofu, and make sure to press it to remove excess moisture before marinating.
  • Pork Tenderloin: Thinly sliced pork tenderloin can add a different flavor profile. It cooks quickly and pairs nicely with the Thai marinade.
  • Shrimp: Shrimp cooks very fast and can be a delightful addition. Add them to the pan during the last 10 minutes of cooking to prevent overcooking.

Sheet Pan Thai Chicken Recipe. Feel free to experiment and find your favorite combination!

Vegetable Substitutions for Sheet Pan Thai Chicken Recipe

Just like proteins, you can easily swap out vegetables based on what you have on hand or your personal preferences. Here are some tasty options:

  • Carrots: Sliced carrots add a sweet crunch and vibrant color to the dish.
  • Zucchini: Chopped zucchini cooks quickly and absorbs the flavors of the marinade beautifully.
  • Cauliflower: Cauliflower florets can be a great substitute for broccoli, adding a different texture.
  • Green Beans: Fresh green beans provide a nice snap and pair well with the other ingredients.
  • Asparagus: Tender asparagus spears can add a gourmet touch to your meal.

Sheet Pan Thai Chicken Recipe. The possibilities are endless, and you can create a dish that’s uniquely yours!

Cooking Note for Sheet Pan Thai Chicken Recipe

Sheet Pan Thai Chicken Recipe, there are a few important cooking notes to keep in mind. These tips will help ensure that your meal turns out perfectly every time.

First, always preheat your oven. This step is crucial for even cooking. If the oven isn’t hot enough, the chicken may not cook through properly, and the vegetables might become soggy instead of crisp. Preheating to 425°F (220°C) is ideal for achieving that perfect roast.

Next, consider the size of your chicken thighs and vegetables. Uniform sizes help everything cook evenly. If your chicken thighs are particularly large, you may need to adjust the cooking time slightly. Similarly, if you cut your vegetables too small, they may cook faster than the chicken. Aim for similar sizes to ensure everything is done at the same time.

Another important note is to avoid overcrowding the pan. If you place too many ingredients on the sheet pan, they will steam instead of roast. This can lead to a less desirable texture. Make sure there’s enough space between the chicken and vegetables for hot air to circulate.

Lastly, always check the internal temperature of the chicken. Using a meat thermometer is the best way to ensure it has reached 165°F (74°C). This guarantees that the chicken is safe to eat and juicy. If you don’t have a thermometer, cut into the thickest part of the chicken to check that the juices run clear.

Sheet Pan Thai Chicken Recipe. Enjoy the process and the delicious results!

Serving Suggestions for Sheet Pan Thai Chicken Recipe

Sheet Pan Thai Chicken Recipe is ready, it’s time to think about how to serve it. This dish is not only delicious but also visually appealing, making it perfect for family dinners or gatherings. Here are some serving suggestions to elevate your meal:

  • Serve with Rice: A bed of fluffy jasmine rice or brown rice pairs wonderfully with the chicken and vegetables. The rice will soak up the flavorful juices, making every bite delightful.
  • Wrap in Lettuce: For a fun twist, serve the chicken and veggies in crisp lettuce leaves. This creates a fresh, low-carb option that’s perfect for a light meal.
  • Top with Peanuts: Sprinkle some crushed peanuts or cashews on top for added crunch and a nutty flavor. This adds a nice texture contrast to the tender chicken and veggies.
  • Accompany with Dipping Sauce: A side of sweet chili sauce or peanut sauce can enhance the flavors even more. Guests can dip their chicken or veggies for an extra kick.
  • Garnish with Fresh Herbs: Besides cilantro, consider adding fresh basil or mint for a burst of freshness. These herbs complement the Thai flavors beautifully.

Sheet Pan Thai Chicken Recipe more enjoyable but also allow you to customize each plate to suit individual tastes. Whether you’re hosting a dinner party or enjoying a quiet night in, these ideas will surely impress!

Tips for Perfecting Your Sheet Pan Thai Chicken Recipe

Sheet Pan Thai Chicken Recipe truly shine, consider these helpful tips. They will ensure that every bite is bursting with flavor and that your dish turns out perfectly every time.

  • Use Fresh Ingredients: Fresh vegetables and herbs can elevate the taste of your dish. Whenever possible, opt for fresh produce over frozen or canned options. Fresh ingredients not only taste better but also add vibrant colors to your meal.
  • Adjust the Marinade: Feel free to tweak the marinade to suit your taste. If you love spice, add more red curry paste or a dash of sriracha. For a sweeter flavor, increase the honey. Experimenting with the marinade can lead to exciting new flavors!
  • Let It Rest: After cooking, let the chicken rest for a few minutes before serving. This allows the juices to redistribute, making the chicken more tender and juicy. It’s a simple step that makes a big difference.
  • Don’t Skip the Garnish: Garnishing your dish with fresh cilantro or lime wedges adds a pop of color and flavor. It makes the dish look more appealing and enhances the overall taste.
  • Make It a Meal Prep: This recipe is perfect for meal prepping. You can marinate the chicken and chop the vegetables ahead of time. Store them in the fridge for a quick and easy dinner during the week.
  • Experiment with Cooking Times: Every oven is different. Keep an eye on your chicken and vegetables as they cook. If you notice they are browning too quickly, you can cover the pan loosely with foil to prevent burning.
  • Pair with a Side Salad: A light salad can complement your Sheet Pan Thai Chicken Recipe beautifully. Consider a simple cucumber salad with a tangy dressing to balance the richness of the chicken.

Sheet Pan Thai Chicken Recipe. Each suggestion is designed to enhance your cooking experience and ensure a delicious meal every time. Happy cooking!

Breakdown of Time for Sheet Pan Thai Chicken Recipe

Sheet Pan Thai Chicken Recipe can help you plan your cooking efficiently. Here’s a simple breakdown of the time involved in preparing this delicious meal.

Prep Time

The prep time for this recipe is approximately 20-30 minutes. This includes:

  • Gathering all your ingredients.
  • Marinating the chicken, which takes about 15 minutes (or longer if you choose to refrigerate it).
  • Washing and slicing the vegetables, which should take around 10-15 minutes.

By organizing your ingredients and tools beforehand, you can streamline this process and make it even quicker!

Cooking Time

Sheet Pan Thai Chicken Recipe is about 25-30 minutes. This includes:

  • Baking the chicken and vegetables in the preheated oven at 425°F (220°C).
  • Checking the internal temperature of the chicken to ensure it reaches 165°F (74°C).

During this time, you can relax or prepare any side dishes you plan to serve with your meal.

Total Time

In total, you can expect the entire process to take around 50-60 minutes. This includes both prep and cooking time. Here’s a quick summary:

  • Prep Time: 20-30 minutes
  • Cooking Time: 25-30 minutes
  • Total Time: 50-60 minutes

Sheet Pan Thai Chicken Recipe a fantastic option for a weeknight dinner. You can have a flavorful, wholesome meal on the table in under an hour!

Nutritional Information for Sheet Pan Thai Chicken Recipe

Sheet Pan Thai Chicken Recipe not only offers great flavor but also provides valuable nutrients. Here’s a closer look at the nutritional information for this delicious dish.

Calories

Sheet Pan Thai Chicken Recipe contains approximately 380 calories. This makes it a satisfying option for dinner without being overly heavy. The combination of chicken and vegetables ensures you’re getting a nutritious meal that won’t leave you feeling sluggish.

Protein Content

Protein is vital for muscle repair and overall health. This recipe packs a punch with about 30 grams of protein per serving. The boneless, skinless chicken thighs are an excellent source of lean protein, making this dish a great choice for those looking to increase their protein intake.

Sodium Levels

When it comes to sodium, each serving contains around 800 milligrams. While this is a reasonable amount for a flavorful dish, it’s important to be mindful of your overall sodium intake throughout the day. If you’re watching your sodium levels, consider using low-sodium soy sauce or fish sauce to reduce the overall sodium content without sacrificing flavor.

Sheet Pan Thai Chicken Recipe is not only delicious but also offers a balanced nutritional profile. With its moderate calorie count, high protein content, and manageable sodium levels, it’s a fantastic option for a healthy weeknight dinner!

FAQs about Sheet Pan Thai Chicken Recipe

Can I use frozen chicken for the Sheet Pan Thai Chicken Recipe?

Sheet Pan Thai Chicken Recipe is possible, but it requires some adjustments. First, you should thaw the chicken completely before marinating. This ensures that the marinade penetrates the meat effectively. You can thaw the chicken overnight in the refrigerator or use the defrost setting on your microwave. Once thawed, follow the marinating and cooking instructions as usual. However, keep in mind that cooking times may vary slightly, so always check the internal temperature to ensure it reaches 165°F (74°C).

What can I serve with Sheet Pan Thai Chicken?

Sheet Pan Thai Chicken Recipe. Here are a few ideas:

  • Rice: Jasmine or brown rice makes a perfect base to soak up the flavorful juices.
  • Noodles: Stir-fried rice noodles or soba noodles can add a delightful twist.
  • Salad: A fresh cucumber salad or a simple green salad can provide a refreshing contrast.
  • Spring Rolls: Serve with fresh spring rolls for a fun appetizer.

These sides will complement the flavors of the chicken and vegetables beautifully, creating a well-rounded meal.

How do I store leftovers from the Sheet Pan Thai Chicken Recipe?

Sheet Pan Thai Chicken Recipe is easy! Allow the dish to cool completely before transferring it to an airtight container. You can store it in the refrigerator for up to 3-4 days. If you want to keep it longer, consider freezing the leftovers. Place them in a freezer-safe container or bag, and they can last for up to 3 months. When you’re ready to enjoy the leftovers, simply thaw them in the refrigerator overnight and reheat in the oven or microwave until heated through.

Can I make the Sheet Pan Thai Chicken Recipe ahead of time?

Sheet Pan Thai Chicken Recipe is perfect for meal prep. You can marinate the chicken and chop the vegetables a day in advance. Store them separately in the refrigerator until you’re ready to cook. This way, you can save time on busy weeknights. Just remember to let the chicken marinate for at least 15 minutes before cooking for the best flavor. When you’re ready to eat, simply assemble everything on the sheet pan and bake as directed!

Conclusion on Sheet Pan Thai Chicken Recipe

Sheet Pan Thai Chicken Recipe is a fantastic choice for anyone seeking a quick, flavorful, and nutritious meal. With its vibrant mix of tender chicken thighs and colorful vegetables, this dish not only satisfies your taste buds but also provides essential nutrients. The ease of preparation and minimal cleanup make it perfect for busy weeknights or casual gatherings.

By following the simple steps outlined in this article, you can create a delicious meal that your family and friends will love. The versatility of this recipe allows you to customize it to your liking, whether you choose different proteins or swap out vegetables. Plus, the tips and variations provided will help you perfect your cooking skills and make each meal unique.

Sheet Pan Thai Chicken Recipe a try? Gather your ingredients, roll up your sleeves, and enjoy the delightful flavors of this Thai-inspired dish. Your kitchen will be filled with wonderful aromas, and your dinner table will be graced with a beautiful, wholesome meal. Happy cooking!

Parmesan Crusted Chicken Sheet Pan Dinner Recipe made easy!

Introduction to Parmesan Crusted Chicken Sheet Pan Dinner Recipe

Parmesan Crusted Chicken Sheet Pan Dinner Recipe is a fantastic choice for busy weeknights. This dish combines juicy chicken breasts with a crispy Parmesan crust, paired with vibrant roasted vegetables. Not only is it tasty, but it also requires minimal cleanup, making it perfect for families or anyone on the go.

This recipe is not just about flavor; it’s also about convenience. With everything cooked on one sheet pan, you can spend less time in the kitchen and more time enjoying your meal. The combination of chicken, broccoli, and cherry tomatoes creates a colorful and nutritious plate that everyone will love.

Moreover, this dish is versatile. You can easily customize it to suit your taste preferences. Whether you want to add a spicy kick or swap out the veggies, the options are endless. Plus, it’s a great way to sneak in some healthy ingredients without sacrificing taste.

Parmesan Crusted Chicken Sheet Pan Dinner Recipe. Let’s dive into the ingredients and preparation steps to create this mouthwatering meal!

Ingredients for Parmesan Crusted Chicken Sheet Pan Dinner Recipe

Parmesan Crusted Chicken Sheet Pan Dinner Recipe, you’ll need a few simple ingredients. These items are easy to find and will help you whip up a meal that’s both satisfying and nutritious. Here’s what you’ll need:

  • 2 large boneless, skinless chicken breasts (about 1 pound total)
  • 1 cup grated Parmesan cheese
  • 1 cup panko breadcrumbs
  • 1 teaspoon garlic powder
  • 1 teaspoon onion powder
  • 1 teaspoon dried Italian herbs
  • Salt and pepper to taste
  • 2 cups broccoli florets
  • 1 cup cherry tomatoes, halved
  • 2 tablespoons olive oil
  • 1 tablespoon balsamic vinegar
  • 1 teaspoon dried basil (optional)

These ingredients come together to create a delightful balance of flavors. The chicken is the star of the show, coated in a crispy, cheesy crust. Meanwhile, the roasted broccoli and cherry tomatoes add a burst of color and nutrition to your plate. Feel free to adjust the quantities based on your family size or personal preferences.

Now that you have your ingredients ready, let’s move on to the next step: preparing the chicken!

Step-by-Step Preparation of Parmesan Crusted Chicken Sheet Pan Dinner Recipe

Parmesan Crusted Chicken Sheet Pan Dinner Recipe. This step-by-step guide will help you create a delicious meal with ease. Let’s get started!

Step 1: Prepping the Chicken

First, you need to prepare the chicken. Start by patting the chicken breasts dry with paper towels. This step is important because it helps the coating stick better. Next, you can season the chicken with a pinch of salt and pepper. This simple seasoning enhances the flavor of the chicken, making it even more delicious.

Step 2: Preparing the Vegetables

While the chicken is resting, it’s time to prepare the vegetables. Take your broccoli florets and cherry tomatoes. Rinse them under cold water to clean them. After that, cut the cherry tomatoes in half. In a large bowl, toss the broccoli and tomatoes with olive oil, balsamic vinegar, salt, and pepper. This mixture will add a wonderful flavor to the veggies as they roast.

Step 3: Making the Parmesan Crust

Now, let’s create the crispy Parmesan crust! In a shallow bowl, combine the grated Parmesan cheese, panko breadcrumbs, garlic powder, onion powder, dried Italian herbs, salt, and pepper. Mix these ingredients well until they are evenly combined. This mixture will give your chicken a crunchy and cheesy topping that everyone will love.

Step 4: Assembling the Sheet Pan

It’s time to assemble your sheet pan! Take the coated chicken breasts and dip them into the breadcrumb mixture. Make sure to press down gently to ensure an even coating on both sides. Once coated, place the chicken on one side of the prepared baking sheet. Next, spread the seasoned broccoli and cherry tomatoes on the other side of the sheet. Ensure that the vegetables are in a single layer for even cooking.

Step 5: Baking the Dish

Finally, it’s time to bake your delicious creation! Place the sheet pan in the preheated oven at 400°F. Bake for 25-30 minutes, or until the chicken reaches an internal temperature of 165°F and the vegetables are tender. If you prefer a crispier topping, you can broil the dish for an additional 2-3 minutes at the end. This will give your chicken that perfect golden-brown finish!

Parmesan Crusted Chicken Sheet Pan Dinner Recipe warm with the roasted vegetables on the side. Enjoy!

Variation of Parmesan Crusted Chicken Sheet Pan Dinner Recipe

Parmesan Crusted Chicken Sheet Pan Dinner Recipe is already a hit, you can easily switch things up! Variations can keep your meals exciting and cater to different tastes. Let’s explore some alternative protein options and vegetable substitutions that can make this dish even more delightful.

Alternative Protein Options

If you want to change the protein in your dish, there are several tasty alternatives to chicken. Here are a few options:

  • Turkey Cutlets: These are lean and cook quickly, just like chicken. They will absorb the flavors of the Parmesan crust beautifully.
  • Pork Chops: Bone-in or boneless pork chops can be used. They add a different flavor profile and pair well with the roasted veggies.
  • Fish Fillets: Try using salmon or tilapia. Fish cooks faster, so adjust the baking time accordingly. The Parmesan crust will add a nice crunch!
  • Tofu: For a vegetarian option, use firm tofu. Press it to remove excess moisture, then coat it in the Parmesan mixture. It’s a great way to enjoy a meatless meal!

These alternatives can provide new flavors and textures while keeping the essence of the original recipe intact. Feel free to experiment with your favorite proteins!

Vegetable Substitutions

Vegetables are a great way to add color and nutrition to your meal. If you want to switch things up, consider these vegetable substitutions:

  • Asparagus: This vegetable roasts beautifully and adds a lovely crunch. Just trim the ends and toss them in the same seasoning mix.
  • Green Beans: Fresh or frozen green beans can be a great addition. They cook quickly and add a nice snap to your dish.
  • Bell Peppers: Sliced bell peppers can add sweetness and vibrant colors. They pair well with the Parmesan crust.
  • Cauliflower: Cauliflower florets can be roasted alongside the chicken. They absorb flavors well and add a unique texture.

Parmesan Crusted Chicken Sheet Pan Dinner Recipe is versatile, making it easy to create a meal that everyone will enjoy!

Cooking Note for Parmesan Crusted Chicken Sheet Pan Dinner Recipe

Parmesan Crusted Chicken Sheet Pan Dinner Recipe, there are a few cooking notes to keep in mind. These tips will help ensure that your meal turns out perfectly every time. Let’s take a look at some important points to consider.

First, always preheat your oven. This step is crucial for even cooking. If the oven isn’t hot enough, the chicken may not cook through properly, and the vegetables might not roast as desired. A preheated oven helps achieve that crispy crust on the chicken and tender veggies.

Next, consider the size of your chicken breasts. If they are particularly thick, you may want to butterfly them or pound them to an even thickness. This will help them cook more evenly and reduce the overall cooking time. Remember, the goal is to reach an internal temperature of 165°F for safe consumption.

Additionally, spacing is key! When placing the chicken and vegetables on the baking sheet, make sure they are not overcrowded. This allows hot air to circulate around the food, promoting even cooking and browning. If necessary, use two baking sheets to give everything enough room.

Lastly, don’t skip the resting time after baking. Allowing the chicken to rest for a few minutes before slicing helps retain its juices. This simple step can make a big difference in the tenderness and flavor of your chicken.

Parmesan Crusted Chicken Sheet Pan Dinner Recipe that your family will love. Happy cooking!

Serving Suggestions for Parmesan Crusted Chicken Sheet Pan Dinner Recipe

Parmesan Crusted Chicken Sheet Pan Dinner Recipe is ready, it’s time to think about how to serve it! Presentation can elevate your meal, making it even more enjoyable. Here are some delightful serving suggestions to consider:

  • Garnish with Fresh Herbs: A sprinkle of fresh parsley or basil can add a pop of color and freshness to your dish. It enhances the visual appeal and adds a burst of flavor.
  • Pair with a Side Salad: A light salad with mixed greens, cucumbers, and a simple vinaigrette can complement the richness of the chicken. It adds a refreshing crunch and balances the meal.
  • Serve with Quinoa or Rice: For a heartier meal, consider serving the chicken and vegetables over a bed of quinoa or brown rice. This adds a nutritious grain component and makes the dish more filling.
  • Offer Dipping Sauces: A side of marinara sauce or a creamy garlic dip can be a fun addition. It allows everyone to customize their meal and adds an extra layer of flavor.
  • Include Crusty Bread: A slice of warm, crusty bread can be perfect for soaking up any juices from the chicken and vegetables. It’s a comforting addition that everyone will love.

Parmesan Crusted Chicken Sheet Pan Dinner Recipe is versatile enough to pair with various sides, making it a fantastic choice for any occasion!

Tips for Perfecting Your Parmesan Crusted Chicken Sheet Pan Dinner Recipe

Parmesan Crusted Chicken Sheet Pan Dinner Recipe truly shine, consider these helpful tips. They will ensure that your meal is not only delicious but also visually appealing and satisfying. Let’s explore some expert advice to elevate your cooking experience!

First, always use fresh ingredients. Fresh chicken and vegetables will enhance the flavor of your dish. When possible, choose organic or locally sourced produce for the best taste. Fresh ingredients can make a noticeable difference in the overall quality of your meal.

Next, don’t be afraid to experiment with seasonings. While the recipe provides a solid base, adding your favorite spices can personalize the dish. For instance, a pinch of smoked paprika or a dash of lemon zest can add a unique twist. Feel free to adjust the seasoning to match your family’s taste preferences.

Another tip is to ensure even cooking by cutting your vegetables into similar sizes. This helps them roast uniformly, preventing some from being overcooked while others remain crunchy. Aim for bite-sized pieces for the best results.

Additionally, consider marinating the chicken for extra flavor. A simple marinade of olive oil, lemon juice, and herbs can infuse the chicken with delicious taste. Marinate for at least 30 minutes, or even overnight, for maximum flavor.

Lastly, keep an eye on the cooking time. Ovens can vary, so it’s essential to check the chicken’s internal temperature with a meat thermometer. This ensures that your chicken is perfectly cooked and safe to eat. Remember, overcooking can lead to dry chicken, so aim for that juicy, tender texture!

Parmesan Crusted Chicken Sheet Pan Dinner Recipe. Enjoy the process and have fun experimenting in the kitchen!

Breakdown of Time for Parmesan Crusted Chicken Sheet Pan Dinner Recipe

Parmesan Crusted Chicken Sheet Pan Dinner Recipe can help you plan your cooking efficiently. Here’s a simple breakdown of the time required for preparation and cooking.

Prep Time

The prep time for this delicious dish is approximately 15-20 minutes. During this time, you will gather your ingredients, prepare the chicken, and season the vegetables. This step is crucial as it sets the stage for a smooth cooking process. Make sure to have everything ready before you start cooking!

Cooking Time

Once everything is prepped, the cooking time is about 25-30 minutes. This includes baking the chicken and vegetables in the oven at 400°F. If you choose to broil the dish for a crispier finish, add an extra 2-3 minutes. Keep an eye on the chicken to ensure it reaches the safe internal temperature of 165°F.

Total Time

Parmesan Crusted Chicken Sheet Pan Dinner Recipe to take around 40-50 minutes from start to finish. This includes both prep and cooking time. With such a quick turnaround, you can enjoy a wholesome and satisfying meal without spending hours in the kitchen!

Nutritional Information for Parmesan Crusted Chicken Sheet Pan Dinner Recipe

Parmesan Crusted Chicken Sheet Pan Dinner Recipe not only offers great taste but also provides valuable nutrients. Here’s a breakdown of the key nutritional information for this delicious dish.

Calories

Parmesan Crusted Chicken Sheet Pan Dinner Recipe contains approximately 350 calories. This makes it a satisfying option for dinner without being overly heavy. The combination of chicken and vegetables ensures you get a nutritious meal that keeps you energized.

Protein

One of the standout features of this recipe is its high protein content. Each serving provides about 36 grams of protein. This is primarily from the chicken and Parmesan cheese, making it an excellent choice for those looking to increase their protein intake. Protein is essential for muscle repair and overall health, making this dish a smart choice for active individuals.

Sodium

Parmesan Crusted Chicken Sheet Pan Dinner Recipe is approximately 600 milligrams per serving. While this is a reasonable amount for a meal, it’s always good to be mindful of your sodium intake, especially if you are watching your salt consumption. You can reduce sodium by using low-sodium versions of ingredients or adjusting the amount of salt added during preparation.

Parmesan Crusted Chicken Sheet Pan Dinner Recipe knowing it’s not just delicious but also good for you!

FAQs about Parmesan Crusted Chicken Sheet Pan Dinner Recipe

Can I use frozen chicken for this recipe?

Parmesan Crusted Chicken Sheet Pan Dinner Recipe. However, it’s important to thaw the chicken completely before cooking. Cooking frozen chicken directly can lead to uneven cooking and may not allow the crust to adhere properly. To thaw, simply place the chicken in the refrigerator overnight or use the defrost setting on your microwave. Once thawed, follow the recipe as usual for the best results!

What can I serve with Parmesan Crusted Chicken Sheet Pan Dinner?

Parmesan Crusted Chicken Sheet Pan Dinner Recipe. Here are a few ideas:

  • Garlic Bread: A warm slice of garlic bread can complement the meal perfectly.
  • Caesar Salad: A fresh Caesar salad adds a nice crunch and pairs well with the chicken.
  • Mashed Potatoes: Creamy mashed potatoes can be a comforting side dish.
  • Steamed Rice: Fluffy rice can soak up the juices from the chicken and veggies.

Feel free to mix and match based on your family’s preferences. The goal is to create a well-rounded meal that everyone will enjoy!

How do I store leftovers of Parmesan Crusted Chicken Sheet Pan Dinner?

Parmesan Crusted Chicken Sheet Pan Dinner Recipe is easy! Allow the dish to cool completely before transferring it to an airtight container. You can store the leftovers in the refrigerator for up to 3-4 days. If you want to keep them longer, consider freezing the chicken and vegetables. Just make sure to use a freezer-safe container. When ready to eat, thaw in the refrigerator overnight and reheat in the oven or microwave until warmed through.

Can I make this recipe ahead of time?

Parmesan Crusted Chicken Sheet Pan Dinner Recipe ahead of time. To do this, follow the preparation steps but do not bake it right away. Instead, cover the assembled sheet pan with plastic wrap or foil and store it in the refrigerator for up to 24 hours. When you’re ready to cook, simply remove the cover and bake as directed. This makes it a great option for meal prep or busy weeknights!

Conclusion on Parmesan Crusted Chicken Sheet Pan Dinner Recipe

Parmesan Crusted Chicken Sheet Pan Dinner Recipe is a delightful and convenient meal that brings together flavor, nutrition, and ease of preparation. This dish is perfect for busy families or anyone looking to enjoy a wholesome dinner without spending hours in the kitchen. With its crispy chicken and vibrant roasted vegetables, it’s sure to please even the pickiest eaters.

Not only is this recipe simple to follow, but it also allows for plenty of customization. Whether you choose to swap out proteins or experiment with different vegetables, the possibilities are endless. This versatility makes it a fantastic addition to your weekly meal rotation.

Moreover, the nutritional benefits of this dish cannot be overlooked. With a good balance of protein, healthy fats, and fiber from the vegetables, it supports a healthy lifestyle while satisfying your taste buds. Plus, the ease of cleanup with just one sheet pan makes it a win-win!

Parmesan Crusted Chicken Sheet Pan Dinner Recipe. Your family will love it, and you’ll appreciate the time saved in the kitchen. Happy cooking!

Mediterranean Chicken and Zucchini Bake: A Flavorful Dinner Delight

Introduction to Mediterranean Chicken and Zucchini Bake

Picture this: a bustling kitchen filled with the aroma of fresh herbs and sizzling chicken. That’s the magic of a Mediterranean Chicken and Zucchini Bake. It’s a dish that brings the sun-kissed flavors of the Mediterranean right to your dinner table. Whether you’re a busy mom juggling a million tasks or a professional seeking a quick yet delightful meal, this recipe is your culinary savior. It’s not just a meal; it’s a flavorful escape from the mundane. So, let’s dive into this delightful journey and create a dish that will impress your loved ones!

Why You’ll Love This Mediterranean Chicken and Zucchini Bake

This Mediterranean Chicken and Zucchini Bake is a weeknight wonder! It’s quick to prepare, bursting with vibrant flavors, and healthy to boot. Imagine tender chicken mingling with juicy zucchini and tangy feta, all in one dish. It’s a breeze to make, leaving you more time to relax. Plus, it’s a crowd-pleaser, perfect for family dinners or impressing guests without the fuss!

Ingredients Mediterranean Chicken and Zucchini Bake

Let’s gather the stars of our culinary show! First up, we have zucchinis, sliced into charming half-moons, bringing a fresh, green crunch. Next, boneless chicken breasts, cut into bite-sized pieces, are the protein heroes of this dish. Cherry tomatoes add a burst of sweetness, while red onions offer a subtle zing. Kalamata olives, with their briny goodness, elevate the Mediterranean vibe.

Garlic cloves, minced to perfection, infuse the dish with aromatic depth. Dried oregano and basil sprinkle in a touch of herbal magic. A dash of salt and pepper balances the flavors, while olive oil ties everything together with its silky richness. Crumbled feta cheese adds a creamy, tangy finish, and fresh parsley provides a pop of color and freshness.

For those who love a twist, consider marinating the chicken in lemon juice and herbs for an extra flavor boost. And if you’re feeling adventurous, swap the chicken for shrimp to create a delightful seafood variation. Remember, the exact quantities are at the bottom of the article, ready for printing!

How to Make Mediterranean Chicken and Zucchini Bake

Preheat and Prepare

First things first, let’s get that oven ready. Preheat it to a toasty 400°F. While it warms up, gather your ingredients. This is the perfect time to slice those zucchinis into half-moons and cut the chicken into bite-sized pieces. Trust me, having everything prepped makes the cooking process a breeze!

Mix Ingredients

Now, grab a large mixing bowl. Toss in the zucchini, chicken, cherry tomatoes, red onion, and olives. Add the minced garlic, dried oregano, and basil. Sprinkle with salt and pepper. Drizzle with olive oil. Use your hands or a spatula to mix everything until well coated. This step is where the magic begins, as the flavors start to meld together.

Bake the Dish

Transfer the mixture into a large baking dish. Spread it out evenly, ensuring every bite gets a bit of everything. Pop it into the preheated oven. Let it bake for 25-30 minutes. You’ll know it’s ready when the chicken is cooked through and the veggies are tender. The aroma wafting through your kitchen will be irresistible!

Add the Finishing Touches

Once baked, remove the dish from the oven. Sprinkle the crumbled feta cheese over the top. Return it to the oven for an additional 5 minutes. This allows the feta to melt slightly, adding a creamy, tangy layer. Let it cool for a few minutes before serving. Garnish with fresh parsley for a burst of color and freshness. Enjoy your Mediterranean masterpiece!

Tips for Success

  • Marinate the chicken in lemon juice and herbs for an hour to enhance flavor.
  • Use a sharp knife for precise slicing of zucchinis and chicken.
  • Ensure even coating of ingredients with olive oil for uniform cooking.
  • Check chicken doneness with a meat thermometer; it should read 165°F.
  • Let the dish rest for a few minutes before serving to meld flavors.

Equipment Needed

  • Large mixing bowl – or use a big salad bowl if needed.
  • Baking dish – a casserole dish works perfectly.
  • Sharp knife – essential for precise slicing.
  • Cutting board – any sturdy board will do.
  • Oven mitts – to safely handle hot dishes.

Variations

  • Swap chicken for shrimp to create a seafood twist, adjusting the bake time to 15-20 minutes.
  • For a vegetarian version, replace chicken with chickpeas or tofu for a protein-packed alternative.
  • Add a sprinkle of pine nuts for a nutty crunch and extra texture.
  • Incorporate bell peppers for a pop of color and additional sweetness.
  • Use goat cheese instead of feta for a creamier, tangier flavor profile.
  • Experiment with fresh herbs like rosemary or thyme for a different aromatic touch.

Serving Suggestions

  • Pair with a crisp, chilled glass of Sauvignon Blanc for a refreshing contrast.
  • Serve alongside a warm, crusty baguette to soak up the delicious juices.
  • Complement with a simple green salad drizzled with balsamic vinaigrette.
  • Garnish with lemon wedges for an extra citrusy zing.
  • Present on a large platter for a family-style dining experience.

FAQs about Mediterranean Chicken and Zucchini Bake

Can I prepare this dish ahead of time?

Absolutely! You can prep the ingredients a day in advance. Store them in the fridge, and when you’re ready, just mix and bake. This makes it a perfect option for busy weeknights or when you’re hosting a dinner party.

What can I use instead of feta cheese?

If feta isn’t your thing, try using goat cheese for a creamier texture. Parmesan or mozzarella can also work, offering a different flavor profile while still keeping that cheesy goodness.

How do I store leftovers?

Leftovers can be stored in an airtight container in the refrigerator for up to three days. Reheat in the oven at 350°F until warmed through, or use the microwave for a quicker option.

Can I freeze this Mediterranean Chicken and Zucchini Bake?

Yes, you can freeze it! Allow the dish to cool completely, then transfer to a freezer-safe container. It can be frozen for up to two months. Thaw overnight in the fridge before reheating.

Is this recipe suitable for a low-carb diet?

Indeed, it is! With its focus on lean protein and vegetables, this dish is naturally low in carbohydrates, making it a great choice for those following a low-carb lifestyle.

Final Thoughts

Creating this Mediterranean Chicken and Zucchini Bake is like embarking on a culinary adventure, where each ingredient tells a story of vibrant flavors and wholesome goodness. It’s a dish that not only satisfies the taste buds but also warms the heart. Whether you’re sharing it with family or savoring it solo, the joy it brings is undeniable. The simplicity of preparation, combined with the rich, Mediterranean flavors, makes it a go-to recipe in my kitchen. So, gather your loved ones, set the table, and let this delightful bake be the centerpiece of your next meal. Enjoy every bite!

Mediterranean Chicken and Zucchini Bake
Paul

Mediterranean Chicken and Zucchini Bake: A Flavorful Dinner Delight

A delicious and healthy Mediterranean-inspired dish featuring chicken, zucchini, and a variety of flavorful ingredients, baked to perfection.
Prep Time 15 minutes
Cook Time 35 minutes
Total Time 50 minutes
Servings: 4 servings
Course: Main Course
Cuisine: Mediterranean
Calories: 320

Ingredients
  

  • 2 large zucchinis sliced into half-moons
  • 1 pound boneless skinless chicken breasts, cut into bite-sized pieces
  • 1 cup cherry tomatoes halved
  • 1/2 cup red onion sliced
  • 1/4 cup Kalamata olives pitted and halved
  • 3 cloves garlic minced
  • 1 teaspoon dried oregano
  • 1 teaspoon dried basil
  • 1/2 teaspoon salt
  • 1/4 teaspoon black pepper
  • 3 tablespoons olive oil
  • 1/2 cup feta cheese crumbled
  • Fresh parsley chopped (for garnish)

Method
 

  1. Preheat the oven to 400°F.
  2. In a large mixing bowl, combine the sliced zucchinis, chicken pieces, cherry tomatoes, red onion, olives, garlic, oregano, basil, salt, pepper, and olive oil. Toss everything together until well coated.
  3. Transfer the mixture to a large baking dish, spreading it out evenly.
  4. Bake in the preheated oven for 25-30 minutes, or until the chicken is cooked through and the vegetables are tender.
  5. Remove the dish from the oven and sprinkle the crumbled feta cheese over the top.
  6. Return to the oven and bake for an additional 5 minutes, until the feta is slightly melted.
  7. Let the dish cool for a few minutes before serving.
  8. Garnish with fresh parsley before serving.

Notes

  • For added flavor, marinate the chicken in lemon juice and herbs for an hour before cooking.
  • You can also substitute the chicken with shrimp for a seafood twist.

No-Bake Banana Split Cake Recipe is a must-try dessert!

There’s something magical about summers in my childhood home. The heat would press through the windows, sticky and sweet, but no one complained—because we knew dessert was chilling in the fridge.

It wasn’t just any dessert. My mom had a signature treat that became our unofficial family anthem for summer: the no-bake banana split cake.

The name doesn’t do justice to how it felt to bite into it. Cool, creamy, sweet, fruity, crunchy—it was like sunshine on a plate. She made it for cookouts, birthdays, or just because we begged for it. We didn’t have much back then, but this dessert felt like luxury.

I still remember the rhythm of helping her layer bananas, then gently pressing graham crackers into the pan. I never knew then that these small rituals would one day feel like treasure.

Now, I make it for my own family. And every time I do, my kitchen smells like those warm afternoons again. This recipe isn’t just delicious—it’s generational joy, wrapped in Cool Whip and strawberries.

Why This No-Bake Banana Split Cake is a Crowd-Pleaser

This dessert has the rare ability to feel nostalgic and exciting all at once. It combines the classic banana split flavors—bananas, strawberries, pineapple, chocolate, and whipped cream—with a cheesecake-style filling and buttery graham cracker crust. But it skips the oven entirely, which is exactly what makes it so brilliant for busy or warm-weather days.

Whether you’re hosting a picnic, looking for a make-ahead potluck treat, or simply want to surprise your family after dinner, this dish delivers that “wow” moment without stress.

Secrets to Building the Perfect Layers

While the ingredient list is simple, the magic lies in the method. Here are a few tips to make sure your layers are as dreamy as possible:

1. Chill that crust.
After pressing your graham cracker mixture into the pan, give it at least 30 minutes in the fridge. This helps it hold up once you add the creamy filling.

2. Use room temp cream cheese.
Cold cream cheese can make the filling lumpy. Let it soften at room temperature before mixing for that silky texture.

3. Drain fruit thoroughly.
Pineapple especially holds water—squeeze it through a fine mesh sieve or cheesecloth to keep your layers firm.

4. Slice bananas last.
Bananas brown quickly. Slice them just before assembling, and if you want extra protection, toss them lightly in lemon juice.

5. Gently fold, don’t stir.
When mixing Cool Whip into the cream cheese, fold with a spatula to keep that light, fluffy consistency.

6. Top like a pro.
Drizzle chocolate sauce in zigzags, sprinkle chopped nuts for crunch, and even add a cherry or mint if you’re feeling fancy.

Common Questions About No-Bake Banana Split Cake

Can I make this in advance?
Yes! In fact, it tastes better after resting in the fridge for several hours or overnight. It allows the flavors to meld and the layers to set.

What’s a good substitute for Cool Whip?
You can use stabilized homemade whipped cream. Just make sure it’s firm enough to hold shape, especially if you’re making it ahead of time.

Can I swap out the fruits?
Absolutely. This dessert is flexible. Add blueberries, raspberries, kiwi—or even mango. Just avoid super juicy fruits like watermelon.

What kind of chocolate sauce works best?
Use a good-quality bottled sauce or homemade ganache. Avoid thin syrups—they can run too much and get messy.

Can I make this gluten-free?
Yes, just use gluten-free graham crackers for the crust. Everything else is naturally gluten-free.

Is it freezer-friendly?
It’s not ideal for freezing because of the whipped topping and fresh fruit, which can become watery when thawed. Refrigeration is best.

How do I keep the banana slices from browning?
Slice them just before assembly, and toss lightly in lemon juice. Covering the dessert tightly will also help reduce oxygen exposure.

What if I don’t have hazelnuts?
Use chopped pecans, almonds, walnuts, or skip the nuts entirely. They add great texture, but the dessert is still delicious without them.

How to Store and Serve

Storage:
Cover the pan tightly with plastic wrap or a lid and store in the fridge. It will stay fresh for up to 3 days, though the texture is best in the first two.

Serving Tips:

  • Use a sharp knife to slice neat squares.
  • Wipe the blade clean between each cut to maintain clean layers.
  • Serve chilled straight from the fridge—it tastes best cold.

Want to make it extra fun? Serve individual portions in mason jars or parfait glasses for a cute, party-ready presentation.

Take It from Family Tradition to Fan Favorite

What I love most about this recipe is how adaptable it is. You can make it for kids and dress it up for adults. You can simplify it for weekday treats or glam it up for a holiday buffet.

This dessert also welcomes creativity. Try a chocolate graham cracker crust, a swirl of caramel on top, or even a splash of rum extract in the filling for a grown-up twist. The foundation is solid—you just add your own flair.

Final Thoughts: A Dessert Worth Remembering

In a world that often demands more time, more effort, and more perfection, this cake stands as a quiet rebellion. It’s joy made easy. It’s flavor without stress. It’s memory-making in a 9×13 pan.

And maybe that’s why it endures. Because in the swirl of pineapple and strawberries, under that cloud of whipped cream, is something bigger than dessert—it’s comfort, tradition, and a reminder that love can live in the little things.

Next time you make it, I hope your kitchen fills with laughter and maybe a little nostalgia too. Because that’s what food is meant to do—bring us together, even if just for a chilled, chocolate-drizzled moment.

Garlic Chicken Gnocchi Recipe is a must-try dish!

Introduction to Garlic Chicken Gnocchi Recipe

If you’re looking for a delicious and comforting meal, the Garlic Chicken Gnocchi Recipe is a perfect choice. This dish combines tender chicken, pillowy gnocchi, and vibrant vegetables, all enveloped in a creamy garlic sauce. It’s not just a meal; it’s an experience that brings warmth and satisfaction to your dinner table.

Gnocchi, a type of Italian pasta made from potatoes, pairs beautifully with the savory flavors of garlic and chicken. The addition of cherry tomatoes and spinach adds a burst of color and nutrition, making this dish not only tasty but also visually appealing. Plus, it’s quick to prepare, making it ideal for busy weeknights or special occasions.

In this article, we will guide you through the ingredients, preparation steps, and variations of this delightful recipe. Whether you’re a seasoned cook or a beginner, you’ll find that making Garlic Chicken Gnocchi is straightforward and rewarding. So, roll up your sleeves and get ready to impress your family and friends with this scrumptious dish!

Ingredients for Garlic Chicken Gnocchi Recipe

To create the delightful Garlic Chicken Gnocchi Recipe, you’ll need a selection of fresh and flavorful ingredients. Each component plays a vital role in bringing this dish to life. Here’s what you’ll need:

  • 2 tablespoons olive oil: This will be used for sautéing the chicken and vegetables, adding a rich flavor.
  • 1 pound boneless, skinless chicken breasts: Cut into bite-sized pieces, the chicken provides protein and heartiness.
  • 1 teaspoon salt: Essential for seasoning the chicken and enhancing the overall taste.
  • 1/2 teaspoon black pepper: Adds a touch of spice to the dish.
  • 3 cloves garlic: Minced, garlic is the star ingredient that gives this recipe its name and flavor.
  • 1 cup cherry tomatoes: Halved, these sweet tomatoes add freshness and color.
  • 1 cup baby spinach: This leafy green not only boosts nutrition but also adds a lovely green hue.
  • 1 pound potato gnocchi: The main carbohydrate in this dish, gnocchi is soft and pillowy.
  • 1/2 cup heavy cream: This creates a rich and creamy sauce that ties everything together.
  • 1/2 cup grated Parmesan cheese: Adds a savory, cheesy flavor that complements the dish perfectly.
  • 1 teaspoon Italian seasoning: A blend of herbs that enhances the overall flavor profile.
  • Fresh basil leaves (optional): For garnish, these add a pop of color and a fresh aroma.

Gathering these ingredients will set you on the right path to creating a delicious Garlic Chicken Gnocchi dish. Each item contributes to the overall taste and texture, making it a meal that everyone will love. Now that you have your ingredients ready, let’s move on to the preparation steps!

Preparation of Garlic Chicken Gnocchi Recipe

Now that you have all your ingredients ready, it’s time to dive into the preparation of the Garlic Chicken Gnocchi Recipe. This process is simple and straightforward, ensuring that you can whip up this delightful dish in no time. Let’s break it down into easy steps!

Step 1: Preparing the Chicken

First, heat 2 tablespoons of olive oil in a large skillet over medium-high heat. Once the oil is hot, add the bite-sized pieces of chicken. Season them with 1 teaspoon of salt and 1/2 teaspoon of black pepper. Cook the chicken for about 5-7 minutes, stirring occasionally. You want the chicken to be browned and cooked through. Once done, remove the chicken from the skillet and set it aside on a plate. This step is crucial as it builds the foundation of flavor for your dish.

Step 2: Cooking the Gnocchi

While the chicken is cooking, bring a pot of salted water to a boil. Once boiling, add 1 pound of potato gnocchi. Cook the gnocchi according to the package instructions, which usually takes about 2-3 minutes. You’ll know they’re ready when they float to the surface. This floating indicates that they are perfectly cooked. Drain the gnocchi and set them aside. This step ensures that your gnocchi will be soft and fluffy, complementing the other ingredients beautifully.

Step 3: Making the Garlic Sauce

In the same skillet where you cooked the chicken, add the minced garlic. Sauté the garlic for about 1 minute until it becomes fragrant. Be careful not to burn it, as burnt garlic can taste bitter. Next, add the halved cherry tomatoes and baby spinach to the skillet. Cook these for about 3-4 minutes, stirring occasionally. You want the spinach to wilt and the tomatoes to soften, creating a vibrant and flavorful base for your sauce.

Step 4: Combining Ingredients

Now it’s time to bring everything together! Return the cooked chicken to the skillet. Then, add the drained gnocchi, 1/2 cup of heavy cream, 1/2 cup of grated Parmesan cheese, and 1 teaspoon of Italian seasoning. Stir gently to combine all the ingredients. Heat everything through for another 2-3 minutes, allowing the flavors to meld beautifully. This final step creates a creamy, delicious sauce that envelops the chicken and gnocchi, making every bite a delight.

Once everything is combined and heated, your Garlic Chicken Gnocchi is ready to be served! This dish is not only easy to prepare but also packed with flavor and nutrition. Now, let’s explore some variations you can try to make this recipe your own!

Variation of Garlic Chicken Gnocchi Recipe

While the Garlic Chicken Gnocchi Recipe is delicious as it is, there are many ways to customize it to suit your taste or dietary needs. Whether you want to switch up the protein or make it vegetarian, these variations will keep your meals exciting and flavorful. Let’s explore some alternative proteins and vegetarian options!

Alternative Proteins

If you’re looking to change the protein in your Garlic Chicken Gnocchi Recipe, there are several tasty options. Here are a few ideas:

  • Turkey: Ground turkey or turkey breast can be used instead of chicken. It’s lean and offers a similar texture.
  • Shrimp: For a seafood twist, try adding shrimp. Cook them until they turn pink and tender, which usually takes just a few minutes.
  • Pork: Diced pork tenderloin can add a different flavor profile. Just ensure it’s cooked through before combining with the other ingredients.
  • Tofu: For a plant-based option, use firm tofu. Cube it and sauté until golden brown for a protein-rich alternative.

These alternative proteins can bring new flavors and textures to your dish, making it versatile and enjoyable for everyone at the table.

Vegetarian Options

If you prefer a vegetarian version of the Garlic Chicken Gnocchi Recipe, you can easily make some adjustments. Here are some ideas to create a delicious meat-free meal:

  • Replace Chicken with Vegetables: Use a mix of your favorite vegetables, such as bell peppers, zucchini, or mushrooms. Sauté them until tender for a hearty dish.
  • Chickpeas: Adding canned chickpeas can provide protein and a satisfying texture. Rinse and drain them before adding to the skillet.
  • Vegetable Broth: Instead of heavy cream, consider using vegetable broth and a splash of plant-based milk for a lighter sauce.
  • Vegan Cheese: If you want to keep it dairy-free, substitute Parmesan cheese with a vegan cheese alternative or nutritional yeast for a cheesy flavor.

These vegetarian options not only make the dish suitable for non-meat eaters but also add a variety of flavors and nutrients. Feel free to mix and match these ideas to create your perfect Garlic Chicken Gnocchi Recipe!

Cooking Note for Garlic Chicken Gnocchi Recipe

When preparing the Garlic Chicken Gnocchi Recipe, there are a few cooking notes to keep in mind. These tips will help ensure that your dish turns out perfectly every time. Let’s dive into some essential points to consider!

First, always use a large skillet for this recipe. A spacious skillet allows for even cooking and prevents overcrowding. This way, the chicken can brown nicely, and the vegetables can sauté without steaming. If your skillet is too small, consider cooking in batches.

Next, be mindful of the cooking times. Chicken should be cooked until it reaches an internal temperature of 165°F (75°C). This ensures it’s safe to eat. Use a meat thermometer for accuracy if you have one. For the gnocchi, remember that they only need a few minutes in boiling water. Keep an eye on them, as overcooking can lead to a mushy texture.

When sautéing garlic, watch it closely. Garlic can burn quickly, which can ruin the flavor of your dish. If you notice it starting to brown too much, lower the heat immediately. A fragrant, golden garlic is what you want!

Lastly, feel free to adjust the creaminess of the sauce to your liking. If you prefer a lighter sauce, you can reduce the amount of heavy cream or substitute it with half-and-half. On the other hand, if you love a rich and creamy texture, add a bit more cream or cheese. The beauty of this recipe lies in its flexibility!

By keeping these cooking notes in mind, you’ll be well on your way to creating a delicious Garlic Chicken Gnocchi dish that everyone will enjoy. Now, let’s explore some serving suggestions to elevate your meal even further!

Serving Suggestions for Garlic Chicken Gnocchi Recipe

Once your Garlic Chicken Gnocchi is ready, it’s time to think about how to serve it. Presentation can elevate your dish, making it even more appealing. Here are some delightful serving suggestions to enhance your meal:

  • Garnish with Fresh Herbs: A sprinkle of fresh basil leaves not only adds a pop of color but also enhances the flavor. You can also use parsley or chives for a different twist.
  • Pair with a Side Salad: A light side salad with mixed greens, cherry tomatoes, and a simple vinaigrette complements the richness of the gnocchi. It adds freshness and balances the meal.
  • Serve with Garlic Bread: For garlic lovers, serving the dish with warm garlic bread is a fantastic idea. It’s perfect for soaking up the creamy sauce!
  • Top with Extra Cheese: If you’re a cheese enthusiast, consider adding more grated Parmesan on top just before serving. It melts slightly and adds a deliciously cheesy finish.
  • Drizzle with Olive Oil: A light drizzle of high-quality olive oil over the finished dish can enhance the flavors and add a touch of elegance.

These serving suggestions not only make your Garlic Chicken Gnocchi visually appealing but also enhance the overall dining experience. Feel free to mix and match these ideas based on your preferences and the occasion. Now that you have some great serving ideas, let’s move on to tips for perfecting your Garlic Chicken Gnocchi Recipe!

Tips for Perfect Garlic Chicken Gnocchi Recipe

Creating the perfect Garlic Chicken Gnocchi Recipe is all about attention to detail and a few handy tips. With these suggestions, you can elevate your dish and impress your family and friends. Let’s explore some essential tips to ensure your meal turns out delicious every time!

First, always use fresh ingredients. Fresh garlic, ripe cherry tomatoes, and vibrant spinach will enhance the flavors of your dish. Fresh ingredients not only taste better but also provide more nutrients. When shopping, look for firm tomatoes and bright green spinach to ensure quality.

Next, don’t rush the cooking process. Allow the chicken to brown properly before removing it from the skillet. This step adds depth to the flavor. Similarly, when sautéing garlic, take your time. A minute or two is all it takes for garlic to become fragrant without burning. Patience is key!

Another tip is to season your ingredients at each step. While you’ll season the chicken, consider adding a pinch of salt and pepper to the vegetables as they cook. This layering of flavors will make your dish more complex and satisfying.

When it comes to the gnocchi, avoid overcooking them. As mentioned earlier, they only need a few minutes in boiling water. Once they float, they’re ready! Overcooked gnocchi can become mushy, which can affect the overall texture of your dish.

Lastly, don’t hesitate to experiment with flavors. If you love a bit of heat, add red pepper flakes when cooking the garlic. For a touch of brightness, a squeeze of lemon juice just before serving can elevate the dish. Feel free to adjust the Italian seasoning to suit your taste as well.

By following these tips, you’ll be well on your way to mastering the Garlic Chicken Gnocchi Recipe. Each step contributes to a delicious and satisfying meal that everyone will enjoy. Now, let’s break down the time needed to prepare this delightful dish!

Breakdown of Time for Garlic Chicken Gnocchi Recipe

Understanding the time required for each step of the Garlic Chicken Gnocchi Recipe can help you plan your cooking efficiently. Here’s a detailed breakdown of the time you’ll need for preparation and cooking. This way, you can enjoy a delicious meal without feeling rushed!

Prep Time

The prep time for this Garlic Chicken Gnocchi Recipe is approximately 15 minutes. During this time, you will gather all your ingredients, wash and chop the vegetables, and cut the chicken into bite-sized pieces. Having everything ready before you start cooking will make the process smoother and more enjoyable.

Cooking Time

The cooking time for this recipe is about 20 minutes. This includes browning the chicken, sautéing the garlic and vegetables, and cooking the gnocchi. Each step is quick, allowing you to create a flavorful dish in no time. The key is to keep an eye on the cooking process to ensure everything is cooked perfectly.

Total Time

In total, you can expect to spend around 35 minutes from start to finish. This includes both prep and cooking times. With just a little bit of organization, you can have a delightful Garlic Chicken Gnocchi dish ready to serve in under an hour. It’s a fantastic option for busy weeknights or when you want to impress guests without spending all day in the kitchen!

Now that you have a clear understanding of the time involved, let’s take a look at the nutritional information for this delicious Garlic Chicken Gnocchi Recipe!

Nutritional Information for Garlic Chicken Gnocchi Recipe

Understanding the nutritional information of the Garlic Chicken Gnocchi Recipe is essential for those who are mindful of their diet. This dish is not only delicious but also provides a balanced mix of nutrients. Here’s a closer look at the nutritional breakdown per serving:

Calories

Each serving of the Garlic Chicken Gnocchi Recipe contains approximately 450 calories. This calorie count makes it a satisfying meal that can fit into a balanced diet. The combination of chicken, gnocchi, and vegetables provides energy, making it perfect for a hearty dinner.

Protein

With about 30 grams of protein per serving, this recipe is an excellent source of protein. The chicken and gnocchi contribute to this protein content, helping to support muscle health and keep you feeling full. Protein is essential for growth and repair, making this dish a nutritious choice for everyone.

Sodium

The sodium content in each serving is around 800 milligrams. While this is a reasonable amount for a meal, it’s important to be mindful of your overall sodium intake throughout the day. You can reduce the sodium level by using low-sodium chicken broth or less salt during cooking. This way, you can enjoy the flavors without worrying about excess sodium.

Overall, the Garlic Chicken Gnocchi Recipe offers a well-rounded meal that is both tasty and nutritious. With its balance of calories, protein, and sodium, it’s a great option for a fulfilling dinner. Now that you have a clear understanding of the nutritional aspects, let’s move on to some frequently asked questions about this delightful recipe!

FAQs about Garlic Chicken Gnocchi Recipe

Can I use store-bought gnocchi for this recipe?

Absolutely! Using store-bought gnocchi is a great time-saver. Most grocery stores offer fresh or frozen gnocchi, which can be just as delicious as homemade. Just follow the package instructions for cooking, and you’ll have a delightful dish in no time. This convenience allows you to focus on the other flavors in your Garlic Chicken Gnocchi Recipe without compromising on taste.

What can I substitute for chicken in the Garlic Chicken Gnocchi Recipe?

If you want to substitute chicken, there are plenty of options! You can use turkey, shrimp, or even diced pork for a different flavor. For a vegetarian option, consider using firm tofu or a mix of your favorite vegetables. Chickpeas are also a great protein-rich alternative. Each of these substitutes will bring its unique taste and texture to the dish, making it versatile and enjoyable for everyone.

How can I make the sauce creamier?

To achieve a creamier sauce in your Garlic Chicken Gnocchi Recipe, you can add more heavy cream or even a splash of cream cheese. Another option is to incorporate a bit of sour cream or Greek yogurt for added richness. If you prefer a dairy-free option, try using coconut cream or a plant-based cream alternative. These adjustments will enhance the creaminess and make your dish even more indulgent!

Can I prepare Garlic Chicken Gnocchi Recipe in advance?

Yes, you can prepare parts of the Garlic Chicken Gnocchi Recipe in advance! You can cook the chicken and vegetables ahead of time and store them in the refrigerator. When you’re ready to serve, simply reheat them in a skillet, add the gnocchi, cream, and cheese, and heat through. However, it’s best to cook the gnocchi fresh, as they can become mushy if stored. This way, you can enjoy a delicious meal with minimal effort on busy days!

Conclusion on Garlic Chicken Gnocchi Recipe

In conclusion, the Garlic Chicken Gnocchi Recipe is a delightful dish that brings together the comforting flavors of tender chicken, soft gnocchi, and vibrant vegetables. This recipe is not only easy to prepare but also offers a wonderful balance of taste and nutrition. Whether you’re cooking for your family on a busy weeknight or impressing guests at a dinner party, this dish is sure to please everyone at the table.

With its creamy garlic sauce and the addition of fresh ingredients like cherry tomatoes and spinach, each bite is a burst of flavor. Plus, the versatility of this recipe allows you to customize it to suit your preferences, whether you choose alternative proteins or opt for a vegetarian version. The tips and variations provided throughout this article will help you create a dish that is uniquely yours.

As you embark on your culinary journey with the Garlic Chicken Gnocchi Recipe, remember to enjoy the process. Cooking is not just about the final product; it’s about the joy of creating something delicious. So gather your ingredients, follow the steps, and savor the delightful flavors that come together in this comforting meal.

We hope you find this recipe as enjoyable to make as it is to eat. Happy cooking, and may your Garlic Chicken Gnocchi be a hit at your dinner table!