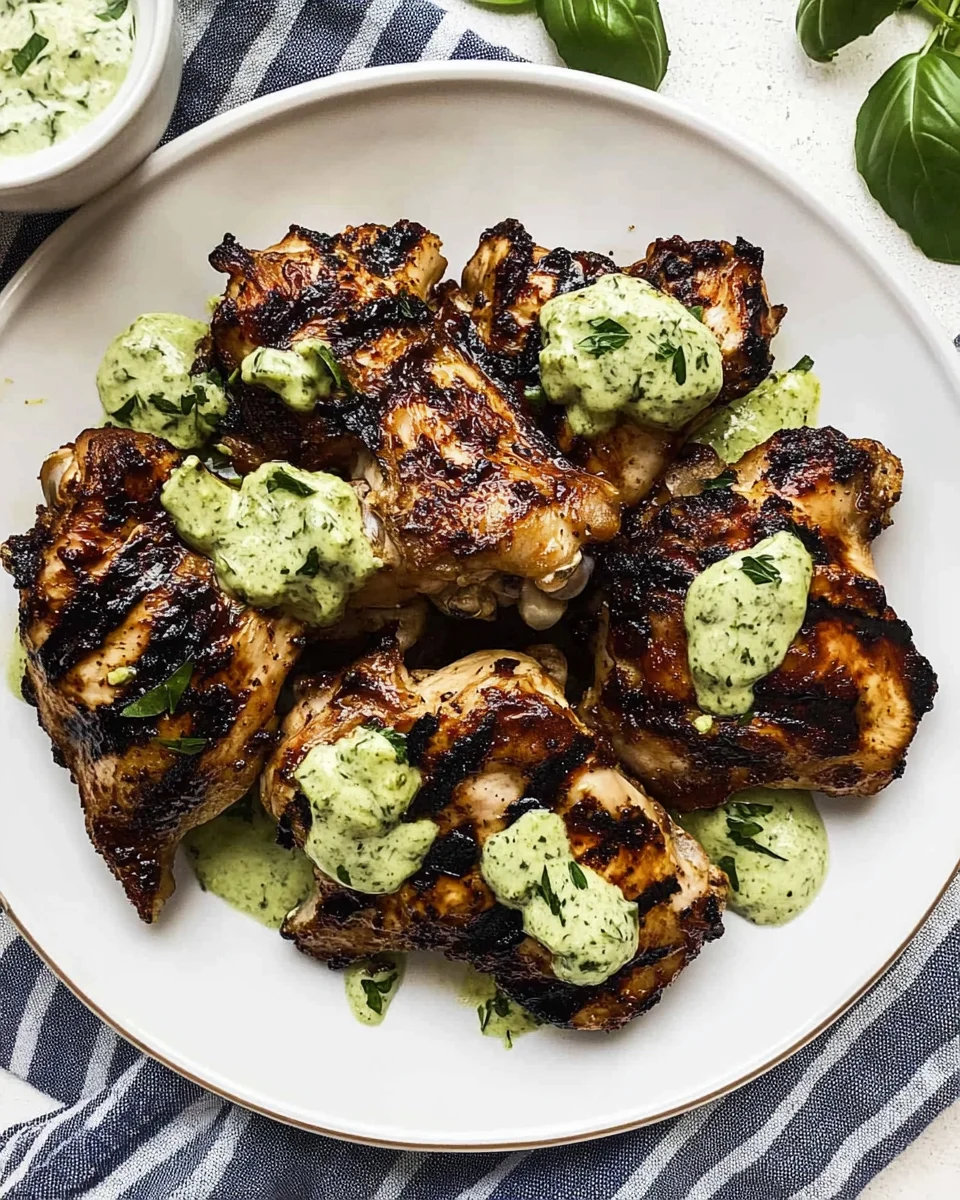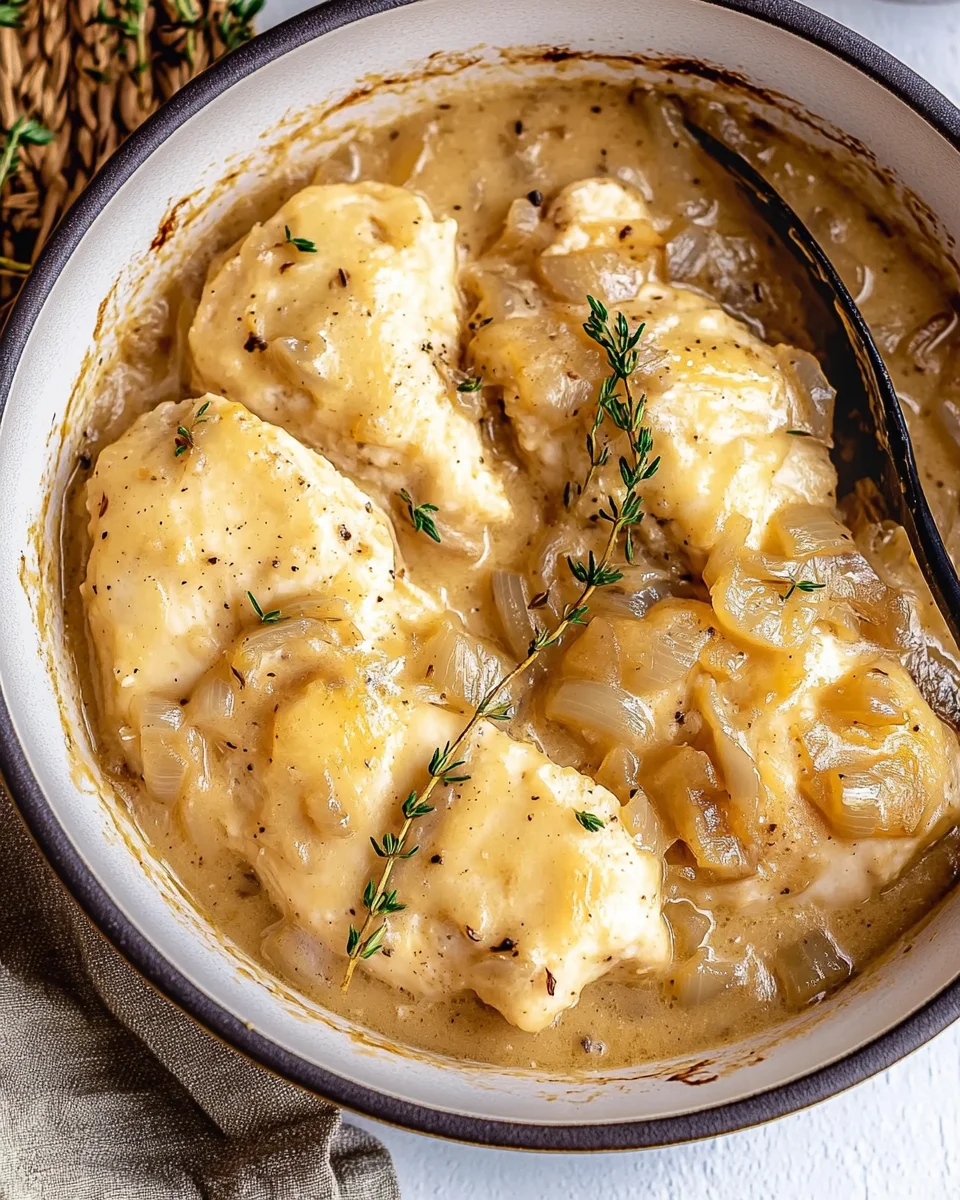
French Onion Chicken Bake Recipe is a must-try!

Introduction to French Onion Chicken Bake Recipe

Are you looking for a comforting and delicious meal that’s easy to prepare? Look no further than the French Onion Chicken Bake Recipe! This dish combines the rich flavors of caramelized onions and savory chicken, topped with gooey cheese. It’s a delightful twist on the classic French onion soup, making it perfect for family dinners or gatherings with friends.

The beauty of this recipe lies in its simplicity. With just a handful of ingredients, you can create a hearty meal that will impress everyone at the table. The chicken is tender and juicy, while the onions add a sweet and savory depth. Plus, the melted Gruyère and Parmesan cheeses create a deliciously cheesy topping that brings everything together.

Not only is this dish satisfying, but it also offers a great balance of protein and flavor. Whether you’re a seasoned cook or a beginner in the kitchen, this French Onion Chicken Bake Recipe is straightforward and rewarding. So, roll up your sleeves and get ready to enjoy a meal that’s sure to become a family favorite!

Ingredients for French Onion Chicken Bake Recipe

To create the mouthwatering French Onion Chicken Bake Recipe, you’ll need a selection of fresh ingredients. Each component plays a vital role in building the rich flavors that make this dish so special. Here’s what you’ll need:

  • 2 pounds boneless, skinless chicken breasts: This is the main protein source, providing a hearty base for the dish.
  • 2 tablespoons olive oil: Used for searing the chicken and sautéing the onions, adding a lovely richness.
  • 1 teaspoon salt: Essential for seasoning the chicken and enhancing the overall flavor.
  • 1/2 teaspoon black pepper: Adds a subtle kick to the dish.
  • 1 large onion, thinly sliced: The star of the show! Caramelized onions bring sweetness and depth.
  • 2 cloves garlic, minced: Garlic adds a fragrant aroma and complements the onions beautifully.
  • 1 cup beef broth: This adds moisture and a savory base for the sauce.
  • 1 tablespoon Worcestershire sauce: A splash of this sauce enhances the umami flavor.
  • 1 teaspoon dried thyme: This herb adds an earthy note that pairs well with the other ingredients.
  • 1 cup shredded Gruyère cheese: This cheese melts beautifully, creating a creamy topping.
  • 1/2 cup grated Parmesan cheese: Adds a sharp, nutty flavor that complements the Gruyère.
  • Fresh parsley, chopped (for garnish): A sprinkle of parsley adds a pop of color and freshness.

With these ingredients on hand, you’re well on your way to creating a delicious French Onion Chicken Bake. Each item contributes to the overall taste, making it a dish that’s sure to please everyone at your table. So gather your ingredients and let’s get cooking!

Preparation of French Onion Chicken Bake Recipe

Now that you have all your ingredients ready, it’s time to dive into the preparation of the French Onion Chicken Bake Recipe. This process is straightforward and will have your kitchen smelling amazing in no time. Let’s break it down step by step!

Step 1: Preheat the Oven

First things first, preheat your oven to 375°F (190°C). This step is crucial as it ensures that your dish cooks evenly. While the oven heats up, you can focus on preparing the chicken and onions.

Step 2: Prepare the Chicken

Next, take your boneless, skinless chicken breasts and season them with salt and black pepper. This simple seasoning enhances the chicken’s natural flavor. In a large oven-safe skillet, heat 2 tablespoons of olive oil over medium heat. Once the oil is hot, add the seasoned chicken breasts. Sear them for about 4-5 minutes on each side until they turn golden brown. This step locks in the juices, making the chicken tender and flavorful. After searing, remove the chicken from the skillet and set it aside on a plate.

Step 3: Sauté the Onions

In the same skillet, add the thinly sliced onion. Cook the onions for about 10-12 minutes, stirring occasionally. You want them to become caramelized and golden brown. This process brings out their natural sweetness, which is key to the dish’s flavor. Once the onions are beautifully caramelized, add 2 cloves of minced garlic and cook for an additional minute. The garlic will add a lovely aroma to your dish.

Step 4: Assemble the Dish

Now it’s time to bring everything together! Pour in 1 cup of beef broth and 1 tablespoon of Worcestershire sauce into the skillet. Make sure to scrape the bottom of the skillet to release any browned bits, as they add extra flavor. Stir in 1 teaspoon of dried thyme for an earthy touch. Return the seared chicken to the skillet, spooning some of the onion mixture over the top. Finally, sprinkle 1 cup of shredded Gruyère cheese and 1/2 cup of grated Parmesan cheese evenly over the chicken. This cheesy topping is what makes this dish so irresistible!

Step 5: Bake the Chicken

With everything assembled, it’s time to bake! Transfer the skillet to your preheated oven and bake for 25-30 minutes. You’ll know it’s done when the chicken is cooked through and the cheese is bubbly and golden. Once baked, remove the skillet from the oven and let it rest for a few minutes. This resting time allows the juices to redistribute, ensuring each bite is juicy and flavorful.

And there you have it! Your French Onion Chicken Bake is ready to be garnished and served. The combination of flavors and textures will surely delight your taste buds!

Variation of French Onion Chicken Bake Recipe

While the classic French Onion Chicken Bake Recipe is delicious as is, there are plenty of ways to switch things up! Whether you want to try different ingredients or explore various cooking methods, these variations can add a unique twist to your meal. Let’s dive into some alternative ingredients and cooking methods that can enhance your dish.

Alternative Ingredients

Sometimes, you might not have all the ingredients on hand, or you may want to try something new. Here are some alternative ingredients you can use:

  • Chicken Thighs: For a juicier option, consider using skinless chicken thighs instead of breasts. They add more flavor and tenderness.
  • Vegetable Broth: If you prefer a lighter dish, swap beef broth for vegetable broth. This change keeps the dish flavorful while making it vegetarian-friendly.
  • Different Cheeses: Feel free to experiment with other cheeses! Cheddar, mozzarella, or even blue cheese can create a different flavor profile.
  • Fresh Herbs: Instead of dried thyme, try using fresh herbs like rosemary or parsley for a burst of freshness.
  • Mushrooms: Adding sliced mushrooms can enhance the umami flavor and add a nice texture to the dish.

These alternative ingredients can help you customize the French Onion Chicken Bake Recipe to suit your taste preferences or dietary needs.

Different Cooking Methods

In addition to changing ingredients, you can also explore different cooking methods to prepare your French Onion Chicken Bake. Here are a few options:

  • Slow Cooker: For a hands-off approach, use a slow cooker. Simply layer the ingredients in the slow cooker and cook on low for 6-8 hours. This method allows the flavors to meld beautifully.
  • Instant Pot: If you’re short on time, the Instant Pot is a great option. Sauté the onions and chicken in the pot, then add the broth and cook on high pressure for about 10 minutes.
  • Grill: For a smoky flavor, grill the chicken instead of baking it. After grilling, top it with the onion mixture and cheese, then place it under the broiler for a few minutes to melt the cheese.

These cooking methods can add variety to your meal prep and make the French Onion Chicken Bake Recipe even more enjoyable. So, don’t hesitate to get creative in the kitchen!

Cooking Note for French Onion Chicken Bake Recipe

When preparing the French Onion Chicken Bake Recipe, there are a few important cooking notes to keep in mind. These tips will help ensure that your dish turns out perfectly every time, enhancing both flavor and texture.

First, the choice of chicken is crucial. While boneless, skinless chicken breasts are the traditional choice, using chicken thighs can add extra moisture and flavor. Thighs tend to be juicier, making them a great option if you prefer a richer taste.

Next, the caramelization of the onions is key to achieving that sweet, rich flavor. Be patient while sautéing them. Stir occasionally, but allow them to sit for a bit to develop that beautiful golden color. If you find the onions are browning too quickly, lower the heat to prevent burning.

Another important note is to scrape the bottom of the skillet when adding the beef broth. This step releases the flavorful browned bits stuck to the pan, which adds depth to your sauce. Don’t skip this step, as it’s where much of the flavor comes from!

When it comes to cheese, feel free to mix and match. Gruyère and Parmesan are fantastic, but you can also try adding mozzarella for extra stretchiness or a sprinkle of goat cheese for a tangy twist. Just remember to keep an eye on the cheese while baking to prevent it from burning.

Lastly, let the dish rest for a few minutes after baking. This resting period allows the juices to redistribute throughout the chicken, ensuring each bite is juicy and flavorful. It also makes serving easier, as the dish will hold together better.

By following these cooking notes, you’ll elevate your French Onion Chicken Bake Recipe to new heights, making it a dish that everyone will love!

Serving Suggestions for French Onion Chicken Bake Recipe

Once your French Onion Chicken Bake is ready, it’s time to think about how to serve it! This dish is not only delicious but also versatile, making it easy to pair with various sides and accompaniments. Here are some serving suggestions to elevate your meal:

  • Crusty Bread: Serve the chicken bake with a side of crusty French bread or a baguette. This is perfect for soaking up the flavorful sauce and caramelized onions.
  • Green Salad: A fresh green salad with mixed greens, cherry tomatoes, and a light vinaigrette can balance the richness of the dish. The crispness of the salad adds a refreshing contrast.
  • Roasted Vegetables: Pair the chicken bake with roasted vegetables like carrots, zucchini, or Brussels sprouts. The caramelized flavors of the veggies complement the dish beautifully.
  • Mashed Potatoes: For a heartier meal, serve the French Onion Chicken Bake over creamy mashed potatoes. The potatoes will soak up the savory sauce, making each bite delightful.
  • Rice or Quinoa: If you prefer a lighter option, consider serving the chicken over a bed of rice or quinoa. This adds a nutritious element while keeping the focus on the chicken and cheese.

Don’t forget to garnish your dish with freshly chopped parsley before serving! This adds a pop of color and a hint of freshness that brightens up the plate. With these serving suggestions, your French Onion Chicken Bake will be a hit at any dinner table!
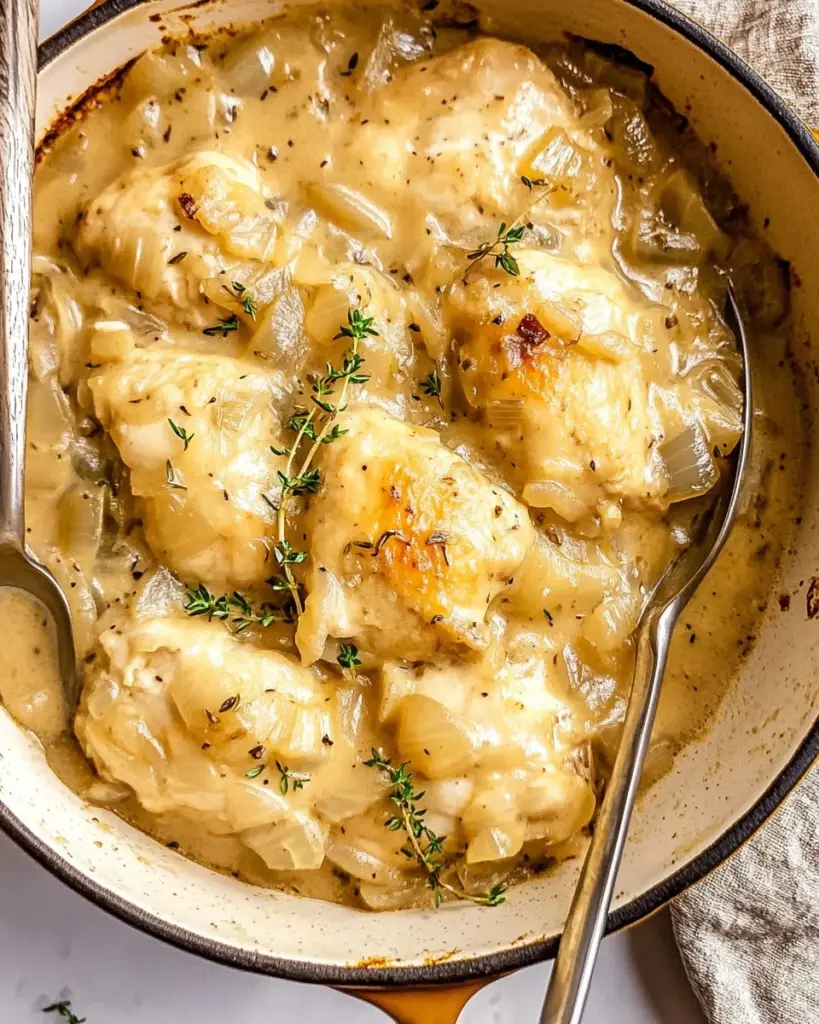
Tips for Perfecting Your French Onion Chicken Bake Recipe

To make your French Onion Chicken Bake Recipe truly exceptional, consider these helpful tips. Each suggestion is designed to enhance the flavors and textures of your dish, ensuring that every bite is a delight. Let’s explore how to perfect this comforting meal!

First, always use fresh ingredients. Fresh onions, garlic, and herbs will elevate the taste of your dish. Fresh ingredients have more flavor and aroma, making your French Onion Chicken Bake even more delicious.

Next, don’t rush the caramelization of the onions. Take your time to cook them slowly over medium heat. This process can take about 10-12 minutes, but it’s worth the wait. Properly caramelized onions add a sweet and rich flavor that is essential to the dish.

When seasoning the chicken, be generous with salt and pepper. This step is crucial for enhancing the chicken’s natural flavors. You can also add a pinch of smoked paprika for a subtle smokiness that complements the dish beautifully.

For a creamier texture, consider adding a splash of heavy cream to the beef broth before pouring it into the skillet. This addition will create a luscious sauce that pairs perfectly with the chicken and cheese.

Another tip is to let the cheese melt properly. If you want a beautifully golden and bubbly cheese topping, broil the dish for the last few minutes of baking. Just keep a close eye on it to prevent burning!

Lastly, don’t forget to let the dish rest after baking. This resting time allows the flavors to meld and the juices to redistribute, making each serving juicy and flavorful. It also makes it easier to serve, as the dish will hold its shape better.

By following these tips, you’ll be well on your way to creating a French Onion Chicken Bake that’s not only delicious but also memorable. Enjoy the process and savor the delightful flavors!

Breakdown of Time for French Onion Chicken Bake Recipe

Understanding the time commitment for the French Onion Chicken Bake Recipe can help you plan your cooking session effectively. Here’s a detailed breakdown of the time required for preparation and cooking, ensuring you can enjoy this delicious dish without any surprises!

Prep Time

The prep time for this recipe is approximately 15-20 minutes. During this time, you will gather all your ingredients, season the chicken, and slice the onions and garlic. Having everything ready before you start cooking will make the process smoother and more enjoyable.

Cooking Time

Once you’ve prepped your ingredients, the cooking time will take about 30-35 minutes. This includes searing the chicken, caramelizing the onions, and baking the dish in the oven. The combination of these steps ensures that the chicken is juicy and the flavors meld beautifully.

Total Time

In total, you can expect to spend around 50-55 minutes from start to finish. This includes both prep and cooking time. With this efficient timeline, you can have a hearty and flavorful meal ready to serve in less than an hour!

Now that you have a clear understanding of the time involved, you can confidently prepare your French Onion Chicken Bake Recipe. Enjoy the cooking process and the delightful aromas that will fill your kitchen!

Nutritional Information for French Onion Chicken Bake Recipe

Understanding the nutritional information of the French Onion Chicken Bake Recipe is essential for those who are mindful of their dietary intake. This dish not only satisfies your taste buds but also provides a good balance of nutrients. Let’s break down the key nutritional components per serving.

Calories

Each serving of the French Onion Chicken Bake contains approximately 450 calories. This calorie count makes it a hearty meal option without being overly indulgent. The combination of chicken, cheese, and onions contributes to the overall caloric content, providing energy for your day.

Protein

One of the standout features of this dish is its high protein content. Each serving offers about 45 grams of protein. This makes it an excellent choice for those looking to increase their protein intake, whether for muscle building or simply to feel fuller for longer. The chicken is the primary source of protein, ensuring you get a nutritious meal.

Sodium

When it comes to sodium, each serving contains around 800 milligrams. While this is a reasonable amount for a savory dish, it’s important to be mindful if you are watching your sodium intake. You can reduce the sodium content by using low-sodium beef broth or adjusting the amount of Worcestershire sauce used in the recipe. This way, you can enjoy the flavors without compromising your dietary needs.

Overall, the French Onion Chicken Bake Recipe is a well-rounded meal that provides a good mix of calories, protein, and flavor. By being aware of the nutritional information, you can enjoy this dish while keeping your health goals in mind!

FAQs about French Onion Chicken Bake Recipe

Can I use different types of cheese in the French Onion Chicken Bake Recipe?

Absolutely! While Gruyère and Parmesan are the traditional choices, you can experiment with various cheeses to suit your taste. Cheddar cheese adds a sharp flavor, while mozzarella provides a gooey texture. If you’re feeling adventurous, try blue cheese for a bold twist. Just remember to choose cheeses that melt well for the best results!

How can I make the French Onion Chicken Bake Recipe healthier?

There are several ways to lighten up the French Onion Chicken Bake Recipe without sacrificing flavor. First, consider using skinless chicken thighs instead of breasts for added moisture and flavor. You can also substitute the beef broth with low-sodium vegetable broth to reduce sodium content. Additionally, using less cheese or opting for lower-fat cheese varieties can help cut calories. Finally, serve the dish with a side of steamed vegetables or a fresh salad to increase the nutritional value of your meal.

What side dishes pair well with the French Onion Chicken Bake Recipe?

This dish is versatile and pairs well with a variety of side dishes. For a classic touch, serve it with crusty French bread or a baguette to soak up the delicious sauce. A fresh green salad with a light vinaigrette adds a refreshing contrast to the rich flavors. Roasted vegetables, such as carrots or Brussels sprouts, complement the dish beautifully. If you’re looking for something heartier, creamy mashed potatoes or rice can be excellent choices to round out your meal.

Can I prepare the French Onion Chicken Bake Recipe in advance?

Yes, you can prepare the French Onion Chicken Bake Recipe in advance! To do this, follow the recipe up to the baking step. Once you’ve assembled the dish, cover it tightly and store it in the refrigerator for up to 24 hours. When you’re ready to bake, simply preheat the oven and bake as directed. You may need to add a few extra minutes to the cooking time if the dish is cold from the fridge. This makes it a great option for meal prep or entertaining!

Conclusion on French Onion Chicken Bake Recipe

In conclusion, the French Onion Chicken Bake Recipe is a delightful dish that brings together the comforting flavors of caramelized onions, tender chicken, and rich cheeses. It’s a perfect meal for any occasion, whether it’s a cozy family dinner or a gathering with friends. The simplicity of the recipe, combined with its delicious taste, makes it a go-to choice for both novice and experienced cooks alike.

As you’ve seen, this recipe is versatile, allowing for various ingredient substitutions and cooking methods. You can easily tailor it to suit your preferences or dietary needs. Whether you choose to use chicken thighs for added juiciness or experiment with different cheeses, the possibilities are endless!

Moreover, the nutritional benefits of this dish, including its high protein content and satisfying flavors, make it a wholesome option for your meal planning. With just a little preparation and attention to detail, you can create a dish that not only tastes amazing but also nourishes your body.

So, gather your ingredients, follow the steps, and enjoy the process of making this French Onion Chicken Bake. Your kitchen will be filled with mouthwatering aromas, and your family and friends will surely be impressed. Happy cooking!
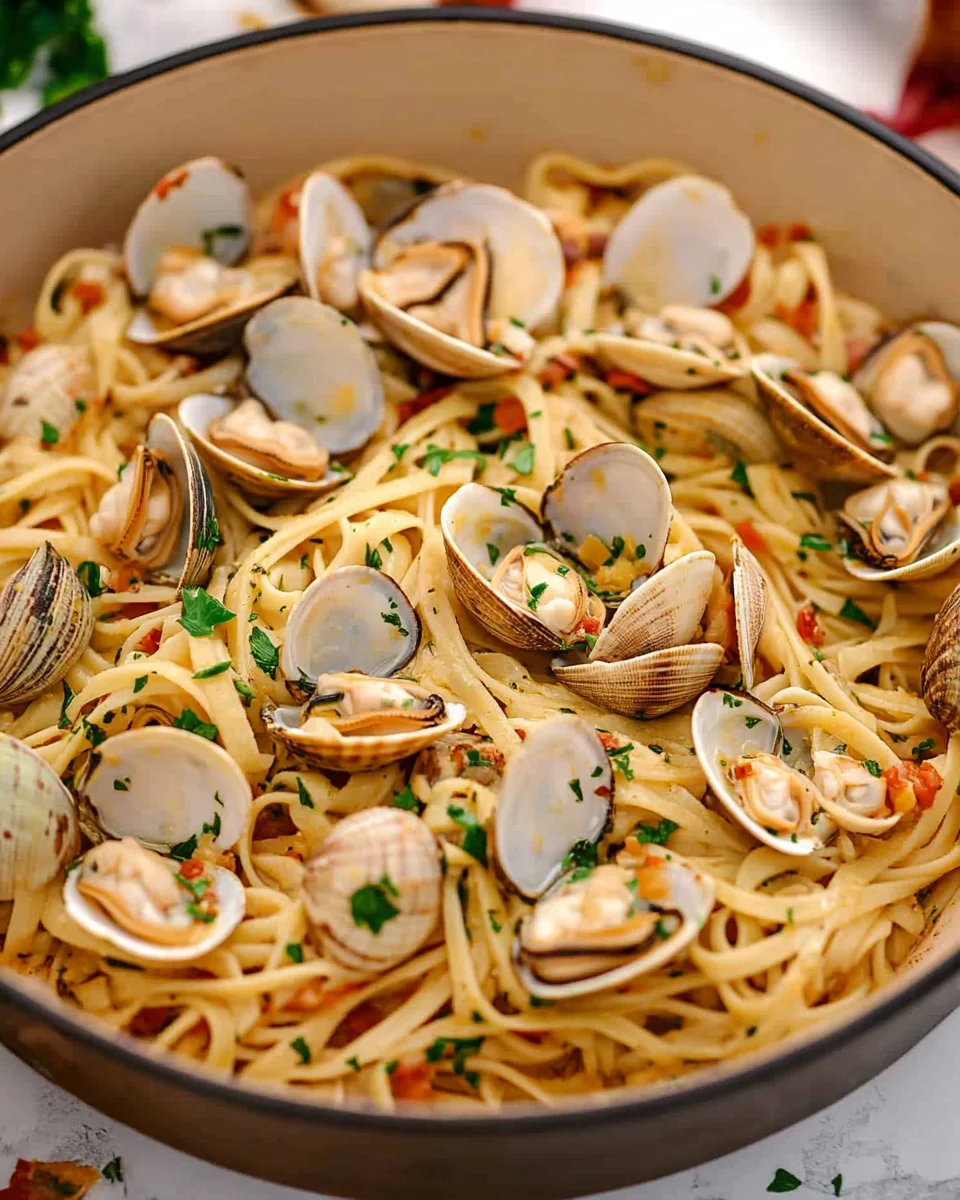
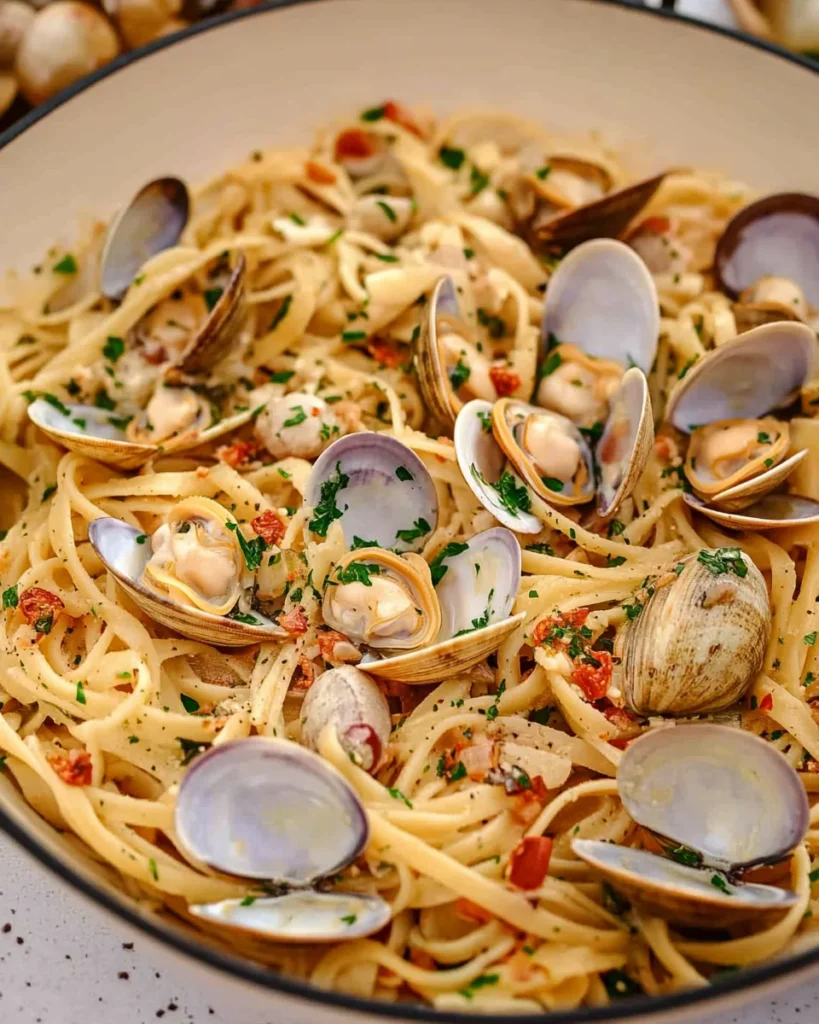
Linguine with Clams Recipe is a must-try dish!

Introduction to Linguine with Clams Recipe

The Origin of Linguine with Clams

Linguine with clams is a classic Italian dish that hails from the coastal regions of Italy, particularly in the area of Naples. This delightful recipe showcases the fresh flavors of the sea, combining tender linguine pasta with succulent clams. The dish is often prepared with simple ingredients, allowing the natural taste of the clams to shine through. Traditionally, it is known as “Linguine alle Vongole,” which translates to linguine with clams. Over the years, it has gained popularity worldwide, becoming a staple in Italian restaurants and home kitchens alike.

Why You Should Try This Linguine with Clams Recipe

If you’re looking for a quick yet impressive meal, this linguine with clams recipe is perfect for you. Not only is it easy to prepare, but it also brings a taste of the ocean right to your table. The combination of garlic, white wine, and fresh clams creates a rich and flavorful sauce that clings beautifully to the pasta. Plus, it’s a great way to introduce seafood into your diet, providing essential nutrients like protein and omega-3 fatty acids. Whether you’re hosting a dinner party or enjoying a cozy night in, this dish is sure to impress your guests and satisfy your taste buds.

Ingredients for Linguine with Clams Recipe

To create a delicious linguine with clams recipe, you’ll need a few fresh ingredients that come together to make a delightful meal. Here’s what you’ll need:

  • 8 ounces linguine pasta
  • 2 tablespoons olive oil
  • 4 cloves garlic, minced
  • 1/2 teaspoon red pepper flakes (adjust to taste)
  • 1 cup dry white wine
  • 2 pounds fresh clams, scrubbed and rinsed
  • 1/4 cup fresh parsley, chopped
  • 1 tablespoon lemon juice
  • Salt and pepper to taste
  • Grated Parmesan cheese (optional, for serving)

These ingredients are not only simple but also readily available at most grocery stores. The fresh clams are the star of the dish, providing a briny flavor that pairs perfectly with the linguine. The garlic and red pepper flakes add a nice kick, while the white wine creates a rich sauce that enhances the overall taste. Don’t forget the parsley and lemon juice, as they add freshness and brightness to the dish. If you want to elevate your meal, consider adding a sprinkle of grated Parmesan cheese on top before serving.

Now that you have your ingredients ready, let’s move on to the step-by-step preparation of this delightful linguine with clams recipe!

Step-by-Step Preparation of Linguine with Clams Recipe

Step 1: Preparing the Clams

Before you start cooking, it’s essential to prepare the clams properly. First, scrub the clams under cold running water. This helps remove any sand or grit. You can use a brush to clean the shells thoroughly. After scrubbing, soak the clams in a bowl of cold water for about 20 minutes. This allows them to expel any remaining sand. Once they’ve soaked, rinse them again under cold water. Discard any clams that are open and do not close when tapped. These clams are not fresh and should not be used.

Step 2: Cooking the Linguine

Next, it’s time to cook the linguine. Bring a large pot of salted water to a rolling boil. The salt enhances the pasta’s flavor. Add the linguine and cook according to the package instructions until it reaches an al dente texture. This usually takes about 8-10 minutes. Remember to stir occasionally to prevent sticking. Once cooked, reserve 1/2 cup of the pasta water, then drain the linguine in a colander. Set it aside while you prepare the sauce.

Step 3: Making the Sauce

Now, let’s create the flavorful sauce. In a large skillet, heat 2 tablespoons of olive oil over medium heat. Once the oil is hot, add the minced garlic and red pepper flakes. Sauté for about 1 minute until the garlic becomes fragrant, but be careful not to let it burn. Next, pour in 1 cup of dry white wine. Bring the mixture to a simmer and let it cook for 2-3 minutes. This helps to reduce the wine slightly, intensifying the flavor.

Step 4: Combining Linguine and Clams

After the sauce has simmered, it’s time to add the clams. Carefully place the prepared clams into the skillet and cover it with a lid. Cook for about 5-7 minutes, or until the clams have opened. Discard any clams that remain closed. Once the clams are ready, stir in the cooked linguine, along with the reserved pasta water, chopped parsley, lemon juice, salt, and pepper. Toss everything together gently until well combined and heated through. Your delicious linguine with clams is now ready to serve!

Variation of Linguine with Clams Recipe

Alternative Ingredients for a Unique Twist

If you’re looking to switch things up, there are plenty of alternative ingredients you can use in your linguine with clams recipe. For instance, consider adding a splash of cream to the sauce for a richer flavor. This will create a delightful creamy sauce that pairs beautifully with the clams. You can also experiment with different types of seafood. Shrimp or scallops can be great substitutes for clams, offering a different texture and taste. If you want a bit more zest, try adding sun-dried tomatoes or artichoke hearts. These ingredients can add a burst of flavor and color to your dish.

Another fun twist is to incorporate different herbs. Instead of parsley, you might use basil or cilantro for a fresh, aromatic touch. You can also play with spices; a pinch of saffron can elevate the dish to a whole new level. Just remember to adjust the cooking time slightly if you’re using larger seafood, ensuring everything is cooked perfectly. With these variations, your linguine with clams recipe can become a new favorite every time you make it!

Vegetarian Options for Linguine with Clams Recipe

For those who prefer a vegetarian option, you can still enjoy a delicious linguine dish without clams. One popular alternative is to use mushrooms, particularly shiitake or portobello, which can mimic the umami flavor of clams. Simply sauté the mushrooms in olive oil until they are tender and add them to your sauce. You can also use zucchini noodles or whole wheat linguine for a healthier twist.

Another great option is to create a vegetable-based sauce. Consider using roasted red peppers blended with garlic and olive oil for a vibrant sauce. You can also add seasonal vegetables like asparagus or spinach for added nutrition and flavor. These vegetarian variations not only maintain the essence of the original dish but also provide a fresh and exciting take on linguine with clams. Enjoy experimenting with these options to find your perfect vegetarian version!

Cooking Note for Linguine with Clams Recipe

When preparing your linguine with clams recipe, there are a few important cooking notes to keep in mind. First, always choose fresh clams for the best flavor. Fresh clams should have a clean, ocean-like smell and should be tightly closed. If any clams are open, give them a gentle tap. If they do not close, discard them as they are not fresh.

Another key point is to avoid overcooking the clams. They should only be cooked until they open, which usually takes about 5-7 minutes. Overcooked clams can become tough and chewy, detracting from the overall dish. If you’re unsure, it’s better to err on the side of caution and check them frequently.

Additionally, the reserved pasta water is a secret weapon in this recipe. It contains starch from the pasta, which helps to thicken the sauce and allows it to cling better to the linguine. If your sauce seems too dry, add a little more reserved pasta water until you reach your desired consistency.

Lastly, remember that the flavors of this dish improve with a little time. Allowing the linguine and clams to sit together for a minute before serving can help the pasta absorb the delicious sauce. This small step can elevate your dish, making it even more enjoyable. With these cooking notes in mind, you’re well on your way to creating a perfect linguine with clams recipe!

Serving Suggestions for Linguine with Clams Recipe

Pairing Wines with Linguine with Clams Recipe

When it comes to enjoying your linguine with clams recipe, the right wine can elevate your dining experience. A crisp, dry white wine is the perfect companion for this dish. Consider a Sauvignon Blanc or a Pinot Grigio. These wines have bright acidity that complements the briny flavor of the clams beautifully. If you prefer something a bit richer, a Chardonnay can also work well, especially if it’s unoaked. The creamy texture of the wine pairs nicely with the garlic and olive oil in the sauce.

For those who enjoy a bit of sparkle, a dry Prosecco can add a festive touch to your meal. The bubbles cleanse the palate and enhance the overall flavors of the dish. Remember to serve your wine chilled, as this will enhance its refreshing qualities. Pour a glass, sit back, and enjoy the delightful combination of flavors in your linguine with clams recipe!

Side Dishes to Complement Your Meal

To round out your meal, consider serving some delicious side dishes alongside your linguine with clams recipe. A simple green salad is always a great choice. Toss together mixed greens, cherry tomatoes, and a light vinaigrette for a refreshing contrast to the rich pasta. You can also add slices of avocado or nuts for extra texture and flavor.

Another excellent side is garlic bread. The buttery, garlicky goodness of the bread pairs perfectly with the linguine, allowing you to soak up any leftover sauce. If you’re looking for something a bit heartier, roasted vegetables like asparagus or zucchini can add a colorful and nutritious element to your meal.

Lastly, consider serving a light soup, such as a tomato basil or a minestrone, as a starter. This will warm up your guests and set the stage for the main course. With these side dishes, your linguine with clams recipe will shine even brighter, creating a well-rounded and satisfying dining experience.

Tips for Perfecting Your Linguine with Clams Recipe

Common Mistakes to Avoid

When making your linguine with clams recipe, avoiding common mistakes can make a big difference in the final dish. One frequent error is overcooking the pasta. Always cook the linguine until it’s al dente, as it will continue to cook when mixed with the sauce. If you overcook it, the pasta can become mushy and lose its texture.

Another mistake is not cleaning the clams properly. Skipping the scrubbing and soaking steps can lead to sandy clams, which can ruin your dish. Always ensure that your clams are fresh and clean before cooking. Discard any that do not open during cooking, as they are not safe to eat.

Additionally, be cautious with the amount of salt you add. Since clams are naturally salty, you may not need as much salt in your dish. Taste as you go to ensure the flavors are balanced. Lastly, avoid rushing the cooking process. Allowing the clams to open slowly in the wine creates a more flavorful sauce. Patience is key to achieving the best results!

Enhancing Flavor in Your Linguine with Clams Recipe

To take your linguine with clams recipe to the next level, consider a few flavor-enhancing tips. First, using high-quality olive oil can significantly impact the taste. A good extra virgin olive oil adds richness and depth to the dish. You can also experiment with different types of garlic. Fresh garlic is always best, but roasted garlic can add a sweet, mellow flavor.

Another way to enhance flavor is by adding fresh herbs. While parsley is traditional, you can also try basil or thyme for a unique twist. A sprinkle of red pepper flakes adds a nice kick, but adjust the amount to suit your taste. For a touch of brightness, consider adding a splash of lemon juice or zest just before serving. This will brighten the dish and enhance the overall flavor profile.

Lastly, don’t forget about the power of freshly grated cheese. A sprinkle of Parmesan cheese can add a savory note that complements the clams beautifully. Just remember to serve it on the side, as not everyone may want cheese with their seafood. With these tips, your linguine with clams recipe will be bursting with flavor and sure to impress!

Breakdown of Time for Linguine with Clams Recipe

Prep Time

Preparing your linguine with clams recipe is a breeze! The prep time typically takes about 20 minutes. This includes cleaning the clams, chopping the garlic and parsley, and measuring out your ingredients. Taking the time to prepare everything beforehand will make the cooking process smoother and more enjoyable. Remember, fresh clams need a little extra attention, so don’t rush this step!

Cooking Time

The cooking time for this delicious dish is around 15-20 minutes. First, you’ll cook the linguine for about 8-10 minutes until it’s al dente. While the pasta is cooking, you can prepare the sauce, which takes about 5-7 minutes. Finally, combining the linguine and clams will take an additional 2-3 minutes. This quick cooking time makes linguine with clams a fantastic option for a weeknight dinner or a last-minute gathering!

Total Time

In total, you can expect to spend about 35-40 minutes from start to finish when making your linguine with clams recipe. This includes both prep and cooking time. With such a short time commitment, you can enjoy a restaurant-quality meal right at home. So gather your ingredients, and get ready to impress your family and friends with this delightful dish!

Nutritional Information for Linguine with Clams Recipe

Calories

When it comes to enjoying your linguine with clams recipe, understanding the calorie content is essential. Each serving of this delightful dish contains approximately 450 calories. This makes it a satisfying meal that won’t weigh you down. The balance of pasta, clams, and olive oil provides a hearty yet healthy option for lunch or dinner. If you’re watching your calorie intake, consider adjusting portion sizes or pairing it with lighter side dishes.

Protein Content

Protein is an important part of any meal, and this linguine with clams recipe delivers! Each serving contains about 20 grams of protein. The clams are a fantastic source of lean protein, which is essential for muscle repair and overall health. Combining the clams with linguine not only makes for a delicious dish but also helps you meet your daily protein needs. This makes it a great option for those looking to maintain a balanced diet.

Sodium Levels

When preparing your linguine with clams recipe, it’s important to be mindful of sodium levels. Each serving contains around 800 milligrams of sodium. This is primarily due to the natural saltiness of the clams and any added salt during cooking. If you’re watching your sodium intake, consider using low-sodium broth or reducing the amount of added salt. Additionally, rinsing the clams thoroughly can help minimize excess sodium. Enjoying this dish in moderation can help you maintain a healthy diet while still indulging in its delicious flavors.

FAQs about Linguine with Clams Recipe

Can I use frozen clams for this recipe?

Yes, you can use frozen clams for your linguine with clams recipe! However, it’s important to thaw them properly before cooking. Place the frozen clams in the refrigerator overnight or run them under cold water for a quicker thaw. Keep in mind that frozen clams may not have the same fresh taste as live clams, but they can still work well in this dish. Just ensure they are fully cooked and opened during the cooking process.

What type of linguine is best for this dish?

For the best results, use traditional semolina linguine for your linguine with clams recipe. This type of pasta has a firm texture that holds up well against the sauce. You can also opt for whole wheat linguine for a healthier option, which adds a nutty flavor. If you’re looking for a gluten-free alternative, consider using gluten-free linguine made from rice or corn. Each type will provide a slightly different taste and texture, so choose one that suits your preference!

How can I make this recipe gluten-free?

Making your linguine with clams recipe gluten-free is simple! Just substitute traditional linguine with a gluten-free pasta option. There are many varieties available, such as rice, corn, or quinoa-based pasta. Be sure to check the cooking instructions on the package, as gluten-free pasta may require different cooking times. Additionally, ensure that all other ingredients, like the wine and seasonings, are gluten-free. With these adjustments, you can enjoy a delicious gluten-free version of this classic dish!

Can I prepare the sauce in advance?

Absolutely! You can prepare the sauce for your linguine with clams recipe in advance. Simply follow the steps for making the sauce, but stop before adding the clams. Allow the sauce to cool, then store it in an airtight container in the refrigerator for up to 2 days. When you’re ready to serve, reheat the sauce in a skillet, add the clams, and continue cooking until they open. This makes it a convenient option for busy weeknights or when hosting guests!

Conclusion on Linguine with Clams Recipe

In conclusion, the linguine with clams recipe is a delightful dish that brings the taste of the sea right to your kitchen. With its simple ingredients and quick preparation, it’s perfect for both busy weeknights and special occasions. The combination of fresh clams, garlic, and white wine creates a rich and flavorful sauce that pairs beautifully with the tender linguine. Plus, it’s a fantastic way to introduce seafood into your diet, offering numerous health benefits.

Whether you choose to stick to the classic recipe or experiment with variations, this dish is sure to impress. From adding a splash of cream for richness to substituting clams with shrimp or even creating a vegetarian version, the possibilities are endless. Remember to pay attention to the cooking notes and tips provided to ensure your dish turns out perfectly every time.

As you gather around the table to enjoy your linguine with clams, take a moment to appreciate the flavors and the joy of sharing a meal with loved ones. This recipe not only nourishes the body but also creates lasting memories. So, roll up your sleeves, gather your ingredients, and dive into the wonderful world of linguine with clams. Bon appétit!

Creamy Vegan Banana Pudding Recipe is a must-try dessert!

Introduction to Creamy Vegan Banana Pudding Recipe

Creamy Vegan Banana Pudding Recipe is here to tickle your taste buds! This dessert is not only delicious but also easy to make. With just a few simple ingredients, you can whip up a treat that everyone will love. Whether you’re vegan or just looking for a healthier dessert option, this recipe is perfect for you.

What Makes This Recipe Special?

This recipe stands out for several reasons. First, it’s completely plant-based, making it suitable for vegans and those with dairy allergies. The use of ripe bananas adds natural sweetness and flavor, while the creamy almond milk creates a rich texture. Plus, the addition of maple syrup gives it a delightful hint of caramel. The layers of crushed graham crackers provide a satisfying crunch, making each bite a delightful experience. It’s a dessert that combines simplicity with elegance, perfect for any occasion!

Benefits of Choosing Vegan Desserts

Choosing vegan desserts like this creamy banana pudding comes with numerous benefits. For starters, they are often lower in saturated fats and cholesterol, which can be better for heart health. Additionally, vegan desserts are typically made with whole, plant-based ingredients, providing more nutrients and fiber. This pudding is a great way to satisfy your sweet tooth without the guilt. Plus, it’s an excellent opportunity to introduce more fruits into your diet. So, why not treat yourself to a dessert that’s both delicious and nutritious?

Ingredients for Creamy Vegan Banana Pudding Recipe

Creamy Vegan Banana Pudding Recipe, you’ll need a handful of simple ingredients. Each component plays a vital role in achieving that perfect creamy texture and sweet flavor. Here’s what you’ll need:

  • 2 ripe bananas, sliced
  • 1 cup unsweetened almond milk
  • 1/4 cup maple syrup
  • 1/4 cup cornstarch
  • 1 teaspoon vanilla extract
  • 1/4 teaspoon salt
  • 1 cup vegan whipped topping
  • 1 cup crushed graham crackers

These ingredients are not only easy to find but also contribute to the overall healthiness of the dessert. The ripe bananas provide natural sweetness, while almond milk keeps it dairy-free. Maple syrup adds a rich flavor, and cornstarch helps thicken the pudding to perfection. The vegan whipped topping gives it that creamy finish, and the graham crackers add a delightful crunch. With these ingredients, you’re well on your way to making a delicious vegan treat!

Step-by-Step Preparation of Creamy Vegan Banana Pudding Recipe

Creamy Vegan Banana Pudding Recipe. Follow these simple steps to create a delicious dessert that will impress everyone!

Step 1: Preparing the Base

unsweetened almond milk, followed by the maple syrup. Next, add the cornstarch, vanilla extract, and salt. Whisk these ingredients together until the mixture is smooth and well combined. This step is crucial as it sets the foundation for your pudding.

Step 2: Mixing the Ingredients

Once your base is ready, place the saucepan over medium heat. Stir the mixture constantly with a whisk or a spatula. This helps prevent any lumps from forming. Keep stirring until the mixture thickens and starts to bubble, which should take about 5-7 minutes. You’ll notice it transforming into a creamy pudding-like consistency. When it reaches this stage, remove the saucepan from the heat and let it cool for about 10 minutes.

Step 3: Assembling the Pudding

vegan whipped topping. Gently fold it into the pudding mixture until fully combined. This will give your pudding that light and airy texture. Now, grab a serving dish and start layering! Begin with half of the sliced bananas, then add half of the pudding mixture, followed by half of the crushed graham crackers. Repeat these layers with the remaining ingredients. This creates a beautiful presentation and ensures every bite is packed with flavor.

Step 4: Chilling the Pudding

Creamy Vegan Banana Pudding!

Variations of Creamy Vegan Banana Pudding Recipe

Creamy Vegan Banana Pudding Recipe is delightful as is, there are many ways to customize it to suit your taste. Let’s explore some fun variations that can elevate your dessert experience!

Adding Different Flavors

If you’re looking to mix things up, consider adding different flavors to your pudding. For a chocolate twist, simply stir in 2 tablespoons of cocoa powder into the pudding mixture before cooking. This will give your dessert a rich, chocolatey flavor that chocolate lovers will adore. Alternatively, you can add a teaspoon of almond extract for a nutty taste or a sprinkle of cinnamon for a warm, spicy kick. The possibilities are endless, and experimenting with flavors can make your pudding even more exciting!

Alternative Sweeteners

While maple syrup is a fantastic natural sweetener, you can also try other options. Agave nectar or coconut sugar can be used as substitutes, providing a different sweetness profile. If you prefer a sugar-free option, consider using stevia or monk fruit sweetener. Just remember to adjust the quantity according to your taste, as these sweeteners can be much sweeter than maple syrup. This way, you can enjoy your pudding while keeping it aligned with your dietary preferences!

Gluten-Free Options

Creamy Vegan Banana Pudding Recipe can easily be made gluten-free. Simply ensure that the graham crackers you use are labeled gluten-free. Many brands offer delicious gluten-free options that will work perfectly in this recipe. Additionally, you can substitute the graham crackers with crushed gluten-free cookies or even granola for a different texture. This way, everyone can enjoy this delightful dessert without worry!

Cooking Note for Creamy Vegan Banana Pudding Recipe

Creamy Vegan Banana Pudding Recipe, there are a few important cooking notes to keep in mind. These tips will help ensure that your pudding turns out perfectly every time!

First, make sure to use ripe bananas. Ripe bananas are sweeter and have a softer texture, which enhances the overall flavor of the pudding. If your bananas are still green, they may not provide the same delicious taste.

Next, when mixing the cornstarch with the almond milk, whisk thoroughly to avoid lumps. A smooth mixture is key to achieving that creamy consistency. If you do notice any lumps while cooking, don’t worry! You can use an immersion blender to smooth it out before adding the whipped topping.

Also, be patient while cooking the pudding base. Stirring constantly is essential to prevent it from sticking to the bottom of the saucepan. If you notice it thickening too quickly, reduce the heat slightly. This will help you achieve the perfect pudding texture without burning.

Lastly, allow the pudding to cool for at least 10 minutes before folding in the vegan whipped topping. This step is crucial as it helps maintain the light and airy texture of the whipped topping. If the pudding is too hot, it may cause the whipped topping to melt, resulting in a denser pudding.

By following these cooking notes, you’ll be well on your way to creating a delicious and creamy vegan banana pudding that everyone will love!

Serving Suggestions for Creamy Vegan Banana Pudding Recipe

Creamy Vegan Banana Pudding Recipe is ready, it’s time to think about how to serve it! Presentation can elevate your dessert experience, making it even more enjoyable. Here are some delightful serving suggestions to consider.

Garnishing Ideas

Garnishing your pudding can add a touch of elegance and flavor. Here are some simple yet effective ideas:

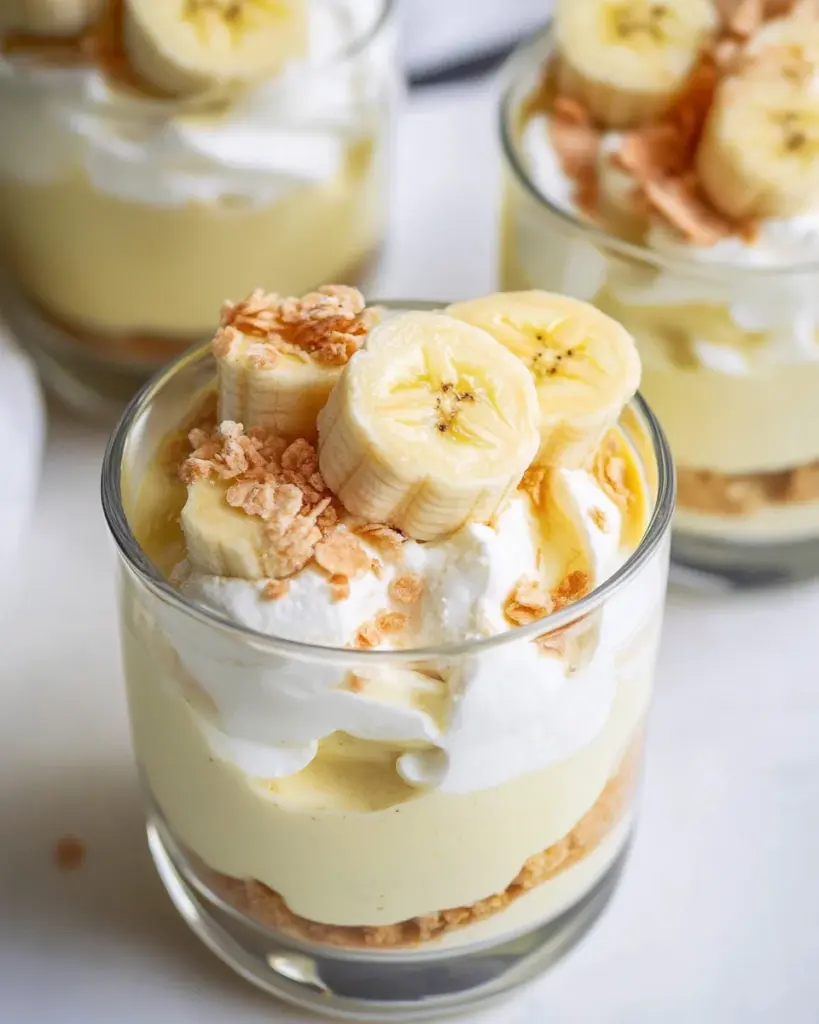
  • Sliced Bananas: Top your pudding with fresh banana slices for a pop of color and extra flavor.
  • Chopped Nuts: Sprinkle some chopped walnuts or pecans on top for a crunchy texture that complements the creaminess.
  • Shredded Coconut: Add a sprinkle of shredded coconut for a tropical twist that pairs beautifully with bananas.
  • Cocoa Powder: Dust a little cocoa powder or cinnamon on top for a hint of spice and visual appeal.
  • Mint Leaves: A few fresh mint leaves can add a refreshing touch and a splash of green to your dessert.

These garnishes not only enhance the look of your pudding but also add layers of flavor that will delight your guests!

Pairing with Other Desserts

Creamy Vegan Banana Pudding Recipe with other sweet treats. Here are some ideas:

  • Vegan Chocolate Cake: The rich flavors of chocolate cake complement the sweetness of banana pudding perfectly.
  • Fruit Salad: A light fruit salad can balance the creaminess of the pudding, providing a refreshing contrast.
  • Vegan Cookies: Serve with a side of vegan cookies, like oatmeal or peanut butter, for a delightful combination.
  • Ice Cream: A scoop of vegan ice cream can take your dessert to the next level, especially on a warm day.
  • Brownies: Pairing with fudgy vegan brownies creates a rich and satisfying dessert platter.

These pairing options can enhance your dessert table, making it a feast for both the eyes and the taste buds. Enjoy your creamy vegan banana pudding with these delightful accompaniments!

Tips for Perfecting Your Creamy Vegan Banana Pudding Recipe

Creamy Vegan Banana Pudding Recipe turns out perfectly every time, it’s essential to keep a few tips in mind. These insights will help you avoid common pitfalls and enhance your dessert-making skills!

Common Mistakes to Avoid

Even the best cooks can make mistakes! Here are some common errors to watch out for:

  • Using Unripe Bananas: Unripe bananas lack the sweetness and creaminess that ripe bananas provide. Always choose bananas that are yellow with a few brown spots for the best flavor.
  • Not Whisking Enough: When mixing the cornstarch with almond milk, make sure to whisk thoroughly. This prevents lumps and ensures a smooth pudding base.
  • Overcooking the Pudding: Cooking the pudding for too long can lead to a rubbery texture. Keep an eye on it and remove it from heat as soon as it thickens and bubbles.
  • Skipping the Cooling Step: Allowing the pudding to cool before adding the whipped topping is crucial. If it’s too hot, the topping may melt, resulting in a denser pudding.
  • Not Layering Properly: When assembling, make sure to layer evenly. This ensures that every bite has a balanced mix of bananas, pudding, and graham crackers.

By avoiding these common mistakes, you’ll be on your way to creating a delicious and creamy vegan banana pudding that everyone will love!

Storage Tips

Creamy Vegan Banana Pudding Recipe fresh and tasty. Here are some helpful storage tips:

  • Refrigeration: Store your pudding in an airtight container in the refrigerator. This will keep it fresh for up to 3 days.
  • Layering Before Serving: If you plan to store leftovers, consider keeping the layers separate. This way, the graham crackers won’t become soggy.
  • Freezing: While it’s best enjoyed fresh, you can freeze the pudding for up to a month. Just remember to thaw it in the refrigerator before serving.
  • Fresh Bananas: If you have leftover bananas, add them just before serving to maintain their freshness and prevent browning.

By following these storage tips, you can enjoy your creamy vegan banana pudding for days to come, ensuring it remains a delightful treat!

Breakdown of Time for Creamy Vegan Banana Pudding Recipe

Creamy Vegan Banana Pudding Recipe can help you plan better. Here’s a quick breakdown of the time required for preparation, cooking, and chilling.

Prep Time

The prep time for this delicious pudding is quite short. You’ll need about 15 minutes to gather your ingredients and prepare the pudding base. This includes slicing the bananas and measuring out the almond milk, maple syrup, cornstarch, vanilla extract, and salt. It’s a quick and easy process that sets the stage for your delightful dessert!

Cooking Time

Once your ingredients are ready, the cooking time is approximately 5-7 minutes. During this time, you’ll be stirring the mixture over medium heat until it thickens and bubbles. This step is crucial for achieving that creamy texture. Just keep an eye on it, and you’ll have a perfect pudding base in no time!

Total Time

In total, you can expect to spend around 2 hours and 15 minutes from start to finish. This includes the 2 hours of chilling time after assembling the pudding. The chilling period is essential as it allows the flavors to meld and the pudding to set properly. So, while the active time is minimal, the waiting time is what makes this dessert truly special!

Nutritional Information for Creamy Vegan Banana Pudding Recipe

Creamy Vegan Banana Pudding Recipe is essential for making informed choices. This dessert not only satisfies your sweet cravings but also provides some nutritional benefits. Let’s break down the key nutritional components per serving.

Calories

Each serving of this delightful pudding contains approximately 210 calories. This makes it a relatively light dessert option, especially when compared to traditional puddings that often contain heavy cream and added sugars. The use of natural ingredients like ripe bananas and almond milk helps keep the calorie count in check while still delivering a satisfying treat.

Protein Content

In terms of protein, this creamy pudding offers about 2 grams per serving. While this may seem low, it’s important to remember that desserts are typically not high in protein. However, the inclusion of almond milk does provide some plant-based protein, making it a better choice than many other sugary desserts. If you’re looking to boost the protein content, consider adding a scoop of your favorite plant-based protein powder to the pudding mixture before cooking.

Sodium Levels

The sodium content in this recipe is around 100 milligrams per serving. This is relatively low, especially for a dessert. The small amount of salt used in the recipe enhances the flavors without adding excessive sodium. Keeping sodium levels low is beneficial for heart health, making this pudding a heart-friendly dessert option.

Creamy Vegan Banana Pudding Recipe is a delicious and nutritious choice. With its balanced calorie count, modest protein content, and low sodium levels, you can enjoy this dessert without any guilt. It’s a sweet treat that fits well into a healthy lifestyle!

FAQs about Creamy Vegan Banana Pudding Recipe

Can I use regular bananas instead of ripe ones?

Creamy Vegan Banana Pudding Recipe. Ripe bananas are sweeter and softer, which enhances the flavor and texture of the pudding. If you use unripe bananas, the pudding may lack the natural sweetness and creamy consistency that ripe bananas provide. For the best results, choose bananas that are yellow with a few brown spots. This ensures a deliciously sweet and creamy dessert!

How long can I store the pudding?

Creamy Vegan Banana Pudding in an airtight container in the refrigerator for up to 3 days. However, it’s best to consume it within the first couple of days for optimal freshness. If you have leftovers, consider keeping the layers separate. This way, the graham crackers won’t become soggy. Just remember to add fresh banana slices just before serving to maintain their freshness!

Is this recipe nut-free?

Creamy Vegan Banana Pudding Recipe is not inherently nut-free due to the use of almond milk. However, you can easily make it nut-free by substituting almond milk with a nut-free alternative, such as oat milk or soy milk. These options will still provide a creamy texture without the use of nuts. Always check the labels to ensure that the milk you choose is free from any nut contamination if you have allergies.

Can I make this pudding ahead of time?

Creamy Vegan Banana Pudding ahead of time is a great idea. Preparing it a day in advance allows the flavors to meld beautifully, resulting in a more delicious dessert. Just remember to cover it tightly with plastic wrap or store it in an airtight container in the refrigerator. This way, you can enjoy a delightful treat without any last-minute preparation on the day you plan to serve it!

Conclusion on Creamy Vegan Banana Pudding Recipe

Creamy Vegan Banana Pudding Recipe is a delightful dessert that brings joy to any occasion. Its creamy texture, combined with the natural sweetness of ripe bananas and the crunch of graham crackers, creates a perfect balance of flavors. This recipe is not only easy to make but also offers a healthier alternative to traditional puddings, making it suitable for everyone, including those following a vegan lifestyle.

By incorporating simple, wholesome ingredients, you can create a dessert that is both satisfying and nutritious. The variations and tips provided allow you to customize the pudding to your liking, ensuring that it remains a favorite in your household. Whether you’re serving it at a family gathering, a potluck, or simply enjoying it at home, this pudding is sure to impress.

Creamy Vegan Banana Pudding Recipe is bound to become a staple in your dessert repertoire. Enjoy every spoonful, and share the joy of this delicious treat with friends and family!

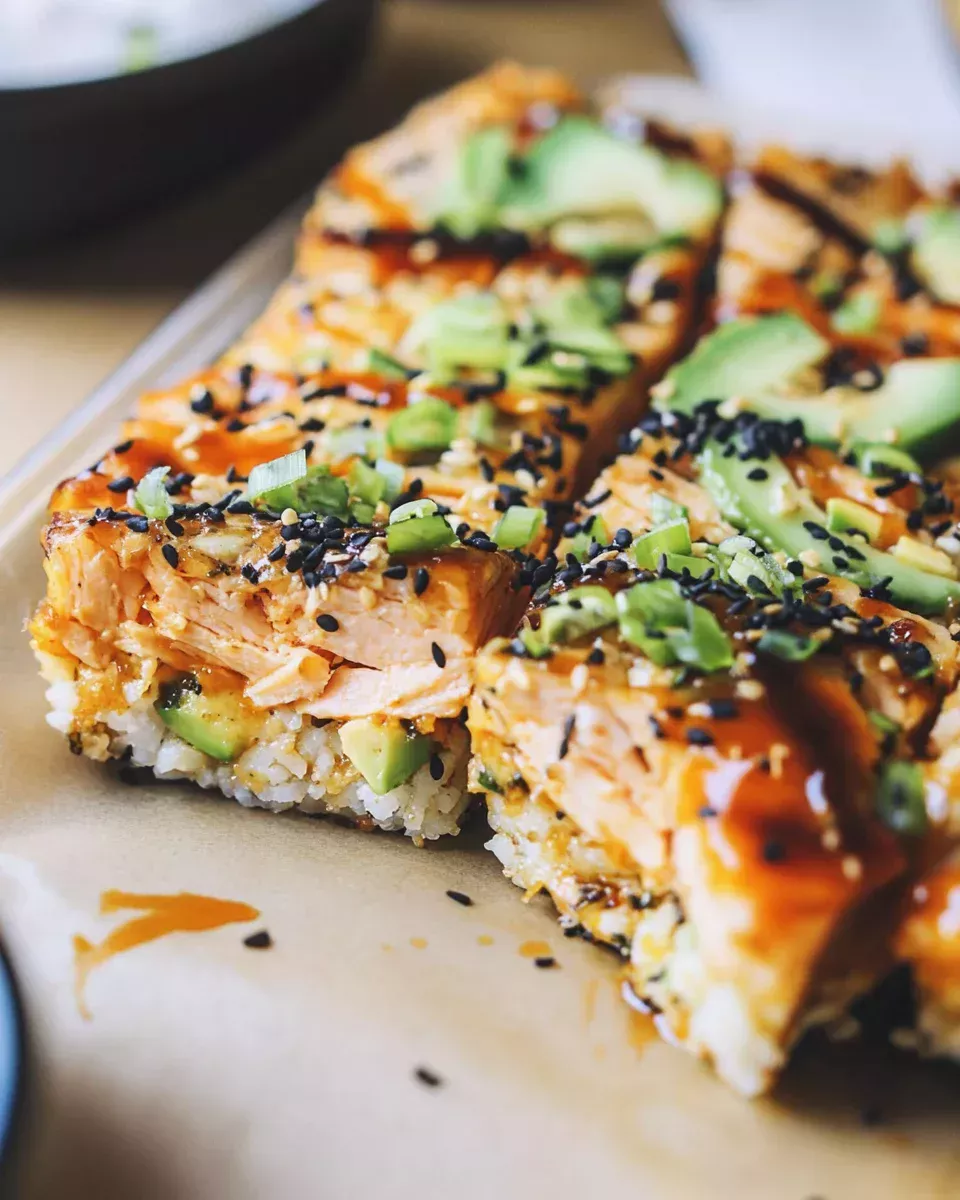
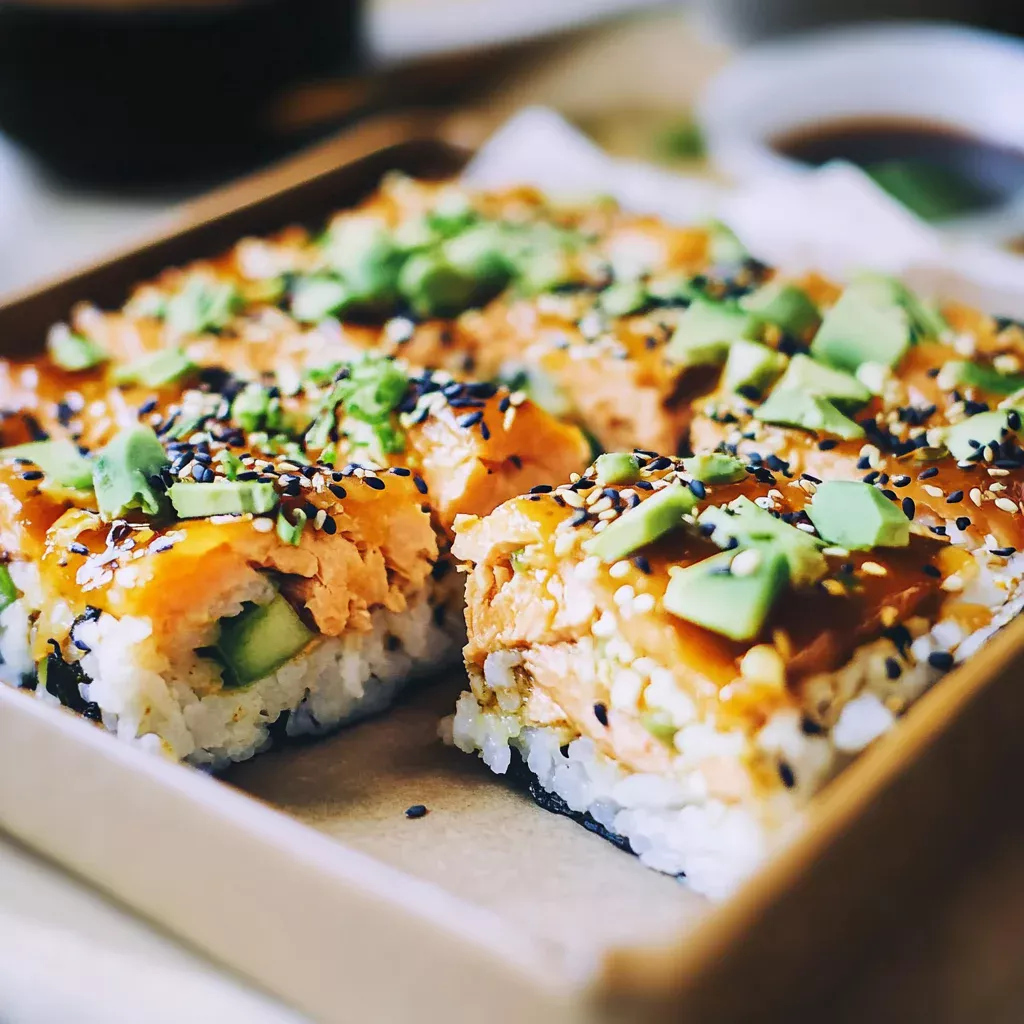
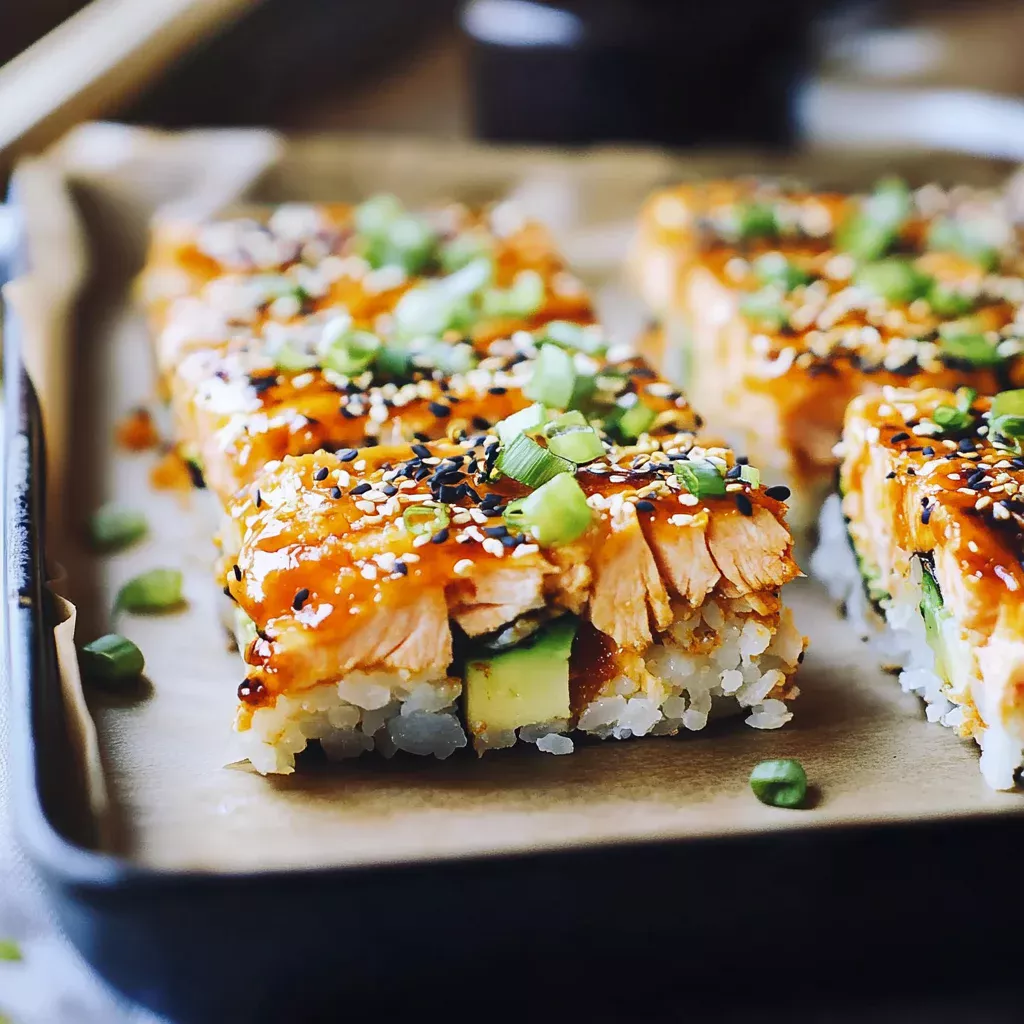
Miso Butter Salmon with Scallions is a must-try dish!

Introduction to Miso Butter Salmon with Scallions

Miso Butter Salmon with Scallions is a delightful dish that brings together the rich flavors of miso and the freshness of scallions. This recipe is not only easy to prepare but also offers a unique twist on traditional salmon dishes. The combination of miso paste, butter, and honey creates a savory glaze that enhances the natural taste of the salmon. Plus, the sizzled scallions add a crunchy texture and a burst of flavor that elevates the entire meal.

What Makes Miso Butter Salmon with Scallions Special?

What sets Miso Butter Salmon with Scallions apart is its perfect balance of flavors. The umami from the miso paste pairs beautifully with the sweetness of honey and the saltiness of soy sauce. This harmony makes each bite a delightful experience. Additionally, the use of butter adds a creamy richness that complements the fish perfectly.

Another reason this dish shines is its versatility. You can easily swap out the salmon for other proteins, like trout or chicken, making it suitable for various dietary preferences. The cooking method is straightforward, allowing even novice cooks to impress their family and friends with a gourmet meal.

Moreover, Miso Butter Salmon with Scallions is packed with nutrients. Salmon is an excellent source of omega-3 fatty acids, which are beneficial for heart health. When served with rice or quinoa, this dish becomes a wholesome meal that is both satisfying and nourishing.

In summary, Miso Butter Salmon with Scallions is a special dish that combines rich flavors, nutritional benefits, and cooking ease. Whether you’re hosting a dinner party or enjoying a quiet night in, this recipe is sure to impress and satisfy.

Ingredients for Miso Butter Salmon with Scallions

To create the delicious Miso Butter Salmon with Scallions, you’ll need a few simple ingredients. Each component plays a vital role in building the dish’s unique flavor profile. Here’s what you’ll need:

  • 2 (6-ounce) salmon fillets: Fresh salmon is the star of this dish. Look for fillets that are bright in color and firm to the touch.
  • 2 tablespoons miso paste: You can use either white or yellow miso. This ingredient adds a rich umami flavor.
  • 2 tablespoons unsalted butter: Softened butter helps create a creamy glaze that enhances the salmon.
  • 1 tablespoon honey: Honey adds a touch of sweetness, balancing the savory elements of the dish.
  • 1 tablespoon soy sauce: Soy sauce brings saltiness and depth to the flavor profile.
  • 1 teaspoon sesame oil: This oil adds a nutty aroma and flavor, making the dish even more delightful.
  • 1 tablespoon vegetable oil: Used for sautéing the scallions, vegetable oil has a high smoke point, making it ideal for cooking.
  • 4 scallions: Chopped scallions provide a fresh, crunchy texture and a mild onion flavor.
  • 1 teaspoon sesame seeds (optional): These seeds can be sprinkled on top for added crunch and visual appeal.
  • Cooked rice or quinoa: Serve the salmon over rice or quinoa for a complete meal.

Gathering these ingredients will set you on the path to creating a flavorful and satisfying dish. Each item contributes to the overall taste, making Miso Butter Salmon with Scallions a delightful experience for your taste buds.

Preparation of Miso Butter Salmon with Scallions

Preparing Miso Butter Salmon with Scallions is a straightforward process that anyone can master. With just a few simple steps, you can create a delicious meal that will impress your family and friends. Let’s break down the preparation into easy-to-follow steps.

Step 1: Preparing the Miso Butter

First, you’ll want to make the miso butter mixture. In a small bowl, combine the miso paste, softened butter, honey, soy sauce, and sesame oil. Use a fork or a whisk to mix everything together until it’s smooth and creamy. This mixture is the key to adding flavor to your salmon. The sweet and savory notes will create a delightful glaze that enhances the fish.

Step 2: Marinating the Salmon

Next, it’s time to marinate the salmon. Place the salmon fillets skin-side down on a lined baking sheet. Using a spatula or a spoon, spread the miso butter mixture evenly over the top of each fillet. Make sure to cover the salmon well, as this will help lock in moisture and flavor during cooking. Let the salmon sit for a few minutes to absorb the flavors while you prepare for baking.

Step 3: Cooking the Salmon

Now, preheat your oven to 400°F (200°C). Once the oven is ready, place the baking sheet with the salmon inside. Bake the salmon for about 12-15 minutes. You’ll know it’s done when the fish flakes easily with a fork. The miso butter will create a beautiful glaze on top, making it look as good as it tastes!

Step 4: Adding Scallions

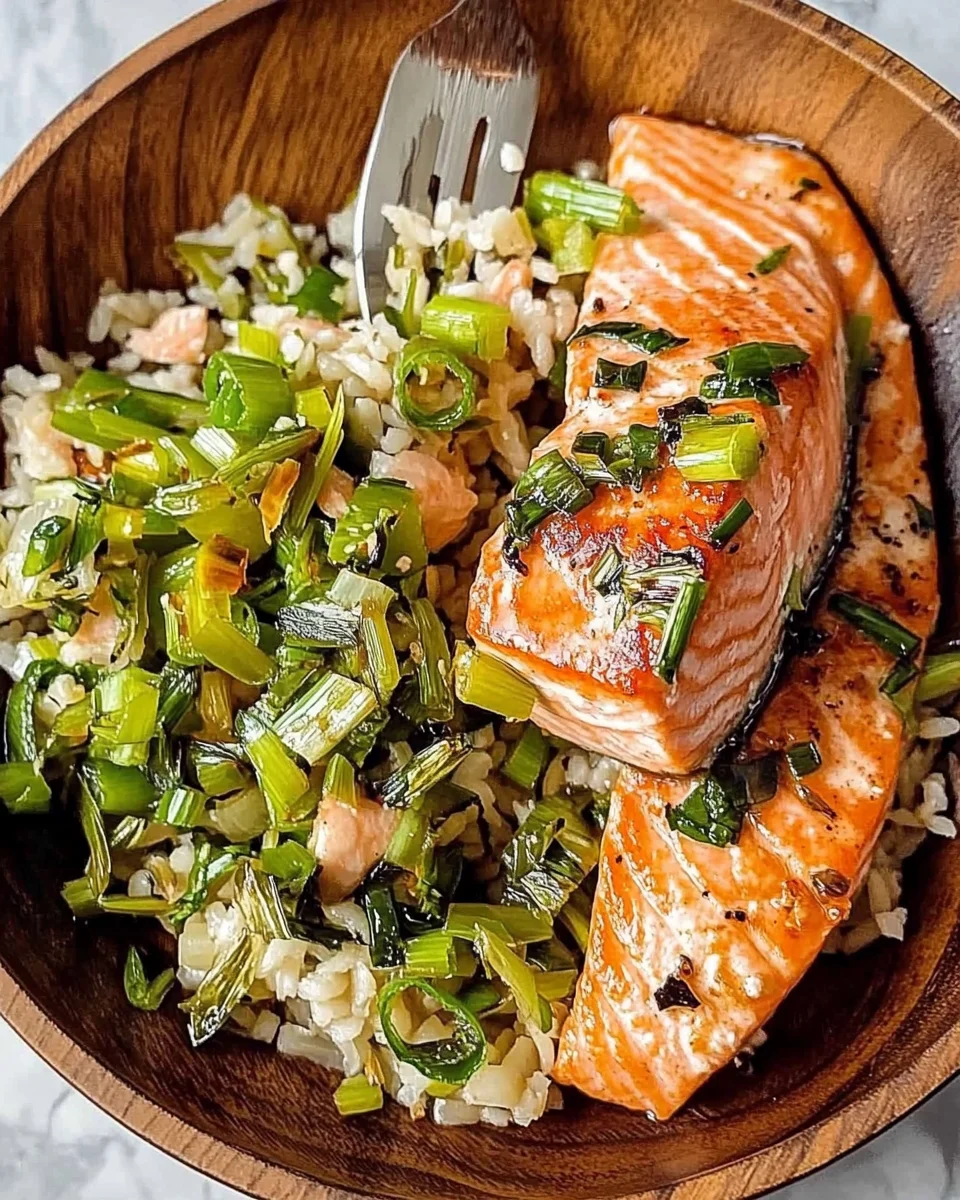
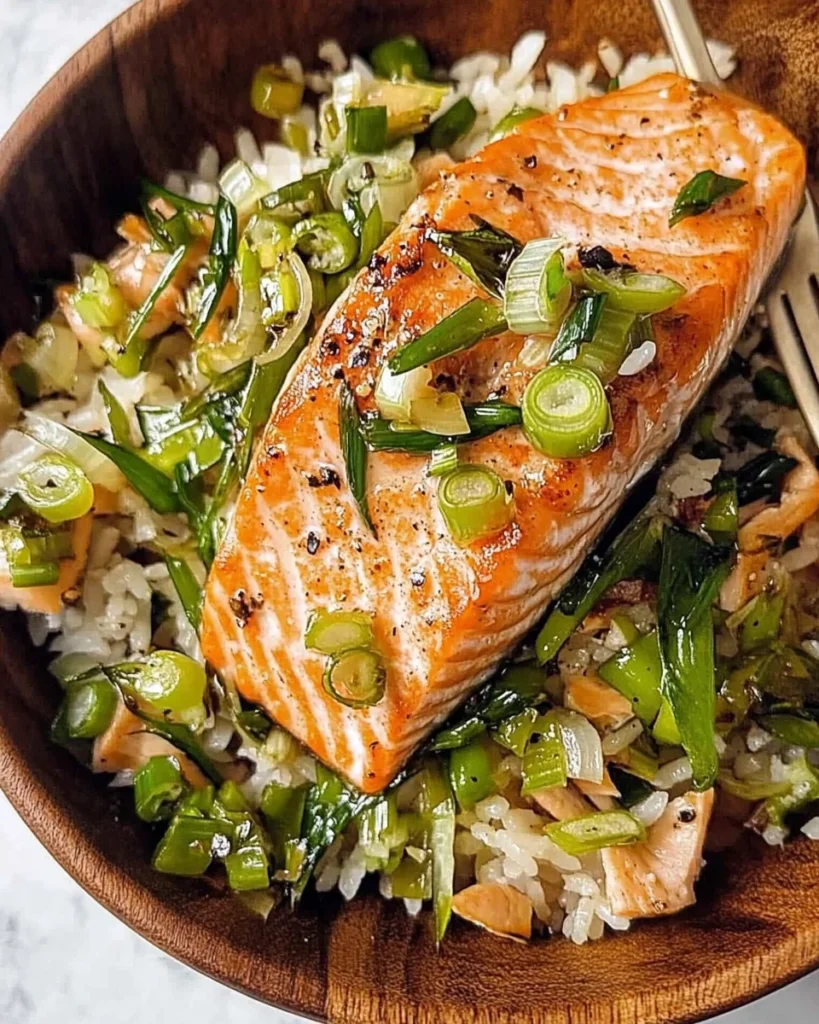
While the salmon is baking, it’s time to prepare the scallions. Heat the vegetable oil in a small skillet over medium heat. Add the chopped scallions and sauté them for about 2-3 minutes. You want them to become tender and slightly crispy. Once the salmon is done, remove it from the oven and let it rest for a couple of minutes. Top the salmon with the sautéed scallions and sprinkle with sesame seeds if you like. This adds a nice crunch and a pop of color to your dish.

With these steps, you’ll have a beautifully prepared Miso Butter Salmon with Scallions ready to serve. The combination of flavors and textures will surely make this dish a favorite in your home!

Variation of Miso Butter Salmon with Scallions

While the classic Miso Butter Salmon with Scallions is a delightful dish on its own, there are many ways to switch things up. Whether you want to try different ingredients or explore various cooking methods, these variations can help you customize the dish to your taste. Let’s dive into some alternative ingredients and cooking methods that can enhance your culinary experience.

Alternative Ingredients for Miso Butter Salmon with Scallions

One of the best things about Miso Butter Salmon with Scallions is its versatility. Here are some alternative ingredients you can use:

  • Different Fish: If you’re not a fan of salmon, consider using trout or mackerel. Both are fatty fish that will absorb the miso butter flavors beautifully.
  • Chicken Breasts: For a poultry option, chicken breasts can be marinated in the same miso butter mixture. Just adjust the cooking time to ensure they are fully cooked.
  • Vegetables: For a vegetarian twist, try using firm tofu or portobello mushrooms. Marinate them in the miso butter and bake until golden.
  • Herbs and Spices: Feel free to add fresh herbs like cilantro or basil for a fresh touch. You can also experiment with spices like ginger or garlic for added depth.
  • Sweeteners: Instead of honey, you can use maple syrup or agave nectar for a different sweetness profile.

These alternatives allow you to create a dish that suits your preferences while still enjoying the delicious flavors of miso butter.

Cooking Methods for Miso Butter Salmon with Scallions

In addition to baking, there are several cooking methods you can use to prepare Miso Butter Salmon with Scallions. Each method brings out different textures and flavors:

  • Grilling: For a smoky flavor, grill the salmon fillets. Preheat your grill and cook the salmon for about 5-7 minutes on each side, brushing with the miso butter mixture as it cooks.
  • Pan-Seering: Heat a skillet over medium-high heat and add a little oil. Cook the salmon fillets skin-side down for about 4-5 minutes, then flip and cook for another 3-4 minutes. This method gives a nice crispy skin.
  • Broiling: Broil the salmon in the oven for a quick and flavorful option. Place the salmon under the broiler for about 6-8 minutes, keeping a close eye to prevent burning.
  • Steaming: For a healthier option, steam the salmon. Place the fillets in a steamer basket over boiling water and steam for about 10-12 minutes. This method keeps the fish moist and tender.

By trying these alternative ingredients and cooking methods, you can create a unique version of Miso Butter Salmon with Scallions that suits your taste and cooking style. Enjoy experimenting in the kitchen!

Cooking Note for Miso Butter Salmon with Scallions

When preparing Miso Butter Salmon with Scallions, there are a few important cooking notes to keep in mind. These tips will help ensure that your dish turns out perfectly every time, enhancing both flavor and texture.

First, always choose fresh salmon fillets. Fresh fish not only tastes better but also has a firmer texture, which is essential for achieving that perfect flaky finish. Look for fillets that are bright in color and have a clean, ocean-like smell.

Next, be mindful of the cooking time. Salmon can easily overcook, leading to a dry texture. The general rule is to bake it for 12-15 minutes at 400°F (200°C). However, cooking times may vary based on the thickness of the fillets. A good way to check for doneness is to use a fork. If the salmon flakes easily, it’s ready to be taken out of the oven.

Additionally, letting the salmon rest for a few minutes after baking is crucial. This resting period allows the juices to redistribute throughout the fish, making it more tender and flavorful. It also gives you time to prepare the scallions without feeling rushed.

Lastly, don’t skip the sautéing of the scallions. This step adds a delightful crunch and enhances their flavor. Sautéing them until they are tender and slightly crispy brings out their natural sweetness, making them the perfect topping for your salmon.

By following these cooking notes, you’ll elevate your Miso Butter Salmon with Scallions to a whole new level. Enjoy the process and savor the delicious results!

Serving Suggestions for Miso Butter Salmon with Scallions

Once you’ve prepared your Miso Butter Salmon with Scallions, it’s time to think about how to serve it. The right side dishes can enhance the meal and create a well-rounded dining experience. Here are some delicious options to consider:

Side Dishes to Pair with Miso Butter Salmon with Scallions

  • Steamed Vegetables: Lightly steamed broccoli, asparagus, or green beans make a great accompaniment. Their fresh flavors complement the rich salmon beautifully.
  • Quinoa Salad: A refreshing quinoa salad with cucumbers, cherry tomatoes, and a light vinaigrette adds a crunchy texture and balances the meal.
  • Garlic Rice: Serve the salmon over garlic-infused rice for an extra layer of flavor. The garlic pairs well with the miso butter, creating a harmonious taste.
  • Pickled Vegetables: A side of pickled vegetables, like radishes or cucumbers, adds a tangy contrast to the savory salmon, enhancing the overall flavor profile.
  • Asian Noodle Salad: Cold noodle salads with sesame dressing can be a delightful side. They add a refreshing element that pairs well with the warm salmon.

These side dishes not only complement the Miso Butter Salmon with Scallions but also add color and variety to your plate. Feel free to mix and match based on your preferences and what you have on hand. Enjoy your meal!

Tips for Perfecting Miso Butter Salmon with Scallions

To truly master Miso Butter Salmon with Scallions, a few tips can make a big difference. These simple suggestions will help you achieve the best flavor and texture, ensuring your dish is a hit every time.

  • Choose Quality Salmon: Always opt for fresh, high-quality salmon. Look for fillets that are bright in color and have a firm texture. This will enhance the overall taste of your dish.
  • Don’t Overmix the Miso Butter: When preparing the miso butter, mix just until combined. Overmixing can make it too airy, which may affect how it adheres to the salmon.
  • Let the Salmon Rest: After baking, allow the salmon to rest for a few minutes. This helps the juices redistribute, making the fish more tender and flavorful.
  • Adjust Cooking Time: Keep an eye on the cooking time. Thicker fillets may need a bit longer, while thinner ones will cook faster. Always check for doneness by seeing if the salmon flakes easily with a fork.
  • Experiment with Toppings: While scallions are delicious, feel free to experiment with other toppings. Chopped cilantro, crushed peanuts, or even a drizzle of chili oil can add exciting flavors.
  • Use a Meat Thermometer: For perfect results, consider using a meat thermometer. Salmon is ideally cooked to an internal temperature of 145°F (63°C). This ensures it’s safe to eat while remaining moist.
  • Pair with Fresh Ingredients: When serving, use fresh ingredients for your sides. Fresh vegetables or herbs can elevate the dish and add a vibrant touch to your plate.
  • Make it Ahead: If you’re short on time, prepare the miso butter in advance. Store it in the fridge, and it will be ready to use when you need it.

By following these tips, you’ll be well on your way to creating the perfect Miso Butter Salmon with Scallions. Enjoy the cooking process and the delicious results!

Breakdown of Time for Miso Butter Salmon with Scallions

Understanding the time needed to prepare Miso Butter Salmon with Scallions can help you plan your meal better. Here’s a simple breakdown of the time required for each step, ensuring you can enjoy this delicious dish without any rush.

Prep Time for Miso Butter Salmon with Scallions

The prep time for Miso Butter Salmon with Scallions is quite short. You’ll need about 10-15 minutes to gather your ingredients and prepare the miso butter mixture. This includes:

  • Measuring and mixing the miso paste, butter, honey, soy sauce, and sesame oil.
  • Chopping the scallions.
  • Preparing the salmon fillets on the baking sheet.

With everything ready, you’ll be set to move on to the cooking phase!

Cooking Time for Miso Butter Salmon with Scallions

The cooking time for Miso Butter Salmon with Scallions is approximately 12-15 minutes. This includes:

  • Baking the salmon in the oven until it’s perfectly cooked and flakes easily.
  • Sautéing the scallions in a skillet until they are tender and slightly crispy.

Keep an eye on the salmon to avoid overcooking, as it can dry out quickly.

Total Time for Miso Butter Salmon with Scallions

In total, you can expect the entire process to take about 25-30 minutes from start to finish. This includes both prep and cooking time. Here’s a quick summary:

  • Prep Time: 10-15 minutes
  • Cooking Time: 12-15 minutes
  • Total Time: 25-30 minutes

This quick and easy timeline makes Miso Butter Salmon with Scallions a fantastic option for a weeknight dinner or a special occasion. You’ll have a delicious meal ready in no time!

Nutritional Information for Miso Butter Salmon with Scallions

Understanding the nutritional content of Miso Butter Salmon with Scallions is essential for those who are health-conscious or following specific dietary plans. This dish not only delights the palate but also provides a good balance of nutrients. Let’s break down the key nutritional components of this delicious meal.

Calories in Miso Butter Salmon with Scallions

Each serving of Miso Butter Salmon with Scallions contains approximately 400 calories. This calorie count makes it a satisfying option for dinner without being overly heavy. The combination of salmon, miso, and butter contributes to the overall caloric content, while the addition of rice or quinoa can increase the total calorie count depending on the serving size.

Protein Content in Miso Butter Salmon with Scallions

One of the standout features of Miso Butter Salmon with Scallions is its high protein content. Each serving provides about 30 grams of protein. Salmon is an excellent source of high-quality protein, which is essential for muscle repair and growth. This makes the dish a great choice for those looking to increase their protein intake, whether for fitness or overall health.

Sodium Levels in Miso Butter Salmon with Scallions

When it comes to sodium, Miso Butter Salmon with Scallions contains approximately 800 milligrams per serving. The sodium primarily comes from the soy sauce and miso paste. While this level is reasonable for most people, those on a low-sodium diet should consider using low-sodium soy sauce or reducing the amount of miso paste to lower the sodium content. Balancing sodium intake is important for maintaining healthy blood pressure levels.

In summary, Miso Butter Salmon with Scallions is not only a flavorful dish but also a nutritious one. With a good balance of calories, protein, and sodium, it can fit well into a healthy eating plan. Enjoy this delightful meal while reaping its health benefits!

FAQs about Miso Butter Salmon with Scallions

Can I use other types of fish for Miso Butter Salmon with Scallions?

Absolutely! While salmon is the star of this dish, you can easily substitute it with other types of fish. Fatty fish like trout or mackerel work wonderfully, as they will absorb the flavors of the miso butter just as well. If you prefer a leaner option, cod or halibut can also be used, but keep in mind that they may require slightly different cooking times. Just ensure that the fish you choose is fresh and of good quality for the best results.

How long should I marinate the salmon for Miso Butter Salmon with Scallions?

For Miso Butter Salmon with Scallions, marinating the salmon for about 10-15 minutes is ideal. This short marination time allows the flavors of the miso butter to penetrate the fish without overpowering it. If you have more time, you can marinate it for up to 30 minutes in the refrigerator. However, avoid marinating for too long, as the miso can start to cure the fish, changing its texture. A quick soak in the flavorful mixture is all you need for a delicious outcome!

What can I substitute for miso in Miso Butter Salmon with Scallions?

If you don’t have miso on hand, there are a few alternatives you can use. One option is to mix tahini with a bit of soy sauce to mimic the umami flavor of miso. Another alternative is to use a combination of soy sauce and a little bit of peanut butter or almond butter for a different twist. While these substitutes may not replicate the exact taste of miso, they can still provide a rich and savory flavor to your dish. Just remember to adjust the quantities to suit your taste!

Conclusion on Miso Butter Salmon with Scallions

In conclusion, Miso Butter Salmon with Scallions is a delightful dish that combines rich flavors and simple preparation. This recipe not only showcases the deliciousness of salmon but also highlights the unique taste of miso and the freshness of scallions. With its savory glaze and satisfying texture, it’s no wonder this dish has become a favorite for many home cooks.

Whether you’re looking for a quick weeknight dinner or a special meal to impress guests, Miso Butter Salmon with Scallions fits the bill perfectly. The versatility of this recipe allows you to experiment with different proteins and cooking methods, making it adaptable to your preferences. Plus, the nutritional benefits of salmon, combined with the wholesome ingredients, make it a smart choice for a healthy diet.

As you prepare this dish, remember to enjoy the process. Cooking should be a joyful experience, and Miso Butter Salmon with Scallions is a wonderful way to bring family and friends together around the table. So, gather your ingredients, follow the steps, and savor the delicious results. Happy cooking!

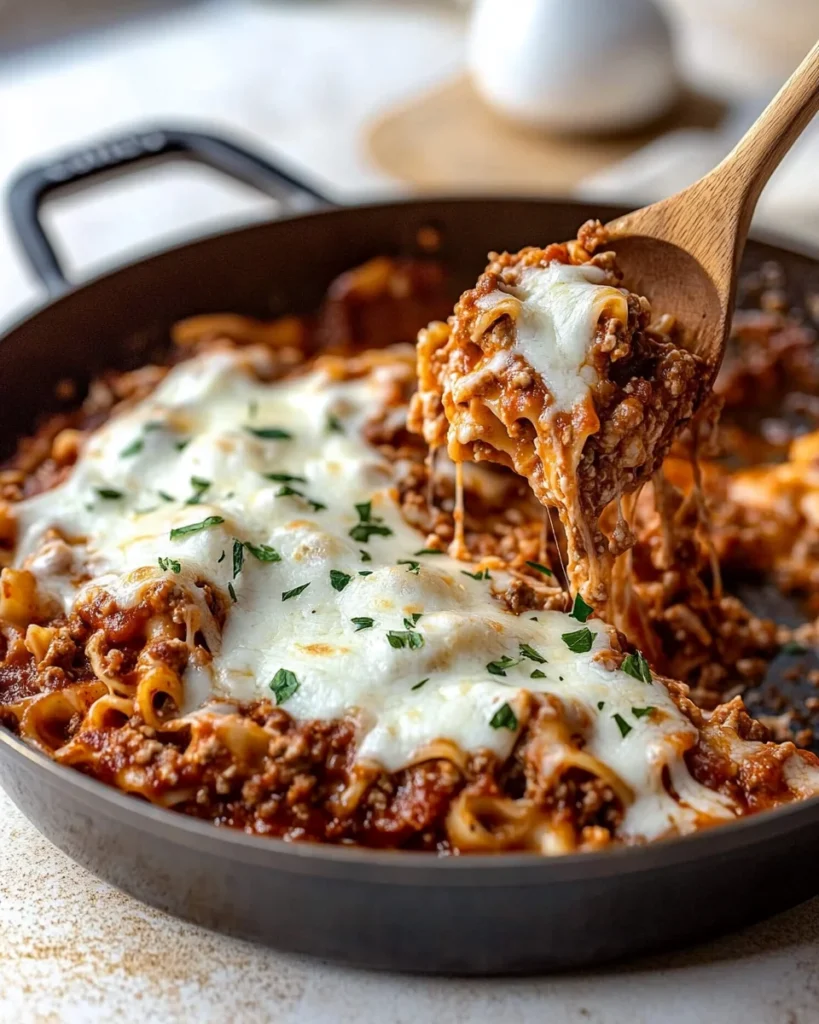
Skillet Lasagna is a quick and easy dinner option.

Introduction to Skillet Lasagna Recipe

Are you looking for a delicious and easy dinner idea? Look no further than the skillet lasagna recipe! This dish combines all the classic flavors of traditional lasagna but simplifies the cooking process. With just one skillet, you can create a hearty meal that the whole family will love.

Skillet lasagna is perfect for busy weeknights. It takes less time to prepare than the traditional oven-baked version, making it a great option for those who want a comforting meal without spending hours in the kitchen. Plus, it’s a fantastic way to enjoy layers of pasta, meat, and cheese without the fuss of assembling a full lasagna.

In this article, we will guide you through the ingredients, preparation steps, and variations of this delightful dish. Whether you’re a seasoned cook or a beginner, you’ll find this skillet lasagna recipe easy to follow and incredibly satisfying. So, grab your skillet and let’s get cooking!

Ingredients for Skillet Lasagna Recipe

To create a mouthwatering skillet lasagna, you’ll need a few key ingredients. Each component plays a vital role in delivering that rich, comforting flavor we all love. Here’s what you’ll need:

  • 2 tablespoons olive oil: This will help sauté the meat and vegetables, adding a nice flavor.
  • 1 pound ground beef or Italian sausage: Choose your favorite for a hearty base.
  • 1 small onion, diced: This adds sweetness and depth to the sauce.
  • 3 cloves garlic, minced: Garlic brings a wonderful aroma and taste.
  • 1 (28-ounce) can crushed tomatoes: This is the heart of your sauce, providing moisture and flavor.
  • 2 cups marinara sauce: For added richness and a touch of sweetness.
  • 1 teaspoon dried basil: A classic herb that complements the tomato sauce.
  • 1 teaspoon dried oregano: Another essential herb that enhances the overall flavor.
  • Salt and pepper to taste: Essential for seasoning your dish perfectly.
  • 8 ounces lasagna noodles, broken into pieces: These will create the layers in your skillet lasagna.
  • 2 cups ricotta cheese: This creamy cheese adds richness and texture.
  • 1 cup shredded mozzarella cheese: For that gooey, melty topping.
  • 1/2 cup grated Parmesan cheese: This adds a salty, nutty flavor to the dish.
  • Fresh basil for garnish (optional): A lovely touch to brighten up your skillet lasagna.

Gathering these ingredients will set you up for success in making a delicious skillet lasagna. Each item contributes to the overall taste and texture, ensuring a satisfying meal for everyone at the table. Now that you have your ingredients ready, let’s move on to the step-by-step preparation!

Step-by-Step Preparation of Skillet Lasagna Recipe

Now that you have all your ingredients ready, it’s time to dive into the step-by-step preparation of your skillet lasagna recipe. This process is straightforward and enjoyable, making it perfect for cooks of all skill levels. Let’s get started!

Step 1: Gather Your Ingredients

Before you begin cooking, make sure you have all your ingredients within reach. This will make the cooking process smoother and more efficient. Lay out your olive oil, ground beef or sausage, onion, garlic, crushed tomatoes, marinara sauce, herbs, lasagna noodles, ricotta, mozzarella, and Parmesan cheese. Having everything organized will help you focus on creating a delicious meal.

Step 2: Prepare the Meat Sauce

In a large skillet, heat the olive oil over medium heat. Once hot, add the ground beef or Italian sausage. Cook it until it’s browned, which should take about 5-7 minutes. If there’s excess fat, drain it off. Next, add the diced onion and minced garlic to the skillet. Sauté these ingredients until the onion becomes translucent, about 3-4 minutes. This step builds a flavorful base for your sauce.

Step 3: Cook the Noodles

After your meat sauce is ready, it’s time to add the crushed tomatoes and marinara sauce. Stir in the dried basil, oregano, salt, and pepper. Bring this mixture to a gentle simmer. Now, add the broken lasagna noodles, stirring to combine everything well. Cover the skillet and let it cook for about 15-20 minutes. Stir occasionally to ensure the noodles cook evenly and absorb all those delicious flavors.

Step 4: Layer the Ingredients

Once the noodles are tender, it’s time to add the ricotta cheese. In a separate bowl, mix the ricotta with a pinch of salt and pepper. Dollop spoonfuls of this mixture over the top of the skillet. Then, sprinkle the shredded mozzarella and grated Parmesan cheese evenly over the ricotta. This layering creates that classic lasagna feel, even in a skillet!

Step 5: Simmer and Melt the Cheese

Cover the skillet again and let it cook for an additional 5-7 minutes. This allows the cheese to melt and become bubbly. The aroma will fill your kitchen, making it hard to resist! Once the cheese is melted, remove the skillet from heat and let it sit for a few minutes. This resting time helps the flavors meld together beautifully.

And there you have it! Your skillet lasagna is ready to be served. It’s a comforting dish that’s sure to please everyone at the table. Next, let’s explore some variations of this delightful recipe!

Variations of Skillet Lasagna Recipe

While the classic skillet lasagna recipe is delicious on its own, there are many ways to customize it to suit different dietary preferences and tastes. Here are two popular variations that you can easily try at home. Each option maintains the comforting essence of the original dish while adding a unique twist.

Vegetarian Skillet Lasagna Recipe

If you’re looking for a meat-free option, the vegetarian skillet lasagna recipe is a fantastic choice. This variation is packed with flavor and nutrients, making it a satisfying meal for everyone. To make this version, simply replace the ground beef or sausage with sautéed mushrooms, zucchini, bell peppers, or a mix of your favorite vegetables. Here’s how to do it:

  • Step 1: Sauté your chosen vegetables in olive oil until they are tender. This usually takes about 5-7 minutes.
  • Step 2: Add the diced onion and minced garlic, cooking until the onion is translucent.
  • Step 3: Follow the same steps as the original recipe, adding crushed tomatoes, marinara sauce, and herbs.
  • Step 4: Stir in the broken lasagna noodles and cook until tender.
  • Step 5: Layer the ricotta, mozzarella, and Parmesan cheese as before, then cover and let it melt.

This vegetarian skillet lasagna is not only delicious but also a great way to sneak in more veggies into your diet. You can even add a layer of spinach or kale for extra nutrition!

Gluten-Free Skillet Lasagna Recipe

For those who need a gluten-free option, you can easily adapt the skillet lasagna recipe to meet your needs. Instead of traditional lasagna noodles, use gluten-free pasta. Many brands offer gluten-free lasagna noodles that work just as well. Here’s how to make it:

  • Step 1: Prepare the meat sauce or vegetable mixture as described in the original recipe.
  • Step 2: When adding the noodles, make sure to follow the cooking instructions on the gluten-free pasta package. They may require different cooking times.
  • Step 3: Continue with the layering and melting steps as usual.

This gluten-free skillet lasagna is just as hearty and satisfying as the traditional version. It allows everyone to enjoy a comforting meal without worrying about gluten.

With these variations, you can enjoy skillet lasagna in a way that fits your dietary preferences. Whether you choose the vegetarian or gluten-free option, you’ll still experience the rich flavors and comforting textures that make this dish a family favorite. Now, let’s move on to some cooking notes to ensure your skillet lasagna turns out perfectly!

Cooking Note for Skillet Lasagna Recipe

Cooking skillet lasagna is a delightful experience, but there are a few important notes to keep in mind to ensure your dish turns out perfectly every time. These tips will help you avoid common pitfalls and enhance the overall flavor and texture of your meal.

First, be mindful of the heat. Cooking over medium heat is crucial. If the heat is too high, the sauce may burn, and the noodles might not cook evenly. Stirring occasionally helps prevent sticking and ensures that all ingredients blend well together.

Next, consider the type of noodles you use. Traditional lasagna noodles work well, but you can also experiment with whole wheat or gluten-free options. Just remember that different types of noodles may require slight adjustments in cooking time. Always check the package instructions for the best results.

Another important note is to let your skillet lasagna rest for a few minutes after cooking. This resting period allows the flavors to meld and makes it easier to serve. If you cut into it too soon, the layers may not hold together as nicely.

Lastly, don’t hesitate to customize your skillet lasagna with additional ingredients. You can add vegetables like spinach, bell peppers, or even olives for extra flavor. Just be sure to adjust the cooking time accordingly, as some vegetables may require longer to soften.

By keeping these cooking notes in mind, you’ll be well on your way to creating a delicious skillet lasagna that everyone will love. Now that you’re equipped with these tips, let’s explore some serving suggestions to make your meal even more enjoyable!

Serving Suggestions for Skillet Lasagna Recipe

Once your skillet lasagna is ready, it’s time to think about how to serve it. This dish is not only delicious but also visually appealing, making it perfect for family dinners or gatherings with friends. Here are some serving suggestions to elevate your skillet lasagna experience:

  • Garnish with Fresh Herbs: A sprinkle of fresh basil or parsley on top adds a pop of color and freshness. It enhances the dish’s flavor and makes it look more inviting.
  • Pair with a Side Salad: A crisp green salad complements the richness of the lasagna. Consider a simple mix of lettuce, cherry tomatoes, and a light vinaigrette. This adds a refreshing contrast to the hearty meal.
  • Serve with Garlic Bread: Nothing beats the combination of lasagna and garlic bread. The crunchy, buttery bread is perfect for scooping up the cheesy goodness. You can make your own or buy it from the store.
  • Offer Extra Cheese: For cheese lovers, provide additional grated Parmesan or mozzarella on the side. This allows guests to customize their servings to their liking.
  • Include a Glass of Wine: A glass of red wine pairs beautifully with lasagna. It enhances the flavors and makes the meal feel more special. If you prefer non-alcoholic options, sparkling water with lemon is a great choice.

When serving skillet lasagna, consider using a large spoon or spatula to scoop out portions. This helps maintain the layers and makes serving easier. You can also serve it directly from the skillet for a rustic touch, allowing everyone to help themselves.

With these serving suggestions, your skillet lasagna will not only taste amazing but also look fantastic on the table. It’s a dish that brings people together, making every meal a memorable occasion. Now that you have ideas for serving, let’s move on to some tips for perfecting your skillet lasagna recipe!

Tips for Perfecting Your Skillet Lasagna Recipe

Creating the perfect skillet lasagna is all about attention to detail and a few helpful tips. With these suggestions, you can elevate your dish and impress your family and friends. Here are some essential tips to keep in mind:

  • Use Quality Ingredients: The flavor of your skillet lasagna greatly depends on the quality of the ingredients. Opt for fresh herbs, high-quality cheese, and good-quality meat or vegetables. This will enhance the overall taste of your dish.
  • Don’t Overcook the Noodles: Since the noodles will continue to cook in the sauce, it’s important not to overcook them initially. Aim for al dente, as they will soften further during the simmering process.
  • Layer Wisely: When adding the ricotta and other cheeses, try to spread them evenly. This ensures that every bite is cheesy and delicious. You can also mix some of the ricotta into the sauce for a creamier texture.
  • Experiment with Spices: Feel free to adjust the spices to suit your taste. Adding a pinch of red pepper flakes can give your skillet lasagna a nice kick. You can also try adding Italian seasoning for an extra flavor boost.
  • Let It Rest: After cooking, allow your skillet lasagna to rest for about 5-10 minutes before serving. This helps the layers set and makes it easier to cut and serve without falling apart.
  • Make It Ahead: If you’re short on time, consider preparing the meat sauce and noodles ahead of time. You can store them separately in the fridge and combine them when you’re ready to cook. This makes for a quick and easy dinner option!
  • Get Creative with Toppings: Don’t hesitate to add your favorite toppings before serving. Sliced olives, sun-dried tomatoes, or even a drizzle of balsamic glaze can add a unique twist to your skillet lasagna.

By following these tips, you’ll be well on your way to mastering the art of skillet lasagna. Each suggestion helps enhance the flavors and textures, ensuring a delightful meal every time. Now that you have the tools to perfect your dish, let’s break down the time needed for this delicious recipe!

Breakdown of Time for Skillet Lasagna Recipe

Understanding the time required for each step of the skillet lasagna recipe can help you plan your cooking efficiently. Here’s a breakdown of the time you’ll need for preparation and cooking. This will ensure that you can enjoy your delicious meal without any last-minute rush!

Prep Time

The prep time for your skillet lasagna is quite manageable. You’ll need about 15-20 minutes to gather and prepare all your ingredients. This includes chopping the onion and garlic, measuring out the sauces, and breaking the lasagna noodles into pieces. Having everything ready will make the cooking process smoother and more enjoyable.

Cooking Time

Once you start cooking, the total cooking time will be approximately 30-35 minutes. This includes:

  • 5-7 minutes to brown the meat and sauté the onion and garlic.
  • 15-20 minutes for the noodles to cook in the sauce.
  • 5-7 minutes for the cheese to melt and become bubbly.

By keeping an eye on the skillet and stirring occasionally, you’ll ensure that everything cooks evenly and perfectly.

Total Time

In total, you can expect to spend about 45-55 minutes from start to finish. This includes both prep and cooking time. It’s a quick and satisfying meal that’s perfect for busy weeknights or family gatherings. With this time breakdown, you can easily fit skillet lasagna into your schedule and enjoy a hearty, homemade dinner!

Nutritional Information for Skillet Lasagna Recipe

Understanding the nutritional information of your skillet lasagna recipe is essential for making informed choices about your meals. This dish is not only delicious but also provides a good balance of nutrients. Here’s a breakdown of the key nutritional components per serving:

Calories

Each serving of skillet lasagna contains approximately 380 calories. This makes it a hearty meal that can satisfy your hunger without going overboard on calories. It’s a great option for dinner, especially when paired with a side salad or some garlic bread.

Protein

Protein is an important part of any meal, and skillet lasagna delivers! Each serving provides about 25 grams of protein. This comes mainly from the ground beef or sausage and the ricotta cheese. Protein helps build and repair tissues, making this dish a nutritious choice for active individuals and families.

Sodium

When it comes to sodium, each serving of skillet lasagna contains around 800 milligrams. While this is a reasonable amount for a hearty meal, it’s always good to be mindful of your sodium intake, especially if you’re watching your salt consumption. You can reduce sodium by using low-sodium marinara sauce and crushed tomatoes.

Overall, skillet lasagna is a well-rounded dish that offers a good mix of calories, protein, and flavor. It’s perfect for a family dinner or a cozy night in. Now that you know the nutritional information, let’s move on to some frequently asked questions about this delightful recipe!

Nutritional Information for Skillet Lasagna Recipe

Understanding the nutritional information of your skillet lasagna recipe is essential for making informed choices about your meals. This dish is not only delicious but also provides a good balance of nutrients. Here’s a breakdown of the key nutritional components per serving:

Calories

Each serving of skillet lasagna contains approximately 380 calories. This makes it a hearty meal that can satisfy your hunger without going overboard on calories. It’s a great option for dinner, especially when paired with a side salad or some garlic bread.

Protein

Protein is an important part of any meal, and skillet lasagna delivers! Each serving provides about 25 grams of protein. This comes mainly from the ground beef or sausage and the ricotta cheese. Protein helps build and repair tissues, making this dish a nutritious choice for active individuals and families.

Sodium

When it comes to sodium, each serving of skillet lasagna contains around 800 milligrams. While this is a reasonable amount for a hearty meal, it’s always good to be mindful of your sodium intake, especially if you’re watching your salt consumption. You can reduce sodium by using low-sodium marinara sauce and crushed tomatoes.

Overall, skillet lasagna is a well-rounded dish that offers a good mix of calories, protein, and flavor. It’s perfect for a family dinner or a cozy night in. Now that you know the nutritional information, let’s move on to some frequently asked questions about this delightful recipe!

FAQs about Skillet Lasagna Recipe

Can I make Skillet Lasagna Recipe ahead of time?

Absolutely! You can prepare your skillet lasagna ahead of time, making it a convenient option for busy days. To do this, follow the recipe up to the point of adding the cheese. Once you’ve layered the ingredients, cover the skillet and refrigerate it for up to 24 hours. When you’re ready to cook, simply heat it on the stove over medium heat until it’s warmed through, then add the cheese and cover to melt. This way, you can enjoy a delicious homemade meal without the last-minute rush!

What can I substitute for ricotta in Skillet Lasagna Recipe?

If you don’t have ricotta cheese on hand or prefer a different option, there are several substitutes you can use. Cream cheese is a popular alternative; just soften it and mix it with a bit of milk to achieve a similar texture. Cottage cheese is another great option; it adds a nice creaminess and is lower in fat. For a dairy-free version, consider using tofu blended with a splash of lemon juice and a pinch of salt. Each of these substitutes will still provide that creamy layer that makes skillet lasagna so delightful!

How do I store leftovers of Skillet Lasagna Recipe?

Storing leftovers of your skillet lasagna is easy! Allow the dish to cool completely before transferring it to an airtight container. You can store it in the refrigerator for up to 3-4 days. If you want to keep it longer, consider freezing it. To freeze, portion the lasagna into individual servings and wrap them tightly in plastic wrap, then place them in a freezer-safe container. When you’re ready to enjoy it again, simply thaw in the refrigerator overnight and reheat in the microwave or on the stove until heated through. This way, you can savor the delicious flavors of skillet lasagna even days later!

Conclusion on Skillet Lasagna Recipe

In conclusion, the skillet lasagna recipe is a fantastic way to enjoy a classic dish with minimal effort. This one-pan meal combines all the beloved flavors of traditional lasagna while saving you time and cleanup. Whether you’re cooking for your family or hosting friends, skillet lasagna is sure to impress everyone at the table.

With its rich layers of meat, cheese, and pasta, this dish is not only satisfying but also versatile. You can easily adapt it to suit various dietary needs, whether you prefer a vegetarian or gluten-free option. The step-by-step preparation makes it accessible for cooks of all skill levels, ensuring that anyone can create a delicious meal.

As you explore the variations and tips provided, you’ll find that skillet lasagna can be customized to your taste. From adding extra vegetables to experimenting with different cheeses, the possibilities are endless. Plus, the nutritional information shows that this dish can be a wholesome choice for dinner.

So, why not give this skillet lasagna recipe a try? Gather your ingredients, follow the steps, and enjoy a comforting meal that brings everyone together. With its delightful flavors and ease of preparation, skillet lasagna is bound to become a favorite in your household. Happy cooking!

Spicy Honey-Glazed Salmon Salad Recipe is a must-try!

Introduction to Spicy Honey-Glazed Salmon Salad Recipe

Spicy Honey-Glazed Salmon Salad Recipe is a perfect choice. This dish combines the rich flavors of salmon with a sweet and spicy glaze, making it a delightful treat for your taste buds.

Salmon is not only tasty but also packed with nutrients. It’s a great source of protein and omega-3 fatty acids, which are essential for heart health. When paired with fresh salad greens and colorful vegetables, this meal becomes a powerhouse of nutrition. Plus, it’s visually appealing, making it a great option for entertaining guests or enjoying a cozy dinner at home.

In this recipe, the salmon is marinated in a zesty blend of honey and sriracha, giving it a unique flavor that’s both sweet and spicy. The salad is loaded with fresh ingredients like cherry tomatoes, avocado, and feta cheese, adding texture and taste. Whether you’re a seasoned cook or a beginner, this recipe is easy to follow and sure to impress.

Spicy Honey-Glazed Salmon Salad. It’s not just a meal; it’s an experience that brings together flavors and health in every bite!

Ingredients for Spicy Honey-Glazed Salmon Salad Recipe

Spicy Honey-Glazed Salmon Salad Recipe, you’ll need a variety of fresh ingredients. Each component plays a vital role in building flavor and nutrition. Here’s what you’ll need:

  • 2 (6-ounce) salmon fillets
  • 1 tablespoon olive oil
  • 1 teaspoon salt
  • 1 teaspoon black pepper
  • 1 teaspoon smoked paprika
  • 1 tablespoon honey
  • 1 tablespoon sriracha sauce
  • 4 cups mixed salad greens (such as spinach, arugula, and romaine)
  • 1 cup cherry tomatoes, halved
  • 1 avocado, sliced
  • 1/4 cup red onion, thinly sliced
  • 1/4 cup feta cheese, crumbled
  • 2 tablespoons balsamic vinaigrette

These ingredients come together to create a vibrant and flavorful salad. The salmon fillets provide a hearty protein base, while the honey and sriracha create a delicious glaze that enhances the fish’s natural flavors. The mixed greens and fresh vegetables add crunch and color, making the dish not only tasty but also visually appealing.

Feel free to adjust the ingredients based on your preferences. For instance, you can add more vegetables or substitute the feta cheese with another cheese of your choice. The beauty of this recipe lies in its versatility, allowing you to customize it to suit your taste!

Step-by-Step Preparation of Spicy Honey-Glazed Salmon Salad Recipe

Spicy Honey-Glazed Salmon Salad Recipe. This step-by-step guide will help you create a delicious meal that’s sure to impress. Let’s get started!

Step 1: Preparing the Salmon

First, take your salmon fillets out of the refrigerator. Pat them dry with a paper towel. This helps the marinade stick better. Next, place the salmon on a clean cutting board. You can remove any skin if you prefer, but it’s not necessary. The skin can add extra flavor when grilled.

Step 2: Making the Spicy Honey Glaze

In a small bowl, combine the olive oil, salt, black pepper, and smoked paprika. These ingredients will enhance the salmon’s flavor. Then, add the honey and sriracha sauce to the bowl. Mix everything together until it forms a smooth marinade. This glaze is what gives the salmon its sweet and spicy kick!

Step 3: Cooking the Salmon

Preheat your grill or grill pan over medium-high heat. Once it’s hot, brush the marinade generously over both sides of the salmon fillets. This ensures that every bite is packed with flavor. Place the salmon on the grill and cook for about 4-5 minutes on each side. You’ll know it’s done when the salmon flakes easily with a fork. This step is crucial for achieving that perfect texture!

Step 4: Assembling the Salad

While the salmon is cooking, it’s time to prepare the salad. In a large bowl, combine the mixed salad greens, halved cherry tomatoes, sliced avocado, thinly sliced red onion, and crumbled feta cheese. These fresh ingredients add color and crunch to your dish. Once the salmon is cooked, let it rest for a couple of minutes. Then, flake it into large pieces and add it to the salad. Drizzle with balsamic vinaigrette and toss gently to combine. Your salad is now ready to serve!

Spicy Honey-Glazed Salmon Salad that’s bursting with flavor. Enjoy every bite of this healthy and satisfying meal!

Variations of Spicy Honey-Glazed Salmon Salad Recipe

Spicy Honey-Glazed Salmon Salad Recipe is not only delicious but also versatile. You can easily switch up the ingredients to suit your taste or dietary needs. Here are some exciting variations to consider:

Alternative Proteins

If you’re not a fan of salmon or want to try something different, there are plenty of alternative proteins you can use. Here are a few options:

  • Grilled Chicken: Chicken breast is a great substitute. Marinate it in the same spicy honey glaze and grill until cooked through.
  • Tofu: For a vegetarian option, use firm tofu. Press it to remove excess moisture, then marinate and grill or sauté until golden.
  • Shrimp: Shrimp cooks quickly and pairs well with the glaze. Just toss them in the marinade and grill for a few minutes until they turn pink.
  • Tempeh: This fermented soy product is packed with protein. Slice it, marinate, and grill for a nutty flavor.

These alternatives allow you to enjoy the same sweet and spicy flavors while catering to different dietary preferences.

Different Salad Bases

The salad base can also be customized to enhance your meal. Here are some ideas for different salad bases:

  • Kale: Use chopped kale for a heartier salad. Massage it with a little olive oil to soften the leaves.
  • Quinoa: Add cooked quinoa for a protein boost. It makes the salad more filling and adds a nice texture.
  • Coleslaw: For a crunchy twist, use a mix of shredded cabbage and carrots. It adds a refreshing crunch to the dish.
  • Mixed Grains: Combine different grains like farro or barley for a unique base that’s both nutritious and satisfying.

Spicy Honey-Glazed Salmon Salad every time you make it. Enjoy the process of discovering your favorite combinations!

Cooking Note for Spicy Honey-Glazed Salmon Salad Recipe

Spicy Honey-Glazed Salmon Salad Recipe, there are a few cooking notes to keep in mind. These tips will help you achieve the best results and ensure your meal is both delicious and visually appealing.

First, always choose fresh salmon fillets. Fresh fish not only tastes better but also has a firmer texture, which is ideal for grilling. If you can, buy wild-caught salmon for its superior flavor and health benefits.

Next, marinating the salmon is key. Allow it to sit in the marinade for at least 15 minutes before grilling. This extra time helps the flavors penetrate the fish, making it even more delicious. If you have more time, marinating for up to an hour can enhance the taste even further.

When grilling, make sure your grill is preheated properly. A hot grill helps to sear the salmon, locking in moisture and flavor. If you’re using a grill pan, lightly oil it to prevent sticking. This will ensure that your salmon cooks evenly and comes off the grill easily.

Keep an eye on the cooking time. Salmon can overcook quickly, leading to a dry texture. Aim for a cooking time of about 4-5 minutes per side, depending on the thickness of the fillets. The salmon is done when it flakes easily with a fork and has an internal temperature of 145°F (63°C).

Lastly, let the salmon rest for a few minutes after grilling. This allows the juices to redistribute, making each bite tender and juicy. Once rested, flake the salmon gently to maintain its texture before adding it to your salad.

Spicy Honey-Glazed Salmon Salad that’s sure to impress your family and friends!

Serving Suggestions for Spicy Honey-Glazed Salmon Salad Recipe

Spicy Honey-Glazed Salmon Salad, it’s time to think about how to serve it. Presentation can elevate your meal, making it even more enjoyable. Here are some delightful serving suggestions to consider:

  • Chilled Plates: Serve your salad on chilled plates. This keeps the salad fresh and adds a touch of elegance to your meal.
  • Garnish with Fresh Herbs: Sprinkle fresh herbs like parsley or cilantro on top for a burst of color and flavor. This simple addition can make your dish look restaurant-quality.
  • Pair with a Light Beverage: Consider serving your salad with a refreshing drink. A glass of iced tea or sparkling water with lemon complements the flavors beautifully.
  • Serve with Whole Grain Bread: For a heartier meal, add a slice of whole grain bread or a warm baguette on the side. This adds texture and makes the meal more filling.
  • Offer Extra Dressing: Place extra balsamic vinaigrette on the table for those who like a little more dressing. This allows everyone to customize their salad to their liking.
  • Make it a Meal Prep Option: If you’re preparing this salad for meal prep, store the salmon and salad separately. This keeps the greens fresh and crisp until you’re ready to eat.

Spicy Honey-Glazed Salmon Salad but also create a delightful dining experience. Whether it’s a casual family dinner or a special occasion, these tips will help you serve a meal that’s both delicious and memorable!

Tips for Perfecting Your Spicy Honey-Glazed Salmon Salad Recipe

Spicy Honey-Glazed Salmon Salad Recipe truly shine, consider these helpful tips. They will ensure that every bite is bursting with flavor and that your dish looks as good as it tastes!

First, always use fresh ingredients. Fresh salmon, crisp greens, and ripe vegetables make a big difference in taste. When shopping, look for vibrant colors and firm textures. This will enhance the overall quality of your salad.

Next, don’t rush the marinating process. Allow the salmon to soak in the spicy honey glaze for at least 15 minutes. If you have time, marinating for up to an hour will deepen the flavors even more. This step is crucial for achieving that perfect balance of sweet and spicy.

When grilling the salmon, make sure your grill is hot. A preheated grill helps to sear the fish, locking in moisture and flavor. If you’re using a grill pan, lightly oil it to prevent sticking. This will help you achieve those beautiful grill marks and a delicious crust.

Pay attention to the cooking time. Salmon can cook quickly, so keep an eye on it. Aim for about 4-5 minutes per side, depending on the thickness of the fillets. The salmon is done when it flakes easily with a fork and has an internal temperature of 145°F (63°C).

After grilling, let the salmon rest for a few minutes. This allows the juices to redistribute, making the fish tender and juicy. Once rested, flake the salmon gently to maintain its texture before adding it to your salad.

Finally, feel free to customize your salad. Add your favorite vegetables or nuts for extra crunch. You can also adjust the level of spiciness by adding more or less sriracha to the glaze. This flexibility allows you to create a dish that suits your taste perfectly.

Spicy Honey-Glazed Salmon Salad that’s not only delicious but also visually stunning. Enjoy the process and savor every bite!

Breakdown of Time for Spicy Honey-Glazed Salmon Salad Recipe

Spicy Honey-Glazed Salmon Salad Recipe can help you plan your cooking efficiently. Here’s a simple breakdown of the time required for preparation and cooking:

Prep Time

The prep time for this delicious salad is approximately 15 minutes. During this time, you will gather all your ingredients, prepare the salmon, and make the spicy honey glaze. It’s a quick process that sets the stage for a delightful meal!

Cooking Time

Cooking the salmon takes about 10 minutes. You’ll grill the salmon for 4-5 minutes on each side. This ensures that the fish is perfectly cooked and has a nice char. While the salmon is grilling, you can prepare the salad, making the most of your time.

Total Time

Spicy Honey-Glazed Salmon Salad in no time!

Nutritional Information for Spicy Honey-Glazed Salmon Salad Recipe

Spicy Honey-Glazed Salmon Salad Recipe not only delights your taste buds but also provides a wealth of nutrients. Here’s a closer look at the nutritional information per serving:

Calories

Each serving of this delicious salad contains approximately 450 calories. This makes it a satisfying meal option without being overly heavy. The combination of salmon, fresh vegetables, and healthy fats from the avocado ensures that you’re getting a nutritious meal that keeps you energized throughout the day.

Protein

Spicy Honey-Glazed Salmon Salad is its protein content. Each serving provides about 30 grams of protein. Salmon is an excellent source of high-quality protein, which is essential for muscle repair and overall health. This makes the salad a great choice for those looking to increase their protein intake.

Sodium

The sodium content in this salad is approximately 800 milligrams per serving. While this is a moderate amount, it’s important to be mindful of your overall sodium intake, especially if you’re watching your salt consumption. You can reduce the sodium by using low-sodium soy sauce or omitting added salt in the marinade if desired.

Spicy Honey-Glazed Salmon Salad Recipe is a nutritious option that balances calories, protein, and sodium. It’s a great way to enjoy a healthy meal that’s both flavorful and satisfying!

FAQs about Spicy Honey-Glazed Salmon Salad Recipe

Can I use frozen salmon for this recipe?

Spicy Honey-Glazed Salmon Salad Recipe. However, it’s important to thaw the salmon properly before cooking. The best way to do this is to place the frozen salmon in the refrigerator overnight. If you’re short on time, you can also thaw it under cold running water for about 30 minutes. Once thawed, pat it dry and follow the recipe as usual. Just keep in mind that frozen salmon may have a slightly different texture compared to fresh salmon, but it will still taste delicious!

What can I substitute for honey in the glaze?

Spicy Honey-Glazed Salmon Salad a delightful flavor!

How spicy is the Spicy Honey-Glazed Salmon Salad Recipe?

Spicy Honey-Glazed Salmon Salad Recipe can be adjusted to your taste. The recipe calls for 1 tablespoon of sriracha sauce, which adds a nice kick without being overwhelming. If you prefer a milder flavor, you can reduce the amount of sriracha or even omit it altogether. On the other hand, if you love heat, feel free to add more sriracha or even a pinch of cayenne pepper to the glaze. This flexibility allows you to customize the spice level to suit your preferences!

Can I make this salad ahead of time?

Spicy Honey-Glazed Salmon Salad ahead of time, making it a great option for meal prep. You can marinate the salmon and store it in the refrigerator for up to 24 hours before cooking. The salad ingredients can also be prepped in advance. Just keep the mixed greens, vegetables, and dressing separate until you’re ready to serve. This will help maintain the freshness and crunch of the salad. Once everything is ready, simply grill the salmon and assemble the salad for a quick and delicious meal!

Conclusion on Spicy Honey-Glazed Salmon Salad Recipe

Spicy Honey-Glazed Salmon Salad Recipe is a delightful blend of flavors and textures that makes for a satisfying meal. With its combination of tender salmon, fresh greens, and a zesty glaze, this dish is not only delicious but also packed with nutrients. It’s a perfect choice for anyone looking to enjoy a healthy yet flavorful meal.

This recipe is incredibly versatile, allowing you to customize it to your liking. Whether you choose to swap out the salmon for chicken, tofu, or shrimp, or experiment with different salad bases, the possibilities are endless. Each variation brings its own unique twist, ensuring that you can enjoy this salad time and time again without getting bored.

Moreover, the preparation is straightforward and quick, making it an excellent option for busy weeknights or special occasions. With just a few simple steps, you can create a restaurant-quality dish right in your own kitchen. Plus, the nutritional benefits of salmon, combined with the freshness of the vegetables, make this salad a smart choice for your health.

Spicy Honey-Glazed Salmon Salad a try? Gather your ingredients, follow the steps, and enjoy a meal that’s not only good for you but also bursting with flavor. Your taste buds will thank you, and you’ll feel great knowing you’ve made a healthy choice!

Grilled Boneless Chicken Thighs Recipe is a must-try!

Introduction to Grilled Boneless Chicken Thighs Recipe

Grilled boneless chicken thighs are a delicious and versatile dish that can elevate any meal. Whether you’re hosting a summer barbecue or simply looking for a quick weeknight dinner, this recipe is sure to impress. The juicy, tender meat of chicken thighs absorbs flavors beautifully, making them a favorite among home cooks and grill enthusiasts alike.

Why Choose Boneless Chicken Thighs?

Boneless chicken thighs are an excellent choice for several reasons. First, they are more flavorful than chicken breasts due to their higher fat content. This fat keeps the meat moist during cooking, resulting in a juicy bite every time. Additionally, boneless thighs cook faster than bone-in cuts, making them perfect for quick meals.

Another advantage is their versatility. You can marinate them in various sauces, spices, or herbs, allowing you to customize the flavor to suit your taste. Plus, they are often more affordable than chicken breasts, making them a budget-friendly option for families.

In summary, boneless chicken thighs are not only tasty but also practical. They provide a great balance of flavor, moisture, and convenience, making them a go-to choice for many home cooks. So, let’s dive into the ingredients and preparation steps for this mouthwatering grilled boneless chicken thighs recipe!

Ingredients for Grilled Boneless Chicken Thighs Recipe

To create the perfect grilled boneless chicken thighs, you’ll need a few simple ingredients. Each component plays a vital role in enhancing the flavor and tenderness of the chicken. Here’s what you’ll need:

  • 2 pounds boneless, skinless chicken thighs: This is the star of the dish. Choose thighs that are fresh and plump for the best results.
  • 1/4 cup olive oil: This adds richness and helps the marinade stick to the chicken.
  • 3 tablespoons soy sauce: Soy sauce brings a savory umami flavor that complements the chicken beautifully.
  • 2 tablespoons honey: Honey adds a touch of sweetness, balancing the saltiness of the soy sauce.
  • 2 tablespoons apple cider vinegar: This ingredient provides acidity, which helps tenderize the meat and adds brightness to the flavor.
  • 4 cloves garlic, minced: Garlic infuses the chicken with a robust flavor that enhances the overall taste.
  • 1 teaspoon smoked paprika: This spice gives a subtle smokiness, perfect for grilling.
  • 1 teaspoon onion powder: Onion powder adds depth and a hint of sweetness.
  • 1/2 teaspoon black pepper: Freshly ground black pepper adds a mild heat and enhances the flavors.
  • 1/2 teaspoon salt: Salt is essential for seasoning and bringing out the natural flavors of the chicken.
  • 1/2 teaspoon red pepper flakes (optional): If you like a bit of heat, these flakes will spice things up!

Gathering these ingredients is the first step toward creating a delicious meal. Each one contributes to the overall flavor profile, ensuring that your grilled boneless chicken thighs are both tasty and satisfying. Now that you have everything ready, let’s move on to the preparation steps!

Step-by-Step Preparation of Grilled Boneless Chicken Thighs Recipe

Now that you have all your ingredients ready, it’s time to dive into the preparation of your grilled boneless chicken thighs. Following these steps will ensure that your chicken is flavorful, juicy, and perfectly cooked. Let’s get started!

Step 1: Marinating the Chicken

Marinating is a crucial step that enhances the flavor of the chicken. Begin by taking a large bowl and whisking together the olive oil, soy sauce, honey, apple cider vinegar, minced garlic, smoked paprika, onion powder, black pepper, salt, and red pepper flakes. Make sure everything is well combined.

Next, add the boneless chicken thighs to the marinade. Use your hands or a spatula to ensure each piece is fully coated. This is where the magic happens! Cover the bowl with plastic wrap and place it in the refrigerator. For the best flavor, let the chicken marinate for at least 1 hour, but if you have time, letting it sit for up to 8 hours will yield even better results.

Step 2: Prepping the Grill

While the chicken is marinating, it’s time to prepare your grill. Preheat your grill to medium-high heat. This temperature is ideal for cooking chicken thighs, as it allows for a nice sear while keeping the inside juicy.

If you’re using a charcoal grill, make sure the coals are evenly distributed. For gas grills, simply turn on the burners and let them heat up. Once the grill is hot, you can lightly oil the grates with a paper towel dipped in oil. This helps prevent the chicken from sticking.

Step 3: Grilling the Chicken

After marinating and prepping the grill, it’s time to cook the chicken! Remove the chicken thighs from the marinade, letting any excess drip off. Discard the leftover marinade, as it’s not safe to reuse.

Place the chicken thighs on the grill. Cook them for about 6-7 minutes on each side. You want to achieve a nice char while ensuring the internal temperature reaches 165°F. Using a meat thermometer is a great way to check for doneness.

Step 4: Resting the Chicken

Once the chicken is cooked, remove it from the grill and let it rest for about 5 minutes. Resting is important because it allows the juices to redistribute throughout the meat, making it even more tender and flavorful.

After resting, you can slice the chicken or serve it whole. Your grilled boneless chicken thighs are now ready to be enjoyed!

Variations of Grilled Boneless Chicken Thighs Recipe

While the classic marinade for grilled boneless chicken thighs is delicious, there are many ways to switch things up! Exploring different marinades and cooking methods can add exciting flavors to your meals. Let’s take a look at some variations you can try.

Different Marinades to Try

Experimenting with marinades can transform your grilled boneless chicken thighs into a whole new dish. Here are a few ideas:

  • Citrus Marinade: Combine the juice of 2 oranges and 1 lemon with 1/4 cup olive oil, 2 tablespoons honey, and a pinch of salt. This marinade adds a refreshing zing!
  • Herb Marinade: Mix 1/4 cup olive oil with 2 tablespoons of chopped fresh herbs like rosemary, thyme, and parsley. Add 4 cloves of minced garlic for extra flavor.
  • Spicy Sriracha Marinade: Blend 1/4 cup soy sauce, 2 tablespoons Sriracha, 1 tablespoon honey, and 1 tablespoon rice vinegar. This will give your chicken a spicy kick!
  • BBQ Marinade: Use your favorite barbecue sauce mixed with a bit of apple cider vinegar for tanginess. This is perfect for a smoky flavor.

Feel free to mix and match ingredients to create your own unique marinades. The possibilities are endless!

Cooking Methods Beyond Grilling

If you don’t have access to a grill, or if the weather isn’t cooperating, there are other cooking methods you can use to prepare your boneless chicken thighs:

  • Oven-Baking: Preheat your oven to 400°F. Place the marinated chicken thighs on a baking sheet lined with parchment paper. Bake for 25-30 minutes, or until the internal temperature reaches 165°F.
  • Pan-Seering: Heat a tablespoon of olive oil in a skillet over medium-high heat. Cook the chicken thighs for about 6-7 minutes on each side until golden brown and cooked through.
  • Slow Cooking: Place the marinated chicken thighs in a slow cooker. Cook on low for 4-6 hours or on high for 2-3 hours. This method makes the chicken incredibly tender!

These alternative cooking methods can yield delicious results, ensuring you can enjoy grilled boneless chicken thighs no matter the circumstances. Now that you have some variations in mind, let’s move on to some serving suggestions!

Cooking Note for Grilled Boneless Chicken Thighs Recipe

When it comes to grilling boneless chicken thighs, a few key cooking notes can make all the difference. Understanding these tips will help you achieve the best results every time you fire up the grill.

First, always start with high-quality chicken thighs. Fresh, plump thighs will yield the juiciest results. If possible, choose organic or free-range chicken for enhanced flavor and texture.

Next, marinating is essential. The longer you marinate the chicken, the more flavorful it becomes. However, avoid marinating for more than 8 hours, as the acid in the marinade can break down the meat too much, leading to a mushy texture.

Temperature control is crucial while grilling. Make sure your grill is preheated to medium-high heat before placing the chicken on it. This helps create a nice sear, locking in the juices. If the grill is too hot, the outside may char before the inside is fully cooked.

Using a meat thermometer is highly recommended. This tool ensures that your chicken reaches the safe internal temperature of 165°F. It’s the best way to avoid undercooking or overcooking your chicken.

Lastly, don’t skip the resting period after grilling. Allowing the chicken to rest for about 5 minutes helps the juices redistribute, resulting in a more tender and flavorful bite. Cutting into the chicken too soon can cause the juices to run out, leaving you with dry meat.

By keeping these cooking notes in mind, you’ll be well on your way to mastering the art of grilling boneless chicken thighs. Now, let’s explore some delicious serving suggestions to complement your dish!

Serving Suggestions for Grilled Boneless Chicken Thighs Recipe

Once your grilled boneless chicken thighs are perfectly cooked, it’s time to think about how to serve them. The right side dishes and creative serving ideas can elevate your meal and impress your guests. Here are some delicious options to consider!

Side Dishes That Pair Well

Choosing the right side dishes can enhance the flavors of your grilled boneless chicken thighs. Here are some tasty options:

  • Grilled Vegetables: A mix of bell peppers, zucchini, and asparagus drizzled with olive oil and grilled until tender makes a colorful and healthy side.
  • Fresh Salad: A crisp salad with mixed greens, cherry tomatoes, cucumbers, and a light vinaigrette complements the richness of the chicken.
  • Rice Pilaf: Fluffy rice pilaf with herbs and spices adds a nice texture and absorbs the delicious juices from the chicken.
  • Coleslaw: A tangy coleslaw provides a crunchy contrast to the tender chicken, making for a delightful combination.
  • Potato Wedges: Crispy baked potato wedges seasoned with herbs are a satisfying side that pairs well with grilled meats.

These side dishes not only complement the flavors of the chicken but also add variety to your meal. Feel free to mix and match based on your preferences and what you have on hand!

Creative Serving Ideas

Serving your grilled boneless chicken thighs creatively can make your meal even more enjoyable. Here are some fun ideas:

  • Chicken Thigh Tacos: Slice the grilled chicken and serve it in warm tortillas with avocado, salsa, and fresh cilantro for a tasty taco night.
  • Chicken Salad: Chop the grilled chicken and mix it with diced apples, walnuts, and a yogurt dressing for a refreshing chicken salad.
  • Skewers: Cut the chicken into bite-sized pieces and thread them onto skewers with vegetables for a fun and easy-to-eat option.
  • Stuffed Peppers: Use the grilled chicken as a filling for stuffed bell peppers along with rice, beans, and cheese for a hearty meal.
  • Sandwiches: Layer sliced chicken on a bun with lettuce, tomato, and your favorite sauce for a delicious grilled chicken sandwich.

These creative serving ideas can turn your grilled boneless chicken thighs into a variety of exciting dishes. Whether you’re hosting a gathering or enjoying a family dinner, these suggestions will surely impress everyone at the table!

Tips for Perfect Grilled Boneless Chicken Thighs Recipe

To achieve the best results with your grilled boneless chicken thighs, a few tips can make all the difference. From selecting the right chicken to ensuring even cooking, these guidelines will help you create a delicious meal every time. Let’s explore these essential tips!

Choosing the Right Chicken Thighs

When it comes to grilled boneless chicken thighs, the quality of the meat matters. Here are some tips for choosing the best chicken thighs:

  • Freshness: Always opt for fresh chicken thighs. Look for thighs that are plump and have a pinkish hue. Avoid any that appear dull or have an off smell.
  • Organic or Free-Range: If possible, choose organic or free-range chicken. These options often have better flavor and texture, as the chickens are raised in healthier environments.
  • Skinless and Boneless: For this recipe, make sure to select skinless and boneless thighs. This will allow the marinade to penetrate the meat better and make grilling easier.
  • Uniform Size: Try to pick thighs that are similar in size. This ensures even cooking, so some pieces don’t end up overcooked while others are undercooked.

By selecting the right chicken thighs, you set the foundation for a flavorful and juicy dish. Now, let’s move on to ensuring even cooking!

Ensuring Even Cooking

Even cooking is crucial for perfectly grilled boneless chicken thighs. Here are some tips to help you achieve that:

  • Marinate Evenly: Make sure each piece of chicken is thoroughly coated in the marinade. This not only enhances flavor but also helps with even cooking.
  • Room Temperature: Before grilling, let the marinated chicken sit at room temperature for about 15-20 minutes. This helps the chicken cook more evenly.
  • Use a Meat Thermometer: Invest in a good meat thermometer. This tool will help you check the internal temperature, ensuring the chicken reaches 165°F without overcooking.
  • Rotate and Flip: While grilling, rotate and flip the chicken thighs halfway through cooking. This promotes even browning and prevents any one side from charring too much.
  • Resting Period: After grilling, let the chicken rest for about 5 minutes. This allows the juices to redistribute, resulting in a more tender and juicy bite.

By following these tips for choosing the right chicken thighs and ensuring even cooking, you’ll be well on your way to mastering the art of grilling boneless chicken thighs. Now, let’s take a look at the breakdown of time for this delicious recipe!

Breakdown of Time for Grilled Boneless Chicken Thighs Recipe

Understanding the time required for each step in the grilled boneless chicken thighs recipe is essential for planning your meal. Here’s a detailed breakdown of the time you’ll need for preparation, cooking, and the total time involved.

Prep Time

The prep time for this recipe mainly involves marinating the chicken. Here’s how it breaks down:

  • Marinating Time: 1 hour (minimum) to 8 hours (maximum). The longer you marinate, the more flavorful the chicken will be.
  • Active Prep Time: About 15 minutes. This includes gathering ingredients, mixing the marinade, and coating the chicken thighs.

In total, you should plan for at least 1 hour and 15 minutes of prep time if you’re marinating for the minimum time. If you choose to marinate for longer, you can prepare the chicken in advance and let it sit in the fridge.

Cooking Time

Once your chicken is marinated, the cooking time is relatively quick:

  • Grilling Time: Approximately 12-14 minutes. This includes about 6-7 minutes on each side of the chicken thighs.
  • Resting Time: 5 minutes. Allowing the chicken to rest after grilling is crucial for juicy results.

So, the total cooking time is around 17-19 minutes, including grilling and resting.

Total Time

When you combine the prep time and cooking time, here’s what you get:

  • Total Time: 1 hour and 32 minutes (minimum) to 8 hours and 19 minutes (maximum). This range accounts for the marinating time.

In summary, if you plan ahead and marinate your chicken thighs for a longer period, you can enjoy a delicious grilled meal with minimal active cooking time. This makes it perfect for busy weeknights or weekend gatherings!

Nutritional Information for Grilled Boneless Chicken Thighs Recipe

Understanding the nutritional content of your meals is essential for maintaining a balanced diet. Grilled boneless chicken thighs are not only delicious but also packed with nutrients. Here’s a breakdown of the nutritional information for this recipe, so you can enjoy your meal while keeping your health in mind.

Calories

Each serving of grilled boneless chicken thighs contains approximately 320 calories. This makes it a satisfying option for those looking to enjoy a hearty meal without overindulging. The calorie content primarily comes from the chicken itself, along with the healthy fats from olive oil and the natural sugars from honey.

Protein Content

One of the standout features of this dish is its protein content. Each serving provides about 24 grams of protein. Protein is essential for building and repairing tissues, making it a crucial part of a healthy diet. Grilled boneless chicken thighs are an excellent source of high-quality protein, making them a great choice for anyone looking to increase their protein intake.

Sodium Levels

When it comes to sodium, each serving contains around 600 milligrams. This level is primarily due to the soy sauce used in the marinade. While sodium is necessary for various bodily functions, it’s important to monitor your intake. If you’re watching your sodium levels, consider using low-sodium soy sauce or adjusting the amount to suit your dietary needs.

In summary, grilled boneless chicken thighs offer a balanced mix of calories, protein, and sodium. They are a nutritious option that can fit well into a healthy eating plan. Enjoy this flavorful dish while being mindful of your nutritional goals!

FAQs About Grilled Boneless Chicken Thighs Recipe

How long should I marinate the chicken?

Marinating the chicken is key to enhancing its flavor. Ideally, you should marinate the chicken thighs for at least 1 hour. However, for the best results, aim for 4 to 8 hours. This allows the marinade to penetrate the meat, making it more flavorful and tender. Just be careful not to exceed 8 hours, as the acid in the marinade can start to break down the meat too much, resulting in a mushy texture.

Can I use skin-on chicken thighs for this recipe?

Yes, you can use skin-on chicken thighs if you prefer! The skin will add extra flavor and crispiness when grilled. Just keep in mind that skin-on thighs may require a slightly longer cooking time. Make sure to monitor the internal temperature to ensure they reach 165°F for safe consumption. If you enjoy crispy skin, consider grilling them skin-side down first to achieve that perfect crunch!

What is the best temperature to grill chicken thighs?

The best temperature for grilling chicken thighs is medium-high heat, around 375°F to 450°F. This temperature allows the chicken to sear nicely on the outside while cooking through to a juicy finish on the inside. If your grill has a thermometer, keep an eye on it to maintain this temperature. If you’re using charcoal, you can test the heat by holding your hand about 6 inches above the grill grates; you should be able to hold it there for about 3-4 seconds before it feels too hot.

How do I know when the chicken is fully cooked?

The best way to know if your chicken is fully cooked is by using a meat thermometer. Insert the thermometer into the thickest part of the thigh, avoiding the bone. The internal temperature should reach 165°F for safe consumption. If you don’t have a thermometer, you can also check for doneness by cutting into the chicken; the juices should run clear, and the meat should no longer be pink. However, using a thermometer is the most reliable method to ensure perfectly cooked chicken every time!

Conclusion on Grilled Boneless Chicken Thighs Recipe

In conclusion, the grilled boneless chicken thighs recipe is a fantastic choice for anyone looking to create a delicious and satisfying meal. With its simple ingredients and straightforward preparation, this dish is perfect for both novice cooks and seasoned grill masters. The combination of flavors from the marinade enhances the natural juiciness of the chicken, making each bite a delightful experience.

Whether you’re preparing a family dinner, hosting a barbecue, or meal prepping for the week, grilled boneless chicken thighs offer versatility and ease. You can customize the marinade to suit your taste, explore various cooking methods, and pair the chicken with a wide range of side dishes. This adaptability makes it a staple in many kitchens.

Moreover, the nutritional benefits of this dish cannot be overlooked. With a good balance of protein, healthy fats, and low carbohydrates, grilled boneless chicken thighs fit well into a healthy eating plan. They provide the energy needed for an active lifestyle while being deliciously satisfying.

So, fire up your grill and give this recipe a try! With the tips and variations provided, you can make it your own and impress your family and friends. Enjoy the process of cooking and the joy of sharing a wonderful meal together. Happy grilling!

Spicy Salmon Sushi Bake: Discover a Flavorful Twist Today!

Introduction to Spicy Salmon Sushi Bake

Have you ever craved sushi but felt too pressed for time to roll those delicate pieces? Enter the Spicy Salmon Sushi Bake, a delightful twist on traditional sushi that’s perfect for busy days. Imagine all the flavors of your favorite sushi roll, but in a warm, comforting bake. It’s like a cozy blanket for your taste buds! This dish is not only a time-saver but also a crowd-pleaser, sure to impress your loved ones. Whether you’re a sushi aficionado or a newbie, this recipe is your ticket to a deliciously easy meal.

Why You’ll Love This Spicy Salmon Sushi Bake

This Spicy Salmon Sushi Bake is a game-changer for those hectic weeknights. It’s quick to prepare, bursting with flavor, and requires minimal cleanup—what’s not to love? The combination of spicy salmon, creamy avocado, and savory sushi rice creates a symphony of taste that dances on your palate. Plus, it’s versatile enough to please even the pickiest eaters in your family. Trust me, you’ll be hooked!

Ingredients for Spicy Salmon Sushi Bake

Creating this Spicy Salmon Sushi Bake is a breeze with a handful of simple ingredients. Let’s dive into what you’ll need:

  • Sushi Rice: The foundation of our dish, providing that classic sticky texture. You can find it in most grocery stores.
  • Water: Essential for cooking the rice to perfection.
  • Rice Vinegar: Adds a tangy kick to the rice, balancing the flavors beautifully.
  • Sugar and Salt: These pantry staples enhance the rice’s flavor, making it irresistible.
  • Salmon Fillet: The star of the show, offering a rich, buttery taste. Opt for fresh, skinless fillets for best results.
  • Mayonnaise: Provides creaminess to the spicy salmon mixture. Feel free to use a light version if you prefer.
  • Sriracha Sauce: Brings the heat! Adjust the amount to suit your spice tolerance.
  • Sesame Oil: Infuses a nutty aroma, elevating the dish’s overall flavor profile.
  • Avocado: Adds a creamy, buttery texture on top. Choose ripe avocados for the best taste.
  • Green Onions: These add a fresh, crisp bite and a pop of color.
  • Nori Strips: For that authentic sushi experience, providing a subtle seaweed flavor.
  • Soy Sauce: A classic accompaniment for serving, enhancing the umami notes.

Exact quantities for each ingredient are listed at the bottom of the article, ready for printing. Feel free to experiment with substitutions, like using cooked shrimp or crab instead of salmon, to suit your taste preferences!

How to Make Spicy Salmon Sushi Bake

Preparing the Sushi Rice

Start by rinsing the sushi rice under cold water. This step is crucial to remove excess starch, ensuring the rice doesn’t turn gummy. Once the water runs clear, combine the rice and water in a rice cooker or pot. If using a pot, bring it to a boil, then reduce the heat to low. Cover and let it simmer for about 20 minutes. While the rice cooks, mix rice vinegar, sugar, and salt in a small bowl until dissolved. Once the rice is ready, transfer it to a large bowl and gently fold in the vinegar mixture. Let it cool slightly before moving on.

Baking the Salmon

Preheat your oven to 375°F (190°C). Place the salmon fillet in a baking dish, ensuring it’s skinless for easy flaking later. Bake for 15-20 minutes, or until the salmon is cooked through and flakes easily with a fork. Once done, remove it from the oven and let it cool slightly. This step is where the magic begins, as the salmon’s rich, buttery flavor develops beautifully in the oven.

Mixing the Spicy Salmon

In a separate bowl, combine the flaked salmon with mayonnaise, sriracha sauce, and sesame oil. This mixture is where the spicy magic happens! Adjust the sriracha to your liking—more for a fiery kick, less for a milder taste. The sesame oil adds a nutty aroma that complements the salmon perfectly. Mix until everything is well combined, creating a creamy, spicy salmon mixture that’s ready to layer.

Assembling the Sushi Bake

In a large baking dish, spread the prepared sushi rice evenly across the bottom. This forms the base of your sushi bake, providing that classic sticky texture. Next, layer the spicy salmon mixture on top of the rice, spreading it evenly. This step is where the flavors start to meld together, creating a harmonious blend of spicy, savory, and umami notes.

Final Baking and Serving

Place the assembled dish back into the preheated oven. Bake for 10-15 minutes, just until everything is heated through and the top is slightly crispy. Once done, remove from the oven and top with sliced avocado and chopped green onions. These add a fresh, creamy contrast to the spicy bake. Serve with nori strips and soy sauce on the side for that authentic sushi experience. Enjoy your homemade Spicy Salmon Sushi Bake!

Tips for Success

  • Rinse the sushi rice thoroughly to avoid a gummy texture.
  • Use fresh salmon for the best flavor and texture.
  • Adjust the sriracha to suit your spice preference.
  • Let the rice cool slightly before assembling to prevent sogginess.
  • For a crispy top, broil the bake for the last 2 minutes.
  • Serve immediately for the freshest taste and texture.

Equipment Needed

  • Rice Cooker or Pot: Essential for cooking the sushi rice. A pot works just as well if you don’t have a rice cooker.
  • Baking Dish: Use a medium-sized dish for even baking.
  • Mixing Bowls: Handy for combining ingredients.
  • Fork: Perfect for flaking the salmon.
  • Oven: Preheat to 375°F for baking the salmon and final dish.

Variations

  • Seafood Swap: Substitute the salmon with cooked shrimp or crab for a different seafood twist.
  • Vegetarian Option: Replace the salmon with roasted vegetables like bell peppers and zucchini for a veggie-friendly version.
  • Spice Level: Adjust the sriracha to your liking, or try adding a dash of wasabi for an extra kick.
  • Low-Carb: Use cauliflower rice instead of sushi rice for a lighter, low-carb alternative.
  • Gluten-Free: Ensure all ingredients, especially soy sauce, are certified gluten-free for a safe meal.

Serving Suggestions

  • Side Salad: Pair with a crisp cucumber and seaweed salad for a refreshing contrast.
  • Drink: Enjoy with a chilled glass of sake or a light, citrusy white wine.
  • Presentation: Serve on a wooden board with nori strips and soy sauce in small bowls for an elegant touch.

FAQs about Spicy Salmon Sushi Bake

Can I make this Spicy Salmon Sushi Bake ahead of time?

Absolutely! You can prepare the sushi rice and spicy salmon mixture a day in advance. Store them separately in airtight containers in the fridge. When you’re ready to serve, assemble and bake as directed. This makes it a perfect dish for entertaining or busy weeknights.

What can I use instead of salmon in this sushi bake?

If you’re not a fan of salmon, feel free to swap it with cooked shrimp or crab. Both options offer a delightful seafood twist. For a vegetarian version, roasted vegetables like bell peppers and zucchini work wonderfully.

How do I store leftovers of the Spicy Salmon Sushi Bake?

Leftovers can be stored in an airtight container in the refrigerator for up to three days. To reheat, simply pop it in the oven at 350°F until warmed through. Avoid microwaving, as it can make the rice gummy.

Is this recipe gluten-free?

Yes, this Spicy Salmon Sushi Bake can be gluten-free if you use certified gluten-free soy sauce. Always double-check the labels of your ingredients to ensure they meet your dietary needs.

Can I adjust the spice level in this sushi bake?

Definitely! The beauty of this recipe is its flexibility. You can easily adjust the sriracha to suit your spice preference. For a milder version, use less sriracha, or add more for an extra kick. You can even drizzle some on top before serving for added heat.

Final Thoughts

Creating this Spicy Salmon Sushi Bake is like embarking on a culinary adventure, where each bite tells a story of flavor and comfort. It’s a dish that brings the joy of sushi into the warmth of your home, without the fuss of rolling. Whether you’re sharing it with family or savoring it solo, this recipe is a testament to the magic of simple ingredients coming together in harmony. So, gather your loved ones, set the table, and let this sushi bake be the centerpiece of a meal filled with laughter and love. Happy cooking!

Spicy Salmon Sushi Bake
Paul

Spicy Salmon Sushi Bake: Discover a Flavorful Twist Today!

A delicious and flavorful twist on traditional sushi, this Spicy Salmon Sushi Bake combines sushi rice, baked salmon, and a spicy mayo mixture, topped with avocado and green onions.
Prep Time 15 minutes
Cook Time 45 minutes
Total Time 1 hour
Servings: 4 servings
Course: Main Course
Cuisine: Japanese
Calories: 480

Ingredients
  

  • 2 cups sushi rice
  • 2 1/2 cups water
  • 1/4 cup rice vinegar
  • 2 tablespoons sugar
  • 1 teaspoon salt
  • 1 pound salmon fillet skinless
  • 2 tablespoons mayonnaise
  • 2 tablespoons sriracha sauce
  • 1 teaspoon sesame oil
  • 1 avocado sliced
  • 1/4 cup green onions chopped
  • 1 sheet nori cut into strips
  • Soy sauce for serving

Method
 

  1. Preheat your oven to 375°F (190°C).
  2. Rinse the sushi rice under cold water until the water runs clear. Combine the rinsed rice and water in a rice cooker or pot, and cook according to the rice cooker instructions or bring to a boil, then reduce heat to low, cover, and simmer for 20 minutes.
  3. In a small bowl, mix the rice vinegar, sugar, and salt until dissolved. Once the rice is cooked, transfer it to a large bowl and gently fold in the vinegar mixture. Allow the rice to cool slightly.
  4. While the rice is cooling, prepare the salmon. Place the salmon fillet in a baking dish and bake for 15-20 minutes, or until cooked through. Remove from the oven and let it cool slightly, then flake the salmon with a fork.
  5. In a separate bowl, mix the flaked salmon with mayonnaise, sriracha sauce, and sesame oil until well combined.
  6. In a large baking dish, spread the sushi rice evenly across the bottom. Layer the spicy salmon mixture on top of the rice.
  7. Bake in the preheated oven for 10-15 minutes, until heated through and slightly crispy on top.
  8. Remove from the oven and top with sliced avocado and chopped green onions. Serve with nori strips and soy sauce on the side.

Notes

  • For an extra kick, add more sriracha to the salmon mixture or drizzle it on top before serving.
  • You can also substitute the salmon with cooked shrimp or crab for a different flavor.

Flank Steak Pinwheels with Spinach and Cheese Delight

Introduction to Flank Steak Pinwheels with Spinach and Cheese

Oh, the joy of discovering a dish that feels like a warm hug after a long day! Flank Steak Pinwheels with Spinach and Cheese is just that—a delightful blend of flavors wrapped in a tender embrace. Imagine coming home to a meal that’s not only quick to prepare but also impressively delicious. Whether you’re a busy mom juggling a million things or a professional seeking a culinary escape, this recipe is your ticket to a satisfying dinner. It’s a savory symphony of spinach, ricotta, and mozzarella, all rolled into one delectable bite. Let’s dive in!

Why You’ll Love This Flank Steak Pinwheels with Spinach and Cheese

Picture this: a dish that’s as easy as pie, yet tastes like a gourmet masterpiece. These Flank Steak Pinwheels with Spinach and Cheese are a breeze to whip up, making them perfect for those hectic weeknights. The combination of tender steak and creamy cheese is a match made in culinary heaven. Plus, it’s a low-carb delight that doesn’t skimp on flavor. What’s not to love?

Ingredients for Flank Steak Pinwheels with Spinach and Cheese

Let’s talk ingredients! At the heart of this dish is the flank steak, a lean cut that’s perfect for rolling. Fresh spinach adds a pop of color and nutrients, while ricotta cheese brings a creamy texture. Shredded mozzarella melts beautifully, creating that gooey goodness we all crave. Minced garlic infuses the filling with aromatic depth, and a sprinkle of salt and pepper enhances every bite. Italian seasoning ties it all together with a hint of Mediterranean flair. Olive oil is your go-to for searing, and a splash of balsamic vinegar adds a tangy finish. Don’t forget toothpicks or kitchen twine to keep everything snug. For exact measurements, scroll to the bottom of the article where you can print the full recipe.

How to Make Flank Steak Pinwheels with Spinach and Cheese

Preparing the Flank Steak

First things first, let’s get that flank steak ready. Place it between two pieces of plastic wrap. This keeps things tidy and makes pounding easier. Grab a meat mallet or rolling pin and gently pound the steak to an even thickness of about ½ inch. This step ensures even cooking and makes rolling a breeze. Once pounded, set it aside and get ready for the next step.

Mixing the Filling

Now, onto the filling! In a mixing bowl, combine chopped spinach, ricotta cheese, and shredded mozzarella. Add minced garlic for that aromatic punch. Season with salt, pepper, and Italian seasoning. Mix everything well until it’s a harmonious blend of flavors. This filling is the heart of your pinwheels, so make sure it’s well combined and ready to spread.

Assembling the Pinwheels

Time to roll up our sleeves and assemble these beauties. Spread the cheese and spinach mixture evenly over the pounded flank steak. Leave a small border around the edges to prevent overflow. Starting from one end, carefully roll the steak into a tight log. Secure the ends with toothpicks or tie with kitchen twine. This step is crucial to keep everything snug and in place during cooking.

Cooking the Pinwheels

Heat olive oil in a large oven-safe skillet over medium-high heat. Once hot, sear the rolled steak for about 3-4 minutes on each side until browned. This searing locks in the flavors and gives a lovely crust. Drizzle balsamic vinegar over the top for a tangy touch. Transfer the skillet to a preheated oven at 375°F. Bake for 20-25 minutes, or until the internal temperature hits 145°F for medium-rare. Let the pinwheels rest for 5-10 minutes before slicing into 1-inch pieces. Serve warm and enjoy the deliciousness!

Tips for Success

  • Ensure the flank steak is evenly pounded for consistent cooking.
  • Use fresh spinach for the best flavor and texture.
  • Secure the roll tightly to prevent the filling from spilling out.
  • Let the pinwheels rest before slicing to retain juices.
  • Experiment with different cheeses for a unique twist.

Equipment Needed

  • Meat mallet or rolling pin for pounding the steak
  • Mixing bowl for combining the filling ingredients
  • Large oven-safe skillet for searing and baking
  • Plastic wrap to keep the workspace tidy
  • Toothpicks or kitchen twine to secure the pinwheels

Variations

  • Swap out the spinach for kale or arugula for a different leafy green flavor.
  • Add sun-dried tomatoes to the filling for a burst of tangy sweetness.
  • Try using feta or goat cheese instead of ricotta for a tangier taste.
  • For a spicy kick, include a pinch of red pepper flakes in the filling.
  • Make it dairy-free by using vegan cheese alternatives.
  • Incorporate chopped mushrooms for an earthy, umami twist.
  • Use a gluten-free balsamic glaze for a celiac-friendly option.

Serving Suggestions

  • Pair with a crisp green salad drizzled with lemon vinaigrette for a refreshing contrast.
  • Serve alongside roasted garlic mashed potatoes for a comforting side.
  • Complement with a glass of full-bodied red wine, like Cabernet Sauvignon.
  • Garnish with fresh basil leaves for a pop of color and flavor.
  • Present on a wooden board for a rustic, inviting look.

FAQs about Flank Steak Pinwheels with Spinach and Cheese

Can I prepare the pinwheels ahead of time?

Absolutely! You can assemble the pinwheels a day in advance. Just wrap them tightly in plastic wrap and store in the fridge. When you’re ready to cook, follow the searing and baking steps. This makes it a perfect dish for entertaining or busy weeknights.

What can I use instead of flank steak?

If flank steak isn’t available, skirt steak is a great alternative. It’s equally tender and works well for rolling. Just ensure it’s pounded to an even thickness for best results. Both cuts are ideal for these pinwheels, offering a delicious base for the filling.

How do I know when the steak is cooked to perfection?

Using a meat thermometer is key. Aim for an internal temperature of 145°F for medium-rare. This ensures the steak is juicy and tender. Remember, the steak will continue to cook slightly as it rests, so don’t skip the resting step!

Can I freeze the pinwheels?

Yes, you can freeze them! After assembling, wrap the pinwheels tightly in plastic wrap and place in a freezer-safe bag. They can be frozen for up to 3 months. Thaw in the fridge overnight before cooking as directed. This is a great way to have a ready-to-cook meal on hand.

What if I don’t have an oven-safe skillet?

No worries! You can sear the pinwheels in a regular skillet, then transfer them to a baking dish for the oven. Just make sure to preheat the dish in the oven for a few minutes before adding the pinwheels. This helps maintain the cooking temperature and ensures even baking.

Final Thoughts

There’s something truly magical about Flank Steak Pinwheels with Spinach and Cheese. It’s a dish that transforms a simple dinner into a memorable experience. The tender steak, wrapped around a creamy, cheesy filling, is like a culinary hug that warms the soul. Whether you’re sharing it with family or savoring it solo, each bite is a celebration of flavors. It’s a reminder that even on the busiest days, a delicious meal is within reach. So, roll up your sleeves, embrace the joy of cooking, and let these pinwheels bring a little extra delight to your table.

Flank Steak Pinwheels with Spinach and Cheese
Paul

Flank Steak Pinwheels with Spinach and Cheese Delight

Flank Steak Pinwheels with Spinach and Cheese is a delicious and savory dish featuring tender flank steak rolled with a flavorful mixture of spinach, ricotta, and mozzarella cheese, seasoned with garlic and Italian herbs.
Prep Time 20 minutes
Cook Time 30 minutes
Total Time 50 minutes
Servings: 4 servings
Course: Main Course
Cuisine: American
Calories: 350

Ingredients
  

  • 1 ½ pounds flank steak
  • 1 cup fresh spinach chopped
  • 1 cup ricotta cheese
  • 1 cup shredded mozzarella cheese
  • 2 cloves garlic minced
  • 1 teaspoon salt
  • ½ teaspoon black pepper
  • 1 teaspoon Italian seasoning
  • 2 tablespoons olive oil
  • 1 tablespoon balsamic vinegar
  • Toothpicks or kitchen twine for securing

Method
 

  1. Preheat your oven to 375°F (190°C).
  2. Place the flank steak between two pieces of plastic wrap and pound it to an even thickness of about ½ inch using a meat mallet or rolling pin.
  3. In a mixing bowl, combine the chopped spinach, ricotta cheese, mozzarella cheese, minced garlic, salt, pepper, and Italian seasoning. Mix well until all ingredients are evenly combined.
  4. Spread the cheese and spinach mixture evenly over the pounded flank steak, leaving a small border around the edges.
  5. Starting from one end, carefully roll the flank steak tightly into a log shape. Secure the ends with toothpicks or tie with kitchen twine.
  6. Heat olive oil in a large oven-safe skillet over medium-high heat. Once hot, sear the rolled flank steak for about 3-4 minutes on each side until browned.
  7. Drizzle balsamic vinegar over the top of the steak, then transfer the skillet to the preheated oven. Bake for 20-25 minutes, or until the internal temperature reaches 145°F (medium-rare).
  8. Remove from the oven and let the pinwheels rest for 5-10 minutes before slicing into 1-inch thick pieces. Serve warm.

Notes

  • For added flavor, consider marinating the flank steak in your favorite marinade for a few hours before preparing.
  • You can substitute the spinach with kale or arugula for a different taste, or add sun-dried tomatoes for an extra burst of flavor.

Honeycomb Cheesecake is a delightful dessert to try!

Introduction to Honeycomb Cheesecake Recipe

Honeycomb Cheesecake Recipe is a delightful treat that combines the rich flavors of cheesecake with the sweet, airy texture of honeycomb candy. This dessert is perfect for any occasion, whether it’s a birthday party, a family gathering, or just a cozy night in. With its luscious filling and crunchy topping, it’s sure to impress your guests and satisfy your sweet tooth.

Making a cheesecake might seem daunting, but this recipe breaks it down into simple steps. You’ll find that the process is not only easy but also enjoyable. The combination of cream cheese, whipped cream, and honeycomb creates a light and fluffy texture that melts in your mouth. Plus, the graham cracker crust adds a delicious crunch that perfectly complements the creamy filling.

Honeycomb Cheesecake Recipe approachable and rewarding. So, let’s dive in and discover how to create this sweet masterpiece!

Ingredients for Honeycomb Cheesecake Recipe

Honeycomb Cheesecake Recipe, you’ll need a few key ingredients that come together to form a delicious dessert. Here’s what you’ll need:

  • 1 ½ cups graham cracker crumbs
  • ½ cup unsalted butter, melted
  • 2 tablespoons granulated sugar
  • 16 ounces cream cheese, softened
  • 1 cup powdered sugar
  • 1 teaspoon vanilla extract
  • 1 cup heavy whipping cream
  • 1 cup honeycomb candy, chopped (plus extra for topping)
  • 1 tablespoon lemon juice

These ingredients are easy to find at your local grocery store. The graham cracker crumbs form a crunchy base, while the cream cheese and heavy cream create a rich and creamy filling. The honeycomb candy adds a unique sweetness and texture that makes this cheesecake stand out.

Honeycomb Cheesecake Recipe so special!

Step-by-Step Preparation of Honeycomb Cheesecake Recipe

Honeycomb Cheesecake Recipe. Follow these simple steps to create a delicious cheesecake that will wow your friends and family!

Step 1: Preparing the Crust

First, let’s make the crust. In a medium bowl, combine the graham cracker crumbs, melted butter, and granulated sugar. Mix everything together until it resembles wet sand. This mixture will form the base of your cheesecake.

Next, press the crumb mixture firmly into the bottom of a 9-inch springform pan. Make sure it’s even and compact. This step is crucial for a sturdy crust. Once done, bake it in a preheated oven at 325°F for about 10 minutes. After baking, remove it from the oven and let it cool completely.

Step 2: Making the Cheesecake Filling

While the crust cools, let’s prepare the cheesecake filling. In a large mixing bowl, beat the softened cream cheese with an electric mixer. Mix until it’s smooth and creamy, which should take about 2-3 minutes. Gradually add the powdered sugar and vanilla extract, mixing until everything is well combined.

In a separate bowl, whip the heavy cream until stiff peaks form. This means the cream should hold its shape when you lift the whisk. Gently fold the whipped cream into the cream cheese mixture. Be careful not to deflate the whipped cream; you want to keep that light and airy texture!

Step 3: Creating the Honeycomb Topping

Now, it’s time to add the star ingredient: honeycomb candy! Chop the honeycomb into small pieces. Then, fold the chopped honeycomb and lemon juice into the cheesecake filling. This will add a delightful crunch and sweetness to your cheesecake.

Step 4: Assembling the Honeycomb Cheesecake

With the crust cooled and the filling ready, it’s time to assemble your cheesecake. Pour the cheesecake filling over the cooled crust. Use a spatula to smooth the top, ensuring it’s even. This step is important for a beautiful presentation!

Step 5: Baking the Cheesecake

Unlike traditional cheesecakes, this one doesn’t require baking after assembly. Instead, you’ll need to refrigerate it. Cover the springform pan with plastic wrap or aluminum foil. Place it in the refrigerator for at least 4 hours, or overnight if you can wait. This allows the cheesecake to set properly.

Step 6: Cooling and Setting

Honeycomb Cheesecake Recipe.

Variation of Honeycomb Cheesecake Recipe

Honeycomb Cheesecake Recipe is already a delightful treat, there are many ways to customize it to suit your taste. Whether you want to experiment with different flavors or cater to dietary needs, these variations will help you create a cheesecake that’s uniquely yours!

Alternative Flavors and Toppings

One of the best things about cheesecake is its versatility. You can easily switch up the flavors to keep things exciting. Here are some ideas:

  • Chocolate Honeycomb Cheesecake: For a rich twist, add ¼ cup of cocoa powder to the cream cheese mixture. This will give your cheesecake a delicious chocolate flavor that pairs wonderfully with the honeycomb.
  • Berry Bliss Cheesecake: Fold in 1 cup of fresh berries, such as strawberries or blueberries, into the filling. This adds a fruity freshness that balances the sweetness of the honeycomb.
  • Caramel Drizzle: Drizzle caramel sauce over the top before serving. This adds a sweet, gooey layer that complements the crunchy honeycomb perfectly.
  • Nutty Crunch: Mix in some chopped nuts, like pecans or almonds, for an extra crunch. You can also sprinkle them on top for a beautiful presentation.

Honeycomb Cheesecake Recipe is a blank canvas waiting for your personal touch.

Gluten-Free Options

If you or your guests are following a gluten-free diet, you can still enjoy this delicious cheesecake. Here’s how to make it gluten-free:

  • Gluten-Free Crust: Substitute regular graham cracker crumbs with gluten-free graham cracker crumbs or crushed gluten-free cookies. This will ensure your crust is safe for those avoiding gluten.
  • Check Ingredients: Always check that your cream cheese, powdered sugar, and other ingredients are labeled gluten-free. Most of these items are naturally gluten-free, but it’s good to double-check.

Honeycomb Cheesecake Recipe without worry!

Cooking Note for Honeycomb Cheesecake Recipe

Honeycomb Cheesecake Recipe, a few cooking notes can help ensure your dessert turns out just right. Here are some tips to keep in mind as you prepare this delightful treat:

  • Room Temperature Ingredients: Make sure your cream cheese is at room temperature before mixing. This helps it blend smoothly without lumps. If it’s too cold, it can be difficult to achieve that creamy texture.
  • Whipping Cream: When whipping the heavy cream, be careful not to over-whip it. You want stiff peaks, but if you whip too long, it can turn into butter. Keep an eye on it as you whip!
  • Chilling Time: Patience is key! Allowing the cheesecake to chill for at least 4 hours, or overnight, is crucial for it to set properly. This step ensures that the filling firms up and holds its shape when sliced.
  • Springform Pan: Using a springform pan makes it easier to remove the cheesecake without damaging it. If you don’t have one, you can use a regular pie dish, but be careful when serving.
  • Serving Temperature: For the best flavor and texture, serve the cheesecake slightly chilled. This enhances the creamy filling and makes the honeycomb topping even more enjoyable.

Honeycomb Cheesecake Recipe that will impress everyone at your gathering. Happy baking!

Serving Suggestions for Honeycomb Cheesecake Recipe

Honeycomb Cheesecake Recipe is ready, it’s time to think about how to serve it! Presentation can elevate your dessert and make it even more appealing. Here are some delightful serving suggestions to consider:

  • Chilled Slices: Serve the cheesecake slices chilled for the best flavor. Place them on a decorative plate and garnish with a sprig of mint for a fresh touch.
  • Honey Drizzle: Drizzle a little honey over each slice before serving. This adds an extra layer of sweetness and enhances the honeycomb flavor.
  • Fresh Berries: Pair your cheesecake with a side of fresh berries, such as strawberries, raspberries, or blueberries. The tartness of the berries complements the sweetness of the cheesecake beautifully.
  • Whipped Cream: Add a dollop of freshly whipped cream on top of each slice. This adds a light and airy texture that balances the richness of the cheesecake.
  • Chocolate Shavings: For a touch of elegance, sprinkle some chocolate shavings on top. This adds a nice visual contrast and a hint of chocolate flavor.
  • Mini Cheesecakes: For a fun twist, consider making mini cheesecakes in cupcake liners. This makes for easy serving and is perfect for parties!

Honeycomb Cheesecake Recipe but also create a delightful experience for your guests. Enjoy the smiles and compliments as they savor each bite!

Tips for Perfecting Your Honeycomb Cheesecake Recipe

Honeycomb Cheesecake Recipe is all about attention to detail and a few helpful tips. Whether you’re a novice baker or a seasoned pro, these suggestions will help you achieve a cheesecake that’s not only delicious but also visually stunning. Let’s explore some essential tips to elevate your cheesecake game!

  • Use Quality Ingredients: The flavor of your cheesecake largely depends on the quality of your ingredients. Opt for high-quality cream cheese and fresh honeycomb candy. This will enhance the overall taste and texture of your cheesecake.
  • Don’t Rush the Mixing: When mixing your cream cheese and sugar, take your time. Beat until the mixture is completely smooth. This step is crucial for avoiding lumps in your cheesecake filling.
  • Fold Gently: When incorporating the whipped cream and honeycomb into the cream cheese mixture, fold gently. This helps maintain the light and airy texture of the whipped cream, ensuring a fluffy cheesecake.
  • Chill Thoroughly: As mentioned earlier, chilling is key! Allow your cheesecake to set in the refrigerator for at least 4 hours, or overnight if possible. This ensures that it firms up properly and slices beautifully.
  • Check for Doneness: If you’re unsure whether your cheesecake is set, gently shake the pan. The center should be slightly jiggly but not liquid. It will firm up as it cools.
  • Experiment with Toppings: Don’t hesitate to get creative with your toppings! Whether it’s fresh fruit, chocolate drizzle, or extra honeycomb, toppings can add flavor and visual appeal to your cheesecake.
  • Serve at the Right Temperature: For the best taste, serve your cheesecake slightly chilled. This enhances the flavors and makes the texture even more enjoyable.
  • Practice Patience: If you’re making this cheesecake for a special occasion, practice patience. Allowing it to chill and set properly will pay off in the end with a perfect slice!

Honeycomb Cheesecake Recipe. Each step is important, and with a little care, you’ll create a dessert that’s sure to impress everyone at your table. Happy baking!

Breakdown of Time for Honeycomb Cheesecake Recipe

Honeycomb Cheesecake Recipe is essential for planning your baking session. Here’s a detailed breakdown of the time you’ll need to create this delicious dessert.

Prep Time

The prep time for this cheesecake is approximately 30 minutes. This includes gathering your ingredients, preparing the crust, and mixing the cheesecake filling. Here’s a quick overview of what to expect:

  • Gathering ingredients: 5 minutes
  • Preparing the crust: 10 minutes
  • Making the cheesecake filling: 15 minutes

With a little organization, you can have everything ready to go in no time!

Cooking Time

While the cheesecake itself doesn’t require baking, you will need to bake the crust. This takes about 10 minutes. Here’s the breakdown:

  • Baking the crust: 10 minutes

After baking, the cheesecake needs to chill in the refrigerator, which is crucial for it to set properly.

Total Time

Honeycomb Cheesecake Recipe is about 4 hours and 40 minutes. This includes:

  • Prep time: 30 minutes
  • Cooking time (baking the crust): 10 minutes
  • Chilling time: At least 4 hours (or overnight for best results)

So, while the active time is relatively short, the chilling time is essential for achieving that perfect cheesecake texture. Plan ahead, and you’ll be rewarded with a delightful dessert that’s worth the wait!

Nutritional Information for Honeycomb Cheesecake Recipe

Honeycomb Cheesecake Recipe is important, especially if you’re mindful of your diet. This delicious dessert is not only a treat for your taste buds but also provides some nutritional value. Here’s a breakdown of the key nutritional components per serving:

Calories

Each slice of this delightful cheesecake contains approximately 350 calories. This calorie count includes the rich ingredients like cream cheese and heavy whipping cream, which contribute to its creamy texture. While it’s a bit indulgent, it’s perfect for special occasions or when you want to treat yourself!

Protein

In terms of protein, each serving offers about 5 grams. The cream cheese and heavy cream are the main sources of protein in this cheesecake. While it’s not a high-protein dessert, it does provide a small amount that can be part of a balanced diet.

Sodium

The sodium content in each slice is approximately 200 milligrams. This amount comes from the cream cheese and butter used in the recipe. If you’re watching your sodium intake, it’s good to be aware of this number. However, for most people, enjoying this cheesecake in moderation is perfectly fine.

Honeycomb Cheesecake Recipe is a delicious dessert that can fit into a balanced diet when enjoyed in moderation. Remember, it’s all about balance and treating yourself occasionally. Enjoy every bite of this creamy, crunchy delight!

FAQs about Honeycomb Cheesecake Recipe

Can I use store-bought honeycomb for the recipe?

Honeycomb Cheesecake Recipe so special. If you can’t find honeycomb, you can also use honeycomb-flavored candies or even toffee as a substitute.

How do I store leftover honeycomb cheesecake?

Honeycomb Cheesecake Recipe is easy! First, cover the cheesecake with plastic wrap or aluminum foil to keep it fresh. You can also place it in an airtight container. Store it in the refrigerator, where it will stay good for about 3 to 5 days. If you want to keep it longer, consider freezing individual slices. Just wrap them tightly in plastic wrap and place them in a freezer-safe container. When you’re ready to enjoy, simply thaw in the refrigerator overnight.

Can I make honeycomb cheesecake in advance?

Honeycomb Cheesecake Recipe in advance is a great idea! In fact, it’s recommended to let it chill overnight for the best results. This allows the flavors to meld and the cheesecake to set properly. You can prepare it a day or two ahead of your event, making it a convenient dessert option. Just remember to store it properly in the refrigerator until you’re ready to serve!

What can I substitute for cream cheese in the recipe?

Honeycomb Cheesecake Recipe, there are a few options. You can use mascarpone cheese for a similar creamy texture. Another option is to use Greek yogurt, which will give a tangy flavor and a lighter texture. If you prefer a dairy-free option, consider using a vegan cream cheese alternative made from nuts or soy. Just keep in mind that the flavor and texture may vary slightly, but it can still be delicious!

FAQs about Honeycomb Cheesecake Recipe

Can I use store-bought honeycomb for the recipe?

Honeycomb Cheesecake Recipe so special. If you can’t find honeycomb, you can also use honeycomb-flavored candies or even toffee as a substitute.

How do I store leftover honeycomb cheesecake?

Honeycomb Cheesecake Recipe is easy! First, cover the cheesecake with plastic wrap or aluminum foil to keep it fresh. You can also place it in an airtight container. Store it in the refrigerator, where it will stay good for about 3 to 5 days. If you want to keep it longer, consider freezing individual slices. Just wrap them tightly in plastic wrap and place them in a freezer-safe container. When you’re ready to enjoy, simply thaw in the refrigerator overnight.

Can I make honeycomb cheesecake in advance?

Honeycomb Cheesecake Recipe in advance is a great idea! In fact, it’s recommended to let it chill overnight for the best results. This allows the flavors to meld and the cheesecake to set properly. You can prepare it a day or two ahead of your event, making it a convenient dessert option. Just remember to store it properly in the refrigerator until you’re ready to serve!

What can I substitute for cream cheese in the recipe?

Honeycomb Cheesecake Recipe, there are a few options. You can use mascarpone cheese for a similar creamy texture. Another option is to use Greek yogurt, which will give a tangy flavor and a lighter texture. If you prefer a dairy-free option, consider using a vegan cream cheese alternative made from nuts or soy. Just keep in mind that the flavor and texture may vary slightly, but it can still be delicious!

Conclusion on Honeycomb Cheesecake Recipe

Honeycomb Cheesecake Recipe is a delightful dessert that brings together the best of both worlds: creamy cheesecake and crunchy honeycomb. This recipe is not only easy to follow but also allows for creativity and personalization. Whether you choose to stick with the classic version or experiment with different flavors and toppings, you’re sure to create a dessert that will impress everyone.

As you prepare this cheesecake, remember the importance of quality ingredients and patience. Allowing the cheesecake to chill properly is key to achieving that perfect texture. With each slice, you’ll experience the rich creaminess of the filling paired with the sweet crunch of honeycomb, making every bite a true delight.

Honeycomb Cheesecake Recipe. It’s perfect for celebrations, gatherings, or simply as a treat for yourself. We hope you enjoy every moment spent baking and savoring this delicious dessert. Happy baking!