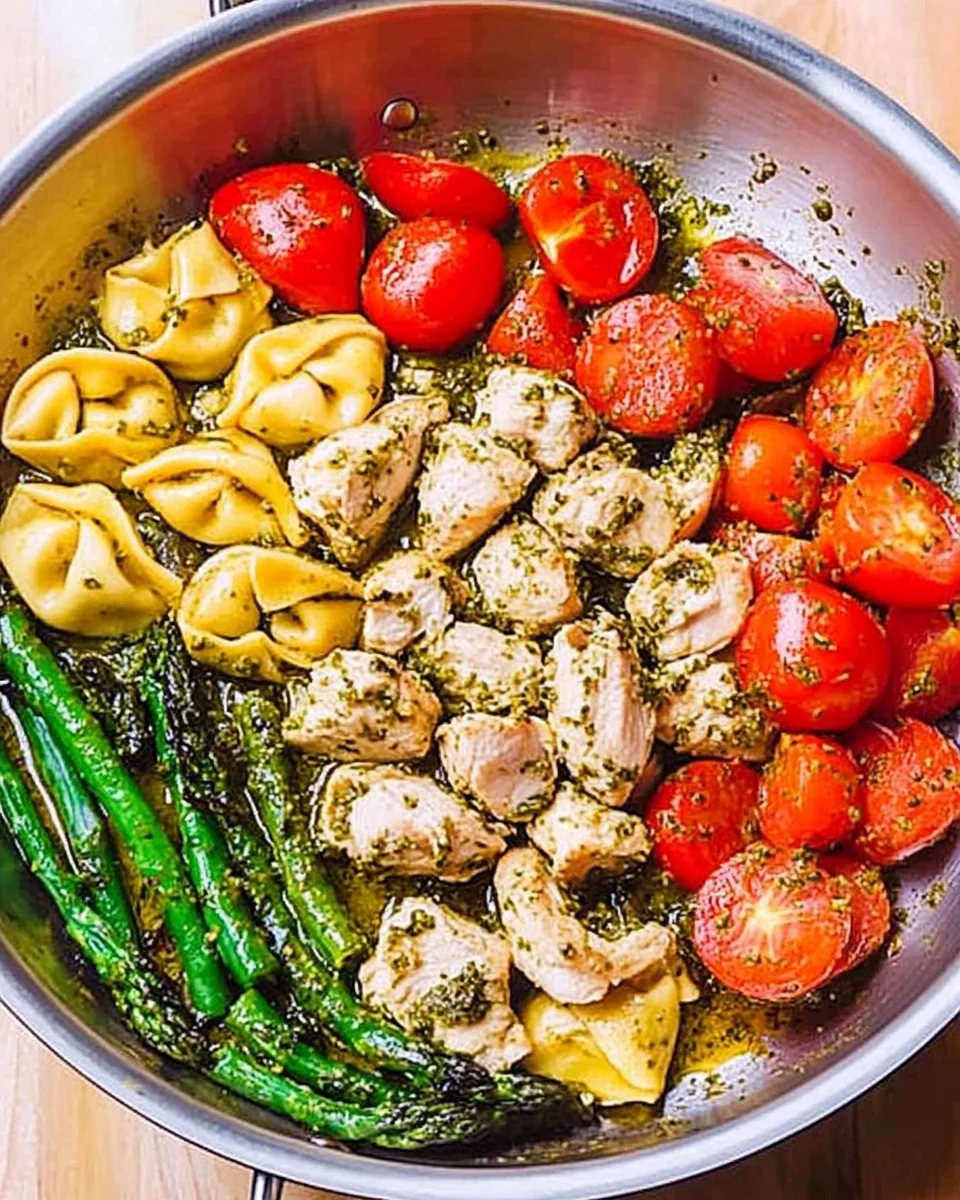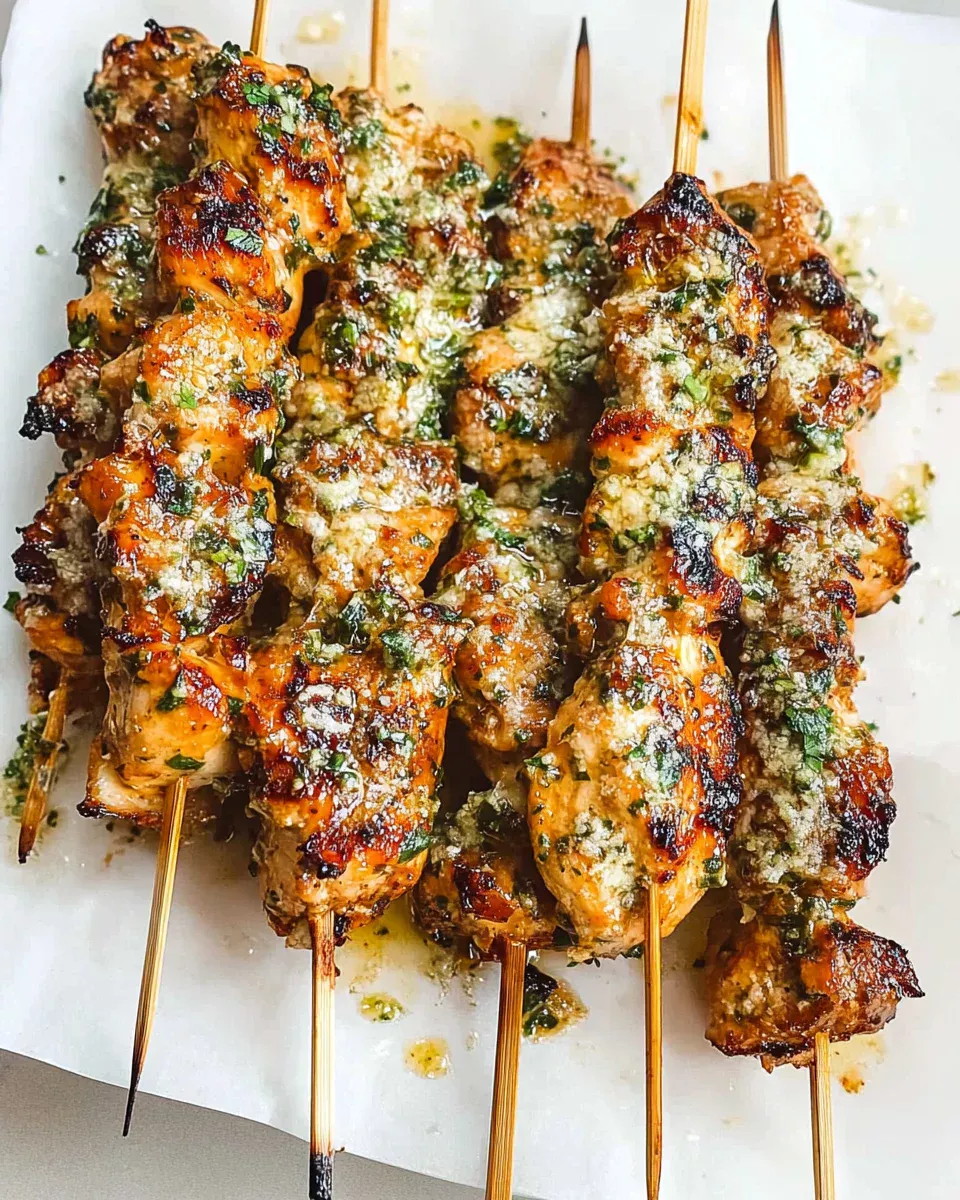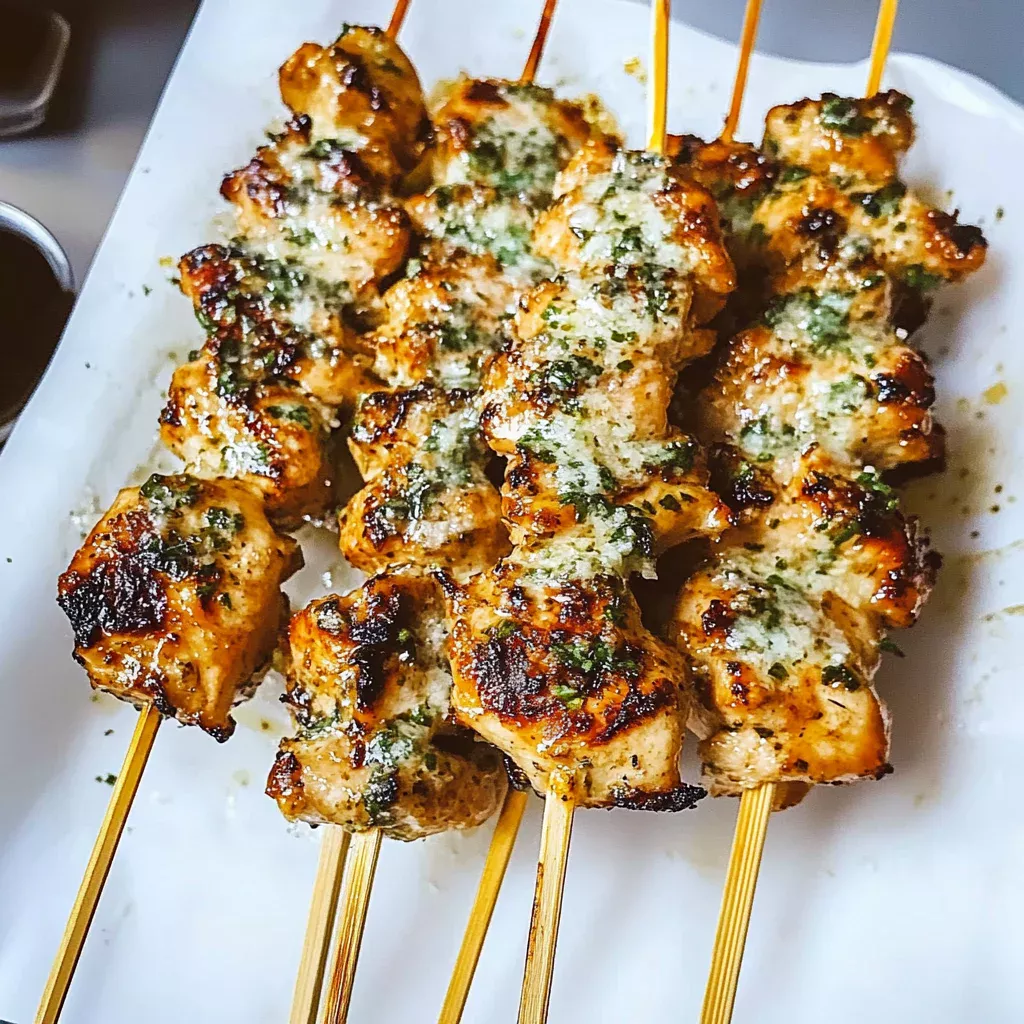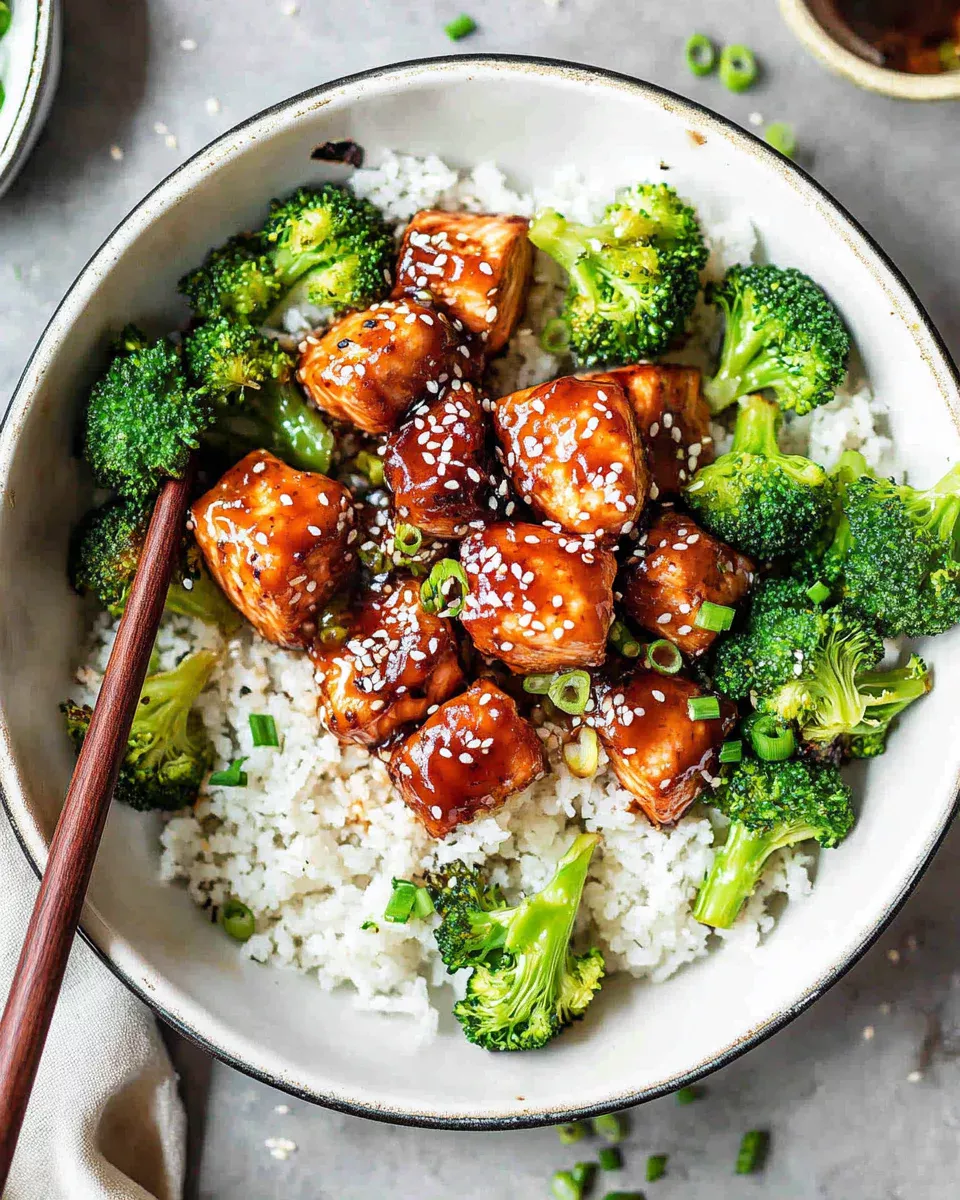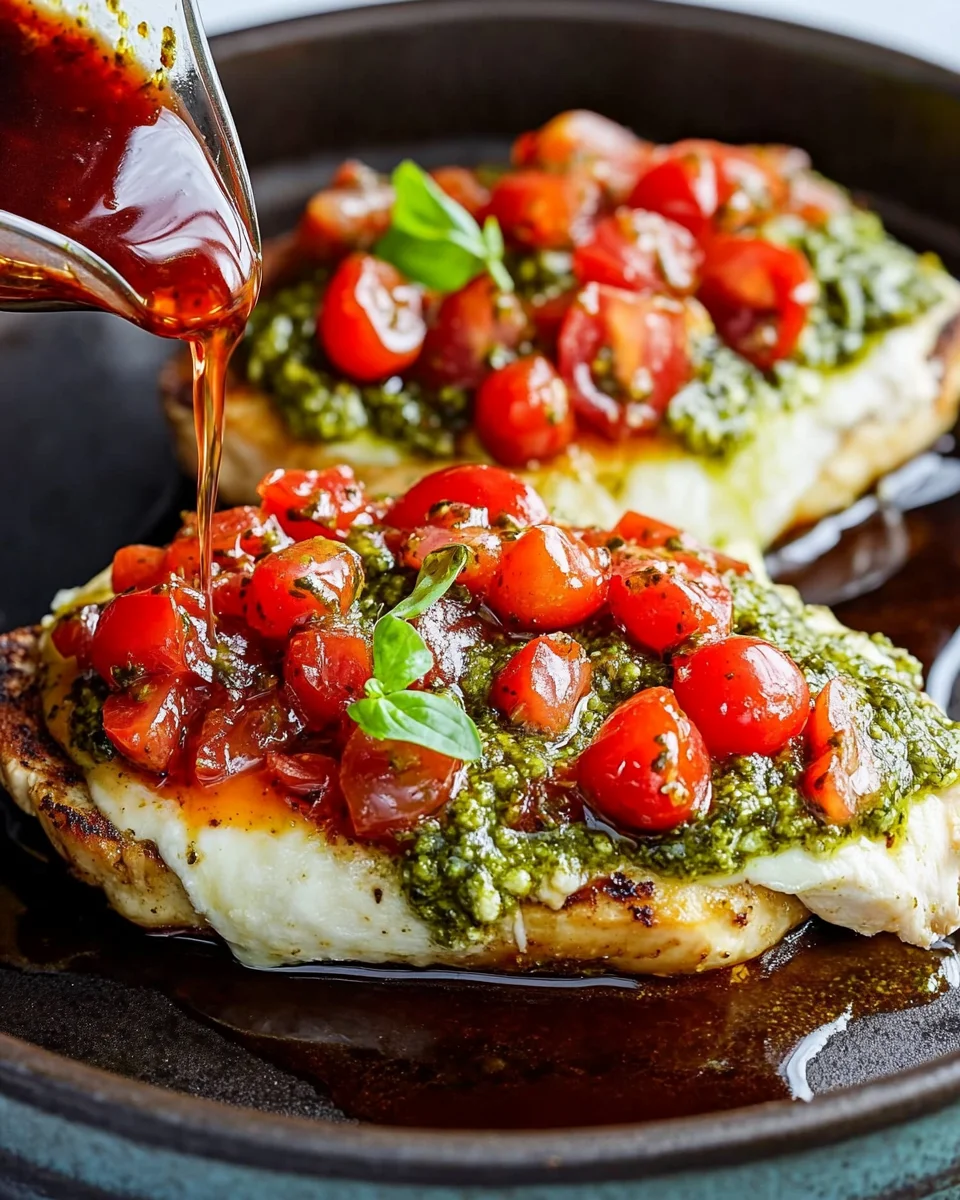
Pesto Bruschetta Chicken is a must-try dinner recipe!

Introduction to Pesto Bruschetta Chicken Recipe

Pesto Bruschetta Chicken Recipe. This dish combines juicy chicken breasts with fresh, vibrant flavors that will make your taste buds dance. It’s perfect for a weeknight meal or a special occasion. With just a few simple ingredients, you can create a dish that looks and tastes gourmet.

What Makes Pesto Bruschetta Chicken Special?

What sets this recipe apart is its delightful combination of flavors and textures. The tender chicken serves as a perfect canvas for the bright, zesty pesto and the juicy cherry tomatoes. The fresh basil adds an aromatic touch, while the melted mozzarella cheese brings everything together in a creamy, comforting way. Plus, the optional drizzle of balsamic glaze adds a sweet and tangy finish that elevates the dish even further.

This recipe is not only tasty but also versatile. You can easily customize it to suit your preferences. Whether you want to add more veggies or switch up the protein, the possibilities are endless. It’s a great way to impress your family or guests without spending hours in the kitchen. So, let’s dive into the ingredients and get started on this mouthwatering meal!

Ingredients for Pesto Bruschetta Chicken Recipe

Pesto Bruschetta Chicken Recipe, you will need a few fresh ingredients. Each component plays a vital role in building the flavors of this dish. Here’s what you’ll need:

  • 2 boneless, skinless chicken breasts (about 1 pound)
  • 1 cup cherry tomatoes, halved
  • 1/2 cup fresh basil leaves, chopped
  • 1/4 cup pesto sauce
  • 1 cup mozzarella cheese, shredded
  • 2 tablespoons olive oil
  • 1 teaspoon garlic powder
  • Salt and pepper to taste
  • 1/4 teaspoon red pepper flakes (optional)
  • Balsamic glaze for drizzling (optional)

These ingredients are not only easy to find but also packed with flavor. The chicken provides a hearty base, while the cherry tomatoes and basil add freshness. The pesto sauce brings a rich, herby taste, and the mozzarella cheese melts beautifully, creating a creamy topping. If you enjoy a little heat, the red pepper flakes are a great addition. Finally, a drizzle of balsamic glaze can enhance the dish with a sweet and tangy kick.

Now that you have your ingredients ready, let’s move on to the step-by-step preparation of this delicious meal!

Step-by-Step Preparation of Pesto Bruschetta Chicken Recipe

Pesto Bruschetta Chicken Recipe. This process is straightforward and will guide you to create a delicious meal that everyone will love. Let’s get started!

Step 1: Preparing the Chicken

First, preheat your oven to 375°F (190°C). This ensures that your chicken will cook evenly. While the oven heats up, take your boneless, skinless chicken breasts and place them on a clean cutting board. Pat them dry with a paper towel. This step helps the seasoning stick better.

Next, in a small bowl, mix together 2 tablespoons of olive oil, 1 teaspoon of garlic powder, salt, and pepper to taste. If you like a little spice, add 1/4 teaspoon of red pepper flakes. Rub this mixture all over the chicken breasts, making sure they are well coated. This will infuse the chicken with flavor as it cooks.

Step 2: Making the Pesto

If you’re using store-bought pesto, you can skip this step. However, if you want to make your own, it’s quite simple! In a food processor, combine 1 cup of fresh basil leaves, 1/4 cup of olive oil, 1/4 cup of grated Parmesan cheese, 1/4 cup of pine nuts, and a pinch of salt. Blend until smooth. This homemade pesto will add a fresh taste to your dish.

Step 3: Assembling the Bruschetta Topping

While the chicken is baking, it’s time to prepare the bruschetta topping. In a medium bowl, combine 1 cup of halved cherry tomatoes and the chopped basil leaves. Pour in the pesto sauce and mix everything together until the tomatoes are well coated. This mixture will add a burst of flavor to your chicken.

Step 4: Cooking the Chicken

After you’ve seasoned the chicken, place the breasts in a baking dish. Bake them in the preheated oven for 20 minutes. This initial cooking time helps the chicken become tender. After 20 minutes, take the chicken out of the oven. Spoon the tomato-basil-pesto mixture evenly over each chicken breast. Then, sprinkle 1 cup of shredded mozzarella cheese on top.

Step 5: Final Assembly and Serving

Return the baking dish to the oven and bake for an additional 10-15 minutes. You’ll know the chicken is done when it reaches an internal temperature of 165°F (75°C) and the cheese is melted and bubbly. Once cooked, remove the dish from the oven and let it rest for 5 minutes. This resting time allows the juices to redistribute, making the chicken even juicier.

Pesto Bruschetta Chicken Recipe is ready to be enjoyed!

Variations of Pesto Bruschetta Chicken Recipe

Pesto Bruschetta Chicken Recipe is not only delicious but also highly adaptable. You can easily modify it to suit different dietary preferences or to simply mix things up. Here are some exciting variations to consider!

Vegetarian Options

If you want to enjoy the flavors of this dish without the chicken, there are plenty of vegetarian options. One great alternative is to use portobello mushrooms. These meaty mushrooms can be grilled or baked and topped with the same pesto, tomato, and mozzarella mixture. They provide a hearty texture that mimics chicken.

Another option is to use zucchini or eggplant slices. Simply slice them into thick rounds, season, and bake until tender. Then, add the bruschetta topping and cheese as you would with the chicken. This way, you can enjoy a flavorful, plant-based meal that everyone will love!

Alternative Proteins

For those who prefer different proteins, there are several tasty alternatives to chicken. Turkey breasts are a lean option that works well with the same seasonings and toppings. Just adjust the cooking time as turkey may take a bit longer to cook through.

Fish lovers can try this recipe with salmon or tilapia. The light, flaky texture of these fish pairs beautifully with the pesto and tomatoes. Just be sure to adjust the cooking time, as fish cooks much faster than chicken. You’ll end up with a delightful dish that’s both healthy and satisfying!

Pesto Bruschetta Chicken Recipe in many different ways. Whether you’re cooking for vegetarians or simply want to try something new, these options will keep your meals exciting and flavorful!

Cooking Note for Pesto Bruschetta Chicken Recipe

Pesto Bruschetta Chicken Recipe, there are a few important cooking notes to keep in mind. These tips will help ensure that your dish turns out perfectly every time.

First, always check the freshness of your ingredients. Fresh basil, ripe cherry tomatoes, and high-quality pesto will significantly enhance the flavor of your dish. If possible, use homemade pesto for a fresher taste. It’s easy to make and can be stored for later use.

Next, be mindful of the chicken’s thickness. If your chicken breasts are particularly thick, consider pounding them to an even thickness. This helps them cook evenly and prevents the outside from drying out while the inside remains undercooked. A meat mallet or rolling pin works well for this task.

Additionally, using a meat thermometer is a great way to ensure your chicken is cooked to perfection. The internal temperature should reach 165°F (75°C) for safe consumption. This tool takes the guesswork out of cooking and helps you avoid overcooking, which can lead to dry chicken.

Lastly, let the chicken rest after baking. This step is crucial as it allows the juices to redistribute throughout the meat. If you cut into the chicken too soon, the juices will run out, leaving you with a drier piece of meat. A resting time of about 5 minutes is ideal.

Pesto Bruschetta Chicken Recipe that will impress your family and friends. Happy cooking!

Serving Suggestions for Pesto Bruschetta Chicken Recipe

Pesto Bruschetta Chicken Recipe is ready, it’s time to think about how to serve it. This dish is not only flavorful but also visually appealing, making it perfect for any dining occasion. Here are some delightful serving suggestions to enhance your meal experience:

  • Pair with a Fresh Salad: A light, crisp salad complements the rich flavors of the chicken. Consider a simple arugula salad with lemon vinaigrette or a classic Caesar salad. The freshness of the greens balances the hearty chicken beautifully.
  • Serve with Garlic Bread: Garlic bread is a fantastic side that adds a crunchy texture. You can easily make it by spreading butter and minced garlic on slices of baguette, then toasting them in the oven.
  • Accompany with Roasted Vegetables: Roasted vegetables like zucchini, bell peppers, or asparagus add color and nutrition to your plate. Toss them in olive oil, salt, and pepper, then roast until tender.
  • Include a Grain: For a more filling meal, serve the chicken with a side of quinoa, rice, or couscous. These grains soak up the delicious juices from the chicken and pesto, making every bite satisfying.
  • Garnish with Extra Basil: For a pop of color and flavor, sprinkle some fresh basil leaves on top of the chicken before serving. This not only enhances the presentation but also adds a fresh aroma.

Pesto Bruschetta Chicken Recipe and create a well-rounded meal. Whether it’s a family dinner or a gathering with friends, your dish will surely impress everyone at the table!

Tips for Perfecting Your Pesto Bruschetta Chicken Recipe

Pesto Bruschetta Chicken Recipe turns out perfectly every time, consider these helpful tips. They will enhance the flavors and presentation of your dish, making it even more enjoyable for you and your guests.

  • Use Fresh Ingredients: Fresh basil, ripe cherry tomatoes, and high-quality mozzarella cheese make a big difference. Fresh ingredients enhance the overall flavor and texture of the dish.
  • Marinate for Extra Flavor: For a deeper flavor, marinate the chicken in the olive oil and garlic mixture for at least 30 minutes before cooking. This allows the flavors to penetrate the meat.
  • Experiment with Cheese: While mozzarella is a classic choice, feel free to experiment with other cheeses. Try using provolone or goat cheese for a unique twist.
  • Adjust the Spice Level: If you enjoy a bit of heat, increase the amount of red pepper flakes. Alternatively, for a milder dish, simply omit them.
  • Serve Immediately: For the best taste and texture, serve the chicken right after it’s done resting. This ensures the cheese is still melty and the chicken is juicy.

Pesto Bruschetta Chicken Recipe that is not only delicious but also visually stunning. Your family and friends will be impressed with your culinary skills!

Breakdown of Time for Pesto Bruschetta Chicken Recipe

Pesto Bruschetta Chicken Recipe can help you plan your cooking efficiently. Here’s a simple breakdown of the time required for preparation and cooking:

Prep Time

The prep time for this recipe is about 15 minutes. This includes gathering your ingredients, seasoning the chicken, and preparing the bruschetta topping. If you choose to make your own pesto, add an extra 5 minutes for that step.

Cooking Time

The cooking time is approximately 30-35 minutes. This consists of 20 minutes for the initial baking of the chicken and an additional 10-15 minutes for the final baking with the toppings. Always check the internal temperature to ensure the chicken is fully cooked.

Total Time

Pesto Bruschetta Chicken Recipe a quick and satisfying meal option for busy weeknights or special occasions.

By keeping track of your time, you can ensure that everything comes together smoothly. Enjoy the process and the delicious results!

Breakdown of Time for Pesto Bruschetta Chicken Recipe

Pesto Bruschetta Chicken Recipe can help you plan your cooking efficiently. Here’s a simple breakdown of the time required for preparation and cooking:

Prep Time

The prep time for this recipe is about 15 minutes. This includes gathering your ingredients, seasoning the chicken, and preparing the bruschetta topping. If you choose to make your own pesto, add an extra 5 minutes for that step. Having everything ready before you start cooking makes the process smoother and more enjoyable.

Cooking Time

The cooking time is approximately 30-35 minutes. This consists of 20 minutes for the initial baking of the chicken and an additional 10-15 minutes for the final baking with the toppings. Always check the internal temperature to ensure the chicken is fully cooked. Using a meat thermometer can help you avoid any guesswork.

Total Time

Pesto Bruschetta Chicken Recipe a quick and satisfying meal option for busy weeknights or special occasions. With this efficient time breakdown, you can easily fit this delicious dish into your schedule.

By keeping track of your time, you can ensure that everything comes together smoothly. Enjoy the process and the delicious results!

Nutritional Information for Pesto Bruschetta Chicken Recipe

Pesto Bruschetta Chicken Recipe not only delights your taste buds but also provides valuable nutrients. Here’s a breakdown of the nutritional information per serving:

Calories

Pesto Bruschetta Chicken Recipe contains approximately 450 calories. This makes it a satisfying option for dinner without being overly heavy. The combination of chicken, cheese, and fresh toppings ensures you get a fulfilling meal that keeps you energized.

Protein

One of the standout features of this dish is its high protein content. Each serving provides about 40 grams of protein. This is great for muscle repair and growth, making it an excellent choice for those who are active or looking to maintain a healthy lifestyle. The chicken and mozzarella cheese contribute significantly to this protein boost.

Sodium

Pesto Bruschetta Chicken Recipe is around 800 milligrams per serving. While this is a moderate amount, it’s important to be mindful of your overall sodium intake, especially if you are watching your salt consumption. You can reduce sodium by using low-sodium pesto or limiting added salt during preparation.

Pesto Bruschetta Chicken Recipe while staying aligned with your dietary goals. This dish is not only delicious but also a nutritious option for any meal!

FAQs about Pesto Bruschetta Chicken Recipe

Can I make the pesto ahead of time?

Pesto Bruschetta Chicken Recipe.

What can I serve with Pesto Bruschetta Chicken?

Pesto Bruschetta Chicken Recipe. A fresh salad is always a great choice. You can also pair it with garlic bread for a crunchy side. Roasted vegetables like zucchini or asparagus add color and nutrition to your plate. If you want something heartier, consider serving it with quinoa or rice. These sides will complement the flavors of the chicken beautifully!

How do I store leftovers of Pesto Bruschetta Chicken?

Pesto Bruschetta Chicken Recipe, let the chicken cool completely. Then, place it in an airtight container and refrigerate. It will stay fresh for about 3-4 days. When you’re ready to enjoy it again, simply reheat in the oven or microwave until warmed through. This way, you can savor the delicious flavors of your meal even after the first serving!

Conclusion on Pesto Bruschetta Chicken Recipe

Pesto Bruschetta Chicken Recipe is a delightful dish that brings together fresh ingredients and bold flavors. It’s not only easy to prepare but also offers a satisfying meal that can impress family and friends alike. With its juicy chicken, vibrant pesto, and melty mozzarella, this recipe is sure to become a favorite in your household.

Whether you’re cooking for a special occasion or a simple weeknight dinner, this dish is versatile enough to suit any setting. Plus, with the various options for customization, you can easily adapt it to meet different dietary needs or personal preferences. From vegetarian alternatives to different proteins, the possibilities are endless!

Remember to follow the cooking tips and serving suggestions to elevate your meal. By using fresh ingredients and allowing the chicken to rest, you’ll ensure a delicious outcome every time. So, gather your ingredients, roll up your sleeves, and enjoy the process of creating this mouthwatering dish.

Pesto Bruschetta Chicken Recipe. It’s a wonderful way to bring people together around the dinner table, creating not just a meal, but also lasting memories. Happy cooking!
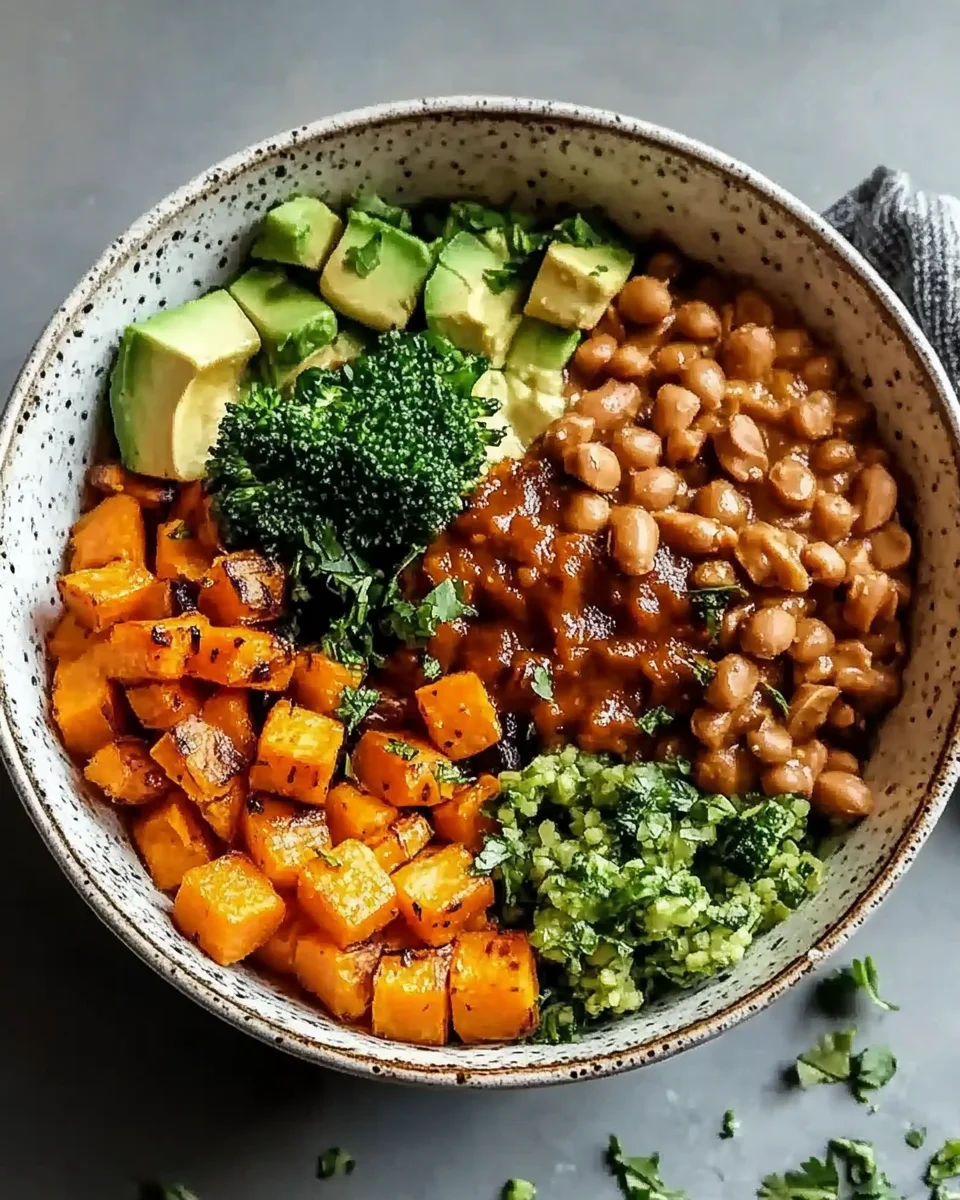
Thai Peanut Sweet Potato Bowl is a must-try dish!

Introduction to the Thai Peanut Sweet Potato Bowl

The Thai Peanut Sweet Potato Bowl is a delightful dish that combines vibrant flavors and nutritious ingredients. This bowl is not just a meal; it’s an experience that brings together the warmth of roasted sweet potatoes, the crunch of fresh vegetables, and the creamy richness of peanut sauce. Whether you’re looking for a quick lunch or a hearty dinner, this bowl is sure to satisfy your cravings.

What Makes the Thai Peanut Sweet Potato Bowl Special?

What sets the Thai Peanut Sweet Potato Bowl apart is its unique blend of textures and flavors. The sweet potatoes provide a natural sweetness, while the chickpeas add protein and heartiness. The colorful vegetables, like shredded carrots and red cabbage, contribute a refreshing crunch. And let’s not forget the star of the show—the peanut sauce! This sauce ties everything together with its creamy, nutty flavor and a hint of spice.

Moreover, this bowl is incredibly versatile. You can easily customize it to suit your taste preferences or dietary needs. Want to add more protein? Toss in some grilled chicken or tofu. Prefer a different base? Swap quinoa for brown rice or cauliflower rice. The possibilities are endless!

Not only is this dish delicious, but it’s also packed with nutrients. Sweet potatoes are rich in vitamins and fiber, while chickpeas provide a good source of plant-based protein. This makes the Thai Peanut Sweet Potato Bowl a wholesome choice for anyone looking to eat healthier without sacrificing flavor.

In the following sections, we will explore the ingredients, preparation steps, and variations of this delightful bowl. Get ready to dive into a world of flavor and nutrition!

Ingredients for the Thai Peanut Sweet Potato Bowl

Creating the Thai Peanut Sweet Potato Bowl is simple and requires fresh, wholesome ingredients. Here’s what you’ll need to whip up this delicious dish:

  • 2 medium sweet potatoes, peeled and diced into 1-inch cubes
  • 1 tablespoon olive oil
  • 1 teaspoon salt
  • 1/2 teaspoon black pepper
  • 1 cup cooked quinoa
  • 1 cup chickpeas, drained and rinsed
  • 1 cup shredded carrots
  • 1 cup red cabbage, thinly sliced
  • 1/4 cup chopped green onions
  • 1/4 cup chopped fresh cilantro

For the peanut sauce, gather the following ingredients:

  • 1/4 cup creamy peanut butter
  • 2 tablespoons soy sauce
  • 1 tablespoon maple syrup
  • 1 tablespoon rice vinegar
  • 1 teaspoon sesame oil
  • 1-2 teaspoons sriracha (adjust to taste)
  • 2-3 tablespoons water (to thin the sauce)

These ingredients come together to create a bowl that is not only visually appealing but also packed with flavor and nutrition. The sweet potatoes and chickpeas provide a hearty base, while the fresh vegetables add a delightful crunch. The peanut sauce is the perfect finishing touch, bringing everything together with its creamy texture and rich taste.

Now that you have your ingredients ready, let’s move on to the preparation steps to create your Thai Peanut Sweet Potato Bowl!

Step-by-Step Preparation of the Thai Peanut Sweet Potato Bowl

Now that you have all your ingredients ready, it’s time to dive into the preparation of your Thai Peanut Sweet Potato Bowl. This step-by-step guide will help you create a delicious and nutritious meal that’s sure to impress!

Step 1: Preparing the Sweet Potatoes

First, let’s focus on the sweet potatoes. Preheat your oven to 400°F. While the oven heats up, peel and dice the sweet potatoes into 1-inch cubes. This size helps them cook evenly and become tender.

Next, place the diced sweet potatoes in a large bowl. Drizzle with 1 tablespoon of olive oil, then sprinkle with 1 teaspoon of salt and 1/2 teaspoon of black pepper. Toss everything together until the sweet potatoes are well coated. This step is crucial as it enhances the flavor and helps achieve that lovely caramelization.

Spread the seasoned sweet potatoes on a baking sheet in a single layer. Roast them in the preheated oven for about 25-30 minutes. Remember to flip them halfway through to ensure even cooking. You’ll know they’re done when they’re tender and slightly golden brown.

Step 2: Making the Thai Peanut Sauce

While the sweet potatoes are roasting, it’s time to whip up the peanut sauce. In a small bowl, combine 1/4 cup of creamy peanut butter, 2 tablespoons of soy sauce, 1 tablespoon of maple syrup, 1 tablespoon of rice vinegar, and 1 teaspoon of sesame oil. This combination creates a rich and flavorful sauce.

For a little kick, add 1-2 teaspoons of sriracha, adjusting to your taste preference. If you like it spicier, feel free to add more! To achieve your desired consistency, gradually mix in 2-3 tablespoons of water, one tablespoon at a time. Whisk until the sauce is smooth and creamy. If you prefer a creamier texture, consider blending the sauce in a food processor.

Step 3: Cooking the Vegetables

With the sweet potatoes roasting and the peanut sauce ready, it’s time to prepare the vegetables. You’ll need 1 cup of shredded carrots and 1 cup of thinly sliced red cabbage. These veggies add color and crunch to your bowl.

Simply wash and chop the vegetables as needed. You can use a box grater for the carrots or buy pre-shredded carrots to save time. For the red cabbage, a sharp knife will do the trick. Once chopped, set them aside until the sweet potatoes are ready.

Step 4: Assembling the Thai Peanut Sweet Potato Bowl

Now comes the fun part—assembling your Thai Peanut Sweet Potato Bowl! Start with a base of 1 cup of cooked quinoa in each bowl. Quinoa is a great source of protein and adds a nutty flavor.

Next, top the quinoa with the roasted sweet potatoes, chickpeas, shredded carrots, and red cabbage. Don’t forget to sprinkle 1/4 cup of chopped green onions and 1/4 cup of chopped fresh cilantro on top for added freshness and flavor.

Finally, drizzle the creamy peanut sauce generously over the assembled bowl. You can serve it immediately or chill it in the refrigerator for a refreshing meal prep option. Enjoy your delicious Thai Peanut Sweet Potato Bowl!

Variations of the Thai Peanut Sweet Potato Bowl

The Thai Peanut Sweet Potato Bowl is a fantastic base for creativity. You can easily modify it to suit your taste or dietary needs. Here are some exciting variations to consider!

Adding Protein Options

If you want to boost the protein content of your Thai Peanut Sweet Potato Bowl, there are plenty of options. Here are a few ideas:

  • Grilled Chicken: Add sliced grilled chicken breast for a lean protein boost. It pairs wonderfully with the peanut sauce.
  • Tofu: For a plant-based option, try adding cubed, pan-fried tofu. It absorbs flavors well and adds a nice texture.
  • Edamame: Toss in some shelled edamame for a pop of color and protein. They’re easy to prepare and delicious!
  • Hard-Boiled Eggs: Sliced hard-boiled eggs can add creaminess and extra protein to your bowl.

Feel free to mix and match these protein options to create a bowl that satisfies your hunger and taste buds!

Alternative Vegetables to Use

While the original recipe calls for shredded carrots and red cabbage, you can switch things up with different vegetables. Here are some tasty alternatives:

  • Spinach: Fresh spinach adds a vibrant green color and is packed with nutrients. Toss it in raw for a fresh crunch.
  • Bell Peppers: Sliced bell peppers add sweetness and crunch. They come in various colors, making your bowl visually appealing.
  • Cucumbers: Thinly sliced cucumbers provide a refreshing crunch. They’re perfect for adding a cool contrast to the warm sweet potatoes.
  • Broccoli: Lightly steamed or roasted broccoli florets can add a nice texture and flavor to your bowl.

Experimenting with different vegetables not only enhances the flavor but also boosts the nutritional value of your Thai Peanut Sweet Potato Bowl. Enjoy creating your unique version!

Cooking Note for the Thai Peanut Sweet Potato Bowl

When preparing the Thai Peanut Sweet Potato Bowl, a few cooking tips can enhance your experience and ensure delicious results. First, always choose fresh ingredients. Fresh vegetables and sweet potatoes will provide the best flavor and texture. If possible, opt for organic produce to maximize nutritional benefits.

Next, pay attention to the roasting of the sweet potatoes. Make sure they are cut into uniform 1-inch cubes. This ensures even cooking and caramelization. If you prefer a crispier texture, you can roast them a bit longer, but keep an eye on them to prevent burning.

For the peanut sauce, feel free to adjust the ingredients to suit your taste. If you like it sweeter, add a bit more maple syrup. If you prefer a tangier flavor, increase the rice vinegar. The beauty of this sauce lies in its versatility, so don’t hesitate to experiment!

Additionally, if you’re preparing this dish for meal prep, consider storing the components separately. Keep the roasted sweet potatoes, quinoa, and vegetables in airtight containers in the fridge. This way, you can assemble your bowl fresh each time you eat, maintaining the crunch of the veggies and the creaminess of the sauce.

Lastly, don’t forget to garnish your bowl! A sprinkle of sesame seeds or a squeeze of lime can elevate the flavors even more. Enjoy the process of making your Thai Peanut Sweet Potato Bowl, and remember, cooking is all about creativity and fun!

Serving Suggestions for the Thai Peanut Sweet Potato Bowl

Serving your Thai Peanut Sweet Potato Bowl can be as fun and creative as making it! Here are some delightful suggestions to enhance your dining experience:

  • Garnish with Fresh Herbs: A sprinkle of fresh herbs like cilantro or basil can brighten up the flavors. They add a burst of freshness that complements the peanut sauce beautifully.
  • Include a Lime Wedge: Serve your bowl with a lime wedge on the side. A squeeze of lime juice just before eating can add a zesty kick that elevates the dish.
  • Pair with a Side Salad: Consider serving your bowl alongside a light side salad. A simple mix of greens with a light vinaigrette can balance the richness of the peanut sauce.
  • Top with Avocado: Sliced avocado adds creaminess and healthy fats. It pairs perfectly with the sweet potatoes and peanut sauce, making each bite even more satisfying.
  • Serve with Rice Paper Rolls: For a fun twist, serve your bowl with fresh rice paper rolls. Fill them with veggies and dip them in the peanut sauce for a delightful appetizer.
  • Offer Extra Peanut Sauce: Always have extra peanut sauce on the side. Some people love to drizzle more on top or use it as a dip for their veggies.

These serving suggestions not only enhance the flavor but also make your meal visually appealing. Whether you’re enjoying this bowl for lunch, dinner, or meal prep, these ideas will surely impress your family and friends. Enjoy every bite of your Thai Peanut Sweet Potato Bowl!

Tips for Perfecting Your Thai Peanut Sweet Potato Bowl

Creating the perfect Thai Peanut Sweet Potato Bowl is all about attention to detail and a few handy tips. Here are some suggestions to elevate your dish and ensure it’s bursting with flavor!

  • Choose the Right Sweet Potatoes: Opt for firm, smooth sweet potatoes. Look for ones that are free from blemishes or soft spots. The fresher the sweet potatoes, the better the flavor!
  • Season Generously: Don’t be shy with the seasoning! A little extra salt and pepper can enhance the natural sweetness of the sweet potatoes. You can also experiment with spices like paprika or garlic powder for added depth.
  • Roast for Maximum Flavor: Roasting sweet potatoes until they are caramelized brings out their natural sweetness. Make sure to spread them out on the baking sheet to avoid steaming. This helps achieve that perfect crispy texture.
  • Customize Your Peanut Sauce: The peanut sauce is key to this dish. Feel free to adjust the ingredients to match your taste. If you love garlic, add minced garlic to the sauce. For a nutty twist, try adding a splash of coconut milk.
  • Mix and Match Vegetables: While the recipe suggests specific vegetables, don’t hesitate to use what you have on hand. Seasonal veggies can add unique flavors and textures. Try adding roasted bell peppers or snap peas for a fresh crunch!
  • Make it Ahead: If you’re short on time, prepare the components in advance. Roast the sweet potatoes and cook the quinoa ahead of time. Store them in the fridge, and assemble your bowl when you’re ready to eat.
  • Experiment with Toppings: Toppings can make a big difference! Consider adding toasted nuts, seeds, or even a sprinkle of chili flakes for a spicy kick. These little extras can enhance the overall experience.
  • Serve Warm: For the best flavor, serve your bowl warm. The warmth of the sweet potatoes and quinoa complements the creamy peanut sauce beautifully.

By following these tips, you’ll create a Thai Peanut Sweet Potato Bowl that’s not only delicious but also visually stunning. Enjoy the process of making this dish, and don’t be afraid to get creative!

Breakdown of Time for the Thai Peanut Sweet Potato Bowl

Understanding the time needed to prepare the Thai Peanut Sweet Potato Bowl can help you plan your cooking efficiently. Here’s a simple breakdown of the time required for each step of the process.

Prep Time

The prep time for this delicious bowl is approximately 15-20 minutes. This includes:

  • Peeling and dicing the sweet potatoes.
  • Chopping the vegetables like carrots, red cabbage, green onions, and cilantro.
  • Measuring out the ingredients for the peanut sauce.

Having all your ingredients prepped and ready to go will make the cooking process smoother and more enjoyable!

Cooking Time

The cooking time for the Thai Peanut Sweet Potato Bowl is about 30-35 minutes. This includes:

  • Roasting the sweet potatoes for 25-30 minutes in the oven.
  • Preparing the peanut sauce, which takes about 5 minutes.

While the sweet potatoes roast, you can easily whip up the peanut sauce, making the most of your time in the kitchen.

Total Time

In total, you can expect to spend around 45-55 minutes from start to finish. This includes both prep and cooking time. It’s a manageable timeframe for a nutritious and flavorful meal that serves four people. Plus, the effort is well worth it when you enjoy the delightful flavors of your Thai Peanut Sweet Potato Bowl!

Nutritional Information for the Thai Peanut Sweet Potato Bowl

Understanding the nutritional content of your meals is essential for maintaining a balanced diet. The Thai Peanut Sweet Potato Bowl is not only delicious but also packed with nutrients. Here’s a breakdown of the nutritional information per serving:

Calories

Each serving of the Thai Peanut Sweet Potato Bowl contains approximately 450 calories. This makes it a satisfying meal that provides energy without being overly heavy. The combination of sweet potatoes, quinoa, and chickpeas contributes to the calorie count while offering essential nutrients.

Protein

In terms of protein, this bowl offers about 15 grams per serving. The chickpeas and quinoa are excellent sources of plant-based protein, making this dish a great option for vegetarians and vegans. Protein is vital for muscle repair and growth, making this bowl a nutritious choice for active individuals.

Sodium

The sodium content in the Thai Peanut Sweet Potato Bowl is approximately 600 milligrams per serving. This amount is reasonable, especially considering the flavor-enhancing ingredients like soy sauce in the peanut sauce. If you’re watching your sodium intake, you can opt for low-sodium soy sauce to reduce the overall sodium content.

Overall, the Thai Peanut Sweet Potato Bowl is a well-rounded meal that provides a good balance of calories, protein, and essential nutrients. It’s a fantastic choice for anyone looking to enjoy a healthy and flavorful dish!

FAQs about the Thai Peanut Sweet Potato Bowl

Can I make the Thai Peanut Sweet Potato Bowl ahead of time?

Absolutely! The Thai Peanut Sweet Potato Bowl is perfect for meal prep. You can prepare the components in advance and store them separately in airtight containers. Roast the sweet potatoes, cook the quinoa, and chop the vegetables ahead of time. When you’re ready to eat, simply assemble the bowl and drizzle with the peanut sauce. This way, you can enjoy a fresh and delicious meal any day of the week!

What can I substitute for peanut butter in the sauce?

If you’re looking for a substitute for peanut butter, there are several options. Almond butter or cashew butter can work well, providing a similar creamy texture and nutty flavor. For a nut-free option, try sunflower seed butter. It has a unique taste and is a great alternative for those with nut allergies. Just keep in mind that the flavor of the sauce may change slightly, but it will still be delicious!

Is the Thai Peanut Sweet Potato Bowl vegan-friendly?

Yes, the Thai Peanut Sweet Potato Bowl is entirely vegan-friendly! All the ingredients, including the sweet potatoes, quinoa, chickpeas, and peanut sauce, are plant-based. This makes it a fantastic option for vegans and anyone looking to enjoy a healthy, meat-free meal. You can feel good about serving this bowl to friends and family, knowing it caters to various dietary preferences!

How can I make the Thai Peanut Sweet Potato Bowl spicier?

If you love a little heat, there are several ways to spice up your Thai Peanut Sweet Potato Bowl. First, you can increase the amount of sriracha in the peanut sauce. Start with an extra teaspoon and adjust to your taste. Additionally, consider adding sliced jalapeños or red pepper flakes on top of the assembled bowl for an extra kick. You can also serve it with a side of spicy chili sauce for those who enjoy a fiery flavor!

Conclusion: Enjoying Your Thai Peanut Sweet Potato Bowl

In conclusion, the Thai Peanut Sweet Potato Bowl is a delightful and nutritious meal that brings together a variety of flavors and textures. From the sweet, roasted sweet potatoes to the crunchy vegetables and creamy peanut sauce, every bite is a celebration of taste. This bowl is not only satisfying but also packed with essential nutrients, making it a perfect choice for anyone looking to eat healthily.

As you enjoy your Thai Peanut Sweet Potato Bowl, remember that the beauty of this dish lies in its versatility. Feel free to customize it with your favorite proteins, vegetables, and toppings. Whether you’re preparing it for a quick lunch, a cozy dinner, or meal prepping for the week, this bowl is sure to impress.

Moreover, sharing this dish with family and friends can create a wonderful dining experience. The vibrant colors and delicious flavors are bound to spark joy and conversation at the table. So, gather your loved ones, serve up your beautifully assembled bowls, and enjoy the delightful flavors together!

Lastly, don’t forget to experiment and make this recipe your own. With each preparation, you can discover new combinations and flavors that suit your taste. Enjoy the process of cooking, and savor every moment spent creating and sharing your Thai Peanut Sweet Potato Bowl!

Chocolate Fig Spice Cake Recipe is a must-try!

Introduction to Chocolate Fig Spice Cake Recipe

The Origins of Chocolate Fig Spice Cake

The Chocolate Fig Spice Cake is a delightful blend of rich flavors and textures. This cake combines the deep, luscious taste of chocolate with the natural sweetness of figs. Figs have been enjoyed for centuries, dating back to ancient civilizations. They were often considered a symbol of prosperity and fertility. The use of figs in desserts became popular in various cultures, especially in Mediterranean regions. Over time, bakers began to experiment with figs in cakes, leading to the creation of this unique recipe.

Chocolate, on the other hand, has its own fascinating history. Originating from the cacao bean, chocolate was once a luxury enjoyed by the elite. Today, it is a beloved ingredient in countless desserts worldwide. The combination of chocolate and figs in this cake not only highlights the rich culinary traditions but also brings a modern twist to classic flavors. This cake is perfect for those who appreciate the harmony of sweet and spicy notes in their desserts.

Why You Should Try This Recipe

There are many reasons to try the Chocolate Fig Spice Cake Recipe. First, it’s a crowd-pleaser! The rich chocolate flavor paired with the chewy figs creates a delightful experience for your taste buds. Plus, the warm spices like cinnamon and nutmeg add a cozy touch, making it perfect for any occasion.

Another reason to give this recipe a go is its versatility. You can serve it plain, with a dollop of whipped cream, or even a drizzle of chocolate ganache for an extra indulgence. It’s also easy to adapt. If you have dietary restrictions, you can easily make gluten-free or vegan versions without sacrificing flavor.

Lastly, baking this cake is a fun and rewarding experience. The process of mixing ingredients and watching the cake rise in the oven is satisfying. When you finally slice into the cake and see the beautiful layers, you’ll feel proud of your creation. So, gather your ingredients and get ready to enjoy a slice of this delicious Chocolate Fig Spice Cake!

Ingredients for Chocolate Fig Spice Cake Recipe

To create the delightful Chocolate Fig Spice Cake, you’ll need a selection of ingredients that come together to form a rich and flavorful dessert. Here’s what you’ll need:

  • 2 cups all-purpose flour
  • 1 cup unsweetened cocoa powder
  • 1 teaspoon baking soda
  • 1 teaspoon baking powder
  • 1 teaspoon ground cinnamon
  • 1/2 teaspoon ground nutmeg
  • 1/2 teaspoon ground ginger
  • 1/4 teaspoon salt
  • 1 cup unsalted butter, softened
  • 1 1/2 cups granulated sugar
  • 3 large eggs
  • 1 teaspoon vanilla extract
  • 1 cup buttermilk
  • 1 cup dried figs, chopped

These ingredients are not only essential for the cake’s structure but also contribute to its unique flavor profile. The combination of cocoa powder and spices creates a warm, inviting aroma, while the figs add a natural sweetness and chewy texture. Make sure to gather everything before you start baking to ensure a smooth process!

Step-by-Step Preparation of Chocolate Fig Spice Cake Recipe

Step 1: Prepping Your Ingredients

Before you start baking, it’s important to prep your ingredients. First, gather all the items listed in the ingredients section. This will make the process smoother and more enjoyable. Make sure your butter is softened, as this helps it blend better with the sugar. You can leave it out at room temperature for about an hour. Also, chop your dried figs into small pieces. This ensures they distribute evenly throughout the cake.

Step 2: Mixing the Dry Ingredients

Next, take a medium bowl and whisk together the dry ingredients. Combine the all-purpose flour, cocoa powder, baking soda, baking powder, ground cinnamon, ground nutmeg, ground ginger, and salt. Whisking these ingredients together helps to evenly distribute the leavening agents and spices. Set this bowl aside for later use.

Step 3: Combining Wet Ingredients

In a large mixing bowl, cream the softened butter and granulated sugar together. Use an electric mixer on medium speed for about 3-4 minutes. You want the mixture to become light and fluffy. Then, add the eggs one at a time, mixing well after each addition. This helps to incorporate air into the batter, making your cake light. Finally, stir in the vanilla extract for added flavor.

Step 4: Merging Wet and Dry Mixtures

Now it’s time to combine the wet and dry mixtures. Gradually add the dry ingredients to the butter mixture. Alternate this with the buttermilk, starting and ending with the dry ingredients. Mix until just combined. Be careful not to overmix, as this can make the cake dense. A few lumps are perfectly fine!

Step 5: Adding Figs and Spices

Once your batter is ready, gently fold in the chopped figs. This step is crucial as it ensures the figs are evenly distributed throughout the batter. You want to maintain the light texture of the cake, so be gentle. The figs will add a lovely sweetness and chewy texture to each bite.

Step 6: Baking the Cake

Preheat your oven to 350°F (175°C) if you haven’t done so already. Divide the batter evenly between the two prepared 9-inch round cake pans. Smooth the tops with a spatula for even baking. Bake for 25-30 minutes. To check if the cakes are done, insert a toothpick into the center. If it comes out clean, your cakes are ready!

Step 7: Cooling and Serving

After baking, allow the cakes to cool in the pans for about 10 minutes. This makes it easier to remove them without breaking. Then, transfer the cakes to wire racks to cool completely. Once cooled, you can serve the cake plain, with whipped cream, or a dusting of powdered sugar. Enjoy your delicious Chocolate Fig Spice Cake!

Variations of Chocolate Fig Spice Cake Recipe

Gluten-Free Options

If you or someone you know has a gluten intolerance, don’t worry! You can still enjoy the deliciousness of Chocolate Fig Spice Cake. To make a gluten-free version, simply substitute the all-purpose flour with a gluten-free flour blend. Many brands offer blends that work well in baking, so choose one that you like. Make sure it contains xanthan gum, as this helps mimic the texture of traditional flour.

Additionally, check that your baking powder and baking soda are gluten-free. Most brands are, but it’s always good to double-check. Follow the same steps in the recipe, and you’ll have a delightful gluten-free cake that everyone can enjoy!

Vegan Adaptations

For those following a vegan diet, you can easily adapt the Chocolate Fig Spice Cake Recipe. Start by replacing the eggs with flaxseed meal or applesauce. To make a flax egg, mix 1 tablespoon of flaxseed meal with 2.5 tablespoons of water. Let it sit for about 5 minutes until it thickens. This will act as a binding agent in your cake.

Next, swap the buttermilk with a plant-based alternative. Almond milk, soy milk, or oat milk work great. Just add a teaspoon of vinegar or lemon juice to the milk and let it sit for a few minutes to curdle, creating a vegan buttermilk. Lastly, ensure your butter is replaced with a vegan butter or coconut oil. With these simple swaps, you’ll have a moist and flavorful vegan Chocolate Fig Spice Cake that everyone will love!

Cooking Note for Chocolate Fig Spice Cake Recipe

When preparing the Chocolate Fig Spice Cake, there are a few cooking notes to keep in mind to ensure your cake turns out perfectly every time. First, always measure your ingredients accurately. Baking is a science, and even a small difference in measurements can affect the final product. Use a kitchen scale for the most precise measurements, especially for flour and cocoa powder.

Next, make sure your oven is properly preheated before placing the cake inside. An oven thermometer can help you verify the temperature, as some ovens may not heat evenly. This step is crucial for achieving the right texture and rise in your cake.

Additionally, consider the quality of your ingredients. Using high-quality cocoa powder and fresh dried figs can significantly enhance the flavor of your cake. If possible, opt for organic or premium brands for the best results.

While baking, avoid opening the oven door too often. Each time you open the door, heat escapes, which can lead to uneven baking. Instead, use the oven light to check on your cake’s progress. If you notice that the top is browning too quickly, you can cover it loosely with aluminum foil to prevent burning.

Lastly, patience is key when cooling your cake. Allow it to cool completely before frosting or serving. This helps the cake set properly and makes it easier to slice. Following these cooking notes will help you create a delicious Chocolate Fig Spice Cake that is sure to impress your family and friends!

Serving Suggestions for Chocolate Fig Spice Cake Recipe

Pairing with Beverages

When it comes to enjoying your Chocolate Fig Spice Cake, the right beverage can elevate the experience. A warm cup of coffee is a classic choice. The rich flavors of the cake pair beautifully with the boldness of coffee. You can opt for a dark roast or even a flavored coffee, like hazelnut or mocha, to complement the chocolate.

If you prefer tea, consider a spiced chai or a smooth Earl Grey. The spices in the cake will harmonize with the aromatic notes of the tea. For a non-caffeinated option, a glass of cold milk is always a hit. The creaminess of the milk balances the cake’s richness perfectly.

For those looking for something a bit more festive, try serving the cake with a dessert wine. A sweet port or a fruity dessert wine can enhance the flavors of the figs and chocolate. Whichever beverage you choose, it will surely make your Chocolate Fig Spice Cake experience even more delightful!

Ideal Occasions for Serving

The Chocolate Fig Spice Cake is versatile enough to be served on various occasions. It’s perfect for birthdays, family gatherings, or holiday celebrations. The warm spices and rich chocolate make it a cozy dessert for fall and winter festivities.

Additionally, this cake can be a wonderful treat for afternoon tea or coffee breaks. Its unique flavor profile will impress your guests and spark delightful conversations. You can also serve it at potlucks or bake sales, as it’s sure to be a crowd-pleaser.

Don’t forget about casual get-togethers! Whether it’s a picnic in the park or a movie night at home, this cake adds a touch of sweetness to any occasion. With its delicious taste and beautiful presentation, the Chocolate Fig Spice Cake is a delightful addition to your dessert repertoire!

Tips for Perfecting Your Chocolate Fig Spice Cake Recipe

To ensure your Chocolate Fig Spice Cake turns out perfectly every time, consider these helpful tips. Each step in the baking process is important, and small adjustments can make a big difference in the final result.

First, always use room temperature ingredients. This includes your butter, eggs, and buttermilk. Room temperature ingredients blend more easily, creating a smoother batter. If you forget to take them out ahead of time, you can warm the eggs in a bowl of warm water for a few minutes and microwave the butter in short bursts to soften it.

Next, be mindful of your mixing technique. When combining the wet and dry ingredients, mix until just combined. Overmixing can lead to a dense cake. A few lumps are okay! This will help keep your cake light and fluffy.

Another tip is to check your oven temperature. Ovens can vary, so using an oven thermometer can help ensure your cake bakes at the right temperature. If your oven runs hot, you may need to reduce the baking time slightly to prevent over-baking.

When it comes to the figs, consider soaking them in warm water or tea for about 10 minutes before adding them to the batter. This can enhance their flavor and make them even softer, resulting in a more moist cake.

Lastly, don’t rush the cooling process. Allow your cake to cool completely in the pans before transferring it to a wire rack. This helps prevent it from breaking apart. Once cooled, you can frost or serve it as desired. Following these tips will help you create a Chocolate Fig Spice Cake that is not only delicious but also visually appealing!

Breakdown of Time for Chocolate Fig Spice Cake Recipe

Prep Time

Preparing the Chocolate Fig Spice Cake is a delightful process that doesn’t take too long. You’ll need about 20-30 minutes for prep time. This includes gathering your ingredients, measuring them accurately, and mixing the dry and wet components. Make sure to take your time during this stage, as it sets the foundation for a delicious cake!

Cooking Time

The cooking time for this cake is approximately 25-30 minutes. Once you place the cake pans in the preheated oven, you can relax for a bit. Just keep an eye on the cakes as they bake. You can check for doneness by inserting a toothpick into the center. If it comes out clean, your cakes are ready to be taken out!

Total Time

In total, you can expect to spend about 55-60 minutes from start to finish. This includes both prep and cooking time. Once the cakes are baked, don’t forget to allow them to cool completely before serving. This cooling period is essential for achieving the perfect texture. With this time breakdown, you can plan your baking session efficiently and enjoy the process of creating your Chocolate Fig Spice Cake!

Nutritional Information for Chocolate Fig Spice Cake Recipe

Calories

When indulging in a slice of Chocolate Fig Spice Cake, it’s good to know what you’re consuming. Each serving contains approximately 350 calories. This makes it a delightful treat that can fit into a balanced diet. While it’s important to enjoy desserts in moderation, this cake offers a rich flavor that can satisfy your sweet tooth without going overboard.

Protein Content

In terms of protein, each slice of this delicious cake provides about 5 grams. While this may not seem like a lot, it contributes to your daily protein intake. The eggs and buttermilk in the recipe help boost the protein content, making it a more balanced dessert option. Pairing it with a glass of milk can further enhance the protein benefits!

Sodium Levels

For those watching their sodium intake, the Chocolate Fig Spice Cake contains approximately 200 milligrams of sodium per serving. This level is relatively moderate, especially for a dessert. The salt in the recipe helps to enhance the flavors of the cake without making it overly salty. If you’re concerned about sodium, you can always adjust the amount of salt used in the recipe to suit your dietary needs.

FAQs about Chocolate Fig Spice Cake Recipe

Can I substitute fresh figs with dried figs in the recipe?

Absolutely! In fact, this recipe specifically calls for dried figs. They add a wonderful sweetness and chewy texture to the cake. Fresh figs can be used, but they have a higher moisture content, which may alter the cake’s texture. If you decide to use fresh figs, consider reducing the amount of buttermilk slightly to balance the moisture levels.

How can I store leftover Chocolate Fig Spice Cake?

Storing leftover Chocolate Fig Spice Cake is easy! First, make sure the cake is completely cooled. Then, wrap it tightly in plastic wrap or aluminum foil. You can also place it in an airtight container. Store it at room temperature for up to three days. If you want to keep it longer, consider refrigerating it, where it can last for about a week. Just remember to bring it back to room temperature before serving for the best flavor!

What are some common mistakes to avoid when making this cake?

There are a few common mistakes to watch out for when making your Chocolate Fig Spice Cake. First, avoid overmixing the batter. This can lead to a dense cake instead of a light and fluffy one. Second, ensure your ingredients are at room temperature for better mixing. Lastly, don’t skip the cooling time! Cutting into the cake too soon can cause it to crumble. Following these tips will help you achieve a perfect cake every time.

Can I freeze Chocolate Fig Spice Cake?

Yes, you can freeze Chocolate Fig Spice Cake! To do this, wrap the cooled cake tightly in plastic wrap, then in aluminum foil. This double wrapping helps prevent freezer burn. The cake can be frozen for up to three months. When you’re ready to enjoy it, simply thaw it in the refrigerator overnight. Once thawed, you can frost it or serve it as is. Freezing is a great way to enjoy this delicious cake later!

Conclusion on Chocolate Fig Spice Cake Recipe

In conclusion, the Chocolate Fig Spice Cake Recipe is a delightful treat that combines rich chocolate flavors with the natural sweetness of figs and warm spices. This cake is not only delicious but also versatile, making it suitable for various occasions, from casual gatherings to festive celebrations. Whether you choose to serve it plain, with whipped cream, or a drizzle of chocolate ganache, each slice promises a unique taste experience.

Moreover, the recipe allows for easy adaptations, catering to different dietary needs. With gluten-free and vegan options available, everyone can enjoy this scrumptious dessert. The step-by-step preparation ensures that even novice bakers can create a beautiful cake that impresses family and friends alike.

As you embark on your baking journey, remember the tips shared throughout this article. They will help you achieve the perfect texture and flavor in your Chocolate Fig Spice Cake. So, gather your ingredients, preheat your oven, and get ready to indulge in a slice of this delightful cake. Happy baking!

ating

Chocolate Fig Spice Cake Recipe is a must-try!

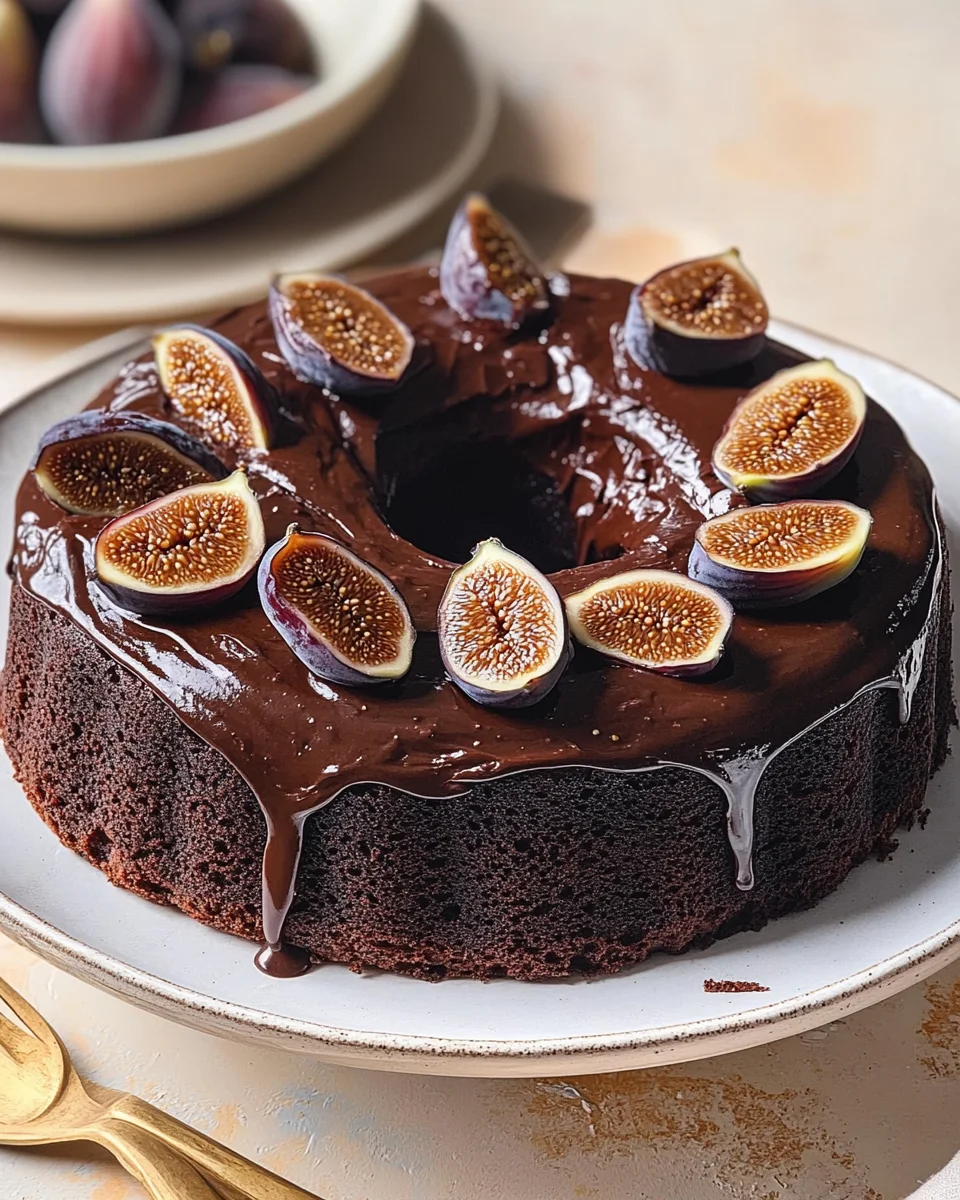
This Chocolate Fig Spice Cake is a warm, cozy celebration of rich cocoa, fragrant spices, and sweet figs soaked in coffee (or orange juice!). Topped with a luscious dark chocolate glaze, it’s the perfect centerpiece for holiday gatherings, dinner parties, or a quiet indulgent treat with your favorite drink.
Prep Time 20 minutes
Cook Time 50 minutes
Total Time 1 hour 10 minutes
Servings: 12 servings
Course: Dessert
Cuisine: American, Holiday-Inspired

Ingredients
  

  • For the Cake:1 cup chopped dried California black mission figs1 cup hot brewed coffee or hot water or orange juice1 cup unsalted butter, softened1 cup granulated sugar2 large eggs, room temperature2 teaspoons vanilla extract1 tablespoon whisky or brandy (optional)1 cup buttermilk, room temperature1 teaspoon orange zest1 3/4 cups all-purpose flour3/4 cup unsweetened cocoa powder1 1/2 teaspoons ground cinnamon1 teaspoon ground allspice1/4 teaspoon ground cloves1 1/2 teaspoons baking soda1/2 teaspoon baking powder1/4 teaspoon salt1/4 cup chopped candied orange (optional)1 tablespoon cocoa powder (for dusting pan and figs)Fig slices for garnish (optional)
  • For the Glaze:2/3 cup semisweet or dark chocolate chips or chopped chocolate1/4 cup heavy cream1 1/2 tablespoons whisky or brandy (optional)1/4 teaspoon vanilla extract1 teaspoon espresso powder or instant coffee (optional)

Method
 

  1. Preheat and PreparePreheat oven to 350°F (175°C). Grease a 10–12 cup bundt pan and dust with cocoa powder.
  2. Mix the Dry IngredientsIn a medium bowl, whisk together flour, cocoa powder, cinnamon, allspice, cloves, baking soda, baking powder, and salt.
  3. Soak the FigsCombine chopped figs with hot coffee (or juice). Let them soak while you prepare the batter.
  4. Cream the Butter and SugarIn a large mixing bowl, beat the butter and sugar until light and creamy. Add the eggs one at a time, then mix in vanilla and optional brandy or whisky.
  5. Add Buttermilk and ZestSlowly mix in buttermilk and orange zest. The mixture may look slightly curdled—this is normal.
  6. Combine Wet and DryAdd the dry mixture to the wet ingredients gradually, mixing until just combined.
  7. Add Soaking LiquidRemove figs from the coffee and reserve the liquid. Gently stir the coffee (or soaking liquid) into the batter.
  8. Add the FigsPat the figs dry and toss them with cocoa powder (and candied orange, if using). Spoon the batter into the prepared pan and swirl the figs into the batter.
  9. BakeBake for 40–50 minutes, or until a toothpick inserted in the center comes out clean. Let cool in the pan for 10–15 minutes before inverting onto a wire rack. Cool completely (about 1 hour).
  10. Make the GlazeMelt chocolate and cream in a saucepan over low heat, stirring until smooth. Stir in vanilla, espresso powder, and optional liquor. Let cool slightly before drizzling over cooled cake.

Notes

  • Booze-Free Option: Skip the whisky/brandy and use more vanilla or orange extract.
  • Flavor Boost: Swap coffee with orange juice for a brighter citrus profile.
  • Make Ahead: Cake can be baked a day ahead and glazed before serving.
  • Storage: Store covered at room temperature for 2 days or in the fridge for up to 5.

One-Pot Shrimp Pasta Primavera is a quick delight!

Introduction to One-Pot Shrimp Pasta Primavera

One-Pot Shrimp Pasta Primavera. This delightful dish combines succulent shrimp, fresh vegetables, and perfectly cooked pasta, all in one pot. It’s not only easy to prepare but also packed with flavor and nutrition.

Imagine a busy weeknight where you want to whip up something special without spending hours in the kitchen. This recipe is your answer! With just a handful of ingredients and minimal cleanup, you can create a satisfying meal that the whole family will love. Plus, it’s versatile enough to adapt to your taste preferences or what you have on hand.

One-Pot Shrimp Pasta Primavera is a breeze. So, let’s dive into the world of flavors and colors that this dish offers!

Ingredients for One-Pot Shrimp Pasta Primavera

One-Pot Shrimp Pasta Primavera, you’ll need a selection of fresh ingredients that come together beautifully. Here’s what you’ll need:

  • 8 ounces of linguine or spaghetti
  • 1 pound of large shrimp, peeled and deveined
  • 1 tablespoon of olive oil
  • 1 small onion, diced
  • 2 cloves of garlic, minced
  • 1 bell pepper, sliced (any color)
  • 1 medium zucchini, sliced
  • 1 cup of cherry tomatoes, halved
  • 1 cup of vegetable or chicken broth
  • 1 teaspoon of Italian seasoning
  • Salt and pepper to taste
  • 1/4 cup of grated Parmesan cheese
  • Fresh basil for garnish (optional)

These ingredients not only provide a burst of flavor but also ensure a colorful presentation. The shrimp adds protein, while the vegetables contribute essential vitamins and minerals. You can easily find these ingredients at your local grocery store, making this dish accessible for everyone.

One-Pot Shrimp Pasta Primavera lies in its flexibility, allowing you to customize it to your liking!

Step-by-Step Preparation of One-Pot Shrimp Pasta Primavera

One-Pot Shrimp Pasta Primavera to life! Follow these simple steps to create a delicious meal that’s sure to impress.

Step 1: Preparing the Ingredients

Start by prepping your ingredients. This makes the cooking process smoother. First, peel and devein the shrimp if you haven’t done so already. Next, dice the onion and mince the garlic. Slice the bell pepper and zucchini into thin pieces. Finally, halve the cherry tomatoes. Having everything ready will help you cook efficiently!

Step 2: Cooking the Shrimp

In a large pot or deep skillet, heat the olive oil over medium heat. Once the oil is hot, add the shrimp. Cook them for about 2-3 minutes until they turn pink and opaque. This step is crucial as it ensures the shrimp are perfectly cooked. Once done, remove the shrimp from the pot and set them aside. This will prevent overcooking later.

Step 3: Sautéing the Vegetables

In the same pot, add the diced onion. Sauté for about 3 minutes until it becomes translucent. Then, stir in the minced garlic and cook for an additional 30 seconds until fragrant. Next, add the sliced bell pepper and zucchini. Cook these vegetables for about 3-4 minutes until they start to soften. This step enhances the flavors and adds a lovely texture to your dish.

Step 4: Combining Ingredients

Once the vegetables are sautéed, it’s time to combine everything. Pour in the vegetable or chicken broth, bringing it to a gentle simmer. Then, add the linguine or spaghetti, ensuring it is fully submerged in the liquid. This is where the magic happens! Sprinkle in the Italian seasoning, salt, and pepper to taste. Cover the pot and let it cook for about 10-12 minutes, stirring occasionally.

Step 5: Cooking the Pasta

As the pasta cooks, it will absorb the broth, becoming flavorful and tender. Keep an eye on it to ensure it reaches the perfect al dente texture. This is a great time to check the seasoning. Adjust it if needed, adding more salt or pepper to suit your taste.

Step 6: Final Touches

One-Pot Shrimp Pasta Primavera. Serve immediately, garnished with fresh basil if desired!

Variations of One-Pot Shrimp Pasta Primavera

One-Pot Shrimp Pasta Primavera is its versatility. You can easily customize this dish to suit your taste or dietary needs. Here are some exciting variations to consider:

Adding Different Proteins

One-Pot Shrimp Pasta Primavera a new experience every time!

Incorporating Seasonal Vegetables

Another way to make this dish your own is by incorporating seasonal vegetables. Depending on the time of year, you can add fresh asparagus in the spring, or sweet corn in the summer. In the fall, consider adding roasted butternut squash or Brussels sprouts. Winter vegetables like kale or spinach can also enhance the dish. Not only do these vegetables add flavor, but they also boost the nutritional value. Feel free to mix and match based on what you have on hand or what’s in season!

One-Pot Shrimp Pasta Primavera that suits your preferences. Enjoy the process of making this dish your own!

Cooking Note for One-Pot Shrimp Pasta Primavera

One-Pot Shrimp Pasta Primavera, there are a few cooking notes to keep in mind to ensure your dish turns out perfectly every time. First, the choice of pasta can affect the overall texture and flavor. While linguine or spaghetti works wonderfully, you can also experiment with whole wheat or gluten-free pasta if you prefer. Just remember that cooking times may vary, so check the package instructions for the best results.

Another important aspect is the shrimp. Fresh shrimp is ideal, but frozen shrimp can also be used. If you opt for frozen shrimp, make sure to thaw them completely before cooking. This helps them cook evenly and prevents them from becoming rubbery. Additionally, always check for the shrimp’s quality. Look for a firm texture and a mild ocean scent.

One-Pot Shrimp Pasta Primavera. Stirring occasionally will help achieve the right balance.

Lastly, don’t hesitate to adjust the seasoning to your liking. Everyone’s taste buds are different, so feel free to add more Italian seasoning, salt, or pepper as needed. A splash of lemon juice at the end can also brighten the flavors, giving your dish a fresh twist.

One-Pot Shrimp Pasta Primavera that your family and friends will rave about!

Serving Suggestions for One-Pot Shrimp Pasta Primavera

One-Pot Shrimp Pasta Primavera is ready, it’s time to think about how to serve it. Presentation can elevate your dish, making it even more enjoyable. Here are some delightful serving suggestions to consider:

  • Garnish with Fresh Herbs: A sprinkle of fresh basil or parsley adds a pop of color and freshness. It enhances the dish’s visual appeal and complements the flavors beautifully.
  • Pair with a Side Salad: A light side salad can balance the meal. Consider a simple mixed greens salad with a lemon vinaigrette. The acidity will contrast nicely with the creamy pasta.
  • Serve with Crusty Bread: A slice of crusty bread or garlic bread is perfect for soaking up any leftover sauce. It adds a satisfying crunch and makes the meal feel complete.
  • Offer Extra Cheese: For cheese lovers, provide additional grated Parmesan on the side. This allows everyone to customize their dish to their liking.
  • Include a Lemon Wedge: A wedge of lemon on the plate can brighten the flavors. Squeezing fresh lemon juice over the pasta just before eating adds a refreshing zing.

One-Pot Shrimp Pasta Primavera look restaurant-worthy. Whether it’s a family dinner or a gathering with friends, these tips will impress your guests and make the meal memorable.

Feel free to mix and match these ideas based on your preferences and the occasion. The goal is to create a delightful dining experience that everyone will enjoy!

Tips for Perfect One-Pot Shrimp Pasta Primavera

One-Pot Shrimp Pasta Primavera is all about attention to detail and a few handy tips. Here are some essential pointers to ensure your dish turns out delicious every time:

  • Use Fresh Ingredients: Fresh vegetables and shrimp make a significant difference in flavor. Whenever possible, choose seasonal produce for the best taste and nutrition.
  • Don’t Overcook the Shrimp: Shrimp cooks quickly. Keep an eye on them, as they only need about 3-5 minutes to turn pink and opaque. Overcooking can make them rubbery.
  • Adjust the Liquid: Depending on the type of pasta you use, you may need to adjust the amount of broth. Whole wheat or gluten-free pasta may absorb more liquid, so keep an eye on it as it cooks.
  • Stir Occasionally: Stirring the pasta occasionally while it cooks helps prevent it from sticking together. It also ensures even cooking and flavor distribution.
  • Season Gradually: Start with a little salt and pepper, then taste as you go. This way, you can adjust the seasoning to your preference without overpowering the dish.
  • Experiment with Herbs: While Italian seasoning is a great base, feel free to add fresh herbs like thyme or oregano for an extra flavor boost. Fresh herbs can elevate your dish to new heights!
  • Let It Rest: After cooking, let the dish sit for a few minutes before serving. This allows the flavors to meld together, enhancing the overall taste.
  • Serve Hot: Enjoy your One-Pot Shrimp Pasta Primavera immediately for the best texture and flavor. The pasta is at its best when served fresh and hot!

One-Pot Shrimp Pasta Primavera. Each step contributes to a delightful meal that’s sure to impress your family and friends!

Breakdown of Time for One-Pot Shrimp Pasta Primavera

One-Pot Shrimp Pasta Primavera can help you plan your meal better. Here’s a simple breakdown of the time involved in each step:

Prep Time

10-15 minutes to gather and prepare all your ingredients. This includes peeling and deveining the shrimp, chopping the vegetables, and measuring out the broth and seasonings. Having everything ready before you start cooking will make the process smoother and more enjoyable!

Cooking Time

15-20 minutes. This includes sautéing the vegetables, cooking the pasta, and adding the shrimp. The key is to keep an eye on the pasta to ensure it reaches that perfect al dente texture. Remember, the shrimp cooks quickly, so you’ll want to add it towards the end of the cooking process.

Total Time

25-35 minutes from start to finish. This makes One-Pot Shrimp Pasta Primavera an excellent choice for a weeknight dinner when you want something delicious without spending hours in the kitchen. With just one pot to clean, you’ll have more time to relax and enjoy your meal!

Nutritional Information for One-Pot Shrimp Pasta Primavera

One-Pot Shrimp Pasta Primavera is not only tasty but also offers a balanced mix of nutrients. Here’s a closer look at the nutritional information per serving:

Calories

One-Pot Shrimp Pasta Primavera contains approximately 400 calories. This makes it a satisfying option for lunch or dinner without being overly heavy. The combination of shrimp, pasta, and vegetables provides a hearty meal that keeps you energized throughout the day.

Protein

30 grams of protein per serving, the shrimp plays a significant role in meeting your daily protein needs. This makes it a great choice for those looking to maintain or build muscle while enjoying a flavorful meal.

Sodium

One-Pot Shrimp Pasta Primavera contains around 600 milligrams per serving. This amount can vary based on the broth used and any additional seasonings you add. If you’re watching your sodium intake, consider using low-sodium broth and adjusting the salt to taste. This way, you can enjoy the dish while keeping your health goals in mind.

One-Pot Shrimp Pasta Primavera is a nutritious meal option that balances calories, protein, and sodium. It’s perfect for anyone looking to enjoy a delicious dish without compromising on health. Whether you’re cooking for yourself or for family and friends, this recipe is sure to please!

FAQs about One-Pot Shrimp Pasta Primavera

Can I use frozen shrimp for One-Pot Shrimp Pasta Primavera?

One-Pot Shrimp Pasta Primavera. Just make sure to thaw them completely before cooking. Thawing can be done overnight in the refrigerator or quickly by placing them in a bowl of cold water for about 15-20 minutes. Once thawed, you can follow the recipe as usual. Using frozen shrimp is a convenient option, especially if you want to keep some on hand for quick meals!

What vegetables work best in One-Pot Shrimp Pasta Primavera?

One-Pot Shrimp Pasta Primavera lies in its versatility with vegetables. You can use a variety of fresh vegetables based on your preferences and what’s in season. Some great options include:

  • Bell Peppers: Any color adds sweetness and crunch.
  • Zucchini: Sliced or diced, it cooks quickly and adds moisture.
  • Cherry Tomatoes: They burst with flavor and add a lovely color.
  • Broccoli: Adds a nice crunch and is packed with nutrients.
  • Asparagus: Tender and flavorful, perfect for spring dishes.
  • Spinach: Wilts down nicely and adds a pop of green.

Feel free to mix and match based on your taste and what you have available. The more colorful your vegetable selection, the more appealing your dish will be!

How can I make One-Pot Shrimp Pasta Primavera gluten-free?

One-Pot Shrimp Pasta Primavera gluten-free is simple! All you need to do is substitute regular pasta with gluten-free pasta. There are many options available, such as rice pasta, quinoa pasta, or chickpea pasta. Just be sure to check the cooking time on the package, as gluten-free pasta may require different cooking times than traditional pasta. Additionally, ensure that your broth is gluten-free, as some brands may contain gluten. With these adjustments, you can enjoy a delicious gluten-free version of this delightful dish!

Conclusion on One-Pot Shrimp Pasta Primavera

One-Pot Shrimp Pasta Primavera is a fantastic dish that combines convenience, flavor, and nutrition. It’s perfect for busy weeknights when you want to prepare a meal that’s both satisfying and quick. With just one pot to clean, you can enjoy a delicious dinner without the hassle of extensive cleanup.

This recipe not only highlights the delightful taste of shrimp but also showcases a variety of colorful vegetables. The combination of fresh ingredients and simple cooking techniques makes it accessible for cooks of all skill levels. Whether you’re a seasoned chef or just starting out, you can easily master this dish and impress your family and friends.

One-Pot Shrimp Pasta Primavera allows you to customize it to your liking. You can experiment with different proteins, seasonal vegetables, and herbs to create a unique version every time. This adaptability ensures that you can enjoy this meal throughout the year, no matter what ingredients you have on hand.

One-Pot Shrimp Pasta Primavera a try? Gather your ingredients, follow the steps, and savor the delightful flavors that come together in just one pot. It’s a meal that promises to bring joy to your table and warmth to your heart. Happy cooking!

ating

One-Pot Shrimp Pasta Primavera is a quick delight!

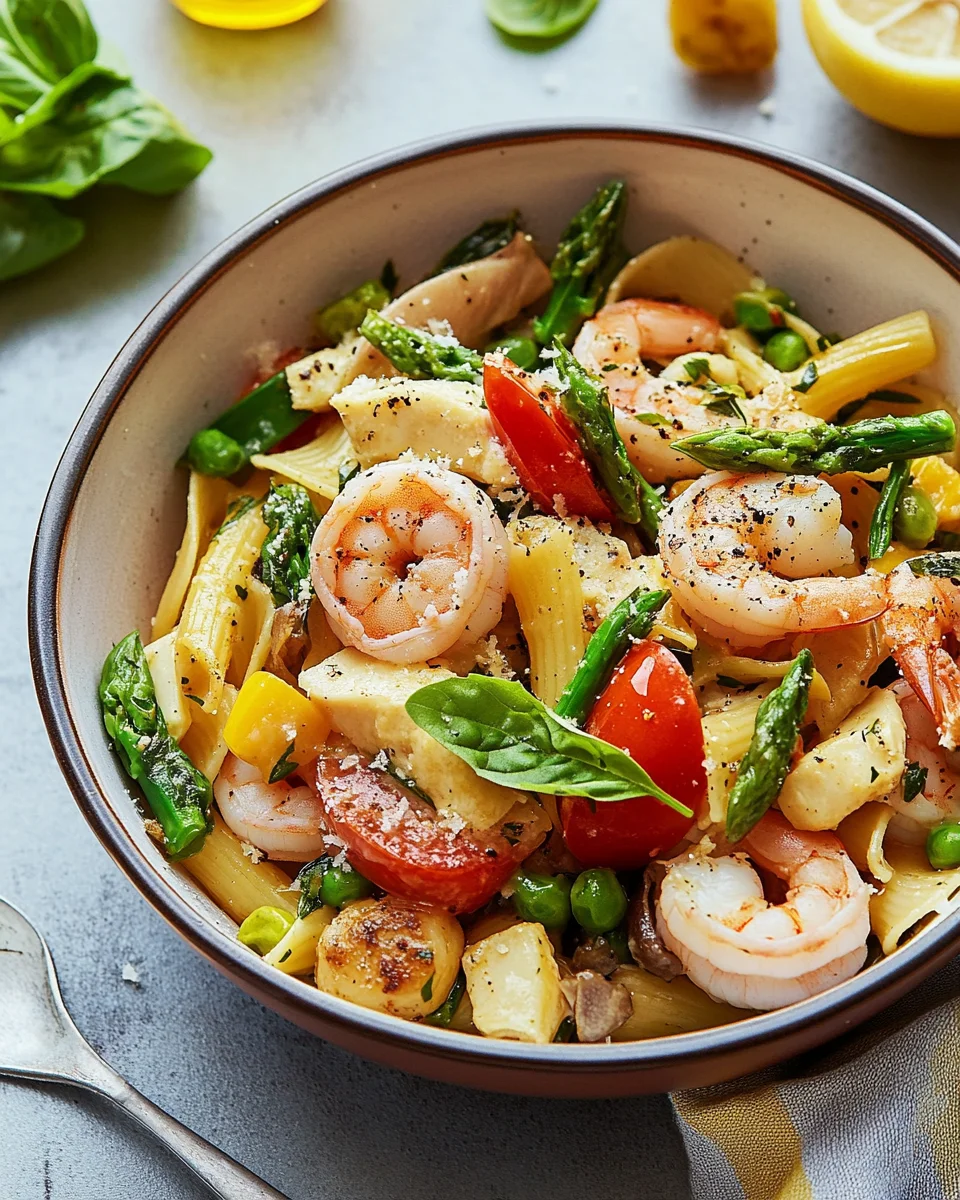
This One Pot Shrimp Pasta Primavera is a creamy, vibrant dish packed with fresh vegetables, juicy shrimp, and tender pasta—all cooked in one skillet for easy cleanup. Bursting with lemon, garlic, herbs, and Parmesan, it’s a light yet comforting meal that comes together in under 40 minutes!
Prep Time 10 minutes
Cook Time 25 minutes
Total Time 35 minutes
Servings: 4 servings
Course: Main Course
Cuisine: Italian-inspired, Seafood

Ingredients
  

  • 2 tablespoons extra virgin olive oil1 onion peeled and diced3 cloves garlic, minced1/4 teaspoon chili flakesSalt, to tasteBlack pepper, to taste2 cups sliced mushrooms (shiitake, white, or cremini)1 1/2 to 2 cups asparagus, trimmed and chopped1 cup green peas (fresh or frozen)1 pint cherry tomatoes, halved1/4 cup chopped fresh basil or parsleyZest of 1 lemon12 ounces penne pasta (or short pasta of choice)11 ounces large shrimp, peeled and deveined (tails on or off)3 cups chicken or vegetable broth (or water)1/2 cup cream or milk (or plant-based alternatives)3 tablespoons unsalted butter3/4 cup grated Parmesan cheese (plus extra for serving)

Method
 

  1. Sauté the BaseHeat olive oil in a large deep skillet or pot over medium-high heat. Add diced onion and mushrooms. Cook for 2–5 minutes until softened. Stir in garlic, chili flakes, salt, and pepper. Cook for 1 more minute until fragrant.
  2. Add Pasta and SimmerStir in uncooked pasta, broth, and cream. Bring to a boil. Cover, then reduce the heat and simmer uncovered, stirring occasionally, for the pasta’s cook time minus 2–3 minutes.
  3. Add Shrimp and VeggiesWhen 2–3 minutes remain on the pasta, stir in the asparagus, peas, shrimp, and butter. Cover and continue cooking until shrimp is pink and opaque, pasta is al dente, and the sauce has slightly thickened.
  4. Finish with FlavorRemove the pan from heat. Stir in the Parmesan cheese until melted. Fold in lemon zest, cherry tomatoes, and fresh herbs.
  5. ServeSpoon into bowls and top with extra Parmesan and basil if desired. Serve with lemon wedges for brightness.

Notes

  • Make it Dairy-Free: Use plant-based milk and vegan Parmesan.
  • Swap Proteins: Try chicken or tofu if you’re out of shrimp.
  • Add Greens: Spinach or arugula can be stirred in at the end for extra color and nutrients.
  • Storage: Best served fresh, but leftovers can be stored for up to 2 days in the fridge.

Spinach Ricotta Stuffed Chicken Breasts are a must-try!

Introduction to Spinach Ricotta Stuffed Chicken Breasts

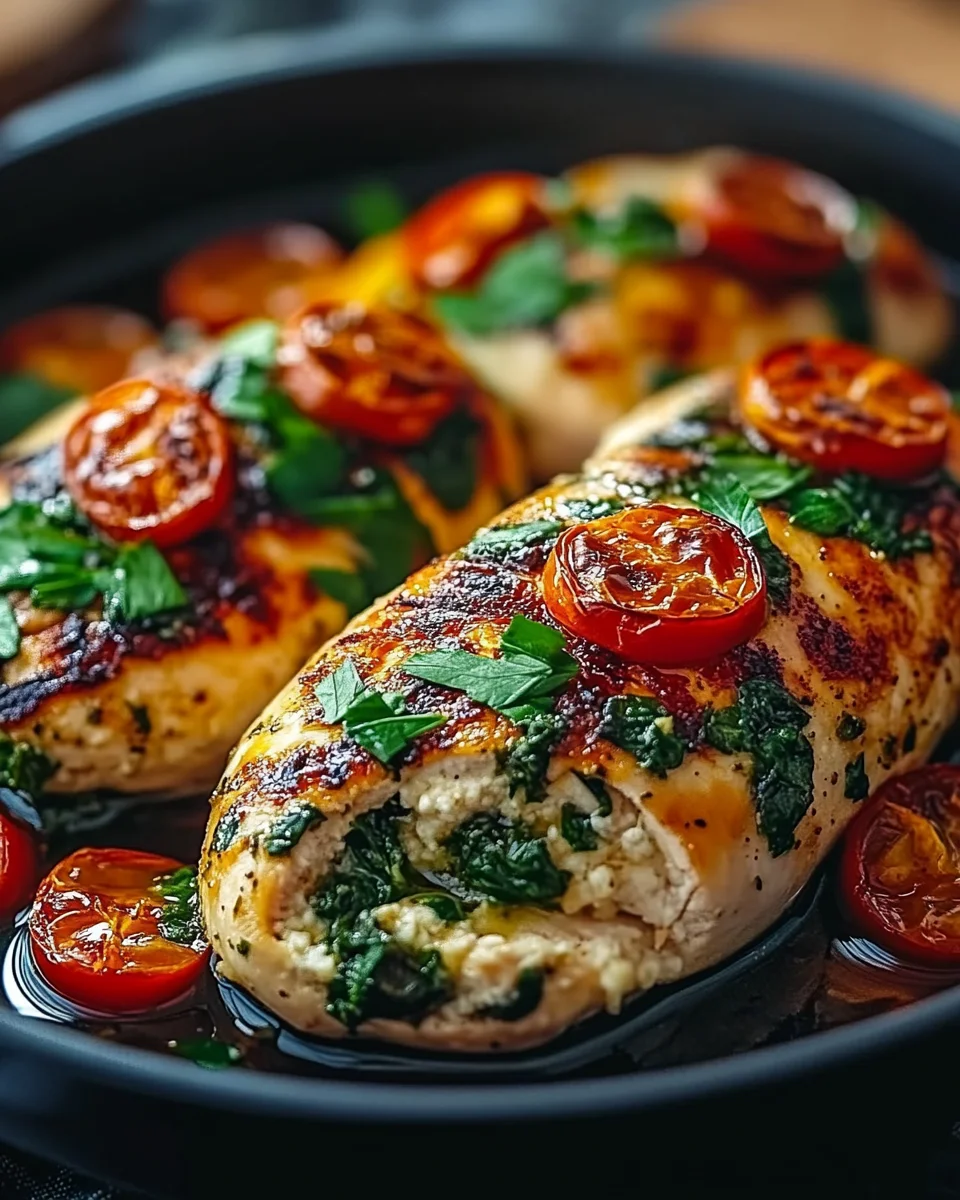
Spinach Ricotta Stuffed Chicken Breasts. This dish combines tender chicken with a creamy, flavorful filling that is sure to impress your family and friends. Not only is it packed with protein, but it also includes nutritious spinach, making it a well-rounded meal.

Spinach Ricotta Stuffed Chicken Breasts are perfect for any occasion. Whether you’re hosting a dinner party or simply cooking for your family, this recipe is both easy to prepare and visually appealing. The vibrant green spinach peeking out from the golden-brown chicken creates a beautiful presentation on your dinner table.

Moreover, this dish is versatile. You can customize the filling to suit your taste preferences. Add herbs, spices, or even different cheeses to make it your own. The possibilities are endless! Plus, it’s a great way to sneak in some greens for those picky eaters.

In this article, we will guide you through the ingredients, preparation steps, and cooking methods for making the perfect Spinach Ricotta Stuffed Chicken Breasts. You’ll also find tips, variations, and serving suggestions to elevate your dining experience. So, let’s dive into this delightful recipe that is sure to become a family favorite!

Ingredients for Spinach Ricotta Stuffed Chicken Breasts

Spinach Ricotta Stuffed Chicken Breasts, you will need a few simple ingredients. Each component plays a vital role in delivering flavor and texture. Here’s what you’ll need:

  • 2 large boneless, skinless chicken breasts (about 1 pound total)
  • 1 cup fresh spinach, chopped
  • 1 cup ricotta cheese
  • 1/2 cup shredded mozzarella cheese
  • 1/4 cup grated Parmesan cheese
  • 1 teaspoon garlic powder
  • 1 teaspoon onion powder
  • 1/2 teaspoon salt
  • 1/4 teaspoon black pepper
  • 1 tablespoon olive oil
  • 1/2 teaspoon Italian seasoning
  • 1/4 teaspoon red pepper flakes (optional)

These ingredients come together to create a delicious filling that complements the chicken perfectly. The combination of ricotta and mozzarella provides a creamy texture, while the spinach adds a fresh, vibrant flavor. The spices enhance the overall taste, making each bite a delight.

Feel free to adjust the quantities based on your preferences. For instance, if you love cheese, you can add more mozzarella or Parmesan. If you prefer a bit of heat, increase the red pepper flakes. The beauty of this recipe lies in its flexibility, allowing you to tailor it to your liking!

Preparation of Spinach Ricotta Stuffed Chicken Breasts

Spinach Ricotta Stuffed Chicken Breasts. This section will guide you through each step, ensuring that your dish turns out perfectly. Let’s get started!

Step 1: Preparing the Chicken Breasts

First, take your large boneless, skinless chicken breasts. Rinse them under cold water and pat them dry with paper towels. This step is important as it helps the chicken cook evenly. Next, carefully slice a pocket into each chicken breast. Make sure not to cut all the way through; you want to create a nice space to hold the filling. A sharp knife works best for this task. Once done, set the chicken aside while you prepare the filling.

Step 2: Making the Spinach and Ricotta Filling

In a medium bowl, combine the chopped spinach, ricotta cheese, shredded mozzarella, and grated Parmesan cheese. Add the garlic powder, onion powder, salt, black pepper, Italian seasoning, and red pepper flakes if you like a little heat. Mix everything together until well combined. The mixture should be creamy and flavorful, with the spinach evenly distributed throughout. This filling is what makes your chicken breasts so delicious!

Step 3: Stuffing the Chicken Breasts

Now it’s time to stuff the chicken breasts! Take a spoonful of the spinach and ricotta mixture and carefully fill each pocket you created earlier. Don’t overstuff, as the filling may spill out during cooking. If needed, use toothpicks to secure the opening of the chicken breasts. This will help keep the filling inside while cooking, ensuring that every bite is packed with flavor.

Step 4: Cooking the Spinach Ricotta Stuffed Chicken Breasts

Heat the olive oil in an oven-safe skillet over medium heat. Once the oil is hot, add the stuffed chicken breasts. Cook them for about 4-5 minutes on each side, or until they are golden brown. This step adds a nice crust to the chicken, enhancing the overall flavor. After browning, transfer the skillet to your preheated oven. Bake for 20-25 minutes, or until the chicken reaches an internal temperature of 165°F (75°C). Once cooked, remove the skillet from the oven and let the chicken rest for 5 minutes before slicing. This resting period allows the juices to redistribute, making your chicken even juicier!

Variation of Spinach Ricotta Stuffed Chicken Breasts

Spinach Ricotta Stuffed Chicken Breasts recipe is delicious on its own, there are many ways to switch things up! You can explore alternative fillings and different cooking methods to create a unique dish every time. Let’s dive into some exciting variations!

Alternative Fillings for Spinach Ricotta Stuffed Chicken Breasts

One of the best parts about making stuffed chicken breasts is the ability to customize the filling. Here are some tasty alternatives to consider:

  • Mushroom and Cream Cheese: Sauté chopped mushrooms and mix them with cream cheese for a rich, earthy flavor.
  • Sun-Dried Tomato and Feta: Combine chopped sun-dried tomatoes with crumbled feta cheese for a Mediterranean twist.
  • Broccoli and Cheddar: Steam broccoli and mix it with sharp cheddar cheese for a classic combination.
  • Artichoke and Goat Cheese: Blend artichoke hearts with creamy goat cheese for a tangy and flavorful filling.

Feel free to mix and match ingredients based on your preferences. The key is to ensure that the filling complements the chicken while providing a burst of flavor in every bite!

Cooking Methods for Spinach Ricotta Stuffed Chicken Breasts

Spinach Ricotta Stuffed Chicken Breasts. Each method offers a different texture and flavor profile:

  • Grilling: For a smoky flavor, grill the stuffed chicken breasts over medium heat. This method adds a delicious char and keeps the chicken juicy.
  • Slow Cooking: Place the stuffed chicken in a slow cooker with a bit of broth. Cook on low for 4-6 hours for tender, flavorful chicken.
  • Air Frying: Preheat your air fryer and cook the stuffed chicken breasts for about 15-20 minutes. This method gives you a crispy exterior without much oil.
  • Pan-Seering: After browning the chicken in a skillet, add a splash of chicken broth and cover to steam. This keeps the chicken moist while cooking.

Experimenting with different cooking methods can lead to delightful surprises. Each technique brings out unique flavors and textures, making your meal even more enjoyable!

Cooking Note for Spinach Ricotta Stuffed Chicken Breasts

Spinach Ricotta Stuffed Chicken Breasts, there are a few important cooking notes to keep in mind. These tips will help ensure that your chicken turns out perfectly every time, making your meal a success!

First, always use a meat thermometer to check the internal temperature of the chicken. The USDA recommends that chicken should reach an internal temperature of 165°F (75°C) to be safe for consumption. This ensures that any harmful bacteria are eliminated, and your chicken is juicy and tender.

Next, consider the thickness of your chicken breasts. If they are particularly thick, you may need to adjust the cooking time. Thicker breasts will require a longer baking time to cook through completely. Conversely, if your chicken breasts are thinner, reduce the cooking time to prevent them from drying out.

Additionally, letting the chicken rest after cooking is crucial. Allowing it to rest for about 5 minutes before slicing helps the juices redistribute throughout the meat. This simple step can make a big difference in the overall juiciness and flavor of your dish.

Lastly, don’t be afraid to experiment with seasonings and marinades. Marinating the chicken in lemon juice or your favorite herbs for 30 minutes before stuffing can add an extra layer of flavor. This is especially helpful if you want to enhance the taste of the chicken itself.

Spinach Ricotta Stuffed Chicken Breasts that are sure to impress everyone at your dinner table!

Serving Suggestions for Spinach Ricotta Stuffed Chicken Breasts

Spinach Ricotta Stuffed Chicken Breasts are cooked to perfection, it’s time to think about how to serve them. The right sides can elevate your meal and create a balanced plate. Here are some delightful serving suggestions that pair wonderfully with this dish:

  • Garlic Mashed Potatoes: Creamy mashed potatoes with a hint of garlic make a comforting side. Their smooth texture complements the stuffed chicken beautifully.
  • Roasted Vegetables: A mix of seasonal vegetables, such as carrots, bell peppers, and zucchini, roasted until tender adds color and nutrition to your plate.
  • Quinoa Salad: A light quinoa salad with cherry tomatoes, cucumber, and a lemon vinaigrette offers a refreshing contrast to the rich filling of the chicken.
  • Steamed Asparagus: Lightly steamed asparagus drizzled with olive oil and lemon juice provides a crisp and healthy side that enhances the meal.
  • Cauliflower Rice: For a low-carb option, serve the chicken with cauliflower rice. It’s a great way to add more veggies to your meal without sacrificing flavor.

For a complete dining experience, consider adding a simple salad. A mixed greens salad with a light vinaigrette can cleanse the palate and add freshness to your meal. You can also serve the chicken with a side of marinara sauce for dipping, which adds a delicious Italian flair.

Finally, don’t forget about the drinks! A crisp white wine, such as Pinot Grigio, pairs nicely with the flavors of the stuffed chicken. If you prefer non-alcoholic options, a sparkling water with a slice of lemon can be refreshing.

Spinach Ricotta Stuffed Chicken Breasts will shine on the dinner table, making for a delightful and satisfying meal that everyone will love!

Tips for Perfect Spinach Ricotta Stuffed Chicken Breasts

Spinach Ricotta Stuffed Chicken Breasts turn out perfectly every time, consider these helpful tips. They will enhance the flavor, texture, and overall presentation of your dish, making it a hit at your dinner table!

First, always use fresh ingredients. Fresh spinach and high-quality cheeses will elevate the taste of your filling. If possible, opt for organic chicken breasts. They tend to be juicier and more flavorful.

Next, don’t skip the seasoning! The spices in the filling are crucial for flavor. Feel free to adjust the seasonings to suit your taste. Adding fresh herbs like basil or parsley can also brighten the dish.

When stuffing the chicken, be gentle. Overstuffing can cause the filling to spill out during cooking. A little filling goes a long way, so aim for a generous but manageable amount.

For an extra layer of flavor, consider searing the chicken breasts in a hot skillet before baking. This step creates a beautiful golden crust and locks in moisture, making your chicken even more delicious.

Additionally, let the chicken rest after cooking. This step is essential for juicy chicken. Resting allows the juices to redistribute, ensuring every bite is tender and flavorful.

Lastly, presentation matters! When serving, slice the chicken breasts at an angle to showcase the colorful filling. This not only looks appealing but also makes it easier for your guests to enjoy.

Spinach Ricotta Stuffed Chicken Breasts that are not only delicious but also visually stunning. Your family and friends will be impressed, and you’ll feel proud of your culinary skills!

Breakdown of Time for Spinach Ricotta Stuffed Chicken Breasts

Spinach Ricotta Stuffed Chicken Breasts can help you plan your meal better. Here’s a detailed breakdown of the time you’ll need for preparation and cooking.

Prep Time

The prep time for this delicious dish is approximately 15-20 minutes. During this time, you will gather all your ingredients, prepare the chicken breasts, and make the flavorful spinach and ricotta filling. This step is crucial as it sets the foundation for your meal. Make sure to take your time to ensure everything is ready for cooking!

Cooking Time

Once you’ve prepped your ingredients, the cooking time will take about 25-30 minutes. This includes browning the stuffed chicken breasts in the skillet for about 8-10 minutes and then baking them in the oven for 20-25 minutes. The cooking time may vary slightly depending on the thickness of your chicken breasts, so keep an eye on them to ensure they reach the perfect internal temperature.

Total Time

In total, you can expect to spend around 40-50 minutes from start to finish. This includes both prep and cooking time. With this quick and efficient timeline, you can have a delicious and healthy meal ready in no time. Perfect for busy weeknights or when you want to impress guests without spending hours in the kitchen!

Nutritional Information for Spinach Ricotta Stuffed Chicken Breasts

Spinach Ricotta Stuffed Chicken Breasts not only taste great but also provide a good amount of nutrients. Here’s a breakdown of the key nutritional information per serving:

Calories

Spinach Ricotta Stuffed Chicken Breasts contains approximately 450 calories. This makes it a satisfying option for dinner without going overboard on calories. The combination of chicken and cheese provides a hearty meal that keeps you feeling full and satisfied.

Protein

One of the standout features of this dish is its high protein content. Each serving offers about 45 grams of protein. This is excellent for muscle repair and growth, making it a great choice for those who are active or looking to maintain a healthy lifestyle. The protein from the chicken and cheeses contributes to this impressive total.

Sodium

In terms of sodium, each serving contains around 600 milligrams. While this is a reasonable amount for a flavorful dish, it’s always good to be mindful of your sodium intake, especially if you are watching your salt consumption. You can reduce the sodium by using low-sodium cheese or adjusting the amount of added salt in the recipe.

Spinach Ricotta Stuffed Chicken Breasts provide a nutritious meal option that is rich in protein and relatively low in calories. It’s a delicious way to enjoy a balanced diet while indulging in a flavorful dish!

FAQs about Spinach Ricotta Stuffed Chicken Breasts

Can I use frozen spinach for Spinach Ricotta Stuffed Chicken Breasts?

Spinach Ricotta Stuffed Chicken Breasts. However, it’s important to thaw and drain the spinach thoroughly before using it. Frozen spinach often contains excess water, which can make your filling too watery. To prepare, simply place the frozen spinach in a colander and run it under cold water until thawed. Then, press out any remaining moisture with a clean kitchen towel. This will ensure that your filling remains creamy and flavorful without being soggy!

How do I know when the chicken is cooked through?

Spinach Ricotta Stuffed Chicken Breasts are cooked through is by using a meat thermometer. Insert the thermometer into the thickest part of the chicken breast. It should read 165°F (75°C) to ensure it is safe to eat. If you don’t have a thermometer, you can also cut into the chicken. The meat should be opaque and the juices should run clear, not pink. Always prioritize food safety to enjoy your meal worry-free!

Can I make Spinach Ricotta Stuffed Chicken Breasts ahead of time?

Spinach Ricotta Stuffed Chicken Breasts ahead of time. After stuffing the chicken, cover it tightly and store it in the refrigerator for up to 24 hours before cooking. This can be a great time-saver for busy weeknights or when hosting guests. Just remember to let the chicken sit at room temperature for about 15-20 minutes before cooking. This helps it cook evenly. If you want to freeze them, wrap each stuffed chicken breast tightly in plastic wrap and then place them in a freezer-safe bag. They can be frozen for up to 3 months. Thaw in the refrigerator before cooking!

What sides pair well with Spinach Ricotta Stuffed Chicken Breasts?

Spinach Ricotta Stuffed Chicken Breasts, you have plenty of delicious side options to choose from. Here are some great pairings:

  • Garlic Mashed Potatoes: Creamy and comforting, they complement the flavors of the chicken.
  • Roasted Vegetables: A colorful mix of seasonal veggies adds nutrition and vibrancy to your plate.
  • Quinoa Salad: A light salad with fresh ingredients balances the richness of the stuffed chicken.
  • Steamed Asparagus: Crisp and healthy, asparagus adds a refreshing touch to your meal.
  • Cauliflower Rice: A low-carb option that pairs well with the flavors of the chicken.

These sides not only enhance the meal but also create a well-rounded dining experience. Enjoy experimenting with different combinations to find your favorite!

Conclusion on Spinach Ricotta Stuffed Chicken Breasts

Spinach Ricotta Stuffed Chicken Breasts are a delightful and nutritious dish that can easily become a staple in your meal rotation. With their tender chicken exterior and creamy, flavorful filling, they offer a perfect balance of taste and health benefits. This recipe not only provides a satisfying meal but also allows for creativity in the kitchen, as you can customize the filling and cooking methods to suit your preferences.

Whether you’re preparing a weeknight dinner or hosting a special occasion, this dish is sure to impress. The vibrant colors and rich flavors make it visually appealing and delicious. Plus, with the tips and variations provided, you can make each experience unique and exciting.

Spinach Ricotta Stuffed Chicken Breasts turn out perfectly every time.

So, gather your ingredients, roll up your sleeves, and get ready to enjoy a meal that is not only good for you but also bursting with flavor. Your family and friends will thank you for introducing them to this delicious dish, and you’ll feel proud to serve it at your table. Happy cooking!

ating

Spinach Ricotta Stuffed Chicken Breasts are a must-try!

This Ricotta and Spinach Stuffed Chicken is a creamy, cheesy, and flavorful dish that brings comfort and elegance to the table. Juicy chicken breasts are filled with a savory ricotta-spinach blend, then seared, smothered in marinara, and baked to bubbly perfection. A low-carb, high-protein meal that’s easy enough for a weeknight and impressive enough for guests!
Prep Time 15 minutes
Cook Time 25 minutes
Total Time 40 minutes
Servings: 4 servings
Course: Main Course
Cuisine: Italian-inspired

Ingredients
  

  • 4 boneless skinless chicken breasts1 cup ricotta cheese (whole milk preferred)1 cup fresh spinach, chopped1/2 cup grated Parmesan cheese2 cloves garlic, minced1 tablespoon olive oilSalt, to tasteBlack pepper, to taste1 teaspoon Italian seasoning1/2 teaspoon red pepper flakes (optional)1 cup marinara sauce1/2 cup shredded mozzarella cheese

Method
 

  1. Preheat the OvenPreheat your oven to 375°F (190°C).
  2. Prepare the ChickenSlice each chicken breast horizontally to create a pocket—being careful not to cut all the way through. Season inside and outside with salt and pepper.
  3. Make the FillingIn a mixing bowl, combine ricotta cheese, chopped spinach, Parmesan cheese, minced garlic, Italian seasoning, red pepper flakes (if using), and a pinch of salt and pepper. Stir until well mixed.
  4. Stuff the ChickenFill each chicken pocket with the ricotta mixture. Use toothpicks to secure if needed to keep the filling inside.
  5. Sear the ChickenHeat olive oil in an oven-safe skillet over medium heat. Add the stuffed chicken breasts and sear for 3–4 minutes on each side until golden brown.
  6. Add Sauce and CheesePour marinara sauce over the chicken and sprinkle the mozzarella cheese evenly on top.
  7. BakeTransfer the skillet to the oven and bake for 20–25 minutes, or until the internal temperature of the chicken reaches 165°F (74°C) and the cheese is melted and bubbly.
  8. Rest and ServeLet the chicken rest for 5 minutes before serving. Serve with extra marinara sauce or fresh herbs, if desired.

Notes

  • Make It Ahead: You can stuff the chicken and refrigerate it for up to 24 hours before cooking.
  • Add-Ins: Feel free to add fresh herbs like basil or parsley to the filling for extra flavor.
  • Low-Carb Friendly: This recipe is naturally low in carbohydrates and works well for keto-style meals.
  • Side Ideas: Serve with zucchini noodles, garlic green beans, or a fresh garden salad.

Winter Nourish Bowl Recipe: A Hearty Delight Awaits!

Introduction to the Winter Nourish Bowl Recipe

Winter Nourish Bowl Recipe is a delightful way to embrace the season while nourishing your body. This bowl is not just a feast for the eyes; it’s packed with vibrant colors and wholesome ingredients that provide essential nutrients. Each bite is a celebration of flavors and textures, making it a perfect dish for family dinners or meal prep.

What makes this recipe stand out is its versatility. You can easily customize it to suit your taste preferences or dietary needs. Whether you’re a vegetarian, vegan, or simply looking to add more plant-based meals to your diet, this bowl has something for everyone. The combination of quinoa, roasted sweet potatoes, and chickpeas offers a satisfying base, while the tahini dressing adds a creamy, tangy finish.

Moreover, this recipe is not only delicious but also quick to prepare. With just a few simple steps, you can create a nourishing meal that warms you from the inside out. So, gather your ingredients and let’s dive into the world of the Winter Nourish Bowl. Your taste buds will thank you!

Ingredients for the Winter Nourish Bowl Recipe

Winter Nourish Bowl Recipe, you’ll need a variety of fresh and wholesome ingredients. Each component plays a vital role in delivering flavor and nutrition. Here’s what you’ll need:

  • 2 cups cooked quinoa
  • 1 cup roasted sweet potatoes, diced
  • 1 cup steamed broccoli florets
  • 1 cup chickpeas, drained and rinsed
  • ½ cup shredded carrots
  • ¼ cup chopped fresh parsley
  • ¼ cup crumbled feta cheese (optional)
  • ¼ cup tahini
  • 2 tablespoons lemon juice
  • 2 tablespoons olive oil
  • 1 teaspoon garlic powder
  • Salt and pepper to taste

These ingredients not only create a colorful and appetizing dish but also provide a balanced mix of carbohydrates, protein, and healthy fats. The quinoa serves as a hearty base, while the roasted sweet potatoes add a touch of sweetness. Broccoli and chickpeas contribute essential vitamins and minerals, making this bowl a powerhouse of nutrition.

Winter Nourish Bowl Recipe is all about flexibility, so don’t hesitate to make it your own!

Step-by-Step Preparation of the Winter Nourish Bowl Recipe

Winter Nourish Bowl Recipe. This step-by-step guide will help you create a delicious and nutritious meal with ease. Let’s get started!

Step 1: Preparing the Base Ingredients

First, you need to prepare the base of your bowl. Start by cooking the quinoa. Rinse 1 cup of quinoa under cold water to remove any bitterness. Then, follow the package instructions to cook it. Usually, you’ll need to combine the quinoa with 2 cups of water in a pot. Bring it to a boil, then reduce the heat and let it simmer for about 15 minutes. Once the quinoa is fluffy, remove it from heat and let it sit for a few minutes. Fluff it with a fork to separate the grains.

Step 2: Cooking the Protein

While the quinoa is cooking, it’s time to prepare the protein. If you’re adding chickpeas, simply drain and rinse them under cold water. If you prefer grilled chicken or tofu, you can cook them in a skillet with a little olive oil. Season with salt and pepper for extra flavor. Cook until golden brown and cooked through, which usually takes about 5-7 minutes. Set aside once done.

Step 3: Roasting the Vegetables

Next, let’s roast the sweet potatoes. Preheat your oven to 400°F (200°C). Dice the sweet potatoes into small cubes and toss them in a bowl with olive oil, salt, and pepper. Spread them evenly on a baking sheet. Roast for 25-30 minutes, or until they are tender and slightly caramelized. While the sweet potatoes are roasting, steam the broccoli florets. You can do this in a steamer basket over boiling water for about 5-7 minutes until they are bright green and tender.

Step 4: Assembling the Winter Nourish Bowl

Winter Nourish Bowl Recipe. In a large bowl, combine the cooked quinoa, roasted sweet potatoes, steamed broccoli, chickpeas, shredded carrots, and chopped parsley. Drizzle the tahini dressing over the top and toss everything gently to combine. If you’re using feta cheese, sprinkle it on top for an extra burst of flavor. Your bowl is now ready to serve!

Enjoy your nourishing meal right away, or chill it in the refrigerator for a refreshing cold option. This bowl is perfect for lunch or dinner, and it’s sure to keep you warm and satisfied during the winter months.

Variations of the Winter Nourish Bowl Recipe

Winter Nourish Bowl Recipe is incredibly versatile, allowing you to mix and match ingredients based on what’s in season or what you have on hand. This section will explore some exciting variations to keep your meals fresh and interesting throughout the winter months.

Seasonal Ingredient Swaps

Winter Nourish Bowl Recipe is its adaptability to seasonal ingredients. Here are some swaps you can try:

  • Root Vegetables: Instead of sweet potatoes, consider using roasted carrots, parsnips, or beets. These root vegetables add a lovely sweetness and earthy flavor.
  • Greens: If you want to boost the greens in your bowl, try adding kale or spinach. These leafy greens are packed with nutrients and can be steamed or sautéed.
  • Winter Squash: Butternut squash or acorn squash can be roasted and added for a creamy texture and rich flavor.
  • Seasonal Fruits: For a touch of sweetness, toss in some diced apples or pears. They add a refreshing crunch that complements the other ingredients.

By incorporating seasonal ingredients, you not only enhance the flavor but also support local farmers and reduce your carbon footprint.

Dietary Modifications

Winter Nourish Bowl Recipe can be easily modified. Here are some ideas:

  • Vegan Option: The recipe is already vegan-friendly, but if you want to skip the feta cheese, you can use nutritional yeast for a cheesy flavor without dairy.
  • Gluten-Free: This bowl is naturally gluten-free, thanks to quinoa. Just ensure that any additional ingredients, like dressings or toppings, are also gluten-free.
  • Low-Carb: For a low-carb version, reduce the quinoa and increase the amount of non-starchy vegetables like zucchini or bell peppers.
  • High-Protein: Add grilled chicken, shrimp, or tempeh to boost the protein content. This makes the bowl even more filling and satisfying.

Winter Nourish Bowl Recipe in countless ways, ensuring that it never gets boring. Feel free to experiment and find your favorite combinations!

Cooking Note for the Winter Nourish Bowl Recipe

Winter Nourish Bowl Recipe, a few cooking notes can enhance your experience and ensure a delicious outcome. First, always use fresh ingredients whenever possible. Fresh vegetables and herbs not only taste better but also provide more nutrients. If you can, visit your local farmer’s market to find seasonal produce.

Next, pay attention to the cooking times for each ingredient. For instance, while roasting sweet potatoes, keep an eye on them to prevent burning. You want them to be tender and caramelized, not overly crispy. Similarly, when steaming broccoli, aim for a bright green color. Overcooking can lead to a mushy texture and loss of nutrients.

Another tip is to prepare the tahini dressing in advance. This allows the flavors to meld together beautifully. If you find the tahini too thick, adding a bit of water or extra lemon juice can help achieve the desired consistency. Remember, the dressing should be creamy but pourable.

Winter Nourish Bowl Recipe is all about balance, so feel free to tweak it until it’s just right for you.

By keeping these cooking notes in mind, you’ll create a nourishing bowl that not only satisfies your hunger but also delights your taste buds. Enjoy the process and happy cooking!

Serving Suggestions for the Winter Nourish Bowl Recipe

Winter Nourish Bowl Recipe, it’s time to think about how to serve it. Presentation can elevate your meal, making it even more enjoyable. Here are some serving suggestions to enhance your dining experience:

  • Layered Presentation: For a beautiful display, layer the ingredients in a clear bowl. Start with quinoa at the bottom, followed by roasted sweet potatoes, broccoli, chickpeas, and finally, the shredded carrots and parsley on top. This not only looks appealing but also allows each ingredient to shine.
  • Individual Bowls: Serve the nourish bowl in individual portions. This makes it easy for guests to enjoy their meal and allows for customization. Each person can add their preferred amount of tahini dressing and feta cheese.
  • Garnish: Add a sprinkle of sesame seeds or a few slices of avocado on top for an extra touch. These garnishes not only enhance the visual appeal but also add flavor and healthy fats.
  • Accompanying Sides: Pair your nourish bowl with a side of whole-grain bread or a light soup. This can make the meal more filling and satisfying, especially on colder days.
  • Chilled Option: If you prefer a refreshing meal, chill the bowl in the refrigerator for about an hour before serving. This makes for a delightful cold option, perfect for lunch or a light dinner.

Winter Nourish Bowl Recipe. Whether you’re enjoying it solo or sharing with friends and family, these tips will make your meal even more enjoyable. So, gather around the table and dig in!

Tips for Perfecting Your Winter Nourish Bowl Recipe

Winter Nourish Bowl Recipe is all about attention to detail and personal touches. Here are some tips to help you elevate your bowl to new heights:

  • Balance Flavors: Aim for a mix of flavors in your bowl. Combine sweet, savory, and tangy elements. The sweetness of roasted sweet potatoes pairs beautifully with the tangy tahini dressing. Don’t hesitate to adjust the seasoning to find your ideal balance.
  • Texture Matters: Incorporate a variety of textures for a more enjoyable eating experience. The crunch of shredded carrots, the creaminess of tahini, and the chewiness of quinoa create a delightful contrast. Consider adding nuts or seeds for an extra crunch.
  • Fresh Herbs: Fresh herbs can brighten up your dish. Parsley is a great choice, but you can also experiment with cilantro or mint. These herbs add a burst of flavor and a pop of color to your bowl.
  • Experiment with Dressings: While tahini dressing is delicious, don’t be afraid to try other dressings. A lemon vinaigrette or a yogurt-based dressing can offer a different flavor profile. Mix it up to keep your meals exciting!
  • Meal Prep Friendly: If you’re short on time, consider meal prepping your ingredients. Cook a large batch of quinoa and roast several sweet potatoes at once. Store them in the fridge for quick assembly throughout the week.
  • Mind the Temperature: Serve your bowl warm for a cozy meal, or chill it for a refreshing option. Both ways are delicious, so choose based on your mood or the weather!
  • Portion Control: Be mindful of portion sizes. This bowl is nutritious, but it’s easy to overfill. Aim for a balanced serving of each ingredient to keep your meal satisfying without being overwhelming.

Winter Nourish Bowl Recipe and make it a staple in your winter meal rotation. Enjoy the process of creating and savoring this nourishing dish!

Breakdown of Time for the Winter Nourish Bowl Recipe

Winter Nourish Bowl Recipe can help you plan your cooking efficiently. Here’s a simple breakdown of the time required for preparation and cooking:

Prep Time

The prep time for this nourishing bowl is quite manageable. You’ll need about 15-20 minutes to gather and prepare your ingredients. This includes:

  • Rinsing and measuring quinoa
  • Dicing sweet potatoes
  • Chopping broccoli and carrots
  • Draining and rinsing chickpeas
  • Chopping fresh parsley

Taking the time to prep your ingredients will make the cooking process smoother and more enjoyable.

Cooking Time

Winter Nourish Bowl Recipe is approximately 30-40 minutes. This includes:

  • Cooking quinoa (about 15 minutes)
  • Roasting sweet potatoes (25-30 minutes)
  • Steaming broccoli (5-7 minutes)

While the sweet potatoes roast, you can multitask by cooking the quinoa and steaming the broccoli, making the most of your time in the kitchen.

Total Time

Winter Nourish Bowl Recipe is a great option for a weeknight dinner or meal prep, as it allows you to create a wholesome meal without spending hours in the kitchen.

Winter Nourish Bowl Recipe into your busy schedule. Enjoy the process and the delicious results!

Nutritional Information for the Winter Nourish Bowl Recipe

Winter Nourish Bowl Recipe is not only delicious but also packed with nutrients that support your health. Here’s a breakdown of the key nutritional components per serving:

Calories

Winter Nourish Bowl Recipe contains approximately 350 calories. This makes it a satisfying meal option that provides energy without being overly heavy. The combination of quinoa, sweet potatoes, and chickpeas contributes to the calorie count while offering essential nutrients.

Protein

In terms of protein, this nourishing bowl provides about 12 grams per serving. The protein comes primarily from quinoa and chickpeas, making it a great choice for vegetarians and vegans. Protein is vital for muscle repair and growth, and it helps keep you feeling full longer.

Sodium

Winter Nourish Bowl Recipe is relatively low, making it a heart-healthy option. Depending on how much salt you add during cooking, the sodium level can vary. On average, you can expect around 300-400 mg of sodium per serving. To keep it lower, use minimal salt and rely on the natural flavors of the ingredients.

Winter Nourish Bowl Recipe is a nutritious meal that balances calories, protein, and sodium. It’s an excellent choice for anyone looking to enjoy a healthy, satisfying dish during the winter months. By incorporating this bowl into your meal rotation, you can nourish your body while enjoying a variety of flavors and textures.

FAQs about the Winter Nourish Bowl Recipe

What can I substitute for the grains in the Winter Nourish Bowl Recipe?

Winter Nourish Bowl Recipe, there are several great alternatives. Brown rice is a popular choice, offering a similar texture and flavor. You could also use farro or barley for a chewy bite. For a gluten-free option, try using millet or even cauliflower rice for a lighter base. Each of these grains brings its unique taste and nutritional benefits, so feel free to experiment!

Can I make the Winter Nourish Bowl Recipe ahead of time?

Winter Nourish Bowl Recipe is perfect for meal prep. You can prepare the quinoa, roasted sweet potatoes, and steamed broccoli in advance. Store each component in separate airtight containers in the refrigerator. When you’re ready to eat, simply assemble the bowl and drizzle with tahini dressing. This makes it easy to enjoy a healthy meal throughout the week without the hassle of cooking every day.

Is the Winter Nourish Bowl Recipe suitable for meal prep?

Winter Nourish Bowl Recipe is highly suitable for meal prep! Its ingredients hold up well in the fridge, making it a convenient option for busy days. You can prepare multiple servings at once and store them in individual containers. Just keep the dressing separate until you’re ready to eat to maintain freshness. This way, you’ll have a nutritious meal ready to go whenever you need it!

How can I add more flavor to the Winter Nourish Bowl Recipe?

Winter Nourish Bowl Recipe, consider adding spices and herbs. A sprinkle of smoked paprika or cumin can enhance the roasted sweet potatoes. You might also try adding a dash of hot sauce or chili flakes for a kick. Fresh herbs like cilantro or basil can brighten the dish. Additionally, experimenting with different dressings, such as a lemon vinaigrette or a spicy tahini sauce, can elevate the overall taste. Don’t be afraid to get creative!

Conclusion on the Winter Nourish Bowl Recipe

Winter Nourish Bowl Recipe is more than just a meal; it’s a celebration of seasonal ingredients and wholesome nutrition. This dish brings together a delightful mix of flavors, textures, and colors that not only satisfy your hunger but also nourish your body. With its easy preparation and versatility, it’s perfect for busy weeknights or leisurely weekend meals.

As you explore the various ingredients and modifications, you’ll find that this bowl can be tailored to fit your personal taste and dietary needs. Whether you choose to stick with the classic recipe or experiment with seasonal swaps, the possibilities are endless. The combination of quinoa, roasted sweet potatoes, and chickpeas provides a hearty base, while the tahini dressing adds a creamy, tangy finish that ties everything together.

Winter Nourish Bowl Recipe is an excellent option for meal prep. Preparing it in advance allows you to enjoy a nutritious meal throughout the week without the stress of daily cooking. Just remember to keep the dressing separate until you’re ready to serve for the best flavor and freshness.

Winter Nourish Bowl Recipe is a delicious and healthy choice that can easily become a staple in your winter meal rotation. So, gather your ingredients, get creative, and enjoy the warmth and nourishment this bowl brings. Your taste buds and body will thank you!

ating

Winter Nourish Bowl Recipe: A Hearty Delight Awaits!

This Winter Nourish Bowl is simple, colorful, and full of nourishing flavor. With crispy roasted Brussels sprouts, carrots, sweet potatoes, and red onion over fluffy quinoa, it’s a perfect plant-based meal that’s wholesome, satisfying, and weeknight-friendly.
Prep Time 10 minutes
Cook Time 30 minutes
Total Time 40 minutes
Servings: 2 -3 servings
Course: Main Course, Side Dish
Cuisine: Gluten-Free, Plant-Based, Vegetarian

Ingredients
  

  • 2 cups Brussels sprouts halved2 carrots, sliced1 sweet potato, cubed1 red onion, sliced2 tablespoons olive oilSalt, to tasteBlack pepper, to taste1 cup cooked quinoaChopped parsley, for garnish

Method
 

  1. Preheat the OvenPreheat oven to 400°F (200°C).
  2. Prepare the VegetablesIn a large bowl, toss the Brussels sprouts, carrots, sweet potato, and red onion with olive oil, salt, and pepper until evenly coated.
  3. Roast the VeggiesSpread the vegetables in a single layer on a baking sheet. Roast for 25–30 minutes, stirring once halfway through, until golden and tender.
  4. Assemble the BowlDivide cooked quinoa into bowls. Top with the roasted vegetables and sprinkle with chopped parsley.
  5. Serve and EnjoyServe warm as a main or hearty side dish. Add a squeeze of lemon or a drizzle of tahini if desired.

Notes

  • Add Protein: Top with roasted chickpeas, grilled tofu, or a soft-boiled egg for extra protein.
  • Make Ahead: Roast the veggies and cook the quinoa in advance for easy meal prep.
  • Flavor Boost: Add garlic powder, smoked paprika, or a splash of balsamic vinegar before roasting for added depth.
  • Serving Tip: Great warm or at room temperature—perfect for lunch boxes or picnics.

One-Pan Pesto Chicken Tortellini Recipe is a must-try!

Introduction to One-Pan Pesto Chicken Tortellini Recipe

Are you looking for a quick and delicious meal that requires minimal cleanup? Look no further! The One-Pan Pesto Chicken Tortellini Recipe is here to save the day. This dish combines tender chicken, fresh vegetables, and flavorful tortellini, all tossed in a vibrant pesto sauce. It’s not just a meal; it’s a delightful experience that brings the family together around the dinner table.

What Makes This Recipe Special?

What sets this recipe apart is its simplicity and flavor. First, it uses just one pan, which means less time spent washing dishes. Second, the combination of ingredients creates a colorful and appetizing dish that is sure to please everyone. The fresh tortellini adds a delightful texture, while the pesto sauce brings a burst of flavor that elevates the entire meal. Plus, it’s versatile! You can easily customize it with your favorite vegetables or proteins.

Benefits of Cooking with One Pan

Cooking with one pan has numerous benefits. For starters, it saves time. You can prepare and cook your meal without juggling multiple pots and pans. This method also helps to lock in flavors, as all the ingredients meld together during cooking. Additionally, it’s a great way to reduce kitchen clutter. With fewer dishes to wash, you can spend more time enjoying your meal and less time cleaning up afterward. Overall, one-pan meals like this One-Pan Pesto Chicken Tortellini Recipe are perfect for busy weeknights or when you want a hassle-free cooking experience.

Ingredients for One-Pan Pesto Chicken Tortellini Recipe

To create the delightful One-Pan Pesto Chicken Tortellini Recipe, you’ll need a few simple ingredients. Each component plays a vital role in building flavor and texture. Here’s what you’ll need:

  • 2 cups fresh tortellini (store-bought for convenience)
  • 1 pound boneless, skinless chicken breasts, cut into bite-sized pieces
  • 1 cup cherry tomatoes, halved for sweetness
  • 1 cup zucchini, diced for a fresh crunch
  • 1 cup bell pepper, diced (any color) for vibrant color
  • 1/2 cup pesto sauce for that rich, herby flavor
  • 2 tablespoons olive oil for cooking
  • 1 teaspoon garlic powder to enhance the taste
  • Salt and pepper to taste for seasoning
  • 1/4 cup grated Parmesan cheese (optional) for a cheesy finish
  • Fresh basil leaves for garnish (optional) to add freshness

These ingredients come together to create a balanced meal that is both satisfying and nutritious. The fresh tortellini pairs beautifully with the tender chicken and colorful veggies, while the pesto sauce ties everything together with its aromatic flavor. Feel free to adjust the quantities based on your preferences or dietary needs. Now that you have your ingredients ready, let’s move on to the preparation steps!

Step-by-Step Preparation of One-Pan Pesto Chicken Tortellini Recipe

Now that you have all your ingredients ready, it’s time to dive into the cooking process! This One-Pan Pesto Chicken Tortellini Recipe is straightforward and fun to make. Follow these simple steps to create a delicious meal that your family will love.

Step 1: Gather Your Ingredients

Before you start cooking, make sure you have everything you need within reach. Gather your fresh tortellini, chicken, vegetables, pesto sauce, and seasonings. Having everything prepared will make the cooking process smoother and more enjoyable. You can even chop the vegetables ahead of time to save a few minutes!

Step 2: Prepare the Chicken

In a large skillet, heat the olive oil over medium heat. Once the oil is hot, add the bite-sized chicken pieces. Season them with garlic powder, salt, and pepper. Cook the chicken for about 5-7 minutes, stirring occasionally. You want the chicken to be golden brown and cooked through, with no pink remaining in the center. This step is crucial as it sets the foundation for the dish’s flavor.

Step 3: Cook the Tortellini

While the chicken is cooking, bring a pot of salted water to a boil. Add the fresh tortellini to the boiling water and cook according to the package instructions, which usually takes about 3-5 minutes. Once they are tender, drain the tortellini and set them aside. This step ensures that the tortellini is perfectly cooked and ready to mix with the other ingredients.

Step 4: Combine Ingredients

Once the chicken is fully cooked, it’s time to add the vegetables. Toss in the diced zucchini and bell pepper into the skillet. Sauté these for about 3-4 minutes until they become tender. Next, stir in the halved cherry tomatoes and the cooked tortellini. This combination of ingredients creates a colorful and nutritious mix that is visually appealing and delicious.

Step 5: Add Pesto and Finish Cooking

Now comes the best part! Pour the pesto sauce over the chicken and vegetable mixture. Toss everything together gently until all the ingredients are well coated with the pesto. Cook for an additional 2-3 minutes to heat everything through. If you like, sprinkle some grated Parmesan cheese on top for an extra layer of flavor. Finally, garnish with fresh basil leaves before serving. Your One-Pan Pesto Chicken Tortellini is now ready to be enjoyed!

Variations of One-Pan Pesto Chicken Tortellini Recipe

One of the best things about the One-Pan Pesto Chicken Tortellini Recipe is its versatility. You can easily adapt it to suit different tastes and dietary preferences. Here are some exciting variations to consider:

Vegetarian Options

If you want to make this dish vegetarian, simply omit the chicken. Instead, you can add more vegetables to enhance the flavor and nutrition. Consider using:

  • Spinach: Fresh spinach wilts beautifully and adds a lovely green color.
  • Mushrooms: Sautéed mushrooms provide a hearty texture and earthy flavor.
  • Broccoli: This veggie adds crunch and is packed with vitamins.

Feel free to mix and match your favorite vegetables. You can also use cheese tortellini for an extra cheesy twist!

Different Protein Choices

If you prefer a different protein, there are plenty of options to choose from. Here are some ideas:

  • Turkey: Ground turkey is a lean alternative that cooks quickly.
  • Shrimp: Shrimp cooks fast and adds a delightful seafood flavor.
  • Tofu: For a plant-based protein, use firm tofu. Just sauté it until golden.

Each protein brings its unique taste, making the dish exciting every time you prepare it!

Alternative Sauces and Seasonings

While pesto is delicious, you can switch it up with different sauces and seasonings. Here are some tasty alternatives:

  • Alfredo Sauce: For a creamy twist, use Alfredo sauce instead of pesto.
  • Marinara Sauce: A classic tomato sauce can give a comforting flavor.
  • Spicy Arrabbiata: If you like heat, try a spicy tomato sauce for a kick.

Additionally, you can experiment with seasonings like Italian herbs, red pepper flakes, or lemon zest to enhance the dish’s flavor profile.

With these variations, you can enjoy the One-Pan Pesto Chicken Tortellini Recipe in many delightful ways. Whether you’re cooking for a crowd or just for yourself, there’s a version that will surely please your palate!

Cooking Note for One-Pan Pesto Chicken Tortellini Recipe

When preparing the One-Pan Pesto Chicken Tortellini Recipe, a few cooking notes can help ensure your dish turns out perfectly every time. These tips will enhance your cooking experience and the final result.

First, always use fresh ingredients when possible. Fresh tortellini, vibrant vegetables, and high-quality pesto will significantly improve the flavor of your dish. If you can, opt for homemade pesto for a richer taste. However, store-bought pesto works just fine for a quick meal.

Next, be mindful of the cooking times. Chicken should be cooked until it reaches an internal temperature of 165°F (75°C) to ensure it is safe to eat. Use a meat thermometer for accuracy. Overcooking can lead to dry chicken, so keep an eye on it while it cooks.

When sautéing the vegetables, remember that different veggies have varying cooking times. For instance, bell peppers and zucchini cook faster than cherry tomatoes. Add them to the skillet in the right order to achieve the perfect texture. Start with the firmer vegetables and add the softer ones later.

Lastly, don’t hesitate to adjust the seasoning to your taste. Everyone has different preferences, so feel free to add more garlic powder, salt, or pepper as you see fit. A splash of lemon juice can also brighten the flavors and add a refreshing touch.

By keeping these cooking notes in mind, you’ll create a delicious One-Pan Pesto Chicken Tortellini that your family will love. Happy cooking!

Serving Suggestions for One-Pan Pesto Chicken Tortellini Recipe

Once your One-Pan Pesto Chicken Tortellini is ready, it’s time to think about how to serve it. A well-presented dish can make your meal feel even more special. Here are some serving suggestions to enhance your dining experience.

Pairing with Sides

While the One-Pan Pesto Chicken Tortellini is a complete meal on its own, pairing it with the right sides can elevate your dining experience. Here are some delightful options:

  • Garlic Bread: A warm slice of garlic bread is perfect for soaking up any leftover pesto sauce. It adds a comforting touch to your meal.
  • Mixed Green Salad: A fresh salad with mixed greens, cucumbers, and a light vinaigrette can provide a refreshing contrast to the rich flavors of the tortellini.
  • Steamed Vegetables: Lightly steamed broccoli or asparagus can add extra nutrients and color to your plate.
  • Roasted Potatoes: Crispy roasted potatoes seasoned with herbs can complement the dish beautifully.

These sides not only enhance the meal but also add variety to your plate, making it visually appealing and satisfying.

Presentation Tips

Presentation plays a key role in making your meal inviting. Here are some simple tips to make your One-Pan Pesto Chicken Tortellini look as good as it tastes:

  • Use a Large Serving Bowl: Transfer the tortellini to a large, shallow serving bowl. This allows the vibrant colors of the dish to shine.
  • Garnish Generously: Sprinkle fresh basil leaves and grated Parmesan cheese on top just before serving. This adds a pop of color and a touch of elegance.
  • Drizzle with Olive Oil: A light drizzle of high-quality olive oil can enhance the flavors and give a glossy finish.
  • Serve with Lemon Wedges: Adding lemon wedges on the side allows guests to squeeze fresh juice over their dish, brightening the flavors.

By following these serving suggestions and presentation tips, your One-Pan Pesto Chicken Tortellini will not only taste amazing but also look stunning on the table. Enjoy your meal with family and friends, and savor every bite!

Tips for Perfecting One-Pan Pesto Chicken Tortellini Recipe

To make your One-Pan Pesto Chicken Tortellini Recipe even better, consider these helpful tips. They will guide you in making delicious adjustments and ensure your meal stays fresh and tasty.

Ingredient Substitutions

Sometimes, you may not have all the ingredients on hand. No worries! Here are some easy substitutions you can make:

  • Tortellini: If you can’t find fresh tortellini, use frozen tortellini or even pasta shapes like penne or farfalle. Just adjust the cooking time accordingly.
  • Chicken: For a quicker option, use rotisserie chicken. Just shred it and add it to the pan at the end to warm it through.
  • Pesto Sauce: If you don’t have pesto, try using a store-bought basil sauce or even a homemade garlic and olive oil mix for a different flavor.
  • Vegetables: Feel free to swap out the zucchini and bell pepper for whatever you have. Carrots, asparagus, or even frozen mixed vegetables work well!

These substitutions can help you create a delicious meal without a trip to the store. Plus, they allow you to experiment with flavors and textures!

Storage and Reheating Tips

After enjoying your One-Pan Pesto Chicken Tortellini, you might have some leftovers. Here’s how to store and reheat them properly:

  • Storage: Allow the dish to cool completely before transferring it to an airtight container. It can be stored in the refrigerator for up to 3 days.
  • Freezing: If you want to keep it longer, you can freeze the dish. Just make sure to use a freezer-safe container. It can last for up to 2 months.
  • Reheating: To reheat, simply warm it in a skillet over medium heat. Add a splash of water or broth to prevent it from drying out. Stir occasionally until heated through. You can also microwave it in a covered bowl for about 2-3 minutes, stirring halfway.

By following these storage and reheating tips, you can enjoy your One-Pan Pesto Chicken Tortellini even after the first meal. It’s a great way to save time and reduce food waste!

Breakdown of Time for One-Pan Pesto Chicken Tortellini Recipe

Understanding the time needed for each step of the One-Pan Pesto Chicken Tortellini Recipe can help you plan your cooking efficiently. Here’s a simple breakdown of the time required for preparation and cooking.

Prep Time

The prep time for this recipe is quite short, making it perfect for busy weeknights. You can expect to spend about 10-15 minutes gathering and preparing your ingredients. This includes:

  • Chopping the vegetables (zucchini, bell pepper, and cherry tomatoes).
  • Cutting the chicken into bite-sized pieces.
  • Measuring out the pesto sauce and other seasonings.

Having everything ready before you start cooking will make the process smoother and more enjoyable!

Cooking Time

The cooking time for the One-Pan Pesto Chicken Tortellini is approximately 15-20 minutes. Here’s how the time breaks down:

  • Cooking the chicken: 5-7 minutes.
  • Cooking the tortellini: 3-5 minutes (while the chicken cooks).
  • Sautéing the vegetables: 3-4 minutes.
  • Combining everything and heating through: 2-3 minutes.

This quick cooking time means you can have a delicious meal ready in no time!

Total Time

When you combine both prep and cooking times, the total time for the One-Pan Pesto Chicken Tortellini Recipe is about 25-35 minutes. This makes it an excellent choice for a weeknight dinner or a last-minute meal. You can enjoy a flavorful dish without spending hours in the kitchen!

Nutritional Information for One-Pan Pesto Chicken Tortellini Recipe

Understanding the nutritional content of your meals is essential for maintaining a balanced diet. The One-Pan Pesto Chicken Tortellini Recipe not only delights your taste buds but also provides a good mix of nutrients. Here’s a breakdown of the nutritional information per serving:

Calories

450 calories. This calorie count makes it a satisfying meal without being overly heavy. It’s perfect for those who want to enjoy a hearty dish while keeping an eye on their caloric intake.

Protein

35 grams of protein. The chicken and tortellini contribute significantly to this protein content, making it an excellent choice for those looking to increase their protein intake.

Sodium

600 milligrams. While this is a reasonable amount for a meal, it’s always good to be mindful of your sodium intake, especially if you are watching your salt consumption. You can reduce the sodium by using low-sodium pesto or adjusting the amount of added salt during cooking.

Overall, the One-Pan Pesto Chicken Tortellini Recipe is a nutritious option that balances calories, protein, and sodium. It’s a great way to enjoy a delicious meal while also fueling your body with essential nutrients. Whether you’re cooking for yourself or your family, this dish is sure to be a hit!

FAQs about One-Pan Pesto Chicken Tortellini Recipe

Can I use frozen tortellini for this recipe?

Absolutely! You can use frozen tortellini in the One-Pan Pesto Chicken Tortellini Recipe. Just remember to adjust the cooking time. Frozen tortellini usually takes a bit longer to cook than fresh ones. Follow the package instructions for the best results. Once cooked, you can mix it in with the chicken and veggies just like you would with fresh tortellini. This makes it a convenient option for busy nights!

How can I make this dish dairy-free?

If you want to make the One-Pan Pesto Chicken Tortellini Recipe dairy-free, there are a few simple swaps you can make. First, choose a dairy-free pesto sauce. Many brands offer vegan pesto made without cheese. You can also skip the Parmesan cheese or use a dairy-free alternative. Additionally, consider adding nutritional yeast for a cheesy flavor without the dairy. These changes will keep the dish delicious while accommodating your dietary needs!

What other vegetables can I add to the recipe?

The beauty of the One-Pan Pesto Chicken Tortellini Recipe is its versatility! You can add a variety of vegetables to enhance the flavor and nutrition. Some great options include:

  • Spinach: Fresh spinach wilts down nicely and adds a pop of color.
  • Broccoli: This veggie adds crunch and is packed with vitamins.
  • Carrots: Sliced or diced carrots can add sweetness and color.
  • Asparagus: Lightly sautéed asparagus adds a unique flavor.

Feel free to mix and match based on what you have on hand or your personal preferences. The more colorful your dish, the more appealing it will be!

How long do leftovers last in the fridge?

Leftovers from the One-Pan Pesto Chicken Tortellini Recipe can be stored in the refrigerator for up to 3 days. Make sure to place them in an airtight container to keep them fresh. When you’re ready to enjoy them again, simply reheat in a skillet over medium heat or in the microwave. If you want to keep them longer, consider freezing the leftovers. They can last for up to 2 months in the freezer. Just remember to thaw them in the fridge before reheating!

Conclusion on One-Pan Pesto Chicken Tortellini Recipe

In conclusion, the One-Pan Pesto Chicken Tortellini Recipe is a fantastic choice for anyone seeking a quick, delicious, and nutritious meal. With its vibrant colors and rich flavors, this dish is sure to impress your family and friends. The combination of tender chicken, fresh vegetables, and delightful tortellini, all coated in aromatic pesto, creates a satisfying experience that is hard to resist.

Not only is this recipe easy to prepare, but it also offers endless possibilities for customization. Whether you prefer to switch up the protein, add more veggies, or try different sauces, the options are limitless. This flexibility makes it a perfect dish for any occasion, from busy weeknights to casual gatherings.

Moreover, the one-pan cooking method simplifies the process, allowing you to enjoy a hearty meal without the hassle of extensive cleanup. You can spend more time savoring your food and less time scrubbing pots and pans. Plus, with the nutritional benefits packed into each serving, you can feel good about what you’re eating.

So, why not give the One-Pan Pesto Chicken Tortellini Recipe a try? Gather your ingredients, follow the steps, and enjoy a delightful meal that brings everyone together. Happy cooking!

ating

One-Pan Pesto Chicken Tortellini Recipe is a must-try!

This one-pan chicken and tortellini skillet is bursting with color, texture, and flavor! Juicy chicken thighs, crisp asparagus, sun-dried and cherry tomatoes, and cheesy tortellini come together in a bright basil pesto sauce. Quick to make and full of garden-fresh goodness, it’s a dinner win any night of the week.
Prep Time 10 minutes
Cook Time 25 minutes
Total Time 35 minutes
Servings: 4 servings
Course: Main Course
Cuisine: Italian-inspired

Ingredients
  

  • 2 tablespoons olive oil1 pound boneless skinless chicken thighs, sliced into stripsSalt, to taste1/2 cup sun-dried tomatoes, chopped and drained of oil1 pound asparagus, ends trimmed and cut in half1/4 cup basil pesto (or more to taste)1 cup cherry tomatoes (yellow and red), halved1 cup uncooked tortellini

Method
 

  1. Cook the ChickenHeat olive oil in a large skillet over medium heat. Add chicken strips and half of the chopped sun-dried tomatoes. Season with salt and cook for 5–10 minutes, flipping occasionally, until the chicken is cooked through. Remove from skillet and set aside.
  2. Sauté the AsparagusIn the same skillet with the remaining oil, add asparagus and the rest of the sun-dried tomatoes. Season with salt and cook for another 5–10 minutes, until asparagus is tender but still crisp. Transfer to a serving plate.
  3. Boil the TortelliniMeanwhile, cook tortellini according to package instructions. Drain and set aside.
  4. Combine Chicken and PestoReturn the cooked chicken to the skillet. Add basil pesto and stir over low to medium heat for 1–2 minutes until warmed and coated.
  5. Finish with Tomatoes and TortelliniAdd the cooked tortellini and halved cherry tomatoes to the skillet. Stir to combine, adding more pesto if desired. Taste and adjust salt as needed.
  6. Serve and EnjoyPlate the tortellini mixture alongside or over the sautéed asparagus and serve warm.

Notes

  • Pasta Tip: Use fresh or frozen tortellini—both work well. Just cook according to the package instructions.
  • Veggie Variation: Substitute green beans or broccolini for asparagus if preferred.
  • Extra Creaminess: Stir in a splash of cream or grated Parmesan cheese for a richer sauce.
  • Make Ahead: All components can be prepped in advance for a fast weeknight assembly.

Garlic Parmesan Chicken Skewers: Grill These Flavorful Treats

Introduction to Garlic Parmesan Chicken Skewers

Ah, the delightful aroma of Garlic Parmesan Chicken Skewers sizzling on the grill! It’s like a warm hug for your taste buds. If you’re anything like me, juggling a busy schedule while trying to whip up something delicious can feel like a culinary tightrope walk. But fear not, these skewers are your trusty safety net. Perfect for a quick weeknight dinner or a summer barbecue, they promise to impress without the stress. With just a few simple ingredients, you can create a dish that’s both flavorful and satisfying. Let’s dive into this easy, yet impressive recipe!

Why You’ll Love This Garlic Parmesan Chicken Skewers

These Garlic Parmesan Chicken Skewers are a busy cook’s dream come true. They’re quick to prepare, bursting with flavor, and perfect for any occasion. Whether you’re hosting a summer barbecue or need a speedy weeknight meal, these skewers deliver. The savory blend of garlic and Parmesan creates a taste sensation that even the pickiest eaters will adore. Plus, they’re low-carb and guilt-free!

Ingredients for Garlic Parmesan Chicken Skewers

Let’s gather the essentials for these mouthwatering Garlic Parmesan Chicken Skewers. First up, boneless, skinless chicken breasts, the star of our show, offering lean protein and a tender bite. Olive oil adds a touch of richness and helps the marinade cling to the chicken. Minced garlic infuses the dish with its unmistakable aroma and flavor, while grated Parmesan cheese brings a savory, nutty depth.

A sprinkle of dried Italian herbs—think oregano, basil, and thyme—adds a hint of Mediterranean flair. Salt and black pepper are your trusty sidekicks, enhancing every other ingredient. Fresh parsley, chopped and sprinkled on top, provides a pop of color and freshness. Don’t forget the skewers, either wooden or metal, to hold everything together. For those who like a bit of heat, a pinch of red pepper flakes can spice things up. And if you’re feeling adventurous, swap the chicken for shrimp or tofu for a delightful twist.

Exact quantities for each ingredient are listed at the bottom of the article, ready for printing. Let’s get cooking!

How to Make Garlic Parmesan Chicken Skewers

Preparing the Marinade

First things first, let’s whip up a marinade that will make your taste buds dance. In a large bowl, combine olive oil, minced garlic, and grated Parmesan cheese. These ingredients are the backbone of our flavor profile. Add a sprinkle of dried Italian herbs—oregano, basil, and thyme—to transport your senses to a sun-drenched Mediterranean coast. Season with salt and black pepper, giving it a good mix until everything is well blended. This marinade is like a cozy blanket, ready to wrap around our chicken cubes.

Marinating the Chicken

Now, it’s time to introduce our chicken to this flavorful concoction. Toss the chicken cubes into the bowl, ensuring each piece is generously coated. This step is crucial for infusing the chicken with all those delightful flavors. Cover the bowl and let it chill in the fridge for at least 30 minutes. If you have the time, let it marinate for up to 2 hours for an even deeper flavor. This is your chance to relax, sip some iced tea, or catch up on your favorite show while the marinade works its magic.

Grilling the Skewers

With the chicken marinated to perfection, it’s time to fire up the grill. Preheat it to medium-high heat, ensuring it’s hot enough to sear the chicken beautifully. Thread the marinated chicken cubes onto skewers, leaving a little space between each piece. This allows the heat to circulate evenly, cooking the chicken to juicy perfection. Place the skewers on the grill, turning them occasionally for about 10-12 minutes. You’re aiming for those lovely grill marks and an internal temperature of 165°F. Once done, let them rest for a few minutes before serving. Garnish with fresh parsley for a burst of color and freshness. Enjoy your Garlic Parmesan Chicken Skewers, a true testament to the art of grilling!

Tips for Success

  • Soak wooden skewers in water for 30 minutes to prevent burning.
  • For even cooking, cut chicken into uniform cubes.
  • Don’t overcrowd the grill; give each skewer space to cook evenly.
  • Use a meat thermometer to ensure chicken reaches 165°F.
  • Let the skewers rest for a few minutes before serving to lock in juices.

Equipment Needed

  • Grill or grill pan – for that perfect char.
  • Mixing bowl – to prepare the marinade.
  • Wooden or metal skewers – to hold the chicken cubes.
  • Meat thermometer – ensures chicken is cooked to 165°F.
  • Tongs – for easy turning of skewers on the grill.

Variations

  • Spicy Twist: Add a pinch of cayenne pepper to the marinade for a fiery kick.
  • Herbaceous Delight: Swap Italian herbs with fresh rosemary and thyme for a fragrant touch.
  • Vegetarian Option: Replace chicken with firm tofu cubes, marinate, and grill for a plant-based treat.
  • Seafood Swap: Use shrimp instead of chicken for a quick-cooking, seafood version.
  • Cheesy Upgrade: Sprinkle extra Parmesan on the skewers during the last minute of grilling for a cheesy crust.

Serving Suggestions

  • Pair with a crisp Caesar salad for a refreshing contrast.
  • Serve alongside buttery garlic bread for a comforting touch.
  • Complement with a chilled glass of white wine or iced tea.
  • Present on a platter with lemon wedges for a zesty finish.
  • Garnish with extra parsley for a pop of color and freshness.

FAQs about Garlic Parmesan Chicken Skewers

Can I prepare the marinade in advance?

Absolutely! You can mix the marinade ingredients a day ahead and store it in the fridge. This way, when you’re ready to cook, you can simply toss the chicken in and let it soak up all those delicious flavors.

What if I don’t have a grill?

No worries! A grill pan or even a regular skillet will work just fine. Just make sure to preheat it well and cook the skewers over medium-high heat, turning occasionally for even cooking.

How do I prevent the chicken from sticking to the grill?

To avoid sticking, ensure your grill is preheated and clean. Lightly oil the grates or brush a bit of oil on the chicken before grilling. This helps achieve those beautiful grill marks without any hassle.

Can I use chicken thighs instead of breasts?

Yes, chicken thighs are a great alternative. They tend to be juicier and more forgiving if slightly overcooked. Just make sure to cut them into similar-sized cubes for even cooking.

How can I make these skewers more kid-friendly?

For a kid-friendly version, reduce the garlic and skip the red pepper flakes. You can also serve the skewers with a side of honey mustard or ranch dressing for dipping, which kids often love.

Final Thoughts

There’s something truly magical about the simplicity and flavor of Garlic Parmesan Chicken Skewers. They transform an ordinary meal into a delightful culinary experience, perfect for sharing with family and friends. Whether you’re gathered around the grill on a sunny afternoon or enjoying a cozy dinner indoors, these skewers bring a sense of joy and satisfaction. The combination of garlic, Parmesan, and herbs creates a symphony of flavors that dance on your palate. So, next time you’re in need of a quick, delicious meal, remember these skewers. They’re not just food; they’re a celebration of taste and togetherness.

Garlic Parmesan Chicken Skewers
Paul

Garlic Parmesan Chicken Skewers: Grill These Flavorful Treats

Garlic Parmesan Chicken Skewers are a delicious and flavorful grilled dish made with marinated chicken cubes, perfect for a summer barbecue or a quick weeknight dinner.
Prep Time 30 minutes
Cook Time 12 minutes
Total Time 42 minutes
Servings: 4 servings
Course: Main Course
Cuisine: American
Calories: 280

Ingredients
  

  • 1 pound boneless skinless chicken breasts, cut into 1-inch cubes
  • 1/4 cup olive oil
  • 4 cloves garlic minced
  • 1/2 cup grated Parmesan cheese
  • 1 teaspoon dried Italian herbs oregano, basil, thyme
  • 1/2 teaspoon salt
  • 1/4 teaspoon black pepper
  • 1 tablespoon fresh parsley chopped (for garnish)
  • Skewers wooden or metal

Method
 

  1. If using wooden skewers, soak them in water for at least 30 minutes to prevent burning.
  2. In a large bowl, combine olive oil, minced garlic, Parmesan cheese, Italian herbs, salt, and black pepper. Mix well to create a marinade.
  3. Add the chicken cubes to the marinade and toss until evenly coated. Cover and refrigerate for at least 30 minutes, or up to 2 hours for more flavor.
  4. Preheat your grill or grill pan over medium-high heat.
  5. Thread the marinated chicken cubes onto the skewers, leaving a little space between each piece for even cooking.
  6. Grill the skewers for about 10-12 minutes, turning occasionally, until the chicken is cooked through and has nice grill marks. The internal temperature should reach 165°F.
  7. Remove from the grill and let rest for a few minutes. Garnish with chopped parsley before serving.

Notes

  • For a spicy kick, add a pinch of red pepper flakes to the marinade.
  • Substitute chicken with shrimp or cubed tofu for a different protein option.

Baked Teriyaki Salmon with Broccoli: Easy Recipe Guide

Introduction to Baked Teriyaki Salmon with Broccoli

Picture this: a busy weekday evening, and you’re craving something delicious yet simple. Enter Baked Teriyaki Salmon with Broccoli, a dish that feels like a warm hug after a long day. This recipe is a lifesaver for those of us juggling work, family, and everything in between. It’s quick, it’s easy, and it’s packed with flavor. Whether you’re looking to impress your loved ones or just need a quick solution for dinner, this dish has got you covered. Trust me, once you try it, it’ll become a staple in your kitchen.

Why You’ll Love This Baked Teriyaki Salmon with Broccoli

Imagine a meal that’s as quick to prepare as it is delightful to eat. This Baked Teriyaki Salmon with Broccoli is a dream come true for busy nights. It’s a symphony of flavors, with the savory teriyaki glaze perfectly complementing the tender salmon and crisp broccoli. Plus, it’s a healthy choice that doesn’t skimp on taste, making it a win-win for everyone at the table.

Ingredients for Baked Teriyaki Salmon with Broccoli

Let’s dive into the heart of this delightful dish. You’ll need fresh salmon fillets, which are the star of the show, bringing a rich, buttery flavor. Broccoli florets add a vibrant crunch and a pop of green, making the meal as pleasing to the eye as it is to the palate.

The teriyaki sauce is the magic potion here, infusing the salmon with a sweet and savory glaze. Olive oil helps everything cook to perfection, while garlic powder and ground ginger add a warm, aromatic depth. A sprinkle of salt and pepper ties it all together.

For a finishing touch, consider garnishing with sesame seeds and chopped green onions. These optional ingredients add a nutty crunch and a fresh, zesty note. Feel free to swap broccoli with asparagus or snap peas for a twist. Exact quantities are listed at the bottom of the article for easy reference and printing.

How to Make Baked Teriyaki Salmon with Broccoli

Preheat and Prepare

First things first, preheat your oven to 400°F (200°C). This ensures everything cooks evenly. Line a baking sheet with parchment paper. Trust me, this little step makes cleanup a breeze.

Mix the Teriyaki Sauce

In a small bowl, combine the teriyaki sauce, olive oil, garlic powder, and ground ginger. Add a pinch of salt and pepper. This mixture is your flavor powerhouse, so give it a good stir until everything is well blended.

Arrange Salmon and Broccoli

Place the salmon fillets on one side of the baking sheet. Brush them generously with the teriyaki mixture. On the other side, arrange the broccoli florets. Drizzle them with a bit of olive oil and season with salt and pepper. This setup ensures both the salmon and broccoli cook to perfection.

Bake to Perfection

Pop the baking sheet into the preheated oven. Bake for 12-15 minutes. You’ll know it’s done when the salmon flakes easily with a fork and the broccoli is tender. The aroma will be irresistible!

Optional Broiling for Crispiness

If you like a crispy finish, switch your oven to broil for an additional 2-3 minutes. Keep an eye on it to prevent burning. This step adds a delightful crunch to the salmon, making it even more delectable.

Tips for Success

  • Marinate the salmon in teriyaki sauce for 30 minutes for deeper flavor.
  • Use fresh salmon for the best taste and texture.
  • Cut broccoli into even-sized florets for uniform cooking.
  • Line the baking sheet with parchment paper to prevent sticking.
  • Keep an eye on the broiling step to avoid overcooking.

Equipment Needed

  • Baking sheet: A standard size works best, but any oven-safe tray will do.
  • Parchment paper: For easy cleanup and non-stick cooking.
  • Small mixing bowl: To blend the teriyaki sauce and spices.
  • Brush: A silicone brush is ideal for applying the sauce evenly.
  • Fork: To check the doneness of the salmon.

Variations

  • Swap salmon with chicken breast for a different protein option.
  • Use tamari instead of teriyaki sauce for a gluten-free version.
  • Add a splash of lemon juice for a citrusy twist.
  • Incorporate bell peppers or carrots for added color and nutrients.
  • Try a honey-soy glaze for a sweeter flavor profile.
  • Top with crushed peanuts for a crunchy texture.

Serving Suggestions

  • Pair with steamed jasmine rice for a complete meal.
  • Serve alongside a crisp cucumber salad for freshness.
  • Complement with a glass of chilled white wine, like Sauvignon Blanc.
  • Garnish with extra green onions for a pop of color.
  • Present on a large platter for a family-style dinner.

FAQs about Baked Teriyaki Salmon with Broccoli

Can I use frozen salmon for this recipe?

Absolutely! Just make sure to thaw the salmon fillets completely before cooking. This ensures even baking and allows the teriyaki sauce to penetrate the fish, enhancing the flavor.

What can I substitute for broccoli?

If broccoli isn’t your favorite, feel free to swap it with asparagus, snap peas, or even bell peppers. These alternatives will still complement the teriyaki salmon beautifully and add a delightful crunch.

How do I know when the salmon is done?

The salmon is perfectly cooked when it flakes easily with a fork. Keep an eye on it during the last few minutes of baking to avoid overcooking, which can dry out the fish.

Is there a way to make this dish gluten-free?

Yes, simply replace the teriyaki sauce with a gluten-free version or use tamari. This small change keeps the dish flavorful while accommodating dietary needs.

Can I prepare this dish ahead of time?

While it’s best enjoyed fresh, you can prepare the teriyaki sauce and marinate the salmon in advance. Store them in the fridge, and when you’re ready to cook, just follow the baking instructions for a quick meal.

Final Thoughts

There’s something truly magical about the simplicity and flavor of Baked Teriyaki Salmon with Broccoli. It’s a dish that brings joy to the table, offering a delightful balance of taste and nutrition. Whether you’re a seasoned cook or just starting your culinary journey, this recipe is a testament to how easy and rewarding home cooking can be. The combination of tender salmon and crisp broccoli, all glazed in a savory teriyaki sauce, is sure to become a family favorite. So, gather your loved ones, share a meal, and savor the moments that make life delicious.

Baked Teriyaki Salmon with Broccoli
Paul

Baked Teriyaki Salmon with Broccoli: Easy Recipe Guide

A simple and delicious recipe for Baked Teriyaki Salmon with Broccoli, perfect for a healthy and flavorful meal.
Prep Time 10 minutes
Cook Time 15 minutes
Total Time 25 minutes
Servings: 2 servings
Course: Main Course
Cuisine: Asian
Calories: 350

Ingredients
  

  • 2 6-ounce salmon fillets
  • 2 cups broccoli florets
  • 1/4 cup teriyaki sauce
  • 2 tablespoons olive oil
  • 1 teaspoon garlic powder
  • 1 teaspoon ground ginger
  • Salt and pepper to taste
  • Sesame seeds for garnish optional
  • Chopped green onions for garnish optional

Method
 

  1. Preheat your oven to 400°F (200°C). Line a baking sheet with parchment paper for easy cleanup.
  2. In a small bowl, mix together the teriyaki sauce, olive oil, garlic powder, ground ginger, salt, and pepper.
  3. Place the salmon fillets on one side of the prepared baking sheet. Brush the teriyaki mixture generously over the salmon.
  4. On the other side of the baking sheet, arrange the broccoli florets. Drizzle with a little olive oil and season with salt and pepper.
  5. Bake in the preheated oven for 12-15 minutes, or until the salmon flakes easily with a fork and the broccoli is tender.
  6. Optional: Broil for an additional 2-3 minutes for a crispy finish on the salmon.
  7. Remove from the oven and sprinkle with sesame seeds and chopped green onions if desired. Serve warm.

Notes

  • For added flavor, marinate the salmon in the teriyaki sauce for 30 minutes before baking.
  • Substitute the broccoli with other vegetables like asparagus or snap peas for a different twist.

Lemon Garlic Chicken with Green Beans: A Flavorful Delight

Introduction to Lemon Garlic Chicken with Green Beans

Oh, the joy of discovering a dish that feels like a warm hug after a long day! Lemon Garlic Chicken with Green Beans is just that—a delightful blend of zesty lemon and aromatic garlic, paired with the crisp freshness of green beans. It’s a recipe that whispers, “Relax, dinner’s sorted.” Whether you’re juggling work, family, or just need a quick solution for a busy day, this dish is your culinary best friend. It’s not just about feeding the family; it’s about creating moments of joy around the dinner table. Let’s dive into this flavorful delight!

Why You’ll Love This Lemon Garlic Chicken with Green Beans

This dish is a symphony of flavors that dances on your taste buds. It’s quick to prepare, making it perfect for those whirlwind evenings. The lemon and garlic create a vibrant, mouthwatering marinade that transforms simple chicken into a gourmet experience. Plus, the green beans add a satisfying crunch, making it a wholesome meal that’s both nutritious and delicious. It’s a win-win for busy nights!

Ingredients for Lemon Garlic Chicken with Green Beans

Let’s talk about the stars of this dish. First up, we have boneless, skinless chicken breasts, the canvas for our zesty masterpiece. Fresh green beans join the party, bringing a pop of color and crunch. Olive oil is our trusty sidekick, adding richness and helping everything cook to perfection.

Garlic cloves, minced to release their full flavor, are the aromatic backbone of our marinade. A lemon, both juiced and zested, provides that tangy zing we all love. Dried oregano adds a hint of earthiness, while salt and black pepper season everything just right.

For those who like a little heat, red pepper flakes are optional but highly recommended. And don’t forget the fresh parsley for garnish—it’s the finishing touch that makes the dish sing. For exact quantities, scroll down to the printable recipe card at the end of this post.

How to Make Lemon Garlic Chicken with Green Beans

Preparing the Marinade

Start by gathering your ingredients. In a large bowl, combine two tablespoons of olive oil with minced garlic. Add the juice and zest of one lemon, and sprinkle in the dried oregano. Season with salt and black pepper. If you’re feeling adventurous, toss in a pinch of red pepper flakes for a little kick. Mix everything well until you have a fragrant, zesty marinade that will make your kitchen smell heavenly.

Marinating the Chicken

Place the boneless, skinless chicken breasts into the bowl with the marinade. Use your hands or a spoon to coat each piece thoroughly. Let the chicken soak up all those delicious flavors for at least 15 minutes. If you have more time, marinate it for up to two hours in the fridge. The longer it sits, the more flavorful it becomes, like a fine wine.

Preparing the Baking Dish

While the chicken is marinating, preheat your oven to 400°F (200°C). Take a baking dish and grease it with the remaining two tablespoons of olive oil. This step ensures that nothing sticks and everything cooks evenly. It’s like giving your dish a non-stick hug.

Baking the Chicken and Green Beans

Arrange the marinated chicken breasts in the prepared baking dish. Nestle the fresh green beans around the chicken, creating a cozy bed of veggies. Drizzle any leftover marinade over the top, ensuring every bite is packed with flavor. Pop the dish into the preheated oven and bake for 25-30 minutes. You’ll know it’s done when the chicken reaches an internal temperature of 165°F (75°C) and the green beans are tender-crisp.

Serving the Dish

Once baked to perfection, remove the dish from the oven and let it rest for about five minutes. This allows the juices to redistribute, making each bite juicy and tender. Before serving, sprinkle freshly chopped parsley over the top for a burst of color and freshness. Plate up your Lemon Garlic Chicken with Green Beans and watch as your family gathers around, ready to enjoy this delightful meal.

Tips for Success

  • Marinate the chicken overnight for an even deeper flavor infusion.
  • Trim the green beans evenly to ensure they cook at the same rate.
  • Use a meat thermometer to check the chicken’s internal temperature for perfect doneness.
  • For a crispy finish, broil the dish for the last 2 minutes of baking.
  • Experiment with different herbs like thyme or rosemary for a unique twist.

Equipment Needed

  • Baking Dish: A 9×13-inch dish works well, but any oven-safe dish will do.
  • Mixing Bowl: Use a large bowl for easy marinating.
  • Measuring Spoons: Essential for precise seasoning.
  • Oven Mitts: Protect your hands when handling hot dishes.
  • Meat Thermometer: Ensures chicken is perfectly cooked.

Variations

  • Spicy Kick: Add a teaspoon of cayenne pepper to the marinade for an extra spicy version.
  • Herb Swap: Substitute basil or thyme for oregano to change up the herbal notes.
  • Vegetable Medley: Mix in sliced bell peppers or cherry tomatoes for added color and flavor.
  • Low-Sodium Option: Use low-sodium chicken broth instead of salt for a heart-healthy twist.
  • Keto-Friendly: Replace green beans with zucchini or cauliflower for a low-carb alternative.

Serving Suggestions

  • Side Dish: Pair with fluffy quinoa or buttery mashed potatoes for a hearty meal.
  • Drink: A crisp white wine like Sauvignon Blanc complements the lemony flavors beautifully.
  • Presentation: Serve on a large platter, garnished with lemon slices and extra parsley for a vibrant touch.
  • Salad: A simple arugula salad with a light vinaigrette adds a refreshing contrast.

FAQs about Lemon Garlic Chicken with Green Beans

Can I use frozen green beans instead of fresh ones?

Absolutely! Frozen green beans are a convenient alternative and work well in this recipe. Just make sure to thaw them first and pat them dry to remove excess moisture. This ensures they roast nicely alongside the chicken.

What can I do if I don’t have fresh lemons?

No fresh lemons? No problem! You can substitute with bottled lemon juice, though fresh is always best for that vibrant zing. If you have lemon zest on hand, it can enhance the flavor even more.

How do I know when the chicken is fully cooked?

Using a meat thermometer is the best way to ensure your chicken is cooked perfectly. Insert it into the thickest part of the breast; it should read 165°F (75°C). This guarantees juicy, safe-to-eat chicken every time.

Can I prepare this dish in advance?

Yes, you can! Marinate the chicken up to a day ahead and store it in the fridge. When you’re ready to cook, simply follow the baking instructions. This makes it a great option for meal prep or entertaining.

What other vegetables can I use with this recipe?

Feel free to get creative! Asparagus, broccoli, or even sliced bell peppers make excellent substitutes or additions. Just ensure they’re cut to similar sizes for even cooking. This way, you can tailor the dish to your family’s preferences.

Final Thoughts

There’s something truly magical about the simplicity of Lemon Garlic Chicken with Green Beans. It’s a dish that brings together the vibrant flavors of lemon and garlic, creating a symphony of taste that delights the senses. As you gather around the table, you’ll find that this meal is more than just food—it’s a moment of connection, a pause in the hustle and bustle of life. Whether you’re sharing it with family or savoring it solo, this recipe is a reminder that delicious, wholesome meals don’t have to be complicated. Here’s to creating more joyful moments, one bite at a time!

Lemon Garlic Chicken with Green Beans
Paul

Lemon Garlic Chicken with Green Beans: A Flavorful Delight

Lemon Garlic Chicken with Green Beans is a delicious and easy-to-make dish featuring tender chicken breasts marinated in a zesty lemon garlic sauce, paired with fresh green beans for a complete meal.
Prep Time 15 minutes
Cook Time 30 minutes
Total Time 45 minutes
Servings: 4 servings
Course: Main Course
Cuisine: American
Calories: 350

Ingredients
  

  • 2 pounds boneless skinless chicken breasts
  • 1 pound fresh green beans trimmed
  • 4 tablespoons olive oil divided
  • 4 cloves garlic minced
  • 1 lemon juiced and zested
  • 1 teaspoon dried oregano
  • 1 teaspoon salt
  • ½ teaspoon black pepper
  • ¼ teaspoon red pepper flakes optional
  • Fresh parsley chopped (for garnish)

Method
 

  1. Preheat your oven to 400°F (200°C).
  2. In a large bowl, combine 2 tablespoons of olive oil, minced garlic, lemon juice, lemon zest, oregano, salt, black pepper, and red pepper flakes (if using). Mix well.
  3. Add the chicken breasts to the bowl and coat them thoroughly with the marinade. Let them marinate for at least 15 minutes (or up to 2 hours in the refrigerator for more flavor).
  4. While the chicken is marinating, prepare a baking dish by greasing it with the remaining 2 tablespoons of olive oil.
  5. Place the marinated chicken breasts in the baking dish. Arrange the green beans around the chicken.
  6. Drizzle any remaining marinade over the green beans and chicken.
  7. Bake in the preheated oven for 25-30 minutes, or until the chicken is cooked through and reaches an internal temperature of 165°F (75°C).
  8. Remove from the oven and let it rest for 5 minutes before serving. Garnish with chopped parsley.

Notes

  • For added flavor, consider marinating the chicken overnight.
  • Substitute asparagus or broccoli for the green beans for a different vegetable option.