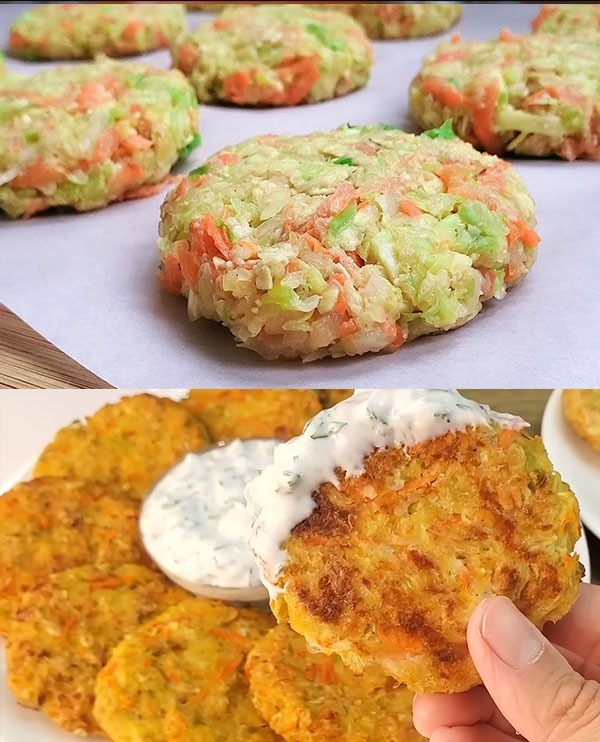
Fresh Cabbage and Carrot Patties Recipe

Embark on a flavor-packed journey with our savory cabbage and carrot fritters recipe. These fritters blend the crisp freshness of cabbage and the subtle sweetness of carrots, enriched with cheese and spices, then baked to achieve a perfect golden crunch. Ideal as a wholesome snack or a versatile side dish, these fritters are a delightful way to incorporate more vegetables into your meals. Accompanied by a creamy yogurt dip enhanced with dill and walnuts, this recipe promises a deliciously balanced bite every time. Let’s get started on creating these nutritious and tasty fritters.

Ingredients:

  • 600g cabbage, finely shredded
  • 1 carrot, grated
  • 2 eggs
  • 1/3 tsp salt, plus an extra 1/4 tsp for seasoning
  • 1/3 tsp black pepper
  • 50g oat flakes
  • 80g cheese, grated
  • 3 tbsp flour
  • 1 tbsp olive oil
  • 3 cloves of garlic, minced
  • 3-4 tbsp thick yogurt, for serving
  • A handful of walnuts, chopped, for garnish
  • Dill, chopped, for garnish

Instructions:

  1. Begin by preheating your oven to 180°C (350°F) and preparing a baking sheet lined with parchment paper.
  2. In a large mixing bowl, combine the shredded cabbage, grated carrot, eggs, salt, black pepper, oat flakes, grated cheese, flour, and minced garlic. Mix well to ensure the ingredients are evenly distributed.
  3. Heat the olive oil in a pan over medium to low heat. Once hot, form patties from the mixture and place them in the pan. Cook each patty until golden brown on both sides, ensuring they are cooked through but still moist on the inside.
  4. Transfer the browned patties to the prepared baking sheet and bake in the preheated oven for 30-35 minutes, or until they are thoroughly cooked and have a crispy exterior.
  5. While the patties are baking, prepare the yogurt dip by mixing the thick yogurt with a pinch of salt. Set aside for serving.
  6. Once the patties are done, let them cool slightly before serving. Serve the fritters with the yogurt dip on the side, garnished with chopped walnuts and dill.

Enjoy your savory cabbage and carrot fritters as a delightful treat that brings both nutrition and flavor to your table.

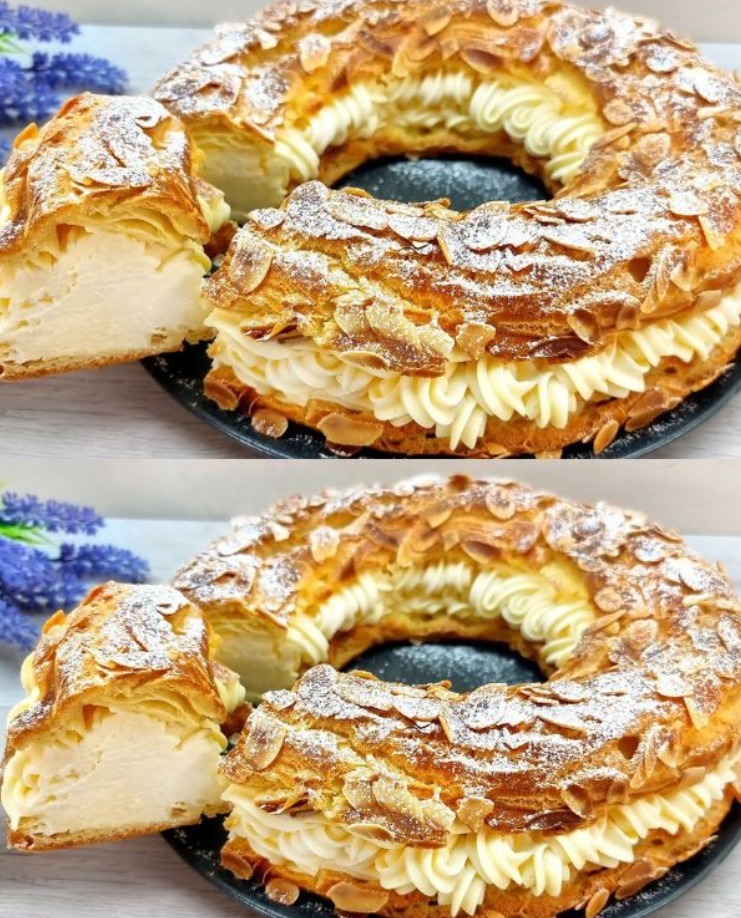
Easy Homemade Creamy Pastry Recipe

Get ready to bake a delicious treat that’s perfect for any occasion! This easy-to-follow recipe will guide you through making a delightful pastry filled with a smooth, vanilla-infused cream. We’ll start by preparing a rich cream mixture, followed by crafting a soft, buttery dough that will form the base of our pastry. Lastly, we’ll whip up a creamy filling that adds the perfect touch of sweetness. Whether you’re a baking novice or a seasoned pro, this recipe is sure to impress your taste buds and your guests. Let’s get started on this mouthwatering adventure!

Ingredients

Cream Mixture:
  • 2 large eggs
  • 150 grams of fine vanilla-infused sugar
  • 70 grams of cornflour (cornstarch)
  • 500 ml of whole milk
Dough Preparation:
  • 100 ml of water
  • 100 ml of milk (full fat recommended)
  • A small dash of salt
  • 1 tsp of granulated sugar
  • 80 grams of unsalted butter
  • 120 grams of all-purpose flour
  • 4 large, fresh eggs
Filling Component:
  • 160 grams of creamy, unsalted butter

Directions

For the Cream:

  1. Begin by whisking together the eggs and vanilla sugar in a medium-sized bowl until the mixture is light and fluffy.
  2. Gradually sift in the cornstarch, ensuring to mix thoroughly to avoid any lumps.
  3. In a saucepan, gently heat the milk just until warm – not boiling. Gradually pour the warm milk into the egg mixture, continuously stirring to combine.
  4. Transfer the mixture back into the saucepan. Over low heat, stir the mixture constantly until it thickens into a custard-like consistency. Remove from heat and set aside to cool.

For the Dough:

  1. In a medium saucepan, combine water, milk, a pinch of salt, and sugar. Bring to a gentle simmer.
  2. Add the butter and let it melt completely. Once melted, quickly stir in the flour. Reduce the heat and continue stirring vigorously until the dough forms a ball and pulls away from the sides of the pan.
  3. Remove from heat. Let the dough cool slightly, then beat in the eggs one at a time, ensuring each is fully incorporated before adding the next.
  4. Preheat your oven to 200°C (390°F). On a lined baking sheet, drop spoonfuls of dough, spacing them well apart.
  5. Bake for 20-25 minutes or until golden and puffed up. Allow to cool before proceeding to the filling.

For the Filling:

  1. Beat the unsalted butter until it’s creamy and smooth.
  2. Cut a small opening in the bottom of each cooled pastry. Pipe the prepared cream mixture into the hollow center of each dough piece.
  3. For an extra touch of luxury, you can also incorporate the creamy, whipped butter into the cream mixture for a richer filling.

Enjoy this delightful dessert with a cup of tea or coffee. It’s perfect for special occasions or as a treat for your family and friends.

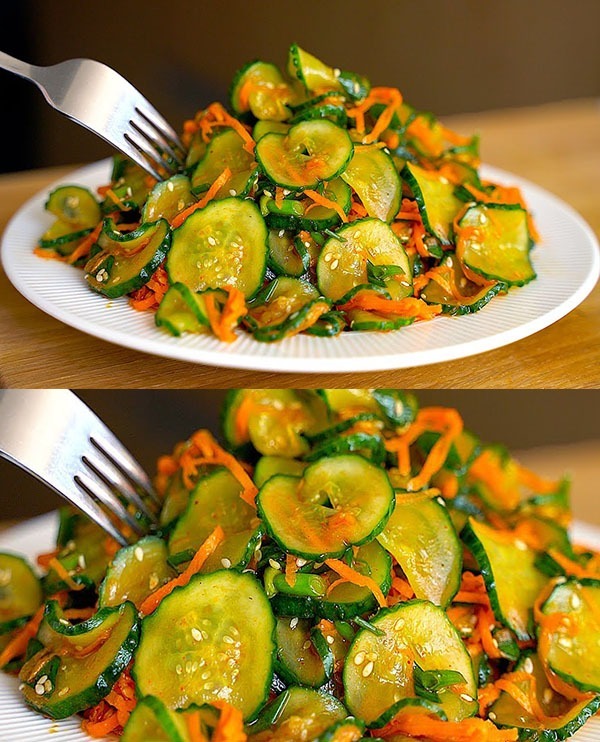
Refreshing Cucumber and Carrot Salad with a Twist

This salad is not only simple and delightful but also perfect for those looking to enjoy a lighter meal. Its vibrant flavors and textures make it an ideal choice for anyone focusing on weight management or simply seeking a refreshing side dish. Enjoy your nutritious creation!

Ingredients:

  • Fresh cucumbers
  • Carrots, ready for grating
  • Green onions, finely chopped
  • Olive oil, approximately 40ml
  • Granulated sugar, about 20g
  • Soy sauce, roughly 20ml
  • Paprika, around 15g for a hint of spice
  • Sesame seeds, about 20g for crunch
  • Apple cider or rice vinegar, just 10ml for a tangy kick
  • A pinch of salt, to taste

Instructions:

  1. Begin by thinly slicing the cucumbers into a mixing bowl. Sprinkle a pinch of salt over them and gently toss. Let this sit for about 15 minutes to draw out some of the moisture.
  2. While the cucumbers are resting, take your carrots and, using a grater designed for fine shreds, grate them into another bowl. This special grater will help achieve the perfect texture for your salad.
  3. Add the finely chopped green onions to the carrots.
  4. After the cucumbers have rested, drain any excess liquid that has been drawn out.
  5. Combine the cucumbers with the carrot and green onion mixture. It’s time to dress your salad.
  6. In a small bowl, whisk together the olive oil, sugar, soy sauce, paprika, and vinegar until the sugar dissolves and the mixture is well combined.
  7. Pour the dressing over the vegetables and toss everything together until the salad is evenly coated.
  8. Finally, sprinkle the sesame seeds over the top and give it one last mix.

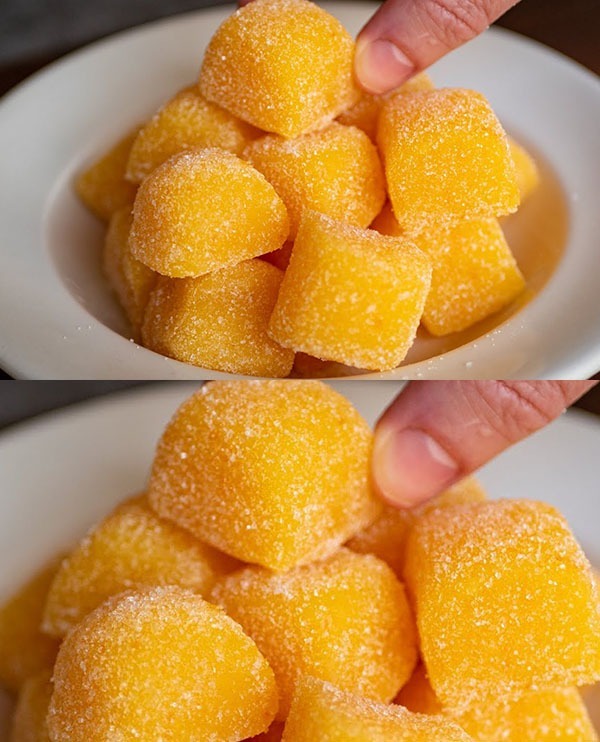
Orange Zest Jelly Squares

Let’s make some super fun and tasty orange jelly treats! These little squares are sweet, a bit tangy, and have a yummy orange flavor that comes from real oranges. They’re perfect for a snack, dessert, or just when you want something sweet and refreshing. Plus, they’re really easy to make with just a few ingredients. Ready to start? Let’s go!

Ingredients:

  • 240 ml (1 cup) fresh orange juice
  • Zest of 1 large orange
  • 200 g (1 cup) granulated sugar
  • 120 g (3/4 cup) cornstarch
  • A pinch of salt
  • ½ tsp (10 g) unsalted butter

Instructions:

  1. Prepare the Orange Juice and Zest:
    • Squeeze enough oranges to make 1 cup of fresh orange juice. Grate the zest of one orange and set aside.
  2. Mix the Dry Ingredients:
    • In a medium saucepan, combine the granulated sugar, cornstarch, and a pinch of salt. Whisk these dry ingredients together to ensure there are no lumps.
  3. Combine with Orange Juice:
    • Gradually add the fresh orange juice to the saucepan, whisking constantly to blend everything smoothly.
  4. Cook the Mixture:
    • Place the saucepan over medium heat. Continue to whisk the mixture constantly as it heats up. This will prevent any lumps from forming and ensure the mixture thickens evenly.
  5. Add Orange Zest and Butter:
    • Once the mixture starts to thicken and bubble, add the orange zest and butter. Continue to stir for another minute until the butter is fully melted and the mixture is smooth and glossy.
  6. Pour and Set:
    • Quickly pour the jelly mixture into a lightly greased square or rectangular dish. Smooth the top with a spatula. Let it cool to room temperature, then refrigerate until set, about 2-3 hours.
  7. Cut into Squares:
    • Once the jelly is firm, use a sharp knife to cut it into squares. For easier cutting, dip the knife in hot water between slices.
  8. Serve and Enjoy:
    • Serve your Orange Zest Jelly Squares chilled. They make a refreshing treat on their own or can be served with a dollop of whipped cream for an extra special touch.

Conclusion:

These Orange Zest Jelly Squares are a delightful way to enjoy the essence of oranges in a sweet, tangy treat. Perfect for sharing or enjoying as a personal treat, they’re a testament to the joy of making simple, homemade desserts. Enjoy the process and the delicious outcome!

Rainbow Fruity Tapioca Drink

Dive into a colorful and refreshing experience with this Rainbow Fruity Tapioca Drink! Perfect for hot days or when you’re looking for a sweet, creamy treat, this drink combines the fun textures of jelly and tapioca pearls with the sweetness of fruit and a trio of milks. It’s a customizable recipe that lets you play with colors and flavors, making it a hit for all ages.

Ingredients:

  • 4 cups water
  • 1/4 cup white sugar
  • 25g white unflavored jelly powder
  • 835g fruit cocktail (or an equivalent amount of your favorite fresh fruits, chopped)
  • 250ml all-purpose cream or heavy cream
  • 300ml condensed milk
  • 2 cups evaporated milk or fresh milk
  • Red, yellow, and green food coloring
  • 1 cup cooked small tapioca pearls

Instructions:

  1. Prepare the Jelly:
    • In a medium saucepan, bring the water to a boil. Add the white sugar and unflavored jelly powder, stirring until completely dissolved. Divide the jelly mixture into three separate bowls.
  2. Color the Jelly:
    • Add a few drops of red food coloring to one bowl, yellow to another, and green to the third, mixing each until you achieve your desired colors. Pour each colored jelly mixture into shallow dishes and refrigerate until set, about 1-2 hours.
  3. Cube the Jelly:
    • Once the jelly has set, cut it into small cubes. Set aside.
  4. Mix the Creamy Base:
    • In a large mixing bowl, combine the all-purpose cream, condensed milk, and evaporated milk (or fresh milk). Whisk together until well combined.
  5. Assemble the Drink:
    • In a large pitcher or individual glasses, layer the fruit cocktail (or fresh fruits), colored jelly cubes, and cooked tapioca pearls. Pour the creamy milk mixture over the layers until well covered.
  6. Chill and Serve:
    • Refrigerate the drink for at least an hour before serving to allow the flavors to meld together. Stir gently before serving to mix the layers slightly.
  7. Enjoy:
    • Serve your Rainbow Fruity Tapioca Drink chilled, with a spoon and straw for enjoying both the liquid and the delicious bits of fruit, jelly, and tapioca pearls.

Conclusion:

This Rainbow Fruity Tapioca Drink is not just a treat for the palate but also a feast for the eyes, with its vibrant layers and delightful mix of textures. It’s a versatile recipe that can be adapted to suit any taste or occasion, making it a fun and refreshing choice for everyone to enjoy.

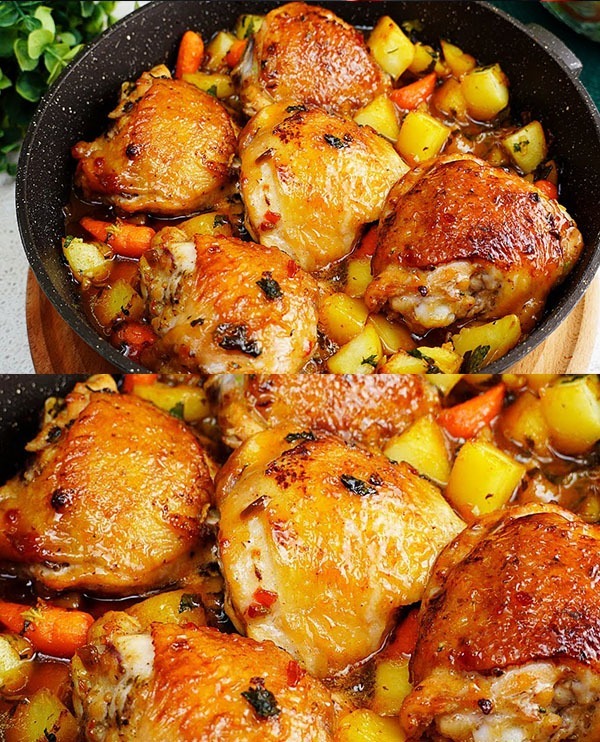
Honey Chili Chicken and Roasted Vegetables

Dive into a world of flavor with this Honey Chili Chicken and Roasted Vegetables recipe. Perfectly seasoned chicken legs are paired with hearty potatoes and sweet baby carrots, all roasted to perfection. The dish is brought to life with a sweet and tangy glaze that caramelizes beautifully in the oven, offering a delightful contrast of flavors. This one-pan wonder is not only delicious but also easy to prepare, making it a perfect meal for any day of the week.

Ingredients:

  • 5 chicken legs
  • 1 teaspoon oregano
  • Salt, to taste
  • Black pepper, to taste
  • 4-5 medium potatoes, quartered
  • 12 baby carrots
  • 2 tablespoons olive oil
  • 1 tablespoon butter
  • 1 large onion, sliced
  • 4 large cloves of garlic, minced
  • A handful of fresh parsley, chopped
  • 90 ml honey
  • 100 ml sweet chili sauce
  • 4 tablespoons lemon juice (divided)
  • 3 tablespoons soy sauce
  • ¾ tablespoon Dijon mustard

Instructions:

  1. Preparation:
    • Preheat your oven to 200°C (392°F). Have an ovenproof pan ready.
  2. Season the Chicken:
    • In a large bowl, season the chicken legs with salt, pepper, and oregano. Ensure each piece is well-coated.
  3. Prepare the Vegetables:
    • In another bowl, toss the quartered potatoes and baby carrots with olive oil, salt, and pepper until evenly coated.
  4. Sauté:
    • Heat the butter in the ovenproof pan over medium heat. Add the sliced onion and minced garlic, sautéing until soft and fragrant.
  5. Assemble in Pan:
    • Add the seasoned chicken legs to the pan, arranging them among the onions and garlic. Scatter the seasoned potatoes and carrots around the chicken.
  6. Make the Glaze:
    • In a small bowl, whisk together the honey, sweet chili sauce, 2 tablespoons of lemon juice, soy sauce, and Dijon mustard until well combined.
  7. Glaze the Chicken:
    • Pour the glaze over the chicken and vegetables in the pan, ensuring everything is nicely coated.
  8. Roast:
    • Place the pan in the preheated oven and roast for 25-35 minutes, or until the chicken is thoroughly cooked and the vegetables are tender and caramelized. Halfway through, baste the chicken and vegetables with the pan juices to enhance the flavor.
  9. Finish with Lemon Juice:
    • Once out of the oven, sprinkle the remaining 2 tablespoons of lemon juice over the dish to add a fresh zing.
  10. Garnish and Serve:
    • Garnish the dish with chopped fresh parsley before serving.

Conclusion:

This Honey Chili Chicken and Roasted Vegetables recipe is a delightful blend of sweet, spicy, and tangy flavors, all brought together in one convenient pan. It’s a dish that promises to impress with its depth of flavor and beautiful presentation. Enjoy the succulent chicken and roasted vegetables with a side of crusty bread or a simple green salad for a complete meal.

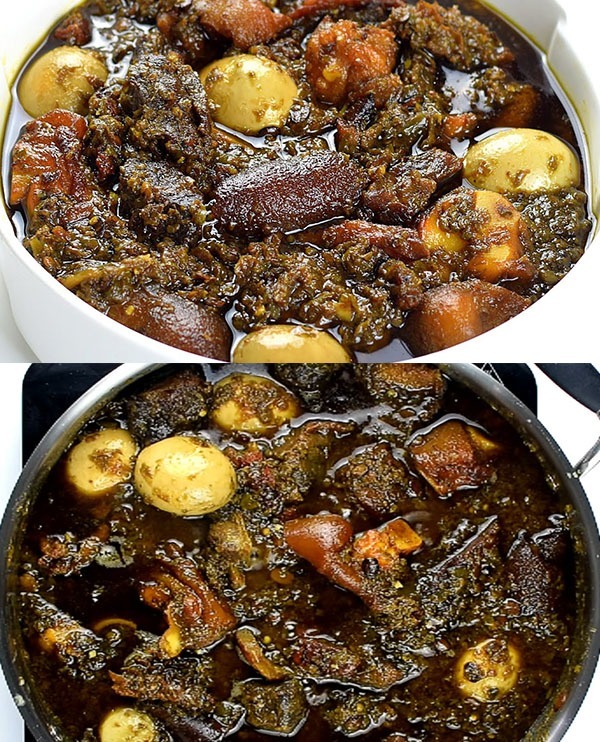
Spicy Green Pepper and Meat Stew

Dive into the rich flavors of this Spicy Green Pepper and Meat Stew, a vibrant dish that brings together the heat of green scotch bonnets with the sweetness of bell peppers. This stew, featuring a mix of tender meats and aromatic spices, is a celebration of texture and taste. Perfect for those who love a bit of spice in their meals, it’s a hearty dish that promises to delight your taste buds.

Ingredients:

  • 5 green bell peppers, roughly chopped
  • 6 green scotch bonnet peppers, adjust according to heat preference
  • 2 whole onions, peeled
  • 1 onion, finely chopped
  • 2 cups palm oil
  • Assorted meats (such as beef, goat, and tripe), boiled, fried, and cut into bite-sized chunks
  • 3 heaped tablespoons of locust beans (Iru)
  • 1 cup shredded boiled smoked fish or stockfish
  • 2 tablespoons crayfish powder
  • Bouillon cubes, to taste
  • Salt, to taste

Instructions:

  1. Prepare the Pepper Base:
    • In a blender, combine the green bell peppers, green scotch bonnet peppers, and the two whole onions. Blend to a smooth paste, adding a little water if necessary to facilitate blending.
  2. Cook the Pepper Mixture:
    • Heat the palm oil in a large pot over medium heat until it gets to a slightly smoky temperature. Carefully add the blended pepper mixture to the hot oil. Cook, stirring occasionally, until the mixture thickens and the oil begins to separate from the pepper, indicating it is well fried.
  3. Add the Flavors:
    • Stir in the chopped onion, locust beans, shredded smoked fish, crayfish powder, bouillon cubes, and salt to the fried pepper mixture. Mix well to ensure all the ingredients are evenly distributed.
  4. Incorporate the Meats:
    • Add the boiled and fried assorted meats to the pot. Stir gently to combine, ensuring the meat is well coated with the sauce.
  5. Simmer:
    • Reduce the heat to low and let the stew simmer for about 20-30 minutes, allowing all the flavors to meld together and the oil to rise to the top, which is a sign of a well-cooked stew.
  6. Taste and Adjust:
    • Taste the stew and adjust the seasoning with additional bouillon cubes or salt, if needed. The stew should have a rich, spicy, and slightly tangy flavor profile.
  7. Serve:
    • Serve your Spicy Green Pepper and Meat Stew hot, accompanied by steamed rice, yams, or your favorite side. It’s a versatile dish that pairs well with various sides, making it perfect for a hearty meal.

Conclusion:

This Spicy Green Pepper and Meat Stew is not just a dish; it’s an experience. With its bold flavors and hearty ingredients, it’s sure to become a favorite for anyone who loves a bit of heat and a lot of flavors. Enjoy the process of making it and the delicious meal that follows!

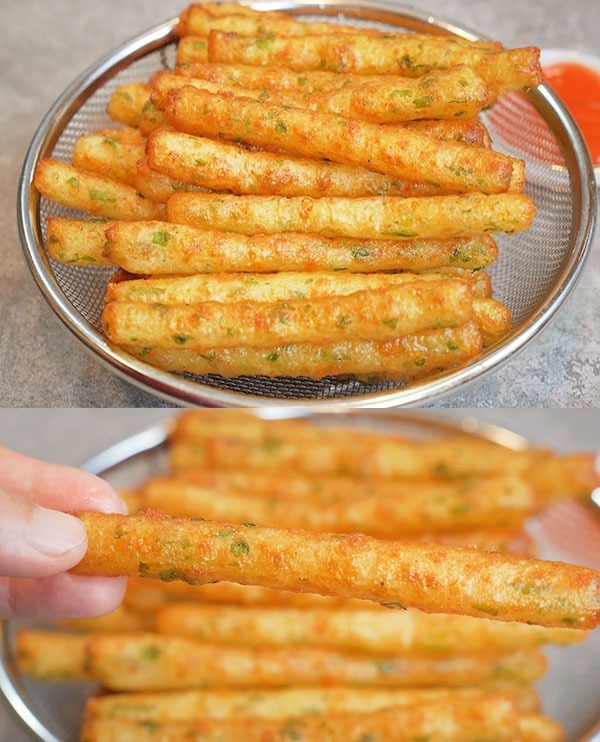
Super Crispy Cheesy Fries

Let’s make some super yummy fries that are extra crispy and loaded with cheese! This easy recipe will show you how to turn plain potatoes into the most delicious snack with a crunchy outside and a cheesy, soft inside. Perfect for sharing with friends or enjoying all by yourself. Get ready for some cheesy goodness!Let’s make some super yummy fries that are extra crispy and loaded with cheese! This easy recipe will show you how to turn plain potatoes into the most delicious snack with a crunchy outside and a cheesy, soft inside. Perfect for sharing with friends or enjoying all by yourself. Get ready for some cheesy goodness!

Ingredients:

  • 500g potatoes, peeled
  • 1/2 tsp salt
  • 1/4 tsp black pepper
  • 20g fresh coriander, finely chopped
  • 100g mozzarella cheese, grated
  • 2 tbsp cornflour
  • 2 tbsp potato starch
  • Cooking oil for frying

Instructions:

  1. Prepare the Potatoes:
    • Cut the potatoes into thin strips to ensure they cook evenly and get that desired crispiness. Soak them in cold water for at least 30 minutes to remove excess starch, which helps in achieving a crispier texture.
  2. Seasoning Mix:
    • In a large bowl, mix the salt, black pepper, and finely chopped coriander. This mix will be used to season our fries, giving them a unique and aromatic flavor.
  3. Coat the Fries:
    • Drain the potatoes and pat them dry with a kitchen towel. Toss them in the seasoning mix until they are evenly coated.
    • Sprinkle the grated mozzarella cheese over the potatoes, ensuring each piece gets some cheesy goodness.
    • Dust the cornflour and potato starch over the seasoned and cheesed potatoes, tossing them gently to coat evenly. This mixture will help in forming a crispy outer layer when fried.
  4. Frying:
    • Heat a generous amount of cooking oil in a deep fryer or a deep pan until it reaches a medium-high temperature (about 180°C or 350°F).
    • Carefully add the coated potatoes in batches to avoid overcrowding, which can lower the oil’s temperature and result in less crispy fries.
    • Fry for about 7 minutes, or until they are golden brown and crispy. The exact time may vary depending on the thickness of your fries and the type of potatoes used.
  5. Serving:
    • Once fried, remove the fries from the oil and let them drain on a paper towel to remove any excess oil.
    • Serve hot and crispy, perhaps with a side of your favorite dipping sauce or simply enjoy them as they are, with their cheesy, crispy goodness shining through.

Conclusion:

These ultimate crispy cheesy fries offer a delightful twist on a classic snack. The combination of mozzarella cheese with the light seasoning and the crunch of perfectly fried potatoes is sure to satisfy your cravings. Whether you’re making them for a party, as a snack for movie night, or just to indulge in some comfort food, these fries are bound to be a crowd-pleaser. Enjoy your cooking adventure!

Easy Yummy Apple Pie

Dive into the comforting embrace of homemade apple pie, a classic dessert reimagined with a personal touch. This recipe guides you through creating a delightful pie with a tender, flaky crust and a warmly spiced apple filling, accentuated with the tangy sweetness of apricot jam. Topped with a golden, almond or peanut crunch, this pie is a testament to the joy of baking from scratch.

Ingredients:

For the Dough:
  • 2 small eggs
  • 5 tablespoons of sugar (100g)
  • 8g vanilla sugar
  • 2 tablespoons butter (40g), softened
  • 4 tablespoons of oil (40ml)
  • 1 teaspoon baking powder (4g)
  • 3 cups of all-purpose flour (300g)
For the Apple Filling:
  • 4 apples (500g), peeled and sliced
  • Juice of half a lemon
  • 1 tablespoon of lemon juice
  • 4 tablespoons of sugar (80g)
  • 2 tablespoons of butter (40g)
For the Topping:
  • 4 tablespoons of apricot jam
  • 1 egg yolk mixed with a spoon of milk
  • Chopped almonds or peanuts for sprinkling
  • Sugar icing for decoration

Instructions:

  1. Prepare the Dough:
    • In a large bowl, whisk together the eggs, sugar, and vanilla sugar until well combined. Incorporate the softened butter and oil, mixing until smooth.
    • Sift in the flour and baking powder, folding into the wet ingredients until a soft dough forms. Divide the dough in half and let it rest while you prepare the filling.
  2. Make the Apple Filling:
    • In a saucepan over medium heat, combine the sliced apples, lemon juice, sugar, and butter. Cook for about 10 minutes, stirring occasionally, until the apples are soft but not mushy. Remove from heat and let it cool slightly.
  3. Assemble the Pie:
    • Preheat your oven to 180°C (350°F) and grease a 26cm pie mold with butter.
    • Roll out one half of the dough to fit the bottom of the mold, including the sides. Spread the apricot jam over the dough, then layer the cooled apple filling on top.
    • Roll out the second half of the dough and place it over the filling, sealing the edges. Brush the top with the egg yolk and milk mixture, then sprinkle with chopped almonds or peanuts.
  4. Bake:
    • Bake in the preheated oven for 30-35 minutes, or until the crust is golden brown and the filling is bubbly.
  5. Final Touches:
    • Allow the pie to cool before drizzling with sugar icing for a sweet finish.
  6. Serve and Enjoy:
    • Slice and serve this delightful apple pie as a heartwarming dessert or a treat for special occasions. Enjoy the blend of textures and flavors that make this pie a comforting classic with a unique twist.

This apple pie recipe brings a homemade charm to any table, offering a perfect balance of sweetness and spice, with a delightful crunch. Enjoy the process of creating something truly special from simple ingredients.

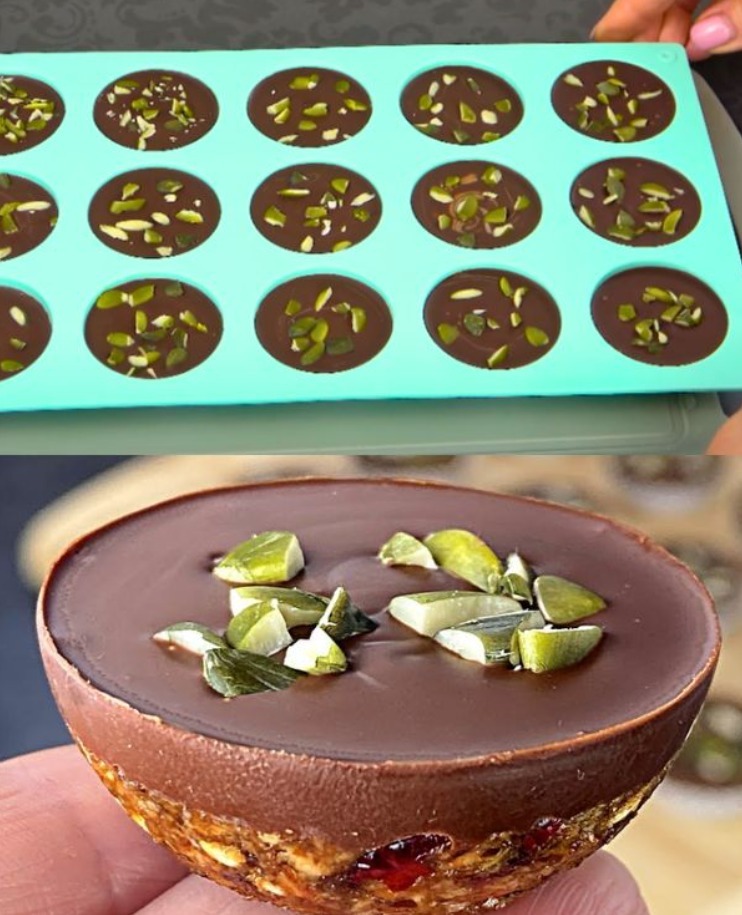
Nutty Chocolate Date Cookies Recipe

Make your own yummy cookies with nuts, fruits, and chocolate. This recipe is simple, using things like dates, cranberries, oats, and almonds. We mix them up, bake, and then drizzle with chocolate. It’s fun and tasty!

Ingredients:

  • 120g dates, pitted and chopped
  • 50g dried cranberries
  • 30g oatmeal
  • 60g almonds, roughly chopped
  • 30g peanuts, roughly chopped
  • 20g pumpkin seeds
  • 15g sesame seeds
  • 15ml honey (adjust to taste)
  • 130g dark chocolate (sugar-free), melted
  • 20ml olive oil

Instructions:

  1. Preheat Oven and Prepare Baking Sheet:
    • Preheat your oven to 175°C (350°F). Line a baking sheet with parchment paper.
  2. Mix Dry Ingredients:
    • In a large mixing bowl, combine the chopped dates, dried cranberries, oatmeal, chopped almonds, chopped peanuts, pumpkin seeds, and sesame seeds. Mix well to ensure even distribution.
  3. Combine Wet Ingredients:
    • In a small bowl, whisk together the honey and olive oil until well combined.
  4. Mix Wet and Dry Ingredients:
    • Pour the honey and olive oil mixture over the dry ingredients. Stir until all components are evenly coated and the mixture starts to stick together.
  5. Form the Cookies:
    • Take spoonfuls of the mixture and form them into cookie shapes with your hands. Place each cookie on the prepared baking sheet. If the mixture is too dry, you can add a little more honey or olive oil to help it stick together.
  6. Bake:
    • Place in the oven that has been preheated for 10-12 minutes, or until the edges begin to take on a golden brown hue. Exercise caution to avoid baking excessively in order to maintain the cookies’ chewy texture.
  7. Melt the Chocolate:
    • While the cookies are baking, melt the dark chocolate. You can do this using a double boiler or by microwaving the chocolate in 30-second intervals, stirring in between, until fully melted.
  8. Drizzle Chocolate:
    • Once the cookies are done and have cooled for a few minutes, drizzle them with the melted dark chocolate. You can use a spoon or a piping bag for more precision.
  9. Cool:
    • Allow the chocolate to set and the cookies to cool completely. This may take about 30 minutes at room temperature, or you can speed up the process by placing them in the refrigerator for about 15 minutes.
  10. Serve and Enjoy:
    • Once the chocolate has set, your Nutty Chocolate Date Cookies are ready to be enjoyed. Keep any remaining portions in a sealed container at room temperature for a maximum of seven days.

Enjoy your homemade cookies with a unique blend of flavors and textures!