Creamy Vanilla Pudding

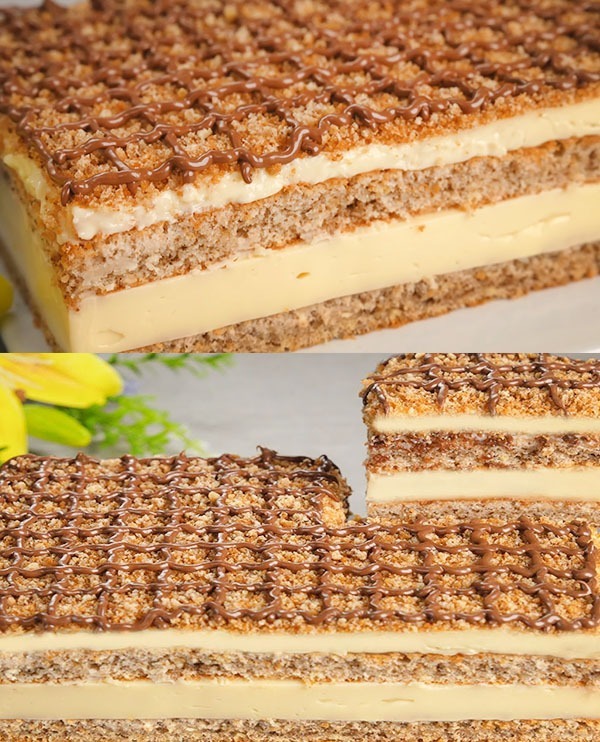
Let’s make a super creamy and sweet vanilla pudding! This recipe is all about mixing butter, milk, and sugar with a hint of vanilla to create a smooth and yummy dessert. It’s really simple and fun to make. Whether you need something sweet for after dinner or just love pudding, this homemade treat is perfect. Ready to make some delicious pudding? Let’s get started!

Ingredients:

  • 100g unsalted butter
  • 120g wheat flour
  • 1 liter of milk
  • 170g sugar
  • 1 teaspoon vanilla extract
  • 1 tablespoon cornstarch
  • 300ml water

Instructions:

  1. Melt the Butter: In a large saucepan, melt the unsalted butter over medium heat. Ensure it melts completely but doesn’t brown.
  2. Make a Roux: Add the wheat flour to the melted butter. Stir continuously for about 2 minutes. This mixture, known as a roux, will help thicken your pudding.
  3. Warm the Milk: In a separate pot, gently warm the milk. Do not boil it; you just want it warm enough to blend smoothly with the roux.
  4. Combine Milk and Roux: Gradually add the warm milk to the roux, whisking constantly to prevent lumps. Keep the heat on medium and continue to whisk until the mixture starts to thicken.
  5. Add Sugar and Flavor: Once the mixture has thickened, add the sugar and vanilla extract. Stir well to ensure the sugar is completely dissolved and the vanilla is evenly distributed.
  6. Dissolve Cornstarch: In a small bowl, mix the cornstarch with the 300ml of water until fully dissolved. This slurry will help achieve the perfect pudding consistency.
  7. Thicken the Pudding: Slowly pour the cornstarch slurry into the pudding mixture, stirring constantly. Continue to cook over medium heat until the pudding reaches a boil and thickens to your desired consistency.
  8. Cool and Serve: Once thickened, remove the pudding from the heat. Pour it into serving dishes or a large bowl. Cover with plastic wrap, ensuring it directly touches the surface of the pudding to prevent the formation of a skin. Let it chill in the refrigerator until it sets, typically for about 2-3 hours.

Serving Suggestions:

Serve your creamy vanilla pudding as is, or top it with fresh fruit, whipped cream, or a sprinkle of cinnamon for an extra special touch. It’s a flexible dessert that can be customized to suit any occasion, whether casual or formal.

Enjoy the rich, comforting flavors of your homemade creamy vanilla pudding, a testament to the joy of cooking from scratch.

Fluffy Soufflé Pancakes

Let’s make some super fluffy pancakes that are like eating clouds! These aren’t just any pancakes; they’re extra special and super light, just like a soufflé. If you want to make breakfast a little more exciting, these pancakes are the way to go. They’re fun to make and even more fun to eat. Ready to make the fluffiest pancakes ever? Let’s get started!

Ingredients:

  • 2 eggs, separated into whites and yolks
  • 25ml (about 3 tablespoons) of milk
  • 37g (about 3 tablespoons) of flour
  • 1 teaspoon of lemon juice or vinegar
  • 40g (about 3 tablespoons) of sugar, divided into three parts

Instructions:

  1. Prepare the Yolk Mixture: In a bowl, mix the egg yolks with the milk. Sift in the flour and stir until just combined, ensuring not to overmix.
  2. Whip the Egg Whites: In a separate, clean, and dry bowl, add the lemon juice or vinegar to the egg whites. Using a hand mixer, start whipping the whites. Gradually add the sugar in three parts, whipping for about 30 seconds between each addition, until the mixture forms stiff peaks. This meringue will give the pancakes their signature fluffiness.
  3. Fold in the Meringue: Carefully fold the meringue into the yolk mixture in parts to keep the air in the meringue. Stir gently until just combined.
  4. Cook the Pancakes: Heat a non-stick pan over low heat. Dollop the batter onto the pan to form pancakes. Add a little water to the pan (not touching the pancakes), cover, and let them cook for about 4 minutes.
  5. Flip and Finish: Carefully flip the pancakes, add a bit more water to the pan, cover, and cook for another 4 minutes. The pancakes are done when they feel set and spring back to the touch.
  6. Rest and Serve: Turn off the heat and let the pancakes sit covered in the pan for a few minutes to set their shape. Serve warm with your favorite toppings like maple syrup, fresh fruit, or whipped cream.

Enjoy Your Dessert:

These Soufflé Pancakes are a delightful twist on the traditional, with a texture that’s as light as air. Perfect for a lazy weekend breakfast or a fancy brunch. Enjoy the fruits of your labor with this delicious, cloud-like creation!

Bon appétit! Enjoy diving into these fluffy, soufflé pancakes and watch them become a favorite treat to start your day.

Fresh Veggie Crunch Cucumber Salad

Let’s make a super fresh and yummy salad that’s perfect for feeling good and healthy! This salad mixes together crunchy Chinese cabbage and cool cucumber with some sweet pepper and a special tangy dressing. It’s really easy to make and super tasty. If you’re looking for something light to eat for dinner, especially if you want to keep fit, this salad is just the thing. Let’s start making this delicious bowl of goodness!

Ingredients:

  • Chinese cabbage, shredded
  • 1 cucumber, thinly sliced
  • Salt, to taste
  • 1 sweet red pepper, thinly sliced
  • Olive oil
  • 1 onion, thinly sliced
  • A small spoonful of sugar
  • Green onion, chopped
  • 3 tablespoons of thick yogurt
  • 1 teaspoon of dried tomatoes, chopped
  • 1 teaspoon of Italian herbs
  • 2 tablespoons of mustard beans
  • 2 tablespoons of apple cider vinegar
  • 1 clove of garlic, minced

Instructions:

  1. Prepare the Vegetables: In a large bowl, combine the shredded Chinese cabbage and thinly sliced cucumber. Sprinkle with salt and let it sit for about 10 minutes. This process helps to draw out moisture, making the vegetables even crisper.
  2. Sauté the Onion and Pepper: Heat some olive oil in a pan over medium heat. Add the sliced onion and sweet red pepper. Fry for about 3 minutes until they start to soften. Then, sprinkle a small spoonful of sugar over the vegetables and continue to fry for another 4 minutes until they’re slightly caramelized. This adds a lovely sweetness to the salad.
  3. Drain the Vegetables: After the cabbage and cucumber have sat with the salt, squeeze out any excess liquid. This step ensures your salad stays crunchy and not watery.
  4. Create the Dressing: In a separate bowl, mix the thick yogurt, dried tomatoes, Italian herbs, mustard beans, apple cider vinegar, and minced garlic. Stir well to combine all the flavors.
  5. Combine and Mix: Add the sautéed onion and pepper to the bowl of squeezed cabbage and cucumber. Pour the dressing over the top and add the chopped green onions. Mix well to ensure every piece of vegetable is coated in the tangy, flavorful dressing.
  6. Serve: Your delicious and healthy salad is now ready to be enjoyed! This dish is perfect as a light dinner, especially if you’re looking to lose weight or simply want a refreshing meal.

Serving Suggestion:

Enjoy this Crunchy Chinese Cabbage and Cucumber Salad on its own for a light and healthy dinner option. It’s packed with flavors and textures that satisfy without weighing you down. Perfect for a nutritious meal any day of the week!

Bon appétit! Enjoy the fresh, vibrant flavors of your homemade salad.

Easy Soft Milk Bread

Let’s make some super soft and yummy milk bread! This bread is perfect for breakfast, making sandwiches, or just snacking. We’ll mix some simple ingredients like flour, milk, and a little sugar to create a loaf that’s fluffy and lightly sweet. It’s really fun to bake, and the best part is enjoying the warm, fresh bread right out of the oven. Ready to bake some delicious bread? Let’s get started!

Ingredients:

  • Bread Flour: 300g
  • Milk: 110g
  • Water: 40g
  • Egg White: 40g
  • Sugar: 55g
  • Salt: 5g
  • Yeast: 4g
  • Unsalted Butter: 35g, at room temperature

Instructions:

  1. Prepare the Dough: In a large mixing bowl, combine the bread flour, sugar, salt, and yeast. Mix these dry ingredients well. In a separate bowl or measuring cup, mix the milk, water, and egg white.
  2. Mix Wet and Dry Ingredients: Gradually add the liquid mixture to the dry ingredients, stirring continuously until a rough dough forms.
  3. Knead the Dough: Transfer the dough to a lightly floured surface and knead for about 10 minutes, or until it becomes smooth and elastic. During the last few minutes of kneading, incorporate the room temperature unsalted butter into the dough until it’s fully integrated and the dough is silky and stretchable.
  4. First Rise: Place the dough in a lightly oiled bowl, covering it with a damp cloth or plastic wrap. Allow it to proof in a warm location for approximately 1 to 1.5 hours, or until it has doubled in volume.
  5. Form the loaf: After the dough has risen, gently press it down to release any trapped air bubbles. Shape the dough into a loaf by rolling it out and then rolling it up tightly. Place the shaped dough into a greased loaf pan.
  6. Second Rise: Cover the loaf pan and let the dough rise again until it’s just about the rim of the pan, approximately 1 hour.
  7. Bake: Preheat your oven to 180°C (350°F). Once preheated, bake the bread for about 25 to 30 minutes, or until the top is golden brown and the loaf sounds hollow when tapped on the bottom.
  8. Cool: Remove the bread from the oven and let it cool in the pan for about 10 minutes. Next, move it onto a wire rack to cool down completely.

Serving Suggestions:

Enjoy your Homemade Tender Milk Bread sliced with butter, jam, or use it to make your favorite sandwiches. The soft texture and slightly sweet flavor make it a versatile bread that’s perfect for any occasion.

Happy baking! Enjoy the wonderful aroma and taste of freshly baked bread right from your kitchen.

Tropical Chicken with Pineapple in Sweet and Sour Sauce

Let’s make a yummy chicken dish that’s sweet, tangy, and full of pineapple goodness! This recipe is all about taking simple chicken breast and mixing it with pineapple and a tasty sauce to make something really special. It’s easy to cook and so delicious to eat. Perfect for when you want to try something new and exciting for your meal. Get ready to enjoy chicken in a whole new way!

Ingredients:

  • Chicken Breast: 300g, cut into bite-sized pieces
  • Salt and Pepper: To taste
  • Paprika: 1/2 teaspoon
  • Cornstarch: 1 tablespoon
  • Vegetable Oil: For frying
  • Onion: 1, chopped
  • Bell Pepper: 1, cut into bite-sized pieces
  • Canned Pineapple Rings: 5, cut into pieces
  • Brown Sugar: 1 teaspoon
  • Soy Sauce: 3 tablespoons
  • Apple Cider Vinegar: 1 tablespoon
  • Garlic: 1 clove, minced
  • Sweet and Sour Sauce: 1 teaspoon
  • Ketchup: 1 tablespoon
  • Spring Onions: A bunch, chopped for garnish

Instructions:

  1. Prep the Chicken: Season the chicken pieces with salt, pepper, and paprika. Dust them with cornstarch until well coated. This not only seasons the chicken but also gives it a nice crust when fried.
  2. Fry the Chicken: Heat some vegetable oil in a pan over medium heat. Add the chicken pieces and fry until golden brown and cooked through. Remove the chicken from the pan and set aside.
  3. Sauté the Veggies: In the same pan, add a bit more oil if needed and toss in the chopped onion and bell pepper. Sauté for about 2 minutes until they start to soften but still retain some crunch.
  4. Create the Sauce: To the veggies, add the pineapple pieces, brown sugar, soy sauce, apple cider vinegar, minced garlic, sweet and sour sauce, and ketchup. Mix thoroughly to blend and bring the mixture to a gentle simmer. Allow it to cook for a few minutes until the sauce thickens slightly.
  5. Combine Chicken and Sauce: Return the fried chicken to the pan, mixing well to ensure each piece is coated in the sweet and sour sauce. Continue cooking them together for an additional 2-3 minutes, allowing the flavors to blend harmoniously.
  6. Garnish and Serve: Once everything is heated through and coated in sauce, transfer the dish to a serving platter. Sprinkle chopped spring onions over the top for a fresh, colorful finish.

Serving Suggestions:

Enjoy your Tropical Chicken with Pineapple alongside steamed rice or noodles for a complete meal. The combination of tender chicken, tangy pineapple, and the rich, flavorful sauce makes for a delightful dish that’s perfect for any day of the week.

Bon appétit! Dive into this delicious fusion of flavors and enjoy a meal that’s sure to impress.

Homemade Sweet Orange Jam

Dive into the world of homemade preserves with this simple and delightful Sweet Orange Jam recipe. Perfect for spreading on toast, swirling into yogurt, or even as a cake filling, this jam combines the fresh zestiness of oranges with a hint of spice. Let’s create a batch of sunshine in a jar!

Ingredients:

  • Oranges: 3 kilos (with peel; will yield 2 kilos of peeled oranges and peel)
  • Sugar: 4 cups (800 grams)
  • Lemon Juice: Juice of one large lemon or 5 tablespoons
  • Lemon Salt: A quarter teaspoon
  • Cloves: 5 pieces (optional for a hint of spice)

Instructions:

  1. Prepare the Oranges: Start by washing the oranges thoroughly. Peel them, making sure to remove as much of the white pith as possible, as it can add bitterness to your jam. Thinly slice the peel into strips if you like bits of peel in your jam. Chop the peeled oranges into small pieces or blend them slightly for a smoother texture.
  2. Mix Ingredients: In a large, heavy-bottomed pot, combine the chopped oranges, orange peel strips (if using), and sugar. Stir well to mix. Let this mixture sit for about an hour, allowing the sugar to draw out the natural juices of the oranges.
  3. Cook the Jam: Place the pot over medium heat, adding the lemon juice and lemon salt. If you’re using cloves for an extra layer of flavor, add them now. Stir continuously as the mixture begins to simmer. The lemon juice not only adds flavor but also helps in setting the jam by providing pectin.
  4. Monitor the Consistency: Cook the mixture until it thickens. This could take anywhere from 30 minutes to an hour, depending on the moisture content of the oranges. To test if the jam is ready, place a small amount on a cold plate; if it wrinkles when pushed with a finger, it’s set.
  5. Final Steps: Once the jam has reached the desired consistency, remove it from heat. If you added cloves, take them out now. Let the jam cool for a few minutes, then carefully ladle it into sterilized jars. Seal the jars while the jam is still hot to ensure a good vacuum seal.
  6. Storage: Store your Sweet Orange Jam in a cool, dark place. Once opened, keep it in the refrigerator to preserve its freshness.

Serving Suggestions:

Enjoy your homemade Sweet Orange Jam on toast, mixed into yogurt, or as a sweet glaze for desserts. Its bright, citrusy flavor will bring a touch of warmth to any dish!

This easy-to-follow recipe ensures you can enjoy the taste of homemade jam with the wholesome goodness of oranges any time of the year.

Easy Coffee Chocolate Truffles

Ingredients:

  • 220g heavy cream (at least 30% fat)
  • 6g instant coffee powder
  • 300g chocolate (55% to 65% cocoa, or dark chocolate as preferred)
  • 75g unsalted butter

Instructions:

  1. Prepare Your Ingredients: Start by finely chopping the chocolate to ensure it melts evenly. Transfer the chopped chocolate into a large mixing bowl.
  2. Infuse the Cream: Pour the heavy cream into a saucepan and warm it over medium heat until it’s just about to simmer. Avoid boiling. Stir in the instant coffee powder until fully dissolved, infusing the cream with a rich coffee flavor.
  3. Make the Ganache: Once the coffee cream is hot and infused, pour it over the chopped chocolate in the bowl. Allow it to rest for 1-2 minutes to let the chocolate soften. Then, stir gently with a spatula or whisk until the mixture becomes smooth and the chocolate has completely melted.
  4. Incorporate the Butter: Add the unsalted butter, cut into small pieces, to the chocolate mixture. Stir smoothly until the butter is fully melted and integrated into the ganache, giving it a glossy and smooth texture.
  5. Chill the Mixture: Cover the bowl with plastic wrap and refrigerate the ganache for about 2 hours, or until it’s firm enough to shape. The ganache should be malleable but not too soft.
  6. Shape the Truffles: Once chilled, use a melon baller or a small spoon to scoop out portions of the ganache. Shape each portion by rolling them between your hands into spherical forms. If the ganache begins to soften too much, chill it for a bit longer.
  7. Finishing Touches: Roll your truffles in a coating of your choice to finish them. Cocoa powder, finely chopped nuts, or even espresso powder make excellent coatings that complement the coffee flavor.
  8. Serving and Storage: Place the finished truffles on a parchment-lined tray. You can indulge in them right away or keep them in a sealed container in the fridge for later enjoyment. Let them sit at room temperature for a few minutes before serving to enhance their flavors.

Enjoy crafting these exquisite Coffee Chocolate Truffles, a treat that promises to delight with its rich flavors and silky texture. Perfect for gifting or indulging in a luxurious treat!

Savory Chicken and Cheesy Potato Drumsticks

Get ready for a delicious twist on chicken drumsticks that’s going to make your taste buds dance! We’re mixing tender chicken with the gooey goodness of cheese and the comforting taste of potatoes, all wrapped up in a crispy coating. This recipe is perfect for anyone who loves a good, hearty meal that’s both fun to make and eat. Whether you’re cooking for family dinner or making something special for friends, these Savory Chicken and Cheesy Potato Drumsticks are sure to be a big hit. Let’s dive in and start cooking up some yummy chicken magic!

Ingredients:

  • For the Chicken:
    • 500g skinless chicken drumsticks
    • 1 large potato, grated
    • 1/2 teaspoon salt
    • 1 teaspoon ground black pepper
    • 1 1/2 teaspoons garlic powder
    • 1 teaspoon paprika
    • 2 tablespoons all-purpose flour
    • 1 cup shredded mozzarella cheese
  • For the Coating:
    • 1 cup all-purpose flour
    • 2 large eggs, beaten
    • 1 cup breadcrumbs
  • For the Aromatic Water:
    • 1 medium onion, quartered
    • 1 small piece of ginger, sliced
    • 4 cloves garlic, smashed
    • 1 1/2 teaspoons salt
    • 1 teaspoon whole black peppercorns
    • 1 liter water

Instructions:

  1. Prepare the Aromatic Water:
    • In a large pot, combine water, onion, ginger, garlic, salt, and black peppercorns. Bring to a boil, then simmer for 10 minutes to infuse the flavors. This will be used to pre-cook the chicken drumsticks.
  2. Pre-Cook Chicken:
    • Add the chicken drumsticks to the aromatic water and simmer for about 15 minutes, or until partially cooked. Remove from water and let cool slightly.
  3. Season and Stuff Chicken:
    • Mix the grated potato with 1/2 teaspoon salt, 1 teaspoon black pepper, garlic powder, paprika, and 2 tablespoons flour. Stir in the shredded mozzarella cheese.
    • Carefully make a slit in each drumstick and stuff with the cheesy potato mixture. Secure with toothpicks if necessary.
  4. Coat the Chicken:
    • Prepare three shallow dishes: one with flour, one with beaten eggs, and one with breadcrumbs.
    • Dredge each stuffed drumstick in flour, dip in beaten eggs, and then roll in breadcrumbs to coat evenly.
  5. Cooking:
    • Preheat your oven to 200°C (400°F). Place the coated drumsticks on a baking sheet lined with parchment paper.
    • Bake for 25-30 minutes, or until the chicken is fully cooked and the coating is golden and crispy.
  6. Serving:
    • Let the chicken rest for a few minutes before serving. This dish is perfect on its own or with a side of your favorite dipping sauce.

Enjoy your homemade Savory Chicken and Cheesy Potato Drumsticks, a delightful twist on classic flavors that’s sure to be a hit with family and friends!

Nutty Vanilla Cake with Creamy Filling

Let’s bake a delicious cake that’s filled with crunchy nuts and has a creamy, dreamy middle! First, we’ll roast some nuts to bring out their flavor, then mix them into a soft and fluffy cake. We’ll split the cake in half and spread a rich, vanilla-flavored cream between the layers. To make it even more special, we’ll add a touch of cocoa cream on top. This cake is perfect for sharing with friends and family or enjoying as a special treat just for you. It’s easy to make and so yummy. Ready to start baking?

Ingredients:

For the Cake:

  • Nuts: 100 grams
  • Eggs: 4
  • Salt: A pinch
  • Sugar: 100 grams (3.5 ounces)
  • Vanilla Extract: 1 teaspoon
  • Sunflower Oil: 100 ml (3.4 fl oz)
  • Milk: 100 ml (3.4 fl oz)
  • Flour: 200 grams (7 ounces)
  • Baking Powder: 10 grams (0.35 oz)

For the Filling:

  • Eggs: 2
  • Sugar: 120 grams (4.2 ounces)
  • Cornstarch: 70 grams (2.5 oz)
  • Vanilla Extract: 1 teaspoon
  • Milk: 800 ml (27 fl oz)
  • Butter: 40 grams
  • Milk: 100 ml (3.4 fl oz)
  • Cocoa Cream (like Nutella): 2 tablespoons

Instructions:

Making the Cake:

  1. Start by toasting 100 grams of nuts in a pan over medium heat for 3-4 minutes. Set aside to cool.
  2. In a large bowl, beat 4 eggs with a pinch of salt, 100 grams of sugar, and 1 teaspoon of vanilla extract for 6-7 minutes until the mixture is fluffy.
  3. Gradually mix in 100 ml each of sunflower oil and milk.
  4. Sift in 200 grams of flour and 10 grams of baking powder, folding gently to incorporate. Stir in the toasted nuts.
  5. Pour the batter into a 40 x 30 cm (16 x 12 inches) baking tray lined with parchment paper.
  6. Bake in a preheated oven at 180°C (356°F) for 25 minutes. Once baked, let the cake cool and then cut it into 2 equal parts.

Preparing the Filling:

  1. Whisk together 2 eggs, 120 grams of sugar, 70 grams of cornstarch, and 1 teaspoon of vanilla extract in a saucepan.
  2. Gradually add 800 ml of milk, stirring constantly to avoid lumps.
  3. Cook the mixture over medium-high heat, stirring continuously, until it comes to a boil and thickens.
  4. Remove from heat and stir in 40 grams of butter and an additional 100 ml of milk until smooth.
  5. Allow the filling to cool slightly, then refrigerate for 2 hours to set.

Assembly:

  1. Spread half of the creamy filling over one layer of the cake.
  2. Place the second layer of cake on top and spread the remaining filling over it.
  3. For the final touch, dollop 2 tablespoons of cocoa cream (like Nutella) on top and spread evenly.

Serving: Chill the assembled cake in the fridge before serving. Slice and enjoy this nutty vanilla cake with its creamy, rich filling—a perfect treat for any occasion.

Creamy Coconut-Chocolate Rolls

Let’s make a super yummy treat that’s perfect for chocolate and coconut lovers! We’re going to mix some milk, sugar, and cocoa with coconut flakes to create a thick chocolate base. Then, we’ll cool it down, add some creamy whipped topping, and sprinkle it with pistachios for a little crunch. These chocolate coconut rolls are not only delicious but also really fun to make. Whether you’re making them for a party or just as a special treat for yourself, they’re sure to be a hit. So, grab your ingredients, and let’s get started on these tasty rolls!

Ingredients:

  • Coconut Flakes: 80g (approximately 1 cup)
  • Milk: 500ml
  • Sugar: 100g (about 1/2 cup)
  • Vanilla Sugar: 10g
  • Flour: 100g (roughly 2/3 cup)
  • Cocoa Powder: 1 tablespoon
  • Butter: 30g
  • Dark Chocolate: 50g
  • Heavy Cream: 150ml (33-36% fat)
  • Powdered Sugar: 1 tablespoon
  • Pistachio Crumbs for garnish

Instructions:

  1. Prepare the Base:
    • In a medium-sized cooking pot, combine the milk, sugar, vanilla sugar, flour, and cocoa powder. Heat the mixture on medium, stirring all the time, until it becomes thick like a smooth paste.
    • Remove the pot from the heat. Add the butter and dark chocolate to the hot mixture, stirring until both are completely melted and the mixture is smooth.
    • Pour the mixture into a 20×30 cm baking form lined with parchment paper, spreading it evenly. Let it cool down naturally until it reaches room temperature.
  2. Chill:
    • Once cooled, transfer the form to the refrigerator. Let it set for several hours, or until it hardens sufficiently to be rolled or cut easily.
  3. Whipped Cream Topping:
    • In a mixing bowl, combine the heavy cream and powdered sugar. Beat until the mixture is thick and holds peaks.
  4. Assembly:
    • Take out the chilled chocolate mixture from the refrigerator. Spread the whipped cream evenly over the top.
    • Carefully roll the chocolate base into a log or cut into equal pieces, about 1.5 to 2 cm wide, depending on your preference.
  5. Final Touch:
    • Sprinkle the rolls or pieces with pistachio crumbs for a nutty crunch and an elegant finish.
  6. Serve:
    • Place the rolls back in the fridge for a few more hours to ensure they are fully set and the flavors meld beautifully.
    • Serve chilled for a refreshing and decadent treat.

Enjoy Your Creamy Coconut-Chocolate Rolls!

These rolls combine the tropical flavor of coconut with the rich indulgence of dark chocolate, all wrapped up in a creamy, dreamy texture. Perfect for a special occasion or when you’re in the mood for something sweet and sophisticated. Enjoy making and eating these delightful treats!