Best Food Waste Reduction Courses for Home Cooks

Food waste is a pressing global issue, but reducing it starts right in your kitchen. Home cooks can make a significant impact by learning portion control, proper food storage techniques, and creative ways to repurpose leftovers. Beyond saving money and resources, reducing food waste is a powerful step toward sustainability.

This guide explores the best courses for mastering food waste reduction, from masterclass cooking classes to workshops on cooking culinary skills and professional cooking techniques. Whether you’re a beginner looking to cut back on waste or an experienced cook seeking advanced strategies, these resources will help you create a zero-waste kitchen.


Why Food Waste Reduction Matters

The Environmental Impact

According to the Food and Agriculture Organization (FAO), approximately one-third of all food produced globally goes to waste. This waste contributes to greenhouse gas emissions, as decomposing food releases methane, a potent pollutant. By adopting waste reduction practices, home cooks can help mitigate these effects.

The Financial Impact

Food waste isn’t just bad for the planet—it’s costly for households. Learning how to minimize waste through proper planning and storage can significantly reduce grocery bills.

The Culinary Impact

Reducing food waste encourages creativity in the kitchen, turning leftover ingredients into delicious meals. It’s an excellent way to enhance your cooking skills while making the most of what you have.


1. MasterClass Cooking Classes: Elevate Your Zero-Waste Skills

Masterclass cooking classes are a premium option for home cooks who want to learn from world-renowned chefs. While not exclusively focused on food waste reduction, many courses incorporate tips and techniques that align with zero-waste principles.

Courses to Explore

  • Massimo Bottura Teaches Modern Italian Cooking: Learn how to repurpose ingredients creatively, a hallmark of Bottura’s philosophy.
  • Alice Waters Teaches the Art of Home Cooking: This course emphasizes using seasonal and local produce, ensuring ingredients are used at their peak freshness.
  • Gordon Ramsay Teaches Cooking: Ramsay shares essential storage techniques and tips for making the most out of every ingredient.

Benefits of MasterClass

  • Learn from experts who prioritize sustainability in their culinary practices.
  • Gain professional cooking tips that enhance your efficiency in the kitchen.
  • Access lessons at your own pace, allowing you to integrate zero-waste strategies over time.

2. Online Food Waste Reduction Courses for Home Cooks

Several platforms offer comprehensive online courses that focus specifically on food waste reduction. These courses teach practical strategies for portion control, meal planning, and creative uses for leftovers.

Popular Platforms and Courses

  • Rouxbe Online Culinary School: Their plant-based courses include modules on reducing waste through creative ingredient use and storage techniques.
  • Udemy – Zero-Waste Kitchen Cooking: A budget-friendly course covering meal planning, food storage, and recipes that use every part of an ingredient.
  • edX – Sustainable Food Systems by Wageningen University: While more academic, this course provides insights into how individuals can contribute to reducing food waste.

What You’ll Learn

  • Portion Control: Techniques for measuring ingredients to avoid over-preparation.
  • Storage Tips: How to extend the shelf life of perishable items.
  • Leftover Recipes: Ideas for turning scraps and remnants into flavorful dishes.

3. Local Cooking Culinary Workshops on Food Waste Reduction

For a hands-on approach, consider enrolling in local workshops that teach cooking culinary techniques with a focus on sustainability. These in-person classes allow you to interact with instructors and other participants, making it a social and educational experience.

Examples of Local Workshops

  • Farm-to-Table Classes: Many local farms or community centers offer classes that emphasize using fresh, local ingredients without waste.
  • Zero-Waste Meal Prep Workshops: These classes teach how to plan and prepare meals while minimizing leftovers and scraps.
  • Community College Culinary Programs: Some professional cooking programs include modules on food sustainability and waste reduction.

Benefits of Local Workshops

  • Real-time feedback from instructors.
  • Networking opportunities with like-minded individuals.
  • Access to local resources, such as farmers’ markets and food co-ops.

4. Professional Cooking Techniques for Zero Waste

Professional cooking schools and culinary institutes are increasingly incorporating sustainability into their curricula. Learning professional cooking techniques can enhance your efficiency and creativity, allowing you to use every part of an ingredient.

Culinary Schools Offering Zero-Waste Training

  • The Culinary Institute of America (CIA): Their programs include sustainability-focused courses that teach students how to reduce waste in professional kitchens.
  • Le Cordon Bleu: Many campuses offer workshops on efficient ingredient use and food preservation.
  • Escoffier School of Culinary Arts: Their online programs include modules on sustainable cooking practices and waste reduction.

Skills You’ll Gain

  • Knife Skills: Properly trimming and cutting ingredients to maximize yield.
  • Batch Cooking: Preparing large quantities efficiently, reducing leftover waste.
  • Creative Plating: Using scraps for garnishes or new dishes.

5. Family-Friendly Homeschool Cooking Classes

For families, integrating waste reduction into cooking lessons can teach kids valuable life skills while promoting sustainability. Homeschool-friendly classes are designed to be engaging and practical, making them ideal for younger learners.

Family-Oriented Zero-Waste Classes

  • Kids Cook Real Food: A subscription-based program that includes lessons on meal planning and using leftovers creatively.
  • Outschool – Zero-Waste Cooking for Kids: Interactive online classes tailored to teach children how to minimize food waste.
  • America’s Test Kitchen Kids: Offers recipes and activities that focus on ingredient conservation.

Benefits for Families

  • Encourages teamwork and problem-solving in the kitchen.
  • Instills eco-friendly habits at a young age.
  • Makes cooking a fun and educational family activity.

6. Tips and Tricks for Reducing Food Waste at Home

In addition to taking courses, implementing simple strategies can significantly reduce waste in your kitchen.

Portion Control

  • Use measuring cups and kitchen scales to prepare the right amount of food.
  • Plan meals based on your family’s eating habits to avoid leftovers.

Smart Storage

  • Store perishables in airtight containers to prolong freshness.
  • Label leftovers with dates to ensure they’re used before they spoil.

Creative Zero-Waste Recipes

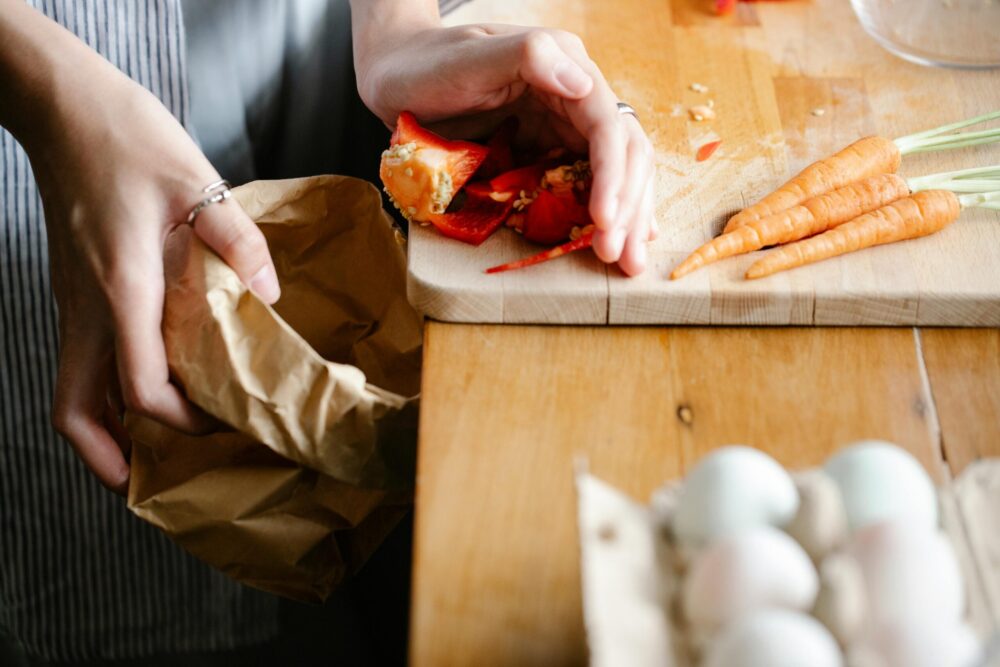
  • Vegetable Scraps Stock: Save carrot tops, onion peels, and celery leaves to make homemade broth.
  • Bread Pudding: Transform stale bread into a delicious dessert.
  • Fruit Smoothies: Use overripe bananas, berries, or apples in smoothies.

7. The Future of Zero-Waste Cooking Education

As sustainability becomes a priority in the culinary world, more educational programs are integrating food waste reduction into their curricula. From AI-powered meal planning tools to virtual cooking labs, the future of zero-waste education is exciting.

Emerging Trends

  • Smart Kitchens: Appliances that help track expiration dates and suggest recipes for soon-to-expire ingredients.
  • 3D Food Printing: Innovative technology that uses food waste to create edible products.
  • Virtual Reality Classes: Immersive cooking experiences that teach sustainability principles.

Final Thoughts: Master the Art of Zero-Waste Cooking

Reducing food waste isn’t just a trend—it’s a necessary step toward a sustainable future. By enrolling in masterclass cooking classes, online courses, or local workshops, home cooks can learn to make the most of every ingredient. These educational resources not only save money and resources but also inspire creativity and enhance your culinary skills.

Whether you’re experimenting with cooking culinary techniques or learning professional cooking methods, there’s a course out there to suit your needs. Start your journey today, and transform your kitchen into a zero-waste powerhouse.

Kitchen Safety 101: Educational Resources for Families Who Cook Together

Cooking together as a family is a fun, creative, and bonding experience. It teaches children essential life skills, encourages teamwork, and fosters a love for good food. However, with sharp knives, hot stoves, and potential accidents lurking in every corner, ensuring kitchen safety is paramount. Families that cook together can benefit greatly from educational resources, workshops, and classes that focus on safe cooking practices while enhancing their culinary skills.

In this guide, we’ll explore top resources for teaching kitchen safety, from masterclass cooking classes to cake making courses for beginners, and share how families can incorporate these lessons into their daily routines.


Why Kitchen Safety Matters for Families

Cooking as a family is an opportunity to teach children about nutrition, culture, and creativity, but it also introduces risks. Teaching kitchen safety ensures that everyone knows how to handle potential hazards, whether it’s using knives, dealing with hot surfaces, or managing spills.

Common Kitchen Hazards

  1. Cuts and Lacerations: Mishandling knives and sharp tools.
  2. Burns: Contact with hot stoves, ovens, or boiling liquids.
  3. Slips and Falls: Wet or cluttered floors.
  4. Food Safety Issues: Cross-contamination and improper storage of ingredients.

Educating your family on these risks and how to mitigate them is crucial, and that’s where workshops, classes, and online resources come in handy.


1. MasterClass Cooking: Professional Insights for Families

Masterclass cooking classes are a premium option for families looking to elevate their skills while incorporating safety lessons. These courses feature world-renowned chefs and are designed to teach essential techniques alongside advanced culinary concepts.

Why It’s Great for Families

  • Expert Instruction: Learn from chefs like Gordon Ramsay, Alice Waters, and Thomas Keller, who emphasize precision and safety in the kitchen.
  • Accessible Format: On-demand videos make it easy to learn at your own pace.
  • Family-Friendly Lessons: Many classes include basic techniques like knife skills, proper food handling, and kitchen organization, which are great for teaching children.

Top MasterClass Cooking Classes for Safety and Skills

  • Gordon Ramsay Teaches Cooking: Ramsay demonstrates safe knife handling, proper chopping techniques, and how to avoid cross-contamination.
  • Alice Waters Teaches the Art of Home Cooking: Learn about sourcing fresh ingredients, safe food preparation, and creating a family-friendly kitchen environment.

2. Cake Making Courses for Beginners: Safety in Baking

Baking is one of the most family-friendly cooking activities, and cake making courses for beginners offer a great introduction to kitchen safety. These courses teach foundational skills while emphasizing safe practices, making them ideal for kids and adults alike.

Safety Lessons in Baking

  • Measuring Ingredients Safely: Prevent spills and accidents by teaching children how to measure flour, sugar, and liquids correctly.
  • Using Ovens: Learn how to safely preheat, place, and remove items from hot ovens.
  • Proper Tool Use: Understand the safe handling of whisks, spatulas, and piping bags.

Recommended Cake Making Courses

  • Craftsy Beginner Baking Class: This course covers basic techniques, including how to handle hot bakeware and avoid burns.
  • Udemy Cake Decorating for Beginners: Offers lessons on using piping tools and working with delicate ingredients safely.
  • Kids Can Bake Too! A family-oriented class that teaches both baking and safety basics for younger chefs.

3. In-Person Family Cooking Workshops

If you prefer a hands-on approach, in-person cooking workshops are excellent for teaching kitchen safety to your family. These workshops often include live demonstrations and interactive activities, ensuring that everyone practices safe cooking habits in real-time.

Benefits of In-Person Workshops

  • Immediate Feedback: Instructors can correct unsafe practices on the spot.
  • Team Building: Families work together to prepare meals, promoting cooperation and safety.
  • Memorable Experience: Workshops often include fun, engaging activities that children enjoy.

Where to Find Workshops

  • Local Community Centers: Many community centers offer family-friendly cooking workshops with a focus on safety.
  • Specialty Culinary Schools: Look for schools offering beginner or family cooking courses, such as Williams-Sonoma classes.
  • Nonprofit Organizations: Groups like Common Threads provide free or low-cost cooking classes emphasizing health and safety for families.

4. Online Cooking Classes for Busy Families

For families with packed schedules, online cooking classes provide a flexible way to learn kitchen safety and new recipes. Many platforms offer affordable or free courses designed for home cooks.

Top Platforms for Online Cooking Classes

  • Rouxbe Cooking School: Offers comprehensive safety modules alongside lessons on knife skills, food handling, and meal preparation.
  • America’s Test Kitchen Kids: Designed for younger audiences, these classes teach safety basics in an engaging, kid-friendly format.
  • Skillshare Cooking Classes: Includes family-focused lessons on safe cooking techniques and easy recipes.

Incorporating Safety into Online Learning

  • Pause videos to explain safety practices in detail to children.
  • Assign age-appropriate tasks, such as washing vegetables or stirring ingredients.
  • Reinforce lessons by practicing skills together after the class.

5. Homeschool Cooking Classes: A Safe and Educational Option

For homeschooling families, cooking can double as an engaging educational activity. Homeschool cooking classes focus on safety while teaching math, science, and life skills through hands-on cooking lessons.

Benefits of Cooking in a Homeschool Setting

  • Customizable Curriculum: Tailor lessons to include kitchen safety topics like fire prevention and proper sanitation.
  • Cross-Disciplinary Learning: Teach fractions through measuring ingredients or biology by explaining how yeast works in bread-making.
  • Life Skills: Equip children with essential skills they’ll use throughout their lives.

Resources for Homeschool Cooking Classes

  • Kids Cook Real Food: A subscription-based program that teaches safety and cooking skills for all ages.
  • Outschool: Offers live virtual classes on topics like “Safe Knife Skills for Kids” and “Baking Basics for Beginners.”
  • Tinkergarten Kitchen Science: Combines cooking and science experiments for a fun, educational experience.

Safety Tips Every Family Should Practice

In addition to taking courses or workshops, families can integrate these essential safety practices into their daily routines:

1. Knife Safety

  • Use age-appropriate knives for children, such as plastic or nylon ones.
  • Teach proper grip and cutting techniques.
  • Always cut on a stable surface.

2. Fire Safety

  • Keep flammable materials away from stovetops.
  • Always have a fire extinguisher in the kitchen and teach everyone how to use it.
  • Monitor stovetops and ovens while in use.

3. Food Safety

  • Wash hands thoroughly before handling food.
  • Use separate cutting boards for raw meat and vegetables.
  • Store perishable items at the correct temperatures.

4. Clean as You Go

  • Wipe up spills immediately to prevent slips and falls.
  • Keep tools and ingredients organized to avoid accidents.
  • Regularly clean stovetops and appliances to prevent grease build-up.

Why Safe Cooking Practices Matter

Learning safe cooking practices benefits more than just your family’s immediate safety—it fosters confidence in the kitchen, encourages healthier eating habits, and sets children up for lifelong success. By investing in educational resources like masterclass cooking classes, cake making courses for beginners, and family-friendly workshops, you can ensure that everyone in your household knows how to cook safely and efficiently.


Final Thoughts: Make Safety a Family Affair

Cooking together as a family should be enjoyable, rewarding, and safe. Educational resources like online classes, in-person workshops, and homeschool programs make it easy to prioritize kitchen safety while honing your culinary skills. Whether you’re enrolling in a masterclass cooking program, signing up for cake making courses for beginners, or exploring homeschool cooking options, these resources ensure that safety becomes second nature for everyone in your household.

Start your journey today by exploring the many options available and creating a safe, fun, and delicious experience for your family. After all, the best meals are made not only with love but also with care.

Broccoli Cheese Patties Recipe

Broccoli cheese patties are a fantastic way to enjoy your vegetables, turning the humble broccoli into something special with the addition of cheeses, breadcrumbs, and spices. These patties are perfect as a side dish, a vegetarian main, or even as a snack. Here’s how to make them:

Ingredients:

  • 1 teaspoon butter: For sautéing the garlic and onion, adding a rich flavor.
  • 2 cloves garlic, minced: Adds a punch of flavor.
  • 1/2 onion, chopped: Provides a sweet, aromatic base.
  • 1 (12 ounce) bag frozen broccoli, defrosted: The star of the dish, packed with nutrients and flavor.
  • 3/4 cup breadcrumbs: Helps bind the patties together and adds texture.
  • 1/2 cup sharp cheddar cheese: Adds a creamy, tangy flavor.
  • 1/3 cup parmesan cheese: Brings a salty, nutty taste to the patties.
  • 2 eggs, beaten: Acts as a binder for the patties.
  • Salt and pepper: To taste, for seasoning.
  • 1 teaspoon vegetable oil: For frying the patties, giving them a golden and crispy exterior.

Instructions:

  1. Prep the Broccoli:
    • Make sure the frozen broccoli is completely defrosted. Drain any excess water and chop into small pieces. For a finer texture, you can pulse the broccoli in a food processor.
  2. Sauté Aromatics:
    • In a skillet, melt the butter over medium heat. Add the minced garlic and chopped onion, sautéing until the onion is translucent and fragrant, about 3-5 minutes. Remove from heat and let it cool.
  3. Mix the Patty Ingredients:
    • In a large mixing bowl, combine the chopped broccoli, breadcrumbs, sharp cheddar cheese, parmesan cheese, and the cooled garlic and onion mixture. Add the beaten eggs, salt, and pepper. Mix until well combined. If the mixture feels too wet, add a little more breadcrumbs until you can easily form patties.
  4. Form Patties:
    • Using your hands, form the mixture into patties. Depending on your preferred size, this recipe should make about 8-12 patties.
  5. Cook Patties:
    • Heat the vegetable oil in a non-stick skillet over medium heat. In batches, fry the patties for about 4-5 minutes on each side or until they are golden brown and crispy. Ensure not to overcrowd the pan to allow for even cooking.
  6. Serve:
    • Serve the broccoli cheese patties hot, with your choice of dipping sauce or as a side to your main meal.

Tips:

  • Serving Suggestions: These patties pair beautifully with a tangy yogurt dip, marinara sauce, or as a complement to a light salad.
  • Storage: Leftover patties can be stored in the refrigerator for up to 3 days. Reheat in the oven or on the stove for the best texture.
  • Freezing: You can also freeze the formed, uncooked patties between layers of parchment paper for later use. Thaw in the refrigerator before cooking as directed.

Enjoy your Broccoli Cheese Patties, a delicious and nutritious addition to any meal that even the pickiest eaters will love!

Apple Cider Glazed Chicken Thighs Recipe

These Apple Cider Glazed Chicken Thighs are a perfect blend of savory flavors with a hint of sweetness from the apple cider. The dish is infused with aromatic spices, making it a comforting and delicious meal. Here’s a detailed recipe to guide you through creating this mouthwatering dish.

Ingredients:

  • Olive Oil: A few tablespoons for cooking. Opt for a light olive oil that withstands high heat well.
  • 1.5 pounds Boneless, Skinless Chicken Thighs: This typically amounts to about 6 chicken thighs.
  • Dried Thyme or Rosemary: About 1 teaspoon, depending on your preference. Both herbs add a nice, earthy flavor to the chicken.
  • Onion Powder: 1 teaspoon, for a concentrated burst of onion flavor.
  • Garlic Powder: 1 teaspoon, to complement the onion powder and add depth.
  • Paprika: 1 teaspoon. Feel free to use mild, hot, or smoked paprika based on your taste.
  • Salt and Pepper: Add salt and pepper according to your taste preferences, ensuring the chicken is adequately seasoned.

Instructions:

  1. Preparation:
    • Begin by using paper towels to pat the chicken thighs dry. This aids in achieving a desirable sear.
    • Season the chicken thighs on both sides with salt, pepper, dried thyme or rosemary, garlic powder, onion powder, and paprika. Ensure that the seasoning is evenly spread across the chicken pieces.
  2. Cook the Chicken:
    • Heat a few tablespoons of light olive oil in a large skillet over medium-high heat. Once the oil reaches the desired temperature, carefully add the chicken thighs to the pan.
    • Cook the chicken for approximately 5-7 minutes on each side, or until they attain a golden-brown crust and are thoroughly cooked. The internal temperature should reach 165°F (74°C) when checked with a meat thermometer.
  3. Apple Cider Glaze (Optional Step for Enhanced Flavor):
    • While the chicken is cooking, you can prepare a simple apple cider glaze by reducing apple cider in a separate saucepan over medium heat, adding a bit of honey or sugar to sweeten it slightly. Cook until the mixture thickens to a glaze consistency.
    • Once the chicken is cooked, brush the apple cider glaze over each thigh, letting it caramelize for a minute or two on each side.
  4. Serve:
    • Once the chicken thighs are fully cooked and glazed, remove them from the skillet and let them rest for a few minutes.
    • Serve the chicken thighs hot, optionally garnished with fresh herbs for added flavor and presentation. They pair wonderfully with roasted vegetables, a fresh salad, or your favorite side dish.

Tips:

  • For the Glaze: Adjust the sweetness of the apple cider glaze according to your preference. Adding a splash of vinegar can introduce a nice tang, balancing the sweetness.
  • Serving Suggestion: These chicken thighs go great with a side of mashed potatoes, rice, or a light salad to make a complete meal.
  • Storage: Leftover chicken thighs can be stored in an airtight container in the refrigerator for up to 3 days. Reheat gently to retain the moisture.

Enjoy your delicious Apple Cider Glazed Chicken Thighs, a dish that promises a delightful mix of flavors and textures that are sure to impress!

Cranberry Pecan Pumpkin Bread Recipe

This Cranberry Pecan Pumpkin Bread is a moist, flavorful loaf that embodies the essence of fall. It combines the classic spices of pumpkin pie with the sweetness of cranberries and the crunch of toasted pecans for a delightful treat. Whether you’re enjoying a slice for breakfast, as a snack, or as a dessert, this bread is sure to bring warmth and comfort. Here’s how to make it.

Ingredients:

  • 3 cups all-purpose flour: Provides structure to the bread.
  • 1 tsp salt: Enhances the flavors.
  • 1 tsp baking powder & 1 tsp baking soda: Leavening agents that help the bread rise.
  • 4 tsp pumpkin pie spice: Adds the quintessential fall flavor.
  • 2 cups canned pumpkin: Adds moisture and a rich pumpkin taste. Ensure it’s not pumpkin pie filling, which is sweetened and spiced.
  • 2/3 cup brown sugar: Adds moisture and a deep, caramel-like sweetness.
  • 2/3 cup granulated sugar: Sweetens the bread.
  • 1 cup applesauce OR canola oil: Applesauce for a healthier, lower-fat option, or canola oil for richness.
  • 3 eggs, room temperature: Bind the ingredients together.
  • 1 tbsp vanilla extract: Enhances the overall flavor.
  • 1 cup dried cranberries: Adds a tart, fruity sweetness.
  • 1 cup chopped pecans, toasted: Provides a nutty flavor and crunchy texture.

Instructions:

  1. Prep Work:
    • Preheat your oven to 350°F (175°C). Grease and flour two 9×5 inch loaf pans, or line them with parchment paper.
  2. Dry Ingredients:
    • In a large bowl, whisk together the flour, salt, baking powder, baking soda, and pumpkin pie spice. Set aside.
  3. Wet Ingredients:
    • In a separate bowl, mix the canned pumpkin, brown sugar, granulated sugar, applesauce (or canola oil), eggs, and vanilla extract until well combined.
  4. Combine and Fold:
    • Gradually add the wet ingredients to the dry ingredients, stirring just until combined and making sure not to overmix.
    • Gently fold in the dried cranberries and toasted pecans.
  5. Bake:
    • Divide the batter evenly between the prepared loaf pans. Smooth the tops with a spatula.
    • Bake for 60-65 minutes, or until a toothpick inserted into the center of the loaves comes out clean.
  6. Cool:
    • Let the bread cool in the pans for about 10 minutes before transferring them to a wire rack to cool completely.

Tips:

  • Toasting Pecans: Spread the pecans on a baking sheet and toast in a 350°F oven for 5-7 minutes, or until fragrant. This enhances their flavor.
  • Serving Suggestion: This bread is delicious on its own but can also be served with a spread of cream cheese or a drizzle of honey for extra indulgence.
  • Storage: Wrap the cooled bread in plastic wrap and store at room temperature for up to 3 days or in the refrigerator for up to a week. It can also be frozen for up to 3 months.

Enjoy your homemade Cranberry Pecan Pumpkin Bread, a treat that’s sure to capture the heart of anyone who tries it with its perfect blend of fall flavors!

No-Bake Pistachio Brownies Recipe

These no-bake pistachio brownies are a delightful treat for anyone looking for a healthier and gluten-free option that doesn’t compromise on taste. With a rich cocoa base, a creamy pistachio center, and a generous amount of pistachios for crunch, they’re sure to satisfy your sweet tooth. Here’s how to whip up these decadent treats.

Ingredients:

For the Base:

  • 100g (3.5 oz) oat flour: You can make this by blending plain oats into a fine flour. Use gluten-free oats if necessary.
  • 4 tbsp cocoa powder: For that rich chocolate flavor.
  • Pinch of salt: Enhances the flavors.
  • 4 tbsp pistachio butter: Provides a unique, nutty taste and creamy texture.
  • 3 tbsp coconut oil, melted: Helps solidify the base when chilled.
  • 2 tbsp maple syrup: Natural sweetener that binds the ingredients together.

For the Pistachio Centre:

  • 100g (3.5 oz) pistachio butter: Acts as the main flavor component of the center layer.
  • 2 tbsp coconut oil, melted: Gives the layer a smooth, melt-in-your-mouth texture.
  • 2 tbsp maple syrup: Adds sweetness and helps blend the mixture.
  • A pinch of salt: Balances the sweetness.
  • 80g (2.8 oz) unsalted pistachios: Adds crunch and intensifies the pistachio flavor.

Instructions:

  1. Prepare the Base:
    • In a medium bowl, combine the oat flour, cocoa powder, and a pinch of salt.
    • Stir in the pistachio butter, melted coconut oil, and maple syrup until the mixture is well combined and sticks together when pressed.
    • Press this mixture firmly into the bottom of a lined 8-inch square baking pan, creating an even layer. Place in the freezer to set while you prepare the pistachio center.
  2. Make the Pistachio Centre:
    • In a separate bowl, mix together the pistachio butter, melted coconut oil, maple syrup, and a pinch of salt until smooth.
    • Chop the unsalted pistachios roughly and stir them into the pistachio mixture.
    • Remove the base from the freezer and spread the pistachio center mixture over the base, smoothing out the top. Return to the freezer for about 1 hour or until firm.
  3. Slice and Serve:
    • Once set, remove the brownie from the freezer and let it sit at room temperature for a few minutes. Then, using a sharp knife, cut into 8 squares.
    • Serve immediately, or store in an airtight container in the fridge for up to a week.

Tips:

  • Pistachio Butter: If you can’t find pistachio butter in stores, you can make your own by blending roasted pistachios in a food processor until smooth and creamy.
  • Serving Suggestion: These brownies are rich and decadent, so they pair well with a cup of coffee or tea.
  • Storage: Keep the brownies refrigerated if you prefer a firmer texture or in the freezer if you like them a bit more solid. Allow to thaw slightly before enjoying if frozen.

Enjoy your delicious no-bake pistachio brownies, a perfect treat for any time you’re craving something sweet, nutty, and chocolaty without the hassle of turning on the oven!

Easy Cranberry Pistachio Cheese Log Recipe

This festive cranberry pistachio cheese log combines the tangy flavor of goat cheese with the creamy texture of cream cheese, sweetened with honey and spiced with a blend of ginger, cinnamon, thyme, and rosemary. Rolled in a crunchy coating of chopped cranberries and pistachios, it’s a visually stunning and delicious appetizer perfect for any gathering. Here’s how to make it:

Ingredients:

For the Cranberry Pistachio Coating:

  • 1 1/4 cups fresh cranberries: For a tart, fruity coating.
  • 1 cup shelled roasted, salted pistachios: Adds a salty crunch and festive color.

For the Cheese Log:

  • 7-8 oz. goat cheese: The base of the cheese log, providing a tangy flavor.
  • 4 oz. cream cheese, softened: Adds creaminess and helps bind the mixture.
  • 2 tablespoons honey: For sweetness and balance.
  • 1/4 tsp each ground ginger, ground cinnamon, salt, dried thyme, dried rosemary: A spice blend that adds warmth and earthiness.
  • 1/8 teaspoon pepper: For a slight kick.
  • 1/2 cup Cranberry Pistachio Coating mixture: To roll the cheese log in, creating a festive exterior.

Garnish:

  • Extra honey: For drizzling over the finished cheese log.

Instructions:

  1. Prepare the Coating:
    • In a food processor, pulse the fresh cranberries and pistachios until finely chopped. Be careful not to over-process; you want some texture for the coating. Set aside 1/2 cup of this mixture for the cheese log, and reserve the rest for rolling.
  2. Mix the Cheese:
    • In a medium bowl, combine the goat cheese, cream cheese, honey, ground ginger, ground cinnamon, salt, dried thyme, dried rosemary, and pepper. Mix until smooth and well combined. If using a tub of goat cheese, you might need to work it with a spatula or spoon to create a log shape before adding the spices and honey.
    • Stir in the reserved 1/2 cup of the cranberry-pistachio mixture until evenly distributed throughout the cheese.
  3. Form the Cheese Log:
    • Place the cheese mixture on a piece of plastic wrap. Using the wrap as an aid, form the cheese into a log shape. Chill in the refrigerator for about 15 minutes to firm up if needed.
  4. Coat the Cheese Log:
    • Spread the remaining cranberry-pistachio mixture on a flat surface like a cutting board or baking sheet. Roll the cheese log in the mixture, pressing lightly to adhere. Ensure the log is evenly coated on all sides.
  5. Chill:
    • Wrap the coated cheese log in plastic wrap and refrigerate for at least an hour, or until firm. This step helps the flavors meld together.
  6. Serve:
    • Before serving, drizzle the cheese log with additional honey for an extra touch of sweetness. Serve with crackers, bread, or sliced apples and pears for a delightful appetizer.

Tips:

  • Serving Suggestion: This cheese log pairs beautifully with a variety of crackers, crostini, or even vegetable sticks. Consider serving it as part of a cheese board with other cheeses, fruits, and nuts for a complete appetizer spread.
  • Make Ahead: You can prepare this cheese log a day in advance. Keep it wrapped in the refrigerator and add the honey drizzle just before serving.

Enjoy your easy cranberry pistachio cheese log, a show-stopping appetizer that’s as delicious as it is beautiful, perfect for holiday gatherings or any special occasion.

Mediterranean Orzo Salad Recipe

This Mediterranean Orzo Salad is a refreshing and flavorful dish that’s perfect for any occasion, from picnics to potlucks, or as a delightful side. Bursting with the vibrant flavors of fresh vegetables, olives, and feta cheese, all tossed together with orzo and a zesty lemon-oregano dressing, it’s sure to be a hit. Here’s how to make it.

Ingredients:

  • Orzo pasta: The base of the salad, orzo is a small, rice-shaped pasta that’s perfect for salads.
  • Red bell pepper: Adds sweetness and a pop of color.
  • Cucumber: Provides a crisp, fresh texture.
  • Red onion: Adds a touch of pungency and zest.
  • Castelvetrano green olives & Kalamata pitted olives: These olives offer a wonderful contrast in flavors, from the buttery Castelvetranos to the briny Kalamatas.
  • Baby spinach: Contributes a crisp, mildly earthy taste.
  • Feta cheese: Introduces a smooth, zesty component to the salad.
  • Canola oil & Olive oil: Used in the dressing, with olive oil for its fruity flavor and canola for its mildness.
  • Lemons: Fresh lemon juice will add brightness and acidity to the dressing.
  • Kosher salt and black pepper: For seasoning.
  • Oregano: Adds a hint of herbal flavor to the dressing, enhancing the Mediterranean vibe.

Instructions:

  1. Cook the Orzo:
    • Heat a sizable pot of water with a dash of salt until it reaches a rolling boil. Add the orzo and cook according to package instructions until al dente. After cooking, drain the contents and rinse them under cold water to halt the cooking process. Drizzle with a touch of olive oil to prevent adherence, then let them cool down.
  2. Prepare the Vegetables:
    • Dice the red bell pepper, peel and dice the cucumber, finely chop the red onion, and roughly chop both types of olives. If the baby spinach leaves are large, give them a rough chop.
  3. Make the Dressing:
    • In a small bowl, whisk together the juice of the lemons (start with the juice of one lemon and adjust to taste), a few tablespoons of olive oil, a splash of canola oil, kosher salt, black pepper, and oregano. Adjust the seasoning and acidity according to your taste.
  4. Combine the Salad:
    • In a large mixing bowl, combine the cooled orzo, diced vegetables, chopped olives, and baby spinach. Sprinkle the feta cheese evenly on the surface.
  5. Dress the Salad:
    • Pour the dressing over the salad and toss gently until everything is well coated. Adjust the seasoning as needed.
  6. Chill and Serve:
    • For the best flavor, let the salad chill in the refrigerator for at least 30 minutes before serving. This step facilitates the harmonious blending of flavors.

Tips:

  • Serving Suggestions: This salad is versatile and can be served as a side dish or as a light main course, perfect for warm weather meals.
  • Variations: Feel free to add other Mediterranean-inspired ingredients such as artichoke hearts, cherry tomatoes, or chickpeas to add variety and texture to the salad.

Enjoy your Mediterranean Orzo Salad, a dish that’s not only visually appealing but also packed with fresh, vibrant flavors that embody the essence of Mediterranean cuisine.

Crustless Garden Vegetable Quiche (Gluten-Free and Dairy-Free)

This crustless garden vegetable quiche is a celebration of fresh produce, packed with the flavors of zucchini, spinach, tomatoes, and basil. It’s an easy, wholesome meal that’s both gluten-free and dairy-free, making it perfect for a wide range of dietary needs. Let’s dive into the recipe that beautifully balances simplicity and taste.

Ingredients:

  • 2 tbsp ghee or avocado oil, divided: Use ghee for a rich flavor, or avocado oil for a completely dairy-free version.
  • 2 small zucchinis, sliced into thin rounds: These add moisture and a tender texture to the quiche.
  • 1/2 small onion, chopped: For a slight sweetness and depth of flavor.
  • 2 cloves garlic, minced: Adds a punch of flavor.
  • 3 cups baby spinach: Introduces a mild, earthy flavor and boosts the nutrient content.
  • 1 and 1/4 cup small tomatoes, sliced into thin slices: Brings a juicy, tangy sweetness and vibrant color.
  • 1 tbsp fresh basil, minced + extra for garnish: Fresh basil adds a peppery, sweet flavor that complements the vegetables perfectly.
  • 8 eggs: The base of the quiche, providing structure and protein.
  • 1/4 cup dairy-free milk: Adds moisture to the egg mixture, making it lighter. Any dairy-free milk like almond, oat, or soy will work.
  • 1/2 tsp salt: Seasoning to enhance all the flavors in the quiche.
  • Fresh ground pepper to taste: Adds a slight heat and complexity.

Instructions:

  1. Preheat and Prep:
    • Preheat your oven to 375°F (190°C). Grease a 9-inch pie dish with a bit of the ghee or avocado oil.
  2. Cook the Vegetables:
    • Heat 1 tablespoon of ghee or avocado oil in a large skillet over medium heat. Add the zucchini rounds and sauté until they are just beginning to soften, about 3-4 minutes. Remove and set aside.
    • In the same skillet, add the remaining ghee or oil. Sauté the onion and garlic until translucent and fragrant, about 2-3 minutes. Add the baby spinach and cook until just wilted, about 1-2 minutes.
  3. Assemble the Quiche:
    • Layer the cooked zucchini at the bottom of the prepared pie dish. Spread the onion, garlic, and spinach mixture over the zucchini. Arrange the tomato slices on top and sprinkle with minced basil.
  4. Prepare the Egg Mixture:
    • In a medium bowl, whisk together the eggs, dairy-free milk, salt, and fresh ground pepper. Pour this mixture evenly over the vegetables in the pie dish.
  5. Bake:
    • Place the dish in the preheated oven and bake for 25-30 minutes, or until the quiche is set and the top is lightly golden.
  6. Serve:
    • Let the quiche cool for a few minutes before slicing. Garnish with additional fresh basil before serving.

Tips:

  • Variations: Feel free to customize this quiche with any vegetables you have on hand. Mushrooms, bell peppers, or asparagus also work beautifully.
  • Make Ahead: This quiche can be prepared in advance and refrigerated. Simply reheat in the oven or microwave when ready to serve.
  • Serving Suggestions: While it’s delicious on its own, this quiche pairs wonderfully with a fresh green salad for a complete meal.

Enjoy this crustless garden vegetable quiche as a testament to the beauty of simple, fresh ingredients coming together to create a dish that’s both nourishing and flavorful. It’s a versatile recipe that’s perfect for breakfast, brunch, or a light dinner.

Zesty Cucumber Salad

Whip up this zesty and spicy cucumber salad that’s perfect as a side dish for any meal. It’s crunchy, flavorful, and has just the right kick to it!

Ingredients:

  • 1 English cucumber (or 2 to 3 kirby cucumbers), make sure it’s clean
  • 1/4 cup onion, cut into thin slices
  • 1 green onion, chopped into small pieces
  • 2 cloves of garlic, make them really tiny (minced)
  • 2 tablespoons soy sauce
  • 2 teaspoons hot pepper flakes (for that spicy kick)
  • 2 teaspoons sesame oil
  • 2 teaspoons sesame seeds (for a bit of crunch)
  • 1 teaspoon sugar (this is up to you, if you like it a bit sweet)

Let’s Make It:

  1. Slice the Cucumber:
    • Cut the cucumber into thin slices. If you’re using kirby cucumbers, you can do the same. The thinner, the better for soaking up all the flavors.
  2. Mix the Flavors:
    • In a big bowl, mix the thinly sliced onion, chopped green onion, and minced garlic with the cucumber slices.
  3. Add the Sauce:
    • Pour the soy sauce over the cucumber mix. Then, sprinkle the hot pepper flakes, sesame oil, and sesame seeds all over. If you’re adding sugar, now’s the time to sprinkle it in.
  4. Toss It Together:
    • Gently toss everything together until the cucumber slices are well coated with all the seasonings and sauce. The idea is to get every slice flavored up.
  5. Chill and Serve:
    • Let the salad sit for a bit to marinate and soak up all the delicious flavors. You can even put it in the fridge for a few minutes before serving.

Enjoy this zesty cucumber salad as a refreshing side dish to any meal. It’s especially great in the summer or alongside a hearty dish that needs a bit of a fresh, spicy kick!