

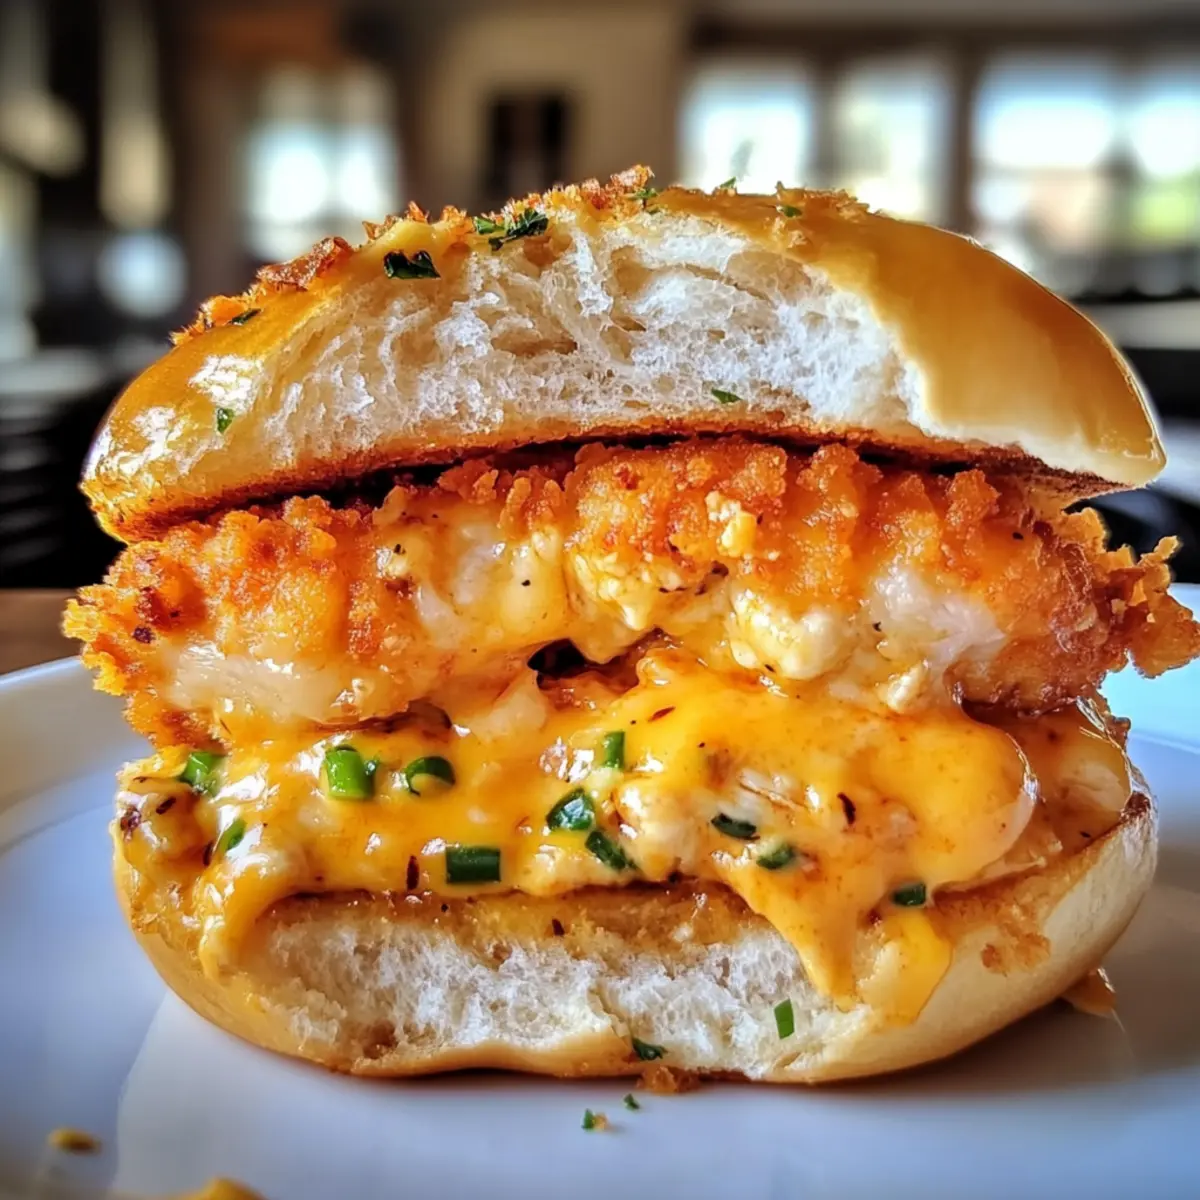
As the oven timer ticks down, the irresistible aroma wafts through my kitchen, stirring memories of joyful gatherings and late-night snacks. Enter my Cheesy Dynamite Chicken Buns, a comforting twist on party food that’s sure to impress. Each fluffy, golden bun is a delightful pocket filled with creamy, spicy chicken and melting cheese, making it a quick and satisfying choice for any occasion. What I love most is how customizable these buns are — add extra spice for those who crave a kick, or maybe even a drizzle of your favorite sauce. Perfect for lunchboxes or casual get-togethers, these little bites of joy are bound to win over any crowd. Are you ready to dive into this cheesy adventure? Let’s bring some comfort food magic to your table!
Why Are These Buns So Irresistible?
Crispy Exterior: Every bite starts with a satisfying crunch, leading to a mouthwatering filling that’s anything but ordinary.
Customizable Flavor: Tailor the spice and sauces to match your preference—try them with a hint of buffalo sauce for an extra zing!
Quick Prep: Using store-bought buns saves time, making these Cheesy Dynamite Chicken Buns a perfect solution for busy weeknights or impromptu gatherings.
Crowd Pleaser: From parties to lunchboxes, these buns are sure to impress family and friends alike, just like my Savory Chicken Cheesy dish!
Pure Comfort Food: With each gooey, cheesy and spicy bite, enjoy the warmth and nostalgia that comfort food brings.
Cheesy Dynamite Chicken Buns Ingredients
For the Chicken Filling
- Boneless Chicken Breast – This is the star protein; feel free to use shredded rotisserie chicken for an even quicker option.
- Creamy Dynamite Sauce – A rich blend of mayonnaise and chili sauce adds the perfect heat; adjust to fit your spice preference.
- Shredded Cheese – Opt for freshly grated cheese for melty goodness; it creates that irresistible gooeyness we all love!
For the Buns
- Buns/Dough – Choose soft store-bought buns or whip up homemade dough for a personal touch.
- Butter/Egg Wash – Applying this gives your buns that beautiful golden finish as they bake to crispy perfection.
These Cheesy Dynamite Chicken Buns are sure to be a hit at your next gathering!
Step‑by‑Step Instructions for Cheesy Dynamite Chicken Buns
Step 1: Prepare the Chicken Filling
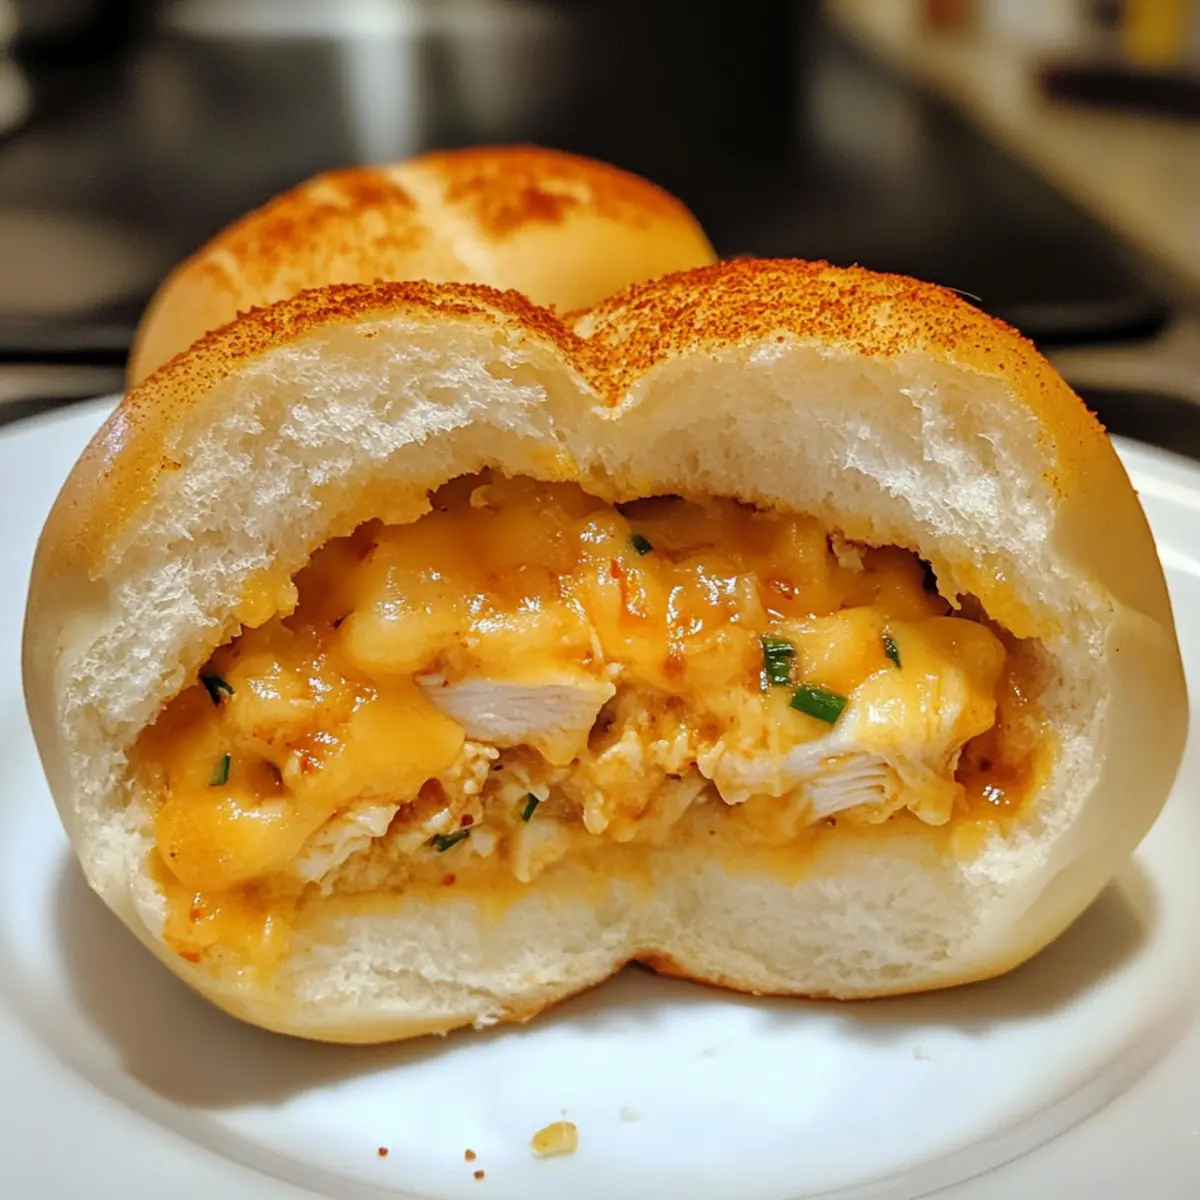
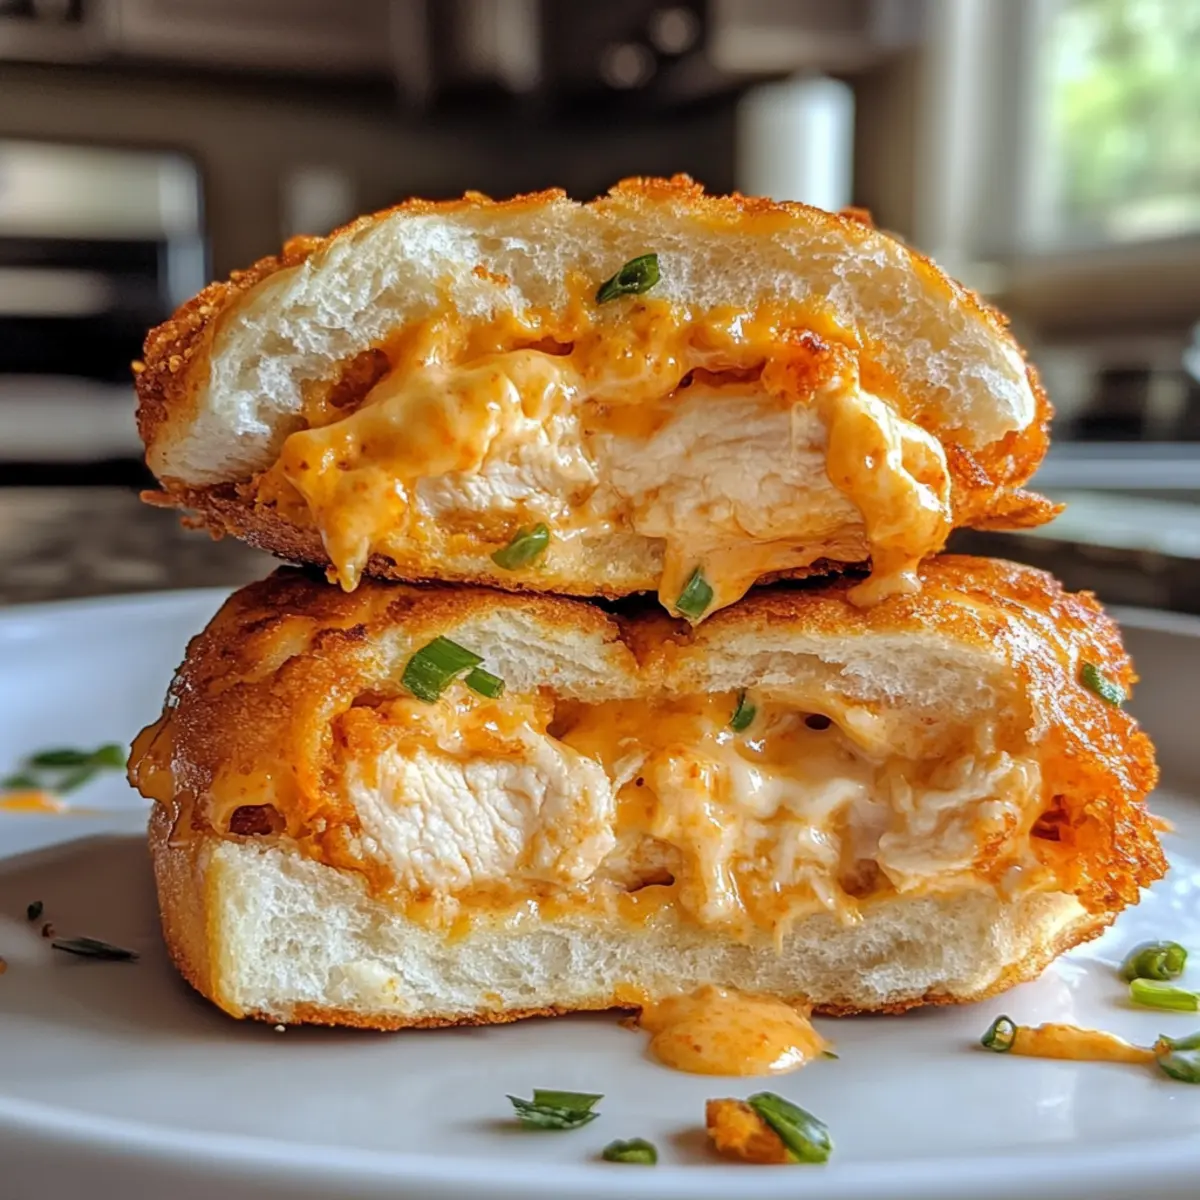
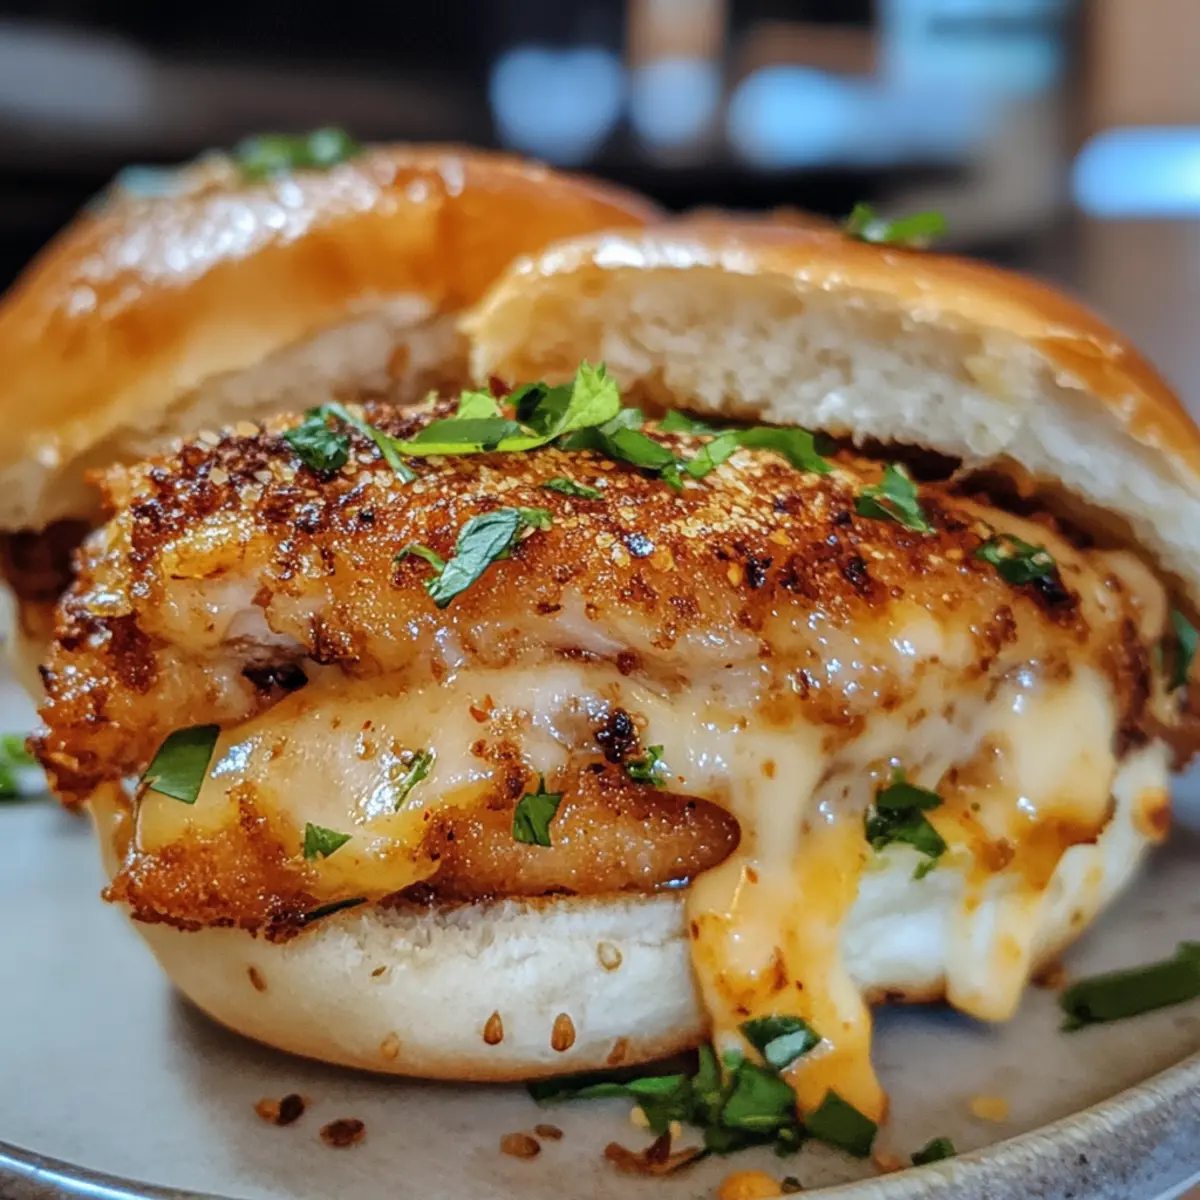
Begin by cooking your boneless chicken breast using your preferred method—bake, boil, or sauté until fully cooked. Allow it to cool slightly before shredding it into bite-sized pieces. In a mixing bowl, combine the shredded chicken with the creamy dynamite sauce, ensuring every piece is well-coated. Then, fold in a generous amount of shredded cheese until fully integrated for that melty goodness you’ll find in Cheesy Dynamite Chicken Buns.
Step 2: Prepare the Buns
While the filling cools, preheat your oven to 375°F (190°C). For store-bought buns, slice them open carefully to create a pocket for the filling. If using homemade dough, flatten the portions into discs, making sure they are thick enough to hold the filling without breaking. Lay the prepared buns or dough on a baking sheet lined with parchment for easy cleanup, ready for stuffing.
Step 3: Assemble the Buns
Spoon a generous amount of the chicken filling into each bun pocket, being careful not to overfill them to avoid leaks during baking. Gently press the sides together to seal, ensuring they’re secure. If using dough, fold the disc carefully over the filling to create a stuffed bun. Arrange the assembled Cheesy Dynamite Chicken Buns on the baking sheet in a single layer for even cooking.
Step 4: Bake to Perfection
Brush the tops of each bun with melted butter or an egg wash for that irresistible golden finish. Place the baking sheet in the preheated oven and bake for about 15–20 minutes, or until the buns are golden brown and the cheese is bubbly. Keep an eye on them; you want a crispy exterior that perfectly contrasts the warm, cheesy filling within.
Step 5: Serve and Enjoy
Once baked, remove the Cheesy Dynamite Chicken Buns from the oven and let them cool for a few minutes. This will help the filling set slightly, making them easier to handle. Serve warm and pair with extra dipping sauces on the side, if desired. These buns will be a crowd-pleaser, perfect for any gathering or as a comforting snack!
Storage Tips for Cheesy Dynamite Chicken Buns
Room Temperature: Cheesy Dynamite Chicken Buns are best enjoyed fresh, but if left out, they can stay at room temperature for up to 2 hours.
Fridge: Store any leftovers in an airtight container in the fridge for up to 3 days. Reheat gently in the oven to maintain that crispy exterior.
Freezer: For longer storage, freeze assembled but unbaked buns. Wrap them tightly in plastic wrap and foil for up to 3 months. Bake from frozen, adding a few extra minutes to the cooking time.
Reheating: To reheat, place the buns in a preheated oven at 350°F (175°C) for 10–15 minutes until heated through and crispy again.
Cheesy Dynamite Chicken Buns Variations
Feel free to get creative and personalize your Cheesy Dynamite Chicken Buns to better match your taste buds!
-
Spicy Kick: Add extra chili flakes or fresh jalapeños for an exciting burst of heat. If you love the thrill of spice, this variation will surely elevate your experience!
-
Garlic Lovers: Brush the buns with garlic butter before baking for an aromatic twist. That fragrant, buttery aroma will entice everyone as they enter your kitchen!
-
Veggie Delight: Substitute chicken with sautéed mushrooms, spinach, or roasted bell peppers for a delicious vegetarian option. Enjoy the heartiness of vegetables wrapped in that crispy bun.
-
Honey BBQ Version: Mix honey with barbecue sauce in the chicken filling for a sweet and tangy twist. This delightful combo will be a crowd-pleaser, reminiscent of summer cookouts!
-
Herb Infusion: Add fresh or dried herbs like basil or thyme to the filling for a flavor boost that transports you to a cozy herb garden. Just a sprinkle brings a beautiful depth to every bite.
-
Crispy Chicken Buns: Replace the shredded chicken with crispy fried chicken for added texture. This version transforms the dish into a crunchy, mouthwatering feast that’s hard to resist!
-
Buffalo Blue Cheese: Swap the dynamite sauce with buffalo sauce and add crumbled blue cheese. This classic flavor pairing takes your buns to a whole new level of deliciousness!
-
Cheese Explosion: Mix multiple cheese varieties like cheddar, mozzarella, and pepper jack for a gooey, cheesy delight. Every bite will have you swooning with cheesy goodness—just like my Homemade Chicken Pot recipe!
No matter how you choose to customize, each variation will make your Cheesy Dynamite Chicken Buns uniquely yours!
What to Serve with Cheesy Dynamite Chicken Buns
As the aroma of these delightful buns fills your home, it’s time to think about what to pair with them to create a complete, satisfying meal.
-
Fresh Garden Salad: A crisp salad with mixed greens and a zesty vinaigrette provides a refreshing contrast to the rich buns.
-
Creamy Coleslaw: The crunch and creaminess of coleslaw not only balance the heat but also adds a comforting touch to your plate.
-
Sweet Potato Fries: Crispy, sweet potato fries offer a delightful sweetness that complements the spicy, cheesy filling of the buns. Perfect for dipping!
-
Tangy Dipping Sauces: Consider serving with ranch or a cool yogurt-based dip to mellow the spiciness while adding layers of flavor with each bite.
-
Grilled Vegetables: Smoky, charred veggies not only enhance the meal’s color but bring a hearty, nourishing element that contrasts with the chewy bun texture.
-
Crisp Pickles: The tanginess of pickles cuts through the richness, making every mouthful refreshing and enticing.
-
Chilled Beverages: Pair with a sparkling lemonade or an icy craft beer to quench your thirst and elevate your dining experience.
Each of these pairings adds a unique twist, making your Cheesy Dynamite Chicken Buns an even more unforgettable feast!
Make Ahead Options
These Cheesy Dynamite Chicken Buns are perfect for meal prep enthusiasts! You can prepare the chicken filling and assemble the buns up to 24 hours in advance. To prep ahead, cook and shred the chicken, then mix it with the dynamite sauce and cheese—refrigerate the filling in an airtight container. Assemble the buns, filling each with the prepared mixture, and store them covered in the refrigerator. This ensures the buns remain fresh and flavorful. When ready to serve, simply brush the tops with butter or egg wash and bake in a preheated oven for 15–20 minutes until golden. With these make-ahead options, you’ll enjoy delicious, hassle-free snacks with minimal effort!
Expert Tips for Cheesy Dynamite Chicken Buns
-
Taste Before Stuffing: Always taste your chicken filling before stuffing it into the buns. Adjust the seasoning according to your preference for perfectly balanced Cheesy Dynamite Chicken Buns.
-
Avoid Overfilling: Be cautious not to overfill the buns while assembling. Overstuffing can lead to messy leaks during baking, ruining the lovely crispy texture you aim for.
-
Use Fresh Cheese: Opt for freshly grated cheese over pre-shredded for better melting quality. It results in that gooey, dreamy texture that elevates your Cheesy Dynamite Chicken Buns!
-
Cool Before Serving: Allow the buns to cool for a few minutes after baking. This helps the filling set and makes them easier to handle—nobody wants a messy experience!
-
Reheat With Care: If you have leftovers, reheat them gently in the oven to prevent the filling from drying out. You’ll want every bite to be just as delicious as the first!
Cheesy Dynamite Chicken Buns Recipe FAQs
How do I choose the right chicken for the filling?
Absolutely! For the best results, use boneless chicken breast as it’s lean and easy to shred after cooking. You can also opt for shredded rotisserie chicken for convenience; just make sure it’s fresh and moist to maintain flavor.
What’s the best way to store leftover Cheesy Dynamite Chicken Buns?
The more the merrier! Store any leftovers in an airtight container in the fridge for up to 3 days. To reheat, pop them back in a preheated oven at 350°F (175°C) for about 10-15 minutes, ensuring they regain that crispy exterior.
Can I freeze the Cheesy Dynamite Chicken Buns?
Definitely! To freeze, wrap unbaked assembled buns tightly in plastic wrap and then foil, ensuring they are well-protected from freezer burn. They can be frozen for up to 3 months. When ready to bake, cook them straight from the freezer, adding a few extra minutes to the baking time.
What should I do if my buns are leaking during baking?
Very important! Ensure that you don’t overfill the buns as this can lead to unwanted leaks. Use just enough filling to fill them comfortably and seal them tightly. If leaks do occur, try placing a baking sheet underneath to catch any drips during the baking process for easier cleanup.
Are there any dietary considerations for these buns?
Absolutely! If you have allergies, be cautious with your sauce, as mayonnaise can contain eggs, which some individuals are allergic to. For a healthier alternative, consider using Greek yogurt instead of mayonnaise in your creamy dynamite sauce. Adjust the cheese as well for dietary preferences!
How can I customize the spice level in the filling?
Personalize it just the way you like it! Start with the base recipe, then add more heat by mixing in additional chili sauce, crushed red pepper flakes, or even diced jalapeños. Taste as you go to achieve the perfect balance of spice for your palate.
Cheesy Dynamite Chicken Buns: Crispy Comfort with a Kick
Ingredients
Equipment
Method
- Prepare the chicken filling by cooking and shredding the chicken. Mix with the creamy dynamite sauce and then fold in shredded cheese.
- Preheat the oven to 375°F (190°C). Prepare the buns by slicing them open or flattening homemade dough.
- Assemble the buns by stuffing them with chicken filling and sealing them carefully.
- Bake the buns in the preheated oven for 15-20 minutes until golden brown.
- Allow the buns to cool for a few minutes before serving warm with dipping sauces.