

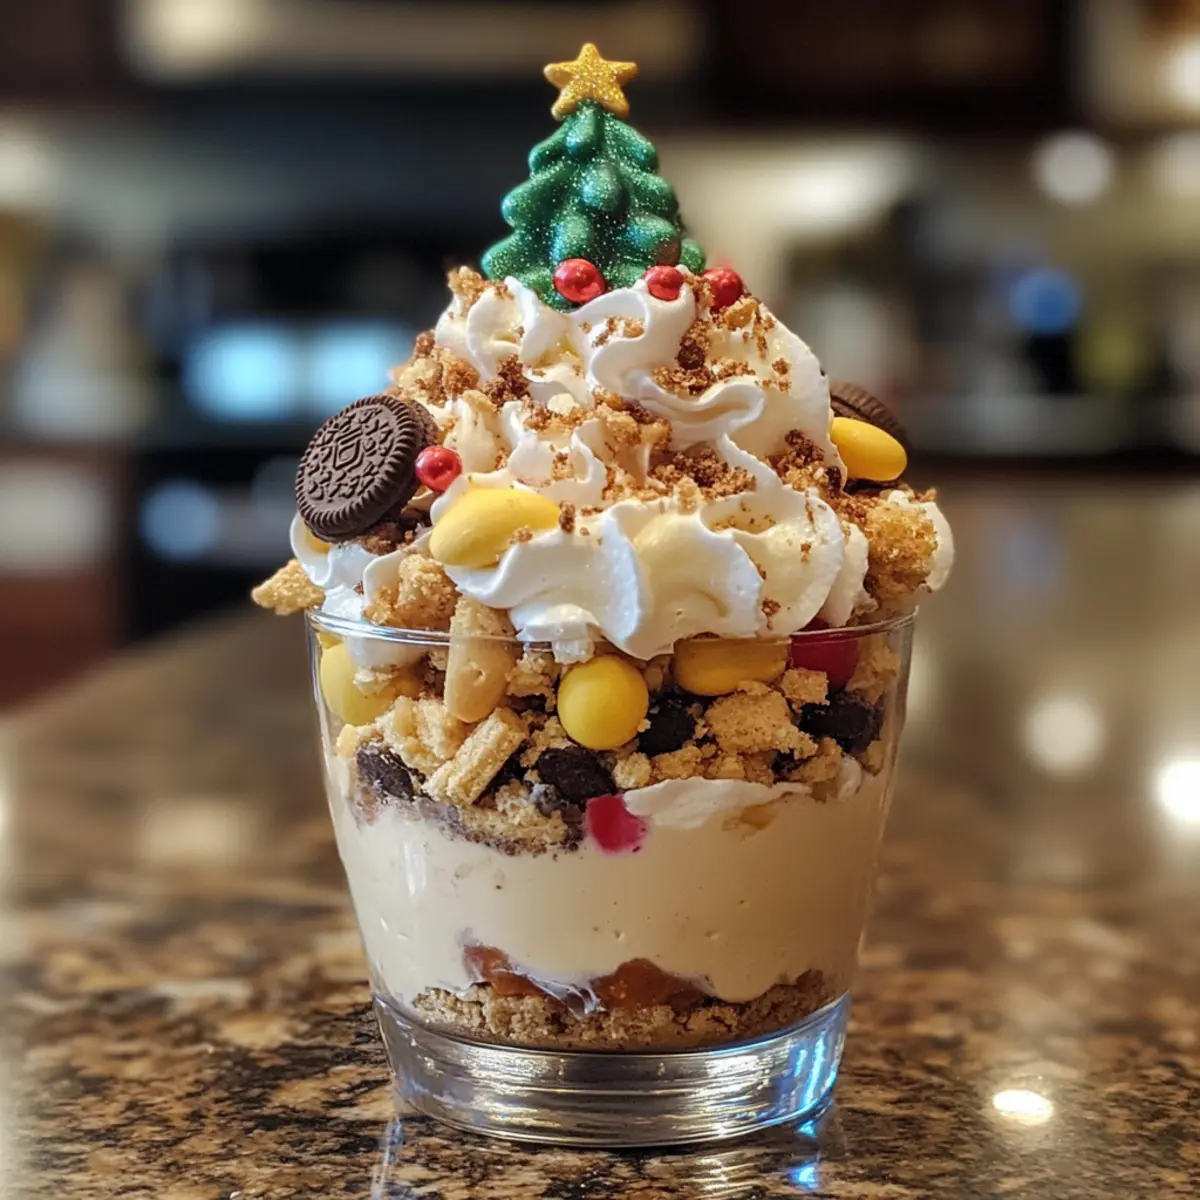
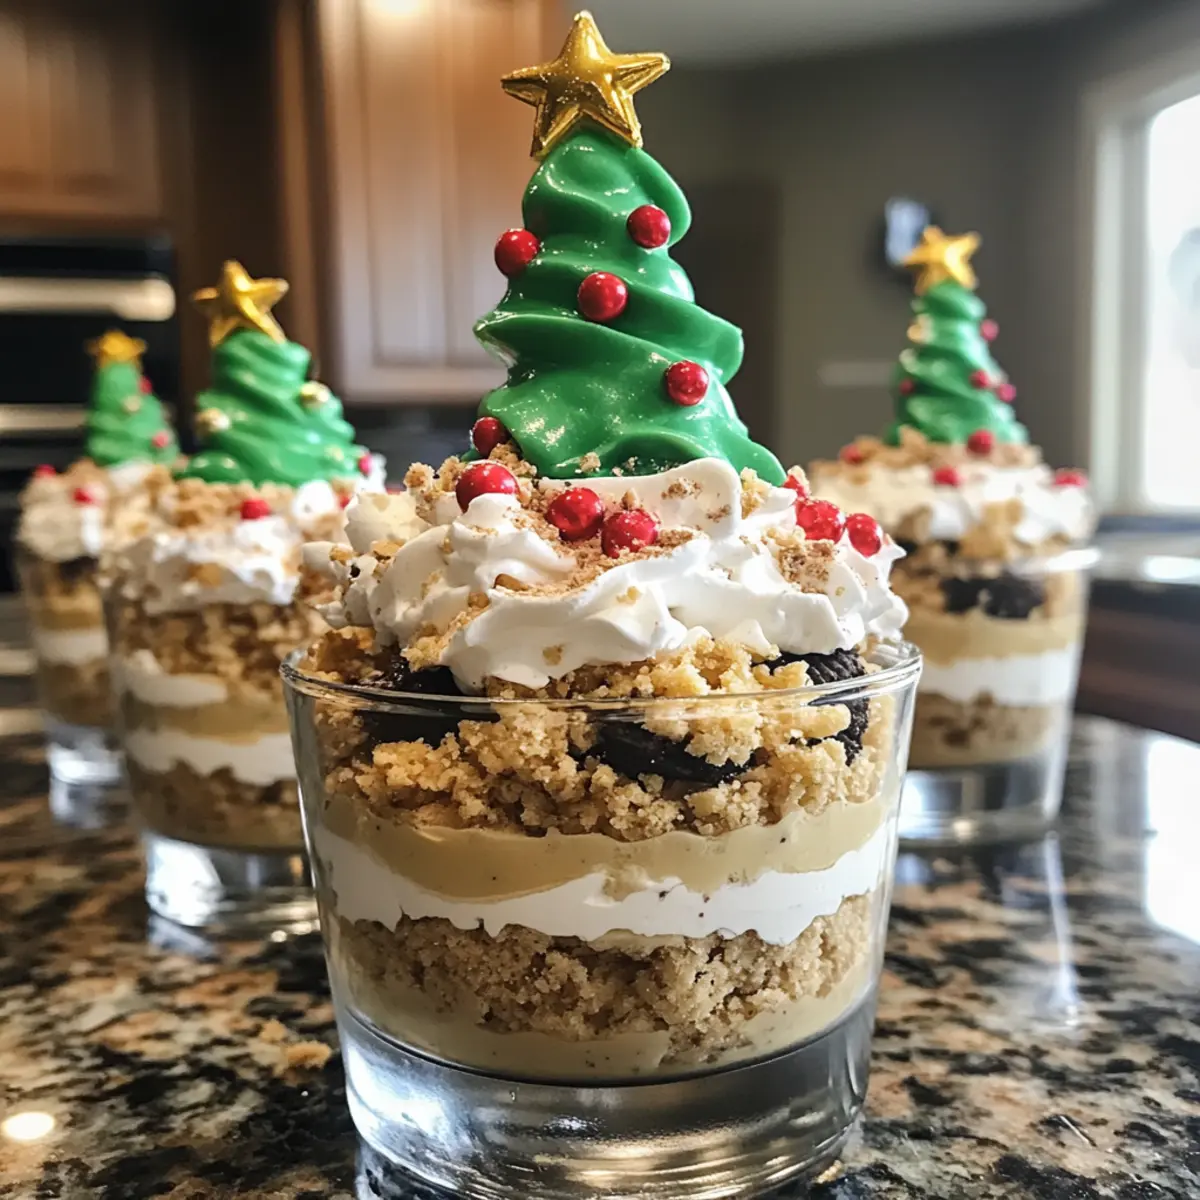
There’s something uniquely magical about the holiday season that brings out our inner child, don’t you think? As I sift through my collection of festive treats, these enchanting No Bake Christmas Dirt Cups stand out brilliantly. They aren’t just a dessert; they’re little edible masterpieces filled with layers of creamy vanilla pudding, crunchy Golden Oreos, and topped with a whimsical Little Debbie Christmas tree cake. What I love most about this recipe is how quick and easy it is to whip up, making it an ideal choice for busy holiday gatherings. Plus, it’s a surefire crowd-pleaser that even the kids will adore! Ready to dive into a fun and festive adventure in your kitchen? Let’s assemble these delightful cups together and spread the joy of the season!

Why are Christmas Dirt Cups so delightful?
Easy Preparation: Whipping up these cups takes minimal time, letting you focus on holiday fun instead of stressful cooking.
Kid-Friendly Fun: With layers of creamy pudding and cookie crumbles, they bring smiles to faces young and old alike!
Visual Appeal: These cups are not just tasty; they look stunning on any table, bringing festive cheer with every layer.
Endless Customization: You can easily swap out cookie or pudding flavors to create your own festive twist, making each batch unique.
Make Ahead Convenience: Prepare these delightful treats up to 24 hours in advance, allowing you to enjoy the festivities without last-minute stress. Try serving them alongside Harvest Salad Cups for a fun party spread!
Christmas Dirt Cups Ingredients
• Get ready to create these festive delights with the following simple ingredients!
For the Pudding Layer
- Instant Vanilla Pudding Mix (3.3 oz) – This pudding serves as the creamy base; feel free to substitute with chocolate pudding for a delicious twist!
- Milk (2 cups) – Essential for hydrating the pudding mix; almond or oat milk makes a great dairy-free choice.
- Cool Whip – Adds a fluffy, creamy texture; homemade whipped cream works beautifully as a substitute.
For the Cookie Crunch
- Golden Oreo Cookies – These provide a crunchy texture and sweetness; using regular Oreos can offer a fun flavor variation.
For the Festive Touch
- Little Debbie Christmas Tree Cakes (12) – Acts as a charming decoration that adds nostalgic flair; any small cake or festive cookie can be used instead.
- Christmas Sprinkles – Perfect for visual appeal; swap them for any seasonal sprinkles you prefer to match your theme.
These simple ingredients help make your Christmas Dirt Cups a crowd-pleasing dessert!
Step‑by‑Step Instructions for Christmas Dirt Cups
Step 1: Prepare Pudding
In a mixing bowl, whisk together the instant vanilla pudding mix and cold milk until fully combined. This should take about 2 minutes, and you’ll know it’s ready when it thickens to a creamy consistency. Cover the bowl and refrigerate the mixture for about 10 minutes, allowing it to firm up nicely for layering in your Christmas Dirt Cups.
Step 2: Combine with Cool Whip
After the pudding has set, gently fold in the Cool Whip using a spatula. Be careful to mix it slowly to keep the mixture light and airy. This should take about 1-2 minutes until you achieve a smooth and creamy texture. Once combined, return the bowl to the refrigerator for another 20 minutes, allowing the flavors to meld beautifully.
Step 3: Crush Cookies
While the pudding is chilling, prepare the Golden Oreo cookies. Using a food processor, pulse the cookies until they become fine crumbs, which should take about 30 seconds. If you don’t have a food processor, place them in a zip bag and crush with a rolling pin instead. Set these crumbs aside as they’ll give your Christmas Dirt Cups that delightful crunchy layer.
Step 4: Assemble Cups
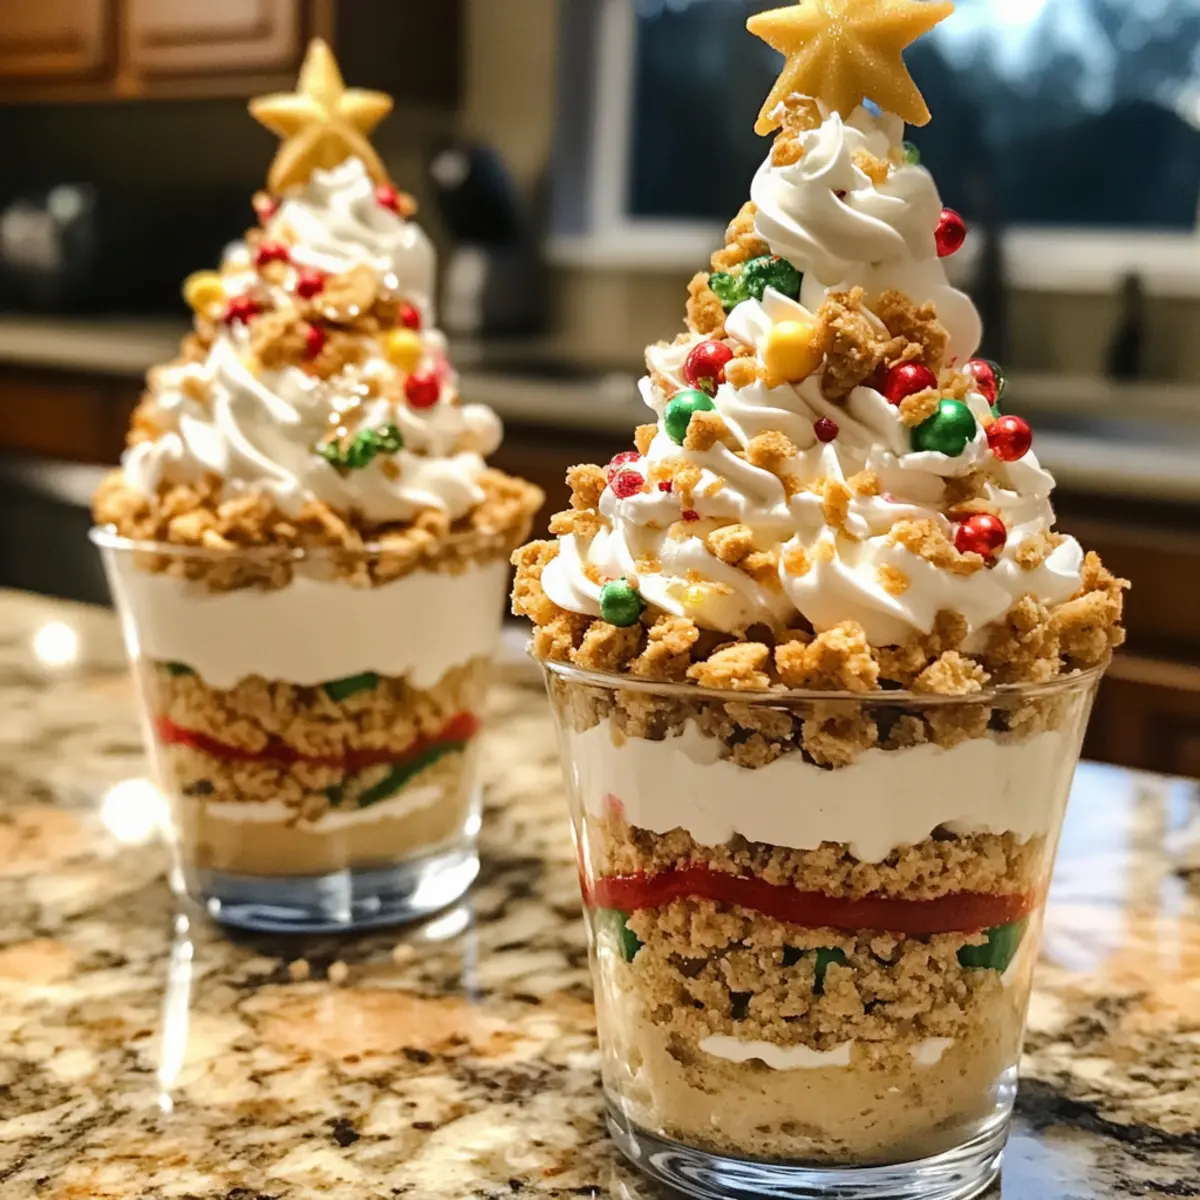
Grab your clear cups or dessert glasses for assembly. Start by adding a layer of the vanilla pudding mixture to the bottom of each cup, about one-third full. Next, sprinkle a generous layer of crushed cookies over the pudding, creating a distinct layer. Continue layering pudding, then cookies until the cups are filled to the brim, ensuring it’s visually appealing for your Christmas Dirt Cups.
Step 5: Decorate
Once your cups are filled, it’s time for the fun part—decorating! Top each cup with a dollop of the remaining pudding to create a snowy effect. Sprinkle festive Christmas sprinkles over the top for added cheer, then place a Little Debbie Christmas tree cake on top of each cup. This adds a whimsical flair that will surely impress your guests!
Step 6: Chill
Finally, cover your assembled Christmas Dirt Cups with plastic wrap and refrigerate them until you’re ready to serve. Let them chill for at least 30 minutes to ensure they’re cool and refreshing. Adding the decorations just before serving will keep them vibrant and prevent sogginess. Enjoy your festive treat with family and friends!
What to Serve with No Bake Christmas Dirt Cups
Elevate your holiday gathering with delightful pairings that enhance these charming dessert cups!
-
Festive Fruit Salad: A vibrant medley of seasonal fruits adds freshness and brightness to balance the creamy richness of the cups. Perfect for a light contrast!
-
Chocolate Peppermint Bark: This sweet treat offers a rich chocolatey crunch with a hint of peppermint, mirroring the dessert’s playful flavors and keeping the festive spirit alive.
-
Spiced Hot Chocolate: Warm up with a cozy mug of spiced hot chocolate. Its creamy texture complements the airy pudding layers beautifully, making for a perfect duo.
-
Gingerbread Cookies: The comforting spice of gingerbread cookies harmonizes with the sweet elements of the Christmas Dirt Cups, creating a nostalgic holiday flavor experience. Their crinkle texture also adds variety!
-
Cranberry Spritzer: Crisp and refreshing, this drink provides a bubbly contrast that cleanses the palate, allowing the sweetness of the dessert to shine brightly.
-
Cheesecake Bites: Bite-sized cheesecake deliver a creamy, dreamy texture that pairs well with the crunchy layers of the cups, creating a delightful dessert tableau.
-
Holiday Spice Cake: A slice of warm holiday spice cake offers a comforting layer of flavor, enhancing the festive experience while keeping guests smiling and satisfied.
-
Eggnog Milkshake: This indulgent shake marries the richness of eggnog with festive flavors, ensuring every sip complements the dessert and adds to the holiday cheer.
Expert Tips for Christmas Dirt Cups
-
Layer Wisely: Carefully layer your pudding and crushed cookies to create visually appealing cups that showcase those delicious textures.
-
Keep Cool Whip Light: When folding in the Cool Whip, use gentle motions to preserve its fluffiness, ensuring a light and creamy pudding layer in your Christmas Dirt Cups.
-
Prep Ahead: To save time, prepare your cups up to 24 hours in advance, but hold off on adding decorative elements until just before serving to retain their crispness.
-
Customize Flavors: Feel free to swap out Golden Oreos for your favorite cookie or use different pudding flavors to create a personal twist on these Christmas Dirt Cups.
-
Chill Time Matters: Allow your cups to chill for at least 30 minutes before serving, as this enhances the flavors and ensures a cool treat on festive occasions.
Christmas Dirt Cups Variations & Substitutions
Let your creativity shine by customizing these fun Christmas Dirt Cups with delightful twists that engage all your senses!
-
Flavorful Oreos: Swap Golden Oreos for chocolate or mint varieties to bring a unique flavor profile to your cups. The rich chocolatey notes can create a fabulous contrast with the creamy pudding.
-
Homemade Whipped Cream: For a fresher taste, use homemade whipped cream instead of Cool Whip. Just whip some heavy cream with sugar and vanilla until fluffy!
-
Pudding Flavor Play: Experiment with different pudding flavors like chocolate, butterscotch, or even banana for a surprise element. Each variation brings a new taste adventure for your guests!
-
Dairy-Free Delight: Use almond or oat milk and coconut whipped cream to create a dairy-free version of these cups. They’ll be just as delightful and creamy!
-
Gluten-Free Option: Opt for gluten-free chocolate sandwich cookies to make these dirt cups suitable for gluten-sensitive guests. Enjoy a tasty dessert without the gluten!
-
Add Some Heat: Sprinkle a pinch of cinnamon or nutmeg into your pudding mixture for a warm, cozy flavor that’s perfect for the holiday season. It adds a delightful twist!
-
Fun Layering: Instead of just cookies and pudding, layer in some crushed candy canes or even mini marshmallows for a textural twist. It will add an extra festive crunch!
-
Alternative Decorations: If you can’t find Little Debbie Christmas Tree Cakes, use any decorative cookie or cupcake on top. A sprinkle of edible glitter could add an enchanting sparkle to your cups.
Feel free to serve these whimsical creations alongside refreshing Harvest Salad Cups for a colorful and delightful holiday gathering!
Make Ahead Options
These No Bake Christmas Dirt Cups are perfect for meal prep enthusiasts! You can prepare the pudding mixture (pudding and Cool Whip combined) up to 24 hours in advance and store it in an airtight container in the refrigerator. Additionally, feel free to crush the Golden Oreo cookies ahead of time and keep them in a separate container to maintain their crunch. When you’re ready to serve, simply layer the chilled pudding and crushed cookies in clear cups, top them with festive sprinkles and a Little Debbie Christmas tree cake, and enjoy the delightful flavors without the last-minute stress! Rest assured, these treats will still be just as delicious and visually stunning!
Storage Tips for Christmas Dirt Cups
Fridge: Store leftover Christmas Dirt Cups in an airtight container for up to 5 to 7 days. This will help maintain their freshness and creamy texture.
Freezer: For longer storage, freeze the pudding mixture (without decorations) for up to 2 months. Thaw completely in the fridge before serving.
Serving: If already assembled, the cups should be eaten within 1-2 days for best taste. Avoid adding sprinkles or decorations until just before serving to keep them from getting soggy.
Reheating: No reheating required, as these delicious cups are best enjoyed chilled!
Christmas Dirt Cups Recipe FAQs
How do I choose the right type of cookies for my Christmas Dirt Cups?
Absolutely! For the best flavor and texture, I recommend using Golden Oreo cookies for their sweetness and crunch. However, if you’re feeling adventurous, regular Oreos or even chocolate sandwich cookies work beautifully too! Just keep in mind the flavor profile you want to highlight in your dessert.
What is the best way to store my Christmas Dirt Cups?
Very good question! You can store leftover Christmas Dirt Cups in an airtight container in the refrigerator for up to 5 to 7 days. This keeps them fresh and maintains that creamy texture that everyone loves. If you’re planning to store them, it’s best not to add the decorative sprinkles or cakes until just before serving to prevent sogginess.
Can I freeze the Christmas Dirt Cups?
Yes, you can! To freeze, assemble only the pudding and cookie layers in airtight containers, excluding any toppings. They can be frozen for up to 2 months. When you’re ready to enjoy them, simply thaw them in the fridge overnight, then add your decorations before serving.
What should I do if my pudding mixture appears lumpy?
If your pudding mixture has lumps, don’t worry; it’s an easy fix! Just whisk it vigorously for a minute or two until it becomes smooth. If the lumps persist, you can use a hand mixer for a minute to achieve that desired creamy consistency. Remember to chill the mixture afterward for about 10 minutes before folding in the Cool Whip!
Are these Christmas Dirt Cups safe for pets?
Great concern! While the ingredients used in Christmas Dirt Cups are safe for human consumption, they could be harmful to pets, especially the chocolate-flavored cookies. It’s best to keep this festive treat strictly for humans and ensure your furry friends enjoy their own special pet-safe treats instead.
Can I make these Christmas Dirt Cups gluten-free?
Absolutely! To create a gluten-free version, simply use gluten-free sandwich cookies as a substitute for the Oreos. There are many great options out there that will retain that delightful cookie crunch, so don’t hesitate to explore the gluten-free aisle at your local store!
Delicious Christmas Dirt Cups for Festive Fun and Flavor
Ingredients
Equipment
Method
- In a mixing bowl, whisk together the instant vanilla pudding mix and cold milk until fully combined. Cover and refrigerate for about 10 minutes.
- Gently fold in the Cool Whip into the pudding mixture until smooth and creamy. Refrigerate for another 20 minutes.
- Crush the Golden Oreo cookies into fine crumbs using a food processor or rolling pin, and set aside.
- In clear cups, layer the vanilla pudding mixture and crushed cookies until filled, ensuring a visually appealing presentation.
- Decorate by topping with the remaining pudding and adding Christmas sprinkles along with a Little Debbie Christmas tree cake on top.
- Cover with plastic wrap and refrigerate until serving time, allowing at least 30 minutes to chill.