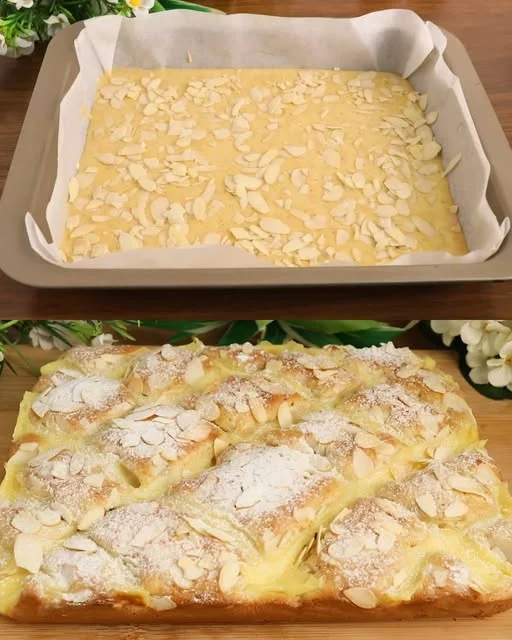
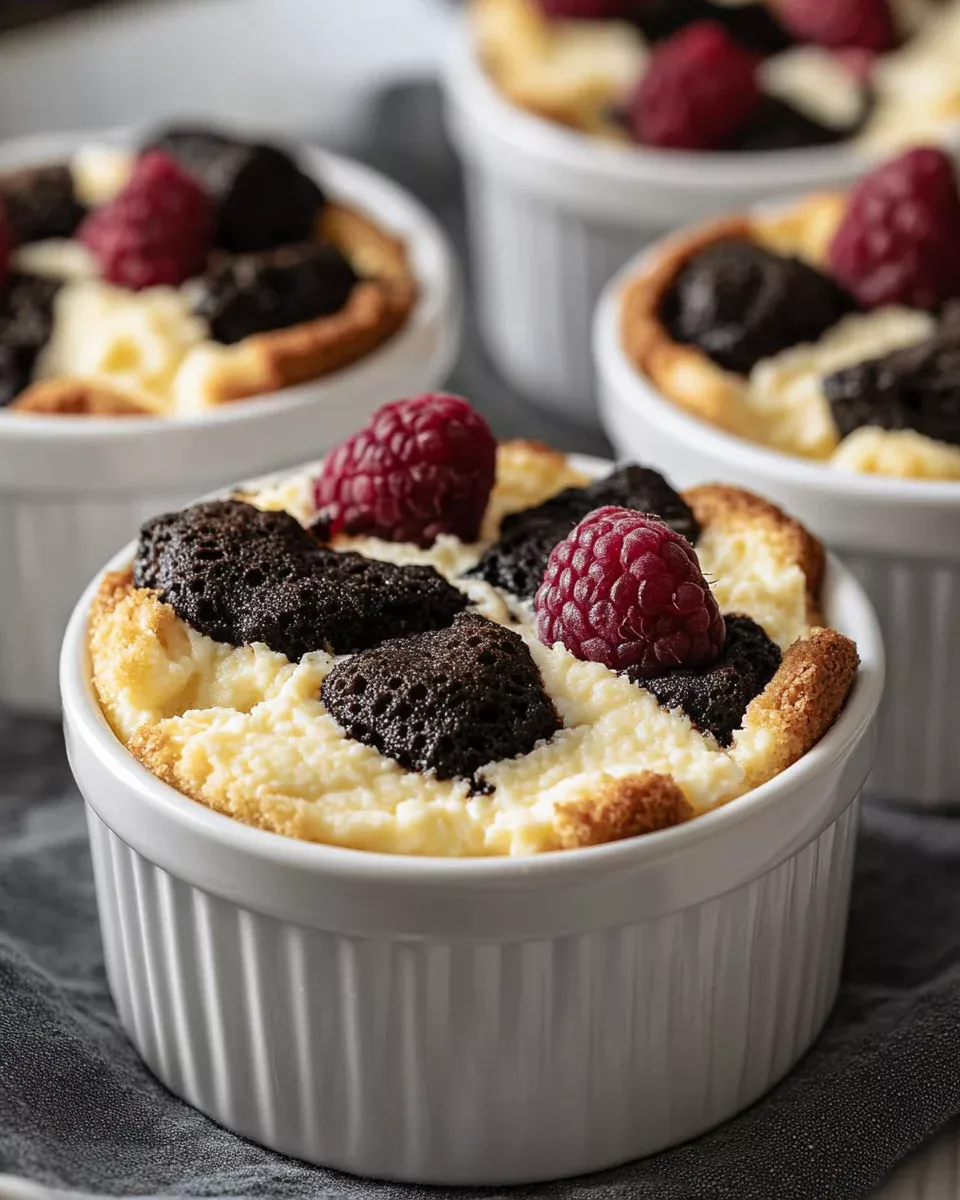
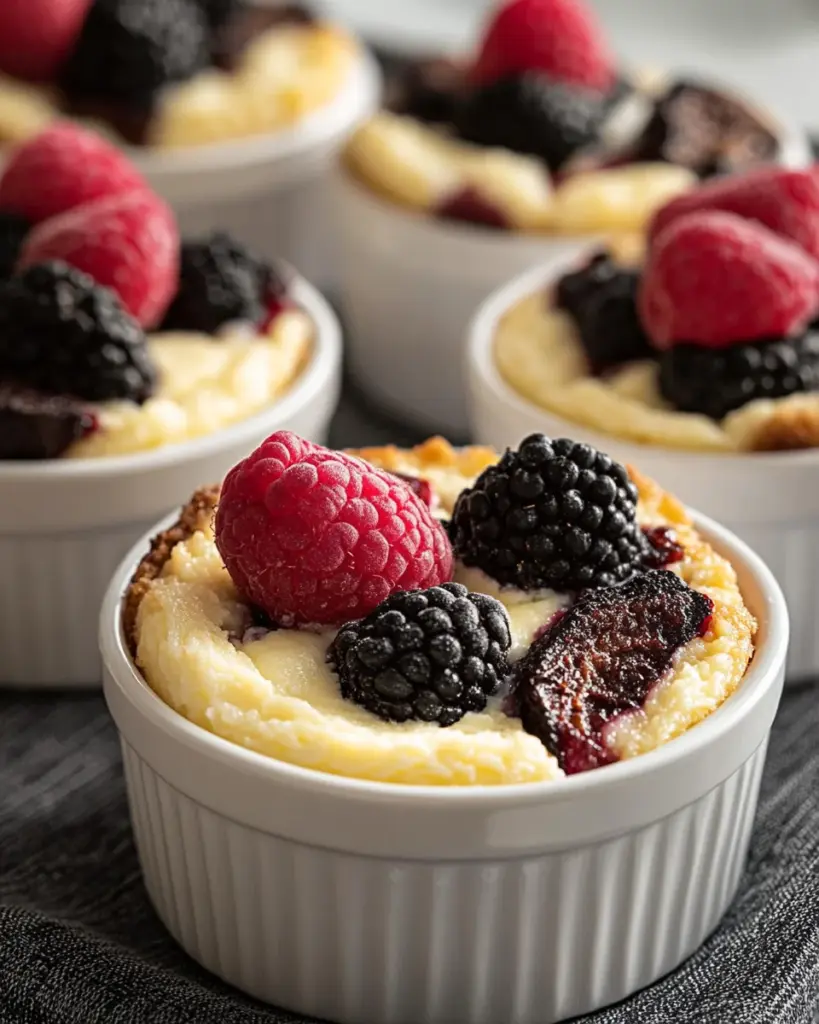
There’s a certain kind of comfort that only comes from a dessert baked not just with ingredients, but with love. For me, that dessert is what we now call the Vanilla Cloud Cake. Soft, pillowy, subtly nutty with a whisper of almond, and laced with a creamy homemade vanilla custard—this cake is more than a sweet treat. It’s a thread that ties generations together.
I remember coming home from school to the scent of something warm and inviting wafting from the kitchen. My mother would be standing at the stove, gently whisking custard in her old enamel pot, while a golden cake rose in the oven. The custard was never made with shortcuts—no instant mixes, no condensed milk. Just eggs, sugar, milk, and patience. She said that you could taste the care in every bite. And she was right.
The Vanilla Cloud Cake became our family’s go-to for celebrations that weren’t quite formal enough for frosted layer cakes, but far too special for store-bought cookies. It was the cake that made ordinary days feel memorable: a Tuesday night with tea, a rainy Saturday afternoon, a quick dessert for unexpected guests. And now, I’ve passed it on to my own children—watching them swirl the custard and laugh when the batter sticks to their fingers. It’s still magic.
This cake is for everyone who believes in the power of homemade comfort. It’s quick, approachable, and incredibly forgiving. And best of all? You don’t need condensed milk or fancy techniques—just your hands, a whisk, and a little time.
What Makes Vanilla Cloud Cake So Special?
While the recipe might look simple, it’s the subtle harmony of textures and flavors that makes this cake shine.
The cake base is light but moist, thanks to the addition of ground almonds and oil. It’s not overly rich, which makes it ideal for layering or pairing with tea. The custard filling is smooth, velvety, and just sweet enough to feel indulgent without being heavy. Together, they create a cake that tastes elegant but feels like a warm hug.
This dessert is also incredibly versatile. It can be served warm or chilled, dressed up with fruit, or enjoyed exactly as it is. It holds its structure beautifully, yet melts in the mouth—earning its “cloud” nickname honestly.
Ingredients Overview
Vanilla Custard Filling
Ingredient
Quantity
Medium egg
1
Granulated sugar
¼ cup (50 g)
Vanilla sugar
8 g (or 1 teaspoon extract)
Cornstarch
2 tablespoons (15 g)
Milk
1 cup (250 ml)
Almond-Infused Cake Batter
Ingredient
Quantity
Large eggs
2
Salt
A pinch
Granulated sugar
½ cup (100 g)
Milk
½ cup (100 ml)
Vegetable oil
¼ cup (50 ml), added gradually
Ground almonds
½ cup (50 g)
All-purpose flour
1½ cups (180 g)
Baking powder
½ tablespoon (8 g)
Preparation Steps
Step 1: Prepare the Vanilla Custard
In a small saucepan, whisk together the egg, granulated sugar, and vanilla sugar or extract until smooth.
Add the cornstarch and whisk until no lumps remain.
Gradually pour in the milk while stirring continuously.
Heat over medium, stirring constantly, until the mixture thickens into a smooth custard.
Once thickened, remove from heat and let cool slightly.
Step 2: Mix the Cake Batter
In a mixing bowl, beat the eggs with a pinch of salt until foamy.
Add granulated sugar and whisk until the mixture is pale and airy.
Stir in the milk.
Gradually add the vegetable oil while continuing to whisk.
Mix in the ground almonds.
Sift in the all-purpose flour and baking powder, then fold gently until just combined.
Step 3: Assemble and Bake
Preheat your oven to 350°F (175°C).
Lightly grease a baking dish or line it with parchment paper.
Pour half of the cake batter into the prepared dish and spread it evenly.
Spoon or pipe the vanilla custard over the first layer of batter.
Cover with the remaining cake batter.
Bake for 25 to 30 minutes, or until the top is golden and a toothpick inserted into the center comes out clean.
Allow the cake to cool slightly before slicing. Serve warm or chilled.
Nutritional Information (Approximate, Per Serving — Based on 8 Servings)
Nutrient
Amount
Calories
~230 kcal
Protein
5 g
Carbohydrates
28 g
Sugars
15 g
Fat
10 g
Saturated Fat
1.5 g
Fiber
1.2 g
Sodium
55 mg
Frequently Asked Questions
Can I use store-bought custard?
Technically, yes. But part of the charm of this cake is the homemade custard. It only takes a few ingredients and minutes to make from scratch, and the payoff in flavor and texture is significant.
What kind of almonds should I use?
Ground almonds or almond meal works best. If you only have whole almonds, you can pulse them in a food processor until fine. Just avoid almond flour made from blanched almonds if it’s too powdery—it won’t give the same body.
Can I make it dairy-free?
Yes. Swap the milk in both the cake and the custard with unsweetened almond, oat, or soy milk. The flavor will change slightly, but it still works beautifully. Just be sure your plant-based milk can handle gentle heating without separating.
Is this recipe freezer-friendly?
You can freeze the baked cake (without custard) for up to a month. However, the custard texture may suffer if frozen. For best results, prepare the custard fresh when serving.
Why is there no butter in the cake?
The cake uses oil instead, which creates a lighter, moister crumb. It also helps the cake stay soft even when refrigerated.
Customizations and Creative Variations
This base recipe is incredibly adaptable. Whether you’re in the mood for something fruity, spiced, or extra decadent, there’s a way to make it your own.
1. Lemon Zest and Blueberries
Add the zest of one lemon to the cake batter, and fold in a handful of fresh or frozen blueberries. The lemon brightens the flavor, and the berries add juicy pockets of color and taste.
2. Spiced Autumn Version
Mix a pinch of cinnamon and nutmeg into the batter and top with thin slices of pear or apple before baking. Serve warm with a drizzle of maple syrup.
3. Chocolate Swirl
For a twist, add a tablespoon of cocoa powder to part of the batter and swirl it in before baking. You could even drizzle with a light chocolate glaze post-bake.
4. Coconut Custard
Replace half of the milk in the custard with canned coconut milk and add a tablespoon of shredded coconut. This adds a tropical depth while maintaining the creamy texture.
Serving Suggestions
The Vanilla Cloud Cake is best enjoyed slightly warm or completely cooled. It pairs wonderfully with:
A dusting of powdered sugar and a few fresh berries
Lightly whipped cream or crème fraîche
A simple fruit compote (like warm raspberries or caramelized bananas)
Hot beverages like earl grey tea, spiced chai, or even black coffee
If you’re serving it at a dinner party, try cutting it into small squares and topping each with a decorative mint leaf or a dollop of cream. It also makes a delightful addition to brunch spreads or afternoon tea trays.
Make-Ahead and Storage Tips
This cake can be made ahead of time, which makes it perfect for busy households or when entertaining.
Storage: Keep the cake refrigerated in an airtight container for up to 3 days. The custard layer helps retain moisture, so it won’t dry out.
Reheating: If you’d like to serve it warm, place a slice in the microwave for 10–15 seconds or warm it gently in the oven.
Transporting: This cake travels well. If you’re bringing it to a gathering, bake it in a disposable foil tray and cover once cool.
Custard Tip: If making ahead, place plastic wrap directly on the surface of the custard as it cools to prevent a skin from forming.
Why This Cake Resonates With So Many
In a world that often demands complicated or trend-driven desserts, this recipe is refreshingly grounded. It’s not trying to be viral—it’s trying to be remembered. The Vanilla Cloud Cake feels like something you’ve had before in your childhood, even if you haven’t.
That’s what makes it so beloved across generations. There’s something about the balance of textures, the familiar notes of vanilla and almond, and the satisfaction of a home-baked custard that turns this simple cake into something unforgettable.
You don’t need an occasion to bake it. You just need a craving for warmth, softness, and sweetness that feels earned, not overwhelming.
A Final Word: The Sweetness of Shared Simplicity
In our family, baking this cake has always been more than just a culinary task—it’s been a shared ritual. A reminder that the best desserts aren’t always elaborate or expensive. They’re made in familiar kitchens, passed from one generation to the next, created with love, and shared around a table.
The Vanilla Cloud Cake isn’t just a recipe. It’s a memory waiting to happen. A simple act of care you can offer to yourself and to the people you love.
So whether you bake it for a birthday, a rainy afternoon, or just because your heart needs a little soft sweetness, this cake will be ready for you—light, tender, and wrapped in vanilla.
It happened on one of those mornings that start in a hurry — a forgotten alarm, missing socks, and sleepy kids dragging their feet to the breakfast table. I stood in the kitchen, half awake, staring at the contents of my fridge. Not much: a couple of tortillas, a few leftover potatoes, and a small block of mozzarella that needed using. But I had a family to feed and less than thirty minutes to do it.
So I improvised.
I tossed the potatoes into a pot to boil, grabbed a handful of frozen peas, chopped a couple of green onions, and rolled it all into a tortilla with some shredded cheese. A quick toast in the skillet, a little slice down the middle — and just like that, breakfast was done.
What surprised me wasn’t how fast it was. It was how much my kids loved it. “Is there more?” they asked, mid-bite. My husband took his second piece to go, and I caught myself stealing the crispy edge from the last wrap as I packed lunches.
From that morning on, these Wholesome Morning Wraps became a family staple. They’re easy, filling, and feel just the right amount of indulgent — even though they’re packed with vegetables. They’ve seen us through rushed school mornings, lazy Sunday brunches, and even those days when dinner needed to be breakfast all over again.
Why These Breakfast Wraps Just Work
There are a few magical things happening in this recipe, and they all come together with simplicity at their core. The beauty of these wraps isn’t in their complexity — it’s in how effortlessly they meet the needs of the morning.
1. Nutrient-Packed Without Trying Too Hard
These wraps include two humble but powerful vegetables: potatoes and green peas. Potatoes provide comforting carbs and natural energy, while peas offer a good dose of fiber and protein. Add in green onions for brightness and mozzarella for richness, and you have a well-balanced, satisfying start to the day.
2. Customizable to Infinity
Once you have the basic formula down, the variations are endless. You can add scrambled eggs, swap in different vegetables, or use whole wheat tortillas. Want to go vegan? Use plant-based cheese and avocado. Want more protein? Toss in chickpeas or cooked lentils. It’s the kind of recipe that adapts with your fridge and your taste.
3. Kid-Friendly and Parent-Approved
The soft texture, melted cheese, and mild flavors make this an easy yes for kids — even picky eaters. And for parents? It’s a five-star solution that checks all the boxes: quick, healthy, portable, and cleanup-friendly.
4. No Fancy Ingredients, No Special Equipment
You don’t need a food processor or a fancy toaster oven. Just a pot, a pan, and a spatula. Everything in the recipe is likely already in your kitchen, which makes this a go-to option on those “what do I even make?” mornings.
Ingredients
Ingredient
Quantity
Potatoes
2 medium, peeled and diced
Water
Enough to boil the potatoes
Green onions
2–3 stalks, chopped
Frozen green peas
1 cup (about 150 g)
Mozzarella cheese
100 g (about 3.5 oz), grated
Tortillas
2 large
Salt
To taste
Black pepper
To taste
Directions:
Cook the Potatoes Boil diced potatoes in salted water until tender (about 10–12 minutes). Drain and let cool slightly.
Mix the Filling In a bowl, combine cooked potatoes, green peas, green onions, and grated mozzarella. Season with salt and black pepper. Stir gently to combine.
Assemble the Wraps Lay out each tortilla and spoon half of the filling down the center. Fold the sides over and roll tightly into a wrap.
Toast to Perfection Heat a skillet over medium heat. Place each wrap seam-side down and toast for 2–3 minutes per side, until golden and crisp.
Serve and Enjoy Let cool slightly, slice if desired, and serve warm for a fast, nutritious meal.
Nutritional (Per Wrap)
Nutrient
Amount
Calories
~320 kcal
Protein
~10 g
Carbohydrates
~35 g
Fat
~14 g
Fiber
~4 g
Sodium
~380 mg
When to Serve These Morning Wraps
While they’re perfect as a morning meal, these wraps have a way of finding their place throughout the day.
Weekday breakfast – Fast to prep and easy to eat with one hand.
Weekend brunch – Pair with fruit or fresh juice for a full plate.
After-school snack – Slice into smaller pieces and serve warm or cold.
Quick lunch or dinner – Add a protein and salad for a full meal.
Meal prep – Make ahead, wrap in foil, and reheat as needed.
Their versatility makes them more than a breakfast — they’re a mealtime solution.
Tips for Making the Best Wraps Every Time
A great wrap is all about texture, timing, and balance. Here’s how to take your breakfast wrap game to the next level:
Don’t Overcook the Potatoes
You want them tender but still holding shape. Mushy potatoes can make the wrap soggy, especially if you’re storing leftovers.
Season Thoughtfully
Salt and pepper go a long way here. Taste the filling before wrapping to ensure it’s flavorful.
Use Just Enough Cheese
Mozzarella melts beautifully and binds everything together. Too much, and it might spill out the sides; too little, and you lose that creamy finish.
Toast Low and Slow
Medium heat is ideal to get a crispy, golden tortilla without burning it before the cheese melts inside.
Wrap Tightly
Fold in the sides first, then roll firmly. If the wrap is loose, it may fall apart in the pan.
Creative Variations to Try
These wraps are an ideal canvas for creativity. Here are some ideas to keep breakfast exciting:
Protein Boost
Add scrambled eggs, cooked quinoa, tofu crumbles, or chickpeas for an extra filling option.
Spice It Up
Add chili flakes, cumin, or smoked paprika to the filling. Serve with a drizzle of hot sauce or sriracha for heat lovers.
Vegan Version
Swap out mozzarella for vegan cheese or mashed avocado. You can also use hummus as a creamy spread alternative.
Mini Wraps for Little Hands
Use small tortillas and make tiny wraps for toddlers and lunchboxes.
Sweet & Savory Combo
Throw in roasted sweet potatoes, caramelized onions, or even a spoonful of corn for a touch of natural sweetness.
Frequently Asked Questions
Can I make these wraps ahead of time?
Yes. Assemble and toast the wraps, then refrigerate them in an airtight container. Reheat in a skillet or oven for best texture. Avoid microwaving if you want to keep them crispy.
Can I freeze them?
You can, although fresh is best. If freezing, wrap each cooled wrap tightly in foil or parchment and store in a freezer bag. Thaw overnight and reheat in a skillet.
Are they good cold?
Surprisingly, yes. While toasting adds texture, these wraps also hold up well at room temperature — making them great for lunchboxes or picnics.
Can I use other cheeses?
Absolutely. Try cheddar, gouda, feta, or a plant-based meltable cheese. Just make sure it complements the veggies.
Can I substitute the potatoes?
Sure. Try mashed sweet potato, roasted squash, or even cooked cauliflower for a lower-carb option.
How do I keep the wrap from falling apart?
Don’t overfill, fold tightly, and always toast seam-side down first to seal it. You can also secure it with a toothpick if serving immediately.
What’s the best way to serve them?
Slice diagonally for presentation and serve with a dip — like plain yogurt, herbed sour cream, or a tangy tahini sauce.
A Breakfast Built for Real Life
Not every morning is calm and quiet. Some are chaotic, some are sleepy, and some are simply too short. These Wholesome Morning Wraps don’t demand much — but they offer a lot in return.
They’re warm, comforting, customizable, and made from real ingredients that nourish without fuss. They’re also a reminder that healthy food doesn’t need to be complicated, expensive, or time-consuming. Sometimes, the best meals are the ones made from what you already have, with a little creativity and a lot of love.
Conclusion: The Kind of Breakfast That Stays With You
This recipe began as an improvisation. A quick fix for a hectic day. But it became something more — a reliable favorite that brings ease and comfort to our table time and again. These wraps are simple, yes. But they’re also delicious, adaptable, and built for real life.
So whether you’re rushing out the door, sitting down to a slow Sunday breakfast, or handing your child a warm bite on the way to school, know that this small, savory wrap carries something bigger: a moment of connection, nourishment, and care.
Because sometimes, that’s exactly what we need from our food.
Every home cook has that one recipe they didn’t see coming—the one that appeared on a whim, took only a handful of ingredients, and somehow managed to steal the spotlight from everything else they’ve made. For me, it was this no-yeast herb bread.
It started with a craving for something warm, buttery, and bread-like on a quiet Sunday afternoon. I had no yeast in the pantry, no intention of waiting hours for dough to rise, and very little patience. But I had flour, butter, water, and a bundle of fresh herbs that needed using up. I remembered a simple flatbread-style recipe I’d seen shared online, tweaked it with what I had, and hoped for the best.
What came out of the oven 35 minutes later stopped me in my tracks.
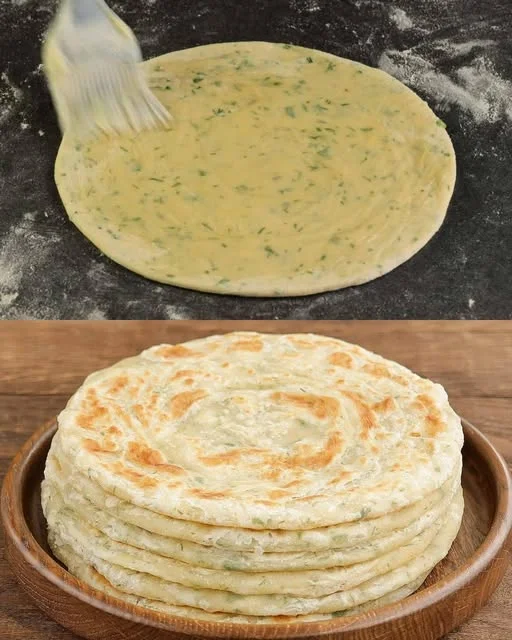
The crust was golden, the inside pillowy and soft, and the aroma of butter and fresh dill made my kitchen smell like a bakery tucked into a garden. I tore off a piece, dipped it in olive oil and sea salt, and immediately knew: this bread was a keeper. That’s when it earned its unofficial title in my house: “The Bread That’s Driving the World Crazy.” No yeast, no waiting, and no one could stop eating it.
Why Everyone’s Obsessed With This No-Yeast Bread
There’s a reason this bread is going viral—not just in social feeds, but in real-life kitchens. It checks all the boxes: easy, fast, flavorful, and deeply satisfying. Let’s take a closer look at what makes this recipe such a game-changer.
1. No Yeast, No Problem
Yeast is often a barrier for new bakers. It requires precision, patience, and warm environments. This bread skips the yeast entirely but still delivers a soft, chewy interior thanks to clever hydration and the richness of butter and oil.
2. Ready in Under an Hour
From mixing the dough to slicing your first warm piece, this recipe comes together fast. You don’t need to proof the dough or wait for it to double in size. The only resting time is 20–30 minutes—just enough for the flour to relax and the herbs to infuse.
3. Uses Pantry Staples
You’re likely to have most of the ingredients on hand already. There’s no need for special tools or obscure ingredients—just a bowl, a spoon, and a little faith.
4. Infused with Real Flavor
What sets this bread apart is the flavor. Fresh herbs like dill and parsley bring brightness, while melted butter gives it a rich, satisfying taste that stands on its own—no need for additional toppings (though you won’t regret adding some).
5. Versatile for Any Meal
This bread works as a side, snack, sandwich base, or dipping vehicle. Serve it warm with soup, slice it for breakfast toast, or use it as a rustic flatbread with Mediterranean spreads.
Ingredients
Ingredient
Quantity
All-purpose flour
700 g (25 oz), sifted
Warm water
500 ml (2 cups)
Salt
8 g (1½ tsp)
Sugar
5 g (1 tsp)
Butter (melted)
150 g (5 oz)
Vegetable oil
45 ml (3 tbsp)
Fresh dill & parsley
50 g (2 oz), finely chopped
Directions
Mix the Dough In a large bowl, whisk together warm water, salt, sugar, melted butter, and vegetable oil. Gradually add sifted flour, mixing continuously until a soft dough forms.
Incorporate the Herbs Fold in the finely chopped dill and parsley. Knead the dough briefly (3–5 minutes) until smooth and elastic. It should be soft but not sticky. Add a bit more flour if needed.
Rest and Shape Cover the dough with a towel and let it rest at room temperature for 20–30 minutes (this helps the gluten relax, even without yeast). Divide and shape into round loaves, rolls, or a single large flatbread.
Bake to Perfection Preheat oven to 400°F (200°C). Place the bread onto a parchment-lined baking sheet. Optionally, brush the top with a little extra melted butter or oil. Bake for 30–35 minutes, or until golden and crisp on the outside.
Cool & Serve Let the bread cool slightly before slicing. Serve warm with butter, dips, soup, or use as sandwich bread.
Nutritional (Per Serving – based on 10 slices)
Nutrient
Amount
Calories
~220 kcal
Carbohydrates
~30 g
Protein
~4 g
Fat
~10 g
Fiber
~1 g
Sodium
~280 mg
When to Make This Bread
This isn’t a once-in-a-while, special occasion recipe. It’s an everyday kind of bread—the one you can turn to when you’re out of store-bought loaves or just need something comforting and homemade.
Weeknight Wonder
Whip it up alongside pasta or roasted vegetables for a warm, homemade touch.
Weekend Brunch Staple
Slice and top with cream cheese, avocado, or poached eggs.
Holiday Table Hero
Rustic enough to serve with soup and salad, but pretty enough to place on a festive table.
Emergency Bread Backup
No yeast? No problem. You can make this any time, even in a pinch.
Expert Tips for Bread Success
Even though this bread is practically foolproof, a few smart moves can elevate your results:
Sift the Flour
Sifting ensures your flour is light and lump-free, which gives you a better texture and helps avoid a dense loaf.
Use Warm Water, Not Hot
Lukewarm water helps hydrate the dough properly. Too hot, and it can cook the flour or melt the butter too quickly.
Resting Time Matters
While this is a no-yeast bread, letting the dough rest for 20–30 minutes helps develop flavor and a tender crumb.
Adjust the Herbs to Taste
Dill and parsley are fresh and vibrant, but you can swap in rosemary, thyme, or chives depending on what you have or prefer.
Butter Before and After Baking
Brushing the top with butter before baking adds a gorgeous golden hue. Brushing it again right out of the oven adds shine and flavor.
Tasty Variations to Try
This recipe is endlessly adaptable. Once you’ve mastered the base, try these flavor twists:
Cheese-Loaded Version
Add shredded cheddar, mozzarella, or feta to the dough for a cheesy pull-apart texture.
Garlic & Herb Upgrade
Add minced garlic or garlic powder to the dough or butter for a punchier flavor.
Spicy Flatbread
Mix in red pepper flakes, chili powder, or za’atar for a spicy or earthy variation.
Sweet Herb Bread
Skip the salt and herbs, and add honey, cinnamon, or cardamom to the dough for a lightly sweet breakfast version.
Frequently Asked Questions
Can I make this bread without herbs?
Absolutely. The herbs add flavor and color, but the bread is still delicious as a plain butter loaf.
Is this bread crispy or soft?
It’s both! The crust bakes up golden and crisp, while the inside stays soft and fluffy.
Can I use whole wheat flour?
You can substitute up to half the flour with whole wheat. The texture will be slightly denser but still tasty.
Can I make it gluten-free?
Yes, with a 1:1 gluten-free flour blend. Be sure to monitor the texture of the dough and add more flour if it’s too sticky.
Can I store the leftovers?
Yes. Store wrapped in foil or an airtight container at room temperature for up to 2 days. For longer storage, freeze for up to a month.
Can I make the dough in advance?
You can mix and shape the dough, then refrigerate it for a few hours before baking. Let it come back to room temperature before putting it in the oven.
Can I cook it in a skillet instead of baking?
Yes! Form the dough into smaller flat rounds and cook over medium heat in a covered, greased skillet until golden on both sides.
From Viral Trend to Kitchen Essential
What started as a spur-of-the-moment experiment has turned into a household favorite. And judging by the response online—and in kitchens around the world—it’s not just my home that’s hooked on this bread.
It’s not the flashiest, most technical recipe. It doesn’t have artisan-style air bubbles or sourdough tang. But it has something arguably better: consistency, flavor, and heart.
Whether you’re a beginner baker or a seasoned pro, this no-yeast herb bread is the kind of recipe that makes you feel like a culinary genius with very little effort. And sometimes, that’s exactly the kind of recipe we need.
Final Thoughts: The Bread That Brings People Together
In a time when we’re constantly told to slow down, to simplify, to savor — this bread quietly delivers on all three.
It brings warmth to your kitchen. It fills the air with real, fresh aromas. It doesn’t require you to wait for yeast to rise or to knead for 20 minutes. It just shows up, does its job, and makes people happy.
So the next time you find yourself wondering what to bake — whether you’re out of bread, craving something homemade, or just looking for a small victory in the kitchen — remember this recipe. It may just drive you a little crazy too… in the best way.
Some of the best recipes don’t come from cookbooks. They come from our own kitchens — improvised, adjusted, handed down, and made better over time. That’s exactly how these Ultimate Banana Carrot Muffins came into my life.
When I was younger, Sunday mornings in my childhood home meant slow breakfasts and the scent of something sweet baking in the oven. My mother had a way of turning simple ingredients into comfort. Overripe bananas on the counter? That meant banana bread. A leftover carrot or two? Those found their way into pancakes, muffins, or soups. And sometimes — when the timing was just right — she combined them.
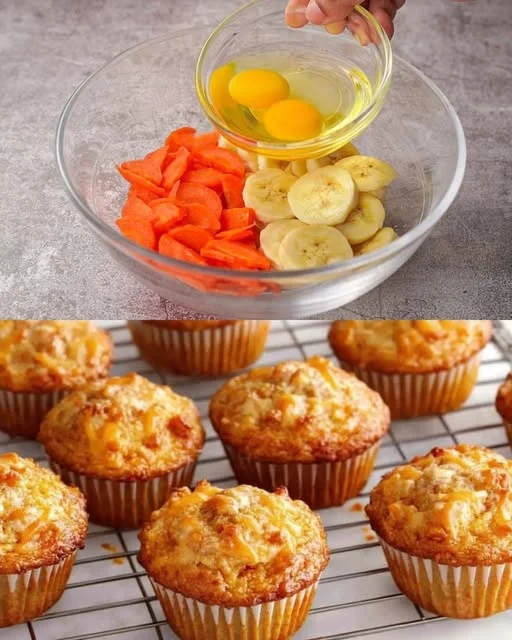
The first time she made banana carrot muffins, it was a total experiment. A way to clean out the fridge before grocery day. But what came out of the oven was magic: moist, subtly spiced muffins with golden tops, sweet but not too sweet, soft but with a bit of bite from the carrots. She scribbled the recipe on the back of a receipt and taped it inside a kitchen cabinet.
Years later, I adapted her notes into something I now call the Ultimate Banana Carrot Muffins — because they deserve that title. They’re not just nostalgic. They’re delicious, wholesome, easy to make, and hard to forget.
Why These Muffins Are Truly “Ultimate”
These muffins aren’t just about flavor (although they have plenty). They’re about balance — between sweetness and spice, softness and structure, indulgence and nourishment. Let’s break down what makes them shine:
1. Moisture from Natural Ingredients
Bananas and carrots aren’t just healthy — they provide natural moisture, which keeps these muffins soft and tender without the need for lots of butter or dairy. Overripe bananas are key here, offering sweetness and richness.
2. Warm Spice Notes
A touch of cinnamon brings cozy warmth to the flavor profile without overpowering the natural taste of the fruit and vegetables. You can also add nutmeg or cardamom for extra depth.
3. One-Bowl Simplicity
These muffins come together with minimal cleanup. No fancy tools. No complicated techniques. Just stir the dry into the wet, scoop, and bake.
4. Make-Ahead Friendly
They store well, freeze well, and travel well. You can bake them on a Sunday and enjoy them all week long — at breakfast, as a snack, or even dessert.
5. Customizable for Every Craving
Add chopped nuts for crunch. Stir in raisins or coconut for texture. Top with oats or a sprinkle of brown sugar before baking for a bakery-style finish.
Ingredients
Ingredient
Quantity
All-purpose flour
1¼ cups (163 g)
Brown sugar
½ cup, lightly packed
Baking powder
1 teaspoon
Ground cinnamon
1 teaspoon
Baking soda
¾ teaspoon
Salt
¼ teaspoon
Ripe bananas (mashed)
2 medium
Grated carrots
1 cup (about 2 medium)
Eggs
2
Vegetable oil
⅓ cup
Vanilla extract
1 teaspoon
Optional add-ins
Chopped walnuts, raisins, or coconut flakes
Directions
Preheat & Prep Preheat your oven to 350°F (175°C). Line a muffin tin with paper liners or lightly grease with oil.
Mix Dry Ingredients In a large bowl, whisk together flour, brown sugar, baking powder, baking soda, cinnamon, and salt.
Mix Wet Ingredients In another bowl, beat the eggs, then mix in mashed bananas, grated carrots, oil, and vanilla extract.
Combine Pour the wet mixture into the dry ingredients and stir just until combined. Fold in any optional add-ins like walnuts or raisins.
Fill & Bake Divide the batter evenly into muffin cups. Bake for 20–25 minutes or until a toothpick inserted in the center comes out clean.
Cool & Enjoy Let muffins cool in the tin for 5 minutes, then transfer to a wire rack to cool completely.
Nutritional (Per Muffin – Approximate, based on 12 muffins)
Nutrient
Amount
Calories
~180 kcal
Protein
~3 g
Carbohydrates
~24 g
Sugars
~11 g
Fat
~8 g
Fiber
~2 g
Sodium
~160 mg
Perfect for Any Occasion
Whether you’re baking for your family or just for yourself, these muffins find their place in all kinds of settings:
Breakfast-on-the-go: Easy to pack, not too messy, and filling enough to fuel your morning.
After-school snack: Kid-approved, especially if you throw in a few chocolate chips.
Brunch spread: They pair beautifully with fresh fruit, yogurt, and a hot cup of coffee.
Meal prep: Make a big batch and freeze them — they defrost quickly and taste freshly baked.
Gifting: Wrap them in parchment and tie with twine for a heartfelt homemade treat.
Tips for Muffin Mastery
Even a simple muffin can be perfected with the right techniques. Here are a few insider tips to make your banana carrot muffins truly unforgettable:
Use Very Ripe Bananas
The darker the peel, the sweeter and softer the banana. Overripe bananas mash easily and add more moisture to your muffins.
Grate Carrots Finely
Finely grated carrots blend into the batter and cook more evenly. Coarser shreds can leave stringy textures.
Don’t Overmix the Batter
Once you combine wet and dry ingredients, stir just until combined. Overmixing can lead to dense muffins.
Fill Muffin Cups Evenly
Use an ice cream scoop or measuring cup to portion batter evenly, ensuring consistent baking and uniform size.
Let Them Cool in the Tin First
Allow muffins to rest in the pan for 5–10 minutes before transferring to a cooling rack. This prevents them from breaking apart.
Fun Add-Ins and Flavor Variations
The base recipe is wonderfully flexible. Here are some ways to switch it up without compromising its signature texture:
Add Nuts
Chopped walnuts or pecans add crunch and a toasty depth of flavor.
Make it Tropical
Add shredded coconut and a splash of pineapple juice or zest for a tropical twist.
Include Chocolate Chips
For a sweeter touch, mini or dark chocolate chips are a great addition — especially if serving kids (or sweet-toothed adults).
Boost the Nutrition
Swap part of the flour with whole wheat flour or oat flour, and add chia or flax seeds for extra fiber.
Top with a Crumb Topping
Mix brown sugar, cinnamon, and a bit of flour and butter for a streusel-style topping.
Frequently Asked Questions (FAQs)
Can I make these muffins dairy-free?
Yes. This recipe can be made entirely dairy-free by using a neutral oil (like sunflower or avocado oil) and skipping any dairy-based mix-ins.
Can I make them gluten-free?
Absolutely. Use a gluten-free flour blend (1:1 ratio) that includes xanthan gum. Almond flour or oat flour may also work, though the texture may vary slightly.
Do I need to peel the carrots?
It’s recommended to peel them, especially if you’re not using organic carrots. The skin can be a bit bitter or tough.
How long do they last?
Stored in an airtight container at room temperature, they’ll last 2–3 days. Refrigerated, they’ll keep for up to 5 days. Frozen, they last for 2–3 months.
Can I make mini muffins?
Yes! Simply reduce the baking time to 12–14 minutes and use a mini muffin tin. Keep a close eye on them — they bake fast.
Are these muffins suitable for toddlers or baby-led weaning?
They can be! Just reduce the sugar, skip any nuts or potential choking hazards, and use a silicone mini muffin tray for easy portioning.
Can I use applesauce instead of oil?
Yes. Applesauce can replace oil 1:1, though it may make the muffins slightly more dense. Great for a lower-fat version.
More Than Just Muffins
There’s a reason this recipe has become a favorite in so many kitchens. It’s not just about the flavor — though that’s certainly a reason to make them again and again. It’s about what they represent: simplicity, nourishment, and a little bit of nostalgia.
There’s comfort in knowing that something as humble as a banana and a carrot can come together to create something so satisfying. There’s joy in making something that feels indulgent but is packed with real ingredients. And there’s pride in serving a muffin that you know is both homemade and wholesome.
These muffins don’t try to be trendy or flashy. They’re not loaded with syrups or layered with frosting. Instead, they’re soft, honest, and made to be shared.
Final Thoughts: A Muffin That Feels Like Home
Not every recipe has to be groundbreaking. Some of the best ones are the ones we return to again and again — the ones we know by heart. These Ultimate Banana Carrot Muffins are that kind of recipe.
They fit effortlessly into your life. They make mornings easier, afternoons tastier, and snack time more comforting. Whether you’re baking for your family, your friends, or just yourself on a quiet Sunday morning, they’re a reminder that real food — honest food — doesn’t have to be complicated.
All it takes is a couple of ripe bananas, a carrot or two, and a little love.
I didn’t grow up in a family that celebrated cabbage.
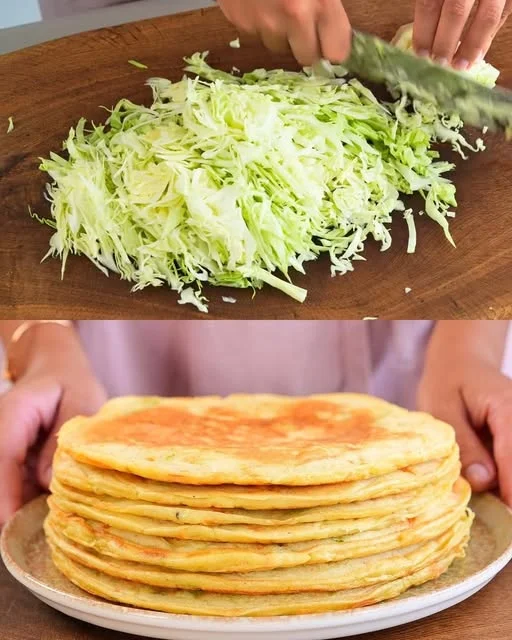
In fact, for most of my life, cabbage was the sad afterthought at the dinner table — boiled too long, barely seasoned, and usually ignored. It wasn’t until I visited my grandmother’s small countryside home that I saw cabbage transformed into something magical. She didn’t boil it. She didn’t steam it. She folded it into fluffy, tangy kefir pancakes and served it piping hot with a dollop of sour cream.
And let me tell you something: I didn’t miss the meat.
It was my first real lesson in the idea that vegetables, when given the right treatment, could sing louder than steak. The cabbage added sweetness and body, while the kefir batter gave the pancakes a light but satisfying texture. They were crispy on the edges, soft in the middle, and impossibly comforting. I didn’t just ask for seconds. I asked for the recipe — and I’ve been making it ever since.
Today, this dish is more than just a clever way to use up cabbage. It’s a reminder that comfort food doesn’t have to be complicated, expensive, or meat-heavy to be deeply satisfying. This recipe has become a staple in my kitchen, and I hope it finds a place in yours too.
Why Kefir Pancakes with Cabbage Deserve a Spot at Your Table
It’s easy to overlook a pancake recipe that doesn’t involve syrup or fruit. But these savory kefir pancakes offer something different — something heartier, healthier, and perhaps even more versatile.
Let’s explore why this recipe is so special:
1. Kefir: The Secret Ingredient for Perfect Pancake Texture
Kefir is a fermented milk product similar to yogurt but thinner and tangier. When combined with baking soda, it reacts beautifully, giving the pancakes lift and lightness without any yeast or long resting time. The result is a batter that creates soft, airy pancakes with crispy edges — even when loaded with hearty cabbage.
2. Cabbage: From Underrated to Unforgettable
Shredded and lightly sautéed, cabbage adds both flavor and structure. It becomes slightly sweet when cooked and softens into the batter in a way that feels indulgent — almost like a filling. If you’ve ever doubted cabbage, this recipe will convert you.
3. Quick and Budget-Friendly
The ingredients are all affordable and accessible, and the batter comes together in minutes. There’s no rising time, no special equipment, and no tricky techniques. It’s the perfect recipe for a busy night or a last-minute lunch.
4. Healthy and Satisfying
With a mix of protein, fiber, and gut-friendly kefir, these pancakes are nourishing as well as filling. They’re naturally vegetarian, and easy to make gluten-free or dairy-free with a few substitutions.
Ingredients
Ingredient
Quantity
Eggs
2 pcs
Salt
To taste
Kefir
450 ml
Baking soda
1 teaspoon
Flour
200 g + 100 g
Olive oil
As needed (for frying or batter)
Cabbage (optional)*
~300–400 g, finely shredded and lightly sautéed
Directions
Make the Batter In a bowl, beat the eggs with a pinch of salt. Stir in kefir and baking soda, then gradually add 200 g of flour. If the batter feels too thin, add the remaining 100 g as needed to achieve a thick but pourable consistency.
Add the Cabbage (Optional but Delicious) For savory cabbage pancakes, sauté shredded cabbage in a little olive oil until soft and golden. Fold it into the batter once cooled.
Pan-Fry to Golden Goodness Heat a non-stick skillet with a touch of olive oil over medium heat. Pour a ladle of batter into the pan and cook for 2–3 minutes per side until puffed and golden brown.
Serve Hot Enjoy your pancakes warm, plain or with sour cream, herbs, or a garlic-yogurt dip.
Nutritional (Per Pancake – Approximate, with cabbage)
Nutrient
Amount
Calories
~110 kcal
Protein
~4 g
Carbohydrates
~12 g
Fat
~5 g
Fiber
~1 g
Sodium
~180 mg
When and How to Serve Them
One of the joys of these kefir pancakes is their adaptability. They fit into almost any meal scenario:
Weeknight Dinner: Serve with a side salad and a dollop of yogurt or sour cream for a no-fuss vegetarian main dish.
Weekend Brunch: Add a poached egg or drizzle of garlic sauce for something a little more indulgent.
Lunchbox Friendly: Pack them cold with a dipping sauce — they hold up well and don’t need reheating.
Snack or Appetizer: Make them smaller and serve as finger food or party bites.
Light Breakfast: They pair wonderfully with tea, especially when reheated and crisped up in a pan.
Tips to Make Your Pancakes Perfect
Even a simple recipe has its tricks. Here’s how to make your kefir cabbage pancakes the best they can be:
Use Fresh, Tangy Kefir
The acidity of the kefir is what reacts with the baking soda to give the batter its rise. If your kefir is flat or expired, the pancakes may not be as fluffy.
Don’t Skip the Sauté
While raw cabbage can be used in a pinch, sautéing it first helps remove excess moisture, concentrates its flavor, and gives the pancakes a better texture.
Watch Your Batter Consistency
The batter should be thick enough to hold its shape on a spoon but still pourable. If it’s too thin, the pancakes will spread and become flat. Too thick, and they won’t cook evenly inside.
Cook Over Medium Heat
Too hot and the outside will burn before the inside is done. Too low and they’ll dry out. Medium heat allows for golden-brown edges and a soft interior.
Rest Before Serving
Let the pancakes rest for a few minutes after frying — it helps the crumb set and makes them easier to handle or stack.
Creative Variations to Explore
Once you master the base recipe, you’ll find yourself playing with variations depending on your cravings and pantry.
Cheese-Stuffed Version
Add a pinch of grated cheese into the batter or even in the center of the pancakes for melty, gooey bites.
Herb-Infused Pancakes
Mix in chopped dill, parsley, or scallions for added freshness and visual appeal.
Spicy Kick
Add chili flakes, black pepper, or a touch of smoked paprika to the batter for a bit of heat.
Gluten-Free Option
Substitute the flour with your favorite gluten-free blend. Just be sure to adjust liquid amounts as needed, since GF flours can vary in absorption.
Dairy-Free Alternative
Use a dairy-free kefir or plain, unsweetened plant-based yogurt thinned with water. Opt for olive oil instead of butter.
Frequently Asked Questions (FAQs)
Can I make these pancakes ahead of time?
Yes! They reheat very well. Store them in the refrigerator for up to 3 days and reheat in a skillet over low heat to restore crispness.
Can I freeze them?
Absolutely. Let the pancakes cool completely, then place parchment between them and freeze in a sealed bag or container. Reheat from frozen in the oven or skillet.
Is kefir necessary, or can I use something else?
Kefir provides the unique tang and rise, but you can substitute with buttermilk or plain yogurt thinned with water. You want the same consistency and acidity.
Can I use red cabbage instead of green?
You can, though it may change the color of the pancakes and give them a slightly different flavor. Green or Savoy cabbage is typically sweeter and softer when cooked.
Can I make these sweet instead of savory?
Yes! Omit the cabbage, add a bit of sugar or vanilla to the batter, and serve with honey, jam, or fruit. It becomes a totally different dish — still delicious.
What do I serve them with?
Sour cream, Greek yogurt, garlicky aioli, herb butter, or even hot sauce all pair beautifully. For a full meal, serve with a side salad or roasted vegetables.
Are they kid-friendly?
Very much so! The mild flavor, soft texture, and slightly sweet cabbage make these pancakes easy to enjoy — especially with a cheesy or creamy dip.
A Recipe That Redefines Comfort Food
There’s something deeply satisfying about taking an overlooked ingredient and turning it into something crave-worthy. In a world where meat is often seen as the center of the plate, these Kefir Cabbage Pancakes remind us that vegetables — when treated with care and creativity — can be just as hearty and soul-satisfying.
They’re budget-friendly, nourishing, and rooted in tradition, but flexible enough to adapt to modern tastes and dietary needs. You can serve them at a fancy brunch, eat them on the go, or enjoy them cold with a dollop of something creamy. They’re the kind of food that feels good — both to cook and to eat.
Final Thoughts: The Power of Simple Things
Not every meal needs to be complicated to be meaningful. Sometimes, the most powerful flavors come from the humblest ingredients. And sometimes, cabbage — yes, cabbage — really does taste better than meat.
This recipe is proof of that.
So the next time you’re staring at that head of cabbage in your fridge, wondering what to do with it, remember this: With a little kefir, a couple of eggs, and a hot pan, you can make something wonderful. Something warm. Something worth remembering.
Because food is more than fuel — it’s memory, tradition, and a little bit of magic folded into every bite.
Introduction to Cottage Cheese Cheesecake Bites Recipe
Cottage Cheese Cheesecake Bites Recipe is a fantastic treat that combines the creamy goodness of cottage cheese with the rich flavors of cheesecake. These bites are not only easy to make but also packed with protein, making them a perfect snack or dessert option for any occasion.
What Makes Cottage Cheese Cheesecake Bites Unique?
What sets these cheesecake bites apart is their unique ingredient: cottage cheese. This ingredient adds a creamy texture while keeping the bites light and fluffy. Unlike traditional cheesecakes, which can be heavy and rich, these bites offer a refreshing twist. The use of Greek yogurt enhances the creaminess and adds a tangy flavor that perfectly complements the sweetness of honey or maple syrup. Plus, they are lower in calories and carbs compared to regular cheesecake, making them a guilt-free indulgence!
Why You Should Try This Recipe
Cottage Cheese Cheesecake Bites Recipe a try. First, they are incredibly simple to prepare, requiring just a few ingredients and minimal effort. Whether you’re a seasoned baker or a beginner, you’ll find this recipe easy to follow. Second, these bites are versatile! You can customize them with your favorite flavors, such as adding fresh fruits or chocolate chips. Lastly, they are perfect for meal prep. You can make a batch ahead of time and enjoy them throughout the week. So, why not treat yourself to a healthy dessert that satisfies your sweet tooth? You won’t regret it!
Ingredients for Cottage Cheese Cheesecake Bites Recipe
Cottage Cheese Cheesecake Bites, you’ll need a handful of simple ingredients. Each one plays a vital role in achieving the perfect texture and flavor. Here’s what you’ll need:
1 cup cottage cheese
1/2 cup Greek yogurt
1/4 cup honey or maple syrup
2 large eggs
1 teaspoon vanilla extract
1/2 teaspoon baking powder
1/4 teaspoon salt
1/2 cup almond flour
1/4 cup chocolate chips (optional)
These ingredients come together to create a creamy, delicious treat that’s both satisfying and nutritious. The cottage cheese and Greek yogurt provide a protein boost, while the honey or maple syrup adds just the right amount of sweetness. The almond flour gives the bites a lovely texture, making them a delightful snack or dessert.
Feel free to experiment with the ingredients! You can swap the almond flour for oat flour or all-purpose flour if you prefer. Additionally, adding fresh fruits or chocolate chips can elevate the flavor even more. The possibilities are endless!
Step-by-Step Preparation of Cottage Cheese Cheesecake Bites Recipe
Cottage Cheese Cheesecake Bites Recipe. Follow these simple steps to create a delicious treat that everyone will love!
Step 1: Preparing the Base
First, preheat your oven to 350°F (175°C). This step is crucial as it ensures your cheesecake bites bake evenly. While the oven heats up, line a muffin tin with paper liners or lightly grease it. This will help prevent sticking and make it easier to remove the bites later.
Step 2: Making the Cheesecake Mixture
Next, grab your blender or food processor. In it, combine the cottage cheese, Greek yogurt, honey (or maple syrup), eggs, vanilla extract, baking powder, and salt. Blend everything together until the mixture is smooth and creamy. This step is important because it creates the rich texture that makes these bites so delightful!
Step 3: Assembling the Bites
Once your cheesecake mixture is ready, it’s time to mix in the dry ingredients. In a separate mixing bowl, combine the almond flour with the blended mixture. Stir until everything is well combined. If you’re feeling adventurous, fold in the chocolate chips at this stage for an extra treat. This adds a lovely chocolatey flavor that pairs perfectly with the creamy cheesecake.
Step 4: Baking the Cheesecake Bites
Now, it’s time to fill the muffin tin! Divide the batter evenly among the cups, filling each about 3/4 full. This allows room for the bites to rise while baking. Place the muffin tin in the preheated oven and bake for 20-25 minutes. You’ll know they’re done when the edges are set and the tops are lightly golden. A toothpick inserted into the center should come out clean, indicating they are perfectly baked.
Step 5: Cooling and Serving
After baking, allow the cheesecake bites to cool in the pan for about 10 minutes. This helps them firm up a bit. Then, carefully transfer them to a wire rack to cool completely. For the best flavor and texture, refrigerate the bites for at least 1 hour before serving. This chilling time allows the flavors to meld beautifully, making each bite even more delicious!
Cottage Cheese Cheesecake Bites are ready to be enjoyed. They make a perfect snack or dessert for any occasion. Enjoy your creation!
Variations of Cottage Cheese Cheesecake Bites Recipe
Cottage Cheese Cheesecake Bites Recipe is its versatility. You can easily customize these bites to suit your taste preferences or dietary needs. Here are some exciting variations to consider:
Flavor Variations
Why stick to just one flavor when you can explore many? Here are some fun ideas to enhance your cheesecake bites:
Berry Bliss: Add 1/2 cup of fresh berries, like blueberries or raspberries, to the batter. This will give your bites a fruity twist and a pop of color.
Chocolate Lovers: Mix in 1/4 cup of cocoa powder along with the almond flour for a rich chocolate flavor. You can also add chocolate chips for extra indulgence!
Banana Nut: Mash one ripe banana and fold it into the batter. Add a handful of chopped walnuts for a delightful crunch.
Coconut Dream: Stir in 1/4 cup of shredded coconut for a tropical flair. This pairs wonderfully with a hint of almond extract instead of vanilla.
Spiced Pumpkin: For a seasonal treat, add 1/2 cup of pumpkin puree and 1 teaspoon of pumpkin spice. This variation is perfect for fall!
Feel free to mix and match these flavors to create your own unique bites. The possibilities are endless, and each variation brings a new taste experience!
Dietary Modifications
Cottage Cheese Cheesecake Bites Recipe to fit your lifestyle. Here are some suggestions:
Gluten-Free: Substitute almond flour with a gluten-free flour blend or oat flour. This will keep your bites gluten-free while maintaining a delicious texture.
Dairy-Free: Use dairy-free yogurt and a plant-based cream cheese alternative. This way, you can enjoy the bites without dairy.
Low-Carb/Keto: Replace honey or maple syrup with a low-carb sweetener like erythritol or stevia. This will help keep the carb count low while still satisfying your sweet tooth.
Vegan: To make these bites vegan, use flax eggs instead of regular eggs and opt for a plant-based yogurt. You can also use maple syrup as a sweetener.
Cottage Cheese Cheesecake Bites, regardless of their dietary preferences. So, get creative and make these bites your own!
Cooking Note for Cottage Cheese Cheesecake Bites Recipe
Cottage Cheese Cheesecake Bites Recipe, there are a few important cooking notes to keep in mind. These tips will help you achieve the best results and ensure your bites turn out perfectly every time.
First, always preheat your oven. This step is crucial for even baking. If the oven isn’t hot enough, your cheesecake bites may not rise properly, leading to a dense texture. A well-preheated oven helps create that light and fluffy consistency we all love.
Next, be mindful of the blending process. When mixing the cottage cheese and Greek yogurt, ensure that the mixture is completely smooth. Any lumps can affect the texture of your cheesecake bites. A high-speed blender or food processor works best for this task. If you don’t have one, you can use a hand mixer, but it may take a bit longer to achieve the desired creaminess.
Additionally, when filling the muffin tin, avoid overfilling the cups. Filling them about 3/4 full allows the bites to rise without spilling over. This will help maintain their shape and make for a more appealing presentation.
Lastly, keep an eye on the baking time. Ovens can vary, so it’s a good idea to check your bites a few minutes before the recommended time. If the tops are golden and a toothpick comes out clean, they’re ready to come out. Overbaking can lead to dry bites, so it’s better to err on the side of caution.
Cottage Cheese Cheesecake Bites that are sure to impress your family and friends. Happy baking!
Serving Suggestions for Cottage Cheese Cheesecake Bites Recipe
Cottage Cheese Cheesecake Bites are perfectly baked and cooled, it’s time to think about how to serve them. These delightful bites are versatile and can be enjoyed in various ways. Here are some serving suggestions to elevate your dessert experience:
Fresh Fruit Topping: Top each cheesecake bite with a dollop of fresh whipped cream and a few slices of strawberries, blueberries, or raspberries. This adds a burst of color and flavor, making your bites even more appealing.
Drizzle of Honey or Chocolate: For an extra touch of sweetness, drizzle honey or melted chocolate over the bites just before serving. This not only enhances the flavor but also makes for a beautiful presentation.
Nutty Crunch: Sprinkle some chopped nuts, like almonds or walnuts, on top of the cheesecake bites. This adds a delightful crunch and complements the creamy texture of the bites.
Yogurt Dip: Serve the bites with a side of Greek yogurt mixed with a bit of honey and vanilla extract. This makes for a delicious dip that pairs wonderfully with the cheesecake flavor.
Mini Dessert Platter: Arrange the cheesecake bites on a platter alongside other mini desserts, such as fruit tarts or chocolate truffles. This creates a lovely dessert spread for parties or gatherings.
Cottage Cheese Cheesecake Bites but also make them visually appealing. Whether you’re hosting a gathering or enjoying a quiet evening at home, these bites are sure to impress!
Tips for Perfecting Your Cottage Cheese Cheesecake Bites Recipe
Cottage Cheese Cheesecake Bites Recipe turns out perfectly every time, consider these helpful tips. They will guide you through the process and help you achieve the best flavor and texture.
First, use fresh ingredients. Fresh cottage cheese and Greek yogurt will enhance the taste and creaminess of your bites. Check the expiration dates on your dairy products to ensure they are at their best.
Next, blend thoroughly. When mixing the cottage cheese and Greek yogurt, make sure to blend until the mixture is completely smooth. This step is crucial for a creamy texture. If you notice any lumps, your bites may not have the desired consistency.
Also, don’t skip the chilling time. After baking, allow your cheesecake bites to cool completely before refrigerating. Chilling them for at least an hour helps the flavors meld together and improves the overall taste. It also makes them easier to slice and serve.
Another tip is to experiment with baking times. Ovens can vary, so keep an eye on your bites as they bake. Start checking them a few minutes before the recommended time. If they look golden and a toothpick comes out clean, they’re ready to come out of the oven.
Lastly, consider portion control. If you’re serving these bites at a gathering, cut them into smaller pieces. This way, guests can enjoy a taste without overindulging. Plus, smaller bites are perfect for sampling different flavors if you’ve made variations!
Cottage Cheese Cheesecake Bites that everyone will love. Happy baking!
Breakdown of Time for Cottage Cheese Cheesecake Bites Recipe
Cottage Cheese Cheesecake Bites Recipe is essential for planning. Here’s a simple breakdown of the time you’ll need for each step, so you can enjoy these delicious bites without any stress!
Prep Time
The prep time for this recipe is quite short, making it perfect for busy days. You’ll need about 15 minutes to gather your ingredients and prepare the cheesecake mixture. This includes measuring, mixing, and getting everything ready for baking. It’s a quick and easy process that anyone can manage!
Cooking Time
Once your mixture is ready, the cooking time is approximately 20-25 minutes. During this time, the bites will bake in the oven, transforming into delicious little treats. Keep an eye on them as they bake, and remember to check for doneness with a toothpick. If it comes out clean, they’re ready!
Total Time
In total, you can expect to spend about 35-40 minutes from start to finish. This includes both prep and cooking time. However, don’t forget to factor in the cooling and chilling time! For the best flavor and texture, it’s recommended to refrigerate the bites for at least 1 hour before serving. So, while the active time is short, plan for a little extra time to let them chill.
Cottage Cheese Cheesecake Bites Recipe into your schedule. Whether you’re making them for a special occasion or just a tasty snack, you’ll find that the effort is well worth it!
Nutritional Information for Cottage Cheese Cheesecake Bites Recipe
Cottage Cheese Cheesecake Bites Recipe is essential for making informed choices about your diet. These bites are not only delicious but also provide a good balance of nutrients. Here’s a closer look at the nutritional information per serving:
Calories
Each serving of these delightful cheesecake bites contains approximately 90 calories. This makes them a great option for a light snack or dessert without the guilt. The relatively low calorie count allows you to enjoy a sweet treat while keeping your overall caloric intake in check.
Protein
Cottage Cheese Cheesecake Bites is their protein content. Each bite offers about 6 grams of protein. This is thanks to the cottage cheese and Greek yogurt, both of which are excellent sources of protein. Including protein in your snacks can help keep you feeling full and satisfied, making these bites a smart choice for any time of day.
Sodium
In terms of sodium, each serving contains around 100 milligrams. This is a moderate amount, especially considering that the recommended daily intake of sodium is about 2,300 milligrams for most adults. Keeping sodium levels in check is important for maintaining heart health, and these bites fit well within a balanced diet.
Cottage Cheese Cheesecake Bites Recipe provides a nutritious option that is both satisfying and delicious. With their low calorie count, high protein content, and moderate sodium levels, these bites are a fantastic addition to your healthy eating plan. Enjoy them guilt-free!
FAQs about Cottage Cheese Cheesecake Bites Recipe
Can I use low-fat cottage cheese for this recipe?
Cottage Cheese Cheesecake Bites Recipe. It will still provide the creamy texture and protein you need. Just keep in mind that the flavor might be slightly different, but it will still be delicious. Low-fat options can help reduce calories while maintaining a satisfying taste!
How do I store leftover cheesecake bites?
Cottage Cheese Cheesecake Bites is easy! Simply place them in an airtight container and refrigerate. They can last for up to 5 days in the fridge. If you want to keep them fresh for longer, consider freezing them. Just make sure to wrap each bite individually in plastic wrap before placing them in a freezer-safe bag. This way, you can enjoy them later without losing flavor or texture!
Can I freeze Cottage Cheese Cheesecake Bites?
Cottage Cheese Cheesecake Bites! Freezing is a great way to preserve their freshness. To do this, allow the bites to cool completely after baking. Then, wrap each one in plastic wrap and place them in a freezer-safe container or bag. They can be frozen for up to 3 months. When you’re ready to enjoy them, simply thaw them in the refrigerator overnight or at room temperature for a few hours.
What can I substitute for sugar in this recipe?
Cottage Cheese Cheesecake Bites Recipe, there are several great alternatives! You can use natural sweeteners like honey or maple syrup, as mentioned in the recipe. For a low-calorie option, consider using stevia, erythritol, or monk fruit sweetener. These substitutes can provide sweetness without the added calories. Just remember to adjust the quantity according to the sweetness level of the substitute you choose!
Conclusion on Cottage Cheese Cheesecake Bites Recipe
Cottage Cheese Cheesecake Bites Recipe is a delightful and nutritious treat that everyone can enjoy. With their creamy texture and rich flavors, these bites are perfect for satisfying your sweet cravings without the guilt. They are easy to make, versatile, and can be customized to fit various dietary needs. Whether you’re looking for a quick snack, a healthy dessert, or a fun addition to a gathering, these cheesecake bites are sure to impress.
By following the simple steps outlined in this recipe, you can create a batch of delicious bites that are not only tasty but also packed with protein. The use of cottage cheese and Greek yogurt ensures that you’re getting a nutritious option that supports your health goals. Plus, with the ability to experiment with different flavors and ingredients, you can make these bites your own!
Cottage Cheese Cheesecake Bites. Enjoy them fresh out of the oven or chilled from the fridge. No matter how you serve them, these bites are bound to become a favorite in your household. Happy baking!
There are few foods that tap into childhood nostalgia quite like pizza. Growing up, Friday nights were always “pizza night” in our house — a tradition that started with my parents working long hours all week and wanting to create something fun and low-effort for dinner. While some nights we ordered in, more often than not, we made it ourselves. But not the kind you might expect.
Instead of a big, doughy pie, my mom introduced us to mini pizzas — quick, clever creations using whatever base we had on hand. Sometimes it was English muffins. Other times, flatbread or even leftover sandwich buns. And the toppings? Whatever was in the fridge. But my favorite, the one that stuck with me long after I grew up and started cooking for myself, was her version with sausage, ketchup, onion, and a generous handful of cheese.
That was the blueprint for this Mini Sausage Pizza recipe — the one I now make with my own kids, or quickly assemble for guests when I need a foolproof appetizer. It’s flexible, fast, and deeply satisfying. The sausage gives it heartiness, the sauce adds tang, and the cheese? Well, it melts everything together — literally and emotionally.
Why Mini Sausage Pizzas Are a Go-To Favorite
What makes these mini pizzas so lovable isn’t just their flavor — though that’s certainly a win — but how effortlessly they fit into real life. They’re quick to prepare, endlessly adaptable, and kid-approved (which, let’s face it, is often the hardest hurdle). They work as after-school snacks, lunchbox fillers, weeknight dinners, or party bites.
And unlike full-size pizzas that need time to rise or specialty dough, these mini versions can be made using everyday items you already have in your pantry or freezer. Puff pastry, English muffins, pita rounds — they all work beautifully as a base.
Let’s break down why this recipe stands out:
1. Minimal Prep, Maximum Flavor
There’s no dough to roll, no yeast to activate. Just a quick assembly of ingredients and into the oven they go.
2. Customizable for Any Occasion
While sausage is the star here, the beauty of this recipe is how easily you can swap, add, or modify the toppings. Want it spicy? Add jalapeños. Need it vegetarian? Swap in sautéed mushrooms or grilled zucchini.
3. Perfect Portions
Mini pizzas mean built-in portion control. They’re great for feeding a crowd or just making enough for yourself without worrying about leftovers.
4. Loved by All Ages
From toddlers to teens to picky adults, the combination of sausage, cheese, and a tangy base hits the spot every time.
Ingredients
Ingredient
Quantity
Sausage (diced)
180 g (6 oz)
Ketchup
6 tablespoons
Mayonnaise (optional)
To taste
Onion (finely chopped)
½ medium
Cheese (grated)
100–120 g (1 cup)
Mini pizza bases*
As needed
Directions
Prep the Bases Arrange your mini pizza rounds on a parchment-lined baking tray. Preheat your oven to 400°F (200°C).
Spread the Sauce In a small bowl, mix ketchup with a little mayonnaise (optional) to create a creamy base. Spread about 1 tablespoon of sauce on each pizza base.
Add Toppings Sprinkle finely chopped onion over each round, then add diced sausage. Finish with a generous layer of grated cheese.
Bake Until Golden Bake in the preheated oven for 10–12 minutes, or until the cheese is melted and bubbling, and the edges are golden and crisp.
Serve and Enjoy Let the pizzas cool slightly before serving. Enjoy warm — perfect for snacking, school lunches, or party platters.
Nutritional Snapshot (Per Mini Pizza – Approximate)
Nutrient
Amount
Calories
~180 kcal
Protein
~8 g
Carbohydrates
~15 g
Fat
~10 g
Fiber
~1 g
Sodium
~360 mg
When to Serve Mini Sausage Pizzas
Think of these mini pizzas as your culinary wildcard — they fit just about anywhere:
Weeknight Dinners: When time is short and hunger is high, these come together fast with no fuss.
Lunchbox Solution: Pack them up for school or work — they taste great warm or at room temp.
Game Day Snacks: Serve on a platter with toothpicks for easy, mess-free bites.
Potlucks and Parties: They’re finger-friendly and universally appealing.
DIY Pizza Night: Set up a mini pizza bar with different toppings and let everyone customize their own.
Tips for the Perfect Mini Pizza Every Time
Mini pizzas are simple, but here are a few pro tips to make them even better:
Use a Crisp Base
Whatever bread or dough you use, make sure it’s sturdy enough to hold toppings and doesn’t get soggy. Toasting the base lightly before assembling can help create a crispier bottom.
Pre-Cook the Sausage
Always cook and dice the sausage before using it as a topping. This ensures even cooking and prevents excess grease from soaking into the base.
Don’t Overload
It’s tempting to pile on the toppings, but less is more. Too much can lead to soggy centers or undercooked cheese.
Cheese Matters
Use a cheese that melts well. Mozzarella is the classic, but cheddar, provolone, or a blend can elevate the flavor.
Bake Hot and Fast
A high-temperature bake (around 400°F / 200°C) helps crisp the edges and melt the cheese quickly, keeping the center from getting too soft.
Creative Variations to Try
Once you’ve mastered the basic sausage version, it’s time to get creative. Here are some of the most-loved variations:
Pepperoni & Bell Pepper
A classic pizza flavor with the sweetness of peppers to balance the salty meat.
Spicy BBQ Chicken
Swap ketchup for barbecue sauce and top with cooked chicken, red onion, and a pinch of chili flakes.
Veggie Supreme
Layer sautéed mushrooms, zucchini, spinach, and a sprinkle of feta.
Breakfast Pizza
Use a scrambled egg base, sausage, and cheese for a protein-packed morning version.
Mediterranean Style
Top with olives, tomatoes, feta, and oregano for a Greek-inspired twist.
Frequently Asked Questions
Can I make these in advance?
Yes! Assemble them up to a day in advance and refrigerate. Bake fresh when ready to serve. You can also freeze them before baking and bake straight from frozen, adding 3–5 extra minutes.
What’s the best base to use?
English muffins, pita bread, naan, puff pastry, or pre-made mini pizza crusts all work well. Choose based on what you have and the texture you want.
Is it okay to use raw sausage?
No — always cook the sausage before using it on the pizzas. Raw sausage won’t fully cook in the short baking time and may release too much grease.
Can I make it dairy-free?
Yes, just use a dairy-free cheese substitute that melts well. You can also skip the cheese entirely and load up on flavorful veggies and herbs.
How do I store leftovers?
Store cooled mini pizzas in an airtight container in the refrigerator for up to 3 days. Reheat in the oven or toaster oven for best results — the microwave can make the base soggy.
Can I turn this into a full-size pizza?
Definitely. Just scale up the ingredients and use a full-sized pizza crust. You’ll need to adjust the baking time accordingly (typically 12–15 minutes for a full pizza at 450°F / 230°C).
What if I want to make it vegetarian?
Swap the sausage for plant-based sausage, sautéed mushrooms, or grilled veggies like zucchini, peppers, and eggplant.
A Pizza That’s More Than a Snack
There’s something beautiful about recipes that are both nostalgic and flexible — that remind us of home but also invite creativity. These Mini Sausage Pizzas are one of those rare dishes. They carry memories of after-school snacks, sleepovers, and casual family dinners, but they also adapt effortlessly to grown-up tastes and gourmet cravings.
Whether you’re making them for your kids, your guests, or just yourself after a long day, they deliver more than flavor — they bring ease, comfort, and a little bit of fun to your kitchen.
They’re a reminder that food doesn’t have to be fancy to be meaningful — and that sometimes, the best dishes are the ones that fit in the palm of your hand.
Final Thoughts: Simple Food, Big Smiles
In a world full of complicated recipes and time-consuming meals, it’s refreshing to return to something simple. Something joyful. Something like Mini Sausage Pizzas — quick to make, satisfying to eat, and easy to share.
These little bites of comfort are perfect for any day, any occasion, and any mood. They’re proof that a great recipe doesn’t need to be extravagant. It just needs to be made with love… and maybe a little extra cheese.
So preheat your oven, grab your ingredients, and let the magic happen — one mini pizza at a time.
Introduction to High-Protein Turkey Stuffed Sweet Potatoes
Are you looking for a delicious and nutritious meal that’s easy to prepare? Look no further! High-Protein Turkey Stuffed Sweet Potatoes are the perfect solution. This dish combines the natural sweetness of sweet potatoes with the savory flavors of ground turkey, making it a delightful option for lunch or dinner.
Not only are these stuffed sweet potatoes tasty, but they are also packed with protein. Each serving contains about 30 grams of protein, which is essential for muscle repair and growth. Plus, sweet potatoes are rich in vitamins and minerals, providing a healthy dose of nutrients.
Whether you’re a busy parent, a student, or just someone who loves good food, this recipe is designed for you. It’s simple, quick, and can be customized to suit your taste. You can add your favorite spices or toppings to make it your own. Plus, it’s a great way to sneak in some veggies!
In this article, we’ll guide you through the ingredients, preparation steps, and even some variations to keep your meals exciting. So, roll up your sleeves and get ready to enjoy a wholesome dish that’s sure to please everyone at the table!
Ingredients for High-Protein Turkey Stuffed Sweet Potatoes
To create these delightful High-Protein Turkey Stuffed Sweet Potatoes, you’ll need a few simple ingredients. Each component plays a vital role in delivering flavor and nutrition. Here’s what you’ll need:
2 medium sweet potatoes (about 1 pound total)
1 tablespoon olive oil
1 pound ground turkey
1 small onion, diced
2 cloves garlic, minced
1 teaspoon chili powder
1 teaspoon cumin
1/2 teaspoon paprika
Salt and pepper to taste
1 cup black beans, drained and rinsed
1 cup corn (fresh, frozen, or canned)
1/2 cup shredded cheese (cheddar or your choice)
2 tablespoons fresh cilantro, chopped (optional)
Sour cream or Greek yogurt for serving (optional)
These ingredients come together to create a hearty meal that’s not only satisfying but also packed with protein. The sweet potatoes provide a natural sweetness, while the ground turkey adds a savory touch. Black beans and corn contribute fiber and additional nutrients, making this dish a well-rounded option.
Feel free to adjust the spices according to your taste. If you like it spicy, consider adding some diced jalapeños to the turkey mixture. This recipe is versatile, allowing you to swap out ingredients based on what you have on hand. Now that you have your ingredients ready, let’s move on to the preparation steps!
Preparation of High-Protein Turkey Stuffed Sweet Potatoes
Now that you have gathered all your ingredients, it’s time to dive into the preparation of your High-Protein Turkey Stuffed Sweet Potatoes. This process is straightforward and will have your kitchen smelling amazing in no time. Let’s break it down step by step!
Step 1: Preparing the Sweet Potatoes
First, preheat your oven to 400°F. This temperature is perfect for roasting sweet potatoes. While the oven heats up, take your medium sweet potatoes and poke holes in them using a fork. This step is crucial as it allows steam to escape while they bake. Place the sweet potatoes on a baking sheet and pop them into the oven. Bake for about 45-50 minutes, or until they are tender. You can check their doneness by inserting a fork; it should slide in easily.
Step 2: Cooking the Turkey Filling
While the sweet potatoes are baking, it’s time to prepare the turkey filling. Heat 1 tablespoon of olive oil in a large skillet over medium heat. Once the oil is hot, add the diced onion. Sauté the onion for about 3-4 minutes until it becomes soft and translucent. Next, add the minced garlic and cook for an additional minute. The aroma will be delightful!
Now, add the pound of ground turkey to the skillet. Use a spoon to break it up as it cooks. Stir occasionally, cooking until the turkey is browned and fully cooked, which should take about 6-8 minutes. Don’t forget to season it with chili powder, cumin, paprika, salt, and pepper. Mix everything well to ensure the flavors meld together.
Step 3: Combining Ingredients
Once the turkey is cooked, it’s time to add the black beans and corn. Stir these ingredients into the skillet, mixing until everything is heated through, which should take about 2-3 minutes. This combination not only adds flavor but also boosts the protein content of your dish. The beans and corn provide a nice texture and additional nutrients.
Step 4: Stuffing the Sweet Potatoes
After the sweet potatoes are done baking, remove them from the oven and let them cool for a few minutes. Carefully cut each sweet potato in half lengthwise. Use a spoon to scoop out a small portion of the flesh, creating a cavity for the filling. Be gentle to avoid breaking the skin!
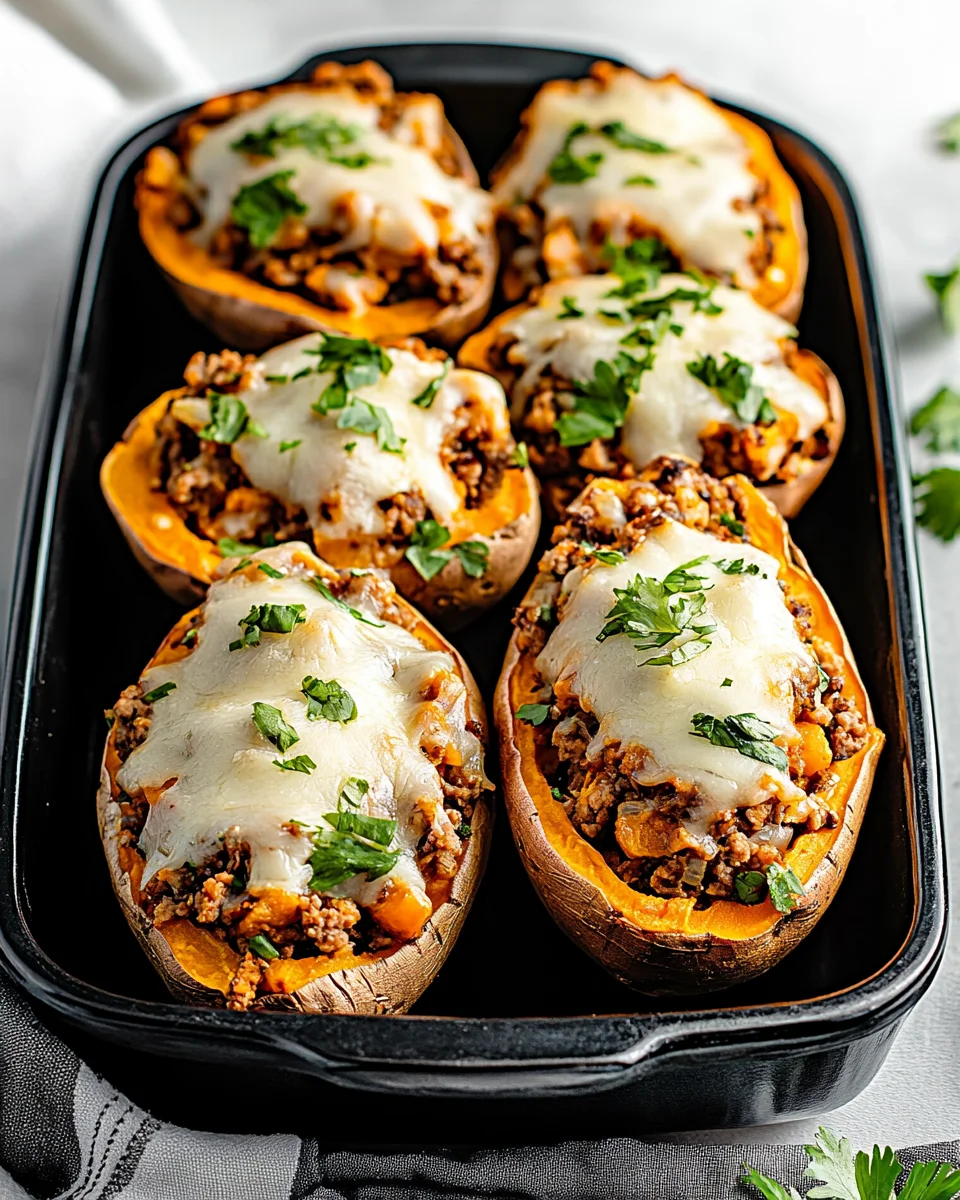
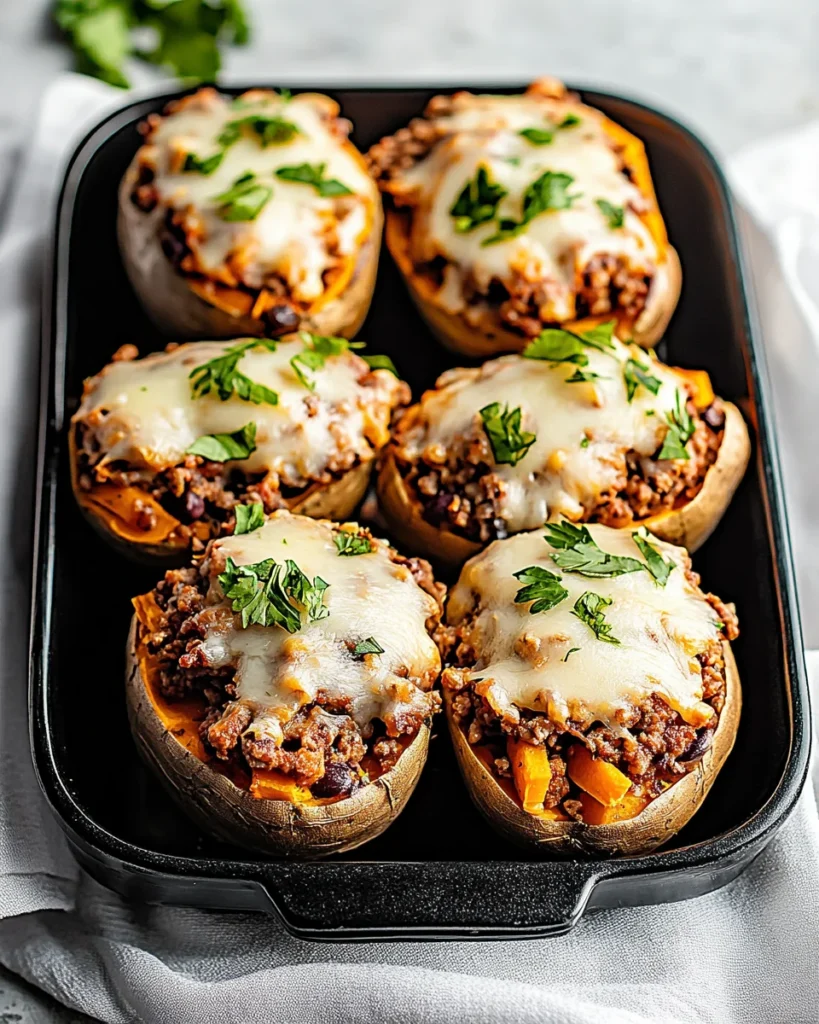
Now, fill each sweet potato half with the turkey mixture. Make sure to pack it in well, so each bite is full of flavor. Top each stuffed sweet potato with shredded cheese. This will melt beautifully in the oven and add a creamy texture to your dish.
Step 5: Baking the Stuffed Sweet Potatoes
Return the stuffed sweet potatoes to the oven for an additional 5-7 minutes. This step allows the cheese to melt and become bubbly. Once they are ready, take them out of the oven and let them cool slightly. Garnish with fresh cilantro if desired, and serve with a dollop of sour cream or Greek yogurt for an extra creamy touch.
And there you have it! Your High-Protein Turkey Stuffed Sweet Potatoes are ready to be enjoyed. This meal is not only nutritious but also visually appealing, making it perfect for family dinners or meal prep for the week.
Variation of High-Protein Turkey Stuffed Sweet Potatoes
One of the best things about High-Protein Turkey Stuffed Sweet Potatoes is their versatility. You can easily switch up the ingredients to suit your taste or dietary needs. Let’s explore some alternative protein options and different flavor profiles to keep your meals exciting!
Alternative Protein Options
If you’re not a fan of ground turkey or simply want to try something different, there are plenty of alternative protein options available. Here are a few ideas:
Ground Chicken: This is a leaner option that still provides a great source of protein. It has a mild flavor that pairs well with the spices.
Ground Beef: For a heartier taste, ground beef is an excellent choice. Opt for lean cuts to keep the dish healthier.
Plant-Based Crumbles: If you prefer a vegetarian option, consider using plant-based meat substitutes. They offer a similar texture and protein content.
Quinoa: For a completely different twist, try using cooked quinoa. It’s packed with protein and adds a nutty flavor to the dish.
These alternatives allow you to customize your stuffed sweet potatoes based on your dietary preferences. Each option brings its unique flavor and texture, making your meal even more enjoyable!
Different Flavor Profiles
Changing the flavor profile of your High-Protein Turkey Stuffed Sweet Potatoes can make a world of difference. Here are some ideas to inspire your culinary creativity:
Mexican-Inspired: Add diced jalapeños, corn salsa, and top with avocado for a fresh twist. You can also use taco seasoning instead of the spices listed.
Italian Flair: Mix in Italian herbs like oregano and basil. Use marinara sauce instead of the spices, and top with mozzarella cheese.
Asian Fusion: Incorporate soy sauce, ginger, and sesame oil into the turkey mixture. Top with green onions and serve with a drizzle of sriracha for heat.
BBQ Style: Mix in your favorite BBQ sauce with the turkey. Top with coleslaw for a crunchy texture and a tangy flavor.
These variations not only keep your meals interesting but also allow you to explore different cuisines. Feel free to mix and match ingredients to create your perfect High-Protein Turkey Stuffed Sweet Potatoes!
Cooking Note for High-Protein Turkey Stuffed Sweet Potatoes
When preparing High-Protein Turkey Stuffed Sweet Potatoes, there are a few cooking notes to keep in mind. These tips will help ensure that your dish turns out perfectly every time. Let’s dive into some essential points to consider!
First, selecting the right sweet potatoes is crucial. Look for medium-sized sweet potatoes that are firm and free from blemishes. The skin should be smooth, as this indicates freshness. If you can, choose organic sweet potatoes for a more natural flavor and fewer pesticides.
Next, when baking the sweet potatoes, make sure to poke enough holes in them. This step is vital as it allows steam to escape, preventing the potatoes from bursting in the oven. If you forget this step, you might end up with a messy kitchen!
While cooking the ground turkey, ensure it is cooked thoroughly. The internal temperature should reach 165°F to guarantee it’s safe to eat. Using a meat thermometer can help you check this easily. Also, breaking up the turkey into smaller pieces while cooking will help it brown evenly and absorb the spices better.
For the filling, feel free to adjust the spices according to your taste preferences. If you enjoy a bit of heat, consider adding more chili powder or even some cayenne pepper. On the other hand, if you prefer milder flavors, you can reduce the spices or omit them altogether.
Lastly, when stuffing the sweet potatoes, don’t be afraid to pack the filling in tightly. This ensures that every bite is flavorful and satisfying. If you have leftover filling, it can be served on the side or used in other dishes, like salads or wraps.
By keeping these cooking notes in mind, you’ll create delicious High-Protein Turkey Stuffed Sweet Potatoes that are sure to impress your family and friends. Happy cooking!
Serving Suggestions for High-Protein Turkey Stuffed Sweet Potatoes
Once your High-Protein Turkey Stuffed Sweet Potatoes are ready, it’s time to think about how to serve them. This dish is not only filling but also visually appealing, making it perfect for any occasion. Here are some serving suggestions to elevate your meal experience!
Garnish with Fresh Herbs: A sprinkle of fresh cilantro or parsley adds a pop of color and freshness. It enhances the flavor and makes the dish look more inviting.
Pair with a Side Salad: A light salad with mixed greens, cherry tomatoes, and a simple vinaigrette complements the stuffed sweet potatoes beautifully. The crispness of the salad balances the softness of the sweet potatoes.
Serve with Dipping Sauces: Consider offering a variety of sauces on the side. Options like salsa, guacamole, or a zesty yogurt sauce can add an extra layer of flavor.
Top with Avocado: Sliced or diced avocado adds creaminess and healthy fats. It pairs wonderfully with the spices in the turkey filling.
Include a Grain: For a heartier meal, serve the stuffed sweet potatoes alongside a grain like quinoa or brown rice. This adds more texture and makes the meal even more filling.
These serving suggestions not only enhance the presentation but also allow you to customize the meal to your liking. Whether you’re hosting a dinner party or enjoying a cozy night in, these ideas will make your High-Protein Turkey Stuffed Sweet Potatoes shine on the table!
Tips for Perfect High-Protein Turkey Stuffed Sweet Potatoes
Creating the perfect High-Protein Turkey Stuffed Sweet Potatoes is all about attention to detail. With a few simple tips, you can elevate your dish and ensure it turns out delicious every time. Here are some helpful suggestions to keep in mind:
Choose the Right Sweet Potatoes: Opt for medium-sized sweet potatoes that are firm and smooth. This ensures even cooking and a delightful texture.
Don’t Skip the Poking: Remember to poke holes in the sweet potatoes before baking. This step prevents them from bursting and helps them cook evenly.
Season Generously: When cooking the turkey, don’t be shy with the spices. A well-seasoned filling makes all the difference in flavor. Taste as you go to find the perfect balance.
Mix in Extra Veggies: For added nutrition, consider mixing in chopped bell peppers, spinach, or zucchini into the turkey filling. This boosts the fiber content and adds more color to your dish.
Let Them Rest: After baking, allow the stuffed sweet potatoes to rest for a few minutes. This helps the flavors meld together and makes them easier to handle.
Experiment with Toppings: Get creative with your toppings! Try different cheeses, nuts, or seeds for added crunch. You can also drizzle with hot sauce or balsamic glaze for a flavor kick.
Store Leftovers Properly: If you have leftovers, store them in an airtight container in the fridge. They can be reheated in the oven or microwave for a quick meal later.
By following these tips, you’ll create High-Protein Turkey Stuffed Sweet Potatoes that are not only tasty but also visually appealing. Enjoy the process and feel free to make this recipe your own!
Breakdown of Time for High-Protein Turkey Stuffed Sweet Potatoes
Understanding the time commitment for preparing High-Protein Turkey Stuffed Sweet Potatoes can help you plan your cooking session better. Here’s a simple breakdown of the time needed for each step, so you can enjoy this delicious meal without any stress!
Prep Time
The prep time for this recipe is approximately 15-20 minutes. During this time, you will gather all your ingredients, wash the sweet potatoes, and chop the onion and garlic. This step is essential as it sets the stage for a smooth cooking process. Having everything ready will make your cooking experience more enjoyable!
Cooking Time
The cooking time is about 50-60 minutes. This includes:
45-50 minutes for baking the sweet potatoes until they are tender.
6-8 minutes for cooking the ground turkey and mixing in the other ingredients.
5-7 minutes for baking the stuffed sweet potatoes with cheese until melted.
While the sweet potatoes are baking, you can prepare the turkey filling, making the most of your time in the kitchen.
Total Time
In total, you can expect to spend about 1 hour and 15-20 minutes from start to finish. This includes both prep and cooking time. It’s a manageable timeframe for a nutritious and satisfying meal that serves four people. Plus, the delicious aroma wafting through your kitchen will make it all worth it!
With this time breakdown, you can easily fit this recipe into your busy schedule. Enjoy the process and the delightful flavors of your High-Protein Turkey Stuffed Sweet Potatoes!
Nutritional Information for High-Protein Turkey Stuffed Sweet Potatoes
Understanding the nutritional content of your meals is essential for maintaining a balanced diet. High-Protein Turkey Stuffed Sweet Potatoes not only taste great but also provide a wealth of nutrients. Let’s break down the key nutritional components of this delicious dish!
Calories
Each serving of High-Protein Turkey Stuffed Sweet Potatoes contains approximately 350 calories. This makes it a satisfying meal option without being overly heavy. The combination of sweet potatoes, ground turkey, and other ingredients ensures that you’re getting a nutritious meal that can fit into various dietary plans.
Protein Content
One of the standout features of this dish is its impressive protein content. Each serving provides about 30 grams of protein. This high-protein content is beneficial for muscle repair and growth, making it an excellent choice for active individuals or anyone looking to increase their protein intake. The ground turkey and black beans contribute significantly to this protein boost, ensuring you feel full and satisfied.
Sodium Levels
When it comes to sodium, each serving contains around 600 milligrams. This level is reasonable for a meal, but it’s always a good idea to monitor your sodium intake, especially if you’re watching your salt consumption. You can reduce sodium levels by using low-sodium black beans and adjusting the amount of salt you add during cooking. This way, you can enjoy your High-Protein Turkey Stuffed Sweet Potatoes while keeping your health goals in mind.
In summary, High-Protein Turkey Stuffed Sweet Potatoes are not only delicious but also packed with essential nutrients. With a balanced calorie count, high protein content, and manageable sodium levels, this dish is a fantastic addition to your meal rotation. Enjoy the benefits of a nutritious meal that’s easy to prepare and full of flavor!
FAQs about High-Protein Turkey Stuffed Sweet Potatoes
Can I use ground chicken instead of turkey?
Absolutely! Ground chicken is a great alternative to turkey. It has a similar texture and flavor, making it an excellent substitute. Just like ground turkey, ground chicken is lean and packed with protein. You can follow the same cooking instructions, and you’ll still end up with delicious High-Protein Stuffed Sweet Potatoes!
How can I make this recipe vegetarian?
Making this recipe vegetarian is easy! Simply replace the ground turkey with plant-based crumbles or cooked lentils. Both options provide a good source of protein and will absorb the spices beautifully. You can also add more vegetables, like diced bell peppers or mushrooms, to enhance the flavor and texture. This way, you can enjoy a hearty and nutritious meal without any meat!
What are the best toppings for stuffed sweet potatoes?
There are so many delicious toppings you can add to your stuffed sweet potatoes! Here are some popular options:
Avocado: Sliced or diced avocado adds creaminess and healthy fats.
Sour Cream or Greek Yogurt: A dollop of sour cream or Greek yogurt adds a tangy flavor.
Fresh Herbs: Chopped cilantro, parsley, or green onions brighten up the dish.
Hot Sauce: A drizzle of your favorite hot sauce can add a spicy kick.
Cheese: Additional shredded cheese, like feta or mozzarella, can enhance the flavor.
Feel free to mix and match these toppings to create your perfect stuffed sweet potato!
Can I prepare these in advance?
Yes, you can prepare High-Protein Turkey Stuffed Sweet Potatoes in advance! You can cook the sweet potatoes and the turkey filling ahead of time. Store them separately in airtight containers in the fridge. When you’re ready to eat, simply stuff the sweet potatoes and bake them with cheese until melted. This makes for a quick and easy meal option during busy days!
Conclusion on High-Protein Turkey Stuffed Sweet Potatoes
In conclusion, High-Protein Turkey Stuffed Sweet Potatoes are a fantastic meal option that combines nutrition, flavor, and versatility. This dish not only satisfies your taste buds but also provides a healthy dose of protein, making it perfect for anyone looking to maintain a balanced diet. With each serving containing around 30 grams of protein, you can feel good about fueling your body with wholesome ingredients.
Throughout this article, we’ve explored the simple preparation steps, variations, and serving suggestions that make this recipe a winner in any kitchen. Whether you’re cooking for yourself, your family, or hosting friends, these stuffed sweet potatoes are sure to impress. The combination of sweet potatoes, ground turkey, black beans, and corn creates a delightful medley of flavors and textures that everyone will love.
Moreover, the flexibility of this recipe allows you to customize it to your liking. From alternative protein options to different flavor profiles, the possibilities are endless. You can easily adapt the ingredients based on what you have on hand or your personal preferences, ensuring that every meal is unique and exciting.
So, why not give High-Protein Turkey Stuffed Sweet Potatoes a try? They are not only easy to make but also a great way to enjoy a nutritious meal that doesn’t compromise on taste. With just a little effort, you can create a dish that is both satisfying and nourishing. Happy cooking, and enjoy your delicious stuffed sweet potatoes!
There’s something grounding about chopping vegetables while rain taps softly on the window. That’s exactly how this recipe came to life — not in the middle of a grand celebration, but on a quiet evening when the fridge was half-full and the craving for comfort was louder than the thunder outside.
I had two chicken fillets thawing, a handful of mushrooms, some tomatoes on the edge of ripeness, and a tub of sour cream begging to be used. I wasn’t sure what I was making, but I knew I wanted something baked, something creamy, something layered — something that would make the house smell like a warm hug.
What emerged from the oven 40 minutes later was exactly that. This Juicy Chicken Fillet with Vegetables wasn’t just dinner. It was satisfaction, comfort, and balance in one dish — tender chicken, earthy mushrooms, juicy tomatoes, all tucked under a golden layer of cheese, bound by a simple creamy sauce.
Since that rainy evening, this dish has earned a regular spot on our table. It’s easy enough for weeknights, but special enough for guests. And every time I make it, I remember how sometimes the best meals come from quiet moments, humble ingredients, and a little bit of instinct.
Why This Dish Works So Well
The secret to this recipe’s success is in its harmony. Every layer brings its own note to the symphony of flavors, and yet nothing overwhelms.
1. Juicy, Flavorful Chicken
Boneless chicken fillets are the star here. They stay tender by baking gently under a layer of vegetables and sauce, locking in moisture. Whether you use breasts or thighs, the result is always juicy and satisfying.
2. Fresh, Balanced Vegetables
Tomatoes add brightness and a hint of acidity that cuts through the creaminess. Mushrooms bring depth, umami, and texture. Onions melt into the sauce, adding sweetness and richness that tie everything together.
3. A Creamy Sauce That Feels Light
The sour cream-based sauce might sound indulgent, but it’s actually quite balanced. Slightly tangy, subtly thickened with a touch of flour, it envelops the chicken and vegetables without feeling heavy.
4. Cheese That Brings It All Home
What’s a baked dish without a bubbling layer of cheese on top? It adds a salty, crispy contrast to the soft layers underneath — a golden finish that makes this dish unforgettable.
Ingredients
Ingredient
Quantity
Chicken fillet
2 pcs (700 g)
Champignons (mushrooms)
250 g, sliced
Tomatoes
2 pcs, sliced
Onion
1 pc, finely chopped
Sour cream
150 ml
Flour
0.5 tablespoon
Cheese
100 g, grated
Parsley
For garnish
Directions
Preheat the Oven Set your oven to 375°F (190°C) and lightly grease a baking dish.
Prepare the Chicken Cut chicken fillets into medium slices or leave whole. Season with salt and pepper to taste, then place into the baking dish.
Sauté the Vegetables In a skillet, sauté the onion and mushrooms in a little oil until soft and golden. Spread this mixture over the chicken.
Layer the Tomatoes Place sliced tomatoes over the mushrooms and onions.
Make the Sauce In a bowl, mix sour cream with flour until smooth. Pour this sauce evenly over the vegetables and chicken.
Top with Cheese Sprinkle grated cheese over the entire dish.
Bake to Perfection Bake for 30–35 minutes, or until the chicken is cooked through and the top is golden and bubbling.
Garnish and Serve Let rest for a few minutes, then garnish with fresh parsley before serving. Pair with rice, mashed potatoes, or fresh bread.
Nutritional (Per Serving – Approx. 4 servings)
Nutrient
Amount
Calories
~420 kcal
Protein
~35 g
Carbohydrates
~8 g
Fat
~25 g
Fiber
~2 g
Sodium
~280 mg
When to Serve This Chicken and Vegetable Bake
The beauty of this dish lies in its flexibility. It fits into many meal moments with ease:
Weeknight dinners: Simple enough to prepare in under an hour.
Dinner parties: It bakes beautifully in a casserole dish and presents like a gourmet meal.
Meal prep: Reheats well and can be portioned for lunches or dinners throughout the week.
Family gatherings: A crowd-pleaser that suits all ages and dietary needs with minor tweaks.
Serve it with mashed potatoes, rice, crusty bread, or even just a fresh green salad for a balanced meal.
Popular Variations and Creative Twists
The core of this recipe is easy to adapt based on your tastes, what’s in season, or what’s in your fridge.
1. Spinach and Bell Pepper Boost
Add a layer of fresh spinach leaves or sliced bell peppers for extra color and nutrients.
2. Herb-Infused Cream
Stir fresh or dried herbs (like thyme, tarragon, or dill) into the sour cream sauce for extra aroma and depth.
3. Add Heat
Craving a spicy twist? Add a pinch of chili flakes to the sauce or layer in thinly sliced jalapeños.
4. Make It Mediterranean
Use feta instead of melting cheese, and sprinkle with olives and oregano before baking.
5. Turn It Vegetarian
Swap the chicken for slices of eggplant or zucchini. Use the same layers, sauce, and bake time for a satisfying vegetarian meal.
Tips for the Best Results
Even a simple recipe can be elevated with the right techniques. Here are a few tips to make sure your Juicy Chicken Fillet with Vegetables comes out perfect every time:
Use Similar Thickness for Chicken
If using whole fillets, pound them slightly to an even thickness to ensure even cooking.
Sauté the Vegetables First
Sautéing the mushrooms and onions before baking draws out their moisture and enhances their flavor. This prevents a watery bake and ensures a concentrated, rich taste.
Don’t Skip the Sauce
The sour cream and flour sauce binds everything together. Without it, the dish risks being dry or unevenly cooked.
Let It Rest
After baking, allow the dish to sit for 5–10 minutes before serving. This helps the sauce settle and makes slicing easier.
Cheese Wisely
Use a cheese that melts well and complements the dish — mozzarella, cheddar, or gouda are all great choices. For more flavor, combine two cheeses.
Frequently Asked Questions
Can I prepare this dish ahead of time?
Yes! You can assemble it in the baking dish, cover, and refrigerate for up to 24 hours. Bake directly from the fridge, adding a few extra minutes to the baking time.
Can I use frozen chicken?
It’s best to thaw the chicken fully before using it in this recipe to ensure even cooking and prevent excess water in the dish.
What vegetables can I substitute?
You can use zucchini, bell peppers, baby spinach, eggplant, or even broccoli florets. Just be mindful of their moisture content and sauté them first if needed.
Is there a dairy-free alternative to sour cream?
Yes, use a plant-based sour cream or full-fat coconut yogurt for a dairy-free version. Be sure to season it well, as these alternatives can be slightly sweeter.
Can I use Greek yogurt instead of sour cream?
Absolutely. Greek yogurt will result in a slightly tangier sauce, but it’s a great substitute and adds more protein.
What’s the best way to store leftovers?
Store in an airtight container in the fridge for up to 3 days. Reheat in the oven or microwave until hot. The flavors often deepen the next day, making it even better!
Can I freeze this dish?
Yes. Allow it to cool completely, then wrap tightly in foil or transfer to a freezer-safe container. Freeze for up to 2 months. Thaw overnight in the fridge before reheating.
A Dish That Feels Like Home
In every family, there are recipes that become part of the rhythm of life. Dishes that don’t need a special occasion but somehow turn everyday meals into something worth remembering.
Juicy Chicken Fillet with Vegetables is one of those recipes.
It’s the kind of meal that doesn’t shout for attention — it simply fills the room with a warm aroma, invites everyone to the table, and delivers a few moments of quiet satisfaction. It nourishes, not just with protein and vitamins, but with that rare kind of comfort only a home-cooked meal can provide.
It’s forgiving, flexible, and just fancy enough to make you feel like you’ve created something special. And perhaps that’s what cooking is really about — not perfection, but presence.
Final Thoughts: More Than Just a Casserole
We often think of recipes in terms of ingredients and steps, but the best ones carry stories, too. This dish started as a way to use what I had — a moment of quiet improvisation on a rainy evening — and it became something I now share with others whenever I want to offer more than food.
If you’re looking for a meal that’s cozy, customizable, and reliably delicious, this Juicy Chicken Fillet with Vegetables is a perfect choice. It’s easy to love, easy to share, and always worth the minimal prep.
Whether you’re cooking for family, hosting a guest, or feeding your own soul after a long day, this dish delivers something essential: warmth on a plate.
Skirt steak rice bowls are a delicious and satisfying meal that combines tender skirt steak with a variety of fresh ingredients. This dish features juicy, marinated skirt steak served over a bed of fluffy white rice. Topped with vibrant vegetables like cherry tomatoes, avocado, corn, and black beans, these bowls are not only colorful but also packed with flavor. The addition of lime juice and fresh cilantro adds a zesty touch, making each bite a delightful experience.
Why You Should Try Skirt Steak Rice Bowls
There are many reasons to try skirt steak rice bowls. First, they are incredibly easy to prepare, making them perfect for busy weeknights or casual gatherings. The combination of protein, healthy fats, and carbohydrates ensures a balanced meal that keeps you full and satisfied. Plus, skirt steak is known for its rich flavor and tenderness, which elevates the dish to a whole new level.
Moreover, these rice bowls are highly customizable. You can easily swap out ingredients based on your preferences or dietary needs. Whether you want to add some spice with jalapeños or switch to quinoa for a healthier grain option, the possibilities are endless. This versatility makes skirt steak rice bowls a fantastic choice for everyone, from meat lovers to health-conscious eaters.
In summary, if you’re looking for a quick, tasty, and nutritious meal, skirt steak rice bowls are a must-try. They bring together a variety of flavors and textures, making every bite a delightful surprise. So, gather your ingredients and get ready to enjoy this scrumptious dish!
Ingredients for Skirt Steak Rice Bowls
To create delicious skirt steak rice bowls, you’ll need a variety of fresh ingredients. Here’s a complete list to help you gather everything you need:
1 pound skirt steak: This cut of meat is flavorful and tender, perfect for grilling.
1 tablespoon olive oil: This helps to marinate the steak and adds a rich flavor.
1 teaspoon garlic powder: For a savory kick that enhances the meat’s taste.
1 teaspoon onion powder: Adds depth and sweetness to the marinade.
1 teaspoon smoked paprika: Gives a smoky flavor that complements the steak beautifully.
Salt and pepper to taste: Essential for seasoning the steak to your liking.
2 cups cooked white rice: The base of the bowl, providing a hearty foundation.
1 cup cherry tomatoes, halved: Adds freshness and a burst of color.
1 avocado, sliced: Creamy and nutritious, it balances the dish.
1 cup corn: Fresh or frozen, it adds sweetness and crunch.
1 cup black beans: Packed with protein and fiber, they make the meal more filling.
1 lime, cut into wedges: For a zesty squeeze that brightens the flavors.
Fresh cilantro: A garnish that adds a pop of color and freshness.
With these ingredients, you’re well on your way to creating a delightful meal. Each component plays a role in making the skirt steak rice bowls not only tasty but also visually appealing. So, gather your ingredients and get ready to cook!
Preparation of Skirt Steak Rice Bowls
Step 1: Marinating the Skirt Steak
Marinating the skirt steak is a crucial step that enhances its flavor. Start by mixing the olive oil, garlic powder, onion powder, smoked paprika, salt, and pepper in a small bowl. This mixture will create a delicious rub for the steak. Once combined, generously coat the skirt steak with the marinade. Make sure to cover all sides for maximum flavor. For best results, let the steak marinate for at least 30 minutes. If you have more time, marinating it for a few hours or overnight in the refrigerator will deepen the flavors even more.
Step 2: Cooking the Skirt Steak
Once your steak is marinated, it’s time to cook it! Preheat your grill or grill pan over medium-high heat. When the grill is hot, place the skirt steak on it. Cook for about 4-5 minutes on each side for a medium-rare finish. If you prefer your steak more well-done, simply extend the cooking time. Remember, the key is to cook it until it reaches your desired doneness. After cooking, remove the steak from the grill and let it rest for about 5 minutes. This resting period allows the juices to redistribute, ensuring a juicy and tender steak.
Step 3: Preparing the Rice
While the steak is resting, you can prepare the rice. If you haven’t done so already, cook 2 cups of white rice according to the package instructions. Typically, this involves rinsing the rice, adding it to boiling water, and letting it simmer until tender. Once cooked, fluff the rice with a fork to separate the grains. This fluffy rice will serve as the perfect base for your skirt steak rice bowls, soaking up all the delicious flavors from the toppings.
Step 4: Assembling the Skirt Steak Rice Bowls
Now comes the fun part—assembling your skirt steak rice bowls! Start by placing a generous scoop of the cooked rice in each serving bowl. Next, slice the rested skirt steak against the grain into thin strips and layer it on top of the rice. Then, add the halved cherry tomatoes, sliced avocado, corn, and black beans. Each ingredient adds its unique flavor and texture, making the bowl visually appealing and delicious. Finally, squeeze fresh lime juice over the top and garnish with chopped cilantro. Your skirt steak rice bowls are now ready to be enjoyed!
Variation of Skirt Steak Rice Bowls
Different Marinades for Skirt Steak Rice Bowls
While the original marinade for skirt steak rice bowls is delicious, experimenting with different marinades can elevate your dish even further. Here are a few ideas to consider:
Teriyaki Marinade: Combine soy sauce, honey, ginger, and garlic for a sweet and savory twist. This Asian-inspired marinade pairs wonderfully with the steak.
Cilantro-Lime Marinade: Blend fresh cilantro, lime juice, olive oil, and garlic for a refreshing flavor. This marinade adds a zesty kick that complements the other ingredients.
Spicy Chipotle Marinade: Mix chipotle peppers in adobo sauce with lime juice and cumin for a smoky and spicy flavor. This option is perfect for those who enjoy a bit of heat.
BBQ Marinade: Use your favorite barbecue sauce mixed with apple cider vinegar for a tangy and sweet flavor. This marinade gives the steak a delicious charred taste.
Feel free to let your creativity shine! Marinating the skirt steak in different flavors can transform your rice bowls into a whole new experience. Just remember to marinate for at least 30 minutes to allow the flavors to penetrate the meat.
Alternative Ingredients for Skirt Steak Rice Bowls
If you’re looking to switch things up, consider using alternative ingredients in your skirt steak rice bowls. Here are some tasty options:
Grains: Instead of white rice, try quinoa, brown rice, or cauliflower rice for a healthier option. Each grain brings its unique texture and flavor.
Vegetables: Add roasted bell peppers, sautéed zucchini, or grilled asparagus for extra nutrition and flavor. These veggies can enhance the color and taste of your bowls.
Beans: Swap black beans for pinto beans or chickpeas. Each type of bean adds a different taste and texture, making your meal more interesting.
Cheese: Sprinkle some crumbled feta or shredded cheddar on top for a creamy finish. Cheese can add richness and depth to your dish.
By mixing and matching these alternative ingredients, you can create a skirt steak rice bowl that suits your taste preferences and dietary needs. The possibilities are endless, so don’t hesitate to get creative!
Cooking Note for Skirt Steak Rice Bowls
When preparing skirt steak rice bowls, there are a few important cooking notes to keep in mind. These tips will help ensure that your dish turns out perfectly every time.
First, always choose high-quality skirt steak. Look for meat that is bright red with good marbling. This marbling is essential as it adds flavor and tenderness to the steak. If possible, ask your butcher for a fresh cut. A well-prepared steak will make a significant difference in the overall taste of your rice bowls.
Next, don’t skip the resting period after cooking the steak. Allowing the meat to rest for about 5 minutes is crucial. This step helps the juices redistribute throughout the steak, making it more tender and juicy. If you cut into the steak too soon, you risk losing those flavorful juices, resulting in a drier bite.
Additionally, when slicing the skirt steak, always cut against the grain. This technique shortens the muscle fibers, making each bite more tender. If you’re unsure which way the grain runs, take a moment to observe the lines in the meat. Cutting against the grain will enhance the overall texture of your dish.
Lastly, feel free to adjust the cooking time based on your preference for doneness. Skirt steak is best enjoyed medium-rare, but if you prefer it more well-done, simply extend the cooking time by a minute or two on each side. Just keep an eye on it to avoid overcooking.
By following these cooking notes, you’ll create skirt steak rice bowls that are not only delicious but also visually appealing. Enjoy the process and savor the delightful flavors that come together in this fantastic dish!
Serving Suggestions for Skirt Steak Rice Bowls
Toppings to Enhance Your Skirt Steak Rice Bowls
To take your skirt steak rice bowls to the next level, consider adding some delicious toppings. These extras can enhance the flavor and texture of your dish, making it even more enjoyable. Here are some tasty topping ideas:
Fresh Salsa: A vibrant salsa made with diced tomatoes, onions, cilantro, and jalapeños can add a refreshing kick. The acidity from the tomatoes brightens the flavors of the steak.
Guacamole: Creamy guacamole is a perfect addition. It adds richness and pairs beautifully with the other ingredients in the bowl.
Feta Cheese: Crumbled feta cheese adds a salty and tangy flavor. It complements the steak and fresh veggies nicely.
Hot Sauce: For those who love heat, a drizzle of your favorite hot sauce can spice things up. It adds an exciting kick that elevates the entire dish.
Chopped Green Onions: Sprinkle some chopped green onions on top for a mild onion flavor and a pop of color. They add a nice crunch and freshness.
Feel free to mix and match these toppings based on your preferences. Each one brings its unique flavor profile, allowing you to customize your skirt steak rice bowls to your liking. The right toppings can transform a simple meal into a gourmet experience!
Side Dishes That Pair Well with Skirt Steak Rice Bowls
While skirt steak rice bowls are a complete meal on their own, serving them with complementary side dishes can enhance your dining experience. Here are some side dishes that pair wonderfully with this dish:
Grilled Vegetables: A medley of grilled vegetables, such as zucchini, bell peppers, and asparagus, adds color and nutrition. The smoky flavor from grilling complements the steak perfectly.
Mexican Street Corn: This dish, known as elote, features corn on the cob slathered in mayo, cheese, and spices. It’s a deliciously sweet and savory side that pairs well with the rice bowls.
Simple Green Salad: A light salad with mixed greens, cucumbers, and a citrus vinaigrette can balance the richness of the steak. It adds freshness and crunch to your meal.
Chips and Salsa: Serve some tortilla chips with fresh salsa as a fun appetizer. This crunchy side is always a hit and sets the tone for a festive meal.
Refried Beans: Creamy refried beans are a classic side that adds extra protein and fiber. They pair well with the flavors of the skirt steak and rice.
By adding these side dishes, you can create a well-rounded meal that is both satisfying and delicious. Enjoy the combination of flavors and textures as you savor your skirt steak rice bowls!
Tips for Perfect Skirt Steak Rice Bowls
Creating the perfect skirt steak rice bowls is all about attention to detail. Here are some helpful tips to ensure your dish turns out delicious every time:
Choose the Right Cut: Skirt steak is known for its flavor, but make sure to select a fresh cut. Look for bright red meat with good marbling. This marbling adds juiciness and tenderness, making your rice bowls even more enjoyable.
Marinate for Flavor: Don’t rush the marinating process. Allow the skirt steak to marinate for at least 30 minutes, or even better, a few hours. This step infuses the meat with flavor, making each bite more delicious.
Preheat Your Grill: Always preheat your grill or grill pan before cooking. A hot grill ensures a nice sear on the steak, locking in juices and enhancing the flavor. This step is crucial for achieving that perfect char.
Rest the Steak: After cooking, let the steak rest for about 5 minutes. This resting period allows the juices to redistribute throughout the meat, resulting in a more tender and juicy steak.
Slice Against the Grain: When it’s time to slice the steak, always cut against the grain. This technique shortens the muscle fibers, making the meat easier to chew and enhancing the overall texture of your dish.
Customize Your Bowls: Feel free to get creative with your toppings and ingredients. Add your favorite vegetables, grains, or sauces to make the dish your own. The versatility of skirt steak rice bowls allows for endless combinations!
Serve Fresh: For the best experience, serve your skirt steak rice bowls immediately after assembling. This ensures that the ingredients are fresh and vibrant, making each bite a delightful experience.
By following these tips, you’ll be well on your way to creating skirt steak rice bowls that are not only tasty but also visually appealing. Enjoy the process and savor the delicious flavors that come together in this fantastic dish!
Breakdown of Time for Skirt Steak Rice Bowls
Prep Time
Preparing skirt steak rice bowls is quick and easy. The prep time mainly involves marinating the skirt steak and cooking the rice. You should expect to spend about 10-15 minutes gathering your ingredients and mixing the marinade. If you choose to marinate the steak for a longer period, you can set it aside for at least 30 minutes or even overnight for deeper flavor. Overall, the prep time can range from 10 minutes to several hours, depending on how long you decide to marinate the steak.
Cooking Time
The cooking time for skirt steak rice bowls is relatively short. Once your grill is preheated, cooking the skirt steak takes about 8-10 minutes total—4-5 minutes on each side for a medium-rare finish. While the steak is resting, you can cook the rice if you haven’t done so already. Cooking the rice typically takes around 15-20 minutes. Therefore, the total cooking time for the entire dish is approximately 20-30 minutes, making it a great option for a quick weeknight meal.
Total Time
When you combine both prep and cooking times, the total time to make skirt steak rice bowls can vary. If you marinate the steak for 30 minutes, the total time will be around 40-45 minutes. However, if you decide to marinate the steak overnight, you can have the dish ready in about 30-35 minutes on the day of cooking. This flexibility allows you to enjoy a delicious meal without spending hours in the kitchen!
Nutritional Information for Skirt Steak Rice Bowls
Calories in Skirt Steak Rice Bowls
When it comes to enjoying skirt steak rice bowls, understanding the calorie content is essential. Each serving of this delicious dish contains approximately 550 calories. This calorie count includes the skirt steak, rice, and all the fresh toppings. It’s a satisfying meal that provides energy without being overly heavy. If you’re watching your calorie intake, you can adjust the portion sizes or swap out certain ingredients to create a lighter version.
Protein Content in Skirt Steak Rice Bowls
Protein is a vital nutrient, and skirt steak rice bowls deliver a good amount. Each serving contains about 30 grams of protein, thanks to the skirt steak and black beans. Protein is essential for muscle repair and growth, making this dish a great option for active individuals. If you want to boost the protein content even further, consider adding extra beans or a sprinkle of cheese on top. This way, you can enjoy a hearty meal that supports your nutritional needs.
Sodium Levels in Skirt Steak Rice Bowls
Monitoring sodium intake is important for maintaining a healthy diet. Each serving of skirt steak rice bowls has a sodium level that can vary based on the seasoning and ingredients used. On average, you can expect around 600-800 mg of sodium per serving. To keep sodium levels in check, consider using low-sodium options for ingredients like black beans and any sauces. Additionally, you can control the amount of salt added during cooking. This way, you can enjoy your meal while being mindful of your sodium intake.
FAQs About Skirt Steak Rice Bowls
Can I use other cuts of meat for Skirt Steak Rice Bowls?
Absolutely! While skirt steak is a popular choice due to its flavor and tenderness, you can use other cuts of meat for your rice bowls. Flank steak, sirloin, or even chicken breast can work well. Just remember that cooking times may vary depending on the cut you choose. For instance, chicken will need to be cooked thoroughly, while flank steak may require similar cooking times to skirt steak. Feel free to experiment with different meats to find your favorite combination!
What type of rice is best for Skirt Steak Rice Bowls?
White rice is the traditional choice for skirt steak rice bowls, but you have plenty of options! Brown rice offers a nuttier flavor and more fiber, making it a healthier alternative. Quinoa is another great option, as it is high in protein and gluten-free. If you’re looking for a low-carb choice, cauliflower rice can be a fantastic substitute. Ultimately, the best type of rice depends on your personal preference and dietary needs. Choose what you enjoy most!
How can I make Skirt Steak Rice Bowls gluten-free?
Making skirt steak rice bowls gluten-free is quite simple! Start by ensuring that all your ingredients are gluten-free. Most fresh vegetables, rice, and beans are naturally gluten-free. However, be cautious with marinades and sauces, as they may contain gluten. Opt for gluten-free soy sauce or tamari if you’re using a marinade. Additionally, check labels on any packaged ingredients to ensure they meet gluten-free standards. With these adjustments, you can enjoy a delicious gluten-free meal!
Can I prepare Skirt Steak Rice Bowls in advance?
Yes, you can prepare skirt steak rice bowls in advance! To do this, cook the rice and marinate the steak ahead of time. You can store the cooked rice in an airtight container in the refrigerator for up to 4 days. For the steak, marinate it and keep it in the fridge until you’re ready to cook. When you’re ready to serve, simply grill the steak, slice it, and assemble your bowls with the prepped ingredients. This makes for a quick and easy meal on busy days!
Conclusion on Skirt Steak Rice Bowls
In conclusion, skirt steak rice bowls are a delightful and versatile meal option that brings together a variety of flavors and textures. With their tender skirt steak, fluffy rice, and vibrant toppings, these bowls are not only visually appealing but also packed with nutrition. Whether you’re preparing a quick weeknight dinner or hosting a casual gathering, skirt steak rice bowls are sure to impress your family and friends.
The beauty of this dish lies in its adaptability. You can easily customize the ingredients to suit your taste preferences or dietary needs. From experimenting with different marinades to swapping out grains and toppings, the possibilities are endless. This flexibility allows you to create a unique bowl every time you make it, keeping your meals exciting and fresh.
Moreover, the nutritional benefits of skirt steak rice bowls make them a smart choice for anyone looking to enjoy a balanced meal. With a good source of protein, healthy fats, and carbohydrates, these bowls provide the energy you need to power through your day. Plus, the addition of fresh vegetables ensures that you’re getting essential vitamins and minerals.
So, why not give skirt steak rice bowls a try? Gather your ingredients, follow the simple steps, and enjoy a delicious meal that is sure to satisfy. Whether you’re a seasoned cook or a beginner in the kitchen, this dish is approachable and rewarding. Embrace the flavors, get creative with your toppings, and savor every bite of your homemade skirt steak rice bowls!