Slow Cooker Mac and Cheese with Ham: A Creamy and Comforting One-Pot Meal

There’s something magical about mac and cheese. It’s the ultimate comfort food, and when you add tender, savory ham to the mix, it becomes an irresistible dish that satisfies everyone. Slow Cooker Mac and Cheese with Ham takes this classic to the next level by combining creamy, cheesy goodness with the convenience of a slow cooker.

Whether you’re looking for a family-friendly dinner or a crowd-pleasing potluck dish, this recipe is as easy as it is delicious. Just set it and forget it—your slow cooker does all the work while you sit back and relax!

Why You’ll Love Slow Cooker Mac and Cheese with Ham

  • Effortless Preparation: Toss everything into the slow cooker, stir occasionally, and let it cook to perfection.
  • Rich and Creamy: The blend of sharp cheddar and Velveeta creates an ultra-smooth, cheesy sauce.
  • A Complete Meal: With protein from the ham and carbs from the macaroni, this dish is satisfying and filling.
  • Perfect for Any Occasion: Great for weeknight dinners, holiday gatherings, or casual get-togethers.

Ingredients for Slow Cooker Mac and Cheese with Ham

Here’s what you’ll need to make this creamy and indulgent dish:

IngredientAmountNotes
Diced ham1 poundAdds a savory, smoky flavor.
Elbow macaroni noodles16 ounces (uncooked)Classic pasta shape for mac and cheese.
Whole milk4 cupsProvides creaminess and richness.
Evaporated milk24 ounces (2 cans)Helps create a thick, silky sauce.
Sharp cheddar cheese (shredded)4 cups, divided3 cups for mixing and 1 cup for topping.
Velveeta cheese (cubed)8 ouncesMelts smoothly for a velvety texture.
Unsalted butter (cubed)4 tablespoonsAdds richness and enhances the flavor.
Salt2 teaspoonsBalances the flavors.
Pepper½ teaspoonAdds a hint of spice.
Ground mustard¼ teaspoonComplements the cheese with a subtle tang.

Step-by-Step Instructions for Slow Cooker Mac and Cheese with Ham

1. Prepare Your Slow Cooker

  • Spray the basin of a 6–8 quart slow cooker with non-stick cooking spray to prevent sticking and make cleanup easier.

2. Add the Ingredients

  • Combine the diced ham, uncooked elbow macaroni, whole milk, evaporated milk, 3 cups of shredded cheddar cheese, cubed Velveeta, butter, salt, pepper, and ground mustard in the slow cooker. Stir well to distribute the ingredients evenly.

3. Start Cooking

  • Cover the slow cooker and set it to LOW. Cook for 2.5–3 hours, stirring every 30 minutes to prevent the edges from burning.

4. Add the Topping

  • About 30 minutes before the cook time is up, sprinkle the remaining 1 cup of shredded cheddar cheese over the top. Replace the cover and let the cheese melt.

5. Check for Doneness

  • The sauce should be slightly loose, and the noodles should be tender. If needed, cook for an additional 10–15 minutes.

6. Serve and Enjoy

  • Turn off the slow cooker and serve immediately. For an extra touch, garnish with fresh parsley or a sprinkle of black pepper.

Tips for the Best Slow Cooker Mac and Cheese with Ham

1. Choose the Right Pasta

  • Stick with elbow macaroni for the best texture. Avoid larger or thinner pasta shapes, as they may not cook evenly in the slow cooker.

2. Stir Regularly

  • Stirring every 30 minutes ensures the edges don’t burn and helps the cheese melt evenly.

3. Don’t Overcook

  • Keep an eye on the pasta, as overcooking can make it mushy. The goal is tender noodles and a creamy sauce.

4. Customize the Cheese Blend

  • While cheddar and Velveeta are a classic combo, feel free to experiment with other cheeses like Gruyère, Monterey Jack, or Colby.

5. Add Vegetables

  • For a nutritious twist, toss in frozen peas, diced bell peppers, or broccoli florets during the last 30 minutes of cooking.

Serving Suggestions for Slow Cooker Mac and Cheese with Ham

Perfect Pairings

  • Green Salad: A crisp, refreshing salad balances the richness of the mac and cheese.
  • Garlic Bread: Perfect for scooping up every bit of the cheesy sauce.
  • Steamed Vegetables: Add a side of lightly steamed broccoli or green beans for a complete meal.

Nutritional Information

NutrientPer Serving (1/8 of recipe)
Calories~450
Protein22g
Fat25g
Carbohydrates35g
Fiber1g

Why Slow Cooker Mac and Cheese with Ham Is a Crowd-Pleaser

This dish is more than just a meal; it’s a comforting, nostalgic experience. The creamy cheese sauce, tender pasta, and savory ham come together to create a recipe that feels indulgent yet easy to make. Perfect for both busy weeknights and special occasions, it’s a dish that everyone at the table will love.

FAQs About Slow Cooker Mac and Cheese with Ham

1. Can I use pre-cooked pasta?

No, it’s best to use uncooked pasta so it can absorb the flavors of the sauce as it cooks.

2. Can I make this recipe gluten-free?

Yes, substitute the macaroni with gluten-free pasta. Be sure to check the cooking time, as gluten-free pasta may cook faster.

3. What if I don’t have Velveeta?

You can use cream cheese or an additional cup of shredded cheddar as a substitute for Velveeta.

4. Can I freeze leftovers?

Yes, store leftovers in an airtight container and freeze for up to 3 months. Thaw in the refrigerator overnight and reheat on the stovetop or in the microwave.

5. How can I make this dish spicier?

Add a pinch of cayenne pepper, red pepper flakes, or diced jalapeños for a kick of heat.

6. Can I use a different type of milk?

Whole milk works best for creaminess, but you can substitute with 2% milk or a non-dairy alternative like unsweetened almond milk.

A Comforting Classic Made Easy

Slow Cooker Mac and Cheese with Ham is the ultimate comfort food, blending creamy cheese, savory ham, and tender pasta into a dish that’s both satisfying and simple to make. Whether you’re cooking for your family, hosting friends, or meal-prepping for the week, this recipe is a guaranteed hit.

So, grab your slow cooker, gather your ingredients, and get ready to enjoy a dish that’s as comforting as it is delicious. Don’t forget to top it with an extra sprinkle of cheddar for that perfect finishing touch.

Call to Action: Try this recipe today and share it with your loved ones—it’s too good to keep to yourself!

ating

Slow Cooker Mac and Cheese with Ham: A Creamy and Comforting One-Pot Meal

A creamy and comforting one-pot meal featuring tender pasta, savory ham, and a rich, cheesy sauce. Perfect for family dinners, potlucks, or anytime you crave indulgent comfort food.

Prep Time 10 minutes
Cook Time 3 hours
Total Time 3 hours 10 minutes
Servings: 8 servings
Course: Main Course
Cuisine: American

Ingredients
  

  • 1 pound diced ham
  • 16 ounces uncooked elbow macaroni
  • 4 cups whole milk
  • 24 ounces evaporated milk 2 cans
  • 4 cups shredded sharp cheddar cheese divided: 3 cups for mixing, 1 cup for topping
  • 8 ounces Velveeta cheese cubed
  • 4 tablespoons unsalted butter cubed
  • 2 teaspoons salt
  • ½ teaspoon ground black pepper
  • ¼ teaspoon ground mustard

Method
 

  1. Prepare the Slow Cooker: Spray the basin of a 6–8 quart slow cooker with non-stick cooking spray to prevent sticking.
  2. Combine Ingredients: In the slow cooker, mix together diced ham, uncooked macaroni, whole milk, evaporated milk, 3 cups of shredded cheddar cheese, Velveeta cheese, butter, salt, pepper, and ground mustard. Stir to distribute evenly.
  3. Cook on Low: Cover the slow cooker and cook on LOW for 2.5–3 hours, stirring every 30 minutes to prevent the edges from burning and to ensure even cooking.
  4. Add Topping: About 30 minutes before the cook time is up, sprinkle the remaining 1 cup of shredded cheddar cheese over the top. Cover and allow the cheese to melt.
  5. Check for Doneness: The pasta should be tender, and the sauce should be creamy and slightly loose. If needed, cook for an additional 10–15 minutes.
  6. Serve and Enjoy: Turn off the slow cooker and serve immediately. Garnish with fresh parsley or a sprinkle of black pepper for extra flavor.

Notes

  • Substitute Velveeta with cream cheese or an extra cup of shredded cheddar if preferred.
  • To make it gluten-free, use gluten-free pasta and ensure all other ingredients are gluten-free.
  • Add frozen peas, diced bell peppers, or broccoli florets during the last 30 minutes of cooking for a veggie-packed twist.
  • Store leftovers in an airtight container in the refrigerator for up to 3 days or freeze for up to 3 months.
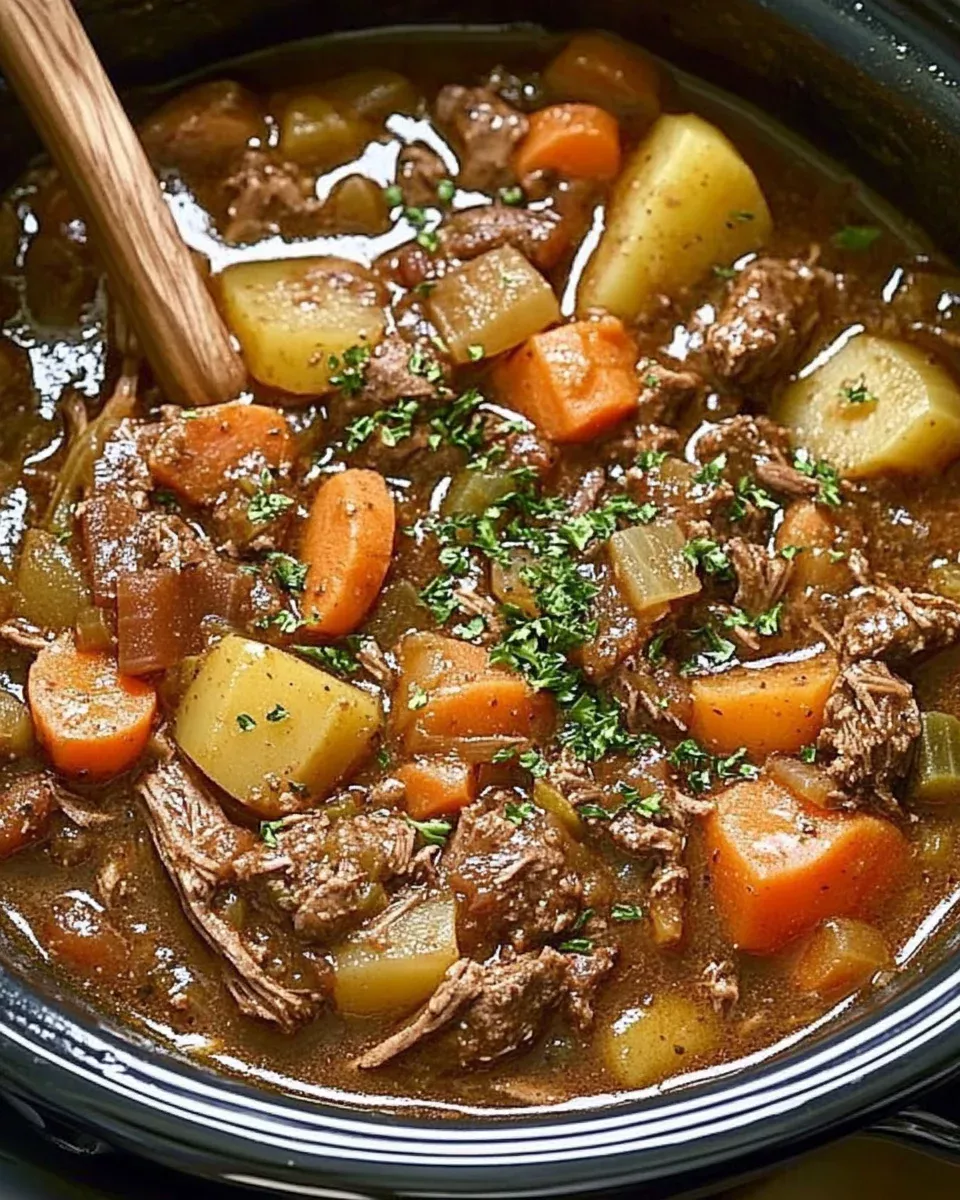

Slow Cooker Beef Stew: A Comforting, Flavorful Classic

When the weather turns chilly, nothing warms you up like a hearty bowl of Slow Cooker Beef Stew. It’s the kind of meal that feels like a hug in a bowl—tender beef, perfectly cooked vegetables, and a rich, savory broth all come together to create a dish that’s satisfying and delicious.

What makes this recipe even better is that it’s easy to prepare. Your slow cooker does all the hard work, leaving you with a warm and comforting meal that’s ready when you need it. Whether you’re making dinner for your family or meal prepping for the week, this stew is a timeless choice.

Why You’ll Love Slow Cooker Beef Stew

  • Minimal Effort: Just prep your ingredients, toss them in the slow cooker, and let it do its magic.
  • Incredibly Tender Beef: Slow cooking makes the beef fall-apart tender.
  • Balanced Flavors: A perfect mix of savory, herby, and subtly sweet.
  • Perfect for Leftovers: The flavors deepen overnight, making it even better the next day.
  • One-Pot Wonder: Fewer dishes mean less cleanup!

Ingredients for Slow Cooker Beef Stew

Here’s what you’ll need to create this hearty, delicious dish:

For the Stew

IngredientAmountNotes
All-purpose flour¼ cupHelps thicken the stew.
Dried thyme2 tspAdds an earthy, herby flavor.
Kosher salt1 ½ tspEnhances the overall flavor.
Freshly ground black pepper1 tspAdds a subtle kick.
Garlic powder1 tspProvides a hint of garlic flavor.
Yellow onion1 medium, diced (~1 ½ cups)A base ingredient for flavor.
Carrots4 medium, sliced (~2 ½ cups)Adds sweetness and texture.
Celery2 medium stalks, sliced (~¾ cup)Brings crunch and balance.
Yukon gold or red potatoes1 lb (~3 medium), cubedHolds their shape during slow cooking.
Boneless beef chuck roast2 ¼ lbs, cut into chunksA rich, tender cut ideal for stewing.
Bay leaves2 driedInfuses a subtle depth of flavor.
Beef broth1 ½ cupsForms the savory base of the stew.
Tomato paste1 tbspAdds a rich umami depth.
Worcestershire sauce1 tbspEnhances the savory notes of the broth.

Optional Garnish

  • Chopped fresh parsley leaves
  • Additional black pepper

Step-by-Step Instructions for Slow Cooker Beef Stew

1. Prepare the Slow Cooker

  • In a 6-quart or larger slow cooker, combine the flour, dried thyme, kosher salt, black pepper, and garlic powder. Stir until evenly mixed.

2. Prep the Vegetables

  • Dice the onion.
  • Peel and slice the carrots into 1-inch-thick rounds.
  • Slice the celery into ½-inch-thick pieces.
  • Cube the potatoes into 1-inch pieces.

3. Cut and Coat the Beef

  • Trim off any large pieces of surface fat from the beef chuck roast.
  • Cut the beef into 1 to 1 ½-inch chunks.
  • Toss the beef in the flour mixture until evenly coated.

4. Add the Ingredients to the Slow Cooker

  • Place the beef in the slow cooker.
  • Add the diced onion, carrots, celery, potatoes, and bay leaves on top.

5. Mix the Broth

  • In a medium bowl or liquid measuring cup, whisk together the beef broth, tomato paste, and Worcestershire sauce.
  • Pour the mixture over the beef and vegetables. Stir gently to combine.

6. Slow Cook the Stew

  • Cover and cook on LOW for 6–8 hours or HIGH for 4 hours.
  • The beef should be tender, and the vegetables cooked through.

7. Taste and Adjust Seasoning

  • Taste the stew and season with additional salt and black pepper as needed.

8. Serve and Garnish

  • Ladle the stew into bowls, and garnish with chopped fresh parsley and a sprinkle of black pepper.

Serving Suggestions for Slow Cooker Beef Stew

Sides to Complement Your Stew

  • Crusty Bread: Perfect for soaking up the rich broth.
  • Mashed Potatoes: Serve the stew over creamy mashed potatoes for a hearty meal.
  • Rice or Quinoa: A lighter option to balance the rich flavors of the stew.

Tips for the Perfect Slow Cooker Beef Stew

1. Choose the Right Cut of Beef

  • Chuck Roast: This cut is marbled with fat, which breaks down during slow cooking, creating tender, flavorful pieces.
  • Other Options: Brisket or bottom round can also work well.

2. Don’t Skip the Flour

  • Tossing the beef in flour helps thicken the stew as it cooks.

3. Customize Your Vegetables

  • Add parsnips, mushrooms, or turnips for variety.

4. Adjust the Liquid

  • If you prefer a thicker stew, mix 1 tablespoon of cornstarch with 2 tablespoons of cold water and stir it in during the last 30 minutes of cooking.

5. Storage and Reheating

  • Refrigerator: Store leftovers in an airtight container for up to 3 days.
  • Freezer: Freeze the stew for up to 3 months. Thaw overnight in the refrigerator before reheating.

Nutritional Information

NutrientPer Serving (1/6 of recipe)
Calories~350
Protein25g
Fat10g
Carbohydrates30g
Fiber5g

Why Slow Cooker Beef Stew Is a Must-Try Dish

  • Perfect for Meal Prep: Make a large batch and enjoy it throughout the week.
  • Nutritious and Filling: Packed with protein, fiber, and vitamins, it’s a complete meal in a bowl.
  • Family-Friendly: Everyone loves the rich, comforting flavors of a classic beef stew.

FAQs About Slow Cooker Beef Stew

1. Can I use a different meat for this recipe?

Yes! Lamb, pork, or even chicken thighs can be substituted for beef.

2. What if I don’t have a slow cooker?

You can cook the stew in a Dutch oven or large pot on the stovetop over low heat for 2–3 hours.

3. How do I keep the potatoes from getting mushy?

Use Yukon gold or red potatoes, as they hold their shape better during slow cooking.

4. Can I add wine to this recipe?

Absolutely! Substitute ½ cup of the beef broth with red wine for extra depth of flavor.

5. Can I make this recipe gluten-free?

Yes, replace the all-purpose flour with gluten-free flour or cornstarch.

6. How do I reheat leftover stew?

Reheat on the stovetop over medium heat, stirring occasionally, or microwave individual portions.

A Dish That Feels Like Home

There’s nothing quite like the smell of Slow Cooker Beef Stew filling your home as it simmers away. With its tender beef, perfectly cooked vegetables, and savory broth, this dish is a true comfort classic.

So, grab your slow cooker and get started. Whether you’re feeding a crowd or meal-prepping for the week, this recipe is guaranteed to be a hit. Serve it with your favorite sides and enjoy every warm, hearty bite!

Pro Tip: Don’t forget to share your creation with friends and family—they’ll be begging you for the recipe! Happy cooking!

ating

Slow Cooker Beef Stew: A Comforting, Flavorful Classic

A warm and hearty classic featuring tender beef, perfectly cooked vegetables, and a rich, savory broth. Perfect for chilly nights, family dinners, or meal prep!

Prep Time 20 minutes
Total Time 6 hours 20 minutes
Servings: 6 servings
Course: Main Course
Cuisine: American

Ingredients
  

For the Stew:
  • ¼ cup all-purpose flour
  • 2 teaspoons dried thyme
  • 1 ½ teaspoons kosher salt
  • 1 teaspoon freshly ground black pepper
  • 1 teaspoon garlic powder
  • 1 medium yellow onion diced (~1 ½ cups)
  • 4 medium carrots sliced (~2 ½ cups)
  • 2 medium celery stalks sliced (~¾ cup)
  • 1 pound Yukon gold or red potatoes cubed (~3 medium)
  • 2 ¼ pounds boneless beef chuck roast cut into chunks
  • 2 dried bay leaves
  • 1 ½ cups beef broth
  • 1 tablespoon tomato paste
  • 1 tablespoon Worcestershire sauce
Optional Garnish:
  • Chopped fresh parsley
  • Additional black pepper

Method
 

Prepare the Slow Cooker:
  1. In a 6-quart or larger slow cooker, combine the flour, dried thyme, kosher salt, black pepper, and garlic powder. Stir to mix evenly.
Prep the Vegetables:
  1. Dice the onion.
  2. Peel and slice the carrots into 1-inch rounds.
  3. Slice the celery into ½-inch pieces.
  4. Cube the potatoes into 1-inch chunks.
Cut and Coat the Beef:
  1. Trim any large pieces of fat from the chuck roast and cut it into 1–1 ½-inch chunks. Toss the beef in the flour mixture until evenly coated.
Assemble the Ingredients:
  1. Place the coated beef into the slow cooker. Add the diced onion, carrots, celery, potatoes, and bay leaves on top.
Mix the Broth:
  1. In a medium bowl or measuring cup, whisk together the beef broth, tomato paste, and Worcestershire sauce. Pour over the beef and vegetables, stirring gently to combine.
Cook the Stew:
  1. Cover and cook on LOW for 6–8 hours or HIGH for 4 hours, until the beef is tender and the vegetables are cooked through.
Taste and Adjust Seasoning:
  1. Taste the stew and add additional salt or black pepper as needed.
Serve:
  1. Ladle the stew into bowls and garnish with chopped parsley and a sprinkle of black pepper, if desired. Serve warm with your favorite sides.

Notes

  • For gluten-free, substitute all-purpose flour with gluten-free flour or cornstarch.
  • Add variety by including parsnips, mushrooms, or turnips.
  • For a thicker stew, mix 1 tablespoon cornstarch with 2 tablespoons water and stir it in during the last 30 minutes of cooking.
  • Store leftovers in an airtight container in the refrigerator for up to 3 days or freeze for up to 3 months.

Creamy Tuscan Chicken: A Rich and Elegant One-Pan Dish

Picture this: a creamy, flavorful sauce filled with garlic, sun-dried tomatoes, and baby spinach, gently hugging tender, juicy chicken breasts. Creamy Tuscan Chicken is more than just a meal—it’s an experience. Perfect for a family dinner or a romantic night in, this one-pan dish brings restaurant-quality flavors straight to your kitchen.

The best part? It’s easy enough for a weeknight yet impressive enough for a special occasion. Let’s dive into everything you need to create this indulgent masterpiece.

Why You’ll Love Creamy Tuscan Chicken

  • Rich and Flavorful: The creamy sauce is packed with Italian-inspired ingredients that burst with flavor.
  • Quick and Easy: This dish comes together in under 30 minutes, making it perfect for busy evenings.
  • One-Pan Wonder: Minimal cleanup means more time to enjoy your meal.
  • Customizable: You can adapt it to suit your dietary needs or preferences.

Ingredients for Creamy Tuscan Chicken

Here’s what you’ll need to create this decadent dish:

For the Chicken

IngredientAmountNotes
Boneless, skinless chicken breasts4 (6 oz each)Pounded to an even thickness for even cooking.
Italian seasoning1 tspA blend of oregano, thyme, basil, and rosemary.
Kosher salt1 tspEnhances the natural flavors.
Freshly ground black pepper½ tspAdds a touch of spice.

For the Sauce

IngredientAmountNotes
Extra virgin olive oil3 tbspFor searing the chicken and sautéing aromatics.
Garlic4 cloves, mincedProvides a rich, aromatic base.
Yellow onion¼ cup, finely choppedAdds depth to the sauce.
Sun-dried tomatoes½ cup, thinly slicedSweet and tangy, they’re a star ingredient.
Baby spinach2 cupsAdds color, flavor, and nutrition.
Heavy cream1 ½ cupsCreates the luxurious sauce. Substitute with coconut cream for a dairy-free option.
Parmesan cheese¼ cup, freshly gratedInfuses the sauce with a savory richness.

Step-by-Step Instructions for Creamy Tuscan Chicken

1. Prepare the Chicken

  • Pat the chicken breasts dry with paper towels.
  • Sprinkle both sides with Italian seasoning, kosher salt, and black pepper.

2. Sear the Chicken

  • Heat 2 tablespoons of olive oil in a large skillet over medium-high heat.
  • Add the chicken breasts and cook for 4–5 minutes per side, until golden brown.
  • Remove the chicken from the skillet and set it aside.

3. Sauté the Aromatics

  • Add the remaining tablespoon of olive oil to the skillet.
  • Sauté the minced garlic and chopped onion for 2–3 minutes, until fragrant and softened.

4. Build the Sauce

  • Stir in the sun-dried tomatoes, letting them warm through for 1–2 minutes.
  • Lower the heat and pour in the heavy cream, stirring to combine.

5. Add the Spinach and Parmesan

  • Add the baby spinach, stirring gently until it wilts.
  • Stir in the grated Parmesan cheese, letting it melt into the sauce.

6. Return the Chicken to the Pan

  • Place the seared chicken breasts back into the skillet.
  • Simmer for 5–7 minutes, spooning the sauce over the chicken, until the chicken is fully cooked (internal temperature of 165°F).

7. Serve and Enjoy

  • Serve your Creamy Tuscan Chicken warm, with the sauce spooned generously over the top.

Serving Suggestions for Creamy Tuscan Chicken

Perfect Pairings

  • Pasta: Toss fettuccine, spaghetti, or penne in the sauce for a complete meal.
  • Mashed Potatoes: Creamy potatoes soak up the sauce beautifully.
  • Rice or Quinoa: A great option for a lighter side dish.
  • Crusty Bread: Use it to mop up every last drop of that delicious sauce.

Tips for the Perfect Creamy Tuscan Chicken

1. Choose the Right Pan

  • Use a large skillet with high sides to prevent the sauce from spilling over.

2. Don’t Skip the Sear

  • Searing the chicken creates a flavorful crust and locks in the juices.

3. Adjust the Consistency

  • If the sauce is too thick, add a splash of chicken broth to thin it out.

4. Make It Dairy-Free

  • Substitute heavy cream with coconut cream and Parmesan with nutritional yeast or a dairy-free cheese.

5. Amp Up the Flavor

  • Add a splash of white wine to deglaze the pan before adding the cream for a touch of acidity.

Nutritional Information

NutrientPer Serving (1/4 of recipe)
Calories~450
Protein32g
Fat32g
Carbohydrates6g

Why Creamy Tuscan Chicken Is Perfect for Any Occasion

This dish strikes the perfect balance between indulgence and simplicity. It’s elegant enough to serve at a dinner party yet quick enough for a busy weeknight. The creamy sauce, combined with the tender chicken, creates a dish that feels both comforting and luxurious.

FAQs About Creamy Tuscan Chicken

1. Can I use chicken thighs instead of breasts?

Yes! Chicken thighs are just as delicious and may even stay juicier. Adjust the cooking time as needed.

2. Can I make this recipe ahead of time?

You can prepare the sauce and sear the chicken in advance. Store them separately and combine them just before serving.

3. How do I store leftovers?

Store leftovers in an airtight container in the refrigerator for up to 3 days. Reheat gently on the stovetop or in the microwave.

4. Can I freeze Creamy Tuscan Chicken?

While the chicken freezes well, the cream-based sauce may separate when reheated. For best results, make it fresh.

5. What can I substitute for sun-dried tomatoes?

If you don’t have sun-dried tomatoes, roasted red peppers make a great alternative.

6. How can I make this dish spicier?

Add a pinch of red pepper flakes or a splash of hot sauce for extra heat.

Bring Restaurant-Quality Flavors to Your Kitchen

Ready to impress your family or guests with a dish that’s as stunning as it is delicious? Creamy Tuscan Chicken combines the best of creamy sauces, fresh ingredients, and bold flavors for a meal that’s truly unforgettable.

Pro Tip: Serve it with a crisp glass of white wine or a refreshing lemonade to complete your meal. Try it tonight, and let the compliments roll in!

ating

Creamy Tuscan Chicken: A Rich and Elegant One-Pan Dish

A rich and elegant one-pan dish featuring tender chicken breasts smothered in a creamy sauce with garlic, sun-dried tomatoes, and baby spinach. Perfect for a cozy dinner or a special occasion!

Prep Time 10 minutes
Cook Time 20 minutes
Total Time 30 minutes
Servings: 4 servings
Course: Main Course
Cuisine: Italian-inspired

Ingredients
  

For the Chicken:
  • 4 boneless skinless chicken breasts (6 oz each)
  • 1 teaspoon Italian seasoning
  • 1 teaspoon kosher salt
  • ½ teaspoon freshly ground black pepper
For the Sauce:
  • 3 tablespoons extra virgin olive oil divided
  • 4 garlic cloves minced
  • ¼ cup yellow onion finely chopped
  • ½ cup sun-dried tomatoes thinly sliced
  • 2 cups baby spinach
  • 1½ cups heavy cream or coconut cream for dairy-free
  • ¼ cup Parmesan cheese freshly grated

Method
 

Prepare the Chicken:
  1. Pat the chicken breasts dry and season both sides with Italian seasoning, kosher salt, and black pepper.
Sear the Chicken:
  1. Heat 2 tablespoons of olive oil in a large skillet over medium-high heat. Sear the chicken breasts for 4–5 minutes per side, until golden brown. Remove from the skillet and set aside.
Sauté Aromatics:
  1. Add the remaining tablespoon of olive oil to the skillet. Sauté minced garlic and chopped onion for 2–3 minutes, until fragrant and softened.
Build the Sauce:
  1. Stir in the sun-dried tomatoes and cook for 1–2 minutes. Reduce heat to low and pour in the heavy cream, stirring to combine.
Add Spinach and Parmesan:
  1. Add baby spinach and gently stir until wilted. Stir in grated Parmesan cheese until melted and incorporated into the sauce.
Return the Chicken:
  1. Place the seared chicken breasts back into the skillet. Simmer for 5–7 minutes, spooning the sauce over the chicken, until the chicken is fully cooked (internal temperature of 165°F).
Serve:
  1. Serve the chicken warm, generously topped with the creamy sauce.

Notes

  • Substitute chicken breasts with chicken thighs for a juicier option.
  • For a thinner sauce, add a splash of chicken broth.
  • Make it dairy-free by using coconut cream and nutritional yeast instead of Parmesan.
  • Add a splash of white wine to deglaze the pan before adding the cream for extra flavor.

Apple Crisp Pizza: A Sweet Twist on a Classic Dessert

Imagine combining two of your favorite desserts into one irresistible dish: the warm, spiced flavors of apple crisp paired with the fun and shareable format of pizza. Apple Crisp Pizza is the ultimate crowd-pleaser, perfect for family gatherings, holiday dinners, or just an indulgent treat on a cozy evening.

This dessert features a buttery pie crust, sweet caramel, tender spiced apples, and a crunchy oat crumble topping. It’s simple to make, fun to serve, and even more enjoyable to eat!

Why You’ll Love Apple Crisp Pizza

  • A Unique Twist: It combines the best of apple pie and apple crisp into a pizza-inspired dessert.
  • Customizable: You can use homemade or store-bought ingredients to suit your schedule.
  • Perfect for Sharing: It’s a fun and interactive dessert that everyone can enjoy.
  • Seasonal Favorite: A great way to celebrate fall or use up extra apples.

Ingredients for Apple Crisp Pizza

Here’s what you’ll need to make this mouthwatering dessert:

Base Ingredients

IngredientAmountNotes
Pie crust (homemade or store-bought)1 crustRolled to fit a pizza pan.
Caramel sauce½ cupAdds a rich, sweet flavor.

Apple Topping

IngredientAmountNotes
Apples1 lb (about 4 apples)Peeled and sliced into ½-inch portions.
Brown sugar⅛ cupEnhances the natural sweetness of the apples.
All-purpose flour2 tbspThickens the apple topping.
Cinnamon1 tspAdds warm spice to the apples.

Crisp Topping

IngredientAmountNotes
All-purpose flour¾ cupForms the base of the crumble.
Brown sugar¼ cupSweetens the crumble topping.
Old-fashioned oats¼ cupAdds a chewy texture.
Cinnamon1 tspInfuses warmth into the crumble.
Butter (room temperature)¼ cup + 2 tbspBinds the crumble ingredients.
Caramel sauce2 tbspAdds sweetness and a sticky texture.

Step-by-Step Instructions for Apple Crisp Pizza

1. Prepare Your Ingredients

  • Preheat your oven to 350°F (175°C).
  • Lightly grease a pizza pan with butter or nonstick spray.

2. Roll Out the Crust

  • Roll your pie crust into a circle large enough to fit your pizza pan (about 14 inches in diameter).
  • Fold the edges back slightly to form a crust.

3. Make the Apple Topping

  • In a mixing bowl, toss the sliced apples with brown sugar, flour, and cinnamon.
  • Spread the apples evenly over the crust in a single layer.

4. Prepare the Crisp Topping

  • In another bowl, combine the flour, brown sugar, oats, cinnamon, and salt.
  • Add the butter and caramel sauce. Use a fork or pastry blender to incorporate the butter until the mixture forms crumbs.

5. Assemble the Pizza

  • Sprinkle the crisp topping evenly over the apples, making sure to cover as much as possible.
  • Drizzle ¼–½ cup of caramel sauce over the top.

6. Bake the Apple Crisp Pizza

  • Place the pan in the oven and bake for 35–40 minutes.
  • The crust should be golden brown, and the apples should be tender.

7. Cool and Serve

  • Let the pizza cool for 10 minutes before slicing.
  • Serve warm or at room temperature, optionally with vanilla ice cream or extra caramel sauce.

Tips for the Perfect Apple Crisp Pizza

1. Choosing the Right Apples

  • Opt for firm, tart apples like Granny Smith, Honeycrisp, or Fuji for the best texture and flavor.

2. Make It Gluten-Free

  • Use a gluten-free pie crust and substitute gluten-free flour for the oat and all-purpose flour.

3. Keep the Crust Crispy

  • Bake on a pizza stone or a perforated pizza pan for a crispier crust.

4. Adding Nuts

  • For extra crunch, sprinkle chopped pecans or walnuts over the crisp topping before baking.

5. Adjust the Sweetness

  • Reduce the sugar in the apple and crisp toppings if your apples are naturally sweet.

Serving Suggestions

  • With Ice Cream: A scoop of vanilla ice cream makes this dessert even more indulgent.
  • Extra Drizzle: Warm caramel or chocolate sauce for added sweetness.
  • Seasonal Spices: Add a pinch of nutmeg or allspice to the apple topping for a festive twist.

Nutritional Information

NutrientPer Serving (1/8 of pizza)
Calories~320
Protein3g
Fat12g
Carbohydrates48g
Fiber3g

Why Apple Crisp Pizza Is Perfect for Any Occasion

This dessert is versatile, easy to make, and always a hit. Whether you’re hosting a holiday party or looking for a creative way to enjoy fall’s bounty of apples, Apple Crisp Pizza fits the bill. It’s a unique twist on classic desserts that’s sure to impress.

FAQs About Apple Crisp Pizza

1. Can I use a store-bought crust?

Yes! Store-bought crusts save time and work perfectly for this recipe.

2. What if I don’t have a pizza pan?

You can use a large baking sheet or a round cake pan instead.

3. Can I make this recipe vegan?

Absolutely! Use a vegan pie crust, plant-based butter, and vegan caramel sauce.

4. How do I store leftovers?

Store in an airtight container at room temperature for up to 2 days, or refrigerate for up to 5 days.

5. Can I freeze Apple Crisp Pizza?

Yes, freeze it unbaked. When ready to enjoy, bake directly from frozen, adding an extra 10–15 minutes to the baking time.

6. What other fruits can I use?

Try pears, peaches, or even a mix of berries for a fun variation.

Ready to Try Apple Crisp Pizza?

Now that you know how to make this sweet, shareable dessert, it’s time to roll up your sleeves and get baking! Whether you stick to the recipe or add your personal touch, Apple Crisp Pizza is sure to become a favorite in your household.

Pro Tip: Serve it warm with a drizzle of caramel and a scoop of ice cream for a dessert that’s impossible to resist. Share your creation with family and friends—they’ll be begging you for the recipe!

ating

Apple Crisp Pizza: A Sweet Twist on a Classic Dessert

A sweet and shareable dessert combining the warm, spiced flavors of apple crisp with the fun format of a pizza. Perfect for gatherings, holidays, or any time you crave something unique and delicious!

Prep Time 20 minutes
Cook Time 40 minutes
Total Time 1 hour
Servings: 8 servings
Course: Dessert
Cuisine: American

Ingredients
  

Base Ingredients:
  • 1 pie crust homemade or store-bought
  • ½ cup caramel sauce
Apple Topping:
  • 1 pound about 4 apples, peeled and sliced into ½-inch portions
  • ⅛ cup brown sugar
  • 2 tablespoons all-purpose flour
  • 1 teaspoon cinnamon
Crisp Topping:
  • ¾ cup all-purpose flour
  • ¼ cup brown sugar
  • ¼ cup old-fashioned oats
  • 1 teaspoon cinnamon
  • ¼ cup + 2 tablespoons butter room temperature
  • 2 tablespoons caramel sauce

Method
 

  1. Preheat Oven: Preheat your oven to 350°F (175°C) and lightly grease a pizza pan with butter or nonstick spray.
  2. Prepare the Crust: Roll the pie crust into a circle large enough to fit a pizza pan (about 14 inches in diameter). Fold the edges back slightly to form a crust.
  3. Make the Apple Topping: In a mixing bowl, toss the sliced apples with brown sugar, flour, and cinnamon. Spread evenly over the pie crust.
  4. Prepare the Crisp Topping: Combine flour, brown sugar, oats, and cinnamon in a bowl. Add butter and caramel sauce. Use a fork or pastry blender to mix until crumbly.
  5. Assemble the Pizza: Sprinkle the crisp topping evenly over the apples. Drizzle ¼–½ cup of caramel sauce over the top.
  6. Bake: Bake in the preheated oven for 35–40 minutes, until the crust is golden brown and the apples are tender.
  7. Cool and Serve: Let the pizza cool for 10 minutes before slicing. Serve warm or at room temperature, optionally with vanilla ice cream or additional caramel sauce.

Notes

  • Use firm, tart apples like Granny Smith, Honeycrisp, or Fuji for the best results.
  • For a gluten-free version, use a gluten-free pie crust and substitute gluten-free flour.
  • Add chopped nuts like pecans or walnuts to the topping for extra crunch.
  • Store leftovers in an airtight container for up to 2 days at room temperature or 5 days in the refrigerator.

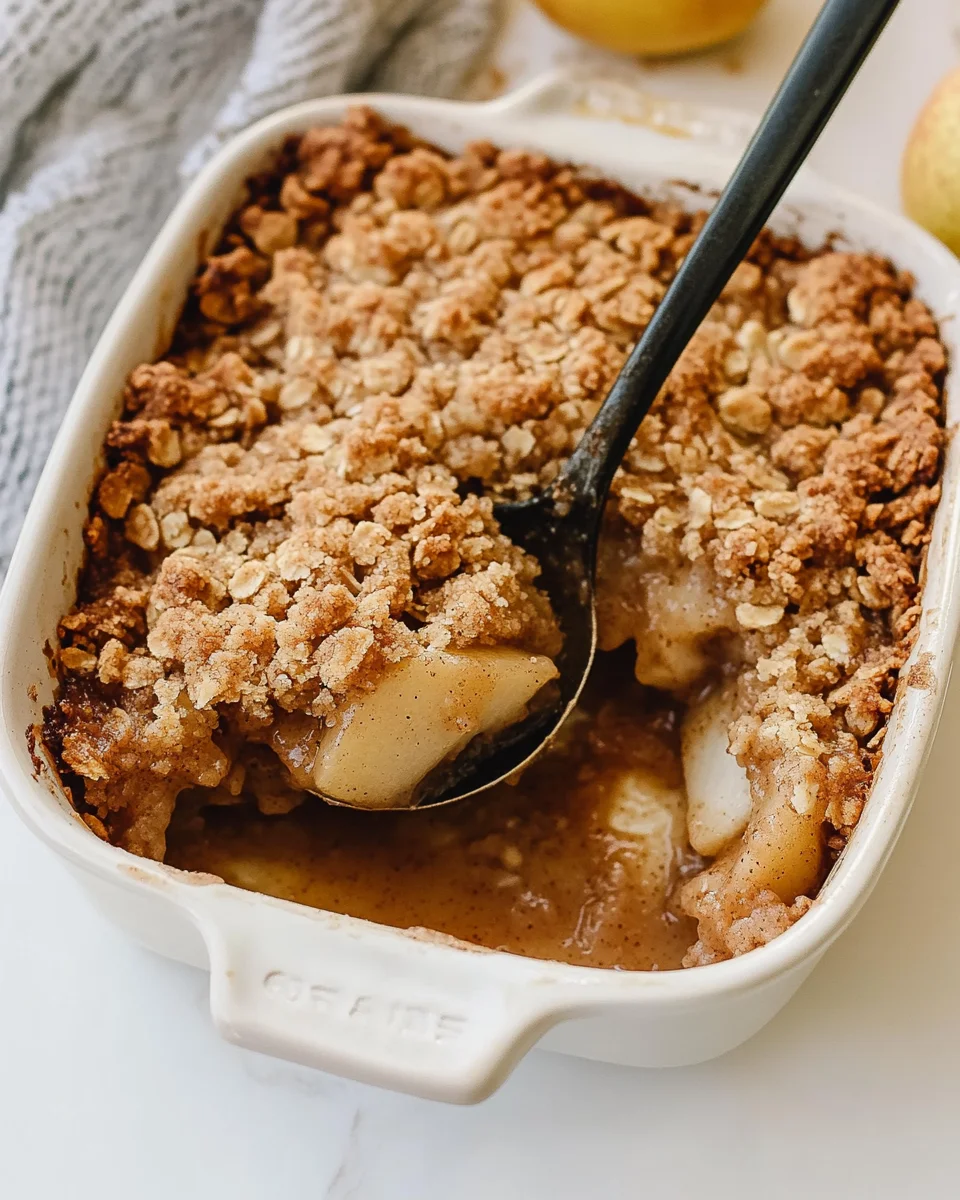
Cinnamon Pear Crisp: A Warm and Comforting Dessert

There’s something magical about the smell of cinnamon and pears baking in the oven. It’s a sweet, cozy aroma that instantly makes you feel at home. Cinnamon Pear Crisp is a dessert that brings together the natural sweetness of pears, a hint of spice, and a crunchy crumble topping. Whether you’re making it for a holiday dinner or just a regular weeknight treat, this recipe is sure to impress without requiring hours in the kitchen.

Let’s dive into everything you need to know to create this delicious, wholesome dessert!

Why You’ll Love Cinnamon Pear Crisp

  • Simple Ingredients: You probably already have most of the ingredients in your pantry.
  • Bursting with Flavor: Sweet pears, warm spices, and a buttery crumble make every bite irresistible.
  • Naturally Sweetened: Maple syrup and coconut sugar provide natural sweetness, making it a healthier alternative to traditional desserts.
  • Perfect for Any Occasion: This crisp is just as fitting for a family dinner as it is for a holiday gathering.

Ingredients for Cinnamon Pear Crisp

Here’s what you’ll need to create the filling and the crunchy topping:

For the Filling

IngredientAmountNotes
Bartlett pears (or apples)6 medium, slicedProvides the juicy base for the crisp.
Maple syrup¼ cupAdds natural sweetness.
Lemon juice2 tbspBalances the sweetness and prevents browning.
Cinnamon1½ tspBrings warmth and spice.
Ground ginger1 tspAdds a hint of zesty spice.
Vanilla extract1 tspEnhances the flavor of the pears.
Salt¼ tspBalances the flavors.
Oat flour (or starch)2 tbspHelps thicken the filling.

For the Crumble Topping

IngredientAmountNotes
Rolled oats1 cupAdds a chewy texture to the topping.
Oat flour½ cupKeeps the topping light and crumbly.
Coconut sugar (or brown sugar)⅓ cupAdds a caramel-like sweetness.
Coconut oil (or butter)⅓ cupBinds the topping together while adding richness.
Cinnamon1½ tspFor a warm, spicy flavor.
Salt½ tspBalances the sweetness.

Step-by-Step Instructions for Cinnamon Pear Crisp

1. Prepare Your Baking Dish

  • Preheat your oven to 350°F.
  • Lightly grease a 9×9-inch or 2-quart baking dish with coconut oil or butter to prevent sticking.

2. Make the Filling

  • Peel and slice the pears into ¼-inch slices.
  • In a large bowl, toss the pear slices with maple syrup, lemon juice, cinnamon, ginger, vanilla extract, and salt.
  • Sprinkle the oat flour or starch over the mixture and stir until combined.
  • Pour the filling into the prepared baking dish, spreading it evenly.

3. Prepare the Crumble Topping

  • In another bowl, combine the rolled oats, oat flour, sugar, cinnamon, and salt.
  • Add the coconut oil or butter. Use a fork or your hands to mix until the ingredients form a crumbly texture.

4. Assemble the Crisp

  • Sprinkle the crumble topping evenly over the pear filling, covering it completely.

5. Bake the Crisp

  • Place the dish in the preheated oven and bake for 55–75 minutes.
  • The filling should be bubbling, and the topping should be golden brown.

6. Cool and Serve

  • Let the crisp cool for at least 10 minutes before serving.
  • For an extra treat, drizzle with almond butter caramel sauce or serve with a scoop of vanilla ice cream.

Tips for the Best Cinnamon Pear Crisp

1. Choosing the Right Pears

  • Bartlett pears are ideal for this recipe because of their sweetness and juiciness.
  • You can also use Bosc pears or even a mix of pears and apples for variety.

2. Adjusting Sweetness

  • If your pears are very ripe, you can reduce the maple syrup to avoid an overly sweet filling.

3. Making It Gluten-Free

  • Oat flour is naturally gluten-free but ensure your oats and oat flour are labeled gluten-free if needed.

4. Adding a Crunchy Twist

  • For more texture, mix chopped nuts like pecans or almonds into the crumble topping.

5. Storing Leftovers

  • Store any leftover crisp in an airtight container in the refrigerator for up to 3 days. Reheat in the oven or microwave before serving.

Nutritional Information

NutrientPer Serving (1/8 of recipe)
Calories~250
Protein3g
Fat11g
Carbohydrates38g
Fiber5g

Why Cinnamon Pear Crisp Is Perfect for Any Occasion

This dessert is versatile and works for everything from casual dinners to festive celebrations:

  • Weeknight Treat: Easy to prepare and a healthier dessert option.
  • Holiday Showstopper: A warm, comforting dessert that feels special enough for a crowd.
  • Seasonal Favorite: Perfect for fall and winter when pears are at their peak.

FAQs About Cinnamon Pear Crisp

1. Can I use other fruits instead of pears?

Absolutely! Apples, peaches, or a mix of berries work wonderfully in this recipe.

2. How do I make this recipe vegan?

This recipe is already vegan if you use coconut oil. Just ensure any toppings (like ice cream) are plant-based.

3. What if I don’t have oat flour?

You can make oat flour by blending rolled oats in a food processor until fine.

4. Can I freeze Cinnamon Pear Crisp?

Yes, assemble the crisp and freeze it unbaked. When ready to serve, bake directly from frozen, adding 10–15 minutes to the baking time.

5. How do I prevent the topping from getting soggy?

Let the crisp cool slightly before covering it, as steam can soften the topping.

6. Can I make this dessert ahead of time?

Yes, prepare and refrigerate the crisp unbaked for up to 24 hours. Bake it when you’re ready to serve.

A Dessert That Feels Like Home

Few desserts capture the warmth and coziness of home quite like Cinnamon Pear Crisp. With its tender, spiced pears and buttery crumble topping, this dish is sure to become a favorite in your recipe collection.

So, why not give it a try? Gather your ingredients, preheat your oven, and prepare to enjoy a dessert that’s as comforting as it is delicious. Don’t forget to share your creation with family and friends—it’s too good to keep to yourself!

Pro Tip: Serve it warm with a scoop of vanilla ice cream or a drizzle of caramel sauce for an extra touch of indulgence. Happy baking!

ating

Cinnamon Pear Crisp: A Warm and Comforting Dessert

A warm and comforting dessert featuring tender, spiced pears and a buttery crumble topping. Perfect for cozy evenings, holiday gatherings, or any occasion that calls for a sweet treat!

Prep Time 15 minutes
Cook Time 1 hour
Total Time 1 hour 15 minutes
Servings: 8 servings
Course: Dessert
Cuisine: American

Ingredients
  

For the Filling:
  • 6 medium Bartlett pears peeled and sliced
  • ¼ cup maple syrup
  • 2 tablespoons lemon juice
  • 1½ teaspoons cinnamon
  • 1 teaspoon ground ginger
  • 1 teaspoon vanilla extract
  • ¼ teaspoon salt
  • 2 tablespoons oat flour or cornstarch
For the Crumble Topping:
  • 1 cup rolled oats
  • ½ cup oat flour
  • ⅓ cup coconut sugar or brown sugar
  • ⅓ cup coconut oil or butter
  • 1½ teaspoons cinnamon
  • ½ teaspoon salt

Method
 

  1. Preheat Oven: Preheat your oven to 350°F and lightly grease a 9×9-inch or 2-quart baking dish with coconut oil or butter.
  2. Prepare the Filling: In a large bowl, combine sliced pears, maple syrup, lemon juice, cinnamon, ginger, vanilla extract, and salt. Sprinkle oat flour or cornstarch over the mixture and stir until well coated. Spread the filling evenly in the prepared baking dish.
  3. Make the Crumble Topping: In a separate bowl, mix rolled oats, oat flour, sugar, cinnamon, and salt. Add coconut oil or butter and use a fork or your hands to mix until the topping forms a crumbly texture.
  4. Assemble the Crisp: Sprinkle the crumble topping evenly over the pear mixture, ensuring full coverage.
  5. Bake: Bake for 55–75 minutes, or until the filling is bubbling and the topping is golden brown.
  6. Cool and Serve: Let the crisp cool for at least 10 minutes before serving. For an extra treat, serve warm with a scoop of vanilla ice cream or a drizzle of caramel sauce.

Notes

  • Swap Bartlett pears for Bosc pears, apples, or a mix of fruits like peaches or berries for variety.
  • Reduce maple syrup if using very ripe and sweet pears.
  • For added crunch, mix chopped nuts like pecans or almonds into the crumble topping.
  • Store leftovers in the fridge for up to 3 days. Reheat in the oven or microwave before serving.
  • To freeze, assemble the crisp unbaked and freeze. Bake from frozen, adding 10–15 minutes to the cooking time.

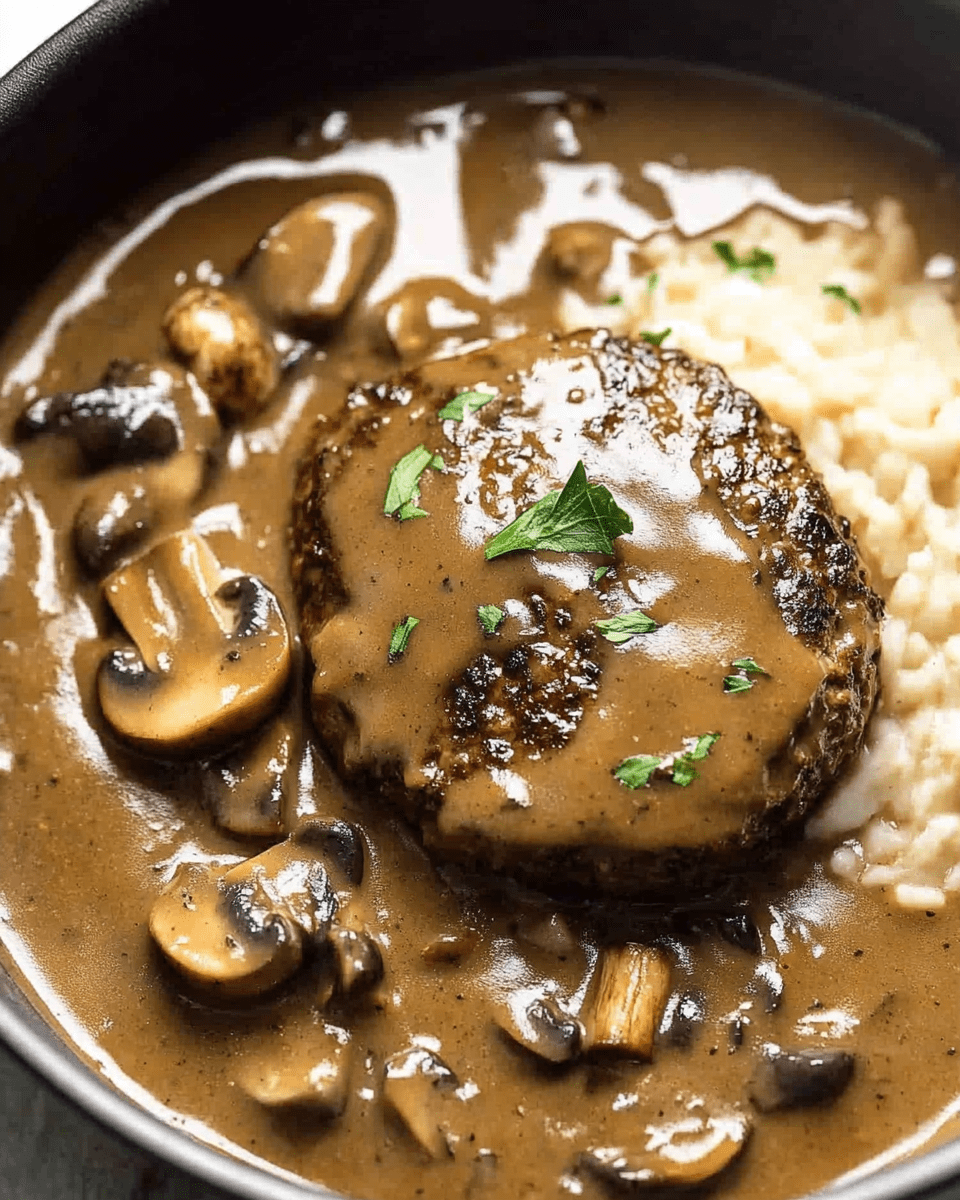
Salisbury Steak with Mushroom Gravy: A Classic Comfort Dish

There’s something magical about a meal that’s rich, hearty, and feels like a warm hug on a plate. Salisbury Steak with Mushroom Gravy is exactly that kind of dish. It’s the perfect combination of tender beef patties, savory mushroom gravy, and soul-satisfying flavors that take you back to nostalgic family dinners. Whether you’re looking for a quick weeknight recipe or a comforting dish for the weekend, this classic recipe will hit all the right notes.

Why Salisbury Steak with Mushroom Gravy is the Ultimate Comfort Food

What makes Salisbury steak so irresistible? It’s the way the beef patties soak up the rich, savory mushroom gravy, creating a meal that’s both hearty and elegant. This dish is:

  • Affordable: Made with ground beef and pantry staples, it’s a budget-friendly option.
  • Customizable: You can tweak the seasoning, add your favorite mushrooms, or serve it with the sides you love.
  • Filling and flavorful: Every bite is packed with flavor and satisfying textures.
  • Family-friendly: It’s a guaranteed hit with both kids and adults.

Once you’ve made this dish, you’ll want to keep it on regular rotation. It’s the kind of recipe that brings everyone to the table.

Ingredients for Salisbury Steak with Mushroom Gravy

Here’s everything you’ll need to prepare this delicious dish:

For the Salisbury Steaks

IngredientQuantity
Onion (grated)1/2
Panko breadcrumbs (or regular)1/2 cup (or 1/3 cup)
Ground beef (mince)1 lb (500g)
Garlic (minced)1 clove
Egg1
Ketchup2 tbsp
Beef bouillon cube (crumbled)1
Worcestershire sauce1/2 tsp
Dijon mustard (or dry mustard)3 tsp (or 2 tsp dry)

For the Mushroom Gravy

IngredientQuantity
Olive oil1 tbsp
Garlic (minced)2 cloves
Onion (finely chopped)1/2
Mushrooms (sliced)5 oz (150g)
Unsalted butter2 tbsp (30g)
All-purpose flour3 tbsp
Beef broth (low sodium)2 cups
Water1/2 cup
Dijon mustard2 tsp
Worcestershire sauce2 tsp
Salt and pepperTo taste

Step-by-Step Directions for Salisbury Steak with Mushroom Gravy

Follow these easy steps to create a perfectly cooked Salisbury Steak with Mushroom Gravy that your family will love.

1. Prepare the Salisbury Steaks

Grate the Onion

  • Place the breadcrumbs in a large bowl.
  • Using a box grater, grate the onion directly over the breadcrumbs. Mix them with your fingers and let them soak for a few minutes.

Mix the Ingredients

  • Add the ground beef, garlic, egg, ketchup, bouillon cube, Worcestershire sauce, and Dijon mustard to the bowl.
  • Use your hands to mix everything together until just combined. Keep mixing for 1–2 minutes until the mixture becomes slightly sticky or “pasty” to help the patties hold together.

Shape the Patties

  • Divide the mixture into 5 portions and shape each into oval patties about 3/4-inch thick.

2. Cook the Salisbury Steaks

Brown the Patties

  • Heat olive oil in a large skillet over high heat.
  • Place the patties in the skillet and cook for about 1 minute on each side until browned. Don’t worry if they’re still raw inside; they’ll finish cooking in the gravy. Remove the patties and set them aside on a plate.

3. Make the Mushroom Gravy

Sauté the Aromatics

  • If the skillet looks dry, add a bit more oil. Add the chopped onion and garlic to the skillet and sauté for about 2 minutes until the onion is translucent.

Cook the Mushrooms

  • Toss the sliced mushrooms into the skillet and cook for 2–3 minutes until golden and slightly softened.

Make the Gravy Base

  • Reduce the heat to medium and add the butter to the skillet. Once melted, sprinkle in the flour and stir constantly for about 30 seconds to create a roux.

Add the Liquids

  • Gradually pour in the beef broth while stirring to prevent lumps. Add the water, Dijon mustard, and Worcestershire sauce, and whisk until smooth.

4. Finish the Dish

Cook the Patties in the Gravy

  • Return the Salisbury steaks to the skillet along with any juices that collected on the plate.
  • Simmer for 5–7 minutes, occasionally stirring around the patties, until the gravy thickens and the steaks are cooked through. If the gravy gets too thick, add a splash of water to thin it out.

Taste and Season

  • Remove the patties and taste the gravy. Adjust the salt and pepper to your liking.

Serve

  • Place the Salisbury steaks on a plate, generously spoon the mushroom gravy on top, and serve over mashed potatoes, rice, or buttered noodles. Sprinkle with fresh parsley if desired.

Pro Tips for Perfect Salisbury Steak

  • Don’t skip the onion grating: Grating the onion adds moisture to the patties and enhances the flavor.
  • Use low-sodium broth: This allows you to control the salt levels in the dish.
  • Mix the beef thoroughly: A well-mixed beef mixture helps the patties stay firm during cooking.
  • Rest the patties before serving: Letting the Salisbury steaks sit for a minute or two allows the flavors to meld.

What to Serve with Salisbury Steak

Salisbury steak pairs beautifully with a variety of sides. Here are some ideas:

Classic Options

  • Creamy mashed potatoes.
  • Steamed green beans.
  • Buttered noodles.

Low-Carb Pairings

  • Cauliflower mash.
  • Zucchini noodles.
  • Roasted asparagus.

Additional Toppings

  • A sprinkle of Parmesan cheese.
  • Freshly cracked black pepper.

Nutritional Information (Per Serving)

Here’s the approximate nutritional breakdown for Salisbury Steak with Mushroom Gravy (based on 5 servings):

NutrientAmount
Calories390–430
Protein24g
Carbohydrates10g
Fat28g
Sodium480mg

FAQs About Salisbury Steak with Mushroom Gravy

1. Can I use ground turkey instead of ground beef?

Yes, ground turkey is a great substitute if you prefer a leaner option. Just be aware that the flavor will be slightly different.

2. Can I freeze Salisbury steak?

Absolutely. Freeze the cooked patties and gravy in an airtight container for up to 3 months. Reheat gently on the stovetop or microwave.

3. What if I don’t have Dijon mustard?

You can use yellow mustard or even dry mustard powder as a substitute. The flavor will still be delicious!

4. Can I make this dish gluten-free?

Yes. Use gluten-free breadcrumbs and substitute the flour with cornstarch or a gluten-free flour blend.

5. How do I store leftovers?

Store leftovers in an airtight container in the fridge for up to 3 days. Reheat on the stovetop or in the microwave.

6. Can I add other vegetables to the gravy?

Of course! Sliced bell peppers, peas, or even spinach can add extra flavor and nutrients.

Why Homemade Salisbury Steak is Better

Making Salisbury steak at home means you get to enjoy a wholesome, preservative-free version of this classic dish. Unlike frozen or pre-made options, you control the ingredients, flavors, and portions. Plus, cooking it yourself is incredibly rewarding, and the results are far more delicious than anything store-bought.

Try This Recipe Tonight!

Ready to bring the ultimate comfort food to your table? Salisbury Steak with Mushroom Gravy is easy to make, packed with flavor, and guaranteed to impress. Whip up this classic recipe tonight, and watch your family come back for seconds!

PAUL

Salisbury Steak with Mushroom Gravy: A Classic Comfort Dish

A comforting classic that combines juicy beef patties with a rich, savory mushroom gravy. Perfect for weeknight dinners or a hearty weekend meal, this dish is easy to make, incredibly satisfying, and sure to become a family favorite.  
Prep Time 10 minutes
Cook Time 25 minutes
Total Time 35 minutes
Servings: 5 servings
Course: Main Course
Cuisine: American

Ingredients
  

For the Salisbury Steaks:
  • 1/2 onion grated
  • 1/2 cup panko breadcrumbs or regular breadcrumbs
  • 1 lb 500g ground beef (mince)
  • 1 clove garlic minced
  • 1 egg
  • 2 tablespoons ketchup
  • 1 beef bouillon cube crumbled
  • 1/2 teaspoon Worcestershire sauce
  • 3 teaspoons Dijon mustard or 2 teaspoons dry mustard
For the Mushroom Gravy:
  • 1 tablespoon olive oil
  • 2 cloves garlic minced
  • 1/2 onion finely chopped
  • 5 oz 150g mushrooms, sliced
  • 2 tablespoons unsalted butter
  • 3 tablespoons all-purpose flour
  • 2 cups beef broth low sodium
  • 1/2 cup water
  • 2 teaspoons Dijon mustard
  • 2 teaspoons Worcestershire sauce
  • Salt and pepper to taste

Method
 

Prepare the Salisbury Steaks:
  1. In a large bowl, combine grated onion and breadcrumbs. Mix with your fingers and let sit for a few minutes.
  2. Add ground beef, garlic, egg, ketchup, bouillon cube, Worcestershire sauce, and Dijon mustard. Mix thoroughly with your hands until the mixture becomes slightly sticky.
  3. Divide the mixture into 5 portions and shape into oval patties about 3/4-inch thick.
Cook the Patties:
  1. Heat olive oil in a large skillet over high heat.
  2. Add the patties and cook for about 1 minute on each side until browned. Remove and set aside (they will finish cooking in the gravy).
Make the Mushroom Gravy:
  1. If the skillet is dry, add a little more oil. Sauté chopped onion and garlic over medium-high heat for about 2 minutes until translucent.
  2. Add mushrooms and cook for 2–3 minutes until softened and golden.
  3. Reduce heat to medium and melt the butter in the skillet. Sprinkle in the flour, stirring constantly for about 30 seconds to make a roux.
  4. Gradually whisk in the beef broth, water, Dijon mustard, and Worcestershire sauce. Stir until smooth.
Finish Cooking:
  1. Return the patties to the skillet along with any juices on the plate.
  2. Simmer for 5–7 minutes, occasionally stirring, until the gravy thickens and the patties are cooked through. Add a splash of water if the gravy gets too thick.
Season and Serve:
  1. Taste the gravy and adjust salt and pepper as needed.
  2. Serve the Salisbury steaks over mashed potatoes, rice, or buttered noodles, generously spooning the mushroom gravy on top. Garnish with fresh parsley if desired.

Notes

  • Substitutions: Use ground turkey or chicken for a lighter version. Substitute Dijon mustard with yellow mustard or dry mustard powder.
  • Gluten-Free Option: Use gluten-free breadcrumbs and replace the flour with cornstarch.
  • Add Vegetables: For extra flavor, stir in peas, spinach, or bell peppers while making the gravy.
  • Storage Tips: Store leftovers in the fridge for up to 3 days or freeze for up to 3 months.
Chicken and Rice Soup: A Warm, Comforting Classic

There’s something magical about a bowl of Chicken and Rice Soup on a cold day or when you’re feeling under the weather. It’s not just food; it’s comfort in a bowl. Whether you’re cooking for your family, nursing a cold, or simply craving something wholesome and hearty, this timeless recipe delivers on all fronts. The combination of tender chicken, hearty rice, and flavorful broth makes it a meal you’ll want to cook again and again.

Let’s dive into how you can create the perfect Chicken and Rice Soup from scratch, with step-by-step instructions, helpful tips, and plenty of customization options.

Why You’ll Love This Recipe

Chicken and Rice Soup isn’t just delicious—it’s nourishing, easy to make, and incredibly versatile. Here’s why you’ll want to keep this recipe in your meal rotation:

  • Warm and comforting: Perfect for chilly evenings or when you need a little pick-me-up.
  • Nutritious and filling: Packed with protein, vegetables, and grains, it’s a complete meal in one pot.
  • Beginner-friendly: You don’t need to be an expert chef to make this dish.
  • Customizable: Add your favorite herbs, spices, or vegetables to make it your own.

This soup is like a warm hug for your soul, and the best part is, you can whip it up with pantry staples and fresh ingredients you already have.

Ingredients for Chicken and Rice Soup

To create this comforting dish, you’ll need the following ingredients. Each one plays an important role in building the flavors and textures of the soup.

IngredientQuantity
Olive oil1 tbsp
Butter1 tbsp
Garlic (minced)2 cloves
Onion (chopped)1
Carrots (halved, sliced)3
Celery ribs (sliced)3
Vegeta stock powder3 tsp (or 2 bouillon cubes)
Dried parsley1/2 tsp
Dried thyme (optional)1/2 tsp
Black pepper (ground)1/4 tsp
Chicken broth (low sodium)4 cups (1 liter)
Water4 cups (1 liter)
Chicken thighs (bone-in, skinless)600g (1.2 lb)
Long grain white rice (uncooked)1 cup (180g)
SaltTo taste
Fresh parsley (chopped)1 tbsp (optional)

Step-by-Step Directions

Making Chicken and Rice Soup is easy and straightforward. Here’s how to create this comforting dish in just a few simple steps.

1. Sauté the Aromatics

  • Heat olive oil and butter in a large pot over medium-high heat.
  • Add the onion and garlic, and cook for about 5 minutes until the onion becomes translucent and fragrant.

2. Add the Vegetables

  • Toss in the carrots and celery, stirring for about a minute to combine the flavors.

3. Add the Broth and Seasonings

  • Stir in the stock powder, dried parsley, thyme (if using), and black pepper.
  • Pour in the chicken broth and water, and give it a good stir to mix everything together.

4. Simmer the Chicken

  • Add the chicken thighs to the pot. Cover it with a lid and let it simmer on medium-low heat for about 30 minutes.
  • Skim off any foam that rises to the surface for a clearer broth (optional but recommended).

5. Add the Rice

  • Remove the lid and stir in the uncooked rice. Cover the pot again and simmer for another 15 minutes until the rice is tender.

6. Shred the Chicken

  • Take the chicken thighs out of the pot and place them in a large bowl. Use two forks to shred the meat, discarding the bones.
  • Return the shredded chicken to the pot and stir to combine.

7. Taste and Adjust

  • Stir in half of the fresh parsley (if using) and taste the soup. Add salt as needed to enhance the flavors.

8. Serve and Enjoy

  • Ladle the soup into bowls, garnish with extra parsley, and serve warm. Pair it with crusty bread or crackers for a complete meal.

Nutritional Information (Per Serving)

Here’s an approximate breakdown of the nutrition per serving (based on 6 servings):

NutrientAmount
Calories320–350
Protein28g
Carbohydrates25g
Fat10g
Fiber3g
Sodium500mg

This soup is not only hearty but also a well-balanced option for a nutritious meal.

Why Chicken and Rice Soup is a Healthy Choice

1. High in Protein

Chicken thighs provide a good source of protein, essential for muscle repair and overall health.

2. Loaded with Vegetables

Carrots, celery, and onion add essential vitamins, minerals, and fiber to the soup.

3. Satisfying and Energizing

The long grain white rice provides a steady source of energy, making this soup both filling and nourishing.

4. Easy on Digestion

The mild ingredients make this soup an excellent choice when you’re feeling unwell or have a sensitive stomach.

Pro Tips for the Best Chicken and Rice Soup

  • Choose bone-in chicken thighs: They add a rich flavor to the broth that’s hard to replicate with boneless chicken.
  • Don’t overcook the rice: Add the rice toward the end to prevent it from becoming mushy.
  • Skim the foam: Removing the foam during the simmering process helps create a clearer, more visually appealing broth.
  • Experiment with herbs: Fresh thyme, bay leaves, or rosemary can elevate the flavors of the soup.

Serving Suggestions

While Chicken and Rice Soup is delicious on its own, here are some ideas to round out your meal:

Sides

  • Crusty French bread or garlic bread.
  • A simple green salad with vinaigrette.
  • Roasted vegetables for added flavor and texture.

Toppings

  • Freshly grated Parmesan cheese.
  • A drizzle of lemon juice for brightness.
  • Crushed red pepper flakes for a spicy kick.

Frequently Asked Questions

1. Can I use leftover chicken?

Yes! If you have cooked chicken on hand, shred it and add it to the soup during the final 5–10 minutes of cooking.

2. Can I make this soup gluten-free?

Absolutely. The recipe is naturally gluten-free, as long as your stock or bouillon cubes are certified gluten-free.

3. What type of rice works best?

Long grain white rice is ideal because it holds its shape well. You can also use brown rice, but it will require a longer cooking time.

4. Can I freeze this soup?

Yes, but keep in mind that the rice may absorb more liquid and become softer upon reheating. Consider freezing the soup without the rice and adding freshly cooked rice when reheating.

5. How long does it keep in the fridge?

Store leftovers in an airtight container in the refrigerator for up to 3–4 days.

6. Can I make this soup in a slow cooker?

Yes! Sauté the aromatics first, then transfer everything except the rice to the slow cooker. Cook on low for 6–8 hours or high for 3–4 hours. Add the rice during the last hour of cooking.

Why Homemade Chicken and Rice Soup is the Best

Making this soup from scratch means you get to control every ingredient, ensuring it’s as healthy and flavorful as possible. Unlike store-bought versions, homemade soup is free from preservatives and artificial additives. Plus, the process of cooking it is a labor of love—an opportunity to slow down, nourish yourself, and share a comforting meal with those you care about.

Make Chicken and Rice Soup Tonight!

Are you ready to fill your kitchen with the irresistible aroma of Chicken and Rice Soup? With this recipe, you’ll have a hearty, flavorful, and nourishing dish on the table in no time. Gather your ingredients, grab your favorite pot, and let the magic begin!

PAUL

Chicken and Rice Soup: A Warm, Comforting Classic

A warm, comforting classic that’s perfect for chilly days or when you need a nourishing pick-me-up. Packed with tender chicken, hearty rice, and flavorful vegetables, this one-pot meal is easy to make and incredibly satisfying.  
Prep Time 10 minutes
Cook Time 45 minutes
Total Time 55 minutes
Servings: 6 servings
Course: Soup
Cuisine: Comfort Food

Ingredients
  

  • 1 tablespoon olive oil
  • 1 tablespoon butter
  • 2 cloves garlic minced
  • 1 onion chopped
  • 3 carrots halved and sliced
  • 3 celery ribs sliced
  • 3 teaspoons Vegeta stock powder or 2 bouillon cubes
  • 1/2 teaspoon dried parsley
  • 1/2 teaspoon dried thyme optional
  • 1/4 teaspoon ground black pepper
  • 4 cups 1 liter chicken broth (low sodium)
  • 4 cups 1 liter water
  • 600 g 1.2 lb chicken thighs, bone-in and skinless
  • 1 cup 180g long grain white rice, uncooked
  • Salt to taste
  • 1 tablespoon fresh parsley chopped (optional)

Method
 

Sauté the Aromatics:
  1. Heat olive oil and butter in a large pot over medium-high heat. Add onion and garlic, cooking for about 5 minutes until fragrant and translucent.
Add the Vegetables:
  1. Stir in the carrots and celery. Cook for 1–2 minutes to combine flavors.
Add Broth and Seasonings:
  1. Mix in the Vegeta stock powder, dried parsley, thyme (if using), and black pepper. Pour in the chicken broth and water, stirring well.
Simmer the Chicken:
  1. Add chicken thighs to the pot. Cover and let simmer on medium-low heat for about 30 minutes. Skim off foam for a clearer broth (optional).
Cook the Rice:
  1. Remove the lid and stir in the uncooked rice. Cover again and simmer for another 15 minutes until the rice is tender.
Shred the Chicken:
  1. Take the chicken thighs out of the pot. Use two forks to shred the meat, discarding the bones. Return the shredded chicken to the pot and stir to combine.
Taste and Adjust:
  1. Stir in half the fresh parsley (if using). Taste the soup and add salt as needed.
Serve:
  1. Ladle the soup into bowls, garnish with additional parsley, and serve warm. Pair with crusty bread or crackers for a complete meal.

Notes

  • Chicken Options: Use bone-in chicken thighs for a rich broth or substitute with boneless thighs or cooked leftover chicken.
  • Rice Tip: Add rice toward the end to prevent overcooking and mushiness.
  • Make-Ahead Option: For freezing, prepare the soup without the rice and add freshly cooked rice when reheating.
  • Herb Variations: Enhance flavors with fresh thyme, bay leaves, or rosemary.

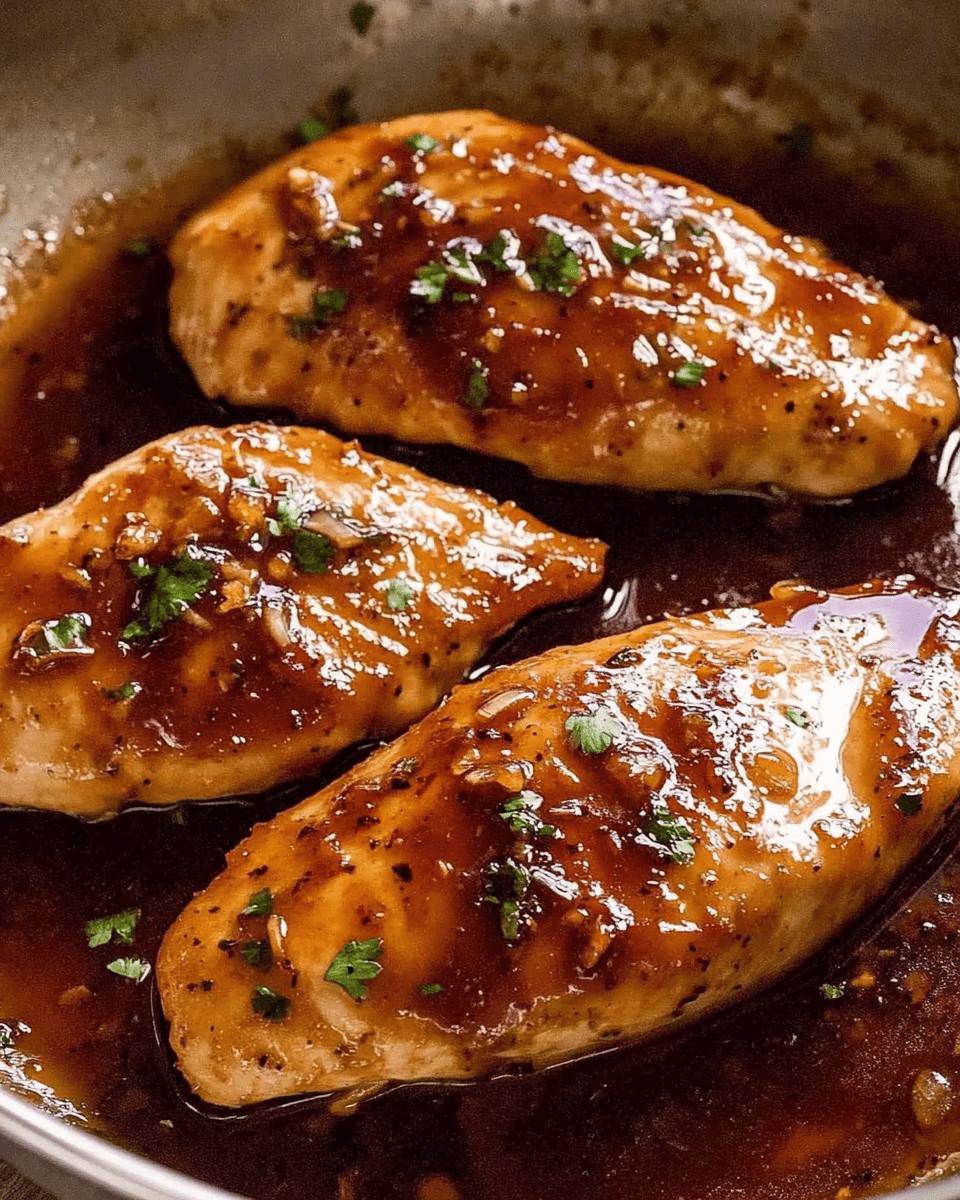
Honey Garlic Chicken Breast: A Sweet and Savory Delight

Imagine this: the aroma of sizzling chicken in a skillet fills your kitchen. The sweet scent of honey and garlic wafts through the air, making your mouth water in anticipation. If you’re craving a quick and flavorful dinner, Honey Garlic Chicken Breast is the perfect choice. This dish combines tender chicken, a golden glaze, and a balance of savory and sweet flavors that will make it a family favorite. Whether you’re cooking for a busy weeknight or hosting a casual dinner, this recipe is sure to impress.

Why You’ll Fall in Love with Honey Garlic Chicken Breast

There’s something magical about a recipe that’s so simple yet tastes like it took hours to make. Honey Garlic Chicken Breast is:

  • Quick and easy: Ready in under 30 minutes, making it perfect for busy schedules.
  • Flavor-packed: A blend of savory soy sauce, tangy vinegar, and sweet honey creates an irresistible glaze.
  • Customizable: Add your favorite sides or adjust the flavors to suit your palate.
  • Family-friendly: Even picky eaters will love this dish.

This recipe transforms everyday chicken breasts into a meal that feels restaurant-quality, yet it’s entirely doable at home with just a few simple ingredients.

Ingredients for Honey Garlic Chicken Breast

Here’s everything you need to make this delicious dish:

IngredientQuantity
Chicken breast (boneless, skinless)500g / 1 lb (2 pieces)
Salt and pepperTo taste
All-purpose flour1/4 cup
Unsalted butter (or olive oil)3 1/2 tbsp (50g)
Garlic (minced)2 cloves
Apple cider vinegar (or other vinegar)1 1/2 tbsp
Soy sauce (light or all-purpose)1 tbsp
Honey (or maple syrup)1/3 cup

Step-by-Step Instructions

Making Honey Garlic Chicken Breast is easy, and you’ll only need one skillet!

1. Prepare the Chicken

  • Start by cutting the chicken breasts in half horizontally to create four thin pieces (or “steaks”). This ensures they cook evenly.
  • Sprinkle both sides of the chicken with salt and pepper.
  • Place the flour in a shallow dish and lightly coat each piece of chicken, shaking off any excess flour.

2. Cook the Chicken

  • Heat most of the butter (reserving 1 teaspoon) in a large skillet over high heat.
  • Add the chicken to the skillet and cook for 2–3 minutes on one side, until golden.
  • Flip the chicken and cook the other side for about 1 minute.

3. Sauté the Garlic

  • Reduce the heat slightly to medium-high. Make a small space in the pan and add the remaining butter.
  • Stir in the minced garlic and let it cook for about 30 seconds until fragrant.

4. Create the Sauce

  • Add the apple cider vinegar, soy sauce, and honey to the skillet.
  • Stir everything together, ensuring the sauce combines evenly. Bring it to a gentle simmer.
  • Let the sauce simmer for about 1 minute, allowing it to thicken slightly. If it thickens too much, add a splash of water to loosen it.

5. Coat the Chicken

  • Turn the chicken pieces in the sauce to coat them thoroughly. The glaze will cling to the chicken, making it shiny and flavorful.

6. Serve and Enjoy

  • Remove the skillet from the heat. Transfer the chicken to plates and drizzle any remaining sauce over the top. Serve hot with your favorite sides!

Tips for the Best Honey Garlic Chicken Breast

  • Use thin chicken breasts: Thinner pieces cook more evenly and absorb the sauce better.
  • Don’t overcrowd the skillet: Cook in batches if necessary to ensure the chicken browns properly.
  • Fresh garlic is key: Minced garlic adds a rich, aromatic flavor that you can’t achieve with garlic powder.
  • Adjust sweetness: If you prefer less sweetness, reduce the honey slightly or use maple syrup for a different flavor profile.

What to Serve with Honey Garlic Chicken Breast

This dish pairs well with a variety of sides. Here are some ideas:

Low-Carb Options

  • Steamed broccoli or asparagus.
  • Cauliflower rice.
  • Zucchini noodles.

Classic Pairings

  • Fluffy white rice or jasmine rice to soak up the sauce.
  • Mashed potatoes for a creamy, comforting side.
  • A simple green salad for a fresh, light contrast.

Nutritional Information (Per Serving)

Here’s the approximate nutritional breakdown of this dish (based on 4 servings):

NutrientAmount
Calories280–320
Protein25g
Carbohydrates20g
Fats12g
Sugar16g
Sodium400mg

This dish is a well-balanced option that’s both satisfying and nutritious.

Health Benefits of Honey Garlic Chicken Breast

1. High in Protein

Chicken breast is an excellent source of lean protein, which helps build and repair muscle while keeping you full for longer.

2. Natural Sweetener

Using honey as the primary sweetener adds a natural source of energy and antioxidants, unlike refined sugars.

3. Simple, Clean Ingredients

This recipe uses minimal processed ingredients, ensuring you’re serving a wholesome, home-cooked meal.

Frequently Asked Questions

1. Can I use chicken thighs instead of chicken breasts?

Yes! Chicken thighs are a great substitute and tend to stay juicier. Just adjust the cooking time slightly, as thighs may take a bit longer to cook through.

2. Can I make this recipe gluten-free?

Absolutely. Replace the all-purpose flour with gluten-free flour or cornstarch for a gluten-free version.

3. How do I store leftovers?

Let the chicken cool completely, then store it in an airtight container in the refrigerator for up to 3 days. Reheat gently on the stovetop or in the microwave.

4. Can I freeze Honey Garlic Chicken Breast?

Yes, you can freeze it! Store the cooked chicken and sauce in a freezer-safe container for up to 2 months. Thaw overnight in the refrigerator before reheating.

5. Can I add vegetables to the skillet?

Of course! Bell peppers, snap peas, or green beans can be added during the sauce-making step for a complete one-pan meal.

6. What if I don’t have apple cider vinegar?

White vinegar, rice vinegar, or even lemon juice can be used as substitutes for apple cider vinegar.

Why Homemade is Always Better

Cooking at home lets you control the quality and freshness of your ingredients, ensuring you’re serving a healthy meal to your loved ones. Plus, making Honey Garlic Chicken Breast from scratch means you get to enjoy a dish that’s free from preservatives and artificial flavors. The combination of sweet, savory, and tangy flavors makes this a recipe you’ll want to return to again and again.

Try This Recipe Today!

Are you ready to make the best Honey Garlic Chicken Breast ever? With just a handful of ingredients and a few simple steps, you’ll have a meal that’s bursting with flavor and perfect for any occasion. Gather your ingredients, fire up your skillet, and start cooking this delicious dish tonight!

PAUL

Honey Garlic Chicken Breast: A Sweet and Savory Delight

Tender, juicy chicken breasts coated in a sweet and savory honey garlic glaze. This quick and easy dish is packed with flavor, making it perfect for weeknight dinners or casual gatherings. Serve it with your favorite sides for a satisfying, restaurant-quality meal at home.  
Prep Time 10 minutes
Cook Time 15 minutes
Total Time 25 minutes
Servings: 4 servings
Course: Main Course
Cuisine: Fusion

Ingredients
  

  • 500 g / 1 lb 2 pieces boneless, skinless chicken breasts
  • Salt and pepper to taste
  • 1/4 cup all-purpose flour
  • 3 1/2 tablespoons unsalted butter or olive oil
  • 2 cloves garlic minced
  • 1 1/2 tablespoons apple cider vinegar or other vinegar
  • 1 tablespoon soy sauce light or all-purpose
  • 1/3 cup honey or maple syrup

Method
 

Prepare the Chicken:
  1. Slice the chicken breasts horizontally to create four thin pieces. Season both sides with salt and pepper.
  2. Lightly coat each piece with flour, shaking off excess.
Cook the Chicken:
  1. Heat most of the butter (reserve 1 teaspoon) in a large skillet over high heat.
  2. Add the chicken and cook for 2–3 minutes on one side until golden. Flip and cook for about 1 minute on the other side.
Sauté the Garlic:
  1. Reduce heat to medium-high. Push the chicken to one side of the skillet and add the remaining butter.
  2. Stir in minced garlic and cook for about 30 seconds until fragrant.
Make the Sauce:
  1. Add apple cider vinegar, soy sauce, and honey to the skillet. Stir to combine, scraping any browned bits from the bottom of the pan.
  2. Let the sauce simmer for about 1 minute until it thickens slightly.
Glaze the Chicken:
  1. Coat the chicken pieces in the sauce, turning them to ensure they’re evenly covered.
Serve:
  1. Remove the skillet from heat and transfer the chicken to plates. Drizzle any remaining sauce over the top. Serve warm with your favorite sides.

Notes

  • Substitutions: Swap apple cider vinegar with white vinegar, rice vinegar, or lemon juice. Use chicken thighs instead of breasts if preferred.
  • Gluten-Free Option: Use gluten-free flour or cornstarch.
  • Add Vegetables: Incorporate bell peppers, snap peas, or green beans during the sauce-making step for a complete one-pan meal.
  • Leftovers: Store in an airtight container in the fridge for up to 3 days. Reheat gently to avoid drying out the chicken.

Low Carb Cauliflower Leek Soup: A Deliciously Healthy Comfort Dish

Sometimes, you just need a warm, comforting bowl of soup that not only satisfies your hunger but also aligns with your health goals. If you’re looking for a low-carb, flavorful, and easy-to-make soup, you’ll love this Low Carb Cauliflower Leek Soup. Packed with the subtle sweetness of leeks, the earthy flavor of cauliflower, and a velvety texture, this soup is a perfect addition to your weekly meal plan.

Whether you’re trying to reduce your carb intake, follow a keto-friendly lifestyle, or simply enjoy a nutritious homemade meal, this recipe has everything you need. And the best part? You can whip it up with simple ingredients, most of which you probably already have in your kitchen.

Why Low Carb Cauliflower Leek Soup is Perfect for You

You don’t have to compromise on taste when you’re eating healthy. This soup is:

  • Low in carbohydrates: Ideal for anyone on a low-carb or ketogenic diet.
  • Rich in nutrients: Cauliflower is loaded with vitamins C, K, and fiber, while leeks add essential antioxidants and minerals.
  • Easy to prepare: A one-pot recipe with minimal clean-up.
  • Customizable: You can tweak the ingredients to suit your dietary preferences or taste buds.

Plus, it’s incredibly versatile—serve it as a starter, a light lunch, or even a main course when paired with a hearty side.

Ingredients for Low Carb Cauliflower Leek Soup

Here’s what you’ll need to create this creamy and satisfying soup:

IngredientQuantity
Butter3 tablespoons
Olive oil2 tablespoons
Leeks (cut into 1-inch pieces)3
Cauliflower (chopped)1 large head
Garlic (finely chopped)3 cloves
Vegetable broth8 cups
SaltTo taste
Ground black pepperTo taste
Heavy cream (optional)1 cup

Step-by-Step Directions

Follow these simple steps to make your Low Carb Cauliflower Leek Soup. The process is straightforward, making it perfect for busy weeknights or meal prep.

1. Heat Your Pot

Start by heating the butter and olive oil in a large pot over medium heat. The combination of butter and olive oil creates a rich base for the soup.

2. Sauté the Vegetables

Add the leeks, cauliflower, and garlic to the pot. Stir them occasionally and let them cook for about 10 minutes until the leeks become tender and fragrant.

3. Add the Broth

Pour in the vegetable broth and bring the mixture to a boil. Reduce the heat, cover the pot, and let it simmer for 45 minutes. During this time, the vegetables will soften and their flavors will meld beautifully.

4. Blend Until Smooth

Remove the soup from the heat and use an immersion blender to puree it until smooth. If you don’t have an immersion blender, you can carefully transfer the soup to a countertop blender in batches.

5. Season and Finish

Season the soup with salt and freshly ground black pepper to taste. If you prefer a creamier texture, stir in the heavy cream and blend again.

6. Serve and Enjoy

Ladle the soup into bowls and garnish with a drizzle of olive oil or a sprinkle of fresh herbs like parsley or chives. Enjoy it warm, paired with your favorite low-carb side dish.

Nutritional Information (Per Serving)

Here’s the approximate nutritional breakdown of this Low Carb Cauliflower Leek Soup, based on 6 servings:

NutrientAmount
Calories160–190
Protein4g
Carbohydrates6g
Fiber2g
Fat14g
Vitamin C80% of DV
Potassium10% of DV

This soup is a great choice for those watching their carb intake while still wanting a filling and nutritious meal.

Health Benefits of Low Carb Cauliflower Leek Soup

1. Packed with Nutrients

Cauliflower is a nutrient powerhouse, offering a generous dose of fiber, vitamin C, and antioxidants. It helps support digestion, boosts immunity, and may even reduce inflammation.

Leeks, on the other hand, are rich in prebiotics, which nourish the healthy bacteria in your gut. They also contain vitamins A, K, and manganese, essential for bone health and blood clotting.

2. Low in Carbs, High in Flavor

By using cauliflower as the base, this soup is naturally low in carbohydrates, making it suitable for keto and low-carb diets. The combination of leeks and garlic adds depth of flavor without the need for starchy thickeners.

3. Supports Weight Management

With its low-calorie and high-fiber profile, this soup helps keep you feeling full without overloading on calories. It’s a fantastic option for those looking to manage their weight while enjoying delicious food.

Pro Tips for Making the Best Low Carb Cauliflower Leek Soup

  • Use fresh, high-quality ingredients: Fresh cauliflower and leeks will make a noticeable difference in the flavor of your soup.
  • Control the texture: If you like a chunkier soup, blend only half the mixture and leave the rest intact.
  • Add toppings: For extra flavor, garnish the soup with crumbled bacon, shredded cheese, or roasted pumpkin seeds.
  • Make it vegan: Skip the butter and heavy cream. Use only olive oil and substitute the cream with coconut milk or cashew cream for a plant-based version.

Serving Suggestions

Low Carb Cauliflower Leek Soup is versatile and pairs well with a variety of low-carb sides, such as:

  • A slice of almond flour bread.
  • A fresh, crisp side salad with vinaigrette.
  • Roasted vegetables for added texture and flavor.

For a heartier meal, you can add cooked chicken, shrimp, or tofu directly to the soup.

Frequently Asked Questions

1. Can I make this soup ahead of time?

Yes! This soup stores well in the fridge for up to 4 days. Reheat it gently on the stovetop or in the microwave, stirring occasionally.

2. Can I freeze this soup?

Absolutely. Allow the soup to cool completely before transferring it to freezer-safe containers. It can be stored in the freezer for up to 3 months. Reheat slowly to maintain its creamy texture.

3. Can I use frozen cauliflower?

Yes, frozen cauliflower works well and saves time on chopping. However, fresh cauliflower generally provides a better texture and flavor.

4. What can I use instead of heavy cream?

If you want to skip the heavy cream, try coconut milk, almond milk, or cashew cream for a dairy-free option.

5. Can I add other vegetables?

Of course! Feel free to add spinach, kale, or zucchini for an extra nutritional boost.

6. How can I make it spicier?

If you like a little heat, add a pinch of red pepper flakes or cayenne pepper while cooking.

Why Homemade Soup is Always a Good Idea

Making soup at home allows you to control every ingredient, ensuring that your meals are free from preservatives and unnecessary additives. It’s a healthier, more budget-friendly option than store-bought soups, and the taste is unparalleled. Plus, there’s something deeply satisfying about creating a dish from scratch that nourishes your body and warms your soul.

Try This Recipe Today!

Now that you know how to make this creamy, satisfying, and nutritious Low Carb Cauliflower Leek Soup, it’s time to head to your kitchen and give it a try. This recipe is simple, versatile, and perfect for any season. You’ll love how easy it is to prepare and how delicious the results are!

PAUL

Low Carb Cauliflower Leek Soup: A Deliciously Healthy Comfort Dish

A velvety, flavorful soup that’s perfect for low-carb or keto-friendly meals. This comforting dish combines the sweetness of leeks, the earthy flavor of cauliflower, and a creamy texture, making it a delightful addition to your healthy eating plan.  
Prep Time 10 minutes
Cook Time 55 minutes
Total Time 1 hour 5 minutes
Servings: 6 servings
Course: Soup
Cuisine: Keto, Low-Carb

Ingredients
  

  • 3 tablespoons butter
  • 2 tablespoons olive oil
  • 3 leeks cut into 1-inch pieces
  • 1 large head cauliflower chopped
  • 3 cloves garlic finely chopped
  • 8 cups vegetable broth
  • Salt to taste
  • Ground black pepper to taste
  • 1 cup heavy cream optional

Method
 

Heat the Pot:
  1. In a large pot, heat butter and olive oil over medium heat to create a rich, flavorful base.
Sauté Vegetables:
  1. Add leeks, cauliflower, and garlic. Sauté for about 10 minutes, stirring occasionally, until the leeks are tender and fragrant.
Add Broth and Simmer:
  1. Pour in the vegetable broth and bring to a boil. Reduce the heat, cover, and let simmer for 45 minutes until the vegetables are soft.
Blend the Soup:
  1. Remove the pot from heat and use an immersion blender to puree the soup until smooth. Alternatively, blend in batches using a countertop blender.
Season and Finish:
  1. Season with salt and pepper to taste. Stir in heavy cream if a creamier texture is desired, and blend again briefly.
Serve:
  1. Ladle the soup into bowls, garnish with fresh herbs, olive oil drizzle, or your favorite toppings, and serve warm.

Notes

  • Fresh or Frozen Cauliflower: Both work, but fresh provides the best texture and flavor.
  • Make It Vegan: Replace butter with additional olive oil and heavy cream with coconut milk or cashew cream.
  • Texture Control: Blend partially for a chunky texture or fully for a smooth, creamy soup.
  • Spice It Up: Add a pinch of cayenne or red pepper flakes for heat.

Sandy’s Homemade Broccoli and Cheddar Soup: A Comforting Classic

Nothing beats the warmth and satisfaction of a homemade bowl of soup on a chilly evening. If you’re looking for a recipe that combines the creamy richness of cheddar cheese with the wholesome goodness of broccoli, then Sandy’s Homemade Broccoli and Cheddar Soup is exactly what you need. This recipe is perfect for beginners and seasoned cooks alike, delivering a heartwarming dish that’s easy to prepare and even easier to enjoy.

Why You’ll Love This Soup

There’s something incredibly comforting about making soup from scratch. It’s not just about the ingredients; it’s about the love and care you pour into each step. Sandy’s Homemade Broccoli and Cheddar Soup is:

  • Simple to make: Perfect for weeknight dinners or leisurely weekends.
  • Nutritious: Packed with vegetables like broccoli, carrots, and celery.
  • Rich and creamy: Thanks to the combination of cheddar cheese and half-and-half.
  • Customizable: You can adjust the flavors and texture to suit your preferences.

This recipe doesn’t require fancy equipment or exotic ingredients—just simple pantry staples and fresh produce to create magic in your kitchen.

Ingredients for Sandy’s Homemade Broccoli and Cheddar Soup

Here’s what you’ll need to bring this delicious soup to life. Each ingredient serves an essential purpose in creating the perfect balance of flavor, texture, and nutrition.

IngredientQuantity
Butter3 tablespoons
Small onion (chopped)¼
All-purpose flour2 tablespoons
Half-and-half1 cup
Chicken broth1 ½ cups
SaltTo taste
Ground black pepperTo taste
Broccoli (chopped)2 cups
Carrot (chopped)1
Celery stalk (chopped)1
Mild Cheddar cheese (shredded)1 ¼ cups

Step-by-Step Instructions

Follow these easy steps to prepare Sandy’s Homemade Broccoli and Cheddar Soup. Don’t rush—enjoy the process and watch your ingredients come together to create a hearty, flavorful dish.

1. Start with a Sauté

  • Melt butter in a large stock pot over medium-high heat.
  • Add the chopped onion and sauté for 3–4 minutes until tender and fragrant.

2. Create the Base

  • Whisk in the flour gradually, stirring continuously. Cook for about 5 minutes until the mixture turns golden brown.
  • Slowly pour in the half-and-half, whisking as you go to ensure a smooth consistency.

3. Add Broth and Seasonings

  • Stir in the chicken broth and season with a pinch of salt and ground black pepper.
  • Reduce the heat to medium-low and let the mixture simmer for 10 minutes, stirring occasionally.

4. Incorporate Vegetables

  • Add the chopped broccoli, carrot, and celery to the pot.
  • Simmer for 20 minutes until the vegetables are tender but still slightly crisp.

5. Melt the Cheese

  • Lower the heat to low and stir in the shredded Cheddar cheese.
  • Continue to stir occasionally for about 5 minutes, allowing the cheese to fully melt and blend into the soup.

6. Serve and Enjoy

  • Ladle the soup into bowls and serve warm. Pair it with crusty bread or crackers for a complete meal.

Pro Tips for the Perfect Broccoli and Cheddar Soup

To take this recipe to the next level, keep these tips in mind:

  • Use fresh broccoli: Fresh broccoli provides a vibrant flavor and texture. If you’re in a pinch, frozen broccoli works too, but it might require a shorter cooking time.
  • Grate your own cheese: Pre-shredded cheese often contains anti-caking agents that can affect the soup’s creaminess. Freshly grated cheese melts more smoothly.
  • Experiment with seasonings: Add a pinch of nutmeg for warmth or a dash of cayenne pepper for a slight kick.
  • Blend for a smoother texture: If you prefer a creamier soup, use an immersion blender to partially or fully puree the soup before adding the cheese.

Nutritional Information (Per Serving)

This soup isn’t just delicious—it’s packed with nutrients. Here’s a quick look at the approximate nutritional breakdown per serving (based on 4 servings):

NutrientAmount
Calories250–300
Protein12g
Carbohydrates15g
Fats18g
Fiber3g
Vitamin C60% of DV
Calcium20% of DV

Frequently Asked Questions

1. Can I make this soup vegetarian?

Yes! Simply substitute the chicken broth with vegetable broth, and you’ll have a vegetarian-friendly version of this soup.

2. How do I store leftovers?

Allow the soup to cool completely, then transfer it to an airtight container. Store in the refrigerator for up to 3 days. Reheat gently on the stovetop or in the microwave.

3. Can I freeze this soup?

Absolutely! However, keep in mind that soups with dairy can sometimes separate when reheated. If you plan to freeze it, consider leaving out the cheese and adding it fresh when reheating.

4. What can I serve with this soup?

This soup pairs beautifully with crusty bread, garlic toast, or a simple side salad. For extra indulgence, serve it in a bread bowl.

5. Can I make it gluten-free?

Yes! Replace the all-purpose flour with a gluten-free flour blend or cornstarch to thicken the soup.

6. Can I use a different type of cheese?

Definitely. Sharp cheddar, Gouda, or even a blend of cheeses can work well in this recipe. Just ensure the cheese melts smoothly.

Why Homemade Soup is Always Better

When you make soup at home, you control every aspect—from the quality of ingredients to the level of seasoning. Homemade soups like Sandy’s Broccoli and Cheddar Soup are free from preservatives and packed with fresh flavors that store-bought versions simply can’t match. Plus, cooking at home brings a sense of accomplishment and joy, knowing you’ve created something wholesome for yourself and your loved ones.

Try Sandy’s Homemade Broccoli and Cheddar Soup Today

Now that you have everything you need, it’s time to roll up your sleeves and get cooking! This creamy, cheesy, veggie-packed soup is sure to become a staple in your household. Share it with friends and family, and don’t forget to experiment with your own creative twists.

PAUL

Sandy’s Homemade Broccoli and Cheddar Soup: A Comforting Classic

A creamy, cheesy, and veggie-packed soup that’s perfect for warming up on a chilly day. With the wholesome goodness of broccoli and the rich flavor of cheddar, this comforting classic is simple to make and customizable for any taste.  
Prep Time 15 minutes
Cook Time 40 minutes
Total Time 55 minutes
Servings: 4 servings
Course: Soup
Cuisine: American

Ingredients
  

  • 3 tablespoons butter
  • ¼ small onion chopped
  • 2 tablespoons all-purpose flour
  • 1 cup half-and-half
  • 1 ½ cups chicken broth
  • Salt to taste
  • Ground black pepper to taste
  • 2 cups broccoli chopped
  • 1 carrot chopped
  • 1 celery stalk chopped
  • 1 ¼ cups mild cheddar cheese shredded

Method
 

Sauté the Onion:
  1. Melt butter in a large stock pot over medium-high heat. Add the chopped onion and sauté for 3–4 minutes until tender and fragrant.
Prepare the Base:
  1. Gradually whisk in the flour, stirring continuously. Cook for about 5 minutes until golden brown. Slowly pour in the half-and-half, whisking to create a smooth consistency.
Add Broth and Season:
  1. Stir in chicken broth. Season with salt and ground black pepper to taste. Reduce heat to medium-low and simmer for 10 minutes, stirring occasionally.
Incorporate Vegetables:
  1. Add chopped broccoli, carrot, and celery. Simmer for 20 minutes until the vegetables are tender but still slightly crisp.
Melt the Cheese:
  1. Lower heat to low. Stir in shredded cheddar cheese and continue stirring until fully melted and incorporated, about 5 minutes.
Serve:
  1. Ladle the soup into bowls. Serve warm with crusty bread or crackers.

Notes

  • Fresh vs. Frozen: Use fresh broccoli for the best flavor, but frozen works in a pinch—just adjust cooking time.
  • Cheese Tip: Freshly grate cheese for a smoother texture. Avoid pre-shredded varieties with anti-caking agents.
  • Texture: Use an immersion blender if you prefer a smoother soup.
  • Storage: Store leftovers in an airtight container in the fridge for up to 3 days. Reheat gently on the stovetop or microwave.

Stay Connected

Get recipes via email: