White Chocolate Raspberry Cookies: A Sweet and Tangy Treat

If you’re a fan of the classic flavor combination of white chocolate and raspberries, you’re in for a treat! These White Chocolate Raspberry Cookies are a delightful blend of sweet and tangy flavors with a soft and chewy texture. Bursting with freeze-dried raspberries, creamy white chocolate chips, and a hint of raspberry jam, these cookies are perfect for special occasions or a simple indulgent snack.

Ingredients:

  • 1⅔ cups (210g) all-purpose flour
  • 1 teaspoon baking powder (preferably aluminum-free)
  • ½ teaspoon baking soda
  • ¼ teaspoon salt
  • ½ cup (113g) unsalted butter, softened to cool room temperature
  • ¼ cup (55g) packed light brown sugar (fresh and soft)
  • ½ cup (100g) granulated sugar
  • 1 large egg (cold, straight from the fridge)
  • ¾ teaspoon pure vanilla extract
  • ¼ teaspoon almond extract
  • 1 cup freeze-dried raspberries
  • ⅔ cup (110g) white chocolate chips or chunks
  • ¼ cup (80g) raspberry jam

Instructions:

  1. Prepare the Dry Ingredients : In a medium-sized mixing bowl, whisk together the all-purpose flour, baking powder, baking soda, and salt. Set aside.
  2. Cream the Butter and Sugars : In a large bowl, use a hand or stand mixer to beat the softened butter, brown sugar, and granulated sugar together until light and fluffy (about 2–3 minutes).
  3. Add the Wet Ingredients : Mix in the cold egg, vanilla extract, and almond extract until fully combined. The mixture may look slightly curdled, but that’s normal.
  4. Combine Wet and Dry Ingredients : Gradually add the dry ingredients to the wet ingredients and mix on low speed until just combined. Do not overmix.
  5. Fold in the Mix-ins : Gently fold in the freeze-dried raspberries and white chocolate chips, being careful not to crush the raspberries too much. Chill the dough in the refrigerator for at least 30 minutes to allow the flavors to develop and prevent spreading during baking.
  6. Shape the Cookies : Preheat the oven to 350°F (175°C) and line a baking sheet with parchment paper. Scoop about 1.5 tablespoons of dough for each cookie and place it on the baking sheet, leaving about 2 inches of space between each cookie. Using a small spoon, create a shallow well in the center of each cookie and fill it with a small dollop of raspberry jam.
  7. Bake : Bake the cookies for 10–12 minutes or until the edges are lightly golden but the centers still look slightly underbaked. Remove from the oven and let the cookies cool on the baking sheet for 5 minutes before transferring them to a wire rack to cool completely.

Conclusion:

These White Chocolate Raspberry Cookies are a heavenly blend of flavors and textures. The tartness of the freeze-dried raspberries balances perfectly with the sweetness of the white chocolate, while the raspberry jam adds a delicious fruity burst. Whether you’re baking for friends, family, or yourself, these cookies are sure to impress!

White Chocolate Raspberry Cookies: A Sweet and Tangy Treat

Soft and chewy White Chocolate Raspberry Cookiesfeaturing freeze-dried raspberries, white chocolate chunks, and a swirl ofraspberry jam for a burst of flavor in every bite.
Prep Time 15 minutes
Cook Time 35 minutes
Total Time 50 minutes
Servings: 18 cookies
Course: Dessert
Cuisine: American
Calories: 150

Ingredients
  

  • 1⅔ cups 210g all-purpose flour
  • 1 teaspoon baking powder preferably aluminum-free
  • ½ teaspoon baking soda
  • ¼ teaspoon salt
  • ½ cup 113g unsalted butter, softened to cool room temperature
  • ¼ cup 55g packed light brown sugar (fresh and soft)
  • ½ cup 100g granulated sugar
  • 1 large egg cold, straight from the fridge
  • ¾ teaspoon pure vanilla extract
  • ¼ teaspoon almond extract
  • 1 cup freeze-dried raspberries
  • ⅔ cup 110g white chocolate chips or chunks
  • ¼ cup 80g raspberry jam

Method
 

  1. Prepare the Dry Ingredients : In a medium-sized mixing bowl, whisk together the all-purpose flour, baking powder, baking soda, and salt. Set aside.
  2. Cream the Butter and Sugars : In a large bowl, use a hand or stand mixer to beat the softened butter, brown sugar, and granulated sugar together until light and fluffy (about 2–3 minutes).
  3. Add the Wet Ingredients : Mix in the cold egg, vanilla extract, and almond extract until fully combined. The mixture may look slightly curdled, but that’s normal.
  4. Combine Wet and Dry Ingredients : Gradually add the dry ingredients to the wet ingredients and mix on low speed until just combined. Do not overmix.
  5. Fold in the Mix-ins : Gently fold in the freeze-dried raspberries and white chocolate chips, being careful not to crush the raspberries too much. Chill the dough in the refrigerator for at least 30 minutes to allow the flavors to develop and prevent spreading during baking.
  6. Shape the Cookies : Preheat the oven to 350°F (175°C) and line a baking sheet with parchment paper. Scoop about 1.5 tablespoons of dough for each cookie and place it on the baking sheet, leaving about 2 inches of space between each cookie. Using a small spoon, create a shallow well in the center of each cookie and fill it with a small dollop of raspberry jam.
  7. Bake : Bake the cookies for 10–12 minutes or until the edges are lightly golden but the centers still look slightly underbaked. Remove from the oven and let the cookies cool on the baking sheet for 5 minutes before transferring them to a wire rack to cool completely.

Oven-Fried Southern Hot Honey Popcorn Chicken

Indulge in the ultimate comfort food with this Oven-Fried Southern Hot Honey Popcorn Chicken. This crispy, flavorful dish is a healthier take on the classic deep-fried popcorn chicken. Coated in crunchy corn flakes and seasoned with a fiery blend of spices, it’s finished with a drizzle of sweet and spicy hot honey sauce for the perfect balance of flavors. Perfect for family dinners, game nights, or as a party appetizer, this recipe is sure to impress!

Ingredients:

  • 2 lbs boneless chicken breasts, cut into bite-sized pieces
  • 4 cloves garlic, minced
  • 1/2 tsp chili flakes
  • 1/2 tsp onion powder
  • 1 egg
  • 1 1/4 cups corn flakes, crushed
  • 3 tbsp honey
  • 2 tbsp flour
  • 1 1/2 tsp smoked paprika
  • 1 tsp chili powder
  • 1 tsp cayenne pepper
  • Kosher salt and black pepper, to taste
  • Extra virgin olive oil (for baking)
  • 6 tbsp salted butter, melted

Instructions:

  1. Prep the Chicken : Preheat your oven to 400°F (200°C) and line a baking sheet with parchment paper. Spray the parchment with olive oil for added crispiness. In a large bowl, toss the bite-sized chicken pieces with 1/2 tsp onion powder, 1/2 tsp chili flakes, and a pinch of salt and pepper. Let it sit for 5 minutes to absorb the seasoning.
  2. Make the Breading : In a shallow bowl, whisk the egg with 1 tbsp of water. In a separate bowl, combine the crushed corn flakes, 1 1/2 tsp smoked paprika, 1 tsp chili powder, 1 tsp cayenne pepper, 2 tbsp flour, and a pinch of salt and pepper.
  3. Coat the Chicken : Dip each piece of chicken into the egg mixture, then roll it in the cornflake mixture, ensuring it’s evenly coated. Place the coated chicken pieces on the prepared baking sheet, leaving space between each piece.
  4. Bake the Chicken : Lightly spray or drizzle the coated chicken with olive oil to help it crisp up in the oven. Bake for 18–22 minutes, flipping the chicken halfway through, until golden brown and cooked through.
  5. Make the Hot Honey : In a small saucepan over low heat, combine 3 tbsp honey, 6 tbsp melted butter, 1 tsp cayenne pepper, and the minced garlic. Stir until well combined and warmed through. Remove from heat and drizzle the hot honey mixture over the baked popcorn chicken.
  6. Serve and Enjoy : Garnish with a sprinkle of chili flakes for extra heat if desired. Serve the hot honey popcorn chicken with your favorite dipping sauces or alongside a fresh salad for a complete meal.

Conclusion:

This Oven-Fried Southern Hot Honey Popcorn Chicken is a deliciously crispy and spicy dish that’s baked, not fried, making it a healthier choice without sacrificing flavor. The combination of the crunchy coating and the sweet, spicy hot honey drizzle is irresistibly good. Perfect as a snack, appetizer, or main course, this recipe is sure to become a family favorite.

Oven-Fried Southern Hot Honey Popcorn Chicken

Crispy oven-fried popcorn chicken coated in a spicyseasoning blend and drizzled with sweet and spicy hot honey for a flavor-packeddish that’s perfect for any occasion.
Prep Time 20 minutes
Cook Time 20 minutes
Total Time 40 minutes
Servings: 6
Course: Main Course
Cuisine: Southern-inspired
Calories: 350

Ingredients
  

  • 2 lbs boneless chicken breasts cut into bite-sized pieces
  • 4 cloves garlic minced
  • 1/2 tsp chili flakes
  • 1/2 tsp onion powder
  • 1 egg
  • 1 1/4 cups corn flakes crushed
  • 3 tbsp honey
  • 2 tbsp flour
  • 1 1/2 tsp smoked paprika
  • 1 tsp chili powder
  • 1 tsp cayenne pepper
  • Kosher salt and black pepper to taste
  • Extra virgin olive oil for baking
  • 6 tbsp salted butter melted

Method
 

  1. Prep the Chicken : Preheat your oven to 400°F (200°C) and line a baking sheet with parchment paper. Spray the parchment with olive oil for added crispiness. In a large bowl, toss the bite-sized chicken pieces with 1/2 tsp onion powder, 1/2 tsp chili flakes, and a pinch of salt and pepper. Let it sit for 5 minutes to absorb the seasoning.
  2. Make the Breading : In a shallow bowl, whisk the egg with 1 tbsp of water. In a separate bowl, combine the crushed corn flakes, 1 1/2 tsp smoked paprika, 1 tsp chili powder, 1 tsp cayenne pepper, 2 tbsp flour, and a pinch of salt and pepper.
  3. Coat the Chicken : Dip each piece of chicken into the egg mixture, then roll it in the cornflake mixture, ensuring it’s evenly coated. Place the coated chicken pieces on the prepared baking sheet, leaving space between each piece.
  4. Bake the Chicken : Lightly spray or drizzle the coated chicken with olive oil to help it crisp up in the oven. Bake for 18–22 minutes, flipping the chicken halfway through, until golden brown and cooked through.
  5. Make the Hot Honey : In a small saucepan over low heat, combine 3 tbsp honey, 6 tbsp melted butter, 1 tsp cayenne pepper, and the minced garlic. Stir until well combined and warmed through. Remove from heat and drizzle the hot honey mixture over the baked popcorn chicken.
  6. Serve and Enjoy : Garnish with a sprinkle of chili flakes for extra heat if desired. Serve the hot honey popcorn chicken with your favorite dipping sauces or alongside a fresh salad for a complete meal.

Keto Stir Fry: A Quick and Healthy Low-Carb Recipe

Enjoy a quick, healthy, and keto-friendly meal with this delicious stir fry recipe. Packed with tender chicken, fresh vegetables, and a savory low-carb sauce, this dish is a perfect combination of flavor and nutrition. Whether you’re following a ketogenic lifestyle or just looking for a light, satisfying dinner option, this recipe has you covered. Ready in just 30 minutes, it’s the ultimate weeknight meal for busy schedules!

Ingredients:

  • 1 pound chicken breast, chopped
  • 1 tablespoon almond flour or coconut flour (for coating)
  • 1 tablespoon oil (avocado or olive oil recommended)
  • 2 cloves garlic, minced
  • 1/2 inch ginger, minced
  • 1 small onion, chopped
  • 1 head broccoli, chopped
  • 1 large bell pepper, chopped
  • 1 batch keto stir fry sauce (store-bought or homemade)
  • 1 teaspoon sesame oil
  • 2 tablespoons chili sauce (optional, for heat)

Instructions:

  1. Prep the Chicken : Coat the chopped chicken breast with almond flour or coconut flour. This helps give the chicken a light crust and enhances the stir fry texture. Heat 1 tablespoon of oil in a large skillet or wok over medium-high heat. Add the chicken to the skillet and cook for 5–7 minutes, stirring occasionally, until golden brown and cooked through. Remove the chicken and set aside.
  2. Cook the Vegetables : In the same skillet, add a little more oil if needed, and sauté the minced garlic and ginger for 30 seconds until fragrant. Add the chopped onion, broccoli, and bell pepper to the skillet. Stir fry for 4–5 minutes until the vegetables are tender yet still crisp.
  3. Make the Sauce : If making your own keto stir fry sauce, combine soy sauce or tamari, rice vinegar, a low-carb sweetener, and water in a bowl. Add the sauce to the skillet with the vegetables, along with the cooked chicken. Stir in the sesame oil and chili sauce (if desired) for an extra kick of heat.
  4. Combine and Serve : Toss everything together in the skillet, ensuring the sauce coats the chicken and vegetables evenly. Cook for another 2–3 minutes until the sauce thickens slightly. Serve hot as is, or over cauliflower rice for a complete keto-friendly meal.

Conclusion:

This Keto Stir Fry is a versatile and satisfying dish that fits perfectly into a low-carb lifestyle. With tender chicken, vibrant vegetables, and a delicious sauce, it’s a quick and healthy dinner that you can easily customize to your taste. Serve it for lunch or dinner and enjoy a flavorful, guilt-free meal!

Keto Stir Fry: A Quick and Healthy Low-Carb Recipe

A flavorful Keto Stir Fry featuring tender chicken,crisp vegetables, and a savory low-carb sauce. Perfect for a quick and healthydinner option.
Prep Time 10 minutes
Cook Time 15 minutes
Total Time 25 minutes
Servings: 4
Course: Main Course
Cuisine: Asian-inspired
Calories: 350

Ingredients
  

  • 1 pound chicken breast chopped
  • 1 tablespoon almond flour or coconut flour for coating
  • 1 tablespoon oil avocado or olive oil recommended
  • 2 cloves garlic minced
  • 1/2 inch ginger minced
  • 1 small onion chopped
  • 1 head broccoli chopped
  • 1 large bell pepper chopped
  • 1 batch keto stir fry sauce store-bought or homemade
  • 1 teaspoon sesame oil
  • 2 tablespoons chili sauce optional, for heat

Method
 

  1. Prep the Chicken : Coat the chopped chicken breast with almond flour or coconut flour. This helps give the chicken a light crust and enhances the stir fry texture. Heat 1 tablespoon of oil in a large skillet or wok over medium-high heat. Add the chicken to the skillet and cook for 5–7 minutes, stirring occasionally, until golden brown and cooked through. Remove the chicken and set aside.
  2. Cook the Vegetables : In the same skillet, add a little more oil if needed, and sauté the minced garlic and ginger for 30 seconds until fragrant. Add the chopped onion, broccoli, and bell pepper to the skillet. Stir fry for 4–5 minutes until the vegetables are tender yet still crisp.
  3. Make the Sauce : If making your own keto stir fry sauce, combine soy sauce or tamari, rice vinegar, a low-carb sweetener, and water in a bowl. Add the sauce to the skillet with the vegetables, along with the cooked chicken. Stir in the sesame oil and chili sauce (if desired) for an extra kick of heat.
  4. Combine and Serve : Toss everything together in the skillet, ensuring the sauce coats the chicken and vegetables evenly. Cook for another 2–3 minutes until the sauce thickens slightly. Serve hot as is, or over cauliflower rice for a complete keto-friendly meal.

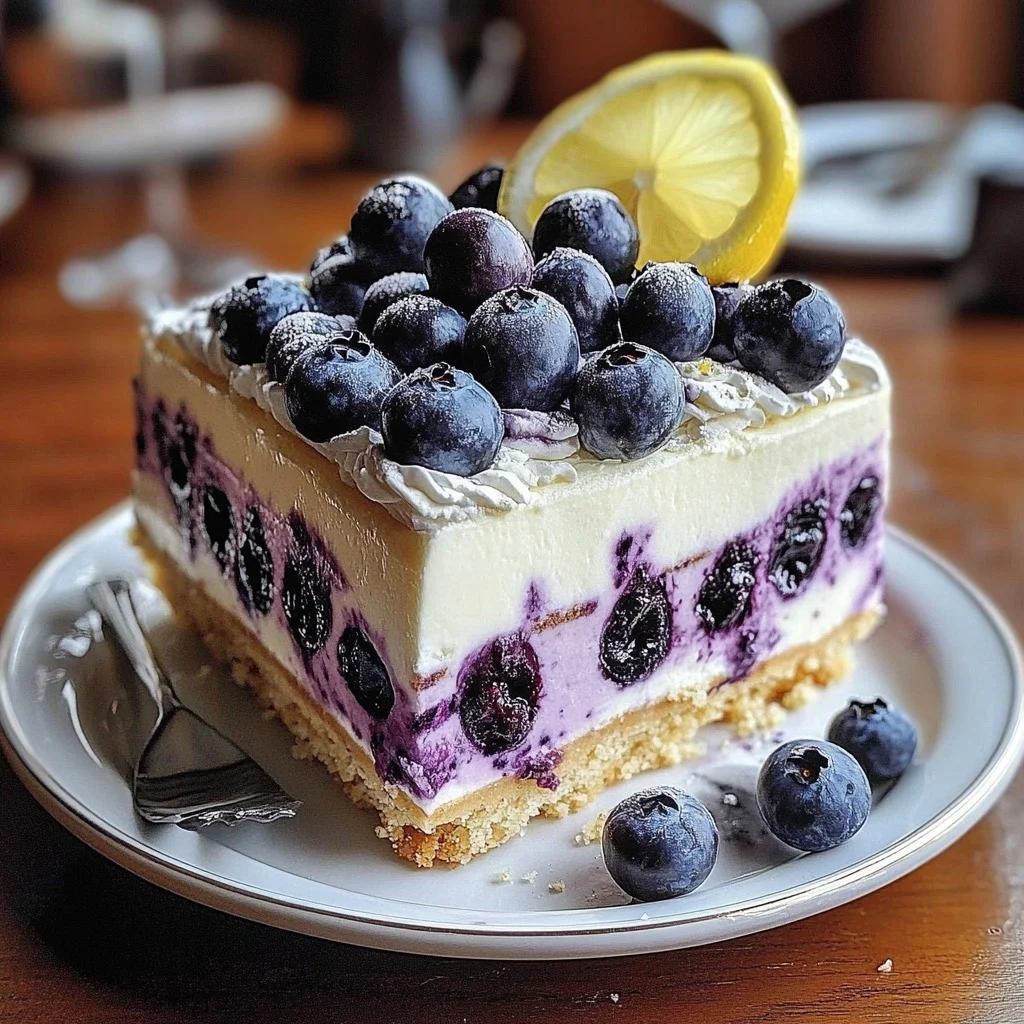
Delightful Lemon Blueberry Shortbread Mousse Cake Recipe

Indulge in the perfect combination of tangy lemon and sweet blueberry flavors with this Lemon Blueberry Shortbread Mousse Cake. This dessert brings together a buttery shortbread crust, a creamy lemon mousse, and a vibrant blueberry topping to create a treat that’s as beautiful as it is delicious. Whether you’re hosting a summer party or just treating yourself, this no-bake dessert is guaranteed to impress everyone.

Ingredients:

Produce :

  • 2 cups fresh blueberries
  • Zest of 2 lemons

Condiments :

  • 9/16 cup fresh lemon juice

Baking & Spices :

  • 3/4 cup granulated sugar
  • 1/2 cup powdered sugar
  • 1 pinch of salt

Dairy :

  • 1/2 cup unsalted butter
  • 8 oz cream cheese
  • 1 cup heavy cream

Desserts :

  • 1 tbsp powdered gelatin

Liquids :

  • 2 tbsp water

Instructions:

  1. Prepare the Shortbread Crust : In a bowl, combine 1/2 cup of unsalted butter, 1/4 cup powdered sugar, and a pinch of salt. Mix until smooth. Gradually add 1 cup of flour and knead into a dough. Press the dough into a greased 9-inch springform pan to form an even layer. Chill the crust in the refrigerator for 20 minutes.
  2. Make the Lemon Mousse : In a small bowl, combine 1 tbsp of gelatin powder with 2 tbsp of water. Let it bloom for 5 minutes. Heat the gelatin mixture over low heat until fully dissolved. Set aside to cool slightly. In a mixing bowl, beat the cream cheese, 1/2 cup powdered sugar, and lemon zest until smooth. Gradually add 9/16 cup of fresh lemon juice and the dissolved gelatin. Mix well. In another bowl, whip 1 cup of heavy cream until stiff peaks form, then gently fold it into the lemon mixture.
  3. Prepare the Blueberry Topping : In a saucepan, combine 2 cups of fresh blueberries, 3/4 cup granulated sugar, and 2 tbsp of water. Cook over medium heat until the blueberries soften and the mixture thickens. Let the mixture cool to room temperature.
  4. Assemble the Cake : Spread the lemon mousse evenly over the shortbread crust. Pour the cooled blueberry mixture on top of the mousse layer, spreading it out evenly. Refrigerate the cake for at least 4 hours or overnight to set.
  5. Serve and Enjoy : Carefully remove the cake from the springform pan. Garnish with additional lemon zest and fresh blueberries if desired. Slice and serve chilled. Enjoy the refreshing combination of lemon and blueberry in every bite!

Conclusion:

This Lemon Blueberry Shortbread Mousse Cake is a delightful dessert that offers a balance of tangy, sweet, and creamy flavors with every bite. The simple preparation process makes it a perfect recipe for both experienced bakers and beginners. Serve it at your next gathering or enjoy it as a special treat for yourself—you’ll find it hard to resist!

Delightful Lemon Blueberry Shortbread Mousse Cake Recipe

A luscious Lemon Blueberry Shortbread Mousse Cakelayered with a buttery crust, creamy lemon mousse, and a fresh blueberrytopping, perfect for any occasion.
Prep Time 30 minutes
Cook Time 10 minutes
Resting Time 4 hours
Total Time 4 hours 40 minutes
Servings: 8
Course: Dessert
Cuisine: American
Calories: 280

Ingredients
  

Produce :
  • 2 cups fresh blueberries
  • Zest of 2 lemons
Condiments :
  • 9/16 cup fresh lemon juice
Baking & Spices :
  • 3/4 cup granulated sugar
  • 1/2 cup powdered sugar
  • 1 pinch of salt
Dairy :
  • 1/2 cup unsalted butter
  • 8 oz cream cheese
  • 1 cup heavy cream
Desserts :
  • 1 tbsp powdered gelatin
Liquids :
  • 2 tbsp water

Method
 

  1. Prepare the Shortbread Crust : In a bowl, combine 1/2 cup of unsalted butter, 1/4 cup powdered sugar, and a pinch of salt. Mix until smooth. Gradually add 1 cup of flour and knead into a dough. Press the dough into a greased 9-inch springform pan to form an even layer. Chill the crust in the refrigerator for 20 minutes.
  2. Make the Lemon Mousse : In a small bowl, combine 1 tbsp of gelatin powder with 2 tbsp of water. Let it bloom for 5 minutes. Heat the gelatin mixture over low heat until fully dissolved. Set aside to cool slightly. In a mixing bowl, beat the cream cheese, 1/2 cup powdered sugar, and lemon zest until smooth. Gradually add 9/16 cup of fresh lemon juice and the dissolved gelatin. Mix well. In another bowl, whip 1 cup of heavy cream until stiff peaks form, then gently fold it into the lemon mixture.
  3. Prepare the Blueberry Topping : In a saucepan, combine 2 cups of fresh blueberries, 3/4 cup granulated sugar, and 2 tbsp of water. Cook over medium heat until the blueberries soften and the mixture thickens. Let the mixture cool to room temperature.
  4. Assemble the Cake : Spread the lemon mousse evenly over the shortbread crust. Pour the cooled blueberry mixture on top of the mousse layer, spreading it out evenly. Refrigerate the cake for at least 4 hours or overnight to set.
  5. Serve and Enjoy : Carefully remove the cake from the springform pan. Garnish with additional lemon zest and fresh blueberries if desired. Slice and serve chilled. Enjoy the refreshing combination of lemon and blueberry in every bite!

Crack Chicken Stuffed Baked Potatoes: A Comfort Food Delight

When you combine tender baked potatoes with creamy, cheesy chicken filling, you get a meal that’s hearty, satisfying, and downright addictive. These Crack Chicken Stuffed Baked Potatoes are the perfect blend of rich flavors and textures. With a ranch-seasoned chicken filling, crispy bacon, and melted cheddar cheese, this dish will quickly become a family favorite for dinner or a crowd-pleasing party entrée.

Ingredients

For the Potatoes:

  • 4 pounds large Russet potatoes (4-6 potatoes)

For the Crack Chicken Filling:

  • 1 pound boneless, skinless chicken breasts (2-3 breasts)
  • 1 tablespoon Ranch seasoning mix
  • 4 ounces block cream cheese, softened
  • 3 slices cooked bacon, diced or crumbled
  • 1 cup freshly grated sharp cheddar cheese

Optional Toppings:

  • Extra bacon
  • Chopped chives
  • Ranch dressing drizzle
  • Blue cheese crumbles

Instructions

  1. Bake the Potatoes : Preheat your oven to 400°F (204°C). Scrub the potatoes and pierce each several times with a fork. Place them directly on the oven rack and bake for 50-60 minutes, or until tender when pierced with a knife.
  2. Cook the Chicken : While the potatoes bake, season the chicken breasts with the ranch seasoning mix. In a skillet over medium heat, cook the chicken for 6-8 minutes per side, or until fully cooked. Remove from the skillet, shred with two forks, and set aside.
  3. Make the Filling : In a large bowl, combine the shredded chicken, cream cheese, diced bacon, and grated cheddar cheese. Mix until well combined.
  4. Assemble the Potatoes : Once the potatoes are baked, remove them from the oven and allow them to cool slightly. Slice each potato lengthwise and gently fluff the interior with a fork. Spoon the crack chicken mixture generously into each potato.
  5. Bake Again : Place the stuffed potatoes on a baking sheet. Return them to the oven and bake for an additional 10-15 minutes, or until the cheese is melted and bubbly.
  6. Add Toppings and Serve : Top each stuffed potato with extra bacon, chopped chives, ranch dressing drizzle, or blue cheese crumbles, if desired. Serve warm and enjoy!

Conclusion

Crack Chicken Stuffed Baked Potatoes are the ultimate comfort food, combining creamy, cheesy chicken with the fluffy goodness of baked potatoes. Customizable with your favorite toppings, this recipe is perfect for weeknight dinners, potlucks, or game-day celebrations. Savor the flavor-packed indulgence and watch these stuffed potatoes disappear from your table!

Crack Chicken Stuffed Baked Potatoes: A Comfort Food Delight

Loaded baked potatoes stuffed with creamyranch-seasoned chicken, bacon, and cheddar cheese, perfect as a hearty meal orindulgent side dish.
Prep Time 15 minutes
Cook Time 1 hour 15 minutes
Total Time 1 hour 30 minutes
Servings: 4
Course: Main Course
Cuisine: American
Calories: 500

Ingredients
  

For the Potatoes:
  • 4 pounds large Russet potatoes 4-6 potatoes
For the Crack Chicken Filling:
  • 1 pound boneless skinless chicken breasts (2-3 breasts)
  • 1 tablespoon Ranch seasoning mix
  • 4 ounces block cream cheese softened
  • 3 slices cooked bacon diced or crumbled
  • 1 cup freshly grated sharp cheddar cheese
Optional Toppings:
  • Extra bacon
  • Chopped chives
  • Ranch dressing drizzle
  • Blue cheese crumbles

Method
 

  1. Bake the Potatoes : Preheat your oven to 400°F (204°C). Scrub the potatoes and pierce each several times with a fork. Place them directly on the oven rack and bake for 50-60 minutes, or until tender when pierced with a knife.
  2. Cook the Chicken : While the potatoes bake, season the chicken breasts with the ranch seasoning mix. In a skillet over medium heat, cook the chicken for 6-8 minutes per side, or until fully cooked. Remove from the skillet, shred with two forks, and set aside.
  3. Make the Filling : In a large bowl, combine the shredded chicken, cream cheese, diced bacon, and grated cheddar cheese. Mix until well combined.
  4. Assemble the Potatoes : Once the potatoes are baked, remove them from the oven and allow them to cool slightly. Slice each potato lengthwise and gently fluff the interior with a fork. Spoon the crack chicken mixture generously into each potato.
  5. Bake Again : Place the stuffed potatoes on a baking sheet. Return them to the oven and bake for an additional 10-15 minutes, or until the cheese is melted and bubbly.
  6. Add Toppings and Serve : Top each stuffed potato with extra bacon, chopped chives, ranch dressing drizzle, or blue cheese crumbles, if desired. Serve warm and enjoy!

Crispy Cheesecake Egg Rolls with Sweet Cinnamon Sugar

Combine the creamy decadence of cheesecake with the satisfying crunch of an egg roll, and you have a dessert that’s sure to impress. These Cheesecake Egg Rolls are easy to make, deliciously sweet, and can be topped with your favorite sauces or fruit. Whether you’re hosting a party or craving a quick dessert, these treats deliver indulgence in every bite.

Ingredients

For the Egg Rolls:

  • 8 oz cream cheese, softened
  • 3 ½ tablespoons sugar
  • ½ teaspoon lemon juice
  • ½ teaspoon vanilla extract
  • ¼ teaspoon salt
  • Egg roll wrappers
  • Water (for sealing wrappers)

For the Topping:

  • 1 cup sugar
  • 2 tablespoons cinnamon
  • Oil (for frying)

Optional for Serving:

  • Caramel sauce
  • Chocolate sauce
  • Chopped strawberries
  • Powdered sugar

Instructions

  1. Make the Cheesecake Filling : In a medium bowl, mix the cream cheese, sugar, lemon juice, vanilla extract, and salt until smooth and creamy. Set aside.
  2. Assemble the Egg Rolls : Lay an egg roll wrapper on a flat surface with one corner pointing toward you (like a diamond shape). Place 2 tablespoons of cheesecake filling in the center. Fold the bottom corner up over the filling, then fold in the sides. Roll tightly to seal, brushing the edges with water to keep them closed. Repeat with remaining wrappers and filling.
  3. Fry the Egg Rolls : Heat oil in a deep skillet or fryer to 350°F (175°C). Fry the egg rolls in batches until golden brown and crispy, about 2-3 minutes per side. Remove and drain on paper towels.
  4. Coat in Cinnamon Sugar : In a shallow dish, mix the sugar and cinnamon. While the egg rolls are still warm, roll them in the cinnamon sugar mixture until fully coated.
  5. Serve and Enjoy : Plate the egg rolls and garnish with your choice of caramel sauce, chocolate drizzle, fresh strawberries, or a dusting of powdered sugar. Serve warm and enjoy!

Conclusion

Crispy on the outside and creamy on the inside, these Cheesecake Egg Rolls are a dessert lover’s dream. The cinnamon sugar coating adds the perfect sweetness and crunch, while the optional toppings let you customize the flavors to your liking. Perfect for any occasion, these egg rolls are easy to make and impossible to resist. Treat yourself to this fusion delight today!

Crispy Cheesecake Egg Rolls with Sweet Cinnamon Sugar

Golden and crispy egg rolls filled with creamycheesecake, coated in cinnamon sugar, and served with your choice of toppingsfor a customizable dessert.
Prep Time 15 minutes
Cook Time 10 minutes
Total Time 25 minutes
Servings: 8 Rolls
Course: Dessert
Cuisine: Fusion
Calories: 150

Ingredients
  

For the Egg Rolls:
  • 8 oz cream cheese softened
  • 3 ½ tablespoons sugar
  • ½ teaspoon lemon juice
  • ½ teaspoon vanilla extract
  • ¼ teaspoon salt
  • Egg roll wrappers
  • Water for sealing wrappers
For the Topping:
  • 1 cup sugar
  • 2 tablespoons cinnamon
  • Oil for frying
Optional for Serving:
  • Caramel sauce
  • Chocolate sauce
  • Chopped strawberries
  • Powdered sugar

Method
 

  1. Make the Cheesecake Filling : In a medium bowl, mix the cream cheese, sugar, lemon juice, vanilla extract, and salt until smooth and creamy. Set aside.
  2. Assemble the Egg Rolls : Lay an egg roll wrapper on a flat surface with one corner pointing toward you (like a diamond shape). Place 2 tablespoons of cheesecake filling in the center. Fold the bottom corner up over the filling, then fold in the sides. Roll tightly to seal, brushing the edges with water to keep them closed. Repeat with remaining wrappers and filling.
  3. Fry the Egg Rolls : Heat oil in a deep skillet or fryer to 350°F (175°C). Fry the egg rolls in batches until golden brown and crispy, about 2-3 minutes per side. Remove and drain on paper towels.
  4. Coat in Cinnamon Sugar : In a shallow dish, mix the sugar and cinnamon. While the egg rolls are still warm, roll them in the cinnamon sugar mixture until fully coated.
  5. Serve and Enjoy : Plate the egg rolls and garnish with your choice of caramel sauce, chocolate drizzle, fresh strawberries, or a dusting of powdered sugar. Serve warm and enjoy!

Mini Vanilla Bean Crème Brûlée Cheesecake Delights

Indulge in the decadence of Vanilla Bean Crème Brûlée Cheesecake Cupcakes. These delightful treats combine the creamy richness of cheesecake with the caramelized top of a classic crème brûlée. Perfect for parties or personal indulgence, these mini desserts pack big flavors into a convenient cupcake size. Each bite is a journey through a buttery graham crust, luscious vanilla cheesecake, and a sweet crackly topping.

Ingredients

For the Crust:

  • 1 cup graham cracker crumbs
  • 2 tablespoons granulated sugar
  • 4 tablespoons unsalted butter, melted

For the Cheesecake Filling:

  • 16 oz cream cheese, softened
  • 1/2 cup granulated sugar
  • 2 large eggs
  • 1/2 cup sour cream
  • 1/2 cup heavy cream
  • 1 vanilla bean, split and seeds scraped
  • 1 teaspoon vanilla extract

For the Crème Brûlée Topping:

  • 1/4 cup granulated sugar

Instructions

  1. Prepare the Crust : Preheat your oven to 325°F (163°C). Line a muffin tin with 12 cupcake liners. In a mixing bowl, combine graham cracker crumbs, granulated sugar, and melted butter. Stir until the mixture resembles wet sand. Divide the mixture evenly among the cupcake liners and press firmly to create a compact crust. Bake for 5 minutes, then let cool.
  2. Make the Cheesecake Filling : In a large bowl, beat the cream cheese and sugar until smooth. Add the eggs one at a time, mixing well after each addition. Mix in the sour cream, heavy cream, vanilla bean seeds, and vanilla extract until just combined. Avoid overmixing.
  3. Assemble and Bake : Pour the cheesecake filling over the cooled crusts, filling each liner almost to the top. Bake for 20-22 minutes or until the centers are set but slightly jiggly. Remove from the oven and let cool to room temperature, then chill in the refrigerator for at least 2 hours.
  4. Add the Crème Brûlée Topping : Just before serving, sprinkle 1 teaspoon of granulated sugar evenly over the top of each cupcake.Use a kitchen torch to caramelize the sugar until it turns golden and crispy. Let cool for a minute to allow the sugar to harden.

Conclusion

These Vanilla Bean Crème Brûlée Cheesecake Cupcakes are the perfect blend of creamy cheesecake and crisp brûlée topping, creating a dessert that’s as visually stunning as it is delicious. Ideal for any special occasion or as a sweet indulgence, these mini treats will leave your guests asking for more. Relish the harmony of textures and the aromatic hint of vanilla in every bite!

Mini Vanilla Bean Crème Brûlée Cheesecake Delights

A mini cheesecake dessert infused with vanillabean, topped with a caramelized sugar crust for a crème brûlée twist. Perfectlysized for individual servings!
Prep Time 20 minutes
Cook Time 30 minutes
Cooling Time 2 hours 10 minutes
Total Time 3 hours
Servings: 12 cupcakes
Course: Dessert
Cuisine: French-American Fusion
Calories: 250

Ingredients
  

For the Crust:
  • 1 cup graham cracker crumbs
  • 2 tablespoons granulated sugar
  • 4 tablespoons unsalted butter melted
For the Cheesecake Filling:
  • 16 oz cream cheese softened
  • 1/2 cup granulated sugar
  • 2 large eggs
  • 1/2 cup sour cream
  • 1/2 cup heavy cream
  • 1 vanilla bean split and seeds scraped
  • 1 teaspoon vanilla extract
For the Crème Brûlée Topping:
  • 1/4 cup granulated sugar

Method
 

  1. Prepare the Crust : Preheat your oven to 325°F (163°C). Line a muffin tin with 12 cupcake liners. In a mixing bowl, combine graham cracker crumbs, granulated sugar, and melted butter. Stir until the mixture resembles wet sand. Divide the mixture evenly among the cupcake liners and press firmly to create a compact crust. Bake for 5 minutes, then let cool.
  2. Make the Cheesecake Filling : In a large bowl, beat the cream cheese and sugar until smooth. Add the eggs one at a time, mixing well after each addition. Mix in the sour cream, heavy cream, vanilla bean seeds, and vanilla extract until just combined. Avoid overmixing.
  3. Assemble and Bake : Pour the cheesecake filling over the cooled crusts, filling each liner almost to the top. Bake for 20-22 minutes or until the centers are set but slightly jiggly. Remove from the oven and let cool to room temperature, then chill in the refrigerator for at least 2 hours.
  4. Add the Crème Brûlée Topping : Just before serving, sprinkle 1 teaspoon of granulated sugar evenly over the top of each cupcake. Use a kitchen torch to caramelize the sugar until it turns golden and crispy. Let cool for a minute to allow the sugar to harden.

Homemade Stromboli Delight

Craving a savory, cheesy, and meaty dish that’s perfect for gatherings or a cozy family dinner? This Homemade Stromboli Delight is the ultimate combination of flavors, featuring layers of deli meats, melty cheese, and a perfectly golden crust. Whether you’re a seasoned chef or just venturing into the kitchen, this recipe is straightforward yet impressive, guaranteed to make your taste buds sing.

Ingredients

  • 1 tube of Pillsbury pizza crust
  • 8 slices of deli ham
  • 10 slices of Genoa salami
  • 12 slices of sandwich pepperoni
  • 8 slices of provolone or mozzarella cheese (or 1 cup shredded)
  • 2 tablespoons butter
  • 2 cloves garlic, minced
  • 2 teaspoons fresh parsley, chopped
  • 3 tablespoons grated Parmesan cheese

Instructions

  1. Prepare the Dough : Preheat your oven to 375°F (190°C). Unroll the pizza dough on a lightly floured surface, shaping it into a rectangle.
  2. Layer the Fillings : Evenly layer the deli ham, Genoa salami, and pepperoni across the dough, leaving about 1-inch of space on the edges. Top with provolone or mozzarella cheese.
  3. Roll It Up : Starting from the shorter side, carefully roll the dough into a tight log. Pinch the edges and seam to seal the filling inside.
  4. Make the Garlic Butter Topping : In a small saucepan, melt the butter over low heat. Stir in the minced garlic and cook for 1 minute until fragrant. Remove from heat and add the chopped parsley.
  5. Brush and Top : Place the stromboli seam-side down on a parchment-lined baking sheet. Brush the garlic butter mixture generously over the top and sprinkle with grated Parmesan cheese.
  6. Bake to Perfection : Bake in the preheated oven for 18-20 minutes or until golden brown and crispy. Allow the stromboli to cool slightly before slicing into thick pieces.
  7. Serve and Enjoy : Serve warm with a side of marinara sauce for dipping, if desired.

Conclusion

This Homemade Stromboli Delight is an easy yet satisfying recipe that packs bold flavors in every bite. Perfect as a main course or even a party appetizer, it’s a versatile dish that will have everyone asking for seconds. Customize it with your favorite meats and cheeses for a personalized touch. Enjoy this comforting Italian-American classic with your loved ones today!

Homemade Stromboli Delight

A simple yet flavorful stromboli recipe featuringham, salami, pepperoni, and cheese rolled up in a golden crust, topped with abuttery garlic-herb mixture.
Prep Time 10 minutes
Cook Time 20 minutes
Total Time 30 minutes
Course: Main Course
Cuisine: Italian-inspired
Calories: 320

Ingredients
  

  • 1 tube of Pillsbury pizza crust
  • 8 slices of deli ham
  • 10 slices of Genoa salami
  • 12 slices of sandwich pepperoni
  • 8 slices of provolone or mozzarella cheese or 1 cup shredded
  • 2 tablespoons butter
  • 2 cloves garlic minced
  • 2 teaspoons fresh parsley chopped
  • 3 tablespoons grated Parmesan cheese

Method
 

  1. Prepare the Dough : Preheat your oven to 375°F (190°C). Unroll the pizza dough on a lightly floured surface, shaping it into a rectangle.
  2. Layer the Fillings : Evenly layer the deli ham, Genoa salami, and pepperoni across the dough, leaving about 1-inch of space on the edges. Top with provolone or mozzarella cheese.
  3. Roll It Up : Starting from the shorter side, carefully roll the dough into a tight log. Pinch the edges and seam to seal the filling inside.
  4. Make the Garlic Butter Topping : In a small saucepan, melt the butter over low heat. Stir in the minced garlic and cook for 1 minute until fragrant. Remove from heat and add the chopped parsley.
  5. Brush and Top : Place the stromboli seam-side down on a parchment-lined baking sheet. Brush the garlic butter mixture generously over the top and sprinkle with grated Parmesan cheese.
  6. Bake to Perfection : Bake in the preheated oven for 18-20 minutes or until golden brown and crispy. Allow the stromboli to cool slightly before slicing into thick pieces.
  7. Serve and Enjoy : Serve warm with a side of marinara sauce for dipping, if desired.

Strawberry Cinnamon Rolls Recipe

Put a fruity twist on a classic favorite with these strawberry cinnamon rolls! Soft, fluffy rolls are swirled with a sweet and tangy strawberry filling, made even more irresistible with a creamy glaze infused with strawberry flavor. These rolls are perfect for breakfast, brunch, or dessert, offering a delightful burst of flavor in every bite.

Ingredients

For the Strawberry Filling:

  • 3 cups frozen or fresh strawberries
  • 3 tablespoons brown sugar, packed
  • 2 teaspoons lemon juice
  • 1 tablespoon + 1 teaspoon cornstarch
  • 2 tablespoons water

For the Tangzhong:

  • ¼ cup all-purpose flour
  • ¾ cup water

For the Dough:

  • 3 ½ cups all-purpose flour
  • ⅓ cup granulated sugar
  • 2 teaspoons instant yeast
  • ¾ teaspoon fine sea salt
  • ½ cup whole milk, room temperature
  • 1 large egg, room temperature
  • 1 teaspoon vanilla extract
  • Prepared Tangzhong (from recipe above)
  • 4 tablespoons unsalted butter, softened

For the Glaze:

  • 1 ounce cream cheese, room temperature
  • 4 tablespoons unsalted butter, room temperature
  • 1 cup powdered sugar
  • 1-2 tablespoons reserved strawberry filling
  • 1 tablespoon whole milk

Instructions

  1. Prepare the Strawberry Filling: In a medium saucepan over medium heat, combine the strawberries, brown sugar, and lemon juice. Cook until the strawberries break down and release their juices (about 5-7 minutes).In a small bowl, mix the cornstarch and water to create a slurry. Add this to the strawberry mixture and cook, stirring, until thickened. Set aside to cool completely.
  2. Make the Tangzhong: In a small saucepan, whisk together the flour and water over medium heat. Cook, stirring constantly, until the mixture thickens into a paste. Remove from heat and let it cool to room temperature.
  3. Prepare the Dough: In a large mixing bowl, combine the flour, sugar, yeast, and salt.Add the milk, egg, vanilla extract, and cooled Tangzhong. Mix until a shaggy dough forms.Add the softened butter and knead until the dough is smooth and elastic (about 8-10 minutes by hand or 5-7 minutes with a stand mixer).Place the dough in a lightly greased bowl, cover, and let it rise in a warm place for 1-1.5 hours, or until doubled in size.
  4. Assemble the Rolls: Punch down the dough and roll it out on a lightly floured surface into a rectangle about 12×18 inches.Spread the cooled strawberry filling evenly over the dough.Starting at one long edge, roll the dough tightly into a log. Slice the log into 12 equal rolls.Arrange the rolls in a greased 9×13-inch baking dish, cover, and let rise for 30-45 minutes, until puffy.
  5. Bake: Preheat your oven to 350°F (175°C).Bake the rolls for 20-25 minutes, or until golden brown.
  6. Prepare the Glaze: Beat the cream cheese and butter until smooth. Add powdered sugar, reserved strawberry filling, and milk. Mix until smooth and spreadable.Spread the glaze over the warm rolls.

Conclusion:

These strawberry cinnamon rolls are a delightful twist on a classic favorite. With their soft dough, fruity filling, and creamy glaze, they’re perfect for a special breakfast or an indulgent treat. Serve them warm and watch them disappear!

Strawberry Cinnamon Rolls Recipe

Soft, tender cinnamon rolls with a strawberrytwist, featuring a tangy fruit filling and a sweet cream cheese glaze.
Prep Time 30 minutes
Cook Time 25 minutes
Resting Time 1 hour 30 minutes
Total Time 2 hours 25 minutes
Servings: 12 Rolls
Course: Dessert
Cuisine: American
Calories: 350

Ingredients
  

For the Strawberry Filling:
  • 3 cups frozen or fresh strawberries
  • 3 tablespoons brown sugar packed
  • 2 teaspoons lemon juice
  • 1 tablespoon + 1 teaspoon cornstarch
  • 2 tablespoons water
For the Tangzhong:
  • ¼ cup all-purpose flour
  • ¾ cup water
For the Dough:
  • 3 ½ cups all-purpose flour
  • ⅓ cup granulated sugar
  • 2 teaspoons instant yeast
  • ¾ teaspoon fine sea salt
  • ½ cup whole milk room temperature
  • 1 large egg room temperature
  • 1 teaspoon vanilla extract
  • Prepared Tangzhong from recipe above
  • 4 tablespoons unsalted butter softened
For the Glaze:
  • 1 ounce cream cheese room temperature
  • 4 tablespoons unsalted butter room temperature
  • 1 cup powdered sugar
  • 1-2 tablespoons reserved strawberry filling
  • 1 tablespoon whole milk

Method
 

  1. Prepare the Strawberry Filling: In a medium saucepan over medium heat, combine the strawberries, brown sugar, and lemon juice. Cook until the strawberries break down and release their juices (about 5-7 minutes). In a small bowl, mix the cornstarch and water to create a slurry. Add this to the strawberry mixture and cook, stirring, until thickened. Set aside to cool completely.
  2. Make the Tangzhong: In a small saucepan, whisk together the flour and water over medium heat. Cook, stirring constantly, until the mixture thickens into a paste. Remove from heat and let it cool to room temperature.
  3. Prepare the Dough: In a large mixing bowl, combine the flour, sugar, yeast, and salt. Add the milk, egg, vanilla extract, and cooled Tangzhong. Mix until a shaggy dough forms. Add the softened butter and knead until the dough is smooth and elastic (about 8-10 minutes by hand or 5-7 minutes with a stand mixer). Place the dough in a lightly greased bowl, cover, and let it rise in a warm place for 1-1.5 hours, or until doubled in size.
  4. Assemble the Rolls: Punch down the dough and roll it out on a lightly floured surface into a rectangle about 12×18 inches. Spread the cooled strawberry filling evenly over the dough. Starting at one long edge, roll the dough tightly into a log. Slice the log into 12 equal rolls. Arrange the rolls in a greased 9×13-inch baking dish, cover, and let rise for 30-45 minutes, until puffy.
  5. Bake: Preheat your oven to 350°F (175°C). Bake the rolls for 20-25 minutes, or until golden brown.
  6. Prepare the Glaze: Beat the cream cheese and butter until smooth. Add powdered sugar, reserved strawberry filling, and milk. Mix until smooth and spreadable. Spread the glaze over the warm rolls.

Savory Breakfast Rolls Recipe

Start your morning right with these mouthwatering savory breakfast rolls! Packed with fluffy eggs, crisp bacon, flavorful sausage, and gooey cheddar cheese, all wrapped in tender crescent dough, these rolls are a hearty, delicious way to fuel your day. Whether for a quick weekday breakfast or a leisurely weekend brunch, this recipe is sure to satisfy.

Ingredients

Egg Mixture:

  • 4 large eggs
  • 2 tablespoons red bell pepper, finely diced
  • 1 tablespoon milk
  • 1/4 teaspoon black pepper

Dough and Fillings:

  • 2 (8-ounce) cans crescent dough sheets*
  • 1/3 cup whipped chive and onion cream cheese
  • 8 ounces ground breakfast sausage, cooked
  • 4 slices bacon, cooked and crumbled
  • 1 1/2 cups shredded cheddar cheese

Instructions

  1. Prepare the Egg Mixture: In a medium bowl, whisk together eggs, diced red bell pepper, milk, and black pepper. Cook the egg mixture in a non-stick skillet over medium heat until softly scrambled. Set aside to cool slightly.
  2. Assemble the Breakfast Rolls: Preheat the oven to 375°F (190°C) and line a baking sheet with parchment paper. Roll out the crescent dough sheets and cut each sheet into 4 rectangles, yielding 8 pieces total. Spread a thin layer of whipped chive and onion cream cheese onto each rectangle. Evenly distribute the scrambled eggs, cooked sausage, crumbled bacon, and shredded cheddar cheese over each dough rectangle.
  3. Roll and Seal: Starting at one end, tightly roll each rectangle into a log shape.Pinch the seams and edges to seal. Place each roll seam-side down on the prepared baking sheet.
  4. Bake: Bake the rolls in the preheated oven for 15-20 minutes, or until golden brown and cooked through. Let them cool slightly before serving.

Conclusion:

These savory breakfast rolls are a perfect combination of flavor and convenience. With their creamy, cheesy filling and crispy bacon and sausage, they’re sure to be a hit with family and friends. Enjoy them fresh from the oven or pack them up for a quick on-the-go breakfast.

Savory Breakfast Rolls Recipe

Savory breakfast rolls featuring a mix of eggs,sausage, bacon, and cheddar cheese wrapped in crescent dough—a perfect,grab-and-go breakfast option.
Prep Time 15 minutes
Cook Time 20 minutes
Total Time 35 minutes
Servings: 8 Rolls
Course: Breakfast
Cuisine: American
Calories: 352

Ingredients
  

Egg Mixture:
  • 4 large eggs
  • 2 tablespoons red bell pepper finely diced
  • 1 tablespoon milk
  • 1/4 teaspoon black pepper
Dough and Fillings:
  • 2 8-ounce cans crescent dough sheets*
  • 1/3 cup whipped chive and onion cream cheese
  • 8 ounces ground breakfast sausage cooked
  • 4 slices bacon cooked and crumbled
  • 1 1/2 cups shredded cheddar cheese

Method
 

  1. Prepare the Egg Mixture: In a medium bowl, whisk together eggs, diced red bell pepper, milk, and black pepper. Cook the egg mixture in a non-stick skillet over medium heat until softly scrambled. Set aside to cool slightly.
  2. Assemble the Breakfast Rolls: Preheat the oven to 375°F (190°C) and line a baking sheet with parchment paper. Roll out the crescent dough sheets and cut each sheet into 4 rectangles, yielding 8 pieces total. Spread a thin layer of whipped chive and onion cream cheese onto each rectangle. Evenly distribute the scrambled eggs, cooked sausage, crumbled bacon, and shredded cheddar cheese over each dough rectangle.
  3. Roll and Seal: Starting at one end, tightly roll each rectangle into a log shape. Pinch the seams and edges to seal. Place each roll seam-side down on the prepared baking sheet.
  4. Bake: Bake the rolls in the preheated oven for 15-20 minutes, or until golden brown and cooked through. Let them cool slightly before serving.

Stay Connected

Get recipes via email: