It was one of those chaotic Tuesday evenings — you know the kind. The workday had drained every last ounce of energy from me, the fridge looked like a barren wasteland, and my motivation to cook anything remotely complicated was non-existent. I needed something fast, warm, and comforting — something that felt like a hug in a bowl.
As I scanned my pantry in desperation, a lone packet of instant ramen caught my eye, tucked between a can of beans and a half-empty jar of peanut butter. My mind raced back to college days when ramen was practically a food group. But tonight, I was craving something more — something hearty, flavorful, and worthy of being called dinner, not just a snack between deadlines.
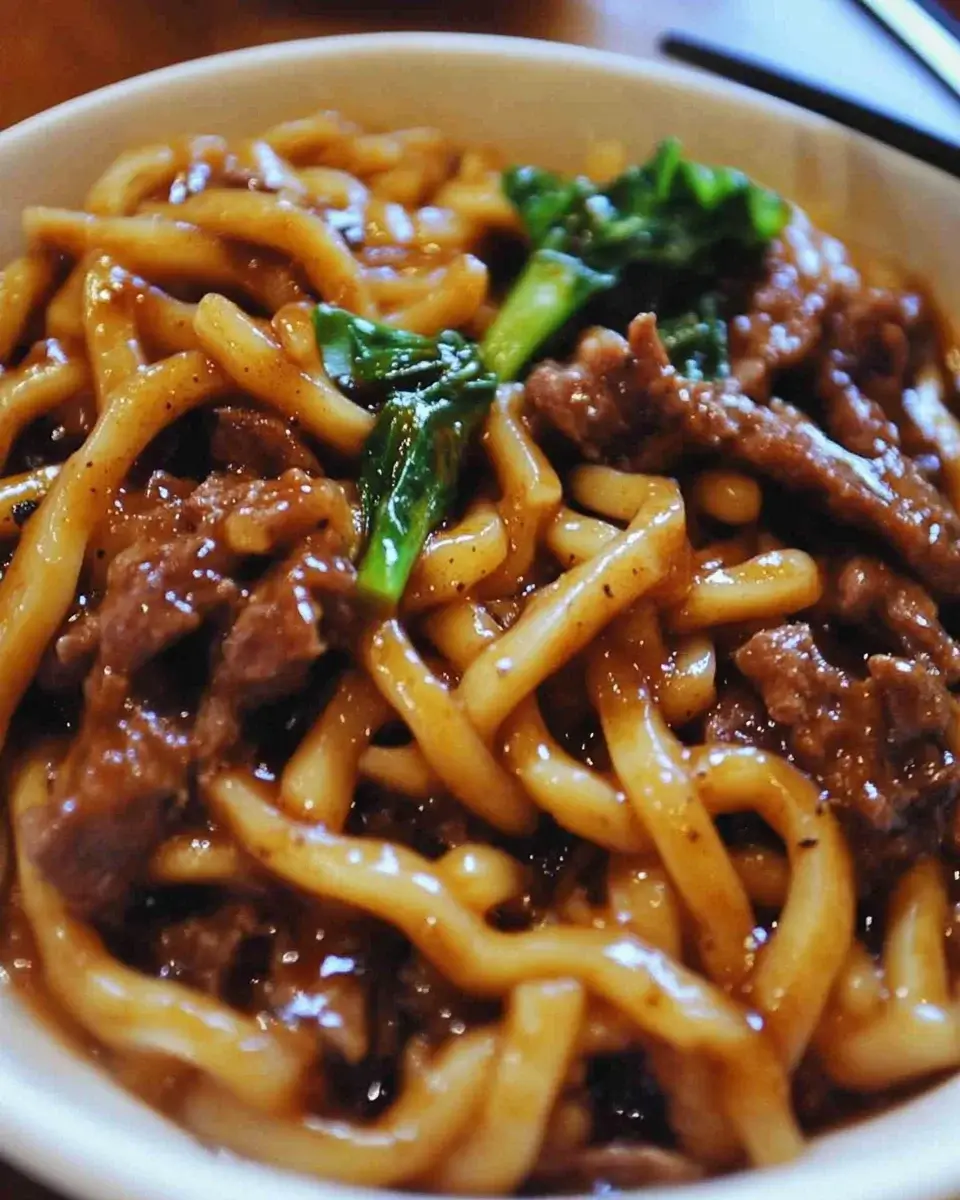
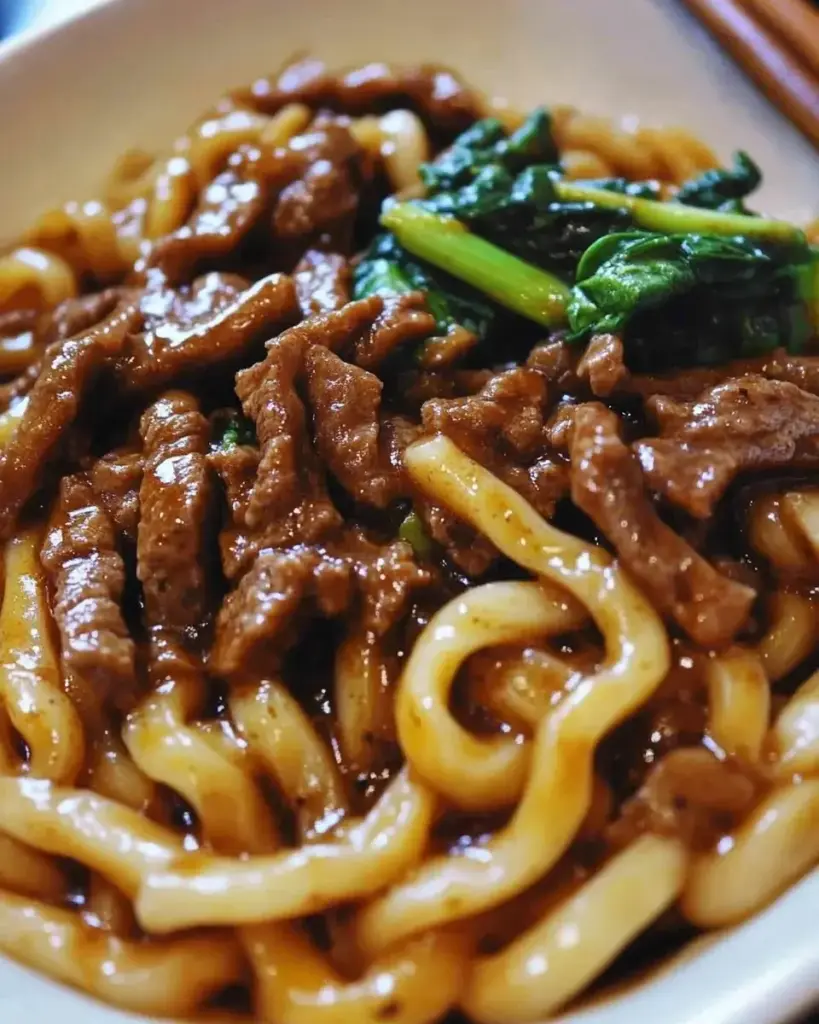
With a little ground beef, a few stray vegetables, and a flash of inspiration, Beef Ramen Noodles were born in my kitchen. Not just a makeshift meal, but a savory, saucy, deeply satisfying stir fry that tasted like a restaurant-worthy dish crafted in under 30 minutes. Since that night, this dish has held a permanent spot in my weeknight rotation — a delicious reminder that sometimes, the best comfort foods are the ones you stumble upon when you least expect it.
Stirring Up Magic: Why This Beef Ramen Noodles Recipe Works
There are countless stir fry and ramen recipes out there, but what makes this Beef Ramen Noodles recipe truly stand out is its balance. It’s rich without being heavy, savory with the perfect touch of sweetness, and layered with textures from tender beef, chewy noodles, and crisp vegetables.
The secret lies in the sauce: a luxurious blend of beef broth, chicken broth, soy sauce, honey, creamy peanut butter, and just a kiss of heat from hot sauce. It’s not just coating the noodles — it clings to every bite, ensuring that each forkful is bursting with umami and comfort.
Add to that the versatility of throwing in any vegetables you have on hand, and you’ve got a meal that’s budget-friendly, endlessly customizable, and deeply satisfying.
Frequently Asked Questions About Beef Ramen Noodles
Can I use a different type of meat?
Absolutely. While ground beef gives the dish a hearty, comforting flavor, you can easily swap it out for ground turkey, chicken, or even pork. Thinly sliced flank steak would also be an excellent, slightly fancier alternative if you want to impress guests or just treat yourself.
What vegetables work best with this stir fry?
The beauty of this dish is its flexibility. While onions, carrots, bell peppers, mushrooms, and cabbage are recommended, you can get creative with broccoli, snap peas, zucchini, edamame, baby corn, or even leftover roasted vegetables. It’s a perfect “clean-out-the-fridge” meal.
Do I have to use both chicken and beef broth?
No, but using both creates a depth of flavor that’s hard to beat. The chicken broth softens the rich intensity of the beef broth, adding subtle complexity to the sauce. If you prefer, you can use all chicken broth or all beef broth depending on what you have on hand — it will still turn out delicious.
What type of ramen should I buy?
Standard instant ramen noodles like Maruchan or Top Ramen are perfect here. Discard the seasoning packet — the homemade sauce will provide all the flavor you need. If you prefer a healthier twist, some stores offer whole grain or reduced-sodium ramen varieties you can substitute.
Can I make this dish spicy?
Yes, and it’s easy to adjust! The hot sauce or sriracha in the sauce mixture adds a mild kick, but if you’re a heat-seeker, feel free to increase the amount, sprinkle in some red pepper flakes, or even toss in a chopped chili pepper during the stir fry.
How do I prevent the noodles from getting soggy?
Timing is key. The noodles should be just loosened up when you boil them — about 1 minute — because they’ll finish cooking once tossed into the hot skillet with the sauce and vegetables. Overcooking at the boiling stage will lead to mushy noodles in the final dish.
Can this be made ahead of time?
While this dish is best enjoyed fresh, it stores surprisingly well. You can make it ahead and refrigerate for up to three days, or freeze it for up to three months. Just keep in mind that the noodles may soften a little upon reheating. If you’re planning to freeze it, slightly undercook the noodles to help them maintain a better texture after thawing.
What about adding eggs?
Scrambled eggs make an excellent addition! You can scramble one or two eggs separately and stir them into the skillet right before serving. It adds extra protein and gives the dish an even more “fried rice” kind of vibe.
What are some great topping ideas?
Toppings elevate the whole experience! Some of the best options include:
Sliced green onions for a fresh crunch
Toasted sesame seeds for nutty flavor
Chopped peanuts or cashews for a rich texture
Crunchy chow mein noodles for an extra savory bite
The Versatility of Beef Ramen Noodles: Make It Your Own
What makes this recipe truly shine is its adaptability. It’s the kind of recipe that meets you where you are — whether you have a crisper full of fresh veggies or just a lonely carrot and a handful of frozen peas.
Need a vegetarian version? Swap the beef for crispy tofu or a plant-based ground meat substitute.
Craving more richness? Add a splash of coconut milk or a handful of shredded cheese.
Feeding a crowd? Double the recipe easily, or set up a “ramen bar” where everyone can customize their bowls with their favorite toppings.
This dish isn’t just a recipe — it’s a canvas for your culinary creativity.
Final Reflections: Why a Simple Bowl of Ramen Is So Much More
In a world where meals are often complicated by endless lists of specialty ingredients and gourmet techniques, there’s something beautifully grounding about a humble bowl of Beef Ramen Noodles.
It’s a reminder that comfort doesn’t have to be complicated. That joy can be found in a simple pan of sizzling beef, in a tangle of noodles swimming in a rich, flavorful sauce, in the aroma that fills the kitchen long before you even sit down to eat.
Most of all, it’s a reminder that some of the best meals — the ones we return to again and again — are born not out of elaborate planning, but out of everyday moments, a little resourcefulness, and a whole lot of heart.
When life gets messy and unpredictable, when the day has left you exhausted and craving something real — this dish will be waiting for you. A bowl of warmth. A taste of comfort. A little piece of home, no matter where you are.
Paul
Beef Ramen Noodles Recipe: A Comforting Delight to Try!
This Beef Ramen Stir Fry is a flavor-packed, satisfying meal loaded with juicy beef, crisp-tender veggies, and quick ramen noodles tossed in a savory-sweet peanut sauce. It’s a fast, crave-worthy dinner perfect for busy weeknights!
1cupbeef broth¾ cup chicken broth¼ cup soy sauce2 tablespoons creamy peanut butter2 tablespoons honey1 teaspoon hot sauce or sriracha½ teaspoon ground ginger1 lb ground beefSalt and pepper to taste¼ cup dry white wine or chicken broth1 tablespoon peanut oil or olive oil4 cloves garlicminced1 yellow onion, sliced½ cup carrots, julienned1 red bell pepper, sliced8 oz white button mushrooms, sliced2 cups shredded cabbage, optional2½ tablespoons cornstarch1 (3 oz) packet ramen noodles, seasoning packet discarded3 green onions, sliced, for garnishToasted sesame seeds and/or roughly chopped peanuts, for garnish
Method
In a large measuring cup, whisk together the beef broth, chicken broth, soy sauce, peanut butter, honey, hot sauce, and ground ginger. Set aside.Season the ground beef with salt and pepper. In a large skillet over medium-high heat, cook and crumble the beef until browned, about 7 to 10 minutes. Drain any excess grease and set the beef aside.Turn off the heat and pour the wine into the skillet. Scrape up any browned bits from the bottom and cook over medium heat until reduced by half, about 2 minutes.Add the oil and minced garlic to the skillet and sauté for 1 minute.Increase heat to medium-high and add the sliced onions, carrots, and mushrooms. Stir-fry for 5 minutes. Add the red bell pepper and shredded cabbage, if using, and cook for 3 more minutes.Stir the cornstarch into the prepared sauce mixture, then pour it into the skillet. Bring to a boil to thicken the sauce, then reduce to a simmer.Meanwhile, bring a small pot of water to a boil. Add the ramen noodles and cook for just 1 minute until loosened. Drain immediately.Add the drained noodles and cooked beef back into the skillet. Toss everything together until evenly coated and heated through.Garnish with sliced green onions, toasted sesame seeds, and chopped peanuts. Serve hot and enjoy!
Notes
You can substitute ground turkey or chicken for the beef if you prefer a lighter version. Use freshly shredded cabbage for extra crunch, or leave it out if you prefer a more classic ramen-style stir fry. Adjust the hot sauce to your spice preference for a milder or spicier dish. If you like it saucier, double the sauce ingredients and add gradually until your desired consistency is reached. Leftovers keep well in an airtight container in the fridge for up to 3 days and reheat beautifully.
Welcome to the delightful world of Southern cooking! Today, we’re diving into a classic dish that brings comfort and flavor to the table: the Crispy Southern Catfish Recipe. This dish is not just a meal; it’s a celebration of Southern heritage and culinary tradition. With its crunchy exterior and tender, flaky fish inside, it’s no wonder that catfish has become a beloved staple in many households.
What Makes Crispy Southern Catfish Unique?
What sets Crispy Southern Catfish apart from other fried fish dishes? It’s all about the preparation and the ingredients. First, the catfish is soaked in buttermilk, which tenderizes the fish and infuses it with flavor. This step is crucial for achieving that melt-in-your-mouth texture. Next, the seasoned coating made from cornmeal and spices gives the catfish its signature crunch. The combination of spices like paprika, garlic powder, and cayenne pepper adds a delightful kick, making each bite a burst of flavor.
Moreover, the frying technique plays a significant role. Cooking the catfish in hot oil ensures a crispy exterior while keeping the inside moist. This contrast in textures is what makes this dish so irresistible. Whether you’re enjoying it at a family gathering or a casual dinner, Crispy Southern Catfish is sure to impress.
The Cultural Significance of Catfish in Southern Cuisine
Catfish holds a special place in Southern cuisine, deeply rooted in the region’s history and culture. Traditionally, catfish was a staple for many families, especially in the rural South. It was often caught fresh from local rivers and lakes, making it an accessible and affordable source of protein. Over the years, catfish has become synonymous with Southern hospitality and comfort food.
In many Southern communities, catfish fry events are a cherished tradition. Families and friends gather to enjoy this delicious dish, often served with sides like coleslaw and cornbread. These gatherings not only celebrate the food but also the bonds of community and family. Thus, when you prepare a Crispy Southern Catfish Recipe, you’re not just cooking; you’re participating in a rich cultural legacy that has been passed down through generations.
Ingredients for Crispy Southern Catfish Recipe
To create the perfect Crispy Southern Catfish, you’ll need a few key ingredients that come together to deliver that classic flavor and texture. Here’s what you’ll need:
1 ½ pounds catfish fillets: Fresh catfish is ideal, but you can also use frozen fillets if necessary.
1 cup buttermilk: This ingredient is essential for marinating the fish, ensuring it stays moist and flavorful.
1 teaspoon hot sauce (optional): For those who enjoy a little heat, adding hot sauce to the buttermilk can elevate the flavor.
1 cup cornmeal: This is the main component for the crispy coating, giving the catfish its signature crunch.
½ cup all-purpose flour: Mixing flour with cornmeal helps create a light and crispy texture.
1 teaspoon paprika: This spice adds a subtle smokiness and vibrant color to the coating.
1 teaspoon garlic powder: Garlic powder enhances the flavor profile, making the dish more savory.
1 teaspoon onion powder: Similar to garlic, onion powder adds depth to the seasoning mix.
1 teaspoon salt: Essential for bringing out the flavors of the fish and the coating.
½ teaspoon black pepper: This adds a mild heat and enhances the overall taste.
½ teaspoon cayenne pepper (adjust to taste): For those who like it spicy, cayenne pepper can be adjusted to your preference.
Vegetable oil for frying: Choose a neutral oil with a high smoke point, such as canola or peanut oil, for frying.
Gathering these ingredients is the first step toward creating a delicious meal that will impress your family and friends. Each component plays a vital role in achieving that crispy, flavorful catfish that everyone loves. Now that you have your ingredients ready, let’s move on to the preparation steps!
Step-by-Step Preparation of Crispy Southern Catfish Recipe
Now that you have gathered all your ingredients, it’s time to dive into the preparation of your Crispy Southern Catfish. Follow these simple steps to ensure your catfish turns out perfectly crispy and delicious!
Step 1: Preparing the Catfish
Start by rinsing the catfish fillets under cold water. This helps remove any residual slime. Next, pat them dry with paper towels. Once dry, place the fillets in a shallow dish. Pour the buttermilk over the fish, ensuring they are fully submerged. If you’re using hot sauce, stir it into the buttermilk before pouring. This step not only adds flavor but also tenderizes the fish. Let the catfish soak for at least 30 minutes. If you have time, soaking for up to 2 hours in the refrigerator will enhance the flavor even more.
Step 2: Making the Seasoned Coating
While the catfish is soaking, it’s time to prepare the seasoned coating. In another shallow dish, combine the cornmeal, all-purpose flour, paprika, garlic powder, onion powder, salt, black pepper, and cayenne pepper. Mix these ingredients well until they are evenly blended. This mixture will create a flavorful and crispy coating for your catfish. For an extra crunch, consider adding crushed crackers or panko breadcrumbs to the mix!
Step 3: Frying the Catfish
Once the catfish has soaked, it’s time to fry! Heat about ½ inch of vegetable oil in a large skillet over medium-high heat. Use a thermometer to check the oil temperature; it should reach around 350°F. Carefully remove the catfish from the buttermilk, allowing any excess to drip off. Dredge each fillet in the seasoned coating, pressing gently to ensure an even layer. This step is crucial for that perfect crunch!
Now, carefully place the coated fillets into the hot oil. Avoid overcrowding the skillet, as this can lower the oil temperature and result in soggy fish. Fry the catfish for about 3-4 minutes on each side, or until they are golden brown and cooked through. You’ll know they’re done when they reach an internal temperature of 145°F.
Step 4: Draining and Serving
Once the catfish is cooked, use a slotted spatula to transfer the fillets to a paper towel-lined plate. This will help drain any excess oil, keeping your catfish crispy. Allow them to rest for a minute before serving. Serve your Crispy Southern Catfish hot, paired with your favorite sides like coleslaw or cornbread. Enjoy the delightful crunch and flavor that this dish brings to your table!
Variations of Crispy Southern Catfish Recipe
While the classic Crispy Southern Catfish Recipe is a favorite, there are many ways to put a twist on this beloved dish. Whether you want to spice things up or opt for a healthier version, these variations will keep your taste buds excited. Let’s explore two popular alternatives: Spicy Crispy Southern Catfish and a Baked Version of Crispy Southern Catfish.
Spicy Crispy Southern Catfish
If you love a little heat, the Spicy Crispy Southern Catfish is the perfect choice for you! To make this variation, simply increase the amount of cayenne pepper in the seasoned coating. You can also add a teaspoon of chili powder for an extra kick. For an even spicier experience, consider marinating the catfish in a mixture of buttermilk and your favorite hot sauce for a few hours before coating. This will not only enhance the flavor but also give the fish a delightful zing. Serve it with a cooling side like ranch dressing or a tangy coleslaw to balance the heat!
Baked Version of Crispy Southern Catfish
For those looking for a healthier option, the Baked Version of Crispy Southern Catfish is a fantastic alternative. Instead of frying, you can bake the coated catfish in the oven. Preheat your oven to 425°F. After dredging the fillets in the seasoned coating, place them on a baking sheet lined with parchment paper. Lightly spray the fillets with cooking spray or brush them with a little olive oil to help achieve that crispy texture. Bake for about 15-20 minutes, flipping halfway through, until the catfish is golden brown and cooked through. This method reduces the amount of oil used while still delivering a deliciously crispy result!
These variations allow you to enjoy the classic flavors of Southern catfish while catering to your personal taste preferences. Whether you choose to spice it up or bake it for a healthier option, you can’t go wrong with these delightful twists on a timeless recipe!
Cooking Note for Crispy Southern Catfish Recipe
When preparing your Crispy Southern Catfish, a few cooking notes can help ensure your dish turns out perfectly every time. First, the temperature of the oil is crucial. If the oil is too hot, the coating may burn before the fish cooks through. Conversely, if the oil is not hot enough, the catfish will absorb too much oil, resulting in a greasy texture. Using a thermometer can help you maintain the ideal frying temperature of 350°F.
Another important tip is to avoid overcrowding the skillet. Frying too many fillets at once can lower the oil temperature, leading to uneven cooking. Instead, fry in batches, allowing enough space for each fillet to cook evenly. This will help achieve that desired crispy exterior while keeping the inside tender and flaky.
Additionally, let the fried catfish rest on a paper towel-lined plate after frying. This step is essential for draining excess oil, which helps maintain the crispiness of the coating. If you want to keep the catfish warm while frying the remaining fillets, place them on a wire rack in a warm oven. This will prevent them from getting soggy while you finish cooking the rest.
Lastly, feel free to experiment with the seasoning in the coating. Adjusting the spices to suit your taste can make a big difference. Whether you prefer it mild or spicy, customizing the flavors will make your Crispy Southern Catfish uniquely yours. Happy cooking!
Serving Suggestions for Crispy Southern Catfish Recipe
Once you’ve perfected your Crispy Southern Catfish, it’s time to think about how to serve it. The right sides can elevate your meal and create a delightful dining experience. Here are some traditional and creative serving ideas to complement your catfish.
Traditional Sides to Pair with Catfish
When it comes to traditional Southern cuisine, certain sides are simply a must-have with catfish. Here are some classic options:
Coleslaw: This crunchy, tangy salad is a perfect contrast to the crispy catfish. The coolness of coleslaw balances the warmth of the fried fish.
Cornbread: A Southern staple, cornbread adds a sweet and buttery flavor that pairs beautifully with catfish. You can serve it warm with honey or butter.
Fried Green Tomatoes: These crispy slices of green tomatoes are a delicious side that adds a unique flavor and texture to your meal.
Hushpuppies: These deep-fried cornmeal balls are a classic accompaniment to catfish. Their slightly sweet flavor complements the savory fish perfectly.
Collard Greens: A hearty side dish, collard greens provide a nutritious and flavorful addition to your plate, enhancing the Southern experience.
These traditional sides not only enhance the meal but also celebrate the rich culinary heritage of the South. They create a well-rounded plate that is sure to satisfy everyone at the table.
Creative Serving Ideas
If you’re looking to mix things up, consider these creative serving ideas for your Crispy Southern Catfish:
Catfish Tacos: Shred the fried catfish and serve it in soft tortillas with fresh toppings like cabbage, avocado, and a zesty lime crema. This twist adds a fun and modern flair to your meal.
Catfish Po’ Boy Sandwich: Place the fried catfish in a crusty baguette with lettuce, tomatoes, and a spicy remoulade sauce. This sandwich is a delicious way to enjoy catfish on the go!
Catfish Salad: For a lighter option, flake the catfish over a bed of mixed greens, cherry tomatoes, and cucumbers. Drizzle with a tangy vinaigrette for a refreshing salad.
Catfish Sliders: Serve small portions of fried catfish on mini buns with pickles and a dollop of tartar sauce. These sliders are perfect for parties or casual gatherings.
Catfish and Grits: Serve the crispy catfish over creamy grits for a comforting and hearty meal. Top with a drizzle of hot sauce for an extra kick!
These creative ideas allow you to enjoy your Crispy Southern Catfish in new and exciting ways. Whether you stick to tradition or venture into new territory, your catfish will shine on the plate!
Tips for Perfecting Your Crispy Southern Catfish Recipe
To ensure your Crispy Southern Catfish turns out perfectly every time, consider these helpful tips. Each suggestion will enhance the flavor and texture of your dish, making it a hit at your dining table.
First, always use fresh catfish if possible. Fresh fish has a better texture and flavor compared to frozen. If you must use frozen, make sure to thaw it completely and pat it dry before marinating. This helps the coating stick better.
Next, don’t skip the buttermilk soak. This step is crucial for tenderizing the fish and infusing it with flavor. If you have time, let the catfish soak for a longer period, as this will enhance the taste even more.
When preparing the seasoned coating, mix the dry ingredients thoroughly. This ensures that every bite of catfish is evenly flavored. You can also experiment with different spices to customize the taste to your liking. Adding herbs like thyme or dill can give a unique twist!
Pay attention to the oil temperature while frying. Use a thermometer to maintain the oil at 350°F. If the oil is too hot, the coating may burn. If it’s too cool, the fish will absorb too much oil, resulting in a greasy texture. Frying in small batches helps keep the temperature consistent.
After frying, let the catfish rest on a wire rack instead of a plate. This allows air to circulate around the fish, keeping it crispy. If you place it directly on a plate, the steam can make the coating soggy.
Lastly, serve your Crispy Southern Catfish immediately after frying for the best taste and texture. If you need to keep it warm, place it in a low oven (around 200°F) on a wire rack. This way, your catfish will stay crispy until it’s time to eat!
By following these tips, you’ll be well on your way to mastering the art of making Crispy Southern Catfish. Enjoy the process and the delicious results!
Breakdown of Time for Crispy Southern Catfish Recipe
Understanding the time needed for each step in the Crispy Southern Catfish Recipe can help you plan your cooking efficiently. Here’s a breakdown of the time required for preparation and cooking, ensuring you have everything ready to enjoy this delicious dish!
Prep Time
The prep time for this recipe is approximately 40 minutes. This includes:
Soaking the Catfish: 30 minutes to 2 hours (you can soak it longer for more flavor).
Preparing the Coating: About 10 minutes to mix the cornmeal and spices.
While the catfish is soaking, you can use this time to prepare your sides or set the table, making the most of your cooking time!
Cooking Time
The cooking time for the Crispy Southern Catfish is around 15-20 minutes. This includes:
Frying the Catfish: Approximately 6-8 minutes per batch, depending on the size of your skillet and the number of fillets.
Frying in batches is recommended to ensure each fillet cooks evenly and achieves that perfect crispy texture.
Total Time
In total, you can expect the entire process to take about 1 hour to 2 hours and 20 minutes, depending on how long you choose to soak the catfish. Here’s a quick summary:
Prep Time: 40 minutes (including soaking)
Cooking Time: 15-20 minutes
Total Time: 1 hour to 2 hours and 20 minutes
With this breakdown, you can easily plan your cooking schedule and enjoy a delicious meal of Crispy Southern Catfish with minimal stress. Happy cooking!
Nutritional Information for Crispy Southern Catfish Recipe
Understanding the nutritional content of your meals is essential for maintaining a balanced diet. The Crispy Southern Catfish Recipe not only delights your taste buds but also provides valuable nutrients. Here’s a breakdown of the nutritional information per serving, so you can enjoy this dish while keeping your health in mind.
Calories
Each serving of Crispy Southern Catfish contains approximately 350 calories. This calorie count includes the catfish fillets, the seasoned coating, and the oil used for frying. While this dish is indulgent, it can fit into a balanced diet when enjoyed in moderation. Pairing it with healthy sides can help create a well-rounded meal.
Protein
One of the standout features of catfish is its high protein content. Each serving provides about 25 grams of protein. Protein is essential for building and repairing tissues, making it a crucial part of your diet. Enjoying this dish can help you meet your daily protein needs, especially when combined with other protein-rich foods.
Sodium
The sodium content in each serving of Crispy Southern Catfish is approximately 600 milligrams. This amount can vary based on the seasoning used and whether you add salt to your sides. While sodium is necessary for bodily functions, it’s important to monitor your intake, especially if you have dietary restrictions. To reduce sodium, consider using less salt in the coating or opting for low-sodium versions of seasonings.
By being aware of the nutritional information, you can enjoy your Crispy Southern Catfish Recipe while making informed choices about your overall diet. This dish is not only delicious but also provides essential nutrients that contribute to a healthy lifestyle.
FAQs about Crispy Southern Catfish Recipe
How do I know when the catfish is done frying?
Knowing when your catfish is perfectly fried is key to enjoying this dish. The best way to check is by using a food thermometer. The internal temperature of the catfish should reach 145°F. Additionally, look for a golden-brown color on the outside. If the coating is crispy and the fish flakes easily with a fork, it’s ready to be taken out of the oil. Remember, overcooking can lead to dry fish, so keep an eye on it while frying!
Can I use frozen catfish for this recipe?
Yes, you can use frozen catfish for this recipe! However, it’s important to thaw the fish completely before cooking. You can do this by placing the frozen fillets in the refrigerator overnight or using the defrost setting on your microwave. Once thawed, pat the catfish dry with paper towels to remove excess moisture. This will help the buttermilk and coating adhere better, ensuring a crispy finish.
What is the best oil for frying catfish?
When it comes to frying catfish, choosing the right oil is essential. The best oils for frying are those with a high smoke point. Canola oil, peanut oil, and vegetable oil are excellent choices. These oils can withstand high temperatures without burning, allowing your catfish to fry evenly and achieve that perfect crispy texture. Avoid using oils with low smoke points, like olive oil, as they can burn and affect the flavor of your dish.
How can I make the coating stick better?
To ensure the coating sticks well to your catfish, start by thoroughly drying the fillets after soaking them in buttermilk. Excess moisture can prevent the coating from adhering properly. Additionally, when dredging the fish in the seasoned coating, press down gently to help it stick. For an extra layer of adhesion, you can dip the fillets back into the buttermilk after the first coating and then re-dredge them in the cornmeal mixture. This double coating will give you an even crispier result!
Conclusion on Crispy Southern Catfish Recipe
In conclusion, the Crispy Southern Catfish Recipe is more than just a dish; it’s a delightful experience that brings the flavors of the South right to your table. With its crunchy exterior and tender, flaky interior, this recipe captures the essence of Southern cooking. Whether you’re preparing it for a family gathering or a casual weeknight dinner, this dish is sure to impress.
By following the steps outlined in this article, you can create a meal that not only satisfies your taste buds but also connects you to the rich cultural heritage of Southern cuisine. The combination of spices, the buttermilk soak, and the frying technique all contribute to the unique flavor and texture that make this catfish recipe a favorite among many.
Don’t forget to explore the variations and serving suggestions to keep your meals exciting. From spicy twists to healthier baked options, there’s a version of this recipe for everyone. Pair it with traditional sides like coleslaw and cornbread, or get creative with tacos and salads. The possibilities are endless!
As you embark on your cooking journey, remember to enjoy the process. Cooking is not just about the final dish; it’s about the love and care you put into each step. So gather your ingredients, invite your loved ones to join you, and savor the joy of making and sharing a delicious meal. Happy cooking, and may your Crispy Southern Catfish always be perfectly crispy and full of flavor!
Paul
Crispy Southern Catfish Recipe for a Perfect Meal!
Crispy on the outside and tender inside, this classic Fried Catfish recipe is full of Southern comfort. Perfectly marinated in buttermilk and dredged in a seasoned cornmeal coating, each bite brings irresistible golden crunch and savory flavor.
1cupbuttermilk2 pounds catfishcut into 3-inch chunks½ cup flour½ cup yellow cornmeal2 teaspoons paprika1 teaspoon kosher salt¼ teaspoon coarse ground black pepper⅛ teaspoon cayenne pepperVegetable oil, for fryingTartar sauce, for servingMalt vinegar, for servingLemon wedges, for serving
Method
Add the buttermilk and catfish pieces to a large ziplock bag or closed container. Refrigerate and marinate for 1 to 2 hours.In a large shallow bowl, combine the flour, cornmeal, paprika, salt, black pepper, and cayenne pepper.Fill a large heavy pot with about 3 inches of vegetable oil and heat it to 350°F over medium-high heat.Remove the catfish from the buttermilk, letting any excess drip off.Dredge each piece thoroughly in the seasoned flour and cornmeal mixture.Working in small batches, fry the catfish pieces for 3 to 4 minutes per side or until golden brown and cooked through.Drain the fried catfish on a wire rack to maintain crispiness.Serve hot with tartar sauce, lemon wedges, and a splash of malt vinegar.
Notes
Marinating the catfish in buttermilk tenderizes the fish and adds subtle flavor. Avoid overcrowding the frying pot; it will lower the oil temperature and result in soggy fish. A wire rack is better than paper towels for draining because it prevents steam buildup and keeps the fish crispy. For a spicier kick, add a pinch more cayenne pepper to the flour mixture.
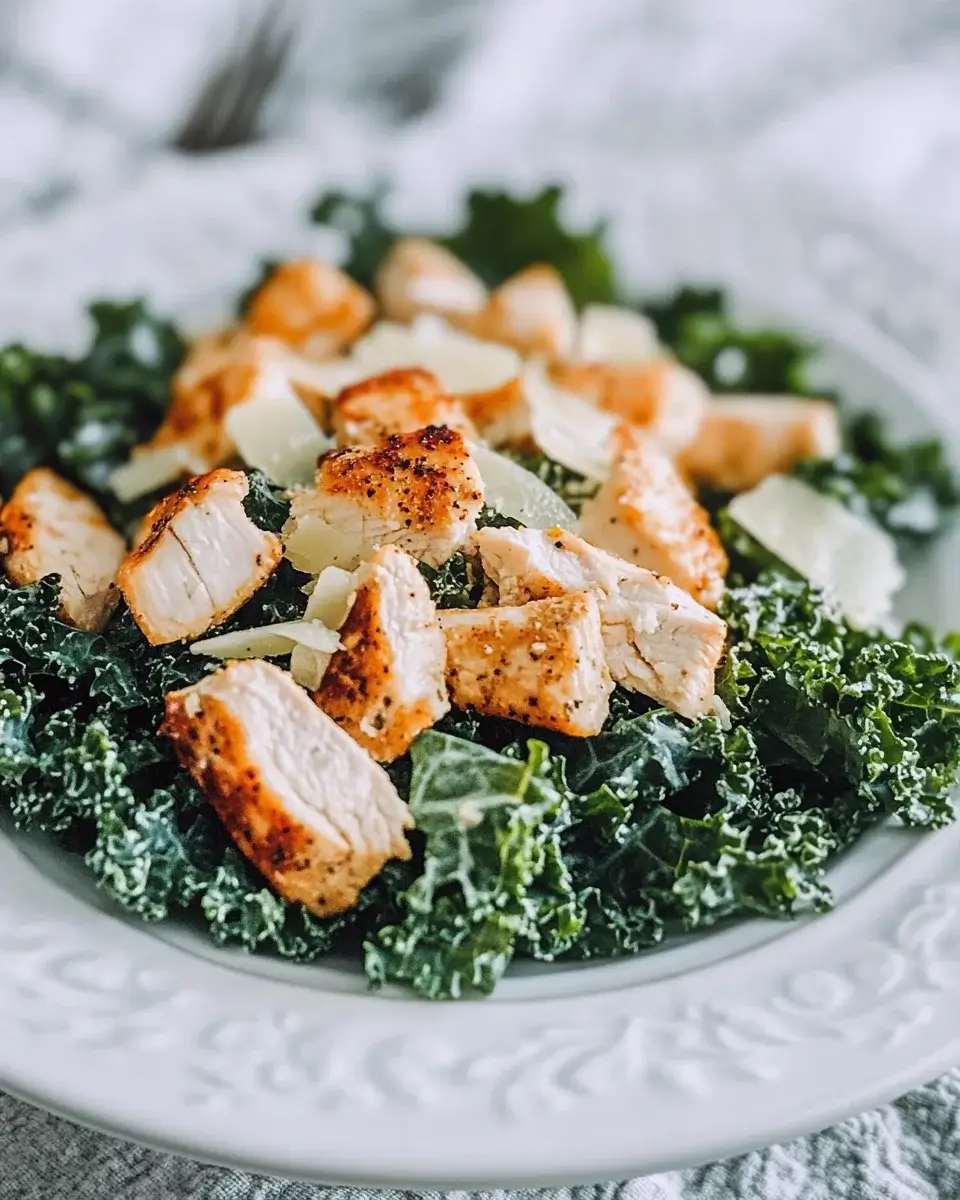
Welcome to a delightful culinary experience! The Kale Caesar Salad with Grilled Chicken is not just a meal; it’s a celebration of flavors and health. This dish combines the crispness of kale with the savory taste of grilled chicken, all brought together by a creamy Caesar dressing. Whether you’re looking for a quick lunch or a satisfying dinner, this salad is sure to impress.
What Makes This Salad Special?
What sets this salad apart is its unique blend of textures and flavors. The kale provides a hearty base, while the grilled chicken adds protein and richness. The Caesar dressing, with its creamy consistency, perfectly complements the freshness of the kale. Plus, the croutons add a delightful crunch, making each bite exciting. This salad is not only delicious but also visually appealing, with vibrant greens and golden croutons that make it a feast for the eyes.
Health Benefits of Kale and Grilled Chicken
Kale is often hailed as a superfood, and for good reason! It’s packed with vitamins A, C, and K, along with antioxidants that help fight inflammation. Additionally, kale is high in fiber, which aids digestion and keeps you feeling full longer. On the other hand, grilled chicken is an excellent source of lean protein, essential for muscle growth and repair. Together, these ingredients create a nutritious meal that supports a healthy lifestyle. Enjoying this Kale Caesar Salad with Grilled Chicken not only satisfies your taste buds but also nourishes your body!
Ingredients for Kale Caesar Salad with Grilled Chicken Recipe
To create the perfect Kale Caesar Salad with Grilled Chicken, you’ll need a selection of fresh and flavorful ingredients. Here’s what you’ll need:
4 cups chopped kale, stems removed
1 cup cooked and shredded chicken breast
½ cup Caesar dressing
½ cup croutons
¼ cup grated Parmesan cheese
1 tablespoon lemon juice
Salt and pepper to taste
These ingredients come together to create a delicious and satisfying salad. The kale serves as a nutritious base, while the grilled chicken adds protein. The Caesar dressing brings a creamy texture, and the croutons provide a satisfying crunch. Don’t forget the Parmesan cheese, which adds a rich, savory flavor that elevates the dish. With these simple yet wholesome ingredients, you’re on your way to making a delightful meal!
Step-by-Step Preparation of Kale Caesar Salad with Grilled Chicken Recipe
Now that you have all your ingredients ready, it’s time to dive into the preparation of your Kale Caesar Salad with Grilled Chicken. Follow these simple steps to create a delicious and nutritious meal that everyone will love!
Step 1: Preparing the Kale
First, let’s focus on the kale. Start by washing the kale leaves thoroughly under cold water. This step is crucial to remove any dirt or grit. After washing, dry the leaves using a salad spinner or by patting them gently with a clean kitchen towel. Next, remove the tough stems from the kale. You can do this by holding the stem in one hand and sliding your other hand down the leaf to separate it. Once you have the leaves, chop them into bite-sized pieces.
Now, place the chopped kale in a large bowl. Add the tablespoon of lemon juice. This not only adds flavor but also helps to soften the kale. Using your hands, massage the kale for about 2-3 minutes. You’ll notice it wilts slightly and becomes tender. This step is essential for making the kale more enjoyable to eat!
Step 2: Grilling the Chicken
Next, let’s prepare the grilled chicken. If you have leftover chicken, that’s perfect! If not, you can grill fresh chicken breasts. Start by preheating your grill or grill pan over medium-high heat. Season the chicken breasts with salt and pepper for flavor. Once the grill is hot, place the chicken on it. Grill for about 6-7 minutes on each side, or until the chicken is cooked through and has nice grill marks.
After grilling, remove the chicken from the grill and let it rest for a few minutes. This resting period allows the juices to redistribute, making the chicken juicy and tender. Once rested, shred the chicken using two forks or chop it into bite-sized pieces. Set it aside for later.
Step 3: Making the Caesar Dressing
If you’re using store-bought Caesar dressing, you can skip this step. However, if you want to make your own, it’s quite simple! In a small bowl, combine ½ cup of mayonnaise, 1 tablespoon of Dijon mustard, 1 tablespoon of Worcestershire sauce, and 1 tablespoon of lemon juice. Whisk these ingredients together until smooth. For added flavor, you can mix in minced garlic or anchovy paste. Taste the dressing and adjust the seasoning with salt and pepper as needed.
Step 4: Assembling the Salad
Now it’s time to bring everything together! In the large bowl with the massaged kale, add the shredded grilled chicken. Pour the Caesar dressing over the top and toss everything together until the kale and chicken are well coated. This is where the magic happens! Make sure every piece of kale is dressed nicely.
Finally, just before serving, sprinkle the croutons and grated Parmesan cheese on top. Toss gently to combine, ensuring the croutons stay crunchy. Serve immediately for the best texture and flavor. Enjoy your delicious Kale Caesar Salad with Grilled Chicken!
Variations of Kale Caesar Salad with Grilled Chicken Recipe
While the Kale Caesar Salad with Grilled Chicken is a delightful dish on its own, there are many ways to customize it to suit your taste or dietary preferences. Here are some exciting variations to consider!
Vegetarian Option
If you’re looking for a vegetarian alternative, you can easily swap out the grilled chicken for plant-based proteins. Chickpeas are a fantastic choice! They add a nice texture and are packed with protein. Simply rinse and drain a can of chickpeas, then toss them into the salad. Another great option is grilled tofu. Marinate the tofu in your favorite seasonings, then grill it until golden brown. This will give your salad a hearty feel without the meat. Both options maintain the delicious flavors of the salad while making it suitable for vegetarians.
Adding Extra Toppings
To elevate your Kale Caesar Salad, consider adding extra toppings for more flavor and nutrition. Sliced avocado is a creamy addition that pairs beautifully with the dressing. It also provides healthy fats! Cherry tomatoes can add a burst of sweetness and color. Simply halve them and sprinkle them over the salad. For a bit of crunch, try adding nuts like walnuts or almonds. They not only enhance the texture but also boost the nutritional value. Feel free to get creative with your toppings; the possibilities are endless!
Cooking Note for Kale Caesar Salad with Grilled Chicken Recipe
When preparing your Kale Caesar Salad with Grilled Chicken, a few cooking notes can enhance your experience and ensure the best results. First, always choose fresh, high-quality ingredients. Fresh kale should be vibrant green and free from any wilting or browning. This ensures that your salad is not only tasty but also visually appealing.
Next, when grilling the chicken, consider marinating it beforehand. A simple marinade of olive oil, lemon juice, garlic, and herbs can infuse the chicken with extra flavor. Allow the chicken to marinate for at least 30 minutes, or even overnight, for the best results. This step can make a significant difference in taste and juiciness.
Additionally, be mindful of the texture of your kale. Massaging it with lemon juice is essential, as it breaks down the tough fibers, making it more palatable. If you prefer a milder flavor, you can let the kale sit with the lemon juice for a bit longer before adding the other ingredients.
Lastly, serve the salad immediately after assembling it. This ensures that the croutons remain crunchy and the kale stays fresh. If you need to prepare it in advance, consider keeping the dressing separate until just before serving. This way, you can maintain the salad’s texture and flavor. Enjoy your cooking adventure with this delightful Kale Caesar Salad with Grilled Chicken!
Serving Suggestions for Kale Caesar Salad with Grilled Chicken Recipe
When it comes to serving your Kale Caesar Salad with Grilled Chicken, presentation and pairing can elevate the dining experience. Here are some delightful serving suggestions to consider:
Chilled Plates: Serve the salad on chilled plates. This keeps the salad fresh and crisp, enhancing the overall enjoyment.
Accompany with Bread: Pair the salad with warm, crusty bread or garlic bread. The bread complements the salad’s flavors and adds a satisfying crunch.
Wine Pairing: For adults, consider serving a light white wine, such as Sauvignon Blanc or Pinot Grigio. These wines enhance the salad’s flavors without overpowering them.
Garnish with Fresh Herbs: Add a sprinkle of fresh herbs like parsley or basil on top of the salad. This not only adds color but also a burst of fresh flavor.
Serve as a Side Dish: This salad can also be served as a side dish alongside grilled fish or steak. It adds a refreshing element to any main course.
Lunch Box Option: If you’re packing lunch, consider layering the salad in a jar. Place the dressing at the bottom, followed by the chicken, kale, and toppings. This keeps everything fresh until you’re ready to eat!
These serving suggestions can help you create a memorable meal with your Kale Caesar Salad with Grilled Chicken. Whether it’s a casual lunch or a special dinner, these ideas will surely impress your guests and family alike!
Tips for Perfecting Your Kale Caesar Salad with Grilled Chicken Recipe
Creating the perfect Kale Caesar Salad with Grilled Chicken is all about attention to detail. Here are some helpful tips to ensure your salad turns out delicious every time!
Choose the Right Kale: Not all kale is created equal! Look for fresh, vibrant leaves. Curly kale is popular for salads, but Lacinato (or dinosaur) kale has a sweeter flavor and is more tender.
Massage the Kale: Don’t skip the massaging step! This process breaks down the tough fibers, making the kale softer and more enjoyable to eat. It also enhances the flavor by allowing the lemon juice to penetrate the leaves.
Season the Chicken Well: When grilling your chicken, don’t be shy with the seasoning. A simple mix of salt, pepper, and your favorite herbs can elevate the flavor. Consider adding garlic powder or paprika for an extra kick!
Use Fresh Ingredients: Fresh ingredients make a world of difference. Use freshly grated Parmesan cheese instead of pre-packaged for a richer taste. Freshly made croutons are also a great addition!
Adjust the Dressing: Taste your Caesar dressing before adding it to the salad. You can always adjust the flavors by adding more lemon juice, garlic, or even a dash of hot sauce for a spicy twist.
Don’t Overcrowd the Bowl: When tossing the salad, do it gently. Overcrowding can lead to bruised kale and soggy croutons. Toss in batches if necessary to keep everything fresh.
Serve Immediately: For the best texture and flavor, serve the salad right after assembling it. If you need to prepare it in advance, keep the dressing separate until you’re ready to eat.
Experiment with Flavors: Don’t hesitate to get creative! Add different toppings like roasted nuts, seeds, or even fruits like apples or pears for a unique twist.
By following these tips, you’ll be well on your way to mastering the Kale Caesar Salad with Grilled Chicken. Each bite will be a delightful mix of flavors and textures, making your meal truly memorable!
Breakdown of Time for Kale Caesar Salad with Grilled Chicken Recipe
Understanding the time needed to prepare your Kale Caesar Salad with Grilled Chicken can help you plan your meal better. Here’s a simple breakdown of the time required for each step of the process.
Prep Time
The prep time for this delicious salad is approximately 15 minutes. This includes washing and chopping the kale, preparing the chicken, and gathering all your ingredients. If you’re making your own Caesar dressing, add an extra 5 minutes to this time. Overall, it’s a quick and easy process that won’t take much of your day!
Cooking Time
Cooking the chicken will take about 15 minutes. If you’re using leftover chicken, you can skip this step entirely! Just ensure it’s heated through if it’s cold. If you’re grilling fresh chicken, allow about 7-8 minutes on each side for it to cook thoroughly. This step is essential for achieving juicy, flavorful chicken that complements the salad perfectly.
Total Time
In total, you can expect to spend around 30 minutes from start to finish. This includes both prep and cooking time. It’s a fantastic option for a quick lunch or dinner, especially when you want something healthy and satisfying without spending hours in the kitchen. With just half an hour, you can enjoy a delightful Kale Caesar Salad with Grilled Chicken that’s sure to please!
Nutritional Information for Kale Caesar Salad with Grilled Chicken Recipe
Understanding the nutritional content of your Kale Caesar Salad with Grilled Chicken is essential for maintaining a balanced diet. This salad not only satisfies your taste buds but also provides a wealth of nutrients. Here’s a closer look at the nutritional information per serving:
Calories
Each serving of this delicious Kale Caesar Salad with Grilled Chicken contains approximately 320 calories. This makes it a great option for those looking to enjoy a filling meal without consuming excessive calories. The combination of kale, chicken, and dressing provides a satisfying experience while keeping the calorie count in check.
Protein
Protein is vital for muscle repair and overall health, and this salad delivers! With about 30 grams of protein per serving, the grilled chicken plays a significant role in meeting your daily protein needs. This makes the Kale Caesar Salad with Grilled Chicken an excellent choice for anyone looking to boost their protein intake while enjoying a tasty meal.
Sodium
When it comes to sodium, this salad contains around 800 mg per serving. While sodium is necessary for bodily functions, it’s important to monitor your intake. If you’re watching your sodium levels, consider using a low-sodium Caesar dressing or making your own to control the amount of salt. This way, you can enjoy the flavors without worrying about excess sodium.
Overall, the Kale Caesar Salad with Grilled Chicken is a nutritious option that fits well into a healthy lifestyle. With its balanced mix of calories, protein, and sodium, it’s a meal you can feel good about enjoying!
FAQs about Kale Caesar Salad with Grilled Chicken Recipe
Can I use other greens instead of kale?
Absolutely! While kale is the star of this salad, you can easily substitute it with other greens. Spinach, romaine lettuce, or arugula are great alternatives. Each green brings its own unique flavor and texture. For instance, spinach is tender and mild, while arugula adds a peppery kick. Just remember to adjust the massaging step if you choose a softer green like spinach. Enjoy experimenting with different greens to find your favorite combination!
How can I make the dressing healthier?
Making a healthier Caesar dressing is simple! Start by using Greek yogurt instead of mayonnaise. This swap reduces calories and adds protein. You can also use a blend of olive oil and lemon juice for a lighter option. Adding fresh herbs like basil or parsley can enhance the flavor without extra calories. If you want a bit of tang, consider adding a splash of vinegar. These adjustments will keep the creamy texture while making your dressing healthier!
What can I substitute for grilled chicken?
If you’re looking for alternatives to grilled chicken, there are plenty of options! For a vegetarian choice, try chickpeas or grilled tofu. Both options provide protein and a satisfying texture. If you prefer seafood, grilled shrimp or salmon can be delicious substitutes. For a heartier option, consider using shredded rotisserie chicken or even sliced steak. Each substitute will bring its own flavor, making your Kale Caesar Salad unique every time!
Conclusion on Kale Caesar Salad with Grilled Chicken Recipe
In conclusion, the Kale Caesar Salad with Grilled Chicken is a fantastic dish that combines health and flavor in every bite. This salad is not only easy to prepare but also versatile, allowing you to customize it to your liking. Whether you enjoy it as a main course or a side dish, it’s sure to satisfy your cravings.
With its vibrant ingredients, this salad stands out as a nutritious option for any meal. The kale provides essential vitamins and minerals, while the grilled chicken adds a hearty dose of protein. Plus, the creamy Caesar dressing and crunchy croutons create a delightful contrast in textures that makes each bite enjoyable.
As you explore the variations and tips shared throughout this article, you’ll find endless possibilities to make this salad your own. From adding extra toppings to experimenting with different proteins, the Kale Caesar Salad can easily adapt to suit your taste preferences and dietary needs.
So, gather your ingredients and give this recipe a try! You’ll be amazed at how quickly you can whip up a delicious and healthy meal. Enjoy the process of making it, and savor the delightful flavors that come together in this Kale Caesar Salad with Grilled Chicken. Happy cooking!
Paul
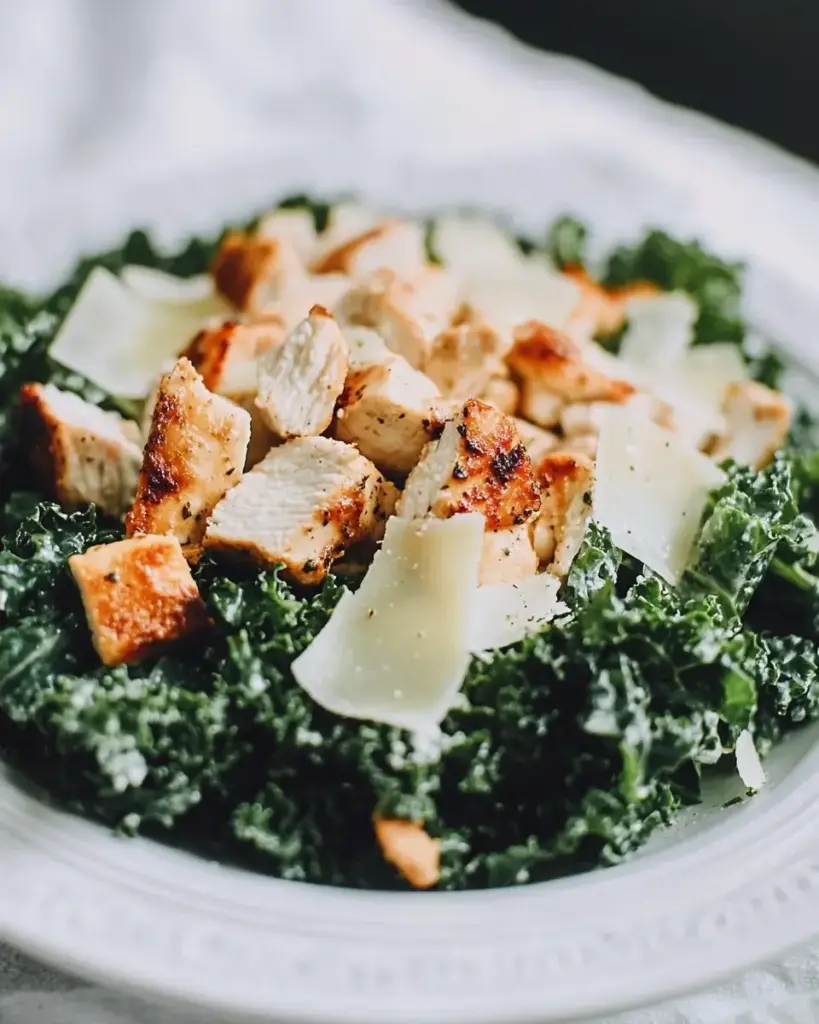
Kale Caesar Salad with Grilled Chicken Recipe delights!
This hearty Kale Caesar Salad with Chicken is a vibrant twist on the classic favorite, featuring tender chicken, crunchy homemade croutons, and a creamy, tangy dressing that clings beautifully to robust shredded kale. Perfect for a satisfying lunch or light dinner!
2cupsdiced crusty bread2 tablespoons olive oilKosher salt and black pepperto taste2 minced garlic cloves1 teaspoon anchovy pasteJuice of 1 lemon1 cup good quality mayonnaise½ teaspoon Worcestershire sauce½ cup finely grated Parmesan cheese½ teaspoon kosher salt¼ teaspoon black pepper8 cups shredded kaleFreshly grated Parmesan cheese, for garnish1 pound chicken tenderloins½ teaspoon garlic powder¼ teaspoon paprika2 tablespoons cooking oil, divided
Method
Preheat the oven to 350°F. Line a baking sheet with foil or parchment paper. Spread the diced bread onto the sheet, drizzle with olive oil, season with salt and pepper, and toss to coat. Bake for about 10 minutes, flipping halfway through, until the croutons are golden and crispy.In a medium bowl, whisk together the garlic, anchovy paste, lemon juice, mayonnaise, Worcestershire sauce, Parmesan cheese, salt, and pepper to make the dressing.Place the shredded kale in a large salad bowl. Add two-thirds of the dressing and toss to coat. Let the kale sit for 4–5 minutes to soften and absorb the flavors.Season the chicken tenderloins with salt, pepper, garlic powder, and paprika. Drizzle with 1 tablespoon of the cooking oil. Heat a non-stick skillet over medium heat, add the remaining oil, and cook the chicken until golden and cooked through, reaching an internal temperature of 165°F.Slice the cooked chicken. Add the remaining dressing to the kale, toss again, then top with the crispy croutons, sliced chicken, and a generous sprinkle of freshly grated Parmesan cheese. Serve immediately and enjoy!
Notes
Massage the kale slightly after tossing it with dressing to further soften it for a more tender texture. If you prefer, substitute romaine lettuce for a more traditional Caesar salad base. Make the dressing ahead and refrigerate it for up to 3 days to save prep time on busy days. Leftover salad can be stored in an airtight container for 1 day, though croutons are best added fresh to maintain crunch.
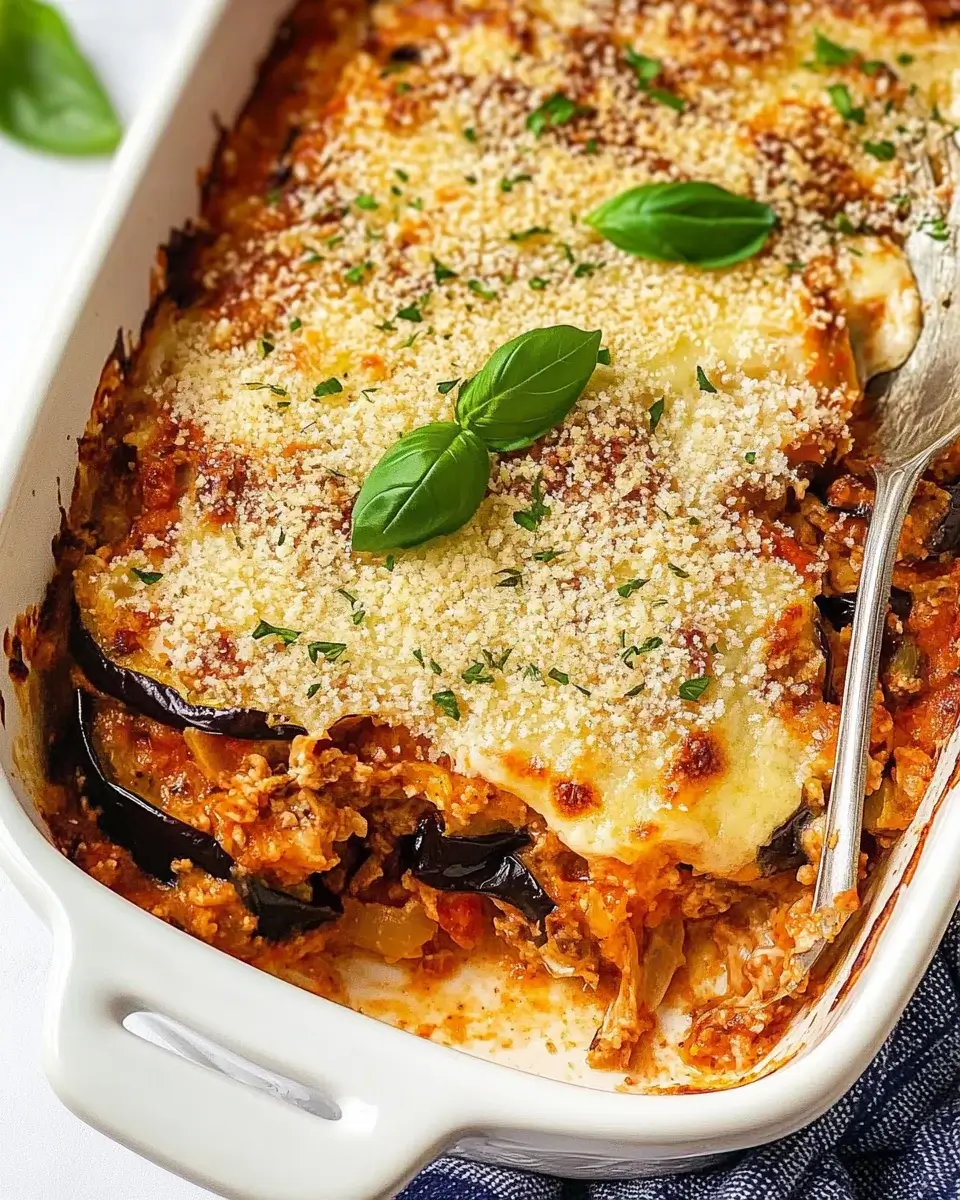
Eggplant Parmesan Casserole is a delightful dish that combines layers of crispy, breaded eggplant with rich marinara sauce and gooey cheese. This comforting casserole is a twist on the classic Eggplant Parmesan, making it easier to serve and enjoy. The eggplant is first salted to remove excess moisture, then breaded and baked until golden brown. Each layer is filled with flavor, thanks to the Italian seasoning and garlic powder. Topped with a generous amount of mozzarella and Parmesan cheese, this casserole is baked to perfection, resulting in a bubbly, cheesy delight that everyone will love.
Why You Should Try This Recipe
There are many reasons to try this Eggplant Parmesan Casserole Recipe. First, it’s a fantastic way to incorporate more vegetables into your diet. Eggplants are not only delicious but also packed with nutrients. This dish is perfect for vegetarians and can easily be adapted for gluten-free diets. Moreover, it’s a crowd-pleaser, making it ideal for family dinners or gatherings with friends. The layers of flavor and texture create a satisfying meal that feels indulgent yet wholesome. Plus, it’s simple to prepare, allowing you to spend more time enjoying your meal and less time in the kitchen. So, gather your ingredients and get ready to impress your loved ones with this scrumptious casserole!
Ingredients for Eggplant Parmesan Casserole Recipe
To create a delicious Eggplant Parmesan Casserole, you’ll need a variety of fresh ingredients. Each component plays a vital role in building flavor and texture. Here’s what you’ll need:
2 medium eggplants, sliced into 1/4-inch rounds
1 teaspoon salt
1 cup all-purpose flour
2 large eggs
1 cup breadcrumbs
1 teaspoon Italian seasoning
1/2 teaspoon garlic powder
1/2 teaspoon black pepper
2 cups marinara sauce
2 cups shredded mozzarella cheese
1 cup grated Parmesan cheese
1/4 cup fresh basil, chopped (optional)
These ingredients come together to create a hearty and satisfying dish. The eggplants provide a meaty texture, while the marinara sauce adds a rich, tangy flavor. The combination of mozzarella and Parmesan cheese gives the casserole its signature gooeyness. Don’t forget the optional fresh basil, which adds a burst of freshness and color to the dish. Gather these ingredients, and you’re ready to start cooking!
Step-by-Step Preparation of Eggplant Parmesan Casserole Recipe
Step 1: Preparing the Eggplant
Preparing the eggplant is a crucial first step in making your Eggplant Parmesan Casserole. Start by slicing the eggplants into 1/4-inch rounds. This thickness ensures they cook evenly and become tender. Next, sprinkle the slices with salt. This process helps draw out excess moisture, which can make the casserole soggy. Let the salted eggplant sit for about 30 minutes. Afterward, rinse the slices under cold water to remove the salt. Pat them dry with paper towels to absorb any remaining moisture. This step is essential for achieving that crispy texture you desire.
Step 2: Making the Sauce
While the eggplant is resting, you can prepare the marinara sauce. If you’re using store-bought sauce, simply heat it in a saucepan over medium heat. For a homemade touch, consider adding some sautéed onions, garlic, or even a pinch of red pepper flakes for extra flavor. Allow the sauce to simmer for a few minutes to enhance its taste. This step is simple but adds a lot of depth to your casserole. Once the sauce is ready, set it aside while you move on to the next step.
Step 3: Assembling the Casserole
Now comes the fun part—assembling your Eggplant Parmesan Casserole! Start by preheating your oven to 375°F (190°C). In a 9×13-inch baking dish, spread a thin layer of marinara sauce on the bottom. This layer prevents the eggplant from sticking and adds flavor. Next, layer half of the baked eggplant slices over the sauce. Follow this with half of the shredded mozzarella and half of the grated Parmesan cheese. Repeat these layers with the remaining ingredients, finishing with a generous layer of cheese on top. Pour any leftover marinara sauce over the top layer of cheese for added moisture and flavor.
Step 4: Baking the Casserole
Once your casserole is assembled, it’s time to bake! Cover the dish with aluminum foil to keep the moisture in. Bake for 25 minutes, then remove the foil and bake for an additional 15 minutes. This allows the cheese to become bubbly and golden brown. The aroma will fill your kitchen, making it hard to wait! After baking, let the casserole cool for about 10 minutes before serving. This cooling time helps the layers set, making it easier to cut and serve. Enjoy your delicious Eggplant Parmesan Casserole!
Variations of Eggplant Parmesan Casserole Recipe
Vegetarian Variations
If you want to enhance the flavors of your Eggplant Parmesan Casserole, consider adding more vegetables. You can include layers of zucchini, bell peppers, or mushrooms. These additions not only boost the nutritional value but also add different textures and tastes. For a Mediterranean twist, try adding spinach or artichokes. These ingredients blend beautifully with the marinara sauce and cheese, creating a delightful medley. You can also experiment with different herbs, like oregano or thyme, to elevate the flavor profile. The beauty of this casserole is its versatility, allowing you to customize it to your liking!
Gluten-Free Options
For those following a gluten-free diet, you can easily adapt this Eggplant Parmesan Casserole Recipe. Start by substituting the all-purpose flour with a gluten-free flour blend. Additionally, choose gluten-free breadcrumbs or make your own by processing gluten-free bread. This way, you can enjoy the same crispy texture without the gluten. Always check the labels on your marinara sauce to ensure it’s gluten-free. With these simple swaps, you can savor this delicious casserole without any worries. It’s a great way to share a comforting meal with friends and family, regardless of dietary restrictions!
Cooking Note for Eggplant Parmesan Casserole Recipe
When preparing your Eggplant Parmesan Casserole, there are a few cooking notes to keep in mind to ensure the best results. First, the quality of your ingredients matters. Fresh eggplants will yield a better flavor and texture than older ones. Look for eggplants that are firm and shiny, with no blemishes. This will enhance the overall taste of your casserole.
Another important tip is to ensure that your eggplant slices are evenly coated during the breading process. This helps achieve a consistent crunch throughout the casserole. If you find that the breading is not sticking well, you can lightly dip the eggplant slices back into the egg mixture before coating them with breadcrumbs again.
Additionally, if you prefer a lighter version of this dish, you can skip the breading altogether. Simply slice the eggplant, season it, and layer it directly in the casserole. This will reduce the calories while still providing a delicious flavor. However, keep in mind that the texture will be different without the crispy coating.
Lastly, don’t hesitate to experiment with the baking time. Ovens can vary, so keep an eye on your casserole as it bakes. You want the cheese to be bubbly and golden brown, but not burnt. If you notice that the top is browning too quickly, you can cover it with foil for the last few minutes of baking. These small adjustments can make a big difference in the final outcome of your Eggplant Parmesan Casserole!
Serving Suggestions for Eggplant Parmesan Casserole Recipe
Serving your Eggplant Parmesan Casserole can be just as delightful as preparing it. This dish is versatile and pairs well with various sides and accompaniments. Here are some suggestions to elevate your meal:
Garlic Bread: A classic pairing, garlic bread complements the rich flavors of the casserole. The crispy, buttery bread is perfect for soaking up any extra marinara sauce.
Side Salad: A fresh side salad adds a refreshing crunch. Consider a simple mix of greens, cherry tomatoes, and a light vinaigrette. This balances the richness of the casserole.
Roasted Vegetables: Roasted seasonal vegetables, such as zucchini, bell peppers, or asparagus, can enhance the meal. Their natural sweetness and charred flavor pair beautifully with the casserole.
Pasta: For a heartier meal, serve the casserole alongside a small portion of pasta. A light olive oil or garlic sauce can complement the flavors without overwhelming them.
Wine Pairing: If you enjoy wine, consider serving a glass of red wine, like Chianti or Merlot. These wines enhance the flavors of the marinara sauce and cheese.
When serving, cut the casserole into squares for easy portions. You can garnish each serving with a sprinkle of fresh basil or a drizzle of olive oil for added flavor. This not only makes the dish look appealing but also adds a touch of freshness. Enjoy your Eggplant Parmesan Casserole with these delightful sides, and watch your family and friends savor every bite!
Tips for Perfecting Your Eggplant Parmesan Casserole Recipe
Perfecting your Eggplant Parmesan Casserole Recipe can take your dish from good to great! Here are some helpful tips to ensure your casserole turns out delicious every time:
Choose the Right Eggplant: Select firm, shiny eggplants with no blemishes. Smaller eggplants tend to be less bitter and have fewer seeds, making them ideal for this recipe.
Salt the Eggplant: Don’t skip the salting step! This process removes excess moisture and bitterness, resulting in a better texture and flavor. Remember to rinse and pat dry afterward.
Use Fresh Ingredients: Fresh herbs, quality cheese, and homemade marinara sauce can elevate your casserole. Fresh basil, for example, adds a burst of flavor that dried herbs can’t match.
Layer Wisely: When assembling, ensure even distribution of eggplant, sauce, and cheese. This helps every bite be flavorful and satisfying.
Experiment with Cheese: While mozzarella and Parmesan are classic choices, feel free to mix in other cheeses like provolone or fontina for a unique twist.
Let it Rest: Allow the casserole to cool for about 10 minutes before serving. This resting time helps the layers set, making it easier to cut and serve.
Make Ahead: You can prepare the casserole a day in advance. Just assemble it, cover it tightly, and refrigerate. Bake it the next day, adding a few extra minutes to the cooking time.
Customize Your Spices: Feel free to adjust the spices to your taste. Adding a pinch of red pepper flakes or Italian herbs can give your casserole a personal touch.
Store Leftovers Properly: If you have leftovers, store them in an airtight container in the fridge. They can last for up to 3 days. Reheat in the oven for the best texture.
By following these tips, you’ll create a mouthwatering Eggplant Parmesan Casserole that will impress your family and friends. Enjoy the process and the delicious results!
Breakdown of Time for Eggplant Parmesan Casserole Recipe
Prep Time
Preparing your Eggplant Parmesan Casserole is a straightforward process. The prep time typically takes about 30 minutes. This includes slicing the eggplants, salting them, and setting up your breading station. While the eggplant sits, you can also prepare your marinara sauce. This multitasking helps you save time and keeps the cooking process efficient.
Cooking Time
The cooking time for the casserole is approximately 40-45 minutes. This includes baking the breaded eggplant slices for 25-30 minutes until they are golden brown and crispy. After assembling the casserole, it bakes for an additional 25 minutes covered with foil, followed by 15 minutes uncovered to achieve that bubbly, golden cheese topping. Keep an eye on it during the last few minutes to ensure it doesn’t over-brown.
Total Time
In total, you can expect to spend about 1 hour and 15 minutes from start to finish. This includes both prep and cooking time. With this manageable time commitment, you can create a delicious Eggplant Parmesan Casserole that will impress your family and friends. It’s a perfect dish for a weeknight dinner or a special occasion!
Nutritional Information for Eggplant Parmesan Casserole Recipe
Calories
When it comes to enjoying a hearty meal, knowing the calorie content can help you make informed choices. Each serving of Eggplant Parmesan Casserole contains approximately 320 calories. This makes it a satisfying option without being overly indulgent. The combination of eggplant, marinara sauce, and cheese provides a balanced meal that can fit into various dietary plans. Enjoying this casserole as part of a well-rounded diet can be both delicious and nutritious!
Protein
Protein is an essential nutrient that helps build and repair tissues in our bodies. Each serving of this Eggplant Parmesan Casserole offers about 15 grams of protein. The protein comes primarily from the eggs, cheese, and eggplant. This makes the dish a great choice for vegetarians looking to increase their protein intake. Pairing it with a side salad or whole grain can further enhance the protein content of your meal.
Sodium
Monitoring sodium intake is important for maintaining heart health. Each serving of Eggplant Parmesan Casserole contains around 600 milligrams of sodium. This amount can vary based on the marinara sauce and cheese brands you choose. To reduce sodium levels, consider using low-sodium marinara sauce and cheese. This way, you can enjoy the flavors of the casserole while keeping your sodium intake in check. Always remember to balance your meals with fresh fruits and vegetables to support overall health!
FAQs about Eggplant Parmesan Casserole Recipe
Can I make Eggplant Parmesan Casserole ahead of time?
Absolutely! Making Eggplant Parmesan Casserole ahead of time is a great way to save time on busy days. You can prepare the casserole up to the point of baking. Simply assemble all the layers in your baking dish, cover it tightly with plastic wrap or aluminum foil, and refrigerate. When you’re ready to bake, just remove the cover and pop it in the oven. You may need to add a few extra minutes to the cooking time since it will be cold from the fridge. This makes it perfect for meal prep or for serving guests without the last-minute rush!
What can I serve with Eggplant Parmesan Casserole?
Eggplant Parmesan Casserole pairs wonderfully with a variety of sides. You can serve it with garlic bread for a classic touch, allowing everyone to soak up the delicious marinara sauce. A fresh side salad with mixed greens, cherry tomatoes, and a light vinaigrette adds a refreshing contrast to the rich casserole. Roasted vegetables, like zucchini or bell peppers, can enhance the meal with their natural sweetness. For a heartier option, consider a small portion of pasta tossed in olive oil or garlic sauce. These sides complement the casserole beautifully, making for a well-rounded meal!
How do I store leftovers of Eggplant Parmesan Casserole?
Storing leftovers of your Eggplant Parmesan Casserole is easy! Allow the casserole to cool completely before transferring it to an airtight container. You can keep it in the refrigerator for up to three days. When you’re ready to enjoy it again, reheat individual portions in the microwave or warm the entire casserole in the oven at 350°F (175°C) until heated through. If you want to keep the crispy texture, reheating in the oven is the best option. Enjoy your delicious leftovers without losing any flavor!
Conclusion on Eggplant Parmesan Casserole Recipe
In conclusion, the Eggplant Parmesan Casserole Recipe is a delightful dish that brings together the best of comfort food and healthy eating. With its layers of crispy eggplant, rich marinara sauce, and gooey cheese, this casserole is sure to please everyone at the table. Whether you’re a seasoned cook or a beginner, this recipe is straightforward and rewarding. It allows for creativity, as you can easily customize it with your favorite vegetables or spices.
Not only is this casserole delicious, but it also offers nutritional benefits. Eggplants are low in calories and high in fiber, making them a great addition to your meals. Plus, the protein from the cheese and eggs helps keep you satisfied. This dish is perfect for family dinners, potlucks, or even meal prep for the week ahead.
As you gather your ingredients and prepare to make this Eggplant Parmesan Casserole, remember to enjoy the process. Cooking can be a joyful experience, especially when you’re creating something that brings people together. So, roll up your sleeves, get your hands a little messy, and savor the delightful flavors of this comforting casserole. Your family and friends will surely appreciate the effort, and you’ll be rewarded with smiles and satisfied appetites!
Now that you have all the tips, variations, and serving suggestions, it’s time to dive into this culinary adventure. Happy cooking!
Paul
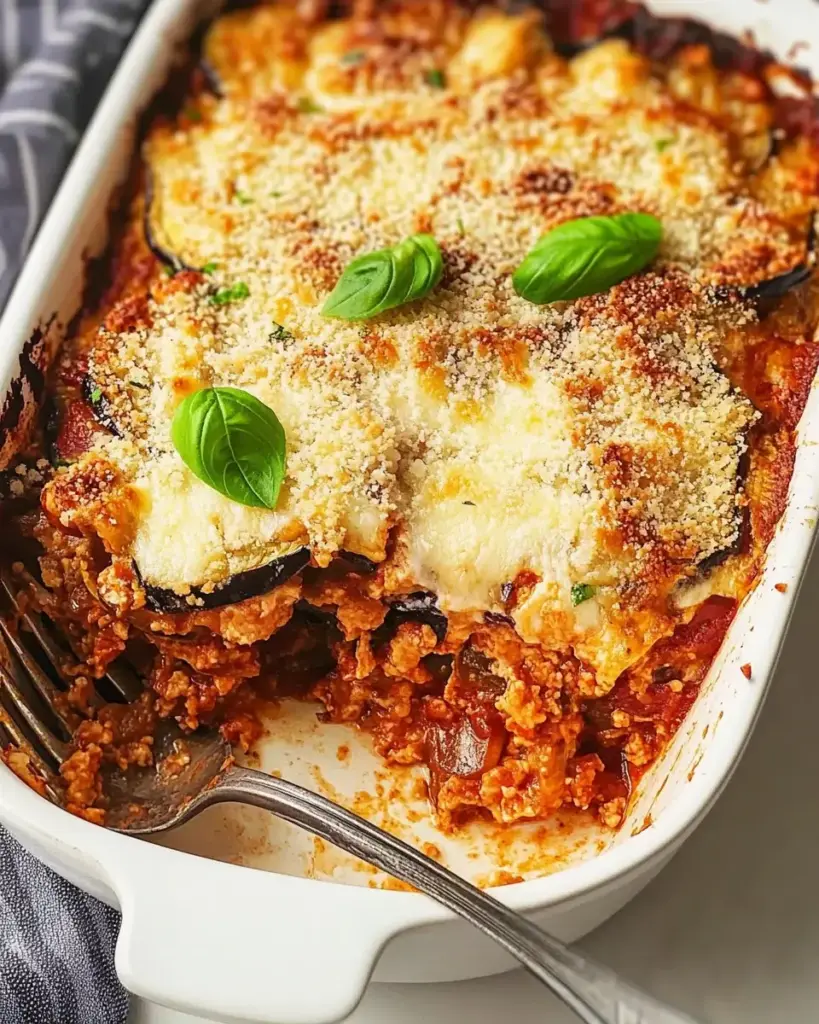
Eggplant Parmesan Casserole Recipe is a must-try dish!
This cozy Eggplant Casserole layers tender roasted eggplant, melty mozzarella, crispy buttered breadcrumbs, and rich marinara sauce into a golden, bubbly, and comforting dish that’s perfect for family dinners or a hearty meatless meal.
¾teaspoonoregano¾ teaspoon basil¾ teaspoon garlic powder¾ teaspoon parsley3 medium ripe eggplantsabout 3½ lbsSalt and pepper to taste3 tablespoons olive oil1 cup panko breadcrumbs2 tablespoons salted butter, melted½ cup grated Parmesan cheese, divided2½ cups shredded mozzarella cheese, divided24 oz marinara sauce, divided
Method
Preheat the oven to 425°F. In a small bowl, mix together the oregano, basil, garlic powder, and parsley.Slice the eggplants into ¼-inch thick rounds and arrange them in a single layer on lightly greased baking sheets.Drizzle the eggplant slices with olive oil and sprinkle with salt, pepper, and the seasoning blend. Toss gently to coat evenly.Roast the eggplant in the oven for 20 minutes until tender. Reduce the oven temperature to 375°F after roasting.Meanwhile, combine the panko breadcrumbs and melted butter in a skillet over medium heat. Toast the breadcrumbs until golden brown, about 2–3 minutes.In a 9×13-inch casserole dish, spread a thin layer of marinara sauce. Layer half of the roasted eggplant slices on top, sprinkle half of the toasted panko breadcrumbs, dollop with half the marinara sauce, and sprinkle half of the Parmesan and mozzarella cheese.Repeat the layers with the remaining ingredients. Cover the dish with foil and bake at 375°F for 18 minutes.Remove the foil, sprinkle the top with the remaining toasted breadcrumbs, and bake uncovered for an additional 5 minutes, until bubbly and golden on top.Allow the casserole to cool slightly before slicing and serving.
Notes
Use ripe but firm eggplants for the best texture. You can substitute Italian-seasoned breadcrumbs for the panko if you want extra flavor. Feel free to add a few fresh basil leaves between the layers for a burst of fresh herb flavor. Store leftovers tightly covered in the refrigerator for up to 3 days and reheat in the oven to maintain crispiness.
Introduction to Decadent Black Forest Brownies Recipe
Decadent Black Forest Brownies Recipe. These brownies are not just any ordinary dessert; they are a delightful fusion of rich chocolate and sweet cherries. Imagine biting into a fudgy brownie that bursts with the flavor of cherry pie filling, all while being enveloped in a luscious chocolatey goodness. It’s a treat that will surely satisfy your sweet tooth!
What Makes This Recipe Decadent?
So, what exactly makes these brownies so decadent? First, it’s the combination of high-quality semi-sweet chocolate and unsalted butter that creates a rich, moist texture. The chocolate melts beautifully, giving the brownies a deep, satisfying flavor. Next, the addition of cherry pie filling adds a fruity twist that perfectly balances the sweetness of the chocolate.
Moreover, the chocolate chips sprinkled throughout the batter provide little pockets of melted chocolate in every bite. This delightful contrast of flavors and textures is what elevates these brownies from simple to extraordinary. Whether you’re serving them at a party or enjoying them as a personal treat, these brownies are sure to impress.
In the following sections, we will guide you through the ingredients, preparation steps, and even some variations to make this recipe your own. Get ready to dive into a baking adventure that will leave your taste buds dancing!
Ingredients for Decadent Black Forest Brownies Recipe
Decadent Black Forest Brownies, you will need a selection of simple yet essential ingredients. Each component plays a vital role in achieving that rich, chocolatey flavor combined with the delightful burst of cherries. Here’s what you’ll need:
1 cup unsalted butter (2 sticks)
8 ounces semi-sweet chocolate, chopped
1 ½ cups granulated sugar
4 large eggs
1 teaspoon vanilla extract
1 cup all-purpose flour
½ teaspoon salt
1 cup cherry pie filling
½ cup chocolate chips
Powdered sugar for dusting (optional)
These ingredients are easy to find and will come together to create a dessert that is both rich and satisfying. The unsalted butter and semi-sweet chocolate form the base, while the eggs and sugar add structure and sweetness. The flour and salt balance the flavors, and the cherry pie filling brings that signature Black Forest taste. Finally, the chocolate chips add extra indulgence!
Now that you have gathered all the ingredients, you’re one step closer to baking these delightful brownies. Let’s move on to the preparation steps to bring this recipe to life!
Step-by-Step Preparation of Decadent Black Forest Brownies Recipe
Decadent Black Forest Brownies. Follow these simple steps to create a batch of brownies that will leave everyone wanting more!
Step 1: Preheat the Oven
First things first, preheat your oven to 350°F (175°C). This step is crucial as it ensures that your brownies bake evenly. While the oven is heating up, you can prepare your baking pan. Grease a 9×13-inch baking pan or line it with parchment paper. This will make it easier to remove the brownies once they are baked.
Step 2: Prepare the Brownie Batter
Next, grab a medium saucepan and place it over low heat. Add the unsalted butter and chopped semi-sweet chocolate. Stir gently until both ingredients melt together smoothly. Once melted, remove the saucepan from the heat and let it cool slightly. In a large mixing bowl, combine the granulated sugar, eggs, and vanilla extract. Whisk these ingredients together until they are well combined and slightly frothy. Now, gradually pour the melted chocolate mixture into the egg mixture, stirring continuously. This will help to keep the eggs from cooking in the warm chocolate.
Step 3: Add the Cherry Filling
After your brownie batter is well mixed, it’s time to add the dry ingredients. Sift in the all-purpose flour and salt, then gently fold them into the batter. Be careful not to overmix, as this can make your brownies tough. Once the flour is just combined, it’s time to fold in the cherry pie filling and chocolate chips. Make sure they are evenly distributed throughout the batter for that perfect burst of flavor in every bite!
Step 4: Bake the Brownies
Now that your batter is ready, pour it into the prepared baking pan. Spread it evenly with a spatula. Place the pan in the preheated oven and bake for 25-30 minutes. To check for doneness, insert a toothpick into the center. If it comes out with a few moist crumbs, your brownies are ready! If it comes out clean, they may be overbaked, so keep an eye on them.
Step 5: Cool and Serve
Decadent Black Forest Brownies!
Variations of Decadent Black Forest Brownies Recipe
Decadent Black Forest Brownies Recipe is already a delightful treat, there are several ways to customize it to suit different dietary needs or personal preferences. Here are two popular variations that you can try!
Gluten-Free Option
If you or someone you know is gluten-sensitive, you can easily make these brownies gluten-free. Simply replace the all-purpose flour with a gluten-free flour blend. Many brands offer a 1:1 substitute that works perfectly in baking. Just make sure to check the ingredients to ensure they are gluten-free. The rest of the recipe remains the same, and you’ll still enjoy that rich chocolate and cherry flavor!
Vegan Adaptation
Decadent Black Forest Brownies Recipe without sacrificing taste. Start by substituting the eggs with flaxseed meal or applesauce. To make flax eggs, mix 1 tablespoon of flaxseed meal with 2.5 tablespoons of water for each egg. Let it sit for a few minutes until it thickens. Additionally, use dairy-free butter and vegan chocolate chips to keep the brownies completely plant-based. These small changes will still yield a deliciously fudgy brownie that everyone can enjoy!
Decadent Black Forest Brownies. No matter which option you choose, you’re sure to create a dessert that delights and satisfies!
Cooking Note for Decadent Black Forest Brownies Recipe
Decadent Black Forest Brownies. Here are some important cooking notes to keep in mind as you embark on this delicious journey:
First, always use high-quality chocolate. The flavor of your brownies largely depends on the chocolate you choose. Opt for semi-sweet or dark chocolate that you enjoy eating on its own. This will enhance the overall taste of your brownies.
Next, be mindful of your oven temperature. Ovens can vary, so it’s a good idea to use an oven thermometer to ensure accuracy. If your oven runs hot, your brownies may bake faster than expected. Conversely, if it runs cool, they may take longer. Keep an eye on them during the last few minutes of baking.
Additionally, avoid overmixing the batter. Once you add the flour, mix just until combined. Overmixing can lead to dense and tough brownies, which is not what we want! A light hand will keep them fudgy and soft.
Lastly, let the brownies cool completely before cutting them. This allows them to set properly, making it easier to achieve clean, neat slices. If you’re in a hurry, you can place the pan in the refrigerator for a short time to speed up the cooling process.
Decadent Black Forest Brownies that are sure to impress. Happy baking!
Serving Suggestions for Decadent Black Forest Brownies Recipe
Decadent Black Forest Brownies are baked and cooled, it’s time to think about how to serve them. Presentation can elevate your dessert experience, making it even more enjoyable. Here are some delightful serving suggestions to consider:
Classic Whipped Cream: A dollop of freshly whipped cream on top of each brownie adds a light and airy contrast to the rich chocolate. You can even sweeten the cream with a bit of powdered sugar for extra flavor.
Fresh Cherries: Garnish your brownies with fresh cherries for a pop of color and a burst of juicy flavor. This not only enhances the Black Forest theme but also adds a refreshing touch.
Chocolate Drizzle: For an extra indulgent treat, drizzle melted chocolate over the brownies before serving. This adds a beautiful finish and intensifies the chocolate flavor.
Ice Cream Pairing: Serve your brownies warm with a scoop of vanilla or cherry ice cream. The combination of warm brownies and cold ice cream is simply irresistible!
Dusting of Cocoa Powder: Instead of powdered sugar, consider dusting your brownies with cocoa powder for a more chocolatey finish. This adds a sophisticated touch to your dessert.
Decadent Black Forest Brownies even more delightful. Enjoy every bite!
Tips for Perfecting Your Decadent Black Forest Brownies Recipe
Decadent Black Forest Brownies turn out perfectly every time, consider these helpful tips. Each suggestion will guide you in achieving that rich, fudgy texture and delightful flavor that makes these brownies a favorite.
First, always measure your ingredients accurately. Baking is a science, and even a small difference can affect the outcome. Use measuring cups and spoons for dry ingredients and a liquid measuring cup for wet ingredients. This precision will help you achieve the best results.
Second, let your butter and eggs come to room temperature before mixing. This helps them blend more easily into the batter, resulting in a smoother texture. If you forget to take them out in advance, you can warm the eggs in a bowl of warm water for a few minutes.
Another tip is to line your baking pan with parchment paper. This not only makes for easy removal but also helps prevent the brownies from sticking. If you don’t have parchment paper, greasing the pan well with butter or cooking spray will work too.
When mixing the batter, use a gentle folding motion when incorporating the flour and other dry ingredients. This helps maintain the airiness of the batter, leading to a lighter brownie. Remember, overmixing can lead to dense brownies, so mix just until combined.
Lastly, consider adding a pinch of espresso powder to the batter. This enhances the chocolate flavor without adding a coffee taste. It’s a secret ingredient that many bakers swear by for richer chocolate desserts.
Decadent Black Forest Brownies. Each batch will be a delicious success, perfect for sharing or enjoying all on your own!
Breakdown of Time for Decadent Black Forest Brownies Recipe
Decadent Black Forest Brownies Recipe can help you plan your baking session better. Here’s a simple breakdown of the time you’ll need to create these delicious brownies:
Prep Time
The prep time for these brownies is approximately 15-20 minutes. This includes gathering your ingredients, melting the chocolate and butter, and mixing everything together. It’s a quick process, allowing you to get to the fun part—baking!
Cooking Time
Once your batter is ready, the cooking time is about 25-30 minutes. Keep an eye on your brownies as they bake. Remember, the perfect brownie will have a few moist crumbs on the toothpick when tested. This ensures they are fudgy and delicious!
Total Time
Decadent Black Forest Brownies!
Nutritional Information for Decadent Black Forest Brownies Recipe
Decadent Black Forest Brownies can help you enjoy them in moderation. Here’s a breakdown of the key nutritional information per serving, which is based on a standard serving size of one brownie:
Calories
Each brownie contains approximately 290 calories. This makes them a rich treat, perfect for satisfying your sweet cravings. While they are indulgent, enjoying them occasionally can fit into a balanced diet.
Protein
In terms of protein, each brownie provides about 4 grams. While this isn’t a high protein snack, it does contribute to your daily intake. Pairing these brownies with a glass of milk can enhance the protein content of your dessert experience!
Sodium
Each serving of these brownies contains around 150 mg of sodium. This is a moderate amount, so it’s important to consider your overall sodium intake for the day. If you’re watching your sodium levels, enjoy these brownies as an occasional treat.
Decadent Black Forest Brownies are a delightful indulgence, being aware of their nutritional information can help you enjoy them responsibly. Remember, balance is key in any diet, and these brownies can be a sweet part of your culinary adventures!
FAQs about Decadent Black Forest Brownies Recipe
Can I use fresh cherries instead of canned?
Decadent Black Forest Brownies Recipe. Just make sure to pit and chop them before adding them to the batter. Fresh cherries will give your brownies a delightful burst of flavor. However, keep in mind that fresh cherries may not provide the same level of moisture as canned cherry pie filling. To compensate, you might want to add a little extra sugar or a splash of cherry juice to maintain the sweetness and moisture in your brownies.
How do I store leftover brownies?
Decadent Black Forest Brownies is easy! First, let them cool completely. Then, place them in an airtight container. You can keep them at room temperature for up to 3 days. If you want to keep them fresh for a longer time, consider refrigerating them. They can last up to a week in the fridge. Just remember to bring them back to room temperature before serving for the best taste and texture!
Can I freeze Decadent Black Forest Brownies?
Decadent Black Forest Brownies! To do this, first, let the brownies cool completely. Then, cut them into squares and wrap each piece tightly in plastic wrap. Place the wrapped brownies in a freezer-safe bag or container. They can be frozen for up to 3 months. When you’re ready to enjoy them, simply thaw them in the refrigerator overnight or at room temperature for a few hours. This way, you can savor the deliciousness of your brownies anytime!
Conclusion on Decadent Black Forest Brownies Recipe
Decadent Black Forest Brownies Recipe is a delightful treat that combines the rich flavors of chocolate with the sweet tang of cherries. This recipe is not only easy to follow but also allows for creativity through various adaptations and serving suggestions. Whether you’re baking for a special occasion or simply indulging in a sweet craving, these brownies are sure to impress.
As you’ve seen, the process of making these brownies is straightforward. From melting the chocolate to folding in the cherry pie filling, each step brings you closer to a delicious outcome. The result is a fudgy, chocolatey dessert that is perfect for sharing with friends and family or enjoying all by yourself!
Remember, baking is all about experimenting and having fun. Don’t hesitate to try different variations or add your personal touch. Whether you choose to make them gluten-free, vegan, or stick to the classic recipe, the joy of baking and sharing these brownies is what truly matters.
Decadent Black Forest Brownies that will leave everyone asking for seconds. Happy baking!
Paul
Decadent Black Forest Brownies Recipe is a must-try!
These Black Forest Brownies combine rich, fudgy chocolate squares with sweet macerated cherries, fluffy whipped cream, and milk chocolate shavings. They’re decadent, dreamy, and perfect for special occasions—or any time you want to impress with dessert!
For the Cherry Layer:2½ cups fresh or frozen pitted cherries1 tablespoon white sugar
For the Brownies:100 grams dark chocolateabout 70% cocoa113 grams unsalted butter (1 stick or ½ cup)3 large eggs, at room temperature1 cup white granulated sugar¼ cup dark brown sugar1½ teaspoons vanilla extract130 grams all-purpose flour (1 cup)25 grams unsweetened cocoa powder (¼ cup)¼ teaspoon salt
For the Topping:¾ cup heavy whipping cream100 grams milk chocolateshavedReserved ½ cup cherries (from earlier)
Method
Preheat the oven to 350°F (180°C) or 160°C with a fan. Grease and line an 8×8 inch square baking pan with parchment paper.
Pit and quarter the cherries, reserving ½ cup for topping. Toss the rest with 1 tablespoon of sugar and let sit for 10 minutes to macerate.
In a microwave-safe bowl, melt the butter and dark chocolate together in 30-second bursts, stirring between each until smooth.
In a large mixing bowl, beat the eggs, granulated sugar, and brown sugar for about 2 minutes until light and fluffy.
Add the melted chocolate mixture and vanilla extract to the egg mixture. Stir until combined.
Sift in the flour, cocoa powder, and salt. Fold gently until just mixed.
Lightly mash the macerated cherries with a fork, then fold them into the brownie batter.
Spread the batter evenly into the prepared pan. Bake for 40 to 45 minutes, until a toothpick inserted in the center comes out with moist crumbs (not wet batter).
Let the brownies cool completely in the pan.
Whip the cream until soft peaks form. Spread the whipped cream over the cooled brownies. Top with reserved cherries and shaved milk chocolate.
Slice and serve chilled or at room temperature.
Notes
You can use frozen cherries, just be sure to thaw and drain them first. For a more intense chocolate flavor, use 85% cocoa dark chocolate. Refrigerate any leftovers in an airtight container for up to 3 days. For cleaner slices, chill the brownies before cutting.
Creamy Garlic Paprika Shrimp Skillet Recipe is a delightful meal that brings together the rich flavors of garlic and paprika with succulent shrimp. This dish is not only quick to make but also offers a creamy texture that will leave your taste buds dancing with joy.
What Makes This Recipe Special?
What sets this recipe apart is its perfect balance of flavors. The combination of smoked and sweet paprika adds depth, while the garlic infuses a wonderful aroma. The heavy cream creates a luscious sauce that coats the shrimp beautifully. Plus, it’s versatile! You can easily adjust the spice levels or add your favorite vegetables to make it your own. This recipe is a true crowd-pleaser, making it a favorite for family dinners or gatherings with friends.
Perfect for Any Occasion
Creamy Garlic Paprika Shrimp Skillet Recipe is perfect for any occasion. Whether you’re hosting a dinner party, celebrating a special event, or simply enjoying a cozy night in, this dish fits the bill. It’s quick enough for a weeknight meal yet elegant enough to impress your guests. Serve it over rice or pasta, and you have a complete meal that’s sure to satisfy everyone at the table.
So, roll up your sleeves and get ready to whip up this delightful dish that’s sure to become a staple in your kitchen!
Ingredients for Creamy Garlic Paprika Shrimp Skillet Recipe
Creamy Garlic Paprika Shrimp Skillet Recipe, you’ll need a few simple ingredients. Each one plays a vital role in building the rich flavors and creamy texture of this dish. Here’s what you’ll need:
1 pound large shrimp: Make sure they are peeled and deveined for easy cooking.
2 tablespoons olive oil: This will be used for sautéing the garlic and shrimp.
4 cloves garlic: Minced garlic adds a wonderful aroma and flavor.
1 teaspoon smoked paprika: This gives a deep, smoky flavor to the dish.
1 teaspoon sweet paprika: Adds a touch of sweetness and color.
1/2 teaspoon red pepper flakes: Optional, for those who enjoy a bit of heat.
1 cup heavy cream: This creates the creamy sauce that makes the dish so indulgent.
1/2 cup chicken broth: Adds depth and richness to the sauce.
1 cup spinach: Chopped spinach adds color and nutrition.
Salt and pepper: To taste, enhancing all the flavors.
Fresh parsley: Chopped, for garnish and a pop of freshness.
Cooked rice or pasta: For serving, providing a base for the creamy shrimp.
Gather these ingredients, and you’ll be well on your way to creating a delicious meal that everyone will love. The combination of shrimp, spices, and creamy sauce is simply irresistible!
Step-by-Step Preparation of Creamy Garlic Paprika Shrimp Skillet Recipe
Creamy Garlic Paprika Shrimp Skillet Recipe. Each step is designed to ensure that your dish turns out perfectly every time.
Step 1: Preparing the Shrimp
Start by rinsing the shrimp under cold water. This helps to remove any residual grit. After rinsing, pat them dry with a paper towel. Dry shrimp will sear better in the skillet. Once dried, place the shrimp in a bowl and season them with salt and pepper. This simple seasoning enhances the shrimp’s natural flavor.
Step 2: Sautéing the Garlic and Spices
Next, heat the olive oil in a large skillet over medium heat. Once the oil is hot, add the minced garlic. Sauté the garlic for about one minute, stirring constantly. You want it to become fragrant but not burnt. After that, add the shrimp to the skillet. Sprinkle the smoked paprika, sweet paprika, and red pepper flakes over the shrimp. Cook for about 2-3 minutes on each side until the shrimp turn pink and opaque. This step is crucial as it locks in the flavors.
Step 3: Creating the Creamy Sauce
Once the shrimp are cooked, remove them from the skillet and set them aside. In the same skillet, pour in the chicken broth. Bring it to a gentle simmer, allowing it to cook for about 2 minutes. This helps to deglaze the pan, lifting all those tasty bits stuck to the bottom. After simmering, lower the heat and stir in the heavy cream. Mix well and let the sauce simmer for another 3-4 minutes until it thickens slightly. This creamy sauce is what makes the dish so indulgent!
Step 4: Combining Ingredients
Now it’s time to bring everything together! Add the chopped spinach and the cooked shrimp back into the skillet. Stir gently to combine all the ingredients. Cook for an additional 2 minutes, just until the spinach wilts. This step not only adds color but also boosts the nutritional value of your dish.
Step 5: Final Touches and Serving
Creamy Garlic Paprika Shrimp Skillet Recipe!
Variations of Creamy Garlic Paprika Shrimp Skillet Recipe
Creamy Garlic Paprika Shrimp Skillet Recipe is not only delicious but also highly adaptable. You can easily customize it to suit your taste or dietary preferences. Here are some exciting variations to consider:
Adding Vegetables for Extra Flavor
Incorporating vegetables into your dish can enhance both flavor and nutrition. Consider adding bell peppers, zucchini, or cherry tomatoes. These veggies not only add color but also provide a delightful crunch. Simply chop them into bite-sized pieces and sauté them along with the garlic in Step 2. You can also add broccoli or asparagus for a fresh twist. The key is to cook the vegetables until they are tender but still vibrant. This way, they will complement the creamy sauce beautifully.
Alternative Protein Options
Creamy Garlic Paprika Shrimp Skillet Recipe a versatile choice for any meal!
Feel free to experiment with these variations to create a dish that’s uniquely yours. The possibilities are endless, and you’ll find that each version brings its own delightful twist to this creamy classic!
Cooking Note for Creamy Garlic Paprika Shrimp Skillet Recipe
Creamy Garlic Paprika Shrimp Skillet Recipe, there are a few important cooking notes to keep in mind. These tips will help ensure that your dish turns out perfectly every time, making it a delightful experience for you and your guests.
First, always choose fresh shrimp when possible. Fresh shrimp not only taste better but also have a firmer texture. If you must use frozen shrimp, make sure to thaw them completely before cooking. This helps them cook evenly and prevents them from becoming rubbery.
Next, be mindful of the heat level while cooking. Medium heat is ideal for sautéing garlic and shrimp. Cooking at too high a temperature can burn the garlic, leading to a bitter taste. On the other hand, cooking at too low a temperature may result in shrimp that are undercooked. Keep an eye on the shrimp as they cook; they should turn pink and opaque, which usually takes about 2-3 minutes per side.
Additionally, when making the creamy sauce, stir frequently to prevent it from sticking to the bottom of the skillet. This will help achieve a smooth and velvety texture. If the sauce becomes too thick, you can always add a splash of chicken broth or water to reach your desired consistency.
By following these cooking notes, you’ll create a delicious and satisfying meal that everyone will love. Happy cooking!
Serving Suggestions for Creamy Garlic Paprika Shrimp Skillet Recipe
Creamy Garlic Paprika Shrimp Skillet Recipe, it’s time to think about how to serve it. The right side dishes and beverages can elevate your meal, making it even more enjoyable. Here are some fantastic serving suggestions to consider.
Best Side Dishes to Pair
When it comes to side dishes, you want something that complements the creamy shrimp without overpowering it. Here are a few excellent options:
Garlic Bread: A warm, crusty garlic bread is perfect for soaking up the creamy sauce. It adds a delightful crunch and flavor.
Steamed Vegetables: Lightly steamed broccoli, asparagus, or green beans provide a fresh contrast to the rich shrimp dish. They add color and nutrition.
Cauliflower Rice: For a low-carb option, serve the shrimp over cauliflower rice. It’s a great way to enjoy the flavors without the extra carbs.
Simple Salad: A light salad with mixed greens, cherry tomatoes, and a lemon vinaigrette can balance the richness of the dish. The acidity from the dressing brightens the meal.
Quinoa: This protein-packed grain is a nutritious alternative to rice or pasta. It absorbs the sauce beautifully and adds a nutty flavor.
These side dishes not only enhance the meal but also provide a variety of textures and flavors that pair wonderfully with the creamy shrimp.
Wine Pairing Recommendations
Creamy Garlic Paprika Shrimp Skillet Recipe:
Sauvignon Blanc: This white wine is crisp and refreshing, with citrus notes that complement the shrimp and creamy sauce.
Chardonnay: A lightly oaked Chardonnay offers a buttery flavor that pairs nicely with the richness of the dish.
Pinot Grigio: This wine is light and fruity, making it a great match for seafood dishes. Its acidity balances the creaminess of the sauce.
Rosé: A dry rosé can add a lovely touch of fruitiness while still being refreshing. It’s perfect for a warm evening.
Creamy Garlic Paprika Shrimp Skillet Recipe and create a memorable dining experience.
Tips for Perfecting Your Creamy Garlic Paprika Shrimp Skillet Recipe
Creamy Garlic Paprika Shrimp Skillet Recipe truly shine, consider these helpful tips. They will guide you in selecting the best ingredients and adjusting flavors to suit your taste. With these suggestions, you’ll create a dish that’s not only delicious but also perfectly tailored to your preferences.
Choosing the Right Shrimp
When it comes to shrimp, quality matters. Always opt for fresh shrimp when possible. Fresh shrimp have a firmer texture and a sweeter taste. If you can’t find fresh shrimp, frozen shrimp are a good alternative. Just make sure to thaw them completely before cooking. To thaw, place them in the refrigerator overnight or run them under cold water for a quick thaw.
Additionally, pay attention to the size of the shrimp. Large shrimp work best for this recipe, as they hold up well during cooking and provide a satisfying bite. Look for shrimp labeled as “U10” or “16/20,” which indicates the number of shrimp per pound. The smaller the number, the larger the shrimp. This ensures that your dish has a nice presentation and a delightful texture.
Adjusting Spice Levels
Creamy Garlic Paprika Shrimp Skillet Recipe includes red pepper flakes for a hint of heat. If you prefer a milder flavor, feel free to omit them or reduce the amount. On the other hand, if you enjoy a bit more spice, consider adding a pinch more red pepper flakes or even a dash of hot sauce.
Another way to enhance the flavor is by experimenting with different spices. For instance, adding a pinch of cayenne pepper can give your dish an extra kick. Alternatively, if you want to keep it mild, consider adding a touch of lemon zest or juice for brightness without the heat. This balance of flavors will elevate your creamy shrimp dish and make it even more enjoyable.
Creamy Garlic Paprika Shrimp Skillet Recipe. Enjoy the process of cooking and feel free to make it your own!
Breakdown of Time for Creamy Garlic Paprika Shrimp Skillet Recipe
Creamy Garlic Paprika Shrimp Skillet Recipe can help you plan your cooking efficiently. Here’s a simple breakdown of the time required for preparation and cooking.
Prep Time
The prep time for this delicious dish is quite short. You’ll need about 10-15 minutes to gather and prepare your ingredients. This includes rinsing and drying the shrimp, mincing the garlic, and chopping the spinach. If you decide to add extra vegetables, factor in a few more minutes for chopping. Overall, you can expect to spend around 15 minutes on prep work.
Cooking Time
Once you’ve prepped your ingredients, the cooking time is quick and efficient. The actual cooking process takes about 15-20 minutes. This includes sautéing the garlic and shrimp, creating the creamy sauce, and combining everything together. The shrimp cooks quickly, usually within 6-8 minutes, while the sauce simmers for an additional 5-7 minutes. So, you can have a delicious meal ready in no time!
Total Time
Creamy Garlic Paprika Shrimp Skillet Recipe to take about 30-35 minutes from start to finish. This makes it an excellent choice for a weeknight dinner or a last-minute meal. With just a little bit of time, you can create a flavorful dish that’s sure to impress!
Nutritional Information for Creamy Garlic Paprika Shrimp Skillet Recipe
Creamy Garlic Paprika Shrimp Skillet Recipe not only delights your taste buds but also provides a good mix of nutrients. Here’s a closer look at the calories and macronutrients in this dish.
This dish is rich in protein, making it a great option for those looking to build muscle or maintain a healthy weight. The healthy fats from the olive oil and heavy cream contribute to satiety, helping you feel full and satisfied. With only 8 grams of net carbs, it’s also suitable for low-carb diets.
Health Benefits of Key Ingredients
Creamy Garlic Paprika Shrimp Skillet Recipe offers unique health benefits:
Shrimp: A lean source of protein, shrimp is low in calories and high in essential nutrients like selenium and vitamin B12. These nutrients support immune function and energy production.
Garlic: Known for its health benefits, garlic can boost the immune system and has anti-inflammatory properties. It may also help lower blood pressure and improve cholesterol levels.
Spinach: Packed with vitamins A, C, and K, spinach is a nutrient-dense leafy green. It’s also rich in antioxidants, which help combat oxidative stress in the body.
Olive Oil: A staple in the Mediterranean diet, olive oil is rich in monounsaturated fats. It’s known to promote heart health and may reduce the risk of chronic diseases.
Paprika: This spice not only adds flavor but also contains antioxidants. It may help improve circulation and support overall health.
Creamy Garlic Paprika Shrimp Skillet Recipe, you’re not just treating yourself to a delicious meal; you’re also nourishing your body with wholesome ingredients. This dish is a perfect example of how healthy eating can be both satisfying and flavorful!
FAQs about Creamy Garlic Paprika Shrimp Skillet Recipe
Can I use frozen shrimp for this recipe?
Creamy Garlic Paprika Shrimp Skillet Recipe. Just make sure to thaw them completely before cooking. The best way to thaw shrimp is to place them in the refrigerator overnight. If you’re short on time, you can run them under cold water for a quick thaw. Once thawed, pat them dry with a paper towel to ensure they sear nicely in the skillet. Using frozen shrimp is a convenient option, and they can be just as delicious as fresh shrimp!
What can I substitute for heavy cream?
Creamy Garlic Paprika Shrimp Skillet Recipe. You can use half-and-half or whole milk for a lower-fat alternative. For a healthier twist, consider using Greek yogurt or low-fat sour cream. Just be sure to add these substitutes gradually and stir well to achieve a creamy consistency. Keep in mind that using a substitute may slightly alter the flavor and texture, but it will still be delicious!
How do I store leftovers?
Creamy Garlic Paprika Shrimp Skillet Recipe is easy! Allow the dish to cool completely before transferring it to an airtight container. You can store it in the refrigerator for up to 3 days. When you’re ready to enjoy it again, simply reheat it on the stove over low heat, stirring occasionally. If the sauce has thickened, you can add a splash of chicken broth or water to loosen it up. Avoid reheating in the microwave, as it may cause the shrimp to become rubbery. Enjoy your leftovers for a quick and tasty meal!
Conclusion on Creamy Garlic Paprika Shrimp Skillet Recipe
Creamy Garlic Paprika Shrimp Skillet Recipe is a delightful dish that combines rich flavors and a creamy texture, making it a favorite for many. With its simple preparation and quick cooking time, this recipe is perfect for busy weeknights or special occasions alike. The balance of spices, fresh ingredients, and succulent shrimp creates a meal that is not only satisfying but also visually appealing.
As you explore this recipe, remember that it’s highly adaptable. Feel free to experiment with different vegetables or proteins to suit your taste. Whether you choose to stick to the classic version or make it your own, the end result will surely impress your family and friends.
Moreover, the nutritional benefits of the ingredients make this dish a wholesome choice. Packed with protein, vitamins, and healthy fats, it supports a balanced diet while still being indulgent. So, gather your ingredients, follow the steps, and enjoy the process of creating this delicious meal.
Creamy Garlic Paprika Shrimp Skillet Recipe. It’s a dish that brings people together, and we’re confident it will become a beloved staple in your kitchen. Happy cooking!
Paul
Creamy Garlic Paprika Shrimp Skillet Recipe is easy to make.
This creamy garlic-paprika shrimp skillet is a rich and savory one-pan dish that’s ready in minutes. Juicy shrimp are pan-seared, then smothered in a silky garlic cream sauce with smoky paprika for a flavorful meal that pairs perfectly with rice, pasta, or crusty bread.
1poundlarge shrimppeeled and deveined3 cloves garlic, minced2 tablespoons olive oil1 teaspoon smoked paprika1 cup heavy creamSalt, to tasteBlack pepper, to tasteFresh parsley, chopped, for garnish
Method
Pat the shrimp dry with paper towels and season with salt, pepper, and smoked paprika.
Mince the garlic and set aside.
Heat olive oil in a large skillet over medium heat.
Add the seasoned shrimp and cook for 2 to 3 minutes per side, or until pink and cooked through. Remove from the skillet and set aside.
In the same skillet, add the minced garlic and sauté for 1 to 2 minutes until fragrant.
Pour in the heavy cream and bring to a gentle simmer, stirring occasionally until slightly thickened, about 3 to 4 minutes.
Return the cooked shrimp to the skillet and toss gently to coat with the garlic cream sauce.
Garnish with freshly chopped parsley and serve hot over rice, pasta, mashed potatoes, or crusty bread.
Notes
Use fresh or frozen shrimp—just make sure they’re fully thawed and patted dry before cooking. For extra depth, add a splash of white wine with the cream. If you like it spicier, add a pinch of chili flakes. Leftovers store well in the fridge for up to 2 days—reheat gently over low heat.
Vindaloo is a popular dish that hails from the Indian subcontinent. It is known for its bold flavors and spicy kick. Traditionally, vindaloo is made with marinated meat, often pork or beef, cooked in a rich, tangy sauce. The dish is characterized by its use of vinegar, spices, and sometimes sugar, which creates a delightful balance of heat and sweetness. The Spicy Beef Vindaloo Recipe we’re exploring today is a perfect example of this delicious culinary tradition.
The Origins of Spicy Beef Vindaloo
The origins of vindaloo can be traced back to the Portuguese colonization of India. The name “vindaloo” comes from the Portuguese dish “carne de vinha d’alhos,” which means meat marinated in wine and garlic. Over time, Indian cooks adapted this recipe, replacing wine with vinegar and adding local spices. This fusion of flavors resulted in the spicy and aromatic dish we know today. The Spicy Beef Vindaloo Recipe showcases this rich history, bringing together various ingredients that create a mouthwatering experience.
Ingredients for Spicy Beef Vindaloo Recipe
To create a delicious Spicy Beef Vindaloo, you’ll need a variety of fresh ingredients that come together to form a rich and flavorful dish. Here’s a list of what you’ll need:
2 pounds beef chuck, cut into 1-inch cubes
2 tablespoons vegetable oil
1 large onion, finely chopped
4 cloves garlic, minced
1 tablespoon fresh ginger, minced
2 tablespoons white vinegar
2 tablespoons tomato paste
2 tablespoons brown sugar
1 tablespoon ground cumin
1 tablespoon ground coriander
1 teaspoon turmeric
1 teaspoon ground cinnamon
1 teaspoon cayenne pepper (adjust to taste)
1 teaspoon black pepper
1 teaspoon salt
1 cup beef broth
1 bay leaf
Fresh cilantro, for garnish
These ingredients are essential for achieving the authentic taste of Spicy Beef Vindaloo. The combination of spices, vinegar, and sweetness from brown sugar creates a unique flavor profile. Make sure to gather everything before you start cooking, as this will help streamline the process and ensure you don’t miss any key components.
Step-by-Step Preparation of Spicy Beef Vindaloo Recipe
Step 1: Marinating the Beef
The first step in making a flavorful Spicy Beef Vindaloo is marinating the beef. Start by placing the beef cubes in a large bowl. Add the white vinegar, minced garlic, minced ginger, ground cumin, ground coriander, turmeric, ground cinnamon, cayenne pepper, black pepper, and salt. Mix everything well, ensuring the beef is evenly coated with the spices. This marination process is crucial as it allows the flavors to penetrate the meat. For the best results, let the beef marinate for at least one hour. If you have time, marinating overnight in the refrigerator will enhance the flavor even more.
Step 2: Preparing the Vindaloo Paste
While the beef is marinating, you can prepare the vindaloo paste. In a small bowl, combine the tomato paste and brown sugar. This mixture will add depth and sweetness to the dish. Stir until well blended. The tomato paste not only thickens the sauce but also contributes to the rich color of the dish. Set this aside for later use when you start cooking the beef.
Step 3: Cooking the Beef
Once the beef has marinated, it’s time to cook it. Heat the vegetable oil in a large pot or Dutch oven over medium-high heat. Add the finely chopped onion and sauté until it turns golden brown, which should take about 5-7 minutes. The onions will add sweetness and flavor to the dish. Next, add the marinated beef to the pot. Brown the beef on all sides for about 5-10 minutes. This step is important as it locks in the juices and flavors of the meat.
Step 4: Simmering the Dish
After browning the beef, it’s time to add the vindaloo paste you prepared earlier. Stir in the tomato paste and brown sugar mixture, cooking for another 2 minutes until everything is well combined. Then, pour in the beef broth and add the bay leaf. Bring the mixture to a simmer, then reduce the heat to low. Cover the pot and let it cook for 1.5 to 2 hours. This slow cooking process allows the beef to become tender and absorb all the wonderful flavors of the spices.
Step 5: Final Touches
Once the beef is tender, it’s time for the final touches. Taste the dish and adjust the seasoning if necessary. If you prefer a spicier kick, feel free to add more cayenne pepper at this stage. Remember to remove the bay leaf before serving. Garnish your Spicy Beef Vindaloo with fresh cilantro for a pop of color and freshness. Serve it hot, and enjoy the delightful flavors that come together in this amazing dish!
Variations of Spicy Beef Vindaloo Recipe
Vegetarian Alternatives
If you’re looking for a vegetarian twist on the classic Spicy Beef Vindaloo Recipe, you’re in luck! There are several delicious alternatives that can capture the essence of this dish without using meat. One popular option is to substitute the beef with hearty vegetables like cauliflower, potatoes, or chickpeas. These ingredients absorb the spices beautifully, creating a rich and satisfying meal.
To make a vegetarian vindaloo, follow the same marination process using the spices and vinegar. Instead of beef, add your chosen vegetables to the pot after sautéing the onions. Cook them until they are tender, and then proceed with the simmering step. You can also use tofu or tempeh for added protein. This way, you can enjoy a flavorful and spicy dish that caters to vegetarian diets while still being true to the vindaloo spirit.
Different Meat Options
While beef is a traditional choice for vindaloo, you can experiment with various meats to create your own unique version. Pork is another popular option, as it pairs well with the spices and vinegar. Simply replace the beef with pork shoulder or tenderloin, and follow the same preparation steps. The result will be a deliciously tender and flavorful dish.
Chicken is also a great alternative for those who prefer poultry. Use boneless chicken thighs or breasts, and adjust the cooking time accordingly, as chicken cooks faster than beef. For a lighter option, you can even try shrimp or fish. Just be mindful of the cooking time, as seafood cooks quickly. No matter which meat you choose, the Spicy Beef Vindaloo Recipe can easily adapt to suit your taste preferences while still delivering that signature spicy kick!
Cooking Note for Spicy Beef Vindaloo Recipe
When preparing the Spicy Beef Vindaloo Recipe, there are a few important cooking notes to keep in mind. These tips will help you achieve the best flavor and texture for your dish.
First, marination is key. Allowing the beef to marinate for a longer time, ideally overnight, enhances the flavors significantly. The spices and vinegar work together to tenderize the meat, making it more flavorful. If you’re short on time, even an hour will still yield good results.
Next, pay attention to the heat level. The cayenne pepper is adjustable, so feel free to modify it based on your spice tolerance. If you’re unsure, start with less and add more later. Remember, you can always increase the spice, but it’s hard to tone it down once it’s in!
Also, consider the cooking vessel. A heavy-bottomed pot or Dutch oven is ideal for even heat distribution. This prevents the beef from sticking and ensures it cooks evenly. Stir occasionally to avoid any sticking at the bottom.
Lastly, don’t rush the simmering process. Cooking the beef low and slow allows the flavors to meld beautifully. The longer you let it simmer, the more tender the beef will become. Patience is key to a delicious vindaloo!
By following these cooking notes, you’ll be well on your way to creating a mouthwatering Spicy Beef Vindaloo that will impress your family and friends.
Serving Suggestions for Spicy Beef Vindaloo Recipe
Best Accompaniments
When it comes to serving your Spicy Beef Vindaloo, the right accompaniments can elevate the meal to new heights. One of the best options is a side of cooling raita. This yogurt-based condiment, often mixed with cucumber and spices, helps balance the heat of the vindaloo. It adds a refreshing touch that complements the rich flavors of the dish.
Another great accompaniment is a simple salad. A fresh salad made with lettuce, tomatoes, and onions can provide a crunchy contrast to the tender beef. You can also add a squeeze of lemon juice for an extra zing. Additionally, pickles or chutneys can enhance the meal with their tangy flavors, making each bite even more enjoyable.
Ideal Pairings with Rice and Bread
Rice and bread are classic pairings for Spicy Beef Vindaloo, and they serve as the perfect base to soak up the delicious sauce. Basmati rice is a popular choice due to its fragrant aroma and fluffy texture. You can serve it plain or with a hint of saffron for added flavor. Alternatively, coconut rice can add a subtle sweetness that pairs beautifully with the spices in the vindaloo.
If you prefer bread, naan is an excellent option. This soft, pillowy bread is perfect for scooping up the beef and sauce. You can also try serving it with roti or paratha for a different texture. Both options are great for enjoying every last bit of the flavorful vindaloo.
In summary, whether you choose to serve your Spicy Beef Vindaloo with cooling raita, a fresh salad, or alongside rice and bread, these accompaniments will enhance your dining experience. Enjoy the delightful combination of flavors and textures that make this dish truly special!
Tips for Perfecting Your Spicy Beef Vindaloo Recipe
Creating the perfect Spicy Beef Vindaloo requires attention to detail and a few helpful tips. These suggestions will ensure that your dish turns out flavorful and satisfying every time.
First, always use fresh spices. Spices lose their potency over time, so using fresh ones will enhance the flavor of your vindaloo. Check the expiration dates on your spices and replace any that are old. Freshly ground spices can also make a big difference in taste.
Next, consider the cut of beef you use. Beef chuck is ideal for this recipe because it becomes tender and flavorful when slow-cooked. However, you can also experiment with other cuts like brisket or short ribs for a different texture. Just remember that tougher cuts benefit from longer cooking times.
Don’t skip the marination step! Marinating the beef not only infuses it with flavor but also helps tenderize the meat. If you can, let it marinate overnight. This extra time allows the spices to penetrate deeply, resulting in a more robust flavor.
When cooking, be patient. Allow the beef to brown properly before adding the other ingredients. This step creates a rich base for your sauce. Browning the meat adds depth and complexity to the dish, so don’t rush it!
Adjust the spice level to your liking. If you’re unsure about the heat, start with less cayenne pepper. You can always add more later if you want it spicier. Remember, it’s easier to increase the heat than to tone it down!
Lastly, let the dish rest before serving. After cooking, allow the vindaloo to sit for about 10-15 minutes. This resting period helps the flavors meld together, making each bite even more delicious. Plus, it allows the sauce to thicken slightly, enhancing the overall texture.
By following these tips, you’ll be well on your way to mastering the art of making a mouthwatering Spicy Beef Vindaloo that will impress your family and friends!
Breakdown of Time for Spicy Beef Vindaloo Recipe
Prep Time
The prep time for the Spicy Beef Vindaloo Recipe is essential for ensuring that all ingredients are ready to go. This includes marinating the beef and preparing the vindaloo paste. Expect to spend about 15-20 minutes on this step. However, if you choose to marinate the beef overnight, you can save time on the day of cooking. Just remember to plan ahead!
Cooking Time
The cooking time for the Spicy Beef Vindaloo is where the magic happens. After browning the beef and adding the other ingredients, you’ll need to let it simmer. This process takes approximately 1.5 to 2 hours. The slow cooking allows the beef to become tender and soak up all the wonderful flavors from the spices. Patience is key here, as the longer it simmers, the better the taste!
Total Time
When you combine the prep time and cooking time, the total time for making the Spicy Beef Vindaloo Recipe is around 2 to 2.5 hours. If you include the optional overnight marination, you can add an additional 12-24 hours to your timeline. This makes it a great dish to prepare in advance for special occasions or family gatherings. The result is a flavorful and satisfying meal that everyone will love!
Nutritional Information for Spicy Beef Vindaloo Recipe
Calories
When enjoying a serving of Spicy Beef Vindaloo, you can expect to consume approximately 350 calories. This makes it a hearty meal that provides energy without being overly heavy. The balance of spices and ingredients ensures that you get a satisfying dish that is both flavorful and fulfilling. If you’re watching your calorie intake, consider pairing it with lighter sides like a fresh salad or steamed vegetables.
Protein
One of the standout features of the Spicy Beef Vindaloo Recipe is its protein content. Each serving contains about 30 grams of protein, making it an excellent choice for those looking to increase their protein intake. The beef chuck used in this recipe is not only rich in flavor but also provides essential amino acids that are vital for muscle repair and overall health. This makes it a great option for active individuals or anyone looking to maintain a balanced diet.
Sodium
In terms of sodium, the Spicy Beef Vindaloo contains approximately 800 milligrams per serving. This level of sodium is typical for many savory dishes, especially those that include broth and seasonings. If you’re concerned about sodium intake, you can easily adjust the recipe. Consider using low-sodium beef broth and reducing the amount of added salt. This way, you can enjoy the rich flavors of the vindaloo while keeping your sodium levels in check.
FAQs about Spicy Beef Vindaloo Recipe
What makes Vindaloo spicy?
Vindaloo is known for its bold and spicy flavor, primarily due to the use of cayenne pepper and other spices. The combination of spices like cumin, coriander, and black pepper adds depth, while the cayenne pepper provides that signature heat. Additionally, the marination process with vinegar helps to enhance the spiciness, making each bite a flavorful experience. If you enjoy a spicy kick, vindaloo is the perfect dish for you!
Can I make Spicy Beef Vindaloo in advance?
Absolutely! Making Spicy Beef Vindaloo in advance is a great idea. In fact, the flavors often improve after sitting for a day. You can prepare the dish, let it cool, and then store it in the refrigerator. When you’re ready to serve, simply reheat it on the stove. This makes it an excellent option for meal prep or for special occasions when you want to save time. Just remember to store it in an airtight container to maintain freshness.
How can I adjust the spice level in Spicy Beef Vindaloo Recipe?
Adjusting the spice level in your Spicy Beef Vindaloo is easy! If you prefer a milder dish, start by reducing the amount of cayenne pepper. You can also omit it entirely if you want a non-spicy version. On the other hand, if you love heat, feel free to add more cayenne or even include fresh chilies during cooking. Tasting the dish as it cooks will help you find the perfect balance of spice that suits your palate.
What are the best side dishes for Spicy Beef Vindaloo?
When serving Spicy Beef Vindaloo, there are several delicious side dishes that complement its rich flavors. Basmati rice is a classic choice, as it soaks up the sauce beautifully. You can also serve it with naan or roti, which are perfect for scooping up the beef and sauce. Additionally, a refreshing cucumber raita or a simple salad can help balance the heat. Pickles or chutneys can also add a tangy contrast, enhancing the overall dining experience.
Conclusion on Spicy Beef Vindaloo Recipe
In conclusion, the Spicy Beef Vindaloo Recipe is a delightful journey into the world of bold flavors and rich culinary traditions. This dish not only showcases the unique blend of spices but also highlights the importance of marination and slow cooking. By following the steps outlined in this article, you can create a mouthwatering meal that is sure to impress your family and friends.
Whether you choose to stick with the classic beef version or explore variations with different meats or vegetarian options, the essence of vindaloo remains the same. The balance of heat, tanginess, and sweetness makes it a standout dish for any occasion. Plus, with the right accompaniments, you can elevate your dining experience even further.
Remember, cooking is all about experimentation and personal taste. Don’t hesitate to adjust the spice levels or add your favorite ingredients. The beauty of the Spicy Beef Vindaloo Recipe lies in its versatility, allowing you to make it your own.
So, gather your ingredients, roll up your sleeves, and embark on this flavorful adventure. Enjoy the process, savor the aromas, and most importantly, relish every bite of your homemade Spicy Beef Vindaloo. Happy cooking!
Paul
Spicy Beef Vindaloo Recipe is a must-try dish!
Beef Vindaloo is a bold and fiery Indian curry featuring tender chunks of marinated beef slow-simmered in a richly spiced sauce. With layers of flavor from vinegar, garlic, ginger, and a warming blend of spices, this dish is the ultimate comfort food for spice lovers.
For Cooking:2 tablespoons avocado oil or other neutral oil1 medium yellow oniondiced1 tablespoon tomato paste1 cup beef broth1 bay leaf
Method
In a large bowl, combine all marinade ingredients and stir to mix well. Add the cubed beef and toss until fully coated. Cover and refrigerate for at least 1 hour or preferably overnight to deepen the flavor.
In a large pot or Dutch oven, heat oil over medium heat. Add the marinated beef and sear on all sides until browned, about 5 to 6 minutes. Remove the beef from the pot and set aside.
In the same pot, add the diced onion and cook for about 5 minutes until soft and translucent. Stir in the tomato paste and cook for another 1 to 2 minutes.
Return the seared beef to the pot. Add beef broth and bay leaf. Stir well and bring the mixture to a boil.
Reduce the heat to low, cover, and simmer for 1.5 to 2 hours, or until the beef is tender and the sauce has thickened slightly.
Remove the bay leaf, taste, and adjust seasoning with additional salt or pepper if needed. Serve hot over steamed rice or with warm naan bread.
Notes
For best flavor, marinate the beef overnight. Adjust the cayenne pepper to your heat preference or add more if you like it extra spicy. You can also swap beef with lamb or chicken for a different twist. Leftovers taste even better the next day after the flavors meld.
Caribbean Chicken and Rice is a delightful dish that brings together the vibrant flavors of the Caribbean islands. This recipe has roots in various cultures, including African, Spanish, and indigenous Caribbean influences. The combination of spices and fresh ingredients reflects the region’s rich culinary heritage. Traditionally, rice and chicken are staples in many Caribbean households, making this dish a beloved comfort food.
In the Caribbean, cooking is often a communal activity, where families gather to enjoy meals together. The use of spices like paprika, thyme, and cayenne pepper adds depth and warmth to the dish. Each island has its unique twist on chicken and rice, showcasing local ingredients and cooking methods. This recipe captures the essence of those traditions, allowing you to experience a taste of the Caribbean right in your kitchen.
Why You Should Try This Recipe
If you’re looking for a meal that’s both satisfying and easy to prepare, this Caribbean Chicken and Rice recipe is perfect for you. Not only is it packed with flavor, but it also offers a wonderful balance of protein, carbs, and vegetables. The combination of tender chicken, fluffy rice, and vibrant veggies makes it a complete meal.
Moreover, this dish is versatile. You can easily customize it to suit your taste preferences. Whether you prefer a milder flavor or a spicy kick, this recipe can adapt to your needs. Plus, it’s a one-pot meal, which means less cleanup for you!
So, gather your ingredients and get ready to embark on a culinary journey to the Caribbean. This recipe is sure to impress your family and friends, making it a great addition to your dinner rotation.
Ingredients for Caribbean Chicken and Rice Recipe
To create a delicious Caribbean Chicken and Rice dish, you’ll need a variety of fresh ingredients. Each component plays a vital role in building the rich flavors that make this recipe so special. Here’s what you’ll need:
2 tablespoons olive oil
1 pound boneless, skinless chicken thighs, cut into bite-sized pieces
1 teaspoon salt
1/2 teaspoon black pepper
1 teaspoon garlic powder
1 teaspoon onion powder
1 teaspoon paprika
1/2 teaspoon cayenne pepper (optional, for those who like it spicy)
1 small onion, diced
2 cloves garlic, minced
1 bell pepper (any color), diced
1 cup long-grain white rice
1 can (14.5 ounces) diced tomatoes, undrained
1 3/4 cups chicken broth
1 teaspoon dried thyme
1 bay leaf
1 cup frozen peas
2 green onions, sliced (for garnish)
These ingredients come together to create a hearty and flavorful meal. The chicken thighs provide a juicy protein base, while the spices and vegetables add depth and color. The rice absorbs all the delicious flavors, making every bite a delight. Don’t forget to have some green onions on hand for a fresh garnish that adds a pop of color and flavor!
Now that you have your ingredients ready, let’s move on to the preparation steps to bring this Caribbean Chicken and Rice recipe to life!
Step-by-Step Preparation of Caribbean Chicken and Rice Recipe
Step 1: Marinating the Chicken
To kick off your Caribbean Chicken and Rice recipe, start by marinating the chicken. This step is crucial for infusing flavor into the meat. In a bowl, combine the chicken pieces with salt, black pepper, garlic powder, onion powder, paprika, and cayenne pepper if you like it spicy. For an extra zing, consider adding a splash of lime juice. Let the chicken marinate for at least 30 minutes. This allows the spices to penetrate the meat, making it tender and flavorful.
Step 2: Preparing the Rice
While the chicken is marinating, you can prepare the rice. Rinse 1 cup of long-grain white rice under cold water until the water runs clear. This step removes excess starch, helping the rice cook evenly and preventing it from becoming sticky. Set the rinsed rice aside. You can also chop your vegetables during this time, making the cooking process smoother.
Step 3: Cooking the Chicken
Once the chicken has marinated, heat 2 tablespoons of olive oil in a large skillet over medium-high heat. Add the marinated chicken pieces to the skillet. Cook them for about 5-7 minutes, stirring occasionally, until they are browned on all sides. This browning adds a delicious depth of flavor. After the chicken is cooked, remove it from the skillet and set it aside. This step ensures the chicken stays juicy while you prepare the rest of the dish.
Step 4: Combining Chicken and Rice
In the same skillet, add the diced onion, minced garlic, and bell pepper. Sauté these vegetables for about 3-4 minutes until they soften. Next, stir in the prepared rice and cook for an additional 2 minutes. This toasting step enhances the rice’s flavor. Now, add the undrained diced tomatoes, chicken broth, dried thyme, and bay leaf. Stir everything together and bring the mixture to a boil. Once boiling, return the browned chicken to the skillet, reduce the heat to low, and cover. Let it simmer for 20 minutes, allowing the rice to absorb all the delicious flavors.
Step 5: Final Touches and Serving
After 20 minutes, check the rice. It should be tender and have absorbed most of the liquid. Remove the bay leaf and stir in 1 cup of frozen peas. Cover the skillet again and let it sit for an additional 5 minutes. This resting time allows the peas to heat through. Finally, fluff the rice with a fork, garnish with sliced green onions, and serve hot. Your Caribbean Chicken and Rice is now ready to be enjoyed!
Variations of Caribbean Chicken and Rice Recipe
Vegetarian Options
If you’re looking for a vegetarian twist on the classic Caribbean Chicken and Rice recipe, you’re in luck! You can easily substitute the chicken with plant-based proteins. Consider using chickpeas, lentils, or even tofu. These options provide a hearty texture and absorb the flavors beautifully.
To make this dish vegetarian, follow the same steps as the original recipe. Start by sautéing your chosen protein in olive oil. Then, add the diced onion, garlic, and bell pepper, just like before. When it comes to the rice, you can use vegetable broth instead of chicken broth for a rich flavor. This way, you still get that comforting, satisfying meal without any meat.
For an extra burst of flavor, add some diced zucchini or carrots to the mix. These vegetables not only enhance the dish’s color but also add nutritional value. With these simple swaps, you can enjoy a delicious vegetarian version of Caribbean Chicken and Rice that everyone will love!
Spicy Versions
If you crave a little heat, there are plenty of ways to spice up your Caribbean Chicken and Rice recipe. Start by increasing the amount of cayenne pepper in the original recipe. You can also add diced jalapeños or serrano peppers when sautéing the vegetables. This will give your dish a fiery kick right from the start!
Another great option is to incorporate hot sauce into the mix. A few dashes of your favorite hot sauce can elevate the flavor profile significantly. If you want to take it a step further, consider adding a pinch of crushed red pepper flakes or a sprinkle of spicy paprika. These additions will not only enhance the heat but also add depth to the overall flavor.
For those who enjoy a smoky flavor, try adding some chipotle peppers in adobo sauce. Just chop them finely and mix them in with the chicken and rice. This will give your dish a unique twist that’s sure to impress anyone who loves spicy food!
Cooking Note for Caribbean Chicken and Rice Recipe
When preparing the Caribbean Chicken and Rice recipe, there are a few important cooking notes to keep in mind. These tips will help ensure that your dish turns out perfectly every time.
First, the quality of your ingredients matters. Fresh vegetables and high-quality chicken will enhance the overall flavor of the dish. If possible, opt for organic chicken and fresh produce. This will not only improve taste but also provide better nutritional value.
Next, pay attention to the cooking times. Each stove and skillet can vary, so keep an eye on the chicken and rice as they cook. If the rice seems too dry before it’s fully cooked, you can add a little more chicken broth or water. This will help achieve that fluffy texture you desire.
Additionally, don’t skip the marinating step. Allowing the chicken to soak in the spices for at least 30 minutes will make a significant difference in flavor. If you have more time, marinating it for a few hours or even overnight will yield even better results.
Lastly, remember to let the dish rest after cooking. This resting period allows the flavors to meld together, making each bite even more delicious. Cover the skillet and let it sit for a few minutes before serving. This small step can elevate your meal from good to great!
By following these cooking notes, you’ll be well on your way to creating a mouthwatering Caribbean Chicken and Rice dish that your family and friends will rave about!
Serving Suggestions for Caribbean Chicken and Rice Recipe
When it comes to serving your Caribbean Chicken and Rice, presentation and pairing can elevate the dining experience. Here are some delightful serving suggestions to consider:
Garnish with Fresh Herbs: After fluffing the rice, sprinkle some freshly chopped cilantro or parsley on top. This adds a pop of color and a fresh flavor that complements the dish beautifully.
Pair with a Side Salad: A light, refreshing salad can balance the hearty nature of the chicken and rice. Consider a simple green salad with a citrus vinaigrette or a mango avocado salad for a tropical twist.
Serve with Plantains: Fried or baked plantains are a classic Caribbean side dish. Their sweetness pairs wonderfully with the savory flavors of the chicken and rice, creating a delightful contrast.
Offer Hot Sauce on the Side: For those who enjoy a bit of heat, provide a selection of hot sauces. This allows guests to customize their meal to their spice preference, making it more enjoyable for everyone.
Accompany with Lime Wedges: A squeeze of fresh lime juice over the dish can brighten the flavors. It adds a zesty kick that enhances the overall taste of the Caribbean Chicken and Rice.
Serve in Colorful Bowls: Presentation matters! Use vibrant bowls or plates to serve the dish. The colorful ingredients will stand out, making the meal visually appealing.
These serving suggestions not only enhance the flavor but also create a festive atmosphere. Whether it’s a family dinner or a gathering with friends, these ideas will make your Caribbean Chicken and Rice recipe a hit. Enjoy your culinary journey to the Caribbean with every bite!
Tips for Perfecting Your Caribbean Chicken and Rice Recipe
To truly master the Caribbean Chicken and Rice recipe, a few tips can help you elevate your dish to new heights. These simple yet effective suggestions will ensure that every bite is bursting with flavor and satisfaction.
Use Fresh Ingredients: Fresh herbs, spices, and vegetables make a significant difference in flavor. Whenever possible, choose fresh over dried ingredients. Fresh thyme, for example, can add a vibrant taste that dried thyme simply can’t match.
Adjust the Spice Level: Everyone has different spice tolerances. Start with a small amount of cayenne pepper and adjust according to your preference. You can always add more, but it’s hard to take it out once it’s in!
Let the Chicken Rest: After cooking, allow the chicken to rest for a few minutes before serving. This helps the juices redistribute, making the chicken even more tender and juicy.
Experiment with Broth: For a richer flavor, consider using homemade chicken broth or a high-quality store-bought version. The broth is a key component, so its quality can greatly impact the final dish.
Don’t Rush the Cooking: Allow the rice to simmer gently. Cooking it too quickly can lead to unevenly cooked rice. Patience is key to achieving that perfect fluffy texture.
Incorporate Seasonal Vegetables: Feel free to add seasonal vegetables to the mix. Zucchini, corn, or even diced carrots can enhance the dish’s nutritional value and add a pop of color.
Try Different Rice Varieties: While long-grain white rice is traditional, you can experiment with jasmine or basmati rice for a different flavor profile. Just be sure to adjust the cooking time and liquid accordingly.
Make it Ahead: This dish can be made ahead of time and reheated. The flavors often deepen and improve after sitting for a day, making it a great option for meal prep.
By following these tips, you’ll be well on your way to creating a Caribbean Chicken and Rice dish that’s not only delicious but also memorable. Enjoy the process and the delightful flavors that come with it!
Breakdown of Time for Caribbean Chicken and Rice Recipe
Prep Time
Preparing your Caribbean Chicken and Rice recipe is a breeze! The prep time typically takes about 15-20 minutes. This includes gathering your ingredients, marinating the chicken, and chopping the vegetables. If you choose to marinate the chicken for longer, you can adjust this time accordingly. Remember, the more time you give the chicken to soak in those delicious spices, the better the flavor will be!
Cooking Time
The cooking time for this dish is approximately 30-35 minutes. This includes browning the chicken, sautéing the vegetables, and allowing the rice to simmer. It’s important to keep an eye on the skillet during this time to ensure everything cooks evenly. The simmering phase is crucial, as it allows the rice to absorb all the wonderful flavors from the chicken and spices.
Total Time
In total, you can expect to spend about 45-55 minutes from start to finish. This includes both prep and cooking times. With such a quick turnaround, you can have a delicious Caribbean Chicken and Rice meal ready in no time! It’s perfect for busy weeknights or when you want to impress guests without spending hours in the kitchen.
Nutritional Information for Caribbean Chicken and Rice Recipe
Calories
When it comes to enjoying a hearty meal, knowing the calorie content can help you make informed choices. Each serving of this Caribbean Chicken and Rice recipe contains approximately 450 calories. This makes it a satisfying option for lunch or dinner without going overboard on calories. The balance of protein, carbs, and healthy fats ensures that you feel full and energized after your meal.
Protein
Protein is essential for building and repairing tissues, and this recipe delivers! Each serving provides about 30 grams of protein, primarily from the chicken thighs. This high protein content makes it an excellent choice for those looking to maintain or build muscle. Additionally, if you opt for vegetarian protein sources like chickpeas or tofu, you can still achieve a similar protein level while enjoying a plant-based meal.
Sodium
Monitoring sodium intake is important for overall health. This Caribbean Chicken and Rice recipe contains approximately 800 milligrams of sodium per serving. While this is a reasonable amount for a flavorful dish, you can reduce the sodium content by using low-sodium chicken broth and limiting added salt. This way, you can enjoy the rich flavors without compromising your health goals.
FAQs about Caribbean Chicken and Rice Recipe
Can I use brown rice instead of white rice?
Yes, you can use brown rice instead of white rice in this Caribbean Chicken and Rice recipe. However, keep in mind that brown rice takes longer to cook. You will need to adjust the cooking time and the amount of liquid. Typically, brown rice requires about 45-50 minutes to become tender. Make sure to add extra chicken broth or water to ensure the rice cooks properly. The nutty flavor of brown rice can add a delightful twist to the dish!
What can I substitute for chicken in this recipe?
If you’re looking for a substitute for chicken, there are several great options! You can use shrimp, tofu, or even chickpeas for a vegetarian version. Shrimp cooks quickly and adds a seafood twist to the dish. Tofu is a fantastic plant-based protein that absorbs flavors well. If you choose chickpeas, they will provide a hearty texture and a good amount of protein. Just follow the same cooking steps, adjusting the cooking time as needed for your chosen protein.
How can I make this dish spicier?
If you love heat, there are many ways to spice up your Caribbean Chicken and Rice! Start by increasing the amount of cayenne pepper in the recipe. You can also add diced jalapeños or serrano peppers when sautéing the vegetables. For an extra kick, consider mixing in some hot sauce or crushed red pepper flakes. If you want a smoky flavor, try adding chipotle peppers in adobo sauce. These additions will give your dish a fiery twist that spice lovers will enjoy!
Can I prepare Caribbean Chicken and Rice in advance?
Absolutely! This Caribbean Chicken and Rice recipe is perfect for meal prep. You can make it ahead of time and store it in the refrigerator for up to three days. The flavors often deepen and improve after sitting, making it even more delicious. When you’re ready to eat, simply reheat it on the stove or in the microwave. Just be sure to add a splash of chicken broth or water to keep it moist while reheating. Enjoy the convenience of a tasty meal ready to go!
Conclusion on Caribbean Chicken and Rice Recipe
In conclusion, the Caribbean Chicken and Rice recipe is a delightful dish that brings the vibrant flavors of the Caribbean right to your kitchen. With its rich history and cultural significance, this meal not only satisfies your hunger but also offers a taste of the diverse culinary traditions of the islands. The combination of tender chicken, fluffy rice, and colorful vegetables creates a wholesome and balanced meal that is perfect for any occasion.
Whether you’re cooking for your family on a busy weeknight or impressing guests at a dinner party, this recipe is sure to be a hit. Its versatility allows you to customize it to your taste, whether you prefer it mild or spicy, vegetarian or with seafood. Plus, the one-pot nature of the dish means less cleanup, making it a practical choice for any home cook.
As you embark on your culinary journey with this Caribbean Chicken and Rice recipe, remember to enjoy the process. Cooking is not just about the final dish; it’s about the love and care you put into each step. So, gather your ingredients, follow the steps, and savor the delightful flavors that await you. Your taste buds will thank you!
Now that you have all the tools and tips to create this delicious meal, it’s time to get cooking. Embrace the spirit of the Caribbean and enjoy every bite of your homemade Caribbean Chicken and Rice!
Paul
Caribbean Chicken and Rice Recipe is a must-try dish!
This Caribbean Chicken and Rice recipe brings the vibrant flavors of the islands straight to your table. Tender jerk-seasoned chicken thighs are seared and baked with aromatic vegetables and fluffy rice, all in one pan for a flavorful, comforting, and satisfying dish.
For the Chicken:2.5 pounds boneless chicken thighs½ teaspoon kosher salt or to taste½ teaspoon ground black pepper or to taste1 tablespoon dry jerk seasoning¼ cup canola oil
For the Rice:1 tablespoon canola oil⅓ cup chopped yellow onions2 carrotsdiced½ red bell pepper, diced½ green bell pepper, diced1 cup long-grain white rice, washed3 fresh curly parsley sprigs1 tablespoon dry jerk seasoning2½ cups vegetable broth or hot water1 teaspoon kosher salt or to taste½ teaspoon ground black pepper or to taste2 tablespoons rice vinegar
Method
Preheat the oven to 350°F (175°C).
Season chicken thighs with salt, pepper, and dry jerk seasoning. Let marinate for at least 30 minutes for deeper flavor.
In a large skillet over medium heat, warm the canola oil. Sear the chicken on both sides until lightly golden. Remove and set aside.
In the same skillet, add another tablespoon of oil and sauté the onions, carrots, and bell peppers for 30 to 45 seconds until fragrant and slightly softened.
Stir in the washed rice, parsley sprigs, remaining dry jerk seasoning, salt, and pepper. Mix well to coat the rice in the seasoning.
Pour in the vegetable broth or hot water and rice vinegar. Stir to combine everything evenly.
Nestle the seared chicken into the rice and veggie mixture. Cover the skillet tightly with foil.
Transfer the skillet to the oven and bake for 35 minutes.
Remove from the oven, fluff the rice gently with a fork, and let sit for a few minutes before serving warm.
Notes
For added heat, use a hot jerk seasoning or add a chopped Scotch bonnet pepper during the sauté step. You can swap chicken thighs for chicken breasts, though thighs remain juicier. This dish makes excellent leftovers—store in the fridge for up to 3 days and reheat gently with a splash of broth or water.
Spicy Beef Black Pepper Udon is a delightful dish that combines the chewy texture of udon noodles with tender slices of beef. This dish is not just about flavor; it’s a celebration of spices and textures. The black pepper adds a warm kick, while the soy and oyster sauces bring a savory depth. Each bite is a perfect balance of heat and umami, making it a favorite among noodle lovers. Whether you’re cooking for family or friends, this dish is sure to impress!
The Origins of Udon Noodles
Udon noodles have a rich history that dates back to Japan. These thick, wheat-based noodles are known for their chewy texture and versatility. Traditionally, udon is served in a hot broth or stir-fried with various ingredients. The origins of udon are believed to trace back to the 9th century, where it was introduced by Chinese travelers. Over the years, it has evolved into a staple in Japanese cuisine. Today, udon is enjoyed in many forms, from hot soups to cold salads, and of course, in delicious stir-fry dishes like Spicy Beef Black Pepper Udon.
Ingredients for Spicy Beef Black Pepper Udon
To create a mouthwatering plate of Spicy Beef Black Pepper Udon, you’ll need a selection of fresh ingredients. Each component plays a vital role in building the dish’s flavor profile. Here’s what you’ll need:
8 ounces udon noodles: These thick, chewy noodles are the star of the dish.
1 tablespoon vegetable oil: This oil is essential for stir-frying the beef and vegetables.
1 pound beef sirloin: Thinly sliced, this tender cut adds richness to the dish.
1 tablespoon black pepper: This spice gives the dish its signature heat.
1 tablespoon soy sauce: A staple in Asian cooking, it adds depth and umami.
1 tablespoon oyster sauce: This sauce enhances the savory flavor of the beef.
2 teaspoons sesame oil: A drizzle of this oil adds a nutty aroma.
2 cloves garlic: Minced garlic brings a fragrant kick to the stir-fry.
1 small onion: Sliced onion adds sweetness and texture.
1 bell pepper: Sliced bell pepper contributes color and crunch.
2 green onions: Chopped green onions are perfect for garnishing.
Salt to taste: A pinch of salt enhances all the flavors.
With these ingredients on hand, you’re ready to embark on a culinary adventure. Each item not only adds flavor but also contributes to the overall experience of enjoying Spicy Beef Black Pepper Udon. So, gather your ingredients and get ready to cook!
Step-by-Step Preparation of Spicy Beef Black Pepper Udon
Step 1: Preparing the Ingredients
Before you start cooking, it’s important to prepare all your ingredients. Begin by slicing the beef sirloin into thin strips. This helps the beef cook quickly and evenly. Next, chop the garlic, onion, and bell pepper. Finally, measure out the sauces and oils. Having everything ready will make the cooking process smooth and enjoyable!
Step 2: Cooking the Udon Noodles
Now it’s time to cook the udon noodles. Bring a large pot of water to a boil. Add the udon noodles and cook them according to the package instructions, usually about 8-10 minutes. Once they are tender, drain the noodles and rinse them under cold water. This stops the cooking process and prevents them from becoming mushy. Set the noodles aside for later.
Step 3: Marinating the Beef
For extra flavor, marinate the sliced beef. In a bowl, combine the beef with black pepper, soy sauce, and a dash of sesame oil. Mix well and let it sit for about 10 minutes. This step allows the beef to absorb the flavors, making it even tastier when cooked.
Step 4: Stir-Frying the Beef
Heat a large skillet or wok over medium-high heat. Add the vegetable oil and let it warm up. Once hot, add the marinated beef to the skillet. Stir-fry for about 3-4 minutes until the beef is browned and cooked through. Make sure to keep stirring to avoid burning. Once done, remove the beef from the skillet and set it aside.
Step 5: Combining Ingredients
In the same skillet, add the minced garlic, sliced onion, and bell pepper. Stir-fry these vegetables for 2-3 minutes until they are tender and fragrant. Then, return the cooked beef to the skillet. Add the udon noodles along with the oyster sauce and remaining sesame oil. Toss everything together until well combined and heated through. This is where all the flavors come together!
Step 6: Final Touches
Before serving, taste the dish and season with salt as needed. Once satisfied, garnish with chopped green onions for a fresh touch. Your Spicy Beef Black Pepper Udon is now ready to be enjoyed! Serve it hot and watch everyone dig in with delight.
Variations of Spicy Beef Black Pepper Udon
Vegetarian Alternatives
If you’re looking for a vegetarian twist on Spicy Beef Black Pepper Udon, you’re in luck! There are plenty of delicious alternatives that maintain the dish’s essence. Instead of beef, consider using tofu or tempeh. Both options absorb flavors well and provide a satisfying texture. Simply cube the tofu or tempeh and marinate it in the same sauces as the beef. Stir-fry until golden brown, then follow the same steps as the original recipe.
Another great option is to add a variety of vegetables. You can include mushrooms, broccoli, or snap peas for added nutrition and flavor. These veggies not only enhance the dish but also make it colorful and appealing. With these substitutions, you can enjoy a hearty and flavorful vegetarian version of Spicy Beef Black Pepper Udon!
Different Protein Options
For those who prefer different proteins, Spicy Beef Black Pepper Udon is quite versatile. Chicken is a popular substitute. Simply slice boneless chicken breast or thighs and follow the same marinating and cooking steps as with the beef. The chicken will soak up the flavors beautifully, creating a delightful dish.
If you’re in the mood for seafood, shrimp is another fantastic option. Just peel and devein the shrimp, then stir-fry them until they turn pink and opaque. This quick-cooking protein pairs wonderfully with the udon noodles and adds a fresh taste to the dish.
Lastly, for a unique twist, you can try using seitan, a wheat-based meat alternative. It has a chewy texture similar to meat and works well in stir-fries. Whichever protein you choose, the key is to marinate it well and stir-fry it to perfection. Enjoy experimenting with these variations!
Cooking Note for Spicy Beef Black Pepper Udon
When preparing Spicy Beef Black Pepper Udon, a few cooking notes can enhance your experience. First, ensure that all your ingredients are prepped and ready before you start cooking. This not only saves time but also helps maintain the dish’s freshness. Stir-frying is a quick process, so having everything at hand is crucial.
Next, the heat level is important. Cooking on medium-high heat allows the beef to sear properly, locking in juices and flavor. If your skillet or wok is not hot enough, the beef may steam instead of fry, resulting in a less desirable texture. Always give your skillet a moment to heat up before adding oil.
Another tip is to avoid overcrowding the pan. If you add too much beef or vegetables at once, they will release moisture and steam rather than fry. This can lead to a soggy dish. If necessary, cook in batches to achieve that perfect stir-fry texture.
Lastly, don’t forget to taste as you go! Adjust the seasoning to your preference. If you like it spicier, feel free to add more black pepper or a splash of chili sauce. Cooking is all about personalizing flavors, so make this dish your own!
Serving Suggestions for Spicy Beef Black Pepper Udon
Ideal Pairings
When it comes to serving Spicy Beef Black Pepper Udon, the right pairings can elevate your meal. Consider serving it alongside a light salad. A simple cucumber salad with a splash of rice vinegar adds a refreshing crunch. The coolness of the salad balances the heat of the udon, creating a delightful contrast.
Another great option is to serve it with steamed vegetables. Broccoli, bok choy, or snap peas are excellent choices. These veggies not only add color but also provide extra nutrients. You can lightly season them with soy sauce or sesame oil for added flavor.
If you want to enhance the Asian theme, consider offering some spring rolls or dumplings on the side. These appetizers are perfect for sharing and complement the main dish beautifully. They add variety and make your meal feel more complete.
Presentation Tips
Presentation plays a key role in making your Spicy Beef Black Pepper Udon appealing. Start by using a large, shallow bowl or plate. This allows the noodles and toppings to be displayed beautifully. When serving, twirl the udon noodles into a nest shape for an inviting look.
Garnish your dish with a sprinkle of chopped green onions and a few sesame seeds. This adds a pop of color and texture. You can also place a lime wedge on the side for a zesty touch. A squeeze of lime just before eating brightens the flavors and adds a refreshing twist.
For an extra special touch, consider using chopsticks for serving. This not only enhances the dining experience but also adds an authentic feel to your meal. With these simple serving suggestions and presentation tips, your Spicy Beef Black Pepper Udon will not only taste amazing but also look stunning on the table!
Tips for Perfecting Spicy Beef Black Pepper Udon
Choosing the Right Udon Noodles
When it comes to making Spicy Beef Black Pepper Udon, the type of udon noodles you choose can make a big difference. Fresh udon noodles are often the best option. They have a delightful chewy texture that enhances the dish. You can find them in the refrigerated section of most Asian grocery stores.
If fresh noodles are not available, dried udon noodles are a great alternative. Just be sure to follow the cooking instructions on the package carefully. Overcooking can lead to mushy noodles, which can ruin the dish. Aim for a firm texture that holds up well when stir-fried.
Another tip is to rinse the cooked noodles under cold water after boiling. This helps to remove excess starch and prevents them from sticking together. Keeping the noodles separate ensures they mix well with the beef and vegetables, creating a harmonious dish.
Balancing Spices
Balancing spices is key to achieving the perfect flavor in your Spicy Beef Black Pepper Udon. Start with the black pepper, which is the star of the show. While it adds a nice kick, too much can overpower the other flavors. Begin with the recommended amount and adjust according to your taste.
Consider adding a touch of sweetness to balance the heat. A small amount of sugar or honey can help mellow the spiciness and enhance the overall flavor. Additionally, if you enjoy a bit of tang, a splash of lime juice or rice vinegar can brighten the dish.
Don’t forget about the umami! The soy sauce and oyster sauce provide a savory depth that complements the beef. Taste as you go, and feel free to tweak the amounts of each ingredient. Cooking is all about finding the right balance that suits your palate.
Lastly, if you want to experiment, try adding a hint of chili oil or Sriracha for an extra layer of flavor. This can elevate your dish and give it a unique twist. With these tips, you’ll be well on your way to perfecting your Spicy Beef Black Pepper Udon!
Breakdown of Time for Spicy Beef Black Pepper Udon
Prep Time
Preparing your ingredients is a crucial step in making Spicy Beef Black Pepper Udon. This includes slicing the beef, chopping vegetables, and measuring out sauces. On average, you should set aside about 15-20 minutes for this prep work. Having everything ready will make the cooking process much smoother and more enjoyable!
Cooking Time
The actual cooking time for Spicy Beef Black Pepper Udon is relatively quick. Once your ingredients are prepped, cooking the udon noodles takes about 8-10 minutes. Stir-frying the beef and vegetables will take an additional 10-12 minutes. In total, you can expect the cooking process to take around 20-25 minutes. This means you can have a delicious meal ready in no time!
Total Time
When you combine both prep and cooking times, the total time to make Spicy Beef Black Pepper Udon is approximately 35-45 minutes. This makes it a fantastic option for a weeknight dinner or a quick meal when you’re short on time. With just a little effort, you can enjoy a flavorful and satisfying dish that everyone will love!
Nutritional Information for Spicy Beef Black Pepper Udon
Calories
When it comes to enjoying Spicy Beef Black Pepper Udon, understanding its caloric content is important. Each serving contains approximately 450 calories. This makes it a hearty meal that can satisfy your hunger without going overboard. The balance of protein, carbohydrates, and fats in this dish contributes to its overall caloric value, making it a well-rounded option for lunch or dinner.
Protein
Protein is a vital nutrient, and Spicy Beef Black Pepper Udon delivers on this front. Each serving provides about 30 grams of protein. The beef sirloin is the primary source of this protein, which is essential for muscle repair and growth. Including a good amount of protein in your meals can help keep you feeling full and energized throughout the day.
Sodium
Sodium is another important factor to consider in your diet. In Spicy Beef Black Pepper Udon, the sodium content is around 800 milligrams per serving. This comes from the soy sauce and oyster sauce used in the recipe. While sodium is necessary for bodily functions, it’s wise to monitor your intake, especially if you are watching your salt consumption. You can always adjust the amount of soy sauce to suit your dietary needs.
FAQs about Spicy Beef Black Pepper Udon
Can I make Spicy Beef Black Pepper Udon ahead of time?
Yes, you can prepare Spicy Beef Black Pepper Udon ahead of time! To do this, cook the udon noodles and stir-fry the beef and vegetables as per the recipe. However, it’s best to store the components separately. This way, the noodles won’t become soggy. When you’re ready to eat, simply reheat everything in a skillet over medium heat. Add a splash of water or broth to help steam the noodles and keep them moist. This makes for a quick and delicious meal any day of the week!
What can I substitute for udon noodles?
If you can’t find udon noodles, don’t worry! There are several great substitutes. You can use soba noodles, which are made from buckwheat and have a slightly nutty flavor. Rice noodles are another option, offering a gluten-free alternative. If you prefer a low-carb option, zucchini noodles or shirataki noodles can work well too. Just remember to adjust the cooking time based on the type of noodles you choose, ensuring they are cooked to your liking!
Is Spicy Beef Black Pepper Udon gluten-free?
Traditional udon noodles are made from wheat flour, which means they are not gluten-free. However, you can easily make a gluten-free version of Spicy Beef Black Pepper Udon by using gluten-free noodles. Look for rice noodles or gluten-free udon alternatives available in stores. Additionally, ensure that the soy sauce you use is gluten-free, as many brands contain wheat. With these adjustments, you can enjoy this flavorful dish without gluten!
How can I adjust the spice level?
Adjusting the spice level in Spicy Beef Black Pepper Udon is simple! If you prefer a milder dish, reduce the amount of black pepper used in the recipe. You can also skip any additional spicy ingredients like chili flakes or Sriracha. On the other hand, if you love heat, feel free to add more black pepper or a teaspoon of chili oil during cooking. For an extra kick, consider adding sliced fresh chili peppers or a dash of hot sauce when serving. Tailor the spice to your taste for the perfect balance!
Conclusion on Spicy Beef Black Pepper Udon
In conclusion, Spicy Beef Black Pepper Udon is a delightful dish that brings together the rich flavors of beef, the chewiness of udon noodles, and the warmth of spices. This recipe is not only easy to prepare but also offers a wonderful opportunity to explore various ingredients and flavors. Whether you’re cooking for a family dinner or a casual gathering with friends, this dish is sure to impress.
With its versatility, you can easily adapt the recipe to suit your dietary preferences. From vegetarian options to different protein choices, Spicy Beef Black Pepper Udon can cater to everyone’s taste. Plus, the cooking process is quick, making it a perfect choice for busy weeknights.
As you enjoy this flavorful meal, remember that cooking is all about creativity and personal touch. Feel free to experiment with spices, vegetables, and sauces to make the dish your own. With each bite, you’ll experience a delightful blend of heat and umami that will leave you wanting more.
So, gather your ingredients, follow the steps, and dive into the delicious world of Spicy Beef Black Pepper Udon. Happy cooking!
Paul
Spicy Beef Black Pepper Udon is a must-try dish!
This Black Pepper Beef Udon is a bold and savory stir fry featuring tender marinated beef, chewy udon noodles, crisp vegetables, and a glossy black pepper sauce. It’s a quick weeknight dinner with serious takeout-style flavor—all in one wok!
2packs udon noodlespreferably fresh, or dried and cooked as instructed200 grams thinly sliced beef (ribeye or flank steak works well)1 clove garlic, minced1 white onion, thinly sliced1 to 2 cups chopped Chinese cabbage or substitute with bok choy, spinach, or broccoliSalt, to tasteSugar, to taste
For the beef marinade:1 clove garlicminced1 teaspoon sesame oil1 tablespoon soy sauce1 teaspoon oyster sauce1 teaspoon Chinese white vinegar1 teaspoon cornstarch mixed with a splash of water (slurry)
For the black pepper sauce:3 tablespoons dark soy sauce1 tablespoon oyster sauce2 teaspoons freshly ground black pepperadjust for spice level3 tablespoons water½ teaspoon potato starch
Method
In a mixing bowl, whisk together the marinade ingredients. Add the thinly sliced beef and let marinate for at least 10 minutes. For extra flavor and tenderness, marinate up to 30 minutes.
Boil udon noodles until just loosened but still chewy, about 1 to 2 minutes. Drain and set aside.
Heat oil in a large wok or skillet over medium heat. Sauté the garlic and onion until fragrant and softened. Add the chopped Chinese cabbage or greens, stir-fry until wilted. Lightly season with salt and sugar. Remove from pan and set aside.
In the same pan, sear the marinated beef on medium-high heat for 2 to 3 minutes until just browned. Do not overcook. Remove and set aside.
In a small bowl, mix the black pepper sauce ingredients until combined. Pour the sauce into the same pan and cook on low heat until slightly thickened and glossy.
Return the beef and udon noodles to the pan. Toss everything together until well coated in sauce. Add the vegetables back in and mix thoroughly. Serve hot.
Notes
Use fresh udon noodles for the best texture, but frozen or shelf-stable works well too. For extra heat, add more freshly ground black pepper or a pinch of chili flakes. You can substitute Chinese cabbage with other quick-cooking greens like spinach or napa cabbage. Adjust saltiness by using low-sodium soy sauce or reducing oyster sauce.
Introduction to Strawberry Honeybun Cake with Strawberry Icing
Strawberry Honeybun Cake with Strawberry Icing. This cake is not just a dessert; it’s a celebration of flavors and textures that will leave your taste buds dancing with joy.
Imagine a soft, moist cake infused with the sweetness of fresh strawberries, complemented by a creamy icing that adds a luscious finish. This cake is perfect for any occasion, whether it’s a family gathering, a birthday party, or simply a cozy afternoon at home. The combination of strawberries and honey creates a delightful harmony that is both refreshing and indulgent.
What makes this cake even more special is its easy preparation. With simple ingredients and straightforward steps, you can whip up this delicious dessert in no time. Plus, the vibrant colors of the strawberries make it visually appealing, making it a showstopper on any dessert table.
Strawberry Honeybun Cake with Strawberry Icing is not only a treat for the palate but also a joy to create. So, roll up your sleeves, gather your ingredients, and let’s get started on making this scrumptious cake that’s sure to impress!
Ingredients for Strawberry Honeybun Cake with Strawberry Icing
Strawberry Honeybun Cake with Strawberry Icing. Having everything ready will make your baking experience smooth and enjoyable. Here’s what you’ll need:
For the Cake:
2 cups all-purpose flour
1 ½ cups granulated sugar
1 tablespoon baking powder
½ teaspoon salt
1 cup vegetable oil
4 large eggs
1 cup buttermilk
1 teaspoon vanilla extract
1 cup fresh strawberries, chopped
1 teaspoon ground cinnamon
For the Creamy Strawberry Icing:
1 cup powdered sugar
2 tablespoons unsalted butter, softened
2 tablespoons milk
1 teaspoon vanilla extract
¼ cup fresh strawberries, pureed
These ingredients come together to create a cake that is not only delicious but also visually stunning. The fresh strawberries add a burst of flavor, while the creamy icing ties everything together beautifully. Make sure to use ripe strawberries for the best taste!
Now that we have our ingredients ready, we can move on to the next step: preparing the cake batter. Let’s get started!
Step-by-Step Preparation of Strawberry Honeybun Cake with Strawberry Icing
Strawberry Honeybun Cake with Strawberry Icing. Follow these simple steps to create a delicious cake that will impress everyone!
Step 1: Preheat the Oven and Prepare the Baking Dish
First things first, preheat your oven to 350°F (175°C). This ensures that your cake bakes evenly. While the oven is heating up, grab a 9×13-inch baking pan. Grease it with butter or cooking spray, and then dust it with flour. This will help the cake come out easily once it’s baked.
Step 2: Mix the Cake Batter
In a large mixing bowl, whisk together the all-purpose flour, granulated sugar, baking powder, and salt. This dry mixture is the base of your cake. In another bowl, combine the vegetable oil, eggs, buttermilk, and vanilla extract. Mix these wet ingredients well. Now, gradually add the wet mixture to the dry ingredients. Stir gently until just combined. Be careful not to overmix; a few lumps are okay!
Step 3: Create the Cinnamon Swirl
In a small bowl, mix ¼ cup of the cake batter with the ground cinnamon. This will create a delightful cinnamon swirl for your cake. The cinnamon adds a warm flavor that pairs beautifully with the strawberries.
Step 4: Assemble the Cake
Now it’s time to fold in the chopped strawberries into the batter. This adds a burst of fruity goodness to every bite. Pour half of the remaining batter into the prepared baking pan. Then, drizzle the cinnamon mixture over this layer. Next, pour the rest of the batter on top. Use a knife to gently swirl the batter, creating a marbled effect. This step is not only fun but also makes the cake look beautiful!
Step 5: Bake the Cake
Place the cake in the preheated oven and bake for 30-35 minutes. To check if it’s done, insert a toothpick into the center. If it comes out clean, your cake is ready! Once baked, remove it from the oven and let it cool completely in the pan on a wire rack. This cooling step is important for the icing to stick properly later.
Step 6: Prepare the Strawberry Icing
While the cake cools, let’s make the creamy strawberry icing. In a mixing bowl, beat together the powdered sugar, softened butter, milk, vanilla extract, and pureed strawberries. Mix until the icing is smooth and creamy. The fresh strawberry puree adds a lovely flavor and color to the icing.
Step 7: Ice the Cake
Strawberry Honeybun Cake with Strawberry Icing is now ready to be served!
Variations of Strawberry Honeybun Cake with Strawberry Icing
Strawberry Honeybun Cake with Strawberry Icing is delicious as is, there are many fun variations you can try. These tweaks can add new flavors and textures, making your cake even more exciting. Let’s explore some alternative icing options and ways to incorporate fresh strawberries!
Alternative Icing Options
If you want to switch things up, consider trying different icing recipes. Here are a few ideas:
Chocolate Ganache: Melt chocolate with heavy cream for a rich, decadent topping. This pairs wonderfully with the fruity cake.
Whipped Cream: For a lighter option, top your cake with freshly whipped cream. It adds a fluffy texture that complements the strawberries.
Lemon Glaze: Mix powdered sugar with lemon juice for a zesty icing. The tartness of lemon balances the sweetness of the cake beautifully.
Cream Cheese Frosting: Blend cream cheese with powdered sugar and vanilla for a tangy, creamy icing. This adds a delightful richness to each bite.
Strawberry Honeybun Cake with Strawberry Icing a new experience every time.
Adding Fresh Strawberries
Fresh strawberries can elevate your cake in many ways. Here are some ideas for incorporating them:
Layered Strawberries: After icing the cake, add a layer of sliced strawberries on top. This not only looks beautiful but also adds a fresh burst of flavor.
Strawberry Compote: Cook down strawberries with a bit of sugar to create a compote. Drizzle this over the icing for an extra fruity kick.
Stuffed Strawberries: Hollow out some strawberries and fill them with whipped cream or icing. Place these on top of the cake for a fun and tasty decoration.
Strawberry Puree Swirl: Before icing, swirl some pureed strawberries into the icing for a marbled effect. This adds both color and flavor.
Strawberry Honeybun Cake with Strawberry Icing visually stunning. So, don’t hesitate to get creative!
Cooking Note for Strawberry Honeybun Cake with Strawberry Icing
Strawberry Honeybun Cake with Strawberry Icing, a few cooking notes can help ensure your cake turns out perfectly every time. Here are some tips to keep in mind:
First, always use fresh ingredients. Fresh strawberries are key to achieving the best flavor. If possible, choose strawberries that are ripe and sweet. This will enhance the overall taste of your cake.
Next, make sure to measure your ingredients accurately. Baking is a science, and even a small difference in measurements can affect the outcome. Use measuring cups and spoons for precision. For the flour, spoon it into the measuring cup and level it off with a knife for the best results.
Another important tip is to avoid overmixing the batter. When combining the wet and dry ingredients, mix until just combined. Overmixing can lead to a dense cake, which is not what we want. A few lumps are perfectly fine!
Additionally, keep an eye on the baking time. Ovens can vary, so start checking your cake a few minutes before the recommended time. Insert a toothpick into the center; if it comes out clean, your cake is ready. If it’s not done, give it a few more minutes and check again.
Lastly, allow the cake to cool completely before icing. This step is crucial for the icing to adhere properly. If the cake is warm, the icing may melt and slide off, ruining the beautiful presentation.
Strawberry Honeybun Cake with Strawberry Icing that will impress your family and friends. Happy baking!
Serving Suggestions for Strawberry Honeybun Cake with Strawberry Icing
Strawberry Honeybun Cake with Strawberry Icing is beautifully baked and iced, it’s time to think about how to serve it! This cake is versatile and can be enjoyed in many delightful ways. Here are some serving suggestions to enhance your dessert experience:
With Fresh Fruit: Serve slices of the cake alongside a medley of fresh fruits. Strawberries, blueberries, and raspberries complement the flavors beautifully. This adds a refreshing touch and makes for a colorful presentation.
With a Scoop of Ice Cream: A scoop of vanilla or strawberry ice cream on the side can take your cake to the next level. The cold ice cream contrasts nicely with the warm cake, creating a delightful treat.
As a Breakfast Treat: Enjoy a slice of this cake for breakfast or brunch. It pairs wonderfully with a cup of coffee or tea. The sweetness of the cake makes it a perfect morning indulgence.
With Whipped Cream: Top each slice with a dollop of freshly whipped cream. This adds a light and airy texture that balances the richness of the cake and icing.
For Special Occasions: Consider serving the cake at celebrations like birthdays or family gatherings. You can decorate it with additional strawberries or edible flowers for a festive touch.
Strawberry Honeybun Cake with Strawberry Icing. Whether you’re enjoying it on a special occasion or as a sweet treat during the week, this cake is sure to impress!
Tips for Perfecting Strawberry Honeybun Cake with Strawberry Icing
Strawberry Honeybun Cake with Strawberry Icing is all about attention to detail. With a few helpful tips, you can ensure that your cake turns out moist, flavorful, and visually appealing. Here are some expert suggestions to help you achieve baking success:
First, always use room temperature ingredients. This includes eggs, buttermilk, and butter. Room temperature ingredients blend more easily, resulting in a smoother batter. If you forget to take them out in advance, you can warm the eggs in a bowl of warm water for a few minutes.
Next, consider sifting your dry ingredients. Sifting flour, baking powder, and salt together not only helps to aerate them but also removes any lumps. This step can lead to a lighter cake texture, which is especially important for a fluffy honeybun cake.
When it comes to strawberries, freshness is key. Choose ripe, sweet strawberries for the best flavor. If you can, buy them from a local farmer’s market. If you’re using frozen strawberries, make sure to thaw and drain them well to avoid excess moisture in the batter.
Another tip is to adjust the baking time based on your oven. Every oven is different, so keep an eye on your cake as it bakes. If you notice it browning too quickly, you can cover it loosely with aluminum foil to prevent burning while it finishes baking.
For the icing, make sure your butter is softened but not melted. This will help create a creamy texture that spreads easily. If your icing is too thick, add a little more milk, one teaspoon at a time, until you reach your desired consistency.
Lastly, let your cake cool completely before icing it. This prevents the icing from melting and sliding off. If you want to speed up the cooling process, you can place the cake in the refrigerator for a short time after it has cooled slightly at room temperature.
Strawberry Honeybun Cake with Strawberry Icing. Each bite will be a delightful experience, and your friends and family will be asking for seconds!
Breakdown of Time for Strawberry Honeybun Cake with Strawberry Icing
Strawberry Honeybun Cake with Strawberry Icing can help you plan your baking session better. Here’s a simple breakdown of the time required for preparation, cooking, and cooling.
Prep Time
The prep time for this delightful cake is approximately 20-25 minutes. During this time, you will gather your ingredients, preheat the oven, and mix the batter. Make sure to have everything ready before you start. This will make the process smoother and more enjoyable!
Cooking Time
Once your cake is in the oven, it will need about 30-35 minutes to bake. Keep an eye on it as it cooks. You can check for doneness by inserting a toothpick into the center. If it comes out clean, your cake is ready to come out of the oven!
Total Time
In total, you should expect to spend around 1 hour to 1 hour and 10 minutes from start to finish. This includes prep time, cooking time, and the cooling period before icing. Remember, patience is key! Allowing the cake to cool completely ensures that the icing will set beautifully.
Strawberry Honeybun Cake with Strawberry Icing into your schedule. Happy baking!
Nutritional Information for Strawberry Honeybun Cake with Strawberry Icing
Strawberry Honeybun Cake with Strawberry Icing can help you enjoy this delicious dessert while keeping your dietary goals in mind. Here’s a breakdown of the key nutritional components per serving:
Calories
Each serving of this delightful cake contains approximately 280 calories. This makes it a satisfying treat without being overly indulgent. The combination of fresh strawberries and creamy icing adds to the flavor while keeping the calorie count reasonable. Enjoying a slice as an occasional dessert can fit nicely into a balanced diet.
Protein
In terms of protein, each serving provides about 3 grams. While this isn’t a high-protein dessert, it does contribute to your daily intake. The eggs in the cake batter help boost the protein content slightly. Pairing your cake with a source of protein, like a dollop of Greek yogurt, can enhance the nutritional value of your dessert.
Sodium
The sodium content in each serving is around 200 milligrams. This is a moderate amount, making it suitable for most diets. However, if you are watching your sodium intake, be mindful of the other meals you consume throughout the day. Using unsalted butter in the icing can help keep the sodium levels lower.
Strawberry Honeybun Cake with Strawberry Icing is a delightful dessert that can be enjoyed in moderation. With its balance of flavors and textures, it’s a treat that can bring joy to any occasion while still being mindful of nutritional content. Enjoy your baking and the delicious results!
FAQs about Strawberry Honeybun Cake with Strawberry Icing
Can I use frozen strawberries for the icing?
Strawberry Honeybun Cake with Strawberry Icing a delightful treat!
How long can I store Strawberry Honeybun Cake with Strawberry Icing?
Strawberry Honeybun Cake with Strawberry Icing at room temperature for up to 3 days. Just make sure to cover it with plastic wrap or keep it in an airtight container to keep it fresh. If you want to store it longer, consider refrigerating it. In the fridge, it can last for about a week. Just remember to bring it back to room temperature before serving for the best taste!
Can I make Strawberry Honeybun Cake with Strawberry Icing ahead of time?
Strawberry Honeybun Cake with Strawberry Icing a day or two in advance. Just bake the cake, let it cool completely, and then store it in an airtight container. You can ice it right before serving to keep the icing fresh and creamy. This makes it a great option for parties or gatherings!
What can I serve with Strawberry Honeybun Cake with Strawberry Icing?
Strawberry Honeybun Cake with Strawberry Icing. Consider pairing it with a scoop of vanilla ice cream or a dollop of whipped cream for added richness. Fresh fruit, like sliced strawberries or berries, can enhance the flavors and add a refreshing touch. You can also serve it with a cup of coffee or tea for a delightful afternoon treat!
Conclusion on Strawberry Honeybun Cake with Strawberry Icing
Strawberry Honeybun Cake with Strawberry Icing is a delightful dessert that brings joy to any occasion. Its soft, moist texture combined with the sweetness of fresh strawberries creates a flavor experience that is simply irresistible. Whether you’re baking for a special event or just treating yourself, this cake is sure to impress.
With its easy preparation and simple ingredients, you can create a stunning dessert that looks as good as it tastes. The creamy strawberry icing adds a luscious finish, making each bite a delightful treat. Plus, the variations and serving suggestions allow you to customize the cake to suit your preferences and occasions.
Strawberry Honeybun Cake with Strawberry Icing will not only be a feast for the eyes but also a sweet memory for you and your loved ones.
So, what are you waiting for? Get baking and indulge in this scrumptious cake that’s sure to become a favorite in your household. Happy baking!
Paul
Strawberry Honeybun Cake with Strawberry Icing delights everyone!
This Strawberry Honeybun Cake blends the nostalgic flavor of a cinnamon-swirled honeybun with the fruity sweetness of strawberries. Ultra-moist, warmly spiced, and topped with a creamy strawberry glaze, it’s the perfect easy dessert for brunches, potlucks, or weeknight treats.
For the Cake:1 box strawberry cake mix3/4 cup vegetable oil4 large eggs1 cup sour cream1/2 cup brown sugar1 tablespoon ground cinnamon
For the Creamy Strawberry Icing:2 cups powdered sugar3 tablespoons melted butter1 teaspoon vanilla extract2 tablespoons strawberry pureefresh or frozen1 to 2 tablespoons milk (as needed for consistency)
Method
Preheat your oven to 350°F (175°C). Grease a 9×13-inch baking dish and set aside.
In a large bowl, mix together the cake mix, oil, eggs, and sour cream until smooth. Do not overmix.
Pour half of the cake batter into the prepared dish. In a small bowl, combine brown sugar and cinnamon. Sprinkle half over the batter.
Add the remaining cake batter, then top with the rest of the cinnamon sugar mixture. Use a knife to gently swirl the layers together.
Bake for 35–40 minutes, or until a toothpick inserted in the center comes out clean. Let the cake cool slightly.
Meanwhile, prepare the icing by whisking together powdered sugar, melted butter, vanilla, strawberry puree, and enough milk to reach a pourable consistency.
Drizzle icing generously over the warm cake and allow it to soak in before serving.
Notes
Substitute strawberry puree with strawberry jam for a more intense flavor.
Want a layered version? Bake in two round pans and add the icing between layers.
Store covered at room temperature for up to 2 days or refrigerate for longer freshness.
Add finely chopped strawberries to the batter for even more fruity goodness.