

As the aroma of baked dough fills the kitchen, I can’t help but feel a rush of nostalgia—those cozy family dinners where everyone gathered around the table, laughter mixing with savory scents. Today, I’ve whipped up a delightful twist on a classic favorite with my Quick & Easy Pizza Pot Pies. Perfectly portioned and ready in just 30 minutes, these little pockets of comfort food are not just tasty but also incredibly customizable. Whether you’re using leftover ingredients or catering to dietary needs with gluten-free crusts, they’re sure to be a hit. Imagine sinking your teeth into a flaky crust that gives way to gooey, cheesy goodness, all while being a fun meal solution for busy nights. Ready to discover how to create these comforting delights? Let’s dive in!
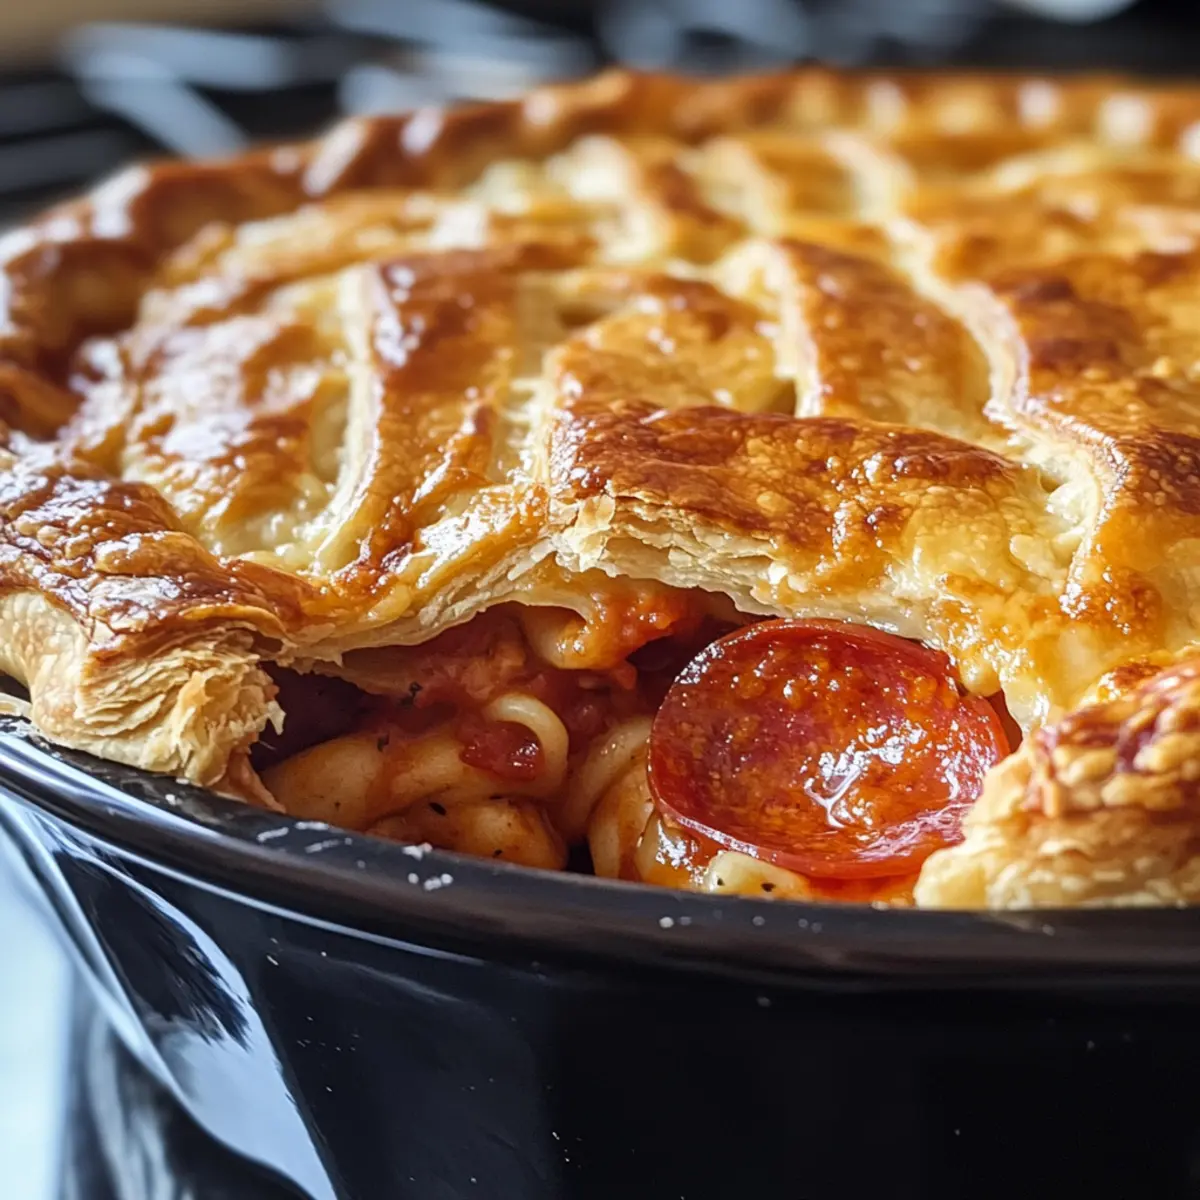
Why are Pizza Pot Pies a Must-Try?
Quick preparation: You can whip these up in just 30 minutes, making them perfect for busy weeknights.
Endless customization: Whether you’re a meat lover or vegetarian, you can tailor the filling to suit your cravings.
Crowd pleaser: Ideal for family dinners or gatherings, everyone will adore these flaky, cheesy treats.
Flavor explosion: The savory filling combined with the crispy crust delivers a delicious culinary experience with every bite.
Transform leftover ingredients into a delightful meal by checking out our Homemade Chicken Pot Pie Soup for more inspiration!
Pizza Pot Pies Ingredients
For the Filling
• Butter – Adds richness to the filling and enhances flavor.
• Olive Oil – Helps to brown the crust while adding a touch of healthy fat.
• Salt – Enhances the overall flavor of the dish.
• Garlic Powder – Infuses a savory aroma and taste.
• Italian Seasoning – Provides a blend of herbs for added depth of flavor.
• Black Pepper – Adds a mild heat that complements the other ingredients.
For the Crust
• Cooking Spray – Prevents sticking to the muffin tin.
• Refrigerated Biscuits – Serves as the crust, providing a tender and easy-to-work dough; can substitute with homemade dough or gluten-free crusts.
For the Filling Options
• Pasta Sauce – Acts as a flavorful base and moisture for the filling.
• Pepperoni – Offers a classic pizza flavor; can swap for cooked shredded chicken, veggies, or turkey.
• Shredded Mozzarella – The key cheese that melts well; combining with provolone or gouda can enhance richness and flavor.
With these Pizza Pot Pies ingredients, you’re on your way to creating a heartwarming dish that everyone will love!
Step‑by‑Step Instructions for Pizza Pot Pies
Step 1: Preheat the Oven
Start by preheating your oven to 350°F (175°C). While the oven is warming up, grease a muffin tin thoroughly with cooking spray to prevent the pizza pot pies from sticking. Ensure each cup is well coated, creating a non-stick surface that will allow the delightful crust to release easily after baking.
Step 2: Prepare the Butter Mixture
In a small bowl, combine the softened butter, olive oil, salt, garlic powder, Italian seasoning, and black pepper. Stir these ingredients well until they form a smooth mixture. This flavorful blend will enhance the taste of your pizza pot pies, especially as you brush it over the crust later in the process.
Step 3: Form the Biscuit Crusts
Take each refrigerated biscuit and press it into one of the muffin tin cups, creating a crust that shapes to the sides. Make sure to stretch it slightly so it goes up the edges. After shaping the crusts, prick the bottom of each biscuit with a fork to avoid bubbling during baking.
Step 4: Brush with Butter Mixture and Sauce
Using a pastry brush, gently apply the butter mixture you prepared earlier to the inside of each biscuit crust. This adds flavor and helps achieve a golden finish. Next, add a spoonful of pasta sauce to each crust, spreading it evenly to create a flavorful base for your pizza pot pies.
Step 5: Layer the Fillings
Begin layering your pizza pot pie with shredded mozzarella cheese and slices of pepperoni. Feel free to get creative with your toppings! For added flavor, you can create multiple layers or swap out ingredients for your favorites, such as veggies or chicken. Ensure that the filling is well-packed, but don’t overfill to prevent spillage.
Step 6: Bake the Pizza Pot Pies
Place the muffin tin in your preheated oven and bake the pizza pot pies for 20 to 23 minutes. Keep an eye on them—you’re looking for a golden-brown crust that’s flaky and a filling that’s bubbling with melted cheese. The delightful aroma should fill your kitchen by now!
Step 7: Cool and Serve
Once baked, carefully remove the tin from the oven using oven mitts. Allow the pizza pot pies to cool for a few minutes before attempting to remove them from the muffin tin. This will help set the filling. Then, gently lift each pot pie out and serve them hot, delighting in your homemade comfort food creation!

Pizza Pot Pies Variations and Substitutions
Feel free to put your own spin on these delightful Pizza Pot Pies—they are a canvas for your culinary creativity!
- BBQ Chicken: Swap in cooked BBQ chicken and sauce for a smoky twist that adds depth to the filling.
- Vegetarian Delight: Replace pepperoni with sautéed veggies like bell peppers, mushrooms, and zucchini for a colorful, meatless option.
- Gluten-Free: Use gluten-free refrigerated biscuits or a homemade gluten-free crust to accommodate dietary needs without compromising taste.
- Cheesy Spinach: For a lighter option, replace the traditional cheese with ricotta and fresh spinach, creating a creamy, indulgent filling.
- Mexican Flair: Add black beans, corn, and taco seasoning for a fun fusion twist that’s bursting with flavor—don’t forget the avocado for topping!
- Spicy Kick: Incorporate jalapeños or crushed red pepper flakes into the filling for those who enjoy a little heat to their comforting meal.
- Herb-Infused: Toss in fresh herbs like basil or oregano for a fresh garden flavor that enhances the traditional pizza taste. It makes each bite refreshing!
- Mini Beef Pies: Want to explore more options? Try making mini beef pies by using ground beef as the main filling—perfect for satisfying hearty appetites.
If you’re curious about different toppings that make for cozy meals, check out the Crispy Mini Beef Pies for another delightful option! These variations ensure your Pizza Pot Pies can accommodate everyone at the table, making them the ultimate comfort food!
Make Ahead Options
These Pizza Pot Pies are a fantastic meal prep option for busy cooks looking to save time on weeknights! You can prep the filling (including the pasta sauce, meats, and cheeses) up to 3 days in advance, storing it in an airtight container in the refrigerator. For the crust, you can also form the biscuit bases and place them in the muffin tin ahead of time; just cover with plastic wrap to prevent drying out—this can be done 24 hours before baking. When you’re ready to serve, simply layer the prepped fillings into the crusts, bake them at 350°F for 20-23 minutes, and you’ll have delicious, homemade comfort food that’s just as delightful as if it were made fresh!
How to Store and Freeze Pizza Pot Pies
Room Temperature: Keep the Pizza Pot Pies out for up to 2 hours to enjoy right after baking, but be mindful of food safety.
Fridge: Store any leftovers in an airtight container for up to 3 days. Make sure the pies are completely cooled before sealing to maintain texture.
Freezer: Freeze unbaked Pizza Pot Pies wrapped in plastic wrap and aluminum foil for up to 3 months. This way, you’ll always have a quick meal ready!
Reheating: To reheat, thaw overnight in the fridge and bake in a preheated oven at 350°F for about 20 minutes, until heated through and the crust is golden again.
Expert Tips for Pizza Pot Pies
-
Pre-Cook Ingredients: Sauté vegetables or meats before adding them to avoid a soggy crust and maximize flavor.
-
Don’t Overfill: Stick to filling each pot pie about ¾ full; this prevents spillage while baking and keeps everything tidy.
-
Use Quality Cheese: Opt for high-quality mozzarella or a blend to elevate the flavor profile. Cheaper cheeses may not melt as well.
-
Perfect Your Tools: Invest in a good muffin tin; a non-stick version ensures easy release and even baking for your pizza pot pies.
-
Experiment with Flavors: Don’t be afraid to mix up your fillings. Use the basic pizza flavors as a starting point—it’s your kitchen, so have fun!
What to Serve with Quick & Easy Pizza Pot Pies
For a cozy dinner that brings warmth and satisfaction, consider these delightful pairings that elevate your pizza pot pies experience.
- Simple Side Salad: A mix of fresh greens with a tangy vinaigrette provides a refreshing contrast to the rich, cheesy pot pies.
- Garlic Breadsticks: Crispy on the outside and soft inside, these will soak up any delicious sauce while adding to the comfort factor.
- Steamed Veggies: Bright-colored veggies like broccoli or carrots add nutrition and a pop of color to your meal—plus they’re easy to prepare!
- Fruit Chutney: A sweet and tangy fruit chutney brings a burst of flavor that complements the savory pot pies and refreshes the palate.
- Creamy Coleslaw: Its cool, creamy texture balances the warm pies, making it a comforting but crunchy addition to your dinner spread.
- Sparkling Water with Lemon: A fizzy drink with a slice of lemon refreshes the senses and offers a light touch to your hearty meal.
- Chocolate Mousse: Finish on a sweet note! This light, airy dessert gives a delightful end to your pizza pot pie dinner without being overly heavy.
Pairing these delightful options with your Pizza Pot Pies creates a joyous, heartwarming meal that everyone will enjoy!

Pizza Pot Pies Recipe FAQs
What kind of biscuits should I use for the crust?
For the crust, I recommend using refrigerated biscuits as they are quick, easy, and create a tender base. If you’re looking for a gluten-free option, you can substitute with a gluten-free pie crust. Alternatively, homemade biscuit dough can also work wonders!
How do I store leftover Pizza Pot Pies?
Store any leftover Pizza Pot Pies in an airtight container in the refrigerator for up to 3 days. Make sure they are cooled completely before sealing them to maintain the best texture. For optimal freshness, try to enjoy them within a couple of days!
Can Pizza Pot Pies be frozen?
Absolutely! You can freeze unbaked Pizza Pot Pies. Just wrap them tightly in plastic wrap and then in aluminum foil to prevent freezer burn. They can be stored this way for up to 3 months. When you’re ready to enjoy them, thaw overnight in the refrigerator and bake them as directed.
What can I do if the crust is soggy after baking?
If your crust turns out soggy, it’s likely due to too much moisture in the filling. Always pre-cook vegetables and meat to reduce moisture, and don’t overfill your pies—stick to about ¾ full. Baking them longer until the top is golden and the cheese is bubbling will also help!
Are there dietary considerations I should keep in mind?
Yes! If you or someone you’re serving has allergies, remember that the recipe includes common allergens like gluten (in the biscuits) and dairy (in the cheese). Always check labels for gluten-free options or dairy substitutes if needed. For a family pet, avoid giving them ingredients like garlic or onions, as they can be harmful.
Can I make these Pizza Pot Pies ahead of time?
Certainly! You can prepare the filling ahead of time and store it in the fridge for up to 2 days. Assemble the pot pies just before baking. Alternatively, prep and freeze them unbaked; this way, you’ll have a quick meal option ready when you need it!

Savory Pizza Pot Pies: Quick Comfort for Cozy Nights
Ingredients
Equipment
Method
- Preheat your oven to 350°F (175°C) and grease a muffin tin with cooking spray.
- In a small bowl, combine softened butter, olive oil, salt, garlic powder, Italian seasoning, and black pepper.
- Press each refrigerated biscuit into a muffin tin cup to form a crust.
- Brush the inside of each biscuit crust with the butter mixture and add a spoonful of pasta sauce.
- Layer shredded mozzarella cheese and pepperoni, ensuring to pack the filling without overfilling.
- Bake for 20 to 23 minutes until the crust is golden-brown and the filling is bubbly.
- Allow to cool for a few minutes before removing from the muffin tin and serve hot.