

Introduction to Red, White, and Blue Dirt Cups
There’s something magical about desserts that bring a splash of color and a burst of flavor to the table. Red, White, and Blue Dirt Cups are just that! These delightful treats are not only visually appealing but also incredibly easy to whip up. Whether you’re celebrating a holiday or just want to impress your loved ones, this no-bake dessert is a quick solution for a busy day. With layers of chocolate cookies, creamy pudding, and fresh berries, it’s a sweet way to show your patriotic spirit while satisfying your sweet tooth.
Why You’ll Love This Red, White, and Blue Dirt Cups
These Red, White, and Blue Dirt Cups are a game-changer for any dessert lover. They come together in just 15 minutes, making them perfect for those last-minute gatherings. The combination of rich chocolate, creamy vanilla, and fresh berries creates a flavor explosion that’s hard to resist. Plus, they’re a hit with both kids and adults, ensuring everyone leaves the table with a smile. What’s not to love?
Ingredients for Red, White, and Blue Dirt Cups
Gathering the right ingredients is the first step to creating these delightful Red, White, and Blue Dirt Cups. Here’s what you’ll need:
- Chocolate sandwich cookies: These provide a rich, crunchy base that mimics dirt, adding a fun twist to your dessert.
- Vanilla pudding: Creamy and smooth, this layer brings a sweet contrast to the chocolate cookies.
- Whipped topping: Light and airy, it adds a fluffy texture that balances the denser layers.
- Strawberries: Fresh and juicy, they add a vibrant red color and a burst of sweetness.
- Blueberries: These little gems not only enhance the patriotic theme but also provide a tangy flavor.
- Fresh mint leaves (optional): A touch of mint can elevate the presentation and add a refreshing note.
For those looking to make healthier choices, consider substituting the vanilla pudding with Greek yogurt and using low-fat whipped topping. You can also customize the fruit layers by adding raspberries or using other seasonal berries for a different flavor profile. The exact quantities for each ingredient are available at the bottom of the article for easy printing.
How to Make Red, White, and Blue Dirt Cups
Creating these Red, White, and Blue Dirt Cups is a breeze! Follow these simple steps, and you’ll have a stunning dessert ready in no time. Let’s dive into the fun of layering and assembling this delightful treat!
Step 1: Prepare the Cookie Base
Start by crushing the chocolate sandwich cookies. You can place them in a zip-top bag and use a rolling pin to smash them into fine crumbs. Alternatively, a food processor works wonders for this task. Once you have a nice, crumbly texture, set the cookie base aside. This will be the foundation of your dessert, adding that delicious crunch!
Step 2: Mix the Pudding and Topping
In a medium bowl, combine the vanilla pudding and whipped topping. Use a spatula or whisk to mix them together until the mixture is smooth and creamy. This step is crucial, as it creates the luscious layer that balances the crunch of the cookies. Make sure there are no lumps; you want it silky and inviting!
Step 3: Layer the Ingredients
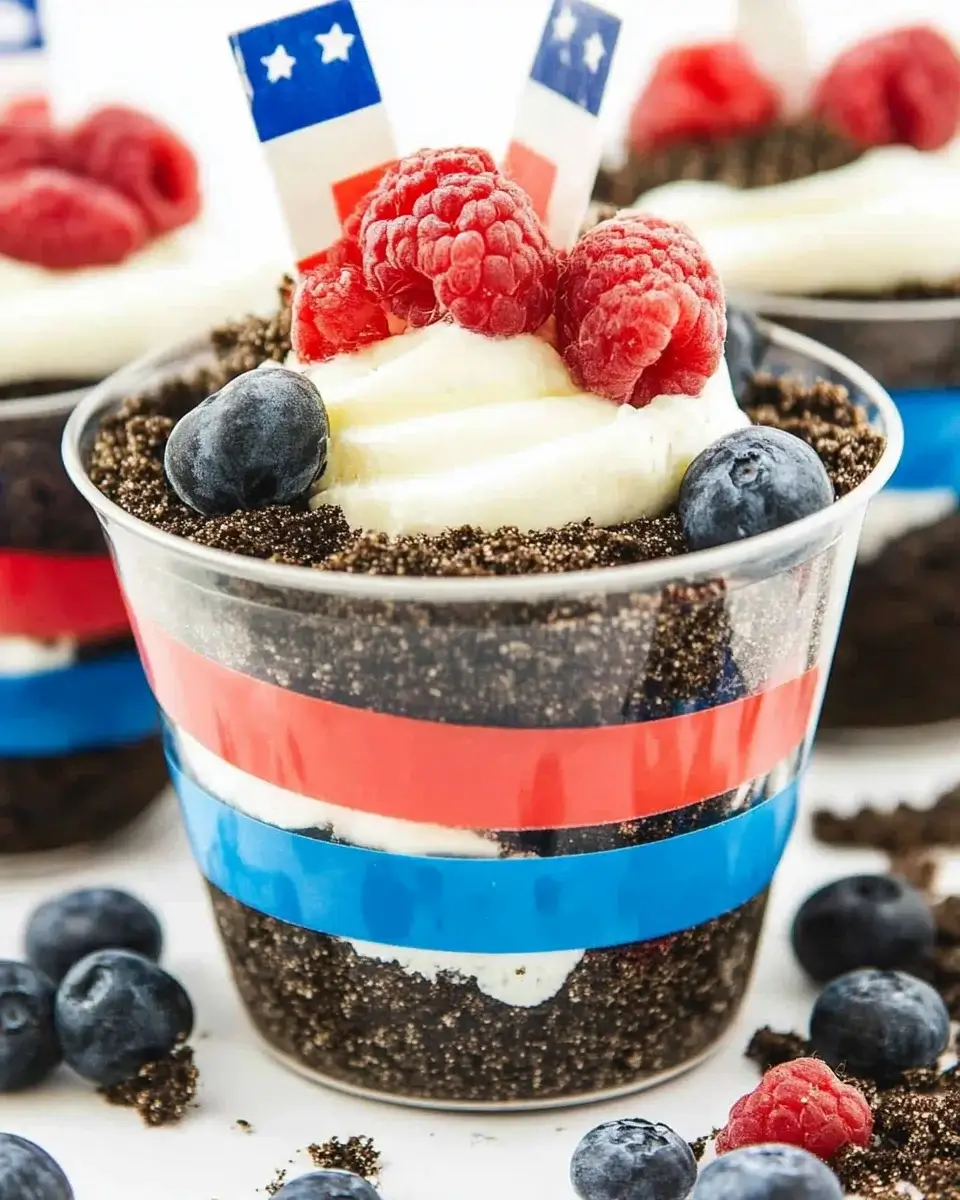
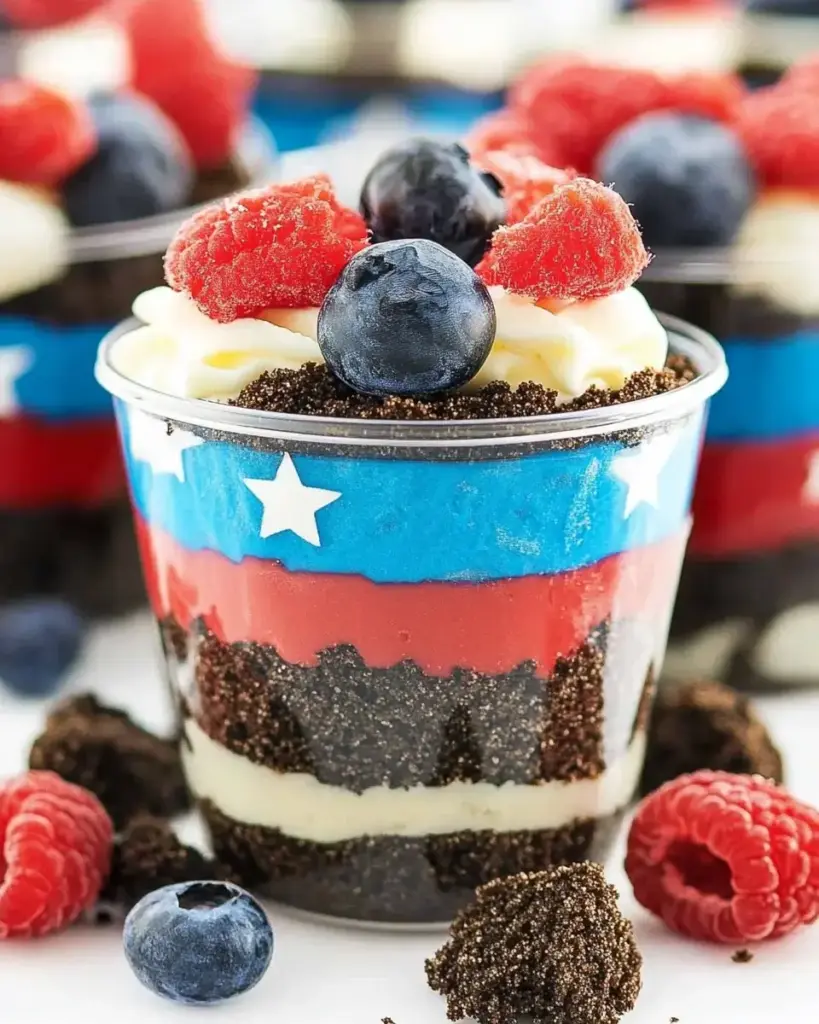
Grab your serving cups or bowls and start layering! Begin with a generous spoonful of the crushed cookie mixture at the bottom. This will be your first layer, setting the stage for the creamy goodness to come. Spread it evenly, creating a solid base for the next layer.
Step 4: Add the Fresh Fruits
Now it’s time to add some color! Spoon a layer of the creamy pudding mixture over the cookie base. Then, sprinkle diced strawberries and blueberries on top. The vibrant red and blue fruits not only enhance the patriotic theme but also add a refreshing burst of flavor. Don’t be shy—load them up!
Step 5: Repeat and Finish
Repeat the layering process until your cups are filled to the brim. Start with another layer of cookie crumbs, followed by more pudding, and finish with a final layer of whipped topping. For the crowning touch, sprinkle some crushed cookies on top. This adds a delightful crunch and makes your dessert look even more appealing!
Step 6: Chill Before Serving
Once your cups are assembled, it’s time to let them chill. Place them in the refrigerator for at least 30 minutes. This step is essential as it allows the flavors to meld together beautifully. Plus, it makes the dessert refreshingly cool, perfect for warm days!
Tips for Success
- Use a food processor for quick cookie crushing; it saves time and effort.
- Let the pudding mixture sit for a few minutes after mixing to thicken slightly.
- For a fun twist, try adding a layer of chocolate pudding for extra richness.
- Make ahead of time! These cups can be prepared a day in advance.
- Experiment with different fruits based on the season for variety.
Equipment Needed
- Mixing bowls: Essential for combining ingredients; any size will do.
- Spatula or whisk: Perfect for mixing the pudding and whipped topping.
- Zip-top bags or food processor: Use for crushing cookies easily.
- Serving cups or bowls: Choose your favorite for a fun presentation.
Variations
- Chocolate Pudding Layer: Swap out the vanilla pudding for chocolate pudding for a double chocolate delight.
- Greek Yogurt Substitute: Use Greek yogurt instead of vanilla pudding for a healthier, protein-packed option.
- Seasonal Fruits: Experiment with seasonal fruits like peaches or blackberries for a unique twist.
- Nutty Crunch: Add a layer of crushed nuts, like almonds or pecans, for an extra crunch and flavor.
- Dairy-Free Option: Use dairy-free whipped topping and pudding for a vegan-friendly dessert.
Serving Suggestions
- Pair with a refreshing lemonade or iced tea for a perfect summer treat.
- Serve alongside grilled burgers or hot dogs for a festive barbecue.
- Garnish with extra mint leaves for a pop of color and freshness.
- Use clear cups to showcase the beautiful layers of your dessert.
FAQs about Red, White, and Blue Dirt Cups
Can I make Red, White, and Blue Dirt Cups ahead of time?
Absolutely! These delightful cups can be prepared a day in advance. Just make sure to keep them covered in the refrigerator until you’re ready to serve. This allows the flavors to meld beautifully.
What can I substitute for chocolate sandwich cookies?
If you’re looking for alternatives, crushed graham crackers or even vanilla wafers can work well. They’ll give a different flavor but still provide that crunchy base.
How can I make these cups healthier?
For a healthier twist, swap the vanilla pudding for Greek yogurt and use low-fat whipped topping. You can also add more fresh fruits to boost the nutritional value.
Can I use frozen berries instead of fresh?
Yes, frozen berries can be used! Just make sure to thaw and drain them before adding to your cups to avoid excess moisture.
What’s the best way to serve these cups?
Serving them in clear cups showcases the beautiful layers. You can also garnish with fresh mint leaves or extra berries for a stunning presentation!
Final Thoughts
Creating Red, White, and Blue Dirt Cups is more than just making a dessert; it’s about crafting a joyful experience. Each layer tells a story, from the crunch of the cookies to the sweetness of the berries. These cups are perfect for gatherings, sparking conversations and smiles around the table. They remind us of summer celebrations, family barbecues, and the simple pleasure of sharing something delicious. So, whether you’re celebrating a holiday or just indulging in a sweet treat, these delightful cups are sure to bring a little extra joy to your day!
Red, White, and Blue Dirt Cups: Delightful Treats Await!
Ingredients
Method
- In a medium bowl, combine the crushed chocolate sandwich cookies and set aside.
- In another bowl, mix the vanilla pudding and whipped topping until well combined and smooth.
- In serving cups or bowls, layer the ingredients starting with a layer of the cookie mixture, followed by a layer of the pudding mixture.
- Add a layer of diced strawberries and blueberries on top of the pudding.
- Repeat the layers until the cups are filled, finishing with a layer of whipped topping and a sprinkle of crushed cookies on top.
- Garnish with fresh mint leaves if desired.
- Refrigerate for at least 30 minutes before serving to allow the flavors to meld.
Notes
- For a healthier option, substitute the vanilla pudding with Greek yogurt and use low-fat whipped topping.
- You can customize the fruit layers by adding raspberries or using other seasonal berries for a different flavor profile.