

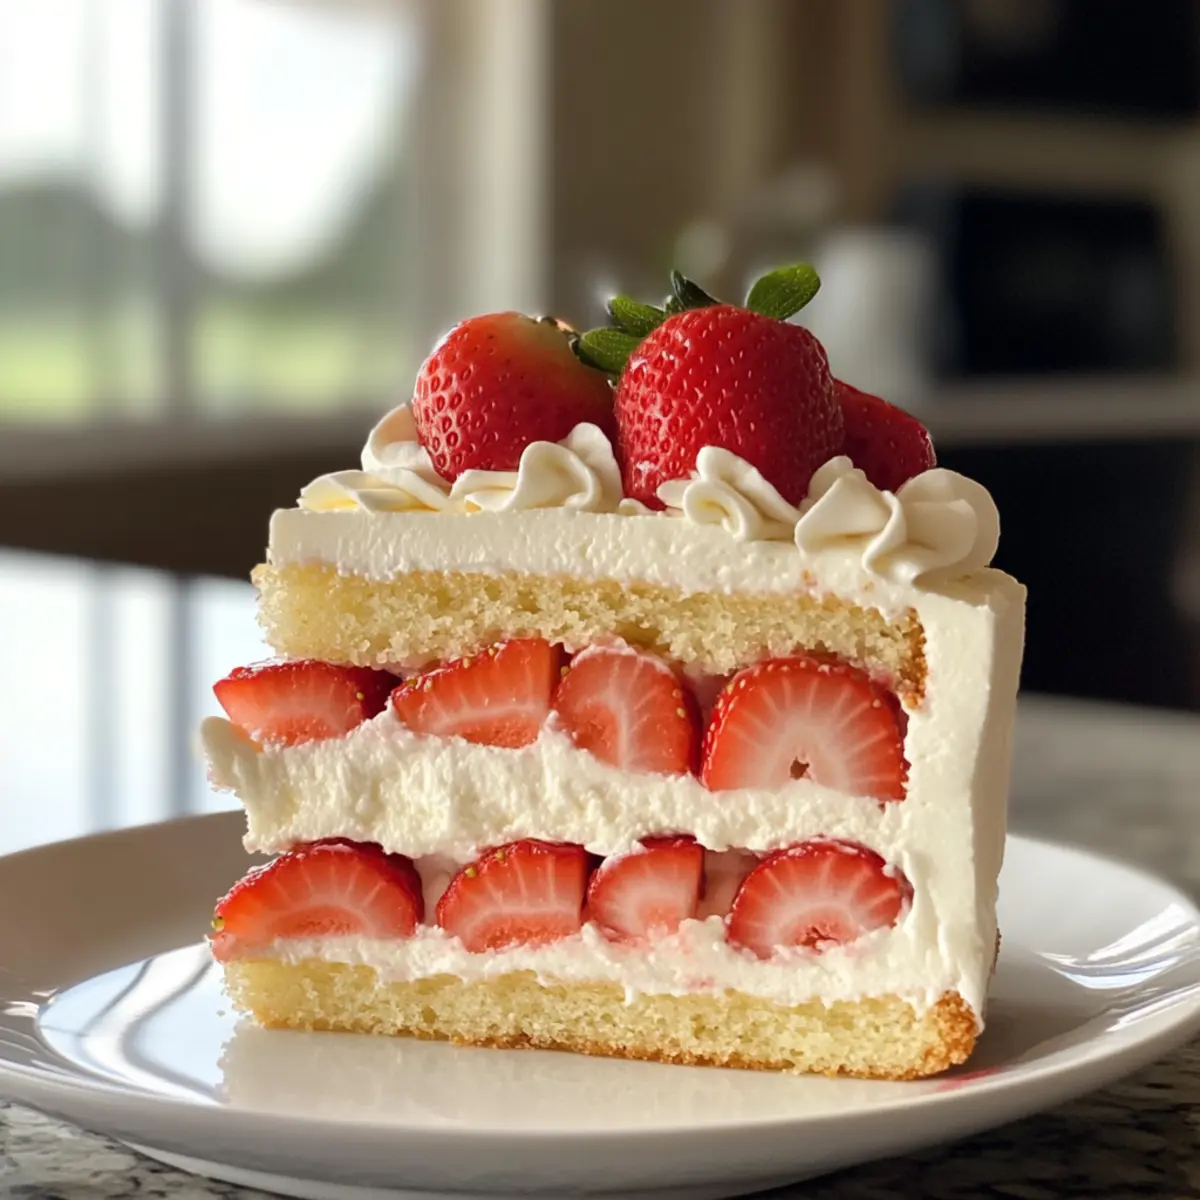
As I stood in my kitchen, the summer sun streaming through the window, the sweet aroma of strawberries called to me. It was the perfect moment for a Strawberry Shortcake Layered Slice—my go-to dessert for any gathering. This easy and family-friendly recipe beautifully captures the essence of summer with its soft vanilla cake, juicy strawberries, and fluffy whipped cream. With just a few simple steps, you can create a stunning dessert that not only impresses guests but also satisfies those cravings for homemade goodness. Imagine serving up each slice, revealing layers of happiness that’s perfect for both casual family dinners and festive celebrations. Curious how this delightful creation comes together? Let’s dive into the recipe!
Why is this recipe a summer favorite?
Simplicity at Its Best: Making the Strawberry Shortcake Layered Slice is a breeze, only requiring basic baking skills and readily available ingredients.
Flavor Explosion: The vibrant combination of fresh, juicy strawberries, fluffy whipped cream, and moist vanilla cake creates a flavor profile that sings of summer.
Crowd-Pleasing Delight: Ideal for gatherings, this dessert never fails to impress family and friends with its beautiful presentation and delightful taste.
Versatile Options: Feel free to swap in different berries or even a layer of lemon curd for a zesty twist, making it adaptable for any palate.
Quick Chill Time: With a chill in the fridge, your masterpiece is ready in no time, making it a perfect last-minute dessert to tantalize your guests.
So, whether you’re looking for a tasty treat for a family dinner or a show-stopping dessert for a celebration, this Strawberry Shortcake Layered Slice is the answer! Don’t forget to check out my delicious Strawberry Cheesecake Dump for another fruity delight!
Strawberry Shortcake Layered Slice Ingredients
• Here’s everything you need to create this summer delight!
For the Cake
- All-Purpose Flour – Provides structure to the cake layer; can be substituted with gluten-free flour for a gluten-free version.
- Granulated Sugar – Adds sweetness to both the cake and strawberries; use brown sugar for a deeper flavor experience.
- Baking Powder – The leavening agent that gives the cake its rise; no substitutes are recommended here.
- Salt – Enhances the flavors and balances the sweetness; sea salt or kosher salt will work well.
- Unsalted Butter – Adds moisture and richness; substitute with vegetable oil for a dairy-free alternative.
- Eggs – Binds ingredients together and adds moisture; for a vegan option, use 1/4 cup applesauce per egg.
- Milk – Keeps the cake moist; for dairy-free, almond or soy milk are great substitutes.
- Vanilla Extract – Boosts the flavor of the cake; almond extract can offer a unique twist.
For the Strawberries
- Fresh Strawberries – The star ingredient that provides natural sweetness; feel free to mix in other berries seasonally.
- Granulated Sugar for Strawberries – Helps draw out the juicy sweetness from the strawberries.
For the Whipped Cream
- Heavy Whipping Cream – Creates a decadent fluffy topping; coconut cream is a fantastic sub for a dairy-free option.
- Powdered Sugar – Sweetens and stabilizes the whipped cream for that perfect texture.
Now you are all set to create a Strawberry Shortcake Layered Slice that bursts with summer flavors!
Step‑by‑Step Instructions for Strawberry Shortcake Layered Slice
Step 1: Preheat the Oven
Begin by preheating your oven to 350°F (175°C). While it’s warming up, prepare a 9×13 inch baking pan by lining it with parchment paper, ensuring that it covers the bottom and sides. This will prevent the cake from sticking and make it easier to remove once baked.
Step 2: Mix the Dry Ingredients
In a large mixing bowl, combine 2 cups of all-purpose flour, 1 cup of granulated sugar, 1 tablespoon of baking powder, and a pinch of salt. Use a whisk to ensure everything is evenly distributed. The dry mixture should appear light and fluffy, creating a solid base for your Strawberry Shortcake Layered Slice.
Step 3: Prepare the Wet Ingredients
In another bowl, whisk together 1/2 cup of melted unsalted butter, 2 large eggs, 1 cup of milk, and 1 teaspoon of vanilla extract. Mix until smooth and homogenous. The wet ingredients should create a silky texture, which will keep your cake moist and flavorful.
Step 4: Combine Wet and Dry Mixtures
Pour the wet mixture into the bowl with the dry ingredients and gently fold them together. Stir just until there are no visible dry spots, being careful not to overmix. You’ll want a smooth batter that has a slightly thick consistency, perfect for your delightful layered slice.
Step 5: Bake the Cake
Pour the batter into the prepared baking pan, spreading it evenly. Slide the pan into the preheated oven and bake for 20 to 25 minutes, or until the top is golden and a toothpick inserted in the center comes out clean. The cake should be lightly springy to the touch when done.
Step 6: Cool the Cake
Once baked, remove the cake from the oven and let it cool in the pan for about 10 minutes. After that, transfer it to a wire rack to cool completely. This is crucial for ensuring the layers hold up when you assemble your Strawberry Shortcake Layered Slice.
Step 7: Prepare the Strawberries
While the cake cools, wash and slice 2 cups of fresh strawberries. In a bowl, sprinkle them with 1/4 cup of granulated sugar and gently toss to coat. Let the strawberries sit for about 10 minutes; this process enhances their natural juices, creating a sweet topping for your dessert.
Step 8: Whip the Cream
In a chilled bowl, add 1 cup of heavy whipping cream and 1/4 cup of powdered sugar. Using an electric mixer, whip the cream on medium-high speed until soft peaks form, which should take about 3-5 minutes. The whipped cream will be fluffy and stable, perfect for layering.
Step 9: Assemble the Layers
Once the cake has cooled completely, spread a thick layer of whipped cream over the top of it. Use an offset spatula for smoothness. Then, evenly distribute the macerated strawberries and their juices on top of the whipped cream, creating that beautiful contrast in your Strawberry Shortcake Layered Slice.
Step 10: Chill and Slice
Finally, place the assembled cake in the refrigerator for at least 30 minutes to chill. This will help set the layers and meld the flavors together. Once chilled, slice the cake into squares and serve, revealing the delightful strawberry and cream layers. Enjoy!
Make Ahead Options
Making the Strawberry Shortcake Layered Slice is a breeze and is perfect for meal prep! You can prepare the cake itself up to 24 hours in advance, allowing you to focus on fresh strawberries and whipped cream later. Simply bake and cool the cake, then wrap it tightly in plastic wrap to keep it moist. The strawberries can be sliced and tossed with sugar up to 3 days ahead; just store them in an airtight container in the refrigerator to prevent browning. When you’re ready to serve, whip the heavy cream and layer it over the chilled cake with strawberries, creating a delightful dessert that’s just as delicious, all while saving you precious time during busy weeknights!
Strawberry Shortcake Layered Slice Variations
Feel free to sprinkle some creativity into this delightful recipe and make it your own!
- Berry Blend: Mix in blueberries or raspberries for a colorful, fruity twist that adds layers of flavor. Each bite takes you on a berry adventure!
- Lemon Curd Layer: Add a tart layer of lemon curd between the cake and cream for an exciting zesty contrast to the sweetness. It’s a delightful balance that wakes up your taste buds!
- Minty Freshness: Incorporate finely chopped fresh mint into the whipped cream for a refreshing burst with every bite. It elevates the flavor to a whole new level!
- Chocolate Drizzle: Drizzle melted dark chocolate over the whipped cream for a rich finish. Imagine the perfect sweet harmony of chocolate and strawberries!
- Peachy Addition: Slice some fresh peaches and mix them in with the strawberries for a delightful stone fruit combo that captures summer’s essence.
- Spiced Up Cream: Add a hint of cinnamon or nutmeg to the whipped cream for a warm, cozy twist that gives a unique depth of flavor to your layers.
- Flavored Extracts: Swap vanilla extract for almond or coconut extract for a surprising flavor note that transforms your cake effortlessly.
- Nutty Crunch: Sprinkle crushed nuts, like almonds or pistachios, on top of the strawberry layer for added texture and a beautiful crunch.
As you explore these variations, don’t miss out on my scrumptious Strawberry Cheesecake Dump for more ways to celebrate the flavors of summer! Your kitchen is your canvas; enjoy creating your ultimate strawberry delight!
Expert Tips for Strawberry Shortcake Layered Slice
• Choose Ripe Strawberries: Use the sweetest, ripest strawberries for the best flavor and natural sweetness, ensuring your dessert shines.
• Cool Completely: Allow the cake to cool completely before assembling; this prevents sogginess and keeps each slice perfect.
• Chill Before Serving: Refrigerate the assembled dish for at least 30 minutes to solidify layers and improve presentation.
• Whip Cream Properly: Whip your heavy cream to soft peaks, as over-whipping can turn it grainy. This keeps your cream fluffy in the Strawberry Shortcake Layered Slice.
• Avoid Overmixing: When combining wet and dry ingredients, stir just until blended to maintain a light cake texture.
How to Store and Freeze Strawberry Shortcake Layered Slice
Fridge: Keep leftover Strawberry Shortcake Layered Slice in an airtight container for up to 2 days to maintain freshness and prevent drying out.
Freezer: It’s best not to freeze this dessert, as freezing can compromise the fluffy texture of the whipped cream and cake layers, leading to a less enjoyable dessert.
Reheating: If serving slightly chilled, feel free to let it sit at room temperature for 10-15 minutes before serving for a deliciously creamy taste.
Assembly Tip: To maintain the best flavor and texture, always assemble the layers just before serving, ensuring each slice is as delightful as the first!
What to Serve with Strawberry Shortcake Layered Slice
Indulging in a slice of this delightful dessert opens up a world of delicious pairings that elevate your summer dining experience.
- Fresh Mint Leaves: A light garnish of mint adds a refreshing touch, brightening the flavors of sweet strawberries and cream.
- Vanilla Ice Cream: Serving a scoop of creamy vanilla alongside balances the airy cake, adding a cool, decadent contrast that’s oh-so-satisfying.
- Lemon Sorbet: For a zesty twist, a scoop of lemon sorbet brings a tangy freshness that cuts through the sweetness beautifully.
- Lemonade Spritzer: A bubbly lemonade with a hint of mint serves as a refreshing beverage, perfectly complementing the cake’s lightness.
- Crispy Almond Biscotti: The crunch of almond biscotti creates a lovely texture contrast to the fluffy layers, enhancing every bite with a nutty flavor.
- Grilled Peaches: Juicy, caramelized peaches add a smoky sweetness that pairs well with the cake, creating a warm and inviting dessert combo.
Whether you’re relishing a family meal or hosting friends, these pairings beautifully enhance the enjoyment of your Strawberry Shortcake Layered Slice!
Strawberry Shortcake Layered Slice Recipe FAQs
What should I look for when selecting strawberries?
Absolutely! When choosing strawberries, look for bright red berries with a fresh green cap. Avoid any with dark spots or mold, as these could indicate overripeness. Ripe strawberries will feel firm but not too hard, and they should have a sweet aroma. The sweeter the strawberries, the more delightful your Strawberry Shortcake Layered Slice will be!
How should I store leftovers?
Very! Leftover Strawberry Shortcake Layered Slice can be stored in an airtight container in the refrigerator for up to 2 days. To preserve its freshness, it’s best to keep it away from moisture and other foods to avoid flavor transfer. Enjoy within this timeframe for the best taste!
Can I freeze this dessert?
While you might be tempted, I recommend avoiding freezing this dessert. The whipped cream and cake can lose their fluffy texture when frozen, leading to a soggy result upon thawing. If you do want to prepare it ahead of time, consider making just the cake and the strawberries, then assemble with whipped cream fresh before serving.
What can I do if my whipped cream isn’t thickening?
Not to worry! If your whipped cream isn’t thickening, ensure your heavy whipping cream is very cold, as warmth affects the whipping process. You can add a bit of powdered sugar or a stabilizer like cornstarch to help it thicken. Whip on medium-high speed and keep an eye on it as you approach soft peaks—stop whipping once it reaches that stage to avoid a grainy texture.
What should I do if someone has a dairy allergy?
Great question! For a delicious dairy-free version of the Strawberry Shortcake Layered Slice, simply substitute all dairy products with alternatives. Use almond or soy milk instead of regular milk, replace heavy whipping cream with coconut cream or a non-dairy whipped topping, and opt for vegetable oil in place of butter. You’ll still get that refreshing summer taste without the dairy!
Delightful Strawberry Shortcake Layered Slice for Summer Bliss
Ingredients
Equipment
Method
- Preheat your oven to 350°F (175°C) and prepare a 9x13 inch baking pan with parchment paper.
- In a large mixing bowl, combine all-purpose flour, granulated sugar, baking powder, and salt; whisk until fluffy.
- In another bowl, whisk together melted unsalted butter, eggs, milk, and vanilla extract until smooth.
- Pour the wet mixture into the dry ingredients and fold together until just combined.
- Pour batter into the prepared pan and bake for 20-25 minutes until golden and a toothpick comes out clean.
- Cool in the pan for 10 minutes, then transfer to a wire rack to cool completely.
- Wash and slice fresh strawberries; sprinkle with granulated sugar and let sit for 10 minutes.
- Whip heavy cream with powdered sugar until soft peaks form.
- Spread whipped cream over the cooled cake, then layer with strawberries.
- Chill the assembled cake in the refrigerator for at least 30 minutes before slicing and serving.