Some desserts are more than just sweets — they’re little moments of joy baked into every bite. I still remember the first time I pulled a bubbling Strawberry Rhubarb Pie out of the oven, its sweet-tart aroma filling the kitchen like a hug from summer.
Since then, I’ve been hooked on homemade dessert recipes that strike the perfect balance between comfort and creativity — whether it’s a rustic Summer Berry Galette, a colorful Rainbow Cupcake, or the creamy magic of Ube Tiramisu.
This collection brings together 10 must-try dessert ideas that range from nostalgic classics to bold flavor fusions. Whether you’re baking for a party, a cozy night in, or just to satisfy that chocolate craving, you’ll find something sweet to love here.
Some meals do more than just fill you up — they take you back. Back to your grandmother’s kitchen, to winter nights warmed by casserole dishes, to the simple joy of a cheesy zucchini pancake sizzling on the stove.
For me, these recipes are memories on a plate. Whether it’s the creamy beef stroganoff my mom made on cold evenings, the spiced potato bake we shared every Sunday, or the zucchini pizza that finally made veggies lovable, every dish in this collection holds a story — and a whole lot of comfort.
This post is a tribute to easy, cozy, and satisfying meals — recipes that are rich in flavor but light on stress. From high-protein chicken chow mein for busy weeknights to broccoli mushroom casseroles that bring everyone to the table, these are my go-to dishes when I want something warm, hearty, and soul-soothing.
There was a time when breakfast in my house meant cold cereal and chaos. Between getting the kids ready and rushing out the door, it felt easier to skip it altogether. But everything changed the day I sat down with a warm slice of cinnamon rhubarb bread and realized — a good morning starts with a good meal.
Since then, I’ve been on a mission to find easy, healthy breakfast recipes that actually fit into real life. No complicated steps, no fancy ingredients — just simple, nourishing food that brings comfort and energy to busy mornings.
In this post, I’m sharing 10 breakfast recipes that saved my mornings — from savory lentil bakes to sweet banana muffins, oatmeal pancakes, and even a cheesy stuffed bread that became an instant family favorite. These are the meals that made me fall back in love with breakfast — and they might just do the same for you.
Growing up, the kitchen was always the heart of our home. My mother, a culinary wizard, would often prepare desserts that seemed magical in their simplicity and elegance. Among the many sweet treats that graced our family table, one stands out like a beacon of comfort and nostalgia: the No-Bake Biscuit Pudding Cake with Vanilla and Chocolate Custard Cream.
It wasn’t just the taste that made this dessert special, but the moments shared around the table. I remember sitting on the kitchen counter, watching my mother whip up the creamy custards, layering them over crispy biscuits. The whole house would fill with the warm, sweet aroma as the custard set in the fridge, and we’d eagerly await the moment we could slice into the cool, silky layers. This was our go-to dessert for birthdays, family gatherings, and even lazy Sunday afternoons. It was a dish that required no oven, yet delivered indulgence in every bite.
As I grew older and started making it myself, I realized how easy it was to recreate those cherished memories. The simplicity of the ingredients, the ease of preparation, and the rich flavor combinations made it a perfect recipe to pass down—just as it had been passed down to me. This No-Bake Biscuit Pudding Cake became my personal tribute to the memories of family and love. It’s a dessert that not only fills the stomach but also fills the heart, offering a sense of nostalgia with each forkful.
For me, this dessert represents more than just food. It’s a celebration of the little things in life, the moments that often go unnoticed but are, in reality, the most precious. Whether you’re making it for a special occasion or simply to enjoy during a quiet evening, this No-Bake Biscuit Pudding Cake brings people together. It’s the kind of dessert that turns an ordinary meal into an extraordinary experience—one that will be remembered and savored.
The Magic of No-Bake Desserts: Why This Pudding Cake Is Perfect for Any Occasion
No-bake desserts are a lifesaver in many kitchens. Whether it’s a busy weeknight or a spontaneous gathering with friends, having a dessert that doesn’t require the oven is a true game-changer. The No-Bake Biscuit Pudding Cake with Vanilla and Chocolate Custard Cream is a prime example of how simplicity can lead to extraordinary results. With just a few staple ingredients and minimal effort, you can create a dessert that’s not only delicious but also visually appealing.
One of the best things about no-bake desserts is their versatility. The base for this pudding cake can be tailored to suit your tastes. While the recipe calls for biscuits, you could easily swap them for other types of cookies or even cake layers. The custards themselves are creamy and rich, but they’re also adaptable. You can infuse different flavors into the vanilla custard or add more cocoa powder to the chocolate custard for a more intense flavor. No-bake desserts allow you to experiment and personalize, making them a perfect choice for those who love to get creative in the kitchen.
Additionally, no-bake desserts are perfect for the warmer months when the last thing you want to do is turn on the oven. The No-Bake Biscuit Pudding Cake is served chilled, making it the ideal treat for a hot summer evening, a picnic, or even an afternoon tea. It’s refreshing, light, and indulgent all at once.
Ingredients
Ingredient
Quantity
For the Vanilla Custard
Chicken egg yolks
3
Sugar
80g (1/3 cup)
Milk
400ml (1 2/3 cups)
Corn starch
30g (1/4 cup)
Vanilla extract
1 tsp
For the Chocolate Custard
Chicken egg yolks
3
Sugar
80g (1/3 cup)
Milk
400ml (1 2/3 cups)
Corn starch
30g (1/4 cup)
Cocoa powder
40g (1/3 cup)
Directions
Make the Vanilla Custard: In a medium saucepan, whisk the egg yolks, sugar, corn starch, and vanilla extract together. Gradually add the milk, whisking continuously to prevent lumps. Cook over medium heat, stirring constantly, until the mixture thickens into a smooth custard. Once thickened, remove the saucepan from the heat and set the custard aside to cool.
Make the Chocolate Custard: In another saucepan, combine the egg yolks, sugar, and corn starch. Add the cocoa powder and whisk together until smooth. Gradually pour in the milk, whisking continuously. Cook over medium heat, stirring constantly, until the chocolate custard thickens and becomes smooth. Remove from heat and allow it to cool.
Assemble the Pudding Cake: Arrange a layer of biscuits in the bottom of a serving dish. Pour a generous portion of vanilla custard over the biscuits, spreading it evenly. Add another layer of biscuits on top, followed by the chocolate custard. Smooth the chocolate custard evenly over the biscuits.
Chill and Set: Place the assembled pudding cake in the refrigerator and let it chill for at least 4 hours, or overnight, to allow the custards to set and the biscuits to soften.
Serve and Enjoy: After the pudding cake has set, slice it into squares and serve chilled. Optionally, garnish with fresh berries or a dollop of whipped cream for an extra touch of elegance.
Nutritional Information (Per Serving)
Nutrient
Amount per Serving
Calories
350 kcal
Protein
6 g
Carbohydrates
45 g
Fat
15 g
Fiber
2 g
Sugars
25 g
Frequently Asked Questions (FAQs)
Can I make this pudding cake ahead of time? Absolutely! In fact, this dessert is best when made in advance. The longer it chills, the more the flavors meld together, and the biscuits soften, allowing the custards to soak in and create a beautifully creamy texture. For best results, prepare it the night before or at least 4 hours before serving.
Can I use a different type of biscuit or cookie? Yes! The beauty of this recipe is in its flexibility. While the traditional choice is a buttery biscuit, you can easily substitute with a variety of other cookies or biscuits. If you want a more intense flavor, consider using a chocolate biscuit or a spice cookie. Just make sure the biscuits are firm enough to hold their structure when layered with custard.
How can I make the dessert dairy-free? If you’re looking to make this pudding cake dairy-free, you can substitute the milk with almond milk, coconut milk, or any other plant-based milk of your choice. For the custards, replace the cream with a coconut-based alternative or a thickened almond milk mixture to maintain the creamy texture.
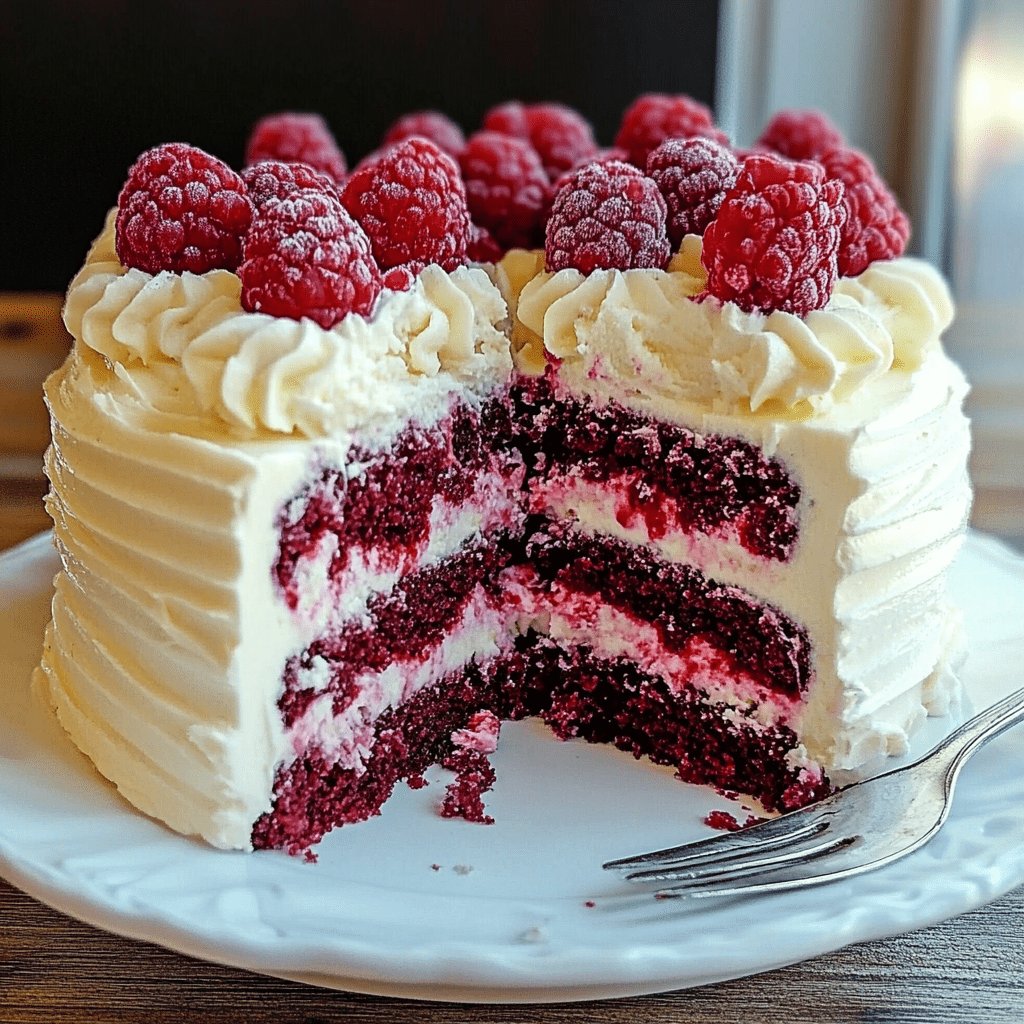
Can I add fruit to this pudding cake? Yes! Fresh berries such as raspberries, strawberries, or blueberries make a wonderful addition to this dessert. You can layer them between the biscuits or scatter them on top as a garnish. The freshness of the fruit balances out the richness of the custards beautifully.
How do I store leftovers? Leftovers should be covered and stored in the refrigerator. The dessert will keep for up to 3 days, though it is best eaten within 1-2 days for optimal flavor and texture. If you notice that the custard is starting to separate or the biscuits are too soft, give it a quick stir to re-incorporate everything, and it will still taste great.
Can I make this recipe gluten-free? Absolutely! To make this dessert gluten-free, use gluten-free biscuits or cookies. Many gluten-free varieties are available at your local grocery store, or you can make your own at home if you prefer. Just ensure that your custard ingredients are also gluten-free, which they typically are.
Why This Dessert Will Be Your New Favorite
Sometimes, the simplest desserts leave the biggest impression. The No-Bake Biscuit Pudding Cake with Vanilla and Chocolate Custard Cream is a prime example of how a few quality ingredients and a little creativity can result in a dessert that feels like a labor of love without requiring hours in the kitchen. Whether you’re preparing it for a celebration, a casual gathering, or just because you deserve a sweet treat, this dessert will quickly become your go-to.
It’s not just about satisfying a sweet tooth—it’s about creating a moment of joy, something that connects generations, that celebrates family traditions, and that invites you to slow down and enjoy the good things in life. When you make this pudding cake, you’re not just making a dessert—you’re creating a memory. You’re passing on a tradition that can be shared and savored for years to come, just as I did with my family.
Conclusion: A Dessert That Brings People Together
The No-Bake Biscuit Pudding Cake with Vanilla and Chocolate Custard Cream isn’t just a treat—it’s a celebration of simplicity and tradition. It’s a dessert that brings people together, whether you’re enjoying it with family, friends, or even on your own after a long day. With its creamy layers, rich flavors, and minimal preparation time, it’s the perfect sweet ending to any meal.
As I sit down with my family to enjoy this dessert, I’m reminded of the importance of the small moments that make life so special—the laughter shared over a meal, the joy of creating something together, and the sweet satisfaction of a well-loved recipe passed down through generations. This pudding cake is more than just a dessert; it’s a story that’s been told in every home, in every bite, and it will continue to be enjoyed for many years to come.
Whether you’re a novice in the kitchen or an experienced home cook, this recipe is guaranteed to impress. So next time you’re in need of a dessert that will wow your guests and delight your taste buds, remember this No-Bake Biscuit Pudding Cake. It’s the sweet, creamy dessert that never goes out of style.
Amal
No-Bake Biscuit Pudding Cake with Vanilla and Chocolate Custard Cream: A Dessert to Remember
This No-Bake Biscuit Pudding Cake with Vanilla and Chocolate Custard Cream is an indulgent yet easy-to-make dessert perfect for any occasion. Layers of buttery biscuits are soaked in smooth, creamy vanilla and chocolate custards, creating a luxurious treat that requires no oven. It’s a dessert that’s sure to impress and can be made ahead of time, making it ideal for a last-minute gathering or a cozy evening at home.
1package of biscuitsabout 250g, any variety you prefer
Fresh berriesoptional, for garnish
Method
Make the Vanilla Custard: In a saucepan, whisk together the egg yolks, sugar, corn starch, and vanilla extract. Slowly add the milk, whisking continuously to prevent lumps. Cook over medium heat, stirring constantly, until the custard thickens. Remove from heat and let cool.
Make the Chocolate Custard: In another saucepan, combine the egg yolks, sugar, corn starch, and cocoa powder. Gradually add the milk, whisking to combine. Cook over medium heat, stirring constantly, until the chocolate custard thickens. Remove from heat and let cool.
Assemble the Pudding Cake: In a serving dish, layer the biscuits at the bottom. Pour a generous amount of vanilla custard over the biscuits, smoothing it into an even layer. Add another layer of biscuits on top, then pour the chocolate custard over the biscuits, spreading it evenly.
Chill and Set: Refrigerate the dessert for at least 4 hours, or overnight, to allow the custards to set and the biscuits to soften.
Serve and Garnish: Once set, slice into squares and serve chilled. Optionally, garnish with fresh berries for an extra burst of flavor and color.
Notes
Make Ahead: This dessert is best when made ahead of time, allowing the custards to set and the flavors to develop. It can be prepared the day before and refrigerated overnight.
Customizable Layers: Feel free to swap the biscuits for cookies or a different type of cake. You can also add fruit between the layers for added freshness.
Dairy-Free Option: Use almond milk, coconut milk, or any other non-dairy milk to make this dessert dairy-free.
As a busy parent, professional, or simply someone trying to manage the hustle and bustle of daily life, the thought of preparing a nutritious and delicious dinner after a long day can often feel daunting. But I have a secret weapon that has been a lifesaver in my kitchen: the Veggie-Packed Scramble Delight. It’s not just another scramble – it’s a dish filled with warmth, comfort, and vibrant flavors that brings together a balance of fresh vegetables, savory ham, and creamy eggs. It’s a reminder that, even in the rush of life, we can create something wholesome and satisfying.
The first time I made this dish was on a chilly Wednesday evening when I had exactly 30 minutes to make dinner before my children’s extracurricular activities kicked off. I wanted something hearty enough to please their growing appetites, but quick enough to allow me some time to catch my breath. I rummaged through my fridge, grabbing whatever veggies I had left – bell pepper, mushrooms, carrots – and decided to throw them all together in a simple scramble. The result? A family favorite that has become part of our weekly dinner rotation. The vibrant colors, the creamy texture, and the delightful crunch of sautéed vegetables and ham made it clear that this dish was something special. Since that night, I’ve found myself making this Veggie-Packed Scramble Delight when I need a meal that brings joy to the table without taking hours to prepare.
Now, this recipe has become a tradition in our home, often serving as the perfect weeknight dinner that brings us together after a busy day. It’s a simple reminder that we can create something nutritious and delicious in a short amount of time – and it’s a perfect dish for those who want to enjoy comfort food without the heavy feeling afterward.
Why This Dish Works So Well for Busy Weeknights
There’s something about the combination of fluffy scrambled eggs, colorful veggies, and savory ham that makes this dish feel like a complete meal, even when you’re short on time. It’s not just a quick recipe; it’s a well-balanced one, too. Packed with protein, fiber, and vitamins, the Veggie-Packed Scramble Delight delivers everything you need in one hearty, satisfying dish.
The beauty of this recipe is in its flexibility. You can use any vegetables you have on hand, making it an ideal dish for clearing out your fridge. Whether it’s a handful of spinach, some leftover broccoli, or even zucchini, you can easily swap out the ingredients to suit your preferences or whatever happens to be in season. The dish is also highly customizable in terms of seasoning. You can add a dash of your favorite spices or even throw in some chili flakes if you’re craving a little heat. It’s a dish that adapts to your tastes, making it as versatile as it is delicious.
The addition of ham gives the scramble a satisfying, meaty texture, but it can easily be swapped for bacon, sausage, or even a plant-based protein if you’re looking for alternatives. The result is always a flavorful, filling dish that can satisfy even the pickiest eaters in your household. And don’t forget the creamy eggs – they’re the perfect base for all the other ingredients, holding everything together in a comforting, cohesive meal.
Ingredients
Ingredient
Quantity
Eggs
4
Salt
to taste
Paprika
to taste
Black pepper
to taste
Milk
100 ml (½ cup)
Cheese
50 g (⅓ cup), shredded
Flour
130 g (1 cup)
Onion
1, finely chopped
Vegetable oil
for frying and greasing
Carrot
1, grated
Bell pepper
1, diced
Mushrooms
150 g (1 cup), chopped
Garlic cloves
2, minced
Ham
150 g (1 cup), diced
Green onions
chopped, for garnish
Directions
Prep Your Ingredients: Start by cracking the eggs into a large mixing bowl. Season with salt, paprika, and black pepper to your taste. Whisk in the milk and shredded cheese, creating a creamy mixture. Set this aside.
Sauté the Veggies: In a large skillet, heat a bit of vegetable oil over medium heat. Add the finely chopped onion, diced bell pepper, and grated carrot. Sauté for about 3-4 minutes until they soften.
Add the Mushrooms and Garlic: Toss in the chopped mushrooms and minced garlic. Stir occasionally, cooking for another 4-5 minutes, until the mushrooms have released their moisture and softened.
Incorporate the Ham: Add the diced ham to the skillet and cook for 2-3 minutes, allowing it to heat through and slightly brown.
Make the Scramble: Pour the egg mixture into the skillet with the veggies and ham. Gently stir the eggs as they cook, allowing them to scramble evenly. Cook for 4-5 minutes until the eggs are fully set but still creamy.
Finishing Touches: Once cooked, transfer the scramble to a serving plate and garnish with chopped green onions.
Nutrients (per serving)
Nutrient
Amount per Serving
Calories
350 kcal
Protein
25 g
Carbohydrates
15 g
Fat
22 g
Fiber
3 g
Sugars
5 g
Frequently Asked Questions (FAQs)
Can I make this dish ahead of time? Yes! This scramble is great for meal prep. You can cook the veggies, ham, and eggs in advance and store them in the fridge for up to 2 days. When you’re ready to eat, simply reheat in the microwave or on the stove for a few minutes. If you want to keep the eggs from becoming too rubbery when reheating, consider making them slightly undercooked the first time so they don’t overcook when you warm them up later.
Can I make this dish without the ham? Absolutely! The Veggie-Packed Scramble Delight is incredibly flexible. You can skip the ham entirely or replace it with another protein such as cooked chicken, turkey, or even tofu for a vegetarian alternative. If you’re going meat-free, try adding a bit of extra cheese or beans for a protein boost.
How can I make this dish spicier? If you enjoy a bit of heat, you can add chili flakes or diced jalapeños to the sautéed veggies. You could also experiment with hot sauce or spicy sausage as your protein of choice. These additions will give the dish a nice kick without overpowering the flavors.
Can I use frozen vegetables? While fresh vegetables offer the best texture and flavor, frozen vegetables can work as a convenient alternative. If you’re using frozen vegetables, be sure to thaw and drain them before cooking to avoid excess moisture. Some frozen veggies, like peas or mixed vegetable blends, could be perfect additions to the scramble.
Can I substitute the cheese? Yes, you can easily swap the cheese for a dairy-free version if you need to make the dish lactose-free or vegan. Nutritional yeast is a great alternative to add a cheesy flavor without the dairy. If you’re looking for a lighter version, you can use a reduced-fat cheese, or even skip the cheese altogether for a lighter meal.
What can I serve this dish with? The Veggie-Packed Scramble Delight is a complete meal on its own, but it also pairs wonderfully with crusty toast, a side of fresh fruit, or a simple salad. You could even serve it with a small bowl of soup for an extra comforting touch.
How to Make the Veggie-Packed Scramble Delight Your Own
One of the best things about this recipe is its adaptability. If you find yourself craving something with a little more richness, add a dollop of sour cream or a handful of crumbled feta for a tangy twist. If you prefer a more savory profile, try adding fresh herbs like thyme or rosemary, or even a bit of smoked paprika for a deep, earthy flavor. You can also experiment with different kinds of cheese – a sharp cheddar adds a bit of bite, while mozzarella offers a soft, melty texture.
Additionally, feel free to experiment with different cooking methods. If you’re trying to cut down on oil, you could opt for a non-stick pan or even bake the scramble in the oven, especially if you’re making a larger batch. This method gives the eggs a nice golden crust on the top, adding another layer of texture to the dish.
The Nutritional Benefits of the Veggie-Packed Scramble Delight
The Veggie-Packed Scramble Delight is more than just a flavorful dish; it’s also packed with nutrients that fuel your body and keep you feeling energized throughout the day. Eggs are a great source of protein, which is essential for muscle repair and growth. They also provide key vitamins like B12 and riboflavin, which support healthy metabolism and energy production.
The vegetables – bell peppers, carrots, mushrooms, and onions – bring a wealth of vitamins and minerals to the table. Bell peppers, for example, are rich in vitamin C, which boosts your immune system, while carrots provide beta-carotene, which supports healthy vision. Mushrooms are an excellent source of antioxidants and vitamin D, while onions help support heart health with their anti-inflammatory properties.
When you add ham to the mix, you’re also incorporating an excellent source of lean protein and iron, which is essential for oxygen transport throughout your body. Overall, this dish is not only delicious but also provides a balanced array of nutrients, making it a perfect choice for a well-rounded weeknight meal.
Conclusion: A Meal for the Busy and the Hungry
The Veggie-Packed Scramble Delight is more than just a quick meal – it’s a reflection of the idea that we don’t have to compromise on taste or nutrition, even when time is tight. Whether you’re cooking for a busy family or preparing a solo meal, this dish brings together fresh ingredients, savory flavors, and a comforting touch that makes any evening feel special. With its versatility, you can enjoy it time and again, adjusting it to suit your taste and dietary needs.
As someone who has turned to this recipe time and time again, I can attest to its ability to bring warmth and comfort to even the most chaotic of days. So next time you find yourself in need of a quick, nutritious dinner, remember this Veggie-Packed Scramble Delight. It’s a dish that not only fills your belly but also reminds you of the joy in simple, home-cooked meals that bring a sense of calm to a busy life.
Amal
A Heartwarming Dish for Busy Weeknights
This Veggie-Packed Scramble Delight perfect for a busy evening, it’s easy to make and packed with flavors that will make everyone ask for seconds. Plus, it’s versatile – swap out ingredients to suit your taste or what you have on hand. This delightful scramble is the ideal way to enjoy a colorful, protein-packed meal that comes together in under 30 minutes!
Prep the Eggs: Crack the eggs into a large mixing bowl. Add salt, paprika, and black pepper to taste, then whisk in the milk and shredded cheese until well combined. Set the mixture aside.
Sauté the Vegetables: Heat a bit of vegetable oil in a large skillet over medium heat. Add the finely chopped onion, diced bell pepper, and grated carrot. Sauté for 3-4 minutes until softened.
Add the Mushrooms and Garlic: Stir in the chopped mushrooms and minced garlic. Cook for another 4-5 minutes, allowing the mushrooms to soften and release their moisture.
Cook the Ham: Add the diced ham to the skillet and cook for 2-3 minutes, allowing it to heat through and lightly brown.
Scramble the Eggs: Pour the egg mixture into the skillet with the vegetables and ham. Gently stir as the eggs cook, allowing them to scramble evenly. Cook for 4-5 minutes until the eggs are fully set, but still creamy.
Garnish and Serve: Transfer the scramble to a serving plate and garnish with chopped green onions. Serve immediately and enjoy!
Notes
Make it your own: Feel free to swap out the vegetables for whatever you have on hand – spinach, zucchini, or even leftover roasted vegetables work great.
Protein alternatives: You can use bacon, sausage, or tofu instead of ham to make the dish your own.
Storage: If you have leftovers, store the scramble in an airtight container in the fridge for up to 2 days. Reheat gently in the microwave or on the stove.
I still remember the smell of sautéed onions and garlic filling the kitchen on chilly Sunday afternoons. My mother, with a wooden spoon in one hand and a story in the other, would toss whatever vegetables we had into the biggest pot we owned. There were no measurements, no cookbooks, no rules — just instinct and love. That’s how her vegetable soup was made. That’s how this soup was born.
Years later, living on my own and far from those cozy, laughter-filled days, I found myself craving something familiar. I didn’t need complexity. I needed comfort. I opened the pantry and saw beans, tomatoes, and some humble vegetables in the fridge. Within minutes, my kitchen was humming with warmth again. The same sizzle of onions. The same rich aroma. And when I took that first spoonful, it wasn’t just soup. It was home.
This Hearty Harvest Bowl isn’t just a recipe. It’s a return to simplicity. A celebration of nourishing food that doesn’t need fancy ingredients or intricate techniques. It’s the kind of meal that makes you exhale after a long day. And if you’re anything like me, it might just remind you of someone you love.
Why This Soup Works Every Time
One of the most beautiful things about a rustic vegetable soup is that it’s both forgiving and flexible. It doesn’t matter if you don’t have every ingredient — this soup invites creativity, not rigidity. Its roots are peasant food: dishes made from whatever was grown or stored, hearty enough to warm cold hands and fill hungry bellies.
This version leans on canned tomatoes for tang and depth, mushrooms for earthy umami, and creamy white beans for protein and heartiness. Peppercorns add a gentle heat while garlic brings the whole thing to life. A splash of olive oil smooths out the flavors, giving the broth a richness without heaviness.
And let’s talk texture — because this soup has it all. Tender bites of carrots and celery, creamy white beans, toothsome mushrooms, and a broth that brings everything together like an old friend at the table.
Ingredients
Ingredient
Amount
Onions
3, chopped
Carrots
2, sliced
Garlic
2 cloves, minced
Water
Enough to cover ingredients
Black peppercorns
To taste or a few whole
Olive oil
2 tablespoons
Mushrooms (button, cremini, etc.)
2 cups, sliced
Celery
2 sticks, chopped
Canned chopped tomatoes
1 can (400 g / 14 oz)
White beans, drained and rinsed
2 cans (approx. 800 g / 28 oz total)
Salt
To taste
Directions
In a large pot, heat olive oil over medium heat. Add onions, carrots, and celery. Sauté for 5–7 minutes until softened.
Add mushrooms and cook until they begin to release their moisture and turn golden.
Stir in the garlic and cook for 1–2 minutes until fragrant.
Add canned tomatoes, drained white beans, and enough water to fully submerge the ingredients.
Add salt and black peppercorns (whole or crushed, depending on preference).
Bring to a boil, then reduce heat and simmer uncovered for 20–25 minutes, stirring occasionally.
Taste and adjust seasoning if needed.
Serve warm with crusty bread or a sprinkle of fresh herbs.
Nutritional Information (per serving, approx. 6 servings)
Nutrient
Amount
Calories
180 kcal
Protein
7 g
Fat
5 g
Carbohydrates
27 g
Fiber
8 g
Sugar
6 g
Sodium
Varies by salt added
Comfort in a Pot: The Soul of the Dish
Food trends may come and go, but some dishes remain timeless. This is one of them. Its appeal lies not in flashy presentation or expensive ingredients, but in its ability to ground us. It invites us to slow down, to nourish ourselves, to share.
There’s something deeply satisfying about making this soup. From the slow sauté of onions to the simmering pot bubbling softly as it thickens with time, the entire process is therapeutic. It’s cooking at its most honest — and it reminds us that wellness can start with one humble bowl.
Nutritional Benefits of Vegetable & Bean Soup
Don’t be fooled by how cozy it tastes — this soup is packed with nutrition:
White beans are an excellent source of plant-based protein and fiber, which aid digestion and help you feel fuller longer.
Carrots and celery add a dose of vitamin A, C, and antioxidants.
Mushrooms are low in calories and offer B-vitamins, selenium, and a unique compound called ergothioneine, which has anti-inflammatory properties.
Olive oil contributes healthy fats, while garlic may support immune function.
The broth is hydrating, making this soup a great option for cooler months when dehydration sneaks in unnoticed.
Together, these ingredients create a balanced meal that satisfies without heaviness — hearty but never sluggish.
Tips for Perfecting the Soup Every Time
Sauté Low and Slow: Give your onions and garlic time to develop flavor. Don’t rush this step — it builds the foundation of the soup.
Layer Flavors: Add ingredients in stages. Start with aromatics, then mushrooms, then beans and tomatoes. Each layer brings something new to the pot.
Don’t Overcook the Veggies: Celery and carrots should be tender but not mushy. Add them early enough to soften, but not so early they disappear.
Use Good Olive Oil: A high-quality olive oil will elevate the entire dish.
Let It Rest: Soup always tastes better after it sits for a bit. Let it rest off the heat for 10 minutes before serving if you can.
Frequently Asked Questions (FAQs)
Can I use fresh tomatoes instead of canned?
Yes! About 4–5 medium fresh tomatoes, chopped, can be used in place of a can. For a deeper flavor, consider roasting them first or using a tomato paste boost.
What beans work best in this soup?
White beans (cannellini or great northern) work beautifully for their creamy texture. However, you can swap them with chickpeas, red kidney beans, or even lentils depending on what’s in your pantry.
Can I freeze this soup?
Absolutely. This soup freezes well. Let it cool completely before transferring to freezer-safe containers. It can be frozen for up to 3 months. Thaw overnight in the fridge or reheat from frozen over low heat.
How can I make it even heartier?
Add small pasta (like ditalini), cooked brown rice, or a handful of chopped kale or spinach in the last few minutes of cooking.
Is this recipe vegan and gluten-free?
Yes, it’s naturally vegan and gluten-free — just be sure to check your canned products for additives if you have sensitivities.
Can I use vegetable stock instead of water?
Definitely. While water works well and keeps it light, using a rich vegetable broth adds depth and complexity.
What to Serve With It
This soup pairs wonderfully with crusty bread — sourdough or a seeded baguette are perfect choices. A dollop of pesto, a swirl of olive oil, or a sprinkle of nutritional yeast can also elevate the flavor. If you’re craving something creamy, a spoonful of vegan yogurt or crème fraîche on top adds a beautiful contrast.
For a full meal, serve alongside a simple green salad with lemon vinaigrette or roasted root vegetables.
Why You’ll Keep Coming Back to This Soup
It’s easy to love a dish that welcomes variation and celebrates what’s on hand. This soup becomes a new experience each time you make it. Add barley in the winter, fresh herbs in spring, or grilled corn in summer. It adapts, evolves, and always satisfies.
But more than that, it connects us — to tradition, to memory, to nourishment. In a world of fast-paced everything, this soup is slow food made simple. And when the weather is grey or your spirit feels a little off-center, there’s nothing like a warm bowl of something made from scratch to bring you back to yourself.
Conclusion: Stirring Up More Than Just Flavor
Hearty Harvest Bowl: Rustic Vegetable & Bean Soup isn’t just about what’s in the pot — it’s about what it brings to the table. A sense of grounding, a moment of calm, a reminder that the most comforting foods often come from the simplest ingredients. Whether you’re new to plant-based meals or just looking to bring more whole foods into your life, this soup will become a beloved staple.
It’s the kind of recipe you’ll reach for on cold nights and quiet Sundays. You’ll share it with friends, pass it down, and tweak it over time — just as I did, and just as my mother did before me. And maybe, just maybe, you’ll find that this humble bowl becomes part of your story, too.
Amal
Hearty Harvest Bowl: Rustic Vegetable & Bean Soup
This rustic vegetable and bean soup is soul-soothing, hearty, and brimming with nourishing ingredients. Loaded with vegetables, white beans, and aromatic herbs, it’s the perfect comforting meal that tastes like it’s been simmering all day — but is easy enough for a weeknight.
There’s something universally comforting about potatoes. Whether mashed, roasted, fried, or baked — they have a way of bringing people together. But for me, it’s the crispy potato patty that holds a special place in my memory, especially during those cozy evenings in my grandmother’s kitchen. She never followed recipes, but somehow, every dish felt like a culinary masterpiece. Her potato patties weren’t just food — they were edible expressions of love, and I can still remember the smell of grated potatoes sizzling in a pan as laughter echoed through the house.
We didn’t have much growing up, but we always had potatoes. These golden patties became a symbol of how the simplest ingredients could transform into something delicious and deeply satisfying. The recipe I’m sharing today is a modern twist on that rustic classic. Enhanced with Provençal herbs and fresh parsley, these patties combine the comfort of the past with flavors that feel elevated enough for a dinner party or a weekend brunch.
But above all, they carry the spirit of home-cooked simplicity — a crispy embrace after a long day.
The Versatile Beauty of Potato Patties
Potato patties, or fritters as they’re sometimes called, are more than just a quick dish — they’re a canvas. With endless variations depending on region, culture, and pantry contents, they allow for creativity while always delivering on flavor and texture. This particular version is light and crispy on the outside, soft and herby on the inside, and balanced with just the right amount of seasoning.
The base of grated potatoes and onion provides a naturally sweet and earthy flavor. The addition of a single egg helps bind the mixture, while a combination of starch and flour gives it the perfect structure. Chopped parsley brightens every bite, and the Provençal herb blend adds an aromatic depth that elevates the entire dish.
Whether you serve them as a snack, a side dish, or a vegetarian main course, these golden potato patties adapt seamlessly to every table.
Ingredients
For the Patties:
Ingredient
Amount
Potatoes (medium, peeled and grated)
3
Onion (finely chopped)
1
Egg
1
Starch
1 tablespoon
Flour
1 tablespoon
Fresh parsley (chopped)
As desired
Provençal herbs
1 teaspoon
Salt
To taste
Black pepper
To taste
Vegetable oil
For frying
Directions
Place the grated potatoes in a clean kitchen towel and squeeze out excess moisture.
In a large bowl, combine the potatoes, onion, egg, starch, flour, parsley, Provençal herbs, salt, and black pepper. Mix well until the mixture holds together.
Heat vegetable oil in a frying pan over medium heat.
Scoop small portions of the mixture and shape into patties.
Fry each side for 3–4 minutes or until golden brown and crispy.
Remove from the pan and drain on paper towels.
Serve hot with sour cream, yogurt dip, or fresh salad.
Nutritional Information (Per Serving, Approximate)
Nutrient
Amount
Calories
180 kcal
Protein
4 g
Carbohydrates
20 g
Fat
10 g
Fiber
2 g
Sodium
220 mg
Why This Recipe Works So Well
1. Quick and Budget-Friendly
All the ingredients are basic pantry staples — potatoes, flour, egg, herbs — and the preparation is straightforward, requiring no special equipment or long prep time. It’s a dish you can whip up when the fridge is nearly empty and still feel like you’re eating something special.
2. Perfect Texture Contrast
Crispy edges and tender centers are the holy grail of fritters. This recipe delivers both, thanks to the careful balance of starch and flour and the simple frying technique that creates that signature golden crust.
3. Naturally Gluten-Free Option
Swap the flour with a gluten-free alternative or use only potato starch, and the patties are easily adaptable to gluten-free diets without sacrificing flavor or structure.
4. Great for Meal Prep
You can make a batch ahead of time and reheat them in the oven or air fryer. They stay crispy, store well in the fridge, and can be frozen for later use.
Serving Ideas That Go Beyond the Basics
Potato patties are delicious on their own, but even better when paired thoughtfully. Here are a few ways to serve them:
With Sour Cream or Greek Yogurt: A dollop of creamy tanginess cuts through the richness and complements the herbs beautifully.
Topped with a Fried Egg: Elevate them to brunch-worthy status by adding a runny egg on top and some arugula on the side.
Layered in a Sandwich: Use them in place of burger patties in a vegetarian sandwich with lettuce, tomato, and a herby aioli.
Alongside a Salad: Serve with a crisp cucumber or tomato salad for a light yet satisfying meal.
Common Mistakes to Avoid
Not Squeezing the Potatoes Enough: Excess moisture can lead to soggy patties that fall apart. Grated potatoes should be wrung out well in a clean kitchen towel or cheesecloth.
Using Too Much Flour: While flour helps with binding, too much can make the patties gummy. Stick to the measurements and add just enough for the mixture to hold together.
Overcrowding the Pan: Fry the patties in batches to allow space for even browning and crisping.
Frequently Asked Questions
Can I use sweet potatoes instead of regular potatoes?
Yes! Sweet potatoes work well and add a naturally sweeter flavor. You may need to adjust the amount of flour depending on moisture levels.
What herbs can I use if I don’t have Provençal seasoning?
Provençal herbs typically include thyme, rosemary, oregano, and marjoram. You can use a pinch of any combination of those or substitute Italian seasoning in a pinch.
Can I bake or air fry these instead of pan frying?
Absolutely. For baking, brush the patties with oil and bake at 400°F (200°C) for about 20 minutes, flipping halfway. In the air fryer, cook at 375°F (190°C) for 10–12 minutes until golden.
Are these patties kid-friendly?
Very much so! Kids usually love the crispy texture and mild flavor. You can leave out the chili or reduce pepper if cooking for younger children.
Can I add cheese to the mixture?
Yes, grated cheese like Parmesan or Cheddar can be added for extra flavor. About ¼ cup should do the trick without making the patties too runny.
How long can I store leftovers?
Cooked patties will keep in the refrigerator for 3–4 days. Reheat in the oven or a dry skillet to maintain crispness. You can also freeze them for up to a month — reheat directly from frozen.
Helpful Tips for Success
Work Quickly After Grating: Potatoes oxidize fast. Either work quickly or soak them in cold water for a few minutes, then dry thoroughly.
Use a Nonstick or Cast Iron Pan: This ensures a good crust and prevents sticking.
Customize Freely: Feel free to add grated zucchini, carrots, or even shredded chicken to the mix for variation.
Double the Batch: These go quickly — you’ll thank yourself for making extras.
Conclusion: Simple Food, Deep Satisfaction
The beauty of potato patties lies in their simplicity. A humble ingredient like the potato, with the help of a few pantry staples and herbs, becomes something golden, comforting, and deeply satisfying. These patties don’t demand much of your time or energy, yet they deliver so much in flavor, texture, and joy.
They remind us that you don’t need to cook fancy or complicated masterpieces to make something delicious. Sometimes, all you need is a hot pan, a little creativity, and a craving for something crispy and warm.
So the next time you’re standing in your kitchen wondering what to make with what you have on hand, give these golden garden patties a try. You just might find that they become your own version of “home.”
Amal
Golden Garden Patties: A Humble Recipe That Feels Like Home
Crispy, golden, and bursting with herbaceous flavor, these potato patties are a comforting classic made with simple ingredients. They’re the perfect balance of rustic and refined — ideal as a snack, side dish, or light meatless meal.
There’s a kind of magic in holiday food. You can almost taste the laughter in the air, hear the rustle of wrapping paper, and feel the warmth of familiar company—all bundled up into a single, comforting plate. For me, one such plate was not served under candlelight or at a lavishly set table. It came to life on a quiet, unexpected evening when time was scarce, the fridge was nearly bare, and I had just 10 minutes to make dinner before rushing out the door. That’s when this dish was born.
It started with leftover potatoes, some ground meat in the freezer, and vegetables that had been sitting patiently in the crisper. What followed wasn’t just dinner—it was a revelation. As the onions began to caramelize and the potatoes mashed with just a touch of sour cream and egg, the familiar aromas began to swirl around me like a cozy blanket. I hadn’t realized I was recreating something that tasted like the holidays. It had everything: warmth, depth, a hint of spice, and the kind of satisfaction that doesn’t need silver platters or fancy garnishes.
I still call it “The Best Holiday Meal I’ve Ever Eaten in 10 Minutes,” not because of how fast it came together, but because of how it made me feel. It reminded me that good food isn’t about extravagance—it’s about heart. And this recipe is packed with it.
Comfort Meets Convenience: A Weeknight Miracle
The brilliance of this dish lies in its versatility. You can build it out of pantry staples and frozen essentials, yet it tastes like a fully planned holiday dinner. It’s hearty enough to impress guests and quick enough to make after a long workday. The base of fluffy, creamy potatoes acts as the perfect foil for the savory, spice-kissed meat and vegetables layered over the top. The textures and flavors balance beautifully—richness from the meat, brightness from the bell pepper and tomato, and a burst of sweetness from the peas.
In a world where we often chase perfection in the kitchen, this recipe is a humble reminder that great meals don’t have to be complicated. Sometimes, they come together when you least expect them—and that’s part of the magic.
Ingredients
For the Filling:
Ingredient
Amount
Egg
1 large
Salt
To taste
Sour cream
1 tablespoon (15 g)
Potatoes
4–5 medium, peeled and diced
Water
Enough to boil the potatoes
Olive oil
2 tablespoons (30 ml)
Onion
1 medium, finely chopped
Garlic
2 cloves, minced
Minced meat
400 g (14 oz)
Bell pepper
1 medium, diced
Frozen green peas
100 g (3.5 oz)
Tomato
1, diced
Black pepper
To taste
Chili pepper
To taste
Directions
Boil the Potatoes In a pot, boil the diced potatoes in salted water until soft. Drain, then mash with the egg, sour cream, and a pinch of salt until smooth. Set aside.
Prepare the Filling In a large skillet, heat olive oil over medium heat. Add the chopped onion and garlic and sauté until golden.
Cook the Meat and Veggies Add minced meat to the pan and cook until browned. Stir in the bell pepper, green peas, and tomato. Season with salt, black pepper, and chili pepper. Cook until vegetables are tender and mixture is well combined.
Assemble and Serve Spoon the mashed potatoes onto plates and top with the warm, flavorful meat mixture. Serve hot — it’s like a holiday hug on a plate.
Nutrition Information (Per Serving)
Nutrient
Amount
Calories
~380 kcal
Protein
~22 g
Carbohydrates
~25 g
Fat
~20 g
Fiber
~4 g
Sugars
~5 g
Sodium
~320 mg
Why This Dish Feels Like a Holiday Every Time
Every culture has its version of a layered, comforting meat and potato dish—whether it’s shepherd’s pie, cottage pie, or pasteles. This version takes inspiration from all of them, while being distinctly simple and accessible. It’s loaded with familiar flavors and textures that resonate across ages and backgrounds.
The combination of ingredients allows for a perfect harmony of flavors:
Creamy mashed potatoes that feel indulgent yet grounding
Savory minced meat seasoned just right for depth and richness
Vegetables like peas, peppers, garlic, and onions for balance and freshness
Hints of tomato and chili for brightness and a tiny kick
Whether you serve it in a baking dish, as individual mounds, or spoon it directly from the pan (guilty as charged), the result is the same: satisfying and heartwarming.
Tips for Making It Your Own
While the recipe is quick and straightforward, there’s plenty of room for customization. Here are a few ways to tweak it based on what you have or what you love:
1. Choose Your Meat Wisely
Ground beef, chicken, turkey, or even plant-based meat alternatives work beautifully. If you’re using leaner meats, consider adding a splash of broth or olive oil to maintain moisture.
2. Play With Spices
Go classic with salt and black pepper, or take a bolder route by adding cumin, paprika, coriander, or smoked chili flakes. A pinch of cinnamon can bring a surprisingly warm, Middle Eastern twist.
3. Make It Creamier
Mix in grated cheese with the mashed potatoes or top with shredded cheese and give it a quick broil for a melty finish.
4. Add a Crunchy Element
Toasted breadcrumbs or crushed crackers on top can create a nice contrast in texture—perfect if you’re serving this at a dinner party.
Frequently Asked Questions
Can I make this ahead of time?
Absolutely. You can prepare both the mashed potatoes and the meat-vegetable mixture ahead of time. Just store them separately in airtight containers in the refrigerator for up to 2 days. Reheat gently and assemble just before serving.
Is this dish freezer-friendly?
Yes. Assemble the meal in a baking dish, let it cool, then cover tightly and freeze. When ready to eat, thaw overnight in the fridge and reheat in the oven until hot all the way through.
Can I make it vegetarian?
Definitely! Replace the meat with lentils, mushrooms, or a plant-based ground meat alternative. The vegetables and seasoning stay the same, making it just as flavorful and filling.
What kind of potatoes are best?
Starchy potatoes like Russets yield fluffier mash, while Yukon Golds add a creamy, buttery texture. Use what you love—or what you have on hand.
Can I use leftover mashed potatoes?
Yes, and it’s a great way to reduce food waste. If they’re already seasoned, just reheat and fold in an egg to help bind the layers.
What else can I add to the filling?
Carrots, corn, chopped spinach, zucchini, or even beans are great additions. It’s a wonderfully forgiving recipe that welcomes creativity.
When Fast Feels Like a Feast
What I love most about this dish isn’t just the flavor—it’s what it represents. We all lead busy lives, constantly chasing time, but we still crave connection. This recipe brings those things together. It lets us show love, celebrate comfort, and feed others (and ourselves) something truly satisfying—even when we only have ten minutes to spare.
It’s perfect for weeknights, yes. But it’s also the kind of dish that’s welcomed on a holiday table, nestled among more complex recipes, standing proud as a simple classic. It carries warmth, flavor, and an undercurrent of gratitude—a meal that says, “I’m here, I care, let’s eat.”
Conclusion: Simplicity Is the Soul of Celebration
Sometimes the best meals aren’t the ones that take hours to prepare. They’re the ones that come together effortlessly but linger in memory for much longer. This 10-minute holiday-style meal may not come with silverware and fanfare, but it delivers the essence of comfort, warmth, and celebration.
Whether you’re cooking for yourself after a long day, feeding your family in a rush, or just looking to recreate that holiday feeling without the fuss, this dish is here to deliver. And the best part? You don’t need a holiday to make it—you just need a few good ingredients, a bit of heart, and ten spare minutes.
So go ahead. Make something wonderful.
Amal
The Best Holiday Meal I’ve Ever Eaten in 10 Minutes
This quick and hearty dish tastes like a cozy holiday feast, ready in just 10 minutes. Creamy mashed potatoes and savory minced meat blend with colorful vegetables for a comforting one-pan wonder you’ll want to make all year long.
I vividly remember the first time I had homemade nougat. It was at a family gathering, a holiday tradition that felt warm with the familiar smells of baking, roasting peanuts, and the comforting hum of conversation. As the adults prepared meals in the kitchen, I found myself in the corner with a bowl of freshly made nougat—crunchy, chewy, and with just the right amount of sweetness. I took one bite, then another, and before I knew it, I had polished off the whole bowl. That moment stuck with me—nougat, in its purest form, wasn’t just candy; it was a memory.
What struck me most about the homemade nougat was the balance between textures. The softness of marshmallows paired with the nutty crunch of peanuts and sesame seeds, and the chewy surprise of dried mango and cranberries, made for an indulgence I hadn’t experienced before. The thought of making it at home seemed like an impossible task, something that belonged in the realm of professional confectioners. But over the years, I realized how easy it was to recreate that same magic in my own kitchen.
Now, whenever I crave a treat that combines nostalgia with a touch of homemade love, I make this nougat. And every time I share it with others, they feel the same sense of wonder that I did all those years ago. This recipe isn’t just about making something sweet—it’s about crafting a memory.
What Makes This Nougat So Special?
Nougat, in its traditional form, is a delightful candy made from sugar, honey, and egg whites, often containing nuts and dried fruits. The texture of nougat is a perfect blend of softness and crunch, making it a favorite treat worldwide. However, making nougat at home can seem like a daunting task, especially when the recipe calls for intricate methods like whipping egg whites or using a candy thermometer.
This homemade nougat recipe, however, is a simplified version that cuts out the complexity without sacrificing flavor or texture. It combines marshmallows, milk powder, nuts, and dried fruits into a treat that’s rich, chewy, and surprisingly easy to make. The addition of black and white sesame seeds provides an unexpected yet delightful crunch, and the dried mango and cranberries add a sweet and tart contrast. This combination of textures and flavors takes nougat to a whole new level.
But beyond the ingredients and textures, what truly sets this homemade nougat apart is the joy of making it yourself. There’s something incredibly rewarding about taking simple ingredients and transforming them into something that’s both satisfying and special. When you make nougat at home, you’re not just cooking—you’re crafting a treat filled with the warmth of your own kitchen and the love you put into it. And that, in essence, is what makes this recipe so special.
Ingredients
Ingredient
Amount
Peanuts
500 g (3 cups)
Black sesame seeds
50 g (1/4 cup)
White sesame seeds
10 g (2 tsp)
Dried mango, chopped
2 pieces
Dried cranberries
1 handful
Marshmallows
200 g (7 oz)
Milk powder
100 g (1 cup)
Directions
Toast the Crunch In a dry pan, lightly toast the peanuts, black sesame seeds, and white sesame seeds over medium heat until fragrant. Set aside to cool.
Melt the Base In a large nonstick pan, add the marshmallows and heat on low until they start to melt, stirring constantly to prevent burning.
Fold in the Flavor Add the milk powder gradually into the melted marshmallows and mix until fully combined into a thick, smooth paste.
Add the Crunchy & Chewy Bits Stir in the toasted peanuts and sesame seeds, then quickly fold in the chopped dried mango and cranberries. Work fast—the mixture sets quickly.
Shape the Nougat Transfer the nougat to a parchment-lined tray. Use another sheet of parchment on top and press it down evenly into a 1-inch thick slab.
Cool and Cut Let the nougat cool completely at room temperature. Once firm, slice into bars or squares and store in an airtight container.
Nutritional Information (Per Serving – approx. 1 square)
Nutrient
Amount
Calories
~180 kcal
Protein
6 g
Fat
10 g
Carbohydrates
17 g
Sugar
9 g
Fiber
2 g
Calcium
40 mg
Iron
1 mg
How to Enjoy This Nougat
While you might be tempted to eat this nougat right away (and who could blame you?), there are a variety of ways to enjoy this homemade treat:
1. As a Snack on Its Own
Freshly made nougat is perfect on its own as a midday treat. The combination of crunchy peanuts, crispy sesame seeds, chewy dried fruits, and the soft marshmallow base makes it incredibly satisfying without being overly sweet. It’s a snack that offers balance in every bite.
2. In Gift Baskets
This nougat makes an excellent homemade gift for any occasion. Wrapped up in parchment paper and tied with a ribbon, it looks beautiful in gift baskets for holidays, birthdays, or even just as a thoughtful gesture for friends and family.
3. Paired with Tea or Coffee
Nougat pairs wonderfully with a cup of tea or coffee. The light, chewy texture complements the warm, rich flavors of your favorite hot beverage. Try it with a nice black tea, or even with a cappuccino, for a truly indulgent experience.
4. In Desserts
Use nougat as an ingredient in desserts, like topping cakes or ice cream, or layering it in parfaits. Its sweet, nutty flavor can elevate simple desserts to something extraordinary.
5. For Special Occasions
Nougat is a great addition to holiday celebrations, weddings, or special gatherings. It adds a homemade touch to any event and can be customized to match the occasion—be it with different dried fruits, nuts, or even a touch of chocolate.
Common Mistakes to Avoid When Making Nougat
Though making homemade nougat is fairly simple, there are a few key things to keep in mind to ensure your nougat turns out perfectly every time:
1. Overheating the Marshmallows
The marshmallows are what give the nougat its chewy texture. Make sure you melt them over low heat to avoid burning or browning them, which will affect the flavor.
2. Not Toasting the Peanuts and Sesame Seeds
Toasting the peanuts and sesame seeds brings out their natural flavors and adds a deeper crunch. Don’t skip this step, as it’s key to achieving the perfect texture.
3. Mixing Too Roughly
When incorporating the peanuts, sesame seeds, and dried fruits into the marshmallow mixture, do it gently to avoid deflating the texture. You want the mixture to remain fluffy, so fold the ingredients carefully.
4. Not Letting It Set Long Enough
Allow the nougat to cool and set fully before cutting into it. If you don’t give it enough time to firm up, it could turn out too sticky to handle.
Frequently Asked Questions (FAQs)
Can I use different nuts in this recipe?
Absolutely! You can use cashews, almonds, or even macadamia nuts in place of peanuts. Just make sure to toast them to bring out their flavor.
Can I make this nougat without milk powder?
Milk powder helps give the nougat its soft and creamy texture. If you don’t have milk powder, you can try using a bit of powdered sugar or omit it, but the texture might be slightly different.
How long will this nougat last?
This homemade nougat will stay fresh for up to two weeks if stored in an airtight container at room temperature. It can also be refrigerated to extend its shelf life.
Can I make this nougat vegan or dairy-free?
To make this nougat vegan, you can replace the marshmallows with a vegan version and substitute the milk powder with a dairy-free alternative like coconut milk powder.
How can I make this nougat less sweet?
If you prefer a less sweet nougat, try reducing the amount of marshmallows and using a sugar substitute like stevia or monk fruit. Keep in mind that this may change the texture slightly.
Conclusion: A Sweet Tradition to Share
In the end, this homemade nougat isn’t just about satisfying a sweet tooth—it’s about creating something with your hands, something that holds the essence of care and comfort. Whether you make it for yourself or as a gift for others, every batch is a reminder that the best things in life are the ones we make with love. The combination of crunchy peanuts, aromatic sesame seeds, chewy dried mango, and marshmallows creates a treat that’s far better than anything you can buy from the store. It’s a small act of sweetness that brings joy not just to the person eating it, but to the one making it as well.
So, the next time you’re looking to make something special, skip the store-bought candies and try your hand at this homemade nougat. You’ll be creating more than just a snack—you’ll be crafting a memory that lasts.
Amal
Sweet Harmony Crunch: The Magic of Homemade Nougat
Indulge in this easy homemade nougat, with a perfect blend of crunchy peanuts, nutty sesame seeds, chewy dried mango, and tangy cranberries. All wrapped up in a soft, marshmallow base, this delightful treat is perfect for snacking, gifting, or adding a special touch to any occasion.
Toast the Crunch: In a dry pan, lightly toast the peanuts, black sesame seeds, and white sesame seeds over medium heat until fragrant. Set aside to cool.
Melt the Base: In a large nonstick pan, add the marshmallows and heat on low until they begin to melt, stirring constantly to avoid burning.
Mix in the Milk Powder: Gradually stir in the milk powder into the melted marshmallows. Mix until smooth and fully combined into a thick, sticky paste.
Add the Crunchy and Chewy Ingredients: Add the toasted peanuts and sesame seeds to the marshmallow mixture. Quickly fold in the chopped dried mango and cranberries.
Shape the Nougat: Transfer the nougat mixture to a parchment-lined tray. Press it down evenly into a 1-inch thick slab using the back of a spoon or another sheet of parchment paper.
Cool and Cut: Allow the nougat to cool completely at room temperature. Once set, slice into bars or squares and store in an airtight container.
Notes
Make sure the marshmallows are fully melted and smooth before adding the milk powder to ensure the nougat mixture is smooth.
Be careful when folding in the crunchy ingredients—try to keep the mixture light to preserve the texture.
For variation, you can add different dried fruits like apricots or raisins, or even drizzle some chocolate over the top.
Store the nougat in an airtight container at room temperature for up to one week.
The first time I made cloud bread, I wasn’t trying to impress anyone. It was a quiet afternoon, the kind that feels like it’s begging for something soft, warm, and comforting. I remember the sky outside was overcast—no surprise then that the name alone called to me: cloud bread. I wasn’t expecting much, just curious. The ingredients were simple, already in my kitchen. The process felt soothing, almost meditative—separating eggs, whipping whites to soft peaks, folding them gently like I was wrapping a gift. And then, when I pulled them out of the oven, I was stunned. These delicate rounds, golden at the edges, light enough to float off the tray, smelled faintly of toast and the memory of meringue.
When I tore one open, I understood why so many people fall in love with it. It was like biting into a cloud—tender, airy, yet satisfying. I slathered a bit of butter on it, watched it melt in seconds, and knew this recipe would be more than a one-time experiment. It’s been a go-to ever since—for mornings when I want something special, for sandwich cravings without the heaviness of regular bread, or just to feel like I’m eating something a little magical.
The Allure of Cloud Bread: What Makes It So Special?
At first glance, cloud bread seems too good to be true. It’s made without flour, sugar, or yeast. It’s high in protein, low in carbs, gluten-free, and versatile enough to go sweet or savory depending on your mood. But the real magic lies in its texture. Unlike traditional bread, it’s soft, springy, and melt-in-your-mouth light. And though the ingredients are humble—just eggs, cream of tartar, a touch of salt, and Greek yogurt—it transforms in the oven into something unexpectedly elegant.
For those following low-carb, keto, gluten-free, or high-protein diets, cloud bread is a dream come true. But even if you’re not avoiding anything, it’s worth making just for the experience: the process is therapeutic, and the result feels like something out of a fairy tale.
Ingredients
Ingredient
Amount
Nonstick cooking spray
As needed
Eggs
3 large, separated
Cream of tartar
⅛ teaspoon
Plain Greek yogurt
¼ cup (whole milk variety)
Sea salt
⅛ teaspoon
Directions
Prep for Lift-Off Preheat your oven to 300°F (150°C) and line a baking sheet with parchment paper. Lightly coat with nonstick spray.
Whip the Whites In a clean bowl, beat the egg whites with cream of tartar using a hand mixer until stiff peaks form. This step is key to creating the cloud-like structure.
Blend the Base In another bowl, whisk together the egg yolks, Greek yogurt, and sea salt until smooth and pale.
Fold with Care Gently fold the whipped egg whites into the yolk mixture, one third at a time. Use a spatula and light hand—don’t deflate the mixture.
Shape the Clouds Spoon the mixture into fluffy rounds on the prepared baking sheet, spacing them slightly apart.
Bake to Perfection Bake for 25–30 minutes until golden brown and puffed. Let cool slightly—they’ll deflate a little, and that’s okay!
Nutrition Facts(Per Serving — makes approx. 6 rounds)
Nutrient
Amount
Calories
38
Protein
3.2g
Fat
2.5g
Carbohydrates
0.6g
Fiber
0g
Sugar
0.3g
Sodium
75mg
Beyond Breakfast: How to Use Cloud Bread
One of the best things about cloud bread is how versatile it is. Here are a few of the many ways you can enjoy it:
1. The Ultimate Sandwich Bread Alternative
Use two pieces of cloud bread as a soft, fluffy base for sandwiches. Whether it’s turkey and avocado, egg salad, or smoked salmon with cream cheese, the texture pairs beautifully with a variety of fillings.
2. Sweet Treats
Add a touch of honey or cinnamon to the batter before baking and enjoy with whipped cream, berries, or nut butter for a light dessert.
3. Mini Pizzas
Top with tomato sauce, cheese, and your favorite toppings, then broil for a quick and guilt-free pizza snack.
4. Side to Soups and Stews
Because it’s soft and absorbent, cloud bread works wonderfully served warm alongside hearty soups or saucy dishes.
5. Toasted with Toppings
Toast leftover pieces and top with butter, jam, avocado, or even hummus. It browns quickly and adds a crisp edge that’s incredibly satisfying.
Common Mistakes (And How to Avoid Them)
Though cloud bread is simple, a few small missteps can affect the result. Here are a few helpful tips to ensure success every time:
Don’t skip the cream of tartar: It helps stabilize the egg whites. If you don’t have it, a small amount of lemon juice or white vinegar can work in a pinch.
Beat whites to stiff peaks: This is essential. The egg whites should hold their shape when you lift the beaters.
Fold gently but completely: Incorporate the whites in batches and don’t overmix, or you’ll deflate the batter. You want streaks gone but fluff intact.
Use parchment paper: Cloud bread can stick to trays. A nonstick surface is key to easy removal.
Bake low and slow: This keeps the bread light and prevents browning too quickly.
These numbers can vary slightly depending on the size of your eggs and yogurt brand, but it’s safe to say cloud bread is one of the leanest “breads” you can enjoy.
Frequently Asked Questions (FAQs)
Can I make cloud bread ahead of time?
Yes! Cloud bread keeps well in an airtight container in the fridge for up to 3 days. Reheat gently in a toaster or oven to revive its soft texture.
Can I freeze cloud bread?
Absolutely. Place sheets of parchment paper between each piece and store them in a freezer-safe bag. Thaw at room temperature and reheat before serving.
Why is my cloud bread flat?
Flat cloud bread usually means the egg whites weren’t beaten long enough or were overmixed when folded in. Make sure to beat them until stiff peaks form and fold gently.
Can I flavor cloud bread?
Definitely! For sweet versions, add a bit of vanilla extract, cinnamon, or a touch of stevia or honey. For savory, mix in herbs, garlic powder, or shredded cheese.
Is cloud bread good for keto or low-carb diets?
Yes, it’s perfect for both. It contains almost no carbohydrates and is high in protein and healthy fats depending on what you cook it in (e.g., butter or coconut oil).
Why Cloud Bread is More Than a Trend
Though it first gained popularity in online wellness circles and social media feeds, cloud bread has more staying power than a passing trend. That’s because it hits all the right notes—simple, affordable, nourishing, and endlessly adaptable. It doesn’t rely on obscure ingredients or complicated techniques. In fact, it brings you closer to the basics of baking: eggs, air, and heat.
More importantly, it encourages us to slow down, to appreciate the subtle magic of transformation that happens in our kitchens every day. From fluffy whipped whites to soft-baked clouds—this is where science meets soul.
Conclusion: Let the Clouds Settle at Your Table
There’s a quiet kind of joy in making food with your hands—beating eggs, folding foam, shaping clouds on parchment. In a world that often demands too much too quickly, cloud bread invites us to pause and appreciate simplicity. It reminds us that comfort doesn’t have to be heavy, and satisfaction doesn’t need to come from indulgence.
Whether you make it for dietary reasons, for curiosity, or just for the sheer pleasure of trying something new, cloud bread is more than just a recipe—it’s an experience. One that, like all the best kitchen stories, is meant to be shared.
So next time the sky looks soft and you’re craving something equally tender, pull out your eggs and whisk. Bake a little cloud and bring a little lightness into your day.
Amal
Fluffy Cloud Bread: A Soft-Baked Dream with Every Bite
Light as air and golden on the edges, this fluffy cloud bread is a low-carb, gluten-free treat that melts in your mouth. Made with just a few simple ingredients, it’s perfect for sandwiches, breakfast, or a soft, guilt-free snack.