Lemon Velvet Dream Cream: A Sweet Taste of Simplicity

The first time I made this Lemon Cream, I wasn’t aiming to impress anyone. It was a quiet Sunday, one of those slow-moving afternoons with golden light coming through the windows, and I had a single lemon on the counter — a little wrinkled, but fragrant. My husband had dozed off on the couch with a book still open on his chest, and I felt the familiar tug of wanting to make something comforting.

Not elaborate. Not fussy. Just something smooth, nostalgic, and sunny — like the kind of custard my grandmother used to stir with an old wooden spoon while humming a lullaby in the background.

I didn’t expect the reaction it would receive. He woke up, wandered into the kitchen as I was pouring the cream into little cups, and tasted a spoonful. Then another. Then another. It was gone in less than a minute.

That same night, he asked me to make it again. And now? I cook this twice a week. It’s not just a dessert anymore — it’s a ritual, a shared comfort, and a reminder that something so simple can feel luxurious when it’s made with love.

This Lemon Velvet Dream Cream has become a quiet staple in our home, and I’m so happy to share it with you.

Why This Lemon Cream Wins Hearts

There’s something magical about this recipe — not just because it’s easy and uses basic ingredients, but because of the way it lands on the tongue: silky, rich, and bright with lemon. It’s not heavy like some puddings or overly tart like some lemon desserts. Instead, it balances on that perfect edge between comforting and refreshing.

Unlike baked custards or complicated tarts, this stovetop cream doesn’t require a water bath, pastry shell, or hours of waiting. It comes together in one pot, thickens like a dream, and chills quickly — perfect for weekday cravings or weekend indulgences.

The infusion of lemon zest creates a gentle citrus perfume without overpowering the cream. The result is something that tastes refined and elegant, yet humble. Think of it as the kind of dessert you might expect at a quaint European inn or a rustic family gathering — a dish made to be remembered.

Ideal Occasions to Serve Lemon Velvet Cream

This dessert adapts beautifully to a variety of moments. Here are a few ways to incorporate it into your life:

  • Date Night Dessert: Serve in elegant glasses with a thin shortbread cookie on the side. Dim the lights. Instant romance.
  • Brunch Table Highlight: Add it to a brunch spread in little ramekins with a few fresh berries on top.
  • Dinner Party Favorite: Make ahead of time and chill. Your guests will be stunned at how elegant and light it feels after a rich meal.
  • After-School Treat: A healthier, homemade alternative to packaged puddings, and a great way to sneak in some fresh lemon flavor for kids.
  • Self-Care Snack: You don’t need a reason. Just a spoon and a quiet moment.

Frequently Asked Questions (FAQs)

Can I use lemon juice instead of lemon zest?

Zest is preferred because it contains aromatic oils that deliver a more complex and subtle lemon flavor. Juice can make the cream too tart and watery. If you only have lemon juice, use it cautiously — about 1 to 2 teaspoons — and consider pairing it with a little grated zest or lemon extract for balance.

Is it possible to make this dairy-free?

Absolutely. Swap the milk with unsweetened almond milk, oat milk, or coconut milk. Just make sure the milk alternative is not too watery, as it could affect the thickness. For best results, use a barista-style oat milk or full-fat coconut milk for a creamy texture.

What can I use instead of cornstarch?

If cornstarch isn’t available, arrowroot powder or tapioca starch are excellent alternatives. Keep in mind that arrowroot thickens at a lower temperature and can become slimy if overcooked, so monitor closely.

Can I make it ahead of time?

Yes, and in fact, it’s better chilled. You can make this up to two days ahead. Store it in airtight containers in the refrigerator. A layer of plastic wrap pressed directly onto the surface will prevent a skin from forming.

How should I serve it?

Lemon Cream is beautiful when served simply in small cups or ramekins. For a touch of flair, top it with:

  • Crushed graham crackers or butter cookies
  • A dollop of whipped cream
  • Sliced strawberries, blueberries, or raspberries
  • A sprig of mint or a dusting of powdered sugar

It also works as a filling between cake layers, in tart shells, or as a dip for fruit and biscotti.

Can I add more flavorings?

Yes! Though the classic version sings on its own, you can enhance or tweak the flavor with:

  • A splash of orange or lime zest
  • A pinch of cardamom or ground ginger
  • A swirl of berry compote
  • A drop of rosewater or orange blossom for a floral twist

Just be careful not to overpower the lemon — it should remain the star of the show.

Why isn’t it setting properly?

If the cream doesn’t thicken, it could be due to:

  • Undercooking: It must reach a gentle boil and then cook a bit longer to activate the cornstarch.
  • Incorrect measurements: Too little cornstarch or too much liquid will lead to a runny texture.
  • Not stirring enough: Consistent stirring ensures even cooking and avoids lumps.

If you’re in doubt, let it cook just a little longer while stirring gently. It should coat the back of a spoon thickly when ready.

What Makes This Dessert So Special?

It’s not just the taste, though that’s certainly reason enough to fall in love with it. It’s what this cream represents: a moment of pause, a bowl of calm, a taste of warmth even when life feels rushed.

There’s something deeply reassuring about desserts that come from simple ingredients. Eggs, milk, sugar, cornstarch, and a bit of zest — humble pantry items transformed into something that feels elegant and indulgent. This is the kind of dish that whispers rather than shouts. It doesn’t need frosting or flourishes to win affection.

More than once, I’ve caught my husband sneaking into the fridge late at night, spoon in hand. No words, just a quiet smile. And that, to me, is the highest compliment.

Conclusion: A Dish That Stays with You

Lemon Velvet Dream Cream isn’t just another dessert — it’s a reminder that the best things are often the simplest. It doesn’t require fancy equipment or exotic ingredients. Just a lemon, a little time, and a little love.

Whether you serve it in tiny tea cups with your closest friends, or straight out of the bowl with someone you love, this cream brings a kind of soft joy that lingers.

And maybe that’s why they disappear so fast. Maybe it’s not just about flavor. Maybe it’s the memories we pour into every spoonful.

So go ahead — make it once, and see how long it lasts. Something tells me it won’t be your last time.

Amal

Lemon Velvet Dream Cream: A Sweet Taste of Simplicity

Light, silky, and kissed with real lemon zest, this easy stovetop lemon cream is the ultimate comfort dessert. Made with simple ingredients and ready in no time, it’s a refreshing treat you’ll crave again and again.
Prep Time 10 minutes
Cook Time 10 minutes
Total Time 20 minutes
Servings: 4 –6 servings
Course: Dessert
Cuisine: European-inspired

Ingredients
  

  • Zest of 1 lemon
  • 1/2 liter 18 oz whole milk
  • 2 eggs
  • 120 grams 4.2 oz granulated sugar
  • 10 grams 1 teaspoon vanilla sugar
  • 50 grams 1.7 oz cornstarch

Method
 

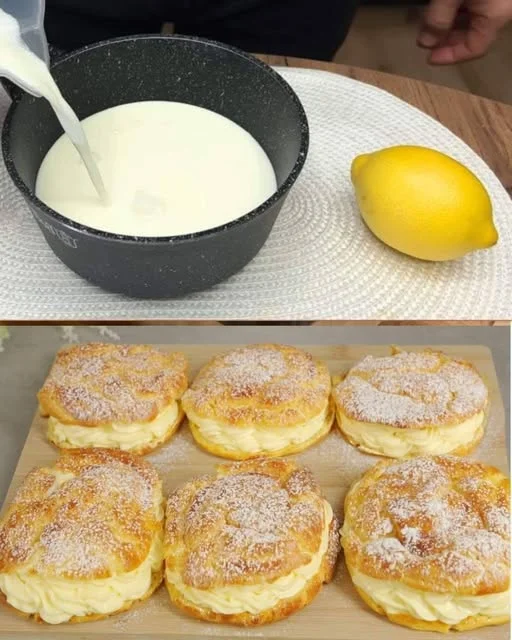
  1. In a medium saucepan, add the milk and lemon zest. Warm gently over low heat until just hot (do not boil), then remove from heat and let sit for 10 minutes to infuse.
  2. In a mixing bowl, whisk together the eggs, granulated sugar, vanilla sugar, and cornstarch until smooth and lump-free.
  3. Gradually pour the warm milk into the egg mixture while whisking constantly to avoid curdling.
  4. Return the mixture to the saucepan and cook over medium-low heat, stirring continuously until it thickens into a silky, custard-like cream (about 5–7 minutes).
  5. Remove from heat. Optional: strain to remove zest for an ultra-smooth finish.
  6. Pour into individual cups or ramekins and let cool slightly before refrigerating. Chill for at least 1 hour before serving.

Notes

  • For extra zing, add a squeeze of fresh lemon juice at the end of cooking.
  • To make it dairy-free, you can use plant-based milk like almond or oat milk.
  • Top with crushed shortbread cookies, whipped cream, or fresh berries for an elegant finish.
  • Best served chilled, but can also be enjoyed slightly warm for a cozy treat.

Crispy Chicken Chops: A Delightful Comfort Food for Any Occasion

There are some meals that take you straight back to a moment, a place, or a feeling, no matter how much time has passed. For me, crispy chicken chops are one of those nostalgic dishes that I associate with family gatherings and weekends spent together in the kitchen. It’s a recipe I’ve carried from my childhood, one that my grandmother used to make when we visited her during summer holidays. She always believed in cooking with simplicity but creating flavors that stayed with you long after the meal was over.

The sound of the chicken fillets sizzling in hot oil, the sight of them turning golden brown, and the irresistible aroma that would fill the house were all part of what made those moments so special. Every time I make crispy chicken chops today, it feels like a warm hug, a connection to my roots, and a reminder of the joy that food can bring to our lives.

In this modern world where meals often come from packages or are prepared in haste, there’s something undeniably satisfying about making a dish that requires no complicated ingredients or long lists of instructions. This crispy chicken chop recipe is all about simplicity and flavor. With just a handful of ingredients and minimal preparation, you can create a dish that’s sure to impress family and friends. The crispy texture, tender meat, and subtle seasoning make this chicken recipe perfect for any occasion, whether it’s a quick weeknight dinner or a comforting weekend meal.

The Art of Crispy Chicken Chops

What makes this recipe stand out is the balance of simplicity and deliciousness. Chicken is a universal favorite, and by turning it into crispy, golden fillets, you elevate the experience. The key to making these chicken chops truly crispy is the technique, rather than the complexity of the ingredients. The crispy exterior contrasts beautifully with the juicy, tender interior, creating a perfect bite every time. Whether you’re a beginner in the kitchen or a seasoned home cook, this recipe is accessible to anyone looking for a satisfying, hassle-free meal.

But it’s not just the crunch that makes crispy chicken chops such a beloved dish. It’s also about the flavors. Salt and black pepper are the foundational seasonings, enhancing the natural taste of the chicken without overwhelming it. And for those who want to take it a step further, the option of adding dried garlic adds a delightful depth of flavor. It’s a perfect example of how a few ingredients, used thoughtfully, can bring out the best in a dish.

Ingredients:

IngredientQuantity
Chicken fillet700 g
Salt and black pepperTo taste
Dried garlic (optional)To taste

Instructions:

  1. Prepare the Chicken: Begin by patting the chicken fillets dry with paper towels to ensure they cook evenly and become crispy on the outside.
  2. Season the Chicken: Season the chicken fillets with salt and black pepper according to your preference. If using dried garlic, sprinkle it on as well. Rub the seasoning into the chicken to distribute it evenly.
  3. Heat the Pan: Heat a little oil in a large skillet or frying pan over medium-high heat. Once the oil is hot, place the chicken fillets in the pan, ensuring they don’t overlap.
  4. Cook the Chicken: Fry the chicken fillets for about 4-6 minutes per side, depending on their thickness. The goal is to achieve a golden-brown, crispy exterior while keeping the inside tender and juicy.
  5. Drain and Serve: After cooking, remove the chicken from the pan and allow it to rest for a couple of minutes. This helps the juices redistribute. Serve the crispy chicken immediately with your favorite sides.

Nutritional Information (Per Serving):

NutrientAmount
Calories250 kcal
Protein35g
Carbohydrates0g
Fat12g
Fiber0g
Sugar0g

Frequently Asked Questions

  1. Can I use boneless chicken thighs instead of chicken fillets? Absolutely! While this recipe uses chicken fillets, boneless chicken thighs can be a great substitute. They’re slightly juicier and add more flavor to the dish. Just adjust the cooking time, as thighs tend to be thicker than fillets.
  2. How can I make the chicken even crispier? If you want to enhance the crispiness, you can coat the chicken fillets in a thin layer of flour or breadcrumbs before frying. This adds an extra crunchy texture that pairs perfectly with the tender meat inside.
  3. Can I bake the chicken instead of frying it? While frying gives the chicken its signature crispiness, you can bake it for a healthier alternative. Preheat your oven to 400°F (200°C), place the seasoned chicken fillets on a baking sheet, and bake for 20-25 minutes or until golden brown and cooked through. To get a crispy exterior, you can spray the chicken lightly with cooking oil before baking.
  4. How do I know when the chicken is cooked through? The best way to ensure your chicken is cooked properly is by checking its internal temperature. It should reach 165°F (75°C). You can also cut into the thickest part of the fillet to check that the meat is no longer pink and the juices run clear.
  5. Can I add more seasonings or spices to this recipe? Absolutely! While this recipe keeps things simple with just salt, pepper, and optional dried garlic, feel free to add your favorite spices. A dash of paprika, onion powder, or even some dried herbs like thyme or oregano can bring extra flavor to your crispy chicken chops.
  6. What can I serve with crispy chicken chops? These crispy chicken chops are versatile and pair well with a variety of side dishes. Try serving them with mashed potatoes, a fresh green salad, roasted vegetables, or even a side of fries for a classic comfort meal. You can also drizzle a bit of honey mustard or your favorite dipping sauce for extra flavor.

Why This Recipe Works

One of the things I love most about this crispy chicken chop recipe is how forgiving it is. You don’t need to be a gourmet chef to achieve delicious results. The ingredients are simple, and the process is straightforward, yet the outcome is incredibly satisfying. It’s a dish that doesn’t require expensive or hard-to-find ingredients, making it accessible to everyone. Whether you’re cooking for one or for a crowd, you can scale this recipe up or down easily, ensuring that no one goes home hungry.

Another thing that makes this recipe a go-to in my kitchen is its versatility. It’s perfect for any meal—whether you’re serving it for lunch, dinner, or even a meal prep option for the week ahead. You can adapt it to suit your preferences, making it as simple or as elaborate as you like. The crispy chicken chops can be the star of a fancy dinner or a quick meal that satisfies your hunger after a long day.

The Healing Power of Comfort Food

Food has always been more than just sustenance. For many of us, it’s a way to connect with our past, our culture, and even our emotions. When I make crispy chicken chops, I’m reminded of the moments spent with family, the laughter around the table, and the love that goes into preparing and sharing a meal. Cooking is an act of love, and sharing that meal with others brings joy to both the cook and the guests.

In our busy lives, we often overlook the power of a simple meal. But comfort foods like crispy chicken chops have a unique way of grounding us, of bringing us back to the present moment. It’s a reminder that, even in the midst of chaos, we can take a moment to nourish our bodies and souls.

Conclusion: A Recipe Worth Making

Crispy chicken chops may seem like a humble dish, but there’s something extraordinary about its simplicity. It’s a reminder that sometimes, the best meals don’t require complicated recipes or exotic ingredients. With just a few basic staples—chicken, salt, pepper, and a little bit of seasoning—you can create a dish that satisfies both your appetite and your heart.

Whether you’re cooking for yourself or for a loved one, this crispy chicken chop recipe is sure to become a staple in your kitchen. It’s the kind of meal that everyone will enjoy, and the kind of recipe you’ll keep coming back to time and time again. So go ahead, grab some chicken, and get frying. The crispy, golden crunch awaits!

Amal

Crispy Chicken Chops: A Delightful Comfort Food for Any Occasion

Crispy Chicken Chops are a quick and delicious dish made with simple ingredients. The chicken is seasoned with salt and black pepper, then fried to perfection, creating a crispy, golden crust on the outside while keeping the meat juicy on the inside. Perfect for any meal, whether it’s lunch, dinner, or a snack!
Prep Time 10 minutes
Cook Time 15 minutes
Total Time 25 minutes
Servings: 2 -3 servings
Course: Main Dish
Cuisine: American

Ingredients
  

  • 700 g chicken fillet
  • Salt and black pepper to taste
  • Dried garlic optional to taste

Method
 

  1. Prepare the Chicken: Start by trimming any excess fat or skin from the chicken fillets. Pat them dry with paper towels to ensure a crispier finish when frying.
  2. Season the Chicken: Season the fillets generously with salt and black pepper. If you like a deeper flavor, sprinkle some dried garlic for an added taste boost.
  3. Heat the Oil: Heat some oil in a frying pan over medium heat. You need enough oil to lightly cover the base of the pan for frying.
  4. Fry the Chicken: Once the oil is hot, carefully add the chicken fillets to the pan. Fry each side for about 4-5 minutes or until golden brown and crispy. Make sure the fillets are cooked through; the internal temperature should reach 165°F (75°C).
  5. Drain and Serve: Remove the chicken from the pan and place it on a plate lined with paper towels to drain any excess oil. Serve the crispy chicken chops hot with your choice of sides or dipping sauces.

Notes

  • Serving Suggestions: Serve the crispy chicken chops with mashed potatoes, roasted vegetables, or a side salad for a complete meal. You can also pair them with your favorite dipping sauce such as honey mustard or barbecue sauce.
  • Baking Option: For a healthier alternative, bake the chicken fillets in a preheated oven at 400°F (200°C) for about 20-25 minutes, flipping halfway through. Lightly spray the chicken with cooking oil for a crispier exterior.
  • Flavor Variations: Feel free to add additional seasonings like paprika, onion powder, or dried herbs like thyme or oregano to customize the flavor to your liking.

A Famous Banana Cocoa Dessert: A Sweet Journey to Simple Indulgence

Growing up, my grandmother was known for her simplicity in the kitchen. She had an incredible way of transforming the most basic ingredients into mouthwatering treats that would fill the house with warmth and love. One of my fondest memories is of her whipping up a dessert so simple, yet so satisfying, that it became a regular feature at family gatherings. It wasn’t a complicated or extravagant dessert, but something about the combination of banana, cocoa, and ghee butter made it magical. I remember the first time I helped her make it. She let me crush the crackers, feeling a sense of pride as I mixed the ingredients together. This dessert became a reminder that the simplest things in life could bring the most joy.

Now, as an adult, whenever I make this dessert, I am reminded of those moments with my grandmother. The banana cocoa dessert has become a symbol of nostalgia and comfort, a way to pass on that same sense of warmth to my own family. It doesn’t require fancy ingredients or complicated techniques. It’s the perfect treat for any occasion, from a quiet afternoon snack to a dessert shared with friends and family. Whether you’re looking for something quick and easy or a simple indulgence, this dessert will satisfy your cravings while evoking feelings of home, warmth, and the love that only a grandmother can provide.

Why This Dessert Works

Sometimes, the most delicious treats are the ones that don’t demand hours of preparation or expensive ingredients. This famous banana cocoa dessert is proof of that. Made with just four main ingredients—bananas, cocoa powder, crackers, and ghee butter—this dessert balances sweetness, richness, and texture in the most satisfying way. The banana provides a natural sweetness, while the cocoa powder brings a deep, rich flavor that complements the fruit beautifully. The crackers form a simple yet sturdy base, while the ghee butter adds a lovely, indulgent richness that pulls it all together.

What makes this dessert truly special is how it can be enjoyed in so many different ways. You can serve it as a light dessert after dinner, or even as a snack during the day when you need a little pick-me-up. The dessert can be customized to suit your personal taste preferences, making it as versatile as it is delicious. Want to make it a little sweeter? Drizzle some honey on top. Want a bit more texture? Add some crushed nuts or shredded coconut. The options are endless, and the result is always a decadent treat that everyone will love.

Ingredients:

IngredientAmount
Banana2 pcs, ripe
Cocoa1 tablespoon
Crackers60 g, crushed
Ghee Butter70 g

Instructions:

  1. Prepare the Bananas: Peel the bananas and slice them into rounds. Set aside for later use.
  2. Prepare the Cracker Base: In a mixing bowl, combine the crushed crackers and ghee butter. Stir until the mixture reaches a crumbly consistency. Press the mixture into the base of your dessert dish or individual serving cups to create a crust.
  3. Mix Cocoa and Banana: In a separate bowl, mix the cocoa powder with the sliced banana. Mash gently until the mixture is smooth, allowing the cocoa to blend well with the banana.
  4. Assemble the Dessert: Spread the banana-cocoa mixture over the cracker base, smoothing it out into an even layer.
  5. Chill and Serve: Refrigerate the dessert for at least 2 hours to allow the flavors to combine and the dessert to set. Serve chilled for the best texture and flavor.

Nutritional Information (per serving):

NutrientAmount
Calories230 kcal
Fat14 g
Carbohydrates27 g
Protein2 g
Sugar14 g

Nutritional Benefits of This Dessert

While this dessert may feel like an indulgence, it’s also packed with nutritional benefits that make it a relatively healthy choice for a sweet treat. Bananas, the star of this dish, are known for their high potassium content, which supports heart health and proper muscle function. They’re also a great source of fiber, which aids in digestion and helps keep you feeling full for longer.

Cocoa powder, often hailed for its antioxidant properties, also offers a boost to brain function and heart health. The ghee butter, made from clarified butter, contains healthy fats that can support brain health and energy levels. While it’s important to enjoy this dessert in moderation, it’s easy to see how these ingredients can contribute to a balanced diet when used in the right proportions.

FAQs About This Banana Cocoa Dessert

1. Can I substitute the ghee butter with another type of fat?

Yes, if you prefer, you can substitute ghee butter with regular butter, coconut oil, or even olive oil. Ghee has a rich, nutty flavor that adds a unique depth to the dessert, but the recipe will still work well with other fats.

2. Is this dessert suitable for people with dietary restrictions?

This dessert is naturally vegetarian and can be easily adapted for various dietary needs. If you are looking for a dairy-free option, you can substitute the ghee butter with coconut oil or another dairy-free alternative. For a vegan version, you can also try using plant-based sweeteners and replace the crackers with a gluten-free variety if necessary.

3. How long will this dessert keep?

This dessert can be stored in the refrigerator for up to 3 days. It’s best served chilled, allowing the flavors to meld together beautifully. If you have leftovers, they can be enjoyed as a quick snack or dessert later on.

4. Can I add other fruits to the dessert?

Absolutely! While the banana is the primary fruit in this dessert, you can experiment with other fruits like strawberries, blueberries, or even pears. Just keep in mind that the texture and flavor might change slightly depending on the fruit you use.

5. Is this dessert suitable for children?

Yes, this dessert is perfect for kids! It’s naturally sweetened with bananas and can be enjoyed as an after-school snack or a fun treat for special occasions. The texture is soft and easy to eat, making it ideal for little ones.

6. Can I make this dessert ahead of time?

Definitely! This dessert is even better when made ahead of time, as it gives the flavors a chance to blend and develop. It’s a great option for meal prep or for serving at a party or family gathering. Just be sure to refrigerate it properly and serve it chilled.

Tips and Variations

  • Add a Crunchy Topping: If you’re a fan of added texture, sprinkle some chopped nuts (like almonds, walnuts, or pistachios) or granola on top of the dessert before serving. The crunch complements the smoothness of the banana and cocoa beautifully.
  • Try Different Cocoa Types: For a richer, more intense flavor, consider using dark cocoa powder or even adding a touch of chocolate chips to the dessert. This can elevate the dessert and give it a more decadent feel.
  • Make it Sweeter: If you like your desserts on the sweeter side, drizzle a little honey or maple syrup on top before refrigerating it. This will give it a little extra sweetness without overpowering the natural flavors of the bananas and cocoa.

The Power of Simplicity

At its core, this dessert is a testament to the beauty of simplicity. No fancy ingredients, no complex cooking techniques—just a handful of simple, wholesome ingredients that come together to create something truly delicious. In a world where we’re often bombarded with complicated recipes and intricate presentations, sometimes it’s refreshing to take a step back and enjoy something that reminds us of the joys of simpler times.

In the end, this banana cocoa dessert isn’t just a treat; it’s a reminder that good things often come in simple packages. Whether you’re enjoying it alone, sharing it with loved ones, or passing it down to the next generation, this dessert has the power to evoke memories, create new traditions, and bring people together. It may be a humble dessert, but it holds a special place in the hearts of those who make it and share it.

Conclusion: The Simple Joy of Homemade Dessert

There’s something magical about preparing a homemade dessert that doesn’t require a lot of effort but delivers on flavor and satisfaction. This banana cocoa dessert is a perfect example of how simple ingredients can come together to create something extraordinary. As you savor each bite, you’ll not only enjoy the sweet, rich flavors but also the sense of comfort and nostalgia that comes with it. Whether it’s a quick snack or the star of your next dinner party, this dessert proves that sometimes the best things in life are the simplest.

Let this dessert be your go-to for moments of indulgence, comfort, and togetherness, just as it has been for me over the years. It’s a little slice of happiness that anyone can create and enjoy—no matter the occasion.

Amal

A Famous Banana Cocoa Dessert: A Sweet Journey to Simple Indulgence

A quick and delightful dessert that combines the rich flavor of cocoa with the natural sweetness of bananas. This simple yet indulgent treat will melt in your mouth and leave you wanting more. With just a handful of ingredients, you can create a dessert that feels luxurious but is incredibly easy to make. Perfect for any occasion and loved by all ages!
Prep Time 10 minutes
Servings: 4 –6 servings
Course: Dessert
Cuisine: International

Ingredients
  

  • 2 Bananas
  • 1 tablespoon Cocoa
  • 60 g Crackers your choice
  • 70 g Ghee Butter

Method
 

  1. Prepare the Base: Break the crackers into small pieces and place them in a bowl. You can use a food processor to make them into crumbs if you prefer a smoother texture.
  2. Mix the Cocoa: In a separate small bowl, mix the cocoa with a little bit of warm water to make a smooth paste. This will help the cocoa blend more evenly in the dessert.
  3. Prepare the Bananas: Peel the bananas and mash them with a fork until smooth. You want to get a creamy texture, but small chunks are okay too if you prefer a bit of texture.
  4. Combine the Ingredients: In a large bowl, combine the crushed crackers, mashed bananas, cocoa paste, and ghee butter. Stir well until everything is thoroughly mixed and you have a cohesive mixture.
  5. Chill and Set: Transfer the mixture into a small baking dish or individual cups. Press the mixture down lightly to compact it and help it set. Refrigerate for at least 2-3 hours, or overnight for best results.
  6. Serve and Enjoy: Once set, serve chilled. You can top with additional cocoa, whipped cream, or fruit for extra flavor and decoration.

Notes

  • Texture Variations: If you want a crunchier base, consider using graham crackers or adding nuts to the mix.
  • Sweetness Adjustments: Depending on the sweetness of your bananas, you can add a bit of honey or maple syrup if desired.
  • Serving Tips: For a fancier presentation, serve in individual glass cups and garnish with a sprinkle of cocoa powder or fresh fruit.

The Delight of No-Bake Desserts: A Memory in Every Bite

I have always believed that food is more than just sustenance—it holds memories, emotions, and stories. Growing up in a household where the kitchen was the heart of the home, my mother’s ability to create dishes that made us feel comforted, loved, and safe was unmatched. There was one recipe, in particular, that stands out in my mind—a no-bake dessert that never failed to bring the family together. It was her signature treat, a no-bake chocolate biscuit cake. The moments spent in the kitchen preparing this dessert were always filled with laughter, love, and a bit of chaos, but the result was always the same: a dessert so indulgent and delicious, it felt like a slice of home.

This no-bake cake became more than just a recipe—it became a tradition. No matter how busy or hectic life got, we always found time to sit down together and share this simple yet heavenly treat. Over the years, I’ve come to realize that sometimes, the best desserts are the ones that don’t require hours of preparation. They’re the ones that remind us that life doesn’t have to be complicated to be beautiful. This Milka Milk Chocolate No-Bake Cake is a modern twist on that childhood favorite, a tribute to the moments we hold dear and the simple pleasures of life.

In this article, we’re diving into the details of this incredibly easy yet rich no-bake cake, highlighting the ingredients, the preparation process, and the countless reasons why this dessert will quickly become a favorite in your kitchen. Let’s explore how a few simple ingredients can come together to create something extraordinary!

Why No-Bake Cakes Are the Ultimate Dessert

No-bake desserts are the perfect solution for those times when you want to indulge in something sweet without turning on the oven. Whether you’re in a rush or simply don’t want to deal with the heat of the kitchen, no-bake cakes offer a quick and satisfying solution. These types of desserts are not only easy to make, but they often have a creamy, rich texture that’s hard to resist.

In addition to their simplicity, no-bake cakes are incredibly versatile. You can make them with a variety of ingredients, adjust them to your taste, and experiment with different flavors. From fruit-based cakes to chocolate and nut combinations, the possibilities are endless. Best of all, you don’t need any fancy baking skills to get the results you want. If you can layer ingredients, you can create a stunning no-bake cake.

Ingredients

IngredientAmount
Whipping cream300 ml (10 fl oz)
Eggs2 large
Sugar70 g (2.5 oz)
Starch45 g (1.6 oz)
Milk500 ml (17 fl oz)
Soft butter50 g (1.8 oz)
Vanilla essence5 ml (0.2 fl oz)
Warm milk200 ml (6.8 fl oz)
Instant coffee10 g (0.4 oz)
Cocoa biscuits500 g (18 oz)
Milka milk chocolate90 g (3.2 oz), chopped

Directions

  1. Whip the cream: In a large mixing bowl, whip the cream until soft peaks form. Set aside.
  2. Prepare the custard: In a saucepan, whisk together the eggs, sugar, starch, and milk over medium heat. Stir continuously until the mixture thickens into a custard consistency. Remove from heat and allow to cool slightly.
  3. Add vanilla: Stir in the vanilla essence into the cooled custard mixture.
  4. Dissolve coffee: In a small bowl, combine the warm milk and instant coffee. Stir until the coffee is completely dissolved.
  5. Layer the biscuits: In a deep dish or cake pan, arrange the cocoa biscuits, lightly soaking them with the coffee mixture to ensure they absorb enough moisture.
  6. Layer the custard and cream: Pour a layer of custard over the soaked biscuits, followed by a layer of whipped cream.
  7. Repeat the layers: Continue layering the biscuits, custard, and whipped cream until all ingredients are used. End with a final layer of whipped cream on top.
  8. Finish with chocolate: Chop the Milka milk chocolate and sprinkle it over the top layer.
  9. Chill: Refrigerate the cake for 2-3 hours to allow it to set. The flavors will meld together, and the texture will firm up.
  10. Serve: Slice and serve chilled.

Nutritional Information (per serving)

NutrientAmount
Calories300 kcal
Total Fat18g
Saturated Fat10g
Carbohydrates34g
Sugars18g
Fiber2g
Protein4g
Cholesterol60mg
Sodium100mg

What Makes This Milka Milk Chocolate No-Bake Cake So Special?

There are many no-bake desserts out there, but this particular recipe stands out because of its balance of flavors and textures. The combination of whipped cream, custard, coffee-soaked cocoa biscuits, and rich Milka milk chocolate is nothing short of indulgent. The custard provides a smooth, velvety base, while the whipped cream adds lightness and creaminess. The cocoa biscuits, softened with coffee, create the perfect contrast in texture, and the milk chocolate topping adds a sweet, decadent finish.

This cake is incredibly easy to make yet feels like a luxurious treat, making it ideal for any occasion—from a casual family gathering to a special celebration. It’s a dessert that can be whipped up in a matter of hours, and it’s guaranteed to impress your guests. Even better, it requires no baking, which makes it a perfect option for hot summer days when you want something cool and refreshing without the added heat of the oven.

The Story Behind the Ingredients

Each ingredient in this Milka Milk Chocolate No-Bake Cake has its own role to play in creating the perfect balance of flavors. Let’s take a closer look at the key elements:

  • Whipping Cream: The cream serves as the base for the light and airy texture of the cake. It gives the dessert its rich mouthfeel and balances the sweetness of the chocolate.
  • Eggs and Starch: These two ingredients come together to create a smooth custard that forms one of the layers of the cake. The eggs add structure and richness, while the starch helps thicken the custard, ensuring that it holds its shape when layered.
  • Milk: Both whole milk and warm milk play crucial roles in this recipe. The whole milk provides a creamy base for the custard, while the warm milk is used to dissolve the instant coffee, giving the dessert its unique depth of flavor.
  • Instant Coffee: Coffee adds a subtle bitterness that complements the sweetness of the milk chocolate and balances the richness of the whipped cream. It’s the secret ingredient that elevates the entire dessert.
  • Cocoa Biscuits: These biscuits are the backbone of the dessert, providing structure and texture. When soaked in coffee, they become tender and flavorful, creating a base for the creamy layers above.
  • Milka Milk Chocolate: The crowning touch of this dessert, the Milka chocolate adds a smooth and sweet finish. Its creamy, milk-based flavor ties together all of the other ingredients and leaves a lasting impression.

How to Make Your Own No-Bake Cake

Making this Milka Milk Chocolate No-Bake Cake is as simple as layering the ingredients in the correct order. There’s no need for baking, which makes it an ideal choice for anyone who’s short on time but still wants to create something impressive. The preparation is straightforward, and once the cake is assembled, all you need to do is let it chill in the fridge for a few hours to set.

The beauty of this recipe lies in its simplicity. There’s no need to worry about perfecting complicated techniques or worrying about oven temperatures. Instead, it’s all about getting the right balance of flavors and textures—and with this recipe, that’s a guarantee.

Frequently Asked Questions (FAQs)

Can I make this cake ahead of time?

Yes, this cake is perfect for making ahead of time. In fact, allowing it to chill in the fridge for several hours (or even overnight) will help the flavors meld together and the cake to set properly.

What can I substitute for Milka milk chocolate?

If you can’t find Milka milk chocolate, you can use any high-quality milk chocolate. Look for a smooth and creamy variety for the best results.

Can I add different flavors to the custard?

Absolutely! You can experiment with different flavorings for the custard. Try adding a bit of cinnamon or even a splash of liqueur like Baileys or Kahlúa for an adult twist.

Is it possible to make this dessert without coffee?

Yes, if you’re not a fan of coffee, you can simply omit it or replace it with a flavor of your choice. Strong brewed tea or even fruit juice could work as a substitute.

How long will this cake keep in the fridge?

This no-bake cake will keep in the refrigerator for up to 3 days. After that, the biscuits may begin to lose their texture, so it’s best to consume it sooner rather than later.

Conclusion: A Slice of Nostalgia and Comfort

In the end, this Milka Milk Chocolate No-Bake Cake is more than just a dessert. It’s a reminder that sometimes, the simplest recipes are the ones that bring the most joy. It’s a dish that can be shared with loved ones, enjoyed on a warm summer afternoon, or served at a special celebration. Each bite takes you back to those moments of connection, comfort, and shared happiness—just like the cakes of our childhoods.

Whether you’re looking for a quick and impressive dessert to make for a gathering or a comforting treat to enjoy at home, this no-bake cake is the perfect solution. It’s easy to make, indulgent to eat, and always sure to impress. Try it today, and let it become a beloved tradition in your home, just as it has in mine.

Amal

The Delight of No-Bake Desserts: A Memory in Every Bite

This indulgent no-bake Milka Milk Chocolate Cake is a delightful dessert perfect for any occasion. With its creamy custard layers, rich coffee-soaked cocoa biscuits, and smooth Milka chocolate topping, it’s a treat that is sure to impress. The best part? It requires no baking, making it an easy and convenient dessert to prepare.
Prep Time 30 minutes
Total Time 4 hours
Servings: 8 -10 servings
Course: Dessert
Cuisine: European-inspired

Ingredients
  

  • Whipping cream: 300 ml 10 fl oz
  • Eggs: 2 large
  • Sugar: 70 g 2.5 oz
  • Starch: 45 g 1.6 oz
  • Milk: 500 ml 17 fl oz
  • Soft butter: 50 g 1.8 oz
  • Vanilla essence: 5 ml 0.2 fl oz
  • Warm milk: 200 ml 6.8 fl oz
  • Instant coffee: 10 g 0.4 oz
  • Cocoa biscuits: 500 g 18 oz
  • Milka milk chocolate: 90 g 3.2 oz, chopped

Method
 

  1. Prepare the Coffee Soaked Biscuits: In a shallow dish, mix 200 ml of warm milk with instant coffee. Stir until dissolved. Quickly dip the cocoa biscuits into the coffee mixture, ensuring they are slightly softened but not soggy. Layer the biscuits in the base of a serving dish or cake pan.
  2. Make the Custard Base: In a saucepan, combine 500 ml milk, sugar, and starch. Place over medium heat, stirring continuously until the mixture thickens into a smooth custard. Remove from heat and stir in the soft butter and vanilla essence. Let it cool to room temperature.
  3. Whip the Cream: In a separate bowl, whip the cream until soft peaks form. Once the custard mixture has cooled, fold in the whipped cream until fully combined.
  4. Assemble the Cake: Spread a layer of the creamy custard mixture over the soaked biscuits. Repeat the layers, alternating between the coffee-soaked biscuits and the custard mixture until all ingredients are used.
  5. Top with Chocolate: Melt the Milka milk chocolate in a microwave-safe bowl or over a double boiler. Pour the melted chocolate over the top layer of the cake, spreading it evenly. Refrigerate the cake for at least 4 hours or until set.
  6. Serve and Enjoy: Once set, slice and serve chilled for the best taste.

Notes

  • Make sure not to soak the biscuits for too long to avoid sogginess.
  • If you want a stronger coffee flavor, you can adjust the amount of instant coffee.
  • You can also use other types of milk chocolate if you prefer a different taste, but the Milka chocolate gives it a rich, creamy finish.

Crispy Zucchini and Cheese Fritters – A Comforting Bite of Home

There is something special about the aroma of golden, crispy fritters sizzling in a pan. It reminds me of childhood afternoons spent in my grandmother’s kitchen, where she would transform simple garden vegetables into magical meals. Among all the dishes she made, her zucchini fritters held a special place in my heart. They were warm, crisp, and oozing with melted cheese—a combination that felt like home.

Now, every time I make these fritters, I am transported back to those cherished moments. This recipe is more than just a dish; it’s a celebration of simple ingredients coming together to create something truly satisfying. Whether you are looking for a light meal, a side dish, or a snack, these zucchini and cheese fritters will bring a touch of comfort to your table.

Why You’ll Love This Recipe

  • Quick and Easy – With minimal prep and a few pantry staples, you can whip up a batch in no time.
  • Crispy on the Outside, Soft on the Inside – A perfect texture that makes each bite irresistible.
  • Versatile and Customizable – Add different cheeses, herbs, or spices to suit your taste.
  • Great for Meal Prep – These fritters store well and can be reheated for a quick meal.

Ingredients

For the Fritters:

IngredientQuantity
Zucchini2 (700 g)
Salt½ tsp
Eggs2
All-purpose flour3 Tbsp
Mozzarella cheese, grated100 g

Directions

  1. Grate the zucchini and sprinkle with salt. Let it sit for 10 minutes to release excess moisture, then squeeze out the liquid.
  2. In a bowl, mix the zucchini with eggs, flour, and grated mozzarella cheese until well combined.
  3. Heat a pan over medium heat and lightly grease with oil.
  4. Drop spoonfuls of the mixture into the pan and flatten slightly.
  5. Cook for 3-4 minutes per side until golden brown and crispy.
  6. Remove and drain on paper towels before serving.

Nutritional Information (Per Serving)

NutrientAmount
Calories~180 kcal
Protein~10 g
Carbohydrates~12 g
Fat~9 g
Fiber~2 g

Tips for Perfect Zucchini Fritters

  1. Drain the Zucchini Well – After grating the zucchini, let it sit with a little salt to draw out moisture, then squeeze out as much liquid as possible. This ensures crispy fritters instead of soggy ones.
  2. Use the Right Cheese – Mozzarella adds a gooey texture, but you can also mix in parmesan for extra flavor.
  3. Don’t Overcrowd the Pan – Cooking in small batches helps the fritters cook evenly and crisp up nicely.
  4. Serve Immediately – These fritters are best enjoyed fresh off the pan while they’re warm and crispy.

Serving Suggestions

  • As a Side Dish: Pair with grilled chicken, fish, or roasted vegetables for a balanced meal.
  • As a Snack: Serve with a side of sour cream, tzatziki, or a garlic yogurt sauce for dipping.
  • For Breakfast: Enjoy alongside eggs and toast for a delicious morning meal.
  • In a Sandwich: Use the fritters as a base for a unique, low-carb sandwich alternative.

FAQs About Zucchini Fritters

Can I bake these fritters instead of frying?

Yes! Arrange the fritters on a lined baking sheet, brush with a little oil, and bake at 200°C (400°F) for about 20 minutes, flipping halfway through.

Can I make them gluten-free?

Absolutely! Swap the all-purpose flour for almond flour or a gluten-free blend.

How do I store and reheat leftovers?

Store leftover fritters in an airtight container in the refrigerator for up to 3 days. Reheat in a skillet over medium heat or in an air fryer to bring back the crispiness.

Can I freeze zucchini fritters?

Yes, you can freeze them. Place them on a baking sheet in a single layer, freeze until solid, then transfer to a freezer bag. Reheat in a pan or oven straight from frozen.

Can I add other vegetables?

Of course! Try adding grated carrots, sweet potatoes, or spinach for extra flavor and nutrition.

Conclusion: A Recipe to Keep Coming Back To

Zucchini and cheese fritters are more than just a meal—they’re a reminder of how simple ingredients can create something truly comforting. Whether you make them for a quick snack, a side dish, or a main meal, they are bound to be a hit with family and friends. So next time you have zucchini in your kitchen, don’t let it go to waste—grate it, mix it with cheese and eggs, and enjoy the golden, crispy magic of these fritters.

Amal

Crispy Zucchini and Cheese Fritters – A Comforting Bite of Home

These zucchini and cheese fritters are the perfect combination of crispy, golden edges and a soft, cheesy center. Made with fresh zucchini, eggs, flour, and gooey mozzarella, they come together in minutes and are packed with flavor. Whether served as a snack, side dish, or light meal, these fritters are guaranteed to be a hit with the whole family.
Prep Time 15 minutes
Cook Time 10 minutes
Total Time 25 minutes
Servings: 8 -10 fritters
Course: Appetizer
Cuisine: International

Ingredients
  

  • 2 zucchini about 700g, grated
  • ½ teaspoon salt
  • 2 eggs
  • 3 tablespoons all-purpose flour
  • 100 g mozzarella cheese grated

Method
 

  1. Prepare the zucchini – Grate the zucchini and sprinkle with salt. Let it sit for 10 minutes, then squeeze out as much liquid as possible.
  2. Mix the batter – In a bowl, combine the drained zucchini, eggs, flour, and grated mozzarella. Stir until well combined.
  3. Heat the pan – Add a bit of oil to a skillet over medium heat.
  4. Cook the fritters – Spoon the batter into the pan, flattening slightly. Cook for 2-3 minutes per side until golden brown and crispy.
  5. Serve warm – Enjoy with sour cream, yogurt, or a dipping sauce of your choice.

Notes

  • Draining the zucchini properly is crucial for crispy fritters.
  • Mozzarella adds a stretchy, gooey texture, but you can also use cheddar or parmesan for a stronger flavor.
  • For extra crispiness, add a tablespoon of breadcrumbs to the mixture.
  • Leftovers can be stored in the fridge for up to 3 days and reheated in a pan or oven.

Oatmeal and Apple in a Mug: A Quick and Nourishing Delight

There’s something incredibly comforting about a warm, homemade meal enjoyed straight from a mug. It takes me back to childhood mornings when the aroma of cinnamon and oats filled the kitchen, signaling the start of a cozy day. My grandmother would always prepare something simple yet nourishing—usually a bowl of oatmeal or a quick-baked treat. Inspired by those memories, this oatmeal mug cake is a fusion of both: soft, chewy, naturally sweet, and bursting with flavor from dried fruit and spices.

In today’s fast-paced world, we often overlook the importance of mindful eating and the joy of preparing something wholesome with minimal effort. That’s why this recipe is a perfect reminder that homemade goodness doesn’t have to be complicated. Whether you’re craving a quick breakfast, a satisfying snack, or even a light dessert, this oatmeal and apple mug cake delivers all the warmth and comfort of traditional baked goods—without the long prep time.

Why You’ll Love This Recipe

  • Quick and Easy: Ready in just minutes, making it perfect for busy mornings or a last-minute snack.
  • Nutritious: Packed with fiber from oats, protein from eggs, and natural sweetness from dried fruit.
  • Naturally Sweetened: The combination of raisins and dried apricots eliminates the need for added sugar.
  • Warm and Comforting: A cinnamon-spiced treat that feels like a hug in every bite.
  • Customizable: Easily adaptable with different dried fruits, nuts, or even a drizzle of honey.

Ingredients

IngredientQuantity
Oatmeal1 cup (100 g)
Ground cinnamon1/2 teaspoon
Baking powder1 teaspoon
SaltPinch
Raisins (rinsed in hot water)3 tablespoons
Dried apricots (rinsed in hot water)10-12 pieces
Egg1

Directions

  1. In a mixing bowl, combine the oatmeal, ground cinnamon, baking powder, and salt.
  2. Chop the rinsed dried apricots into small pieces and mix them into the dry ingredients along with the raisins.
  3. Beat the egg and add it to the mixture, stirring well until fully combined.
  4. Transfer the mixture into a microwave-safe mug or small oven-safe dish.
  5. Microwave on high for 2-3 minutes or bake at 180°C (350°F) for 12-15 minutes until set.
  6. Let it cool slightly before enjoying warm.

Nutritional Information (Per Serving)

NutrientAmount
Calories~180 kcal
Protein6 g
Carbohydrates32 g
Fiber4 g
Sugar10 g
Fat4 g

Health Benefits of Oatmeal and Dried Fruits

1. Oats: A Heart-Healthy Staple

Oats are known for their high fiber content, specifically beta-glucan, which helps lower cholesterol levels and supports digestive health. They provide sustained energy and keep you full longer, making them an excellent breakfast option.

2. Dried Fruits: Nature’s Candy

Raisins and apricots are rich in antioxidants, vitamins, and minerals. They contribute natural sweetness without the need for refined sugar while also offering potassium, iron, and fiber.

3. Cinnamon: More Than Just Flavor

This spice is loaded with antioxidants and has anti-inflammatory properties. It also helps regulate blood sugar levels, making this recipe a smart choice for those looking to maintain balanced energy levels throughout the day.

4. Protein Power from Eggs

Eggs provide high-quality protein that supports muscle growth and keeps you feeling satisfied. They also help bind the ingredients together, giving the mug cake a soft, tender texture.

Frequently Asked Questions

1. Can I Make This Recipe Vegan?

Yes! You can substitute the egg with a flaxseed or chia seed “egg.” Simply mix 1 tablespoon of ground flaxseeds or chia seeds with 2.5 tablespoons of water, let it sit for a few minutes, and use it in place of the egg.

2. Can I Use Fresh Fruit Instead of Dried Fruit?

Absolutely! Fresh apple slices, mashed banana, or blueberries can replace the dried fruits. However, dried fruits add a concentrated natural sweetness that enhances the overall flavor.

3. Can I Prepare This Recipe Without a Microwave?

Yes! If you don’t have a microwave, you can bake this in a preheated oven at 180°C (350°F) for about 12-15 minutes until set.

4. How Can I Make This Recipe Gluten-Free?

Ensure that you’re using certified gluten-free oats, as some brands may contain traces of gluten due to cross-contamination during processing.

5. Can I Add Nuts or Other Toppings?

Of course! Chopped walnuts, almonds, pecans, or a sprinkle of shredded coconut can add extra crunch and nutrition.

6. What’s the Best Way to Serve This Mug Cake?

Enjoy it straight from the mug, or top it with a dollop of Greek yogurt, a drizzle of honey, or a sprinkle of cinnamon for an extra-special treat.

Tips for the Best Mug Cake

  1. Use a Microwave-Safe Mug: Choose a mug that’s at least 12 oz in size to prevent overflowing while cooking.
  2. Don’t Overmix the Batter: Stir until just combined to avoid a dense texture.
  3. Adjust Sweetness to Taste: If you prefer a sweeter treat, add a teaspoon of honey or maple syrup.
  4. Watch the Cooking Time: Since microwave wattages vary, start with 90 seconds and check if the cake is set. Add extra time in 10-second increments if needed.
  5. Enjoy Immediately: Mug cakes are best eaten warm and fresh for the softest texture.

Conclusion: A Simple Treat That Feels Special

Oatmeal and apple in a mug is more than just a quick recipe—it’s a wholesome way to bring warmth and comfort into your day. Whether you’re making it as a morning pick-me-up or a late-night indulgence, this easy treat proves that healthy eating doesn’t have to be boring. It’s an invitation to slow down, savor every bite, and appreciate the simple pleasures of homemade food.

So the next time you’re craving something sweet but nutritious, grab a mug, a handful of ingredients, and let the magic happen in just a few minutes.

Amal

Oatmeal and Apple in a Mug: A Quick and Nourishing Delight

This warm and comforting oatmeal mug cake is a perfect quick breakfast or snack. Made with wholesome oats, dried fruit, and a touch of cinnamon, it delivers a naturally sweet and nutritious treat in just minutes. Whether you need a cozy start to your morning or a guilt-free dessert, this easy recipe is packed with fiber and flavor.
Prep Time 5 minutes
Cook Time 5 minutes
Total Time 10 minutes
Servings: 2 -3 servings
Course: Snack
Cuisine: Healthy

Ingredients
  

  • 1 cup 100 g oatmeal
  • 1/2 teaspoon ground cinnamon
  • 1 teaspoon baking powder
  • Pinch of salt
  • 3 tablespoons raisins rinsed in hot water
  • 10-12 pieces of dried apricots rinsed in hot water
  • 1 egg

Method
 

  1. In a bowl, mix oatmeal, cinnamon, baking powder, and salt.
  2. Chop the dried apricots into small pieces and combine them with the raisins.
  3. Add the egg and mix well until combined.
  4. Pour the mixture into a microwave-safe mug.
  5. Microwave for 2-3 minutes until the top is set.
  6. Let cool slightly before enjoying warm.

Notes

  • If you prefer a softer texture, add 1-2 tablespoons of milk or water.
  • You can swap raisins and apricots for chopped dates, cranberries, or nuts.
  • For extra sweetness, drizzle with honey or maple syrup after cooking.

A Nourishing Start: Oatmeal with Banana and Apple

There’s something deeply comforting about a warm bowl of oatmeal. For me, it brings back memories of crisp autumn mornings when my grandmother would wake up early to prepare a hearty breakfast before we set off for school. She believed that a nutritious start was the key to a productive day, and nothing compared to her homemade oatmeal, filled with natural sweetness from ripe bananas and juicy apples.

She would let me mash the banana while she stirred the oats, and I remember how the cinnamon-scented steam filled the kitchen. I always thought it was magic—how a few simple ingredients could turn into something so satisfying. As I grew older, I realized it wasn’t just the taste that made this breakfast special; it was the love and tradition poured into every bowl.

Today, I carry on that tradition by making this wholesome oatmeal recipe for my own family. Packed with fiber, protein, and natural sugars, it’s a meal that keeps you full, energized, and ready to take on the day.

Why This Recipe Stands Out

A Perfect Balance of Nutrition and Flavor

This recipe is not only delicious but also incredibly nourishing. Oatmeal provides slow-digesting carbohydrates that keep you full for hours, while nuts and seeds offer healthy fats and protein. The natural sweetness from bananas and apples eliminates the need for added sugar, making it a great choice for those watching their sugar intake.

Easy to Make and Customizable

One of the best things about this oatmeal recipe is how versatile it is. You can swap out ingredients based on your preferences or dietary needs. Want a crunchier texture? Add more nuts or sunflower seeds. Prefer a creamier consistency? Increase the mashed banana.

Great for Any Time of Day

While this oatmeal recipe is an excellent breakfast option, it can also be enjoyed as a mid-day snack or even a healthy dessert. If you bake it into bars, it becomes a convenient grab-and-go option for busy mornings.

Ingredients

IngredientQuantity
Oatmeal1 cup
Nuts (walnuts, almonds, pecans, etc.), chopped1/2 cup
Sweetener (honey, maple syrup, or stevia)1 tablespoon
Sesame seeds1 tablespoon
Sunflower seeds1 tablespoon
Cinnamon1/4 teaspoon
Apple, peeled and chopped1 medium
Banana, mashed1 medium
Oatmeal (additional)1/2 cup

Directions

  1. Prepare the Base – In a mixing bowl, combine the oatmeal, chopped nuts, sweetener, sesame seeds, sunflower seeds, and cinnamon. Mix well.
  2. Incorporate Fruits – Add the peeled and chopped apple along with the mashed banana. Stir until all ingredients are well combined.
  3. Add More Oats – Gradually mix in the additional 1/2 cup of oatmeal to enhance texture and consistency.
  4. Shape and Set – Scoop small portions onto a parchment-lined tray, shaping them as desired.
  5. Refrigerate or Bake – For a chewy texture, refrigerate for 30 minutes before serving. For a firmer, toasted flavor, bake at 160°C (320°F) for 12-15 minutes.
  6. Serve and Enjoy – Enjoy warm or chilled for a nutrient-packed snack or breakfast.

Nutritional Information (Per Serving)

NutrientAmount (Approximate)
Calories220 kcal
Protein6g
Carbohydrates35g
Fiber5g
Sugars10g
Healthy Fats8g

Health Benefits of the Key Ingredients

Oatmeal: A Heart-Healthy Superfood

Oats are one of the best sources of beta-glucan, a type of fiber that helps lower cholesterol levels and supports heart health. They also aid in digestion, keep blood sugar levels stable, and provide long-lasting energy.

Bananas: Nature’s Perfect Sweetener

Bananas are not just a natural sweetener; they are packed with potassium, which helps regulate blood pressure. They also contain vitamin B6, which plays a crucial role in brain function and mood regulation.

Apples: Fiber-Rich and Antioxidant-Packed

An apple a day truly does keep the doctor away! Apples contain pectin, a type of soluble fiber that promotes gut health. They are also rich in antioxidants, which help combat oxidative stress and inflammation.

Nuts and Seeds: A Nutrient Powerhouse

From walnuts and almonds to sunflower and sesame seeds, these ingredients add a dose of healthy fats, plant-based protein, and essential minerals like magnesium and zinc. They help with brain function, skin health, and overall immunity.

Frequently Asked Questions (FAQs)

1. Can I make this oatmeal without bananas?

Yes! If you prefer to skip the banana, you can use unsweetened applesauce or a tablespoon of almond butter for a creamy texture and mild sweetness.

2. Can I use instant oats instead of rolled oats?

You can, but the texture will be different. Instant oats cook faster and tend to become mushy. Rolled oats provide a heartier texture and better nutritional value.

3. How can I make this recipe vegan?

This recipe is naturally vegan as long as you use maple syrup or stevia instead of honey as a sweetener.

4. Can I prepare this oatmeal in advance?

Absolutely! You can make a batch and store it in the fridge for up to three days. Just reheat with a little water or milk before serving.

5. Can I bake this into oatmeal bars?

Yes! Simply mix all the ingredients, spread them into a baking dish, and bake at 160°C (320°F) for 20 minutes. Let them cool before cutting into bars.

6. What can I serve with this oatmeal?

It pairs well with a drizzle of nut butter, a spoonful of yogurt, or a handful of extra fresh fruits on top.

7. Is this recipe suitable for kids?

Definitely! It’s a great way to introduce kids to healthy eating with a naturally sweet and satisfying meal.

Conclusion: A Simple Yet Powerful Way to Start Your Day

This oatmeal recipe with banana and apple is more than just a meal; it’s a wholesome experience that nourishes both the body and the soul. Whether you enjoy it warm on a chilly morning or chilled as an afternoon snack, it’s a versatile and nutritious dish that brings comfort with every bite.

With just a handful of natural ingredients, you can create a meal that supports your health, fuels your body, and satisfies your taste buds. And who knows? Maybe this will become a new family tradition in your home, just like it did in mine.

Amal

A Nourishing Start: Oatmeal with Banana and Apple

This wholesome oatmeal recipe combines the natural sweetness of ripe bananas and fresh apples with the crunch of nuts and seeds. Packed with fiber, protein, and essential nutrients, it’s the perfect way to start your day or enjoy as a healthy snack. Simple to make and naturally sweetened, this recipe will keep you full and energized for hours.
Prep Time 10 minutes
Cook Time 15 minutes
Total Time 25 minutes
Servings: 4 –6 servings
Course: Snack
Cuisine: American

Ingredients
  

  • 1 cup oatmeal
  • 1/2 cup nuts chopped (walnuts, almonds, pecans, etc.)
  • 1 tablespoon sweetener honey, maple syrup, or stevia
  • 1 tablespoon sesame seeds
  • 1 tablespoon sunflower seeds
  • 1/4 teaspoon cinnamon
  • 1 apple peeled and chopped
  • 1 banana mashed
  • 1/2 cup oatmeal additional

Method
 

  1. In a mixing bowl, combine the oatmeal, chopped nuts, sweetener, sesame seeds, sunflower seeds, and cinnamon.
  2. Add the peeled and chopped apple and the mashed banana. Stir well to combine.
  3. Mix in the additional oatmeal to adjust texture and consistency.
  4. Scoop portions onto a parchment-lined tray and shape as desired.
  5. Refrigerate for 30 minutes for a chewy texture, or bake at 160°C (320°F) for 12-15 minutes for a firmer bite.
  6. Serve warm or chilled and enjoy.

Notes

  • Nut Alternatives: Use any nuts you prefer, or replace them with seeds for a nut-free version.
  • Texture Adjustments: Add extra mashed banana for a softer texture or more oats for a firmer bite.
  • Sweetness Level: Adjust the amount of honey or maple syrup to suit your taste.

Best Danish Butter Cookies: A Timeless Classic

It was a chilly winter afternoon when I first made these Danish butter cookies. The scent of the butter, the softness of the dough, and the crispy edges that melted in my mouth brought back so many memories. I remembered my grandmother, who would bake them every year during the holidays, filling the house with a sense of comfort and nostalgia. As the years went by, I tried different recipes, but nothing could replicate the magic of her Danish butter cookies. With a little trial and error, I finally found the recipe that brought back that warmth—perfectly crisp, buttery, and slightly sweet.

These cookies, though simple, are a reminder of how food has the ability to transport us to moments and places we cherish. Danish butter cookies have a rich history, and their delicate texture has made them a favorite across generations. Whether it’s a special occasion, a holiday treat, or an everyday indulgence, they bring comfort with every bite.

The Allure of Danish Butter Cookies: A Perfect Treat for Every Occasion

Danish butter cookies have been beloved for centuries, and for good reason. They offer a perfect balance of rich, buttery flavor and a delicate, melt-in-your-mouth texture. Unlike many other types of cookies, they are not overly sweet, making them versatile and appropriate for various occasions. These cookies can be enjoyed on their own, paired with a hot beverage like tea or coffee, or even given as gifts in beautifully decorated tins.

The simplicity of the ingredients and the ease with which they come together make these cookies a go-to recipe for both beginner and experienced bakers. The fact that they are so universally adored by people of all ages is a testament to the recipe’s timeless appeal. Whether shared at a family gathering, a holiday party, or a casual afternoon snack, Danish butter cookies have earned their place in kitchens worldwide.

Ingredients:

IngredientAmount
Salted Butter250g
Egg1
Icing Sugar130g
Vanilla Essence1/2 tsp
Cake Flour270g
Corn Starch70g
Milk Powder20g

Directions:

  1. Prepare the Dough: Start by softening the salted butter at room temperature. Once it’s soft, beat the butter and icing sugar in a large mixing bowl until light and creamy.
  2. Add Egg and Vanilla: Crack in the egg and add the vanilla essence. Mix until well combined.
  3. Sift Dry Ingredients: In a separate bowl, sift together the cake flour, corn starch, and milk powder. This will eliminate any lumps and ensure smooth mixing.
  4. Combine Wet and Dry: Gradually add the sifted dry ingredients to the wet mixture. Stir gently until the dough comes together. Avoid overmixing to ensure a tender texture.
  5. Chill the Dough: Wrap the dough in plastic wrap and chill it in the fridge for about 30 minutes. This will make it easier to handle when shaping the cookies.
  6. Preheat the Oven: While the dough chills, preheat the oven to 170°C (340°F). Line a baking tray with parchment paper.
  7. Shape the Cookies: After the dough has chilled, remove it from the fridge. Roll it out on a lightly floured surface to your desired thickness, then use cookie cutters to shape the dough into rounds or any other shape.
  8. Bake: Arrange the cookies on the prepared tray and bake for 12-15 minutes or until the edges are golden brown. Keep an eye on them to avoid overbaking.
  9. Cool and Serve: Allow the cookies to cool on the tray for a few minutes, then transfer them to a wire rack to cool completely. Enjoy them once they have cooled down.

Nutritional Information (per cookie, approximately 20 servings):

NutrientAmount
Calories120 kcal
Fat8g
Carbohydrates13g
Protein1g
Sugar6g

Why Make Danish Butter Cookies at Home?

In today’s fast-paced world, it’s easy to reach for store-bought cookies. But there is something special about homemade treats that you can’t get from a package. When you bake these cookies at home, you have control over the ingredients, ensuring that you are making the freshest, most delicious version possible. The rich aroma that fills your kitchen as they bake is a sensory experience that no store-bought cookie can replicate.

Homemade cookies also have a more personal touch. Whether you’re baking with family, gifting a tin to a friend, or enjoying them with a cup of tea after a long day, these cookies are about more than just eating—they are about creating memories and sharing moments. The process of making Danish butter cookies allows you to slow down, enjoy the act of baking, and take pride in creating something that will bring joy to others.

The Secret to Perfect Danish Butter Cookies: Key Ingredients

The success of these Danish butter cookies lies in their simplicity. The ingredients may seem basic, but they come together to create the perfect balance of textures and flavors. Here’s a closer look at the key ingredients that give these cookies their magic:

  1. Salted Butter: The rich, creamy butter is the star of this recipe. It provides the cookies with their signature melt-in-your-mouth texture. Using salted butter enhances the flavor and adds a hint of savory contrast to the sweetness.
  2. Icing Sugar: This is used instead of granulated sugar because it dissolves quickly and creates a smooth, tender dough. It also helps give the cookies a lighter, more delicate texture.
  3. Eggs: The egg provides structure to the dough and helps bind the ingredients together. It also contributes to the golden color and slight richness in flavor.
  4. Vanilla Essence: This subtle flavor enhances the buttery taste of the cookies. Vanilla is often associated with warmth and sweetness, making it a perfect addition to this recipe.
  5. Cake Flour: This flour has a lower protein content than all-purpose flour, which helps make the cookies tender and light. It gives the cookies their delicate texture.
  6. Corn Starch: Adding corn starch to the dough ensures that the cookies are soft and crumbly. It helps to create that melt-in-your-mouth effect that is characteristic of Danish butter cookies.
  7. Milk Powder: The addition of milk powder imparts a slight creaminess to the cookies, further enhancing their rich, buttery flavor.

Each ingredient plays an essential role in creating the perfect balance of texture and flavor. With these simple ingredients, you can make the best Danish butter cookies that will impress your friends and family.

FAQs: All You Need to Know About Danish Butter Cookies

Can I use unsalted butter instead of salted butter?

Yes, you can use unsalted butter, but you’ll need to add a pinch of salt to the dough to replicate the effect of salted butter. However, using salted butter provides a richer flavor and can help balance the sweetness.

Can I substitute the cake flour?

If you don’t have cake flour on hand, you can substitute it with all-purpose flour, but the texture of the cookies might not be as tender. To replicate cake flour, you can also try replacing a tablespoon of all-purpose flour with cornstarch.

How can I store Danish butter cookies?

Danish butter cookies can be stored in an airtight container for up to a week. They also freeze well; just place them in a freezer bag or airtight container and freeze for up to three months. When ready to enjoy, allow them to thaw at room temperature.

Can I add chocolate chips or other flavors to these cookies?

While traditional Danish butter cookies are simple and flavorful on their own, you can certainly experiment by adding chocolate chips, crushed nuts, or dried fruit. However, these additions may alter the delicate texture, so proceed with caution and adjust accordingly.

How do I make the cookies more crispy?

If you prefer your Danish butter cookies to be more crispy, you can flatten the dough slightly before baking. Baking them a little longer until the edges are golden brown will also give them a crispier texture.

Can I double the recipe?

Yes, you can easily double or even triple the recipe to make a larger batch. Just be sure to use larger mixing bowls and possibly multiple baking sheets. Adjust the baking time accordingly if you’re baking more than one sheet at a time.

The Timeless Appeal of Danish Butter Cookies

There’s a reason why Danish butter cookies have stood the test of time. Their simple ingredients and delicate flavor make them perfect for nearly every occasion. From holiday gift-giving to everyday indulgence, these cookies never go out of style.

Baking them yourself adds an extra layer of enjoyment. As the cookies bake, the scent of butter fills the air, evoking memories of holiday gatherings and family traditions. With each bite, you’re not just savoring a delicious treat; you’re reliving moments of joy, connection, and comfort.

Conclusion: The Perfect Cookie for Any Occasion

Danish butter cookies are the perfect combination of simplicity and elegance. They are versatile enough to be served at any event, and their rich flavor and delicate texture make them a crowd favorite. Whether you’re making them for a special occasion or just to enjoy at home with your loved ones, these cookies are sure to delight.

The process of making these cookies is a reminder of how the simplest ingredients, when combined with care and attention, can create something extraordinary. Each batch of Danish butter cookies you bake will not only bring joy to your taste buds but will also be a celebration of tradition, warmth, and the joy of homemade baking. So, grab your apron and give this recipe a try—the results will be a batch of cookies that are nothing short of perfect.

Amal

Best Danish Butter Cookies: A Timeless Classic

Crisp, buttery, and irresistibly delicate, these Danish butter cookies are a timeless classic. Made with simple ingredients, they have a melt-in-your-mouth texture and a rich, buttery flavor that makes them perfect for any occasion. Whether enjoyed with a cup of tea or gifted in a festive tin, these homemade cookies are sure to impress.
Prep Time 15 minutes
Cook Time 20 minutes
Total Time 35 minutes
Servings: 30 cookies
Course: Dessert
Cuisine: Danish

Ingredients
  

  • 250 g salted butter softened
  • 1 egg
  • 130 g icing sugar
  • 1/2 teaspoon vanilla essence
  • 270 g cake flour
  • 70 g corn starch
  • 20 g milk powder

Method
 

  1. Cream the Butter and Sugar – In a large mixing bowl, beat the softened butter and icing sugar together until light and fluffy.
  2. Add Egg and Vanilla – Mix in the egg and vanilla essence until well incorporated.
  3. Sift and Combine Dry Ingredients – In a separate bowl, sift together the cake flour, corn starch, and milk powder. Gradually add this to the butter mixture, stirring gently to combine.
  4. Chill the Dough – Wrap the dough in plastic wrap and refrigerate for about 30 minutes to make handling easier.
  5. Preheat Oven – While the dough chills, preheat your oven to 170°C (340°F). Line a baking tray with parchment paper.
  6. Shape the Cookies – Roll the dough into small balls or pipe into classic Danish butter cookie shapes.
  7. Bake – Arrange the cookies on the prepared baking sheet and bake for 12-15 minutes, or until the edges are lightly golden.
  8. Cool and Enjoy – Allow the cookies to cool on the baking tray for a few minutes before transferring to a wire rack to cool completely.

Notes

  • If you prefer unsalted butter, add 1/4 teaspoon of salt to the dough.
  • Piping the dough through a star-shaped nozzle gives the cookies their traditional appearance.
  • Store the cookies in an airtight container for up to two weeks.

The Comfort of Homemade Bread: A Journey Back to Simplicity

There’s something inherently comforting about the smell of freshly baked bread wafting through the house. For me, baking bread is more than just a culinary activity—it’s a connection to memories of family gatherings, slow afternoons spent with loved ones, and the joy of making something from scratch. I remember the first time I baked bread with my grandmother. She had this quiet way of making the process feel like magic—measuring, kneading, and waiting for the dough to rise while we chatted about life, love, and everything in between.

Over the years, that simple experience stayed with me. Baking bread became my way of grounding myself during stressful times. No matter how busy life gets, there’s something truly therapeutic about the process of creating bread. It’s a sensory experience—the feel of the dough in your hands, the sound of it rising, and the satisfaction of pulling a warm loaf from the oven. In a world that moves so fast, bread reminds me to slow down and appreciate the simple, beautiful things.

This easy homemade bread recipe is one I’ve perfected over time, and I want to share it with you. It’s versatile, easy to make, and results in a fluffy, delicious loaf that you’ll want to make again and again. Whether you’re a seasoned baker or someone who’s just starting out, this recipe offers something for everyone. Let’s dive into the process of baking a loaf of bread that is sure to fill your home with warmth and comfort.

Why Homemade Bread is Worth the Effort

In the age of convenience, it’s easy to forget the satisfaction that comes from creating something with your own hands. While store-bought bread is convenient, it doesn’t compare to the flavor and texture of a fresh loaf made at home. Homemade bread allows you to control the ingredients, ensuring there are no preservatives or artificial additives. You get a healthier, more natural product that not only tastes better but makes you feel good about what you’re eating.

Baking bread also offers a sense of accomplishment. Watching the dough rise, kneading it with your hands, and finally seeing the finished loaf golden brown and fresh out of the oven—it’s incredibly satisfying. And there’s nothing quite like the taste of warm bread, straight from the oven, with butter melting on top.

Ingredients for the Dough

IngredientQuantity
Eggs2
Milk200 ml (1 cup)
Flour600 grams (2 1/2 cups)
Oil80 ml (1/3 cup)
Sugar45 grams (1/4 cup)
Salt1/2 tsp (4 grams)
Dry yeast1 1/2 tsp (10 grams)

Ingredients for the Topping

IngredientQuantity
Butter (melted)50 grams
Garlic Powder1 tsp
Parmesan Cheese50 grams (grated)
Chopped Parsley2 tbsp

Directions

  1. Prepare the Dough: In a large bowl, whisk together the eggs and milk until well combined. Add in the flour, sugar, salt, and dry yeast. Mix until the dough starts to form. Gradually add the oil, then knead the dough on a lightly floured surface for 8-10 minutes until smooth and elastic.
  2. Let it Rise: Place the dough in a greased bowl, cover it with a clean cloth, and let it rise in a warm place for 1-1.5 hours, or until it doubles in size.
  3. Shape the Dough: Once the dough has risen, punch it down gently to release the air. Shape the dough into a loaf or divide it into smaller rolls and place it in a greased baking pan.
  4. Prepare the Topping: In a small bowl, mix together the melted butter, garlic powder, grated parmesan cheese, and chopped parsley. Brush this mixture generously over the top of the shaped dough.
  5. Bake the Bread: Preheat the oven to 375°F (190°C). Bake the bread for 25-30 minutes, or until it’s golden brown on top and sounds hollow when tapped on the bottom.
  6. Cool and Serve: Let the bread cool on a wire rack for at least 15 minutes before slicing. Enjoy warm with your favorite spreads or as a side to any meal!

Nutritional Information (Per Serving)

NutrientAmount per Serving
Calories180 kcal
Carbohydrates30 grams
Protein4 grams
Fat6 grams
Fiber1 gram
Sodium220 mg

The Health Benefits of Homemade Bread

Making your own bread is not just about taste; it’s also about the health benefits that come with it. Most store-bought breads are loaded with preservatives, added sugars, and unnecessary chemicals to extend shelf life. When you bake bread at home, you get to choose every ingredient, ensuring that it’s as wholesome and nutritious as possible. Here are a few reasons why homemade bread is a healthier option:

  1. No Preservatives: Homemade bread doesn’t require chemical preservatives to extend its shelf life. This means it’s fresher and free from harmful additives.
  2. Whole Grains: You can use whole wheat flour or other grains to boost the fiber content in your bread, making it more filling and beneficial for digestive health.
  3. Control Over Ingredients: You control the type of flour, fat, and sweetness you add to your bread, allowing you to tailor it to your dietary preferences. If you prefer a gluten-free version or want to add healthy seeds, it’s all up to you.
  4. Lower Sodium: Most store-bought breads are loaded with salt, which can contribute to high blood pressure and other health issues. With homemade bread, you can significantly reduce the amount of sodium.

The Magic of Bread Making: A Relaxing Process

Bread making is as much about the journey as it is about the destination. There’s something magical about mixing simple ingredients—flour, water, yeast, and salt—and turning them into something so satisfying. While the process does require time and patience, it’s remarkably simple once you understand the basics.

Kneading the dough may feel therapeutic, almost like a form of stress relief. The dough becomes smoother and more elastic with every fold, and the rhythmic process of kneading allows you to feel more connected to the food you’re preparing. Then there’s the rise—waiting for the dough to double in size. It’s almost like watching a slow transformation, and when you punch it down and shape it into a loaf, there’s a sense of accomplishment that’s hard to match.

The waiting time—while the dough rises and then bakes—is a great opportunity to relax, enjoy a cup of tea, or perhaps spend time with friends and family. Once the bread is done, the whole house is filled with the comforting aroma of freshly baked bread, which is the true reward.

Tips and Tricks for Perfect Homemade Bread

While the process of making homemade bread is relatively straightforward, there are a few tips that can elevate your baking game. Here are some key things to keep in mind:

  1. Proper Yeast Activation: The yeast needs to be activated properly for the bread to rise. Always check the expiration date on your yeast packet, and make sure to use warm water (around 110°F or 43°C) to activate it. If the water is too hot, it will kill the yeast, and if it’s too cold, the yeast won’t activate.
  2. Kneading Technique: Kneading is crucial for developing gluten, which gives the bread its structure and chewiness. Use the heel of your hands to push the dough down and fold it over, turning the dough a quarter turn after each fold.
  3. Let the Dough Rise Fully: Be patient during the rising stages. If the dough hasn’t doubled in size, it hasn’t risen enough. This step is critical for achieving light, fluffy bread.
  4. Baking Temperature: Ensure your oven is preheated to the correct temperature before placing your bread inside. Baking at a high temperature helps create a crisp, golden crust while keeping the inside soft and airy.
  5. Storage: Store your homemade bread in an airtight container or wrap it in a cloth to keep it fresh for as long as possible. You can also freeze the bread for later use—just slice it before freezing, and you can toast individual slices as needed.

Common FAQs About Homemade Bread

Q: Can I make this recipe with whole wheat flour?

A: Absolutely! You can substitute whole wheat flour for part or all of the all-purpose flour. Keep in mind that whole wheat flour absorbs more liquid, so you may need to adjust the amount of liquid in the recipe.

Q: What if I don’t have yeast?

A: Yeast is a key ingredient in this recipe for leavening, but if you don’t have it, you can try using baking soda or baking powder as a substitute. However, this will alter the texture and flavor, so the result may not be the same.

Q: How do I know when the bread is done baking?

A: You can test the bread’s doneness by tapping the bottom of the loaf. If it sounds hollow, it’s done. You can also check the internal temperature with a thermometer—bread is usually done when it reaches 190°F (88°C).

Q: Can I freeze the dough?

A: Yes, you can freeze the dough after the first rise. Once it has doubled in size, punch it down and wrap it tightly in plastic wrap or place it in a freezer bag. When you’re ready to bake, thaw the dough in the refrigerator overnight and let it rise again before baking.

Conclusion: The Simple Joy of Homemade Bread

Baking your own bread is a rewarding and enjoyable experience that brings warmth and comfort to any occasion. This easy homemade bread recipe is not just a way to fill your stomach; it’s a way to connect with the past, create new memories, and enjoy the satisfaction of baking something from scratch. With just a few simple ingredients and a little patience, you can create a loaf that’s soft, fluffy, and full of flavor.

Whether you’re baking for a special occasion, making a family meal, or just treating yourself, homemade bread is always a good choice. So, roll up your sleeves, get your hands in the dough, and enjoy the process. And the next time you take a bite of your fresh, warm bread, remember that the joy of baking is in the simple moments—like the ones shared with family, friends, and loved ones. Happy baking!

Amal

The Comfort of Homemade Bread: A Journey Back to Simplicity

This simple homemade bread recipe delivers a fluffy, golden loaf that’s perfect for any meal. With just a few basic ingredients, you can create a bread that tastes infinitely better than store-bought, while filling your home with the warm, inviting aroma of freshly baked bread.
Prep Time 15 minutes
Cook Time 30 minutes
Servings: 8 -10 slices
Course: Bread
Cuisine: American

Ingredients
  

  • 375 ml warm water 1½ cups
  • ½ tablespoon sugar 7 g
  • 7 g dry yeast about 2¼ teaspoons
  • 500 g flour 4 cups, plus extra for dusting
  • 1 teaspoon salt 6 g
  • 2 tablespoons sunflower oil 30 ml

Method
 

  1. Activate the Yeast: In a bowl, combine the warm water and sugar. Sprinkle the dry yeast over the water and stir gently to dissolve. Let the mixture sit for about 5-10 minutes, or until it becomes frothy and bubbly. This step ensures that the yeast is active and ready to work.
  2. Combine Dry Ingredients: In a separate large mixing bowl, combine the flour and salt. Mix well.
  3. Form the Dough: Add the yeast mixture and sunflower oil to the dry ingredients. Stir until the mixture comes together into a dough.
  4. Knead the Dough: Turn the dough out onto a lightly floured surface. Knead for about 8-10 minutes, or until the dough is smooth, elastic, and no longer sticky. You can add a bit more flour if the dough is too sticky, but try to use as little as possible to keep the bread light and fluffy.
  5. First Rise: Place the kneaded dough into a lightly oiled bowl and cover it with a clean kitchen towel. Let the dough rise in a warm place for 1-2 hours, or until it has doubled in size.
  6. Shape the Loaf: Punch down the risen dough and turn it out onto a lightly floured surface. Shape it into a loaf by folding the edges toward the center, then rolling it up tightly. Place the dough into a greased loaf pan.
  7. Second Rise: Cover the loaf with a towel and let it rise again for about 30-45 minutes, or until it has puffed up and nearly doubled in size.
  8. Bake the Bread: Preheat your oven to 375°F (190°C). Bake the bread for 25-30 minutes, or until the top is golden brown and the loaf sounds hollow when tapped on the bottom. You can also check the internal temperature; it should reach about 190°F (88°C).
  9. Cool the Bread: Remove the bread from the pan and let it cool on a wire rack before slicing. Enjoy fresh or toasted with butter, jams, or your favorite spread.

Notes

  • Yeast Activation: Make sure the water is warm but not hot. If the water is too hot, it can kill the yeast, resulting in a flat loaf.
  • Flour Options: You can substitute part of the all-purpose flour with whole wheat flour for a heartier loaf. Keep in mind that whole wheat flour will make the dough denser, so you may need to add a little more water.
  • Storage: Store the bread in an airtight container or bread bag for up to 4-5 days at room temperature. It also freezes well for up to 3 months.

The Joy of Homemade Bread: A Tradition That Brings Comfort

There’s something incredibly comforting about the smell of freshly baked bread. It takes me back to my childhood when my grandmother would knead dough in the kitchen every weekend. The warmth of the oven, the soft rise of the dough, and the crackling sound of the crust as it cooled on the countertop—it all felt like home. I remember sitting at the kitchen table, eagerly waiting for that first slice, slathered in butter, with the faintest hint of sweetness.

Homemade bread, in its simplest form, offers an unparalleled level of comfort and satisfaction. It’s the kind of recipe that doesn’t just fill your stomach—it fills your heart. The process itself is a simple yet transformative one, as raw ingredients come together to create something magical. Whether you’re a beginner or an experienced baker, there’s something profoundly rewarding about making bread from scratch.

In today’s fast-paced world, it’s easy to forget the joy of taking a few basic ingredients and turning them into something extraordinary. Baking your own bread is an act of love, patience, and a little bit of magic. And when you slice into that loaf, the feeling of accomplishment is enough to make it all worth it.

This easy homemade bread recipe is designed for those who crave the satisfaction of fresh, soft bread without the complicated steps that often come with advanced baking techniques. It’s approachable, simple, and incredibly rewarding. Let’s dive into why making bread at home is more than just a culinary task—it’s an experience that brings joy and memories to life.

Why Homemade Bread Is a Game-Changer

Freshness at Its Best

There’s something distinctly different about the taste of bread made fresh from your kitchen. Store-bought bread often contains preservatives and additives that affect both the texture and flavor. When you make bread at home, you have control over the quality of ingredients, ensuring that you’re getting the best flavors possible. The freshness of bread straight out of the oven is incomparable, and the satisfaction of knowing you made it yourself is an added bonus.

The Art of Patience and Crafting

Baking bread is a beautiful exercise in patience. It teaches you the value of waiting and gives you a tangible reward for your efforts. Watching the dough rise and transform over time is almost meditative. The process encourages mindfulness, allowing you to engage with the simple act of creation. It’s a reminder that sometimes, the best things in life take a little time to develop.

Simple Ingredients, Profound Results

What makes this homemade bread so special is that it uses just a handful of ingredients—things you likely already have in your pantry. Flour, yeast, water, sugar, and oil come together to create a loaf that’s soft, warm, and perfect for any meal. It’s a testament to the fact that even the simplest ingredients can yield something extraordinary. With the right technique and a little bit of patience, you can create a loaf of bread that is far more satisfying than anything you’ll find on the supermarket shelf.

Ingredients

IngredientAmount
Warm water375 ml (1½ cups)
Sugar½ tablespoon (7 g)
Dry yeast7 g (about 2¼ teaspoons)
Flour500 g (4 cups), plus extra for dusting
Salt1 teaspoon (6 g)
Sunflower oil2 tablespoons (30 ml)

Instructions

  1. Activate the Yeast: In a small bowl, combine warm water and sugar. Sprinkle dry yeast over the water and let it sit for about 5-10 minutes, until the yeast becomes frothy and bubbly.
  2. Prepare the Dough: In a large mixing bowl, combine the flour and salt. Make a well in the center and pour in the activated yeast mixture along with the sunflower oil. Stir until the dough begins to form.
  3. Knead the Dough: Transfer the dough onto a lightly floured surface and knead for about 8-10 minutes, until the dough becomes smooth and elastic. If the dough feels too sticky, add a little extra flour as needed.
  4. Let the Dough Rise: Place the kneaded dough in a greased bowl and cover with a damp cloth. Let it rise in a warm place for about 1 to 1.5 hours, or until the dough has doubled in size.
  5. Shape the Loaf: Once the dough has risen, punch it down gently to release the air. Shape it into a loaf by folding the edges inwards and rolling it up. Place the shaped dough into a greased loaf pan.
  6. Second Rise: Cover the loaf pan with a damp cloth and allow the dough to rise for another 30-45 minutes until it has risen slightly above the edge of the pan.
  7. Bake: Preheat your oven to 375°F (190°C). Bake the loaf for 25-30 minutes or until the top is golden brown, and the loaf sounds hollow when tapped on the bottom.
  8. Cool and Serve: Once baked, remove the bread from the oven and let it cool on a wire rack before slicing. Enjoy with butter, jam, or any topping of your choice!

Nutritional Information (per serving, based on 10 slices)

NutrientAmount
Calories120 kcal
Carbohydrates24 g
Protein3 g
Fat2 g
Fiber1 g
Sodium150 mg

FAQs About Homemade Bread

1. Why does my bread dough not rise?

The most common reason for dough not rising is inactive yeast. Be sure that your yeast is fresh, and test it by dissolving it in warm water with a bit of sugar. If it doesn’t foam after a few minutes, it may be expired, and you’ll need to use fresh yeast. Also, make sure the dough is kept in a warm place, as cold temperatures can slow down or stop the rising process.

2. Can I make this bread recipe in a bread machine?

Yes! If you prefer using a bread machine, you can still follow this recipe. Simply add the ingredients to the bread machine in the order specified by the machine’s manufacturer and select the basic or white bread setting. The bread machine will take care of the kneading and rising for you. Once it’s done, you’ll have a freshly baked loaf.

3. Can I add extra flavorings or herbs to this bread?

Absolutely! This recipe serves as a great base for customization. Feel free to add herbs like rosemary or thyme, a handful of shredded cheese, or even a sprinkle of garlic powder to the dough before kneading. You can also incorporate spices such as cinnamon or nutmeg for a sweet variation.

4. How can I store homemade bread?

Once your bread has cooled, store it in an airtight container or a plastic bag to keep it fresh for several days. If you’re not planning to finish it within a few days, you can also freeze it. To freeze, slice the bread and wrap it tightly in plastic wrap or foil before placing it in a freezer-safe bag. When you’re ready to eat it, simply toast the slices directly from the freezer.

5. What if I don’t have sunflower oil?

You can substitute sunflower oil with any neutral oil, such as vegetable oil, canola oil, or even olive oil (though olive oil may impart a stronger flavor). If you’re looking for a dairy option, melted butter can also work well, giving the bread a richer flavor.

The Benefits of Baking Your Own Bread

A Therapeutic Experience

In our increasingly fast-paced world, baking bread is a rare opportunity to slow down. It’s a process that encourages you to focus on the present moment. As you mix, knead, and shape the dough, you become fully immersed in the task at hand. The repetitive motions can be soothing, providing a welcome respite from daily stresses. The end result, a warm loaf, serves as a reminder that taking your time can lead to great rewards.

A Connection to the Past

Baking bread has deep historical roots. It’s one of the oldest forms of cooking, predating even written history. Many cultures have their own unique bread-making traditions that have been passed down through generations. By baking bread yourself, you’re not only reconnecting with a craft that’s been around for centuries, but you’re also creating your own food memories that can be passed down.

Building Confidence in the Kitchen

If you’ve ever been intimidated by the thought of baking from scratch, this recipe is a perfect starting point. Bread-making doesn’t need to be complicated or daunting. With the right ingredients and a bit of patience, anyone can create delicious, fresh bread. Once you master this simple recipe, you’ll gain confidence to experiment with more complex baking projects, expanding your culinary skills.

Conclusion: Bread, More Than Just a Meal

Baking bread at home is more than just making something to eat—it’s an experience that nourishes the body and soul. There’s a sense of accomplishment that comes with preparing a dish from scratch, knowing you’ve turned simple ingredients into something special. Whether you’re making it for a family gathering, as part of a cozy dinner, or just because you enjoy the process, homemade bread is always a good choice.

This easy homemade bread recipe is a perfect introduction to the world of baking, but it’s also flexible enough for seasoned bakers to get creative. From adding herbs and spices to experimenting with different types of flour, the possibilities are endless. Each loaf becomes a reflection of your personality and creativity.

Next time you’re in the kitchen, try this bread recipe. It might just become a staple in your household—a warm, comforting symbol of home and tradition. And who knows? Maybe one day you’ll be passing down your bread-baking knowledge to the next generation, just like my grandmother did with me.

Amal

The Joy of Homemade Bread: A Tradition That Brings Comfort

There’s nothing quite like the aroma of fresh bread filling the house, making it feel warm, inviting, and comforting. This easy homemade bread recipe is the perfect way to indulge in the simple pleasure of baking from scratch. With minimal ingredients and just a few easy steps, you’ll have a soft, golden loaf that’s perfect for sandwiches, toasts, or simply enjoying with a spread of butter.
Prep Time 15 minutes
Cook Time 30 minutes
Total Time 1 hour 45 minutes
Servings: 10 slices
Course: Bread
Cuisine: International

Ingredients
  

  • 375 ml 1½ cups warm water
  • ½ tablespoon 7 g sugar
  • 7 g about 2¼ teaspoons dry yeast
  • 500 g 4 cups flour, plus extra for dusting
  • 1 teaspoon 6 g salt
  • 2 tablespoons 30 ml sunflower oil

Method
 

  1. Activate the Yeast: In a small bowl, dissolve the sugar in warm water. Sprinkle the yeast over the water and let it sit for about 5-10 minutes. The mixture should become frothy as the yeast activates.
  2. Prepare the Dough: In a large mixing bowl, combine the flour and salt. Create a well in the center and pour in the yeast mixture along with the sunflower oil. Stir the ingredients together until they begin to form a dough.
  3. Knead the Dough: Transfer the dough to a lightly floured surface. Knead it for about 8-10 minutes, until the dough becomes smooth and elastic. Add more flour as needed to prevent sticking.
  4. First Rise: Place the kneaded dough into a greased bowl and cover it with a damp cloth. Let the dough rise in a warm place for about 1 to 1.5 hours, or until it has doubled in size.
  5. Shape the Dough: Once the dough has risen, punch it down gently to release the air. Shape the dough into a loaf by folding the edges inwards and rolling it into a log shape. Place the shaped dough into a greased loaf pan.
  6. Second Rise: Cover the loaf with a damp cloth and let it rise for another 30-45 minutes, or until it has risen slightly above the edge of the pan.
  7. Bake the Bread: Preheat the oven to 375°F (190°C). Bake the loaf for 25-30 minutes, or until the bread is golden brown on top and sounds hollow when tapped on the bottom.
  8. Cool and Slice: Remove the bread from the oven and allow it to cool on a wire rack before slicing. Enjoy warm with your favorite spread or topping.

Notes

  • Storage: Store the bread in an airtight container or plastic bag to keep it fresh for up to 4 days. If you want to keep it longer, you can freeze it by slicing it first and wrapping it in plastic wrap before placing it in a freezer-safe bag.
  • Optional Additions: Feel free to customize the recipe by adding herbs, spices, or even shredded cheese to the dough before baking. Rosemary, garlic, or cheddar cheese are great choices to elevate the flavor of the bread.
  • Troubleshooting: If your bread doesn’t rise as expected, it could be due to the yeast being inactive. Always check the expiration date on your yeast or test it with warm water and sugar before starting.