Hot Cocoa Marshmallow Surprise Cookies

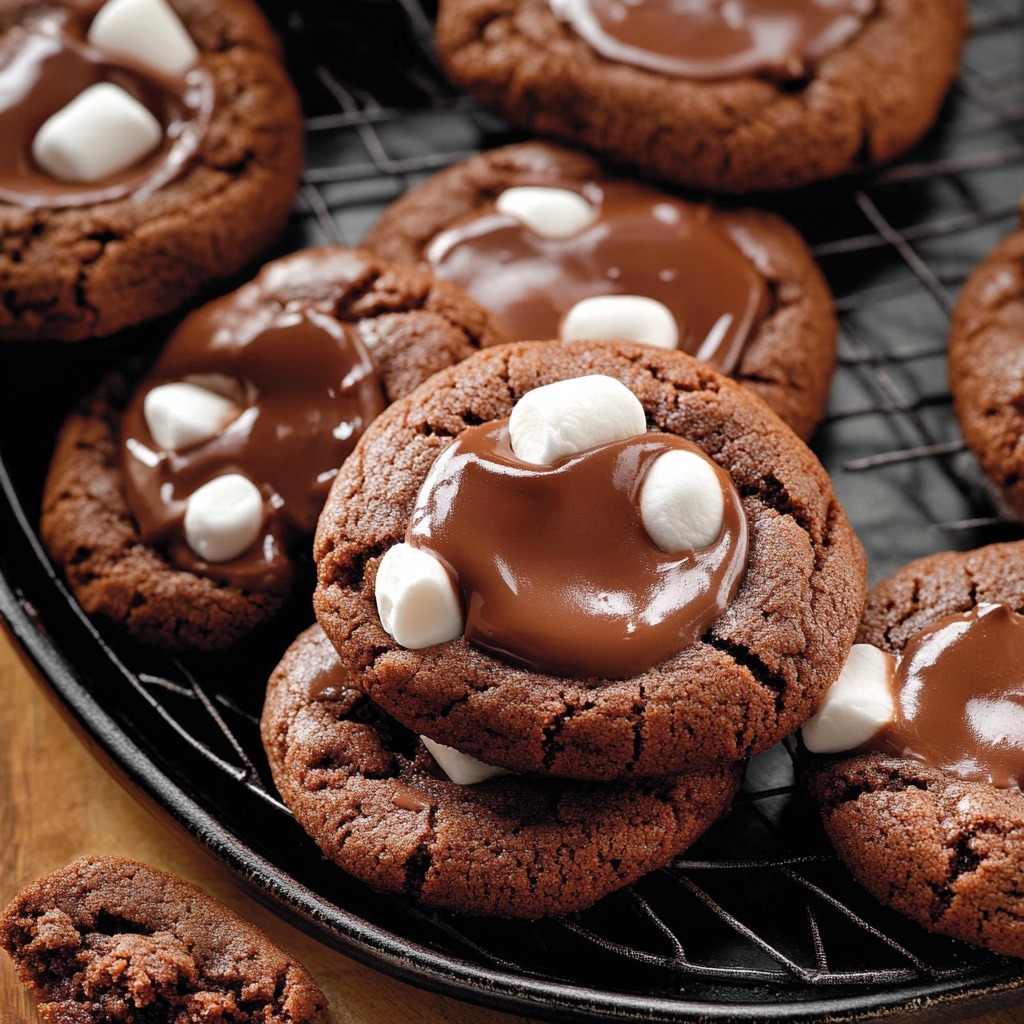
Cozy up with these Hot Cocoa Marshmallow Surprise Cookies, a delightful dessert twist inspired by the classic winter beverage. Imagine biting into a soft and chewy chocolate cookie that’s bursting with the rich flavors of cocoa and topped with a gooey marshmallow surprise. Perfect for chilly nights, holiday gatherings, or a simple sweet treat, these cookies will transport you to a winter wonderland of indulgence.

Ingredients

For the Cookies

  • ½ cup (113g) unsalted butter, softened to room temperature
  • ½ cup (100g) granulated sugar
  • ½ cup (100g) packed light or dark brown sugar
  • 1 large egg, at room temperature
  • 1 teaspoon pure vanilla extract
  • 1½ cups (188g) all-purpose flour (spooned & leveled)
  • ⅓ cup (27g) natural unsweetened cocoa powder
  • ¼ cup (40g) dry hot cocoa mix
  • 1 teaspoon baking soda
  • ⅛ teaspoon salt
  • 2 teaspoons (10ml) milk (any kind, dairy or nondairy, is fine)

For the Topping

  • 10–11 large marshmallows, cut in half
  • 8 ounces (226g) semi-sweet chocolate, finely chopped

Instructions

  1. Prepare the Cookie Dough : Preheat your oven to 350°F (177°C) and line baking sheets with parchment paper or silicone baking mats. In a large mixing bowl, cream together the softened butter, granulated sugar, and brown sugar using a hand or stand mixer on medium speed until smooth and creamy. Add the egg and vanilla extract, mixing until fully incorporated. In a separate bowl, whisk together the all-purpose flour, cocoa powder, hot cocoa mix, baking soda, and salt. Gradually add the dry ingredients to the wet ingredients, mixing on low speed until a soft dough forms. Add the milk and mix until the dough is smooth.
  2. Bake the Cookies : Using a cookie scoop or tablespoon, portion out the dough into 1.5-tablespoon-sized balls. Place them on the prepared baking sheets about 2 inches apart. Bake for 8–9 minutes, or until the edges are set but the centers are still soft. Do not overbake.
  3. Add the Marshmallow Surprise : Remove the cookies from the oven and immediately press one marshmallow half (cut side down) into the center of each cookie. Return the cookies to the oven and bake for an additional 2 minutes, just until the marshmallows puff slightly.
  4. Melt the Chocolate : While the cookies cool on the baking sheet, melt the semi-sweet chocolate in a microwave-safe bowl in 20-second increments, stirring after each interval, until smooth. Drizzle the melted chocolate over the cookies, covering the marshmallows and part of the cookie for a rich, glossy finish.
  5. Cool and Serve : Allow the cookies to cool completely on the baking sheets so the chocolate can set. Serve with a cup of hot cocoa or enjoy them as a stand-alone treat!

Conclusion

These Hot Cocoa Marshmallow Surprise Cookies are the ultimate cozy dessert for chocolate lovers. The rich cookie base, gooey marshmallow topping, and decadent chocolate drizzle create a trifecta of flavors and textures that’s irresistible. Whether you’re snuggling by the fire or hosting a holiday party, these cookies are guaranteed to delight and impress. Give them a try, and make every bite a warm, chocolatey hug!

Hot Cocoa Marshmallow Surprise Cookies

Hot Cocoa Marshmallow Surprise Cookies are chewy chocolate cookies infused with cocoa mix, topped with gooey marshmallows, and drizzled with melted chocolate for a warm, comforting dessert treat.
Prep Time 15 minutes
Cook Time 10 minutes
Total Time 25 minutes
Servings: 20 Cookies
Course: Dessert
Cuisine: American
Calories: 120

Ingredients
  

For the Cookies
  • ½ cup 113g unsalted butter, softened to room temperature
  • ½ cup 100g granulated sugar
  • ½ cup 100g packed light or dark brown sugar
  • 1 large egg at room temperature
  • 1 teaspoon pure vanilla extract
  • cups 188g all-purpose flour (spooned & leveled)
  • cup 27g natural unsweetened cocoa powder
  • ¼ cup 40g dry hot cocoa mix
  • 1 teaspoon baking soda
  • teaspoon salt
  • 2 teaspoons 10ml milk (any kind, dairy or nondairy, is fine)
For the Topping
  • 10 –11 large marshmallows cut in half
  • 8 ounces 226g semi-sweet chocolate, finely chopped

Method
 

  1. Prepare the Cookie Dough : Preheat your oven to 350°F (177°C) and line baking sheets with parchment paper or silicone baking mats. In a large mixing bowl, cream together the softened butter, granulated sugar, and brown sugar using a hand or stand mixer on medium speed until smooth and creamy. Add the egg and vanilla extract, mixing until fully incorporated. In a separate bowl, whisk together the all-purpose flour, cocoa powder, hot cocoa mix, baking soda, and salt. Gradually add the dry ingredients to the wet ingredients, mixing on low speed until a soft dough forms. Add the milk and mix until the dough is smooth.
  2. Bake the Cookies : Using a cookie scoop or tablespoon, portion out the dough into 1.5-tablespoon-sized balls. Place them on the prepared baking sheets about 2 inches apart. Bake for 8–9 minutes, or until the edges are set but the centers are still soft. Do not overbake.
  3. Add the Marshmallow Surprise : Remove the cookies from the oven and immediately press one marshmallow half (cut side down) into the center of each cookie. Return the cookies to the oven and bake for an additional 2 minutes, just until the marshmallows puff slightly.
  4. Melt the Chocolate : While the cookies cool on the baking sheet, melt the semi-sweet chocolate in a microwave-safe bowl in 20-second increments, stirring after each interval, until smooth. Drizzle the melted chocolate over the cookies, covering the marshmallows and part of the cookie for a rich, glossy finish.
  5. Cool and Serve : Allow the cookies to cool completely on the baking sheets so the chocolate can set. Serve with a cup of hot cocoa or enjoy them as a stand-alone treat!

Savory Garlic Parmesan Cheeseburger Bombs with a Bacon Twist

Looking for a unique, mouthwatering twist on the classic cheeseburger? These Savory Garlic Parmesan Cheeseburger Bombs combine juicy ground beef, crispy bacon, and gooey cheddar cheese, all encased in golden Pillsbury biscuits. Infused with the bold flavors of garlic, Parmesan, and a tangy barbecue-mustard sauce, this recipe is perfect for a quick family dinner, party appetizers, or game-day treats. Each bite is an explosion of comfort food goodness that’s guaranteed to satisfy any craving!

Ingredients

  • 1 can Pillsbury Biscuits (10 biscuits)
  • 1 pound lean ground beef
  • ½ onion, finely chopped
  • 3 slices turkey bacon, chopped
  • ⅓ cup cream cheese
  • 1 tablespoon ketchup
  • 2 tablespoons barbecue sauce
  • 1 teaspoon yellow mustard
  • 1 teaspoon Worcestershire sauce
  • 5 ounces cheddar cheese, chopped into 10 squares
  • 1 egg white, beaten
  • 2 tablespoons sesame seeds
  • 2 teaspoons garlic powder (for garnish)
  • 2 tablespoons grated Parmesan cheese (for garnish)

Instructions

  1. Prepare the Filling : In a large skillet, cook the turkey bacon over medium heat until crispy. Remove and set aside. Using the same skillet, cook the ground beef and onions until the beef is browned and fully cooked. Drain excess grease. Add the cream cheese, ketchup, barbecue sauce, mustard, and Worcestershire sauce. Stir until well combined. Remove from heat and mix in the cooked turkey bacon. Set aside to cool slightly.
  2. Assemble the Cheeseburger Bombs : Preheat your oven to 375°F (190°C). Flatten each Pillsbury biscuit into a 4-inch circle. Place a small scoop of the beef mixture in the center of each biscuit. Top with a cheddar cheese square. Fold the edges of the biscuit dough around the filling, pinching it tightly to seal. Roll gently into a ball.
  3. Add Garlic Parmesan Topping : Arrange the sealed bombs seam-side down on a baking sheet lined with parchment paper. Brush each bomb with the beaten egg white. Sprinkle sesame seeds, garlic powder, and Parmesan cheese on top for extra flavor.
  4. Bake to Perfection : Bake in the preheated oven for 12-15 minutes, or until the biscuits are golden brown and puffed. Remove from the oven and let cool for 5 minutes before serving.
  5. Serve and Enjoy : Serve warm, paired with your favorite dipping sauces like ranch, barbecue, or ketchup.

Conclusion

These Garlic Parmesan Cheeseburger Bombs are an irresistible fusion of hearty and savory flavors, wrapped in buttery, flaky biscuit dough. Whether you’re hosting a party, looking for a kid-friendly meal, or simply craving a comforting snack, these bombs will undoubtedly be a hit. Easy to make and packed with cheesy, meaty goodness, this recipe is sure to become a family favorite in no time!

Savory Garlic Parmesan Cheeseburger Bombs with a Bacon Twist

Garlic Parmesan Cheeseburger Bombs are a delicious combination of ground beef, bacon, and cheddar cheese wrapped in Pillsbury biscuits, infused with garlic and Parmesan seasoning. Perfect for family dinners or appetizers!
Prep Time 20 minutes
Cook Time 15 minutes
Total Time 35 minutes
Servings: 10
Course: Main Course
Cuisine: American
Calories: 320

Ingredients
  

  • 1 can Pillsbury Biscuits 10 biscuits
  • 1 pound lean ground beef
  • ½ onion finely chopped
  • 3 slices turkey bacon chopped
  • cup cream cheese
  • 1 tablespoon ketchup
  • 2 tablespoons barbecue sauce
  • 1 teaspoon yellow mustard
  • 1 teaspoon Worcestershire sauce
  • 5 ounces cheddar cheese chopped into 10 squares
  • 1 egg white beaten
  • 2 tablespoons sesame seeds
  • 2 teaspoons garlic powder for garnish
  • 2 tablespoons grated Parmesan cheese for garnish

Method
 

  1. Prepare the Filling : In a large skillet, cook the turkey bacon over medium heat until crispy. Remove and set aside. Using the same skillet, cook the ground beef and onions until the beef is browned and fully cooked. Drain excess grease. Add the cream cheese, ketchup, barbecue sauce, mustard, and Worcestershire sauce. Stir until well combined. Remove from heat and mix in the cooked turkey bacon. Set aside to cool slightly.
  2. Assemble the Cheeseburger Bombs : Preheat your oven to 375°F (190°C). Flatten each Pillsbury biscuit into a 4-inch circle. Place a small scoop of the beef mixture in the center of each biscuit. Top with a cheddar cheese square. Fold the edges of the biscuit dough around the filling, pinching it tightly to seal. Roll gently into a ball.
  3. Add Garlic Parmesan Topping : Arrange the sealed bombs seam-side down on a baking sheet lined with parchment paper. Brush each bomb with the beaten egg white. Sprinkle sesame seeds, garlic powder, and Parmesan cheese on top for extra flavor.
  4. Bake to Perfection : Bake in the preheated oven for 12-15 minutes, or until the biscuits are golden brown and puffed. Remove from the oven and let cool for 5 minutes before serving.
  5. Serve and Enjoy : Serve warm, paired with your favorite dipping sauces like ranch, barbecue, or ketchup.

Festive Christmas Cookie Bars: A Holiday Delight

Celebrate the holiday season with these irresistible Christmas Cookie Bars! Soft, chewy, and bursting with festive red and green M&Ms, these bars are the ultimate holiday treat. Perfect for cookie swaps, gifting, or just indulging in the Christmas spirit, they’re easy to make and packed with flavor. Let’s get baking and spread some holiday cheer!

Ingredients

Wet Ingredients:

  • 1 cup unsalted butter, melted
  • 1 cup brown sugar, packed
  • ½ cup granulated sugar
  • 2 large eggs
  • 2 teaspoons vanilla extract

Dry Ingredients:

  • 2 ½ cups all-purpose flour
  • 1 teaspoon baking soda
  • ½ teaspoon salt

Add-ins:

  • 1 cup red and green M&Ms, for festive color
  • ½ cup white chocolate chips, for creamy sweetness

Instructions

  1. Preheat the Oven : Preheat your oven to 350°F (175°C).Grease and line a 9×13-inch baking pan with parchment paper for easy removal.
  2. Prepare the Dough : In a large mixing bowl, combine the melted butter, brown sugar, and granulated sugar. Mix until smooth and creamy.Add the eggs and vanilla extract. Whisk until fully combined.
  3. Combine Dry Ingredients : In a separate bowl, whisk together the all-purpose flour, baking soda, and salt.Gradually add the dry ingredients to the wet ingredients, mixing just until combined. Be careful not to overmix.
  4. Fold in the Festive Add-Ins : Gently fold in the red and green M&Ms and white chocolate chips, reserving a few M&Ms to sprinkle on top for decoration.
  5. Assemble and Bake : Spread the dough evenly into the prepared baking pan, smoothing the top with a spatula. Sprinkle the reserved M&Ms on top for a festive look. Bake in the preheated oven for 20-25 minutes, or until the edges are golden brown and a toothpick inserted in the center comes out clean.
  6. Cool and Slice : Allow the cookie bars to cool completely in the pan before slicing into squares or rectangles.Serve and enjoy the festive flavors of Christmas!

Conclusion

These Christmas Cookie Bars are the perfect blend of chewy, buttery goodness and festive flair. With every bite, you’ll enjoy the creamy sweetness of white chocolate and the crunch of colorful M&Ms. Easy to make and a hit with everyone, these bars will become a holiday baking tradition in no time!

Festive Christmas Cookie Bars: A Holiday Delight

Soft and chewy cookie bars packed with festive redand green M&Ms and creamy white chocolate chips. A perfect holiday treatthat’s easy to bake and share.
Prep Time 10 minutes
Cook Time 25 minutes
Total Time 35 minutes
Servings: 20 Bars
Course: Dessert
Cuisine: American
Calories: 250

Ingredients
  

Wet Ingredients:
  • 1 cup unsalted butter melted
  • 1 cup brown sugar packed
  • ½ cup granulated sugar
  • 2 large eggs
  • 2 teaspoons vanilla extract
Dry Ingredients:
  • 2 ½ cups all-purpose flour
  • 1 teaspoon baking soda
  • ½ teaspoon salt
Add-ins:
  • 1 cup red and green M&Ms for festive color
  • ½ cup white chocolate chips for creamy sweetness

Method
 

  1. Preheat the Oven : Preheat your oven to 350°F (175°C). Grease and line a 9×13-inch baking pan with parchment paper for easy removal.
  2. Prepare the Dough : In a large mixing bowl, combine the melted butter, brown sugar, and granulated sugar. Mix until smooth and creamy. Add the eggs and vanilla extract. Whisk until fully combined.
  3. Combine Dry Ingredients : In a separate bowl, whisk together the all-purpose flour, baking soda, and salt. Gradually add the dry ingredients to the wet ingredients, mixing just until combined. Be careful not to overmix.
  4. Fold in the Festive Add-Ins : Gently fold in the red and green M&Ms and white chocolate chips, reserving a few M&Ms to sprinkle on top for decoration.
  5. Assemble and Bake : Spread the dough evenly into the prepared baking pan, smoothing the top with a spatula. Sprinkle the reserved M&Ms on top for a festive look. Bake in the preheated oven for 20-25 minutes, or until the edges are golden brown and a toothpick inserted in the center comes out clean.
  6. Cool and Slice : Allow the cookie bars to cool completely in the pan before slicing into squares or rectangles. Serve and enjoy the festive flavors of Christmas!

Jalapeño Popper Grilled Cheese: A Spicy Twist on a Classic

Take your grilled cheese game to the next level with this Jalapeño Popper Grilled Cheese! Combining the creamy goodness of cream cheese, the spicy kick of jalapeños, crispy bacon, and melty cheddar and Monterey Jack cheese, this sandwich is a flavor-packed fusion of two all-time favorites. Perfect for a quick lunch or indulgent snack, this recipe will have you coming back for more.

Ingredients

Meat:

  • 4 slices crispy cooked bacon

Produce:

  • 2 jalapeños, sliced lengthwise (seeds and membranes removed)
  • Cilantro (optional, for garnish)

Bread & Baked Goods:

  • 4 slices Italian bread

Dairy:

  • 2 slices sharp cheddar cheese
  • 2 slices Monterey Jack cheese
  • 4 oz cream cheese, softened
  • 1 pat of butter

Instructions

  1. Slice the Jalapeños: Cut the jalapeños lengthwise, removing the seeds and membranes for a milder heat.
  2. Cook the Jalapeños: In a skillet over medium heat, cook the jalapeño halves for 2-3 minutes per side until they are slightly charred and softened. Set them aside.
  3. Spread the Cream Cheese: Evenly spread 1 oz of softened cream cheese onto each slice of Italian bread.
  4. Add the Toppings: Layer one slice of cheddar cheese, the cooked jalapeño slices, 2 slices of crispy bacon, and one slice of Monterey Jack cheese on two slices of bread. Top with the remaining bread slices (cream cheese side down).
  5. Butter the Bread: Spread a thin layer of butter on the outside of each sandwich.
  6. Grill to Perfection: Heat a skillet or griddle over medium heat. Place the sandwiches in the skillet and grill for 3-4 minutes on each side, or until the bread is golden brown and the cheese is melted.
  7. Garnish and Slice: If desired, sprinkle the sandwich with chopped cilantro for added freshness. Slice in half and serve immediately.
  8. Enjoy the Flavors: Bite into the gooey, cheesy, spicy deliciousness of your Jalapeño Popper Grilled Cheese!

Conclusion

This Jalapeño Popper Grilled Cheese is the perfect combination of spicy, cheesy, and crispy textures. Whether you’re looking for a hearty lunch, a unique snack, or a way to spice up your grilled cheese routine, this sandwich delivers bold flavors that you’ll crave again and again.

Jalapeño Popper Grilled Cheese: A Spicy Twist on a Classic

A grilled cheese sandwich packed with creamy creamcheese, sharp cheddar, Monterey Jack, spicy jalapeños, and crispy bacon. Aperfect fusion of comfort food and bold flavors.
Prep Time 10 minutes
Cook Time 10 minutes
Total Time 20 minutes
Servings: 2 sandwichs
Course: Snack
Cuisine: American
Calories: 500

Ingredients
  

Meat:
  • 4 slices crispy cooked bacon
Produce:
  • 2 jalapeños sliced lengthwise (seeds and membranes removed)
  • Cilantro optional, for garnish
Bread & Baked Goods:
  • 4 slices Italian bread
Dairy:
  • 2 slices sharp cheddar cheese
  • 2 slices Monterey Jack cheese
  • 4 oz cream cheese softened
  • 1 pat of butter

Method
 

  1. Slice the Jalapeños: Cut the jalapeños lengthwise, removing the seeds and membranes for a milder heat.
  2. Cook the Jalapeños: In a skillet over medium heat, cook the jalapeño halves for 2-3 minutes per side until they are slightly charred and softened. Set them aside.
  3. Spread the Cream Cheese: Evenly spread 1 oz of softened cream cheese onto each slice of Italian bread.
  4. Add the Toppings: Layer one slice of cheddar cheese, the cooked jalapeño slices, 2 slices of crispy bacon, and one slice of Monterey Jack cheese on two slices of bread. Top with the remaining bread slices (cream cheese side down).
  5. Butter the Bread: Spread a thin layer of butter on the outside of each sandwich.
  6. Grill to Perfection: Heat a skillet or griddle over medium heat. Place the sandwiches in the skillet and grill for 3-4 minutes on each side, or until the bread is golden brown and the cheese is melted.
  7. Garnish and Slice: If desired, sprinkle the sandwich with chopped cilantro for added freshness. Slice in half and serve immediately.
  8. Enjoy the Flavors: Bite into the gooey, cheesy, spicy deliciousness of your Jalapeño Popper Grilled Cheese!

Bacon Stuffed Jalapeño Poppers: The Ultimate Party Snack

Bacon Stuffed Jalapeño Poppers are the perfect crowd-pleasing appetizer for game days, parties, or any casual get-together. These poppers combine the smoky flavor of crispy bacon with creamy cheese, fresh herbs, and the spicy kick of jalapeños. They’re quick to make, easy to bake, and guaranteed to disappear in minutes!

Ingredients

  • 8 Large Jalapeños, seeds removed
  • 8 oz Cream Cheese, softened
  • 1 ½ cups Cheese, grated (Three Alarm Cheese or your favorite blend)
  • ¼ cup Green Onions, sliced
  • ⅛ cup Cilantro, chopped
  • 8 slices Bacon

Instructions

  1. Prepare the Jalapeños : Preheat your oven to 400°F (200°C) and line a baking sheet with parchment paper. Slice the jalapeños in half lengthwise and remove the seeds and membranes. Be careful if you’re sensitive to spice – wearing gloves can help!
  2. Make the Filling : In a medium bowl, combine the softened cream cheese, grated cheese, green onions, and chopped cilantro. Mix until well combined. Using a spoon or piping bag, fill each jalapeño half generously with the cheese mixture.
  3. Wrap with Bacon : Cut each slice of bacon in half. Wrap one piece of bacon around each stuffed jalapeño half, securing the ends with a toothpick if needed.
  4. Bake : Place the bacon-wrapped jalapeños on the prepared baking sheet. Bake in the preheated oven for 20-25 minutes or until the bacon is crispy and the cheese filling is bubbly.
  5. Serve : Remove the poppers from the oven and let them cool slightly. Serve warm as a spicy, cheesy, and smoky appetizer your guests will love!

Conclusion

Bacon Stuffed Jalapeño Poppers are the ultimate appetizer that combines creaminess, smokiness, and spice into a bite-sized delight. Whether you’re entertaining friends or treating yourself, these poppers are sure to bring bold flavors and smiles to the table. Make a double batch – they’ll be gone in no time!

Bacon Stuffed Jalapeño Poppers: The Ultimate Party Snack

Crispy bacon-wrapped jalapeños stuffed with acreamy, cheesy filling and baked to perfection. A spicy, savory appetizerperfect for any occasion!
Prep Time 10 minutes
Cook Time 25 minutes
Total Time 35 minutes
Servings: 16 poppers
Course: Appetizer
Cuisine: American
Calories: 100

Ingredients
  

  • 8 Large Jalapeños seeds removed
  • 8 oz Cream Cheese softened
  • 1 ½ cups Cheese grated (Three Alarm Cheese or your favorite blend)
  • ¼ cup Green Onions sliced
  • cup Cilantro chopped
  • 8 slices Bacon

Method
 

  1. Prepare the Jalapeños : Preheat your oven to 400°F (200°C) and line a baking sheet with parchment paper. Slice the jalapeños in half lengthwise and remove the seeds and membranes. Be careful if you’re sensitive to spice – wearing gloves can help!
  2. Make the Filling : In a medium bowl, combine the softened cream cheese, grated cheese, green onions, and chopped cilantro. Mix until well combined. Using a spoon or piping bag, fill each jalapeño half generously with the cheese mixture.
  3. Wrap with Bacon : Cut each slice of bacon in half. Wrap one piece of bacon around each stuffed jalapeño half, securing the ends with a toothpick if needed.
  4. Bake : Place the bacon-wrapped jalapeños on the prepared baking sheet. Bake in the preheated oven for 20-25 minutes or until the bacon is crispy and the cheese filling is bubbly.
  5. Serve : Remove the poppers from the oven and let them cool slightly. Serve warm as a spicy, cheesy, and smoky appetizer your guests will love!

Strawberry Crunch Cheesecake: A No-Bake Dessert Masterpiece

Dive into the sweet and tangy world of this Strawberry Crunch Cheesecake. This no-bake dessert combines a buttery golden Oreo crust, creamy cheesecake layers, and a delightful strawberry crunch topping. Perfect for warm days or when you want to impress your guests with a stunning yet simple treat, this cheesecake will steal the spotlight at any gathering.

Ingredients

Crust:

  • 20 golden Oreos, crushed (about 2 cups)
  • 5 tablespoons unsalted butter, melted

Strawberry Crunch Topping:

  • 10 golden Oreos, crushed
  • ½ cup freeze-dried strawberries, crushed
  • 4 tablespoons unsalted butter, melted

Strawberry Cheesecake Layer:

  • 8 ounces cream cheese, softened
  • ½ cup granulated sugar
  • 1 cup heavy whipping cream
  • 1 tablespoon strawberry gelatin powder
  • ½ cup fresh strawberries, diced

Plain Cheesecake Layer:

  • 8 ounces cream cheese, softened
  • ⅓ cup granulated sugar
  • 1 cup heavy whipping cream
  • 1 teaspoon vanilla extract

Instructions

  1. Crush the Oreos: In a food processor or resealable bag, crush the golden Oreos until they resemble fine crumbs.
  2. Combine with Butter: Mix the crushed Oreos with the melted butter until the mixture resembles wet sand.
  3. Set the Crust: Press the mixture firmly into the bottom of a 9-inch springform pan, creating an even layer. Refrigerate for 20 minutes while preparing the fillings.
  4. Crush the Ingredients: In a food processor, crush the golden Oreos and freeze-dried strawberries together until fine.
  5. Combine with Butter: Mix the crushed mixture with melted butter until evenly coated. Set aside for later.
  6. Whip the Cream: In a large mixing bowl, whip the heavy cream until stiff peaks form. Set aside.
  7. Cream the Base: In another bowl, beat the cream cheese and granulated sugar until smooth and fluffy. Add the strawberry gelatin powder and mix until combined.
  8. Fold in the Whipped Cream: Gently fold the whipped cream into the cream cheese mixture. Add the diced fresh strawberries and stir until evenly distributed.
  9. Layer the Cheesecake: Spread the strawberry cheesecake mixture evenly over the chilled crust. Refrigerate for 15 minutes to set slightly.
  10. Whip the Cream: In a clean bowl, whip the heavy cream until stiff peaks form.
  11. Cream the Base: In another bowl, beat the cream cheese, granulated sugar, and vanilla extract until smooth.
  12. Combine: Gently fold the whipped cream into the cream cheese mixture until smooth and creamy.
  13. Layer on Top: Spread the plain cheesecake layer over the strawberry layer, smoothing it evenly. Refrigerate for at least 4 hours or overnight to set completely.
  14. Top the Cheesecake: Once the cheesecake is fully set, sprinkle the strawberry crunch topping evenly over the top. Gently press it down to ensure it adheres to the surface.
  15. Release the Cheesecake: Remove the cheesecake from the springform pan.
  16. Slice and Enjoy: Cut into slices and serve this beautiful and delicious dessert!

Conclusion

Strawberry Crunch Cheesecake is a perfect combination of creamy layers and crunchy textures. The vibrant colors and refreshing strawberry flavor make it a show-stopping dessert for any occasion. This no-bake recipe is easy to prepare but delivers a stunning result that will have everyone asking for seconds.

Strawberry Crunch Cheesecake: A No-Bake Dessert Masterpiece

A no-bake cheesecake with a golden Oreo crust,creamy strawberry and vanilla cheesecake layers, and a crunchy strawberrytopping. A refreshing and stunning dessert for all occasions!
Prep Time 30 minutes
Resting Time 6 hours
Total Time 6 hours 30 minutes
Servings: 12 Slice
Course: Dessert
Cuisine: American
Calories: 400

Ingredients
  

Crust:
  • 20 golden Oreos crushed (about 2 cups)
  • 5 tablespoons unsalted butter melted
  • Strawberry Crunch Topping:
  • 10 golden Oreos crushed
  • ½ cup freeze-dried strawberries crushed
  • 4 tablespoons unsalted butter melted
Strawberry Cheesecake Layer:
  • 8 ounces cream cheese softened
  • ½ cup granulated sugar
  • 1 cup heavy whipping cream
  • 1 tablespoon strawberry gelatin powder
  • ½ cup fresh strawberries diced
Plain Cheesecake Layer:
  • 8 ounces cream cheese softened
  • cup granulated sugar
  • 1 cup heavy whipping cream
  • 1 teaspoon vanilla extract

Method
 

  1. Crush the Oreos: In a food processor or resealable bag, crush the golden Oreos until they resemble fine crumbs.
  2. Combine with Butter: Mix the crushed Oreos with the melted butter until the mixture resembles wet sand.
  3. Set the Crust: Press the mixture firmly into the bottom of a 9-inch springform pan, creating an even layer. Refrigerate for 20 minutes while preparing the fillings.
  4. Crush the Ingredients: In a food processor, crush the golden Oreos and freeze-dried strawberries together until fine.
  5. Combine with Butter: Mix the crushed mixture with melted butter until evenly coated. Set aside for later.
  6. Whip the Cream: In a large mixing bowl, whip the heavy cream until stiff peaks form. Set aside.
  7. Cream the Base: In another bowl, beat the cream cheese and granulated sugar until smooth and fluffy. Add the strawberry gelatin powder and mix until combined.
  8. Fold in the Whipped Cream: Gently fold the whipped cream into the cream cheese mixture. Add the diced fresh strawberries and stir until evenly distributed.
  9. Layer the Cheesecake: Spread the strawberry cheesecake mixture evenly over the chilled crust. Refrigerate for 15 minutes to set slightly.
  10. Whip the Cream: In a clean bowl, whip the heavy cream until stiff peaks form.
  11. Cream the Base: In another bowl, beat the cream cheese, granulated sugar, and vanilla extract until smooth.
  12. Combine: Gently fold the whipped cream into the cream cheese mixture until smooth and creamy.
  13. Layer on Top: Spread the plain cheesecake layer over the strawberry layer, smoothing it evenly. Refrigerate for at least 4 hours or overnight to set completely.
  14. Top the Cheesecake: Once the cheesecake is fully set, sprinkle the strawberry crunch topping evenly over the top. Gently press it down to ensure it adheres to the surface.
  15. Release the Cheesecake: Remove the cheesecake from the springform pan.
  16. Slice and Enjoy: Cut into slices and serve this beautiful and delicious dessert!

Irresistible Biscoff Cake: A Homemade Delight

Transform your dessert table with this show-stopping Biscoff Cake. Perfect for Biscoff lovers, this homemade creation combines layers of moist, cinnamon-spiced cake, luscious cookie butter frosting, and the irresistible crunch of Biscoff cookies. With its bold flavor and elegant design, this cake is ideal for birthdays, celebrations, or simply indulging your sweet tooth.

Ingredients

For the Cake:

  • 1 cup pasteurized egg whites (or 7 large egg whites)
  • 3 cups all-purpose flour
  • 2 1/2 teaspoons baking powder
  • 2 cups packed brown sugar (dark or light)
  • 2 teaspoons ground cinnamon
  • 1 cup granulated sugar
  • 1/2 teaspoon salt, fine
  • 2 tablespoons vegetable oil
  • 1 1/2 cups buttermilk
  • 2 teaspoons vanilla

For the Frosting:

  • 4 cups unsalted butter, softened
  • 2 cups cookie butter
  • 11 cups powdered sugar
  • 1/4 cup heavy cream
  • 3 teaspoons vanilla
  • 1 teaspoon salt

For Decoration:

  • 12 Biscoff cookies, crumbled or whole
  • 1/3 cup heavy cream (or whipping cream)
  • 1 teaspoon cinnamon (optional, for garnish)
  • French piping tip

Instructions

  1. Preheat the Oven: Preheat your oven to 350°F (175°C) and grease three 8-inch round cake pans. Line the bottoms with parchment paper.
  2. Mix the Dry Ingredients: In a medium bowl, sift together the all-purpose flour, baking powder, cinnamon, and salt. Set aside.
  3. Whip the Egg Whites: In a large mixing bowl, whip the egg whites until soft peaks form. Gradually add the granulated sugar and continue beating until stiff peaks form.
  4. Combine Wet Ingredients: In a separate bowl, mix the brown sugar, vegetable oil, buttermilk, and vanilla until well combined.
  5. Incorporate Dry and Wet Mixtures: Gently fold the dry ingredients into the wet mixture. Once combined, fold in the whipped egg whites in three parts to keep the batter light and airy.
  6. Bake the Cakes: Divide the batter evenly among the prepared cake pans. Bake for 25-30 minutes, or until a toothpick inserted in the center comes out clean. Let the cakes cool completely before frosting.
  7. Cream the Butter: In a stand mixer or large bowl, beat the softened butter until creamy and smooth.
  8. Add the Cookie Butter: Mix in the cookie butter until fully combined.
  9. Incorporate Powdered Sugar: Gradually add the powdered sugar, one cup at a time, beating well after each addition.
  10. Adjust Consistency: Add the heavy cream, vanilla, and salt. Beat until the frosting is fluffy and spreadable. Adjust the consistency with more powdered sugar or cream, as needed.
  11. Prepare the Layers: Level the tops of the cooled cakes with a serrated knife if necessary. Place one cake layer on a cake board or serving plate.
  12. Layer the Frosting: Spread an even layer of frosting over the first cake layer. Repeat with the second and third layers.
  13. Crumb Coat and Chill: Apply a thin crumb coat of frosting over the entire cake and refrigerate for 20 minutes to set.
  14. Final Frosting and Decoration: Frost the cake with a smooth or textured final coat of frosting. Use a French piping tip to create decorative swirls or patterns on top. Garnish with crumbled Biscoff cookies and drizzle cookie butter (microwaved for easier pouring).
  15. Whipped Cream Garnish (Optional): Whip 1/3 cup heavy cream with a pinch of cinnamon and pipe it onto the cake for an extra decorative touch.
  16. Serve and Enjoy: Slice and serve this decadent cake to your guests, and watch it disappear in no time!

Conclusion

This Irresistible Biscoff Cake is a masterpiece for dessert lovers, combining the warm spice of cinnamon, the crunch of Biscoff cookies, and the creamy decadence of cookie butter frosting. Whether you’re hosting a celebration or treating yourself, this cake will surely make every moment extra special.

Irresistible Biscoff Cake: A Homemade Delight”

A moist and flavorful cake layered with creamycookie butter frosting, topped with crunchy Biscoff cookies, and designed toimpress. A must-try dessert for any Biscoff enthusiast!
Prep Time 30 minutes
Cook Time 30 minutes
Total Time 1 hour
Servings: 12 Slice
Course: Dessert
Cuisine: European-inspired
Calories: 550

Ingredients
  

For the Cake:
  • 1 cup pasteurized egg whites or 7 large egg whites
  • 3 cups all-purpose flour
  • 2 1/2 teaspoons baking powder
  • 2 cups packed brown sugar dark or light
  • 2 teaspoons ground cinnamon
  • 1 cup granulated sugar
  • 1/2 teaspoon salt fine
  • 2 tablespoons vegetable oil
  • 1 1/2 cups buttermilk
  • 2 teaspoons vanilla
For the Frosting:
  • 4 cups unsalted butter softened
  • 2 cups cookie butter
  • 11 cups powdered sugar
  • 1/4 cup heavy cream
  • 3 teaspoons vanilla
  • 1 teaspoon salt
For Decoration:
  • 12 Biscoff cookies crumbled or whole
  • 1/3 cup heavy cream or whipping cream
  • 1 teaspoon cinnamon optional, for garnish
  • French piping tip

Method
 

  1. Preheat the Oven: Preheat your oven to 350°F (175°C) and grease three 8-inch round cake pans. Line the bottoms with parchment paper.
  2. Mix the Dry Ingredients: In a medium bowl, sift together the all-purpose flour, baking powder, cinnamon, and salt. Set aside.
  3. Whip the Egg Whites: In a large mixing bowl, whip the egg whites until soft peaks form. Gradually add the granulated sugar and continue beating until stiff peaks form.
  4. Combine Wet Ingredients: In a separate bowl, mix the brown sugar, vegetable oil, buttermilk, and vanilla until well combined.
  5. Incorporate Dry and Wet Mixtures: Gently fold the dry ingredients into the wet mixture. Once combined, fold in the whipped egg whites in three parts to keep the batter light and airy.
  6. Bake the Cakes: Divide the batter evenly among the prepared cake pans. Bake for 25-30 minutes, or until a toothpick inserted in the center comes out clean. Let the cakes cool completely before frosting.
  7. Cream the Butter: In a stand mixer or large bowl, beat the softened butter until creamy and smooth.
  8. Add the Cookie Butter: Mix in the cookie butter until fully combined.
  9. Incorporate Powdered Sugar: Gradually add the powdered sugar, one cup at a time, beating well after each addition.
  10. Adjust Consistency: Add the heavy cream, vanilla, and salt. Beat until the frosting is fluffy and spreadable. Adjust the consistency with more powdered sugar or cream, as needed.
  11. Prepare the Layers: Level the tops of the cooled cakes with a serrated knife if necessary. Place one cake layer on a cake board or serving plate.
  12. Layer the Frosting: Spread an even layer of frosting over the first cake layer. Repeat with the second and third layers.
  13. Crumb Coat and Chill: Apply a thin crumb coat of frosting over the entire cake and refrigerate for 20 minutes to set.
  14. Final Frosting and Decoration: Frost the cake with a smooth or textured final coat of frosting. Use a French piping tip to create decorative swirls or patterns on top. Garnish with crumbled Biscoff cookies and drizzle cookie butter (microwaved for easier pouring).
  15. Whipped Cream Garnish (Optional): Whip 1/3 cup heavy cream with a pinch of cinnamon and pipe it onto the cake for an extra decorative touch.
  16. Serve and Enjoy: Slice and serve this decadent cake to your guests, and watch it disappear in no time!

Decadent Chocolate Fudge Cake with Salted Caramel Buttercream”

Indulge in the ultimate dessert experience with this Decadent Chocolate Fudge Cake with Salted Caramel Buttercream. This cake combines rich, moist layers of chocolate fudge with the luxurious sweetness of salted caramel. Topped with a glossy dark chocolate ganache, every slice is a perfect balance of sweet and salty decadence. Whether for a special occasion or a treat-yourself moment, this cake will impress even the most discerning dessert lovers.

Ingredients

For the Cake:

  • 200g butter, room temperature
  • 1 1/2 cups caster sugar
  • 2 teaspoons vanilla extract
  • 3 eggs
  • 1 cup Dutch-processed cocoa
  • 1 cup hot water
  • 1 1/2 cups milk
  • 3 teaspoons vinegar
  • 1 1/2 cups plain cake flour
  • 2 teaspoons baking powder
  • 2 teaspoons bicarbonate soda

For the Salted Caramel:

  • 1 cup caster sugar
  • 1 cup brown sugar
  • 180g butter
  • 1 cup heavy cream
  • 1/2 to 1 teaspoon salt flakes

For the Dark Chocolate Ganache:

  • 300g dark chocolate, chopped
  • 350ml heavy cream

For the Salted Caramel Buttercream:

  • 375g butter, room temperature
  • 3 cups sifted icing sugar
  • 1 1/2 cups salted caramel (prepared from above recipe)

Instructions

  1. Prepare the Cake Layers : Preheat your oven to 180°C (350°F) and grease and line three 8-inch round cake pans. In a large bowl, cream the butter, caster sugar, and vanilla extract until light and fluffy. Add eggs one at a time, mixing well after each addition. In a separate bowl, mix the cocoa and hot water until smooth. Let it cool slightly. Combine milk and vinegar in a small bowl, letting it curdle for about 5 minutes. Gradually add the cocoa mixture and milk mixture to the creamed butter, alternating with the sifted dry ingredients (flour, baking powder, bicarbonate soda). Mix until the batter is smooth and lump-free. Divide the batter evenly among the prepared pans and bake for 25-30 minutes or until a skewer inserted in the center comes out clean. Let the cakes cool completely.
  2. Make the Salted Caramel : In a medium saucepan over medium heat, melt the caster sugar and brown sugar, stirring occasionally, until the mixture turns a deep amber color.Add the butter and stir until melted. Slowly pour in the cream while whisking continuously.Simmer the mixture for 2-3 minutes, then stir in the salt flakes to taste. Let the caramel cool to room temperature.
  3. Prepare the Dark Chocolate Ganache : Heat the heavy cream in a saucepan until it just begins to simmer (do not boil).Pour the hot cream over the chopped dark chocolate in a heatproof bowl. Let it sit for 2-3 minutes, then stir until smooth and glossy. Allow the ganache to cool slightly until it reaches a spreadable consistency.
  4. Make the Salted Caramel Buttercream : In a large mixing bowl, beat the butter until creamy and pale. Gradually add the sifted icing sugar, one cup at a time, beating well after each addition.Add the salted caramel and continue to beat until the buttercream is smooth and fluffy.
  5. Assemble the Cake : Place one cake layer on a serving plate or cake stand. Spread an even layer of salted caramel buttercream over the top. Repeat with the second layer and top with the final cake layer.Cover the entire cake with a thin crumb coat of buttercream and refrigerate for 30 minutes.Once chilled, spread a thick layer of dark chocolate ganache over the cake, letting it drip slightly down the sides for a dramatic effect.Decorate with additional salted caramel drizzle or chocolate shavings, if desired.

Conclusion

This Decadent Chocolate Fudge Cake with Salted Caramel Buttercream is a show-stopping dessert that’s as stunning as it is delicious. With its moist chocolate layers, silky buttercream, and rich ganache topping, it’s a masterpiece for chocolate and caramel lovers alike. Perfect for celebrations or any moment worth savoring!

Decadent Chocolate Fudge Cake with Salted Caramel Buttercream”

A rich chocolate fudge cake layered with saltedcaramel buttercream and topped with dark chocolate ganache. A perfectlybalanced dessert for chocolate and caramel enthusiasts.
Prep Time 45 minutes
Cook Time 30 minutes
Total Time 1 hour 15 minutes
Servings: 12 Slice
Course: Dessert
Cuisine: American
Calories: 502

Ingredients
  

For the Cake:
  • 200 g butter room temperature
  • 1 1/2 cups caster sugar
  • 2 teaspoons vanilla extract
  • 3 eggs
  • 1 cup Dutch-processed cocoa
  • 1 cup hot water
  • 1 1/2 cups milk
  • 3 teaspoons vinegar
  • 1 1/2 cups plain cake flour
  • 2 teaspoons baking powder
  • 2 teaspoons bicarbonate soda
For the Salted Caramel:
  • 1 cup caster sugar
  • 1 cup brown sugar
  • 180 g butter
  • 1 cup heavy cream
  • 1/2 to 1 teaspoon salt flakes
For the Dark Chocolate Ganache:
  • 300 g dark chocolate chopped
  • 350 ml heavy cream
For the Salted Caramel Buttercream:
  • 375 g butter room temperature
  • 3 cups sifted icing sugar
  • 1 1/2 cups salted caramel prepared from above recipe

Method
 

  1. Prepare the Cake Layers : Preheat your oven to 180°C (350°F) and grease and line three 8-inch round cake pans. In a large bowl, cream the butter, caster sugar, and vanilla extract until light and fluffy. Add eggs one at a time, mixing well after each addition. In a separate bowl, mix the cocoa and hot water until smooth. Let it cool slightly. Combine milk and vinegar in a small bowl, letting it curdle for about 5 minutes. Gradually add the cocoa mixture and milk mixture to the creamed butter, alternating with the sifted dry ingredients (flour, baking powder, bicarbonate soda). Mix until the batter is smooth and lump-free. Divide the batter evenly among the prepared pans and bake for 25-30 minutes or until a skewer inserted in the center comes out clean. Let the cakes cool completely.
  2. Make the Salted Caramel : In a medium saucepan over medium heat, melt the caster sugar and brown sugar, stirring occasionally, until the mixture turns a deep amber color. Add the butter and stir until melted. Slowly pour in the cream while whisking continuously. Simmer the mixture for 2-3 minutes, then stir in the salt flakes to taste. Let the caramel cool to room temperature.
  3. Prepare the Dark Chocolate Ganache : Heat the heavy cream in a saucepan until it just begins to simmer (do not boil). Pour the hot cream over the chopped dark chocolate in a heatproof bowl. Let it sit for 2-3 minutes, then stir until smooth and glossy. Allow the ganache to cool slightly until it reaches a spreadable consistency.
  4. Make the Salted Caramel Buttercream : In a large mixing bowl, beat the butter until creamy and pale. Gradually add the sifted icing sugar, one cup at a time, beating well after each addition. Add the salted caramel and continue to beat until the buttercream is smooth and fluffy.
  5. Assemble the Cake : Place one cake layer on a serving plate or cake stand. Spread an even layer of salted caramel buttercream over the top. Repeat with the second layer and top with the final cake layer. Cover the entire cake with a thin crumb coat of buttercream and refrigerate for 30 minutes. Once chilled, spread a thick layer of dark chocolate ganache over the cake, letting it drip slightly down the sides for a dramatic effect. Decorate with additional salted caramel drizzle or chocolate shavings, if desired.

Hearty Slow Cooker Cowboy Potato Casserole

If you’re looking for a comforting, filling, and easy-to-make meal, this Slow Cooker Cowboy Potato Casserole is the perfect dish for you. Packed with tender potatoes, seasoned ground beef, creamy mushroom sauce, and melted cheddar cheese, it’s the ultimate family-friendly recipe. With minimal prep and the magic of a slow cooker, this casserole is guaranteed to become a weeknight favorite.

Ingredients

Protein & Vegetables:

  • 1 1/2 pounds ground beef
  • 1 onion, chopped
  • 3 cloves garlic, minced
  • 1 red bell pepper, diced
  • 5 large potatoes, peeled and cut into chunks or diced

Dairy & Condiments:

  • 1 can (10.75 oz) condensed cream of mushroom soup
  • 1/2 cup milk
  • 1 cup shredded cheddar cheese

Spices & Garnishes:

  • 1 teaspoon salt
  • 1/2 teaspoon black pepper
  • 1/4 teaspoon paprika
  • 2 tablespoons fresh parsley, chopped for garnish

Instructions

  1. Cook the Ground Beef: In a large skillet, cook the ground beef over medium heat until browned. Add the chopped onion, minced garlic, and diced red bell pepper. Cook until the vegetables are soft. Drain excess grease if necessary.
  2. Layer the Ingredients in the Slow Cooker: Lightly grease the slow cooker. Begin by layering half of the potato chunks at the bottom. Add half of the cooked ground beef mixture over the potatoes. Repeat the layers with the remaining potatoes and beef mixture.
  3. Mix the Cream Sauce: In a small bowl, whisk together the condensed cream of mushroom soup, milk, salt, black pepper, and paprika. Pour the mixture evenly over the layers in the slow cooker.
  4. Cook Low and Slow: Cover the slow cooker with the lid and cook on low for 6-7 hours or on high for 3-4 hours, until the potatoes are tender.
  5. Add the Cheese: About 15 minutes before serving, sprinkle the shredded cheddar cheese over the casserole. Cover the slow cooker and let the cheese melt.
  6. Garnish and Serve: Once the cheese has melted, garnish the casserole with freshly chopped parsley. Serve warm and enjoy the hearty, comforting flavors!

Conclusion

Slow Cooker Cowboy Potato Casserole is the definition of comfort food at its best. With layers of seasoned beef, tender potatoes, and a creamy cheese topping, it’s a meal that brings everyone to the table. Ideal for busy families or anyone looking to enjoy a home-cooked meal without the hassle, this dish is sure to be a hit!

Hearty Slow Cooker Cowboy Potato Casserole

A hearty and comforting casserole made withseasoned ground beef, tender potatoes, and a creamy mushroom sauce, all cookedto perfection in a slow cooker and topped with melted cheddar cheese.
Prep Time 15 minutes
Cook Time 7 hours
Total Time 7 hours 15 minutes
Course: Main Course
Cuisine: American
Calories: 400

Ingredients
  

Protein & Vegetables:
  • 1 1/2 pounds ground beef
  • 1 onion chopped
  • 3 cloves garlic minced
  • 1 red bell pepper diced
  • 5 large potatoes peeled and cut into chunks or diced
Dairy & Condiments:
  • 1 can 10.75 oz condensed cream of mushroom soup
  • 1/2 cup milk
  • 1 cup shredded cheddar cheese
  • Spices & Garnishes:
  • 1 teaspoon salt
  • 1/2 teaspoon black pepper
  • 1/4 teaspoon paprika
  • 2 tablespoons fresh parsley chopped for garnish

Method
 

  1. Cook the Ground Beef: In a large skillet, cook the ground beef over medium heat until browned. Add the chopped onion, minced garlic, and diced red bell pepper. Cook until the vegetables are soft. Drain excess grease if necessary.
  2. Layer the Ingredients in the Slow Cooker: Lightly grease the slow cooker. Begin by layering half of the potato chunks at the bottom. Add half of the cooked ground beef mixture over the potatoes. Repeat the layers with the remaining potatoes and beef mixture.
  3. Mix the Cream Sauce: In a small bowl, whisk together the condensed cream of mushroom soup, milk, salt, black pepper, and paprika. Pour the mixture evenly over the layers in the slow cooker.
  4. Cook Low and Slow: Cover the slow cooker with the lid and cook on low for 6-7 hours or on high for 3-4 hours, until the potatoes are tender.
  5. Add the Cheese: About 15 minutes before serving, sprinkle the shredded cheddar cheese over the casserole. Cover the slow cooker and let the cheese melt.
  6. Garnish and Serve: Once the cheese has melted, garnish the casserole with freshly chopped parsley. Serve warm and enjoy the hearty, comforting flavors!

Quick and Easy Microwave Peppermint Fudge Delight

Craving something sweet and festive but don’t want to spend hours in the kitchen? This Quick and Easy Microwave Peppermint Fudge Delight is the perfect solution. Made with only four simple ingredients, this creamy fudge bursts with the refreshing flavor of peppermint and the holiday charm of red swirls. Whether you’re entertaining guests or indulging in a personal treat, this recipe is a hassle-free way to add some sweetness to your day.

Ingredients

Baking & Spices:

  • 4 drops of red food coloring
  • 1 teaspoon peppermint extract
  • 3 cups of white chocolate chips

Dairy:

  • 1 (14-ounce) can of condensed milk

Instructions

  1. Prepare the Baking Dish: Line an 8×8-inch square baking dish with parchment paper or lightly grease it for easy removal later.
  2. Combine the Base Ingredients: In a microwave-safe bowl, mix the white chocolate chips and condensed milk. Microwave on high in 30-second intervals, stirring between each, until the mixture is smooth and melted.
  3. Add Peppermint Flavor: Once fully melted, stir in the peppermint extract to evenly distribute the flavor.
  4. Create the Festive Swirl: Pour the melted mixture into the prepared baking dish. Quickly add drops of red food coloring on top of the fudge and use a toothpick or knife to create festive swirls.
  5. Set the Fudge: Allow the fudge to cool at room temperature for about 30 minutes before transferring it to the refrigerator. Let it chill for at least 2 hours or until firm.
  6. Slice and Serve: Once set, remove the fudge from the pan, cut it into squares, and enjoy!

Conclusion

This Microwave Peppermint Fudge Delight proves that you don’t need an elaborate recipe to create something truly special. With its festive swirls, creamy texture, and refreshing peppermint taste, this dessert is sure to become a holiday favorite. Perfect for gifting, sharing, or simply enjoying on your own, this fudge delivers joy in every bite!

Quick and Easy Microwave Peppermint Fudge Delight

A quick and festive treat made in the microwavewith white chocolate, peppermint extract, and a swirl of holiday cheer. Perfectfor holiday gatherings or gifting!
Prep Time 5 minutes
Cook Time 5 minutes
Resting Time 2 hours
Total Time 2 hours 10 minutes
Servings: 16 squares
Course: Dessert
Cuisine: American
Calories: 150

Ingredients
  

Baking & Spices:
  • 4 drops of red food coloring
  • 1 teaspoon peppermint extract
  • 3 cups of white chocolate chips
Dairy:
  • 1 14-ounce can of condensed milk

Method
 

  1. Prepare the Baking Dish: Line an 8×8-inch square baking dish with parchment paper or lightly grease it for easy removal later.
  2. Combine the Base Ingredients: In a microwave-safe bowl, mix the white chocolate chips and condensed milk. Microwave on high in 30-second intervals, stirring between each, until the mixture is smooth and melted.
  3. Add Peppermint Flavor: Once fully melted, stir in the peppermint extract to evenly distribute the flavor.
  4. Create the Festive Swirl: Pour the melted mixture into the prepared baking dish. Quickly add drops of red food coloring on top of the fudge and use a toothpick or knife to create festive swirls.
  5. Set the Fudge: Allow the fudge to cool at room temperature for about 30 minutes before transferring it to the refrigerator. Let it chill for at least 2 hours or until firm.
  6. Slice and Serve: Once set, remove the fudge from the pan, cut it into squares, and enjoy!