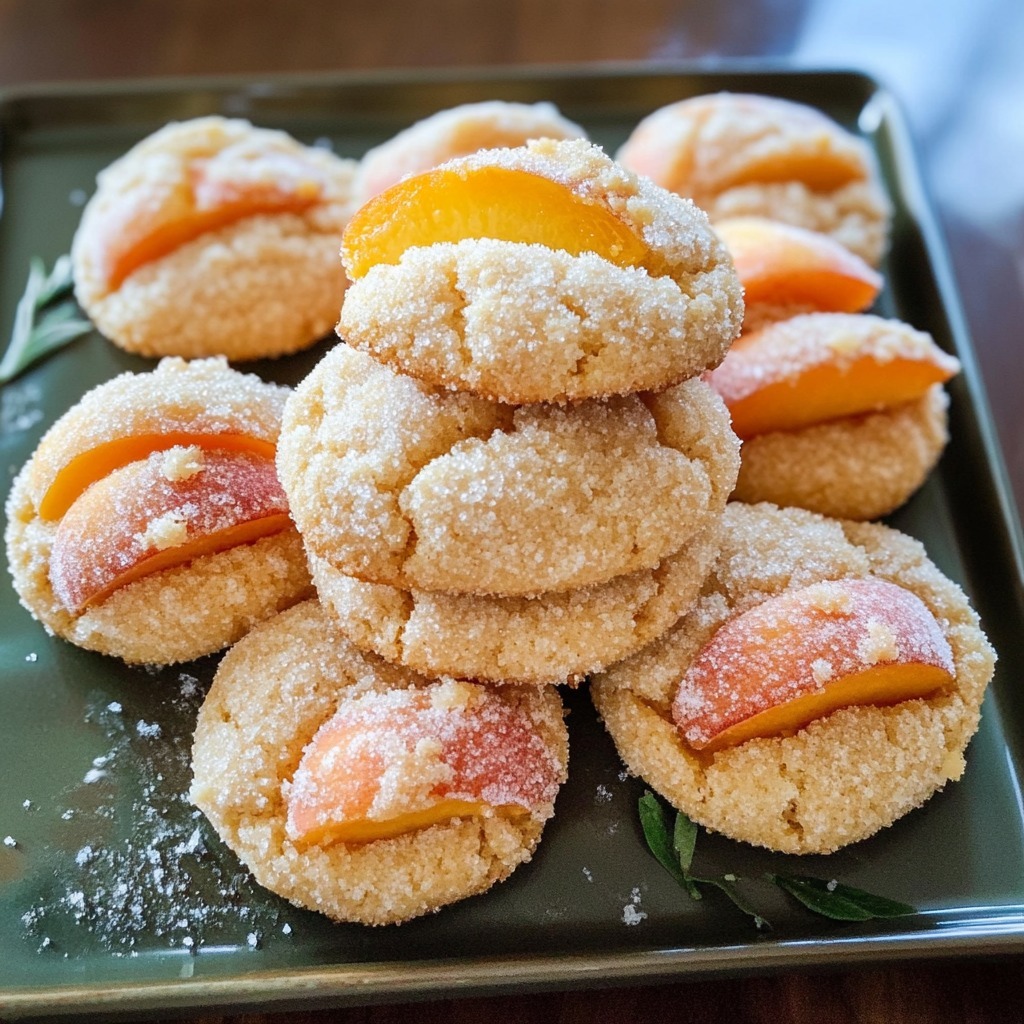
Decadent Peach Cookies with Dulce de Leche Filling

Peach cookies are a whimsical dessert that combines soft, buttery cookies with a luscious dulce de leche filling, creating a treat that resembles a real peach! With their delicate texture, fruity flavor, and eye-catching decoration, these cookies are perfect for special occasions or to impress your loved ones. Let’s dive into this fun recipe to create these delightful peach-inspired cookies!

Ingredients:

For the Cookies:

  • 2 large eggs
  • 1 cup granulated sugar
  • 8 tablespoons softened butter
  • 2 heaping tablespoons sour cream
  • 1 heaping tablespoon mayonnaise
  • 1 teaspoon baking powder
  • 4 cups all-purpose flour
  • 1 heaping teaspoon baking soda, diluted in 1 tablespoon of lemon juice

For the Apricot Dulce de Leche Filling:

  • 2 ounces cream cheese, softened
  • 2 tablespoons softened butter
  • 5 ounces dulce de leche
  • 2 tablespoons apricot jam
  • 3 ounces cool whip

For Decoration:

  • 1 cup milk
  • Red food coloring
  • Orange food coloring
  • ¾ cup granulated sugar

Instructions:

  1. Prepare the Cookie Dough: Preheat your oven to 350°F (175°C) and line a baking sheet with parchment paper. In a large mixing bowl, whisk the eggs and sugar together until light and fluffy. Add the softened butter, sour cream, and mayonnaise, mixing until smooth. Sift in the baking powder and flour gradually, mixing until a soft dough forms. Finally, stir in the baking soda diluted with lemon juice. The dough should be pliable but not sticky.
  2. Shape and Bake: Divide the dough into small portions and roll them into balls, about the size of a walnut. Place the dough balls on the prepared baking sheet and bake for 12–15 minutes or until the cookies are lightly golden. Remove from the oven and let them cool completely.
  3. Make the Filling: In a medium bowl, beat the cream cheese and butter until smooth. Add the dulce de leche and apricot jam, mixing until well incorporated. Gently fold in the cool whip to create a light, fluffy filling.
  4. Assemble the Cookies: Using a small spoon or knife, carefully carve out a small hollow in the bottom of each cookie. Fill one hollowed-out cookie with the dulce de leche filling and sandwich it with another cookie, creating a peach shape. Repeat for all cookies.
  5. Decorate the Peaches: Mix the milk with red and orange food coloring to create a vibrant peachy hue. Lightly dip each cookie sandwich into the colored milk, then roll it in granulated sugar for a sparkly, fruity appearance. Allow the cookies to dry on a cooling rack.

Conclusion:

These peach cookies are as delightful to look at as they are to eat! With their golden hue, sugar-crusted finish, and decadent filling, they’re a showstopper at any gathering. Serve them as a sweet conversation starter or package them as edible gifts. Their combination of flavors and textures will leave everyone wanting more!
Decadent Peach Cookies with Dulce de Leche Filling

Soft, buttery cookies filled with a creamy apricotdulce de leche filling, decorated to look like real peaches. These cookies areas fun to make as they are delicious to eat.
Prep Time 30 minutes
Cook Time 30 minutes
Total Time 1 hour
Servings: 20 peach cookies
Course: Dessert
Cuisine: European-inspired
Calories: 120

Ingredients
  

For the Cookies:
  • 2 large eggs
  • 1 cup granulated sugar
  • 8 tablespoons softened butter
  • 2 heaping tablespoons sour cream
  • 1 heaping tablespoon mayonnaise
  • 1 teaspoon baking powder
  • 4 cups all-purpose flour
  • 1 heaping teaspoon baking soda diluted in 1 tablespoon of lemon juice
For the Apricot Dulce de Leche Filling:
  • 2 ounces cream cheese softened
  • 2 tablespoons softened butter
  • 5 ounces dulce de leche
  • 2 tablespoons apricot jam
  • 3 ounces cool whip
For Decoration:
  • 1 cup milk
  • Red food coloring
  • Orange food coloring
  • ¾ cup granulated sugar

Method
 

  1. Prepare the Cookie Dough: Preheat your oven to 350°F (175°C) and line a baking sheet with parchment paper. In a large mixing bowl, whisk the eggs and sugar together until light and fluffy. Add the softened butter, sour cream, and mayonnaise, mixing until smooth. Sift in the baking powder and flour gradually, mixing until a soft dough forms. Finally, stir in the baking soda diluted with lemon juice. The dough should be pliable but not sticky.
  2. Shape and Bake: Divide the dough into small portions and roll them into balls, about the size of a walnut. Place the dough balls on the prepared baking sheet and bake for 12–15 minutes or until the cookies are lightly golden. Remove from the oven and let them cool completely.
  3. Make the Filling: In a medium bowl, beat the cream cheese and butter until smooth. Add the dulce de leche and apricot jam, mixing until well incorporated. Gently fold in the cool whip to create a light, fluffy filling.
  4. Assemble the Cookies: Using a small spoon or knife, carefully carve out a small hollow in the bottom of each cookie. Fill one hollowed-out cookie with the dulce de leche filling and sandwich it with another cookie, creating a peach shape. Repeat for all cookies.
  5. Decorate the Peaches: Mix the milk with red and orange food coloring to create a vibrant peachy hue. Lightly dip each cookie sandwich into the colored milk, then roll it in granulated sugar for a sparkly, fruity appearance. Allow the cookies to dry on a cooling rack.
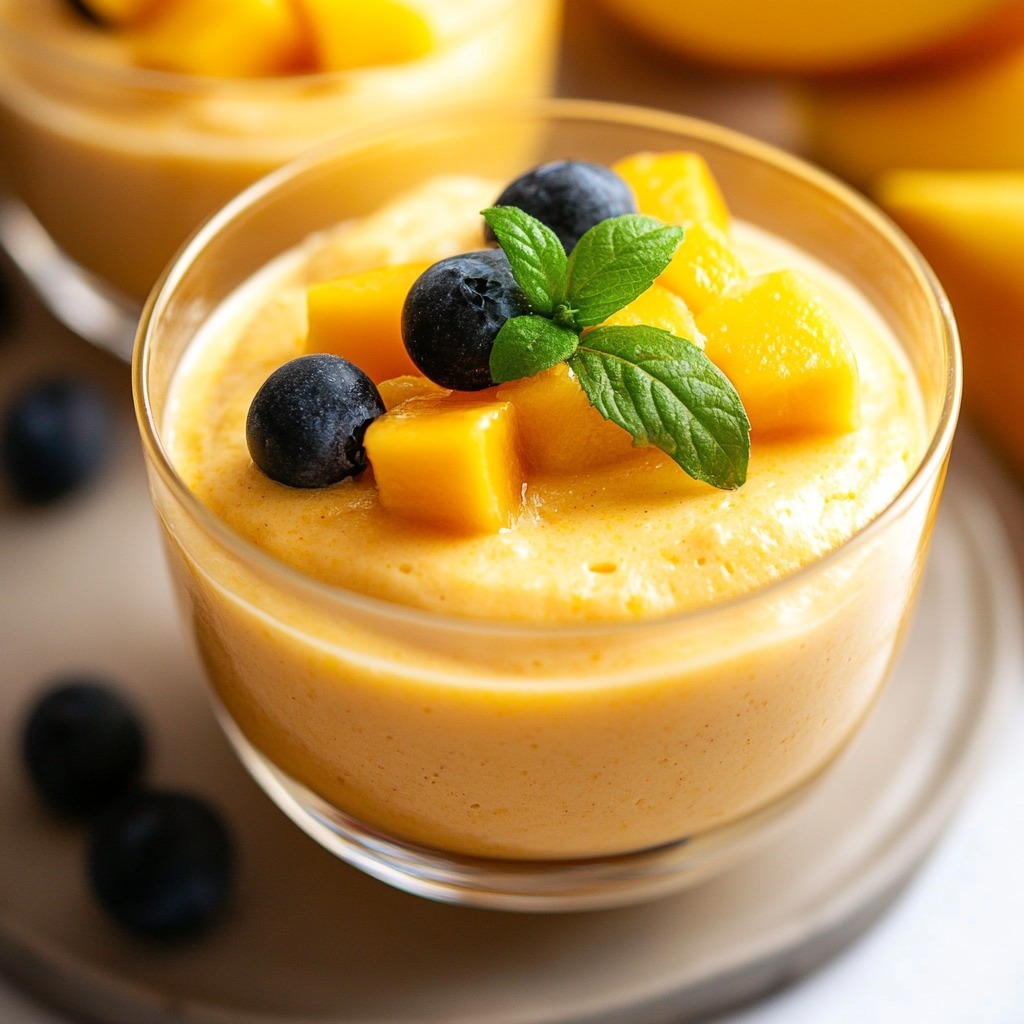
Tropical Bliss: Creamy Mango Delight Mousse

Indulge in a taste of the tropics with this creamy mango mousse! This dessert is a perfect blend of luscious mangoes, rich cream, and a hint of vanilla for a smooth and velvety treat. Whether you’re hosting a dinner party or simply craving something sweet, this mango mousse will bring a burst of sunshine to your table. Its light and airy texture paired with the tropical sweetness makes it an irresistible delight!

Ingredients:

Produce:

  • 1 ½ cups ripe mangoes (pureed, fresh or frozen)

Baking & Spices:

  • ⅓ cup powdered sugar

Dairy:

  • 1 ½ cups heavy cream (cold)

Desserts:

  • 3 tablespoons vanilla instant pudding mix

Instructions:

  1. Prepare the Mango Puree : Peel, dice, and puree the mangoes until smooth. For a finer texture, strain the puree to remove any fibers. Set aside.
  2. Whip the Creaù : In a large mixing bowl, pour the cold heavy cream and begin whipping it on medium speed using an electric mixer. Gradually add the powdered sugar as you whip.
  3. Incorporate the Pudding Mix : Add the vanilla instant pudding mix to the whipped cream and continue mixing until soft peaks form. Be careful not to overwhip to avoid a grainy texture.
  4. Fold in the Mango Puree : Gently fold the mango puree into the whipped cream mixture using a spatula. Mix until evenly combined, ensuring the mousse retains its light and fluffy texture.
  5. Chill and Serve : Transfer the mousse into serving glasses or bowls. Cover with plastic wrap and refrigerate for at least 2 hours to set. Serve chilled and garnish with diced mangoes, mint leaves, or a dollop of whipped cream for an extra touch.

Conclusion:

This tropical mango mousse is as delightful to make as it is to eat! With simple ingredients and a straightforward process, it’s an ideal dessert for any occasion. The vibrant mango flavor and creamy texture will leave everyone asking for seconds. Serve it as a refreshing end to a meal or a sweet treat on a sunny day!

Tropical Bliss: Creamy Mango Delight Mousse

A light and airy tropical mango mousse made withreal mango puree, whipped cream, and vanilla pudding mix. Perfect for anyoccasion, this dessert is easy to prepare and refreshingly delicious!
Prep Time 15 minutes
Resting Time 2 hours
Total Time 2 hours 15 minutes
Servings: 4
Course: Dessert
Cuisine: Fusion, Tropical
Calories: 250

Ingredients
  

Produce:
  • 1 ½ cups ripe mangoes pureed, fresh or frozen
Baking & Spices:
  • cup powdered sugar
Dairy:
  • 1 ½ cups heavy cream cold
Desserts:
  • 3 tablespoons vanilla instant pudding mix

Method
 

  1. Prepare the Mango Puree : Peel, dice, and puree the mangoes until smooth. For a finer texture, strain the puree to remove any fibers. Set aside.
  2. Whip the Creaù : In a large mixing bowl, pour the cold heavy cream and begin whipping it on medium speed using an electric mixer. Gradually add the powdered sugar as you whip.
  3. Incorporate the Pudding Mix : Add the vanilla instant pudding mix to the whipped cream and continue mixing until soft peaks form. Be careful not to overwhip to avoid a grainy texture.
  4. Fold in the Mango Puree : Gently fold the mango puree into the whipped cream mixture using a spatula. Mix until evenly combined, ensuring the mousse retains its light and fluffy texture.
  5. Chill and Serve : Transfer the mousse into serving glasses or bowls. Cover with plastic wrap and refrigerate for at least 2 hours to set. Serve chilled and garnish with diced mangoes, mint leaves, or a dollop of whipped cream for an extra touch.

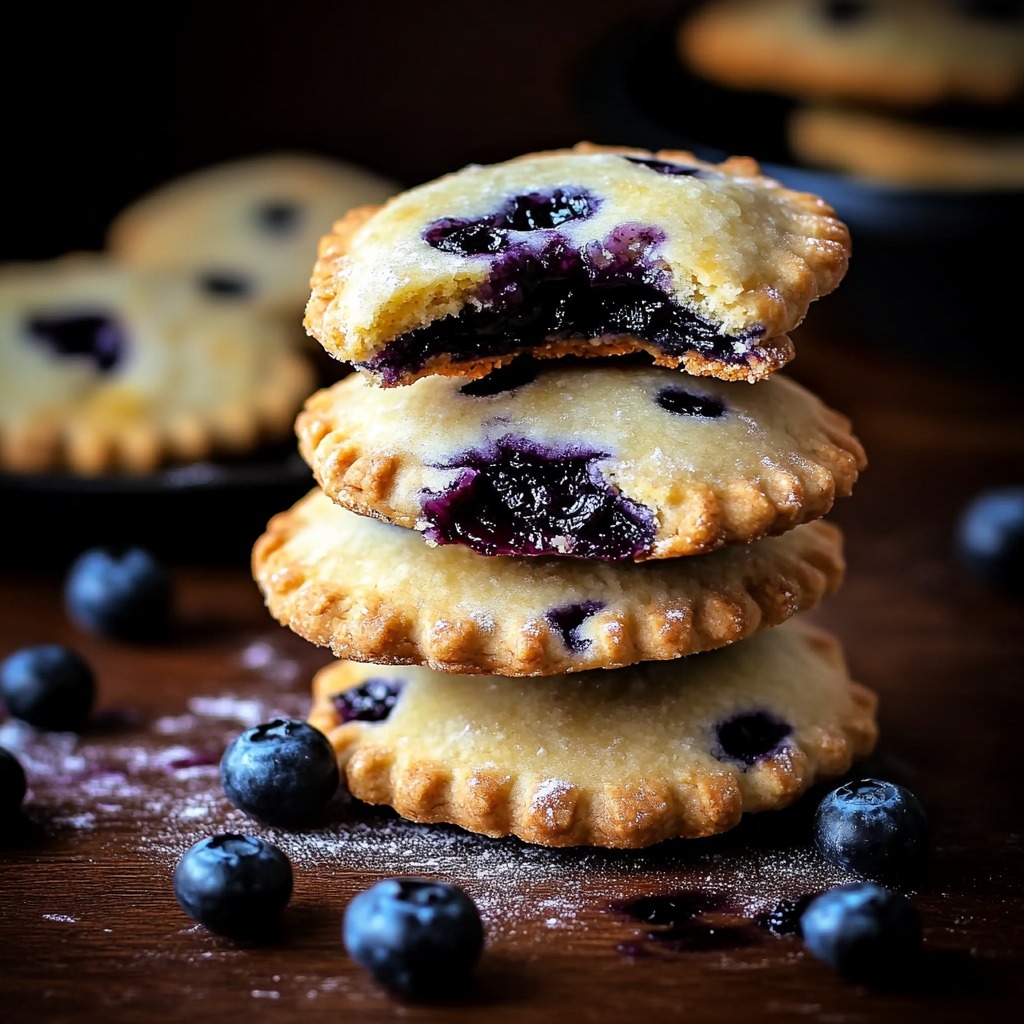
Blueberry Pie Cookies: Bite-Sized Bliss

Take your love for pie to a whole new level with these Blueberry Pie Cookies. Combining the fruity sweetness of a classic blueberry pie with the convenience of a handheld treat, these cookies are perfect for any occasion. With buttery, flaky crusts and a juicy blueberry filling kissed with a hint of cinnamon, they’re as beautiful as they are delicious.

Ingredients

Produce:

  • 1 pint fresh blueberries

Refrigerated:

  • 1 large egg (for egg wash)

Condiments:

  • 1 tsp lemon juice

Baking & Spices:

  • ½ cup granulated sugar
  • 1 tbsp cornstarch
  • 1 pinch ground cinnamon
  • 1 pinch salt

Bread & Baked Goods:

  • Prepared pie crust (store-bought or homemade, sufficient for two crusts)

Dairy:

  • 1 tbsp butter

Liquids:

  • ¼ cup water

Instructions

  1. Preheat and Prepare : Preheat your oven to 375°F (190°C). Line a baking sheet with parchment paper or a silicone mat for easy cleanup.
  2. Make the Blueberry Filling : In a small saucepan, combine the blueberries, sugar, cornstarch, cinnamon, salt, lemon juice, and water. Cook over medium heat, stirring occasionally, until the mixture thickens (about 5–7 minutes). Remove from heat and let it cool to room temperature.
  3. Prepare the Pie Crust : Roll out your prepared pie crusts on a lightly floured surface. Use a round cookie cutter (3–4 inches in diameter) to cut out circles. Re-roll scraps as needed to maximize the number of circles.
  4. Assemble the Cookies : Place a small spoonful of the blueberry filling in the center of half of the pie crust circles. Dot with a tiny piece of butter. Cover each with a second circle of pie crust, pressing the edges together to seal. Use a fork to crimp the edges for a decorative touch.
  5. Apply Egg Wash : Beat the egg in a small bowl and brush the tops of the cookies with the egg wash. For extra shine and sweetness, sprinkle a pinch of granulated sugar over the tops.
  6. Bake the Cookies : Arrange the cookies on the prepared baking sheet, leaving space between them. Bake in the preheated oven for 15–18 minutes, or until the tops are golden brown. Remove and allow them to cool on a wire rack.
  7. Serve and Enjoy : Serve the cookies warm or at room temperature. Pair with a dollop of whipped cream or a scoop of vanilla ice cream for a decadent touch!

Conclusion

These Blueberry Pie Cookies are a delightful way to enjoy the flavors of blueberry pie in a fun, portable form. With their flaky crust and sweet, fruity filling, they’re perfect for sharing at parties, picnics, or anytime you need a quick dessert fix. One bite, and they’ll become your go-to treat!

Blueberry Pie Cookies: Bite-Sized Bliss

Miniature pie-inspired cookies filled with sweet,juicy blueberries and wrapped in flaky crusts. Easy to make and perfect for any occasion.
Prep Time 20 minutes
Cook Time 15 minutes
Total Time 35 minutes
Servings: 12 Cookies
Course: Dessert
Cuisine: American
Calories: 150

Ingredients
  

  • 1 pint fresh blueberries
  • 1 large egg for egg wash
  • 1 tsp lemon juice
  • ½ cup granulated sugar
  • 1 tbsp cornstarch
  • 1 pinch ground cinnamon
  • 1 pinch salt
  • Prepared pie crust store-bought or homemade, sufficient for two crusts
  • 1 tbsp butter
  • ¼ cup water

Method
 

  1. Preheat and Prepare : Preheat your oven to 375°F (190°C). Line a baking sheet with parchment paper or a silicone mat for easy cleanup.
  2. Make the Blueberry Filling : In a small saucepan, combine the blueberries, sugar, cornstarch, cinnamon, salt, lemon juice, and water. Cook over medium heat, stirring occasionally, until the mixture thickens (about 5–7 minutes). Remove from heat and let it cool to room temperature.
  3. Prepare the Pie Crust : Roll out your prepared pie crusts on a lightly floured surface. Use a round cookie cutter (3–4 inches in diameter) to cut out circles. Re-roll scraps as needed to maximize the number of circles.
  4. Assemble the Cookies : Place a small spoonful of the blueberry filling in the center of half of the pie crust circles. Dot with a tiny piece of butter. Cover each with a second circle of pie crust, pressing the edges together to seal. Use a fork to crimp the edges for a decorative touch.
  5. Apply Egg Wash : Beat the egg in a small bowl and brush the tops of the cookies with the egg wash. For extra shine and sweetness, sprinkle a pinch of granulated sugar over the tops.
  6. Bake the Cookies : Arrange the cookies on the prepared baking sheet, leaving space between them. Bake in the preheated oven for 15–18 minutes, or until the tops are golden brown. Remove and allow them to cool on a wire rack.
  7. Serve and Enjoy : Serve the cookies warm or at room temperature. Pair with a dollop of whipped cream or a scoop of vanilla ice cream for a decadent touch!

Cinnamon Kissed Cheesecake Donut Cookies: A Delectable Fusion Dessert

Indulge in the perfect combination of cheesecake, donuts, and cookies with these Cinnamon Kissed Cheesecake Donut Cookies. Each bite is a rich, buttery treat kissed with warm cinnamon and topped with luscious caramel sauce. These cookies offer a soft, cheesecake-like texture while maintaining a delightful donut-inspired flavor profile. Perfect for holidays, tea parties, or anytime you crave a little decadence!

Ingredients

Refrigerated:

  • 2 large eggs

Condiments:

  • 1 cup caramel sauce

Baking & Spices:

  • 3 cups all-purpose flour
  • 1 tsp baking powder
  • 1 tbsp ground cinnamon
  • 2 ¼ cups granulated sugar
  • ½ tsp salt
  • 2 tsp vanilla extract

Dairy:

  • 1 cup unsalted butter, softened
  • 8 oz cream cheese, softened

Instructions

  1. Preheat and Prepare : Preheat your oven to 350°F (175°C). Line baking sheets with parchment paper or silicone baking mats.
  2. Mix the Wet Ingredients : In a large bowl, beat together the softened butter, cream cheese, and granulated sugar until light and fluffy. Add the eggs one at a time, mixing well after each addition. Stir in the vanilla extract.
  3. Combine Dry Ingredients : In a separate bowl, whisk together the flour, baking powder, ground cinnamon, and salt. Gradually add the dry ingredients to the wet ingredients, mixing until a soft dough forms.
  4. Shape the Cookies : Using a cookie scoop or spoon, portion the dough into 1 ½-inch balls and place them on the prepared baking sheets. Gently flatten each ball slightly with your fingers.
  5. Bake the Cookies : Bake in the preheated oven for 10–12 minutes, or until the edges are set and the tops are slightly golden. Remove from the oven and let the cookies cool completely on a wire rack.
  6. Top with Caramel Sauce : Once the cookies are cool, drizzle each one generously with caramel sauce. For an extra touch, sprinkle with a pinch of cinnamon if desired.

Conclusion

These Cinnamon Kissed Cheesecake Donut Cookies are a melt-in-your-mouth delight with their soft, creamy centers and warm cinnamon flavor. The caramel topping adds a luxurious finishing touch, making them a standout dessert for any occasion. Share them with loved ones or savor them all to yourself—either way, they’re bound to disappear quickly!

Cinnamon Kissed Cheesecake Donut Cookies: A Delectable Fusion Dessert

Soft and creamy cookies with a hint of cinnamon,inspired by cheesecake and donuts, and topped with caramel sauce for anirresistible treat.
Prep Time 15 minutes
Cook Time 15 minutes
Total Time 30 minutes
Servings: 24 Cookies
Course: Dessert
Cuisine: American
Calories: 250

Ingredients
  

  • 2 large eggs
  • 1 cup caramel sauce
  • 3 cups all-purpose flour
  • 1 tsp baking powder
  • 1 tbsp ground cinnamon
  • 2 ¼ cups granulated sugar
  • ½ tsp salt
  • 2 tsp vanilla extract
  • 1 cup unsalted butter softened
  • 8 oz cream cheese softened

Method
 

  1. Preheat and Prepare : Preheat your oven to 350°F (175°C). Line baking sheets with parchment paper or silicone baking mats.
  2. Mix the Wet Ingredients : In a large bowl, beat together the softened butter, cream cheese, and granulated sugar until light and fluffy. Add the eggs one at a time, mixing well after each addition. Stir in the vanilla extract.
  3. Combine Dry Ingredients : In a separate bowl, whisk together the flour, baking powder, ground cinnamon, and salt. Gradually add the dry ingredients to the wet ingredients, mixing until a soft dough forms.
  4. Shape the Cookies : Using a cookie scoop or spoon, portion the dough into 1 ½-inch balls and place them on the prepared baking sheets. Gently flatten each ball slightly with your fingers.
  5. Bake the Cookies : Bake in the preheated oven for 10–12 minutes, or until the edges are set and the tops are slightly golden. Remove from the oven and let the cookies cool completely on a wire rack.
  6. Top with Caramel Sauce : Once the cookies are cool, drizzle each one generously with caramel sauce. For an extra touch, sprinkle with a pinch of cinnamon if desired.

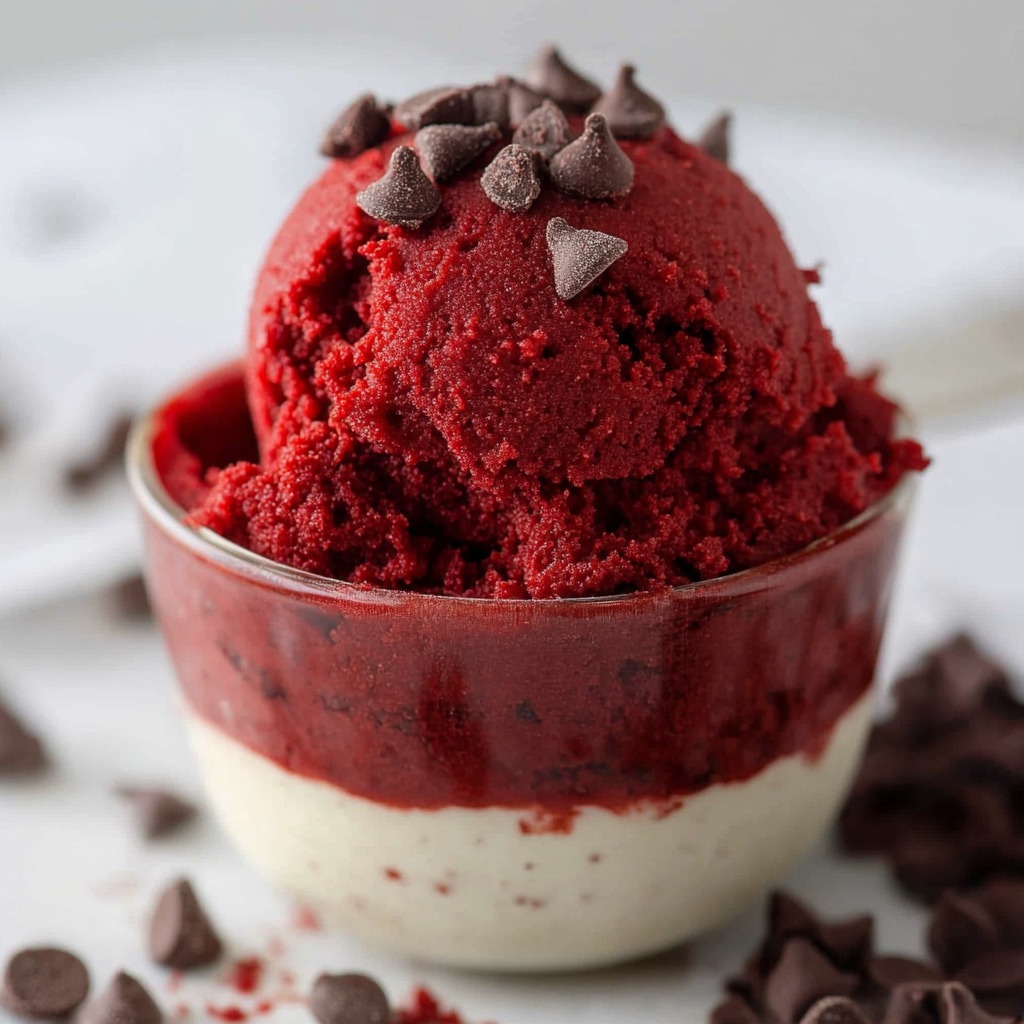
Red Velvet Edible Cookie Dough: A Sweet Treat Without the Bake!

Craving something sweet but don’t want to fire up the oven? This Red Velvet Edible Cookie Dough is the perfect indulgence for red velvet fans! Rich, chocolatey, and perfectly safe to eat, it’s made with heat-treated flour and no eggs. A splash of vibrant red food coloring and mini chocolate chips give it a festive touch, making it ideal for parties, gifts, or satisfying your sweet tooth.

Ingredients

Baking & Spices:

  • ⅔ cup all-purpose flour (heat-treated for safety)
  • ¼ cup brown sugar
  • ¼ cup granulated sugar
  • 1 tbsp unsweetened cocoa powder
  • ½ tbsp red food coloring
  • ¼ tsp salt
  • 1 tsp vanilla extract
  • ⅓ cup mini chocolate chips

Dairy:

  • ¼ cup unsalted butter, softened
  • 1 tbsp milk

Instructions

  1. Prepare the Flour : To ensure the flour is safe for consumption, heat-treat it first. Spread the flour evenly on a baking sheet and bake at 350°F (175°C) for 5–7 minutes. Let it cool completely before using.
  2. Cream the Butter and Sugars : In a mixing bowl, cream together the softened butter, brown sugar, and granulated sugar until smooth and fluffy.
  3. Add Flavor and Color : Mix in the vanilla extract, cocoa powder, red food coloring, and milk until the dough is evenly colored and well combined.
  4. Incorporate Dry Ingredients : Gradually add the cooled, heat-treated flour and salt to the wet ingredients. Stir until smooth and the dough comes together.
  5. Fold in the Chocolate Chips : Gently fold in the mini chocolate chips to distribute them evenly throughout the dough.
  6. Serve and Store : Scoop the cookie dough into small bowls or roll into bite-sized portions. Enjoy immediately, or refrigerate for up to one week in an airtight container.

Conclusion

This Red Velvet Edible Cookie Dough is a quick and easy dessert that’s perfect for any occasion. With its creamy texture, chocolatey flavor, and striking red hue, it’s bound to satisfy your sweet cravings. Whether you share it with friends or keep it all to yourself, this no-bake treat is irresistibly good!

Red Velvet Edible Cookie Dough: A Sweet Treat Without the Bake!

A rich and vibrant red velvet edible cookie doughthat's quick, easy, and safe to eat. Perfect for snacking or as a party treat!
Prep Time 10 minutes
Total Time 10 minutes
Servings: 4
Course: Dessert
Cuisine: American
Calories: 190

Ingredients
  

  • cup all-purpose flour heat-treated for safety
  • ¼ cup brown sugar
  • ¼ cup granulated sugar
  • 1 tbsp unsweetened cocoa powder
  • ½ tbsp red food coloring
  • ¼ tsp salt
  • 1 tsp vanilla extract
  • cup mini chocolate chips
  • ¼ cup unsalted butter softened
  • 1 tbsp milk

Method
 

  1. Prepare the Flour : To ensure the flour is safe for consumption, heat-treat it first. Spread the flour evenly on a baking sheet and bake at 350°F (175°C) for 5–7 minutes. Let it cool completely before using.
  2. Cream the Butter and Sugars : In a mixing bowl, cream together the softened butter, brown sugar, and granulated sugar until smooth and fluffy.
  3. Add Flavor and Color : Mix in the vanilla extract, cocoa powder, red food coloring, and milk until the dough is evenly colored and well combined.
  4. Incorporate Dry Ingredients : Gradually add the cooled, heat-treated flour and salt to the wet ingredients. Stir until smooth and the dough comes together.
  5. Fold in the Chocolate Chips : Gently fold in the mini chocolate chips to distribute them evenly throughout the dough.
  6. Serve and Store : Scoop the cookie dough into small bowls or roll into bite-sized portions. Enjoy immediately, or refrigerate for up to one week in an airtight container.

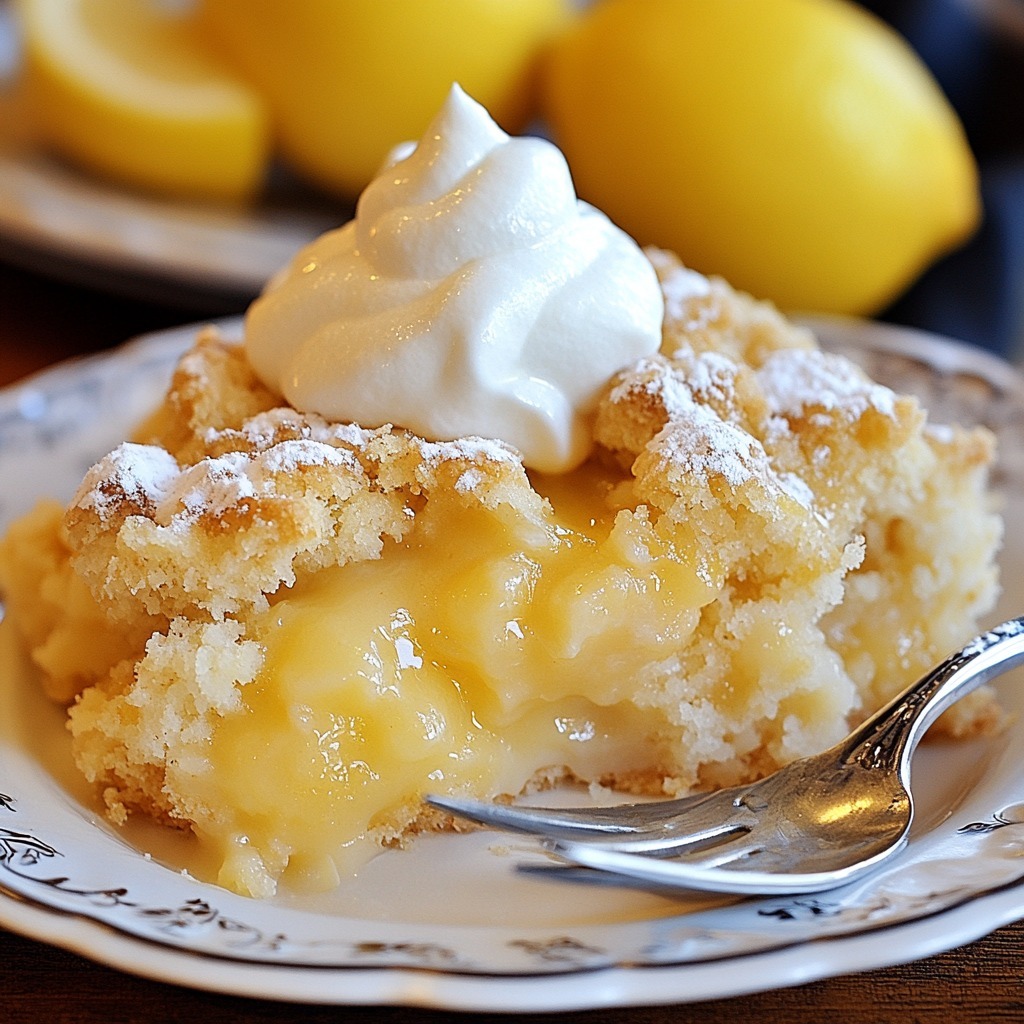
Zesty Lemon Magic Cobbler: A Citrus Lover’s Delight

Transform a few pantry staples into a luscious dessert bursting with tangy lemon flavor! This Zesty Lemon Magic Cobbler combines the bright taste of lemon with a soft, buttery cobbler topping. Perfect for any occasion, this cobbler is an easy-to-make dessert that will wow your guests. With its refreshing citrusy notes and creamy texture, it’s destined to become a family favorite.

Ingredients

Condiments:

  • 1 (21 oz) can lemon pie filling or lemon curd

Baking & Spices:

  • 1 cup all-purpose flour
  • 1 ½ tsp baking powder
  • 1 cup granulated sugar
  • 1 tsp lemon extract
  • ¼ tsp salt
  • 1 tsp vanilla extract

Dairy:

  • ½ cup (1 stick) unsalted butter, melted
  • 1 cup buttermilk

Instructions

  1. Preheat the Oven : Preheat your oven to 350°F (175°C). Grease an 8×8-inch baking dish or similar-sized pan to prevent sticking.
  2. Prepare the Batter : In a mixing bowl, whisk together the flour, baking powder, sugar, and salt. Add the buttermilk, melted butter, lemon extract, and vanilla extract. Stir until smooth and no lumps remain.
  3. Layer the Ingredients : Pour the lemon pie filling or lemon curd evenly across the bottom of the prepared dish. Carefully spoon the cobbler batter over the lemon layer, spreading it as evenly as possible. Don’t worry if the layers mix slightly—they’ll bake into a magical, delicious blend!
  4. Bake to Perfection : Bake for 40–45 minutes or until the top is golden brown and a toothpick inserted into the cobbler topping comes out clean. Allow it to cool for 10 minutes to set.
  5. Serve and Enjoy : Serve warm with a scoop of vanilla ice cream or a dollop of whipped cream for an extra indulgent treat!

Conclusion

This Zesty Lemon Magic Cobbler is a perfect blend of tart and sweet, with a tender topping that melts in your mouth. It’s an easy dessert recipe that requires minimal prep time and guarantees maximum flavor. Whether for a family dinner or a festive gathering, this cobbler is sure to impress!

Zesty Lemon Magic Cobbler: A Citrus Lover’s Delight

A quick and easy cobbler recipe bursting with zestylemon flavor and a buttery, soft topping. Perfect for any occasion!
Prep Time 10 minutes
Cook Time 40 minutes
Total Time 50 minutes
Servings: 6
Course: Dessert
Cuisine: American
Calories: 120

Ingredients
  

  • 1 21 oz can lemon pie filling or lemon curd
  • 1 cup all-purpose flour
  • 1 ½ tsp baking powder
  • 1 cup granulated sugar
  • 1 tsp lemon extract
  • ¼ tsp salt
  • 1 tsp vanilla extract
  • ½ cup 1 stick unsalted butter, melted
  • 1 cup buttermilk

Method
 

  1. Preheat the Oven : Preheat your oven to 350°F (175°C). Grease an 8×8-inch baking dish or similar-sized pan to prevent sticking.
  2. Prepare the Batter : In a mixing bowl, whisk together the flour, baking powder, sugar, and salt. Add the buttermilk, melted butter, lemon extract, and vanilla extract. Stir until smooth and no lumps remain.
  3. Layer the Ingredients : Pour the lemon pie filling or lemon curd evenly across the bottom of the prepared dish. Carefully spoon the cobbler batter over the lemon layer, spreading it as evenly as possible. Don’t worry if the layers mix slightly—they’ll bake into a magical, delicious blend!
  4. Bake to Perfection : Bake for 40–45 minutes or until the top is golden brown and a toothpick inserted into the cobbler topping comes out clean. Allow it to cool for 10 minutes to set.
  5. Serve and Enjoy : Serve warm with a scoop of vanilla ice cream or a dollop of whipped cream for an extra indulgent treat!

Pistachio Raspberry Cake: A Delightful Combination of Nutty and Fruity Flavors

Elevate your dessert table with this Pistachio Raspberry Cake, a delectable treat that perfectly balances the rich, nutty flavors of pistachios with the bright tartness of raspberries. With layers of moist cake, luscious raspberry jam, and pistachio cream, this dessert is as stunning as it is delicious. Whether for a celebration or a special treat, this cake is sure to impress.

Ingredients

Produce

  • 250 g fresh raspberries
  • 1 sprig fresh mint (for garnish)

Refrigerated

  • 4 large eggs

Condiments

  • 1 tsp lemon juice
  • 3 tbsp raspberry jam

Baking & Spices

  • 2 tsp baking powder
  • 240 g golden caster sugar
  • 280 g icing sugar
  • 150 g plain flour
  • 3/4 tsp fine sea salt
  • 1 tsp vanilla extract

Nuts & Seeds

  • 100 g ground pistachios
  • 2 tbsp whole pistachios (for garnish)

Dairy

  • 250 g unsalted butter (for cake)
  • 175 g unsalted butter (for frosting)
  • 2 tbsp smooth pistachio cream

Instructions

  1. Preheat and Prepare : Preheat your oven to 180°C (350°F). Grease and line two 8-inch round cake pans with parchment paper.
  2. Make the Cake Batter : In a large mixing bowl, beat the butter and golden caster sugar together until light and fluffy. Add the eggs one at a time, mixing well after each addition. Stir in the vanilla extract. In a separate bowl, sift together the plain flour, baking powder, sea salt, and ground pistachios. Gradually fold the dry ingredients into the wet mixture until well combined.
  3. Bake the Cakes : Divide the batter evenly between the prepared cake pans. Bake for 25–30 minutes or until a toothpick inserted in the center comes out clean. Let the cakes cool in the pans for 10 minutes before transferring them to a wire rack to cool completely.
  4. Prepare the Frosting : Beat the unsalted butter (175 g) until creamy. Gradually add the icing sugar and beat until light and fluffy. Mix in the pistachio cream and lemon juice until smooth.
  5. Assemble the Cake : Spread a thin layer of raspberry jam over the top of one cake layer. Pipe or spread a layer of pistachio frosting over the jam. Place the second cake layer on top and spread frosting over the top and sides of the cake.
  6. Garnish : Decorate the cake with fresh raspberries, whole pistachios, and a sprig of fresh mint. Chill for 30 minutes to set before serving.

Conclusion

This Pistachio Raspberry Cake is a show-stopping dessert that marries nutty pistachios and tart raspberries in a heavenly combination. With its moist layers, vibrant flavors, and beautiful presentation, it’s perfect for celebrations or as a sweet indulgence.

Pistachio Raspberry Cake: A Delightful Combination of Nutty and Fruity Flavors

A moist pistachio-flavored cake layered withraspberry jam and pistachio cream frosting, topped with fresh raspberries andnuts. Perfect for any occasion.
Prep Time 20 minutes
Cook Time 30 minutes
Cooling Time 20 minutes
Total Time 1 hour 10 minutes
Servings: 12
Course: Dessert
Cuisine: European-inspired
Calories: 220

Ingredients
  

  • 250 g fresh raspberries
  • 1 sprig fresh mint for garnish
  • 4 large eggs
  • 1 tsp lemon juice
  • 3 tbsp raspberry jam
  • 2 tsp baking powder
  • 240 g golden caster sugar
  • 280 g icing sugar
  • 150 g plain flour
  • 3/4 tsp fine sea salt
  • 1 tsp vanilla extract
  • 100 g ground pistachios
  • 2 tbsp whole pistachios for garnish
  • 250 g unsalted butter for cake
  • 175 g unsalted butter for frosting
  • 2 tbsp smooth pistachio cream

Method
 

  1. Preheat and Prepare : Preheat your oven to 180°C (350°F). Grease and line two 8-inch round cake pans with parchment paper.
  2. Make the Cake Batter : In a large mixing bowl, beat the butter and golden caster sugar together until light and fluffy. Add the eggs one at a time, mixing well after each addition. Stir in the vanilla extract. In a separate bowl, sift together the plain flour, baking powder, sea salt, and ground pistachios. Gradually fold the dry ingredients into the wet mixture until well combined.
  3. Bake the Cakes : Divide the batter evenly between the prepared cake pans. Bake for 25–30 minutes or until a toothpick inserted in the center comes out clean. Let the cakes cool in the pans for 10 minutes before transferring them to a wire rack to cool completely.
  4. Prepare the Frosting : Beat the unsalted butter (175 g) until creamy. Gradually add the icing sugar and beat until light and fluffy. Mix in the pistachio cream and lemon juice until smooth.
  5. Assemble the Cake : Spread a thin layer of raspberry jam over the top of one cake layer. Pipe or spread a layer of pistachio frosting over the jam. Place the second cake layer on top and spread frosting over the top and sides of the cake.
  6. Garnish : Decorate the cake with fresh raspberries, whole pistachios, and a sprig of fresh mint. Chill for 30 minutes to set before serving.

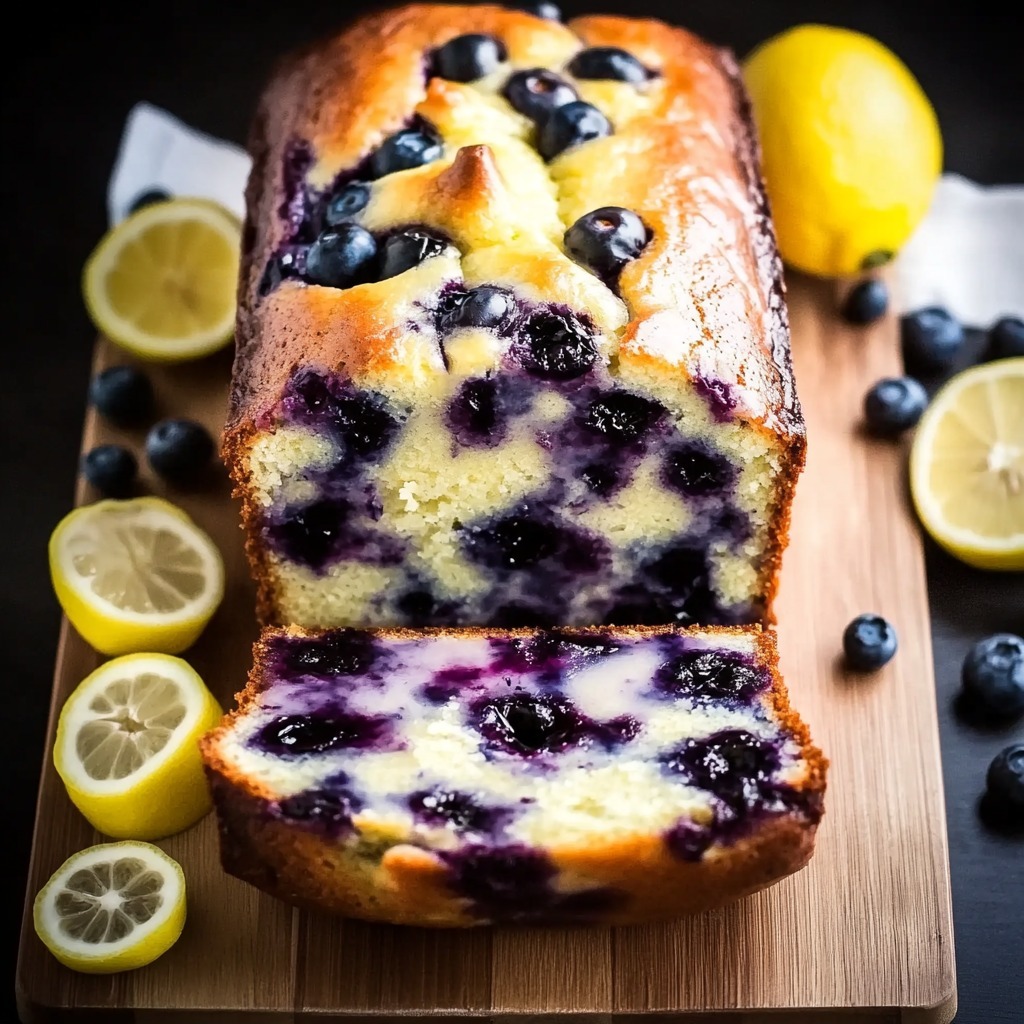
Lemon Blueberry Yogurt Loaf: A Delightful Burst of Flavor

Brighten your day with this Lemon Blueberry Yogurt Loaf, a moist and flavorful treat that’s perfect for breakfast, brunch, or dessert. The tangy zest of lemon complements the sweetness of blueberries, while Greek yogurt ensures a tender crumb. This recipe is a breeze to whip up and delivers a loaf that’s as beautiful as it is delicious.

Ingredients

Produce

  • 1 1/2 cups fresh or frozen blueberries
  • 2 tbsp lemon zest

Refrigerated

  • 3 large eggs

Condiments

  • 1/2 cup freshly squeezed lemon juice

Baking & Spices

  • 2 tsp baking powder
  • 1 9/16 cups flour (all-purpose)
  • 1 1/16 cups granulated sugar
  • 1 cup icing sugar
  • 1/2 tsp salt
  • 2 tsp vanilla extract

Oils & Vinegars

  • 1/2 cup vegetable oil

Dairy

  • 1 cup Greek yogurt
  • 1 tbsp milk (for glaze)

Instructions

  1. Preheat and Prep : Preheat your oven to 350°F (175°C). Grease a standard loaf pan and line it with parchment paper for easy removal. Toss the blueberries in a tablespoon of flour to prevent them from sinking during baking.
  2. Mix Wet Ingredients : In a large mixing bowl, whisk together the Greek yogurt, vegetable oil, eggs, lemon zest, and vanilla extract until smooth and well combined.
  3. Combine Dry Ingredients : In a separate bowl, sift together the flour, baking powder, sugar, and salt. Gradually add the dry mixture to the wet mixture, stirring until just combined. Be careful not to overmix.
  4. Fold in Blueberries : Gently fold the blueberries into the batter, being careful not to crush them. Pour the batter into the prepared loaf pan, spreading it evenly.
  5. Bake the Loaf : Bake for 50–60 minutes, or until a toothpick inserted in the center comes out clean. Allow the loaf to cool in the pan for 10 minutes before transferring it to a wire rack to cool completely.
  6. Prepare the Lemon Glaze : In a small bowl, whisk together the icing sugar, 1 tbsp lemon juice, and 1 tbsp milk until smooth and pourable. Adjust consistency with more milk or sugar as needed.
  7. Glaze and Serve : Drizzle the glaze over the cooled loaf, letting it cascade down the sides. Slice and serve this luscious, citrusy loaf with a cup of tea or coffee.

Conclusion

This Lemon Blueberry Yogurt Loaf is a showstopper with its vibrant flavors and tender texture. Perfect for any time of day, it’s a versatile recipe that’s sure to impress. The tart lemon and juicy blueberries create a harmonious balance that will leave you reaching for another slice.

Lemon Blueberry Yogurt Loaf: A Delightful Burst of Flavor

A soft and moist lemon blueberry loaf with a tangyglaze, perfect for brunch or dessert. The Greek yogurt ensures a tender crumbwhile the blueberries add bursts of fruity goodness.
Prep Time 15 minutes
Cook Time 55 minutes
Cooling Time 20 minutes
Total Time 1 hour 30 minutes
Servings: 10
Course: Dessert
Cuisine: American
Calories: 150

Ingredients
  

  • 1 1/2 cups fresh or frozen blueberries
  • 2 tbsp lemon zest
  • 3 large eggs
  • 1/2 cup freshly squeezed lemon juice
  • 2 tsp baking powder
  • 1 9/16 cups flour all-purpose
  • 1 1/16 cups granulated sugar
  • 1 cup icing sugar
  • 1/2 tsp salt
  • 2 tsp vanilla extract
  • 1/2 cup vegetable oil
  • 1 cup Greek yogurt
  • 1 tbsp milk for glaze

Method
 

  1. Preheat and Prep : Preheat your oven to 350°F (175°C). Grease a standard loaf pan and line it with parchment paper for easy removal. Toss the blueberries in a tablespoon of flour to prevent them from sinking during baking.
  2. Mix Wet Ingredients : In a large mixing bowl, whisk together the Greek yogurt, vegetable oil, eggs, lemon zest, and vanilla extract until smooth and well combined.
  3. Combine Dry Ingredients : In a separate bowl, sift together the flour, baking powder, sugar, and salt. Gradually add the dry mixture to the wet mixture, stirring until just combined. Be careful not to overmix.
  4. Fold in Blueberries : Gently fold the blueberries into the batter, being careful not to crush them. Pour the batter into the prepared loaf pan, spreading it evenly.
  5. Bake the Loaf : Bake for 50–60 minutes, or until a toothpick inserted in the center comes out clean. Allow the loaf to cool in the pan for 10 minutes before transferring it to a wire rack to cool completely.
  6. Prepare the Lemon Glaze : In a small bowl, whisk together the icing sugar, 1 tbsp lemon juice, and 1 tbsp milk until smooth and pourable. Adjust consistency with more milk or sugar as needed.
  7. Glaze and Serve : Drizzle the glaze over the cooled loaf, letting it cascade down the sides. Slice and serve this luscious, citrusy loaf with a cup of tea or coffee.

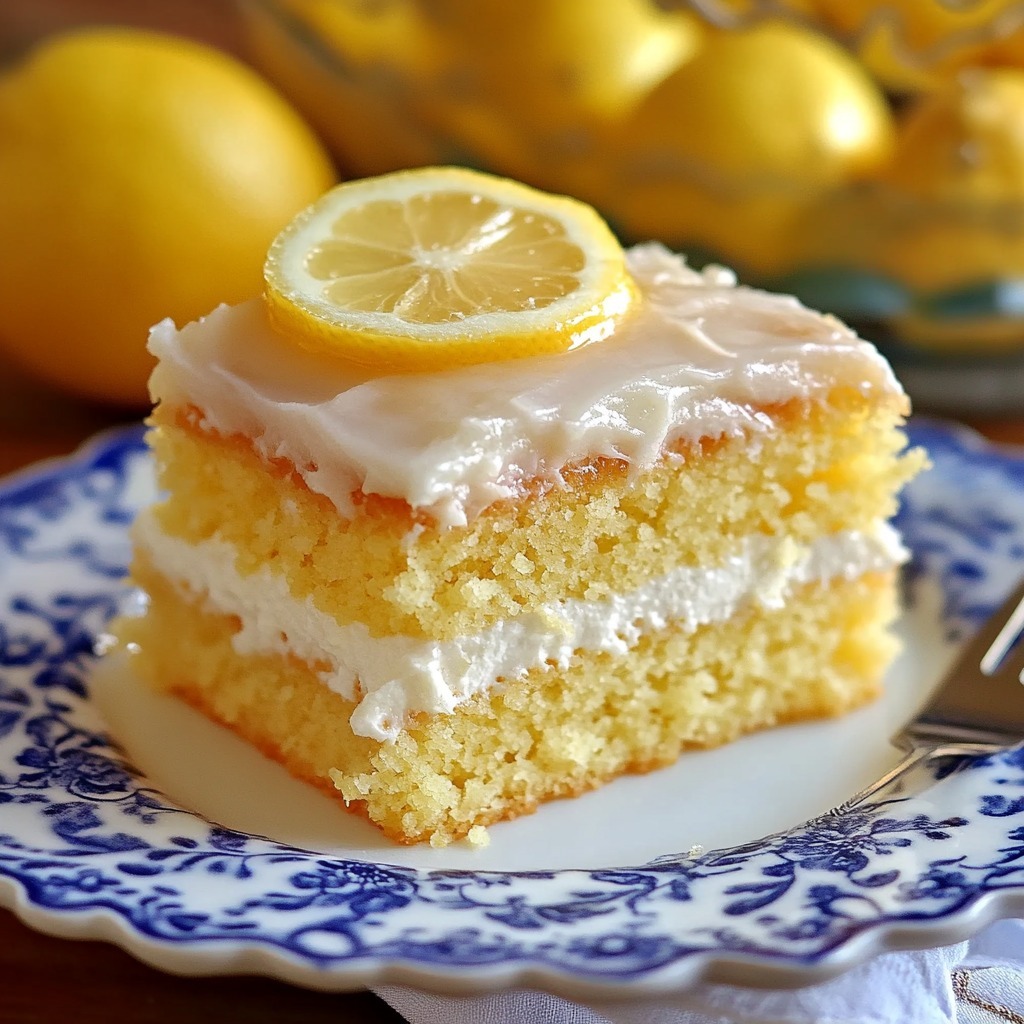
Irresistible Lemon Bliss Cake: A Recipe to Savor

Experience the ultimate citrus delight with this Lemon Bliss Cake, a luscious dessert that’s tangy, sweet, and irresistibly moist. This recipe combines the bright flavors of lemon with a buttery richness that melts in your mouth. It’s a crowd-pleaser for gatherings, birthdays, or just a special treat for yourself. Simple yet decadent, it’s a recipe you’ll return to time and again.

Ingredients

Refrigerated

  • 4 large eggs

Condiments

  • 1/4 cup lemon juice

Baking & Spices

  • 1 box yellow cake mix
  • 1 box lemon instant pudding mix
  • 1 tsp vanilla extract
  • 2 cups confectioners’ sugar

Oils & Vinegars

  • 2/3 cup oil

Dairy

  • 2 tbsp unsalted butter
  • 2 tbsp heavy whipping cream

Liquids

  • 2/3 cup water

Instructions

  1. Prepare the Batter : Preheat your oven to 350°F (175°C) and grease a 9×13-inch baking pan. In a large mixing bowl, combine the yellow cake mix, lemon pudding mix, eggs, oil, water, and vanilla extract. Use an electric mixer to blend the ingredients until smooth, about 2–3 minutes.
  2. Bake the Cake : Pour the batter into the prepared pan and smooth the top. Bake for 35–40 minutes, or until a toothpick inserted in the center comes out clean. Let the cake cool in the pan for 10 minutes, then transfer to a wire rack to cool completely.
  3. Make the Glaze : In a small saucepan over low heat, melt the butter. Stir in the lemon juice, heavy whipping cream, and confectioners’ sugar until smooth. Remove from heat and let it cool slightly.
  4. Glaze the Cake : Using a skewer or fork, poke small holes all over the cake. Pour the glaze evenly over the surface, allowing it to seep into the cake for extra moisture and flavor.
  5. Serve and Enjoy : Once the glaze sets, slice the cake into squares and serve. Garnish with a dusting of confectioners’ sugar or a twist of lemon zest for a decorative touch.

Conclusion

This Lemon Bliss Cake is the epitome of a refreshing dessert, with its perfect balance of tangy lemon and sweet vanilla flavors. Whether served as an after-dinner treat or the star of a party, it’s sure to win hearts and leave everyone asking for seconds.

Irresistible Lemon Bliss Cake: A Recipe to Savor

A zesty lemon cake with a moist crumb and a richglaze that elevates it to perfection. Simple to make yet irresistiblydelicious, this is a go-to recipe for lemon lovers.
Prep Time 15 minutes
Cook Time 40 minutes
Cooling Time 20 minutes
Total Time 1 hour 15 minutes
Servings: 12
Course: Dessert
Cuisine: American
Calories: 310

Ingredients
  

  • 4 large eggs
  • 1/4 cup lemon juice
  • 1 box yellow cake mix
  • 1 box lemon instant pudding mix
  • 1 tsp vanilla extract
  • 2 cups confectioners’ sugar
  • 2/3 cup oil
  • 2 tbsp unsalted butter
  • 2 tbsp heavy whipping cream
  • 2/3 cup water

Method
 

  1. Prepare the Batter : Preheat your oven to 350°F (175°C) and grease a 9×13-inch baking pan. In a large mixing bowl, combine the yellow cake mix, lemon pudding mix, eggs, oil, water, and vanilla extract. Use an electric mixer to blend the ingredients until smooth, about 2–3 minutes.
  2. Bake the Cake : Pour the batter into the prepared pan and smooth the top. Bake for 35–40 minutes, or until a toothpick inserted in the center comes out clean. Let the cake cool in the pan for 10 minutes, then transfer to a wire rack to cool completely.
  3. Make the Glaze : In a small saucepan over low heat, melt the butter. Stir in the lemon juice, heavy whipping cream, and confectioners’ sugar until smooth. Remove from heat and let it cool slightly.
  4. Glaze the Cake : Using a skewer or fork, poke small holes all over the cake. Pour the glaze evenly over the surface, allowing it to seep into the cake for extra moisture and flavor.
  5. Serve and Enjoy : Once the glaze sets, slice the cake into squares and serve. Garnish with a dusting of confectioners’ sugar or a twist of lemon zest for a decorative touch.

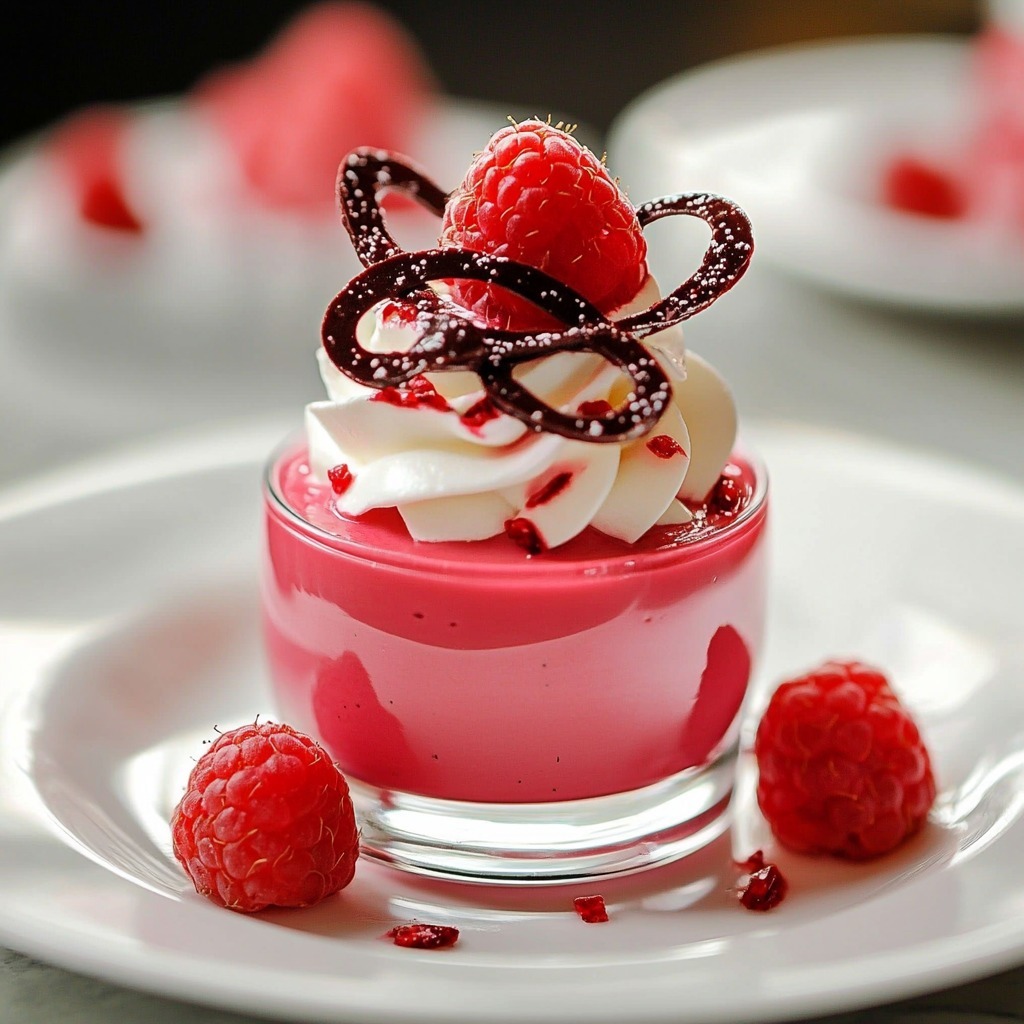
Fluffy Raspberry Bliss: A Decadent Raspberry Mousse Recipe

Indulge in the luxurious taste of this fluffy raspberry mousse, a dessert that’s as elegant as it is simple to make. Perfect for celebrations or a quiet evening treat, this light and airy mousse showcases the vibrant flavor of raspberries with a creamy, dreamy texture. Whether you’re entertaining guests or treating yourself, this recipe will elevate your dessert game.

Ingredients

Produce

  • 10 oz raspberries (fresh or frozen)

Condiments

  • 2 tbsp fresh lemon juice

Baking & Spices

  • 1/2 cup granulated sugar
  • 1/4 cup powdered sugar
  • 8 fresh raspberries (for garnish)
  • Extra whipped cream (for garnish)

Dairy

  • 2 cups heavy whipping cream

Desserts

  • 2 1/3 tsp powdered gelatin

Liquids

  • 3 tbsp water

Instructions

  1. Prepare the Raspberry Base : In a small saucepan, combine the raspberries, lemon juice, and granulated sugar. Heat over medium, stirring occasionally, until the raspberries break down and the sugar dissolves (about 5–7 minutes). Strain through a fine mesh sieve to remove seeds and let it cool.
  2. Bloom the Gelatin : In a small bowl, sprinkle the gelatin over 3 tablespoons of water. Let it sit for 5 minutes to bloom. Once bloomed, microwave for 10–15 seconds until fully dissolved. Stir into the cooled raspberry mixture.
  3. Whip the Cream : In a chilled mixing bowl, whip the heavy whipping cream and powdered sugar until soft peaks form. Reserve 1/2 cup of the whipped cream for garnishing.
  4. Fold and Chill : Gently fold the raspberry mixture into the whipped cream, ensuring it’s evenly incorporated without deflating the cream. Divide the mousse into serving glasses or bowls, smoothing the tops with a spoon. Cover and refrigerate for at least 4 hours, or until set.
  5. Garnish and Serve : Top the mousse with a dollop of whipped cream, fresh raspberries, and a sprinkle of powdered sugar. Serve chilled and enjoy the fruity bliss!

Conclusion

This raspberry mousse is a stunning dessert that combines simplicity with sophistication. Its vibrant color and delicate texture make it a crowd-pleaser for any occasion. Plus, the refreshing raspberry flavor balances the creaminess perfectly, making each bite irresistible.

Fluffy Raspberry Bliss: A Decadent Raspberry Mousse Recipe

A light and creamy raspberry mousse that’s perfectfor dessert or special occasions. Simple to prepare, it’s a delightful blend offresh fruit and luscious cream.
Prep Time 15 minutes
Cook Time 10 minutes
Resting Time 4 hours
Total Time 4 hours 25 minutes
Servings: 6
Course: Dessert
Cuisine: French-inspired
Calories: 280

Ingredients
  

  • 10 oz raspberries fresh or frozen
  • 2 tbsp fresh lemon juice
  • 1/2 cup granulated sugar
  • 1/4 cup powdered sugar
  • 8 fresh raspberries for garnish
  • Extra whipped cream for garnish
  • 2 cups heavy whipping cream
  • 2 1/3 tsp powdered gelatin
  • 3 tbsp water

Method
 

  1. Prepare the Raspberry Base : In a small saucepan, combine the raspberries, lemon juice, and granulated sugar. Heat over medium, stirring occasionally, until the raspberries break down and the sugar dissolves (about 5–7 minutes). Strain through a fine mesh sieve to remove seeds and let it cool.
  2. Bloom the Gelatin : In a small bowl, sprinkle the gelatin over 3 tablespoons of water. Let it sit for 5 minutes to bloom. Once bloomed, microwave for 10–15 seconds until fully dissolved. Stir into the cooled raspberry mixture.
  3. Whip the Cream : In a chilled mixing bowl, whip the heavy whipping cream and powdered sugar until soft peaks form. Reserve 1/2 cup of the whipped cream for garnishing.
  4. Fold and Chill : Gently fold the raspberry mixture into the whipped cream, ensuring it’s evenly incorporated without deflating the cream. Divide the mousse into serving glasses or bowls, smoothing the tops with a spoon. Cover and refrigerate for at least 4 hours, or until set.
  5. Garnish and Serve : Top the mousse with a dollop of whipped cream, fresh raspberries, and a sprinkle of powdered sugar. Serve chilled and enjoy the fruity bliss!