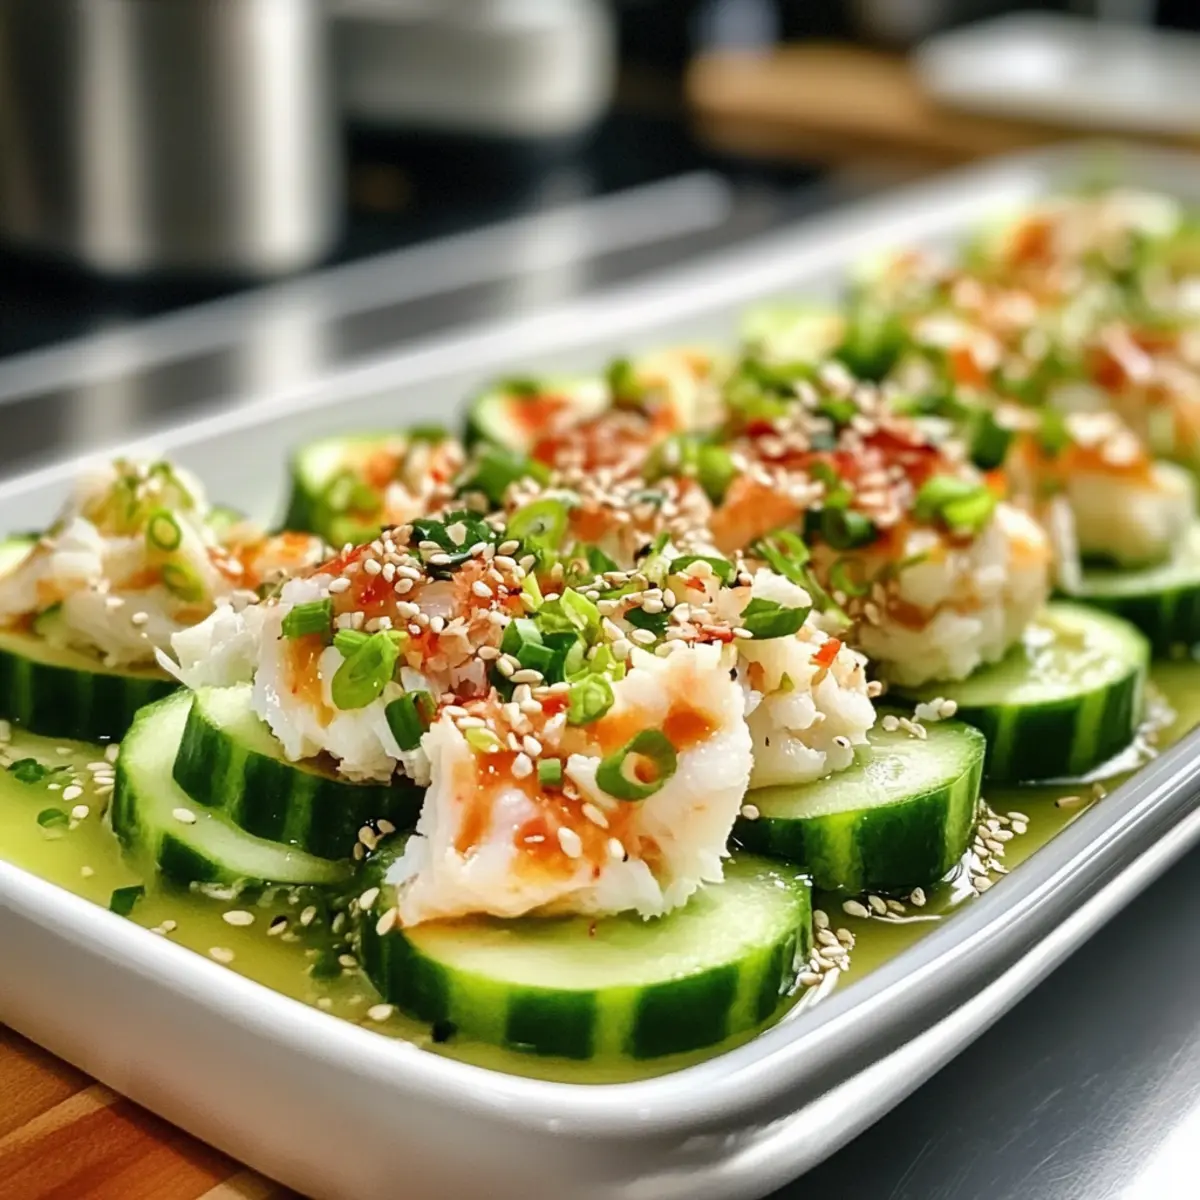
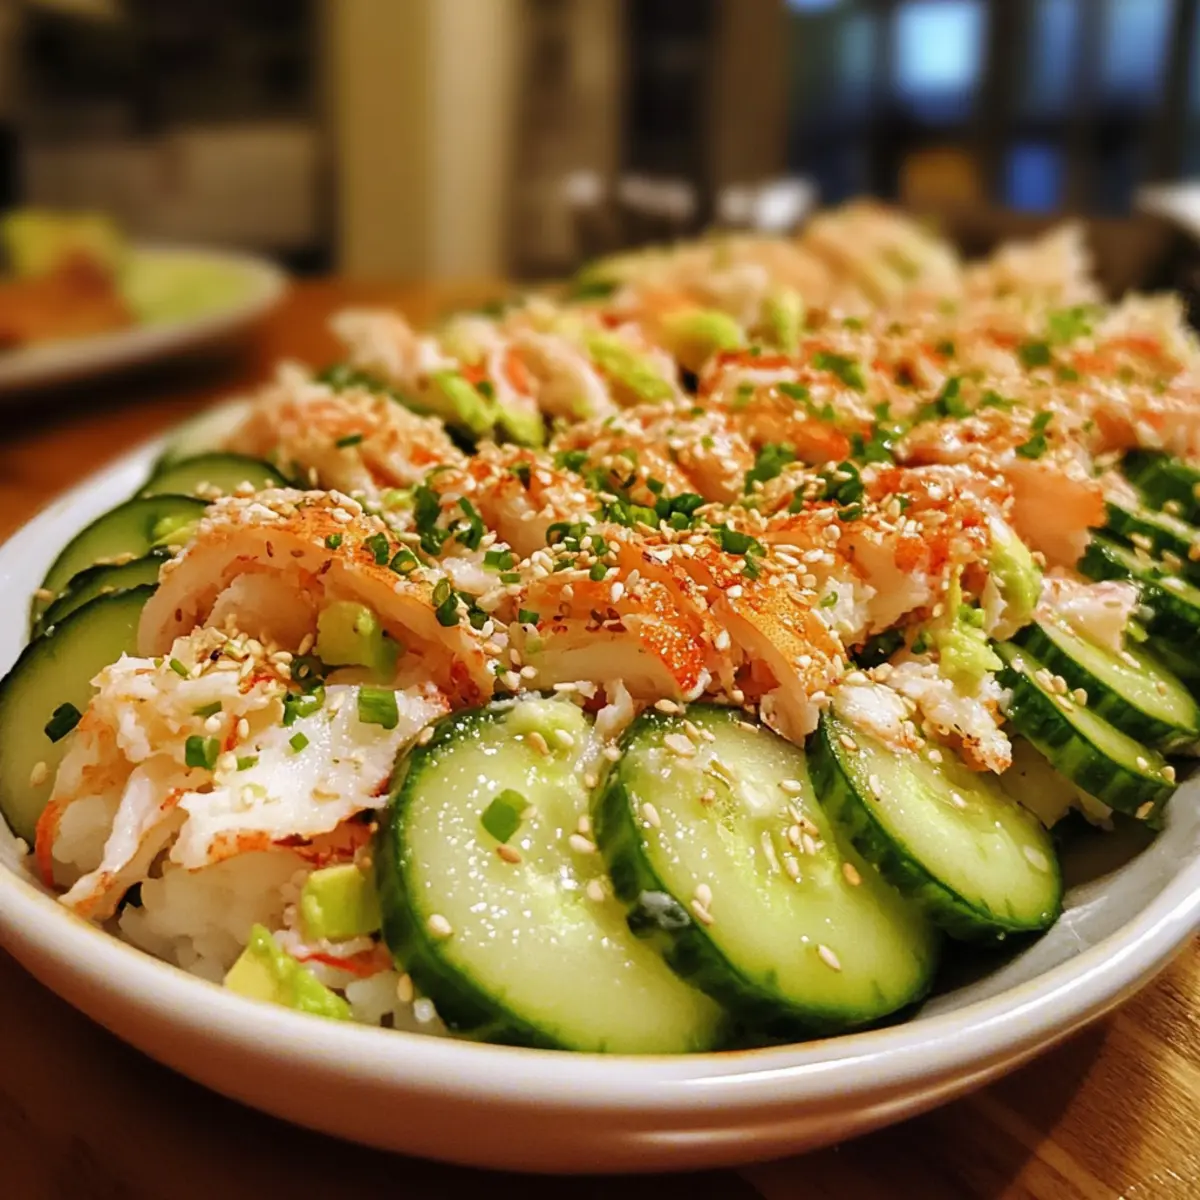
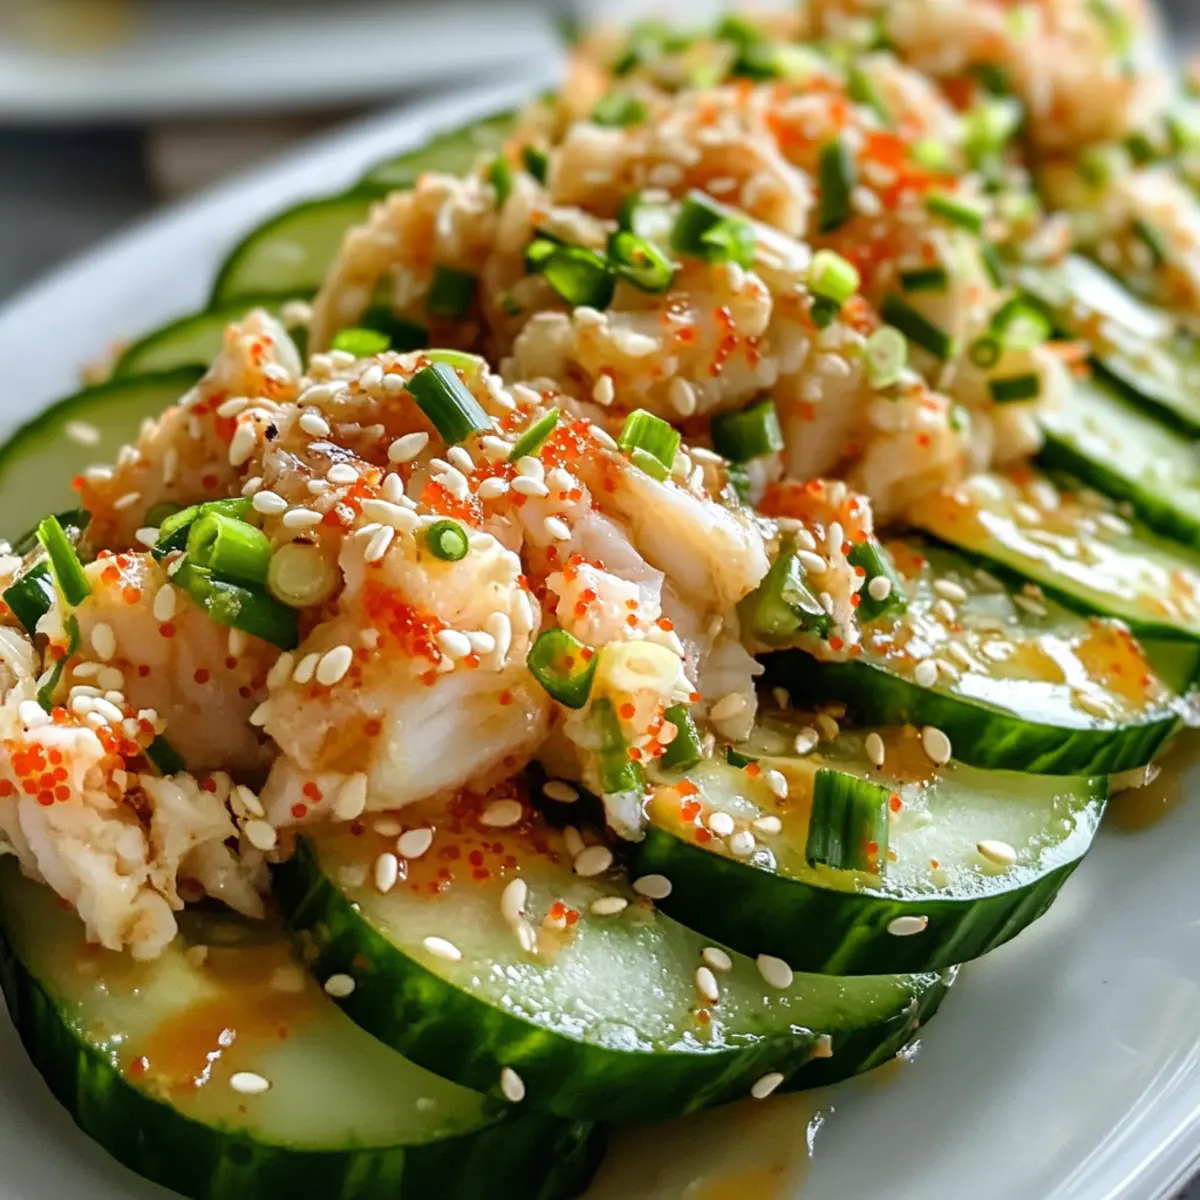
As I stood in my kitchen, the sun streaming through the window, I was struck by the vibrant colors of fresh produce that seemed to whisper, “Make something delightful!” That’s when I decided to whip up my Easy California Roll Cucumber Salad. With its bright, crunchy cucumbers, sweet crab, and creamy avocado, it’s a refreshing, no-cook dish perfect for those warm summer days. The best part? This salad takes only 10 minutes to prepare, making it an effortless addition to meals or gatherings. Not only is it gluten-free, but it also happens to be a crowd-pleaser that everyone can enjoy. Ready to add a burst of fresh flavor to your table? Let’s dive into this deliciously simple recipe!
Why is this salad a must-try?
Quick Preparation: This California Roll Cucumber Salad comes together in just 10 minutes, making it the ultimate go-to dish for busy days.
No Cooking Required: Enjoy the convenience of a refreshing salad without any cooking! Perfect for those sweltering summer afternoons.
Flavor Explosion: The delightful combination of crisp cucumbers, sweet crab, and creamy avocado is bursting with flavor, reminiscent of your favorite sushi roll.
Health-Friendly: Gluten-free and packed with healthy fats, this salad is a guilt-free indulgence that everyone will love.
Versatile Side Dish: Pair it with grilled teriyaki chicken or serve it as part of a sushi platter alongside a Garden Harvest Salad for a truly delightful meal!
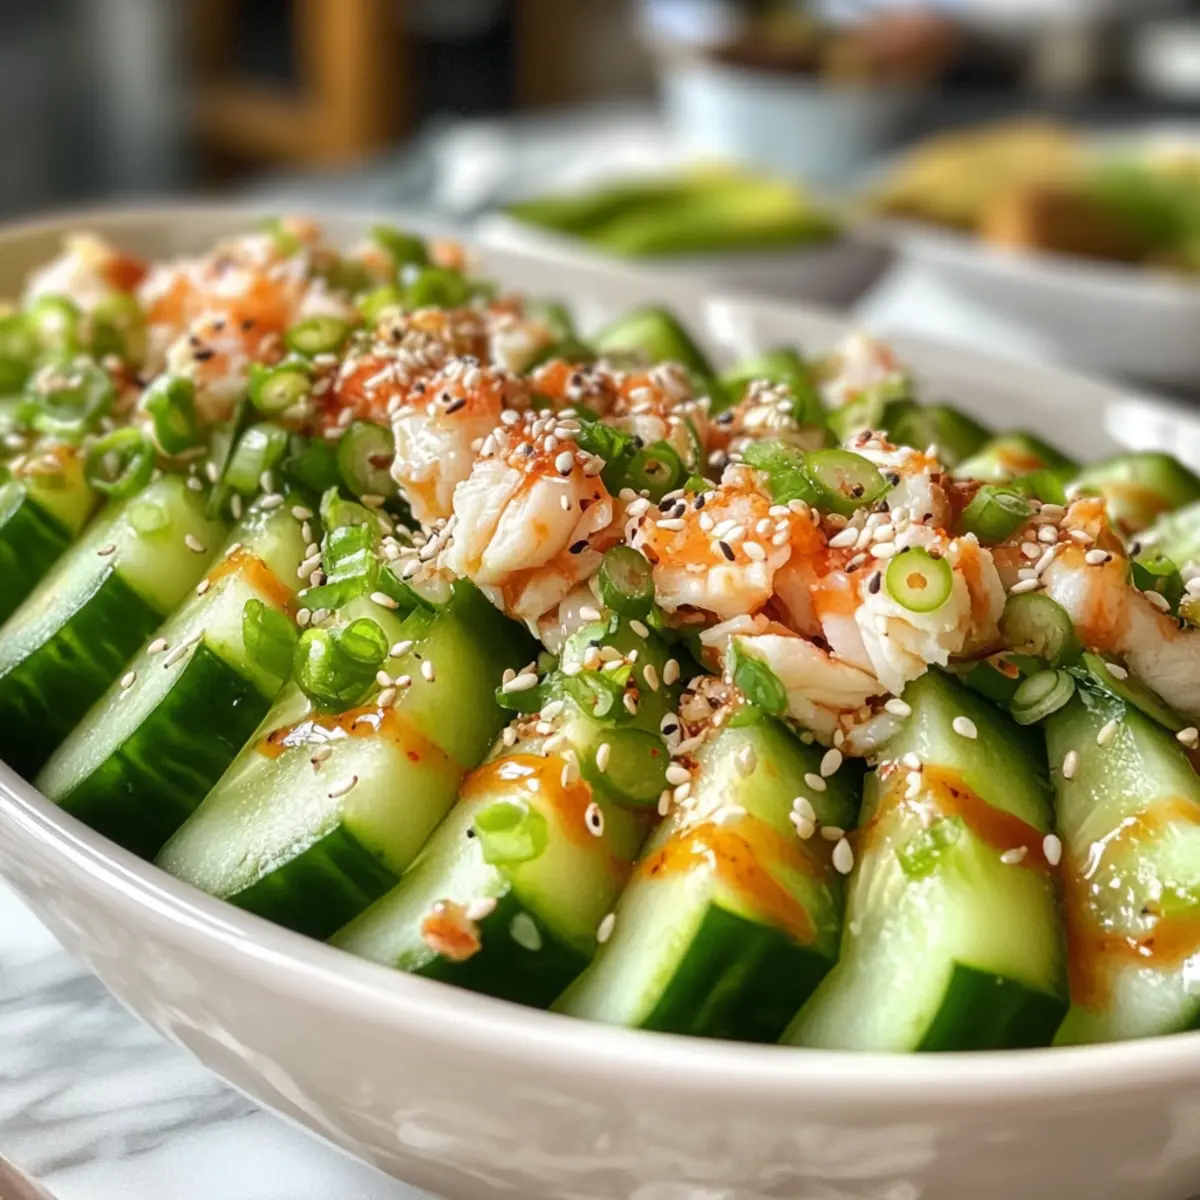
California Roll Cucumber Salad Ingredients
• Here’s everything you need to create this refreshing dish!
For the Salad
- English Cucumbers – Provide a refreshing base with crunch; Substitution: Persian cucumbers for a different flavor.
- Crab (or Imitation Crab) – Adds sweetness and protein; Note: Imitation crab is budget-friendly; use real crab for a gourmet touch.
- Avocado – Adds creaminess and healthy fats; Note: Cube right before serving to maintain freshness.
- Chopped Scallions/Radishes – Optional add-ons for extra crunch and flavor.
For the Dressing
- Mayonnaise – Offers creaminess and tang; Note: Adjust quantity to taste.
- Cream Cheese – Provides a luxurious texture; Note: Optional; can be adjusted or omitted.
- Soy Sauce – Enhances umami flavor.
- Sesame Seeds – For garnish and crunch; Note: Optional but recommended.
Step‑by‑Step Instructions for California Roll Cucumber Salad
Step 1: Prep Cucumbers
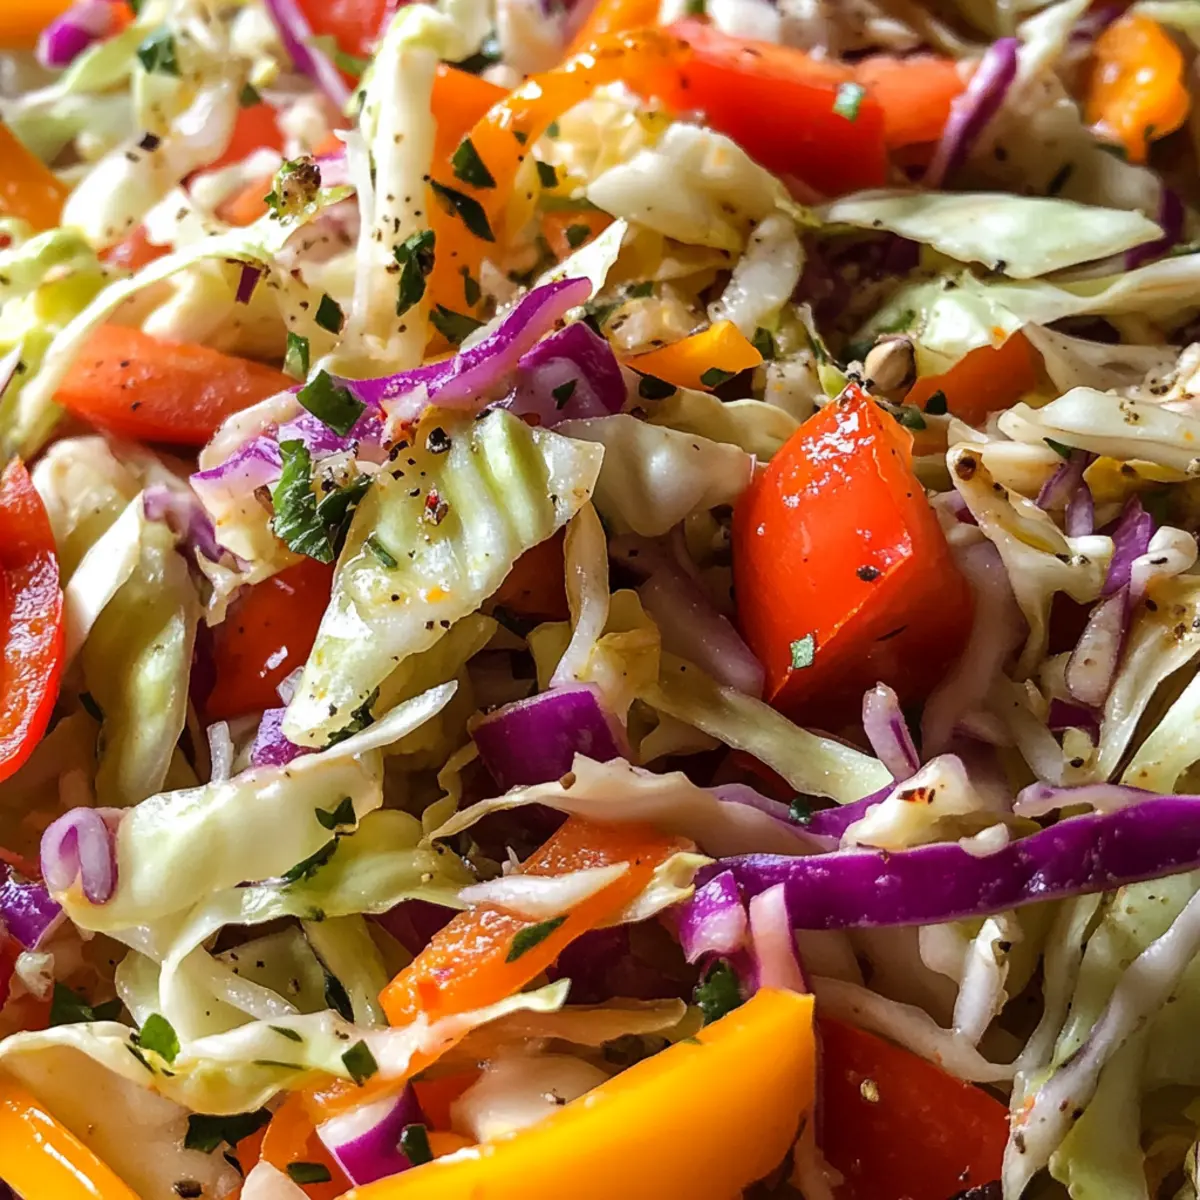
Begin by slicing the English cucumbers into 1/8-inch rounds. After slicing, sprinkle them lightly with salt and let them drain in a colander for about 15-20 minutes. This process helps remove excess moisture for the perfect crunch in your California Roll Cucumber Salad. Once drained, pat the slices dry with paper towels to ensure they retain their crispness.
Step 2: Mix Ingredients
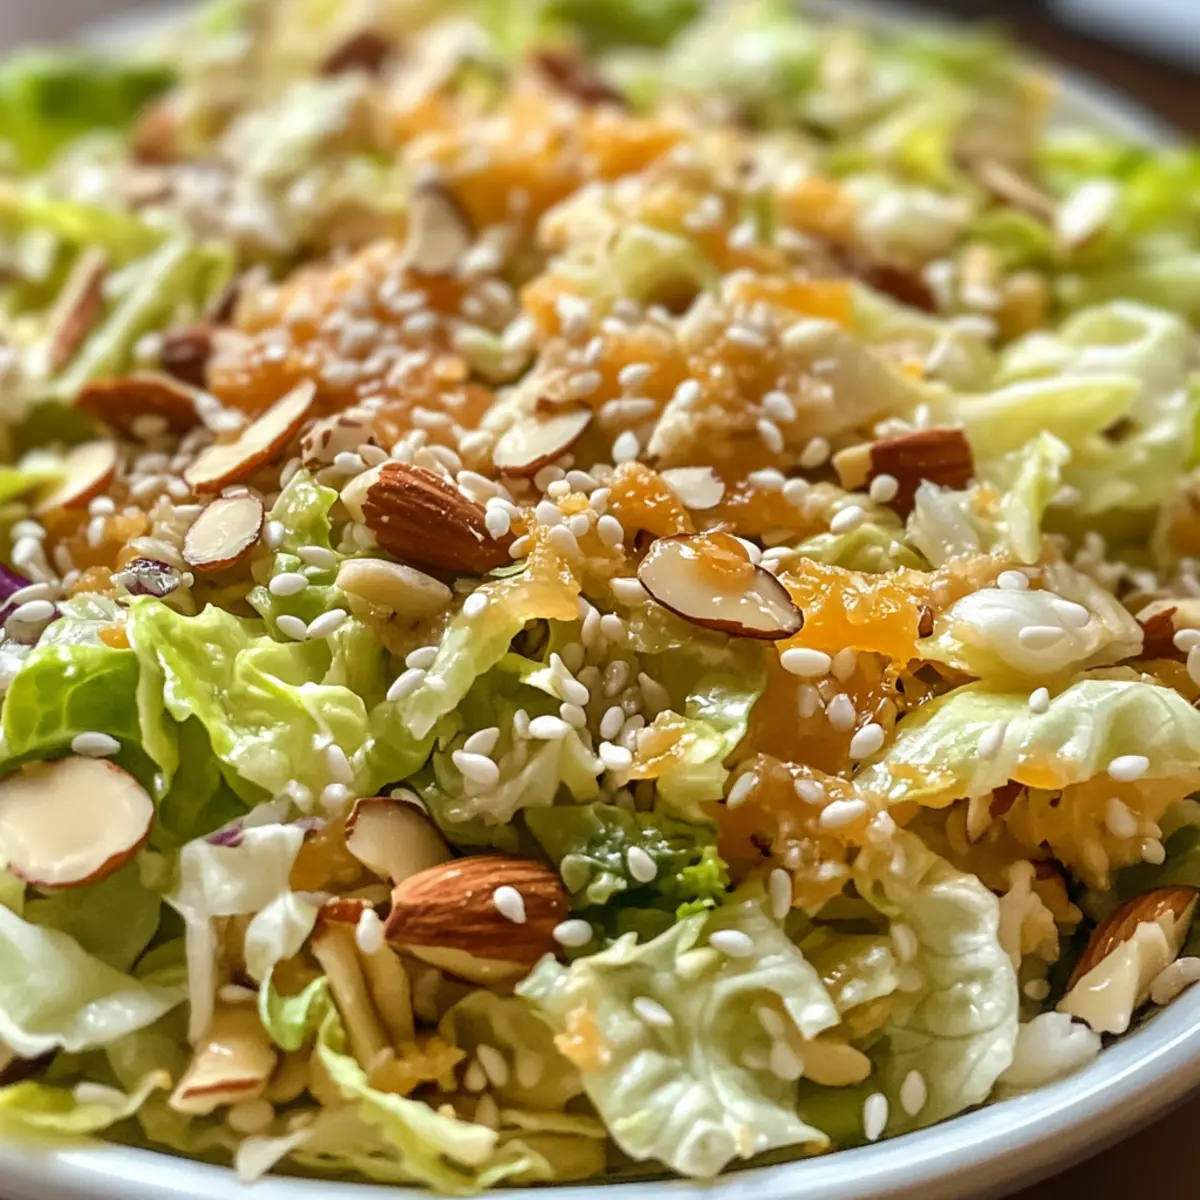
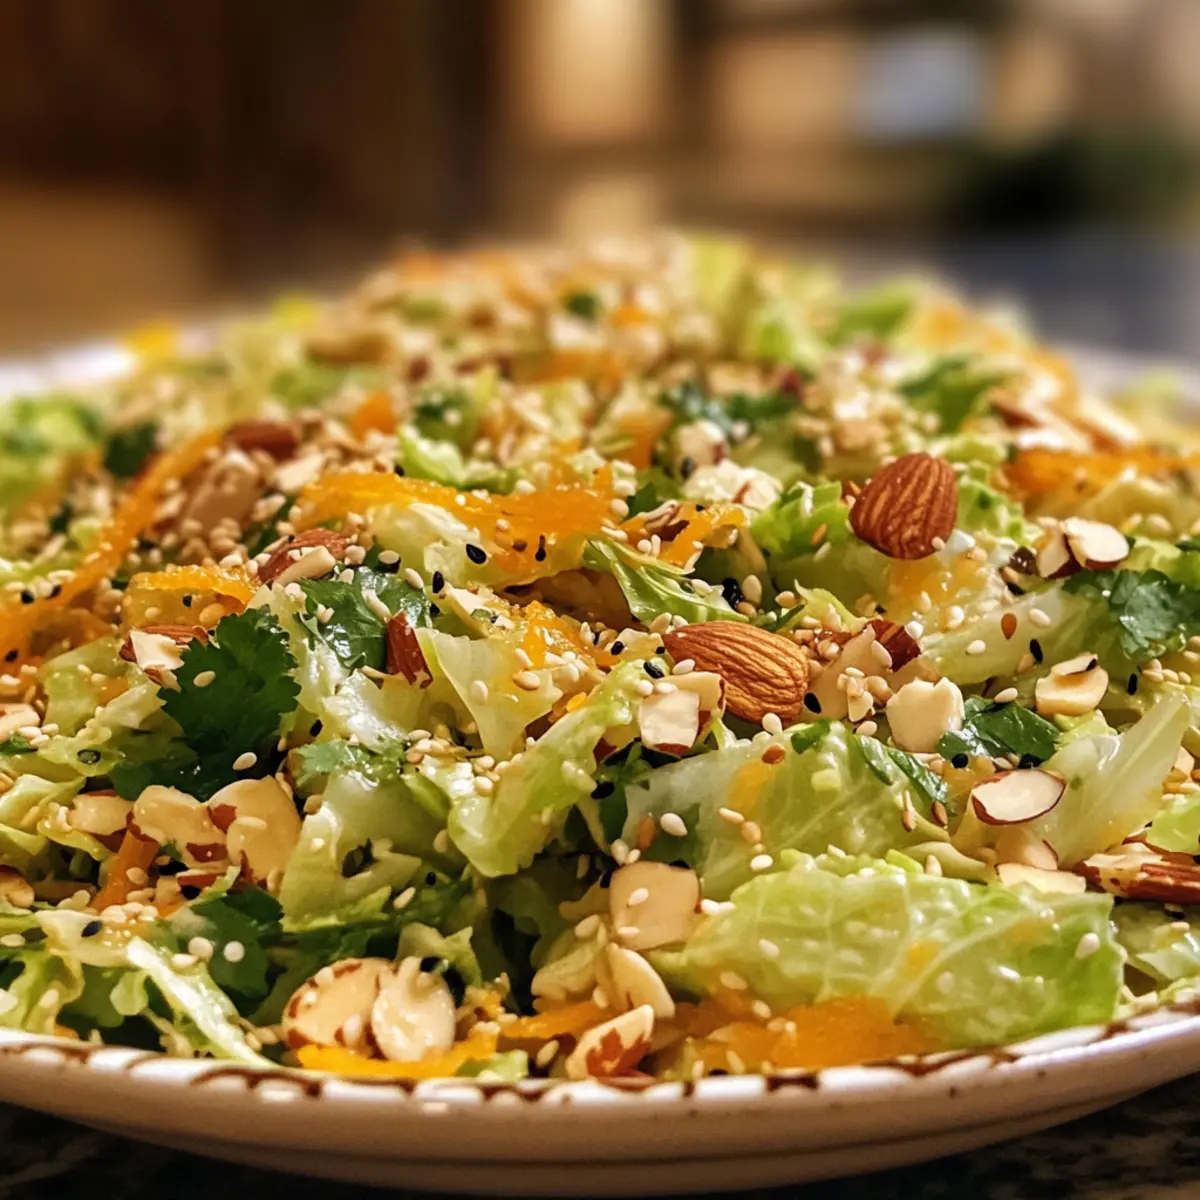
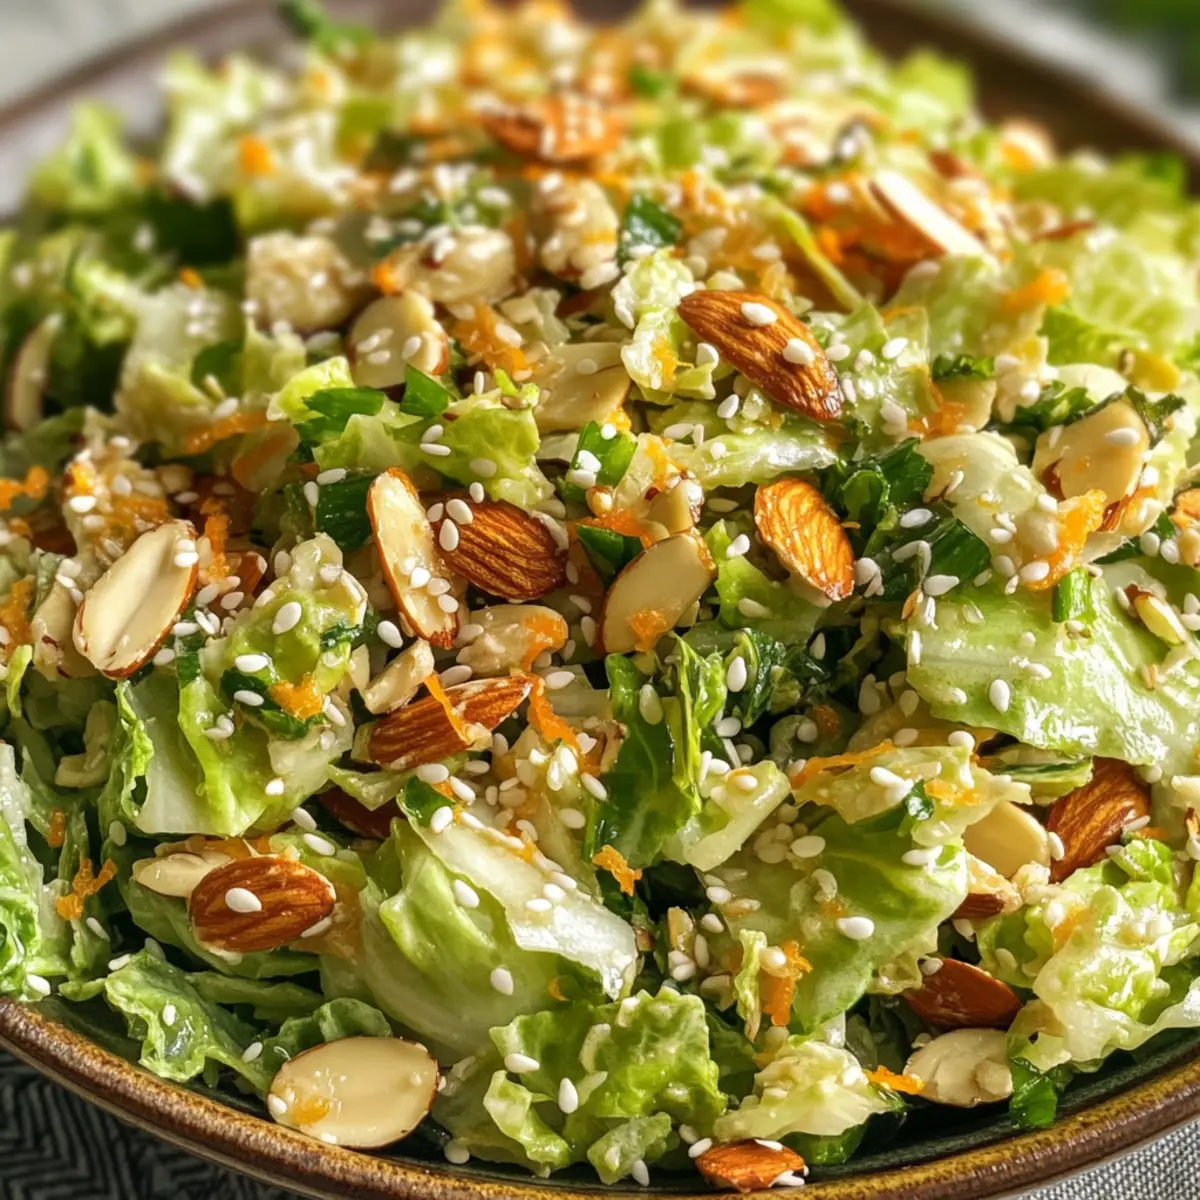
In a large mixing bowl, combine the drained cucumber rounds with diced crab (or imitation crab) and cubed avocado. Gently stir the mixture to combine the ingredients without mashing the avocado, which adds a creamy texture. Take a moment to admire the vibrant colors, as this salad is not only tasty but also visually appealing.
Step 3: Make Dressing
In a separate bowl, whisk together the mayonnaise, cream cheese, soy sauce, and sesame seeds until smooth and well blended. Adjust the quantities to taste; you want a creamy dressing that complements the fresh flavors of the cucumber and crab. This dressing will bring all the elements of the California Roll Cucumber Salad together beautifully.
Step 4: Combine
Pour the prepared dressing over the cucumber mixture, then gently toss all the ingredients together until the cucumbers and crab are nicely coated. Be careful not to over-mix, as you want to keep the avocado pieces intact for that delightful creaminess. Let the flavors meld together for a minute before serving to enhance the taste.
Step 5: Serve
You can serve the California Roll Cucumber Salad immediately, or if you prefer a chilled option, let it rest in the refrigerator for about 10 minutes. For a beautiful presentation, garnish with additional sesame seeds or chopped scallions. This refreshing salad is perfect for warm weather and is sure to impress your family and friends!
What to Serve with Easy California Roll Cucumber Salad
Elevate your meal with delightful pairings that perfectly complement the refreshing flavors of a cool summer salad.
-
Grilled Teriyaki Chicken: The savory sweetness of teriyaki chicken enhances the flavors of the salad, making each bite a harmonious experience. The contrast between the warm chicken and cold salad is simply irresistible.
-
Sushi Platter: Serve with an assortment of sushi rolls for a complete Japanese feast. The variety of textures and tastes creates a marvelous dining adventure, perfect for sharing with friends and family.
-
Miso Soup: The warm, umami-rich miso soup adds depth to your meal. Its comforting essence perfectly balances the refreshing profile of the cucumber salad, creating a satisfying contrast.
-
Rice Paper Rolls: Light and healthy, these rolls filled with shrimp or veggies bring a refreshing crunch that mirrors the salad’s texture. Pair them for a delightful finger-food spread.
-
Chilled Sake: This crisp, refreshing drink elevates the meal, providing a smooth contrast to the salad’s flavors. Plus, it makes for a fabulous way to toast your gathering!
-
Fresh Fruit Salad: The sweetness of seasonal fruits adds a lovely contrast to the savory elements of the cucumber salad. It’s an easy, vibrant side that your guests will adore.
-
Garlic Edamame: A simple and addictive side, garlic edamame brings a touch of protein and earthiness, rounding out the meal. Pairing it with your salad will give an enjoyable crunch.
-
Asian Cucumber Salad: If you crave a double dose of freshness, serve this alongside your main salad. The added flavors from the spices can create a fun taste adventure on your plate.
-
Chocolate Mousse: End on a sweet note with a light chocolate mousse. Its rich creaminess pairs beautifully with the refreshing salad, ensuring your dinner is both satisfying and indulgent!
Make Ahead Options
These Easy California Roll Cucumber Salad preparations are perfect for busy home cooks! You can slice the cucumbers and sprinkle them with salt up to 24 hours in advance; just remember to pat them dry before mixing to maintain that satisfying crunch. The crab and avocado can also be prepared ahead—diced crab stays fresh for up to 3 days in the refrigerator, while avocado should be cubed right before serving to prevent browning. When it’s time to enjoy your salad, simply combine the prepared ingredients and dressing in a bowl, toss gently, and serve. This saves you time and provides the same delightful flavors with minimal effort!
Expert Tips for California Roll Cucumber Salad
-
Drain Well: Ensure cucumbers are thoroughly drained after salting to avoid sogginess in your California Roll Cucumber Salad. Pat dry with paper towels for maximum crunch.
-
Fresh Ingredients: Use fresh, ripe avocados and high-quality crab (or imitation crab) for the best flavor. Avoid overripe avocados as they can become mushy in the salad.
-
Dressing Adjustments: Taste your dressing before combining it with the salad. Feel free to adjust the mayonnaise and soy sauce to match your flavor preferences for the California Roll Cucumber Salad.
-
Garnish Smartly: For added texture and visual appeal, consider finishing with a sprinkle of toasted sesame seeds and sliced scallions on top of your salad.
-
Serve Immediately: For optimal taste and texture, enjoy the salad right after preparation. If storing, keep it in an airtight container for up to 24 hours and drain excess liquid before serving leftovers.
How to Store and Freeze California Roll Cucumber Salad
Fridge: Keep your California Roll Cucumber Salad in an airtight container in the fridge for up to 24 hours to maintain its fresh flavors.
Room Temperature: It’s best enjoyed right after preparation, but if left out, consume within 2 hours to ensure safety.
Leftover Drainage: When serving leftovers, drain any excess liquid that may accumulate to avoid sogginess and keep the salad crunchy.
Avoid Freezing: Do not freeze the salad, as the texture of the cucumbers and avocado will suffer, losing their delightful crunch.
California Roll Cucumber Salad Variations
Feel free to explore these delightful ideas that can elevate your California Roll Cucumber Salad into something uniquely yours!
-
Dairy-Free Swap: Replace cream cheese with dairy-free yogurt for a creamy texture without the dairy. This twist maintains a luscious mouthfeel while keeping the salad light and suitable for everyone.
-
Add Shrimp: For a different protein twist, fold in chopped shrimp. This brings an entirely new flavor profile and extra protein punch, enhancing the overall experience of your salad.
-
Fresh Herbs: Toss in chopped cilantro or mint for a refreshing herbaceous note. A little herb action can transform the profile of your dish, imparting bursts of flavor with every bite.
-
Spicy Kick: Add diced jalapeños or a sprinkle of chili flakes to introduce some heat. This choice is perfect for spice enthusiasts looking to zest up their salad experience!
-
Citrus Boost: Drizzle with fresh lime or lemon juice for a zesty finish. The tangy notes will enhance the salad’s overall brightness, making each bite a bit more lively and refreshing.
-
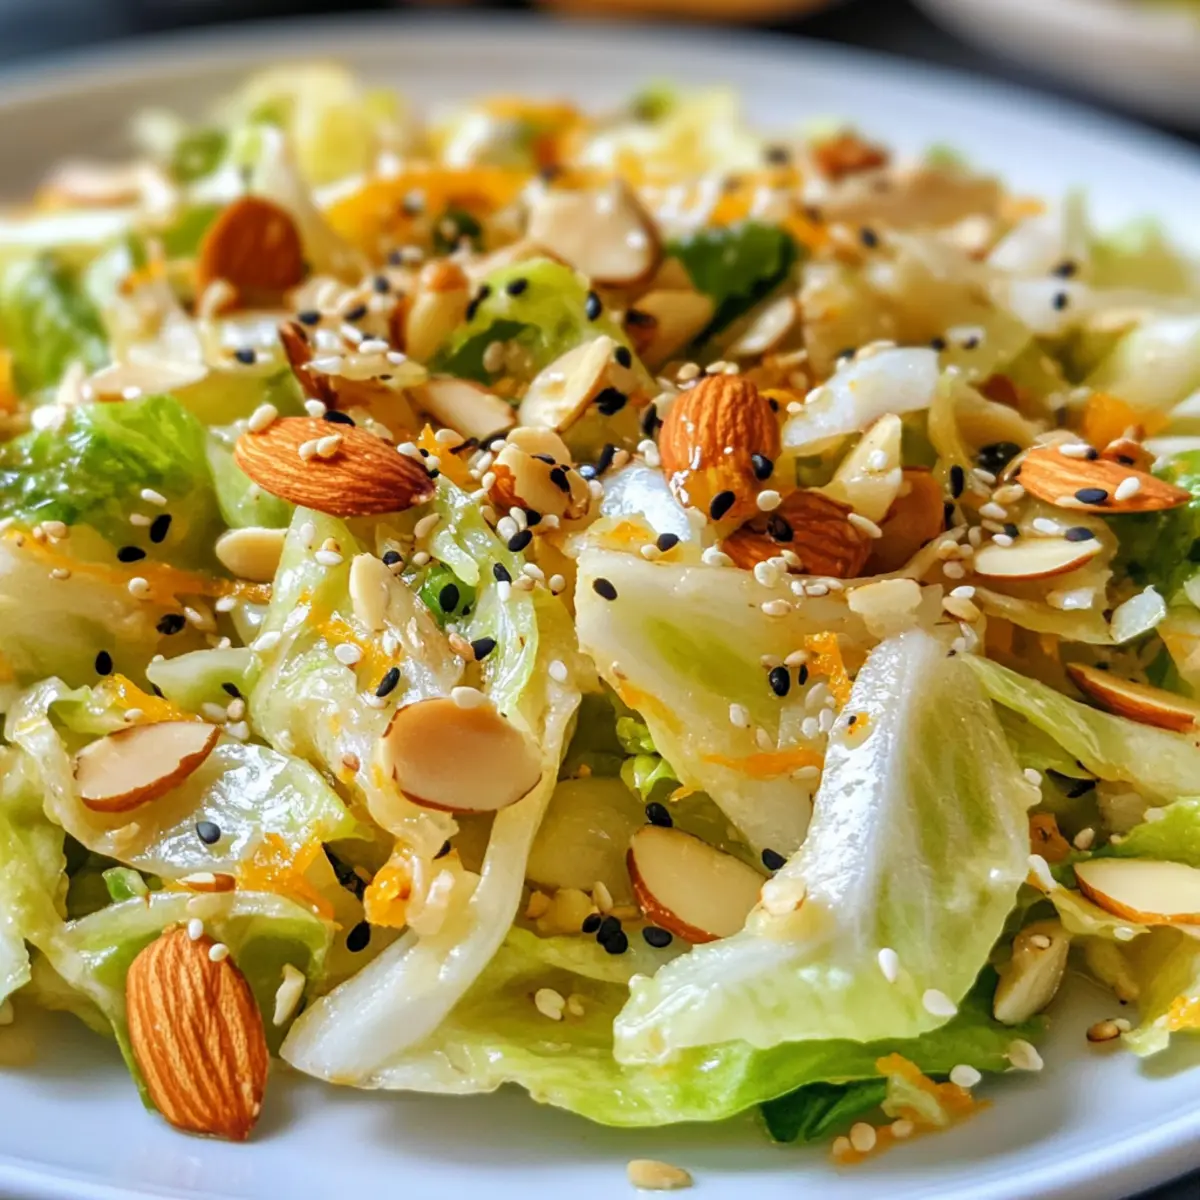
Nutty Flavor: Incorporate toasted walnuts or almonds for a satisfying crunch. This provides an additional texture that beautifully complements the soft avocado and silky crab.
-
Asian Twist: Include sliced radishes or snow peas for an added crunch and flavor complexity. These crunch elements add layers of vibrancy and a fun textural contrast to your salad.
For even more crunchy inspiration, you might love my Crunch Cucumber Salad or the delightful Cabbage Cucumber Salad. Each offers unique twists that fit beautifully alongside your California Roll Cucumber Salad!
California Roll Cucumber Salad Recipe FAQs
What type of cucumbers should I use for this salad?
Absolutely! I recommend using English cucumbers for their crispness and mild flavor, but Persian cucumbers are a great alternative if you want a different twist. Just be sure to slice them thinly to maintain that delightful crunch!
How should I store leftover California Roll Cucumber Salad?
To keep your salad fresh, store it in an airtight container in the fridge for up to 24 hours. If you have leftovers, I suggest draining any excess liquid before serving to ensure it doesn’t get soggy and retains its delicious crunch.
Can I freeze the California Roll Cucumber Salad?
Very! It’s best not to freeze this salad because the texture of the cucumbers and avocado changes after being frozen, becoming mushy when thawed. If you’re preparing it in advance, simply enjoy it fresh or within the 24-hour storage period.
What if my cucumbers are too watery?
If you find that your cucumbers release too much water, it helps to salt them and let them drain longer, about 20 minutes or so, then pat them dry with paper towels. This process keeps the salad crisp and enjoyable!
Are there any dietary considerations with this salad?
Absolutely! This recipe is gluten-free as it doesn’t require any wheat-based ingredients. However, if you have seafood allergies, you can substitute the crab with diced tofu or additional vegetables to accommodate your dietary needs.
Can I add other ingredients to this salad?
The more, the merrier! Feel free to experiment by adding diced bell peppers, shredded carrots, or even some fresh herbs like cilantro or mint. These additions can enhance the flavor profile and bring a unique twist to your California Roll Cucumber Salad!
Refreshing California Roll Cucumber Salad in Just 10 Minutes
Ingredients
Equipment
Method
- Begin by slicing the English cucumbers into 1/8-inch rounds. After slicing, sprinkle them lightly with salt and let them drain in a colander for about 15-20 minutes.
- In a large mixing bowl, combine the drained cucumber rounds with diced crab (or imitation crab) and cubed avocado. Gently stir the mixture to combine without mashing the avocado.
- In a separate bowl, whisk together the mayonnaise, cream cheese, soy sauce, and sesame seeds until smooth. Adjust the quantities to taste.
- Pour the prepared dressing over the cucumber mixture, then gently toss all the ingredients together until nicely coated.
- You can serve the salad immediately or let it chill in the refrigerator for about 10 minutes before serving.