Miso Glazed Eggplant: A Deliciously Sweet Umami Surprise

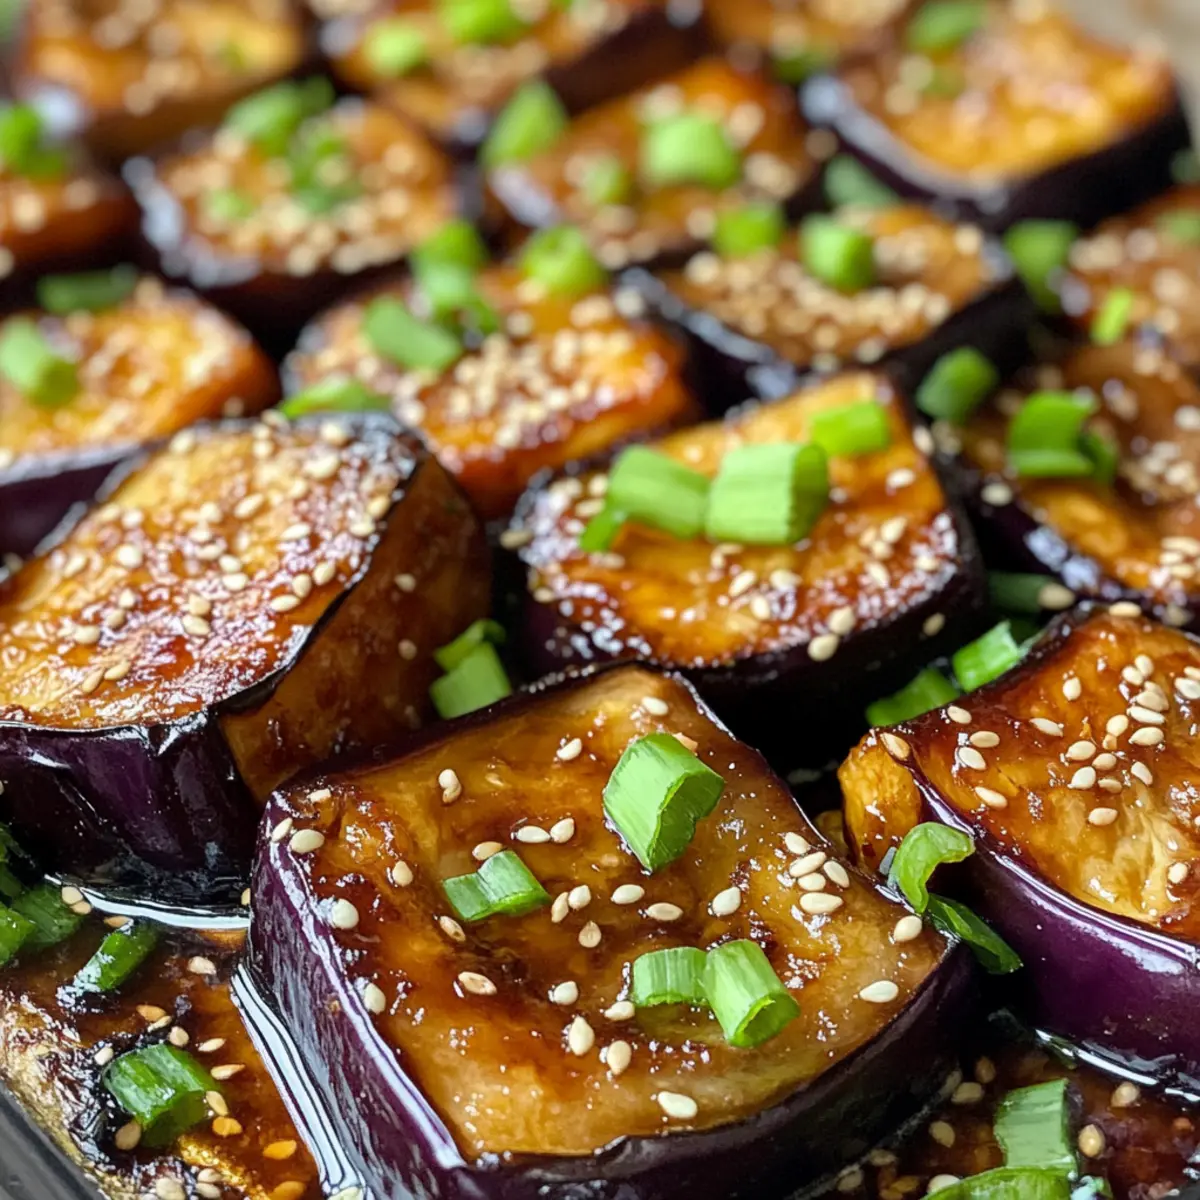
As I stood by the oven, the rich aroma of roasting eggplant filled my kitchen like a warm embrace. That’s when I decided to whip up a batch of Miso Glazed Eggplant, a Japanese-inspired side dish that has quickly become a favorite in my home. The magic lies in the glossy miso glaze that marries savory and sweet notes, transforming simple ingredients into a culinary masterpiece. What I love most is how quick and easy it is to prepare—perfect for busy weeknights yet impressive enough for special occasions. This dish not only brings vibrant flavor to the table but also caters beautifully to vegetarians. Are you ready to explore this delightful recipe that elevates any meal?

Why is Miso Glazed Eggplant a Must-Try?

Flavor Explosion: The combination of savory miso and sweet honey creates an irresistible taste sensation that dances on your palate.

Quick and Easy: With just a few simple steps and minimal prep time, you can whip up this dish in under 40 minutes, making it a great choice for busy weeknights.

Versatile Side Dish: Perfect alongside grilled chicken or fish, or served over rice for a hearty vegetarian meal, this dish adapts to any occasion.

Healthy and Wholesome: Packed with nutritional benefits, eggplant adds fiber and antioxidants, making this recipe not just delicious but also good for you.

Crowd-Pleaser: Whether it’s a family dinner or a gathering with friends, the vibrant flavors and appealing presentation of Miso Glazed Eggplant are sure to impress!

Elevate your culinary skills with this beautiful dish; if you’re also looking for a refreshing salad to accompany it, explore our Japanese cucumber salad for a perfect pairing!

Miso Glazed Eggplant Ingredients

• Discover everything you need to create this delectable dish!

For the Eggplant

  • Eggplant – The main ingredient providing substance and texture; you can use zucchini as a substitute, but the texture will change.
  • Olive Oil – Essential for roasting to achieve a crispy exterior; avocado oil is a great alternative due to its high smoke point.
  • Salt – Enhances flavors and is essential for seasoning; don’t skip this ingredient!
  • Pepper – Adds a hint of heat, essential for a balanced flavor.

For the Miso Glaze

  • White Miso Paste – The key to the glaze, offering a mild sweetness; red miso can work as a substitute but with a stronger flavor.
  • Mirin – Adds sweetness and depth to the glaze; mix 1 tbsp rice vinegar with 1 tsp sugar for a substitute.
  • Soy Sauce – Provides savory depth to the glaze; use tamari for a gluten-free option.
  • Honey – Contributes to caramelization and sweetness; maple syrup works as a vegan substitute.
  • Fresh Ginger – Imparts a bright, aromatic flavor in the glaze; ground ginger can be used in a pinch but lacks freshness.
  • Garlic – Adds another layer of flavor; you can adjust the amount according to your taste.

Optional Garnishes

  • Sesame Seeds – A garnish for texture and flavor; you can replace them with chopped nuts for an extra crunch.
  • Chopped Green Onions – Add color and fresh flavor as a garnish; feel free to omit if you prefer.

Now that you’re ready with the ingredients, let’s dive into the simple steps to create your own delightful Miso Glazed Eggplant!

Step‑by‑Step Instructions for Miso Glazed Eggplant

Step 1: Preheat the Oven
Begin by preheating your oven to 400°F (200°C). This temperature will ensure that your Miso Glazed Eggplant roasts evenly, resulting in a tender, caramelized texture. Meanwhile, line a baking sheet with parchment paper to help with clean-up and prevent sticking.

Step 2: Prepare the Eggplant
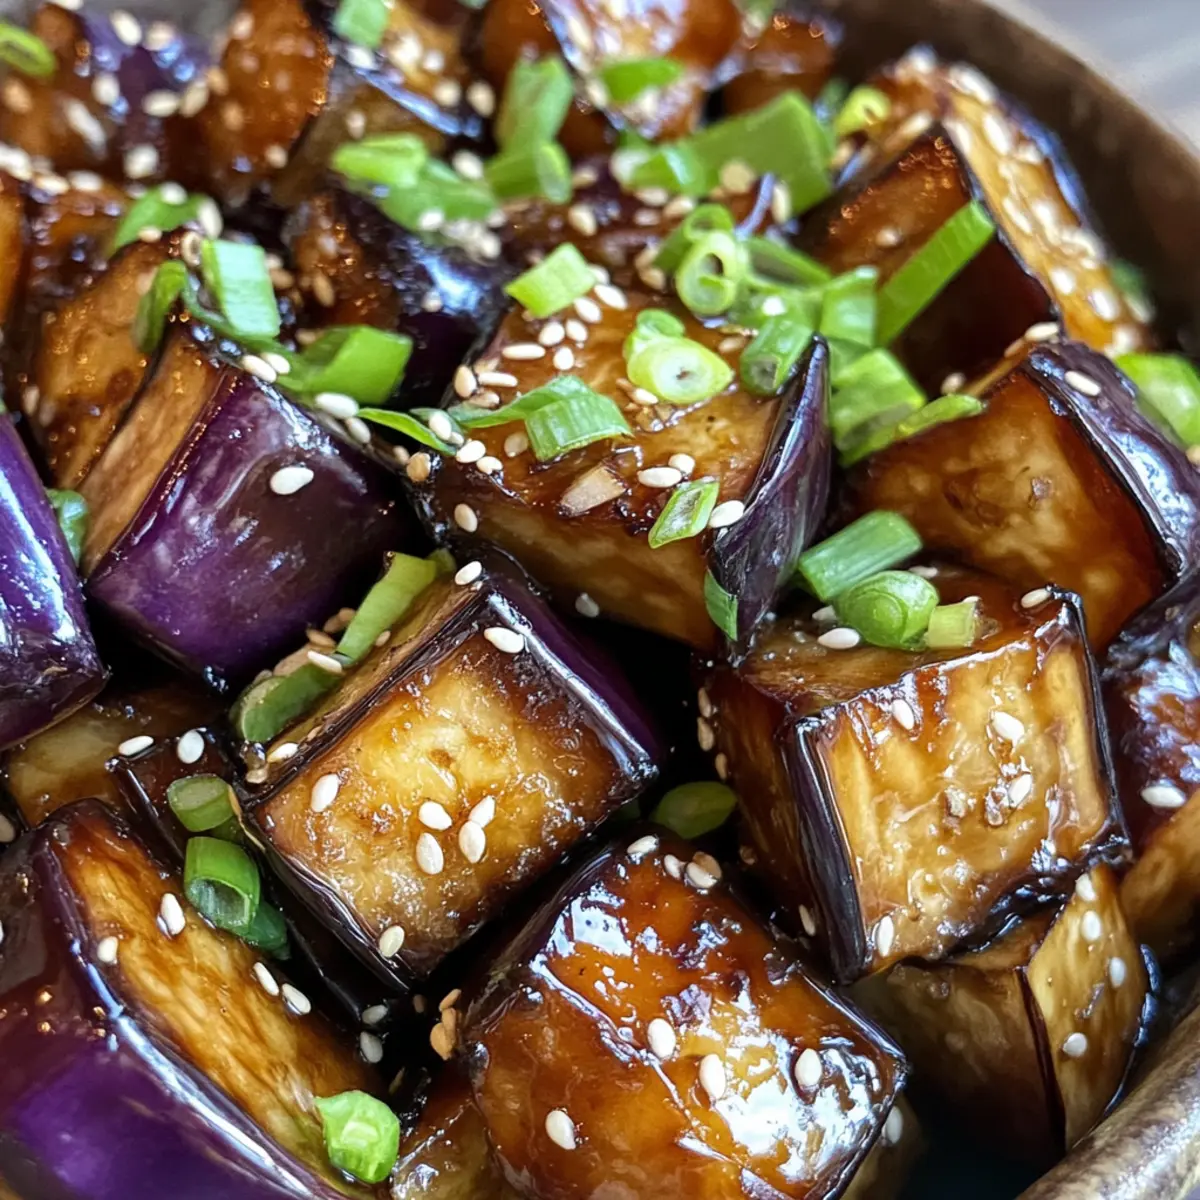
Cut the eggplant into 1-inch cubes, ensuring uniform sizes for even cooking. In a large bowl, toss the cubes with olive oil, salt, and pepper until evenly coated. You want them glistening and seasoned, creating a flavorful base for the miso glaze that’s to come.

Step 3: Roast the Eggplant
Spread the seasoned eggplant evenly across the prepared baking sheet. Roast them in the preheated oven for 20-25 minutes. Halfway through, flip the eggplant to promote even browning. You’re aiming for tender pieces that are lightly browned, indicating they’re ready for the next step.

Step 4: Make the Miso Glaze
While the eggplant is roasting, prepare the miso glaze. In a bowl, whisk together the white miso paste, mirin, soy sauce, honey, freshly grated ginger, and minced garlic until smooth. This glossy mixture will provide a savory-sweet coating that enhances the Miso Glazed Eggplant’s flavors beautifully.

Step 5: Apply the Glaze
Once your eggplant is perfectly roasted, remove it from the oven. Generously brush the miso glaze over the warm eggplant, making sure each piece is well-coated. Return the baking sheet to the oven for an additional 5-7 minutes, allowing the glaze to become bubbly and caramelized.

Step 6: Garnish and Serve
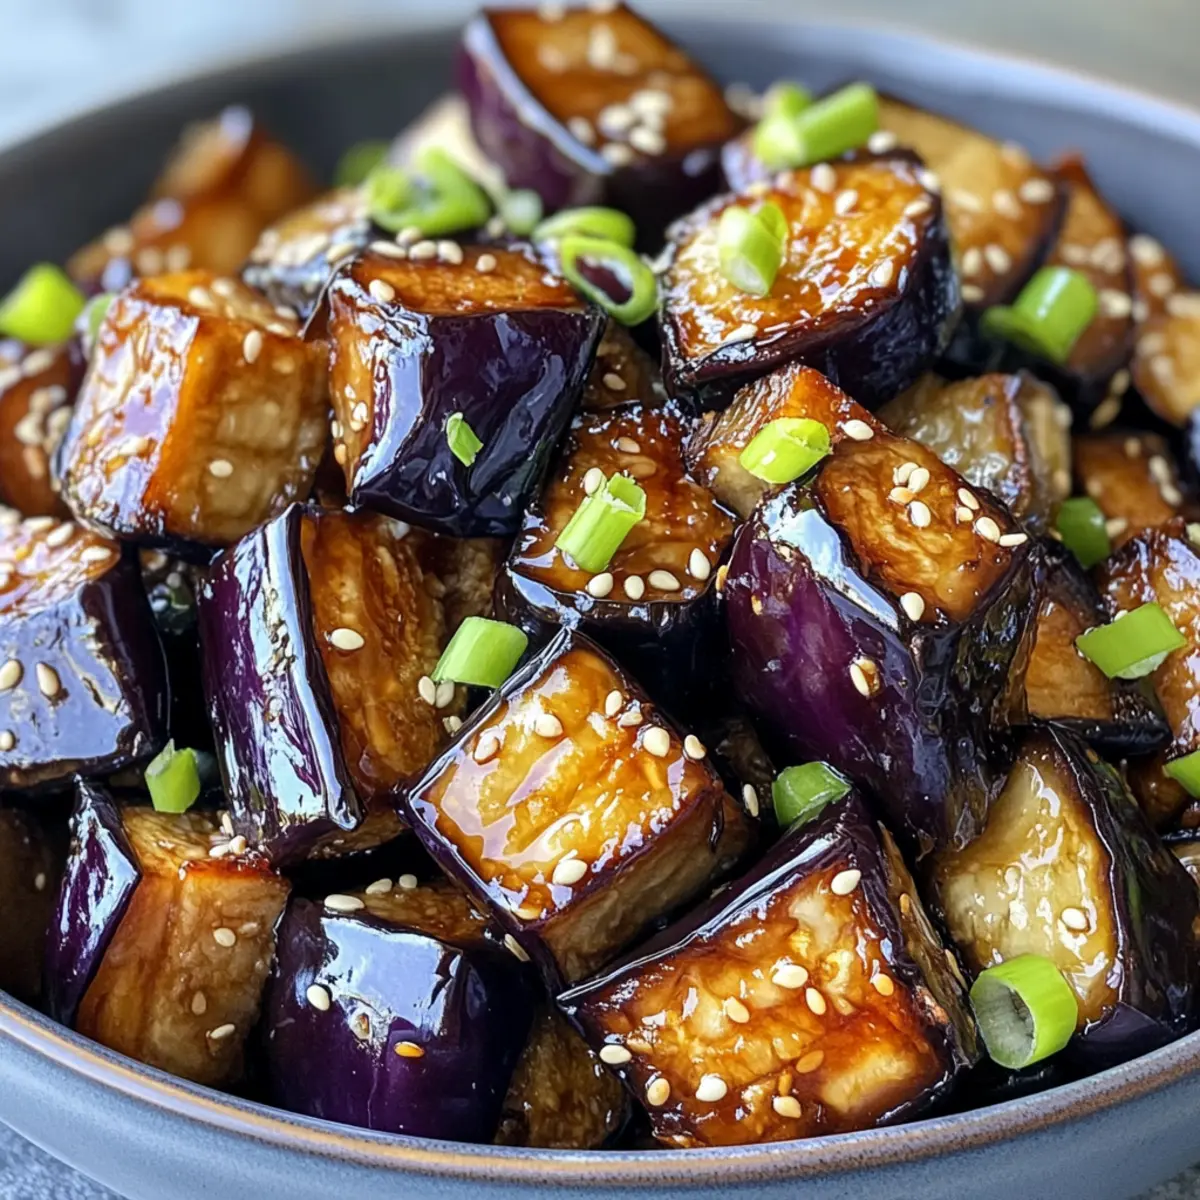
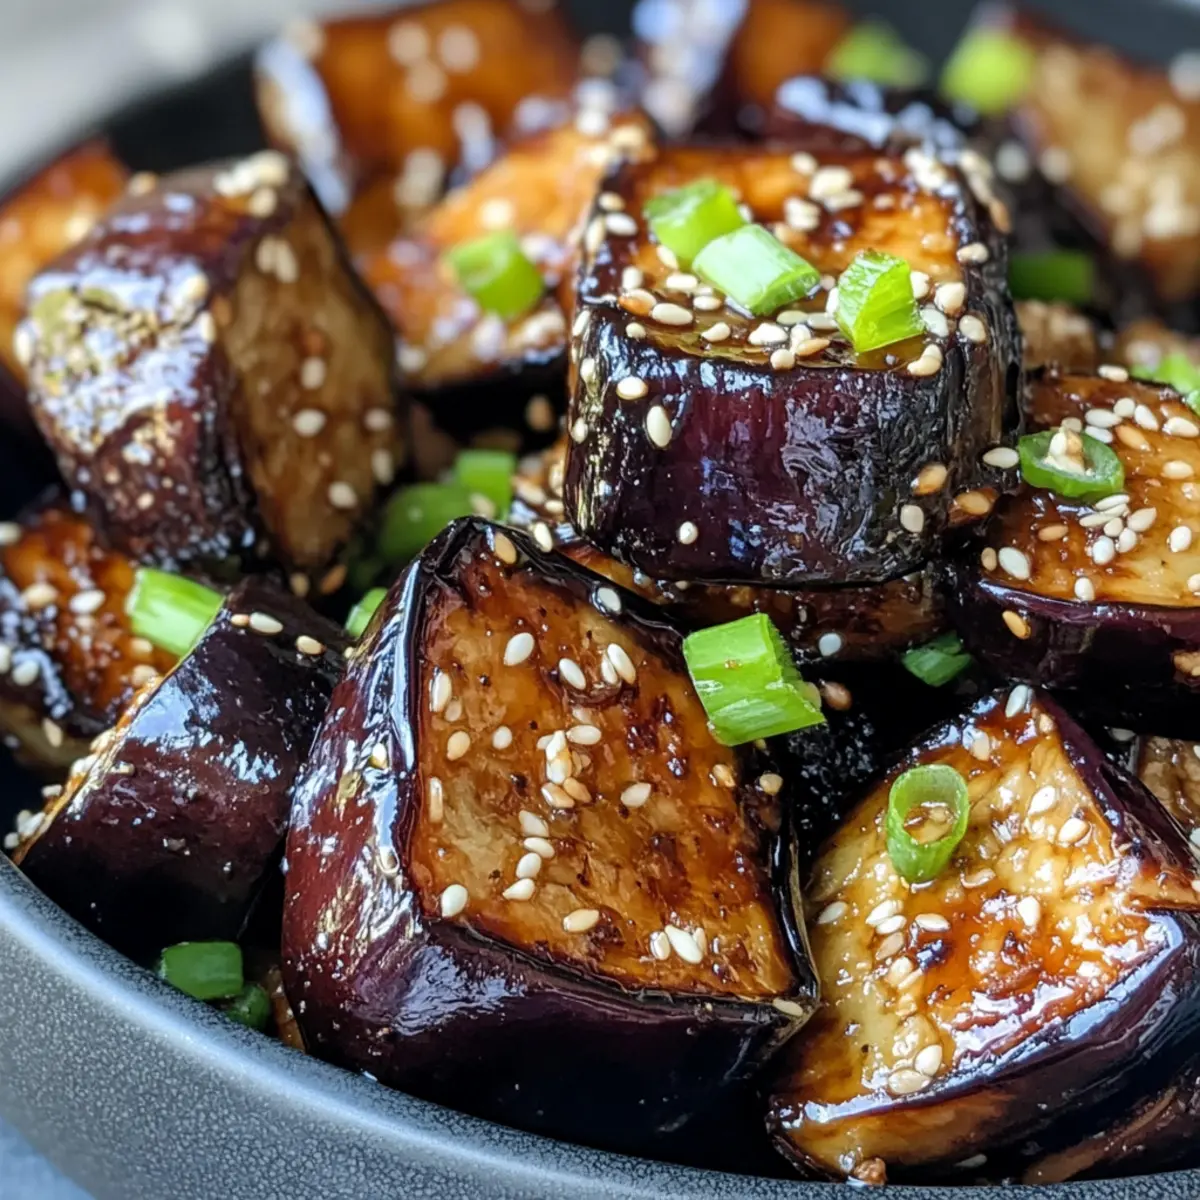
After the final roasting, remove the Miso Glazed Eggplant from the oven and let it cool slightly. For a delightful finishing touch, sprinkle with sesame seeds and chopped green onions if desired. Serve warm and enjoy the vibrant flavors that make this dish a standout!

Make Ahead Options

These Miso Glazed Eggplant are ideal for meal prep enthusiasts! You can chop the eggplant and toss it with olive oil, salt, and pepper up to 24 hours in advance, storing it in an airtight container in the refrigerator to maintain freshness. Additionally, whisk together the miso glaze (miso paste, mirin, soy sauce, honey, ginger, and garlic) and refrigerate it for up to 3 days. When you’re ready to serve, simply roast the prepped eggplant as directed, brush on the glaze, and return it to the oven for the final few minutes. This way, you’ll have rich, flavorful Miso Glazed Eggplant on the table with minimal effort, perfectly saving you time on busy weeknights!

What to Serve with Miso Glazed Eggplant

Imagine a delightful spread featuring a symphony of flavors and textures that perfectly complement this savory-sweet side dish.

  • Steamed Jasmine Rice: The fluffy, fragrant rice acts as a perfect canvas to soak up the delicious miso glaze, enhancing every bite.

  • Grilled Teriyaki Chicken: The smoky sweetness of teriyaki-glazed chicken pairs beautifully with the umami flavors of the eggplant, creating a well-rounded meal.

  • Japanese Cucumber Salad: This refreshing salad offers a crispy crunch and bright acidity that balances the richness of the Miso Glazed Eggplant. Tossed with sesame oil and rice vinegar, it’s a must-try!

  • Stir-Fried Broccoli: Nutty, stir-fried broccoli adds a vibrant green element and a satisfying crunch, making your plate feel both colorful and hearty.

  • Sake or Japanese Beer: A chilled glass of sake or a crisp Japanese beer complements the flavors beautifully while enhancing the overall dining experience.

  • Mochi Ice Cream: For dessert, the sweet, chewy mochi ice cream provides a delightful contrast to the savory eggplant, finishing the meal on a high note.

  • Miso Soup: A warm bowl of miso soup deepens the Japanese theme while providing a comforting embrace, making it an ideal pairing.

  • Pickled Radishes: These tangy bites offer a crunchy palate cleanser, enhancing the flavors of both the Miso Glazed Eggplant and other rich dishes on the table.

Storage Tips for Miso Glazed Eggplant

Fridge: Store leftovers in an airtight container in the refrigerator for up to 3 days. This helps maintain the flavors while keeping the dish fresh.

Freezer: For longer storage, freeze the Miso Glazed Eggplant in a freezer-safe container or bag for up to 2 months. Thaw in the fridge before reheating.

Reheating: Reheat the eggplant gently in the oven or microwave until warmed through. If reheating in the oven, brush with a little extra glaze for added moisture and flavor.

Serving Suggestion: This dish can be enjoyed warm or at room temperature, making it a versatile option for meal prep or gatherings.

Miso Glazed Eggplant Variations & Substitutions

Customizing your Miso Glazed Eggplant is a delightful way to explore new flavors and textures!

  • Dairy-Free: Use maple syrup instead of honey for a completely vegan twist that will still provide the necessary sweetness.

  • Gluten-Free: Swap soy sauce for tamari, allowing those with gluten sensitivities to enjoy all the flavors without worry.

  • Spicy Kick: Add a pinch of red pepper flakes or a drizzle of sriracha to the miso glaze for a delightful spicy element that complements the sweetness.

  • Crispy Texture: For an extra crunch, sprinkle panko breadcrumbs over the eggplant during the last few minutes of roasting for added texture and a beautiful golden finish.

  • Herb Infusion: Mix fresh or dried herbs, like basil or cilantro, into the miso glaze for an aromatic touch that brightens the overall flavor.

  • Zesty Addition: Incorporate the zest of a lemon or lime into the glaze to add a refreshing citrus note that balances the richness of the miso and honey.

  • Grilled Version: For a smoky flavor, grill the eggplant instead of roasting, brushing with the miso glaze while cooking for charred goodness and depth.

Embrace creativity as you explore these substitutes, and for a cooling side, check out our refreshing Japanese cucumber salad to perfectly complement your meal!

Expert Tips for Miso Glazed Eggplant

  • Glaze Consistency: Ensure your miso glaze isn’t too thick; a splash of water or mirin can help achieve the perfect pouring consistency.

  • Roasting Care: Monitor the final roasting closely; if the glaze starts to burn, tent it loosely with foil to protect the flavors of your Miso Glazed Eggplant.

  • Avoid Overcrowding: When placing your eggplant on the baking sheet, space them out to ensure all sides roast evenly and achieve those delicious crispy edges.

  • Prep Ahead: Make the miso glaze in advance to save time on cooking day, ensuring flavors meld beautifully before you apply it to your eggplant.

  • Season Generously: Don’t skip on salt and pepper! Proper seasoning is crucial in elevating the overall flavor of your Miso Glazed Eggplant, so be generous but taste as you go.

Miso Glazed Eggplant Recipe FAQs

What should I look for when selecting eggplant?
Absolutely! When selecting eggplant, choose ones that are firm and glossy, with no dark spots or blemishes. A good eggplant should feel heavy for its size and have a vibrant purple color. If the skin is dull or wrinkled, it’s a sign of over-ripeness.

How can I store leftover Miso Glazed Eggplant?
You can store leftover Miso Glazed Eggplant in an airtight container in the refrigerator for up to 3 days. To keep the flavors vibrant, try to consume it within this timeframe. When storing, separate layers with parchment paper to prevent sticking.

Can I freeze Miso Glazed Eggplant?
Yes, you can freeze Miso Glazed Eggplant! Place the cooled eggplant in a freezer-safe container or bag, ensuring it’s laid flat to freeze evenly. It will keep nicely for up to 2 months. To reheat, simply thaw overnight in the fridge, then warm it gently in the oven or microwave for best results.

What if my miso glaze is too thick?
Not to worry! If your Miso glaze is too thick, simply add a splash of warm water or mirin and whisk until it reaches a pourable consistency. You can achieve the perfect balance without losing any of that delicious flavor!

Is this recipe suitable for those with dietary restrictions?
Very! Miso Glazed Eggplant is vegetarian and can be made vegan by substituting honey with maple syrup or agave nectar. If you’re gluten-sensitive, simply replace soy sauce with tamari. Always double-check ingredient labels to ensure they align with your dietary needs.

How do I ensure my eggplant is not bitter?
Before cooking, you can slice the eggplant and sprinkle it with salt; let it sit for about 30 minutes. This draws out excess moisture and bitterness, which you can rinse off before proceeding with your recipe. This step enhances the overall taste, making your Miso Glazed Eggplant even more delicious!

Miso Glazed Eggplant

Miso Glazed Eggplant: A Deliciously Sweet Umami Surprise

Discover the delightful Miso Glazed Eggplant, a Japanese-inspired side dish that delivers a savory and sweet flavor explosion, perfect for any occasion.
Prep Time 15 minutes
Cook Time 25 minutes
Total Time 40 minutes
Servings: 4 servings
Course: Dinner
Cuisine: Japanese
Calories: 180

Ingredients
  

For the Eggplant
  • 2 medium Eggplant can substitute with zucchini
  • 2 tablespoons Olive Oil avocado oil is a good alternative
  • 1 teaspoon Salt
  • 1/2 teaspoon Pepper
For the Miso Glaze
  • 1/4 cup White Miso Paste red miso can be a substitute
  • 2 tablespoons Mirin mix 1 tbsp rice vinegar with 1 tsp sugar for a substitute
  • 2 tablespoons Soy Sauce use tamari for gluten-free
  • 2 tablespoons Honey maple syrup works as a vegan substitute
  • 1 tablespoon Fresh Ginger or use ground ginger
  • 2 cloves Garlic minced
Optional Garnishes
  • 1 tablespoon Sesame Seeds or chopped nuts
  • 2 stalks Chopped Green Onions optional

Equipment

  • oven
  • baking sheet
  • parchment paper
  • mixing bowl
  • whisk

Method
 

Preparation
  1. Preheat the oven to 400°F (200°C) and line a baking sheet with parchment paper.
  2. Cut the eggplant into 1-inch cubes and toss with olive oil, salt, and pepper.
  3. Spread the seasoned eggplant on the baking sheet and roast for 20-25 minutes, flipping halfway.
  4. In a bowl, whisk together the white miso paste, mirin, soy sauce, honey, ginger, and garlic until smooth.
  5. Brush the miso glaze over the roasted eggplant and return to the oven for an additional 5-7 minutes.
  6. Garnish with sesame seeds and chopped green onions before serving.

Notes

Store leftovers in an airtight container in the refrigerator for up to 3 days. For longer storage, freeze in an airtight container for up to 2 months. Reheat gently in the oven or microwave.

Delight in Lovely Pink Grapefruit and Thyme Vegan Shortbread Cookies

As I sifted through the pantry for inspiration, a vibrant grapefruit caught my eye, whispering secrets of citrusy delight. That’s how these Lovely Pink Grapefruit and Thyme Vegan Shortbread Cookies were born—cookies that are not only easy to whip up but also beautifully unique, with a crisp texture and a burst of surprising flavor. Imagine sharing these delightful treats with friends during an afternoon tea or gifting them to loved ones; the combination of fresh grapefruit zest and aromatic thyme elevates your typical cookie into a memorable experience. Plus, with no dough rolling required and minimal cleanup, you’ll find making these both simple and satisfying. Curious about how to bring a little zest into your cookie game? Let’s dive into this refreshing recipe!

Why You’ll Love These Cookies

Simplicity at its finest: With no rolling required and minimal cleanup, these delightful vegan cookies are a breeze to make.

Unique flavors: The combination of bright grapefruit zest and earthy thyme creates a cookie experience that’s both refreshing and sophisticated.

Perfect for gifting: Their elegant look and unique taste make them a fantastic choice for presents or special occasions.

Versatile use: Enjoy them as an afternoon snack with a hot cup of tea or coffee, like in our Nutty Apricot Cookies, or dress them up for a special gathering.

Crowd-pleaser: These cookies will impress guests with their delightful crunch and hint of herbal goodness, ensuring your baking skills shine!

Now, get ready to indulge in these Lovely Pink Grapefruit and Thyme Vegan Shortbread Cookies!

Lovely Pink Grapefruit and Thyme Vegan Shortbread Cookie Ingredients

• To make these unique cookies, gather the following ingredients:

For the Cookie Dough

  • Unbleached All-Purpose Flour – This provides the structure for your cookies; you can substitute gluten-free flour, but the texture may change.
  • Icing Sugar – Adds a touch of sweetness and a fine texture; coconut sugar can be used as a substitute, although it will slightly alter the color.
  • Salt – Enhances all the flavors in your cookies; no substitutions are needed here.
  • Fresh Grapefruit Zest – Infuses your cookies with a bright, citrus aroma and flavor; you can swap it for lemon zest to add a different citrus profile.
  • Fresh Thyme – Adds earthy notes to your cookies; feel free to use fresh rosemary for a different herbal twist.
  • Cold Unsalted Vegan Butter – Provides richness and moisture; any vegan butter should work, but coconut oil may change the texture.

For the Icing

  • Sifted Icing Sugar – Used for icing the cookies, contributing sweetness; maple powdered sugar is a delightful alternative if you wish for a twist.
  • Freshly Squeezed Grapefruit Juice – Incorporates the citrus flavor in the icing; if you’re in a pinch, lemon juice or a sweetener can serve as a substitute.
  • Food Gel Coloring (optional) – Adds a pop of color to your icing; however, it can be omitted if you prefer a more natural look.

For Garnish

  • Fresh Thyme or Pearl Sugar – Adds visual appeal and crunchy texture; they can be omitted if not available.

These Lovely Pink Grapefruit and Thyme Vegan Shortbread Cookies are not just a treat; they are a burst of flavor and creativity in every bite!

Step‑by‑Step Instructions for Lovely Pink Grapefruit and Thyme Vegan Shortbread Cookie

Step 1: Preheat the Oven
Begin by preheating your oven to 300°F (150°C). This low temperature ensures that the Lovely Pink Grapefruit and Thyme Vegan Shortbread Cookies bake slowly for an even, crispy texture. While the oven heats up, gather your ingredients and equipment, including a 9-inch tart pan and a food processor, to keep your workspace organized.

Step 2: Prepare the Dough
In your food processor, combine the unbleached all-purpose flour, icing sugar, salt, grapefruit zest, and fresh thyme. Pulse the mixture until it’s well blended, creating a fragrant dry mixture. Gradually add the cold, cubed vegan butter while pulsing until the dough starts to come together into a rough, crumbly texture—this should take about 1-2 minutes.

Step 3: Shape and Bake
Transfer the dough to a 9-inch tart pan and press it evenly across the base and up the sides. Aim for a smooth, flat surface, ensuring even thickness for consistent baking. Place the pan in the preheated oven and bake for 35-40 minutes, until the edges are lightly golden and the center feels firm when touched.

Step 4: Cut and Cool
Once baked, remove the pan from the oven and let the shortbread cool for about 10 minutes. While it’s still warm, use a sharp knife to cut it into 16 even pieces. Allow it to cool completely in the pan—this helps maintain the lovely crisp texture of your vegan shortbread cookies.

Step 5: Prepare the Icing
In a medium bowl, mix the sifted icing sugar with freshly squeezed grapefruit juice. Whisk until you reach a smooth, pourable consistency—adjusting the juice until perfect. If you desire a pop of color, add food gel coloring at this stage, mixing until evenly distributed.

Step 6: Ice the Cookies
Once the cookies are fully cooled, gently dip the tops into the prepared icing or pour it over them for a lovely glaze. Allow any excess icing to drip off before placing them on a wire rack to dry. For a decorative touch, sprinkle fresh thyme or pearl sugar on top before the icing sets.

Step 7: Let Set and Serve
Once iced, leave the Lovely Pink Grapefruit and Thyme Vegan Shortbread Cookies on the rack for at least 30 minutes to fully set. After the icing has hardened, they are ready to be served, enjoyed with tea, or beautifully packaged for gifting. Store any leftovers in an airtight container for up to 2 weeks, if there are any!

What to Serve with Lovely Pink Grapefruit and Thyme Vegan Shortbread Cookies

These delightful cookies can elevate any gathering, creating a warm and inviting atmosphere to enjoy together.

  • Fragrant Earl Grey Tea: The bergamot notes in Earl Grey complement the citrusy grapefruit, creating a sophisticated pairing perfect for afternoon tea.

  • Fresh Fruit Salad: A light, refreshing fruit salad bursting with berries and citrus helps balance the cookies’ rich flavors with natural sweetness.

  • Herbed Cream Cheese Dip: An herbed vegan cream cheese spread offers a savory contrast, making for a delightful nibble alongside your sweet treats.

  • Light Sparkling Wine: A chilled glass of sparkling wine brings a celebratory vibe and complements the bright tartness of your grapefruit cookies perfectly.

  • Toasted Coconut Whipped Cream: Light, airy, and subtly sweet, this creamy topping adds a delectable twist to your cookie experience and pairs beautifully with their citrus notes.

  • Chocolate-Dipped Strawberry Skewers: The rich chocolate brings a pleasing contrast to the citrusy cookies, while the strawberries keep the pairing bright and fun.

  • Mint-Infused Lemonade: This refreshing drink adds bright undertones, echoing the grapefruit while cooling your palate after each delightful bite.

  • Lemon Thyme Sorbet: This zesty sorbet mirrors the cookie’s flavors and offers a delightful, refreshing contrast that elevates any dessert table.

Enjoy crafting a joyfully unique experience when you serve these lovely pink grapefruit and thyme vegan shortbread cookies alongside these delicious pairings!

How to Store and Freeze Lovely Pink Grapefruit and Thyme Vegan Shortbread Cookies

Room Temperature: Store in an airtight container at room temperature for up to 2 weeks. This keeps your cookies fresh and delicious, perfect for snacking or sharing.

Freezer: For longer storage, freeze these cookies in an airtight container for up to 6 months. Just layer them between parchment paper to prevent sticking.

Thawing: To enjoy frozen cookies, thaw them at room temperature. If iced, it’s best to glaze after thawing to maintain the icing’s texture and appearance.

Reheating: If you prefer warm cookies, reheat them for a few minutes in a preheated oven at 300°F (150°C) before serving, enhancing the lovely taste of these grapefruit and thyme cookies.

Expert Tips for Lovely Pink Grapefruit and Thyme Vegan Shortbread Cookies

  • Cold Butter Is Key: Ensure your vegan butter is cold to achieve that perfect crispy texture. Room temperature butter can lead to a dough that spreads too much.

  • Avoid Overmixing: Pulse the dough just until it comes together to prevent tough cookies. Treat it gently for that tender, crumbly bite everyone loves!

  • Check Oven Temp: If your cookies aren’t firming up as expected, double-check your oven temperature with an oven thermometer. Consistency is crucial for these lovely vegan shortbread cookies.

  • Icing Consistency Matters: Add the grapefruit juice slowly to the icing sugar, stirring as you go. A too-thin icing may run off the cookies, while too thick may not coat them well.

  • Creative Garnishes: Feel free to get creative with garnishes! Fresh thyme or pearl sugar adds visual appeal, but chopped nuts or edible flowers can elevate your presentation too.

Make Ahead Options

These Lovely Pink Grapefruit and Thyme Vegan Shortbread Cookies are a fantastic choice for meal prep! You can prepare the cookie dough up to 24 hours in advance by mixing all the dry ingredients and vegan butter, then refrigerating it in an airtight container. This helps preserve the fresh flavors while saving you time later. When you’re ready to bake, just shape the dough, bake, and finish with icing. To maintain their delightful crispiness, be sure to cool them completely before glazing. You can also freeze the baked cookies for up to 3 months; just thaw before icing, and you’ll have a delicious treat ready whenever you need it!

Variations & Substitutions for Lovely Pink Grapefruit and Thyme Vegan Shortbread Cookies

Feel free to get creative with these cookies—add your twist and explore delightful alternatives!

  • Gluten-Free: Use a gluten-free all-purpose flour blend for a similar texture that everyone can enjoy.
  • Sweetener Swap: Try using maple powdered sugar instead of icing sugar for a uniquely flavored frosting.
  • Citrus Twist: Substitute grapefruit zest with lemon or orange zest for a fresh, different citrus kick in every bite.
  • Herb Substitute: Replace thyme with fresh basil or mint for a fragrant and herbaceous cookie variation. The flavor profiles make each batch uniquely delightful.
  • Nutty Crunch: Fold in chopped pecans or walnuts into the dough for an added crunch that contrasts beautifully with the delicate texture.
  • ** cookie:** For a spiced version, add a pinch of ground ginger or cardamom to the dough—this will warm up the flavor profile wonderfully.
  • Icing Flavor: To elevate the icing, mix in a few drops of vanilla extract or almond extract for a deliciously aromatic finish.
  • Decorative Sprinkles: Don’t shy away from using edible flowers or colorful sprinkles as garnishes—your cookies will bloom with aesthetics!

These Lovely Pink Grapefruit and Thyme Vegan Shortbread Cookies are not just a treat, but a canvas for your culinary creativity! Pair them with a warm cup of tea or our delectable Nutty Apricot Cookies for a perfectly cozy afternoon!

Lovely Pink Grapefruit and Thyme Vegan Shortbread Cookies Recipe FAQs

What is the best way to select grapefruit for the cookies?
Absolutely! When choosing grapefruit for these vegan shortbread cookies, look for ones that are firm to the touch, without any dark spots or soft areas. The skin should be vibrant and fragrant—a good indication of freshness. If you can, opt for organic grapefruit since you’re using the zest!

How should I store the cookies to keep them fresh?
Store your Lovely Pink Grapefruit and Thyme Vegan Shortbread Cookies in an airtight container at room temperature for up to 2 weeks. This helps maintain their delightful crispiness. If you want to keep them longer, freeze them! They’ll stay fresh for up to 6 months when placed in a freezer-safe container with layers of parchment paper to prevent sticking.

Can I freeze the cookies after icing them?
Yes, you can freeze the cookies, but it’s best to glaze them after thawing to preserve the icing’s texture. When ready to freeze, let the icing set fully, then store cookies in an airtight container in the freezer. They’ll maintain their lovely taste and texture!

What should I do if the cookies turn out too tough?
Oh no! If your cookies are too tough, it typically means the dough was overmixed. Next time, pulse the ingredients just until combined and avoid any extra mixing after adding the butter. Additionally, make sure your vegan butter is cold, as room temperature butter can lead to spreading and dense cookies.

Are these cookies safe for pets or allergic individuals?
These Lovely Pink Grapefruit and Thyme Vegan Shortbread Cookies should not be shared with pets, especially dogs, as grapefruit can be harmful to them. For individuals with allergies, always check labels on your ingredients to ensure there are no allergens present, especially if using gluten-free substitutes which may contain other allergens.

Lovely Pink Grapefruit and Thyme Vegan Shortbread Cookie

Delight in Lovely Pink Grapefruit and Thyme Vegan Shortbread Cookies

Enjoy Lovely Pink Grapefruit and Thyme Vegan Shortbread Cookies that are easy to make and uniquely delicious.
Prep Time 20 minutes
Cook Time 40 minutes
Cooling Time 10 minutes
Total Time 1 hour 10 minutes
Servings: 16 cookies
Course: Dessert
Cuisine: Vegan
Calories: 120

Ingredients
  

For the Cookie Dough
  • 2 cups Unbleached All-Purpose Flour Gluten-free flour can be substituted.
  • 1/2 cup Icing Sugar Coconut sugar can be used as a substitute.
  • 1/4 teaspoon Salt No substitutions needed.
  • 2 tablespoons Fresh Grapefruit Zest Can swap for lemon zest.
  • 2 teaspoons Fresh Thyme Fresh rosemary can also be used.
  • 1/2 cup Cold Unsalted Vegan Butter Coconut oil may change the texture.
For the Icing
  • 1 cup Sifted Icing Sugar Maple powdered sugar is an alternative.
  • 2 tablespoons Freshly Squeezed Grapefruit Juice Lemon juice can be substituted.
  • Food Gel Coloring Optional for color.
For Garnish
  • Fresh Thyme or Pearl Sugar Can be omitted if not available.

Equipment

  • Food Processor
  • 9-inch tart pan
  • Wire rack

Method
 

Directions
  1. Preheat the oven to 300°F (150°C). Gather all ingredients and equipment.
  2. In a food processor, combine flour, icing sugar, salt, grapefruit zest, and thyme. Pulse until well blended. Gradually add cubed vegan butter and pulse until a crumbly texture forms.
  3. Transfer dough to a 9-inch tart pan, pressing it evenly across the base and sides. Bake for 35-40 minutes until edges are golden.
  4. Cool for 10 minutes, then cut into 16 pieces while still warm. Allow to cool completely in the pan.
  5. Mix icing sugar with grapefruit juice until smooth. Add food gel coloring if desired.
  6. Dip cooled cookies into icing or pour it over. Sprinkle fresh thyme or pearl sugar before icing sets.
  7. Let cookies set for at least 30 minutes before serving. Store leftovers in an airtight container for up to 2 weeks.

Notes

Ensure your vegan butter is cold and avoid overmixing the dough for the best texture. Feel free to get creative with your garnishes.

Crispy Air Fryer Radish Chips: A Guilt-Free Snack Delight

As I rummaged through my fridge one day, the vibrant radishes caught my eye, sparking an idea for a healthy and crunchy delight: Air Fryer Radish Chips! These little gems are not just visually appealing; they also pack a nutritious punch, making for an irresistible snack that’s perfect for the whole family. With their quick prep time and inspiring versatility, these vegan snacks easily elevate any meal or serve as a guilt-free treat all on their own. Whether you’re looking to indulge your crispy cravings or seeking a wholesome alternative to fast food, these radish chips will not disappoint. Ready to crunch your way to a delicious and healthy snack? Let’s dive into how to make these delightful Air Fryer Radish Chips!

Why Make Air Fryer Radish Chips?

Crispy Satisfaction: You’ll love how the air fryer transforms radishes into delightfully crunchy chips with minimal effort.

Quick Preparation: With just a few simple steps, you can whip up a healthy snack in no time.

Vegan & Healthy: These chips are a guilt-free indulgence, perfect for those embracing a vegan or low-calorie lifestyle.

Versatile Flavor Options: Feel free to experiment with different spices, making these radish chips uniquely yours!

Crowd-Pleasing Snack: Whether served at a gathering or as a family snack, these chips are sure to impress everyone at the table.

For the best experience, consider pairing your radish chips with delicious dips or alongside a fresh salad for an added crunch. Enjoy the savory goodness and explore more healthy snack ideas to satisfy your cravings!

Air Fryer Radish Chips Ingredients

• Get ready for a crunchy delight!

For the Chips

  • Radishes – Fresh radishes are essential for that crisp texture that’s the star of your Air Fryer Radish Chips.
  • Olive Oil – This helps to achieve a crispy finish; opt for extra-virgin for the best flavor or substitute with avocado oil.
  • Garlic Powder – Adds a punch of flavor; feel free to swap with onion powder or your favorite seasonings for variety.
  • Salt – Enhances the overall taste, so season to your liking.
  • Black Pepper – Offers just the right amount of heat; adjust based on your preference.

These simple ingredients work together harmoniously to create a snack that satisfies cravings while keeping it healthy and vegan!

Step‑by‑Step Instructions for Air Fryer Radish Chips

Step 1: Wash and Dry the Radishes
Begin by thoroughly washing the radishes under cold running water to remove any dirt and impurities. Once clean, use a clean kitchen towel or paper towel to dry them completely. This step is crucial for achieving crispy Air Fryer Radish Chips, as excess moisture will steam rather than crisp during cooking.

Step 2: Slice the Radishes
Using a sharp knife or a mandolin slicer, cut the radishes into quarter-inch thick slices, ensuring they are uniform for even cooking. Aim for consistency, as this will help the chips achieve that perfect crispiness. Once sliced, set the radish rounds aside, ready for seasoning.

Step 3: Season the Radish Slices
In a large mixing bowl, add the sliced radishes. Drizzle olive oil over them, making sure to coat each piece evenly. Then, sprinkle garlic powder, salt, and black pepper to taste. Toss everything together gently, ensuring each slice is well-seasoned to maximize flavor in your Air Fryer Radish Chips.

Step 4: Arrange in the Air Fryer
Carefully arrange the seasoned radish slices in the air fryer basket in a single layer, keeping a little space between each slice. This will allow for optimal air circulation, ensuring that every chip gets that delightful golden crisp. You may need to work in batches if your air fryer has limited space.

Step 5: Air Fry the Chips
Set your air fryer to 360°F (182°C) and cook the radish slices for about 10 minutes. Halfway through the cooking time, open the air fryer and shake the basket gently to ensure even cooking. Keep an eye on the chips during the final minutes, and remove them once they turn golden brown and crisp.

Step 6: Cool and Serve
Once done, carefully take out the Air Fryer Radish Chips and place them on a cooling rack or a plate. Allow them to cool for a minute to enhance their crunchiness. Serve immediately while they’re still warm for the best texture, and enjoy the satisfying crunch of these guilt-free snacks!

Expert Tips for Air Fryer Radish Chips

Uniform Slices: Ensure even cooking by slicing radishes consistently to a quarter-inch thickness. This results in perfect crispiness for your Air Fryer Radish Chips.

Dry Thoroughly: Don’t skip drying the radishes after washing. Excess moisture can lead to soggy chips instead of the desired crunch.

Layering Matters: Avoid overcrowding the air fryer basket; arrange radish slices in a single layer for optimal airflow and even cooking.

Seasoning Mix: Pre-mix your seasonings in a bowl before adding them to the radishes to ensure every slice is deliciously flavored.

Storage Tips: For best results, consume your Air Fryer Radish Chips fresh. If you have leftovers, store them in an airtight container and enjoy within two days.

Storage Tips for Air Fryer Radish Chips

Room Temperature: Keep your radish chips in a cool, dry place for a crunchy snack experience. They’re best enjoyed fresh, ideally within the first couple of hours.

Fridge: If you must refrigerate, place your leftover chips in an airtight container. Consume them within up to 3 days, but note that they may lose some crispiness.

Freezer: For longer storage, you can freeze the air fryer radish chips. Place them in a freezer-safe bag and store for up to 1 month. Re-crisp in the air fryer for a quick snack!

Reheating: To restore crispiness, reheat the leftover chips in the air fryer at 360°F (182°C) for about 3–5 minutes before serving.

What to Serve with Air Fryer Radish Chips?

These delightful little snacks are perfect for elevating your meal and adding crunch to your dinner table.

  • Creamy Avocado Dip: The rich, buttery flavor of avocado dip complements the crunchy texture of radish chips beautifully, creating a heavenly snack experience. This combination is not only delicious but adds a nutritious element to your dish.

  • Zesty Hummus: A tangy, lemony hummus brings a burst of flavor that pairs incredibly with the savory notes of radish chips. This dip is a favorite for its creamy consistency and healthy profile, making it perfect for parties or casual snacking.

  • Fresh Garden Salad: A crisp salad filled with vibrant greens and juicy vegetables can balance the earthy notes of the radish chips while providing a refreshing contrast. Toss in a light vinaigrette to elevate your meal.

  • Crispy Tofu Bites: Serve alongside crispy tofu for a satisfying protein hit. The contrast in texture and flavor will make for a well-rounded meal that keeps everyone coming back for more.

  • Smooth Guacamole: The smooth and creamy texture of guacamole complements the crunchy chips wonderfully, while its fresh flavors highlight the salty notes of the radishes.

  • Light White Wine: A chilled glass of Sauvignon Blanc or Pinot Grigio pairs beautifully, enhancing the savory experience with a refreshing zest that dances on your palate.

  • Lemon Garlic Aioli: This luscious dip adds a rich, garlicky twist to the crunchy radish chips, intensifying their flavor and making for a memorable snacking experience.

Elevate your snacking or serving game with these easy yet delectable pairings!

Make Ahead Options

These delightful Air Fryer Radish Chips are perfect for meal prep! You can slice and season the radishes up to 24 hours in advance; just toss them with olive oil and your favorite spices, then store them in an airtight container in the refrigerator. This not only saves time but also allows the flavors to meld beautifully. When you’re ready to enjoy your chips, simply arrange the seasoned radishes in the air fryer and cook them at 360°F (182°C) for about 10 minutes. For the best results, keep your sliced radishes covered to prevent them from drying out, ensuring they are just as delicious as when freshly prepared!

Air Fryer Radish Chips Variations

Feel free to get creative with these Air Fryer Radish Chips and make them uniquely yours!

  • Keto-Friendly: Use olive oil or avocado oil to maintain a low-carb profile while enjoying these crispy snacks.
  • Spicy Kick: Add chili powder or cayenne to the mix for a flavorful heat that will tantalize your taste buds.
  • Herb-Infused: Incorporate dried herbs like rosemary or thyme to elevate the flavor and add an aromatic twist.
  • Cheesy Flavor: Sprinkle nutritional yeast over the radishes before air frying for a cheese-like flavor without dairy.
  • Thick Cut Chips: For a different texture, slice radishes thicker for hearty chips that have a satisfying bite.
  • Sweet Twist: Drizzle a little balsamic glaze over the finished chips for a touch of sweetness that pairs beautifully with their savoriness.
  • Vegetable Medley: Experiment by substituting radishes with zucchini or eggplant for a variety of flavors and textures.
  • Smoky Flavor: Use smoked paprika instead of garlic powder for a delightful smoky essence that enhances the chip experience.

Exploring these variations could lead you to your new favorite snack. You can also check out some delightful vegan dip recipes to pair with your chips, making for an even more engaging snacking experience!

Air Fryer Radish Chips Recipe FAQs

How do I pick the best radishes for this recipe?
Absolutely! Look for radishes that are firm, smooth, and brightly colored. Avoid any that have soft spots, dark blemishes, or wrinkles, as these indicate overripeness. Fresh radishes will create that satisfying crunch you crave in your Air Fryer Radish Chips!

How do I store leftover radish chips?
To keep your Air Fryer Radish Chips crunchy, store them in an airtight container at room temperature for up to 2 days. If you decide to refrigerate them, make sure they’re completely cool before sealing them away, but keep in mind they may lose some of their crispness after chilling.

Can I freeze radish chips for later use?
Certainly! To freeze your Air Fryer Radish Chips, place them in a single layer on a baking sheet and freeze them until solid. Then transfer the chips into a freezer-safe bag or container. They can be stored for up to 3 months. When you’re ready to enjoy, just reheat them in the air fryer at 360°F (182°C) for about 3-5 minutes to get that crispy texture back!

Why did my radish chips come out soggy?
There are a couple of reasons this can happen. First, if the radishes were not dried thoroughly after washing, the moisture could prevent them from crisping up. Also, overcrowding the air fryer basket can lead to uneven cooking; make sure to arrange them in a single layer for optimal results.

Are these radish chips suitable for pets or those with allergies?
Yes, these Air Fryer Radish Chips are vegan and gluten-free, making them suitable for many dietary considerations. However, it’s always wise to consult your vet regarding any homemade treats for pets, as radishes should be given in moderation, and be cautious if anyone in your household has allergies to related foods. Enjoy guilt-free snacking!

Air Fryer Radish Chips

Crispy Air Fryer Radish Chips: A Guilt-Free Snack Delight

Enjoy these Air Fryer Radish Chips for a healthy, guilt-free snack that satisfies your crispy cravings.
Prep Time 15 minutes
Cook Time 10 minutes
Cooling Time 1 minute
Total Time 26 minutes
Servings: 4 servings
Course: Other
Cuisine: Vegan
Calories: 50

Ingredients
  

For the Chips
  • 1 bunch Fresh Radishes Ensure they are vibrant and crisp.
  • 1 tablespoon Olive Oil Extra-virgin recommended.
  • 1 teaspoon Garlic Powder Can substitute with onion powder.
  • to taste Salt Season according to preference.
  • to taste Black Pepper Adjust based on your heat preference.

Equipment

  • Air Fryer

Method
 

Step-by-Step Instructions
  1. Wash the radishes thoroughly under cold running water and dry them with a kitchen towel.
  2. Slice the radishes into quarter-inch thick slices using a sharp knife or mandolin slicer.
  3. In a mixing bowl, drizzle olive oil over the slices and sprinkle garlic powder, salt, and black pepper. Toss to coat evenly.
  4. Arrange the seasoned radish slices in the air fryer basket in a single layer.
  5. Set the air fryer to 360°F (182°C) and cook for 10 minutes, shaking the basket halfway through.
  6. Remove the chips and let them cool for a minute before serving.

Notes

For best results, consume fresh. Store leftover chips in an airtight container for up to 3 days, or freeze for 1 month.

Decadent Chocolate Brownie Date Balls that Energize Your Day

There I was, rummaging through my pantry one afternoon, desperately seeking a healthy treat that could satisfy my sweet tooth without the guilt. That’s when the idea for these Chocolate Brownie Date Balls hit me like a bolt of inspiration. With their delightful combination of Medjool dates, pumpkin puree, and rich cocoa powder, these no-bake snacks offer a fudgy and satisfying texture that’s ideal for an energy boost anytime of the day. Not only can you whip them up in just 15 minutes, but they’re also dairy-free, gluten-free, and perfect for anyone looking to shake off the fast-food blues. Want to indulge in a sweet escape that nourishes your body as much as your cravings? Let’s dive into this delicious recipe together!

Why are Chocolate Brownie Date Balls irresistible?

Decadent flavors: The luscious mix of Medjool dates and rich cocoa creates a sweet delight that melts in your mouth.
Convenient prep: Ready in just 15 minutes, these no-bake bites fit perfectly into your busy schedule.
Health-conscious treat: Packed with natural ingredients, they’re a guilt-free snack that satisfies cravings without sacrificing your diet.
Creative variations: Whether you’re nut-free or craving coconut, you can easily customize these balls to match your taste!
Crowd-pleaser: Perfect for family gatherings or a quick boost after workouts, they’ll leave everyone asking for seconds. For more quick and healthy treats, check out my Homemade Bake Chocolate or Coconut Chocolate Rolls.

Chocolate Brownie Date Balls Ingredients

• Get ready to create a sweet sensation!

For the Base

  • Walnuts – Adds healthy fats and a crunchy texture. Substitution: Use pecans or almonds for a different flavor.
  • Medjool Dates – Provides natural sweetness and softness. Substitution: Regular dates can be used; adjust quantity due to smaller size.
  • Pumpkin Purée – Adds moisture and contributes to the fudgy texture. Substitution: Can swap with mashed banana or other fruit puree.
  • Cocoa Powder – Provides rich chocolate flavor. Substitution/Note: Protein powder can substitute cocoa for an extra protein boost.
  • Sea Salt – Enhances the overall flavor and balances sweetness.
  • Vanilla Extract – Adds aromatic flavor complexity.

Finishing Touch

  • Coarsely Ground Walnuts – Roll the balls in these to add extra texture and flavor before serving.

Step‑by‑Step Instructions for Chocolate Brownie Date Balls

Step 1: Prep the Walnuts
Begin by processing 1/3 cup of walnuts in a food processor until they resemble coarse sand, which should take about 30 seconds. Once ready, transfer the ground walnuts to a bowl and set aside, as these will enhance the texture and flavor of your Chocolate Brownie Date Balls once finished.

Step 2: Combine the Ingredients
In the same food processor, add the remaining walnuts and process until they form a fine powder, about 30 seconds more. Next, add the Medjool dates, pumpkin purée, cocoa powder, sea salt, and vanilla extract. Blend everything together until the mixture is smooth and well combined, which will take about 1 minute.

Step 3: Shape the Balls
Once the mixture is ready, use a spoon or your hands to scoop out portions and roll them into balls about the size of golf balls, ensuring they are firm yet cohesive. Aim for a total of 8 evenly-sized Chocolate Brownie Date Balls; this step should take approximately 5 minutes.

Step 4: Finish with Walnuts
Finally, roll each formed ball in the reserved coarsely ground walnuts, ensuring they are evenly coated for added crunch and flavor. At this stage, your Chocolate Brownie Date Balls are ready to be enjoyed! Serve them immediately for a delightful treat or store them in the fridge or freezer for later.

Make Ahead Options

These Chocolate Brownie Date Balls are perfect for meal prep, allowing you to enjoy a healthy snack without the last-minute rush! You can prepare the mixture up to up to 24 hours in advance by following steps 1 and 2—processing the walnuts and blending the other ingredients together. Simply store the mixture in an airtight container in the refrigerator to maintain its freshness and vibrant flavors. When you’re ready to enjoy them, scoop and roll the mixture into balls and coat them in the reserved coarsely ground walnuts as directed in step 4. This way, you’ll have delicious, fudgy treats ready to satisfy your cravings any time of day!

Storage Tips for Chocolate Brownie Date Balls

Fridge: Store your Chocolate Brownie Date Balls in an airtight container in the fridge for up to one week. This keeps them fresh and flavorful, ready for your cravings!

Freezer: For longer storage, place the balls in a freezer-safe container or bag. They can last for up to 3 months when properly sealed, allowing you to enjoy that healthy sweet treat anytime!

Reheating: There’s no need to reheat these no-bake bites—simply enjoy them straight from the fridge or freezer for a delicious treat on the go!

Serving: If you plan to serve them at gatherings, let the chilled balls sit at room temperature for about 10-15 minutes before serving to bring out their delightful fudgy texture.

Expert Tips for Chocolate Brownie Date Balls

  • Process Nuts Well: Ensure your walnuts are finely processed to avoid large chunks. This helps create a smooth, fudgy texture in your Chocolate Brownie Date Balls.

  • Soak Dates for Ease: If your Medjool dates feel dry, soak them in warm water for 10-15 minutes. This will ensure they blend easily and yield a luscious mixture.

  • Taste and Adjust: Always taste the mixture before shaping the balls. You can easily adjust sweetness with additional dates or cocoa powder if needed.

  • Chill for Better Shape: If the mixture feels too soft, refrigerate it for 10 minutes before rolling into balls. Chilling makes shaping easier and enhances the fudgy texture.

  • Experiment with Coatings: Don’t hesitate to roll your balls in different coatings like coconut or cocoa powder for an extra flavor kick!

What to Serve with Chocolate Brownie Date Balls

Experience a delightful pairing with these fudgy treats to elevate your snacking experience!

  • Creamy Coconut Yogurt: A dollop of creamy coconut yogurt adds a refreshing tang, perfectly balancing the rich sweetness of the brownie date balls.

  • Fresh Fruit Skewers: Juicy strawberries and tangy pineapple add a burst of freshness, complementing the chocolate flavor wonderfully while increasing your fruit intake.

  • Nutty Granola: Crunchy granola can offer a delightful contrast in texture, making your snack feel even more indulgent. It’s also a great way to add some healthy grains!

  • Herbal Tea: Sipping on a warm cup of herbal tea, such as peppermint or chamomile, creates a soothing contrast, enhancing the cozy experience of enjoying your treats.

  • Dark Chocolate Drizzle: A drizzle of melted dark chocolate on top brings an extra layer of richness, making every bite an indulgent experience that chocolate lovers will adore.

  • Matcha Latte: The earthy tones of matcha contrast beautifully with the sweetness of the date balls, providing a delicious and energizing beverage option that pairs perfectly.

  • Peanut Butter Dip: A creamy peanut butter dip adds a nutty flavor that pairs harmoniously with the chocolate, perfect for those craving a little extra protein.

  • Olive Tapenade: For adventurous palates, a savory olive tapenade on the side introduces a unique flavor combination that balances sweetness, bringing a delightful twist to your snack time.

Chocolate Brownie Date Balls Variations

Feel free to get creative with your Chocolate Brownie Date Balls; there are endless delightful twists waiting for you!

  • Nut-Free: Substitute walnuts with hemp seeds or pumpkin seeds for a nut-free alternative that still brings texture.

  • Flavor Boost: Add shredded coconut to the mixture for a tropical flavor, creating a delightful chewiness in every bite.

  • Heat Level: Mix in a pinch of cayenne pepper for a surprising kick that elevates the flavor profile beautifully.

  • Protein-Packed: Stir in your favorite protein powder into the blended mix for an extra nutritional boost, especially great post-workout.

  • Sweet Variants: Incorporate cacao nibs for an added chocolate crunch, giving your date balls an irresistible chocolate explosion.

  • Fruity Twist: Experiment with mashed bananas or even applesauce for a unique fruity flavor that complements the chocolate beautifully.

  • Decadent Coatings: Try rolling the balls in cocoa powder or crushed almonds for an extra layer of deliciousness and texture.

For even more inspiration, check out my Banana Bread Brownies or whip up some delightful Coffee Chocolate Truffles. Enjoy customizing your treats!

Chocolate Brownie Date Balls Recipe FAQs

How do I choose the right Medjool dates?
Absolutely! When selecting Medjool dates, look for ones that are plump, shiny, and have a rich brown color. Avoid dates that are dry or have dark spots all over, as these may be past their prime. If they’re a little dry, soaking them in warm water for 10-15 minutes can help rehydrate them before use.

How should I store Chocolate Brownie Date Balls?
Very! Your Chocolate Brownie Date Balls can be stored in an airtight container in the refrigerator for up to one week. This keeps them fresh and ready for those snack attacks! If you’re planning to enjoy them later, freeze them in a freezer-safe bag for up to 3 months. Just be sure to separate them with parchment paper to prevent sticking.

Can I freeze Chocolate Brownie Date Balls?
Absolutely! To freeze these delightful treats, arrange the balls in a single layer on a parchment-lined baking sheet and freeze until firm. Then, transfer them to a freezer-safe container, layering parchment paper between each row. This method allows them to keep their shape and texture while stored for up to 3 months.

What if my mixture is too dry or crumbly?
No worries! If your Chocolate Brownie Date Balls mixture appears too dry or crumbly, try adding a teaspoon of water or a little extra pumpkin purée to the mixture. Blend again until smooth, allowing the ingredients to come together seamlessly. Remember, a touch of extra moisture can enhance the fudgy texture!

Are Chocolate Brownie Date Balls safe for my dog?
Very importantly, Chocolate Brownie Date Balls contain ingredients like chocolate and nuts, which can be harmful to dogs. Always keep these treats out of reach of your furry friends. If you’re looking to share a special treat with them, consider making a dog-friendly version with fruits and oats instead!

Can I make Chocolate Brownie Date Balls nut-free?
Absolutely! For a nut-free option, simply replace walnuts with seeds like pumpkin seeds or sunflower seeds. You can even enhance texture and flavor by incorporating ingredients like shredded coconut or oat flour, ensuring everyone at your gathering has the chance to indulge without worry!

Chocolate Brownie Date Balls

Decadent Chocolate Brownie Date Balls that Energize Your Day

Indulge in these healthy Chocolate Brownie Date Balls, a no-bake treat that satisfies your sweet tooth while keeping you energized.
Prep Time 15 minutes
Total Time 15 minutes
Servings: 8 balls
Course: Dessert
Cuisine: American
Calories: 120

Ingredients
  

For the Base
  • 1/3 cup walnuts Adds healthy fats and a crunchy texture.
  • 1 cup Medjool dates Provides natural sweetness and softness.
  • 1/2 cup pumpkin purée Adds moisture and contributes to the fudgy texture.
  • 1/4 cup cocoa powder Provides rich chocolate flavor.
  • 1/4 teaspoon sea salt Enhances the overall flavor and balances sweetness.
  • 1 teaspoon vanilla extract Adds aromatic flavor complexity.
Finishing Touch
  • 1/3 cup coarsely ground walnuts Roll the balls in these for added texture and flavor.

Equipment

  • Food Processor

Method
 

Step-by-Step Instructions
  1. Begin by processing 1/3 cup of walnuts in a food processor until they resemble coarse sand, which should take about 30 seconds. Transfer to a bowl and set aside.
  2. In the same food processor, add the remaining walnuts and process until they form a fine powder. Then add the Medjool dates, pumpkin purée, cocoa powder, sea salt, and vanilla extract. Blend everything until smooth, about 1 minute.
  3. Use a spoon to scoop out portions and roll them into balls about the size of golf balls. Aim for a total of 8 Chocolate Brownie Date Balls; this should take about 5 minutes.
  4. Roll each ball in the reserved coarsely ground walnuts to coat them for added crunch and flavor. Your Chocolate Brownie Date Balls are ready to be enjoyed!

Notes

For best results, process walnuts well and soak dates if they feel dry for easier blending. Experiment with coatings for unique flavors.

Cabbage Carbonara: Creamy, Low-Carb Comfort Food Delight

Roasting cabbage might not be on your culinary radar, but this humble vegetable transforms beautifully in my Creamy Cabbage Carbonara. As a delightful low-carb pasta replacement, it’s both budget-friendly and quick to whip up—a perfect option for those busy weeknight dinners. The roasted cabbage takes on a pleasantly chewy texture that echoes traditional carbonara, while the rich sauce of bacon, cream, and Parmesan adds a touch of comfort that’s hard to resist. Plus, you can easily switch things up with variations like turkey bacon or extra veggies for an exciting twist. Are you ready to give this dish a try and redefine your pasta night?

Why is Cabbage Your New Favorite?

Simplicity at Its Best: This recipe is not only straightforward but also requires minimal kitchen skills, making it perfect for everyone.

Deliciously Rich Flavor: The combination of smoky bacon, creamy sauce, and Parmesan cheese creates a flavor explosion that will have you coming back for seconds.

Versatile and Adaptable: Whether you prefer turkey bacon or want to add your favorite veggies, this dish allows for easy customization to suit any palate.

Low-Carb Satisfaction: Enjoy all the comfort of traditional carbonara without the guilt—each serving is a mere 253 calories with just 7g net carbs!

Crowd-Pleasing Option: Perfect for family dinners or impressing guests, this unique twist on a classic will leave everyone raving. Pair it with a side of Crisp Cabbage Cucumber salad for an added crunch!

Cabbage Carbonara Ingredients

For the Cabbage Base

  • Cabbage – A medium head serves as the main low-carb pasta substitute, providing a deliciously chewy texture.
  • Olive Oil – Essential for roasting, it intensifies the cabbage’s natural sweetness and prevents sticking.

For the Sauce

  • Bacon – Adds smoky richness; consider turkey bacon for a lighter alternative.
  • Onion – Provides a sweet and aromatic base; swap with shallots for a different flavor profile.
  • Garlic – Fresh minced garlic deepens the aroma; using fresh is key for authenticity.
  • Heavy Cream – Creates a luscious, creamy sauce; light cream can be substituted but may alter consistency.
  • Parmesan Cheese – Essential for umami and thickness; freshly grated delivers a smoother texture.
  • Black Pepper – Adds just the right amount of spice; adjust based on your taste preference.
  • Salt – Enhances overall flavors; use to taste during the cooking process.

Optional Garnish

  • Extra Parmesan – Sprinkle on top for added cheesy goodness.
  • Cracked Black Pepper – A final burst of flavor for a perfect finish.

Transforming ordinary cabbage into a delightful Cabbage Carbonara brings comfort food to new heights without the carbs!

Step‑by‑Step Instructions for Cabbage Carbonara

Step 1: Preheat the Oven
Start by preheating your oven to 400°F (200°C). This temperature is perfect for roasting the cabbage, ensuring it becomes tender and delightful without losing its structure. While the oven heats, you can prepare the cabbage for roasting, setting the stage for a delicious Cabbage Carbonara.

Step 2: Prepare the Cabbage
Slice a medium head of cabbage into long, thin strips, yielding about 5-6 cups total. This shape mimics traditional pasta, giving your Cabbage Carbonara a satisfying bite. Once sliced, it’s ready to be transformed into a cozy alternative to pasta, enhancing your comfort food experience.

Step 3: Toss and Spread
In a large bowl, toss the sliced cabbage with olive oil and a sprinkle of salt until well coated. This step allows the natural sweetness of the cabbage to shine through. Spread the cabbage evenly on a baking sheet in a single layer, ensuring that each piece has room to roast beautifully.

Step 4: Roast the Cabbage
Roast the cabbage in the preheated oven for 10-15 minutes, or until it becomes tender with lightly browned edges. Keep an eye on it during the last few minutes for that perfect golden color, which will enhance the flavor of your Cabbage Carbonara.

Step 5: Cook the Bacon
While the cabbage roasts, heat a pan over medium heat and add chopped bacon. Cook for about 2-3 minutes until the bacon is crispy and fragrant, releasing its smoky aroma. This step adds richness to your Cabbage Carbonara, setting a flavorful foundation for the creamy sauce.

Step 6: Sauté the Aromatics
Add chopped onion to the pan with the bacon and cook until they become translucent, about 2-3 minutes. Then, stir in minced garlic and cook for an additional 30 seconds. The combination of these aromatics will create a fragrant base that elevates the depth of your Cabbage Carbonara.

Step 7: Make the Creamy Sauce
In the same pan, incorporate heavy cream, freshly grated Parmesan cheese, and freshly cracked black pepper. Let the mixture simmer for 2-3 minutes until thickened and bubbly. This creamy sauce is the heart of Cabbage Carbonara, providing a luscious coat for the roasted cabbage.

Step 8: Combine and Coat
Once the cabbage is perfectly roasted, toss it into the creamy sauce in the pan. Stir well for 1-2 minutes to ensure that each piece of cabbage is evenly coated with the rich carbonara sauce. This blending step merges all the flavors beautifully, making your dish irresistible.

Step 9: Serve and Garnish
Plate your Cabbage Carbonara hot, garnished with extra Parmesan cheese, crispy bacon bits, and a sprinkle of cracked black pepper for that finishing touch. Presenting the dish while it’s warm enhances the flavors and ensures a memorable dining experience for you and your guests.

Storage Tips for Cabbage Carbonara

Fridge: Store leftovers in an airtight container in the fridge for up to 3 days to maintain freshness. Always allow the dish to cool slightly before covering to prevent condensation.

Freezer: For longer storage, seal Cabbage Carbonara in freezer-safe bags or containers and freeze for up to 3 months. Thaw in the fridge overnight before reheating.

Reheating: Reheat gently in a skillet over low heat or in the microwave at 50% power to avoid overcooking the cabbage. Add a splash of cream or broth to restore moisture if needed.

Texture Reminder: When reheating, remember that the cabbage should retain its slight chewiness to mimic the experience of traditional carbonara.

What to Serve with Cabbage Carbonara?

To complete your meal, consider delightful sides that elevate the comforting essence of this low-carb dish.

  • Crisp Side Salad: A refreshing salad with mixed greens, cherry tomatoes, and a light vinaigrette perfectly balances the creamy richness of the Cabbage Carbonara.

  • Garlic Breadsticks: Soft breadsticks brushed with garlic butter provide a delightful, chewy side that complements the creamy sauce. They are perfect for soaking up every bit of that delicious carbonara sauce.

  • Roasted Vegetables: A medley of seasonal roasted veggies, such as zucchini and bell peppers, adds a colorful and nutritious contrast, enhancing the dish’s overall appeal.

  • Steamed Broccoli: Tender, vibrant broccoli adds a fresh and crunchy element, balancing the richness of the carbonara while contributing nutritional benefits.

  • Cauliflower Rice: For another low-carb option, serve the Cabbage Carbonara over cauliflower rice for an added serve of veggies that keeps the dish light and satisfying.

  • Red Wine: A glass of light red wine enhances the flavors beautifully, providing a sophisticated touch that pairs wonderfully with the smokiness of the bacon and richness of the cream.

Transform your dining experience with these perfect pairings that complement the creamy, indulgent taste of your Cabbage Carbonara!

Make Ahead Options

These Cabbage Carbonara are perfect for busy home cooks looking to save time during the week! You can roast the cabbage up to 24 hours in advance; simply slice it, toss with olive oil and salt, and store it in an airtight container in the refrigerator. The creamy sauce can also be prepared ahead and refrigerated for up to 3 days—just make sure to let it cool before sealing. When ready to serve, gently reheat the sauce over low heat until warmed through, and combine it with the roasted cabbage for a dish that tastes just as delicious as when fresh. This way, you’ll enjoy a comforting, satisfying meal with minimal effort!

Cabbage Carbonara Variations & Substitutions

Feel free to personalize your Cabbage Carbonara with these creative tweaks to enhance your culinary experience!

  • Dairy-Free: Use coconut milk or cashew cream as a replacement for heavy cream to create a plant-based sauce. This swap will add a subtle sweetness that balances the savory elements beautifully.

  • Gluten-Free: For a completely gluten-free dish, make sure to choose gluten-free soy sauce if adding any Asian-inspired flavors, or simply savor the dish as is for a deliciously simple meal.

  • Smoky Flavor: Incorporate smoked paprika or liquid smoke in place of bacon for a vegan twist that delivers that irresistible smoky aroma, while still keeping everything comforting.

  • Extra Veggies: Add sautéed spinach or kale to boost nutrition and flavor. These leafy greens complement the creamy sauce wonderfully, allowing you to enjoy some vibrant color and texture.

  • Protein-Packed: Mix in grilled chicken or seasoned shrimp for an extra protein boost. Their juicy texture pairs perfectly with roasted cabbage, making your dish even more satisfying!

  • Herb Infusion: Feel free to add fresh herbs like thyme or basil to elevate the flavor profile. A sprinkle of herbs right before serving adds freshness and color that will impress your guests.

  • Heat it Up: For those who crave a little spice, toss in some crushed red pepper flakes or diced jalapeños. This will give your dish a warm kick that complements the creamy goodness.

  • Classic Italian: Swap cabbage with zucchini noodles for a traditional pasta feel while still keeping it low-carb. This adaptation allows you to enjoy a more familiar texture without sacrificing your dietary goals.

If you’re looking for more delicious cabbage recipes, check out the vibrant Crisp Cabbage Cucumber salad or the exciting Asian Inspired Cabbage dish, both of which celebrate this humble vegetable in delightful ways!

Expert Tips for Cabbage Carbonara

Keep Cabbage Chewy: Avoid overcooking the cabbage; it should maintain a pleasant chewiness that mimics traditional pasta for the best Cabbage Carbonara.

Use Fresh Ingredients: Opt for fresh minced garlic and freshly grated Parmesan cheese to elevate the sauce’s flavor and texture, ensuring a rich result.

Adjust Consistency: If the sauce is too thick, gradually add a splash of cream or water until you reach your desired consistency, giving the dish the perfect coat.

Mix and Match: Don’t hesitate to customize your Cabbage Carbonara by swapping bacon with pancetta or turkey bacon, and adding in your favorite sautéed veggies.

Watch the Roasting Time: Keep an eye on your roasted cabbage; you want it tender and slightly golden, as this develops depth in flavor without losing its character.

Serve Hot: Serve your Cabbage Carbonara immediately after plating, garnished generously with extra Parmesan and cracked black pepper for a delightful finish.

Cabbage Carbonara Recipe FAQs

What is the best cabbage for Cabbage Carbonara?
Absolutely! I recommend using a medium head of green cabbage for this recipe. Look for heads that are firm and heavy for their size, ideally free from dark spots or blemishes. This ensures a satisfying chewiness reminiscent of pasta.

How can I store leftovers of Cabbage Carbonara?
Leftovers can be stored in an airtight container in the fridge for up to 3 days. Make sure to allow the dish to cool slightly before sealing, which helps avoid moisture buildup. Gently reheat on the stove or in the microwave to bring it back to life without losing its deliciousness!

Can I freeze Cabbage Carbonara?
Yes, you can absolutely freeze Cabbage Carbonara! Place it in a freezer-safe container or bag and keep it in the freezer for up to 3 months. Once you’re ready to enjoy again, thaw it in the refrigerator overnight and warm it up. For best results, add a splash of cream or broth during reheating to maintain that creamy texture.

What if I overcook the cabbage?
Very! If you accidentally overcook the cabbage, it may become mushy. To fix this, try not to cook it beyond the 10-15 minute roasting time. Keep an eye on it towards the end; you want it tender but still with a little bite. If it’s already done, consider adding sautéed vegetables or a sprinkle of fresh herbs to liven it up!

Is Cabbage Carbonara suitable for a low-carb diet?
Absolutely! Each serving of Cabbage Carbonara is around 253 calories and contains only about 7g of net carbs, making it an excellent choice for low-carb or keto diets. Just be sure to use ingredients that align with your dietary needs, such as checking the cream and cheese for hidden carbs.

Are there alternatives for bacon in Cabbage Carbonara?
Very much! You can substitute traditional bacon with turkey bacon or pancetta for a lighter option, but regardless of what you choose, the key is to enhance the flavor of the sauce. You could also consider using sautéed mushrooms for a vegetarian take, while still keeping that rich flavor.

Cabbage Carbonara

Cabbage Carbonara: Creamy, Low-Carb Comfort Food Delight

Discover the delightful low-carb comfort of Cabbage Carbonara, a budget-friendly pasta replacement that’s quick and satisfying.
Prep Time 10 minutes
Cook Time 25 minutes
Total Time 35 minutes
Servings: 4 servings
Course: Dinner
Cuisine: Italian
Calories: 253

Ingredients
  

For the Cabbage Base
  • 1 medium head Cabbage Main low-carb substitute
  • 2 tablespoons Olive Oil For roasting
For the Sauce
  • 6 slices Bacon Can substitute with turkey bacon
  • 1 medium Onion Chopped
  • 2 cloves Garlic Minced, fresh is better
  • 1 cup Heavy Cream For a creamy sauce
  • 1 cup Parmesan Cheese Freshly grated
  • 1 teaspoon Black Pepper To taste
  • Salt To taste
Optional Garnish
  • 1/4 cup Extra Parmesan For topping
  • 1/2 teaspoon Cracked Black Pepper For finishing touch

Equipment

  • oven
  • baking sheet
  • large bowl
  • Pan
  • Knife
  • Cutting Board

Method
 

Step-by-Step Instructions for Cabbage Carbonara
  1. Preheat your oven to 400°F (200°C).
  2. Slice a medium head of cabbage into long, thin strips, yielding about 5-6 cups total.
  3. In a large bowl, toss the sliced cabbage with olive oil and a sprinkle of salt.
  4. Spread the cabbage evenly on a baking sheet in a single layer.
  5. Roast the cabbage for 10-15 minutes until tender and lightly browned.
  6. Cook chopped bacon in a pan over medium heat for 2-3 minutes until crispy.
  7. Add chopped onion to the pan and cook until translucent, about 2-3 minutes, then stir in minced garlic for 30 seconds.
  8. In the same pan, add heavy cream, freshly grated Parmesan cheese, and black pepper, simmering for 2-3 minutes.
  9. Toss the roasted cabbage into the creamy sauce, stirring for 1-2 minutes.
  10. Serve hot, garnished with extra Parmesan and cracked black pepper.

Notes

Use fresh ingredients for the best flavor and serve immediately for optimal texture.

Mouthwatering Shrimp Dumplings: Easy Homemade Delight

As I folded each delicate dumpling, the warm aroma of shrimp filled my kitchen, transporting me straight to my favorite dim sum spot. These easy Rice Paper Har Gow are not only a treat for the taste buds but also a delightful way to explore Asian cuisine from the comfort of your home. With a preparation time of just 25 minutes, you can savor these irresistible shrimp dumplings without any time-consuming dough-making. Plus, the customizable filling options mean you can easily cater to everyone’s tastes, whether they prefer shrimp, chicken, or even tofu. Ready to impress your friends and family with these homemade gems? Let’s dive into the magic of dumpling-making together!

Why are homemade shrimp dumplings special?

Simplicity at Its Best: This recipe for shrimp dumplings requires minimal effort and can be prepared in just 25 minutes, perfect for busy weeknights or last-minute gatherings.

Endless Customization: Tailor the fillings to suit your preferences; swap the shrimp for chicken, tofu, or even seasonal veggies for a unique twist.

Authentic Taste: Enjoy the robust flavors of Asian cuisine right in your kitchen, without the fuss of making traditional dumpling dough!

Crowd-Pleasing Appeal: These delightful dumplings are sure to impress guests or your family, providing a fun and interactive dining experience.

Healthy and Wholesome: Made with fresh ingredients, these shrimp dumplings offer a light yet satisfying meal that can easily fit into a nutritious lifestyle.

Ready to master the art of making shrimp dumplings? Grab your rice papers and dive into this fun culinary adventure!

Shrimp Dumplings Ingredients

• Here’s what you’ll need to create those unforgettable shrimp dumplings!

For the Filling

  • Prawns – Fresh and finely chopped shrimp adds a rich, seafood flavor; substitute with cooked chicken or tofu for a non-seafood option.
  • Sesame Oil – Adds richness and a nutty aroma to the filling; you can use neutral oil if sesame isn’t on hand.
  • Spring Onion – Provides freshness and a mild onion flavor; replace with finely chopped scallions or chives if needed.
  • Cornstarch – Acts as a thickener, binding the filling; tapioca starch works as a gluten-free alternative.
  • Salt – Enhances flavor; adjust according to your taste preferences.
  • White Pepper – Adds gentle heat and depth; black pepper is a suitable substitute if you prefer.
  • Carrot – Finely diced for sweetness and color; zucchini makes a great low-calorie alternative.

For the Wrapping

  • Rice Papers – Essential for wrapping the dumplings; look for rice paper made specifically for spring rolls.

For Serving

  • Soy Sauce – For dipping, it adds umami; opt for low-sodium for a healthier option.
  • Rice Vinegar – Provides acidity to balance the flavors; you can replace it with apple cider vinegar if needed.
  • Chili Oil – Optional for a spicy kick; sriracha is an excellent alternative for similar heat.

Now that you have everything ready, you’re just moments away from enjoying these customizable shrimp dumplings!

Step‑by‑Step Instructions for Easy Rice Paper Har Gow

Step 1: Prepare Filling
In a mixing bowl, combine fresh, finely chopped prawns with sesame oil, finely chopped spring onion, cornstarch, salt, white pepper, and diced carrot. Mix thoroughly until all ingredients are well-incorporated, creating a vibrant, flavorful filling. This mixture should be slightly sticky and cohesive, making it easy to fill your dumplings.

Step 2: Prepare Rice Papers
Fill a shallow dish with warm water. Dip each rice paper briefly in the water until it softens—this should take about 5-10 seconds—ensuring they are pliable but not overly soggy. Lay the moistened rice paper flat on a clean surface, ready for assembling your shrimp dumplings.

Step 3: Assemble Dumplings
Place a spoonful of the shrimp filling in the center of each softened rice paper. Fold the bottom of the rice paper over the filling, then fold in the sides and roll upwards to secure the filling inside. Gently press the edges to seal the shrimp dumpling, ensuring no gaps remain that could cause leakage during cooking.

Step 4: Cook Dumplings
Prepare a steamer basket lined with parchment paper or a lightly greased surface, then carefully place the assembled dumplings inside without crowding them. Cover and steam over simmering water for 8-10 minutes, or until the shrimp filling is cooked through and the wrappers turn translucent. The smell of steaming shrimp dumplings is sure to entice you!

Step 5: Serve
Once cooked, carefully remove the dumplings from the steamer and serve them warm on a plate. Pair your easy rice paper har gow with soy sauce, rice vinegar, or a drizzle of chili oil for an extra flavor kick. Enjoy this delightful journey into homemade shrimp dumplings with your loved ones!

Make Ahead Options

These shrimp dumplings are perfect for meal prep enthusiasts! You can prepare and assemble the dumplings up to 24 hours in advance, keeping them covered in the refrigerator. To maintain their quality, ensure that each dumpling is separated by parchment paper to prevent sticking. If you’re looking for longer-term storage, uncooked dumplings can be frozen for up to 1 month; just steam them directly from frozen, adding a couple of extra minutes to the cooking time. When you’re ready to serve, simply steam the dumplings until they’re cooked through—your guests will be delighted to enjoy these fresh and flavorful shrimp dumplings with minimal effort!

What to Serve with Easy Rice Paper Har Gow

Nothing complements these delightful dumplings better than a thoughtfully curated meal that engages all your senses.

  • Crispy Vegetable Spring Rolls: Light and crunchy, these spring rolls offer a delightful contrast to the silky dumplings. It’s a fun addition to a dim sum-inspired feast.
  • Steamed Bok Choy: With its tender greens and subtle crunch, this vegetable adds a nutritious balance to the meal while enhancing the Asian flair.
  • Mango Salad: Sweet and refreshing, a mango salad adds a burst of color and a tropical twist that pairs beautifully with the savory shrimp dumplings.
  • Coconut Rice: Creamy coconut rice serves as a comforting vehicle for absorbing the flavors from your dumplings, making each bite even more luxurious.
  • Jasmine Tea: Fragrant and soothing, jasmine tea cuts through the richness of the dumplings, creating a well-rounded tasting experience.
  • Chili Oil Dipping Sauce: For those who love a kick, serve a side of chili oil for dipping. It enhances the flavor profile, turning these dumplings into a spicy treat!

Each of these pairings not only complements the shrimp dumplings but also elevates your dining experience, inviting you to savor the moment together with your loved ones!

Expert Tips for Shrimp Dumplings

  • Moisture Control: Ensure rice papers are just submerged to avoid tearing. Over-soaking makes them too fragile to work with.

  • Proper Filling: Avoid overfilling your dumplings to prevent breakage. A small spoonful should be enough to secure delicious shrimp flavor without spilling out.

  • Sealing Edges: Press the edges firmly to seal. Any gaps may cause the filling to leak during steaming, ruining your well-crafted shrimp dumplings.

  • Steaming Technique: Line your steamer with parchment paper to prevent sticking. This ensures a smooth release and retains the dumpling shape beautifully.

  • Storage Tips: Use parchment paper between layers when storing uncooked dumplings to prevent them from sticking together. They can be refrigerated for up to 2 days or frozen for a month.

  • Variety is Key: Experiment with different fillings like ground chicken or veggies to keep your dumpling nights fun and exciting with various flavors!

How to Store and Freeze Shrimp Dumplings

  • Fridge: Store uncooked shrimp dumplings in an airtight container for up to 2 days to keep them fresh. Layer parchment paper between them to prevent sticking.
  • Freezer: For longer storage, freeze uncooked dumplings by placing them on a baking sheet until firm, then transfer to a freezer bag. They can stay frozen for up to a month.
  • Reheating: Cooked shrimp dumplings should be consumed within 3 days. Reheat gently by steaming for a few minutes, allowing them to warm through without losing texture.
  • Cooking from Frozen: To cook frozen shrimp dumplings, steam directly from the freezer, adding 2-3 extra minutes to the cooking time for perfectly tender dumplings.

Shrimp Dumplings Variations & Substitutions

Feel free to explore beyond the basic recipe and personalize your shrimp dumplings in a way that delights your taste buds!

  • Chicken Option: Swap shrimp for ground chicken for a hearty alternative. It’s a delicious twist that even non-seafood lovers will enjoy!

  • Tofu Twist: Use firm tofu instead of shrimp for a vegetarian take, perfect for satisfying meatless cravings while remaining scrumptiously flavorful.

  • Veggie-Packed: Add finely diced bell peppers or mushrooms to your filling for an extra crunch and vibrant color, making each bite even more delightful.

  • Herb Infusion: Incorporate fresh herbs like cilantro or basil into your filling for a burst of refreshing flavor. These herbs can completely transform the taste experience!

  • Spicy Kick: Enhance the heat level by adding finely chopped jalapeños or a sprinkle of red pepper flakes into the filling. You’ll enjoy a delightful zing with every bite!

  • Zesty Citrus: Mix in a splash of lime or lemon juice to the filling for a refreshing zest that lightens the richness of the dumplings beautifully.

  • Gluten-Free Option: Use tamari instead of soy sauce for a gluten-free dipping sauce that maintains the umami flavor without sacrificing taste.

  • Dipping Delights: Pair your dumplings with different dipping sauces such as sweet chili sauce or homemade peanut sauce for exciting new flavor profiles.

These variations not only cater to different dietary needs but also encourage your creativity in the kitchen. Don’t hesitate to explore different ingredients and make this dumpling experience yours!

Shrimp Dumplings Recipe FAQs

What type of prawns should I use for the dumplings?
Absolutely! For the best flavor, I recommend using fresh, deveined shrimp. Look for shrimp that are firm with a slight sheen and no dark spots. If you can’t find fresh, frozen shrimp works too—just make sure to thaw them completely before mixing into the filling.

How should I store the uncooked dumplings?
For optimal freshness, store uncooked shrimp dumplings in an airtight container in the fridge for up to 2 days. To prevent sticking, it’s a great idea to layer parchment paper between each dumpling or use a silicone mat to keep them separated.

Can I freeze shrimp dumplings? If so, how?
Certainly! To freeze uncooked dumplings, first, lay them on a baking sheet lined with parchment paper, ensuring they aren’t touching each other. Freeze them until solid, about 1-2 hours, then transfer the frozen dumplings to a freezer bag. They can be stored like this for up to 1 month. When you’re ready to cook, steam them directly from the freezer, adding an extra 2-3 minutes to the cooking time.

What if my rice papers are tearing when I wrap the dumplings?
Very! If you’re encountering issues with tearing, try lowering the soaking time in warm water. You want the rice papers to be pliable yet not overly soggy—soaking them for just 5-10 seconds usually does the trick. If they still tear, ensure that you’re not overfilling the dumplings, as excessive filling can put stress on the wrapper.

Are there any dietary concerns I should consider?
Definitely! These shrimp dumplings can be made to fit various dietary preferences. If someone is gluten-sensitive, simply substitute cornstarch with tapioca starch, and ensure your soy sauce is gluten-free. For vegetarians, swapping shrimp for cooked, finely chopped tofu or a medley of vegetables works fantastic! Always check for allergies with your fillings and dipping sauces, especially if serving to guests.

How long do cooked shrimp dumplings last?
Cooked shrimp dumplings should be consumed within 3 days for the best taste and freshness. Store them in an airtight container in the refrigerator. When ready to enjoy, gently reheat them by steaming to maintain their delicate texture. If they feel dry, a light spray of water while reheating can help revive their moisture!

Shrimp Dumplings

Mouthwatering Shrimp Dumplings: Easy Homemade Delight

Delicious shrimp dumplings made easy with rice paper, perfect for a light lunch or a crowd-pleasing dish at gatherings.
Prep Time 25 minutes
Cook Time 10 minutes
Total Time 35 minutes
Servings: 4 dumplings
Course: Lunch
Cuisine: Asian
Calories: 100

Ingredients
  

Filling
  • 200 grams Prawns Fresh and finely chopped
  • 1 tablespoon Sesame Oil Can substitute with neutral oil
  • 1 piece Spring Onion Finely chopped
  • 2 tablespoons Cornstarch Can substitute with tapioca starch
  • 1 teaspoon Salt Adjust according to taste
  • 1 teaspoon White Pepper Can substitute with black pepper
  • 1 piece Carrot Finely diced
Wrapping
  • 10 pieces Rice Papers Made specifically for spring rolls
Serving
  • 3 tablespoons Soy Sauce Low-sodium preferred for health
  • 2 tablespoons Rice Vinegar Can replace with apple cider vinegar
  • 1 tablespoon Chili Oil Optional for spice

Equipment

  • steamer basket
  • mixing bowl
  • Shallow dish

Method
 

Prep and Cook
  1. Prepare Filling: In a mixing bowl, combine fresh, finely chopped prawns with sesame oil, finely chopped spring onion, cornstarch, salt, white pepper, and diced carrot. Mix thoroughly until all ingredients are well-incorporated.
  2. Prepare Rice Papers: Fill a shallow dish with warm water. Dip each rice paper briefly in the water until it softens, about 5-10 seconds.
  3. Assemble Dumplings: Place a spoonful of the shrimp filling in the center of each softened rice paper. Fold and seal the dumpling edges.
  4. Cook Dumplings: Prepare a steamer basket lined with parchment paper. Steam the dumplings for 8-10 minutes until cooked through.
  5. Serve: Remove dumplings from the steamer and serve warm with soy sauce, rice vinegar, or chili oil.

Notes

Store uncooked shrimp dumplings in an airtight container in the fridge for up to 2 days or freeze for up to a month.

Deliciously Healthy Chocolate Brownie Date Balls to Savor

As I was rummaging through my pantry, a delightful surprise caught my eye—my stash of Medjool dates. Instantly, I was inspired to whip up some No-Bake Chocolate Brownie Date Balls. These vegan delights offer an exciting way to satisfy your chocolate cravings while remaining healthy and guilt-free. Packed with wholesome ingredients like walnuts and pumpkin puree, they provide a satisfying energy boost for any time you need a little pick-me-up. Best of all, their quick prep means you can enjoy this scrumptious snack without any fuss. Whether you’re treating yourself post-workout or need a sweet nibble with your afternoon tea, these treats deliver both flavor and nutrition. Ready to dive into this delightful recipe? Let’s get rolling!

Why are Chocolate Brownie Date Balls Delightful?

Easy to Prepare: These Chocolate Brownie Date Balls require no baking and only a few minutes of your time, making them a go-to snack for busy days.

Nutritious Ingredients: Packed with Medjool dates and walnuts, they deliver a wealth of healthy nutrients without sacrificing flavor.

Guilt-Free Indulgence: Enjoy the rich chocolate taste without the guilt—perfect for anyone looking to reduce refined sugars.

Versatile Snacks: Whether you have them as a post-workout treat or a midday pick-me-up, these balls fit any moment beautifully. You may also want to explore my Banana Bread Brownies for another delightful, healthy option!

Family Favorite: These snack balls are a hit with both kids and adults, ensuring that everyone gets their chocolate fix in a wholesome way.

Chocolate Brownie Date Balls Ingredients

For the Base

  • Walnuts – Provides healthy fats and a crunchy texture; substitute with pecans or almonds for variety.
  • Medjool Dates – The main source of sweetness and moisture, giving a rich flavor; Deglet Noor dates can be used for a firmer texture, but adjust the quantity.
  • Pumpkin Purée – Adds moisture, flavor, and nutrition; can be swapped with mashed bananas or other fruit purées for a different taste.
  • Cocoa Powder – Gives chocolate flavor; using Dutch process enhances richness; consider substituting with protein powder for a protein boost.
  • Vanilla Extract – Adds depth of flavor; no substitutes needed.

For Rolling

  • Ground Walnuts – Use to roll the balls for extra crunch; you can add unsweetened cocoa powder for a richer chocolate experience as well.

These Chocolate Brownie Date Balls are not only easy to whip up but filled with wholesome, nutritious ingredients that ensure you can savor every bite without any guilt!

Step‑by‑Step Instructions for Chocolate Brownie Date Balls

Step 1: Ground the Walnuts
Begin by placing 1/3 cup of walnuts in a food processor. Pulse them until they are finely ground, resembling coarse sand, in about 30 seconds. This step helps create a wonderful texture for your Chocolate Brownie Date Balls. Once achieved, set the ground walnuts aside and keep the food processor handy for the next step.

Step 2: Blend the Mixture
In the same food processor, combine the remaining walnuts, pitted Medjool dates, pumpkin purée, cocoa powder, sea salt, and vanilla extract. Blend the mixture for 1-2 minutes or until it becomes smooth and well combined. The consistency should be thick and sticky, resembling a dense brownie batter, ensuring ample flavor in your Chocolate Brownie Date Balls.

Step 3: Form the Balls
Using a spoon or your hands, scoop the blended mixture and roll it into 8 golf ball-sized portions. Make sure to compact each ball firmly so they hold their shape. This shaping process should take about 5 minutes. The rich brown color of the mixture will evoke the taste of your delicious Chocolate Brownie Date Balls.

Step 4: Roll in Ground Walnuts
Once you have formed the balls, take the reserved ground walnuts and spread them out on a plate. Roll each chocolate ball in the ground walnuts until fully coated for an extra crunch. This step adds both texture and flavor to your Chocolate Brownie Date Balls, elevating your healthy snack.

Step 5: Serve or Store
These delectable Chocolate Brownie Date Balls can be enjoyed immediately or stored for later. If serving right away, present them on a platter. For storage, place the balls in a sealed container in the refrigerator for up to a week or freeze them for longer enjoyment. The choice is yours, but either way, you’re in for a treat!

Expert Tips for No-Bake Chocolate Brownie Date Balls

  • Pitting Dates: Always ensure your Medjool dates are pitted before blending to avoid unexpected hard bits in your Chocolate Brownie Date Balls.

  • Texture Control: If the mixture seems too sticky after blending, chill it in the refrigerator for 10-15 minutes before forming the balls. This will make rolling easier.

  • Ingredient Quality: Use fresh Medjool dates for the best sweetness and flavor. Stale dates can affect the taste and texture of your treats.

  • Customizable Coating: Instead of ground walnuts, experiment with options like unsweetened cocoa powder or shredded coconut to roll your balls in adding extra flavor and texture.

  • Nut Alternatives: If you have nut allergies, consider using seeds such as sunflower or pumpkin seeds to maintain the nutritious profile of your Chocolate Brownie Date Balls without sacrificing taste.

Make Ahead Options

These Chocolate Brownie Date Balls are perfect for busy home cooks looking to save time during their week! You can easily prepare the mixture up to 24 hours in advance by following the blending instructions and then storing it in the refrigerator. Just be sure to keep it in an airtight container to maintain moisture. When you’re ready to enjoy them, simply scoop and roll the mixture into balls, then coat them with ground walnuts for that delightful crunch. If you prefer, you can also roll the balls ahead of time and store them in the fridge for up to 3 days. With these prep tips, you’ll have healthy snacks ready to go whenever those chocolate cravings hit!

How to Store and Freeze Chocolate Brownie Date Balls

Fridge: Keep your Chocolate Brownie Date Balls in a sealed container in the refrigerator for up to 1 week. This maintains their chewy texture while keeping them fresh.

Freezer: For longer storage, freeze the balls in an airtight container for up to 3 months. Just make sure to separate layers with parchment paper to prevent sticking.

Thawing: To enjoy them from the freezer, simply transfer the desired number to the fridge overnight to thaw, or let them sit at room temperature for about 30 minutes.

No Baking Required: Remember, these treats are no-bake, making them an effortless and delicious snack that’s easy to prepare and store!

Chocolate Brownie Date Balls Variations

Feel free to get creative with these Chocolate Brownie Date Balls – the possibilities are endless!

  • Nut-Free: Swap walnuts for pumpkin or sunflower seeds to make them nut-free while maintaining a delicious crunch. These seeds not only add texture but also pack a nutritional punch!

  • Coconut Bliss: Mix in shredded coconut throughout the mixture and roll the balls in coconut for a tropical flair. The sweet, chewy coconut balances beautifully with the rich chocolate.

  • Banana Swap: Use mashed bananas instead of pumpkin purée for a sweeter twist. This creates a lovely banana-chocolate flavor combination, perfect for those who crave something fruity.

  • Protein Boost: Replace cocoa powder with your favorite protein powder to give these treats an extra nutritional boost. Enjoy a chocolatey delight that powers you through the day!

  • Spiced Up: Mix in a dash of cinnamon or nutmeg for a warm, comforting flavor. These spices enhance the chocolate taste and add a delightful aromatic touch to your snack.

  • Add Some Heat: Include a pinch of cayenne pepper or chili powder for a subtle kick. The heat contrasts wonderful with the sweetness, creating a unique chocolate experience that lingers on the palate.

  • Decadent Drizzle: Melt some dark chocolate and drizzle it over the finished balls for an indulgent touch. This adds both aesthetic appeal and extra chocolate goodness to your bites.

For another scrumptious treat, consider trying out my delightful Nutty Chocolate Date or go for creamy options like Coconut Chocolate Rolls. Whatever variant you choose, these Chocolate Brownie Date Balls will always be a wholesome and delicious indulgence!

What to Serve with No-Bake Chocolate Brownie Date Balls?

Elevate your snacking experience by exploring these delightful pairings that complement your sweet treats perfectly.

  • Fresh Berries: The tartness of berries balances the sweetness, adding a fresh pop of flavor.

  • Coconut Yogurt: This creamy alternative offers a cool, luxurious texture that meshes beautifully with the chewy date balls.

  • Nut Butter Dip: Rich almond or peanut butter creates a satisfying, nutty contrast that enhances each bite.

  • Herbal Iced Tea: A refreshing drink that offers light herbal notes, cooling you down while enjoying your chocolate indulgence.

  • Honey Drizzle: A touch of honey on top adds an extra layer of sweetness, resonating with the natural flavors of the dates.

  • Cheese Platter: Pairing with a mild cheese offers a savory counterbalance, perfect for a more substantial snack experience.

Explore these options to complement your Chocolate Brownie Date Balls and indulge all your senses!

Chocolate Brownie Date Balls Recipe FAQs

What type of dates should I use for the best flavor?
Absolutely! Medjool dates are the star here, providing natural sweetness and a chewy texture. If you prefer a firmer texture, you can swap them with Deglet Noor dates; however, you might need to use a few more to match the sweetness.

How should I store my Chocolate Brownie Date Balls?
To keep your delicious Chocolate Brownie Date Balls fresh, store them in a sealed container in the refrigerator for up to 1 week. If you’d like to enjoy them for a longer period, freeze them in an airtight container for up to 3 months.

Can I freeze Chocolate Brownie Date Balls? How?
Absolutely! To freeze your Chocolate Brownie Date Balls, place them in an airtight container, ensuring to separate layers with parchment paper to prevent any sticking. They can stay delightful in the freezer for up to 3 months! To thaw, just let them sit at room temperature for about 30 minutes or transfer them to the fridge the night before.

What if the mixture is too sticky to roll into balls?
Very! If your mixture feels too sticky, simply refrigerate it for 10-15 minutes. This chilling period allows it to firm up, making it much easier to roll into those perfect golf-ball-sized treats.

Can I make substitutions if I have dietary restrictions or allergies?
Definitely! If you’re dealing with nut allergies, feel free to use seeds such as sunflower or pumpkin seeds instead of walnuts. You can also add delightful textures with options like shredded coconut or swap pumpkin puree for mashed bananas for a different twist.

What is the best way to serve Chocolate Brownie Date Balls?
These tasty treats are versatile! They shine as a post-workout snack, a midday energy boost, or even as a sweet addition to an afternoon tea spread. Pair them with your favorite beverage for an extra touch of indulgence.

Chocolate Brownie Date Balls

Deliciously Healthy Chocolate Brownie Date Balls to Savor

Enjoy guilt-free Chocolate Brownie Date Balls made from wholesome ingredients for a delicious treat.
Prep Time 10 minutes
Chilling Time 15 minutes
Total Time 25 minutes
Servings: 8 balls
Course: Dessert
Cuisine: Vegan
Calories: 120

Ingredients
  

For the Base
  • 1 cup Walnuts Provides healthy fats and a crunchy texture; substitute with pecans or almonds for variety.
  • 1 cup Medjool Dates The main source of sweetness and moisture, giving a rich flavor; Deglet Noor dates can be used for a firmer texture.
  • 1/2 cup Pumpkin Purée Adds moisture, flavor, and nutrition; can be swapped with mashed bananas or other fruit purées.
  • 1/4 cup Cocoa Powder Gives chocolate flavor; using Dutch process enhances richness.
  • 1 teaspoon Vanilla Extract Adds depth of flavor; no substitutes needed.
For Rolling
  • 1/4 cup Ground Walnuts Use to roll the balls for extra crunch; you can add unsweetened cocoa powder.

Equipment

  • Food Processor

Method
 

Step-by-Step Instructions for Chocolate Brownie Date Balls
  1. Ground the Walnuts: Place 1/3 cup of walnuts in a food processor and pulse until finely ground, resembling coarse sand, about 30 seconds.
  2. Blend the Mixture: Combine remaining walnuts, pitted Medjool dates, pumpkin purée, cocoa powder, sea salt, and vanilla extract in the food processor. Blend for 1-2 minutes until smooth and thick.
  3. Form the Balls: Scoop the blended mixture and roll into 8 golf ball-sized portions, compacting each ball firmly.
  4. Roll in Ground Walnuts: Roll each ball in the reserved ground walnuts until fully coated.
  5. Serve or Store: Enjoy immediately or store in a sealed container in the refrigerator for up to a week.

Notes

Ensure dates are pitted before blending. Chill mixture if too sticky after blending.

Lemon-Dijon Asparagus and Pea Macaroni Salad for Spring Vibes

As the gentle spring sunlight streams through my kitchen window, the vibrant colors of fresh produce invite me to whip up a delightful dish. Today, I’m excited to share my Creamy Lemon-Dijon Asparagus and Pea Macaroni Salad—an easy recipe packed with the crispy goodness of vegetables and a zesty dressing that makes it a crowd-pleaser at any gathering. This salad is completely plant-based and takes just 30 minutes to prepare, making it perfect for those busy days when you crave something light yet satisfying. Whether you’re looking for a quick lunch option or a make-ahead dish to serve at your next picnic, this macaroni salad fits the bill oh-so-well. Are you ready to bring some fresh flavors to your table?

Why is this salad a must-try?

Fresh and Flavorful: This Creamy Lemon-Dijon Asparagus and Pea Macaroni Salad bursts with fresh spring colors and tastes, making it visually appealing and wonderfully delicious.

Quick to Make: With just 30 minutes of prep time, this dish is perfect for those last-minute meal plans or unexpected guests.

Versatile Ingredients: Feel free to customize it with gluten-free pasta or add proteins like chickpeas for a heartier meal, ensuring everyone can enjoy it.

Crowd-Pleasing Appeal: Perfect for potlucks or picnics, it’s a vegan delight that will impress friends and family alike, standing out alongside other tasty options like Cucumber Carrot Salad or Avocado Tomato Salad.

Balanced Nutrition: Low in calories yet high in flavor, this salad makes for a delightful side dish or light main course that won’t weigh you down!

Lemon-Dijon Asparagus and Pea Macaroni Salad Ingredients

For the Salad Base

  • Elbow Macaroni Pasta – This provides the comforting structure of the salad; opt for gluten-free varieties for dietary needs.
  • Fresh Asparagus – Adds a crunchy texture and earthy notes; make sure to remove the tough ends and slice into bite-sized pieces.
  • Frozen Peas – These sweet gems offer vibrant color and flavor; there’s no need to thaw them before adding.
  • Sun-Dried Tomatoes – Provides a tangy punch; ensure they are marinated, drained, and roughly chopped for optimal taste.

For the Dressing

  • Mayonnaise – The creamy base of the dressing; Vegenaise is a great vegan substitute.
  • Lemons – Essential for that bright, zesty flavor; use both juice and zest for maximum brightness.
  • Dijon Mustard – Adds depth and tang to the dressing; a little goes a long way.
  • Garlic – Infuses the dish with aromatic richness; you can use minced or grated for ease.
  • Fine Sea Salt – Enhances the flavors throughout the salad; adjust to your taste.
  • Fresh Ground Pepper – Adds a touch of heat; sprinkle in to meet your spice preference.

For the Finishing Touches

  • Curly Parsley – A pop of color and freshness; finely chop before tossing in.
  • Chives – Offers a mild onion flavor; chive flowers are lovely for garnish and add beauty to the presentation.

Each ingredient in this Lemon-Dijon Asparagus and Pea Macaroni Salad contributes to a symphony of flavors and textures that will elevate your dining experience!

Step‑by‑Step Instructions for Lemon-Dijon Asparagus and Pea Macaroni Salad

Step 1: Cook Pasta
Begin by bringing a large pot of salted water to a boil over high heat. Add the elbow macaroni, stirring occasionally, and cook according to the package directions until al dente, usually about 8-10 minutes. It’s essential to not overcook the pasta, as it should have a slight firmness that will complement the creamy dressing in the Lemon-Dijon Asparagus and Pea Macaroni Salad.

Step 2: Add Veggies
During the last 4 minutes of cooking the macaroni, add the sliced asparagus to the pot. Allow the asparagus to cook with the pasta until it turns bright green and tender-crisp. Then, in the final minute, toss in the frozen peas, ensuring they heat through without losing their vibrant color. This step adds freshness and a delightful crunch to your salad.

Step 3: Drain and Cool
Carefully drain the pasta, asparagus, and peas in a colander, and then rinse them under cool running water to stop the cooking process. This helps maintain their texture and color. Once well-drained, transfer the mixture to a large bowl, allowing it to cool completely while you prepare the dressing for your Lemon-Dijon Asparagus and Pea Macaroni Salad.

Step 4: Combine
In the now-cooled bowl, gently stir in the chopped sun-dried tomatoes. This ingredient brings a tangy flavor and adds another layer of texture. Cover the bowl with plastic wrap and chill it in the refrigerator for about 15-20 minutes, allowing the flavors to meld together before adding the dressing.

Step 5: Make Dressing
In a separate mixing bowl, whisk together the mayonnaise, lemon juice, lemon zest, Dijon mustard, minced garlic, fine sea salt, and fresh ground pepper. Aim for a smooth and creamy consistency. This zesty dressing serves as the delightful base of the Lemon-Dijon Asparagus and Pea Macaroni Salad, infusing each bite with mouthwatering flavor.

Step 6: Mix Salad
Once the pasta and vegetables are chilled and ready, pour the dressing over the mixture in the large bowl. Add the finely chopped curly parsley and chives to brighten the dish further. Gently toss all the ingredients together until well coated, ensuring every piece is enveloped in that creamy dressing.

Step 7: Serve or Store
You can serve the Lemon-Dijon Asparagus and Pea Macaroni Salad immediately for a fresh and vibrant dish, or cover it with a lid or plastic wrap and store it in the refrigerator for up to four days. This makes it a perfect make-ahead dish, ideal for picnics or potlucks, with the flavors developing beautifully over time.

Lemon-Dijon Asparagus and Pea Macaroni Salad Variations

Feel free to adapt this delightful salad to suit your taste buds or any dietary needs!

  • Gluten-Free: Substitute elbow macaroni with gluten-free options like brown rice pasta or quinoa pasta for a perfect texture.

  • Fresh Tomato Twist: Replace sun-dried tomatoes with fresh cherry tomatoes for a juicier, lighter flavor, keeping it bright and vibrant.

  • Protein Boost: Add chickpeas or white beans to amp up the protein content while enhancing the overall heartiness of the dish. These legumes not only add nutrition but also a pleasant creaminess that complements the dressing beautifully.

  • Herb Swaps: For a different herbal twist, use chopped dill or tarragon instead of parsley and chives, adding a unique flavor profile that elevates the dish.

  • Creamy Avocado: Incorporate diced avocado for a rich, buttery texture that pairs wonderfully with the zesty dressing, making every bite a creamy delight.

  • Spicy Kick: Add a pinch of red pepper flakes or a diced jalapeño for a touch of heat, making this refreshing salad unexpectedly exciting.

  • Nutty Crunch: Toss in toasted pine nuts or slivered almonds for a delightful crunch that contrasts with the creamy dressing, enhancing both flavor and texture.

Consider pairing this versatile dish with a refreshing Cucumber Carrot Salad or a colorful Cabbage Cucumber Salad for a full spread that’s sure to impress!

What to Serve with Lemon-Dijon Asparagus and Pea Macaroni Salad

Elevate your dining experience by complementing this delightful salad with a variety of delectable sides and pairings.

  • Grilled Lemon Tofu Skewers: These add a smoky, tangy flavor that perfectly balances the creamy goodness of the salad.

  • Garlic Herb Bread: A warm, crusty loaf served with a garlicky spread brings a comforting touch to the table, inviting everyone to dip and savor.

  • Chilled Cucumber Soup: Light and refreshing, this soup enhances the vibrant flavors of the salad while providing a cool contrast that’s simply ideal for spring.

  • Roasted Vegetable Medley: A colorful array of seasonal vegetables roasted to caramelized perfection offers both texture and an umami flavor that beautifully complements the macaroni salad.

  • Zesty Quinoa Salad: Packed with protein and herbs, this dish adds a grainy contrast that’s both nutritious and satisfying, making it a wholesome addition to your meal spread.

  • Lemon Basil Iced Tea: This refreshing drink harmonizes the zesty notes of the macaroni salad, making it a delightful beverage choice for a sunny gathering.

  • Berry Crisp with Oat Topping: Finish off your feast with a sweet homemade dessert, where the burst of berries and crunchy topping will leave your guests feeling pleasantly satisfied and content.

Expert Tips for Lemon-Dijon Asparagus and Pea Macaroni Salad

  • Perfect Pasta: Cook the macaroni al dente to avoid mushiness. Follow package directions closely but start checking a minute early.
  • Freshness Matters: Try to prepare the salad the same day for brighter colors and flavors—vegetables can lose vibrancy if left too long.
  • Adjust Acidity: Be cautious with the amount of lemon juice in the dressing; if you’re sensitive to acidity, start with less and taste as you go.
  • Veggie Variations: You can substitute elbow macaroni with gluten-free pasta; there are plenty of options available that work great in this Lemon-Dijon Asparagus and Pea Macaroni Salad.
  • Add Protein: For a heartier meal, toss in some chickpeas or white beans, adding nutrition and making it more filling.
  • Seasoning Balance: Taste and adjust salt and pepper before serving to ensure every bite is deliciously seasoned—don’t be shy about seasoning!

How to Store and Freeze Lemon-Dijon Asparagus and Pea Macaroni Salad

Fridge: Keep the macaroni salad in an airtight container for up to 4 days. Make sure it’s chilled before storing to maintain the best texture and flavor.

Freezer: For longer storage, you can freeze the salad without the dressing for up to 2 months. Once ready to serve, thaw and mix with fresh dressing.

Reheating: While it’s best enjoyed chilled, if you prefer it warm, gently reheat the salad in a skillet over low heat, stirring carefully to avoid mushiness.

Serving Freshness: For optimal taste and color, enjoy your Lemon-Dijon Asparagus and Pea Macaroni Salad fresh, as the vibrant vegetables can lose their appeal over time.

Make Ahead Options

This Creamy Lemon-Dijon Asparagus and Pea Macaroni Salad is an excellent choice for meal prep, allowing you to save time on busy days. You can cook the macaroni and vegetables up to 24 hours in advance, then store them separately in the refrigerator to maintain their vibrant textures. Meanwhile, prepare the dressing up to 3 days ahead and keep it in an airtight container. When you’re ready to serve, simply combine the chilled pasta and vegetables with the dressing and toss in the freshly chopped herbs. This way, you’ll enjoy the same delicious flavors while enjoying the convenience of a quick, prepped meal!

Lemon-Dijon Asparagus and Pea Macaroni Salad Recipe FAQs

How do I select fresh asparagus?
Absolutely! Look for firm stalks with bright green color and closed tips. Avoid any that appear limp or have dark spots. The fresher the asparagus, the better your Lemon-Dijon Asparagus and Pea Macaroni Salad will taste!

What’s the best way to store leftover macaroni salad?
Keep your salad in an airtight container in the refrigerator for up to 4 days. It’s essential to make sure it’s chilled before storage to maintain its texture and flavor.

Can I freeze Lemon-Dijon Asparagus and Pea Macaroni Salad?
Yes, you can! However, I recommend freezing the salad without the dressing. Place it in a freezer-safe container for up to 2 months. When you’re ready to serve, just thaw in the refrigerator overnight, then mix with fresh dressing before enjoying.

What if my pasta turns mushy?
Not to worry! If you happen to overcook your pasta, a common mistake, you can try brief cooling with ice water right after draining it. This can help stop the cooking process. For a crispier texture next time, ensure you cook it al dente, checking it a minute earlier than the package suggests.

Is this salad suitable for a gluten-free diet?
Very much so! Just swap the elbow macaroni for a gluten-free variety, and you’re good to go! There are many delicious options available that work perfectly in this Lemon-Dijon Asparagus and Pea Macaroni Salad.

Can I make this salad ahead of time?
Definitely! This salad is a fantastic make-ahead option. Prepare it up to a day in advance and store it in the refrigerator. Just remember, for the best flavor and color, it’s preferable to enjoy it within the first couple of days.

Lemon-Dijon Asparagus and Pea Macaroni Salad

Lemon-Dijon Asparagus and Pea Macaroni Salad for Spring Vibes

Enjoy this vibrant and easy Lemon-Dijon Asparagus and Pea Macaroni Salad, perfect for spring gatherings.
Prep Time 30 minutes
Cook Time 10 minutes
Chilling Time 20 minutes
Total Time 1 hour
Servings: 4 servings
Course: Lunch
Cuisine: Vegan, Vegetarian
Calories: 350

Ingredients
  

Salad Base
  • 8 oz Elbow Macaroni Pasta Gluten-free varieties for dietary needs.
  • 1 cup Fresh Asparagus Remove tough ends and slice into bite-sized pieces.
  • 1 cup Frozen Peas No need to thaw before adding.
  • 1/2 cup Sun-Dried Tomatoes Marinated, drained, and roughly chopped.
Dressing
  • 1/2 cup Mayonnaise Vegenaise is a great vegan substitute.
  • 2 Lemons Juice and zest for maximum brightness.
  • 1 tbsp Dijon Mustard A little goes a long way.
  • 1 clove Garlic Minced or grated.
  • 1 tsp Fine Sea Salt Adjust to taste.
  • 1/4 tsp Fresh Ground Pepper Sprinkle in to meet your spice preference.
Finishing Touches
  • 1/4 cup Curly Parsley Finely chopped.
  • 2 tbsp Chives Chive flowers can be used for garnish.

Equipment

  • pot
  • Colander
  • mixing bowl
  • whisk

Method
 

Cooking Instructions
  1. Begin by bringing a large pot of salted water to a boil over high heat. Add the elbow macaroni, stirring occasionally, and cook according to the package directions until al dente, about 8-10 minutes.
  2. During the last 4 minutes of cooking the macaroni, add the sliced asparagus to the pot. In the final minute, toss in the frozen peas to heat through.
  3. Carefully drain the pasta, asparagus, and peas in a colander, rinse under cool running water and transfer to a large bowl.
  4. In the now-cooled bowl, gently stir in the chopped sun-dried tomatoes. Cover with plastic wrap and chill in the refrigerator for about 15-20 minutes.
  5. In a separate mixing bowl, whisk together the mayonnaise, lemon juice, lemon zest, Dijon mustard, minced garlic, fine sea salt, and fresh ground pepper until smooth.
  6. Once chilled, pour the dressing over the pasta and vegetable mixture. Add the finely chopped curly parsley and chives, and gently toss everything until well-coated.
  7. Serve immediately or cover and store in the refrigerator for up to four days.

Notes

Perfect for potlucks or picnics. This salad tastes best fresh, but can be made ahead.

Zesty Cava Greek Vinaigrette for Fresh Flavorful Dishes

As I whisked together the vibrant ingredients for my homemade CAVA Greek Vinaigrette, a wave of Mediterranean sunshine flooded the kitchen. This delightful dressing strikes the perfect balance between tangy and rich, making it an essential addition to salads, roasted veggies, or even as a marinade for meats. What I love most about this recipe is how quick and easy it is to prepare—anyone can elevate their meals in mere minutes! Plus, with fresh garlic, zesty lemon, and aromatic oregano, it’s not just a dressing; it’s a flavor explosion that’s as healthy as it is delicious. Ready to transform your dishes and impress your family? Let’s dive into the recipe that will turn ordinary meals into extraordinary experiences!

Why is this dressing a must-try?

Quick and Easy: Whip up this vibrant vinaigrette in just minutes, perfect for anyone from busy parents to weekend chefs.

Rich, Tangy Flavor: The combination of fresh garlic and zesty lemon creates a taste that’s both bright and savory, elevating any dish.

Versatile Use: Whether drizzled over greens or marinated for meats, this dressing adapts to your culinary creations.

Health-Boosting Ingredients: Made with wholesome components, it’s a low-calorie option packed with healthy fats from olive oil, making it a nutritious choice for all.

Meal Prep Friendly: Store it in the fridge for up to two weeks; it only gets better as the flavors meld! Start with my other recipes for more delicious dressing ideas.

CAVA Greek Vinaigrette Ingredients

For the Dressing
Garlic Cloves – Fresh garlic adds sharpness and enhances the overall flavor.
Lemon Juice – Fresh-squeezed lemon juice provides acidity and brightness for a zesty kick.
Red Wine Vinegar – This ingredient contributes tang and depth; feel free to substitute it with white wine vinegar for a milder flavor.
Dijon Mustard – It adds a smooth texture and tangy kick to the dressing; for a milder option, you can use yellow mustard instead.
Oregano – Fresh or dried oregano brings those vibrant Mediterranean herbal notes, with fresh offering the best flavor.
Black Pepper – A bit of black pepper provides mild heat and enhances all the flavors.
Salt – Important for balancing the flavors; adjust according to your taste.
Olive Oil – Extra virgin olive oil adds richness and creaminess to the vinaigrette, truly elevating the taste of this CAVA Greek Vinaigrette.

Step‑by‑Step Instructions for CAVA Greek Vinaigrette

Step 1: Combine Ingredients
In a blender, start by adding 2 minced garlic cloves, a teaspoon of dried oregano, a pinch of black pepper, and half a teaspoon of salt. Pour in the freshly squeezed juice of one lemon and 2 tablespoons of red wine vinegar. Blend on high for about 30 seconds, or until the mixture is thoroughly combined and smooth.

Step 2: Add Oil
With the blender running on high speed, slowly drizzle in ½ cup of extra virgin olive oil. This should take about 30 seconds as you pour the oil gradually. Continue blending until the vinaigrette takes on a thick, creamy consistency and appears glossy, about an additional 20 seconds.

Step 3: Store
Carefully transfer the vibrant CAVA Greek Vinaigrette into a clean mason jar or airtight container. Seal it tightly and store in the refrigerator. This dressing is best enjoyed after chilling for at least an hour, allowing the flavors to meld beautifully, but you can use it immediately if desired.

Step 4: Shake Before Serving
Before serving your delicious CAVA Greek Vinaigrette, give the jar a good shake to remix any ingredients that may have settled. This quick step ensures you enjoy the vinaigrette at its best. Drizzle it over fresh salads, roasted veggies, or use it as a marinade for a delightful flavor boost!

Expert Tips for CAVA Greek Vinaigrette

  • Fresh Ingredients Matter: Always use fresh garlic and lemon juice for brighter flavors; stale or bottled versions can dull your vinaigrette.

  • Blend Slowly: When adding olive oil, do so gradually while blending on high to achieve the creamy consistency perfect for CAVA Greek Vinaigrette.

  • Taste and Adjust: After blending, taste the vinaigrette and adjust salt or pepper to your preference; this step ensures it complements your dishes perfectly.

  • Experiment with Variations: Don’t hesitate to try different herbs or citrus; substituting lime juice or balsamic vinegar can create unique flavor profiles.

  • Shake Before Use: If the dressing has been stored, always shake it before serving to recombine any settled ingredients for the best taste.

  • Store Properly: Keep the vinaigrette in a tightly sealed container in the fridge for optimal freshness, and enjoy within two weeks!

How to Store and Freeze CAVA Greek Vinaigrette

  • Fridge: Store your CAVA Greek Vinaigrette in an airtight container in the refrigerator for up to 2 weeks. Always shake well before each use to remix the ingredients.

  • Freezer: For longer storage, pour the vinaigrette into ice cube trays. Once frozen, transfer the cubes to a freezer bag and store for up to 3 months. Thaw by placing them in the fridge overnight.

  • Room Temperature: Avoid leaving the vinaigrette out at room temperature as the olive oil may spoil. Ensure it remains refrigerated for best taste and quality.

  • Reheating: This vinaigrette is best served cold or at room temperature, so there’s no need to heat it. Simply shake or stir before using to ensure even distribution.

What to Serve with Authentic CAVA Greek Vinaigrette Dressing

Prepare to elevate your meals with delightful pairings that enhance the vibrant essence of this homemade dressing!

  • Mixed Greens Salad: Fresh greens tossed in this tangy vinaigrette provide a delightful contrast to rich flavors, making every bite a refreshing experience.

  • Grilled Chicken: Drizzling this vinaigrette over grilled chicken adds a burst of Mediterranean flavor, transforming a simple dish into something extraordinary.

  • Roasted Vegetables: The richness of roasted carrots and bell peppers shines with a splash of CAVA Greek Vinaigrette, complementing their natural sweetness.

  • Quinoa Bowl: A hearty quinoa bowl benefits from this zesty dressing, marrying the wholesome grains with fresh veggies for a colorful, nutrient-packed dish.

  • Pita Bread and Hummus: Serve this vinaigrette as a drizzle over hummus alongside warm pita bread for a delightful appetizer with a Mediterranean twist.

  • Pasta Salad: A chilled pasta salad dressed in CAVA Greek Vinaigrette offers a bright, creamy tang, making it a perfect side dish for picnics and gatherings.

  • Lemonade or Iced Tea: Quench your thirst with a glass of lemonade or iced tea, whose citrus notes harmonize beautifully with the zesty flavors of the vinaigrette.

  • Baklava: End your meal on a sweet note; the honey and nutty flavors of baklava contrast wonderfully with this tangy dressing, providing an unexpected yet delightful pairing.

Cava Greek Vinaigrette Variations

Feel free to personalize this dressing to match your taste buds and what you have on hand!

  • Lime Juice: Swap lemon juice for fresh lime juice for a zesty twist that adds a fun, tangy vibe.
  • Honey or Maple Syrup: Stir in a teaspoon of honey or maple syrup for a touch of sweetness that beautifully balances the acidity.
  • Balsamic Vinegar: Use balsamic vinegar instead of red wine vinegar for a richer flavor profile that brings a sweet depth.
  • Avocado Oil: Replace olive oil with avocado oil for a light and buttery taste, making it a healthy alternative.
  • Herb Medley: Experiment with fresh herbs like basil or parsley instead of oregano for a vibrant flavor explosion.
  • Spicy Kick: Add a pinch of red pepper flakes for a delightful heat that will awaken your taste buds!
  • Nutty Addition: Blend in a tablespoon of toasted sesame oil for a nutty finish that enhances the vinaigrette’s complexity.
  • Garlic-Free Option: Omit garlic and add a teaspoon of shallot for a milder flavor that still delivers aromatic goodness.

These variations will not only enhance your salads but can also be delightful marinades for grilled veggies or chicken. Be sure to check out other recipes for more versatile dressing ideas that can elevate your meals!

Make Ahead Options

These CAVA Greek Vinaigrette preparations are perfect for busy home cooks looking to streamline their meal planning! You can blend the dressing up to 3 days in advance, allowing the flavors to meld beautifully while stored in an airtight container in the refrigerator. Just combine all ingredients except the olive oil, then keep the vinaigrette—without oil—stored until you’re ready to serve. When you’re prepared to enjoy it, simply whisk in the olive oil before drizzling over your greens or using as a marinade. This method not only saves time on busy nights but also keeps your vinaigrette just as delicious and fresh!

CAVA Greek Vinaigrette Recipe FAQs

What type of garlic should I use for this vinaigrette?
Absolutely! For the best flavor, I recommend using fresh garlic cloves. Fresh garlic has a sharper taste that elevates the dressing, whereas pre-minced or powdered garlic can dull the overall flavor.

How long can I store CAVA Greek Vinaigrette in the fridge?
You can store your CAVA Greek Vinaigrette in a tightly sealed container in the refrigerator for up to 2 weeks. Always shake well before each use to remix any ingredients that might have settled.

Can I freeze CAVA Greek Vinaigrette?
Yes! For longer storage, pour your vinaigrette into ice cube trays. Freeze until solid, then transfer the cubes to a freezer bag for up to 3 months. To use, simply thaw the desired amount in the fridge overnight. This method allows you to enjoy a freshly flavored dressing without wasting any!

What if my vinaigrette is too thick?
If you find that your CAVA Greek Vinaigrette is too thick after blending, don’t worry! Just add a teaspoon or two of water or additional lemon juice and blend again until it reaches your desired consistency. This way, you can maintain that creamy texture while ensuring it’s pourable for your salads or marinades.

Can I make this dressing vegan-friendly?
Certainly! CAVA Greek Vinaigrette is already vegan-friendly, as it contains no animal products. It’s a great option for anyone following a plant-based diet. Just ensure that any mustard you use is also vegan, as some yellow mustards may contain honey.

Is this dressing safe for pets?
While this vinaigrette is delicious for human consumption, it’s important to keep it away from pets. Ingredients like garlic can be harmful to dogs and cats when consumed in large amounts. It’s best to enjoy this flavor-packed dressing yourself and ensure your furry friends stick to their own meals.

Cava Greek Vinaigrette

Zesty Cava Greek Vinaigrette for Fresh Flavorful Dishes

This Cava Greek Vinaigrette balances tangy and rich flavors, making it perfect for salads and marinades.
Prep Time 5 minutes
Chilling Time 1 hour
Total Time 1 hour 5 minutes
Servings: 8 servings
Course: Other
Cuisine: Mediterranean
Calories: 90

Ingredients
  

For the Dressing
  • 2 cloves Garlic minced
  • 1 cup Lemon Juice fresh-squeezed
  • 2 tablespoons Red Wine Vinegar
  • 1 teaspoon Dijon Mustard
  • 1 teaspoon Oregano dried
  • 1 pinch Black Pepper
  • 0.5 teaspoon Salt
  • 0.5 cup Olive Oil extra virgin

Equipment

  • Blender
  • Mason jar

Method
 

Step-by-Step Instructions
  1. In a blender, combine minced garlic, oregano, black pepper, and salt. Pour in lemon juice and red wine vinegar. Blend on high for 30 seconds until smooth.
  2. With the blender running, slowly drizzle in olive oil for about 30 seconds until the vinaigrette is thick and glossy.
  3. Transfer the vinaigrette to a clean jar or container and seal. Chill for at least an hour before serving.
  4. Shake before serving to remix any settled ingredients.

Notes

This vinaigrette is perfect for salads, roasted veggies, or as a marinade for meats. Use fresh ingredients for the best flavor. Store in the refrigerator for up to 2 weeks.

Delicious Vegan Blackberry Cookies Perfect for Any Sweet Tooth

As I rummaged through my pantry, a burst of vibrant color caught my eye: a punnet of plump blackberries just waiting to shine. This sparked an idea—what if I transformed these juicy gems into Naturally Blue Blackberry Cookies? With their beautiful hue, these vegan-friendly treats are a delightful departure from the ordinary, ensuring no artificial colors are involved. The best part? They come together in a flash and make for an irresistible dessert that’s perfect for gatherings or cozy nights in. Not only will you impress your friends and family with their eye-catching allure, but you’ll also enjoy a soft, cake-like cookie that bursts with fruity goodness. Ready to take your baking to colorful new heights? Let’s dive into the delicious world of these unique cookies!

Why Choose Vegan Blackberry Cookies?

Colorful Creation: These cookies showcase a stunning blue hue, making them a feast for the eyes as much as for the taste buds.

Quick and Easy: With just simple pantry staples and minimal effort, you can whip up these delightful treats in no time.

Crowd-Pleasing Flavor: The sweet and tangy essence of blackberries adds a unique twist, perfect for gatherings or cozy movie nights.

Vegan-Friendly Delight: Enjoy a guilt-free indulgence that’s dairy-free and eggless, catering to various dietary preferences without sacrificing taste.

Versatile Variations: Feel free to experiment with other fruits, like strawberries or blueberries, for a customized cookie experience. For more delicious cookie ideas, check out our Nutty Apricot Cookies and Crunchy Banana Seed Cookies.

Perfectly Portable: These cookies store well, making them ideal for snacks on-the-go or lunchbox treats.

Blackberry Cookies Ingredients

For the Dough
Blackberries – Provides natural blue color and tangy sweetness; use fresh or frozen for this delicious treat.
Vegan Butter – Adds richness and moisture to the cookie dough; substitute with regular butter if you’re not keeping it vegan.
Granulated Sugar – Sweetens the cookies perfectly; can be swapped with coconut sugar for a healthier option.
Vanilla Extract – Enhances flavor; make sure to use pure extract for the best aroma.
All-Purpose Flour – Acts as the main structure ingredient; substitute with gluten-free flour blend to meet dietary needs.
Baking Soda – Helps cookies rise and creates the vibrant hue from blackberries; essential for this recipe, so don’t substitute with baking powder.
Salt – Balances the sweetness to enhance the overall flavor profile.
Chocolate Chips – Adds sweetness and texture; swap for white chocolate or even omit for a lighter cookie.

Optional Add-Ins
Nuts or Dried Fruits – Mix in for a delightful crunch and added flavor; consider walnuts or cranberries for an exciting twist.
Cinnamon – A hint of this spice can elevate the taste, providing a warm contrast to the sweetness of the cookies.

Embrace the delightful, naturally blue color of these Blackberry Cookies and enjoy a treat that’s not only beautiful but also caters to a variety of dietary preferences!

Step‑by‑Step Instructions for Blackberry Cookies

Step 1: Preheat the Oven
Begin by preheating your oven to 350°F (180°C). While waiting for the oven to reach temperature, take a moment to line your baking sheets with parchment paper. This will ensure the Blackberry Cookies bake evenly and don’t stick, making clean-up a breeze.

Step 2: Prepare the Blackberries
If using frozen blackberries, let them thaw completely. Once thawed, puree the blackberries using a blender or immersion blender until smooth, achieving about ½ cup of vibrant puree. The rich purple hue will soon lend a beautiful color to your cookies, so set the puree aside while you prep the dough.

Step 3: Cream the Butter and Sugar
In a medium-sized mixing bowl, combine the softened vegan butter and granulated sugar. Using an electric mixer, beat them together on medium speed until the mixture becomes light and fluffy, which should take about 2-3 minutes. Then, gently fold in the prepared blackberry puree and a splash of vanilla extract for added flavor.

Step 4: Combine the Dry Ingredients
In a separate bowl, whisk together the all-purpose flour, baking soda, and salt. Gradually add the dry mixture to the wet ingredients, mixing just until combined. Take care not to overwork the dough; it should be soft with a slightly sticky texture. Fold in the chocolate chips, making sure to reserve about a quarter for topping your cookies.

Step 5: Chill the Dough
Cover the bowl with plastic wrap and place it in the refrigerator to chill for at least 30 minutes. Chilling the dough will enhance the texture of your Vegan Blackberry Cookies and help maintain their vibrant color during baking. You’ll know it’s ready when the dough feels firmer to the touch.

Step 6: Shape the Cookies
After chilling, remove the dough from the refrigerator. Using a tablespoon, scoop out portions of dough and roll them into balls in your hands. Place the dough balls on the prepared baking sheets, spacing them about 2 inches apart. Gently press each ball down to flatten slightly, creating an even baking surface.

Step 7: Bake
Slide the baking sheets into your preheated oven and bake the Blackberry Cookies for 8-10 minutes. Keep an eye on them—the edges should be set and the center slightly soft. Once baked, remove them from the oven and, while still warm, press the reserved chocolate chips into the tops for a delightful finishing touch.

Step 8: Cool the Cookies
Allow the cookies to cool on the baking sheet for a few minutes, then carefully transfer them to a wire rack to cool completely. This final step allows your Vegan Blackberry Cookies to firm up nicely, ensuring a soft, cake-like consistency with a slightly chewy edge that will leave everyone craving more!

Make Ahead Options

These Naturally Blue Blackberry Cookies are perfect for busy weeknights or spontaneous gatherings! You can prepare the cookie dough up to 3 days in advance; simply mix all the ingredients, roll the dough into balls, and place them on a baking sheet lined with parchment paper. Cover tightly with plastic wrap and refrigerate. When you’re ready to bake, take the dough out, let it sit at room temperature for about 10-15 minutes to soften slightly, and bake as directed. This ensures that your cookies maintain their vibrant blue color and delightful soft texture, coming out just as delicious as if they’d been baked fresh! Embrace this time-saving method to enjoy homemade treats without the last-minute rush.

What to Serve with Naturally Blue Blackberry Cookies

Indulging in these vibrant cookies is just the beginning of a delightful dessert experience, so let’s create the perfect accompaniment.

  • Almond Milk: This creamy beverage complements the tangy flavor of the cookies while offering a soothing balance of textures. It’s a classic pairing that the whole family will enjoy.

  • Vanilla Ice Cream: The velvety richness of vanilla ice cream enhances the sweet and fruity notes of the cookies, making each bite an explosion of deliciousness.

  • Fresh Fruits Salad: A light fruit salad adds a refreshing element to your dessert spread, contrasting beautifully with the rich texture of the cookies. Toss in berries for a color theme that ties everything together.

  • Mint Tea: A fragrant cup of mint tea cleanses the palate and provides a warm, aromatic experience that pairs perfectly with the sweet blackberry flavor.

  • Chocolate Sauce Drizzle: For the chocolate lovers, a warm chocolate drizzle takes these cookies to the next level, intensifying their lusciousness while adding a diagonal flair to presentation.

  • Coconut Whipped Cream: This dairy-free whipped cream brings lightness and a touch of sweetness that perfectly complements the cookies. Garnish with a sprinkle of cocoa for a lovely finish.

  • Coffee or Espresso: A robust cup of coffee or a shot of espresso brings out the berry’s natural sweetness while making for a delightful and energizing dessert experience.

  • Spiced Chai Latte: Infused with aromatic spices, a chai latte offers a warming contrast to the fruity flavors, making your dessert experience cozy and inviting.

Blackberry Cookies Variations & Substitutions

Customize your baking adventure with these delightful twists that will bring new life to your Blackberry Cookies!

  • Berry Swap: Use raspberries or blueberries for a different flavor profile; the vibrant colors will still amaze!

  • Nut-Free: Replace chocolate chips with sunflower seeds or pumpkin seeds for a nut-free version that’s just as delicious.

  • Gluten-Free: Swap all-purpose flour for a gluten-free blend to cater to those with gluten sensitivities without sacrificing taste.

  • Sugar Alternative: Use agave syrup or maple syrup instead of granulated sugar for a natural sweetener with a twist. Just adjust the flour slightly to absorb the extra moisture!

  • Flavor Boost: Add a teaspoon of almond extract for a nutty undertone that complements the blackberries beautifully.

  • Fruit Medley: Mix in chopped dried fruits such as apricots or cranberries for added texture and an explosion of sweetness.

  • Spice it Up: For a hint of warmth, sprinkle a touch of cinnamon or nutmeg into the batter for a delightful seasonal flair.

  • Zesty Kick: Incorporate a bit of lemon or orange zest into the dough to bring a zing that lifts the entire cookie experience.

These variations are just the beginning! For more cookie inspiration, check out our Nutty Apricot Cookies or try making Apple Oatmeal Cookies for even more flavor adventures!

Storage Tips for Blackberry Cookies

  • Room Temperature: Store cooled cookies in an airtight container at room temperature for up to 5 days. Keeping them sealed will help maintain their texture and moisture.

  • Fridge: If you want to extend their freshness, you can store the cookies in the fridge for up to a week. Just ensure they’re in an airtight container to prevent drying out.

  • Freezer: For longer storage, wrap unbaked cookie dough tightly in plastic wrap and place it in an airtight container or freezer bag. It will keep well in the freezer for up to 4 months.

  • Reheating: When ready to enjoy your Blackberry Cookies again, simply thaw and bake them directly from frozen, adding an extra 1-2 minutes to the baking time, or gently warm baked cookies in the microwave for a few seconds.

Expert Tips for Blackberry Cookies

  • Chill the Dough: Make sure to chill the dough for at least 30 minutes. This step prevents the cookies from spreading too much and helps maintain their vibrant color.

  • Don’t Overmix: When combining wet and dry ingredients, mix just until incorporated. Overmixing can lead to tough cookies, so a gentle hand is key!

  • Monitor Baking Time: Keep a close eye on your cookies while they bake. Overbaking can dull the beautiful blue hue and lead to a dry texture.

  • Use Fresh Ingredients: For the best flavor, opt for fresh blackberries and pure vanilla extract. Quality ingredients make all the difference in your Blackberry Cookies!

  • Adjust Sweetness: If you like your cookies sweeter, consider adding more sugar or a sprinkle of powdered sugar on top after baking.

  • Explore Alternatives: Feel free to swap out the blackberries for fresh strawberries or blueberries to add variation. Just remember, the color will change!

Blackberry Cookies Recipe FAQs

What should I look for when selecting ripe blackberries?
Absolutely! When choosing blackberries, look for ones that are plump, deep in color, and have a slight shine. Avoid those with dark spots all over, as they may be overripe or starting to spoil. Fresh blackberries should be firm to the touch and not mushy.

How should I store my Blackberry Cookies?
You’ll want to store your cooled cookies in an airtight container at room temperature for up to 5 days. If you prefer, you can also keep them in the fridge for up to a week; just be sure they’re sealed tightly to retain moisture.

Can I freeze the unbaked cookie dough?
Yes! For freezing, wrap the unbaked cookie dough tightly in plastic wrap and place it in an airtight container or freezer bag. It can be stored in the freezer for up to 4 months. When ready to bake, simply thaw it in the refrigerator overnight and then bake as directed, adding an extra minute or two as needed.

What should I do if my cookie dough is too sticky?
Very! If your dough seems excessively sticky after chilling, it might be due to humidity or over-measuring the wet ingredients. To troubleshoot, sprinkle a little extra flour onto the dough and mix gently. If your dough is too wet due to the blackberry puree, you can adjust by gradually incorporating more flour until it reaches a firmer texture.

Are these cookies safe for those with allergies?
While these Vegan Blackberry Cookies are eggless and dairy-free, they do contain gluten and may have gluten-related allergies. If you’re serving these cookies to someone with allergies, be sure to use gluten-free flour as a substitute and check that your vegan butter is free from allergens, such as nuts.

How can I enhance the flavor of my Blackberry Cookies?
Absolutely! For an extra kick, consider adding a pinch of cinnamon or nutmeg to the dry ingredients. You could also enhance them with a splash of almond extract for added depth. Don’t hesitate to explore other fruits like strawberries or blueberries—though they will alter the color, they bring delightful flavor variations and a fun twist to the recipe!

Blackberry Cookies

Delicious Vegan Blackberry Cookies Perfect for Any Sweet Tooth

These vegan Blackberry Cookies are a colorful, guilt-free treat perfect for any sweet tooth.
Prep Time 30 minutes
Cook Time 10 minutes
Chilling Time 30 minutes
Total Time 1 hour 10 minutes
Servings: 12 cookies
Course: Dessert
Calories: 150

Ingredients
  

For the Dough
  • 1 cup Blackberries Fresh or frozen, pureed
  • 1/2 cup Vegan Butter Softened
  • 1 cup Granulated Sugar Can substitute with coconut sugar
  • 1 teaspoon Vanilla Extract Use pure for best flavor
  • 2 cups All-Purpose Flour Can substitute with gluten-free blend
  • 1 teaspoon Baking Soda Essential for rising
  • 1/4 teaspoon Salt Balances sweetness
  • 1/2 cup Chocolate Chips Reserve some for topping
Optional Add-Ins
  • 1/2 cup Nuts or Dried Fruits Consider walnuts or cranberries
  • 1 teaspoon Cinnamon Optional

Equipment

  • mixing bowl
  • electric mixer
  • Baking sheets
  • parchment paper
  • Blender or immersion blender

Method
 

Step-by-Step Instructions
  1. Preheat your oven to 350°F (180°C) and line baking sheets with parchment paper.
  2. If using frozen blackberries, let them thaw and then puree until smooth, achieving about ½ cup of puree.
  3. In a mixing bowl, cream the vegan butter and sugar together until light and fluffy, then fold in blackberry puree and vanilla.
  4. In a separate bowl, whisk together flour, baking soda, and salt. Gradually add to the wet ingredients, mix gently.
  5. Chill the dough in the refrigerator for at least 30 minutes.
  6. Scoop dough and roll into balls, placing them on the baking sheets, and flatten slightly.
  7. Bake for 8-10 minutes until edges are set and centers are soft. Add reserved chocolate chips on top.
  8. Cool on baking sheet for a few minutes before transferring to wire rack.

Notes

For best taste, use fresh ingredients and avoid overmixing dough. Store cookies in an airtight container to maintain texture.