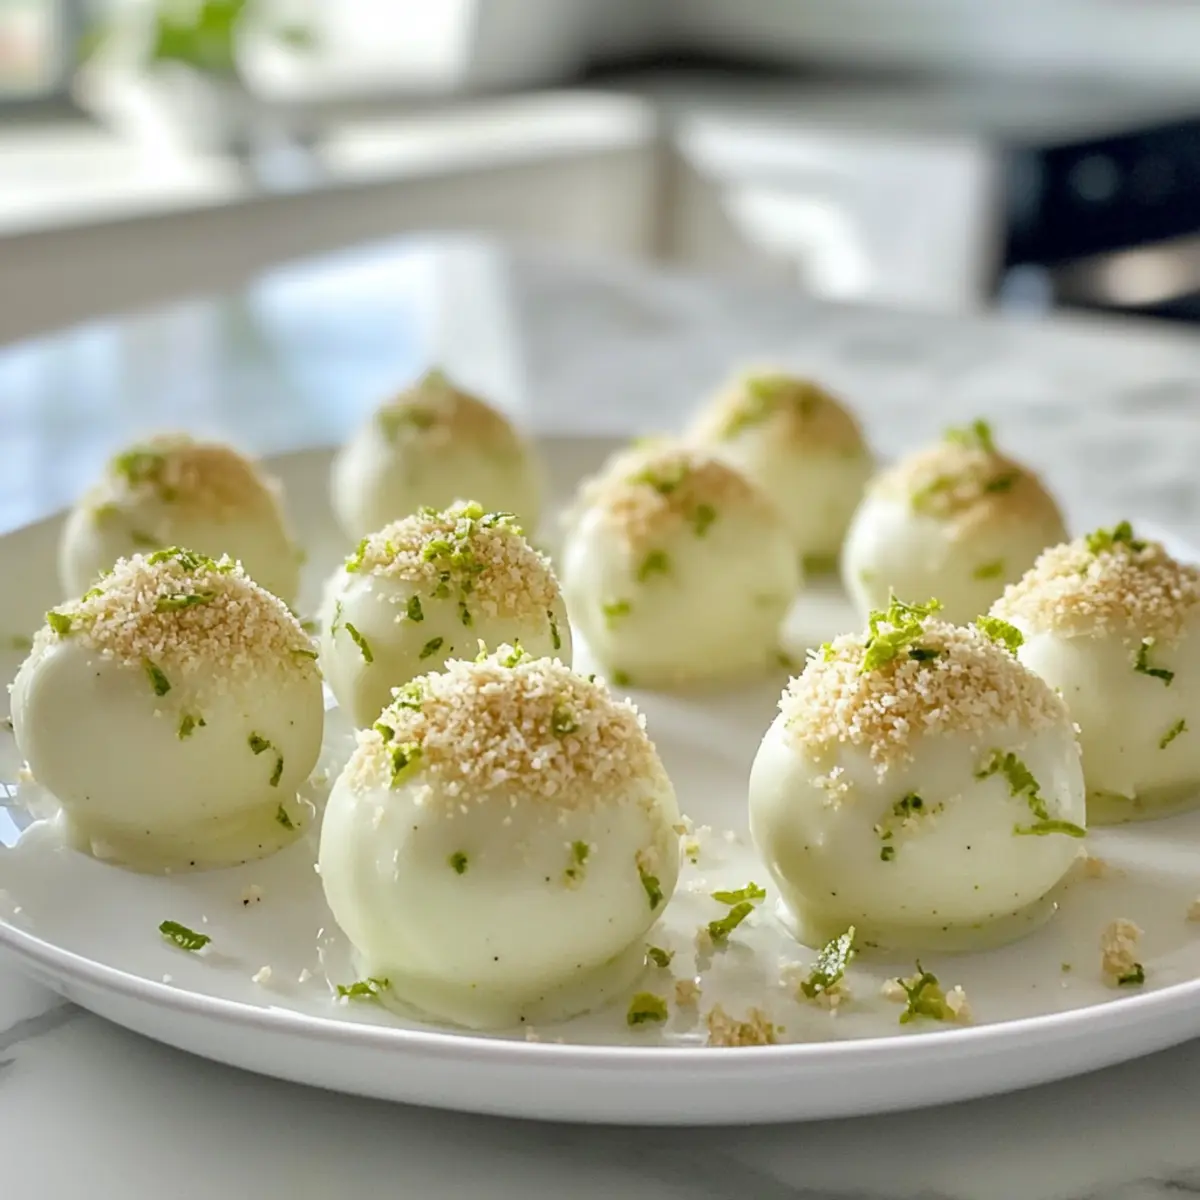
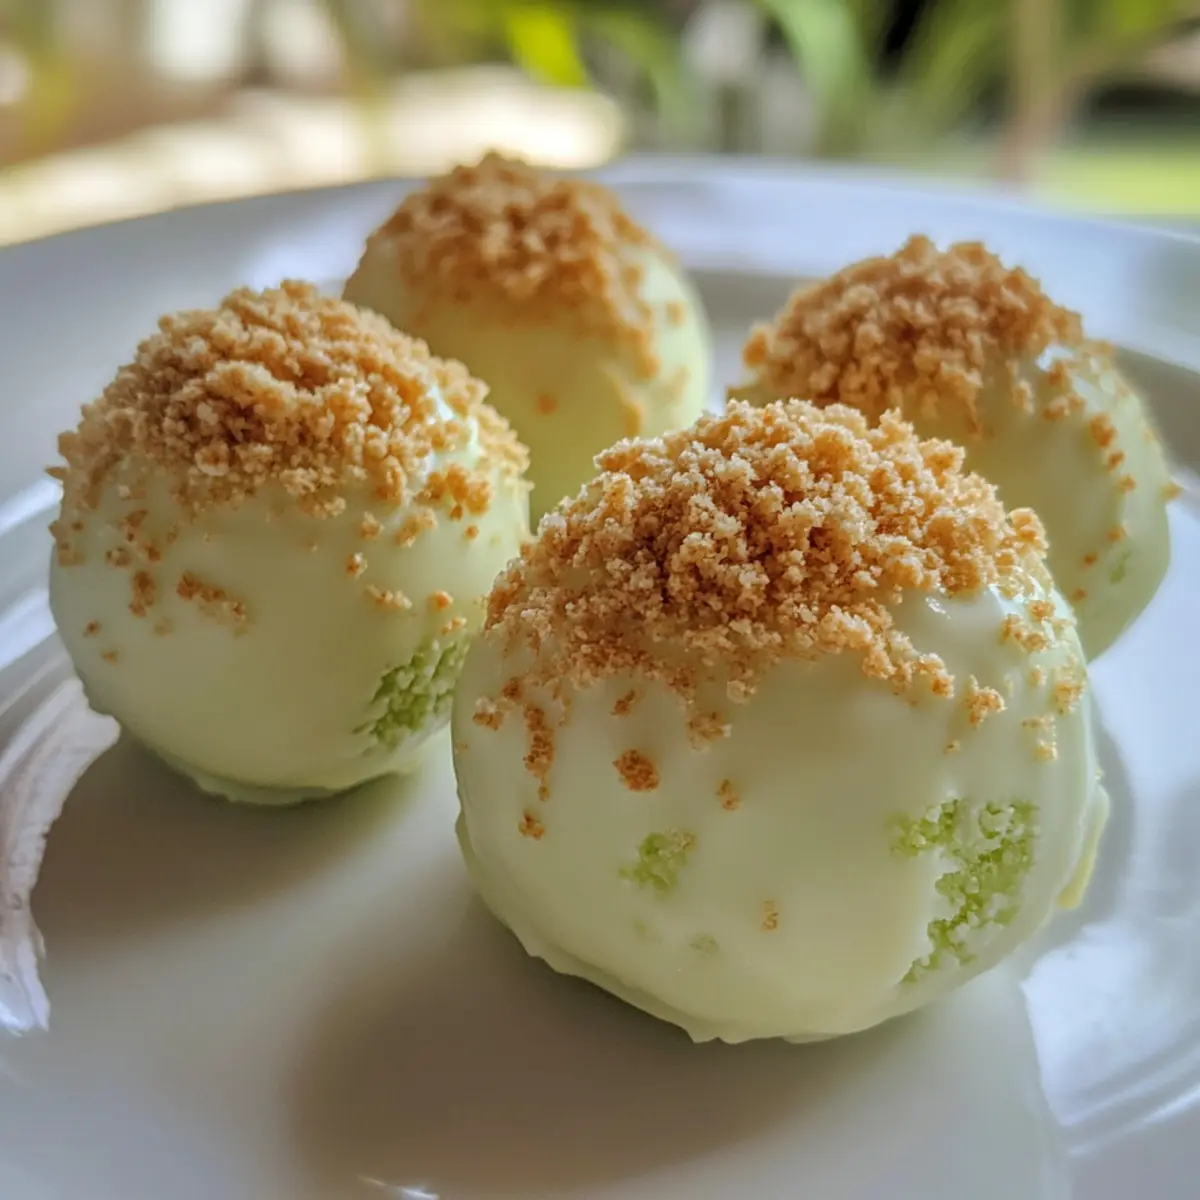
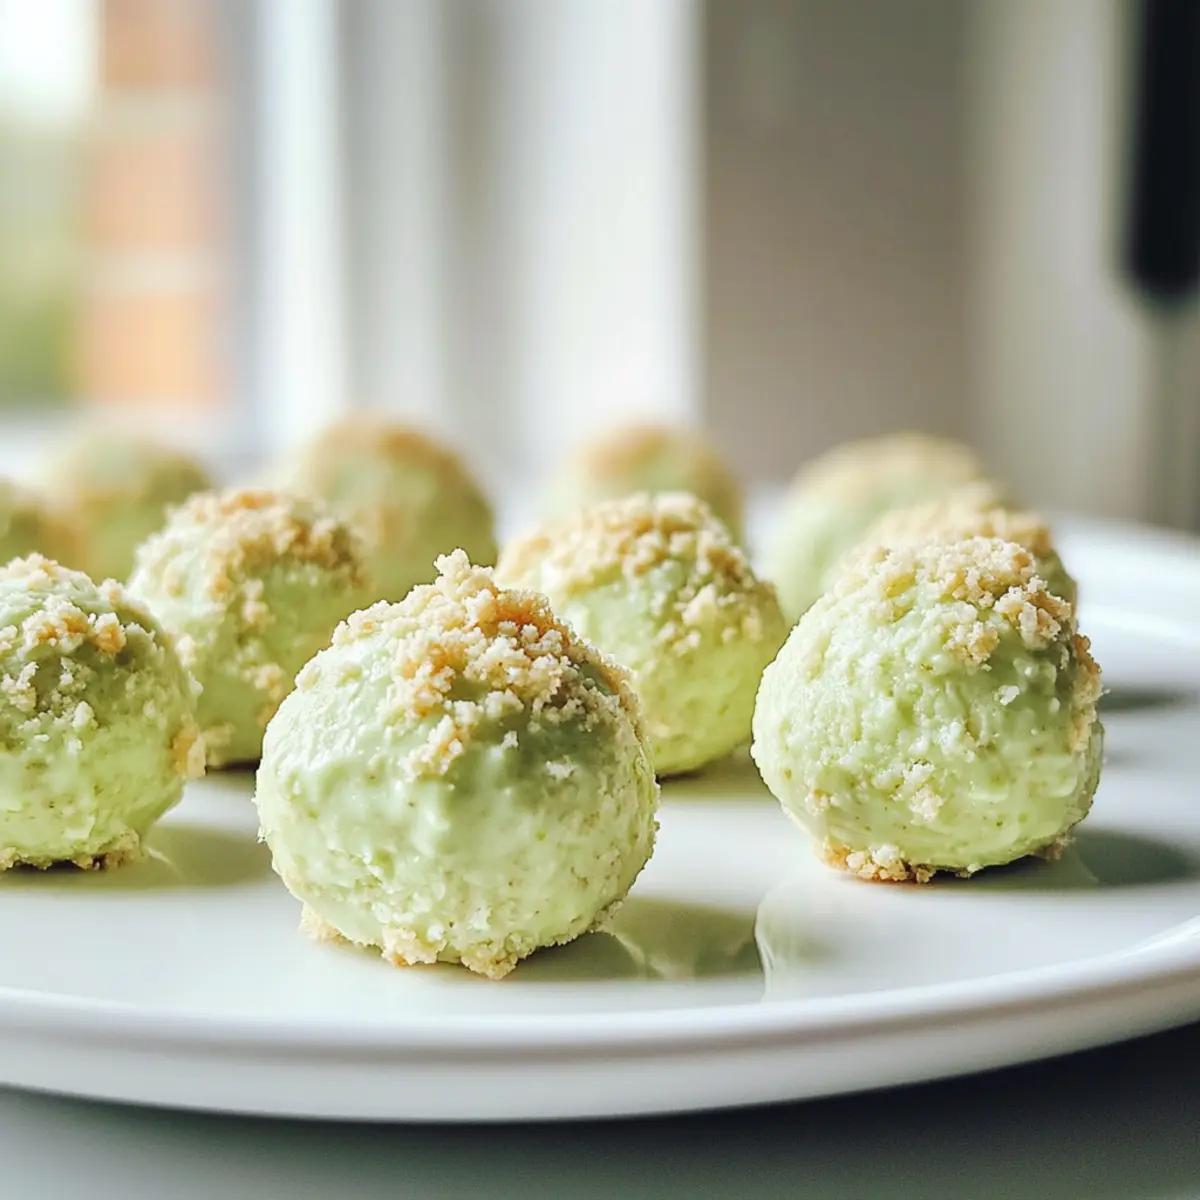
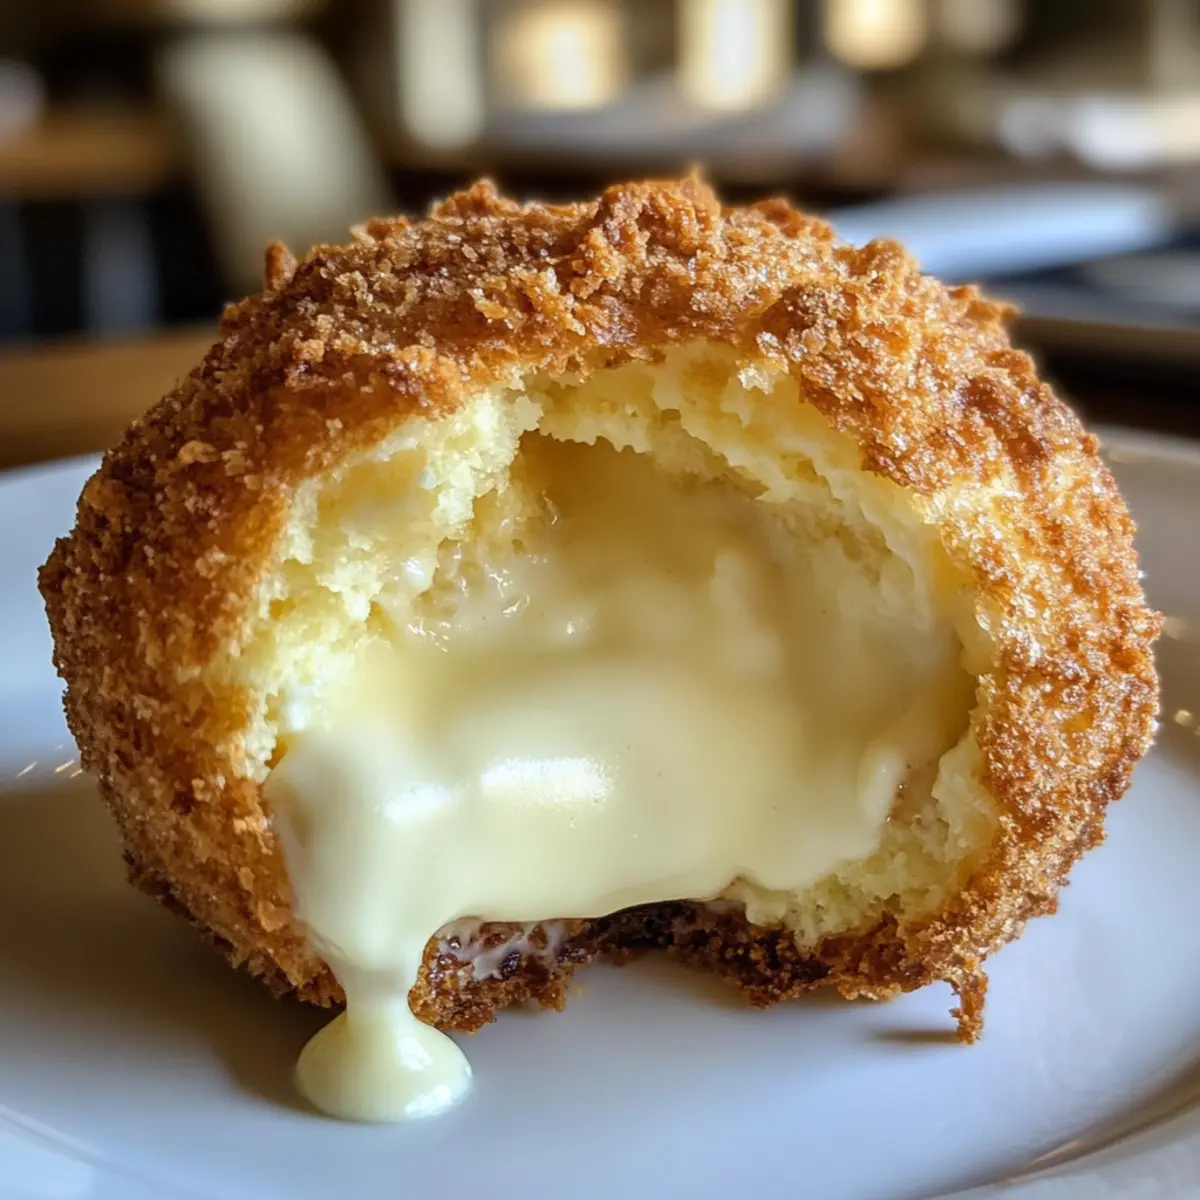
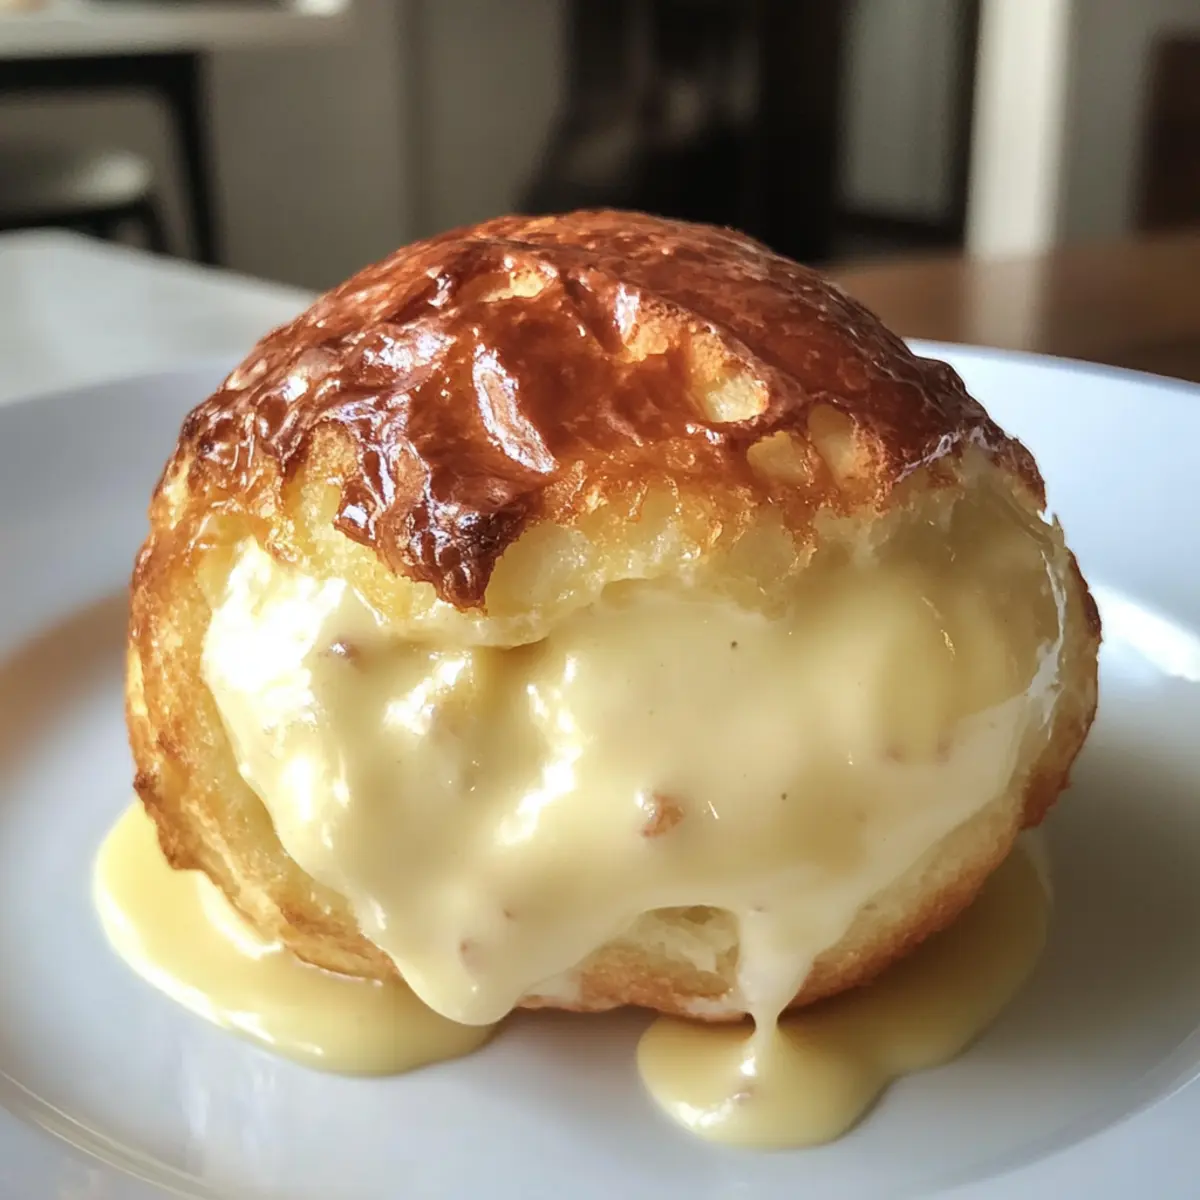
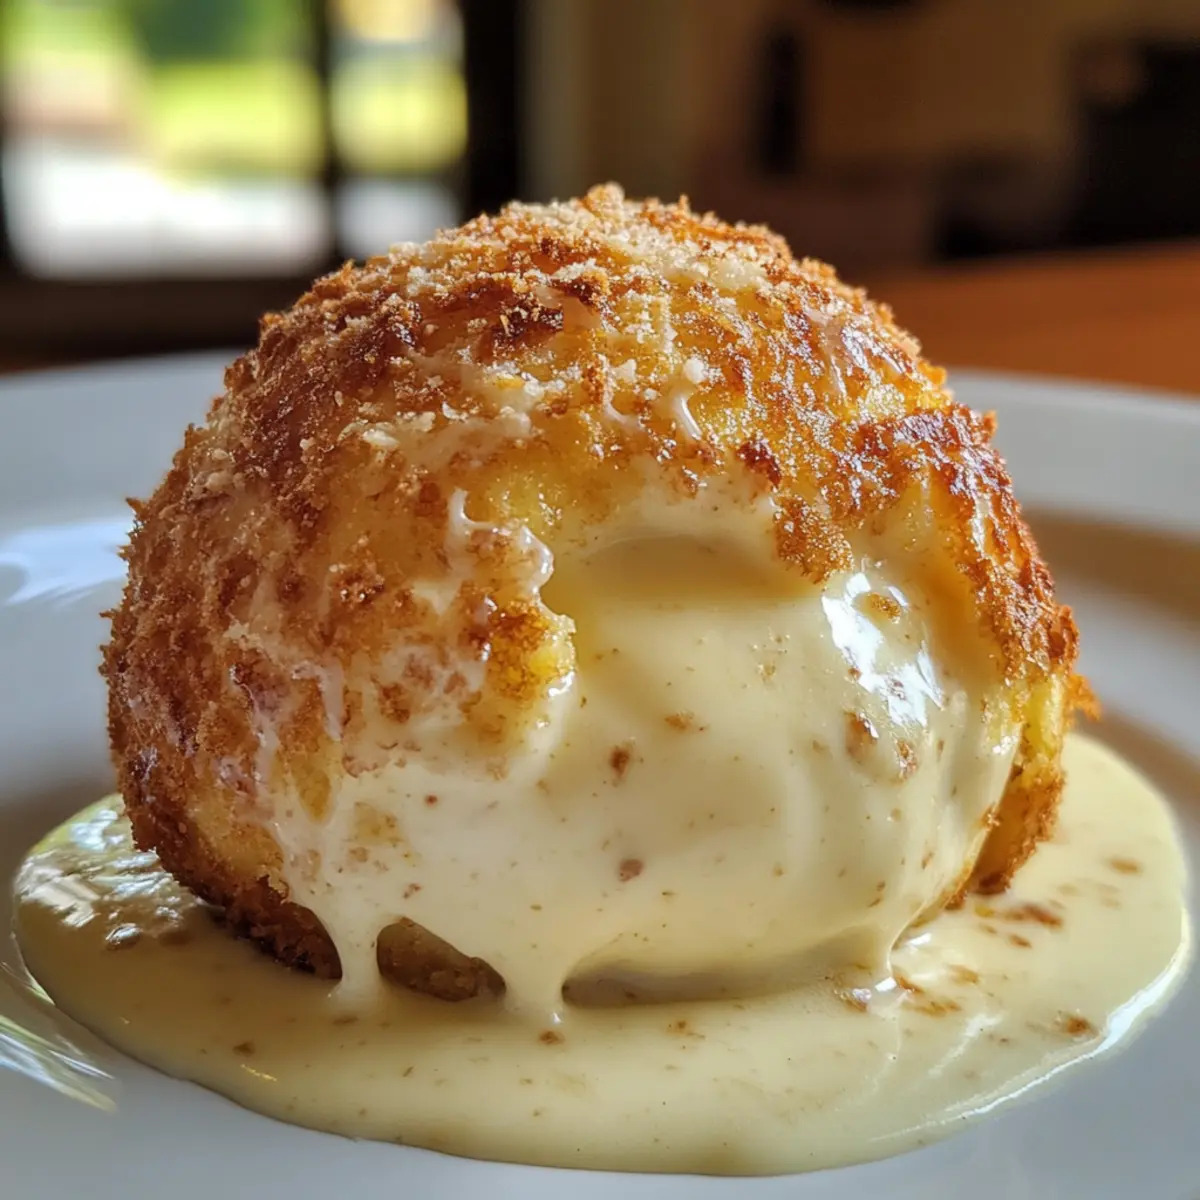
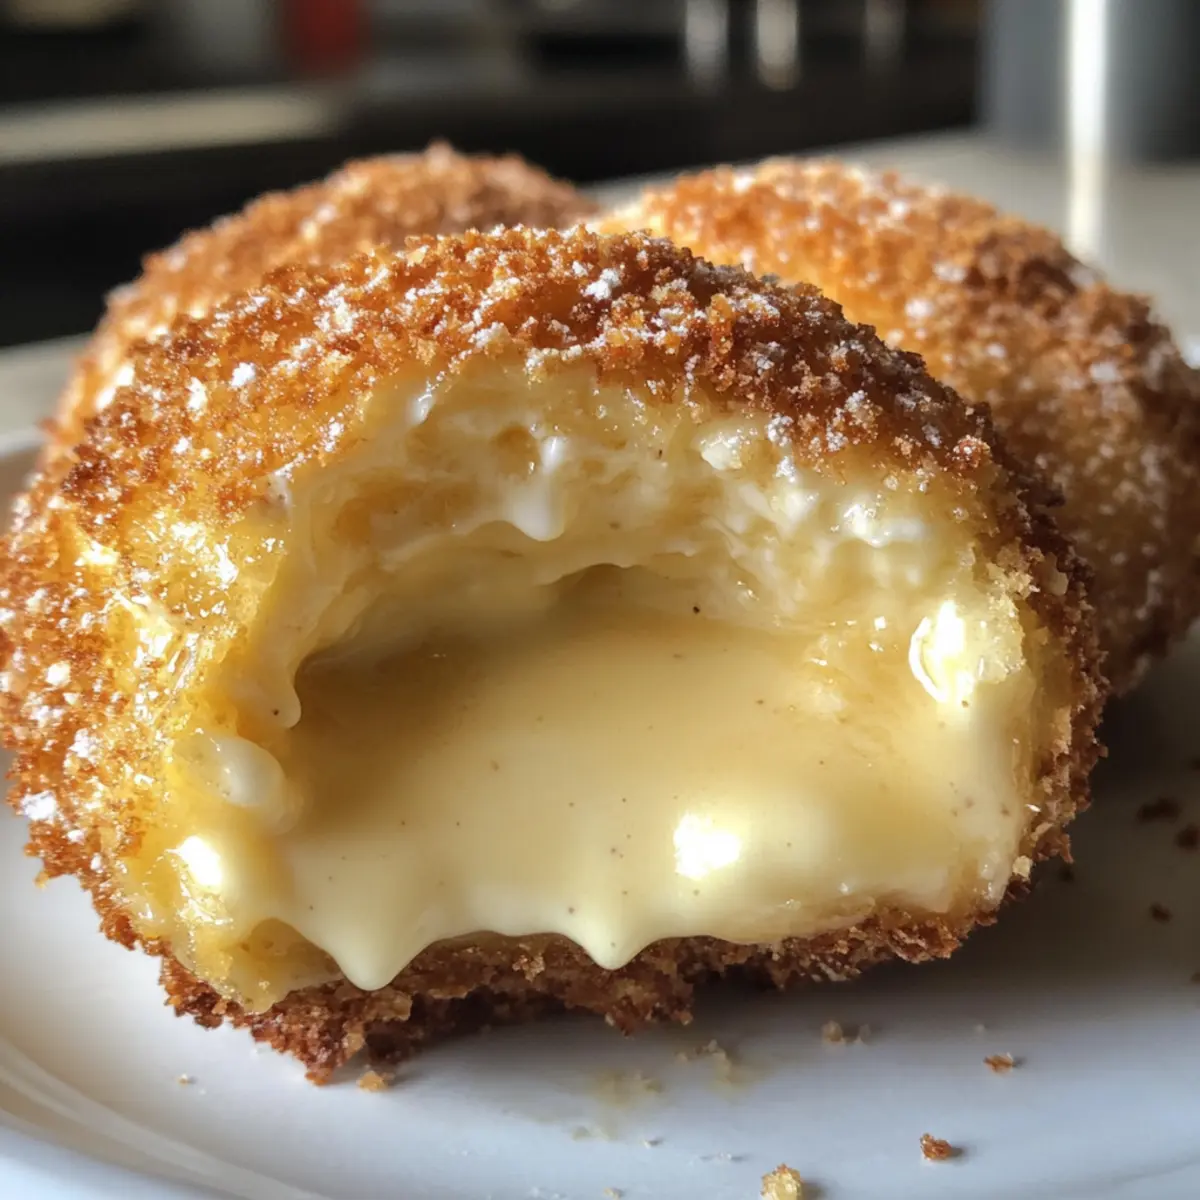
Crispy Fruity Pebbles Cheesecake Tacos for Sweet Nostalgia

How did a simple taco shell become the star of this irresistible dessert? Enter Crispy Fruity Pebbles Cheesecake Tacos—a delightful mashup that brings together velvety cheesecake and playful, crunchy cereal in a way that feels nostalgic yet totally new. This no-bake recipe is not just a quick prep masterpiece, but it’s also a customizable treat that will have your family and friends clamoring for seconds. Whether it’s for a birthday bash or a cozy family night, these tasty tacos make dessert a fun and memorable experience. Curious how to create this sugary sensation? Let’s dive into the delightful details!

Why You’ll Crave These Tacos!

Unique Twist: The Crispy Fruity Pebbles Cheesecake Tacos combine two favorites—cheesecake and cereal—creating a playful dessert unlike any other!
No-Bake Convenience: With a simple no-bake process, you can whip these up quickly, making them perfect for unexpected cravings.
Customization Galore: Feel free to swap out the Fruity Pebbles with your favorite cereal or drizzle on chocolate sauce for extra decadence.
Crowd-Pleasing Treat: Whether for a birthday party or family gathering, these tacos are always a hit, bringing smiles and nostalgia. Why not pair them with some Cheesy Fries for an unforgettable meal?
Make-Ahead Friendly: Prepare the cheesecake filling a day in advance—just assemble before serving for optimal freshness and texture.

Crispy Fruity Pebbles Cheesecake Tacos Ingredients

For the Cheesecake Filling
Cream Cheese – Be sure to soften it for easy mixing, creating that dreamy, smooth texture.
Sugar – Sweeten the filling to taste; a sugar substitute can keep it lower-calorie if needed.
Vanilla Extract – Use pure vanilla extract for the best flavor enhancement in your cheesecake.

For the Taco Shells
Taco Shells – Choose sturdy taco shells for that perfect crunch and to keep the filling from leaking.

For the Topping
Fruity Pebbles Cereal – These add vibrant color and a satisfying crunch, making your Crispy Fruity Pebbles Cheesecake Tacos a feast for the eyes and palate!

Feel free to mix and match ingredients to make this delightful dessert your own!

Step‑by‑Step Instructions for Crispy Fruity Pebbles Cheesecake Tacos

Step 1: Prepare the Cheesecake Filling
In a medium mixing bowl, combine 8 ounces of softened cream cheese, ½ cup of sugar, and 1 teaspoon of vanilla extract. Using an electric mixer, beat on medium speed for about 2-3 minutes until the mixture is smooth and creamy, with no lumps remaining. The filling should have a luscious texture, perfect for filling your tacos.

Step 2: Fill Taco Shells
Carefully take about 6 sturdy taco shells and gently spoon the cheesecake filling into each one, filling them generously while ensuring not to overstuff. Use a spatula to help push the filling into the corners of the shells for an even distribution. Aim for a nice, rounded fill that showcases the creamy goodness of your Crispy Fruity Pebbles Cheesecake Tacos.

Step 3: Add Fruity Pebbles
Once the taco shells are filled, take 1 cup of Fruity Pebbles cereal and generously sprinkle it over the cheesecake mixture in each shell. This adds a delightful crunch and vibrant color to your dessert. Don’t be shy—let the Fruity Pebbles layer spill over for an extra playful look that makes these tacos visually enticing and fun.

Step 4: Chill and Serve
After assembling the tacos, place them in an airtight container and refrigerate for at least 30 minutes to set. This chilling time helps the flavors meld together and allows the taco shells to remain crispy. Remember, to enjoy the best texture and flavor, assemble your Crispy Fruity Pebbles Cheesecake Tacos just before serving them to your guests.

Variations & Substitutions for Crispy Fruity Pebbles Cheesecake Tacos

Feel free to let your creativity shine! Customize these delightful tacos to match your taste and dietary needs.

  • Dairy-Free: Replace cream cheese with a dairy-free cream cheese alternative for a lactose-free option. Silken tofu blended with a bit of vanilla can also work beautifully!

  • Sugar-Free: Use a sugar substitute like erythritol or stevia to cater to a sugar-free lifestyle without sacrificing flavor. Your cheesecake filling will still taste sweet and delicious!

  • Gluten-Free: Opt for gluten-free taco shells to ensure everyone can enjoy. This simple swap allows you to keep things fun and inclusive!

  • Enhanced Flavor: Add a tablespoon of lemon juice or zest to the cheesecake filling for a zesty twist. The citrus notes will elevate the dessert to new heights!

  • Flavor Boost: Incorporate mini chocolate chips or crushed strawberries into the filling for added flavor and texture. Who can resist a bit of chocolate or fruity goodness?

  • Chocolatey Version: Swap in chocolate cereal for the Fruity Pebbles for a cocoa-inspired delight. Drizzle with chocolate sauce to make it ultra-decadent—perfect for chocolate lovers!

  • Crunchy Layer: For a textural twist, add crushed nuts or granola on top of the Fruity Pebbles. It adds delightful crunch while providing a nutritious component.

  • Tropical Twist: Introduce shredded coconut or diced pineapple to the filling for a refreshing tropical flavor. It’s like a vacation in every bite!

Ask your family to join in for a fun culinary experience that can create new, tasty memories together. These Crispy Fruity Pebbles Cheesecake Tacos are versatile—why not explore some of these variations to bring a new twist to your favorite dessert? And if you’re interested in different sweet options, don’t miss the delicious Strawberry Cheesecake Dump or Rainbow Fruity Tapioca recipes!

What to Serve with Crispy Fruity Pebbles Cheesecake Tacos

Satisfy your sweet tooth by creating the perfect accompaniment to these colorful dessert tacos that evoke nostalgia and joy.

  • Whipped Cream: A dollop of light, airy whipped cream enhances each bite, adding a creamy contrast to the playful crunch of the tacos.

  • Fresh Berries: Serve alongside mixed berries like strawberries and blueberries for a refreshing burst of tartness, balancing the sweetness.

  • Ice Cream: A scoop of vanilla or fruity sorbet brings a delightful chill to the table, turning your dessert into a delicious sundae experience.

  • Chocolate Sauce: Drizzle warm chocolate sauce over the tacos for an indulgent touch that complements the creamy cheesecake flavor.

  • Coconut Flakes: Sprinkle toasted coconut flakes on top for a tropical flair and chewy texture that pairs beautifully with colorful Fruity Pebbles.

  • Sparkling Lemonade: Refreshing and light, a glass of sparkling lemonade cleanses the palate and adds a zesty kick to your dessert experience.

  • Mini Fruit Tarts: Serve these alongside mini fruit tarts for a delightful assortment of flavors and textures that guests will adore.

  • Chocolate Dipped Strawberries: Treat your loved ones to these elegant bites of fruit, offering both sweetness and sophistication alongside the fun tacos.

  • Caramel Sauce: Provide a side of warm caramel sauce for drizzling, creating a decadent experience that tantalizes the taste buds.

  • Milkshakes: Craft a creamy milkshake in flavors like vanilla or strawberry to wash down that delightful sweetness and keep the fun rolling!

How to Store and Freeze Crispy Fruity Pebbles Cheesecake Tacos

Refrigerator: Store assembled tacos in an airtight container for up to 3 days. To maintain the taco shell’s crispiness, it’s best to assemble them just before serving.

Freezer: While it’s not ideal to freeze the assembled tacos due to the potential sogginess, you can freeze the cheesecake filling for up to 2 months. Thaw it in the fridge before refilling fresh taco shells.

Make-Ahead Tips: The cheesecake filling can be prepared up to 1 day in advance and kept in the refrigerator. Just remember to use fresh taco shells and add the Fruity Pebbles topping right before serving for optimal taste and texture.

Reheating: If you have leftover filled tacos, enjoy them cold or at room temperature. Avoid reheating in a microwave, as this might compromise the taco shell’s crunch!

Make Ahead Options

These Crispy Fruity Pebbles Cheesecake Tacos are perfect for busy home cooks seeking effortless meal planning! You can prepare the cheesecake filling up to 24 hours ahead of time—just blend the softened cream cheese, sugar, and vanilla, then store it in an airtight container in the refrigerator. Additionally, you can assemble your taco shells without the Fruity Pebbles up to 3 days in advance; this way, the shells stay crispy while the filling blends seamlessly with the flavors. When you’re ready to serve, simply fill the taco shells with the cheesecake mixture, top with the crunchy Fruity Pebbles, and enjoy a delightful dessert that’s just as delicious as if made fresh!

Expert Tips for Crispy Fruity Pebbles Cheesecake Tacos

  • Room Temperature Cream Cheese: Ensure cream cheese is softened to room temperature for a lump-free, creamy filling that blends beautifully.

  • Assemble Just Before Serving: To keep the taco shells crispy, fill them right before serving. This prevents them from becoming soggy.

  • Ingredient Substitutions: Get creative! Substitute Fruity Pebbles with other colorful cereals for a fun twist on the classic Crispy Fruity Pebbles Cheesecake Tacos.

  • Sweetener Options: Taste as you go! Adjust sugar levels according to preference, or try using a sugar alternative for a healthier option.

  • Storage Tips: Store any leftovers in the refrigerator for up to 3 days, but be mindful that the shells will soften over time; hence, it’s best to assemble fresh!

Crispy Fruity Pebbles Cheesecake Tacos Recipe FAQs

What is the best way to select ripe ingredients for my cheesecake filling?
Absolutely! For a luscious cheesecake filling, ensure your cream cheese is fully softened to room temperature. This is crucial as it helps the mixture blend smoothly without lumps. When selecting your cream cheese, opt for a high-quality brand for the best flavor. You want it creamy and rich, which makes all the difference in your Crispy Fruity Pebbles Cheesecake Tacos.

How should I store leftover tacos, and for how long will they last?
You can store assembled tacos in an airtight container in the refrigerator for up to 3 days. However, to maintain their delightful crunch, it’s best to fill the taco shells just before serving. If they do soften a bit, a quick crisp in the oven can help revive them. Just keep in mind that the quality is best within the first couple of days!

Can I freeze the cheesecake filling for later use?
Yes, indeed! You can freeze the cheesecake filling for up to 2 months. To do this, first scoop it into an airtight container or freezer bag, removing as much air as possible. When you’re ready to make more tacos, simply thaw the filling in the refrigerator overnight. After it’s fully thawed, give it a good stir to return its creamy consistency before refilling fresh taco shells.

What should I do if my taco shells become soggy?
The key is to assemble your Crispy Fruity Pebbles Cheesecake Tacos right before serving. If they do become soggy, you can re-crisp them. Simply place the shells in a preheated oven at 350°F (175°C) for a few minutes until they feel crispy again. Alternatively, avoid the filling reaching the edges of the shells to help maintain their integrity until it’s time to serve!

Are there any dietary considerations I should keep in mind?
Definitely! If you’re serving these tacos to guests with dietary restrictions, consider using a gluten-free cereal option or sugar substitutes for those watching their sugar intake. Always check for any allergies related to dairy and gluten in the ingredients used. These little adjustments will help ensure everyone can enjoy your delicious Crispy Fruity Pebbles Cheesecake Tacos!

Crispy Fruity Pebbles Cheesecake Tacos

Crispy Fruity Pebbles Cheesecake Tacos for Sweet Nostalgia

Enjoy nostalgic Crispy Fruity Pebbles Cheesecake Tacos, a delightful no-bake dessert that merges creamy cheesecake with crunchy cereal.
Prep Time 30 minutes
Chilling Time 30 minutes
Total Time 1 hour
Servings: 6 tacos
Course: Dessert
Cuisine: American
Calories: 250

Ingredients
  

For the Cheesecake Filling
  • 8 ounces cream cheese softened
  • 1/2 cup sugar to taste
  • 1 teaspoon vanilla extract pure for best flavor
For the Taco Shells
  • 6 sturdy taco shells
For the Topping
  • 1 cup Fruity Pebbles cereal

Equipment

  • mixing bowl
  • electric mixer
  • spatula
  • airtight container

Method
 

Step-by-Step Instructions
  1. In a medium mixing bowl, combine 8 ounces of softened cream cheese, ½ cup of sugar, and 1 teaspoon of vanilla extract. Using an electric mixer, beat on medium speed for about 2-3 minutes until the mixture is smooth and creamy, with no lumps remaining.
  2. Carefully take about 6 sturdy taco shells and gently spoon the cheesecake filling into each one, filling them generously while ensuring not to overstuff.
  3. Once the taco shells are filled, take 1 cup of Fruity Pebbles cereal and generously sprinkle it over the cheesecake mixture in each shell.
  4. After assembling the tacos, place them in an airtight container and refrigerate for at least 30 minutes to set.

Notes

To keep the taco shells crispy, fill them right before serving. Store leftovers in the refrigerator for up to 3 days.

Refreshing Piña Colada Cheesecake for a Tropical Escape

As the sun begins to set, painting the sky in hues of orange and pink, it’s the perfect time to indulge in something sweet and refreshing. My No-Bake Piña Colada Cheesecake effortlessly transports you to a tropical paradise with every bite. This dreamy dessert combines the delightful tang of pineapple, the creamy richness of coconut, and a whisper of rum, making it a sensational summer treat. You won’t need to turn on the oven, which allows for quick preparation—ideal for warm gatherings with friends and family. Plus, its luscious texture and vibrant flavors will ensure it’s a crowd favorite that leaves everyone smiling. Curious how you can whip up this tropical delight? Let’s dive into the recipe!

What Makes This Cheesecake So Special?

Effortless Preparation: This No-Bake Piña Colada Cheesecake requires minimal effort, perfect for those busy summer days when you want to impress without the fuss.
Tropical Bliss: Each bite transports you to an island paradise, blending refreshing pineapple and creamy coconut for a delightful flavor explosion.
Versatile Variations: Feel free to switch out the pineapple for mango or add a passion fruit glaze for a unique twist, as seen in my Strawberry Cheesecake Dump recipe.
Crowd-Pleaser Appeal: It’s the ideal dessert to share at BBQs or gatherings; everyone loves a treat that screams summer fun!
Time-Saving Delight: No lengthy baking times, this recipe chills while you enjoy the sunshine, making it the perfect treat for spontaneous get-togethers.
Beautiful Presentation: Garnished with cherries and fresh pineapple, its vibrant colors ensure it looks as good as it tastes, making it a standout centerpiece!

Piña Colada Cheesecake Ingredients

For the Crust
Graham Crackers – 2 ½ cups, provides a sweet and crunchy base; substitute with gluten-free crumbs for a GF option.
Unsalted Butter – 6 tablespoons, binds the crust together; use coconut oil for a dairy-free version.
Sugar – 4 tablespoons, sweetens the crust; can be reduced or replaced with coconut sugar for a subtle flavor.

For the Cheesecake Filling
Cream Cheese – 16 oz, softened, forms the rich base of the cheesecake; opt for a dairy-free cream cheese if vegan.
Heavy Cream – 2 cups, whipped to provide lightness and creaminess; can substitute with coconut cream for dairy-free.
Powdered Sugar – 1 cup, adds sweetness to the filling; reducing sugar can be an option for a less sweet dessert.
Rum Extract – 1 teaspoon, infuses the cheesecake with classic piña colada flavor; omit for a non-alcoholic version.
Crushed Pineapple – 1 cup, brings moisture and tropical flavor; drain well to prevent sogginess.
Sweetened Shredded Coconut – ½ cup, enhances the coconut flavor and adds texture; use unsweetened for less sweetness.

For Garnishing
Whipped Cream – for garnish, adds decorative appeal and creaminess; optional but recommended for visual contrast.
Maraschino Cherry – for garnish, a classic touch for decoration; optional based on preference.
Pineapple Pieces – for garnish, fresh pineapple adds a fruity touch to the presentation.

Step‑by‑Step Instructions for No-Bake Piña Colada Cheesecake

Step 1: Prepare the Crust
In a medium bowl, combine 2 ½ cups of graham cracker crumbs, 4 tablespoons of sugar, and 6 tablespoons of melted unsalted butter. Mix until well incorporated, resembling wet sand. Press this mixture firmly into the bottom of a greased 9-inch springform pan, creating an even layer. Once formed, freeze the crust for 10-15 minutes to allow it to firm up before adding the filling.

Step 2: Make Cheesecake Filling
While the crust chills, prepare the cheesecake filling. In a large mixing bowl, beat 16 oz of softened cream cheese and 1 cup of powdered sugar together until the mixture is smooth and creamy. In a separate bowl, whip 2 cups of heavy cream to soft peaks. Gently fold the whipped cream into the cream cheese mixture, being careful not to deflate the whipped cream, until combined into a light, airy filling.

Step 3: Add Flavorings
Stir in 1 cup of well-drained crushed pineapple, ½ cup of sweetened shredded coconut, and 1 teaspoon of rum extract into the cream cheese mixture. Mix gently until all the ingredients are well incorporated, ensuring the flavoring is evenly distributed throughout the filling. The sweet and tropical aroma will start to come together, reminiscent of the classic piña colada.

Step 4: Combine Layers
Spread the cheesecake filling over the chilled crust in the springform pan. Use a spatula to smooth the top, creating an even surface for a beautiful finish. Cover the pan with plastic wrap and refrigerate it for at least 3-4 hours, or until the cheesecake is fully set and firm to the touch, making it a perfect foundation for garnishing.

Step 5: Serve
Once the setting time has passed, carefully run a knife around the edge of the springform pan to release the cheesecake. Carefully remove the sides of the pan and place the cheesecake on a serving platter. Garnish with dollops of whipped cream, maraschino cherries, and fresh pineapple pieces for an inviting, tropical presentation before slicing and enjoying your No-Bake Piña Colada Cheesecake.

Piña Colada Cheesecake Variations

Isn’t it fun to make a recipe your own? Get ready to jazz up your Piña Colada Cheesecake with these delightful twists and swaps that will keep your taste buds dancing!

  • Mango Magic: Swap crushed pineapple for diced mango to create a tropical explosion that’s equally tempting.
  • Passion Fruit Glaze: Drizzle a layer of passion fruit glaze on top for a tangy flavor boost that adds a pop of color.
  • Dairy-Free Delight: Use dairy-free cream cheese and coconut cream to cater to vegan guests without sacrificing that creamy texture.
  • Sugar Smart: Replace powdered sugar with maple syrup for a natural sweetness if you’re looking for a healthier alternative.
  • Nutty Crust: Blend in ground almonds or pecans with the graham cracker crust for an nutty aromatic twist—it adds depth and crunch!
  • Spice It Up: For a hint of spice, mix in a dash of cinnamon or nutmeg to the filling; it pairs beautifully with the tropical flavors.
  • Coconut Cream Topping: Whip up coconut cream for a light and airy topping instead of traditional whipped cream for a tropical touch.
  • Frozen Treat: Pour the mixture into popsicle molds and freeze for a refreshing dessert on a stick—perfect for summer days!

For additional ideas, check out my delicious Strawberry Cheesecake Dump for more inspiration to elevate your dessert game! Your Piña Colada Cheesecake is a canvas, so let your creativity shine through!

Expert Tips for No-Bake Piña Colada Cheesecake

  • Chill Time Matters: Allow the cheesecake to chill for the full 3-4 hours to achieve the best texture and firmness.
  • Room Temperature Cream Cheese: Ensure your cream cheese is softened to room temperature; this helps create a smoother filling and prevents lumps.
  • Drain Pineapple Well: Be sure to drain the crushed pineapple thoroughly to avoid a soggy filling; sogginess is a common mistake.
  • Substitution Savvy: If you prefer a dairy-free cake, swap heavy cream with coconut cream and choose dairy-free cream cheese for the filling.
  • Aesthetic Touch: Garnish with fresh pineapple, cherries, and whipped cream for a beautiful presentation that highlights your delicious Piña Colada Cheesecake!
  • Layer Creativity: Get creative with layers! Feel free to incorporate alternative tropical fruits like diced mango for a unique twist on this classic cheesecake.

What to Serve with No-Bake Piña Colada Cheesecake?

As you gather with loved ones, let’s take your tropical dessert to new heights with these delightful pairings.

  • Tropical Fruit Salad: A bright mix of fresh mango, kiwi, and strawberries, balancing the cheesecake’s creamy richness with fruity freshness. This salad not only looks stunning but its juicy textures are a perfect match for the cheesecake.

  • Coconut Rice: This subtly sweet and creamy dish pairs well by enhancing the coconut flavor in your dessert. Each bite brings you a new layer of tropical delight.

  • Grilled Pineapple: Caramelized pieces topped with a sprinkle of cinnamon add an extra touch of summer. Their warm sweetness harmonizes beautifully with the chilled cheesecake.

  • Mojito Mocktail: Refreshing mint and lime elevate your meal experience, offering a zesty drink that complements the cheesecake’s tropical notes. Sip slowly to enjoy the full flavor explosion!

  • Chocolate-Covered Strawberries: A decadent choice! The rich chocolate contrasts with the light cheesecake, creating a delightful flavor spectrum that’s hard to resist.

  • Vanilla Ice Cream: A scoop of vanilla ice cream brings a smooth creaminess that enhances your pie experience. The coolness mingles with the cheesecake, presenting a delightful duo.

  • Caramel Sauce: Drizzling caramel over each slice creates an indulgent treat. This sweet addition enhances the tropical flavors, making every bite a sweet surprise.

Make Ahead Options

Prepare your No-Bake Piña Colada Cheesecake ahead of time for a stress-free dessert experience! You can whip up the crust and filling and refrigerate them separately up to 24 hours in advance. To do this, simply make the graham cracker crust and allow it to chill completely in the fridge. Then, prepare the cheesecake filling and keep it covered in the refrigerator until you’re ready to assemble. When you’re set to serve, layer the chilled filling over the crust, let it set in the refrigerator for about 3-4 hours, and garnish just before serving to ensure it looks and tastes just as delightful! This makes meal prep a breeze, ensuring your sweet treat is waiting for you when the occasion arises.

Storage Tips for Piña Colada Cheesecake

Fridge: Keep your No-Bake Piña Colada Cheesecake tightly covered with plastic wrap in the refrigerator for up to 3-4 days to maintain its freshness.

Freezer: For longer storage, wrap slices in plastic wrap and then in aluminum foil. This can keep them in the freezer for up to 2 months; simply thaw in the fridge before serving.

Room Temperature: Avoid leaving the cheesecake at room temperature for over 2 hours to prevent spoilage and maintain flavor.

Reheating: This cheesecake is best served chilled. No need to reheat; just slice and enjoy straight from the fridge!

Piña Colada Cheesecake Recipe FAQs

How do I select ripe ingredients for the cheesecake?
Absolutely! When choosing fresh pineapple, look for one that’s firm but gives slightly when squeezed and has a sweet aroma at the base. For the best flavor, avoid pineapple with dark spots all over. For the cream cheese, softness at room temperature is key; make sure it’s not too cold or too warm, as this will affect mixing.

How do I store leftover Piña Colada Cheesecake?
Definitely! Cover your cheesecake tightly with plastic wrap and store it in the refrigerator for up to 3-4 days. This helps keep it fresh and the flavors intact. If you prefer to keep it longer, you can wrap individual slices in plastic wrap and then in aluminum foil for storage in the freezer for up to 2 months. Just remember to thaw in the refrigerator before serving!

Can I freeze Piña Colada Cheesecake?
Yes, you can! To properly freeze your cheesecake, wrap each slice carefully in plastic wrap followed by aluminum foil to prevent freezer burn. When you’re ready to enjoy it again, simply place it in the fridge for a few hours or at room temperature for about two hours until thawed. Enjoy that tropical goodness!

What if my cheesecake doesn’t set properly?
Very! If your Piña Colada Cheesecake hasn’t set after the chilling time, it could be due to a few factors. Ensure the cream cheese is thoroughly softened before mixing, as cold cream cheese can trap air and lead to a less firm texture. Also, double-check that you drained the crushed pineapple well to avoid excess moisture. If it’s still soft, you could try chilling it for a few more hours or even overnight for firmer results.

Are there any dietary considerations for this cheesecake?
Absolutely! If you’re accommodating dietary preferences, you can substitute the heavy cream with coconut cream for a dairy-free version, and opt for dairy-free cream cheese. Also, if you want to omit the rum extract for a kid-friendly treat, feel free to leave it out without sacrificing flavor. Always check for allergies if sharing with others!

Piña Colada Cheesecake

Refreshing Piña Colada Cheesecake for a Tropical Escape

This No-Bake Piña Colada Cheesecake combines the flavors of pineapple, coconut, and a hint of rum, making it a refreshing dessert perfect for summer gatherings.
Prep Time 30 minutes
Chilling Time 4 hours
Total Time 4 hours 30 minutes
Servings: 8 slices
Course: Dessert
Cuisine: Tropical
Calories: 400

Ingredients
  

For the Crust
  • 2.5 cups Graham Crackers Substitute with gluten-free crumbs for a GF option.
  • 6 tablespoons Unsalted Butter Use coconut oil for a dairy-free version.
  • 4 tablespoons Sugar Can be reduced or replaced with coconut sugar.
For the Cheesecake Filling
  • 16 oz Cream Cheese Opt for dairy-free cream cheese if vegan.
  • 2 cups Heavy Cream Substitute with coconut cream for dairy-free.
  • 1 cup Powdered Sugar Reducing sugar is an option.
  • 1 teaspoon Rum Extract Omit for a non-alcoholic version.
  • 1 cup Crushed Pineapple Drain well to prevent sogginess.
  • 0.5 cup Sweetened Shredded Coconut Use unsweetened for less sweetness.
For Garnishing
  • Whipped Cream Optional but recommended for visual contrast.
  • Maraschino Cherry Optional based on preference.
  • Pineapple Pieces Fresh pineapple adds a fruity touch.

Equipment

  • 9-inch springform pan

Method
 

Step-by-Step Instructions
  1. In a medium bowl, combine 2 ½ cups of graham cracker crumbs, 4 tablespoons of sugar, and 6 tablespoons of melted unsalted butter. Mix until well incorporated, resembling wet sand. Press this mixture firmly into the bottom of a greased 9-inch springform pan, creating an even layer. Once formed, freeze the crust for 10-15 minutes to allow it to firm up before adding the filling.
  2. While the crust chills, prepare the cheesecake filling. In a large mixing bowl, beat 16 oz of softened cream cheese and 1 cup of powdered sugar together until the mixture is smooth and creamy. In a separate bowl, whip 2 cups of heavy cream to soft peaks. Gently fold the whipped cream into the cream cheese mixture, being careful not to deflate the whipped cream, until combined into a light, airy filling.
  3. Stir in 1 cup of well-drained crushed pineapple, ½ cup of sweetened shredded coconut, and 1 teaspoon of rum extract into the cream cheese mixture. Mix gently until all the ingredients are well incorporated.
  4. Spread the cheesecake filling over the chilled crust in the springform pan. Use a spatula to smooth the top, creating an even surface. Cover the pan with plastic wrap and refrigerate it for at least 3-4 hours, or until the cheesecake is fully set.
  5. Once the setting time has passed, carefully run a knife around the edge of the springform pan to release the cheesecake. Carefully remove the sides of the pan and place the cheesecake on a serving platter. Garnish with dollops of whipped cream, maraschino cherries, and fresh pineapple pieces before slicing and enjoying.

Notes

Allow the cheesecake to chill for the full 3-4 hours for best texture. Use room temperature cream cheese for a smoother filling. Drain pineapple well to avoid sogginess.

Cozy Slow Cooker Parmesan Herb Chicken with Creamy Orzo Bliss

As I leisurely stirred the pot on a chilly afternoon, the aroma of herbs and creamy goodness filled my kitchen, drawing me back to a comforting moment of childhood. Today, I’m excited to share my Cozy Slow Cooker Parmesan Herb Chicken with Creamy Orzo—a hands-off recipe that’s the perfect antidote to hectic days. With its tender chicken simmered in a rich herby sauce and perfectly cooked orzo, this dish promises to bring warmth and comfort to your table, all while ensuring quick prep and minimal cleanup. Whether you’re too busy for takeout or simply craving a heartwarming meal, this slow cooker recipe will have you savoring every bite. Curious about how to make it? Let’s dive in!

Why is this recipe a must-try?

Simplicity at Its Best: This cozy dish requires minimal prep—just season and combine!

Comforting Flavors: The combination of creamy orzo and aromatic herbs creates a dish that warms both the body and the soul.

Time-Saving Delight: With the slow cooker, you can set it and forget it, freeing up your evening for what truly matters.

Crowd-Pleasing Appeal: Perfect for family gatherings or weeknight dinners, everyone will rave about this delicious comfort food.

Versatile and Customizable: Feel free to add veggies like spinach or swap chicken breasts for thighs for even more flavor!

Whether you’re looking for a quick meal on a busy day or seeking inspiration to broaden your culinary repertoire, this Cozy Slow Cooker Parmesan Herb Chicken with Creamy Orzo is bound to become a staple. Enjoy your homemade goodness that rivals any takeout!

Cozy Slow Cooker Parmesan Herb Chicken Ingredients

• To create your nourishing Cozy Slow Cooker Parmesan Herb Chicken with Creamy Orzo, gather these essential ingredients:

For the Chicken

  • Chicken Breasts – Boneless, skinless varieties make for easy handling and tender results.

For the Creamy Orzo

  • Orzo Pasta – This small pasta shape captures all the delicious flavors; feel free to swap with other tiny pasta if needed.
  • Parmesan Cheese – Freshly grated enhances creaminess and flavor, making all the difference.
  • Heavy Cream – Adds a luxurious creaminess; half-and-half can be used for a lighter touch.

For the Flavor

  • Herbs (Italian seasoning, garlic, etc.) – These aromatic wonders will deepen the dish’s flavor; opt for fresh herbs when possible, using a 3:1 ratio if substituting dried.
  • Chicken Broth – The cooking liquid that imparts flavor; consider low-sodium options for a lighter meal.
  • Salt and Pepper – Essential seasonings; taste test and adjust based on your chicken broth’s saltiness.

With these ingredients at the ready, you’re set to craft a dish that speaks comfort and warmth, promising to delight your taste buds!

Step‑by‑Step Instructions for Cozy Slow Cooker Parmesan Herb Chicken with Creamy Orzo

Step 1: Prep Chicken
Begin by seasoning the boneless, skinless chicken breasts with salt and pepper to enhance the flavor. Place them neatly into the bottom of your slow cooker, ensuring they lay flat for even cooking. This foundational step is key to the success of your cozy slow cooker Parmesan herb chicken, bringing out its best flavors as the chicken simmers.

Step 2: Combine Ingredients
In a mixing bowl, whisk together the chicken broth, heavy cream, Italian seasoning, and minced garlic until well combined. Pour this creamy mixture over the chicken in the slow cooker, ensuring the chicken is mostly submerged. The sauce will create a luscious base for your dish and will help the flavors mingle beautifully throughout the cooking process.

Step 3: Cook
Cover the slow cooker and set it to low heat for 6 to 7 hours or high heat for 3 to 4 hours. This gentle cooking method allows the chicken to become beautifully tender and soak up the herby flavors. Check for doneness; the chicken should be cooked through and easily shred with a fork, indicating it’s ready for the next step.

Step 4: Add Orzo
About 20 to 30 minutes before the cooking time is up, carefully stir in the orzo into the slow cooker, ensuring it’s fully submerged in the creamy sauce. Cover and continue to cook for the remaining time. The orzo will absorb the flavors of the Parmesan herb chicken, creating a comforting and satisfying texture in your dish.

Step 5: Serve
Once the orzo is tender and the chicken is effortlessly shredded, give the contents of the slow cooker a gentle stir to combine all the delicious flavors. Serve your warm, cozy slow cooker Parmesan herb chicken with creamy orzo in bowls, allowing each bite to highlight the creamy goodness and tender chicken, promising a heartwarming meal.

How to Store and Freeze Cozy Slow Cooker Parmesan Herb Chicken

  • Fridge: Store leftovers in an airtight container for up to 4 days. This will keep your cozy slow cooker Parmesan herb chicken fresh and flavorful for your next meal.

  • Freezer: Freeze portions in airtight containers for up to 3 months. For best results, let the dish cool completely before freezing to maintain texture.

  • Thawing: When ready to enjoy, thaw your frozen dish in the fridge overnight. This ensures that it retains its creamy goodness when reheated.

  • Reheating: Reheat on the stove or in the microwave until warmed through. Add a splash of chicken broth or cream if the orzo has absorbed too much liquid, restoring its delightful creaminess.

Make Ahead Options

These Cozy Slow Cooker Parmesan Herb Chicken with Creamy Orzo are perfect for busy weeknights! You can season the chicken and combine the broth, heavy cream, Italian seasoning, and garlic up to 24 hours in advance; simply refrigerate the mixture until you’re ready to cook. You can also chop any additional veggies you wish to add, storing them in an airtight container for up to 3 days. When you’re ready to serve, place the seasoned chicken in the slow cooker, pour over the creamy mixture, and cook as directed. This make-ahead approach ensures that you can enjoy a comforting homemade meal with just a few simple steps, all while preserving the delightful flavors and creamy texture!

What to Serve with Cozy Slow Cooker Parmesan Herb Chicken with Creamy Orzo

As you savor the rich flavors of this delicious dish, think about how to round out your meal with delicious pairings that complement its creamy, herby essence.

  • Garlic Roasted Vegetables: These tender veggies add a caramelized sweetness that contrasts beautifully with the dish’s richness. Toss seasonal veggies with olive oil, garlic, and herbs, then roast until golden.

  • Crispy Brussels Sprouts: Their crispy edges bring a delightful crunch that beautifully balances the creamy orzo. Drizzle with balsamic glaze for an extra touch of flavor.

  • Simple Green Salad: A refreshing blend of greens like spinach and arugula, topped with a lemon vinaigrette, perfectly cuts through the dish’s richness while adding a bright, fresh flavor.

  • Garlic Bread: This warm, buttery side enhances the cozy experience. Whether you choose a classic baguette or an artisan loaf, the garlic flavor pairs beautifully with the herby sauce.

  • Mushroom Risotto: For those wanting to lean into more creaminess, a rich mushroom risotto brings an earthy depth that complements the flavors of the chicken and orzo perfectly.

  • Chardonnay: This lightly oaked wine offers a crisp acidity that pairs wonderfully with the creamy sauce, enhancing the overall dining experience.

  • Decadent Cheesecake: Conclude your meal on a sweet note! The creamy texture of cheesecake can mirror the comfort of your main dish while offering a delightful contrast with its sweetness.

  • Lemon Sorbet: A refreshing palate cleanser that brightens the dining experience. Its zesty notes can balance the richness of your main dish beautifully.

Expert Tips for Cozy Slow Cooker Parmesan Herb Chicken

Ingredient Quality: Use fresh herbs and high-quality Parmesan cheese for maximum flavor. Fresh ingredients truly enhance this comforting dish.

Submersion is Key: Ensure the chicken is completely submerged in the sauce to prevent dryness; this will keep the meat tender and juicy.

Perfect Time Management: Avoid overcooking by monitoring the cooking time. If using chicken thighs, adjust the cook time slightly as they can tend to cook faster.

Thickening the Sauce: For a creamier texture, consider mixing cornstarch with a bit of water and adding it to the slow cooker towards the end of cooking.

Personalize Your Dish: Feel free to add veggies like peas or spinach during the last 30 minutes for a fresh twist on this cozy slow cooker Parmesan herb chicken with creamy orzo.

Cozy Slow Cooker Parmesan Herb Chicken Variations

Feel free to play around and transform the flavors of this comforting dish to fit your taste preferences and dietary needs!

  • Thighs for Tenderness: Use boneless chicken thighs instead of breasts for richer flavor and tenderness. This small change elevates the dish to new heights.

  • Vegetable Medley: Add chopped spinach or peas in the last 30 minutes of cooking for a nutritious boost. It not only enhances the color but also incorporates more vitamins into your meal.

  • Pasta Swap: If you don’t have orzo, swap it for small pasta shapes like ditalini or or small shells. Each version brings a unique twist to the creamy texture.

  • Herb Explosion: Replace Italian seasoning with fresh herbs like basil or thyme for a vibrant flavor. A simple adjustment can breathe new life into your dish!

  • Spicy Kick: Add red pepper flakes for a hint of heat. Adjust the amount to your preferred spice level for an extra zing that warms the soul.

  • Light and Lemony: For a refreshing twist, sprinkle fresh lemon juice over the finished dish. The acidity brightens the creamy sauce, creating a delightful balance.

  • Nutty Flavor: Stir in a handful of toasted pine nuts or walnuts for added crunch and nuttiness. This enhances both the texture and flavor profile, making it irresistible.

Elevate your Tropical Chicken Pineapple night by pairing with these variations or enjoy something lighter with Savory Zucchini Pancakes Herbs. Let your creativity shine in the kitchen!

Cozy Slow Cooker Parmesan Herb Chicken with Creamy Orzo Recipe FAQs

How do I choose the right chicken for this recipe?
Absolutely! For the best results in your Cozy Slow Cooker Parmesan Herb Chicken with Creamy Orzo, I recommend using boneless, skinless chicken breasts. They cook evenly and become wonderfully tender in the slow cooker. If you prefer a richer flavor, feel free to swap them out for chicken thighs, which may require a slight adjustment in cooking time as they tend to cook a bit faster.

How should I store leftovers from this recipe?
Very! To keep your Cozy Slow Cooker Parmesan Herb Chicken fresh, store any leftovers in an airtight container in the refrigerator for up to 4 days. This way, you can enjoy this comforting dish again without worrying about spoilage.

Can I freeze this dish for later?
Absolutely! You can freeze your leftovers for up to 3 months. After cooking and cooling the dish completely, portion it into airtight containers. When you’re ready to enjoy, simply thaw it overnight in the refrigerator before reheating. This will keep all those delicious flavors intact.

How can I reheat the chicken and orzo to preserve the creaminess?
To reheat your Cozy Slow Cooker Parmesan Herb Chicken with Creamy Orzo, gently warm it on the stove over low heat or in the microwave. If you notice the orzo has absorbed too much liquid, adding a splash of chicken broth or heavy cream during reheating will restore its delightful creaminess, making it just as luscious as when it was first prepared.

Are there any dietary considerations I should be aware of?
Of course! If you’re cooking for someone with dietary restrictions, this recipe can easily be adapted. For a lighter version, feel free to substitute heavy cream with half-and-half or a dairy-free option like coconut cream. If there are allergies, always check the specific brands of chicken broth and cheese for potential allergens. Additionally, this dish is pet-friendly (except for the cheese) in moderate quantities—just ensure all ingredients are safe for furry companions!

Cozy Slow Cooker Parmesan Herb Chicken with Creamy Orzo

Cozy Slow Cooker Parmesan Herb Chicken with Creamy Orzo Bliss

A comforting recipe featuring Parmesan herb chicken and creamy orzo, perfect for busy days.
Prep Time 15 minutes
Cook Time 6 hours
Total Time 6 hours 15 minutes
Servings: 4 servings
Course: Chicken
Cuisine: American
Calories: 450

Ingredients
  

For the Chicken
  • 2 pounds Boneless, skinless chicken breasts
For the Creamy Orzo
  • 1 cup Orzo pasta or substitute with other tiny pasta
  • 1 cup Freshly grated Parmesan cheese
  • 1 cup Heavy cream or use half-and-half for lighter version
For the Flavor
  • 2 cups Chicken broth consider low-sodium
  • 1 tablespoon Italian seasoning or to taste
  • 3 cloves Minced garlic
  • to taste Salt adjust based on broth's saltiness
  • to taste Pepper

Equipment

  • Slow Cooker

Method
 

Instructions
  1. Step 1: Prep Chicken - Season the chicken breasts with salt and pepper and place in the slow cooker.
  2. Step 2: Combine Ingredients - Whisk chicken broth, heavy cream, Italian seasoning, and garlic in a bowl. Pour over chicken.
  3. Step 3: Cook - Cover and cook on low for 6-7 hours or high for 3-4 hours until chicken is tender.
  4. Step 4: Add Orzo - Stir in orzo 20-30 minutes before cooking time ends.
  5. Step 5: Serve - Once orzo is tender, stir and serve in bowls.

Notes

Use fresh herbs and high-quality Parmesan for best results. Incorporate veggies for added nutrition.

Enchanting Unicorn Lemonade: Refreshing Summer Magic

As I stood on my porch, the warmth of the sun kissing my skin, I contemplated a refreshing drink that would lift my spirits and delight my guests. Enter the Enchanted Unicorn Lemonade—this whimsical summer drink is not only visually stunning with its playful pastel hues, but it also offers a perfect balance of tangy lemon and sweet goodness that’s sure to please both kids and adults alike. Quick to prepare and endlessly customizable, this delightful beverage brings a touch of magic to any gathering. Just imagine the joy on everyone’s faces as they sip on this colorful concoction, bursting with brightness and fun! Curious about how to whip up this enchanting drink for your next party? Let’s dive in and make some summer memories!

Why Is Unicorn Lemonade So Special?

Visual Appeal: The Enchanted Unicorn Lemonade dazzles with its soft pastel hues, making it a feast for the eyes. Customizable Colors: Use different food colorings to create unique shades that match any party theme! Kid-Friendly: This refreshing drink is a hit with both kids and adults, reviving the fun of summer gatherings. Quick to Prepare: In just a few simple steps, you can have a delightful drink ready to impress your guests. Perfect for Any Occasion: Whether it’s a birthday party or a casual afternoon, this whimsical lemonade adds a magical touch to every gathering!

Enchanted Unicorn Lemonade Ingredients

• Whip up this colorful drink with ease!

For the Lemonade Base

  • Fresh Lemon Juice – Key for tangy flavor and vitamin C; always opt for freshly squeezed for maximum brightness.
  • Granulated Sugar – Balances the tartness of the lemon juice; adjust according to your desired sweetness.
  • Water – Provides the refreshing base; modify the amount for your preferred strength.

For the Fun Factor

  • Food Coloring – Use this to bring pastel magic to your drink; experiment with different colors for a unique twist!
  • Ice Cubes – Necessary for that refreshing chill; don’t skimp on the ice to keep your lemonade cool.
  • Edible Glitter – Sprinkle in a touch of sparkle for a magical finish; make sure it’s food-safe and dietary-friendly.

With these simple ingredients, you’ll be set to create the delightful Enchanted Unicorn Lemonade that adds a whimsical touch to any gathering!

Step‑by‑Step Instructions for Enchanted Unicorn Lemonade

Step 1: Prepare the Lemon Base
Start by squeezing 1 cup of fresh lemons to extract the juice—this will brighten your Enchanted Unicorn Lemonade with tangy flavor. In a medium-sized pitcher, combine the fresh lemon juice with 1 cup of granulated sugar. Stir vigorously for about 2-3 minutes until the sugar fully dissolves, leaving you with a sweet and tart lemonade base that glistens.

Step 2: Mix in the Water
Next, pour in 4 cups of cold water into your pitcher, blending well into the lemonade mixture. Give it a gentle stir to ensure the flavors meld beautifully, adjusting the sweetness if necessary. You can taste at this stage—if it’s too tart, add a little more sugar. Your base should be refreshing and ready for a splash of color!

Step 3: Divide for Coloring
Carefully pour the lemonade into 3-4 smaller bowls, evenly dividing the mixture. This allows you to create different pastel shades for your Enchanted Unicorn Lemonade. Keep the pitcher handy, as you may want to add or mix more lemonade depending on the colors you’re creating—just remember that visual appeal is key!

Step 4: Create Colorful Hues
Add a few drops of food coloring to each bowl, mixing gently with a spoon until you achieve soft, whimsical shades. Take care to incorporate the colors until they blend well with the lemonade. Consider experimenting with combinations—like blue and pink—until you find the pastel colors that will make your drink pop!

Step 5: Layer the Colors
Now it’s time to assemble! Fill tall glasses with ice cubes to keep your Enchanted Unicorn Lemonade refreshingly cold. Begin by pouring one colored lemonade in a glass, allowing it to settle before adding another color carefully. This layering will create a stunning visual effect, capturing the magic of a unicorn every time you pour.

Step 6: Garnish and Serve
For that final magical touch, garnish each glass with a slice of lemon and a sprinkle of edible glitter. This will add sparkle to your presentation, making the Enchanted Unicorn Lemonade even more enchanting! Serve chilled to your guests, and revel in their delight as they sip on these whimsical creations.

Storage Tips for Enchanted Unicorn Lemonade

  • Fridge: Store leftover lemonade in an airtight container in the fridge for up to 3 days. This keeps it fresh while maintaining its vibrant colors and flavors.
  • Make-Ahead: Prepare the lemonade base without the water and food coloring and store in the fridge. Add cold water and your chosen colors just before serving for maximum freshness.
  • Freezer (for Lemon Base): If you want to prepare ahead, you can freeze just the lemon base in an ice cube tray, which can be blended later into a refreshing drink. Avoid freezing the finished lemonade to preserve the texture.
  • Reheating: Not applicable; this drink is best served chilled!

Expert Tips for Enchanted Unicorn Lemonade

  • Lemon Quality Matters: Use firm, heavy lemons with glossy skin to ensure juiciness and flavor for your Enchanted Unicorn Lemonade.
  • Adjust Sweetness Wisely: If your lemonade turns out too sweet, simply add more lemon juice or a splash of cold water to balance the flavors.
  • Serve Immediately: For the best visual effect, layer the colors just before serving. Prepare the lemon base in advance to save time.
  • Mind the Temperature: Avoid freezing the finished lemonade, as it can change texture; instead, consider freezing the lemon base ahead of time.
  • Experiment with Colors: Have fun and mix different food colorings to create unique and enchanting shades that suit your summer party theme!

Enchanted Unicorn Lemonade Variations

Feel free to get creative and make this delightful drink your own with these fun twists!

  • Dairy-Free: Substitute granulated sugar with agave syrup or maple syrup for a plant-based sweetener.
  • Herbal Twist: Add fresh mint or basil for a refreshing herbal note that complements the tangy lemonade beautifully.
  • Sparkling Magic: Replace some of the water with sparkling water or club soda for a fizzy enchantment. The added carbonation brings a lively twist to your sips!
  • Citrus Blend: Mix in other citrus juices like lime or orange to create a zesty flavor explosion that’s bursting with sunshine. Try combining lemon and lime for a classic tartness!
  • Flavored Ice Cubes: Freeze your lemonade with chunks of fruit or edible flowers in ice cubes for a visually stunning and refreshing surprise as they melt.
  • Heat it Up: Add a pinch of cayenne or crushed pepper for a subtle kick that plays off the sweetness of your lemonade perfectly.
  • Gourmet Garnish: Instead of just a lemon slice, add colorful fruit slices or berries on the rim for a visually appealing touch. Not only does it look stunning, but it adds extra flavor each time you sip!
  • Enhanced Sweetness: Use flavored syrups, like lavender or rose, instead of sugar, to add a beautiful floral note to your lemonade.

With these variations, your Enchanted Unicorn Lemonade will always feel fresh and exciting—a guaranteed recipe for smiles at any gathering!

What to Serve with Enchanted Unicorn Lemonade

Imagine a sunny afternoon, laughter ringing in the air as colorful drinks fill your garden table, creating a vibrant and inviting atmosphere.

  • Fruit Skewers: Bright, fresh fruits on skewers provide a vibrant crunch that complements the sweet and tangy lemonade beautifully.

  • Mini Sandwiches: These bite-sized delights pair perfectly with the refreshing drink, offering savory balance to your enchanting lemonade.

  • Cucumber Salad: Light and crisp, this salad adds a refreshing touch, making it a wonderful sidekick that brings freshness to each sip.

  • Cheese Platter: A selection of soft and hard cheeses alongside nuts and fruits creates a wonderful contrast, enhancing the lemonade’s sweetness.

  • Pineapple Sorbet: Served in bowls, this dessert’s fruity chill enhances the summer vibes while echoing the lemonade’s citrus notes.

  • Mint Spritzer: A refreshing non-alcoholic drink featuring mint and soda water adds bubbly zest, making it a joyous companion to your vibrant lemonade.

  • Cupcakes: Delightful pastel cupcakes transport the whimsy of unicorn lemonade into dessert form, creating cohesive and festive fun.

  • Sparkling Water: Light and bubbly, this drink serves as a refreshing palate cleanser between sips of the vibrant unicorn lemonade.

  • Chocolate-Dipped Strawberries: Juicy strawberries enveloped in chocolate offer a sweet touch that adds a luxurious feel to your spread.

Make Ahead Options

The Enchanted Unicorn Lemonade is a fantastic choice for meal prep, allowing you to enjoy more time with your guests! You can prepare the lemonade base (fresh lemon juice and sugar mixed with water) up to 24 hours in advance. Store it in an airtight container in the refrigerator to maintain freshness. For the colorful presentation, divide the base into smaller bowls and add food coloring just before serving to keep those vibrant hues intact. Layer the colors over ice right before serving to ensure the lemonade looks just as enchanting as it tastes. This way, you’ll have a spectacular drink ready with minimal effort, perfect for busy summer days!

Enchanted Unicorn Lemonade Recipe FAQs

How do I select the best lemons for making Enchanted Unicorn Lemonade?
Absolutely! Look for firm, heavy lemons with glossy skin and without dark spots. This ensures you get the juiciest fruit, which is key to a bright and tangy lemonade. Avoid lemons that feel soft or have blemishes, as they may lack flavor.

How should I store leftover Enchanted Unicorn Lemonade, and for how long?
You can store any leftover lemonade in an airtight container in the fridge for up to 3 days. Just make sure to keep it sealed to maintain its vibrant colors and refreshing taste! If you’re making a larger batch, it’s always a good idea to serve it fresh for the best quality.

Can I freeze the Enchanted Unicorn Lemonade?
While I wouldn’t recommend freezing the finished lemonade due to potential texture changes, you can freeze the base! Simply pour your prepared lemonade (without water and food coloring) into ice cube trays and freeze for up to 3 months. When you’re ready to enjoy your drink, blend the lemon cubes with cold water or add them directly to your glass for a tangy treat!

What if my Enchanted Unicorn Lemonade turns out too sweet?
Very! If you find your lemonade sweeter than desired, you can easily fix it by either adding more fresh lemon juice or a splash of cold water. Just remember to taste as you adjust, balancing the flavors until it’s just right.

Are there any dietary considerations I should know about for this recipe?
Absolutely! The Enchanted Unicorn Lemonade is vegan and kid-friendly, making it a great option for most dietary preferences. However, be sure to check the ingredients for the food coloring and edible glitter to ensure they align with dietary needs, especially for allergies. Always opt for food-safe options to keep everyone happy!

Enchanted Unicorn Lemonade

Enchanting Unicorn Lemonade: Refreshing Summer Magic

Enchanted Unicorn Lemonade is a visually stunning, refreshing drink that balances tangy lemon and sweet goodness, perfect for any summer gathering.
Prep Time 10 minutes
Total Time 10 minutes
Servings: 4 glasses
Course: Drinks
Cuisine: American
Calories: 120

Ingredients
  

For the Lemonade Base
  • 1 cup fresh lemon juice Always opt for freshly squeezed for maximum brightness.
  • 1 cup granulated sugar Adjust according to your desired sweetness.
  • 4 cups water Modify the amount for your preferred strength.
For the Fun Factor
  • as needed food coloring Experiment with different colors for a unique twist.
  • as needed ice cubes Necessary for that refreshing chill.
  • as needed edible glitter Ensure it’s food-safe and dietary-friendly.

Equipment

  • Pitcher
  • spoons
  • glasses
  • bowls
  • juicer

Method
 

Step-by-Step Instructions for Enchanted Unicorn Lemonade
  1. Start by squeezing 1 cup of fresh lemons to extract the juice. In a medium-sized pitcher, combine the fresh lemon juice with 1 cup of granulated sugar. Stir vigorously for about 2-3 minutes until the sugar fully dissolves.
  2. Next, pour in 4 cups of cold water into your pitcher, blending well into the lemonade mixture. Give it a gentle stir to ensure the flavors meld beautifully.
  3. Carefully pour the lemonade into 3-4 smaller bowls, evenly dividing the mixture to create different pastel shades.
  4. Add a few drops of food coloring to each bowl, mixing gently with a spoon until you achieve soft, whimsical shades.
  5. Fill tall glasses with ice cubes. Begin by pouring one colored lemonade in a glass, allowing it to settle before adding another color carefully.
  6. Garnish each glass with a slice of lemon and a sprinkle of edible glitter. Serve chilled to your guests.

Notes

For the best visual effect, layer the colors just before serving. Prepare the lemon base in advance to save time.

Savor Avocado, Bacon and Egg Toasts with Hot Honey Delight

There’s nothing quite like the crunch of perfectly toasted sourdough, topped with creamy avocado, savory bacon, and fluffy eggs. My mornings are transformed when I whip up these Avocado, Bacon and Egg Toasts with Hot Honey—a dish that feels indulgent yet can be made in just 30 minutes. This recipe not only caters to diverse breakfast cravings but also offers endless customization, allowing you to swap ingredients and toppings based on your mood or what’s in your fridge. Whether you’re preparing a cozy brunch for friends or looking for a quick breakfast fix, these toasts are bound to become a beloved favorite. Ready to discover how to bring this delightful combo to your table? Let’s dive in!

Why are these toasts a breakfast game-changer?

Unforgettable Flavor: The combination of creamy avocados, crispy bacon, and fluffy eggs topped with spicy-sweet hot honey creates a flavor explosion that’s simply irresistible.

Quick Preparation: In just 30 minutes, you can whip up a gourmet breakfast, making it perfect for busy mornings.

Total Versatility: Customize to your heart’s content! Swap bacon for turkey bacon or add fresh veggies for a personal twist.

Crowd-pleaser: These toasts are sure to impress at any brunch gathering, leaving your guests raving about their flavor.

Nutritionally Balanced: Packed with healthy fats, protein, and fiber, you’ll enjoy a satisfying meal that fuels your day.

Pair it with a refreshing side, like Crunchy Cucumber and Egg Salad, for a balanced feast!

Avocado, Bacon and Egg Toasts with Hot Honey Ingredients

For the Toast
Sourdough Bread – Provides a sturdy base with a crunchy texture that perfectly complements the toppings.
Avocado – Adds creaminess and richness; substitute with guacamole for extra flavor.

For the Toppings
Bacon – Brings a savory, crispy texture; use turkey bacon or smoked tempeh for a lighter or vegetarian option.
Eggs – Essential for fluffiness and protein; opt for egg whites for a lower-fat alternative.
Hot Honey – Offers a unique sweet-heat profile; regular honey with chili flakes works if hot honey isn’t available.
Salt – Enhances overall flavors; consider using Himalayan or sea salt for a more robust taste.

Feel free to gear up your mornings with these delightful Avocado, Bacon and Egg Toasts with Hot Honey!

Step‑by‑Step Instructions for Avocado, Bacon and Egg Toasts with Hot Honey

Step 1: Prepare the Ingredients
Start by gathering all your ingredients for the Avocado, Bacon and Egg Toasts with Hot Honey. Wash and slice ripe avocados and mash them in a bowl; season with salt and pepper to taste. Whisk eggs in another bowl until well combined, and keep everything within reach so you can easily move to the next steps.

Step 2: Cook the Bacon
In a frying pan, heat over medium heat and add your bacon slices. Cook them for about 5–7 minutes, turning occasionally until they’re crispy and golden. Once done, remove the bacon from the pan and set it on paper towels to drain excess grease, while allowing that savory aroma to fill your kitchen.

Step 3: Scramble the Eggs
Using the same pan with bacon drippings for flavor, lower the heat slightly and pour in your whisked eggs. Stir gently for about 3–4 minutes, scraping the bottom of the pan to ensure even cooking until they reach a soft, fluffy consistency. Remove them from heat just as they become a creamy texture for perfect scrambled eggs.

Step 4: Toast the Sourdough
While the eggs are cooking, place your slices of sourdough bread in a toaster or on a hot skillet for about 3–5 minutes until they are golden brown and crispy. The toasts should be firm enough to hold the toppings without becoming soggy, providing that delightful crunch.

Step 5: Assemble the Toasts
Spread a generous layer of your seasoned mashed avocado onto each warm sourdough slice, ensuring it covers the surface completely. Next, top with the creamy scrambled eggs, followed by the crispy bacon pieces to create a hearty layer of flavors in your Avocado, Bacon and Egg Toasts with Hot Honey.

Step 6: Drizzle with Hot Honey
Finally, drizzle a glorious amount of hot honey over the assembled toasts, letting its sweet heat cascade over the edges. This last touch elevates the dish, enhancing the flavors and adding a new dimension to your breakfast creation, ready to be served immediately while still warm.

What to Serve with Avocado, Bacon and Egg Toasts with Hot Honey

Elevate your breakfast experience by pairing these delightful toasts with complementary sides and drinks for a truly memorable meal.

  • Fresh Fruit Salad: A medley of vibrant seasonal fruits adds a refreshing contrast, brightening your plate and palate.
  • Greek Yogurt with Honey: Creamy yogurt topped with a drizzle of honey enhances the sweet notes of the hot honey. Enjoy this creamy side as a tangy balance to the savory elements.
  • Arugula Salad: Light, peppery arugula tossed with a lemon vinaigrette brings freshness and cuts through the richness of the toasts, making for a well-rounded plate.
  • Crispy Hash Browns: The crunchiness of golden hash browns complements the textures of the toasts and adds heartiness to your meal, ensuring no bite goes to waste.
  • Chilled Iced Tea: A refreshing glass of iced tea—sweetened or unsweetened—provides a delightful beverage pairing that won’t overshadow your dish’s flavors.
  • Savory Tomato Salad: Juicy slices of ripe tomatoes drizzled with balsamic glaze elevate the flavors and offer a fresh, juicy bite that brightens your morning.
  • Mimosa: For a celebratory touch, a bubbly mimosa pairs beautifully, adding a hint of citrus and effervescence that enhances your brunch vibe.
  • Buttery Croissants: Flaky, buttery croissants can serve as a delicious side, offering a different texture and richness that harmonizes with your toasts.

Avocado, Bacon and Egg Toasts with Hot Honey Variations

Get ready to unleash your creativity! These toasts are just the canvas for a masterpiece of flavors and textures waiting to delight your taste buds.

  • Vegetarian Option: Substitute bacon with roasted vegetables like bell peppers and zucchini for a colorful, satisfying twist. Fresh herbs will elevate the flavor profile.

  • Guacamole Upgrade: Instead of plain avocado, spread a vibrant layer of guacamole for a zesty kick and enhanced creaminess. Perfect for avocado lovers!

  • Spicy Ketchup: Swap hot honey for spicy ketchup or sriracha for those who crave an intense heat that pairs perfectly with eggs and bacon. Taste the warmth in every bite!

  • Cheesy Addition: Sprinkle crumbled feta or shredded cheddar on top for an added layer of richness and flavor that melts beautifully against the warm eggs.

  • Whole Grain Goodness: Switch out sourdough for whole grain or multigrain bread to amp up the fiber and nutrients without sacrificing taste.

  • Sweet and Savory: Top with caramelized onions or sliced figs to add a touch of sweetness, balancing perfectly with the saltiness of bacon and creaminess of avocado.

  • Nutty Flavor Boost: Drizzle with tahini or sprinkle with toasted seeds for an unexpected nutty twist that adds unique texture and depth.

  • Herb Infusion: Freshly chopped herbs like chives, parsley, or cilantro can brighten the dish and infuse it with fresh flavors, making it feel lighter.

These variations are inspired to mix and match as you enjoy your morning! If you’re looking for more ideas, check out my delicious Tropical Chicken with Pineapple in Sweet and Sour Sauce for a unique flavor adventure or pair it with my Savory Beef and Bacon Cheese Rolls for more brunch inspiration!

Storage Tips for Avocado, Bacon and Egg Toasts with Hot Honey

Fridge: Store individual components separately in airtight containers for up to 2 days. This helps maintain freshness and prevents the avocado from browning.

Avocado: To keep it fresh, you can drizzle a little lemon juice over the mashed avocado before sealing it tightly, helping to reduce oxidation.

Reheating: If you need to reheat the eggs or bacon, place them in a skillet over low heat, or microwave in short intervals until warmed through.

Freezing: The assembled Avocado, Bacon and Egg Toasts with Hot Honey are not suitable for freezing due to avocado browning and texture changes upon thawing.

Make Ahead Options

These Avocado, Bacon and Egg Toasts with Hot Honey are perfect for meal prep, allowing you to enjoy a delicious breakfast with minimal morning fuss! You can prepare the mashed avocado and cooked bacon up to 3 days in advance; simply store them in airtight containers in the fridge. To prevent browning, squeeze a bit of lemon juice into the avocado before refrigerating. For the eggs, cook them fresh, but you can beat them and season them the night before to save time. When you’re ready to indulge, simply toast your sourdough, layer on the avocado and bacon, scramble the eggs, and drizzle with hot honey. This way, you’ll savor every scrumptious bite with just a few quick steps!

Expert Tips for Avocado, Bacon and Egg Toasts

Fresh Avocados: Use ripe avocados for the best creaminess. Avoid hard avocados; they’ll be difficult to mash and lack flavor.

Egg Cooking: Aim for soft scrambled eggs—removing them from heat just before they’re fully cooked ensures fluffiness.

Sourdough Choice: Opt for fresh, hearty sourdough bread; avoid stale pieces which could result in a soggy toast.

Assembly Timing: Assemble your Avocado, Bacon and Egg Toasts with Hot Honey just before serving to keep the bread crispy and toppings fresh.

Customizable Toppings: Feel free to add your favorite vegetables or herbs to enhance flavors, such as diced tomatoes or fresh cilantro.

Avocado, Bacon and Egg Toasts with Hot Honey Recipe FAQs

What kind of avocados should I use?
Absolutely! Make sure to choose ripe avocados for the best texture and flavor. Look for avocados that are slightly soft to the touch but not overly mushy. Avoid those with dark spots all over or ones that feel rock-hard.

How should I store leftover ingredients?
For best results, store the individual components separately in airtight containers in the fridge for up to 2 days. This prevents the avocado from browning and keeps everything fresh. I recommend covering the mashed avocado with a little lemon juice to slow down oxidation!

Can I freeze avocado toast?
Very! Unfortunately, the assembled Avocado, Bacon and Egg Toasts with Hot Honey are not suitable for freezing due to the avocado browning and losing its creamy texture upon thawing. However, you can freeze bacon or scrambled egg portions separately; they can be reheated later.

What should I do if my eggs aren’t fluffy?
If your eggs aren’t reaching that delightful fluffy texture, it’s all about the heat and timing! Lower the heat slightly when scrambling and stir gently for about 3–4 minutes. Remove them from heat just before they appear fully set to keep them soft and creamy.

Can I modify this recipe for dietary restrictions?
Of course! If you’re looking for a lighter option, you can easily replace regular bacon with turkey bacon or smoked tempeh. For a vegetarian version, consider adding roasted vegetables or replacing eggs with a chickpea scramble. Enjoy customizing it to fit your dietary needs!

Avocado, Bacon and Egg Toasts with Hot Honey

Savor Avocado, Bacon and Egg Toasts with Hot Honey Delight

Indulge in Avocado, Bacon and Egg Toasts with Hot Honey for a delicious breakfast experience.
Prep Time 10 minutes
Cook Time 20 minutes
Total Time 30 minutes
Servings: 2 toasts
Course: Breakfast
Cuisine: American
Calories: 350

Ingredients
  

For the Toast
  • 2 slices Sourdough Bread provides a crunchy texture
  • 1 medium Avocado add creaminess; substitute with guacamole if desired
For the Toppings
  • 4 slices Bacon use turkey bacon or smoked tempeh for lighter option
  • 2 large Eggs scrambled; can use egg whites for lower fat
  • 2 tbsp Hot Honey for sweet-heat flavor; regular honey with chili flakes can substitute
  • 1 pinch Salt Himalayan or sea salt recommended

Equipment

  • Frying pan
  • Toaster
  • mixing bowl

Method
 

Step-by-Step Instructions
  1. Gather all ingredients. Wash and slice avocados, mash them with salt and pepper. Whisk eggs in a separate bowl.
  2. Cook bacon in a frying pan over medium heat for about 5-7 minutes until crispy. Remove and let drain on paper towels.
  3. In the bacon drippings, lower heat and pour in whisked eggs. Stir gently for 3-4 minutes until soft and fluffy.
  4. Toast sourdough in a toaster or skillet for 3-5 minutes until golden brown and crispy.
  5. Spread mashed avocado on each slice of toasted sourdough, then top with scrambled eggs and crispy bacon.
  6. Drizzle hot honey over the assembled toasts and serve warm.

Notes

Customize your toppings with vegetables or herbs for added flavor. Best to assemble just before serving.

Creamy Roasted Red Pepper and Garlic Dip Ready in Minutes

While preparing for a game night recently, I found myself in a mini crisis—what to serve that would please both the snackers and the foodies? That’s when the idea of a Creamy Roasted Red Pepper and Garlic Dip came to mind. This easy appetizer not only boasts a velvety texture that’s inviting to dip into, but it’s also a make-ahead marvel, allowing you to enjoy the festivities instead of being stuck in the kitchen. The magic happens when you roast the red peppers and garlic, drawing out their sweetness and creating a depth of flavor that is simply irresistible. Whether you’re hosting friends or just satisfying your own cravings, this dip is sure to be a crowd-pleaser. Ready to elevate your snacking game? Let’s dive into this delicious recipe together!

Why is this dip a game changer?

Crowd-Pleasing Delight: This Creamy Roasted Red Pepper and Garlic Dip is a surefire way to impress your guests, combining a rich flavor profile that appeals to everyone—snackers and foodies alike.

Make-Ahead Magic: Prepare it in advance and simply chill, allowing your gathering to be stress-free and enjoyable.

Savory Sweetness: Roasting the peppers and garlic transforms them, unlocking a delightful sweetness for a unique taste experience.

Versatile Pairing: Serve it with your favorite dippers—fresh vegetables, pita chips, or toasted baguette slices make perfect companions. For a twist, pair it with a refreshing side like Asian Inspired Cabbage to balance the flavors.

Easy Preparation: With simple steps to follow, you’ll find this recipe a breeze. It’s the perfect way to delight at any occasion, while also allowing you to enjoy every moment with friends and family.

Creamy Roasted Red Pepper and Garlic Dip Ingredients

  • For the Dip
    Red Bell Peppers – Sweetness enhances the dip’s overall taste; roast until soft and caramelized for the best flavor.
    Garlic – Adds depth and aroma; roast until tender for a mellow flavor that’s luscious in the dip.
    Cream Cheese – Provides creaminess and body; remember to soften it at room temperature for easier blending.
    Sour Cream – Contributes tanginess and smoothness; Greek yogurt can be an excellent substitution for a lighter option.
    Salt – Enhance the overall flavor; adjust to taste based on saltiness from other ingredients.
    Black Pepper – Adds a hint of spice; freshly cracked black pepper offers the best flavor profile.

This delightful Creamy Roasted Red Pepper and Garlic Dip is sure to be a hit at your next gathering!

Step‑by‑Step Instructions for Creamy Roasted Red Pepper and Garlic Dip

Step 1: Roasting Peppers and Garlic
Preheat your oven to 400°F (200°C). On a baking sheet, arrange whole red bell peppers and unpeeled garlic cloves in a single layer. Roast in the oven for 25-30 minutes, or until the peppers’ skin blisters and the garlic turns soft and golden. Keep an eye on them as they roast; their sweet aroma will fill your kitchen!

Step 2: Cooling
Once the peppers and garlic are done roasting, remove them from the oven and let them cool slightly for about 10 minutes. This will make them easier to handle. Peel the skins off the bell peppers—this step is crucial for achieving that silky-smooth texture in your Creamy Roasted Red Pepper and Garlic Dip. Also, gently squeeze the roasted garlic out of its skin.

Step 3: Blending
In your food processor, combine the roasted red peppers, garlic, softened cream cheese, sour cream, salt, and black pepper. Pulse until the mixture is completely smooth, scraping down the sides as needed. The goal here is to create a rich, creamy dip with no lumps. Taste and adjust seasoning if necessary; every scoop should burst with flavor!

Step 4: Chill
Transfer your dip to an airtight container. Refrigerate for at least 2 hours, allowing the flavors to meld beautifully. This step not only enhances the taste but also gives the dip a dreamy consistency, perfect for spreading or scooping with your favorite dippers. The longer it chills, the better it gets!

Step 5: Serving
Once the Creamy Roasted Red Pepper and Garlic Dip has chilled, it’s ready to serve! You can enjoy it straight from the fridge or let it come to room temperature for a softer texture. Pair it with fresh veggies, pita chips, or toasted baguette slices for an unforgettable appetizer that will have everyone coming back for more.

Make Ahead Options

This Creamy Roasted Red Pepper and Garlic Dip is a fantastic make-ahead option for busy home cooks! You can roast the peppers and garlic up to 24 hours in advance; simply store them in an airtight container in the refrigerator once they’ve cooled. Additionally, you can prepare the dip completely, refrigerating it for up to 3 days for the flavors to meld beautifully. To maintain quality, ensure it’s sealed properly to prevent drying out. When you’re ready to serve, simply take it out, give it a quick stir, and enjoy with your favorite dippers. With these prep-ahead steps, you’ll save time and effortlessly impress your guests!

What to Serve with Creamy Roasted Red Pepper and Garlic Dip

Looking to create the perfect spread for your next gathering? Discover delectable pairings that elevate this creamy appetizer!

  • Crispy Pita Chips: Their light, crispy texture contrasts beautifully with the dip’s rich creaminess, making for a delightful tasting experience.

  • Fresh Veggie Platter: Crisp bell peppers, cucumbers, and cherry tomatoes add a refreshing crunch that complements the dip’s smoky flavors wonderfully.

  • Toasted Baguette Slices: These warm, toasty bites become an irresistible base for the dip, offering a satisfying crunch that enhances every scoop.

  • Grilled Shrimp Skewers: The slight char and savory notes from the shrimp play nicely with the dip, creating an unforgettable balance of tastes.

  • Stuffed Mini Bell Peppers: These mini delights, filled with herbed cream cheese, echo the roasted red pepper flavors while adding an intriguing twist.

  • Zesty Lemonade: A refreshing glass of zesty lemonade or iced tea cleanses the palate, making each dip even more enjoyable.

  • Chocolate-Dipped Strawberries: Finish off your gathering on a sweet note; the chocolate’s richness pairs surprisingly well after indulging in the savory dip.

Expert Tips for Creamy Roasted Red Pepper and Garlic Dip

  • Roasting Perfection: Ensure you roast the peppers and garlic until they’re blistered and soft. This caramelizes their natural sugars, elevating the flavor of your dip.

  • Smooth Blending: To achieve the smoothest texture for your Creamy Roasted Red Pepper and Garlic Dip, blend using room temperature ingredients; this helps them combine effortlessly.

  • Adjusting Flavor: Taste your dip after blending and before chilling; feel free to adjust salt and pepper to ensure the flavors are balanced and to your liking.

  • Chill Time: Allowing the dip to chill for at least 2 hours enhances the flavors. If time permits, chill it overnight for an even more robust taste.

  • Serving Suggestions: Pair the dip with an assortment of dippers! Crostini, celery sticks, and crispy tortilla chips create a delightful experience for guests.

How to Store and Freeze Creamy Roasted Red Pepper and Garlic Dip

  • Fridge: Store your Creamy Roasted Red Pepper and Garlic Dip in an airtight container for up to 5 days. This keeps it fresh and flavorful while ready for you to enjoy anytime.

  • Freezer: If you’d like to prepare this delicious dip in advance, freeze it for up to 2 months. Make sure to use a freezer-safe container, and thaw it overnight in the refrigerator when you’re ready to use it.

  • Reheating: If you prefer your dip warm, gently reheat it in the microwave or on the stove. Keep in mind that slow and low is key—this maintains the creamy texture without compromising flavor.

Creamy Roasted Red Pepper and Garlic Dip Variations

Feel free to get creative and make this dip your own with these fun variations that will delight your taste buds.

  • Greek Yogurt: Substitute Greek yogurt for sour cream for a tangier, healthier twist. The dip remains creamy while introducing a refreshing flavor.

  • Herb Infusion: Add fresh herbs like basil or dill for a bright, aromatic layer. Chopped herbs will make each bite truly refreshing.

  • Smoky Flavor: Incorporate smoked paprika or chipotle powder for a touch of smokiness. This small adjustment can add depth and a hint of heat.

  • Add Cheese: Grate in some Parmesan or feta cheese for an extra creamy and savory richness. The cheese melds beautifully with the roasted flavors.

  • Nutty Crunch: Top the dip with toasted pine nuts or walnuts for a delightful crunch. This addition creates a lovely texture contrast against the creaminess.

  • Spicy Kick: Mix in crushed red pepper flakes or a pinch of cayenne for a spicy version. Just a little can elevate the experience and wake up the palate.

  • Vegetable Power: Blend in some roasted zucchini or spinach for a veggie-packed version. This adds nutritional value while keeping the dip flavorful and colorful.

  • Citrus Zing: Squeeze in a bit of lemon or lime juice to brighten the flavors. The acidity will balance the creaminess perfectly.

Explore these variations and make them your own! To complement this dip, consider pairing it with a hearty dish like my Honey Garlic Slow Cooked Ribs or serve it alongside some crispy Garlic Butter French Fries for a delightful gathering. The possibilities are endless!

Creamy Roasted Red Pepper and Garlic Dip Recipe FAQs

How should I select the red bell peppers?
Absolutely! Look for bell peppers that are firm to the touch, glossy, and vibrant in color. Avoid any that have dark spots or are wrinkled, as these may indicate overripeness. Roasting enhances their natural sweetness, so pick ones that feel heavy and have a nice sheen!

What’s the best way to store leftover dip?
To keep your Creamy Roasted Red Pepper and Garlic Dip fresh, store it in an airtight container in the refrigerator. It should last for up to 5 days. Ensure the lid is sealed tightly to prevent any unwanted odors from hitching a ride in the goodness!

Can I freeze this dip?
Very! This dip freezes beautifully for up to 2 months. Simply transfer it to a freezer-safe container or heavy-duty freezer bag. When ready to enjoy, thaw it overnight in the refrigerator. When it’s time to serve, gently reheat on the stove or in the microwave while stirring to maintain its creamy texture.

What if my dip turns out lumpy?
Don’t worry! If your Creamy Roasted Red Pepper and Garlic Dip is lumpy, it could be due to blending cold ingredients. Ensure your cream cheese is at room temperature before blending, and pulse it well in the food processor. If it’s still not smooth enough, try blending it a bit longer or adding a splash of milk to achieve that velvety consistency!

Are there any dietary considerations?
For those who are lactose intolerant or looking for a lighter option, Greek yogurt is a fantastic substitute for sour cream! Additionally, if you have allergies, always make sure to check the ingredients of your cream cheese or any dips you plan to serve alongside to keep everyone’s health in mind.

How can I enhance the flavor further?
If you’re looking to jazz it up, consider adding a dash of smoked paprika or fresh herbs like basil or parsley before blending. You can even stir in some grated cheese, like Parmesan, for an extra creamy texture that will leave your taste buds dancing with joy!

Creamy Roasted Red Pepper and Garlic Dip

Creamy Roasted Red Pepper and Garlic Dip Ready in Minutes

This Creamy Roasted Red Pepper and Garlic Dip is a delicious, make-ahead appetizer perfect for any gathering.
Prep Time 10 minutes
Cook Time 30 minutes
Chill Time 2 hours
Total Time 2 hours 40 minutes
Servings: 8 servings
Course: Other
Cuisine: American
Calories: 150

Ingredients
  

For the Dip
  • 2 pieces Red Bell Peppers Roasted until soft and caramelized.
  • 6 cloves Garlic Roasted until tender.
  • 8 ounces Cream Cheese Softened at room temperature.
  • 1 cup Sour Cream Greek yogurt can be a substitute.
  • 1 teaspoon Salt Adjust to taste.
  • 1/2 teaspoon Black Pepper Freshly cracked for best flavor.

Equipment

  • oven
  • baking sheet
  • Food Processor
  • airtight container

Method
 

Step-by-Step Instructions
  1. Preheat your oven to 400°F (200°C). On a baking sheet, arrange whole red bell peppers and unpeeled garlic cloves in a single layer. Roast for 25-30 minutes until blistered.
  2. Remove from oven and let cool for about 10 minutes. Peel the skins off the peppers and squeeze the garlic out of its skin.
  3. In a food processor, combine roasted red peppers, garlic, softened cream cheese, sour cream, salt, and black pepper. Pulse until smooth.
  4. Transfer the dip to an airtight container and refrigerate for at least 2 hours to meld flavors.
  5. Serve chilled or at room temperature with dippers like fresh veggies or pita chips.

Notes

Chilling the dip enhances the flavors. It's best enjoyed with various dippers such as crostini or tortilla chips.

Mini Pancake Spieße: Whimsical Treats Perfect for Any Party

On sunny mornings, I can’t help but imagine a whimsical creation that combines my love for pancakes and fresh fruit into one delightful treat. Enter the Mini Pancake Spieße! These fluffy, handheld snacks are not just a feast for the eyes but also perfect for any occasion—whether you’re hosting a breezy brunch or bringing a playful dessert to a family gathering. With the option to cater to different dietary needs like vegan or gluten-free, everyone can join in on the fun. Plus, their quick prep time means you’ll have more moments to savor with your loved ones. Ready to turn your breakfast routine into a creative adventure? Let’s dive into this delicious recipe!

Why Are Mini Pancake Spieße So Fun?

Whimsical appeal: Mini Pancake Spieße are not only visually stunning, but they also bring a festive touch to any table. Flavorful combinations: The layering of fluffy pancakes and juicy fruits creates an explosion of taste with every bite. Diet-friendly options: Customize your skewers with vegan or gluten-free ingredients, ensuring that everyone can enjoy these delightful treats. Quick preparation: With a straightforward recipe, you’ll whip up these snacks in no time, leaving more moments to indulge. Perfect for sharing: Pack them for brunch or serve at parties; these handheld delights are sure to impress guests and ignite smiles! For a cozy twist, consider adding some Mini Cheeseburger Breads to your menu!

Mini Pancake Spieße Ingredients

For the Pancakes
All-purpose flour – Provides structure to pancakes; substitute with gluten-free flour blend for a gluten-free version.
Granulated sugar – Adds sweetness; feel free to adjust to your taste preference.
Baking powder – This leavening agent ensures perfect fluffiness; always check for freshness.
Salt – Enhances the flavor of the batter and balances sweetness.
Whole milk – Adds moisture and texture; can swap for soy or oat milk to make it vegan.
Large egg – Binds the ingredients together and enriches flavor; substitute with a flax egg for vegan option.
Melted unsalted butter – Contributes to richness; vegan butter can be used as a substitute.
Vanilla extract – Elevates flavor; pure extract is recommended for the best results.

For the Fruit Skewers
Fresh strawberries – Adds juicy sweetness; remember to hull and quarter them.
Banana – Offers natural sweetness and creaminess; slice into firm rounds to avoid overripeness.
Fresh blueberries – Bursting with flavor; fresh is best as frozen can make pancakes soggy.

For the Drizzle
Chocolate hazelnut spread – Adds a delightful richness; can be replaced with melted white chocolate for a twist.

Explore this fun facet of your cooking and share the joy of these Mini Pancake Spieße with family and friends!

Step‑by‑Step Instructions for Mini Pancake Spieße

Step 1: Prepare Dry Ingredients
In a mixing bowl, whisk together 1 cup of all-purpose flour, 2 tablespoons of granulated sugar, 1 tablespoon of baking powder, and a pinch of salt. Ensure there are no lumps for a smooth batter. This dry mix is crucial for the structure of your Mini Pancake Spieße, so keep whisking until well combined.

Step 2: Prepare Wet Ingredients
In a separate jug, combine 1 large egg, 1 cup of whole milk, 2 tablespoons of melted unsalted butter, and 1 teaspoon of vanilla extract. Whisk well until the mixture is smooth and slightly frothy. This wet mixture is essential for binding the pancakes together, so take care to blend thoroughly.

Step 3: Combine Mixtures
Pour the wet ingredients into the bowl of dry ingredients. Gently stir the two together with a spatula just until fully combined, but keep a few small lumps in the batter for fluffiness. Avoid over-mixing, as this can lead to dense pancakes, ruining the charm of the Mini Pancake Spieße.

Step 4: Cook Pancakes
Heat a non-stick skillet over medium heat, adding a small knob of butter until it sizzles. Use a squeeze bottle or spoon to dollop 1-inch pancake circles onto the skillet. Cook until bubbles form on the surface and the edges look set, about 2 minutes, then flip and cook for an additional minute until golden brown.

Step 5: Cool & Assemble
Once cooked, transfer the Mini Pancakes to a wire rack to cool slightly. While they cool, prepare your fruit; hulled and quarter fresh strawberries, slice bananas into rounds, and gather fresh blueberries. Begin threading the pancakes onto wooden skewers, alternating with the fruit for a colorful presentation.

Step 6: Drizzle
In a microwave-safe bowl, gently melt 1/4 cup of chocolate hazelnut spread for about 20 seconds, stirring until smooth. Drizzle the melted spread over the assembled pancake skewers, letting it cascade down for a delightful finish. This touch transforms your Mini Pancake Spieße into an eye-catching dessert.

Storage Tips for Mini Pancake Spieße

Fridge: Store cooked Mini Pancake Spieße in an airtight container for up to 3 days. This will keep them fresh and ready for enjoyment anytime!

Freezer: To prolong the life of your pancakes, flash freeze them on a baking sheet for about an hour, then transfer to a freezer bag for up to 2 months.

Reheating: For best results, reheat pancakes in a non-stick skillet over low heat for a few minutes, or microwave them for about 15-20 seconds until warm.

Assembly: If storing skewers, assemble right before serving to prevent pancakes from becoming soggy due to the moisture from the fruit. Enjoy these delightful Mini Pancake Spieße warm!

Make Ahead Options

These Mini Pancake Spieße are perfect for busy home cooks looking to save time without sacrificing flavor! You can prepare the pancake batter up to 24 hours in advance and refrigerate it in an airtight container; this helps to deepen the flavor. Additionally, you can also cut and portion the fruit a day ahead, storing them in separate airtight containers to maintain their freshness. When you’re ready to enjoy your Mini Pancake Spieße, simply cook the pancakes fresh in the morning, assemble them with the prepped fruit, and drizzle that delicious chocolate hazelnut spread on top. This way, you’ll have a delightful brunch option that comes together quickly, allowing for more time spent with your loved ones.

Mini Pancake Spieße Variations

Feel free to get creative with these Mini Pancake Spieße and make them truly your own!

  • Tropical Vibe: Swap strawberries for mango and blueberries for pineapple for a sunny flavor burst. This twist takes you straight to a beachside brunch, brightening any gathering.

  • Zesty Refreshment: Add a teaspoon of lemon zest to the batter and use kiwi and raspberries for a tangy twist. The citrus notes will awaken your taste buds and spark a joyful atmosphere.

  • Vegan Option: Pair a flax egg with soy or oat milk and replace butter with vegan butter. This version ensures everyone at the table can indulge in this delightful treat without worry.

  • Gluten-Free Version: Simply substitute all-purpose flour with a gluten-free blend. Just be sure to adjust liquid as needed to maintain the right consistency for fluffy pancakes.

  • Nutty Flavor: Add 1/4 cup of finely chopped nuts, like pecans or walnuts, to the batter for extra crunch and nutrition. Mixing textures will surprise and delight those who take a bite.

  • Spiced Delight: Incorporate a dash of cinnamon into your batter for a warm, cozy flavor. The aromatic spices will remind you of fall, perfect for a seasonal treat.

  • Chocolate Lover: Mix in mini chocolate chips to the batter for a rich chocolate experience. The gooey chocolate nestled in fluffy pancakes creates an irresistible combination.

  • Berry Medley: Use a combination of strawberries, blueberries, and raspberries threaded together for a colorful arrangement. This lovely medley not only looks stunning but offers a burst of varied flavors in every skewer.

Pair your whimsical creations with a side of Nutritious Oatmeal Pancake for added variety, and let the good times roll!

Expert Tips for Mini Pancake Spieße

  • Fluffy Texture: Ensure the batter has tiny lumps for the fluffiest pancakes. Over-mixing can lead to dense texture, which defeats the purpose of these charming Mini Pancake Spieße.

  • Preheating is Key: Always preheat your skillet until butter sizzles. This ensures your pancakes cook evenly and achieve that delightful golden brown color.

  • Fruit Freshness: Assemble the skewers right before serving to prevent pancakes from becoming soggy. Fresh fruit adds juiciness, so choose fruits that are ripe, but not overripe.

  • Baking Powder Check: For perfect puffiness, make sure your baking powder is fresh. An expired leavening agent can result in flat pancakes.

  • Customization Options: Don’t hesitate to explore various fruit combinations or dietary variations. The beauty of Mini Pancake Spieße is their adaptability to everyone’s taste preferences!

What to Serve with Mini Pancake Spieße?

Elevate your brunch spread by pairing these whimsical treats with delightful accompaniments that enhance every bite.

  • Chilled Greek Yogurt: This creamy dip, lightly sweetened with honey, complements the pancakes and balances their sweetness beautifully. A dollop on the side sparks a rich taste experience.
  • Crispy Bacon: A salty, savory side that adds a satisfying crunch to counter the sweetness of the pancakes. It’s the perfect pairing for those who love flavor contrasts!
  • Fresh Fruit Salad: A medley of seasonal fruits can brighten the plate, providing refreshing flavors that harmonize wonderfully with the Mini Pancake Spieße. It invites more colorful textures to your meal.
  • Avocado Toast: Creamy avocado on toasted bread brings a rich, buttery contrast, ideal for a hearty brunch vibe that keeps you satisfied. Try it topped with a sprinkle of chili flakes for an extra kick!
  • Maple Syrup Drizzle: This classic companion adds a familiar sweetness and enhances the playful nature of the pancakes. A little bit on the side can elevate their delightful flavor.
  • Sparkling Lemonade: Light and bubbly, this refreshing drink complements the sweetness of the pancakes while cleansing the palate between bites. It’s an effervescent choice for any gathering!
  • Mini Cheeseburger Breads: For a playful twist, consider adding savory mini cheeseburger breads to your spread, offering a delightful balance between sweet and savory for adventurous eaters.

Mini Pancake Spieße Recipe FAQs

How do I select ripe ingredients for my Mini Pancake Spieße?
Absolutely! When choosing fruits, look for strawberries that are bright red and firm, avoiding any with dark spots. Bananas should be yellow and slightly firm; steer clear of overly brown ones as they can turn mushy. Fresh blueberries should be plump and bright. If you’re going for tropical variations, choose mango that gives slightly when pressed and pineapple that’s golden and fragrant.

What is the best way to store leftover Mini Pancake Spieße?
Very easy! After you’ve enjoyed your fun Mini Pancake Spieße, place any leftovers in an airtight container. They will stay fresh in the fridge for up to 3 days, just ensure they are not touching to prevent sogginess. If you’re planning to store them longer, follow the flash freezing method: lay the pancakes flat on a baking sheet, freeze for about an hour, then place in a freezer bag. They can last up to 2 months frozen!

Can I freeze Mini Pancake Spieße? If so, how?
Absolutely! For freezing, you can flash freeze your cooked pancakes first. Lay them on a baking sheet without overlapping and place them in the freezer for about an hour. Once frozen, transfer them to a freezer-safe bag or container, and they can last for up to 2 months. When you’re ready to enjoy, reheat them on a skillet over low heat for a few minutes or in the microwave for about 15-20 seconds.

Why didn’t my pancakes puff up properly?
No worries! If your Mini Pancake Spieße didn’t puff, there could be a few reasons. First, check the freshness of your baking powder; it should fizz when you add liquid. Second, be careful not to over-mix the batter; tiny lumps are essential for fluffiness. Lastly, ensure your skillet is preheated properly—if it’s not hot enough when you pour in the batter, pancakes may spread instead of puffing!

Can I make Mini Pancake Spieße vegan or gluten-free?
Definitely! To make a vegan version, substitute the large egg with a flax egg (1 tablespoon ground flaxseed mixed with 3 tablespoons of water) and replace whole milk with soy or oat milk. For a gluten-free option, simply swap out the all-purpose flour for a gluten-free baking blend. Just keep an eye on the liquid measurements, as some blends may absorb more moisture.

Are these Mini Pancake Spieße safe for young children or those with allergies?
Very much so! Mini Pancake Spieße can cater to dietary needs, making them a great choice for children. Just be mindful of any specific allergies to the ingredients, such as gluten, dairy, or eggs. You can easily customize the recipe to meet your family’s needs, and their fun presentation may entice even the pickiest eaters!

Mini Pancake Spieße

Mini Pancake Spieße: Whimsical Treats Perfect for Any Party

Mini Pancake Spieße are delightful handheld snacks perfect for any occasion, combining fluffy pancakes and fresh fruit into a whimsical treat.
Prep Time 15 minutes
Cook Time 10 minutes
Cooling Time 5 minutes
Total Time 30 minutes
Servings: 4 skewers
Course: Breakfast
Cuisine: American
Calories: 200

Ingredients
  

For the Pancakes
  • 1 cup all-purpose flour Gluten-free flour blend can be used for gluten-free version.
  • 2 tablespoons granulated sugar Adjust to taste.
  • 1 tablespoon baking powder Always check for freshness.
  • 1 pinch salt Enhances flavor.
  • 1 cup whole milk Soy or oat milk can be used for a vegan option.
  • 1 large egg Substitute with a flax egg for vegan option.
  • 2 tablespoons melted unsalted butter Vegan butter can be used as a substitute.
  • 1 teaspoon vanilla extract Pure extract is recommended.
For the Fruit Skewers
  • 1 cup fresh strawberries Hulled and quartered.
  • 1 medium banana Slice into firm rounds.
  • 1 cup fresh blueberries Use fresh, not frozen.
For the Drizzle
  • 1/4 cup chocolate hazelnut spread Can be replaced with melted white chocolate.

Equipment

  • mixing bowl
  • Skillet
  • spatula
  • Squeeze bottle
  • Wooden skewers

Method
 

Step-by-Step Instructions
  1. Prepare Dry Ingredients: In a mixing bowl, whisk together the flour, sugar, baking powder, and salt until well combined.
  2. Prepare Wet Ingredients: In a separate jug, combine the egg, milk, melted butter, and vanilla extract. Whisk until smooth.
  3. Combine Mixtures: Pour the wet ingredients into the dry ingredients and stir gently until just combined.
  4. Cook Pancakes: Heat a skillet and dollop 1-inch circles of batter, cooking until bubbles form; flip and cook until golden.
  5. Cool & Assemble: Cool the pancakes slightly, prepare the fruit, and thread the pancakes onto skewers with the fruit.
  6. Drizzle: Melt the chocolate hazelnut spread and drizzle over the skewers before serving.

Notes

These Mini Pancake Spieße are ideal for brunch or parties, allowing for countless customization options to suit dietary preferences.

Mouthwatering Garlic Butter Shrimp and Steak for Date Night Magic

As I stood in my kitchen, the aroma of sizzling garlic and butter wrapping around me like a warm hug, I realized it was the perfect evening for a cozy yet elegant dinner. Enter the mouthwatering Garlic Butter Shrimp and Steak—a delightful symphony of flavors that combines succulent, buttery shrimp with tender, seared ribeye steak. This dish not only impresses with its elegance but also offers the ease of an easy weeknight dinner; it’s a true crowd-pleaser. Whether you’re planning a romantic date night or simply treating yourself after a long week, this recipe strikes the perfect balance between comfort and sophistication. Ready to make a meal that feels like a five-star experience at home? Let’s get cooking!

Why is this recipe a must-try?

Mouthwatering Garlic Butter Shrimp and Steak is a dish designed for maximum pleasure. Crowd-Pleaser: It’s a dazzling combination that’s sure to impress guests or elevate a cozy dinner for two. Ease of Preparation: With simple steps, even novice cooks can master this luxurious meal. Flavor Fusion: The rich steak paired with succulent shrimp and aromatic garlic butter creates an unforgettable taste experience. Versatile Pairings: Serve with a fresh salad or crusty bread for the perfect balance, just like my Cabbage Apple Salad or Garlic Butter French for extra charm. You’ll savor every bite!

Mouthwatering Garlic Butter Shrimp and Steak Ingredients

• Get ready to impress with these essential ingredients that make this dish truly shine!

For the Steak

  • Ribeye Steak – A meaty cut that provides a rich flavor; opt for at least 1.5 inches thick for the best juiciness.
  • Olive Oil – Ideal for cooking the steak and achieving that perfect crust; can be substituted with any neutral oil.
  • Flaky Sea Salt – Enhances flavor and draws out moisture from the steak; kosher salt works as a substitute.
  • Freshly Cracked Black Pepper – Adds depth and warmth to the seasoning; regular ground pepper is fine too.

For the Shrimp

  • Large Shrimp – The star of this dish, featuring a sweet and succulent flavor; use peeled and deveined shrimp for ease and presentation.
  • Garlic – Provides that aromatic flavor for the garlic butter; fresh minced garlic is preferred for the best results.
  • Unsalted Butter – Adds richness to both the steak and shrimp; consider it optional for an extra flavor boost.
  • Red Pepper Flakes – For a subtle kick to the dish; feel free to omit or reduce for milder tastes.

For Flavor and Freshness

  • Lemon Juice – Enhances the rich flavors beautifully; can be substituted with white wine or omitted if desired.
  • Fresh Parsley – Brightens the dish and lends a fresh herbal note; cilantro can be used as a flavorful alternative.

For the Accompaniment

  • Asparagus – Adds a refreshing crunch and vibrant color contrast; you can substitute with green beans or broccoli if you wish.

With these mouthwatering garlic butter shrimp and steak ingredients, you’re just a few steps away from creating a meal that feels like a celebratory feast!

Step‑by‑Step Instructions for Mouthwatering Garlic Butter Shrimp and Steak

Step 1: Prepare Garlic Butter
In a small bowl, combine 4 tablespoons of unsalted butter, 4 minced garlic cloves, 2.5 tablespoons of chopped fresh parsley, 1/8 teaspoon of red pepper flakes, and 1/2 teaspoon of lemon juice. Mix everything thoroughly until well blended and set aside. This delightful garlic butter will enhance the flavors of both the shrimp and the steak, creating a luxurious finishing touch.

Step 2: Season Steak
Pat your 1.5-inch-thick ribeye steak dry using paper towels to ensure a nice crust forms during cooking. Generously season both sides with 1 teaspoon of flaky sea salt and 1/2 teaspoon of freshly cracked black pepper. Let the steak sit at room temperature for about 20 minutes for even cooking while you prepare the rest of your ingredients.

Step 3: Cook Asparagus
In a large skillet, heat 1/2 tablespoon of olive oil over medium heat. Add the trimmed asparagus spears along with 4 tablespoons of water and 1/2 teaspoon of salt. Cover the skillet and steam for approximately 5 minutes until the asparagus is tender-crisp and vibrant green. Remove the lid and transfer the asparagus to a serving plate, letting them rest while you cook the steak.

Step 4: Sear Steak
In the same skillet, increase the heat to medium-high and add a dash of olive oil if needed. Place the seasoned ribeye steak in the skillet and sear it for 3-5 minutes on each side, aiming for a medium-rare finish at 130-135°F. The steak should develop a beautiful, golden crust. Once cooked to your liking, remove the steak from the skillet and allow it to rest on a cutting board for 5-10 minutes, topping it with 1.5 tablespoons of the garlic butter.

Step 5: Cook Shrimp
In a separate skillet, melt 2 tablespoons of unsalted butter and 1 tablespoon of olive oil over medium heat. Once hot, add the peeled and deveined large shrimp in a single layer. Cook for 2-3 minutes until the shrimp turn pink and curl, then flip them over and cook for another 2-3 minutes. The garlic butter flavor will permeate the shrimp, making them succulent and delectable.

Step 6: Serve
To serve the mouthwatering garlic butter shrimp and steak, slice the rested steak against the grain into thin strips. Plate the steak alongside the perfectly cooked shrimp and vibrant asparagus. Drizzle any remaining garlic butter mixture over the entire dish for added richness. Serve hot, and watch your family or guests delight in this elegant yet simple meal.

Mouthwatering Garlic Butter Shrimp and Steak Variations

Feel free to customize your dish with these enticing twists to make it your own!

  • Different Cuts: Swap ribeye for filet mignon or sirloin for a unique texture experience. Each cut brings its own delightful flavor and tenderness.

  • Seafood Swap: Use scallops instead of shrimp for a luxurious seafood variation. The sweet, buttery taste of scallops elevates this dish to new heights.

  • Vegetable Medley: Add colorful vegetables like bell peppers or zucchini to the skillet for an exciting, seasonal flair. They’ll bring both color and extra nutrition to your meal.

  • Herb Enhancements: Experiment with different herbs such as dill or tarragon in place of parsley. These fresh flavors create a whole new aromatic profile.

  • Creamy Twist: For a richer sauce, stir in a splash of cream or crème fraîche after cooking the shrimp. This adds a lovely silkiness that complements the garlic butter perfectly.

  • Spicy Kick: If you enjoy heat, toss in some diced jalapeños or increase the amount of red pepper flakes. This will take your dish from delectable to daring!

  • Flavorful Marinade: Before cooking, marinate your steak in a mixture of soy sauce, garlic, and ginger for an Asian-inspired twist. This enhances the umami and adds depth to your meal.

  • Serving Style: Plate the dish over a bed of jasmine rice or quinoa for a hearty and satisfying meal. This will soak up all those delectable garlic butter juices!

Play around with these variations to discover your favorite combination, and don’t hesitate to explore delightful pairings like my Savory Chicken and Cheesy Potato Drumsticks or a crisp salad to balance the richness, such as the vibrant Everyday Broccoli Patties with Yogurt Garlic Dressing. Happy cooking!

Make Ahead Options

These mouthwatering Garlic Butter Shrimp and Steak are perfect for meal prep enthusiasts! You can prepare the garlic butter up to 24 hours in advance; just mix it together and refrigerate in an airtight container to keep its fresh flavor. Additionally, season the steak and store it wrapped tightly in plastic wrap for up to 3 days, allowing for easy cooking later. For the asparagus, you can wash and trim it ahead of time, placing it in a resealable bag in the fridge. When it’s time to serve, simply follow the cooking instructions, searing the steak and shrimp as directed, and you’ll enjoy a delicious meal that feels effortless and freshly made—ideal for busy weeknights!

Expert Tips for Mouthwatering Garlic Butter Shrimp and Steak

  • Hot Skillet: Ensure your skillet is preheated for a good sear on the ribeye steak; a hot skillet prevents steaming and promotes a delicious crust.
  • Don’t Overcrowd: When cooking shrimp, avoid overcrowding the pan. Cook in batches to maintain the right temperature for searing, leading to perfectly tender shrimp.
  • Rest the Steak: Let the steak rest after searing for a minimum of 5-10 minutes. This step allows the juices to redistribute, making each bite juicy and flavorful.
  • Use Fresh Ingredients: Utilize fresh garlic and herbs for the best flavor in the garlic butter; dried versions won’t deliver the same vibrant taste.
  • Season Generously: Don’t skimp on seasoning the steak beforehand; it enhances the overall flavor of your mouthwatering garlic butter shrimp and steak dish.

What to Serve with Garlic Butter Shrimp and Steak

The perfect meal deserves delightful companions to create a memorable dining experience.

  • Creamy Mashed Potatoes: Their velvety texture and buttery flavor provide a comforting contrast to the savory steak and shrimp.

  • Garlic Bread: This warm, crusty addition offers a satisfying crunch to soak up any leftover garlic butter, elevating each bite.

  • Crisp Green Salad: A refreshing salad with mixed greens, cherry tomatoes, and a light vinaigrette balances the richness of the garlic butter shrimp and steak, adding a vibrant crunch.

  • Roasted Vegetables: Seasoned vegetables like carrots, bell peppers, and zucchini enhance the plate with color and earthy flavors, bringing an additional layer of taste.

  • Herbed Rice: Fluffy rice with fresh herbs absorbs the rich juices, creating a wholesome base that complements the hearty components of the meal.

  • Chardonnay: A glass of crisp, chilled Chardonnay beautifully amplifies the dish, harmonizing with the buttery sauce while refreshing your palate.

  • Chocolate Mousse: End on a sweet note with this rich, airy dessert. Its luxurious texture offers a perfect finale after such a delightful dinner.

Each of these pairings enhances your garlic butter shrimp and steak, ensuring a dining experience that’s as delightful as it is memorable!

Storage Tips for Mouthwatering Garlic Butter Shrimp and Steak

  • Fridge: Store leftovers in an airtight container for up to 2 days to maintain freshness. Keeping the dish sealed prevents the shrimp from becoming rubbery.
  • Freezer: It’s best to avoid freezing this dish, as shrimp and steak can lose their texture. However, if needed, you can freeze the shrimp separately for up to 1 month.
  • Reheating: Gently reheat in a skillet over low heat, adding a splash of water or broth to keep the shrimp moist. Avoid high heat to prevent overcooking.
  • Prep-Ahead Options: Consider preparing the garlic butter in advance; it can be stored in the fridge for up to a week, adding convenience when making your mouthwatering garlic butter shrimp and steak.

Mouthwatering Garlic Butter Shrimp and Steak Recipe FAQs

What type of ribeye steak should I use?
Absolutely! For the best flavor and juiciness, choose a ribeye steak that is at least 1.5 inches thick. This thickness ensures a rich, meaty taste and helps achieve the perfect sear while keeping the inside tender and juicy.

How do I store leftovers from this dish?
Very good question! The leftovers can be safely stored in an airtight container in the refrigerator for up to 2 days. Be sure to seal it well to keep the shrimp from becoming rubbery. When you’re ready to enjoy it again, gently reheat in a skillet over low heat with a splash of water to keep it moist.

Can I freeze garlic butter shrimp and steak?
While it’s best to enjoy this dish fresh, you can freeze shrimp separately for up to 1 month if necessary. To do this, place the shrimp in a single layer on a baking sheet until frozen solid, then transfer them to a freezer-safe bag. Just remember that freezing the steak isn’t recommended, as it may alter the texture.

What can I do if my shrimp turn out rubbery?
To prevent rubbery shrimp in the future, ensure you don’t overcrowd the skillet when cooking. Cook them in batches if needed and keep a close eye on the timing—overcooking can happen swiftly! Aim for that beautiful pink color and a slight curl, usually about 2-3 minutes per side.

Is this dish suitable for dietary restrictions?
Absolutely! While this dish features shrimp and steak, you can modify it to accommodate dietary preferences! If someone has shellfish allergies, you can substitute shrimp with scallops or omit seafood altogether. For those watching their sodium intake, use low-sodium butter or herbs instead of salt. Enjoy the versatility!

Can I use frozen shrimp for this recipe?
Yes, you can absolutely use frozen shrimp! Just be sure to fully thaw them in the refrigerator overnight or under cold running water before cooking. This ensures even cooking and prevents excess moisture from affecting your dish’s flavor and texture. Enjoy making your mouthwatering garlic butter shrimp and steak!

Mouthwatering Garlic Butter Shrimp and Steak

Mouthwatering Garlic Butter Shrimp and Steak for Date Night Magic

This Mouthwatering Garlic Butter Shrimp and Steak recipe combines succulent shrimp and tender ribeye steak, creating an elegant dish that’s perfect for a romantic dinner.
Prep Time 20 minutes
Cook Time 20 minutes
Resting Time 10 minutes
Total Time 50 minutes
Servings: 2 servings
Course: Dinner
Cuisine: American
Calories: 650

Ingredients
  

For the Steak
  • 1.5 inches Ribeye Steak Opt for at least 1.5 inches thick for the best juiciness.
  • 0.5 tablespoon Olive Oil Can be substituted with any neutral oil.
  • 1 teaspoon Flaky Sea Salt Kosher salt works as a substitute.
  • 0.5 teaspoon Freshly Cracked Black Pepper Regular ground pepper is fine too.
For the Shrimp
  • 1 pound Large Shrimp Use peeled and deveined shrimp for ease and presentation.
  • 4 cloves Garlic Fresh minced garlic is preferred for the best results.
  • 2 tablespoons Unsalted Butter Consider it optional for an extra flavor boost.
  • 1/8 teaspoon Red Pepper Flakes Feel free to omit or reduce for milder tastes.
For Flavor and Freshness
  • 1 tablespoon Lemon Juice Can be substituted with white wine or omitted if desired.
  • 2.5 tablespoons Fresh Parsley Cilantro can be used as a flavorful alternative.
For the Accompaniment
  • 1 bunch Asparagus You can substitute with green beans or broccoli if you wish.

Equipment

  • Skillet
  • mixing bowl

Method
 

Preparation
  1. In a small bowl, combine 4 tablespoons of unsalted butter, 4 minced garlic cloves, 2.5 tablespoons of chopped fresh parsley, 1/8 teaspoon of red pepper flakes, and 1/2 teaspoon of lemon juice. Mix thoroughly and set aside.
  2. Pat the 1.5-inch-thick ribeye steak dry and season both sides with 1 teaspoon of flaky sea salt and 1/2 teaspoon of freshly cracked black pepper. Let it sit at room temperature for about 20 minutes.
  3. Heat 1/2 tablespoon of olive oil in a large skillet over medium heat. Add trimmed asparagus and 4 tablespoons of water and cover to steam for approximately 5 minutes.
  4. Sear the seasoned ribeye steak in the same skillet over medium-high heat for 3-5 minutes on each side, aiming for medium-rare doneness. Allow steak to rest for 5-10 minutes before slicing.
  5. In a separate skillet, melt 2 tablespoons of unsalted butter and 1 tablespoon of olive oil. Cook the shrimp for 2-3 minutes on each side until pink and curled.
  6. Serve by plating the sliced steak, shrimp, and asparagus. Drizzle remaining garlic butter over the dish.

Notes

Ensure your skillet is preheated for a good sear on the ribeye. Let the steak rest after cooking for juicy results. Use fresh ingredients for best flavor.

Classic Columbia 1905 Salad with Ham and Swiss Delight

As I was tossing together the ingredients for dinner, I stumbled upon the delightful memory of a summertime picnic featuring a vibrant salad that had all my taste buds singing. The Classic Columbia 1905 Salad with Ham and Swiss Cheese is a scrumptious blend of savory ham, creamy Swiss cheese, and crisp greens that can be prepped in just 20 minutes—a dream for those busy weeknights. I love how versatile this salad is; you can easily swap in your favorite veggies or proteins to suit your mood. It’s not just a quick side dish but a satisfying light lunch, making it perfect for anyone looking to escape the fast-food rut. Curious about how easy it is to make this refreshing treat? Let’s dive into the details!

Why is the Columbia 1905 Salad a must-try?

Ease of Preparation: This salad comes together in just 20 minutes, combining fresh ingredients with minimal effort.
Versatile Ingredients: You can easily customize it by swapping in turkey, chicken, or your choice of cheese.
Crowd-Pleasing Appeal: Perfect for gatherings, this salad has something for everyone—it’s a delightful addition to any table.
Fresh and Crunchy: The crisp greens paired with savory ham and creamy Swiss cheese create a refreshing and satisfying bite.
Make-Ahead Benefits: Prep the individual components ahead of time for a quick assembly, making dinner a breeze—similar to how you’d enjoy a Cucumber Carrot Salad or Crunchy Cabbage Salad.
Embrace the wholesome flavors of the Classic Columbia 1905 Salad and enjoy a taste of nostalgia with every bite!

Classic Columbia 1905 Salad Ingredients

• For an unforgettable dish!

For the Salad

  • Ham – Provides protein and a salty flavor; substitute turkey or chicken for a lighter version.
  • Swiss Cheese – Adds creaminess and richness to the salad; can be swapped with any semi-soft cheese for variety.
  • Lettuce (Iceberg or Green Leaf) – Base of the salad providing crunch; iceberg can be substituted with green leaf for a different texture.

For the Dressing

  • Dressing – Essential for flavor; use a gluten-free version to maintain the dish’s dietary compliance.

For Additional Veggies

  • Cherry Tomatoes – Offers enhanced texture and a burst of freshness; perfect for adding color.
  • Cucumbers – Adds extra crispness; great for a refreshing crunch in every bite.

Dive into making your Classic Columbia 1905 Salad with Ham and Swiss—it’s bound to become a family favorite!

Step‑by‑Step Instructions for Classic Columbia 1905 Salad with Ham and Swiss

Step 1: Prep the Ingredients
Start by gathering all your ingredients for the Classic Columbia 1905 Salad. Dice the ham and Swiss cheese into bite-sized pieces, and chop the lettuce into roughly 2-inch pieces. Be sure to wash the lettuce well, and pat it dry to enhance the crispness. Having everything prepared ahead of time will make the assembly process quick and easy!

Step 2: Combine the Base Ingredients
In a large mixing bowl, toss together the chopped lettuce, diced ham, and Swiss cheese. Use your hands or a pair of tongs to mix gently, ensuring the flavors meld while keeping the lettuce from wilting. This step should take about 1-2 minutes, and you should see the vibrant colors of the salad coming together beautifully.

Step 3: Add Optional Veggies
If you’d like to enhance your Classic Columbia 1905 Salad, now is the time to mix in additional veggies such as halved cherry tomatoes and sliced cucumbers. These will not only add a splash of color but also a refreshing crunch. Toss these ingredients together for another minute, ensuring they are evenly distributed throughout the salad.

Step 4: Prepare the Dressing
In a small bowl or jar, whisk together your choice of dressing, ideally a gluten-free option to maintain the dish’s dietary compliance. Depending on your taste preferences, you can choose a simple vinaigrette or a creamy dressing. Aim for a slightly thicker consistency that will cling nicely to the salad components, which typically takes about 2 minutes to achieve.

Step 5: Dress the Salad
Just before serving, drizzle the dressing generously over the salad mixture. Toss everything gently but thoroughly to make sure every leaf, piece of ham, and slice of cheese is coated in that delicious dressing. This last step should only take about 1 minute, and the salad will look vibrant and inviting when done.

Step 6: Serve Immediately
For the best texture and flavor, serve your Classic Columbia 1905 Salad right after dressing it. This will keep the lettuce crisp and fresh, making for an irresistible dish. Use large serving bowls or individual plates to present your creation. Enjoy the delightful contrasts of flavors and textures that make this salad a family favorite!

How to Store and Freeze Classic Columbia 1905 Salad

Fridge: Store any leftover Classic Columbia 1905 Salad in an airtight container for up to 3 days. Separating the dressing until ready to serve keeps the greens fresh and crisp.

Freezer: This salad is not ideal for freezing due to its fresh ingredients. Instead, consider freezing the individual components (like ham or cheese) separately for later use.

Reheating: If you have leftover ham or cheese, simply thaw in the fridge and enjoy cold or at room temperature—no need to heat!

Prep Ahead: Pre-chop ingredients and store them individually in the fridge for quick assembly later in the week, ensuring you maintain vibrant flavors and textures.

Make Ahead Options

These Classic Columbia 1905 Salad with Ham and Swiss are perfect for meal prep enthusiasts! You can chop the ham, cheese, and lettuce up to 24 hours in advance, storing them separately in the refrigerator to maintain freshness and prevent sogginess. Additionally, you can prepare the dressing ahead of time and refrigerate it in a sealed container for up to 3 days. When you’re ready to serve, simply toss the prepped ingredients together with the dressing just before enjoying, ensuring a crisp and delicious finish. This way, you save time on busy weeknights while still serving a salad that’s just as delightful as if it were freshly made!

Classic Columbia 1905 Salad with Ham and Swiss Variations

Feel free to get creative with your Classic Columbia 1905 Salad; customizing it can elevate the flavors and textures in delightful ways!

  • Turkey Swap: Substitute ham with turkey for a leaner protein option while still keeping that savory taste.
  • Cheese Twist: Try gouda or cheddar instead of Swiss cheese for a different flavor profile that adds its own unique richness.
  • Lettuce Switch: Use arugula for a peppery crunch, or baby spinach for a more tender bite that brings extra nutrients.
  • Veggie Boost: Toss in some radishes or bell peppers for added color and a satisfying crunch that brightens the salad.
  • Spicy Kick: Drizzle a little Sriracha over the salad to introduce a delightful heat that will make your taste buds dance.
  • Dressing Adventure: Experiment with a balsamic vinaigrette or a honey mustard blend to create a zesty twist that complements your ingredients perfectly.
  • Nuts for Texture: Add some toasted walnuts or pecans for a surprising crunch and a boost of healthy fats.
  • Herb Infusion: Fresh herbs like basil or parsley can enhance the flavors beautifully and add vibrancy to your salad.

Whether you decide to keep it classic or mix it up, this salad is a canvas just waiting for your culinary creativity! For more delicious salad ideas, check out our Cabbage Apple Salad or Crunchy Cucumber and Egg Salad. Enjoy every bite!

What to Serve With Classic Columbia 1905 Salad with Ham and Swiss

Enhance your meal experience by pairing delightful accompaniments that resonate with the refreshing tones of this salad.

  • Creamy Mashed Potatoes: The buttery richness of mashed potatoes balances the crispness of the salad perfectly. This comforting side adds warmth, creating a truly satisfying dinner.
  • Garlic Breadsticks: These golden, flaky treats bring a delightful crunch and aromatic flavor, ideal for soaking up any leftover dressing. They transform any meal into a cozy gathering.
  • Classic Tomato Soup: A warm, tangy tomato soup complements the flavors of the salad while providing a soothing base that invites you to savor every bite.
  • Quinoa Pilaf: This protein-packed option adds texture and nuttiness, making the meal heartier. It’s a great way to spice things up while maintaining a light touch.
  • Apple Crisp: A warm dessert featuring sweet, baked apples and a crunchy topping transforms dinner into a sweet finale—each spoonful bursting with flavor contrasts perfectly with the salad.
  • Lemonade Spritzer: A refreshing drink that balances the savory with a hint of sweetness, lifting the entire meal while enhancing the bright flavors of the salad.
  • Avocado Toast: Creamy, savory avocado on toasted bread provides comforting richness, making it an excellent pairing for the salad’s crunchiness and bright flavors.
  • Cucumber and Tomato Salad: This light, refreshing side echoes the salad’s tones, offering additional crunch and flavors that complement without overwhelming the palate.
  • Grilled Chicken Skewers: Juicy chicken adds a protein punch, combining beautifully with the ham and Swiss, offering an exciting variation to the dining experience.

Expert Tips for Classic Columbia 1905 Salad

  • Prep Ahead: Preparing all ingredients ahead of time allows for a quick assembly when you’re ready to eat. This helps streamline your meal preparation.

  • Dress Last Minute: Always dress the Classic Columbia 1905 Salad just before serving to keep the greens crisp and refreshing. This prevents sogginess and ensures every bite is delightful.

  • Taste Test the Dressing: Make sure to taste the dressing before adding too much. Adjusting it to your preference enhances the overall flavor and prevents overwhelming the fresh ingredients.

  • Store Smart: If you have leftovers, store them in an airtight container in the fridge for up to three days. Potentially separating the dressing can maintain freshness for even longer!

  • Veggie Variety: Don’t hesitate to get creative! Adding colorful veggies like bell peppers or carrots can elevate the salad’s flavor and nutrition while giving a fun twist to the Classic Columbia 1905 Salad.

Classic Columbia 1905 Salad with Ham and Swiss Recipe FAQs

How do I choose the right ham for my salad?
Absolutely! When selecting ham, opt for a high-quality product, preferably from the deli counter for freshness. Look for ham that is moist and free from dark spots. If you’re after a lighter option, turkey or chicken can be excellent substitutes.

How should I store leftover Classic Columbia 1905 Salad?
Very well! Store any leftover Classic Columbia 1905 Salad in an airtight container in the fridge for up to 3 days. To maintain the crispness of the greens, it’s best to keep the dressing separate until you’re ready to enjoy the leftovers.

Can I freeze my Classic Columbia 1905 Salad?
No, this salad isn’t ideal for freezing due to its fresh ingredients, particularly the lettuce. However, you can prepare the individual components in advance. For instance, you can freeze diced ham and cheese separately for later use in other dishes without compromising flavor.

What if my greens wilt before serving?
Not a problem! If you find your greens wilting, try refreshing them by soaking the lettuce in cold water for about 10-15 minutes before serving. This helps restore some crispness. Just be sure to drain and dry them thoroughly before mixing into the salad.

Is the Classic Columbia 1905 Salad suitable for gluten-free diets?
Absolutely! The salad can easily be made gluten-free by using gluten-free dressing. Just make sure to check the labels of any pre-packaged ingredients, like mustard or dressings, to ensure they meet gluten-free standards.

Classic Columbia 1905 Salad with Ham and Swiss

Classic Columbia 1905 Salad with Ham and Swiss Delight

Classic Columbia 1905 Salad with Ham and Swiss is a vibrant salad that combines savory ham, creamy Swiss cheese, and crisp greens in just 20 minutes.
Prep Time 20 minutes
Total Time 20 minutes
Servings: 4 servings
Course: Lunch
Cuisine: American
Calories: 350

Ingredients
  

For the Salad
  • 8 oz Ham Provides protein and a salty flavor; substitute turkey or chicken for a lighter version.
  • 4 oz Swiss Cheese Adds creaminess and richness; can be swapped with any semi-soft cheese.
  • 1 head Lettuce (Iceberg or Green Leaf) Base of the salad providing crunch; iceberg can be substituted with green leaf.
For the Dressing
  • 1/2 cup Dressing Essential for flavor; use a gluten-free version to maintain dietary compliance.
For Additional Veggies
  • 1 cup Cherry Tomatoes Offers enhanced texture and a burst of freshness; perfect for adding color.
  • 1 cup Cucumbers Adds extra crispness; great for a refreshing crunch.

Equipment

  • mixing bowl
  • whisk
  • Cutting Board
  • Knife
  • tongs

Method
 

Preparation Steps
  1. Start by gathering all your ingredients for the Classic Columbia 1905 Salad. Dice the ham and Swiss cheese into bite-sized pieces, and chop the lettuce into roughly 2-inch pieces. Wash and dry the lettuce well.
  2. In a large mixing bowl, toss together the chopped lettuce, diced ham, and Swiss cheese. Mix gently with hands or tongs.
  3. If you’d like to enhance your salad, mix in additional veggies such as halved cherry tomatoes and sliced cucumbers. Toss to evenly distribute.
  4. In a small bowl or jar, whisk together your choice of dressing. Aim for a slightly thicker consistency.
  5. Just before serving, drizzle the dressing generously over the salad mixture and toss gently to coat.
  6. Serve your Classic Columbia 1905 Salad immediately for the best texture and flavor.

Notes

This salad can be customized with different proteins and veggies. It's perfect for making ahead for quick assembly later.

Roasted Rainbow Vegetables with Fresh Herbs: A Flavor Boost!

As I stood in my kitchen, the vibrant hues of fresh vegetables caught my eye—crimson bell peppers, deep green zucchini, and bright orange carrots. It dawned on me how simple ingredients could transform into a deliciously colorful dish: Easy Roasted Rainbow Vegetables with Fresh Herbs. This recipe isn’t just visually appealing; it’s a feast for the senses with the fragrant aroma of fresh herbs mingling with the sweet, roasted goodness of the veggies. Not only is it a breeze to whip up, making it perfect for a busy weeknight, but it’s also a versatile make-ahead option for gatherings. Whether paired with grilled meats or served over grains, these roasted beauties are sure to impress. Are you ready to turn your kitchen into a rainbow wonderland?

Why Are Rainbow Vegetables So Appealing?

Vibrant Colors: These roasted rainbow vegetables don’t just taste great; they look stunning on your plate! The mix of colors adds a feast for the eyes, making every meal more exciting.

Fresh Flavors: The fragrant blend of fresh herbs like rosemary and thyme brings a burst of flavor that elevates this simple dish to gourmet levels.

Easy Preparation: With minimal chopping and seasoning required, you can have these veggies roasting while you focus on other dishes. Check out my Crunch Cucumber Salad for a refreshing side!

Versatility at Its Best: Use whatever vegetables are in season, or tailor them to match your main course. How about pairing them with grilled meats or enjoying them on their own?

Healthy & Nourishing: Packed with vitamins and nutrients, this dish is gluten-free and suitable for vegetarians. It’s the perfect healthy option for any dinner.

Make-Ahead Magic: Simply prep these veggies ahead of time, and when you’re ready, just pop them in the oven. Ideal for busy weeknights or when hosting friends!

Roasted Rainbow Vegetables Ingredients

• Discover the key elements for perfect Roasted Rainbow Vegetables with Fresh Herbs!

For the Vegetables

  • Bell Peppers – choose a mix of red, yellow, and green for a colorful variety that adds sweetness.
  • Zucchini – adds a tender texture; opt for firm, fresh ones to avoid sogginess.
  • Carrots – their natural sweetness intensifies when roasted; slice them evenly for consistent cooking.

For the Fresh Herbs

  • Rosemary – offers a woody, fragrant note; chop finely to distribute flavor.
  • Thyme – enhances the aroma and taste; fresh is best, but dried can work too—reduce the amount.
  • Parsley – adds a burst of freshness and color at serving time; sprinkle it on just before you enjoy!

For the Seasoning

  • Olive Oil – use high-quality extra virgin olive oil to improve the overall flavor and achieve even roasting.
  • Salt – brings out the natural tastes of the vegetables; adjust according to preference.
  • Pepper – a dash of freshly ground black pepper will elevate the dish with subtle heat.

Feel free to explore different veggie combinations, ensuring your Roasted Rainbow Vegetables with Fresh Herbs can truly shine!

Step‑by‑Step Instructions for Roasted Rainbow Vegetables with Fresh Herbs

Step 1: Preheat the Oven
Begin by preheating your oven to 400°F (200°C). This temperature is ideal for roasting, ensuring your vegetables achieve that perfect golden-brown caramelization. Prepare a large baking sheet lined with parchment paper or lightly greased to facilitate easy cleanup and prevent sticking.

Step 2: Prepare the Vegetables
While the oven heats, wash and chop your choice of vibrant vegetables such as bell peppers, zucchini, and carrots. Aim for even-sized pieces to ensure consistent cooking and a beautiful presentation. The colors of these veggies will create a stunning visual that’s as appetizing as it is nutritious for your Roasted Rainbow Vegetables.

Step 3: Season the Vegetables
In a large mixing bowl, combine the chopped vegetables with a generous drizzle of high-quality olive oil. Season them with salt and freshly ground pepper to taste. Add chopped fresh herbs like rosemary and thyme, mixing everything well so the flavors coat each piece evenly. This step enhances the taste and aroma of your dish.

Step 4: Roast the Vegetables
Spread the seasoned vegetables onto the prepared baking sheet in a single layer, ensuring they are not overcrowded to avoid steaming. Roast them in the preheated oven for 15-20 minutes, shaking the pan halfway through. This will help achieve that crispy texture and allow for even roasting, resulting in beautifully caramelized Roasted Rainbow Vegetables.

Step 5: Check for Doneness
After 15 minutes, check the vegetables for doneness by piercing them with a fork. They should be tender with a slight crispness and golden edges. If they need more time, continue roasting for an additional 5 minutes. This step ensures that your Roasted Rainbow Vegetables are perfectly cooked and bursting with flavor.

Step 6: Serve and Enjoy
Once the vegetables are ready, remove them from the oven and let them cool for a few moments. Serve them hot to retain maximum flavor and texture. These Roasted Rainbow Vegetables with Fresh Herbs are fantastic as a side dish or can be enjoyed as a nutritious main over grains.

Roasted Rainbow Vegetables Variations

Feel free to get creative and tailor your roasted rainbow vegetables to suit your taste and pantry ingredients!

  • Seasonal Swap: Adjust your vegetable mix based on what’s fresh and available for a delightful twist on flavor and texture.
  • Herb Mix: Try basil or cilantro instead of rosemary for a refreshing Mediterranean twist that brightens the dish.
  • Spicy Kick: Add red pepper flakes or diced jalapeños to the mix for an exciting heat that ignites your taste buds.
  • Balsamic Glaze Finish: Drizzle with balsamic reduction after roasting for a sweet, tangy finish that elevates the dish’s flavor.
  • Cheesy Delight: Top with crumbled feta or parmesan cheese before serving to add a creamy, salty contrast to the roasted veggies.
  • Sweet Touch: Incorporate sweet potatoes or butternut squash for a natural sweetness that pairs beautifully with the other veggies.
  • Citrus Zest: Grate lemon or orange zest over the hot vegetables right before serving for a zesty brightness that awakens the palate.
  • Nutty Crunch: Toss in some toasted almonds or walnuts after roasting to add a satisfying crunch and a hint of nuttiness.

As you explore these variations, consider serving your roasted veggies alongside my Chili Chicken Roasted for a hearty meal or enjoy them in a nourishing bowl with grains!

Expert Tips for Roasted Rainbow Vegetables

  • Don’t Overcrowd: Ensure each vegetable piece has space to breathe on the baking sheet; overcrowding leads to steaming rather than roasting, which can make them soggy.

  • Cut Evenly: Chop your vegetables into similar sizes for even cooking. Smaller pieces may cook faster, while larger ones might need a bit longer in the oven.

  • Use Fresh Herbs: Fresh herbs add vibrancy and flavor, but if you choose dried herbs, remember that they are more concentrated—use less than you would with fresh.

  • Toss Halfway: Shake or stir the vegetables halfway through roasting. This guarantees even cooking and helps develop a lovely caramelization, enhancing your Roasted Rainbow Vegetables’ overall flavor.

  • Adjust for Preferences: Feel free to customize the herbs and vegetables based on your taste or what you have available—this recipe is all about flexibility and enjoying fresh, seasonal produce!

  • Cool Before Storing: If you have leftovers, let them cool completely before transferring them to an airtight container. This prevents moisture buildup, helping them stay fresh longer in the fridge.

How to Store and Freeze Roasted Rainbow Vegetables

Fridge: Store leftover roasted rainbow vegetables in an airtight container for up to 5 days. Allow them to cool completely before sealing to retain their crispness.

Freezer: If you want to keep them longer, these vegetables can be frozen for up to 3 months. Place cooled veggies in a freezer-safe bag or container, extracting as much air as possible.

Reheating: For optimal taste and texture, reheat in a preheated 350°F (175°C) oven for 10-15 minutes. Alternatively, microwave for 2-3 minutes, stirring halfway through to heat evenly.

What to Serve with Easy Roasted Rainbow Vegetables with Fresh Herbs

These vibrant roasted veggies create the perfect base for a colorful and flavorful meal that everyone’s going to love.

  • Grilled Chicken: Juicy, seasoned chicken complements the vegetables beautifully, adding protein to your plate while enhancing the flavors of fresh herbs.
  • Quinoa Pilaf: A hearty bed of fluffy quinoa boosts nutrition and adds a slightly nutty flavor, making it a fantastic match for roasted veggies.
  • Garlic Bread: Crunchy, buttery garlic bread offers a delightful contrast in texture while soaking up the delicious juices from the roasted vegetables.
  • Greek Salad: Fresh, crunchy, and tangy salad brings a refreshing element, showcasing the garden-fresh ingredients that pair perfectly with the roasted medley.
  • Honey-Balsamic Glazed Salmon: This sweet and savory fish adds elegance to your meal, beautifully balancing the sweetness of the roasted vegetables.
  • Lemon-Herb Couscous: Light and fluffy couscous enriched with lemon and herbs enhances the overall dish, bringing brightness to the plate.

Mix and match these ideas for a delightful, colorful feast that celebrates the essence of home-cooked meals!

Make Ahead Options

These Easy Roasted Rainbow Vegetables with Fresh Herbs are perfect for busy meal prep! You can chop and season your choice of vegetables up to 24 hours in advance—just store them in an airtight container in the refrigerator to preserve their freshness. To maintain quality, keep the seasoning separate until you’re ready to roast, as this prevents any sogginess. When you’re ready to enjoy, simply spread the prepped veggies onto a baking sheet, drizzle with olive oil, and roast in a preheated oven at 400°F (200°C) for 15-20 minutes until they are golden and tender. With this method, you can savor delicious roasted vegetables with minimal effort and maximum flavor!

Easy Roasted Rainbow Vegetables with Fresh Herbs Recipe FAQs

How do I select the best vegetables for roasting?
Absolutely! For the best results, choose vegetables that are firm and fresh. Look for vibrant colors without dark spots or blemishes. Bell peppers should feel heavy for their size, zucchini should have a smooth skin, and carrots should be crisp. Seasonal veggies can offer variety, so feel free to experiment with what you find at the farmers’ market!

How long can I store leftover roasted vegetables in the fridge?
Very! You can store your leftover roasted rainbow vegetables in an airtight container in the fridge for up to 5 days. Ensure they cool completely before sealing to maintain their crispness. This way, you can enjoy them in salads, wraps, or as a hearty side dish throughout the week!

Can I freeze roasted rainbow vegetables for future meals?
Absolutely! You can freeze these delicious roasted veggies for up to 3 months. To do this, allow them to cool entirely, then place them in a freezer-safe bag or container, squeezing out as much air as possible to prevent freezer burn. When you’re ready to enjoy them, thaw overnight in the fridge and reheat in a preheated 350°F (175°C) oven for about 10-15 minutes, or microwave for 2-3 minutes.

What should I do if my roasted vegetables become soggy?
If your veggies turn out soggy, it’s likely due to overcrowding the baking sheet during roasting. To troubleshoot for next time, make sure to spread the vegetables out in a single layer and allow them space to breathe. This will promote proper roasting and enhance that delightful crispy texture!

Are roasted rainbow vegetables safe for my pets?
Very! Roasted vegetables can indeed be shared with pets, but it’s best to avoid any seasonings like salt or pepper. Although many veggies are safe, always double-check for any specific foods that might be toxic to your furry friends, such as onions or garlic. When in doubt, consult with your veterinarian to ensure your pet’s safety!

Can I swap out vegetables in this recipe?
Sure thing! This recipe is wonderfully versatile—feel free to swap in seasonal vegetables as you please! Consider using sweet potatoes for a heartier texture, or add in asparagus for a spring touch. Just keep in mind that cooking times may vary slightly based on what you choose, so make sure to keep an eye on them as they roast!

Roasted Rainbow Vegetables with Fresh Herbs

Roasted Rainbow Vegetables with Fresh Herbs: A Flavor Boost!

Enjoy the vibrant colors and fresh flavors of Roasted Rainbow Vegetables with Fresh Herbs, a visually appealing and healthy dish perfect for dinner.
Prep Time 10 minutes
Cook Time 20 minutes
Total Time 30 minutes
Servings: 4 servings
Course: Dinner
Cuisine: American
Calories: 120

Ingredients
  

Vegetables
  • 3 cups Bell Peppers (red, yellow, green) Choose a mix for sweetness.
  • 2 cups Zucchini Use firm, fresh ones.
  • 2 cups Carrots Slice them evenly for consistent cooking.
Fresh Herbs
  • 1 tablespoon Rosemary Chop finely.
  • 1 tablespoon Thyme Fresh is best; reduce if dried.
  • 1 tablespoon Parsley Sprinkle before serving.
Seasoning
  • 3 tablespoons Olive Oil High-quality extra virgin recommended.
  • 1 teaspoon Salt Adjust to taste.
  • 1 teaspoon Pepper Freshly ground for best flavor.

Equipment

  • oven
  • baking sheet
  • mixing bowl
  • parchment paper

Method
 

Cooking Instructions
  1. Preheat your oven to 400°F (200°C). Prepare a large baking sheet lined with parchment paper.
    Roasted Rainbow Vegetables with Fresh Herbs
  2. Wash and chop your choice of vegetables into even-sized pieces.
    Roasted Rainbow Vegetables with Fresh Herbs
  3. Combine the chopped vegetables with olive oil, salt, pepper, rosemary, and thyme in a bowl. Mix well.
    Roasted Rainbow Vegetables with Fresh Herbs
  4. Spread the seasoned vegetables onto the baking sheet in a single layer and roast for 15-20 minutes, shaking halfway through.
    Roasted Rainbow Vegetables with Fresh Herbs
  5. Check for doneness by piercing with a fork. If tender and golden, remove from oven or roast an additional 5 minutes if needed.
    Roasted Rainbow Vegetables with Fresh Herbs
  6. Serve hot, optionally garnished with parsley.
    Roasted Rainbow Vegetables with Fresh Herbs

Notes

These vegetables can be customized based on seasonal availability and personal preferences.