As I rolled out the dough, the cozy aroma of cinnamon filled the room, instantly whisking me back to my grandmother’s kitchen, where time seemed to slow down. This Easy Braided Cinnamon Babka is a delightful combination of tender, swirled bread and warm spices, perfect for those moments when you crave a slice of homemade comfort. It’s an approachable recipe, ideal for both seasoned bakers and those just starting their culinary adventures. With its effortless preparation and the option to personalize with fillings like chocolate or nuts, it’s a guaranteed crowd-pleaser for brunches and special occasions. Are you ready to fill your home with the enticing scent of fresh-baked goodness?
Why is this babka so irresistible?
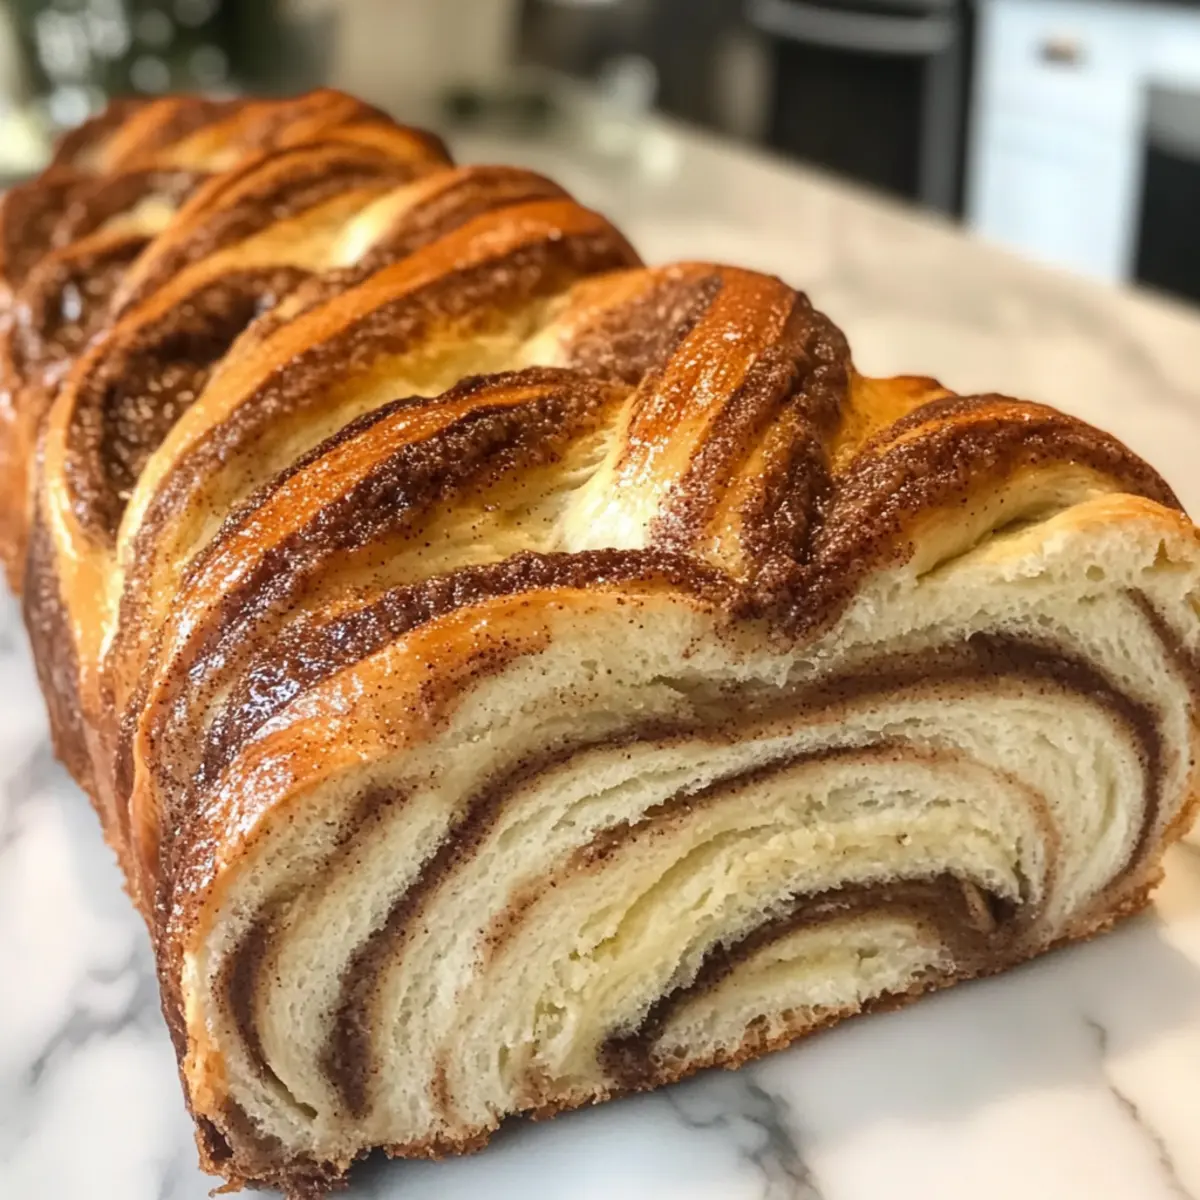
Deliciously Unique: The swirling layers of tender dough filled with warm cinnamon create an unforgettable flavor experience that will have everyone asking for seconds.
Easy to Make: This straightforward recipe ensures that novice bakers can achieve bakery-quality results without any fuss.
Versatile Options: Personalize your babka with alternative fillings like chocolate or nuts, making it suitable for any palate.
Perfect for Sharing: Its stunning braided design makes it an eye-catching centerpiece for brunch or festive gatherings.
Aromatic Bliss: The delightful scent of baking cinnamon wafts through your kitchen, creating a cozy, inviting atmosphere.
Elevate your next brunch with this heavenly braided cinnamon babka that is sure to impress! And for those who love variety, check out the variation ideas to customize your babka further!
Braided Cinnamon Babka Ingredients
• Get ready to create this delightful treat!
For the Dough
- Unbleached All-Purpose Flour – Provides structure and texture; substitute up to ½ cup with bread flour for a richer crumb.
- Active Dry Yeast – Responsible for dough rise; proof in warm milk to activate; instant yeast can be used without proofing.
- Warm Milk (110°F/43°C) – Activates the yeast and keeps the dough tender; do not overheat; aim for a cozy bath temperature.
- Unsalted Butter – Adds richness and tenderness; ensure it’s softened for easy mixing; substitute with unsalted margarine or coconut oil for dairy-free options.
- Granulated Sugar – Sweetens both the dough and filling; brown sugar can be blended for added moisture and flavor.
- Large Eggs – Adds richness and binds the dough; use room temperature eggs for best results.
- Fine Sea Salt – Balances sweetness and strengthens the dough structure; do not omit.
- Pure Vanilla Extract – Enhances flavor richness; substitute with other extracts or omit if desired.
For the Filling
- Fresh Ground Cinnamon – The star of the filling; always use fresh ground for maximum flavor; can substitute with quality pre-ground cinnamon.
- Granulated Sugar – Adds sweetness; combine with cinnamon to create a buttery paste.
- Unsalted Butter – Softened; integral to mixing with sugars for the filling, creating a smooth texture.
Optional Topping
- Pearl Sugar or Streusel Topping – For added texture and sweetness on top; can be omitted for a simpler presentation.
This Braided Cinnamon Babka is sure to fill your home with heartwarming aromas and delight everyone at your table!
Step‑by‑Step Instructions for Braided Cinnamon Babka
Step 1: Proof the Yeast
In a small bowl, combine 1/2 cup of warm milk (110°F/43°C), a teaspoon of sugar, and 2 teaspoons of active dry yeast. Let it sit for about 5-10 minutes until it becomes frothy and bubbly, signaling that the yeast is active and ready to help your Braided Cinnamon Babka rise beautifully.
Step 2: Mix Dry Ingredients
In a large mixing bowl, whisk together 4 cups of unbleached all-purpose flour, 1/4 cup of granulated sugar, and 1 teaspoon of fine sea salt. This mixture forms the base of your dough, providing structure and flavor that will complement the indulgent cinnamon filling, so make sure it’s well combined before moving on.
Step 3: Combine Ingredients
Add the foamy yeast mixture, 3 large eggs, 1/4 cup of softened unsalted butter, and 1 teaspoon of pure vanilla extract to the dry ingredients. Mix until a shaggy dough forms, then knead by hand or with a stand mixer fitted with a dough hook for about 8 minutes, until the dough is smooth and slightly tacky but not sticky.
Step 4: First Rise
Shape the dough into a ball and place it in a greased bowl, turning to coat it in oil. Cover with a damp cloth and let it rise in a warm place for approximately 1-2 hours, or until doubled in size. The dough should feel airy and light, indicating it’s ready for the next steps of your Braided Cinnamon Babka.
Step 5: Prepare Filling
While the dough rises, mix together 1/2 cup of softened unsalted butter, 1/2 cup of granulated sugar, and 1 tablespoon of fresh ground cinnamon in a small bowl. This paste will create the luscious filling that melds beautifully within the bread, so ensure it’s smooth and spreadable for easier application later.
Step 6: Shape the Dough
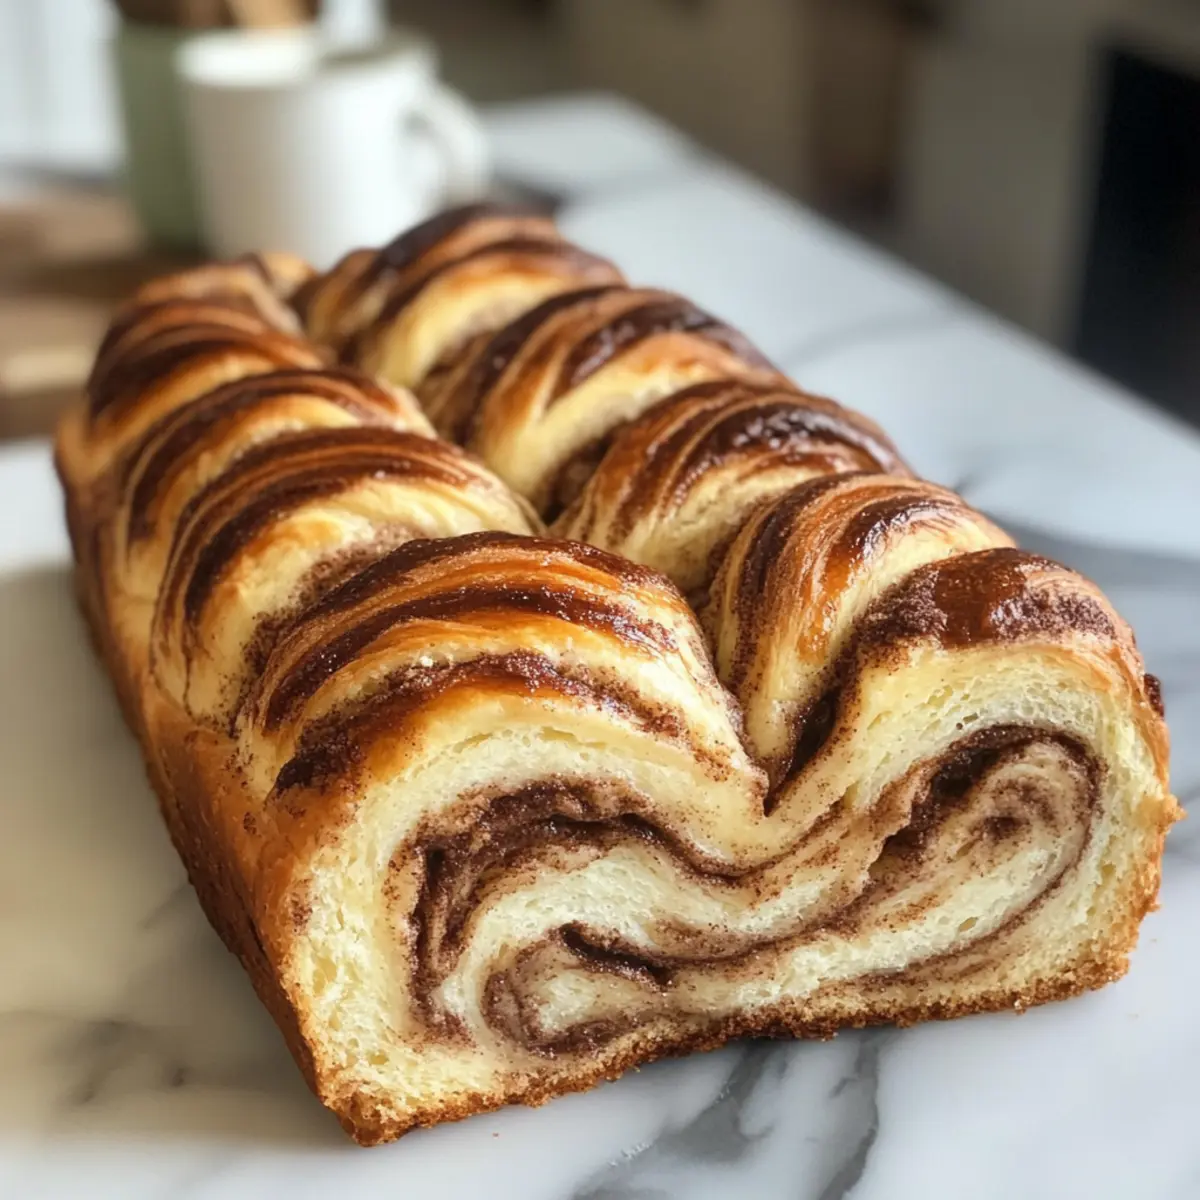
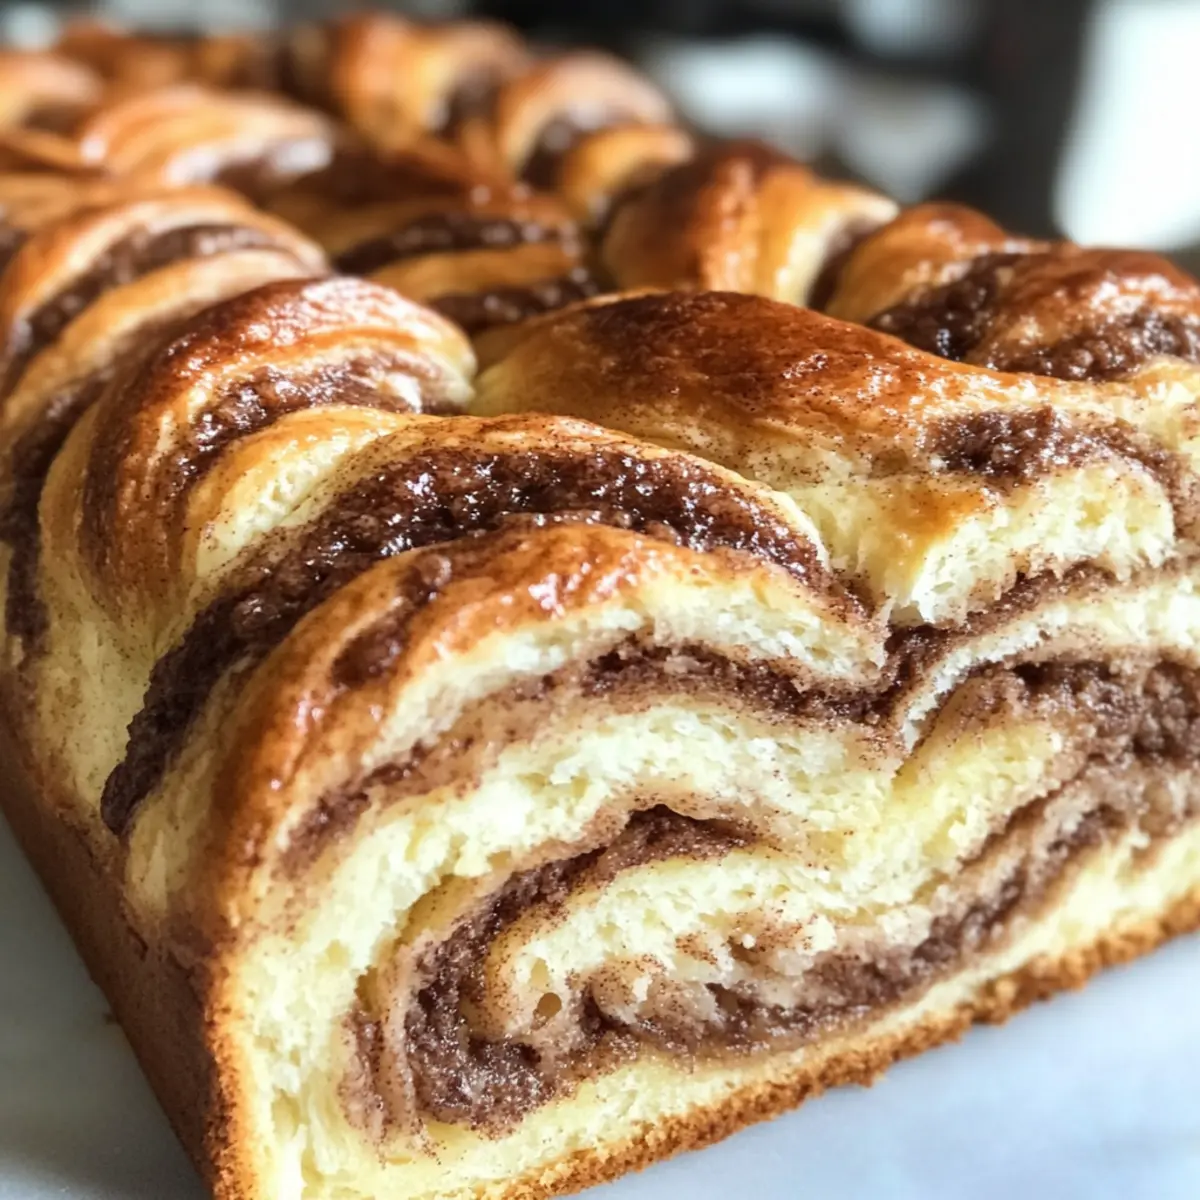
Once the dough has risen, punch it down gently and roll it out on a floured surface into a rectangle about 1/4 inch thick. Spread the cinnamon filling evenly over the dough, then tightly roll it from one long side to the other, forming a cylinder. Cut the roll lengthwise to reveal the beautiful swirls of filling.
Step 7: Braid
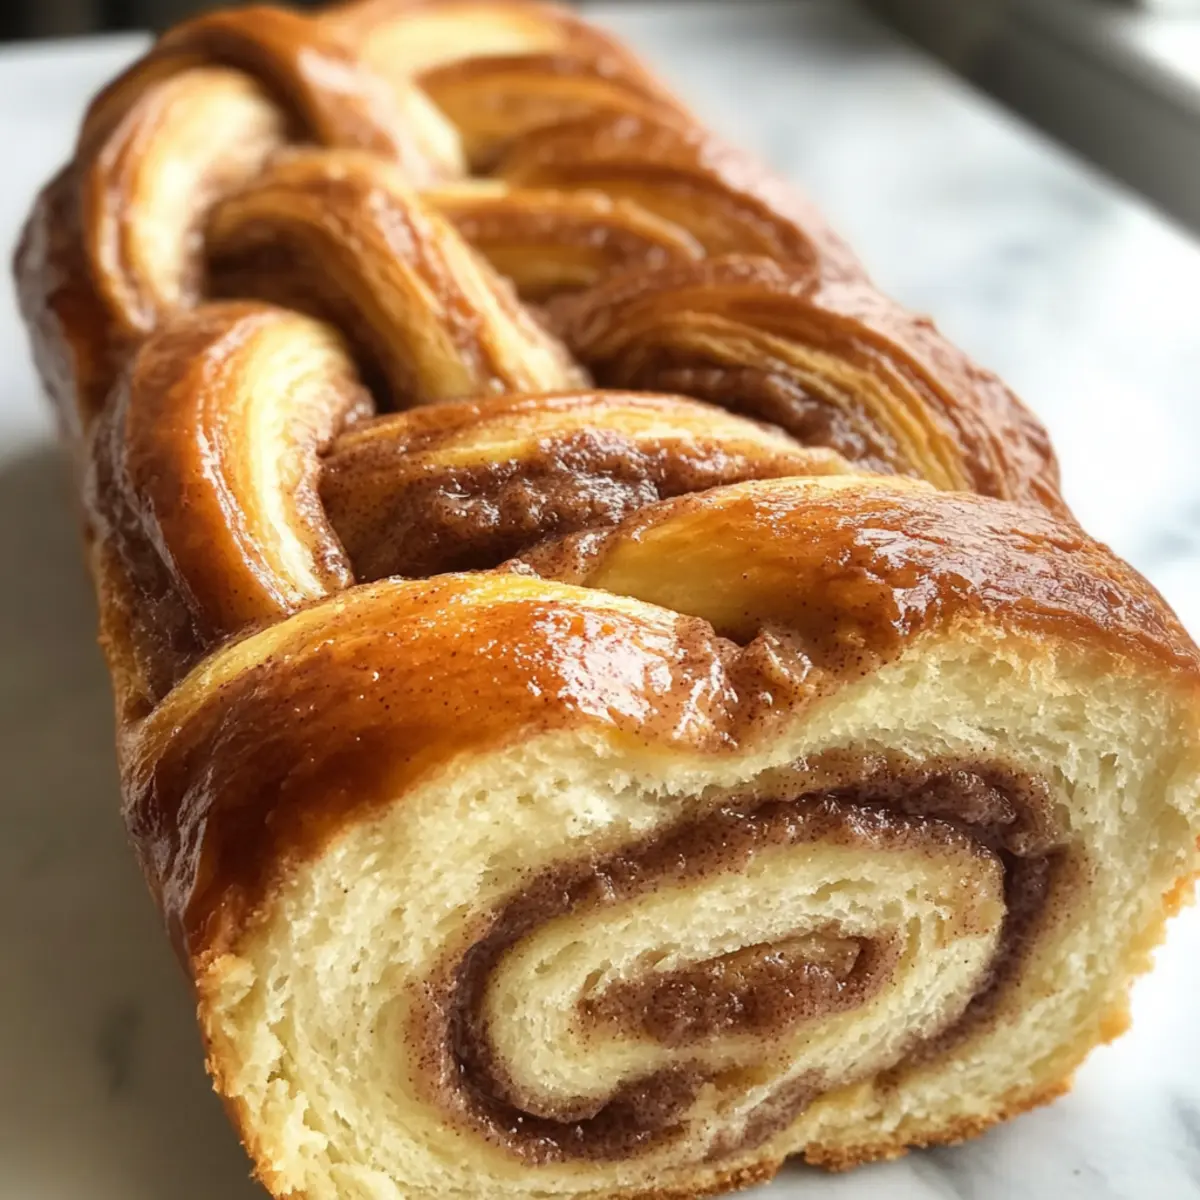
With the cut sides facing up, gently twist the two halves together and form it into a braid. Place the braided dough into a greased loaf pan, ensuring the ends are tucked in for a neat appearance. Cover loosely with a cloth and let it rise for another 30-45 minutes until puffy and almost doubled.
Step 8: Preheat and Bake
Preheat your oven to 350°F (175°C). Before placing the Braided Cinnamon Babka in the oven, brush the top with an egg wash (one beaten egg) for a glossy finish. Bake for 30-35 minutes, or until the top is golden brown and the dough sounds hollow when tapped on the bottom.
Step 9: Cool
Once baked, let your Braided Cinnamon Babka cool in the pan for about 15 minutes. Carefully transfer it to a wire rack to cool completely. The aroma will be irresistible, inviting everyone to enjoy a slice of your delightful creation.
What to Serve with Easy Braided Cinnamon Babka
Indulging in a slice of warm babka transforms any moment into a cozy gathering, so why not elevate the experience with delightful pairings?
-
Creamy Cream Cheese Spread: A dollop of cream cheese adds a rich, tangy contrast to the sweet, spiced babka. It takes each bite to the next level of indulgence.
-
Fresh Fruit Salad: Bright, refreshing fruits like berries or citrus provide a vibrant balance, cutting through the richness of the cinnamon bread beautifully.
-
Scrambled Eggs: Fluffy scrambled eggs are a perfect savory side, offering a wholesome complement that enhances your brunch spread and brings variety to the table.
-
Mimosas: A chilled mimosa brings a celebratory feel to your meal, with the lightness of sparkling wine paired with refreshing orange juice creating an uplifting combination.
-
Caramel Drizzle: A light drizzle of caramel sauce over warm slices adds an extra layer of sweetness that’s simply irresistible, great for dessert lovers.
-
Warm Coffee or Tea: Pair your babka with a cup of your favorite brew; the aromatic flavors will harmonize beautifully, making for a comforting treat.
Imagine savoring a warm slice of your braided cinnamon babka alongside these delightful accompaniments while sharing laughter and stories with loved ones.
Braided Cinnamon Babka Variations
Feel free to use your creativity to make this braided cinnamon babka uniquely yours with these delightful tweaks!
-
Chocolate Twist: Replace the cinnamon filling with a mix of melted dark chocolate, cocoa powder, and sugar. For added crunch, stir in chopped hazelnuts. The rich chocolate offers a decadent alternative that will please any sweet tooth.
-
Nutty Delight: Mix softened butter with finely chopped walnuts or pecans. For a touch of sweetness, drizzle honey in place of cinnamon. This variation brings a delightful crunch and a hint of nuttiness for extra texture.
-
Fruity Filling: Incorporate finely chopped sautéed apples into the filling for added moisture and flavor. The apples caramelize slightly, lending a beautiful sweetness that pairs perfectly with the warm spices.
-
Gluten-Free Option: To make this babka gluten-free, swap unbleached all-purpose flour for a gluten-free mix designed for yeast breads. Consider adding extra eggs or a touch of xanthan gum to enhance elasticity.
-
Cinnamon Raisin Swirl: Add plump raisins or dried cranberries into the cinnamon filling for a fruity surprise in every slice. This adds a lovely chewiness that contrasts beautifully with the tender dough.
-
Lemon Zest Infusion: Brighten up the flavors by adding lemon zest to the dough and filling. This unexpected twist refreshes the palate and complements the sweet cinnamon beautifully.
-
Spicy Kick: For those who like a little heat, sprinkle a pinch of cayenne pepper or freshly grated nutmeg into the cinnamon mixture. This surprise element will awaken the senses and offer a unique flavor profile.
-
Vanilla Bean Heaven: Infuse the filling with freshly scraped vanilla bean or extract for an extra layer of aromatic sweetness. This little change elevates the filling, bringing an elegant touch to this homey treat.
Elevate your baking experience with these variations and feel free to explore even further! If you’re ever in need of a new baking suggestion, don’t miss our scrumptious apple-filled babka recipe for another easy treat!
Make Ahead Options
These Easy Braided Cinnamon Babka are perfect for busy home cooks looking to save time on special occasions or hectic weekdays! You can prepare the dough and filling up to 24 hours in advance; simply store the rolled dough in the refrigerator after shaping, ensuring it’s wrapped tightly to prevent drying out. Alternatively, you can shape the babka and freeze it before the second rise for up to 3 months. Just thaw overnight in the refrigerator, then let it proof at room temperature until puffy before baking. For the best results, brush with an egg wash right before baking, ensuring a glossy finish just as delightful as if you had made it fresh!
Expert Tips for Braided Cinnamon Babka
- Proof the Yeast Right: Ensure your yeast is bubbly and frothy before using; if not, your baked babka may turn out dense and heavy.
- Knead to Perfection: The dough should be slightly tacky but not sticky. Adjust your flour or milk accordingly to create the right texture for your braided cinnamon babka.
- Chill for Easy Spread: If your filling is too soft and gooey, refrigerate it for a few minutes to make spreading easier and cleaner.
- Loosely Braid: Don’t braid too tightly; this helps prevent the filling from spilling out during baking and creates a beautiful, swirled look.
- Egg Wash for Shine: Brushing the top with egg wash will give a lovely golden, glossy finish. If it browns too fast, use foil to shield it during baking.
Storage Tips for Braided Cinnamon Babka
Room Temperature: Keep your babka in an airtight container or wrapped in foil at room temperature for up to 2 days to maintain its freshness and softness.
Fridge: If you want to extend its life, refrigerate the babka, wrapped properly, for up to a week. Just be aware that refrigeration may slightly dry it out.
Freezer: For longer storage, slice the braids and freeze them in a freezer-safe bag or container for up to 3 months. Thaw overnight in the fridge before reheating.
Reheating: Warm slices in a toaster oven or microwave for a few seconds to revive the softness and flavor of your delicious braided cinnamon babka.
Easy Braided Cinnamon Babka Recipe FAQs
How do I choose the right ripeness for my ingredients?
For the best results, use ingredients that are at room temperature and ready to work with. The milk should feel warm to the touch, around 110°F (43°C). Ensure your butter is softened but not melted, making it easy to blend. Eggs should ideally be at room temperature to help with dough structure.
What are the best storage methods for leftover babka?
Absolutely! Store leftover Bakers Cinnamon Babka in an airtight container at room temperature for up to 2 days. If you want to keep it fresh longer, you can refrigerate it for up to a week, though it may dry out slightly. For longer storage, slice and freeze it in a freezer-safe bag for up to 3 months.
Can I freeze my braided cinnamon babka?
Yes, you can! To freeze your braid, wait until it has completely cooled. Slice it into individual pieces and wrap each piece tightly in plastic wrap, then place them in a freezer-safe bag. When you’re ready to enjoy some, simply thaw them overnight in the fridge and warm up as needed. This will keep your babka tasty and fresh for up to 3 months.
What should I do if my dough isn’t rising?
If your dough isn’t rising, don’t fret! First, check that the yeast is fresh. It should be bubbly and frothy after proofing; if not, start over. If the dough is too cold, it will also rise more slowly. Try moving it to a warmer spot, like a turned-off oven with the light on, or place it near a heater. Ensure that your ingredients, like the milk, were the right temperature to activate the yeast.
Is this recipe suitable for people with allergies?
This braided cinnamon babka contains gluten, dairy, and eggs, which could be problematic for individuals with allergies to these ingredients. To make a dairy-free version, substitute the butter with coconut oil or vegan margarine. For a gluten-free option, you can use a gluten-free flour blend designed for yeast breads. Be sure to add extra eggs or xanthan gum to maintain the dough’s structure.
Can I change the filling ingredients?
Definitely! The beauty of this braided cinnamon babka lies in its versatility. You can swap the cinnamon filling for melted chocolate, cocoa powder, and sugar, or mix in chopped nuts for an added crunch. If you love fruity flavors, consider adding finely chopped apples or raisins to the filling for a delightful twist! Feel free to get creative, and make it your own.
Heavenly Braided Cinnamon Babka That Melts in Your Mouth
Ingredients
Equipment
Method
- Proof the Yeast: Combine warm milk, a teaspoon of sugar, and active dry yeast. Let sit for 5-10 minutes until frothy.
- Mix Dry Ingredients: In a bowl, whisk flour, sugar, and salt.
- Combine Ingredients: Add yeast mixture, eggs, butter, and vanilla to dry ingredients. Mix until shaggy dough forms.
- First Rise: Shape dough into a ball, place in greased bowl, and cover. Let rise for 1-2 hours until doubled.
- Prepare Filling: Mix butter, sugar, and cinnamon in a bowl.
- Shape the Dough: Roll out dough, spread filling, roll into a cylinder, and cut lengthwise.
- Braid: Twist the two halves together and place in a greased loaf pan. Cover and let rise for 30-45 minutes.
- Preheat and Bake: Preheat oven to 350°F. Brush top with egg wash and bake for 30-35 minutes.
- Cool: Let babka cool in the pan for 15 minutes, then transfer to wire rack.