Introduction to BBQ Chicken Pasta Salad
Summer is here, and with it comes the joy of outdoor gatherings and delicious food. One dish that never fails to impress is BBQ Chicken Pasta Salad. This vibrant salad is not just a feast for the eyes; it’s a quick solution for busy days when you want something refreshing yet satisfying. I remember the first time I made it for a backyard barbecue. The compliments flowed as freely as the drinks! With its blend of flavors and textures, this salad is sure to become a staple at your summer get-togethers.
Why You’ll Love This BBQ Chicken Pasta Salad
This BBQ Chicken Pasta Salad is a game-changer for summer meals. It’s incredibly easy to whip up, taking just 15 minutes of prep time. The combination of smoky BBQ flavor and creamy ranch dressing creates a taste explosion that will have everyone coming back for seconds. Plus, it’s versatile! Whether you’re hosting a cookout or just need a quick lunch, this salad fits the bill perfectly.
Ingredients for BBQ Chicken Pasta Salad
Gathering the right ingredients is the first step to creating this delightful BBQ Chicken Pasta Salad. Here’s what you’ll need:
- Cooked rotini pasta: This spiral-shaped pasta holds onto the dressing beautifully, making every bite flavorful.
- Cooked, shredded chicken breast: A great source of protein, it adds heartiness to the salad. You can use leftover chicken or rotisserie for convenience.
- Cherry tomatoes: Their sweetness and juiciness provide a burst of flavor, balancing the smoky BBQ taste.
- Corn kernels: Whether canned or frozen, corn adds a delightful crunch and a hint of sweetness.
- Diced bell pepper: Any color works! They bring a pop of color and a fresh, crisp texture.
- Red onion: Finely chopped, it adds a sharp bite that complements the other ingredients.
- Shredded cheddar cheese: This creamy cheese enhances the richness of the salad and adds a savory note.
- BBQ sauce: The star of the show! Choose your favorite brand for that smoky, tangy flavor.
- Ranch dressing: This creamy dressing ties everything together, adding a cool contrast to the BBQ sauce.
- Salt and pepper: Essential for seasoning, they enhance the overall flavor of the dish.
- Fresh cilantro or parsley: Optional, but a sprinkle of herbs adds freshness and a lovely finishing touch.
For those looking to mix things up, consider substituting the chicken with black beans or chickpeas for a vegetarian option. You can also add diced avocado or sliced olives for extra flavor and texture. The exact quantities of these ingredients are available at the bottom of the article for easy printing!
How to Make BBQ Chicken Pasta Salad
Creating this BBQ Chicken Pasta Salad is a breeze! Follow these simple steps, and you’ll have a delicious dish ready in no time. Let’s dive in!
Step 1: Combine the Base Ingredients
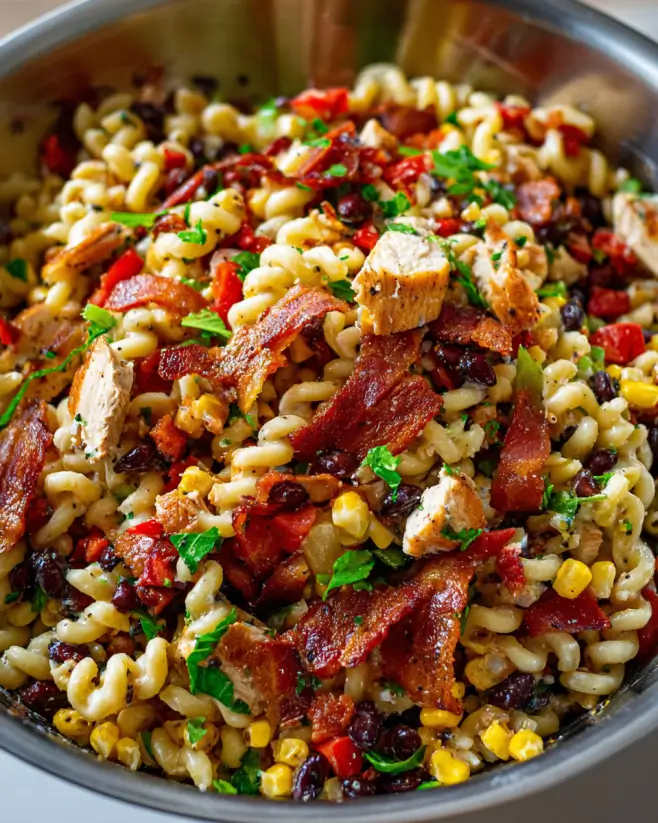
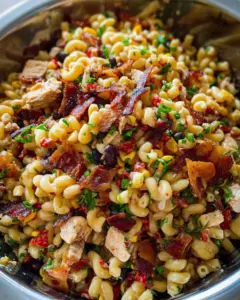
Start by grabbing a large bowl. Toss in the cooked rotini pasta, shredded chicken, cherry tomatoes, corn, diced bell pepper, red onion, and shredded cheddar cheese.
Mix everything gently, ensuring the ingredients are evenly distributed. The colors alone will make your mouth water!
Step 2: Prepare the Dressing
In a separate small bowl, whisk together the BBQ sauce and ranch dressing.
This combination is where the magic happens! The smoky BBQ flavor pairs perfectly with the creamy ranch, creating a dressing that’s both tangy and rich.
Step 3: Mix Everything Together
Pour the dressing over your pasta salad mixture.
Gently toss everything together until all the ingredients are coated in that delicious dressing. Don’t forget to season with salt and pepper to taste. A little seasoning goes a long way in enhancing the flavors!
Step 4: Chill the Salad
Cover the bowl with plastic wrap and pop it in the refrigerator for at least 30 minutes.
This step is crucial! Chilling allows the flavors to meld together, making each bite even more delightful. Trust me, it’s worth the wait!
Step 5: Serve and Garnish
When you’re ready to serve, give the salad a gentle stir.
If you like, garnish with fresh cilantro or parsley for a pop of color and freshness. Serve it in a large bowl or individual plates, and watch your guests dig in!
Tips for Success
- Use leftover chicken or rotisserie for a quick prep.
- Cook the pasta al dente for the best texture.
- Let the salad chill longer than 30 minutes if possible; it enhances the flavors.
- Adjust the BBQ sauce and ranch dressing to your taste preference.
- Feel free to add seasonal veggies for extra crunch and color.
Equipment Needed
- Large mixing bowl: Essential for combining all your ingredients. A salad bowl works too!
- Small mixing bowl: Perfect for whisking the dressing. A mason jar can also do the trick.
- Whisk or fork: Use either to blend the dressing smoothly.
- Plastic wrap: To cover the salad while it chills. A lid works just as well!
Variations
- Vegetarian Delight: Swap the chicken for black beans or chickpeas for a protein-packed vegetarian option.
- Spicy Kick: Add diced jalapeños or a splash of hot sauce to the dressing for a spicy twist.
- Cheesy Goodness: Mix in crumbled feta or pepper jack cheese for an extra layer of flavor.
- Grilled Veggies: Toss in some grilled zucchini or asparagus for a smoky, charred taste.
- Fruit Fusion: Incorporate diced mango or pineapple for a sweet contrast to the savory elements.
Serving Suggestions
- Pair the BBQ Chicken Pasta Salad with grilled corn on the cob for a classic summer side.
- Serve it alongside a refreshing cucumber salad to balance the flavors.
- For drinks, consider iced tea or a light beer to complement the meal.
- Present the salad in a vibrant bowl for an eye-catching display.
FAQs about BBQ Chicken Pasta Salad
Can I make BBQ Chicken Pasta Salad ahead of time?
Absolutely! This salad is perfect for meal prep. You can make it a day in advance and store it in the refrigerator. Just give it a good stir before serving to refresh the flavors.
What can I substitute for chicken in this recipe?
If you’re looking for a vegetarian option, black beans or chickpeas work wonderfully. They add protein and a nice texture to the salad.
How long does BBQ Chicken Pasta Salad last in the fridge?
This salad can last up to 3 days in the fridge. Just make sure it’s stored in an airtight container to keep it fresh.
Can I use a different type of pasta?
Of course! While rotini is great for holding the dressing, you can use any pasta shape you prefer, like penne or fusilli. Just cook it al dente for the best texture.
Is this BBQ Chicken Pasta Salad gluten-free?
Yes! As long as you use gluten-free pasta, this dish can easily fit into a gluten-free diet. Just check the labels on your ingredients to be sure.
Final Thoughts
There’s something truly special about sharing a bowl of BBQ Chicken Pasta Salad with friends and family. It’s more than just a dish; it’s a celebration of summer flavors and good times. Each bite is a reminder of laughter, sunshine, and the joy of gathering around the table. Whether you’re hosting a barbecue or enjoying a quiet evening at home, this salad brings a burst of color and taste that brightens any meal. So, roll up your sleeves, dive into this recipe, and let the compliments roll in. Trust me, your taste buds will thank you!
BBQ Chicken Pasta Salad: A Delightful Summer Dish!
Ingredients
Method
- In a large bowl, combine the cooked rotini pasta, shredded chicken, cherry tomatoes, corn, bell pepper, red onion, and cheddar cheese.
- In a separate small bowl, whisk together the BBQ sauce and ranch dressing until well combined.
- Pour the dressing mixture over the pasta salad and gently toss until all ingredients are evenly coated.
- Season with salt and pepper to taste, and toss again.
- Cover the bowl with plastic wrap and refrigerate for at least 30 minutes to allow the flavors to meld.
- Before serving, give the salad a gentle stir and garnish with fresh cilantro or parsley if desired.
Notes
- For a vegetarian option, substitute the chicken with black beans or chickpeas.
- Add diced avocado or sliced olives for extra flavor and texture.