Vibrant Garden Salad with Homemade Greek Dressing

Dive into the freshness of the garden with this vibrant salad, featuring crisp romaine lettuce, juicy tomatoes, and creamy avocado, all brought to life with a zesty homemade Greek dressing. This salad is not just a dish; it’s a celebration of flavors and textures, making every bite a delightful experience.

Salad Ingredients:

  • 1 head of romaine lettuce, freshly chopped
  • 1/2 of a medium red onion, finely sliced
  • 1/2 of a bell pepper, your choice of color, diced
  • 1 cup of cherry or grape tomatoes, halved, or sliced heirloom tomatoes when in season
  • 1 English cucumber, thinly sliced
  • 1 ripe avocado, peeled, pitted, and sliced
  • 1/2 cup of kalamata olives, sliced into thirds
  • 4 ounces of feta cheese, gently crumbled

Homemade Greek Dressing Ingredients:

  • 3 tablespoons of extra virgin olive oil
  • 3 tablespoons of fresh lemon juice, squeezed from 1 large lemon
  • 1 clove of garlic, finely pressed
  • 1/2 teaspoon of sea salt
  • 1/4 teaspoon of freshly ground black pepper

Instructions:

  1. Prepare the Salad Base: In a large salad bowl, combine the chopped romaine lettuce, thinly sliced red onion, diced bell pepper, halved cherry tomatoes (or sliced heirloom tomatoes), sliced English cucumber, and sliced avocado. Toss these ingredients gently to mix.
  2. Add Olives and Feta: Sprinkle the sliced kalamata olives and crumbled feta cheese over the top of the salad. The olives add a briny depth, while the feta introduces a creamy tanginess that complements the fresh vegetables.
  3. Make the Greek Dressing: In a small bowl or jar, whisk together the extra virgin olive oil, fresh lemon juice, pressed garlic, sea salt, and black pepper until well combined. This homemade dressing is the secret weapon that infuses the salad with its vibrant, zesty flavor.
  4. Dress the Salad: Drizzle the homemade Greek dressing over the salad just before serving. Toss everything together to ensure the salad is evenly coated with the dressing, allowing the flavors to meld beautifully.
  5. Serve: Present the salad immediately, offering a refreshing and wholesome delight that’s perfect as a standalone meal or as a side dish to complement any main course.

This garden salad with homemade Greek dressing is a testament to the power of fresh, quality ingredients coming together in harmony. The dressing, with its simple yet bold flavors, elevates the salad to new heights, making it a must-try for anyone looking to indulge in the simple joys of homemade goodness.

Warm and Comforting Hot Milk Pie

Embrace the comforting flavors of home with this delightful Hot Milk Pie, a recipe that weaves together the warmth of tradition and the simple joy of homemade baking. Each slice offers a tender, flaky crust enveloped around a heartwarming, creamy filling, baked to a golden hue that promises to soothe and satisfy.

Ingredients:

  • 200 ml of warm water
  • 200 ml of warm milk
  • 10 grams of dry yeast
  • 2 tablespoons of sugar
  • 100 ml of sunflower oil
  • 1 teaspoon of salt
  • 720 grams of wheat flour
  • Butter, for greasing the pan
  • 1 egg, beaten (for the egg wash)

Instructions:

  1. Yeast Mixture: In a large mixing bowl, combine the warm water, warm milk, and sugar. Sprinkle the dry yeast over the mixture and let it sit for about 5-10 minutes, or until it becomes frothy. This step activates the yeast, ensuring your pie crust rises beautifully.
  2. Form the Dough: To the yeast mixture, add the sunflower oil and salt, mixing gently to incorporate. Gradually add the wheat flour, stirring continuously, until a soft dough forms. You may need to adjust the amount of flour slightly, depending on the dough’s consistency.
  3. Knead the Dough: Turn the dough out onto a floured surface and knead it for about 10 minutes, or until it’s smooth and elastic. This process develops the gluten in the flour, giving your pie crust its delightful texture.
  4. First Rise: Lightly grease a clean bowl with a bit of butter and place the dough inside. Cover the bowl with a clean kitchen towel and let the dough rise in a warm, draft-free area for about 1 hour, or until it has doubled in size.
  5. Shape and Second Rise: Once the dough has risen, punch it down gently to release any air bubbles. Transfer the dough to a butter-greased pie dish, spreading it evenly across the bottom and up the sides. Cover it again and let it rise for an additional 30 minutes.
  6. Preheat the Oven: While the dough is rising for the second time, preheat your oven to 180°C (350°F).
  7. Egg Wash: Just before baking, gently brush the top of the dough with the beaten egg. This will give your pie a beautiful golden color and a shiny finish.
  8. Bake: Place the pie dish in the preheated oven and bake for about 25-30 minutes, or until the crust is golden brown and sounds hollow when tapped.
  9. Serve: Allow the Hot Milk Pie to cool slightly before slicing. Serve warm, inviting each bite to be a cozy embrace of creamy goodness and flaky crust, perfectly baked to golden perfection.

This Hot Milk Pie is more than just a dessert; it’s a celebration of family, tradition, and the simple pleasures of baking from scratch. Enjoy it with loved ones, savoring the warmth and comfort that only a homemade pie can bring.

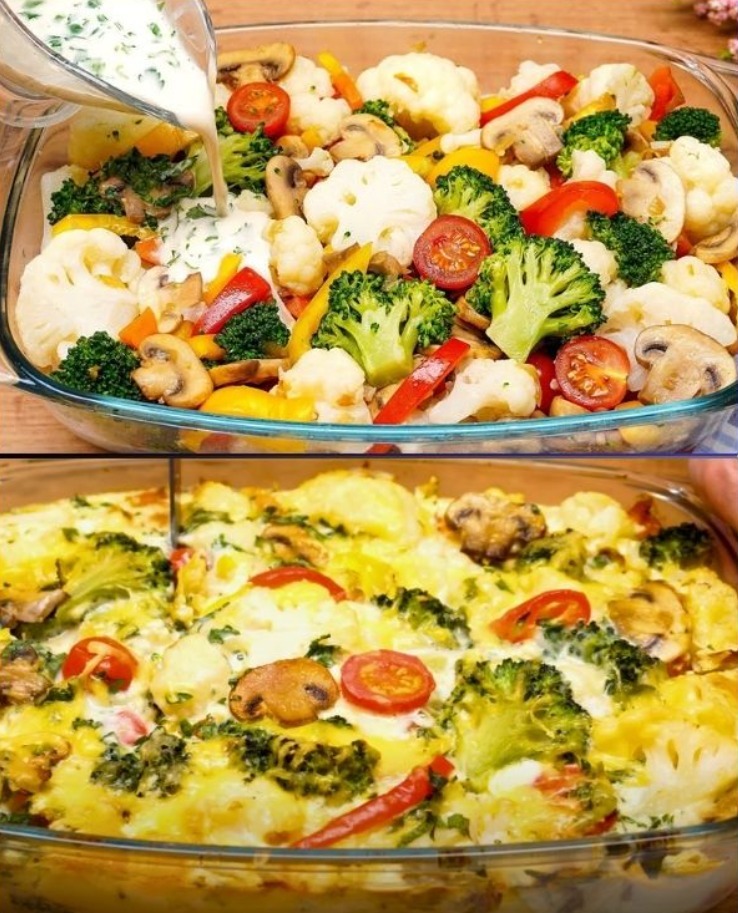
Hearty Vegetable Casserole with Cauliflower and Broccoli

This vegetable casserole is a vibrant, nourishing dish that brings together cauliflower, broccoli, and a medley of other vegetables in a delightful way. Bound together with a savory egg and cheese mixture, it’s a comforting meal perfect for any day of the week.

Ingredients:

  • 400 grams of cauliflower, cut into florets
  • 1 whole broccoli, cut into florets
  • 1 large onion, finely chopped
  • 1 red bell pepper, diced
  • 1 yellow bell pepper, diced
  • 4 large eggs
  • 500 milliliters of milk
  • 130 grams of all-purpose flour
  • 150 grams of semi-hard cheese, grated
  • 1 large carrot, grated
  • A handful of mushrooms, sliced
  • 2 cloves of garlic, minced
  • Salt, to taste
  • Black pepper, to taste
  • Vegetable oil, for greasing

Instructions:

  1. Preheat the Oven: Begin by preheating your oven to 180°C (350°F). Lightly grease a large baking dish with vegetable oil.
  2. Prepare the Vegetables: In a large mixing bowl, combine the cauliflower and broccoli florets, diced onions, red and yellow bell peppers, grated carrot, and sliced mushrooms. Toss with the minced garlic, and season with salt and black pepper to taste.
  3. Make the Batter: In another bowl, whisk together the eggs, milk, and flour until smooth. Stir in the grated semi-hard cheese (reserving some for topping), and season with a little more salt and pepper. Mix until you have a smooth, pourable batter.
  4. Assemble the Casserole: Spread the vegetable mixture evenly in the prepared baking dish. Pour the egg and cheese batter over the vegetables, making sure to cover them completely. Sprinkle the top with the reserved grated cheese.
  5. Bake: Place the casserole in the preheated oven and bake for about 45 minutes to 1 hour, or until the top is golden brown and the vegetables are tender. Check the doneness by inserting a knife or skewer into the center; it should come out clean.
  6. Serve: Let the casserole cool for a few minutes before serving. This dish is wonderfully satisfying on its own or can be served alongside a light salad or crusty bread for a fuller meal.

Enjoy this hearty vegetable casserole, where the flavors of cauliflower, broccoli, and a host of other vegetables come together under a golden, cheesy crust. It’s a versatile recipe that invites you to use whatever vegetables you have on hand, making it perfect for a nutritious family dinner or a cozy meal any time.

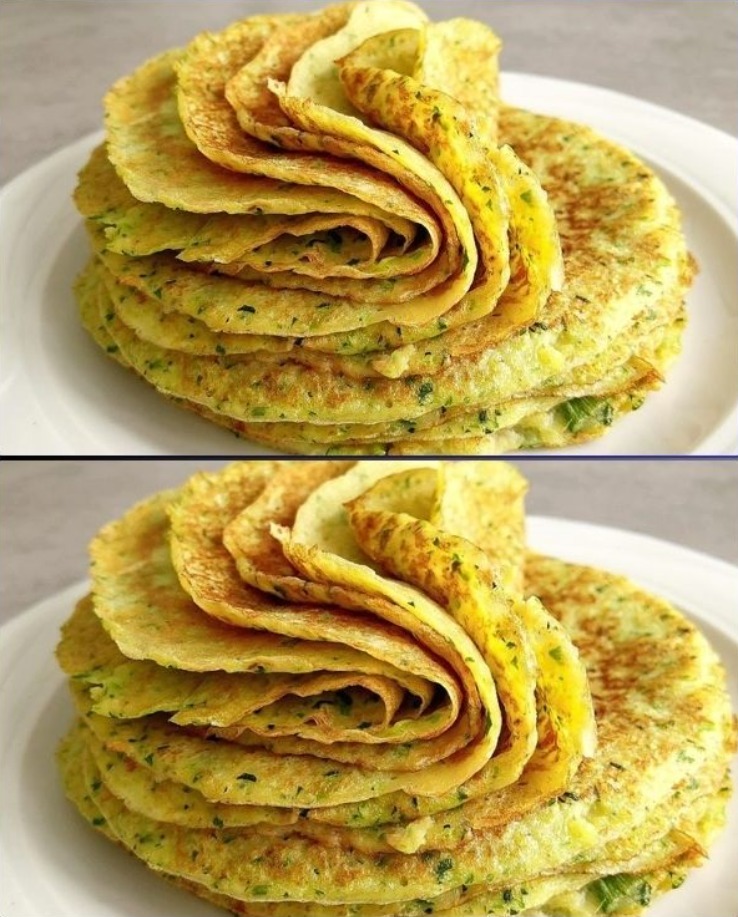
Crispy Zucchini and Potato Pancakes

Discover the joy of making these deliciously crispy pancakes that combine the freshness of zucchini with the heartiness of potatoes. Perfect for any meal of the day, these pancakes are a testament to the magic of simple ingredients coming together to create something incredibly tasty.

Ingredients:

  • 1 medium zucchini
  • 2 medium potatoes
  • 1 teaspoon of salt
  • 1 1/2 cups all-purpose flour
  • 1 1/2 cups milk
  • 3 large eggs
  • A generous handful of fresh parsley, finely chopped
  • 2 spring onions, finely chopped
  • 1 teaspoon baking powder
  • 3 tablespoons vegetable oil for frying

Instructions:

  1. Prepare the Vegetables: Start by grating the zucchini and potatoes into a large mixing bowl. To ensure your pancakes are crispy, squeeze out as much liquid as possible from the grated vegetables using a clean kitchen towel or a sieve.
  2. Mix the Batter: To the bowl of grated vegetables, add the salt, flour, milk, eggs, chopped parsley, and spring onions. Sprinkle the baking powder over the mixture. Stir everything together until well combined. The batter should have a consistency that’s thick enough to hold its shape but still pourable.
  3. Heat the Oil: In a large skillet or frying pan, heat the vegetable oil over medium heat. You’ll know it’s ready when a small drop of batter sizzles upon contact.
  4. Cook the Pancakes: For each pancake, ladle a portion of the batter into the hot pan, flattening it slightly with the back of the spoon to form a round shape. Cook for about 2-3 minutes on each side or until the pancakes are golden brown and crispy. Adjust the heat as necessary to prevent burning.
  5. Serve Warm: Transfer the cooked pancakes to a plate lined with paper towels to absorb any excess oil. Continue with the remaining batter, adding more oil to the pan as needed.
  6. Enjoy: Serve these crispy zucchini and potato pancakes hot, with a side of sour cream or your favorite dipping sauce. They make a fantastic breakfast, a satisfying lunch, or a light dinner.

These pancakes are a wonderful way to enjoy the simple goodness of zucchini and potatoes, with the added freshness of parsley and spring onions. Whether you’re looking for a new breakfast favorite or a quick and tasty side dish, these pancakes are sure to impress.

Homemade Dorayaki Pancakes

Embark on a culinary journey to Japan with this simple yet delightful recipe for Dorayaki, a traditional Japanese dessert known for its sweet red bean filling sandwiched between two fluffy pancakes. Perfect for snacks or dessert, these pancakes will bring a taste of Japan right into your kitchen.

Ingredients for Red Bean Paste (Anko):

  • 100 grams of red beans
  • Water for soaking and cooking
  • 75 grams of granulated sugar

Ingredients for Pancakes:

  • 2 large eggs
  • 50 grams of granulated sugar
  • 15 grams of honey
  • 80 grams of cake flour (for a lighter texture)
  • 1/2 teaspoon of baking powder
  • 10 milliliters of water
  • A little cooking oil for frying

Instructions:

Prepare the Red Bean Paste:

  1. Rinse the red beans and place them in a large bowl. Cover with water and let them soak for at least 6 hours or overnight.
  2. Drain the beans and transfer them to a pot. Cover with fresh water, bring to a boil, then reduce the heat to medium. Simmer for about 40 minutes or until the beans are soft.
  3. Add 75 grams of sugar to the pot and stir until fully dissolved. Continue to cook on low heat, mashing the beans until you get a thick, smooth paste. Set aside to cool.

Make the Pancakes:

  1. In a mixing bowl, beat the eggs with 50 grams of sugar and honey until the mixture is light and frothy.
  2. Sift the cake flour and baking powder into the egg mixture. Add 10 milliliters of water and mix until you have a smooth batter.
  3. Heat a non-stick frying pan over low heat and brush with a little cooking oil.
  4. Pour a small amount of batter into the pan to form a pancake about 10cm in diameter. Cook until bubbles form on the surface, then flip and cook the other side until golden brown. Repeat with the remaining batter.
  5. Once the pancakes are cool enough to handle, take one pancake and spread a layer of red bean paste over one side. Cover with another pancake, pressing gently to seal the filling inside.

Enjoy your homemade Dorayaki with a cup of green tea for a truly authentic Japanese experience. These sweet treats are best enjoyed fresh but can be stored in an airtight container for a day or two.

Oven-Baked Savory Meatloaf with Creamy Mushroom Sauce

Let’s dive into a cozy and delicious meal that’s perfect for sharing with family and friends. We’re making a special meatloaf that’s not just any meatloaf. It’s packed with flavor, thanks to some yummy spices and breadcrumbs that make it extra tasty. But that’s not all! We’re also whipping up a creamy mushroom sauce that’s so good, you’ll want to put it on everything. And to make sure we have a little bit of freshness on the plate, we’re tossing together a simple, yet delightful salad. This meal is all about bringing comfort and joy to your table with every bite. So, let’s get started and create a dish that’s sure to warm hearts and fill tummies with happiness.

Ingredients:

For the Meatloaf:

  • 800 grams of ground meat
  • 2 large eggs
  • 15 grams of salt
  • 7 grams of ground black pepper
  • 7 grams of sweet paprika
  • 30 grams of breadcrumbs

For the Mushroom Sauté:

  • 2 fresh mushrooms, sliced
  • 1 carrot, finely chopped
  • 110 grams of canned mushrooms, drained
  • 10 grams of salt
  • 5 grams of ground black pepper

For the Cream Sauce:

  • 130 grams of cream cheese
  • 90 grams of grated hard cheese
  • 5 hard-boiled eggs, chopped
  • 20 milliliters of vegetable oil

For the Salad:

  • 1 boiled beetroot, diced
  • 1 boiled carrot, diced
  • 1 cucumber, diced
  • 2 cloves of garlic, minced
  • 10 milliliters of lemon juice
  • 20 milliliters of soy sauce
  • 25 milliliters of vegetable oil

Instructions:

Meatloaf Preparation:

  1. Preheat your oven to 375°F (190°C).
  2. In a large bowl, combine the ground meat, eggs, salt, pepper, sweet paprika, and breadcrumbs. Mix well until all ingredients are evenly distributed.
  3. Shape the mixture into a loaf and place it in a baking dish.
  4. Bake in the preheated oven for about 1 hour or until the meatloaf is cooked through and has a golden crust.

Mushroom Sauté:

  1. In a skillet over medium heat, sauté the fresh and canned mushrooms along with the chopped carrot. Season with salt and pepper.
  2. Cook until the vegetables are tender and the mushrooms have released their moisture and become golden brown.

Cream Sauce:

  1. In a saucepan, heat the oil over medium heat. Add the cream cheese and stir until melted and smooth.
  2. Incorporate the grated hard cheese, stirring until the sauce is creamy.
  3. Add the chopped boiled eggs to the sauce, gently folding them in until well combined.

Salad:

  1. In a bowl, combine the diced beetroot, carrot, cucumber, and minced garlic.
  2. Dress the salad with lemon juice, soy sauce, and vegetable oil. Toss well to ensure all the ingredients are evenly coated.

Serving:

  1. Slice the baked meatloaf and arrange the slices on a serving platter.
  2. Serve the meatloaf with the mushroom sauté and cream sauce on the side.
  3. Accompany with the fresh salad for a balanced meal.

Enjoy this delicious and satisfying baked meatloaf with its unique combination of flavors and textures, perfect for any occasion.

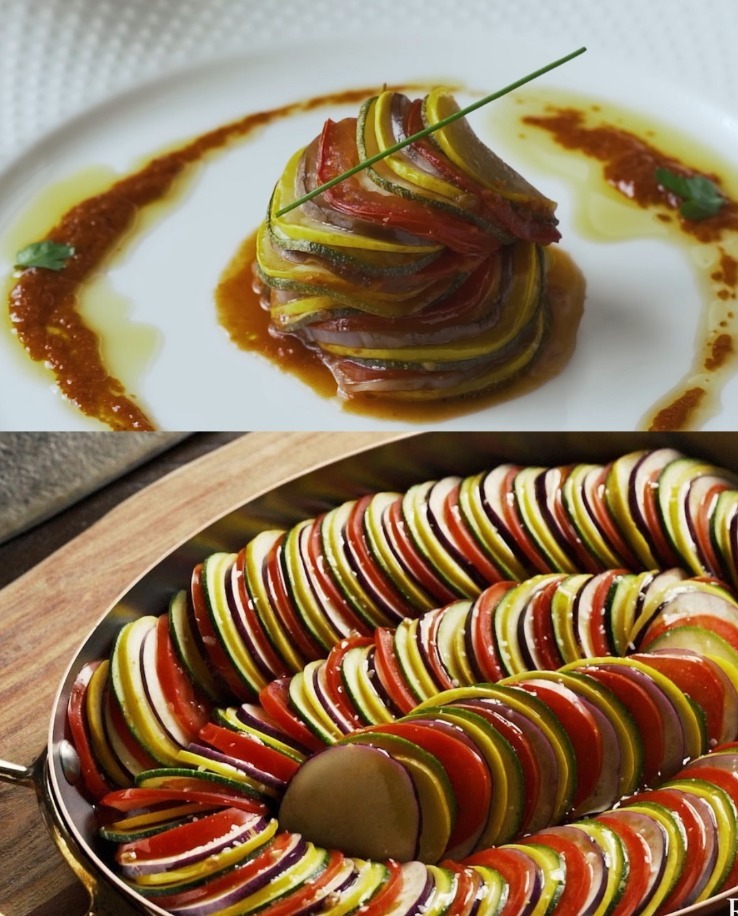
Classic Ratatouille Recipe

Dive into the heart of French cuisine with this timeless ratatouille recipe, a vegetable medley that celebrates simplicity and flavor. Perfect as a main dish or a side, it’s a testament to the beauty of fresh produce.

Ingredients:

For the Ratatouille:
  • 2 large onions, finely sliced
  • 4 cloves of garlic, finely chopped
  • 2 red bell peppers, cut into thin strips
  • 2 yellow bell peppers, cut into thin strips
  • 2 zucchinis, sliced into thin rounds
  • 2 yellow squashes, sliced into thin rounds
  • 4 tomatoes, sliced into thin rounds
  • Olive oil for cooking
  • Salt and freshly ground black pepper, to taste
  • A handful of fresh thyme leaves, for garnishing
For the Tomato Sauce:
  • 4 ripe tomatoes, blended into a puree
  • 2 cloves of garlic, finely chopped
  • 1 tablespoon of olive oil
  • Salt and freshly ground black pepper, to taste
  • Fresh basil leaves, finely chopped, for garnishing

Instructions:

  1. Prepare the Tomato Sauce:
    • Heat 1 tablespoon of olive oil in a saucepan over medium heat. Add the minced garlic and sauté until fragrant.
    • Stir in the pureed tomatoes. Season with salt and pepper.
    • Simmer on low heat for about 15-20 minutes, or until the sauce thickens slightly. Remove from heat and set aside.
  2. Assemble the Ratatouille:
    • Preheat your oven to 375°F (190°C).
    • In a large baking dish, spread the tomato sauce evenly on the bottom.
    • Arrange the sliced vegetables (onions, bell peppers, zucchinis, yellow squashes, and tomatoes) in a spiral pattern, alternating them and overlapping slightly, starting from the edge of the dish and working towards the center.
    • Drizzle olive oil over the vegetables and season with salt and pepper. Sprinkle fresh thyme leaves on top.
    • Cover the dish with aluminum foil and bake in the preheated oven for about 40 minutes.
    • After 40 minutes, remove the foil and bake for an additional 20 minutes, or until the vegetables are tender and lightly browned.
  3. Final Touches:
    • Once done, remove from the oven and let it cool slightly.
    • Garnish with fresh basil leaves before serving.

Enjoy this classic ratatouille on its own, or serve it alongside your favorite protein for a complete meal. Its vibrant colors and rich flavors are sure to impress at any table.

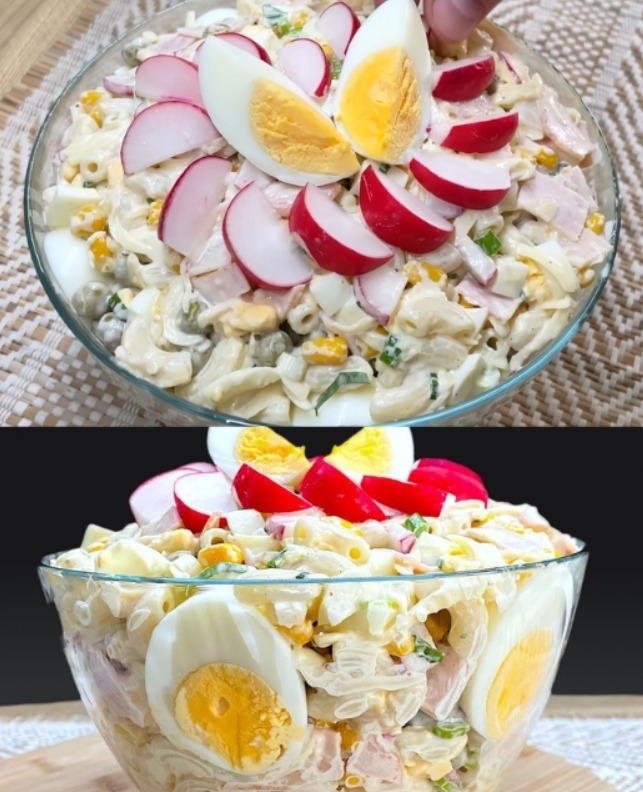
Classic Delight Salad

Discover a delightful salad that combines the comfort of classic ingredients with a touch of elegance, perfect for any gathering or a cozy meal at home. This salad, brimming with a harmonious blend of flavors and textures, is a testament to the beauty of simplicity in cooking.

Classic Delight Salad

Ingredients:

  • 150g pasta of your choice
  • 1 teaspoon salt (for boiling the pasta)
  • 7 eggs, hard-boiled, peeled, and chopped
  • 150g ham, cut into small cubes
  • A handful of radishes, thinly sliced
  • A few spring onions, finely chopped
  • 120g Gouda cheese, cubed
  • 150g peas, boiled and cooled
  • 150g corn, boiled and cooled
  • 3 tablespoons natural yogurt
  • 2 tablespoons mayonnaise
  • 1 teaspoon mustard
  • Salt and freshly ground black pepper, to taste

Instructions:

  1. Prepare the Pasta:
    • Cook the pasta in boiling water seasoned with a teaspoon of salt, following the package instructions until al dente. Drain and rinse under cold water to stop the cooking process. Set aside to cool.
  2. Combine the Salad Ingredients:
    • In a large mixing bowl, add the cooled pasta, chopped hard-boiled eggs, diced ham, sliced radishes, chopped spring onions, cubed Gouda cheese, cooled peas, and corn. Gently toss to combine.
  3. Dress the Salad:
    • In a small bowl, whisk together the natural yogurt, mayonnaise, and mustard until smooth. Season with salt and freshly ground black pepper according to your taste.
  4. Mix and Chill:
    • Pour the dressing over the salad ingredients in the large bowl. Toss gently until everything is evenly coated with the dressing.
    • Cover and refrigerate the salad for at least 30 minutes to allow the flavors to meld together.
  5. Serve:
    • Give the salad a gentle stir before serving. Adjust the seasoning if necessary. Serve chilled as a refreshing side dish or a light main course.

This timeless salad, with its rich array of ingredients, offers a delightful mix of creamy, crunchy, and savory elements. It’s a versatile dish that can grace your table on any occasion, proving that sometimes, the simplest recipes are the most memorable. Enjoy the blend of textures and flavors that make this salad a forgotten treasure worth rediscovering.

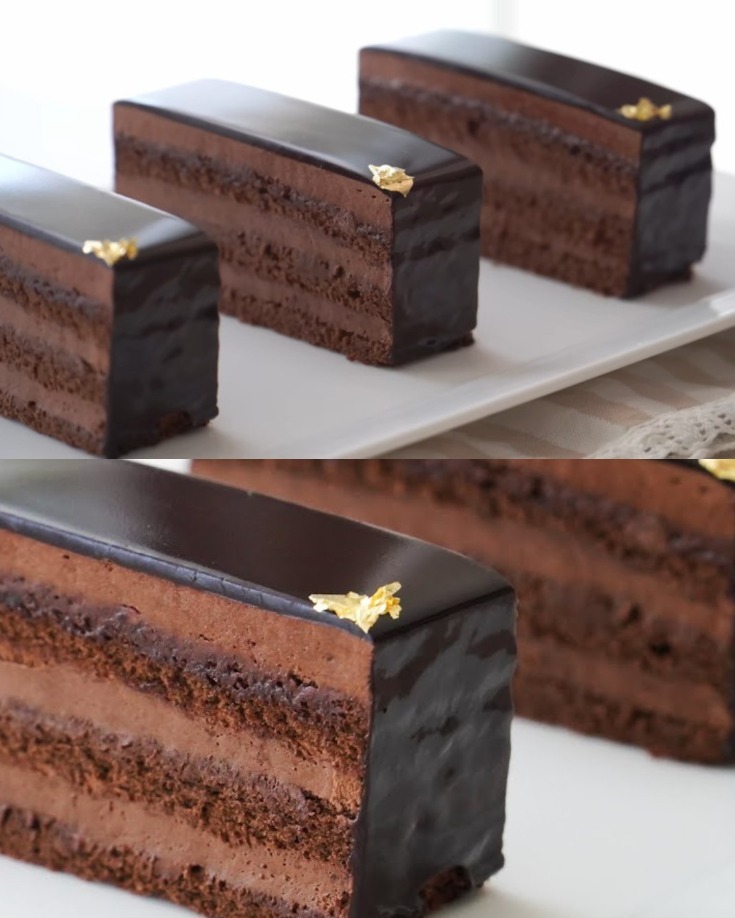
Decadent Flourless Chocolate Cake

Embark on a culinary adventure with this exquisite Flourless Chocolate Cake, layered with a luscious chocolate cream filling and drizzled with a rich cocoa syrup. This recipe is a chocolate lover’s dream, offering deep, intense flavors and a variety of textures that come together in a decadent dessert. Perfect for special occasions or as a luxurious treat for any day.

Ingredients:

For the Cake:

  • 120g bittersweet chocolate, finely chopped
  • 30g unsalted butter
  • 30ml whole milk
  • 4 large egg whites
  • A pinch of fine sea salt
  • 50g granulated sugar
  • 4 large egg yolks
  • 5ml pure vanilla extract

For the Chocolate Cream Filling:

  • 150g bittersweet chocolate, finely chopped
  • 90ml heavy cream (for melting chocolate)
  • 300ml cold heavy cream
  • 30g granulated sugar

For the Cocoa Syrup:

  • 75ml boiling water
  • 7g unsweetened cocoa powder
  • 25g granulated sugar

For the Chocolate Glaze:

  • 50g unsweetened cocoa powder
  • 115g granulated sugar
  • 85ml water
  • 85ml heavy cream
  • 9g gelatine powder
  • 45ml cold water (for blooming gelatine)

Instructions:

  1. Cake Preparation:
    • Melt the bittersweet chocolate, butter, and milk in a heatproof bowl over a pot of simmering water. Once melted, remove from heat and let cool slightly.
    • Beat the egg whites with a pinch of salt until soft peaks form. Gradually add sugar, continuing to beat until stiff peaks form.
    • Mix the egg yolks and vanilla into the cooled chocolate mixture. Gently fold in a third of the egg whites to lighten the mixture, then carefully fold in the remaining whites.
    • Pour the batter into a greased and parchment-lined round cake pan. Bake in a preheated oven at 175°C (350°F) for about 25 minutes. Let cool completely.
  2. Chocolate Cream Filling:
    • Melt the 150g of chocolate with 90ml of heavy cream, stirring until smooth. Cool to room temperature.
    • Whip the 300ml of cold heavy cream with sugar until it forms soft peaks. Fold in the cooled chocolate mixture until no streaks remain.
  3. Cocoa Syrup:
    • Dissolve cocoa powder and sugar in hot water, stirring until smooth. Let cool.
  4. Chocolate Glaze:
    • Mix cocoa powder, sugar, and water in a saucepan. Bring to a boil, then simmer for about 5 minutes, stirring occasionally.
    • Bloom the gelatine in cold water, then add it to the hot cocoa mixture along with the heavy cream. Stir until the gelatine is fully dissolved and the mixture is smooth. Cool until it thickens slightly.
  5. Assembly:
    • Slice the cooled cake horizontally to create two layers. Place the bottom layer on a serving plate and soak with half of the cocoa syrup.
    • Spread the chocolate cream filling over the bottom layer, then top with the second cake layer. Soak the top layer with the remaining cocoa syrup.
    • Pour the chocolate glaze over the cake, spreading it to cover the top and sides. Refrigerate until set.

This Flourless Chocolate Cake with its creamy filling and glossy glaze is not only a showstopper but also a testament to the rich and comforting flavors of chocolate. Enjoy this indulgent dessert with friends and family, or savor it piece by piece on your own.

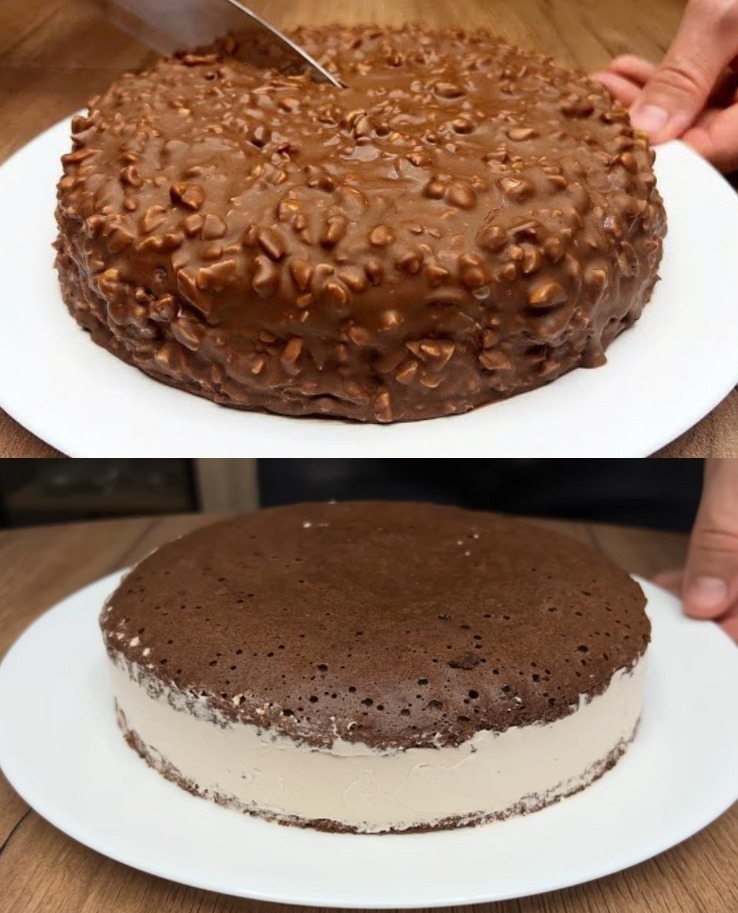
Quick Chocolate Delight

Indulge in a quick and delightful chocolate treat that’s sure to satisfy your sweet tooth. This recipe guides you through creating a decadent chocolate dessert, complete with a soft cake base, rich ganache, creamy ricotta filling, and a crunchy chocolate coating. Perfect for when you need a chocolate fix without spending hours in the kitchen.

Quick Chocolate Delight

Ingredients:

For the Chocolate Base:

  • 4 large eggs
  • A dash of salt
  • 100g granulated sugar
  • 100g all-purpose flour
  • 40g unsweetened cocoa powder
  • 20g cornflour
  • An 18cm baking tin

For the Ganache:

  • 100g granulated sugar
  • 30g unsalted butter
  • 100ml cream, warmed

For the Ricotta Chocolate Filling:

  • 70g ricotta cheese
  • 30g icing sugar
  • 150ml heavy cream, whipped to soft peaks
  • 80g chocolate, gently melted

For the Chocolate & Peanut Coating:

  • 60g peanuts, toasted and roughly chopped
  • 150g chocolate, melted smoothly
  • A drizzle of vegetable oil

Method:

  1. Prepare the Chocolate Base:
    • Preheat your oven to 180°C (350°F) and grease your baking tin.
    • Beat the eggs with a pinch of salt until frothy. Gradually add the sugar, beating until thick and pale.
    • Sift together the flour, cocoa, and cornflour. Gently fold into the egg mixture.
    • Pour the batter into the prepared tin and bake for about 12-15 minutes. Let cool.
  2. Make the Ganache:
    • In a saucepan, dissolve the sugar in a splash of water and heat until amber-colored. Carefully add the butter and warmed cream (it will bubble), stirring until smooth.
    • Let the ganache cool slightly before spreading over the cooled cake base.
  3. Whip Up the Ricotta Chocolate Filling:
    • Blend the ricotta with icing sugar until smooth. Fold in the whipped cream and melted chocolate until well combined.
    • Spread this mixture over the ganache layer on the cake.
  4. Create the Chocolate & Peanut Coating:
    • Mix the melted chocolate with a drizzle of vegetable oil for a glossy finish. Stir in the toasted peanuts.
    • Pour this over the ricotta layer, spreading evenly.
  5. Chill and Serve:
    • Allow the dessert to set in the fridge for at least 30 minutes.
    • Slice and serve chilled for a blissful chocolate experience.

This quick chocolate dessert is a perfect blend of textures and flavors, from the soft cake base to the creamy fillings and the crunchy, nutty topping. Enjoy crafting this sweet masterpiece that’s bound to impress at any gathering or simply as a treat for yourself.