There are some smells that live in your memory long after the moment has passed. For me, one of them is the unmistakable scent of freshly baked bread, wafting through my grandmother’s kitchen in a quiet German village. The aroma was rich with warmth, carried by the gentle crackle of the crust and the soft, yeasty promise of the crumb inside. That bread—her bread—was the centerpiece of everything. It didn’t need a grand meal to accompany it. A pat of butter and her homemade jam would do.
She would start early, before the sun had fully risen. I’d wake to the sound of her mixing bowl scraping against the wooden countertop, her hands kneading dough with the rhythm of a song only she knew. I was too small to help, but she’d let me press my fingers gently into the rising dough, amazed at how it would spring back, alive with warmth. That bread recipe, passed down from her mother and her mother before her, wasn’t written anywhere. It lived in her memory, in her hands, and now, in mine.
This recipe for Old German Bread is more than just flour, yeast, and water. It’s the story of simplicity, resilience, and love baked into a humble loaf. It’s a nod to a time when food was unhurried and every ingredient mattered. Whether you’re baking it for the first time or rediscovering an old tradition, this bread has a way of making you feel at home.
The Soul of Old German Bread
Old German bread, or Altes Deutsches Brot, is rooted in rural kitchens and farmhouse tables. It is not the dark rye or dense pumpernickel commonly associated with German baking—though those are equally cherished. This version leans rustic yet tender, a lighter loaf made with pantry staples, perfect for everyday use.
At its heart, this bread is about accessibility. There’s no sourdough starter to maintain, no fancy flours to hunt down. Just water, flour, yeast, and time. The addition of oil brings softness, and a touch of sugar enhances the subtle depth of flavor that makes every bite feel like it belongs to a Sunday morning in the countryside.
It’s the kind of bread you’d find cooling on a wooden rack by a kitchen window, ready to feed a hungry family or soak up a hearty stew. It’s no-frills but never boring. This bread carries character.
Ingredients
Ingredient
Quantity
Warm water
400 ml
Dry yeast
7 g
Sugar
1 tablespoon
Vegetable oil
100 ml
All-purpose flour
500 g
Salt
1 teaspoon
Directions:
Activate the Yeast: In a large mixing bowl, combine the warm water, sugar, and dry yeast. Let it sit for 8–10 minutes until frothy.
Mix the Dough: Add the vegetable oil, salt, and flour to the yeast mixture. Stir with a wooden spoon or use a stand mixer with a dough hook until a shaggy dough forms.
Knead & Rest: Knead the dough on a lightly floured surface for 8–10 minutes, or until smooth and elastic. Place it back in the bowl, cover with a damp towel, and let it rise in a warm place for about 1 hour, or until doubled in size.
Shape & Rise Again: Punch down the dough, then shape it into a loaf or place it into a greased bread tin. Let it rise again for about 30–40 minutes.
Bake to Golden Perfection: Preheat the oven to 375°F (190°C). Bake for 30–35 minutes, or until the crust is golden and the loaf sounds hollow when tapped on the bottom.
Cool & Serve: Let the bread cool on a wire rack for at least 15 minutes before slicing. Serve warm or toasted with butter, cheese, or jam.
Nutrition Information (Per Slice, Approx. 12 slices total)
Nutrient
Amount
Calories
190 kcal
Carbohydrates
28 g
Protein
4 g
Fat
6 g
Saturated Fat
0.7 g
Fiber
1.2 g
Sugar
1.5 g
Sodium
200 mg
A Versatile Staple for Any Table
One of the best things about Old German Bread is how it adapts. Serve it with sweet toppings for breakfast—think fruit preserves, nut butter, or honey. At lunch, it pairs beautifully with cheese and cured meats. Come dinnertime, it becomes the perfect vehicle for mopping up soup or stew.
Its mild flavor also makes it a wonderful base for toast toppings or open-faced sandwiches. Whether you top it with pickled vegetables or creamy spreads, the bread remains a quiet but confident partner—sturdy, soft, and inviting.
Why This Bread Works
There’s a science to its simplicity. The warm water activates the yeast, which feeds on the sugar and begins the fermentation process. Oil keeps the crumb tender and helps extend shelf life. The kneading process creates gluten structure, which gives the bread its satisfying texture and helps it rise evenly.
Unlike artisan loaves that require long fermentation, this recipe is quicker, designed for the modern home baker who still craves the satisfaction of homemade bread without the marathon commitment.
It’s also a forgiving recipe. Don’t worry if you knead a little less or more, or if your rise time is slightly longer. The bread will still reward you with a golden crust and soft interior.
Tips for the Perfect Loaf
Use fresh yeast: Always check the expiration date on your yeast. If it doesn’t foam during activation, start again with a fresh packet.
Don’t rush the rise: Warmth and patience are key. Let the dough rise until doubled in size for the best texture.
Shape with care: Whether you choose a free-form rustic round or a neat loaf in a tin, shaping helps create structure and visual appeal.
Let it cool before slicing: It’s tempting to dive in, but resting the bread for 20–30 minutes after baking helps the crumb set properly and keeps it from becoming gummy.
Variations to Try
Though traditional Old German Bread keeps it simple, you can easily adapt the recipe to fit your tastes:
Add seeds: Sprinkle sunflower, flax, or sesame seeds into the dough or on top before baking for texture and flavor.
Mix in herbs: Dried thyme, caraway, or rosemary can add a savory twist.
Use whole wheat flour: Substitute up to half of the all-purpose flour with whole wheat for a heartier loaf.
Sweeten the loaf: Add raisins and a pinch of cinnamon to make a breakfast bread version.
The base recipe is a canvas—one that encourages creativity without sacrificing its comforting core.
Frequently Asked Questions (FAQs)
Can I use fresh yeast instead of dry yeast? Yes. If using fresh yeast, use about 21g (three times the amount of dry yeast). Dissolve it in the warm water just like dry yeast.
Can I freeze this bread? Absolutely. Once cooled completely, slice and freeze the bread in an airtight bag. Reheat in a toaster or oven for that just-baked taste.
How long does it stay fresh? Stored in a bread box or airtight container, the bread stays fresh for up to 3 days. You can also store it in the refrigerator to extend its life, though the texture may firm up slightly.
Can I make it gluten-free? This particular recipe relies on the gluten structure from wheat flour. While you could experiment with a gluten-free flour blend, the texture will likely be very different and may require binding agents like xanthan gum.
Why is my bread dense? This could be due to under-proofing, expired yeast, or too much flour. Make sure your dough rises well and feels light and puffy before baking.
Can I make this without sugar? Yes, but the sugar helps feed the yeast and improve texture. Omitting it will slightly affect the flavor and rise, but the bread will still work.
Old Traditions, New Tables
In a world that often celebrates complexity and flash, there’s something deeply grounding about making a loaf of bread like this. It doesn’t rely on gadgets or specialty ingredients. It doesn’t require a culinary degree. It just needs your hands, a warm place, and a little time.
Baking Old German Bread connects us to generations of people who made do with what they had—and turned it into something nourishing. It invites us to slow down, honor tradition, and create something real.
If you’re new to bread baking, this is a gentle way to begin. And if you’re already well into your baking journey, it’s a recipe worth returning to. Sometimes, the simplest loaves carry the most meaning.
Conclusion: A Loaf With Legacy
Old German Bread is more than a recipe—it’s a bridge between past and present, between simple ingredients and rich memories. Whether you’re making it for yourself or for others, the act of baking this bread is a small, beautiful ritual. It nourishes the body, yes—but also the spirit.
In every golden slice, there is care. In every warm bite, there is history. And in every loaf, there is the quiet, comforting truth that something made with intention always tastes better.
Bake it once, and you’ll understand. Bake it often, and it may just become your own legacy.
Amal
Baking Memory Into Every Slice: The Legacy of Old German Bread
A rustic, tender-crusted loaf with deep roots in tradition. This Old German Bread is soft inside, golden on the outside, and built on humble ingredients that have stood the test of time. Perfect for breakfast, sandwiches, or served warm with a pat of butter.
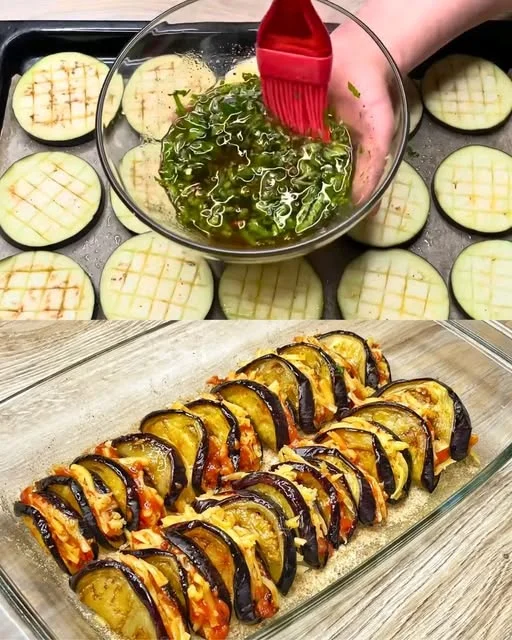
There’s something profoundly nostalgic about the scent of roasted eggplant wafting through the kitchen. It pulls me back to long summer afternoons in my grandmother’s garden, where rows of vegetables flourished in the heat of the Mediterranean sun. Among them, eggplants stood proudly—glossy, violet, and warm to the touch. My grandmother, an intuitive cook who never followed a recipe, would pluck them at the perfect moment, slice them with practiced ease, and sprinkle them with a blend of dried herbs and ground spices she kept tucked away in a small wooden box.
I remember watching her from a tiny wooden stool, entranced as the eggplant slices sizzled in the oven, their edges curling and caramelizing into something magical. She never made a fuss about it. To her, it was just another humble dinner. But to me, it was an unforgettable ritual—simple ingredients transformed into comfort, nourishment, and love.
This Herbed Eggplant Delight is my homage to those quiet moments. It’s a celebration of simplicity and a tribute to the powerful flavors born from a few fresh ingredients and a little care. Whether you grew up with eggplants or are just learning to love them, this dish invites you to slow down, savor each bite, and discover the beauty in humble vegetables.
Why Eggplant Deserves a Starring Role
Eggplant is one of those ingredients that often gets overlooked or underestimated. Some find it too spongy, others complain about bitterness, but when treated right, eggplant becomes the silky, savory centerpiece of a dish. In this recipe, roasting coaxes out its natural richness and lends a beautifully tender texture, while herbs and paprika create a warming aromatic profile.
This dish isn’t just about taste—it’s about the texture, the contrast of softness and roasted edges, and the brightness of fresh parsley against smoky spices. It’s both rustic and elegant, easy enough for weeknights but special enough to serve guests.
Ingredients
Ingredient
Quantity
Eggplants
2 medium
Green parsley
Handful, finely chopped
Italian herbs
1 tsp
Paprika
1 tsp
Ground black pepper
To taste
Olive oil (optional)
1–2 tbsp
Salt
To taste
Directions
Preheat & Prep: Preheat your oven to 400°F (200°C). Slice the eggplants lengthwise or into thick rounds (about ½-inch thick).
Season the Slices: Place the slices on a baking sheet lined with parchment paper. Brush both sides lightly with olive oil (optional), then sprinkle with Italian herbs, paprika, salt, and ground black pepper.
Roast to Perfection: Roast in the oven for about 25–30 minutes, flipping halfway through, until the eggplant is tender and golden-brown.
Garnish & Serve: Once out of the oven, immediately sprinkle chopped parsley over the warm eggplant. Serve hot as a side, over grains, or even layered on toast.
Nutrition Information (Approx. per serving, based on 4 servings)
Nutrient
Amount
Calories
90 kcal
Protein
2 g
Carbohydrates
10 g
Fiber
5 g
Fat
5 g
Saturated Fat
0.5 g
Sodium
100 mg
Potassium
380 mg
Vitamin A
15% DV
Vitamin C
20% DV
What Makes This Dish Shine
Minimal Ingredients, Maximum Flavor: With just a few pantry staples, this dish transforms into something deeply satisfying.
Naturally Plant-Based: It’s vegan-friendly, gluten-free, and perfect for those seeking cleaner eating without sacrificing taste.
Customizable: Whether you prefer it spicy, garlicky, or topped with cheese, there are countless ways to make it your own.
Versatile Serving Options: Serve it warm as a side dish, layer it over couscous or quinoa for a hearty lunch, or use it as a topping for flatbread.
Nutritional Snapshot
Eggplants are a nutrition powerhouse wrapped in deep purple skin. They’re low in calories and rich in fiber, antioxidants, and several important nutrients like manganese and folate. Here’s what they bring to the table:
Fiber-Rich: Eggplant helps keep digestion smooth and contributes to satiety, making it great for weight management.
Antioxidants Galore: Rich in anthocyanins like nasunin (found in the skin), eggplants help combat oxidative stress.
Heart Health Benefits: Studies suggest that eggplants can help lower LDL cholesterol and improve overall heart function.
Brain Food: Thanks to nasunin and chlorogenic acid, eggplant supports cognitive health and reduces inflammation.
Add a touch of olive oil and fresh parsley, and you’re enhancing absorption of fat-soluble vitamins and adding additional health benefits like anti-inflammatory and antibacterial properties.
Creative Twists and Serving Suggestions
If you’re looking to reinvent the Herbed Eggplant Delight for different occasions, here are some ideas:
1. Mediterranean Flatbread Topping
Use the roasted eggplant as a topping for warm pita or flatbread, add crumbled feta, a drizzle of tahini sauce, and scatter some cherry tomatoes on top.
2. Grain Bowl Companion
Serve alongside a quinoa or couscous bowl with chickpeas, cucumber, and a dollop of Greek yogurt or hummus for a hearty, balanced meal.
3. Wrap or Sandwich Filling
Layer eggplant slices into a wrap with greens, sun-dried tomatoes, and roasted red peppers for a vibrant, satisfying lunch.
4. Cheesy Casserole-Style
Before baking, sprinkle shredded mozzarella or parmesan over the top for a more indulgent, gratin-style dish.
5. With a Kick
Add a pinch of cayenne or a drizzle of chili oil before serving if you like a little heat with your herbs.
Frequently Asked Questions
Do I need to salt the eggplant before roasting?
Salting eggplant is an old-school technique used to remove bitterness and excess moisture. With modern eggplant varieties, this step is often unnecessary, especially if you’re roasting at high temperatures. However, if you’re using larger or older eggplants, salting for 15–30 minutes can help enhance texture.
Can I grill the eggplant instead of roasting it?
Absolutely! Grilling adds a delightful smokiness. Just brush the slices with oil and grill over medium-high heat for 3–5 minutes per side until tender and charred.
Is this recipe freezer-friendly?
Eggplant changes texture once frozen, often becoming mushier. It’s best enjoyed fresh or stored in the refrigerator for up to 3 days. If you’d like to meal prep, consider roasting and storing the eggplant separately, then reheating in the oven before serving.
What herbs can I substitute for Italian seasoning?
If you’re out of Italian herbs, use a mix of dried oregano, thyme, basil, and rosemary. Fresh herbs like chopped basil or mint can also be added after roasting for a more aromatic finish.
How can I make this dish more filling?
Add cooked lentils, white beans, or a handful of toasted nuts like pine nuts or walnuts on top. These additions provide plant-based protein and satisfying crunch or creaminess.
Tips for Perfect Roasted Eggplant
Cut evenly: Uniform slices roast more consistently. Aim for ½-inch thickness for the perfect balance of tenderness and structure.
Don’t overcrowd the pan: Give each piece space to roast rather than steam.
Use parchment paper: It makes cleanup easier and helps prevent sticking.
Roast at high heat: 400°F (200°C) is ideal for caramelizing the edges while softening the interior.
Finish with something fresh: Fresh herbs or a squeeze of lemon add brightness to the richness of roasted eggplant.
A Dish That Feels Like Home
There’s a quiet kind of joy in making something simple and letting it speak for itself. Herbed Eggplant Delight is a dish that doesn’t rely on bells and whistles—it’s built on memories, flavor, and soul. It’s the kind of food that welcomes you after a long day, that fills your kitchen with warmth, and reminds you that sometimes, less really is more.
I still think of my grandmother whenever I roast eggplant. The way her hands moved confidently, the way she believed in the power of a few herbs and a hot oven. This recipe carries that spirit forward—offering comfort, flavor, and just a touch of nostalgia with every bite.
Whether you’re new to eggplant or have loved it for years, this dish is an invitation: to gather, to savor, and to share.
Amal
From Grandmother’s Garden to My Kitchen: A Love Letter to Eggplant
A simple and flavorful roasted eggplant recipe infused with Italian herbs, paprika, and fresh parsley. This Mediterranean-inspired dish is light, savory, and perfect as a side or vegetarian main.
Introduction to Raspberry Chocolate Chip Cookies Recipe
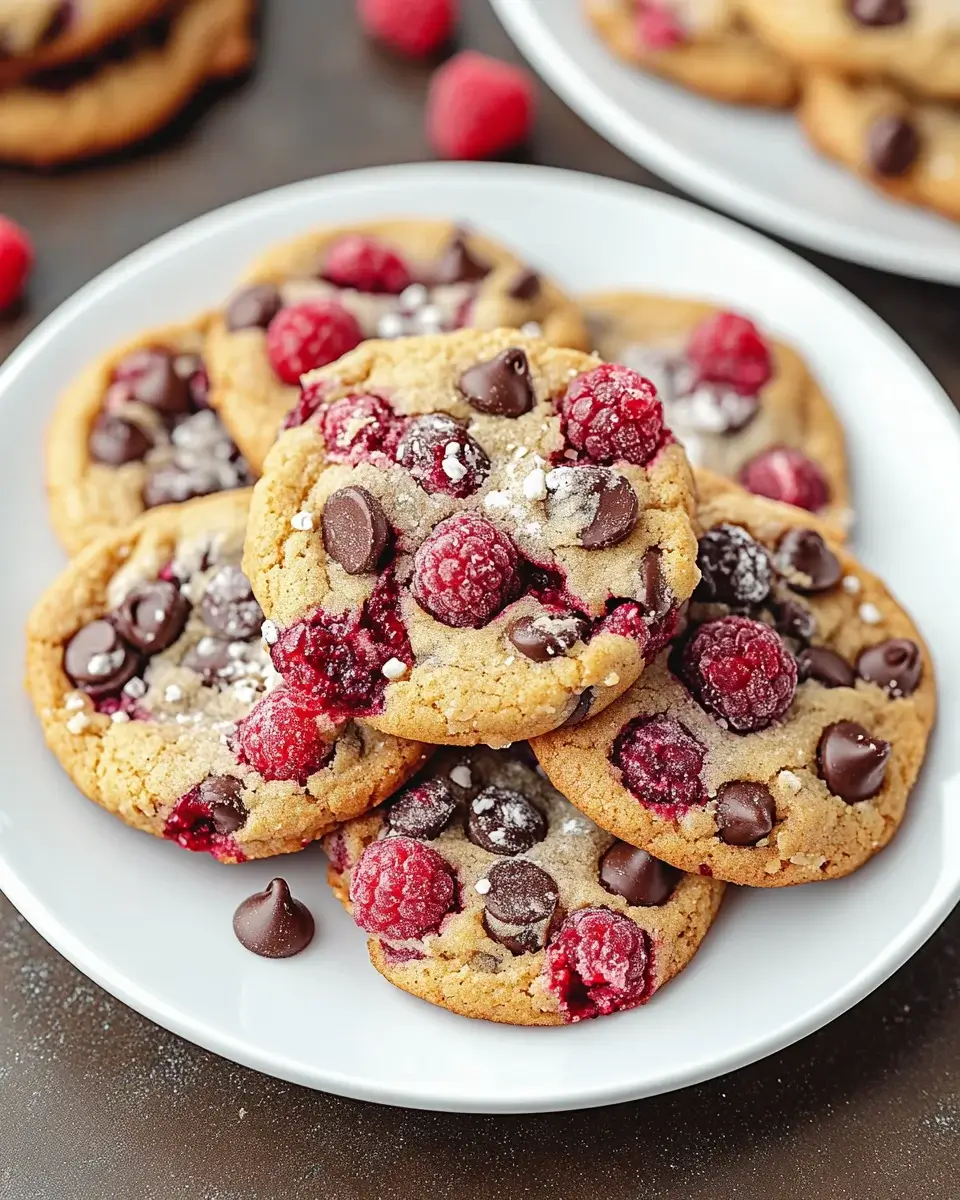
Raspberry Chocolate Chip Cookies Recipe is not just a treat; it’s an experience that brings joy to any occasion. Whether you’re celebrating a birthday, hosting a gathering, or simply indulging in a sweet craving, these cookies are sure to impress.
The Perfect Treat for Any Occasion
Imagine biting into a warm cookie, where the gooey chocolate chips melt in your mouth, and the burst of raspberry flavor dances on your taste buds. Sounds heavenly, right? These cookies are perfect for sharing with friends and family or enjoying all by yourself. They are easy to make and require simple ingredients that you likely already have in your kitchen.
Raspberry Chocolate Chip Cookies Recipe is a must-try!
Let’s get started on this delicious journey. Gather your ingredients, and prepare to create a batch of cookies that will leave everyone asking for more!
Ingredients for Raspberry Chocolate Chip Cookies Recipe
Raspberry Chocolate Chip Cookies Recipe. Having everything ready will make your baking experience smooth and enjoyable. Here’s what you’ll need:
1 cup unsalted butter, softened
1 cup granulated sugar
1 cup packed brown sugar
2 large eggs
2 teaspoons vanilla extract
3 cups all-purpose flour
1 teaspoon baking soda
1/2 teaspoon salt
1 cup semi-sweet chocolate chips
1 cup fresh raspberries, gently mashed
These ingredients come together to create a delightful cookie that balances sweetness and tartness perfectly. The unsalted butter adds richness, while the sugars provide that classic cookie sweetness. Eggs and vanilla extract contribute to the overall flavor and texture, making the cookies soft and chewy.
The all-purpose flour, baking soda, and salt form the base of the dough, ensuring the cookies rise beautifully. Finally, the star ingredients—chocolate chips and fresh raspberries—bring the whole recipe to life. The chocolate chips melt into gooey pockets of sweetness, while the raspberries add a refreshing burst of flavor.
Now that you have your ingredients ready, let’s move on to the next step of preparing these delicious cookies!
Step-by-Step Preparation of Raspberry Chocolate Chip Cookies Recipe
Raspberry Chocolate Chip Cookies Recipe. Follow these simple steps to ensure your cookies turn out perfectly every time!
Step 1: Preheat the Oven
First things first, preheat your oven to 350°F (175°C). This step is crucial as it ensures that your cookies bake evenly. A properly preheated oven helps achieve that golden-brown color and soft texture we all love. While the oven heats up, you can move on to the next step.
Step 2: Prepare the Dough
In a large mixing bowl, cream together the softened butter, granulated sugar, and brown sugar. Use an electric mixer or a sturdy wooden spoon to mix until the mixture is light and fluffy. This process usually takes about 2-3 minutes. Next, add the eggs one at a time, mixing well after each addition. Then, stir in the vanilla extract. This will add a lovely aroma to your cookie dough!
In a separate bowl, whisk together the all-purpose flour, baking soda, and salt. Gradually add this dry mixture to the wet ingredients. Mix until just combined. Be careful not to overmix, as this can lead to tough cookies.
Step 3: Fold in the Chocolate Chips and Raspberries
Now comes the fun part! Gently fold in the semi-sweet chocolate chips and the gently mashed raspberries. Use a spatula to combine everything, ensuring the chocolate and raspberries are evenly distributed throughout the dough. Remember, the key is to be gentle to keep the raspberries intact and avoid turning the dough pink!
Step 4: Scoop and Shape the Cookies
Using a tablespoon or a cookie scoop, drop rounded tablespoons of dough onto ungreased baking sheets. Make sure to space them about 2 inches apart. This spacing allows the cookies to spread while baking without merging into one another. If you like, you can slightly flatten the tops for a more uniform shape.
Step 5: Bake the Cookies
It’s time to bake! Place the baking sheets in the preheated oven and bake for 10-12 minutes. Keep an eye on them; you want the edges to be lightly golden while the centers remain soft. Once done, remove the cookies from the oven and let them cool on the baking sheets for about 5 minutes. After that, transfer them to wire racks to cool completely. This cooling time helps them set perfectly!
Raspberry Chocolate Chip Cookies Recipe is now ready to be enjoyed. The combination of chocolate and raspberry is sure to delight your taste buds!
Variations of Raspberry Chocolate Chip Cookies Recipe
Raspberry Chocolate Chip Cookies Recipe but have specific dietary needs, don’t worry! There are plenty of variations you can try. Whether you’re looking for a gluten-free option or a vegan adaptation, these tweaks will ensure everyone can enjoy these delicious cookies.
Gluten-Free Option
For those who need to avoid gluten, making gluten-free raspberry chocolate chip cookies is simple! Just substitute the all-purpose flour with a gluten-free flour blend. Many brands offer a 1:1 gluten-free flour that works perfectly in cookie recipes. Additionally, make sure your baking soda is gluten-free, as some brands may contain traces of gluten.
When using gluten-free flour, the texture may vary slightly. To enhance the chewiness, consider adding a tablespoon of cornstarch to the mix. This will help mimic the texture of traditional cookies. Follow the same steps in the original recipe, and you’ll have a delightful batch of gluten-free cookies that everyone can enjoy!
Vegan Adaptation
Raspberry Chocolate Chip Cookies Recipe, it’s quite easy to make! Start by replacing the eggs with flax eggs. To make a flax egg, mix 1 tablespoon of ground flaxseed with 2.5 tablespoons of water. Let it sit for about 5 minutes until it thickens. This will act as a binding agent in your cookie dough.
Next, swap the unsalted butter for a plant-based butter or coconut oil. Ensure that the chocolate chips you use are dairy-free to keep the recipe vegan-friendly. Follow the same preparation steps, and you’ll have a batch of vegan cookies that are just as delicious as the original!
These variations allow everyone to enjoy the delightful taste of raspberry and chocolate in cookie form. No matter your dietary preference, these adaptations ensure that the joy of baking and sharing cookies remains accessible to all!
Cooking Note for Raspberry Chocolate Chip Cookies Recipe
Raspberry Chocolate Chip Cookies Recipe. Here are some essential cooking notes to keep in mind:
Ingredient Temperature: Make sure your butter is softened but not melted. This helps create a light and fluffy texture. If you forget to take it out of the fridge, you can cut it into small pieces and let it sit at room temperature for about 15 minutes.
Measuring Flour: For the best results, spoon the flour into your measuring cup and level it off with a knife. Avoid scooping directly from the bag, as this can pack the flour and lead to dry cookies.
Mixing Technique: When combining the wet and dry ingredients, mix until just combined. Overmixing can lead to tough cookies. A few flour streaks are okay; they will incorporate as you fold in the chocolate chips and raspberries.
Cooling Time: Allowing the cookies to cool on the baking sheet for a few minutes is crucial. This helps them set and makes them easier to transfer to wire racks without breaking.
Storage: If you have leftovers (which is rare!), store the cookies in an airtight container at room temperature. They will stay fresh for up to a week. You can also freeze them for longer storage; just make sure to separate layers with parchment paper.
Raspberry Chocolate Chip Cookies Recipe turns out perfectly every time. Happy baking!
Serving Suggestions for Raspberry Chocolate Chip Cookies Recipe
Raspberry Chocolate Chip Cookies, it’s time to think about how to serve them! These cookies are not only tasty but also versatile. Here are some delightful serving suggestions to elevate your cookie experience:
With a Glass of Milk: There’s nothing quite like enjoying warm cookies with a cold glass of milk. The creamy texture of milk complements the rich chocolate and tart raspberry flavors perfectly.
Ice Cream Sandwiches: For a fun twist, use two cookies to create an ice cream sandwich. Choose your favorite ice cream flavor, like vanilla or raspberry sorbet, and scoop it between two cookies. This makes for a refreshing treat, especially on warm days!
On a Dessert Platter: Arrange your cookies on a beautiful dessert platter alongside other treats. Pair them with brownies, fruit tarts, or mini cheesecakes for a delightful dessert spread at parties or gatherings.
With Fresh Berries: Serve your cookies with a side of fresh berries. The additional fruit enhances the raspberry flavor and adds a pop of color to your plate. Strawberries, blueberries, or even more raspberries work wonderfully!
Drizzled with Chocolate: For an extra touch of indulgence, melt some chocolate and drizzle it over the cookies. This adds a beautiful finish and enhances the chocolate flavor, making them even more irresistible.
Raspberry Chocolate Chip Cookies Recipe more enjoyable but also impress your guests. Whether you’re hosting a gathering or simply treating yourself, these ideas will elevate your cookie experience to new heights!
Tips for Perfect Raspberry Chocolate Chip Cookies Recipe
Raspberry Chocolate Chip Cookies Recipe turns out perfectly every time, here are some handy tips to keep in mind. These simple tricks can elevate your baking game and help you create cookies that are not only delicious but also visually appealing.
Use Fresh Ingredients: Always use fresh raspberries and high-quality chocolate chips. Fresh ingredients enhance the flavor and texture of your cookies. Check the expiration dates on your baking soda and flour to ensure they are still effective.
Chill the Dough: For chewier cookies, consider chilling the dough for at least 30 minutes before baking. This helps the flavors meld together and prevents the cookies from spreading too much in the oven.
Don’t Overmix: When combining the wet and dry ingredients, mix until just combined. Overmixing can lead to tough cookies. A few lumps are perfectly fine; they will smooth out as you fold in the chocolate chips and raspberries.
Experiment with Add-Ins: Feel free to get creative! You can add nuts, like chopped walnuts or pecans, for extra crunch. Alternatively, try using white chocolate chips or even a sprinkle of sea salt on top before baking for a sweet and salty contrast.
Watch the Baking Time: Keep a close eye on your cookies as they bake. Every oven is different, so start checking them at the 10-minute mark. You want the edges to be golden while the centers remain soft. They will continue to cook slightly after being removed from the oven.
Let Them Cool: Allow the cookies to cool on the baking sheet for a few minutes before transferring them to wire racks. This cooling time helps them set and makes them easier to handle without breaking.
Store Properly: To keep your cookies fresh, store them in an airtight container at room temperature. If you want to keep them longer, consider freezing them. Just make sure to separate layers with parchment paper to prevent sticking.
Raspberry Chocolate Chip Cookies Recipe. Enjoy the process, and happy baking!
Breakdown of Time for Raspberry Chocolate Chip Cookies Recipe
Raspberry Chocolate Chip Cookies Recipe can help you plan your baking session better. Here’s a simple breakdown of the time required for preparation and cooking:
Prep Time
The prep time for this delightful cookie recipe is approximately 15-20 minutes. This includes gathering your ingredients, creaming the butter and sugars, mixing in the eggs and vanilla, and preparing the dough. If you choose to chill the dough for a chewier texture, add an additional 30 minutes to this time.
Cooking Time
The cooking time for the cookies is about 10-12 minutes. Keep an eye on them as they bake, ensuring the edges turn lightly golden while the centers remain soft. Remember, every oven is different, so it’s wise to check them a minute or two before the timer goes off.
Total Time
Raspberry Chocolate Chip Cookies Recipe a quick and easy treat to whip up, perfect for any occasion!
Nutritional Information for Raspberry Chocolate Chip Cookies Recipe
Raspberry Chocolate Chip Cookies Recipe can help you enjoy them in moderation. Here’s a breakdown of the key nutritional information for each cookie, based on the recipe provided. This will give you a clearer picture of what you’re indulging in!
Calories
Each cookie contains approximately 180 calories. This makes them a delightful treat without being overly indulgent. Enjoying one or two cookies can satisfy your sweet tooth while keeping your calorie intake in check. Pair them with a healthy snack or a glass of milk for a balanced treat!
Protein
In terms of protein, each cookie offers about 2 grams. While this isn’t a high protein snack, it does contribute to your daily intake. The eggs and chocolate chips provide some protein, making these cookies a tasty option when you need a little energy boost.
Sodium
Each cookie contains roughly 100 mg of sodium. This amount is relatively low, especially considering the average daily recommended intake for adults is around 2,300 mg. Keeping an eye on sodium levels is important, but these cookies can fit into a balanced diet without worry.
Raspberry Chocolate Chip Cookies Recipe offers a delightful balance of flavors and nutrition. Enjoy them as a treat, and remember that moderation is key to enjoying your favorite sweets!
FAQs about Raspberry Chocolate Chip Cookies Recipe
Can I use frozen raspberries in the Raspberry Chocolate Chip Cookies Recipe?
Raspberry Chocolate Chip Cookies Recipe. However, there are a few things to keep in mind. First, make sure to thaw the raspberries and gently pat them dry with a paper towel. This helps prevent excess moisture from making your cookie dough too wet. Also, be aware that frozen raspberries may break apart more easily, so handle them gently when folding into the dough. The flavor will still be delicious, and your cookies will turn out great!
How do I store leftover Raspberry Chocolate Chip Cookies?
Raspberry Chocolate Chip Cookies fresh, store them in an airtight container at room temperature. This will help maintain their soft texture and flavor. If you want to keep them for a longer period, consider freezing them. To freeze, place the cookies in a single layer on a baking sheet and freeze until solid. Then, transfer them to a freezer-safe bag or container, separating layers with parchment paper. They can be stored in the freezer for up to three months. When you’re ready to enjoy them, simply thaw at room temperature or warm them in the oven for a few minutes!
Can I substitute chocolate chips with other types of chocolate in the Raspberry Chocolate Chip Cookies Recipe?
Raspberry Chocolate Chip Cookies Recipe. For a different flavor profile, try using white chocolate chips, which pair wonderfully with raspberries. You can also use dark chocolate chips for a richer taste. If you’re feeling adventurous, consider adding chopped chocolate bars or even a mix of different chocolates for a unique twist. Just remember to adjust the amount based on your preference, and enjoy experimenting with flavors!
Conclusion on Raspberry Chocolate Chip Cookies Recipe
Raspberry Chocolate Chip Cookies Recipe is a delightful treat that combines the sweetness of chocolate with the tartness of fresh raspberries. This recipe is not only easy to follow but also allows for creativity with variations to suit different dietary needs. Whether you choose to make them gluten-free or vegan, the essence of these cookies remains the same—deliciousness!
As you bake these cookies, remember that the joy of cooking comes from sharing your creations with others. The vibrant colors and mouthwatering flavors make these cookies a perfect addition to any gathering or a sweet surprise for yourself. Plus, with the tips and variations provided, you can customize your cookies to make them uniquely yours.
Raspberry Chocolate Chip Cookies, and happy baking!
Paul
Raspberry Chocolate Chip Cookies Recipe is a must-try!
These Raspberry Chocolate Chip Cookies are buttery, sweet, and bursting with juicy raspberries and gooey chocolate chips. The perfect balance of rich and fruity, they’re soft in the middle with golden edges—a bakery-style treat made right at home!
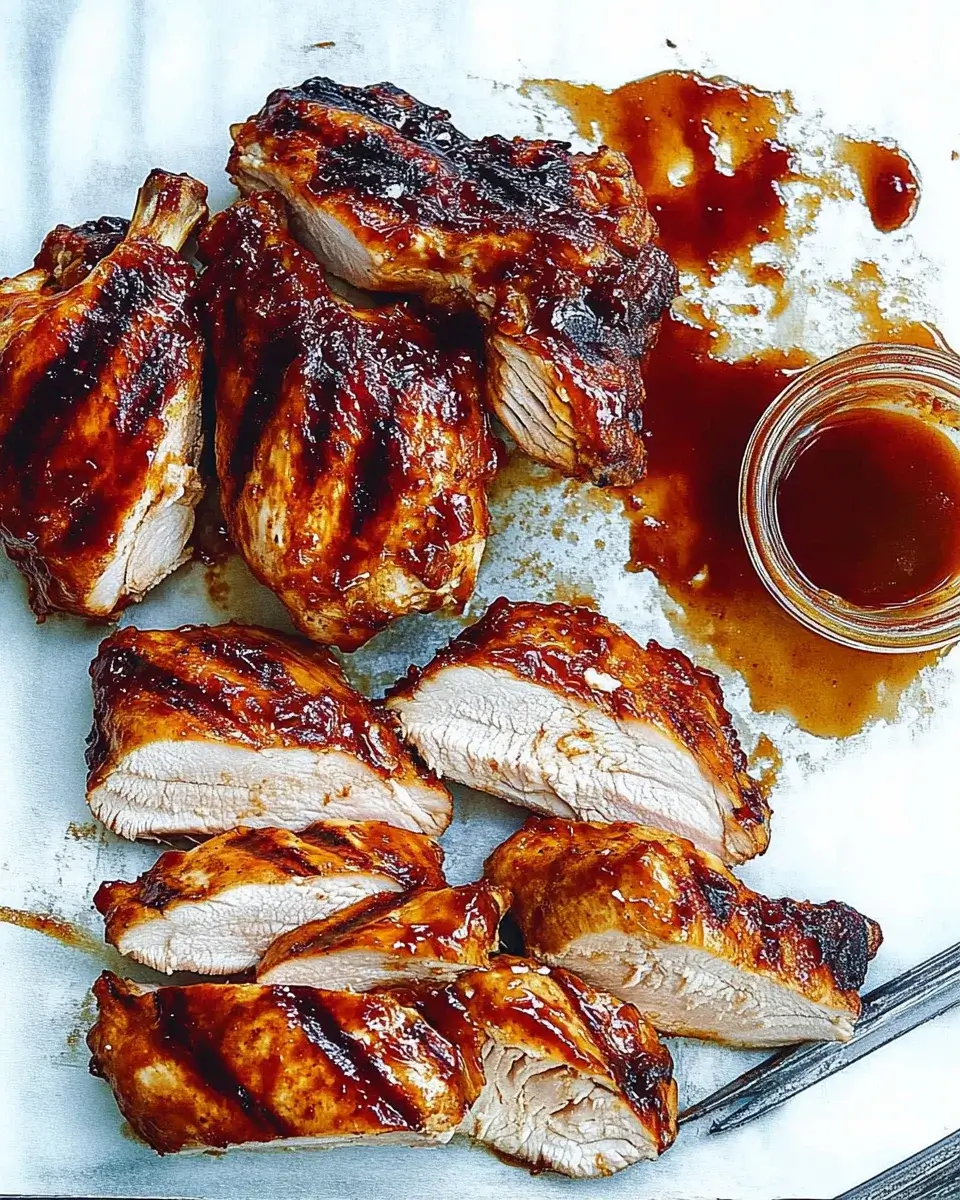
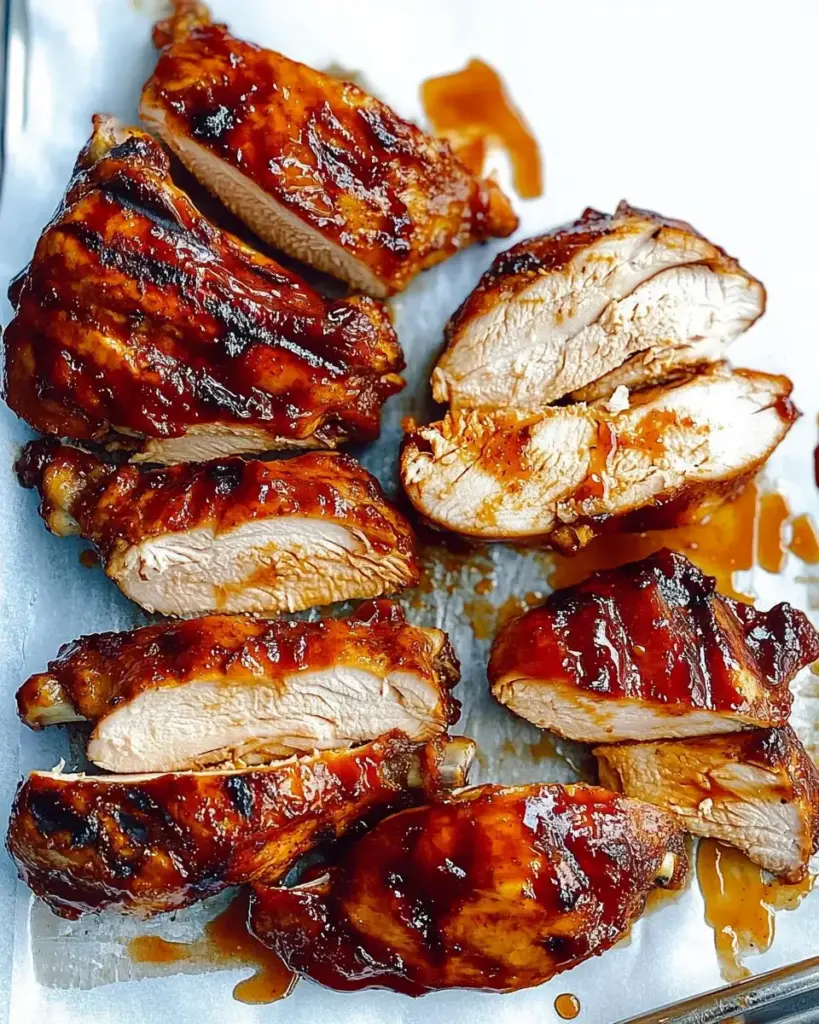
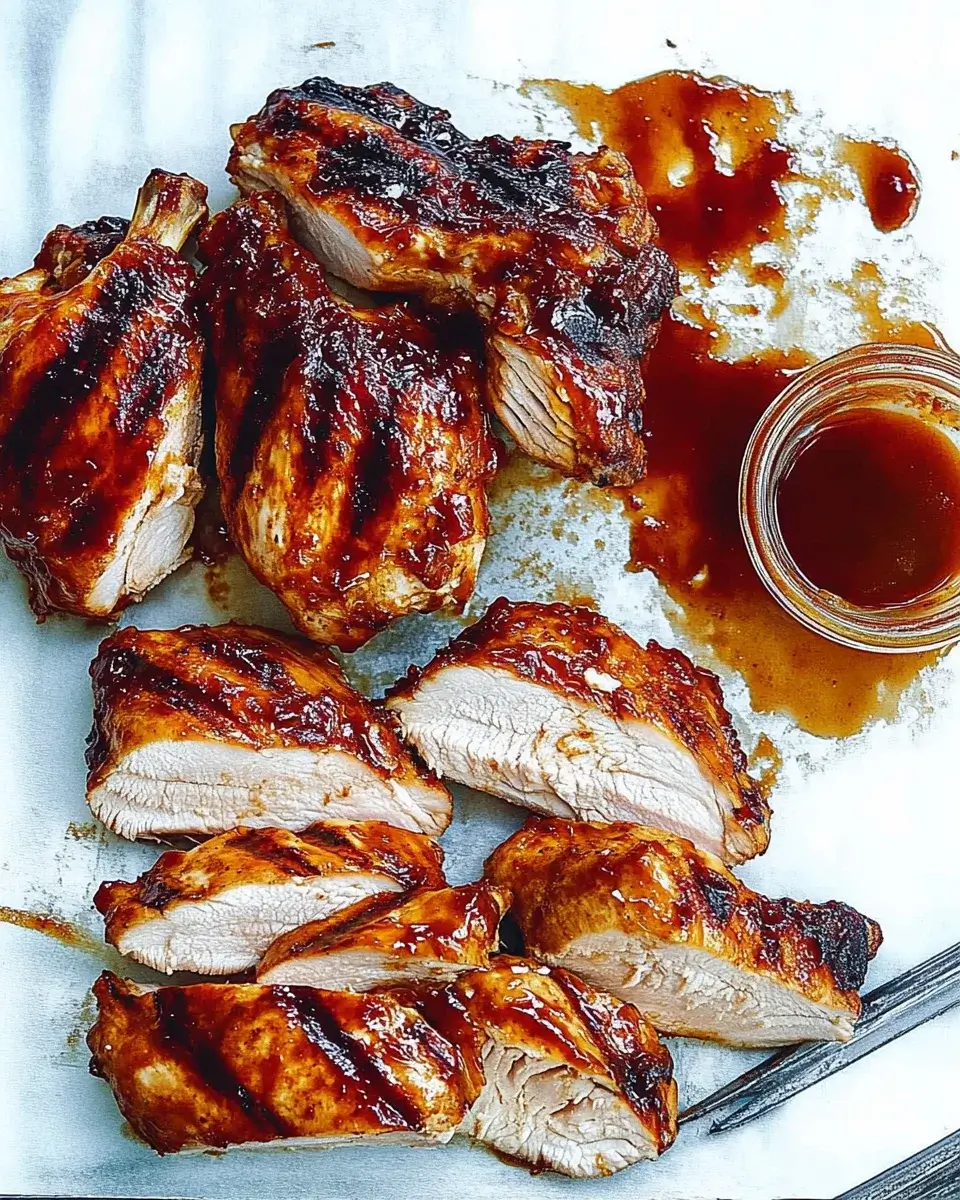
Are you ready to elevate your grilling game? Honey Garlic BBQ Chicken is a delightful dish that combines sweet and savory flavors, making it a favorite for many. This recipe is not just about cooking chicken; it’s about creating a memorable meal that brings family and friends together. The combination of honey, garlic, and barbecue sauce creates a mouthwatering glaze that caramelizes beautifully on the grill.
What Makes Honey Garlic BBQ Chicken Special?
What sets Honey Garlic BBQ Chicken apart from other grilled chicken recipes? First, the unique blend of ingredients. Honey adds a natural sweetness, while garlic provides a robust flavor that enhances the overall taste. The barbecue sauce ties everything together, creating a sticky, delicious coating that you can’t resist.
Moreover, this dish is incredibly versatile. You can easily adjust the sweetness or spice level to suit your taste. Whether you prefer a mild flavor or a spicy kick, this recipe can accommodate your preferences. Plus, it’s perfect for any occasion, from casual family dinners to summer barbecues.
Another reason to love Honey Garlic BBQ Chicken is its simplicity. With just a few ingredients and straightforward steps, you can whip up a fantastic meal in no time. This makes it an excellent choice for busy weeknights or last-minute gatherings.
In summary, Honey Garlic BBQ Chicken is not just a meal; it’s an experience. The delightful flavors, ease of preparation, and versatility make it a must-try for anyone who enjoys good food. So, let’s dive into the ingredients and get started on this delicious journey!
Ingredients for Honey Garlic BBQ Chicken
To create the perfect Honey Garlic BBQ Chicken, you’ll need a few key ingredients. Each one plays a vital role in building the rich flavors that make this dish so special. Here’s what you’ll need:
2 pounds bone-in, skin-on chicken thighs: These provide juicy meat and crispy skin, perfect for grilling.
1 cup barbecue sauce: Choose your favorite brand or homemade version for the best flavor.
2 tablespoons honey: This adds a natural sweetness that balances the savory elements.
3 cloves garlic, minced: Fresh garlic gives a robust flavor that enhances the dish.
1 teaspoon smoked paprika: This adds a subtle smokiness that complements the barbecue sauce.
1 teaspoon salt: Essential for bringing out the flavors in the chicken.
1/2 teaspoon black pepper: A touch of spice to elevate the taste.
1 tablespoon olive oil: Helps to keep the chicken moist while grilling.
1 tablespoon apple cider vinegar: Adds a tangy note that brightens the overall flavor.
1 teaspoon Worcestershire sauce: This adds depth and umami to the marinade.
These ingredients come together to create a delicious marinade that infuses the chicken with flavor. Feel free to experiment with different barbecue sauces or add spices to suit your taste. The beauty of Honey Garlic BBQ Chicken lies in its adaptability, allowing you to make it your own!
Preparation of Honey Garlic BBQ Chicken
Now that you have all the ingredients ready, it’s time to prepare your Honey Garlic BBQ Chicken. This process is simple and straightforward, ensuring that you can enjoy a delicious meal without any hassle. Let’s break it down into easy steps.
Step 1: Marinating the Chicken
Marinating the chicken is a crucial step that enhances the flavor. Start by patting the chicken thighs dry with paper towels. This helps the marinade stick better. Next, place the chicken in a large bowl. Pour half of the prepared barbecue mixture over the chicken, making sure each piece is well coated. This will infuse the chicken with all those wonderful flavors.
For the best results, let the chicken marinate for at least one hour. If you have more time, marinating overnight in the refrigerator is even better. This allows the flavors to penetrate deeply into the meat, making it even tastier.
Step 2: Preparing the Honey Garlic Sauce
While the chicken is marinating, you can prepare the honey garlic sauce. In a small bowl, whisk together the remaining barbecue mixture. This will be used for basting the chicken while it cooks. Make sure it’s well combined, so every bite of chicken is packed with flavor. Set it aside until you’re ready to grill.
Step 3: Grilling the Chicken
Once the chicken has marinated, it’s time to fire up the grill! Preheat your grill to medium-high heat, around 375°F to 400°F. If you’re using a charcoal grill, prepare the coals for direct grilling. When the grill is hot, place the chicken thighs skin-side down. Grill them for about 5-7 minutes. This will help achieve that crispy skin we all love.
After the first side is nicely browned, flip the chicken and grill for another 5-7 minutes. Keep an eye on the chicken to prevent burning. The goal is to get a beautiful char while keeping the inside juicy.
Step 4: Basting and Finishing Touches
Now comes the fun part—basting! Brush the reserved honey garlic sauce over the chicken. This adds an extra layer of flavor and helps create a sticky glaze. Continue grilling for an additional 10-15 minutes, turning the chicken occasionally. You want to ensure it cooks evenly and reaches an internal temperature of 165°F.
Once done, remove the chicken from the grill and let it rest for about 5 minutes. This resting period allows the juices to redistribute, making each bite tender and juicy. Now, you’re ready to serve your delicious Honey Garlic BBQ Chicken!
Variation of Honey Garlic BBQ Chicken
While the classic Honey Garlic BBQ Chicken recipe is a hit, there are many ways to switch things up. Variations can enhance flavors and cater to different dietary preferences. Let’s explore some alternative ingredients and cooking methods that can make this dish even more exciting!
Alternative Ingredients for Different Flavors
One of the best things about Honey Garlic BBQ Chicken is its versatility. You can easily swap out ingredients to create new flavor profiles. Here are some ideas:
Different Cuts of Chicken: While thighs are juicy, you can use chicken breasts for a leaner option. Just remember to adjust the cooking time, as breasts cook faster.
Spicy Kick: If you love heat, add some cayenne pepper or hot sauce to the marinade. This will give your chicken a fiery twist!
Herbs and Spices: Fresh herbs like rosemary or thyme can add a fragrant touch. You can also experiment with different spices like cumin or chili powder for a unique flavor.
Fruit Additions: For a fruity twist, consider adding pineapple or peach slices to the grill. They caramelize beautifully and pair well with the honey garlic sauce.
These alternatives allow you to customize your Honey Garlic BBQ Chicken to suit your taste buds. Feel free to get creative and make it your own!
Cooking Methods: Oven vs. Grill
While grilling is a popular method for cooking Honey Garlic BBQ Chicken, you can also achieve delicious results in the oven. Here’s a quick comparison of both methods:
Grilling: This method gives the chicken a smoky flavor and crispy skin. It’s perfect for outdoor gatherings and summer barbecues. Just keep an eye on the temperature to avoid overcooking.
Oven Baking: If the weather isn’t suitable for grilling, baking is a great alternative. Preheat your oven to 400°F. Place the marinated chicken on a baking sheet lined with parchment paper. Bake for about 30-35 minutes, basting halfway through. This method ensures juicy chicken with less hands-on time.
Both methods yield tasty results, so choose the one that fits your situation best. Whether you grill or bake, your Honey Garlic BBQ Chicken will be a crowd-pleaser!
Cooking Note for Honey Garlic BBQ Chicken
When preparing Honey Garlic BBQ Chicken, a few cooking notes can help ensure your dish turns out perfectly every time. These tips will guide you through the process, making it easier to achieve that delicious, mouthwatering flavor.
First, always check the freshness of your ingredients. Fresh chicken and high-quality barbecue sauce can significantly enhance the taste of your dish. If possible, opt for organic or free-range chicken for better flavor and texture.
Next, marinating is key. As mentioned earlier, letting the chicken sit in the marinade for at least an hour is essential. However, if you can plan ahead, marinating overnight will yield even better results. This allows the flavors to penetrate deeply into the meat, making it more flavorful and tender.
Temperature control is crucial when grilling. Make sure your grill is preheated to the right temperature before placing the chicken on it. This helps to sear the chicken quickly, locking in the juices and creating that crispy skin we all love. Use a meat thermometer to check the internal temperature, ensuring it reaches 165°F for safe consumption.
Lastly, don’t rush the resting period after grilling. Allowing the chicken to rest for about 5 minutes before serving is vital. This step helps the juices redistribute throughout the meat, resulting in a juicier and more flavorful bite.
By following these cooking notes, you’ll be well on your way to mastering Honey Garlic BBQ Chicken. Enjoy the process, and don’t forget to share your delicious creation with family and friends!
Serving Suggestions for Honey Garlic BBQ Chicken
Once your Honey Garlic BBQ Chicken is grilled to perfection, it’s time to think about how to serve it. The right side dishes and presentation can elevate your meal, making it even more enjoyable. Let’s explore some delicious side dishes that pair well with this flavorful chicken and some tips for presenting your dish beautifully.
Side Dishes that Pair Well
Choosing the right side dishes can enhance the overall dining experience. Here are some tasty options that complement Honey Garlic BBQ Chicken:
Coleslaw: A refreshing coleslaw adds crunch and balances the sweetness of the chicken. You can make a classic cabbage slaw or try a fruity version with apples or pineapple.
Grilled Vegetables: Seasonal vegetables like zucchini, bell peppers, and corn are perfect for grilling. Toss them in olive oil and seasonings for a colorful and healthy side.
Rice or Quinoa: A side of fluffy rice or quinoa can soak up the delicious barbecue sauce. Consider adding herbs or spices to the grains for extra flavor.
Potato Salad: Creamy potato salad is a classic barbecue side. It’s filling and pairs well with the sweet and savory notes of the chicken.
Baked Beans: Sweet and smoky baked beans are a hearty option that complements the flavors of Honey Garlic BBQ Chicken beautifully.
These side dishes not only taste great but also add variety to your meal. Feel free to mix and match based on your preferences and what you have on hand!
Presentation Tips for Serving
Presentation is key when serving your Honey Garlic BBQ Chicken. A well-presented dish can make your meal feel special. Here are some tips to make your chicken shine:
Use a Platter: Serve the chicken on a large platter to create an inviting display. Arrange the pieces neatly, and consider garnishing with fresh herbs like parsley or cilantro for a pop of color.
Drizzle with Sauce: Before serving, drizzle some of the reserved honey garlic sauce over the chicken. This adds a glossy finish and highlights the flavors.
Accompany with Sides: Arrange your chosen side dishes around the chicken on the platter. This creates a beautiful spread that encourages sharing.
Use Colorful Dishes: If you’re serving individual plates, use colorful dishes to make the meal visually appealing. Bright colors can enhance the overall dining experience.
Garnish with Lemon or Lime: Adding lemon or lime wedges to the platter not only looks great but also offers a fresh squeeze of citrus for those who enjoy a tangy kick.
By following these presentation tips, you’ll create a stunning meal that’s sure to impress your guests. Enjoy your Honey Garlic BBQ Chicken with pride, knowing you’ve put together a delicious and visually appealing feast!
Tips for Perfect Honey Garlic BBQ Chicken
To ensure your Honey Garlic BBQ Chicken turns out perfectly every time, it’s essential to keep a few tips in mind. These pointers will help you avoid common pitfalls and enhance the flavor of your dish. Let’s dive into some common mistakes to avoid and how to achieve the best flavor.
Common Mistakes to Avoid
Even the best cooks can make mistakes. Here are some common errors to watch out for when preparing Honey Garlic BBQ Chicken:
Skipping the Marinade: One of the biggest mistakes is not marinating the chicken long enough. Marinating for at least one hour is crucial for flavor. If you can, let it sit overnight for the best results.
Overcooking the Chicken: Cooking chicken for too long can lead to dry meat. Always use a meat thermometer to check for doneness. The internal temperature should reach 165°F for safe consumption.
Not Preheating the Grill: Placing chicken on a cold grill can result in uneven cooking. Always preheat your grill to the right temperature before adding the chicken.
Using Too Much Sauce Too Early: Applying all the sauce at the beginning can cause it to burn. Reserve some for basting and serving to keep the flavors fresh and vibrant.
Ignoring Resting Time: Cutting into the chicken right after grilling can cause juices to escape. Letting it rest for about 5 minutes allows the juices to redistribute, ensuring a juicy bite.
How to Achieve the Best Flavor
Flavor is key to a delicious Honey Garlic BBQ Chicken. Here are some tips to enhance the taste:
Use Fresh Ingredients: Fresh garlic and high-quality barbecue sauce can make a significant difference. Opt for organic or homemade sauces when possible.
Experiment with Spices: Don’t hesitate to add your favorite spices to the marinade. A pinch of cayenne or a dash of chili powder can elevate the flavor profile.
Incorporate Fresh Herbs: Adding fresh herbs like rosemary or thyme to the marinade can introduce a delightful aroma and taste. They pair beautifully with the sweetness of honey.
Try Different Barbecue Sauces: Different brands or homemade sauces can change the flavor dramatically. Experiment to find your favorite combination.
Consider Wood Chips for Smoking: If you’re using a grill, adding wood chips can infuse a smoky flavor into the chicken. Soak the chips in water for 30 minutes before placing them on the grill.
By avoiding common mistakes and following these flavor-enhancing tips, you’ll be well on your way to creating the perfect Honey Garlic BBQ Chicken. Enjoy the process and the delicious results!
Breakdown of Time for Honey Garlic BBQ Chicken
Understanding the time required for each step in preparing Honey Garlic BBQ Chicken can help you plan your cooking efficiently. Here’s a breakdown of the time you’ll need for preparation, cooking, and the total time involved in making this delicious dish.
Prep Time
The prep time for Honey Garlic BBQ Chicken is relatively short. You’ll need about 15-20 minutes to gather your ingredients and prepare the marinade. This includes:
Measuring and mixing the ingredients for the marinade.
Patting the chicken dry and placing it in a bowl.
Coating the chicken with the marinade.
Additionally, if you choose to marinate the chicken for at least one hour or overnight, this will add to the overall time but is essential for flavor.
Cooking Time
The cooking time for Honey Garlic BBQ Chicken on the grill is approximately 25-30 minutes. Here’s how it breaks down:
Grilling the chicken thighs skin-side down for 5-7 minutes.
Flipping the chicken and grilling for another 5-7 minutes.
Basting with the reserved sauce and grilling for an additional 10-15 minutes until fully cooked.
Always ensure the internal temperature reaches 165°F for safe consumption.
Total Time
When you combine the prep time and cooking time, the total time for making Honey Garlic BBQ Chicken is about 40-50 minutes, not including marinating time. If you opt for marinating overnight, the total time will extend to the next day, but the hands-on time remains the same.
In summary, you can enjoy a flavorful and satisfying meal in under an hour, making Honey Garlic BBQ Chicken a fantastic choice for busy weeknights or weekend gatherings!
Nutritional Information for Honey Garlic BBQ Chicken
Understanding the nutritional content of your meals is essential for maintaining a balanced diet. Honey Garlic BBQ Chicken not only satisfies your taste buds but also provides valuable nutrients. Let’s break down the nutritional information for this delicious dish.
Calories
Each serving of Honey Garlic BBQ Chicken contains approximately 350 calories. This makes it a hearty option for dinner without being overly heavy. The combination of chicken and the flavorful marinade contributes to the calorie count, ensuring you enjoy a fulfilling meal.
Protein Content
Protein is vital for muscle repair and overall health. In each serving of Honey Garlic BBQ Chicken, you’ll find about 25 grams of protein. This high protein content makes it an excellent choice for those looking to build muscle or maintain a healthy diet. Chicken thighs are particularly rich in protein, making this dish both nutritious and satisfying.
Sodium Levels
When it comes to sodium, each serving contains around 800 milligrams. While this is a reasonable amount for a flavorful dish, it’s essential to be mindful of your overall sodium intake throughout the day. If you’re watching your sodium levels, consider using low-sodium barbecue sauce or adjusting the salt in the marinade to suit your dietary needs.
In summary, Honey Garlic BBQ Chicken is a delicious and nutritious option for your meals. With a good balance of calories, protein, and sodium, it can fit well into a healthy eating plan. Enjoy this dish knowing you’re treating yourself to something both tasty and beneficial!
FAQs about Honey Garlic BBQ Chicken
Can I use chicken thighs instead of breasts?
Absolutely! Chicken thighs are a fantastic choice for Honey Garlic BBQ Chicken. They are juicy and flavorful, making them perfect for grilling. If you prefer a leaner option, you can use chicken breasts. Just keep in mind that breasts cook faster, so adjust your grilling time accordingly to avoid drying them out.
How long should I marinate the chicken?
For the best flavor, marinate the chicken for at least one hour. However, if you have the time, letting it sit overnight in the refrigerator is even better. This allows the marinade to penetrate the meat deeply, resulting in a more flavorful and tender chicken. Just remember to keep it covered in the fridge!
What can I substitute for honey in the recipe?
If you need a substitute for honey, there are several options you can try. Maple syrup is a great alternative that provides a similar sweetness. Agave nectar is another option that works well. If you prefer a sugar-free option, consider using a sugar substitute like stevia or erythritol. Just keep in mind that the flavor may vary slightly with these substitutes.
Is Honey Garlic BBQ Chicken suitable for meal prep?
Yes, Honey Garlic BBQ Chicken is perfect for meal prep! You can marinate the chicken ahead of time and store it in the refrigerator for up to 24 hours. After grilling, you can portion the chicken into containers for easy lunches or dinners throughout the week. It reheats well, making it a convenient and delicious option for busy days!
Conclusion on Honey Garlic BBQ Chicken
In conclusion, Honey Garlic BBQ Chicken is a delightful dish that brings together sweet and savory flavors in a way that is sure to please everyone at your table. With its simple preparation and versatile ingredients, this recipe is perfect for both novice cooks and seasoned chefs alike. Whether you’re hosting a summer barbecue or enjoying a cozy family dinner, this dish is bound to impress.
By following the steps outlined in this article, you can create a mouthwatering meal that not only tastes great but also nourishes your body. The combination of juicy chicken thighs, a flavorful marinade, and the smoky essence from the grill makes for an unforgettable dining experience. Plus, with the option to customize the recipe to suit your taste, the possibilities are endless!
Remember to take your time with the marinating process, as it is key to achieving that deep, rich flavor. Don’t forget to experiment with different side dishes and presentation styles to make your meal even more enjoyable. With a little creativity, you can turn a simple recipe into a culinary masterpiece.
So, gather your ingredients, fire up the grill, and get ready to savor the deliciousness of Honey Garlic BBQ Chicken. Your taste buds will thank you, and your family and friends will be asking for seconds. Happy cooking!
Paul
Honey Garlic BBQ Chicken is a must-try recipe!
This juicy grilled BBQ chicken is a backyard classic made easy. With just a few pantry staples and your favorite BBQ sauce, these flame-kissed chicken breasts turn out tender, smoky, and packed with flavor—perfect for summer cookouts or weeknight dinners alike!
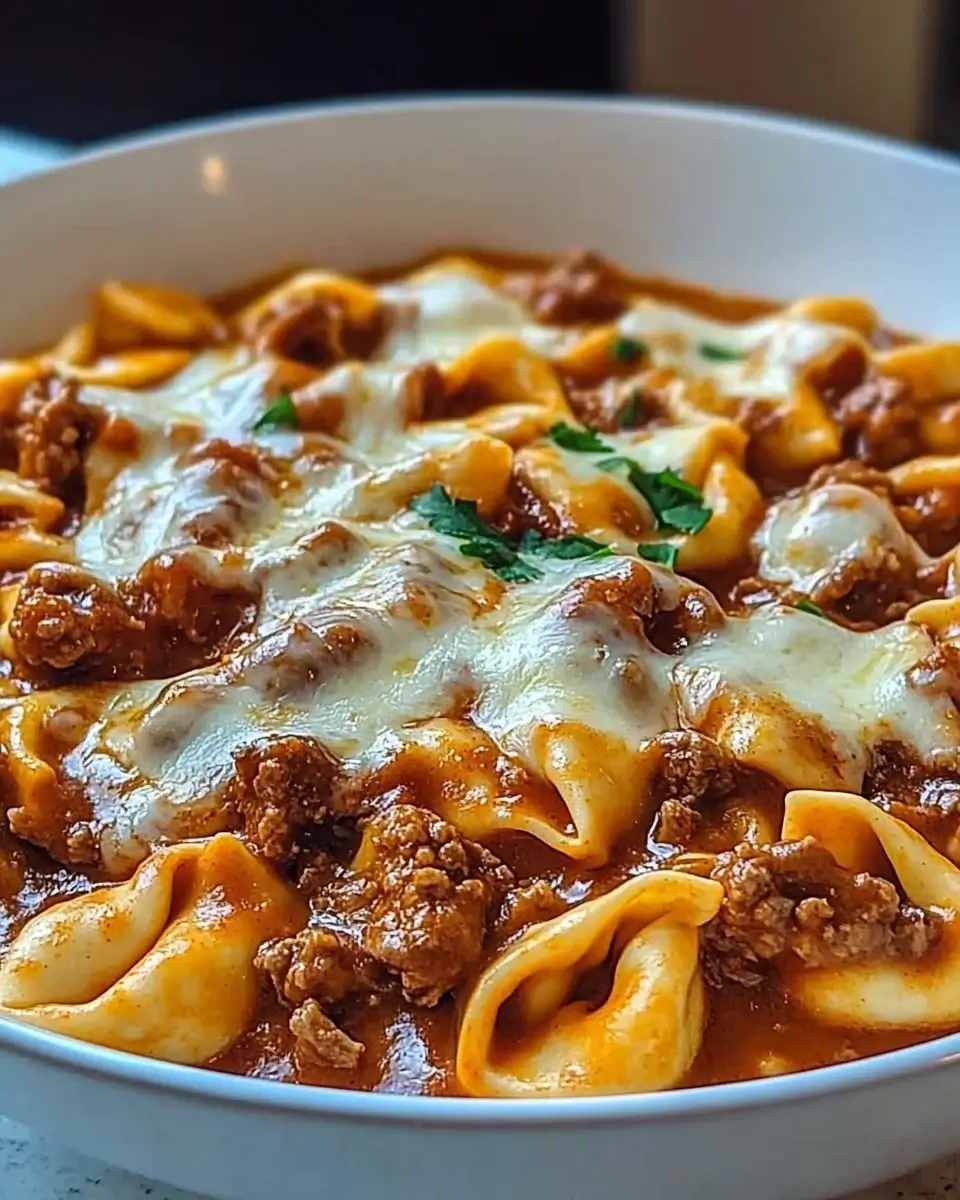
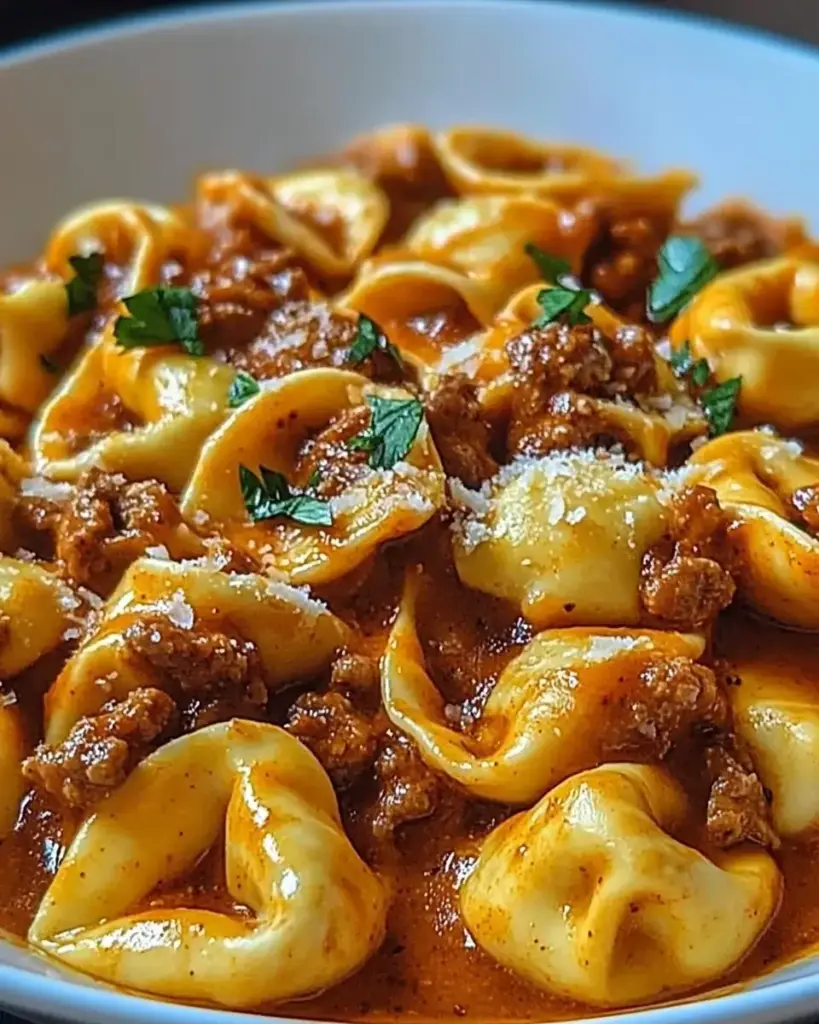
Cheesy Beef Enchilada Tortellini Recipe is a delightful dish that brings together the rich flavors of enchiladas and the comforting texture of cheese tortellini. This recipe is perfect for busy weeknights or cozy family dinners. With just a few simple ingredients, you can create a meal that everyone will love.
What Makes This Recipe Unique?
This recipe stands out because it combines traditional Mexican flavors with Italian pasta. The use of cheese tortellini adds a fun twist to the classic enchilada dish. The creamy, cheesy goodness melts in your mouth, while the enchilada sauce gives it a zesty kick. Plus, it’s a one-pan meal, which means less cleanup for you! The combination of ground beef, spices, and cheese creates a hearty dish that is both satisfying and comforting.
Why You Should Try Cheesy Beef Enchilada Tortellini
Cheesy Beef Enchilada Tortellini Recipe. First, it’s quick and easy to prepare, making it perfect for those busy evenings. Second, it’s a crowd-pleaser! Whether you’re cooking for your family or hosting friends, this dish is sure to impress. Lastly, it’s versatile. You can easily customize it to suit your taste preferences. Want it spicier? Add jalapeños! Prefer it vegetarian? Swap the beef for black beans. The possibilities are endless!
So, gather your ingredients and get ready to enjoy a delicious meal that’s sure to become a favorite in your household!
Ingredients for Cheesy Beef Enchilada Tortellini Recipe
Cheesy Beef Enchilada Tortellini Recipe, you’ll need a few key ingredients. Each component plays a vital role in delivering that rich, cheesy flavor combined with a hint of spice. Here’s what you’ll need:
1 pound ground beef: This is the main protein source, providing a hearty base for the dish.
1 small onion, diced: Onions add sweetness and depth to the flavor.
2 cloves garlic, minced: Garlic brings a wonderful aroma and taste.
1 (15-ounce) can enchilada sauce: This sauce is the star of the show, giving the dish its signature flavor.
1 (14-ounce) can diced tomatoes with green chilies: These add a nice kick and texture.
1 (9-ounce) package refrigerated cheese tortellini: The tortellini adds a delightful cheesy element.
1 cup shredded cheddar cheese: Cheddar provides a sharp, tangy flavor.
1 cup shredded Monterey Jack cheese: This cheese melts beautifully, adding creaminess.
1 teaspoon chili powder: Chili powder enhances the dish with a warm spice.
1 teaspoon cumin: Cumin adds an earthy flavor that complements the other spices.
Salt and pepper to taste: These seasonings help balance the flavors.
Fresh cilantro for garnish (optional): Cilantro adds a fresh touch and brightens the dish.
With these ingredients on hand, you’re ready to whip up a delicious meal that’s sure to satisfy your taste buds. The combination of flavors and textures will make this dish a hit at your dinner table!
Step-by-Step Preparation of Cheesy Beef Enchilada Tortellini Recipe
Cheesy Beef Enchilada Tortellini Recipe. Each step is designed to ensure that your dish turns out perfectly delicious.
Step 1: Preparing the Beef
Start by heating a large skillet over medium heat. Once hot, add the ground beef and diced onion. Cook them together for about 5-7 minutes. You want the beef to brown nicely and the onion to become soft. Stir occasionally to break up the beef and ensure even cooking. If there’s excess fat, drain it off to keep your dish from becoming greasy. This step is crucial as it builds the foundation of flavor for your meal.
Step 2: Cooking the Tortellini
While the beef is cooking, bring a pot of salted water to a boil. Add the cheese tortellini and cook according to the package instructions, usually around 3-5 minutes. Once they are tender, drain the tortellini and set them aside. This step is important because the tortellini will soak up the delicious flavors of the sauce later on.
Step 3: Combining Ingredients
After the beef is cooked and the tortellini is ready, it’s time to combine everything. Add the minced garlic, chili powder, cumin, salt, and pepper to the skillet with the beef. Stir and cook for an additional 1-2 minutes until the garlic is fragrant. Then, pour in the enchilada sauce and the can of diced tomatoes with green chilies. Stir well to combine all the ingredients. Let this mixture simmer for about 5 minutes. This allows the flavors to meld beautifully.
Step 4: Baking the Dish
Now, gently fold the cooked tortellini into the beef mixture. Make sure every piece is well coated with the sauce. Next, sprinkle the shredded cheddar and Monterey Jack cheeses over the top. Cover the skillet with a lid and let it cook for another 5 minutes. This will melt the cheese and create a bubbly, cheesy topping. Once the cheese is melted and gooey, remove the skillet from heat. If you like, garnish with fresh cilantro for a pop of color and flavor.
Cheesy Beef Enchilada Tortellini Recipe is ready to be served. Enjoy the delightful blend of flavors and textures in every bite!
Variations of Cheesy Beef Enchilada Tortellini Recipe
Cheesy Beef Enchilada Tortellini Recipe is its versatility. You can easily adapt it to suit different dietary preferences and taste buds. Here are some exciting variations to consider:
Vegetarian Options
If you want to make this dish vegetarian, it’s simple! Swap out the ground beef for black beans or lentils. Both options provide a hearty texture and are packed with protein. You can also use a mix of sautéed vegetables like bell peppers, zucchini, or mushrooms for added flavor and nutrition. Just remember to use vegetable broth instead of enchilada sauce to keep it vegetarian-friendly. This way, you can enjoy the same delicious flavors without the meat!
Different Cheese Choices
Cheesy Beef Enchilada Tortellini Recipe to suit your taste. While cheddar and Monterey Jack are classic choices, feel free to experiment. Try using pepper jack for a spicy kick or mozzarella for a milder flavor. You can even mix in some crumbled feta or goat cheese for a unique twist. The cheese you choose will change the flavor profile, making each version special!
Spicy Additions
Cheesy Beef Enchilada Tortellini Recipe and make it even more exciting!
With these variations, you can create a dish that fits your preferences perfectly. Whether you’re cooking for a crowd or just for yourself, the possibilities are endless!
Cooking Note for Cheesy Beef Enchilada Tortellini Recipe
Cheesy Beef Enchilada Tortellini Recipe, there are a few important cooking notes to keep in mind. These tips will help ensure that your dish turns out perfectly every time.
First, always use fresh ingredients. Fresh vegetables and high-quality cheese can significantly enhance the flavor of your dish. If possible, opt for freshly made tortellini from a local store or market. This will add a delightful texture and taste that dried pasta simply can’t match.
Next, be mindful of the cooking times. Overcooking the tortellini can lead to a mushy texture. Make sure to follow the package instructions closely. Remember, the tortellini will continue to cook slightly when mixed with the hot beef and sauce, so it’s best to undercook them by a minute or two.
Additionally, when combining the ingredients, be gentle. You want to ensure that the tortellini remains intact and doesn’t break apart. Stir carefully to coat the pasta without causing it to become mushy.
Lastly, feel free to adjust the seasoning to your taste. Everyone has different preferences when it comes to spice levels. If you like it spicier, add more chili powder or jalapeños. If you prefer a milder flavor, reduce the spices accordingly. Taste as you go to find the perfect balance for your palate.
Cheesy Beef Enchilada Tortellini Recipe that is sure to impress your family and friends. Happy cooking!
Serving Suggestions for Cheesy Beef Enchilada Tortellini Recipe
Cheesy Beef Enchilada Tortellini Recipe is ready, it’s time to think about how to serve it. The right sides and garnishes can elevate your meal and make it even more enjoyable. Here are some great serving suggestions to consider.
Pairing with Sides
To complement the rich flavors of your cheesy dish, consider serving it with some tasty sides. Here are a few ideas:
Mexican Rice: A side of fluffy Mexican rice pairs perfectly with the enchilada flavors. The rice absorbs the sauce and adds a nice texture.
Refried Beans: Creamy refried beans are a classic side that adds protein and fiber. They also enhance the overall Mexican theme of the meal.
Fresh Salad: A light salad with lettuce, tomatoes, and avocado can balance the richness of the tortellini. Drizzle with a lime vinaigrette for a refreshing touch.
Grilled Vegetables: Grilled zucchini, bell peppers, and corn can add a smoky flavor and colorful presentation to your plate.
These sides not only enhance the meal but also provide a variety of flavors and textures that everyone will enjoy!
Garnishing Ideas
Cheesy Beef Enchilada Tortellini Recipe can make it look even more appetizing. Here are some fun ideas:
Fresh Cilantro: A sprinkle of chopped cilantro adds a burst of color and a fresh flavor that brightens the dish.
Sour Cream: A dollop of sour cream on top can add creaminess and a tangy contrast to the spicy flavors.
Avocado Slices: Creamy avocado slices not only look beautiful but also add a rich texture that complements the dish.
Chopped Green Onions: Sliced green onions can add a mild onion flavor and a pop of color.
These garnishes will not only enhance the visual appeal of your dish but also add layers of flavor that everyone will love. Enjoy your meal!
Tips for Perfecting Your Cheesy Beef Enchilada Tortellini Recipe
Cheesy Beef Enchilada Tortellini Recipe truly shine, consider these helpful tips. They will guide you in creating a dish that is not only delicious but also visually appealing and satisfying.
First, always taste as you go. This is key to achieving the perfect balance of flavors. After adding spices, take a moment to sample the mixture. Adjust the seasoning if needed. A little extra salt or spice can make a big difference!
Cheesy Beef Enchilada Tortellini Recipe.
When it comes to the cheese, consider mixing different types for a more complex flavor. Combining sharp cheddar with creamy Monterey Jack creates a delightful contrast. You can even add a sprinkle of Parmesan for an extra cheesy kick!
Another tip is to let the dish sit for a few minutes after cooking. This allows the flavors to meld together, making each bite even more delicious. Plus, it gives the cheese a moment to set, making serving easier.
Lastly, don’t be afraid to get creative! Add your favorite vegetables to the mix. Spinach, bell peppers, or corn can add color and nutrition. This not only enhances the flavor but also makes your dish more visually appealing.
Cheesy Beef Enchilada Tortellini Recipe that is sure to impress. Enjoy the process and happy cooking!
Breakdown of Time for Cheesy Beef Enchilada Tortellini Recipe
Cheesy Beef Enchilada Tortellini Recipe can help you plan your cooking efficiently. Here’s a simple breakdown of the time required for preparation and cooking.
Prep Time
The prep time for this delicious dish is quite short. You’ll need about 10-15 minutes to gather and prepare your ingredients. This includes dicing the onion, mincing the garlic, and measuring out your spices and sauces. Having everything ready before you start cooking will make the process smoother and more enjoyable.
Cooking Time
Once you start cooking, the total cooking time is approximately 20-25 minutes. This includes browning the beef and onions, simmering the sauce, and cooking the tortellini. Each step is quick, allowing you to have a hearty meal on the table in no time!
Total Time
Cheesy Beef Enchilada Tortellini Recipe a fantastic option for busy weeknights when you want something delicious without spending hours in the kitchen. With this quick and easy recipe, you’ll have a satisfying meal ready to enjoy in no time!
Breakdown of Time for Cheesy Beef Enchilada Tortellini Recipe
Cheesy Beef Enchilada Tortellini Recipe can help you plan your cooking efficiently. Here’s a simple breakdown of the time required for preparation and cooking.
Prep Time
The prep time for this delicious dish is quite short. You’ll need about 10-15 minutes to gather and prepare your ingredients. This includes dicing the onion, mincing the garlic, and measuring out your spices and sauces. Having everything ready before you start cooking will make the process smoother and more enjoyable.
Cooking Time
Once you start cooking, the total cooking time is approximately 20-25 minutes. This includes browning the beef and onions, simmering the sauce, and cooking the tortellini. Each step is quick, allowing you to have a hearty meal on the table in no time!
Total Time
Cheesy Beef Enchilada Tortellini Recipe a fantastic option for busy weeknights when you want something delicious without spending hours in the kitchen. With this quick and easy recipe, you’ll have a satisfying meal ready to enjoy in no time!
Nutritional Information for Cheesy Beef Enchilada Tortellini Recipe
Cheesy Beef Enchilada Tortellini Recipe not only satisfies your taste buds but also provides valuable nutrients. Here’s a breakdown of the key nutritional information for this delicious dish.
Calories
Cheesy Beef Enchilada Tortellini Recipe contains approximately 550 calories. This makes it a hearty meal that can keep you full and satisfied. The combination of ground beef, cheese, and tortellini contributes to the calorie count, providing energy for your day.
Protein
Protein is an essential nutrient for building and repairing tissues. This recipe packs a punch with about 35 grams of protein per serving. The ground beef and cheese are excellent sources of protein, making this dish a great option for those looking to increase their protein intake.
Sodium
Cheesy Beef Enchilada Tortellini Recipe contains around 800 milligrams of sodium. This is primarily due to the enchilada sauce and canned tomatoes. If you’re watching your sodium levels, consider using low-sodium versions of these ingredients to help reduce the overall sodium content.
Cheesy Beef Enchilada Tortellini Recipe while being aware of its health benefits. It’s a delicious way to fuel your body with essential nutrients!
FAQs about Cheesy Beef Enchilada Tortellini Recipe
Can I make Cheesy Beef Enchilada Tortellini ahead of time?
Cheesy Beef Enchilada Tortellini Recipe ahead of time. Simply follow the steps up to the point of combining the ingredients. After mixing everything together, let it cool completely. Then, transfer it to an airtight container and store it in the refrigerator for up to 2 days. When you’re ready to serve, just reheat it on the stove over medium heat until warmed through. You may need to add a splash of water or broth to loosen the sauce if it thickens while stored.
What can I substitute for tortellini in this recipe?
Cheesy Beef Enchilada Tortellini Recipe without compromising on taste!
How do I store leftovers of Cheesy Beef Enchilada Tortellini?
Cheesy Beef Enchilada Tortellini to cool down to room temperature. Then, place it in an airtight container and store it in the refrigerator. It will stay fresh for about 3-4 days. When you’re ready to enjoy it again, reheat it on the stove or in the microwave until it’s heated through. If you find the sauce has thickened, adding a little water or broth can help restore its creamy consistency. Enjoy your delicious leftovers!
Conclusion on Cheesy Beef Enchilada Tortellini Recipe
Cheesy Beef Enchilada Tortellini Recipe is a delightful fusion of flavors that brings together the best of Mexican and Italian cuisines. This dish is not only easy to prepare but also incredibly satisfying, making it a perfect choice for busy weeknights or family gatherings. With its rich, cheesy goodness and zesty enchilada sauce, it’s sure to become a favorite in your household.
Whether you choose to stick to the classic recipe or explore the various adaptations, such as vegetarian options or spicy additions, the possibilities are endless. Each variation allows you to tailor the dish to your taste preferences, ensuring that everyone at the table can enjoy it. Plus, with the tips and serving suggestions provided, you can elevate your meal to new heights.
Cheesy Beef Enchilada Tortellini Recipe that will impress your family and friends. Enjoy the process of cooking and the joy of sharing a hearty meal together. Happy cooking!
Paul
Cheesy Beef Enchilada Tortellini is a must-try dish!
This one-skillet meal is where Tex-Mex meets Italian comfort food! Cheesy tortellini meets saucy enchilada-style ground beef for a fast and flavor-packed dinner. Melty cheese, bold spices, and a creamy finish make this fusion dish a weeknight win for the whole family.
Cook the Tortellini:Boil the tortellini according to the package directions. Drain and set aside.
Brown the Beef:In a large skillet over medium heat, cook the ground beef until browned and fully cooked, breaking it up as it cooks. Drain any excess grease.
Add Aromatics:Stir in chopped onion and minced garlic. Sauté for 2–3 minutes until soft and fragrant.
Spice It Up:Add chili powder, cumin, paprika, salt, and black pepper. Cook for another minute to toast the spices.
Add Sauce and Pasta:Pour in the enchilada sauce and simmer for 5 minutes. Add the cooked tortellini and stir until well coated in the sauce.
Melt the Cheese:Top the skillet with mozzarella and cheddar. Cover and let sit over low heat for 2–3 minutes, until the cheese is melted and gooey.
Creamy Finish:Remove from heat, stir in the sour cream for added creaminess, and sprinkle with chopped cilantro if desired.
Notes
Choose red enchilada sauce for a bold, smoky flavor or green sauce for a tangy twist.
Ground turkey or plant-based meat can be substituted for the beef.
Add black beans or corn for more texture and nutrition.
Leftovers reheat best with a splash of milk or broth to refresh the sauce.
Southern-Style Crispy Fried Chicken is more than just a meal; it’s a beloved tradition. This dish has roots that stretch deep into the heart of Southern culture. It brings families together and creates memories around the dinner table. The crispy, golden-brown exterior and juicy, tender meat make it a favorite for many. Whether served at a family gathering or a casual weeknight dinner, this dish never fails to impress.
The History of Southern-Style Crispy Fried Chicken
The history of Southern-Style Crispy Fried Chicken is rich and fascinating. It dates back to the 18th century when Scottish immigrants brought their frying techniques to America. They used lard to fry chicken, creating a crispy texture that was hard to resist. Over time, African American cooks added their own spices and flavors, transforming the dish into what we know today.
By the 19th century, fried chicken became a staple in Southern cuisine. It was often served during special occasions and gatherings. The dish symbolizes hospitality and warmth, making it a cherished part of Southern culture. Today, Southern-Style Crispy Fried Chicken is enjoyed all over the world, but its roots remain firmly planted in the South.
Why Southern-Style Crispy Fried Chicken is a Favorite
There are many reasons why Southern-Style Crispy Fried Chicken is a favorite among food lovers. First, the flavor is simply irresistible. The combination of spices creates a mouthwatering taste that keeps people coming back for more. Second, the texture is a delight. The crispy coating contrasts beautifully with the juicy chicken inside, making each bite a satisfying experience.
Moreover, this dish is versatile. It can be served with a variety of sides, from creamy coleslaw to fluffy biscuits. It’s perfect for any occasion, whether it’s a picnic, a holiday feast, or a casual dinner. The warmth and comfort that Southern-Style Crispy Fried Chicken brings to the table make it a timeless classic that will always hold a special place in our hearts.
Ingredients for Southern-Style Crispy Fried Chicken
To create the perfect Southern-Style Crispy Fried Chicken, you need a few key ingredients. Each component plays a vital role in achieving that delicious flavor and crispy texture. Here’s what you’ll need:
2 pounds chicken pieces: You can use legs, thighs, breasts, or wings. Choose your favorite cuts for the best results.
1 cup all-purpose flour: This is essential for creating the crispy coating that everyone loves.
1 teaspoon paprika: Adds a subtle smokiness and beautiful color to the chicken.
1 teaspoon garlic powder: Provides a savory depth of flavor that enhances the overall taste.
1 teaspoon onion powder: Complements the garlic and adds a hint of sweetness.
1 teaspoon salt: Essential for seasoning the chicken and bringing out its natural flavors.
1/2 teaspoon black pepper: Adds a mild heat and enhances the dish’s overall flavor profile.
1/2 teaspoon cayenne pepper: This is optional but recommended for those who enjoy a little kick in their fried chicken.
1 cup milk: Used for marinating the chicken, it helps tenderize the meat and adds moisture.
1 large egg: This binds the milk and chicken together, ensuring the flour coating sticks well.
Vegetable oil: For frying, it’s important to use oil with a high smoke point to achieve that perfect crispiness.
Gathering these ingredients is the first step toward making a delicious Southern-Style Crispy Fried Chicken. Each item contributes to the dish’s unique flavor and texture, making it a beloved favorite in many households.
Preparation of Southern-Style Crispy Fried Chicken
Preparing Southern-Style Crispy Fried Chicken is a delightful process. Each step is essential to ensure that your chicken turns out perfectly crispy and flavorful. Let’s dive into the preparation steps that will lead you to fried chicken perfection.
Step 1: Marinating the Chicken
Marinating the chicken is a crucial first step. Start by whisking together the milk and egg in a large bowl. This mixture not only adds flavor but also helps tenderize the chicken. Once combined, add the chicken pieces, making sure they are fully submerged. Cover the bowl and let it marinate in the refrigerator for at least 30 minutes. This allows the flavors to penetrate the meat, resulting in juicy chicken.
Step 2: Preparing the Coating
While the chicken is marinating, it’s time to prepare the coating. In another bowl, combine the all-purpose flour, paprika, garlic powder, onion powder, salt, black pepper, and cayenne pepper. Mix these ingredients well to ensure an even distribution of spices. This flavorful coating is what gives Southern-Style Crispy Fried Chicken its signature crunch and taste.
Step 3: Dredging the Chicken
After marinating, it’s time to dredge the chicken. Remove each piece from the milk mixture, allowing any excess liquid to drip off. Then, take each piece and coat it in the flour mixture. Press lightly to ensure the coating sticks well. This step is vital for achieving that crispy exterior. Shake off any excess flour before moving on to the next step.
Step 4: Heating the Oil
Next, heat about 1 inch of vegetable oil in a large skillet over medium-high heat. Use a thermometer to check the oil temperature, aiming for around 350°F. This temperature is perfect for frying, as it ensures the chicken cooks evenly while developing a golden-brown crust. Be patient; heating the oil properly is key to crispy fried chicken.
Step 5: Frying the Chicken
Once the oil is hot, carefully place the coated chicken pieces into the skillet. Be sure not to overcrowd the pan, as this can lower the oil temperature and result in soggy chicken. Fry the chicken in batches if necessary. Cook each piece for about 12-15 minutes per side, or until it reaches a golden brown color and an internal temperature of 165°F. Adjust the heat as needed to maintain the oil temperature throughout the frying process.
Step 6: Draining and Resting
After frying, it’s important to drain the chicken properly. Transfer the cooked pieces to a plate lined with paper towels. This will help absorb any excess oil, keeping your chicken crispy. Allow the chicken to rest for a few minutes before serving. This resting period helps the juices redistribute, ensuring each bite is tender and flavorful.
Variation of Southern-Style Crispy Fried Chicken
Southern-Style Crispy Fried Chicken is a classic dish, but there are many ways to put a twist on it. Whether you like a little heat or prefer a healthier option, these variations will keep your taste buds excited. Let’s explore two popular variations: Spicy Southern-Style Crispy Fried Chicken and Baked Southern-Style Crispy Fried Chicken.
Spicy Southern-Style Crispy Fried Chicken
If you love a kick of heat, then Spicy Southern-Style Crispy Fried Chicken is for you! To make this variation, simply add more cayenne pepper to the flour mixture. You can also include other spices like crushed red pepper flakes or hot sauce in the milk marinade. This will infuse the chicken with a fiery flavor that’s sure to please spice lovers.
For an extra layer of flavor, consider marinating the chicken overnight. This allows the spices to penetrate deeper into the meat, resulting in a more intense taste. When frying, keep an eye on the oil temperature, as spicy coatings can sometimes brown faster. Enjoy this spicy twist with your favorite cooling side dishes, like coleslaw or ranch dressing!
Baked Southern-Style Crispy Fried Chicken
If you’re looking for a healthier alternative, Baked Southern-Style Crispy Fried Chicken is a fantastic option. Instead of frying, you can achieve a crispy texture by baking the chicken in the oven. Start by following the same marinating and coating steps as the traditional recipe.
Once coated, place the chicken pieces on a baking sheet lined with parchment paper. For added crispiness, spray the chicken lightly with cooking oil. Bake in a preheated oven at 425°F for about 30-40 minutes, flipping halfway through. The high temperature will help create a golden-brown crust while keeping the chicken juicy inside.
This baked version is not only healthier but also easier to prepare for larger gatherings. Serve it with your favorite dipping sauces and sides for a delicious meal that everyone will love!
Cooking Note for Southern-Style Crispy Fried Chicken
Cooking Southern-Style Crispy Fried Chicken requires attention to detail and a few important notes to ensure success. Here are some key points to keep in mind while preparing this delicious dish:
First, always choose high-quality chicken. Fresh chicken will yield the best flavor and texture. If possible, opt for organic or free-range chicken, as it tends to be more flavorful and tender. Additionally, consider the size of the chicken pieces. Uniform sizes will help them cook evenly, preventing some pieces from being overcooked while others remain undercooked.
Next, temperature control is crucial. Maintaining the oil temperature at around 350°F is essential for achieving that perfect crispy coating. If the oil is too hot, the outside may burn before the inside cooks through. Conversely, if the oil is too cool, the chicken will absorb more oil, resulting in a greasy texture. Use a thermometer to monitor the oil temperature throughout the frying process.
Another important note is to avoid overcrowding the skillet. Frying too many pieces at once can lower the oil temperature, leading to soggy chicken. Instead, fry in batches, allowing enough space for each piece to cook properly. This will ensure that every piece gets that golden-brown crust we all love.
Lastly, let the chicken rest after frying. This step is often overlooked but is vital for juicy chicken. Resting allows the juices to redistribute throughout the meat, ensuring each bite is tender and flavorful. So, be patient and let your fried chicken rest for a few minutes before serving.
By following these cooking notes, you’ll be well on your way to creating the ultimate Southern-Style Crispy Fried Chicken that will impress family and friends alike!
Serving Suggestions for Southern-Style Crispy Fried Chicken
Once you’ve perfected your Southern-Style Crispy Fried Chicken, it’s time to think about how to serve it. This dish is incredibly versatile and pairs wonderfully with a variety of side dishes and sauces. Let’s explore some delicious options that will elevate your meal and make it even more enjoyable.
Side Dishes that Pair Well
When it comes to side dishes, Southern-Style Crispy Fried Chicken shines alongside classic accompaniments. Here are some popular options:
Coleslaw: This crunchy, tangy salad adds a refreshing contrast to the rich flavors of fried chicken. The creaminess of coleslaw complements the crispy texture perfectly.
Mashed Potatoes: Creamy mashed potatoes are a comforting side that pairs beautifully with fried chicken. Add some gravy for an extra touch of flavor!
Biscuits: Fluffy, buttery biscuits are a Southern staple. They’re perfect for soaking up any leftover juices from the chicken.
Green Beans: Steamed or sautéed green beans add a pop of color and a healthy touch to your plate. Their crispness balances the richness of the chicken.
Macaroni and Cheese: This cheesy, creamy dish is a favorite among many. It adds a delightful richness that pairs well with the crispy chicken.
These side dishes not only enhance the meal but also bring a taste of Southern hospitality to your table. Feel free to mix and match based on your preferences and the occasion!
Sauces and Dips to Enhance Flavor
To take your Southern-Style Crispy Fried Chicken to the next level, consider serving it with a variety of sauces and dips. Here are some tasty options:
Honey: Drizzling honey over your fried chicken adds a sweet touch that contrasts beautifully with the savory flavors.
Hot Sauce: For those who love heat, a splash of hot sauce can elevate the dish. It adds a spicy kick that many enjoy.
Ranch Dressing: This creamy dressing is a classic dip for fried chicken. Its coolness balances the crispy, hot chicken perfectly.
Barbecue Sauce: Smoky and tangy barbecue sauce is another great option. It adds a rich flavor that complements the chicken’s spices.
Gravy: A rich, homemade gravy can be poured over the chicken or served on the side for dipping. It adds a comforting touch to the meal.
These sauces and dips not only enhance the flavor of your Southern-Style Crispy Fried Chicken but also allow guests to customize their experience. Whether you prefer sweet, spicy, or savory, there’s a perfect pairing for everyone!
Tips for Perfecting Southern-Style Crispy Fried Chicken
Perfecting Southern-Style Crispy Fried Chicken takes practice and attention to detail. Here are some essential tips to help you achieve that crispy, flavorful chicken every time you cook. From selecting the right chicken to managing the cooking temperature, these tips will guide you on your culinary journey.
Choosing the Right Chicken
The first step to delicious Southern-Style Crispy Fried Chicken is choosing the right chicken. Opt for fresh, high-quality chicken pieces. Organic or free-range chicken is often more flavorful and tender, making it a great choice for frying. When selecting your chicken, consider the size of the pieces. Uniform sizes ensure even cooking, preventing some pieces from being overcooked while others remain undercooked.
Additionally, bone-in chicken pieces, like thighs and drumsticks, tend to stay juicier during frying. They also provide a richer flavor compared to boneless cuts. If you prefer white meat, chicken breasts can work well too, but be cautious not to overcook them, as they can dry out quickly. Ultimately, the right chicken will set the foundation for your Southern-Style Crispy Fried Chicken.
Importance of Temperature Control
Temperature control is crucial when frying chicken. Maintaining the oil temperature at around 350°F is essential for achieving that perfect crispy coating. If the oil is too hot, the chicken may burn on the outside while remaining raw inside. Conversely, if the oil is too cool, the chicken will absorb more oil, resulting in a greasy texture.
To monitor the oil temperature accurately, use a thermometer. This will help you keep the oil at the right heat throughout the frying process. If you notice the temperature dropping, adjust the heat accordingly. Frying in small batches can also help maintain the oil temperature, ensuring that each piece cooks evenly and develops that golden-brown crust we all love.
By following these tips on choosing the right chicken and managing temperature control, you’ll be well on your way to creating the ultimate Southern-Style Crispy Fried Chicken. Your family and friends will be impressed with your culinary skills, and you’ll enjoy every delicious bite!
Breakdown of Time for Southern-Style Crispy Fried Chicken
Understanding the time required for each step in making Southern-Style Crispy Fried Chicken is essential for planning your meal. Here’s a detailed breakdown of the time you’ll need for preparation and cooking.
Prep Time
The prep time for Southern-Style Crispy Fried Chicken is approximately 40 minutes. This includes:
Marinating the Chicken: 30 minutes in the refrigerator.
Preparing the Coating: 10 minutes to mix the flour and spices.
While the chicken marinates, you can use this time to gather your ingredients and set up your cooking area. This will help streamline the process and make everything more efficient.
Cooking Time
The cooking time for Southern-Style Crispy Fried Chicken is about 30 minutes. This includes:
Heating the Oil: 5-10 minutes to reach the right temperature.
Frying the Chicken: 24-30 minutes, depending on the size of the chicken pieces and how many batches you fry.
Make sure to monitor the oil temperature closely during frying. This ensures that your chicken cooks evenly and achieves that perfect crispy texture.
Total Time
In total, you can expect to spend about 1 hour and 10 minutes to 1 hour and 15 minutes from start to finish. This includes both prep and cooking time. Here’s a quick summary:
Prep Time: 40 minutes
Cooking Time: 30 minutes
Total Time: 1 hour and 10-15 minutes
By planning your time effectively, you can enjoy a delicious meal of Southern-Style Crispy Fried Chicken without feeling rushed. This dish is worth every minute spent in the kitchen!
Nutritional Information for Southern-Style Crispy Fried Chicken
Understanding the nutritional information of Southern-Style Crispy Fried Chicken is important for those who are mindful of their diet. This delicious dish can be enjoyed in moderation, and knowing its nutritional content can help you make informed choices. Here’s a breakdown of the key nutritional components per serving:
Calories
Each serving of Southern-Style Crispy Fried Chicken contains approximately 450 calories. This calorie count includes the chicken, the coating, and the oil used for frying. While it’s a hearty meal, it’s essential to balance it with lighter sides or salads to maintain a well-rounded diet.
Protein
One of the highlights of Southern-Style Crispy Fried Chicken is its protein content. Each serving provides about 30 grams of protein. This makes it a great option for those looking to increase their protein intake, whether for muscle building or overall health. Protein is vital for repairing tissues and keeping you feeling full longer.
Sodium
In terms of sodium, Southern-Style Crispy Fried Chicken contains around 800 milligrams per serving. This amount can vary based on the seasoning used and whether any additional sauces are added. It’s wise to be cautious with sodium intake, especially for those with dietary restrictions. Pairing the chicken with low-sodium sides can help balance the meal.
By being aware of the nutritional information, you can enjoy Southern-Style Crispy Fried Chicken as part of a balanced diet. Remember, moderation is key, and this dish can be a delightful treat when enjoyed alongside healthy accompaniments.
FAQs about Southern-Style Crispy Fried Chicken
What is the secret to crispy fried chicken?
The secret to achieving perfectly crispy fried chicken lies in a few key techniques. First, marinating the chicken in a milk and egg mixture helps tenderize the meat while adding moisture. This step is crucial for flavor and juiciness. Next, the coating is essential. A well-seasoned flour mixture, combined with proper dredging, ensures that the coating adheres well to the chicken. Pressing the flour onto the chicken helps create that desired crunch.
Another important factor is maintaining the right oil temperature. Frying at around 350°F allows the chicken to cook evenly while developing a golden-brown crust. Lastly, letting the chicken rest after frying allows the juices to redistribute, keeping it moist and flavorful. By following these tips, you can enjoy crispy fried chicken every time!
Can I make Southern-Style Crispy Fried Chicken in an air fryer?
Yes, you can make Southern-Style Crispy Fried Chicken in an air fryer! This method is a healthier alternative to traditional frying. To do this, follow the same marinating and coating steps as the original recipe. Once coated, place the chicken pieces in the air fryer basket in a single layer, ensuring they are not overcrowded.
Set the air fryer to 375°F and cook for about 25-30 minutes, flipping halfway through. The air fryer circulates hot air, creating a crispy texture without the need for excessive oil. Keep an eye on the chicken to ensure it reaches an internal temperature of 165°F. Enjoy your air-fried chicken with the same delicious sides and sauces!
How do I store leftover Southern-Style Crispy Fried Chicken?
Storing leftover Southern-Style Crispy Fried Chicken is simple. First, allow the chicken to cool completely at room temperature. Once cooled, place the chicken in an airtight container. You can also wrap it tightly in aluminum foil or plastic wrap. Store the chicken in the refrigerator for up to 3-4 days.
If you want to keep it longer, consider freezing the chicken. Wrap each piece in plastic wrap and then place them in a freezer-safe bag. This will help prevent freezer burn. When you’re ready to enjoy it again, thaw the chicken in the refrigerator overnight. Reheat in the oven at 350°F for about 15-20 minutes to restore its crispy texture.
What sides go best with Southern-Style Crispy Fried Chicken?
Southern-Style Crispy Fried Chicken pairs wonderfully with a variety of side dishes. Some classic options include:
Coleslaw: The crunchy, tangy salad complements the rich flavors of the chicken.
Mashed Potatoes: Creamy mashed potatoes with gravy are a comforting choice.
Biscuits: Fluffy biscuits are perfect for soaking up juices.
Green Beans: Steamed or sautéed green beans add a healthy touch.
Macaroni and Cheese: This cheesy dish is a favorite among many.
These sides not only enhance the meal but also bring a taste of Southern hospitality to your table. Feel free to mix and match based on your preferences and the occasion!
Conclusion on Southern-Style Crispy Fried Chicken
Southern-Style Crispy Fried Chicken is more than just a dish; it’s a celebration of flavor, tradition, and togetherness. From its rich history to its mouthwatering taste, this beloved recipe has earned its place in kitchens across the globe. Whether you’re preparing it for a family gathering or a cozy dinner at home, the joy of serving crispy fried chicken is unmatched.
As you embark on your culinary journey to create this dish, remember the importance of each step. From marinating the chicken to achieving that perfect golden crust, every detail matters. With the right ingredients and techniques, you can create a meal that not only satisfies hunger but also warms the heart.
Don’t hesitate to experiment with variations, whether it’s adding a spicy kick or opting for a healthier baked version. The beauty of Southern-Style Crispy Fried Chicken lies in its versatility. Pair it with your favorite sides and sauces to create a meal that reflects your personal taste.
In conclusion, Southern-Style Crispy Fried Chicken is a timeless classic that brings people together. It’s a dish that tells a story, evokes memories, and creates new ones around the dinner table. So, roll up your sleeves, gather your loved ones, and enjoy the delightful experience of making and sharing this iconic dish. Happy cooking!
Paul
Southern-Style Crispy Fried Chicken is a must-try dish.
This fried chicken delivers everything you love—crispy coating, juicy interior, and loads of flavor—without the need for buttermilk. A simple egg and seasoned flour dredge is all it takes to create golden, crunchy perfection. Perfect for a comforting dinner or crowd-pleasing weekend treat.
1.5lbschicken drumsticksor substitute with thighs, wings, or legs; skin-on for best results
2large eggs
1cupall-purpose flour
Saltto taste
Black pepperto taste
1teaspoonpaprika powder
½teaspoononion powder
½teaspoondried thyme
½teaspoondried rosemary
¼teaspooncayenne pepper
Oil for fryingvegetable, canola, or peanut oil work well
Method
Season the Chicken:Pat chicken dry and season generously with salt and pepper.
Prepare the Coatings:In one bowl, beat the eggs.In another bowl, combine flour with paprika, onion powder, thyme, rosemary, cayenne pepper, and a few extra pinches of salt and black pepper.
Double Dredge:Coat each chicken piece in the seasoned flour mixture, then dip into the egg wash, and return once more to the flour for a second coat. Press the flour on firmly to help it stick.
Heat the Oil:In a deep skillet or heavy-bottomed pot, heat about 2 inches of oil over medium-high heat until it reaches 350°F (175°C).
Fry the Chicken:Working in batches, fry chicken pieces for about 5 minutes per side or until deeply golden and cooked through (internal temperature should reach 165°F/74°C).
Drain and Serve:Transfer fried chicken to a wire rack to drain excess oil. Serve hot with your favorite sides like mashed potatoes, coleslaw, or biscuits.
Notes
No thermometer? Drop a bit of flour into the oil—if it sizzles immediately, it’s ready.
Don’t overcrowd the pan; it drops the oil temp and causes soggy coating.
Want extra crunch? Add 1 tablespoon of cornstarch to the flour mixture.
For a spicy kick, increase the cayenne or add chili powder.
Welcome to the delightful world of Creamy Steak Alfredo! This dish is a perfect blend of rich flavors and comforting textures. It combines tender flank steak with creamy Alfredo sauce, all served over fettuccine pasta. Whether you’re cooking for a special occasion or just a cozy dinner at home, this recipe is sure to impress.
What Makes Creamy Steak Alfredo Special?
What sets Creamy Steak Alfredo apart from other pasta dishes? First, it’s the combination of high-quality ingredients. The flank steak is juicy and flavorful, while the heavy cream creates a luscious sauce that clings to the pasta. The addition of garlic and Parmesan cheese elevates the dish, giving it a savory depth that is hard to resist.
Moreover, this recipe is versatile. You can easily customize it to suit your taste. Want to add some greens? Toss in some steamed broccoli or spinach! Prefer a lighter version? Substitute half-and-half for the heavy cream. The possibilities are endless, making it a favorite for many home cooks.
In just a few simple steps, you can create a restaurant-quality meal right in your kitchen. So, roll up your sleeves and get ready to enjoy a delicious plate of Creamy Steak Alfredo!
Ingredients for Creamy Steak Alfredo Recipe
To create a mouthwatering Creamy Steak Alfredo, you’ll need a selection of fresh and flavorful ingredients. Each component plays a vital role in achieving that perfect balance of taste and texture. Here’s what you’ll need:
1 pound fettuccine pasta: This classic pasta shape is ideal for holding onto the creamy sauce.
1 pound flank steak: A tender cut of beef that cooks quickly and adds rich flavor.
2 tablespoons olive oil: Used for cooking the steak, it adds a nice depth of flavor.
Salt and pepper to taste: Essential for seasoning the steak and enhancing all the flavors.
4 cloves garlic, minced: Fresh garlic adds a wonderful aroma and taste to the sauce.
1 cup heavy cream: This is the star of the sauce, making it rich and creamy.
1 cup grated Parmesan cheese: Adds a savory, cheesy flavor that complements the cream.
1 teaspoon Italian seasoning: A blend of herbs that brings a touch of warmth and earthiness.
Fresh parsley, chopped (for garnish): Adds a pop of color and freshness to the finished dish.
Gathering these ingredients is the first step toward creating your delicious Creamy Steak Alfredo. Make sure to choose high-quality products for the best results. Fresh ingredients not only enhance the flavor but also make your dish visually appealing. Now that you have everything ready, let’s move on to the next step in preparing this delightful meal!
Step-by-Step Preparation of Creamy Steak Alfredo Recipe
Now that you have all your ingredients ready, it’s time to dive into the step-by-step preparation of your Creamy Steak Alfredo. This process is straightforward and will guide you to create a delicious meal that everyone will love. Let’s get started!
Step 1: Preparing the Steak
First, you need to prepare the flank steak. Start by taking the steak out of the refrigerator and letting it sit at room temperature for about 15 minutes. This helps it cook evenly. Next, season both sides generously with salt and pepper. The seasoning enhances the natural flavors of the meat.
Heat 2 tablespoons of olive oil in a large skillet over medium-high heat. Once the oil is hot, carefully place the steak in the skillet. Cook it for about 4-5 minutes on each side, depending on how well-done you like your steak. For medium-rare, aim for an internal temperature of 135°F. After cooking, remove the steak from the skillet and let it rest for 5 minutes. This resting period allows the juices to redistribute, making the steak tender and juicy.
Step 2: Cooking the Pasta
While the steak is resting, it’s time to cook the fettuccine pasta. Bring a large pot of salted water to a boil. Add the fettuccine and cook according to the package instructions until it’s al dente, which usually takes about 8-10 minutes. Stir occasionally to prevent sticking. Once cooked, drain the pasta in a colander, but remember to reserve ½ cup of the pasta water. This starchy water will help adjust the sauce’s consistency later.
Step 3: Making the Alfredo Sauce
Now, let’s make the creamy Alfredo sauce! In the same skillet you used for the steak, add the minced garlic. Sauté it over medium heat for about 1 minute until it becomes fragrant. Be careful not to burn the garlic, as it can turn bitter.
Next, pour in 1 cup of heavy cream and bring it to a gentle simmer. Stir the cream continuously to prevent it from scorching. Once it’s simmering, add 1 cup of grated Parmesan cheese and 1 teaspoon of Italian seasoning. Mix everything together until the cheese melts and the sauce becomes smooth and creamy. If the sauce is too thick, gradually add the reserved pasta water until you reach your desired consistency.
Step 4: Combining Ingredients
With the sauce ready, it’s time to bring everything together! Slice the rested flank steak into thin strips. Add the cooked fettuccine and sliced steak to the skillet with the Alfredo sauce. Toss everything together gently, ensuring that the pasta and steak are well-coated in the creamy sauce. This step is crucial for flavor, as it allows the pasta to absorb the delicious sauce.
Step 5: Final Touches
Your Creamy Steak Alfredo is almost ready! To finish, serve the dish immediately on warm plates. Garnish with freshly chopped parsley for a pop of color and added freshness. This final touch not only enhances the presentation but also adds a delightful herbal note to the dish.
Now, sit back and enjoy your homemade Creamy Steak Alfredo! It’s a comforting meal that’s sure to impress your family and friends.
Variations of Creamy Steak Alfredo Recipe
While the classic Creamy Steak Alfredo is a delicious dish on its own, there are many ways to customize it to suit your taste or dietary preferences. Here are some exciting variations that can elevate your meal even further!
Adding Vegetables
Incorporating vegetables into your Creamy Steak Alfredo not only boosts its nutritional value but also adds vibrant colors and textures. Here are a few great options:
Broccoli: Steamed broccoli florets add a nice crunch and a pop of green. Simply steam them while the pasta cooks and toss them in with the fettuccine.
Spinach: Fresh spinach wilts beautifully in the warm sauce. Stir in a couple of handfuls just before serving for a nutritious boost.
Mushrooms: Sauté sliced mushrooms in the skillet after cooking the steak. They add an earthy flavor that complements the creamy sauce.
Bell Peppers: Colorful bell peppers can be sautéed along with the garlic for a sweet and crunchy addition.
Feel free to mix and match these vegetables based on what you have on hand or your personal preferences. Adding veggies not only enhances the dish but also makes it more filling!
Alternative Proteins
If you’re looking to switch things up, consider using different proteins in your Creamy Steak Alfredo. Here are some tasty alternatives:
Chicken: Grilled or sautéed chicken breast is a fantastic substitute. Season it well and cook it until golden brown for a delicious twist.
Shrimp: For a seafood variation, sauté shrimp in the skillet until they turn pink and tender. They pair wonderfully with the creamy sauce.
Tofu: For a vegetarian option, use firm tofu. Press and cube it, then sauté until golden. It absorbs flavors well and adds protein.
Turkey: Ground turkey can be used as a leaner alternative. Cook it in the skillet until browned, then proceed with the sauce.
These alternative proteins can bring new flavors and textures to your Creamy Steak Alfredo, making it a versatile dish that everyone can enjoy!
Cooking Note for Creamy Steak Alfredo Recipe
When preparing your Creamy Steak Alfredo, a few cooking notes can help ensure your dish turns out perfectly every time. Here are some essential tips to keep in mind:
Choosing the Right Steak: Flank steak is a great choice for this recipe due to its flavor and tenderness. However, you can also use sirloin or ribeye if you prefer. Just remember to adjust cooking times based on the thickness of the steak.
Don’t Overcook the Steak: Overcooking can lead to tough meat. Use a meat thermometer to check for doneness. Aim for 135°F for medium-rare and 145°F for medium.
Reserve Pasta Water: Always save some pasta water before draining. This starchy water is a secret weapon for adjusting the sauce’s consistency. It helps the sauce cling to the pasta better.
Fresh Ingredients Matter: Using fresh garlic and high-quality Parmesan cheese can significantly enhance the flavor of your sauce. Fresh ingredients make a noticeable difference in taste.
Adjusting Sauce Thickness: If your sauce is too thick, gradually add the reserved pasta water until you reach the desired creaminess. If it’s too thin, let it simmer a bit longer to thicken.
Serving Temperature: Serve your Creamy Steak Alfredo immediately after combining the ingredients. The sauce is best enjoyed warm and creamy, so don’t let it sit too long before serving.
By following these cooking notes, you can create a delicious and satisfying Creamy Steak Alfredo that will impress your family and friends. Happy cooking!
Serving Suggestions for Creamy Steak Alfredo Recipe
Once you’ve prepared your delicious Creamy Steak Alfredo, it’s time to think about how to serve it. The right sides and beverages can elevate your meal, making it even more enjoyable. Here are some fantastic serving suggestions to complement your dish!
Pairing with Sides
When it comes to sides, you want to choose options that balance the richness of the Creamy Steak Alfredo. Here are some delightful pairings:
Garlic Bread: A classic choice! The crispy, buttery garlic bread is perfect for soaking up the creamy sauce.
Caesar Salad: A fresh Caesar salad adds a crunchy texture and a tangy flavor that contrasts beautifully with the creamy pasta.
Steamed Vegetables: Lightly steamed vegetables like green beans or asparagus provide a healthy and colorful addition to your meal.
Roasted Brussels Sprouts: These add a nutty flavor and crispy texture, making them a great side dish to complement the pasta.
Caprese Salad: Fresh tomatoes, mozzarella, and basil drizzled with balsamic glaze offer a refreshing taste that pairs well with the richness of the Alfredo.
These sides not only enhance the meal but also add variety to your dining experience. Choose one or two to serve alongside your Creamy Steak Alfredo for a well-rounded dinner!
Wine Pairings
To elevate your dining experience even further, consider pairing your Creamy Steak Alfredo with the right wine. Here are some excellent options:
Chardonnay: A full-bodied Chardonnay complements the creamy sauce beautifully. Look for one with a hint of oak for added depth.
Sauvignon Blanc: This wine’s crisp acidity cuts through the richness of the Alfredo, making it a refreshing choice.
Pinot Noir: If you prefer red wine, a light-bodied Pinot Noir works well with steak. Its fruity notes balance the savory flavors of the dish.
Prosecco: For a sparkling option, Prosecco adds a fun and bubbly touch. Its lightness pairs nicely with the creamy pasta.
Choosing the right wine can enhance the flavors of your Creamy Steak Alfredo, making your meal feel even more special. So, pour a glass and enjoy your delightful dinner!
Tips for Perfecting Your Creamy Steak Alfredo Recipe
Creating the perfect Creamy Steak Alfredo is all about attention to detail. With a few helpful tips, you can elevate your dish to restaurant-quality status. Here are some essential tips to ensure your Alfredo is creamy, flavorful, and utterly delicious!
Use Fresh Ingredients: Fresh garlic, high-quality Parmesan cheese, and good olive oil make a significant difference in flavor. Always opt for fresh over pre-packaged ingredients when possible.
Don’t Rush the Cooking: Take your time when cooking the steak and sauce. Allowing the steak to rest after cooking ensures it remains juicy. Similarly, simmer the sauce gently to develop rich flavors.
Adjust Seasoning: Taste your sauce before serving. You may want to add more salt, pepper, or Italian seasoning to enhance the flavors. Remember, seasoning is key!
Perfect Pasta Cooking: Cook the fettuccine until it’s al dente. This means it should be firm to the bite. Overcooked pasta can become mushy and won’t hold the sauce well.
Reserve Pasta Water: Always save some pasta water before draining. This starchy water is a secret weapon for adjusting the sauce’s consistency. It helps the sauce cling to the pasta better.
Experiment with Cheese: While Parmesan is traditional, feel free to mix in other cheeses like Pecorino Romano or Asiago for a unique flavor twist.
Garnish Wisely: A sprinkle of fresh parsley not only adds color but also a fresh taste. Consider adding a squeeze of lemon juice for brightness just before serving.
Serve Immediately: Creamy Steak Alfredo is best enjoyed fresh. Serve it right after combining the ingredients to keep the sauce creamy and the pasta warm.
By following these tips, you can create a Creamy Steak Alfredo that is not only delicious but also visually appealing. Enjoy the process and savor every bite of your homemade masterpiece!
Breakdown of Time for Creamy Steak Alfredo Recipe
Understanding the time needed for each step in your Creamy Steak Alfredo recipe can help you plan your cooking efficiently. Here’s a breakdown of the time required for preparation and cooking, so you can enjoy your meal without any rush!
Prep Time
The prep time for your Creamy Steak Alfredo is approximately 15-20 minutes. This includes gathering all your ingredients, seasoning the steak, and chopping the garlic and parsley. Taking a little time to prepare will make the cooking process smoother and more enjoyable.
Cooking Time
Once you start cooking, the total cooking time is about 20-25 minutes. This includes:
Cooking the flank steak (about 8-10 minutes)
Cooking the fettuccine pasta (8-10 minutes, can be done simultaneously with the steak)
Making the Alfredo sauce (5-7 minutes)
Combining everything together (2-3 minutes)
By managing your time well, you can have everything ready to serve in no time!
Total Time
In total, you can expect to spend around 35-45 minutes from start to finish. This includes both prep and cooking time. With this quick and easy timeline, you can whip up a delicious Creamy Steak Alfredo that will impress your family and friends without spending all evening in the kitchen!
Nutritional Information for Creamy Steak Alfredo Recipe
Understanding the nutritional content of your Creamy Steak Alfredo is essential for making informed choices about your meals. This dish is not only delicious but also provides a good balance of macronutrients. Here’s a breakdown of the nutritional information per serving:
Calories
Each serving of Creamy Steak Alfredo contains approximately 650 calories. This calorie count comes from the combination of pasta, steak, cream, and cheese, making it a hearty meal. While it’s a bit higher in calories, it’s packed with flavor and satisfaction, perfect for a special dinner.
Protein
Protein is an essential nutrient, and this recipe delivers! Each serving provides about 40 grams of protein. The flank steak is a significant contributor to this protein content, making it a great choice for those looking to increase their protein intake. This makes Creamy Steak Alfredo not only tasty but also a filling option for dinner.
Sodium
When it comes to sodium, each serving contains around 800 milligrams. This amount can vary based on the specific ingredients you use, especially if you add salt during cooking. While sodium is necessary for our bodies, it’s important to monitor your intake. If you’re watching your sodium levels, consider using low-sodium broth or cheese alternatives.
Overall, Creamy Steak Alfredo is a delicious and satisfying meal that can fit into a balanced diet. Enjoy it as an occasional treat, and feel free to adjust the ingredients to suit your nutritional needs!
FAQs about Creamy Steak Alfredo Recipe
Can I use chicken instead of steak in the Creamy Steak Alfredo Recipe?
Absolutely! You can easily substitute chicken for steak in your Creamy Steak Alfredo. Chicken breast or thighs work well. Just season and cook the chicken until it’s golden brown and fully cooked through. Slice it thinly, just like you would with the steak, and toss it into the creamy sauce. This variation is just as delicious and offers a lighter option for those who prefer poultry.
How can I make the sauce thicker in the Creamy Steak Alfredo Recipe?
If you want a thicker sauce for your Creamy Steak Alfredo, there are a few tricks you can use. First, let the sauce simmer a bit longer without adding any pasta water. This allows it to reduce and thicken naturally. You can also add a bit more grated Parmesan cheese, as it will melt and help thicken the sauce. Lastly, if you prefer, you can mix a teaspoon of cornstarch with a tablespoon of cold water to create a slurry. Stir this into the sauce while it simmers, and it will thicken up nicely!
What type of pasta is best for Creamy Steak Alfredo Recipe?
Fettuccine is the traditional pasta choice for Creamy Steak Alfredo. Its flat shape holds onto the creamy sauce beautifully. However, you can also use other pasta types like linguine, tagliatelle, or even penne if you prefer. The key is to choose a pasta that can capture the sauce well, ensuring every bite is flavorful and satisfying.
Can I make Creamy Steak Alfredo Recipe ahead of time?
While it’s best to enjoy Creamy Steak Alfredo fresh, you can prepare some components ahead of time. You can cook the steak and pasta in advance, then store them separately in the refrigerator. When you’re ready to serve, simply reheat them in a skillet, make the sauce, and combine everything. However, keep in mind that the sauce may thicken as it cools, so you might need to add a splash of cream or reserved pasta water to achieve the desired consistency when reheating.
Conclusion on Creamy Steak Alfredo Recipe
In conclusion, the Creamy Steak Alfredo recipe is a delightful dish that brings together rich flavors and comforting textures. With its tender flank steak, creamy sauce, and perfectly cooked fettuccine, this meal is sure to impress anyone at your dinner table. Whether you’re celebrating a special occasion or simply enjoying a cozy night in, this recipe is a fantastic choice.
Not only is it easy to prepare, but it also allows for plenty of customization. You can add vegetables for extra nutrition or swap out the steak for chicken or shrimp, making it versatile for any palate. Plus, with the tips and variations provided, you can easily adapt the recipe to suit your preferences.
As you gather your ingredients and follow the steps, remember to enjoy the cooking process. The aroma of garlic and cream filling your kitchen is just the beginning of the delicious experience that awaits. So, roll up your sleeves, get cooking, and savor every bite of your homemade Creamy Steak Alfredo!
We hope this recipe inspires you to create a memorable meal that you and your loved ones will cherish. Happy cooking!
Paul
Creamy Steak Alfredo Recipe is a must-try dish!
A luxurious twist on a comfort food classic! Tender, seasoned steak slices meet creamy, garlicky Alfredo sauce and rotini pasta in this decadent dish. Perfect for steak night or when you’re craving something indulgent and satisfying—all in one skillet.
1tablespoonMontreal steak spiceor your favorite steak seasoning blend
¼cupbutter
3tablespoonsgarlic puree
2½cupsheavy cream
½teaspoonsalt
½teaspoonblack pepper
⅔cupshredded parmesan cheese
Method
Cook the Pasta:Bring a large pot of salted water to a boil. Cook rotini according to package directions. Drain and set aside.
Season and Prep the Steak:Brush both sides of the steaks with oil and sprinkle evenly with steak spice or seasoning.
Sear the Steak:Heat a non-stick skillet over medium-high heat. Sear the steaks for a few minutes per side until they reach your desired doneness (130–135°F for medium-rare). Remove from the pan and let rest under foil.
Make the Alfredo Sauce:Wipe out the skillet and lower the heat to medium. Melt butter, then stir in the garlic puree and cook for 1–2 minutes until fragrant.
Add the Cream and Seasoning:Pour in the heavy cream. Add salt and pepper. Stir well and bring to a gentle boil, letting the sauce thicken for 3–4 minutes.
Toss the Pasta:Reduce heat to low. Add the cooked pasta into the sauce and stir to coat evenly. Mix in the parmesan cheese until melted and the sauce is creamy.
Plate and Serve:Slice the rested steak and serve it over the creamy Alfredo pasta. Garnish with additional parmesan or fresh parsley if desired.
Notes
You can substitute ribeye, striploin, or sirloin for the eye of round steak if you prefer a more tender cut.
For extra flavor, finish the dish with a sprinkle of crushed red pepper flakes or a drizzle of truffle oil.
Garlic puree can be swapped with minced garlic (about 3 cloves).
Leftovers reheat well—add a splash of cream or milk when reheating to loosen the sauce.
My love for this recipe didn’t start in a professional kitchen, or in the glossy pages of a cookbook. It began on a gray afternoon, in a small tiled kitchen with steamed windows and music humming softly from the radio. My grandmother, who never measured a single thing in her life, grated potatoes with a rhythm only she understood — her hands steady, her smile quiet.
She would nod toward me to crack the eggs. She always said that a dish tasted better when two people made it together. There wasn’t much to the recipe — potatoes, eggs, something smoky from the fridge, and always a handful of cheese. But when it came out of the oven, golden and bubbling, it felt like something more than food. It was comfort. It was nourishment. It was, in its purest form, home.
This recipe is my interpretation of that memory — a simple and brilliant dish that anyone can make, from any kitchen, no matter how small or quiet. And best of all, it still tastes like home.
Why This Recipe Works So Well
We’ve seen endless potato casseroles, but there’s something timeless about the combination of golden potatoes, fluffy eggs, melted cheese, and savory sausage. Here’s why this one stands out:
1. It’s Incredibly Versatile
This is one of those recipes that works for breakfast, brunch, lunch, or even dinner. Serve it alongside a fresh salad for a light lunch or with a warm bowl of soup for something heartier. It’s flexible, adaptable, and never fussy.
2. Minimal Ingredients, Maximum Flavor
With just six core ingredients, this dish proves you don’t need a long shopping list to make something special. The key lies in balance — the earthy richness of the potatoes, the umami from smoked sausage, the silkiness of baked eggs, and the boldness of melted cheese.
3. Crowd-Pleaser Appeal
Whether you’re feeding a family, hosting brunch, or preparing weekday meal prep, this dish delivers. It’s naturally gluten-free (when using gluten-free sausage), easy to portion, and satisfying enough to keep everyone happy — from picky kids to flavor-seeking adults.
Ingredients
Ingredient
Amount
Potatoes
6 large, peeled and grated
Eggs
4
Salt
To taste
Black Pepper
To taste
Smoked Sausage
100 grams, diced
Green Onions
Chopped, to taste
Cheese
100 grams, grated (any type)
Directions
Preheat your oven to 180°C (350°F) and lightly grease a baking dish.
Grate the potatoes and squeeze out any excess moisture using a clean towel or cheesecloth.
In a large bowl, whisk the eggs and season with salt and black pepper.
Add the grated potatoes, diced smoked sausage, chopped green onions, and grated cheese to the bowl. Mix everything until well combined.
Pour the mixture into the prepared baking dish and spread it evenly.
Bake for 35–40 minutes or until golden brown and the top is crispy.
Let it cool slightly before slicing and serving warm.
Nutritional Information (Per Serving – Approx. 6 servings)
Nutrient
Amount
Calories
~290 kcal
Protein
~13 g
Carbohydrates
~22 g
Fats
~16 g
Fiber
~2.5 g
Sodium
~500 mg
The Genius is in the Texture
A great bake like this one should hit every note. You want the edges slightly crisp, the center custardy but firm, the cheese melty and bubbling, and the sausage providing little bursts of smoky flavor. That’s why the method — especially removing moisture from the potatoes before baking — is so important. It allows the eggs to bind everything together without becoming soggy.
The result? A beautifully unified dish that slices cleanly but still melts in your mouth.
Toppings, Mix-ins, and Variations
Once you’ve mastered the base version, you can start riffing on it depending on what you have in your kitchen. Here are a few fun twists:
– Herbs for Freshness
Add chopped parsley, chives, or dill for a fresh lift. These herbs don’t overpower the core flavors but do brighten them.
– Spice it Up
If you like heat, a pinch of paprika, chili flakes, or diced jalapeños goes a long way. The spice contrasts beautifully with the richness of the cheese and eggs.
– Cheese Options
Mozzarella makes for a subtle melt, but don’t hesitate to swap it out for sharper cheeses like cheddar, gouda, or a smoked provolone. Each brings a new dimension to the dish.
– Vegetarian-Friendly
Leave out the sausage entirely and bulk up the dish with sautéed mushrooms, bell peppers, or even a handful of spinach.
– Mini Muffin Version
Portion the mixture into muffin tins instead of a casserole dish. You’ll end up with individual egg-potato bites that are great for breakfast on the go.
Storage, Reheating, and Meal Prep Tips
This bake is not just delicious — it’s practical. That makes it ideal for meal planning or making ahead.
To Store: Keep leftovers in an airtight container in the fridge for up to 4 days.
To Freeze: Wrap slices tightly and freeze for up to 2 months. Thaw overnight in the fridge.
To Reheat: Use an oven or toaster oven to reheat, which will preserve the crispy edges. Microwave works too but may soften the texture slightly.
Frequently Asked Questions (FAQs)
Can I prepare it the night before and bake in the morning?
Absolutely. Prepare the full mixture, pour it into your baking dish, cover, and refrigerate overnight. Let it sit at room temperature for 15–20 minutes before baking.
What kind of potatoes work best?
Starchy potatoes like Russets or Yukon Golds are ideal. They shred easily and bake up soft with crispy edges.
Can I make this dairy-free?
Yes, you can omit the cheese or use a dairy-free cheese alternative. The eggs still provide plenty of structure and richness.
Do I have to peel the potatoes?
Not at all. If you’re using thin-skinned potatoes and enjoy the rustic texture, feel free to leave them unpeeled. Just be sure to wash them thoroughly.
How can I make it more protein-packed?
Add extra eggs, diced chicken breast, or even lentils for a meat-free protein source. This dish adapts easily.
Is this recipe kid-friendly?
Very much so. The flavors are mild, the texture is soft, and the cheesy goodness is always a win with little ones.
A Dish That Belongs at Every Table
There’s something deeply satisfying about a recipe that delivers warmth, nourishment, and familiarity without stress or complication. This cheesy potato bake does all of that — and more. It’s the kind of dish that lives in rotation, one that never feels tired even after the fifth or sixth time you’ve made it.
Maybe it’s the simplicity. Maybe it’s the memory of it baking in the oven while the house slowly fills with scent and anticipation. Or maybe it’s the joy of sharing something made with so little — yet giving so much.
Conclusion: The Beauty of Everyday Ingredients
This “Simple and Brilliant” bake is more than just another casserole — it’s a love letter to home cooking. It reminds us that the best meals don’t always require fancy tools, hard-to-pronounce ingredients, or hours of preparation. Sometimes all you need is a handful of honest ingredients, a warm oven, and a little bit of care.
Serve it to loved ones, freeze it for busy days, or enjoy it straight from the baking dish at midnight — this is the kind of recipe that becomes a regular in your kitchen and a quiet favorite at your table.
Amal
When Simplicity Wins: A Humble Potato Bake That Steals the Show
This comforting potato bake is pure genius in its simplicity — a golden, cheesy, and savory delight made with just a handful of everyday ingredients. Packed with smoky sausage, fluffy eggs, and melted cheese, it’s the perfect crowd-pleaser for any time of day. No fuss, no fancy tools — just honest, delicious flavor.
There’s a kind of quiet magic in baking bread at home. The soft hum of warm water meeting flour, the satisfying feel of dough under your palms, the comfort of rising yeast — it’s an experience that awakens something ancient and nurturing in us. For me, this bread in particular is tied to one of my earliest food memories: my grandmother, flour-dusted from head to toe, shaping small balls of dough and tucking tiny cubes of cheese into the center like precious gifts.
Back then, I didn’t know anything about gluten development or fermentation. I only knew that a golden crust meant we were close to pulling something wonderful out of the oven. And when that something was cheese-stuffed, my joy was doubled. It was warm, stretchy, buttery — and perfectly simple.
This recipe is a homage to that memory. With just a few pantry staples, no special equipment, and mozzarella cheese tucked inside each roll, it’s a go-to comfort recipe that invites hands-on moments, shared meals, and the unbeatable scent of fresh bread wafting through your kitchen.
Why This Bread Is Loved by Everyone Who Tries It
In the world of elaborate loaves and artisan fermentation, it’s easy to forget how satisfying simple bread can be. This recipe brings us back to basics — in the best way.
1. Foolproof and Beginner-Friendly
Even if you’ve never baked a loaf in your life, this recipe welcomes you. It doesn’t rely on advanced techniques or long rises. Everything is straightforward, from kneading to shaping.
2. Melty Cheese Surprise
Each bite offers a gentle pull of mozzarella hidden in the soft center — satisfying and comforting. It transforms a plain roll into something magical, without much effort at all.
3. Flexible and Adaptable
You can shape it into rounds, braid it, make a pull-apart ring, or even turn it into filled breadsticks. The dough is versatile and forgiving, and it works beautifully with different cheeses, too.
4. Pantry Staples, No Fuss
This recipe uses ingredients you probably already have: flour, yeast, sugar, milk, oil. No eggs needed, and you can use any milk you have on hand — even plant-based in a pinch.
Ingredients
Ingredient
Amount
Warm Water
½ cup (120 ml)
Warm Milk
½ cup (120 ml)
Dry Yeast
1 teaspoon
Sugar
1 tablespoon
Salt
½ teaspoon
Vegetable Oil
1 tablespoon
All-Purpose Flour
3 cups (approx. 360 g)
Mozzarella Cheese
100 g, shredded or cubed
Sesame Seeds
As desired, for topping
Directions
Activate the Yeast In a mixing bowl, combine the warm water, warm milk, dry yeast, and sugar. Let it rest for about 5–10 minutes, until foamy.
Make the Dough Add salt, oil, and flour gradually into the yeast mixture. Mix until a soft dough forms. Knead for 8–10 minutes until smooth and elastic.
First Rise Cover the dough and let it rise in a warm spot for 1 hour, or until doubled in size.
Shape and Fill Divide the dough into portions. Flatten each piece slightly and place a bit of mozzarella cheese in the center. Fold the dough over the cheese and seal tightly to form balls or desired shapes.
Second Rise Place the shaped dough on a baking tray lined with parchment paper. Cover and let rise again for 15–20 minutes.
Top and Bake Brush the tops with milk or egg wash (optional) and sprinkle with sesame seeds. Bake in a preheated oven at 180°C (350°F) for 20–25 minutes, or until golden brown.
Cool and Serve Let the bread cool slightly before serving. Enjoy warm while the cheese is still melty.
Nutritional Information (Per Piece, Approx. 10 Servings)
Nutrient
Amount
Calories
~210 kcal
Carbohydrates
~30 g
Protein
~7 g
Fat
~7 g
Saturated Fat
~2.5 g
Fiber
~1 g
Sugar
~2 g
Sodium
~200 mg
Cultural Connections: Bread as a Universal Language
Bread has long been a staple across cultures — from French baguettes to Turkish pide, from Middle Eastern manakish to Indian naan. What unites all these varieties is their role in daily life. Bread feeds families, brings people to the table, and accompanies everything from soups to stews.
Stuffed breads are particularly beloved in many cuisines. Think Georgian khachapuri, Italian panzerotti, or Middle Eastern cheese-filled fatayer. This simple cheese-stuffed bread draws from those inspirations but adapts them into a weeknight-friendly form. It’s a hybrid between the softness of dinner rolls and the indulgence of cheese pastries — and it’s universally satisfying.
Ways to Make It Your Own
One of the beauties of this bread is how open it is to customization. Here are some ideas to tailor it to your taste or occasion:
Switch Up the Cheese
Mozzarella melts beautifully, but you can also try cheddar for a sharper flavor, feta for a salty bite, or even a cube of cream cheese with herbs.
Mixing cheeses adds depth — mozzarella and parmesan together work wonderfully.
Add Herbs or Spices to the Dough
Try adding dried oregano, basil, or garlic powder directly into the dough for an aromatic twist.
A sprinkle of paprika on top before baking gives a warm, golden hue and a touch of smokiness.
Make It a Full Meal
Add cooked and crumbled sausage or sautéed mushrooms with the cheese for a heartier filling.
Serve it with a warm bowl of tomato soup, lentil stew, or even alongside a fresh salad.
Shape Variations
Roll it flat, spread the cheese, and roll it up like a log before baking.
Shape into a ring for a pull-apart party bread.
Cut into sticks and bake as cheesy bread fingers for dipping.
FAQs About This Simple Cheese-Stuffed Bread
Q: Can I make the dough in advance? Yes. You can prepare the dough and let it rise in the refrigerator overnight. Just bring it to room temperature before shaping and baking the next day.
Q: What type of yeast should I use? Instant or active dry yeast both work well. If using active dry yeast, activate it in warm water and milk with sugar and wait for it to foam before proceeding.
Q: My dough isn’t rising — what went wrong? Double-check the water temperature (it should be warm, not hot), and make sure your yeast isn’t expired. A draft-free, slightly warm space helps the dough rise faster.
Q: Can I freeze the bread? Absolutely. Once baked and cooled, you can freeze the bread for up to 2 months. Reheat it in a warm oven to bring back the soft texture and melted cheese.
Q: Can I make it dairy-free? Yes. Use plant-based milk and swap the cheese for a dairy-free alternative. The texture will be slightly different, but still tasty.
Q: Is this bread sweet or savory? It’s lightly savory — the sugar helps activate the yeast but doesn’t make it sweet. The sesame seeds and cheese give it a subtle, salty character.
Why You’ll Make This Again and Again
Sometimes, it’s the simple things that linger in memory the longest. This bread doesn’t shout for attention. It doesn’t need glossy icing or dramatic layers. It rises slowly, bakes to a soft golden brown, and quietly wins you over with its warm heart of cheese.
You’ll find yourself turning to this recipe on rainy days, when guests are coming unexpectedly, or when your soul just needs something homemade and honest. It’s a reminder that not everything delicious has to be difficult.
Conclusion: A Recipe That Feels Like Home
There are recipes you try once and move on from, and then there are those that become part of your kitchen’s rhythm. This simple cheese-stuffed bread is the latter. It’s unfussy, welcoming, and comforting — the kind of food that belongs on any table, in any season, with anyone you love.
More than just a recipe, it’s a ritual. It’s warm dough under your palms, the smell of baking bread curling through the air, and the quiet joy of watching something rise into golden perfection. It’s the invitation to slow down, to savor, and to find happiness in a handful of humble ingredients.
So go ahead. Make the dough. Tuck in the cheese. Let the oven do the rest. You’re not just baking bread — you’re making something meaningful, one swirl at a time.
Amal
From Dough to Delight: The Magic of Simple Cheese-Stuffed Bread
Soft, golden, and gently crisped on the outside, this cheese-stuffed bread is a simple yet irresistible treat. With a melty mozzarella center and a sprinkle of sesame on top, it’s the kind of recipe that turns pantry staples into something warm, comforting, and deeply satisfying. Perfect for beginners and seasoned bakers alike.
There’s something irresistibly nostalgic about a jam cake. For me, it traces back to late afternoons in my grandmother’s cozy kitchen. I’d come home from school, the scent of something sweet already wafting through the hallway. It wasn’t elaborate or adorned with frosting — just a humble golden cake with ruby streaks of raspberry or cherry running through it like soft ribbons. It was never about impressing anyone. It was about care, comfort, and love poured into a mixing bowl.
That simplicity is what inspired this 5-minute jam-swirled cake. No fancy tools. No complicated steps. Just pantry staples, a swirl of your favorite jam, and a bit of quiet joy. It’s the kind of recipe that holds a memory in every bite — one that reminds you how beautiful the ordinary can be.
Why This Cake is a Keeper
In a world filled with layered desserts and gourmet techniques, there’s something deeply refreshing about a cake that takes five minutes to prepare and still tastes like a hug. The beauty of this jam cake lies in its balance — between sweetness and ease, between soft texture and sticky jam pockets. You’re never too far away from creating something delightful.
Here are just a few reasons why this cake earns a permanent spot in your baking rotation:
1. It’s Perfectly Uncomplicated
No electric mixer, no separate bowls, no creaming butter and sugar. You simply whisk, swirl, and bake.
2. Versatile and Seasonal
This cake shines with any jam — cherry, strawberry, apricot, fig, or even a medley. You can also use homemade preserves or marmalade for a personalized touch.
3. Pantry-Friendly
All ingredients are likely already in your kitchen. It’s the ideal last-minute dessert when guests pop over or when your sweet tooth refuses to wait.
4. Kid-Friendly
Both in taste and in process. Little hands can help swirl the jam or whisk the batter, making it a family activity as much as a treat.
Ingredients
(Measurements using a 200 ml glass)
Ingredient
Amount
Eggs
3
Salt
A pinch
Sugar
150 g (approx. 4/5 cup)
Milk
120 ml (½ cup + 2 tablespoons)
Vegetable Oil
120 ml (½ cup + 1 tablespoon)
Vanilla Extract
2 teaspoons
All-Purpose Flour
250 g (1 cup + 2/3 cup)
Baking Powder
15 g (3 teaspoons)
Jam (your choice)
150 g (e.g., cherry, strawberry)
Directions
Preheat Oven: Preheat your oven to 180°C (350°F). Grease or line a loaf or square baking pan with parchment paper.
Whisk Wet Ingredients: In a large bowl, whisk the eggs with a pinch of salt. Add the sugar and continue whisking until lightly frothy. Stir in the milk, vegetable oil, and vanilla extract.
Incorporate Dry Ingredients: Sift in the flour and baking powder. Stir with a spatula or whisk until the batter is smooth and lump-free.
Add the Jam Swirl: Pour the batter into the prepared baking pan. Spoon the jam over the top in small dollops. Use a knife or skewer to gently swirl the jam through the batter — don’t overmix.
Bake: Bake in the preheated oven for 30–35 minutes, or until a toothpick inserted into the center comes out clean.
Cool and Serve: Allow the cake to cool slightly in the pan before slicing. Serve warm or at room temperature with tea, coffee, or a dusting of powdered sugar if desired.
Nutritional Information (Per Serving – approx. 10 slices)
Nutrient
Amount
Calories
~210 kcal
Carbohydrates
~29 g
Sugars
~14 g
Protein
~3.5 g
Fat
~9 g
Fiber
~0.7 g
Saturated Fat
~1.2 g
Sodium
~75 mg
The Visual and Textural Charm
When baked, the cake puffs up lightly, becoming golden on top with slightly crisp edges. The jam bubbles gently, creating glistening streaks and small caramelized pockets that burst with flavor. Cut into slices, you’ll see the swirls — uneven, organic, and utterly beautiful.
The crumb is soft but sturdy. It doesn’t crumble too easily, making it great for lunchboxes, picnics, or teatime spreads. It tastes rich without being heavy, thanks to the balance of eggs, milk, and oil.
How to Make It Your Own
This cake is a blank canvas for creativity. Whether you want to elevate it with flavor variations or simplify it even further, here are some ideas:
Flavor Variations:
Citrus Zest: Add grated lemon or orange zest to the batter for a bright, fragrant twist.
Spiced Up: Mix in a pinch of cinnamon or cardamom to complement darker jams like plum or blackberry.
Nutty Finish: Sprinkle chopped walnuts, almonds, or pistachios on top before baking for added texture.
Creamy Touch: Dollop spoonfuls of cream cheese alongside the jam before swirling for a cheesecake-like effect.
Jam Choices:
Apricot: Subtle and not too sweet.
Blackberry or Blueberry: Slightly tart with a deep purple swirl.
Fig or Date Jam: Earthy, rich, and extra comforting in colder months.
Strawberry & Rhubarb: Tangy-sweet and vibrant.
Presentation Tips:
Dust with powdered sugar for a charming finish.
Serve with whipped cream or ice cream for a more indulgent dessert.
Use mini loaf tins for personal-sized cakes or gifting.
Baking Tips from Experience
Don’t overmix the jam: Swirl it gently. Over-stirring will mix it into the batter completely, losing the visual and flavor contrast.
Let it rest: Though it’s tempting to slice right in, letting the cake cool slightly helps it set and slice more cleanly.
Storage: Wrap tightly and store at room temperature for 2–3 days, or refrigerate for up to a week. It also freezes well — just thaw and reheat slightly before serving.
Frequently Asked Questions
Can I use any type of jam or preserve?
Yes! Any thick fruit jam or preserve will work beautifully. Just make sure it’s not too runny, as overly watery jam can sink or cause uneven baking.
What if I don’t have vanilla extract?
You can skip it, but a pinch of cinnamon or citrus zest will add a lovely flavor boost in its place.
Can I make this cake dairy-free?
Absolutely. Use any plant-based milk (like almond, oat, or soy), and replace the milk with the same amount. Make sure your jam doesn’t contain dairy additives.
Can I reduce the sugar?
Yes, especially if your jam is on the sweeter side. You can reduce the sugar by 20–30g without affecting the texture too much. Just note it may slightly impact the rise.
Does it work as muffins or cupcakes?
Definitely. Pour the batter into lined muffin tins (fill ¾ of the way), add a swirl of jam to each, and bake for 18–20 minutes or until a toothpick comes out clean.
Can I double the recipe?
Yes — simply double all the ingredients and bake in a larger pan. Add 5–10 extra minutes to the baking time, keeping an eye on doneness.
From Ordinary to Extraordinary
This jam-swirled cake may be simple, but it delivers something that goes beyond flavor — a quiet kind of joy. It’s the cake you make when the day feels long. It’s what you bake with your kids on a rainy afternoon, what you gift to a neighbor just because. It reminds us that comfort doesn’t have to be complicated, and that a good dessert doesn’t need to be fancy to feel special.
And in a world that often asks us to rush or impress, this cake invites you to slow down — if only for the time it takes to swirl jam into batter, and to watch it rise in the oven.
Conclusion: A Recipe You’ll Come Back To
Whether you’re a seasoned baker or just starting out, this 5-minute jam cake will quickly find a home in your kitchen. It’s unfussy, endlessly flexible, and filled with that familiar, warm-from-the-oven magic. Keep a jar of jam in the pantry and this recipe in your heart — you’ll be surprised how often it saves the day, sweetens a moment, or brings people together.
After all, the best recipes aren’t the ones that just impress — they’re the ones you turn to, time and time again.
Amal
A Slice of Sweet Simplicity: The Magic of a 5-Minute Jam Cake
A soft, fluffy, golden cake swirled with sweet jam — ready in minutes and made with simple pantry staples. This jam-swirled cake is the perfect last-minute dessert or cozy treat with coffee or tea. No fancy equipment, no hassle — just sweet satisfaction in every bite.