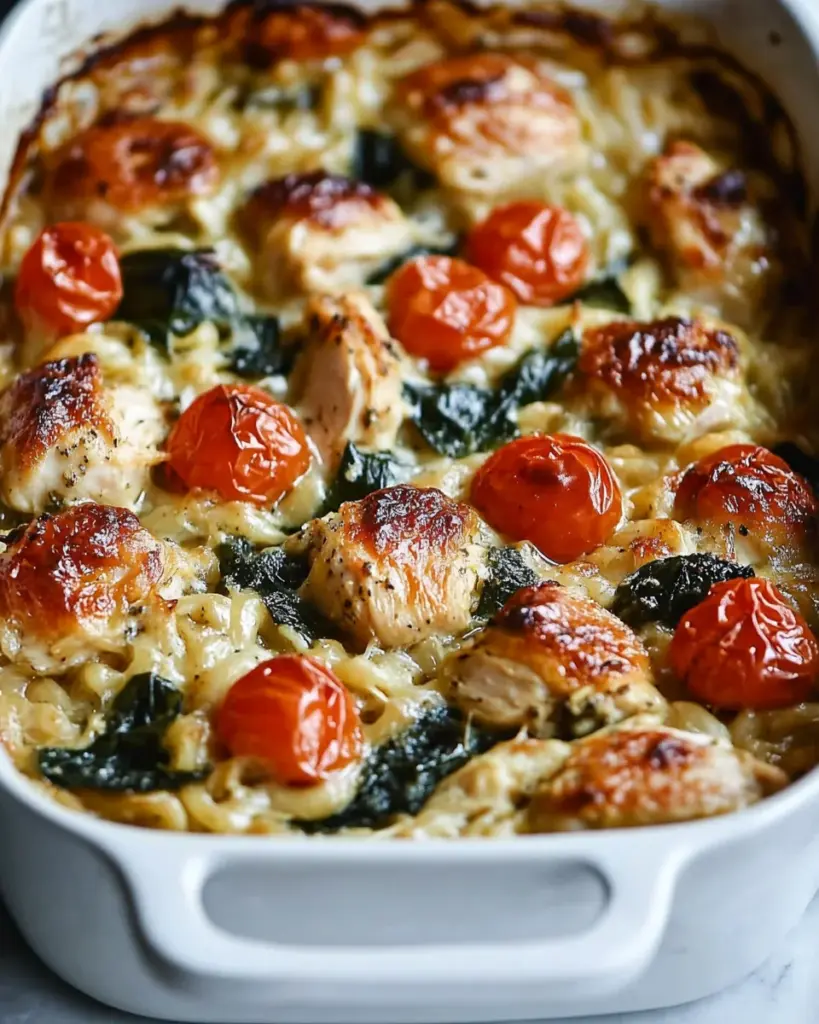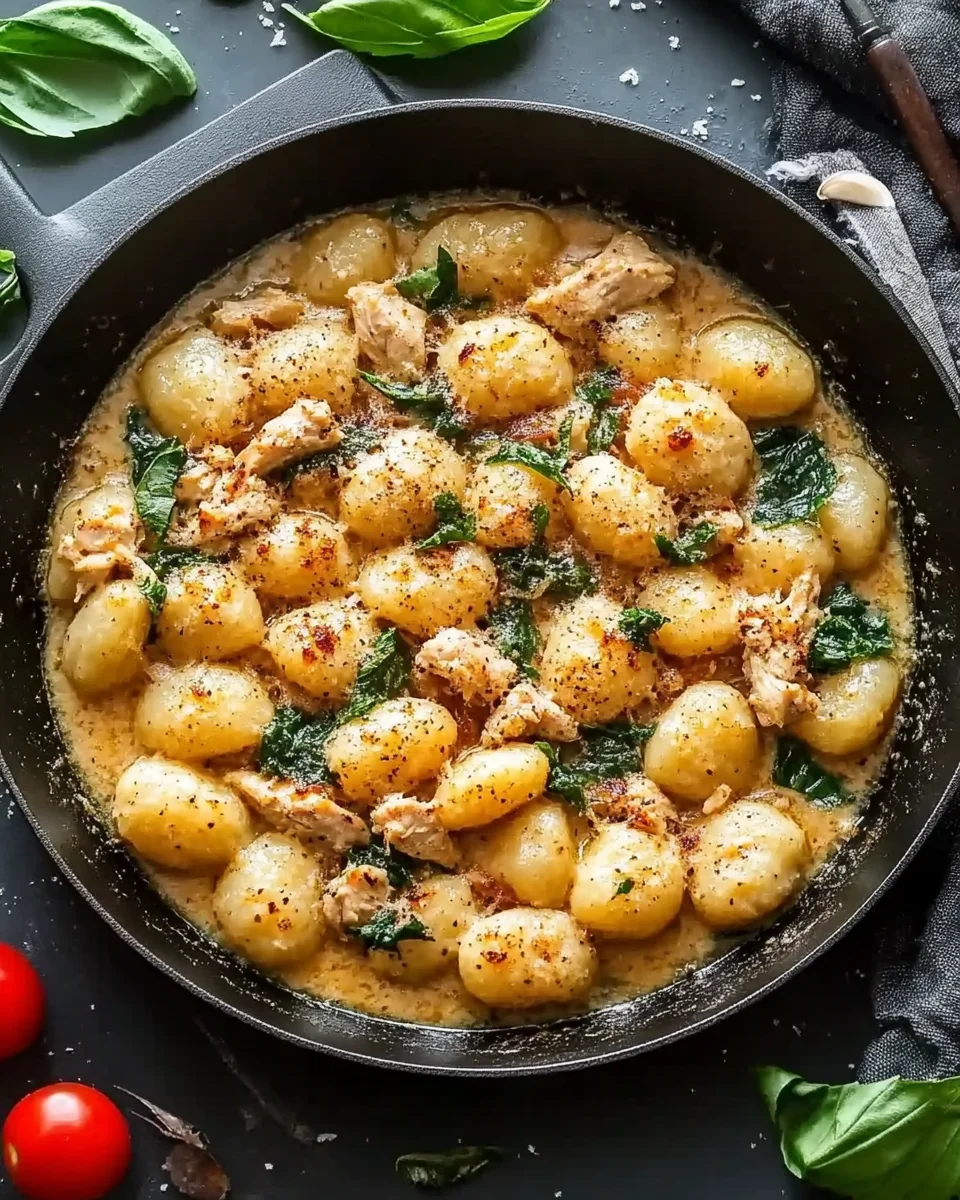
Garlic Chicken Gnocchi Recipe is a must-try dish!

Introduction to Garlic Chicken Gnocchi Recipe

If you’re looking for a delicious and comforting meal, the Garlic Chicken Gnocchi Recipe is a perfect choice. This dish combines tender chicken, pillowy gnocchi, and vibrant vegetables, all enveloped in a creamy garlic sauce. It’s not just a meal; it’s an experience that brings warmth and satisfaction to your dinner table.

Gnocchi, a type of Italian pasta made from potatoes, pairs beautifully with the savory flavors of garlic and chicken. The addition of cherry tomatoes and spinach adds a burst of color and nutrition, making this dish not only tasty but also visually appealing. Plus, it’s quick to prepare, making it ideal for busy weeknights or special occasions.

In this article, we will guide you through the ingredients, preparation steps, and variations of this delightful recipe. Whether you’re a seasoned cook or a beginner, you’ll find that making Garlic Chicken Gnocchi is straightforward and rewarding. So, roll up your sleeves and get ready to impress your family and friends with this scrumptious dish!

Ingredients for Garlic Chicken Gnocchi Recipe

To create the delightful Garlic Chicken Gnocchi Recipe, you’ll need a selection of fresh and flavorful ingredients. Each component plays a vital role in bringing this dish to life. Here’s what you’ll need:

  • 2 tablespoons olive oil: This will be used for sautéing the chicken and vegetables, adding a rich flavor.
  • 1 pound boneless, skinless chicken breasts: Cut into bite-sized pieces, the chicken provides protein and heartiness.
  • 1 teaspoon salt: Essential for seasoning the chicken and enhancing the overall taste.
  • 1/2 teaspoon black pepper: Adds a touch of spice to the dish.
  • 3 cloves garlic: Minced, garlic is the star ingredient that gives this recipe its name and flavor.
  • 1 cup cherry tomatoes: Halved, these sweet tomatoes add freshness and color.
  • 1 cup baby spinach: This leafy green not only boosts nutrition but also adds a lovely green hue.
  • 1 pound potato gnocchi: The main carbohydrate in this dish, gnocchi is soft and pillowy.
  • 1/2 cup heavy cream: This creates a rich and creamy sauce that ties everything together.
  • 1/2 cup grated Parmesan cheese: Adds a savory, cheesy flavor that complements the dish perfectly.
  • 1 teaspoon Italian seasoning: A blend of herbs that enhances the overall flavor profile.
  • Fresh basil leaves (optional): For garnish, these add a pop of color and a fresh aroma.

Gathering these ingredients will set you on the right path to creating a delicious Garlic Chicken Gnocchi dish. Each item contributes to the overall taste and texture, making it a meal that everyone will love. Now that you have your ingredients ready, let’s move on to the preparation steps!

Preparation of Garlic Chicken Gnocchi Recipe

Now that you have all your ingredients ready, it’s time to dive into the preparation of the Garlic Chicken Gnocchi Recipe. This process is simple and straightforward, ensuring that you can whip up this delightful dish in no time. Let’s break it down into easy steps!

Step 1: Preparing the Chicken

First, heat 2 tablespoons of olive oil in a large skillet over medium-high heat. Once the oil is hot, add the bite-sized pieces of chicken. Season them with 1 teaspoon of salt and 1/2 teaspoon of black pepper. Cook the chicken for about 5-7 minutes, stirring occasionally. You want the chicken to be browned and cooked through. Once done, remove the chicken from the skillet and set it aside on a plate. This step is crucial as it builds the foundation of flavor for your dish.

Step 2: Cooking the Gnocchi

While the chicken is cooking, bring a pot of salted water to a boil. Once boiling, add 1 pound of potato gnocchi. Cook the gnocchi according to the package instructions, which usually takes about 2-3 minutes. You’ll know they’re ready when they float to the surface. This floating indicates that they are perfectly cooked. Drain the gnocchi and set them aside. This step ensures that your gnocchi will be soft and fluffy, complementing the other ingredients beautifully.

Step 3: Making the Garlic Sauce

In the same skillet where you cooked the chicken, add the minced garlic. Sauté the garlic for about 1 minute until it becomes fragrant. Be careful not to burn it, as burnt garlic can taste bitter. Next, add the halved cherry tomatoes and baby spinach to the skillet. Cook these for about 3-4 minutes, stirring occasionally. You want the spinach to wilt and the tomatoes to soften, creating a vibrant and flavorful base for your sauce.

Step 4: Combining Ingredients

Now it’s time to bring everything together! Return the cooked chicken to the skillet. Then, add the drained gnocchi, 1/2 cup of heavy cream, 1/2 cup of grated Parmesan cheese, and 1 teaspoon of Italian seasoning. Stir gently to combine all the ingredients. Heat everything through for another 2-3 minutes, allowing the flavors to meld beautifully. This final step creates a creamy, delicious sauce that envelops the chicken and gnocchi, making every bite a delight.

Once everything is combined and heated, your Garlic Chicken Gnocchi is ready to be served! This dish is not only easy to prepare but also packed with flavor and nutrition. Now, let’s explore some variations you can try to make this recipe your own!

Variation of Garlic Chicken Gnocchi Recipe

While the Garlic Chicken Gnocchi Recipe is delicious as it is, there are many ways to customize it to suit your taste or dietary needs. Whether you want to switch up the protein or make it vegetarian, these variations will keep your meals exciting and flavorful. Let’s explore some alternative proteins and vegetarian options!

Alternative Proteins

If you’re looking to change the protein in your Garlic Chicken Gnocchi Recipe, there are several tasty options. Here are a few ideas:

  • Turkey: Ground turkey or turkey breast can be used instead of chicken. It’s lean and offers a similar texture.
  • Shrimp: For a seafood twist, try adding shrimp. Cook them until they turn pink and tender, which usually takes just a few minutes.
  • Pork: Diced pork tenderloin can add a different flavor profile. Just ensure it’s cooked through before combining with the other ingredients.
  • Tofu: For a plant-based option, use firm tofu. Cube it and sauté until golden brown for a protein-rich alternative.

These alternative proteins can bring new flavors and textures to your dish, making it versatile and enjoyable for everyone at the table.

Vegetarian Options

If you prefer a vegetarian version of the Garlic Chicken Gnocchi Recipe, you can easily make some adjustments. Here are some ideas to create a delicious meat-free meal:

  • Replace Chicken with Vegetables: Use a mix of your favorite vegetables, such as bell peppers, zucchini, or mushrooms. Sauté them until tender for a hearty dish.
  • Chickpeas: Adding canned chickpeas can provide protein and a satisfying texture. Rinse and drain them before adding to the skillet.
  • Vegetable Broth: Instead of heavy cream, consider using vegetable broth and a splash of plant-based milk for a lighter sauce.
  • Vegan Cheese: If you want to keep it dairy-free, substitute Parmesan cheese with a vegan cheese alternative or nutritional yeast for a cheesy flavor.

These vegetarian options not only make the dish suitable for non-meat eaters but also add a variety of flavors and nutrients. Feel free to mix and match these ideas to create your perfect Garlic Chicken Gnocchi Recipe!

Cooking Note for Garlic Chicken Gnocchi Recipe

When preparing the Garlic Chicken Gnocchi Recipe, there are a few cooking notes to keep in mind. These tips will help ensure that your dish turns out perfectly every time. Let’s dive into some essential points to consider!

First, always use a large skillet for this recipe. A spacious skillet allows for even cooking and prevents overcrowding. This way, the chicken can brown nicely, and the vegetables can sauté without steaming. If your skillet is too small, consider cooking in batches.

Next, be mindful of the cooking times. Chicken should be cooked until it reaches an internal temperature of 165°F (75°C). This ensures it’s safe to eat. Use a meat thermometer for accuracy if you have one. For the gnocchi, remember that they only need a few minutes in boiling water. Keep an eye on them, as overcooking can lead to a mushy texture.

When sautéing garlic, watch it closely. Garlic can burn quickly, which can ruin the flavor of your dish. If you notice it starting to brown too much, lower the heat immediately. A fragrant, golden garlic is what you want!

Lastly, feel free to adjust the creaminess of the sauce to your liking. If you prefer a lighter sauce, you can reduce the amount of heavy cream or substitute it with half-and-half. On the other hand, if you love a rich and creamy texture, add a bit more cream or cheese. The beauty of this recipe lies in its flexibility!

By keeping these cooking notes in mind, you’ll be well on your way to creating a delicious Garlic Chicken Gnocchi dish that everyone will enjoy. Now, let’s explore some serving suggestions to elevate your meal even further!

Serving Suggestions for Garlic Chicken Gnocchi Recipe

Once your Garlic Chicken Gnocchi is ready, it’s time to think about how to serve it. Presentation can elevate your dish, making it even more appealing. Here are some delightful serving suggestions to enhance your meal:

  • Garnish with Fresh Herbs: A sprinkle of fresh basil leaves not only adds a pop of color but also enhances the flavor. You can also use parsley or chives for a different twist.
  • Pair with a Side Salad: A light side salad with mixed greens, cherry tomatoes, and a simple vinaigrette complements the richness of the gnocchi. It adds freshness and balances the meal.
  • Serve with Garlic Bread: For garlic lovers, serving the dish with warm garlic bread is a fantastic idea. It’s perfect for soaking up the creamy sauce!
  • Top with Extra Cheese: If you’re a cheese enthusiast, consider adding more grated Parmesan on top just before serving. It melts slightly and adds a deliciously cheesy finish.
  • Drizzle with Olive Oil: A light drizzle of high-quality olive oil over the finished dish can enhance the flavors and add a touch of elegance.

These serving suggestions not only make your Garlic Chicken Gnocchi visually appealing but also enhance the overall dining experience. Feel free to mix and match these ideas based on your preferences and the occasion. Now that you have some great serving ideas, let’s move on to tips for perfecting your Garlic Chicken Gnocchi Recipe!
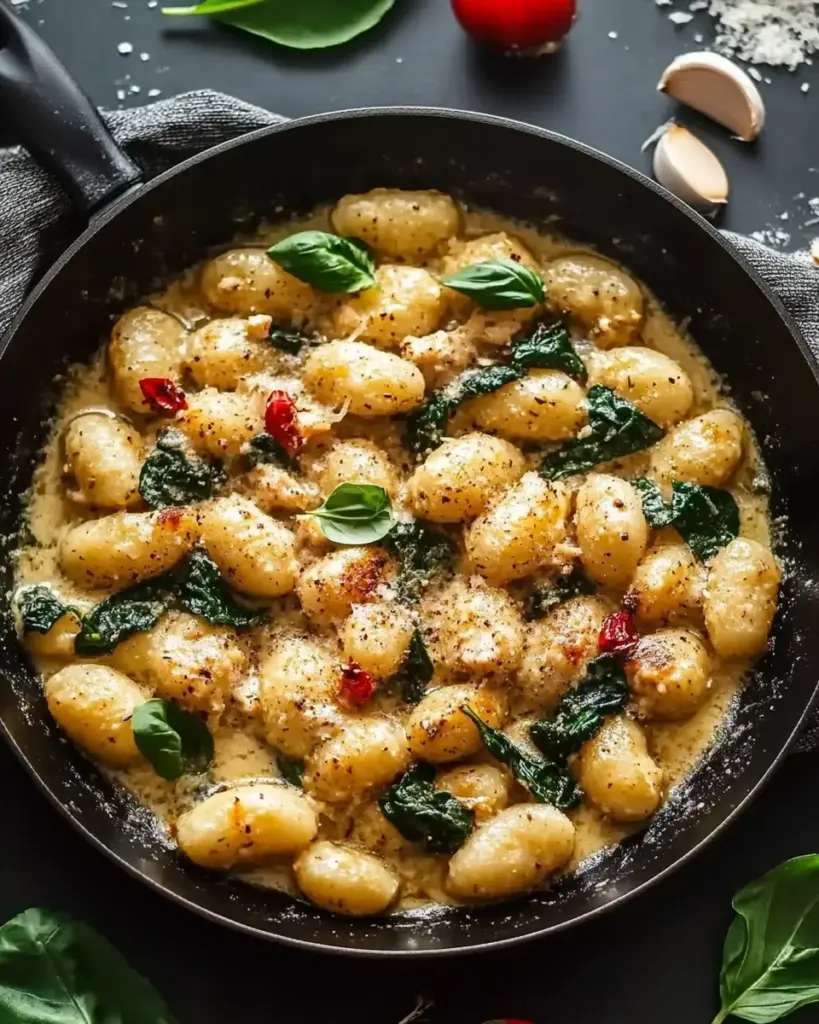
Tips for Perfect Garlic Chicken Gnocchi Recipe

Creating the perfect Garlic Chicken Gnocchi Recipe is all about attention to detail and a few handy tips. With these suggestions, you can elevate your dish and impress your family and friends. Let’s explore some essential tips to ensure your meal turns out delicious every time!

First, always use fresh ingredients. Fresh garlic, ripe cherry tomatoes, and vibrant spinach will enhance the flavors of your dish. Fresh ingredients not only taste better but also provide more nutrients. When shopping, look for firm tomatoes and bright green spinach to ensure quality.

Next, don’t rush the cooking process. Allow the chicken to brown properly before removing it from the skillet. This step adds depth to the flavor. Similarly, when sautéing garlic, take your time. A minute or two is all it takes for garlic to become fragrant without burning. Patience is key!

Another tip is to season your ingredients at each step. While you’ll season the chicken, consider adding a pinch of salt and pepper to the vegetables as they cook. This layering of flavors will make your dish more complex and satisfying.

When it comes to the gnocchi, avoid overcooking them. As mentioned earlier, they only need a few minutes in boiling water. Once they float, they’re ready! Overcooked gnocchi can become mushy, which can affect the overall texture of your dish.

Lastly, don’t hesitate to experiment with flavors. If you love a bit of heat, add red pepper flakes when cooking the garlic. For a touch of brightness, a squeeze of lemon juice just before serving can elevate the dish. Feel free to adjust the Italian seasoning to suit your taste as well.

By following these tips, you’ll be well on your way to mastering the Garlic Chicken Gnocchi Recipe. Each step contributes to a delicious and satisfying meal that everyone will enjoy. Now, let’s break down the time needed to prepare this delightful dish!

Breakdown of Time for Garlic Chicken Gnocchi Recipe

Understanding the time required for each step of the Garlic Chicken Gnocchi Recipe can help you plan your cooking efficiently. Here’s a detailed breakdown of the time you’ll need for preparation and cooking. This way, you can enjoy a delicious meal without feeling rushed!

Prep Time

The prep time for this Garlic Chicken Gnocchi Recipe is approximately 15 minutes. During this time, you will gather all your ingredients, wash and chop the vegetables, and cut the chicken into bite-sized pieces. Having everything ready before you start cooking will make the process smoother and more enjoyable.

Cooking Time

The cooking time for this recipe is about 20 minutes. This includes browning the chicken, sautéing the garlic and vegetables, and cooking the gnocchi. Each step is quick, allowing you to create a flavorful dish in no time. The key is to keep an eye on the cooking process to ensure everything is cooked perfectly.

Total Time

In total, you can expect to spend around 35 minutes from start to finish. This includes both prep and cooking times. With just a little bit of organization, you can have a delightful Garlic Chicken Gnocchi dish ready to serve in under an hour. It’s a fantastic option for busy weeknights or when you want to impress guests without spending all day in the kitchen!

Now that you have a clear understanding of the time involved, let’s take a look at the nutritional information for this delicious Garlic Chicken Gnocchi Recipe!

Nutritional Information for Garlic Chicken Gnocchi Recipe

Understanding the nutritional information of the Garlic Chicken Gnocchi Recipe is essential for those who are mindful of their diet. This dish is not only delicious but also provides a balanced mix of nutrients. Here’s a closer look at the nutritional breakdown per serving:

Calories

Each serving of the Garlic Chicken Gnocchi Recipe contains approximately 450 calories. This calorie count makes it a satisfying meal that can fit into a balanced diet. The combination of chicken, gnocchi, and vegetables provides energy, making it perfect for a hearty dinner.

Protein

With about 30 grams of protein per serving, this recipe is an excellent source of protein. The chicken and gnocchi contribute to this protein content, helping to support muscle health and keep you feeling full. Protein is essential for growth and repair, making this dish a nutritious choice for everyone.

Sodium

The sodium content in each serving is around 800 milligrams. While this is a reasonable amount for a meal, it’s important to be mindful of your overall sodium intake throughout the day. You can reduce the sodium level by using low-sodium chicken broth or less salt during cooking. This way, you can enjoy the flavors without worrying about excess sodium.

Overall, the Garlic Chicken Gnocchi Recipe offers a well-rounded meal that is both tasty and nutritious. With its balance of calories, protein, and sodium, it’s a great option for a fulfilling dinner. Now that you have a clear understanding of the nutritional aspects, let’s move on to some frequently asked questions about this delightful recipe!

FAQs about Garlic Chicken Gnocchi Recipe

Can I use store-bought gnocchi for this recipe?

Absolutely! Using store-bought gnocchi is a great time-saver. Most grocery stores offer fresh or frozen gnocchi, which can be just as delicious as homemade. Just follow the package instructions for cooking, and you’ll have a delightful dish in no time. This convenience allows you to focus on the other flavors in your Garlic Chicken Gnocchi Recipe without compromising on taste.

What can I substitute for chicken in the Garlic Chicken Gnocchi Recipe?

If you want to substitute chicken, there are plenty of options! You can use turkey, shrimp, or even diced pork for a different flavor. For a vegetarian option, consider using firm tofu or a mix of your favorite vegetables. Chickpeas are also a great protein-rich alternative. Each of these substitutes will bring its unique taste and texture to the dish, making it versatile and enjoyable for everyone.

How can I make the sauce creamier?

To achieve a creamier sauce in your Garlic Chicken Gnocchi Recipe, you can add more heavy cream or even a splash of cream cheese. Another option is to incorporate a bit of sour cream or Greek yogurt for added richness. If you prefer a dairy-free option, try using coconut cream or a plant-based cream alternative. These adjustments will enhance the creaminess and make your dish even more indulgent!

Can I prepare Garlic Chicken Gnocchi Recipe in advance?

Yes, you can prepare parts of the Garlic Chicken Gnocchi Recipe in advance! You can cook the chicken and vegetables ahead of time and store them in the refrigerator. When you’re ready to serve, simply reheat them in a skillet, add the gnocchi, cream, and cheese, and heat through. However, it’s best to cook the gnocchi fresh, as they can become mushy if stored. This way, you can enjoy a delicious meal with minimal effort on busy days!

Conclusion on Garlic Chicken Gnocchi Recipe

In conclusion, the Garlic Chicken Gnocchi Recipe is a delightful dish that brings together the comforting flavors of tender chicken, soft gnocchi, and vibrant vegetables. This recipe is not only easy to prepare but also offers a wonderful balance of taste and nutrition. Whether you’re cooking for your family on a busy weeknight or impressing guests at a dinner party, this dish is sure to please everyone at the table.

With its creamy garlic sauce and the addition of fresh ingredients like cherry tomatoes and spinach, each bite is a burst of flavor. Plus, the versatility of this recipe allows you to customize it to suit your preferences, whether you choose alternative proteins or opt for a vegetarian version. The tips and variations provided throughout this article will help you create a dish that is uniquely yours.

As you embark on your culinary journey with the Garlic Chicken Gnocchi Recipe, remember to enjoy the process. Cooking is not just about the final product; it’s about the joy of creating something delicious. So gather your ingredients, follow the steps, and savor the delightful flavors that come together in this comforting meal.

We hope you find this recipe as enjoyable to make as it is to eat. Happy cooking, and may your Garlic Chicken Gnocchi be a hit at your dinner table!

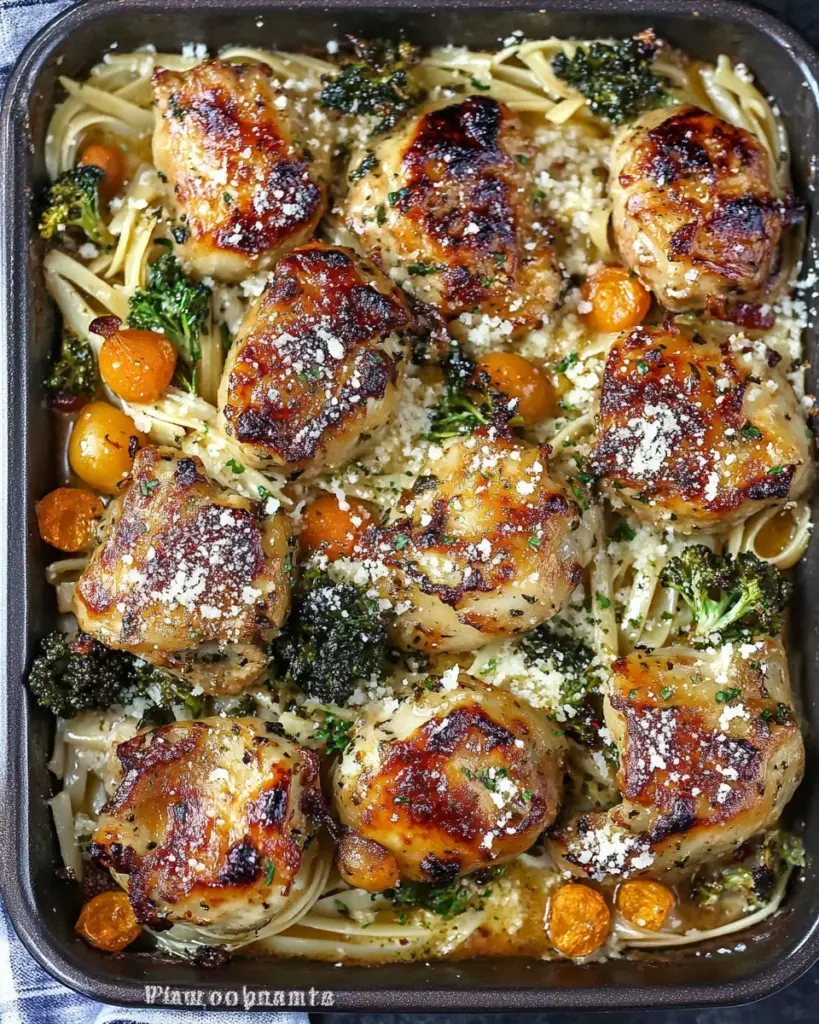
Creamy Garlic Parmesan Pasta Recipe is a must-try!

Introduction to Creamy Garlic Parmesan Pasta Recipe

Creamy Garlic Parmesan Pasta Recipe is a perfect choice. This dish combines the rich flavors of garlic and Parmesan cheese with the smooth texture of cream, creating a sauce that clings beautifully to your pasta. It’s a simple yet elegant recipe that can impress family and friends alike.

Whether you’re a busy parent, a student, or just someone who loves good food, this recipe is quick and easy to prepare. In just a matter of minutes, you can whip up a satisfying dinner that feels indulgent without requiring hours in the kitchen. Plus, it’s versatile! You can customize it with your favorite proteins or vegetables, making it a go-to meal for any occasion.

In this article, we will guide you through the ingredients, preparation steps, and variations of this delightful dish. So, grab your apron and let’s dive into the world of creamy, garlicky goodness!

Ingredients for Creamy Garlic Parmesan Pasta Recipe

Creamy Garlic Parmesan Pasta Recipe, you’ll need a few simple ingredients. Each component plays a vital role in building the rich and creamy flavor profile that makes this dish so beloved. Here’s what you’ll need:

  • 8 ounces of fettuccine or spaghetti
  • 2 tablespoons of olive oil
  • 4 cloves of garlic, minced
  • 1 cup of heavy cream
  • 1 cup of grated Parmesan cheese
  • 1 teaspoon of salt
  • 1/2 teaspoon of black pepper
  • 1/4 teaspoon of red pepper flakes (optional)
  • 2 tablespoons of chopped fresh parsley (for garnish)

These ingredients come together to create a creamy sauce that perfectly coats your pasta. The garlic adds a wonderful aroma, while the Parmesan cheese brings a savory depth to the dish. Feel free to adjust the seasonings to suit your taste. Now that you have your ingredients ready, let’s move on to the preparation steps!

Step-by-Step Preparation of Creamy Garlic Parmesan Pasta Recipe

Creamy Garlic Parmesan Pasta Recipe to life! Follow these simple steps to create a delicious meal that will delight your taste buds.

Step 1: Cooking the Pasta

8 ounces of fettuccine or spaghetti. Cook according to the package instructions until the pasta is al dente, which usually takes about 8 to 10 minutes. Remember to stir occasionally to prevent sticking. When the pasta is ready, drain it in a colander, but don’t forget to reserve 1/2 cup of the pasta water. This starchy water will help adjust the sauce later!

Step 2: Preparing the Garlic Sauce

2 tablespoons of olive oil over medium heat. Once the oil is hot, add 4 cloves of minced garlic. Sauté the garlic for about 1 minute, just until it becomes fragrant. Be careful not to let it brown, as burnt garlic can taste bitter. This step is crucial for infusing the oil with that delicious garlic flavor!

Step 3: Combining Pasta and Sauce

1 cup of heavy cream into the skillet with the garlic. Allow it to come to a gentle simmer. Then, add the cooked pasta directly into the skillet. Toss the pasta in the creamy sauce, ensuring every strand is coated. If the sauce seems too thick, gradually add some of the reserved pasta water until you reach your desired consistency. This will make the sauce silky and smooth!

Step 4: Adding Parmesan Cheese

1 cup of grated Parmesan cheese. Mix well until the cheese melts and blends into the sauce, creating a rich and creamy texture. Season the pasta with 1 teaspoon of salt, 1/2 teaspoon of black pepper, and 1/4 teaspoon of red pepper flakes if you like a little heat. Give everything a good stir to combine all the flavors. Your creamy garlic Parmesan pasta is almost ready to serve!

Variation of Creamy Garlic Parmesan Pasta Recipe

Creamy Garlic Parmesan Pasta Recipe lies in its versatility. You can easily customize it to suit your taste or dietary needs. Whether you want to add protein or incorporate more vegetables, there are plenty of options to make this dish your own. Let’s explore some delicious variations!

Adding Protein Options

If you’re looking to boost the protein content of your meal, consider adding cooked chicken, shrimp, or even bacon. These additions not only enhance the nutritional value but also add a delightful flavor to the dish.

  • Chicken: Grilled or sautéed chicken breast works wonderfully. Simply slice it and toss it with the pasta before serving.
  • Shrimp: Sauté shrimp in the garlic oil before adding the cream. This will infuse the sauce with a lovely seafood flavor.
  • Bacon: Crispy bacon bits can add a smoky crunch. Cook the bacon first, then use the rendered fat to sauté the garlic.

These protein options can turn your creamy pasta into a hearty meal, perfect for any occasion. Plus, they make it more filling, which is great for hungry diners!

Vegetable Additions for Creamy Garlic Parmesan Pasta Recipe

For those who want to incorporate more veggies, there are many delicious options to consider. Adding vegetables not only enhances the flavor but also boosts the nutritional profile of your dish.

  • Spinach: Fresh spinach wilts beautifully in the creamy sauce. Stir it in just before serving for a pop of color and nutrition.
  • Mushrooms: Sauté sliced mushrooms with the garlic for an earthy flavor that complements the creaminess.
  • Broccoli: Steamed or sautéed broccoli florets add a nice crunch and vibrant color. Toss them in with the pasta for a complete meal.

Creamy Garlic Parmesan Pasta Recipe. The possibilities are endless, and each variation brings its own unique twist to this classic dish!

Cooking Note for Creamy Garlic Parmesan Pasta Recipe

Creamy Garlic Parmesan Pasta Recipe, there are a few important cooking notes to keep in mind. These tips will help ensure that your dish turns out perfectly every time, making it a delightful experience for you and your guests.

First, always use fresh ingredients. Fresh garlic and high-quality Parmesan cheese can significantly enhance the flavor of your pasta. Avoid pre-grated cheese if possible, as it often contains anti-caking agents that can affect the creaminess of your sauce.

Next, be mindful of the heat when cooking the garlic. Sautéing it over medium heat is key. If the garlic cooks too quickly or burns, it can impart a bitter taste to your sauce. Remember, you want it to be fragrant and golden, not brown.

Another important note is to reserve that pasta water! The starchy water is a secret weapon in achieving the perfect sauce consistency. If your sauce is too thick, adding a splash of this water can help loosen it up while also adding flavor.

Lastly, serve your creamy pasta immediately after cooking. The sauce is at its best when fresh and hot. If you let it sit too long, the sauce may thicken and lose its creamy texture. If you do have leftovers, reheat gently on low heat, adding a bit more cream or pasta water to restore its original consistency.

Creamy Garlic Parmesan Pasta Recipe that everyone will love. Enjoy the process and the delightful results!

Serving Suggestions for Creamy Garlic Parmesan Pasta Recipe

Creamy Garlic Parmesan Pasta Recipe, it’s time to think about how to serve it. Presentation can elevate your dish, making it even more enjoyable for you and your guests. Here are some delightful serving suggestions to consider:

  • Garnish with Fresh Herbs: A sprinkle of chopped fresh parsley not only adds a pop of color but also enhances the flavor. You can also use basil or chives for a different twist.
  • Pair with a Side Salad: A light, crisp salad complements the richness of the pasta. Consider a simple mixed greens salad with a lemon vinaigrette to balance the flavors.
  • Serve with Garlic Bread: Nothing pairs better with creamy pasta than warm, buttery garlic bread. It’s perfect for soaking up any leftover sauce!
  • Top with Extra Cheese: For cheese lovers, adding a bit more grated Parmesan on top just before serving can make the dish even more indulgent.
  • Accompany with Wine: A glass of white wine, like Chardonnay or Pinot Grigio, can enhance the dining experience. The acidity in the wine cuts through the creaminess of the pasta.

Creamy Garlic Parmesan Pasta Recipe will surely impress everyone at the table!

Tips for Perfecting Your Creamy Garlic Parmesan Pasta Recipe

Creamy Garlic Parmesan Pasta Recipe, a few tips can make all the difference. These simple yet effective suggestions will help you achieve a dish that is not only delicious but also visually appealing. Let’s explore some key tips to elevate your pasta game!

  • Use Quality Ingredients: The flavor of your dish starts with the ingredients. Opt for fresh garlic and high-quality Parmesan cheese. Freshly grated cheese melts better and enhances the creaminess of the sauce.
  • Don’t Overcook the Pasta: Cooking your pasta to al dente is crucial. This means it should be firm to the bite. Overcooked pasta can become mushy and won’t hold up well in the sauce.
  • Adjust the Sauce Consistency: If your sauce is too thick, don’t hesitate to add more reserved pasta water. This starchy water not only thins the sauce but also helps it cling to the pasta.
  • Season Gradually: When adding salt and pepper, do so gradually. Taste as you go to ensure the flavors are balanced. You can always add more, but it’s hard to fix an overly salty dish!
  • Let the Sauce Simmer: Allowing the sauce to simmer gently after adding the cream helps meld the flavors together. Just a few minutes can make a big difference in taste.
  • Experiment with Flavors: Don’t be afraid to get creative! Add herbs like thyme or oregano for an extra layer of flavor. A squeeze of lemon juice can also brighten the dish.
  • Serve Immediately: For the best experience, serve your pasta right after cooking. The sauce is creamiest when fresh, and the pasta will maintain its perfect texture.

Creamy Garlic Parmesan Pasta Recipe that will impress everyone at your table. Enjoy the cooking process and the delightful results!

Breakdown of Time for Creamy Garlic Parmesan Pasta Recipe

Creamy Garlic Parmesan Pasta Recipe can help you plan your cooking efficiently. Here’s a simple breakdown of the time required for preparation and cooking.

Prep Time

10 minutes to gather your ingredients and prepare them. This includes measuring out the pasta, chopping the garlic, and grating the Parmesan cheese. Having everything ready before you start cooking will make the process smoother and more enjoyable!

Cooking Time

15 minutes. This includes boiling the pasta, sautéing the garlic, and combining everything into a creamy sauce. The quick cooking time makes this recipe perfect for busy weeknights or when you want a delicious meal in a hurry.

Total Time

25 minutes from start to finish. This includes both prep and cooking time. With such a quick turnaround, you can enjoy a comforting and flavorful Creamy Garlic Parmesan Pasta Recipe without spending hours in the kitchen!

Nutritional Information for Creamy Garlic Parmesan Pasta Recipe

Creamy Garlic Parmesan Pasta Recipe not only satisfies your taste buds but also provides valuable nutrients. Here’s a breakdown of the nutritional information per serving:

Calories

550 calories. This calorie count includes the rich flavors from the heavy cream and Parmesan cheese, making it a hearty meal. While it’s indulgent, it’s important to enjoy it in moderation, especially if you’re watching your calorie intake.

Protein

18 grams per serving. The protein comes primarily from the Parmesan cheese, which not only adds flavor but also contributes to your daily protein needs. If you choose to add chicken, shrimp, or other protein sources, this number will increase, making it an even more satisfying meal.

Sodium

800 milligrams per serving. This amount can vary based on the type of Parmesan cheese used and how much salt you add during cooking. If you’re watching your sodium intake, consider using low-sodium cheese or reducing the added salt. Balancing flavors with herbs and spices can also help reduce the need for extra salt.

Creamy Garlic Parmesan Pasta Recipe is a delicious option that provides a good balance of calories, protein, and flavor. By being mindful of portion sizes and ingredient choices, you can enjoy this comforting dish while keeping your nutritional goals in check!

FAQs about Creamy Garlic Parmesan Pasta Recipe

Can I make Creamy Garlic Parmesan Pasta Recipe ahead of time?

Creamy Garlic Parmesan Pasta Recipe ahead of time, but there are a few things to keep in mind. It’s best to cook the pasta and sauce separately. You can store the sauce in the refrigerator for up to three days. When you’re ready to serve, simply reheat the sauce gently on the stove. Cook the pasta fresh to ensure it maintains its perfect texture. If you combine them too early, the pasta may absorb the sauce and become mushy.

What can I substitute for Parmesan cheese in this recipe?

Creamy Garlic Parmesan Pasta Recipe.

How can I make Creamy Garlic Parmesan Pasta Recipe gluten-free?

Creamy Garlic Parmesan Pasta Recipe gluten-free, simply swap out regular pasta for gluten-free pasta. There are many options available, such as rice, quinoa, or chickpea pasta. Just be sure to check the cooking instructions, as gluten-free pasta may require different cooking times. The rest of the recipe remains the same, allowing you to enjoy this creamy dish without gluten!

Can I add more vegetables to the Creamy Garlic Parmesan Pasta Recipe?

Creamy Garlic Parmesan Pasta Recipe is a fantastic way to boost its nutritional value and flavor. You can include vegetables like bell peppers, zucchini, or asparagus. Simply sauté them along with the garlic or steam them before mixing them into the pasta. This not only enhances the dish but also adds color and texture, making it even more appealing!

Conclusion on Creamy Garlic Parmesan Pasta Recipe

Creamy Garlic Parmesan Pasta Recipe is a delightful dish that brings comfort and flavor to your table. With its rich, creamy sauce and the aromatic essence of garlic, this pasta is sure to become a favorite in your household. Whether you’re cooking for a special occasion or a simple weeknight dinner, this recipe is both quick and satisfying.

By following the steps outlined in this article, you can easily create a meal that not only tastes amazing but also allows for personal touches through various protein and vegetable additions. The versatility of this dish means you can adapt it to suit your dietary preferences or the ingredients you have on hand.

Remember to keep the cooking tips in mind for the best results. Using fresh ingredients, adjusting the sauce consistency, and serving immediately will ensure that your pasta is always a hit. Plus, with the nutritional information provided, you can enjoy this creamy delight while being mindful of your dietary goals.

Creamy Garlic Parmesan Pasta Recipe is not just a meal; it’s an experience that brings joy to every bite. Enjoy your cooking adventure and the delicious results that follow!

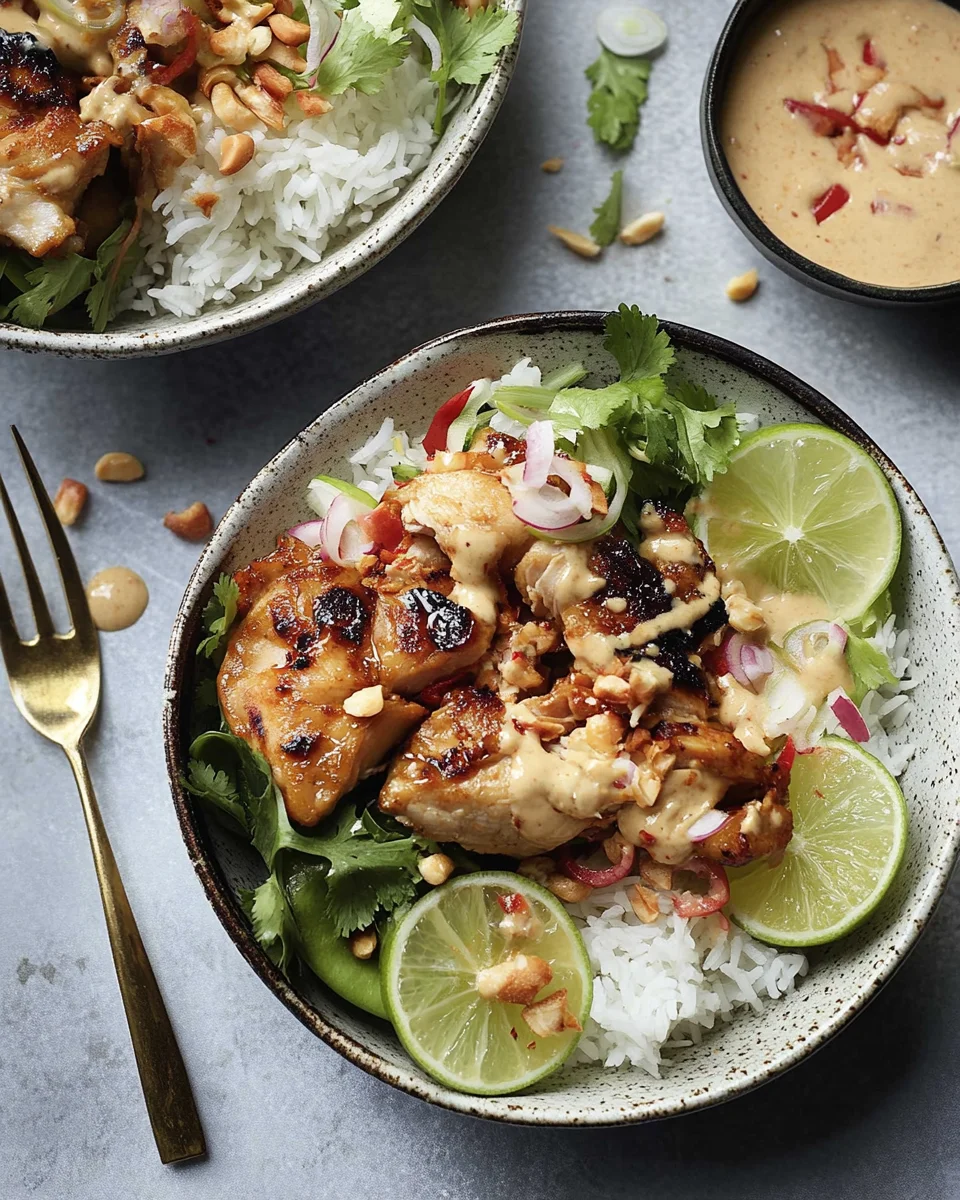
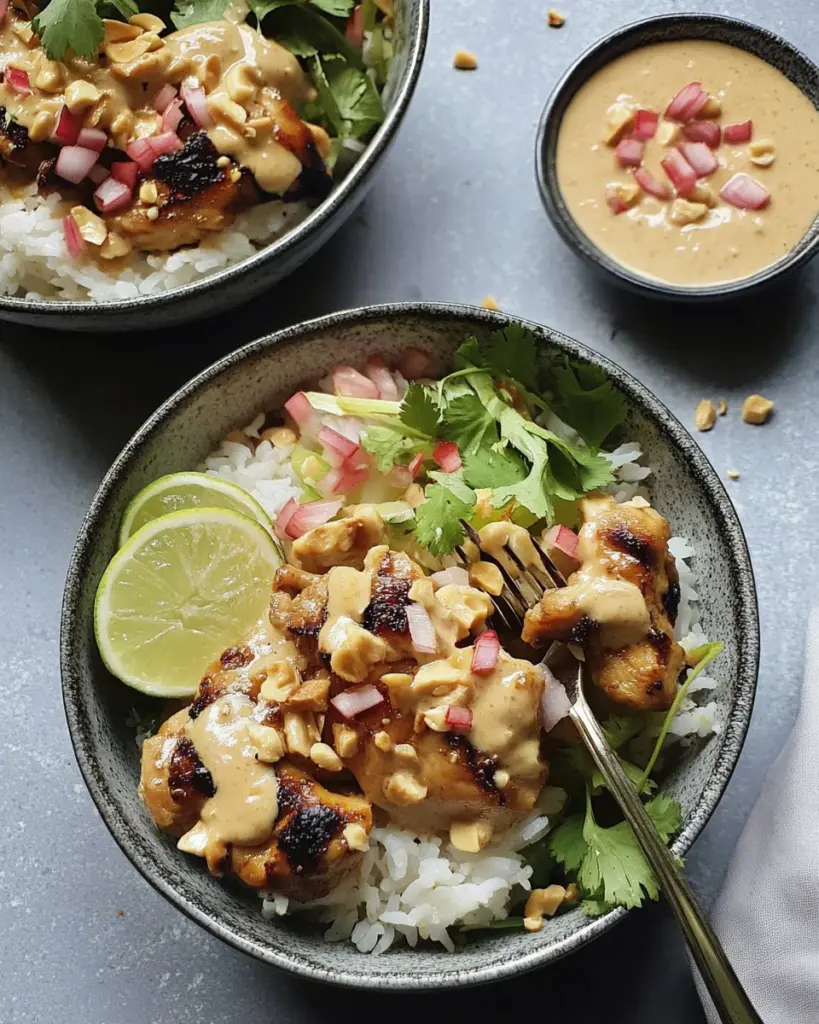
Chicken Satay Rice Bowls Recipe is a must-try dish!

Introduction to Chicken Satay Rice Bowls Recipe

Are you looking for a delicious and easy meal that brings a taste of Southeast Asia to your kitchen? Look no further than the Chicken Satay Rice Bowls Recipe! This dish combines tender chicken marinated in a rich, flavorful satay sauce, served over fluffy jasmine rice. It’s not just a meal; it’s an experience that tantalizes your taste buds.

What Makes Chicken Satay Rice Bowls Special?

What sets Chicken Satay Rice Bowls apart is the perfect blend of flavors and textures. The marinated chicken is juicy and packed with a savory-sweet taste, thanks to the peanut butter, honey, and lime juice. The crunch of fresh vegetables like cucumber and carrots adds a refreshing contrast, making each bite exciting.

Moreover, this recipe is versatile. You can easily customize it to suit your dietary preferences. Whether you’re a meat lover or a vegetarian, there’s a way to make this dish work for you. Plus, it’s a great option for meal prep, allowing you to enjoy a healthy and satisfying meal throughout the week.

In addition, the vibrant colors of the ingredients make the dish visually appealing. It’s not just about eating; it’s about enjoying a feast for the eyes as well. So, gather your ingredients and get ready to create a delightful Chicken Satay Rice Bowl that will impress your family and friends!

Ingredients for Chicken Satay Rice Bowls Recipe

To create the mouthwatering Chicken Satay Rice Bowls, you’ll need a selection of fresh ingredients that come together to form a delightful meal. Here’s what you’ll need:

  • 2 cups cooked jasmine rice
  • 1 pound boneless, skinless chicken thighs
  • 1/4 cup peanut butter
  • 2 tablespoons soy sauce
  • 2 tablespoons honey
  • 2 tablespoons lime juice
  • 1 tablespoon sesame oil
  • 2 cloves garlic, minced
  • 1 teaspoon ground ginger
  • 1/2 teaspoon red pepper flakes (optional)
  • 1 cup cucumber, sliced
  • 1 cup carrots, shredded
  • 1/4 cup chopped fresh cilantro
  • 1/4 cup chopped peanuts (for garnish)
  • Lime wedges (for serving)

These ingredients not only provide a burst of flavor but also contribute to a balanced meal. The jasmine rice serves as a fluffy base, while the chicken thighs soak up the delicious marinade. The peanut butter adds creaminess, and the fresh vegetables bring crunch and color. Don’t forget the lime wedges; they add a zesty kick that elevates the dish!

Feel free to adjust the ingredients based on your preferences. For instance, if you love a bit of heat, you can increase the red pepper flakes. Or, if you prefer a sweeter taste, add a touch more honey. The beauty of this Chicken Satay Rice Bowls Recipe lies in its flexibility, allowing you to make it your own!

Step-by-Step Preparation of Chicken Satay Rice Bowls Recipe

Now that you have all your ingredients ready, it’s time to dive into the preparation of your Chicken Satay Rice Bowls. This step-by-step guide will help you create a delicious meal that’s sure to impress. Let’s get started!

Step 1: Marinating the Chicken

First, you’ll want to marinate the chicken. This step is crucial for infusing flavor into the meat. Begin by cutting the boneless, skinless chicken thighs into bite-sized pieces. Place them in a medium bowl. Next, take your prepared satay sauce, which we’ll make in the next step, and pour it over the chicken. Make sure every piece is well-coated.

Once the chicken is coated, cover the bowl with plastic wrap or a lid. Let it marinate for at least 30 minutes. If you have more time, marinating for up to 2 hours in the refrigerator will enhance the flavor even more. This waiting period allows the chicken to absorb all those delicious flavors!

Step 2: Preparing the Satay Sauce

While the chicken is marinating, it’s time to prepare the satay sauce. In a separate bowl, combine the peanut butter, soy sauce, honey, lime juice, sesame oil, minced garlic, ground ginger, and red pepper flakes (if using). Whisk these ingredients together until the mixture is smooth and creamy.

This sauce is the heart of your Chicken Satay Rice Bowls. The combination of sweet, savory, and tangy flavors will make your dish truly special. Set the sauce aside for now, as it will be used to cook the chicken later.

Step 3: Cooking the Chicken

Once the chicken has marinated, it’s time to cook it. Heat a large skillet or grill pan over medium-high heat. Add a splash of oil if needed to prevent sticking. When the pan is hot, add the marinated chicken pieces. Cook for about 5-7 minutes, stirring occasionally.

As the chicken cooks, it will turn golden brown and become tender. Make sure it’s cooked through, with no pink remaining in the center. The aroma of the satay sauce will fill your kitchen, making it hard to resist tasting a piece!

Step 4: Assembling the Rice Bowls

Now comes the fun part—assembling your Chicken Satay Rice Bowls! Start by dividing the cooked jasmine rice among four bowls. This fluffy rice will serve as the perfect base for your dish.

Next, top each bowl with the cooked chicken. Then, add the sliced cucumber and shredded carrots for a fresh crunch. Finally, sprinkle chopped cilantro and peanuts on top for added flavor and texture.

Don’t forget to serve lime wedges on the side. A squeeze of lime juice over the top will brighten the flavors even more. Your Chicken Satay Rice Bowls are now ready to be enjoyed!

Variations of Chicken Satay Rice Bowls Recipe

While the traditional Chicken Satay Rice Bowls are delicious, there are many ways to switch things up! Whether you’re looking for vegetarian options or different protein choices, these variations will keep your meals exciting and flavorful.

Vegetarian Options

If you’re a vegetarian or simply want to try something different, you can easily adapt this recipe. One great option is to substitute the chicken with tofu or tempeh. Both of these ingredients absorb flavors well, making them perfect for marinating.

To prepare tofu, press it to remove excess moisture, then cut it into cubes. Marinate the tofu just like you would the chicken. For tempeh, slice it thinly and marinate as well. When cooking, sauté the tofu or tempeh in the same way as the chicken until golden brown. You’ll still enjoy that rich satay flavor!

Additionally, you can add more vegetables to your bowls. Consider using bell peppers, snap peas, or even roasted sweet potatoes. These additions not only enhance the flavor but also boost the nutritional value of your meal.

Different Protein Choices

If you’re not in the mood for chicken, there are plenty of other protein options to explore. Shrimp is a fantastic alternative. Simply marinate the shrimp in the same satay sauce and cook them for just a few minutes until they turn pink and opaque.

Another option is beef. Thinly slice flank steak or sirloin, marinate it, and then grill or sauté it until cooked to your liking. The rich flavors of the beef pair wonderfully with the satay sauce.

For a lighter option, consider using fish like salmon or tilapia. These proteins cook quickly and can be marinated for a short time. Just be careful not to overcook them, as they can become dry.

With these variations, you can enjoy Chicken Satay Rice Bowls in many different ways. Each option brings its own unique taste and texture, ensuring that you never get bored of this delightful dish!

Cooking Note for Chicken Satay Rice Bowls Recipe

When preparing your Chicken Satay Rice Bowls, there are a few cooking notes to keep in mind to ensure the best results. First, always use fresh ingredients. Fresh vegetables and high-quality chicken will enhance the overall flavor of your dish. If possible, choose organic produce and free-range chicken for a healthier meal.

Next, pay attention to the marinating time. While 30 minutes is the minimum, allowing the chicken to marinate for up to 2 hours will deepen the flavors. If you have the time, consider marinating overnight in the refrigerator. This will make the chicken even more tender and flavorful.

When cooking the chicken, make sure your skillet or grill pan is hot before adding the meat. This helps to sear the chicken, locking in moisture and creating a delicious golden crust. Avoid overcrowding the pan, as this can cause the chicken to steam instead of sear. If you have a lot of chicken, cook it in batches.

Lastly, feel free to adjust the cooking time based on the size of your chicken pieces. Smaller pieces will cook faster, while larger ones may need a bit more time. Always check that the internal temperature reaches 165°F (75°C) to ensure it’s safe to eat.

By following these cooking notes, you’ll create Chicken Satay Rice Bowls that are not only delicious but also visually appealing. Enjoy the process and savor the delightful flavors that come together in this wonderful dish!

Serving Suggestions for Chicken Satay Rice Bowls Recipe

When it comes to serving your Chicken Satay Rice Bowls, presentation is key! A well-served dish not only looks appealing but also enhances the dining experience. Here are some delightful serving suggestions to elevate your meal:

  • Garnish Generously: After assembling your bowls, don’t forget to sprinkle extra chopped peanuts and fresh cilantro on top. This adds a pop of color and a burst of flavor that will impress your guests.
  • Colorful Plates: Use vibrant, colorful bowls or plates to serve your Chicken Satay Rice Bowls. The bright colors of the ingredients will stand out beautifully against a contrasting background.
  • Side Dishes: Consider serving your bowls with a side of Asian-inspired slaw or a light cucumber salad. These sides complement the flavors of the satay and add extra crunch.
  • Extra Lime: Place lime wedges on each plate. A squeeze of fresh lime juice right before eating brightens the flavors and adds a refreshing zing.
  • Chili Sauce: For those who enjoy a bit of heat, offer a side of chili sauce or sriracha. This allows everyone to customize their spice level according to their taste.
  • Rice Variations: While jasmine rice is traditional, you can also serve the satay over brown rice, quinoa, or cauliflower rice for a healthier twist.

These serving suggestions will not only make your Chicken Satay Rice Bowls look appetizing but also enhance the overall dining experience. Enjoy sharing this delightful dish with family and friends, and watch as they savor every bite!

Tips for Perfect Chicken Satay Rice Bowls Recipe

Creating the perfect Chicken Satay Rice Bowls is all about attention to detail. Here are some helpful tips to ensure your dish turns out delicious every time:

  • Choose Quality Ingredients: Start with fresh, high-quality chicken and vegetables. Organic options can enhance flavor and nutrition.
  • Marinate Longer: For the best flavor, marinate the chicken for at least 1 hour. If you can, let it sit overnight. This allows the flavors to penetrate deeply.
  • Don’t Rush the Cooking: Cook the chicken over medium-high heat. This helps achieve a nice sear while keeping the meat juicy. Avoid cooking on too high heat, as it can burn the marinade.
  • Use a Meat Thermometer: To ensure your chicken is perfectly cooked, use a meat thermometer. The internal temperature should reach 165°F (75°C).
  • Customize Your Veggies: Feel free to add or substitute vegetables based on your preferences. Bell peppers, snap peas, or even broccoli can add great flavor and texture.
  • Serve Immediately: For the best taste and texture, serve the bowls right after assembling. This keeps the rice fluffy and the veggies crisp.
  • Experiment with Toppings: Don’t hesitate to try different toppings. Sesame seeds, sliced green onions, or even a drizzle of extra satay sauce can elevate your dish.
  • Make It a Meal Prep: These bowls are perfect for meal prep. Prepare the chicken and rice in advance, and assemble the bowls when you’re ready to eat.

By following these tips, you’ll create Chicken Satay Rice Bowls that are not only flavorful but also visually stunning. Enjoy the process and the delightful results!

Breakdown of Time for Chicken Satay Rice Bowls Recipe

Understanding the time needed for each step in the Chicken Satay Rice Bowls Recipe can help you plan your cooking efficiently. Here’s a breakdown of the time required for preparation and cooking:

Prep Time

The prep time for this recipe is approximately 15-20 minutes. This includes gathering your ingredients, cutting the chicken, and preparing the marinade. If you choose to chop your vegetables in advance, it can save you even more time when you’re ready to assemble the bowls.

Cooking Time

Cooking the Chicken Satay Rice Bowls takes about 15-20 minutes. This includes marinating the chicken for at least 30 minutes, but you can extend this time for deeper flavor. Once marinated, cooking the chicken in a skillet or grill pan will take around 5-7 minutes. The jasmine rice typically cooks in about 15 minutes, so you can prepare it simultaneously.

Total Time

In total, you can expect the Chicken Satay Rice Bowls Recipe to take about 1 hour from start to finish. This includes the marinating time, prep, and cooking. If you plan to marinate the chicken longer, such as overnight, you can enjoy a flavorful meal with minimal effort on the day of cooking!

By keeping track of these time frames, you can easily fit this delicious meal into your busy schedule. Enjoy the process and the delightful flavors of your Chicken Satay Rice Bowls!

Nutritional Information for Chicken Satay Rice Bowls Recipe

Understanding the nutritional content of your meals is essential for maintaining a balanced diet. The Chicken Satay Rice Bowls Recipe not only offers delicious flavors but also provides a good mix of nutrients. Here’s a breakdown of the nutritional information per serving:

Calories

Each serving of Chicken Satay Rice Bowls contains approximately 480 calories. This makes it a satisfying meal that can fit well into a balanced diet. The calories come from a combination of protein, healthy fats, and carbohydrates, providing energy for your day.

Protein

With about 28 grams of protein per serving, this dish is an excellent source of this essential nutrient. Protein is vital for muscle repair and growth, making it especially important for active individuals. The chicken thighs contribute significantly to the protein content, ensuring you feel full and satisfied.

Sodium

The sodium content in Chicken Satay Rice Bowls is around 800 milligrams per serving. While this is a moderate amount, it’s important to be mindful of your overall sodium intake throughout the day. You can reduce the sodium level by using low-sodium soy sauce or adjusting the amount of sauce used in the recipe.

Overall, the Chicken Satay Rice Bowls Recipe provides a well-rounded meal that is not only tasty but also nutritious. By being aware of the nutritional information, you can enjoy this dish while keeping your dietary goals in mind!

FAQs about Chicken Satay Rice Bowls Recipe

Can I make Chicken Satay Rice Bowls ahead of time?

Absolutely! You can prepare Chicken Satay Rice Bowls ahead of time, making them perfect for meal prep. To do this, marinate the chicken and cook it as directed. Once cooked, let the chicken cool before storing it in an airtight container in the refrigerator. You can also cook the jasmine rice in advance and store it separately.

When you’re ready to enjoy your meal, simply reheat the chicken and rice in the microwave or on the stovetop. Add fresh vegetables like cucumber and carrots just before serving to keep them crisp. This way, you’ll have a delicious and convenient meal ready to go!

What can I substitute for chicken in this recipe?

If you’re looking for alternatives to chicken, there are plenty of options! For a vegetarian version, tofu or tempeh works wonderfully. Both absorb flavors well and can be marinated just like chicken. If you prefer seafood, shrimp is a fantastic choice. Simply marinate and cook them for a few minutes until they turn pink.

For those who enjoy beef, thinly sliced flank steak or sirloin can be used. Just marinate and cook until your desired doneness. You can even try fish like salmon or tilapia for a lighter option. Each of these substitutes will bring a unique flavor to your Chicken Satay Rice Bowls!

How do I store leftovers of Chicken Satay Rice Bowls?

Storing leftovers of Chicken Satay Rice Bowls is easy! Place any remaining chicken, rice, and vegetables in separate airtight containers. This helps maintain the freshness and texture of each component. Store them in the refrigerator for up to 3 days.

When you’re ready to eat, reheat the chicken and rice in the microwave or on the stovetop. Add fresh vegetables just before serving to keep them crunchy. If you find the rice has dried out, a splash of water or broth can help revive it. Enjoy your delicious leftovers!

Conclusion on Chicken Satay Rice Bowls Recipe

In conclusion, the Chicken Satay Rice Bowls Recipe is a delightful dish that brings together a medley of flavors and textures. With its tender chicken marinated in a rich satay sauce, served over fluffy jasmine rice, this meal is not only satisfying but also visually appealing. The combination of fresh vegetables adds a refreshing crunch, making each bite a joy.

This recipe is incredibly versatile, allowing you to customize it to fit your dietary preferences. Whether you choose to stick with chicken, opt for tofu, or even try shrimp, the satay sauce will elevate the dish to new heights. Plus, the vibrant colors of the ingredients make it a feast for the eyes as well as the palate.

Moreover, the Chicken Satay Rice Bowls are perfect for meal prep. You can prepare the components in advance, making it easy to enjoy a healthy and delicious meal throughout the week. With just a little planning, you can have this delightful dish ready to go whenever hunger strikes.

So, gather your ingredients, follow the steps, and enjoy the process of creating this wonderful meal. Your family and friends will surely be impressed, and you’ll find yourself making this recipe time and time again. Happy cooking!

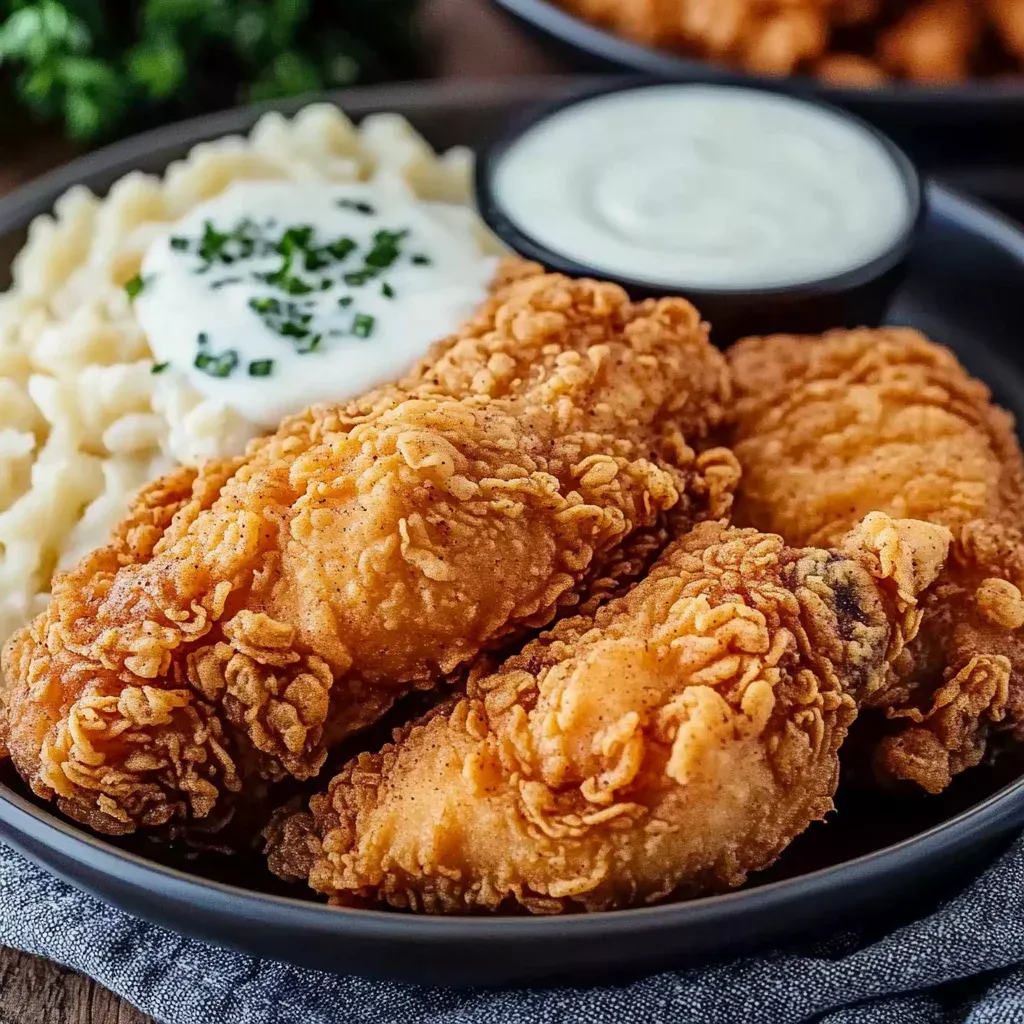
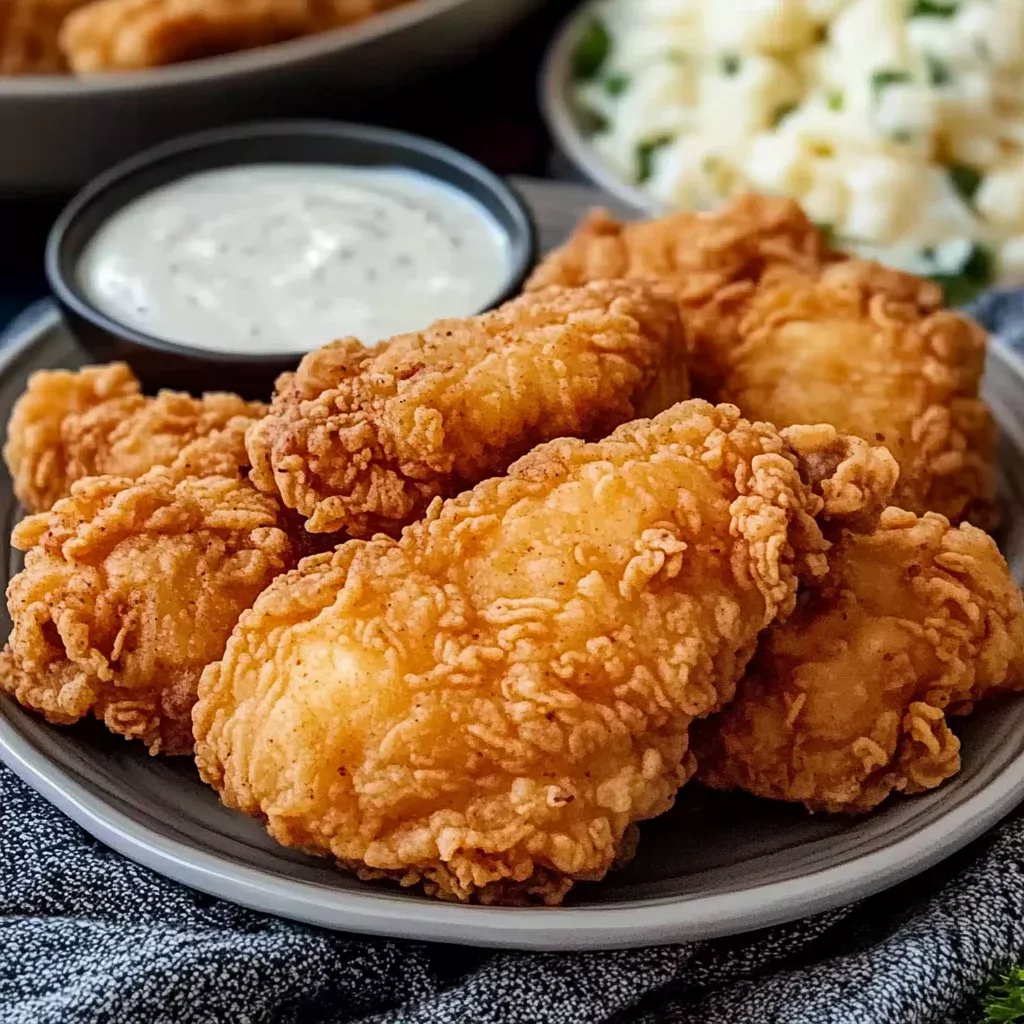
Crispy Southern Fried Chicken: Ultimate Recipe Revealed!

Introduction to Crispy Southern Fried Chicken

Ah, the irresistible allure of Crispy Southern Fried Chicken! Just the thought of it brings back memories of family gatherings and Sunday dinners. If you’re like me, juggling a busy schedule while trying to whip up something delicious, this recipe is your golden ticket. It’s the perfect blend of ease and flavor, making it a quick solution for those hectic days. Imagine biting into that crunchy coating, with a burst of spices that dance on your taste buds. Whether you’re impressing guests or treating yourself, this dish is sure to become a beloved staple in your kitchen.

Why You’ll Love This Crispy Southern Fried Chicken

This Crispy Southern Fried Chicken is a game-changer for busy moms and professionals alike. It’s not just about the taste—though that’s a winner, too! The ease of preparation and the speed at which it comes together make it a lifesaver on those whirlwind days. Plus, the satisfying crunch and juicy interior will have your family begging for seconds. It’s comfort food at its finest!

Ingredients for Crispy Southern Fried Chicken

Let’s dive into the heart of this Crispy Southern Fried Chicken recipe. Each ingredient plays a crucial role in creating that perfect bite. First, you’ll need chicken pieces—legs, thighs, or breasts work beautifully. Buttermilk is essential for tenderizing the meat, while a splash of hot sauce adds a subtle kick. The flour forms the crispy coating, and spices like paprika, garlic, and onion powder bring depth of flavor. A pinch of salt and pepper enhances everything, and a dash of cayenne pepper is optional for those who love extra heat. Finally, vegetable oil is your frying partner. For exact measurements, scroll to the bottom of the article where you can print the full recipe.

How to Make Crispy Southern Fried Chicken

Marinate the Chicken

Start by giving your chicken a luxurious bath in buttermilk. This step is crucial for tender, juicy meat. In a large bowl, mix the buttermilk with a dash of hot sauce if you like a little zing. Submerge the chicken pieces completely, cover, and let them soak in the fridge for at least four hours. If you can, leave them overnight. Trust me, patience here pays off with flavor-packed, succulent chicken.

Prepare the Coating

While your chicken is marinating, let’s get the coating ready. In a separate bowl, combine the flour with paprika, garlic powder, onion powder, salt, and black pepper. For those who enjoy a spicy kick, add a sprinkle of cayenne pepper. This blend of spices is what gives our fried chicken its signature Southern flair. Once mixed, set it aside until you’re ready to dredge the chicken.

Fry the Chicken

Now, it’s time to fry! Heat about an inch of vegetable oil in a large skillet or Dutch oven over medium-high heat. Aim for a temperature of 350°F. Take the chicken out of the buttermilk, letting the excess drip off. Dredge each piece in the flour mixture, pressing gently to ensure it sticks. Shake off any extra flour. Carefully place the chicken in the hot oil, frying in batches to avoid overcrowding. Cook each side for 12-15 minutes until golden brown and the internal temperature hits 165°F.

Rest and Serve

Once your chicken is perfectly fried, transfer it to a wire rack or paper towels to drain any excess oil. Let it rest for about five minutes. This short wait allows the juices to redistribute, ensuring every bite is as juicy as the last. Serve your crispy Southern fried chicken hot, and watch as it disappears from the plate in no time. Enjoy the crunch and savor the flavors!

Tips for Success

  • Ensure the oil is hot enough before frying; a thermometer is your best friend here.
  • Don’t overcrowd the pan; it lowers the oil temperature and affects crispiness.
  • Double-dip for extra crunch: flour, buttermilk, then flour again.
  • Let the chicken rest on a wire rack to keep it crispy.
  • Experiment with spices to find your perfect flavor blend.

Equipment Needed

  • Large bowl for marinating the chicken; a zip-top bag works too.
  • Mixing bowl for the flour and spices.
  • Deep skillet or Dutch oven for frying; a heavy-bottomed pot is a great alternative.
  • Wire rack for draining; paper towels can substitute in a pinch.
  • Meat thermometer to ensure perfect doneness.

Variations

  • For a gluten-free version, swap the all-purpose flour with a gluten-free flour blend.
  • Try using boneless chicken tenders for a quicker cooking time and kid-friendly option.
  • For a smoky twist, add a teaspoon of smoked paprika to the flour mixture.
  • Experiment with different oils like peanut or canola for a unique flavor profile.
  • For a healthier take, bake the chicken at 400°F for 25-30 minutes instead of frying.

Serving Suggestions

  • Pair with creamy mashed potatoes and gravy for a classic Southern meal.
  • Serve alongside a fresh coleslaw to add a crunchy, tangy contrast.
  • Complement with a chilled glass of sweet iced tea or lemonade.
  • Garnish with fresh parsley for a pop of color and freshness.
  • For a picnic vibe, add cornbread and a side of baked beans.

FAQs about Crispy Southern Fried Chicken

How do I ensure my fried chicken stays crispy?

To keep your Crispy Southern Fried Chicken crunchy, make sure the oil is hot enough before frying. Use a thermometer to maintain a steady 350°F. After frying, let the chicken rest on a wire rack instead of paper towels to prevent sogginess.

Can I make this recipe ahead of time?

Absolutely! You can marinate the chicken in buttermilk up to a day in advance. For the best crunch, fry the chicken just before serving. If you need to reheat, use an oven at 350°F to maintain crispiness.

What’s the best oil for frying Southern fried chicken?

Vegetable oil is a great choice for frying Southern fried chicken due to its high smoke point and neutral flavor. You can also use peanut or canola oil for a slightly different taste.

Can I use an air fryer for this recipe?

Yes, you can adapt this recipe for an air fryer. Preheat the air fryer to 375°F, and cook the chicken in batches for about 25 minutes, flipping halfway through. It won’t be quite the same, but it’s a healthier alternative.

What can I do with leftover fried chicken?

Leftover Crispy Southern Fried Chicken can be repurposed into delicious sandwiches or salads. Simply reheat in the oven to restore some of the crispiness, and enjoy!

Final Thoughts

There’s something truly magical about Crispy Southern Fried Chicken. It’s more than just a meal; it’s an experience that brings warmth and joy to the table. The satisfying crunch, the tender, juicy meat, and the symphony of spices create a dish that’s both comforting and indulgent. Whether you’re sharing it with family or savoring it solo, this recipe is a testament to the power of good food to bring people together. So, roll up your sleeves, embrace the process, and let this Southern classic become a cherished part of your culinary repertoire. Happy cooking!

Crispy Southern Fried Chicken
Paul

Crispy Southern Fried Chicken: Ultimate Recipe Revealed!

This recipe for Crispy Southern Fried Chicken provides a delicious and crunchy coating with a flavorful blend of spices, perfect for a classic Southern meal.
Prep Time 4 hours
Cook Time 30 minutes
Total Time 4 hours 30 minutes
Course: Main Course
Cuisine: Southern
Calories: 400

Ingredients
  

  • 3 pounds of chicken pieces legs, thighs, breasts, or a mix
  • 2 cups buttermilk
  • 2 teaspoons hot sauce optional
  • 2 cups all-purpose flour
  • 1 tablespoon paprika
  • 1 teaspoon garlic powder
  • 1 teaspoon onion powder
  • 1 teaspoon salt
  • 1/2 teaspoon black pepper
  • 1/2 teaspoon cayenne pepper optional for extra heat
  • Vegetable oil for frying

Method
 

  1. In a large bowl, combine the buttermilk and hot sauce. Add the chicken pieces, ensuring they are fully submerged. Cover and refrigerate for at least 4 hours, or overnight for best results.
  2. In a separate bowl, mix together the flour, paprika, garlic powder, onion powder, salt, black pepper, and cayenne pepper.
  3. Remove the chicken from the buttermilk, allowing excess to drip off. Dredge each piece in the flour mixture, pressing lightly to adhere the coating. Shake off any excess flour.
  4. In a large, deep skillet or Dutch oven, heat about 1 inch of vegetable oil over medium-high heat until it reaches 350°F.
  5. Carefully add the chicken pieces to the hot oil, working in batches to avoid overcrowding. Fry for 12-15 minutes per side, or until the chicken is golden brown and cooked through (internal temperature should reach 165°F).
  6. Once cooked, transfer the chicken to a wire rack or paper towels to drain excess oil. Let it rest for 5 minutes before serving.

Notes

  • For extra crunch, double-dip the chicken by returning it to the buttermilk after the first flour coating and then dredging it in flour again.
  • Try adding different spices to the flour mixture, such as dried thyme or oregano, for a unique flavor twist.

Blackberry Bliss Mousse Recipe is a must-try dessert!

A Taste That Brings Time to a Standstill

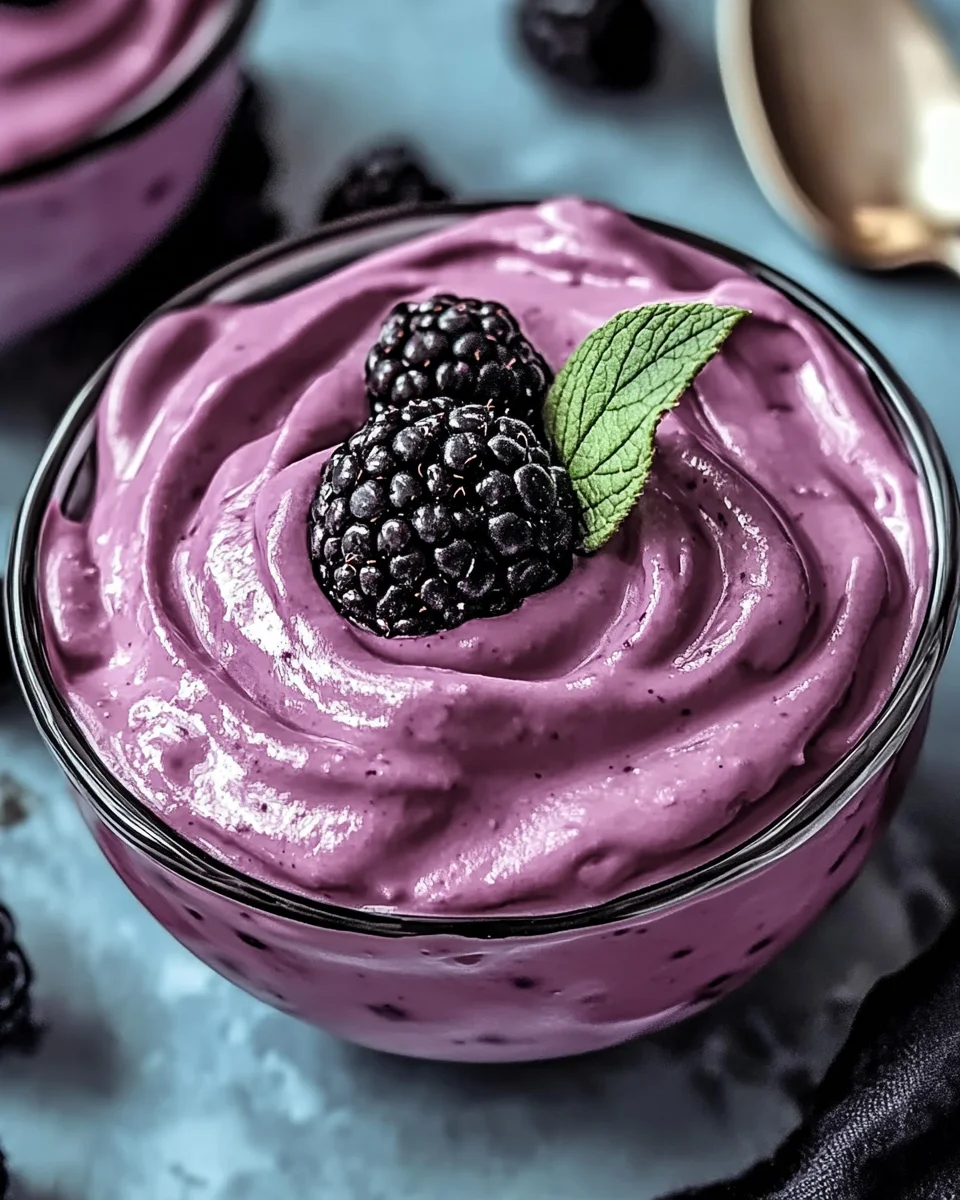
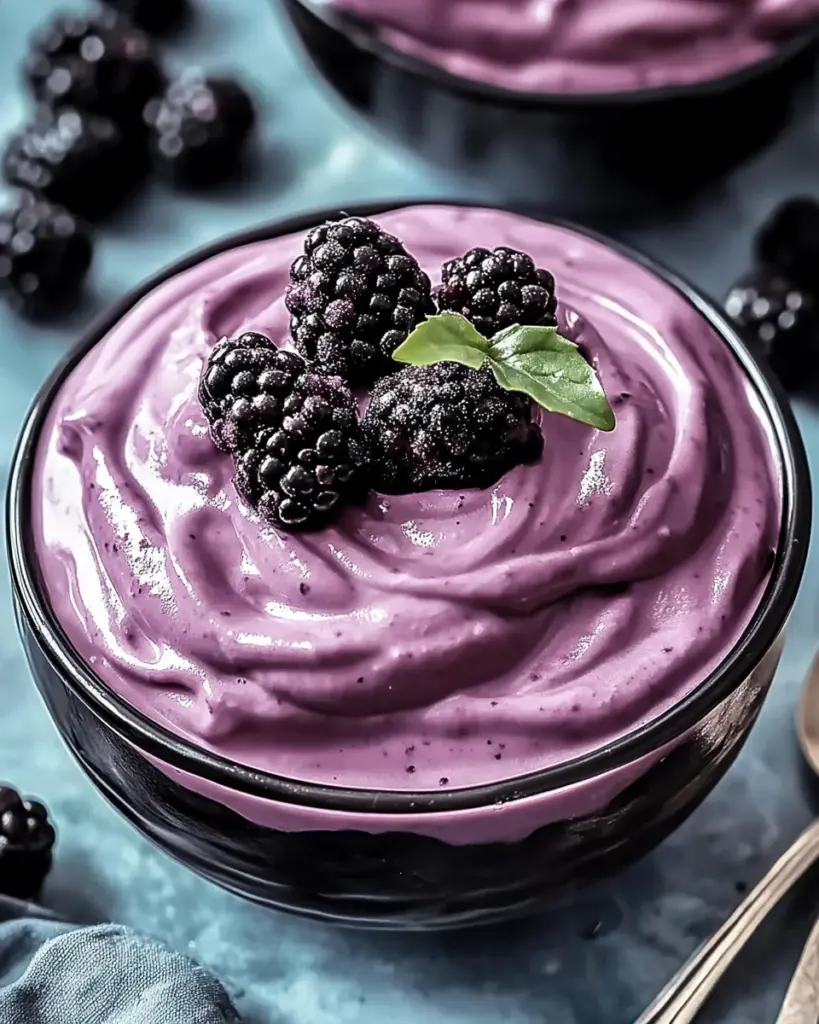
Some recipes are more than a list of ingredients. They’re memories—stitched together with flavor, scent, and stories that live in the quiet corners of our hearts. I still remember the sun-warmed blackberry bushes behind my grandmother’s garden, their vines climbing wildly, like nature was trying to reclaim the sky. As a child, I would spend what felt like hours under their shade, fingers stained purple, basket half-empty because I couldn’t resist sneaking a few with each pick.

My grandmother had this way of turning the simplest ingredients into something unforgettable. Her blackberry mousse wasn’t just dessert—it was summer in a spoon. Light, velvety, and somehow both indulgent and refreshing, it would melt on the tongue like a soft breeze on a July evening. Years later, I’ve recreated that mousse in my own kitchen, each batch a bridge to those golden afternoons.

That’s the essence of Blackberry Bliss Mousse. It’s not just a dish—it’s an experience.

The Allure of Blackberry Mousse

Why does this mousse hold such timeless appeal? Because it speaks to all the senses. Visually, the rich lavender hue hints at something special even before the first bite. Its aroma—bright, fruity, kissed by lemon—draws you in. But it’s the texture that seals the deal: airy, smooth, a featherlight indulgence that dances across your tongue.

It’s the kind of dessert that manages to be elegant and approachable. Sophisticated enough for a dinner party, yet simple enough to whip up on a quiet Sunday afternoon. It carries a rustic charm but plates like something you’d find in a patisserie.

And blackberries themselves are little miracles—earthy, sweet, tart, and complex. They balance beautifully against the richness of whipped cream, while lemon brings the brightness and sugar smooths out the sharp edges. It’s a harmony of contrasts that somehow feels effortless.

Beyond the Basics: Creative Twists and Serving Ideas

One of the most delightful things about Blackberry Bliss Mousse is how adaptable it is. While it shines on its own, you can elevate it—or reinvent it entirely—depending on the occasion or your mood.

1. Layer It Up

Create a stunning parfait by alternating layers of mousse with crushed graham crackers, shortbread cookies, or even vanilla cake crumbs. The texture contrast adds depth, and visually, it’s a showstopper.

2. Garnish with Flair

A sprig of mint adds freshness. A sprinkle of lemon zest offers a burst of citrus. A drizzle of dark or white chocolate brings richness. Play with color and contrast to match the theme of your meal.

3. Serve It Chilled… and Unexpected

Present it in vintage teacups, mini glass jars, or champagne flutes. Hosting a summer brunch? Pair it with a chilled glass of rosé. Looking for a wintery variation? Try a touch of cinnamon or nutmeg folded into the purée.

4. Explore Flavor Variants

This recipe is a springboard. Try it with raspberries for a brighter bite, blueberries for a deeper flavor, or a mix of all three for a “berry medley mousse.” Want to push boundaries? Add a splash of Chambord or crème de cassis to the purée before folding.

Storage & Make-Ahead Tips

Blackberry mousse is incredibly convenient for entertaining or prepping ahead of time. But to preserve its delicate texture and flavor, a few best practices go a long way.

  • Refrigeration: It keeps beautifully in the fridge for up to 48 hours. Cover the containers with plastic wrap or airtight lids to maintain freshness and prevent absorption of fridge odors.
  • Freezing? Not so much. The mousse’s light structure doesn’t handle freezing well—ice crystals form, and the texture breaks down when thawed. If you need a frozen treat, consider turning it into a semifreddo instead.
  • Fluffing Before Serving: If the mousse has settled or deflated slightly after chilling, a gentle stir with a spoon or whisk can help revive some of its airiness. Be careful not to overmix.
  • Garnish Last Minute: Always wait until right before serving to add berries, chocolate, or herbs—this keeps everything vibrant and crisp.

Here’s the recipe from “Blackberry Bliss: A Mousse That Tastes Like Summer” presented in your requested format, with creative section titles:

Berry Beautiful: Ingredients You’ll Need

  • 2 cups fresh blackberries (plus extra for garnish)
  • ½ cup granulated sugar
  • 1 tablespoon lemon juice
  • 1½ cups heavy cream (chilled)
  • 1 teaspoon vanilla extract
  • 2 tablespoons powdered sugar
  • Fresh mint leaves (optional, for garnish)

Whip It to Bliss: Step-by-Step Directions

1. Blackberry Purée Magic

  • In a saucepan over medium heat, combine blackberries, granulated sugar, and lemon juice.
  • Cook for 5–7 minutes, stirring occasionally, until the berries soften and release juices.
  • Blend the mixture until smooth, then strain through a fine mesh sieve to remove seeds.
  • Let it cool to room temperature.

2. Cloud-Like Cream

  • In a mixing bowl, whip the chilled heavy cream until soft peaks form.
  • Add vanilla extract and powdered sugar. Continue beating until stiff peaks form.

3. Bringing It All Together

  • Gently fold the cooled blackberry purée into the whipped cream, keeping the texture airy.
  • Spoon the mousse into serving glasses or bowls.

4. Chill & Thrill

  • Refrigerate for at least 2 hours to let it set.
  • Garnish with fresh blackberries and mint leaves just before serving.

Nutrition in a Spoon: Per Serving

  • Calories: 260
  • Total Fat: 18g
  • Carbohydrates: 23g
  • Protein: 2g
  • Fiber: 3g

Frequently Asked Questions

Can I use frozen blackberries?

Absolutely. Frozen blackberries work well—just thaw them fully and drain off any excess liquid before cooking them down. You may need a touch more sugar depending on how tart they are.

How can I make this mousse dairy-free?

Try using chilled coconut cream in place of heavy cream. It whips up similarly and adds a subtle tropical note that complements the berries beautifully. There are also several plant-based whipping creams available that hold their structure well.

Is this recipe gluten-free?

Yes! The base mousse is entirely gluten-free. Just be cautious with any toppings or layers you add—stick to gluten-free cookies or cake if needed.

How do I adjust the sweetness?

Taste your blackberries first. If they’re very tart, add 1–2 tablespoons more sugar when making the purée. If they’re super sweet, you can reduce the sugar slightly or leave it as-is for contrast.

What can I pair this with for a full dessert spread?

Think light and crisp: biscotti, vanilla wafers, or almond thins work beautifully. For a romantic evening, serve alongside a sparkling rosé or a splash of dessert wine. For a garden brunch, complement it with lemon tarts or fruit salad.

Can I make this mousse ahead for a dinner party?

Definitely! In fact, it’s ideal. Make it the day before, store it in individual serving cups, and chill. Add toppings just before guests arrive, and you’re golden.

What other berries work in this recipe?

Raspberries are a classic swap, bringing a more intense tartness. Strawberries yield a sweeter, more mellow mousse. Blueberries add richness and a gorgeous deep color. You can even combine all three for a “forest fruit” twist.

The Emotional Undercurrent of Homemade Desserts

Food does more than nourish the body—it connects us to people and places, to laughter and love. This mousse might be quick to make, but it lingers long after the spoon is set down. Every bite carries the warmth of summer, the joy of a shared table, and the quiet intimacy of tradition.

Making Blackberry Bliss Mousse is more than following a recipe. It’s recreating a moment. It’s the giggle of a child sneaking an extra spoonful, the smile of a partner savoring something sweet you made just for them, the silent thanks you whisper to generations past for teaching you how to create love from simple things.

Conclusion: A Blissful End to Any Meal

There’s a reason this mousse has earned its place in both my recipe box and my heart. It’s proof that simplicity can be luxurious, that fruit can be decadent, and that dessert can be both a celebration and a comfort.

So the next time blackberries are in season—or even if they’re waiting in the freezer—let them remind you of sunlit days and stories worth sharing. Whip up a batch of Blackberry Bliss Mousse, serve it with love, and let it carry you (and your guests) to a place where time slows down and every spoonful matters.

Because sometimes, the most unforgettable dishes are the ones that remind us who we are and where we’ve been.

Garlic Parmesan Cheeseburger Bombs Recipe is a must-try!

Introduction to Garlic Parmesan Cheeseburger Bombs Recipe

What Are Garlic Parmesan Cheeseburger Bombs?

Garlic Parmesan Cheeseburger Bombs are a delightful twist on traditional cheeseburgers. Imagine juicy ground beef mixed with savory garlic and rich cheeses, all wrapped in a soft, buttery biscuit. These tasty bites are perfect for parties, game days, or a cozy family dinner. Each bomb is packed with flavor, making them a hit with both kids and adults alike. Plus, they’re easy to make, which means you can whip them up in no time!

Why You’ll Love This Recipe

There are many reasons to love this Garlic Parmesan Cheeseburger Bombs recipe. First, it combines the classic flavors of a cheeseburger with the fun of a finger food. Second, the recipe is simple and quick, making it perfect for busy weeknights. You can even customize the filling to suit your taste. Want a little heat? Add some red pepper flakes! Prefer a vegetarian option? Swap the beef for your favorite veggies. The possibilities are endless!

Moreover, these bombs are not just delicious; they are also satisfying. Each bite is a burst of cheesy goodness, complemented by the garlic flavor. Serve them with your favorite dipping sauce, and you have a meal that everyone will enjoy. So, gather your ingredients and get ready to impress your family and friends with this scrumptious treat!

Ingredients for Garlic Parmesan Cheeseburger Bombs Recipe

To create these mouthwatering Garlic Parmesan Cheeseburger Bombs, you’ll need a few simple ingredients. Each one plays a vital role in delivering that delicious flavor and texture. Here’s what you’ll need:

  • 1 pound ground beef: This is the star of the show! Choose a good quality beef for the best taste.
  • 1 teaspoon garlic powder: Adds a rich garlic flavor that complements the beef perfectly.
  • 1 teaspoon onion powder: Enhances the overall taste with a hint of sweetness.
  • 1 teaspoon salt: Essential for bringing out the flavors in the meat.
  • 1/2 teaspoon black pepper: Adds a touch of heat and depth to the mixture.
  • 1 cup shredded cheddar cheese: This cheese melts beautifully and adds creaminess.
  • 1/2 cup grated Parmesan cheese: Provides a nutty flavor that pairs well with garlic.
  • 1 can (16 ounces) refrigerated biscuit dough: The perfect outer layer that becomes golden and flaky when baked.
  • 2 tablespoons melted butter: Used to brush on top for a rich, buttery finish.
  • 1 tablespoon chopped fresh parsley (optional): For a pop of color and freshness.
  • 1 teaspoon garlic salt: Adds an extra layer of garlic flavor to the topping.

These ingredients come together to create a delightful treat that’s sure to please everyone. Feel free to adjust the quantities based on your preferences or dietary needs. Now that you have everything ready, let’s move on to the next step of preparing these delicious bombs!

Step-by-Step Preparation of Garlic Parmesan Cheeseburger Bombs Recipe

Step 1: Preheat the Oven

First things first, you need to preheat your oven to 375°F. This step is crucial because it ensures that your Garlic Parmesan Cheeseburger Bombs bake evenly. While the oven heats up, you can prepare the other ingredients. This way, you’ll save time and have everything ready to go!

Step 2: Prepare the Beef Mixture

In a large bowl, combine the ground beef, garlic powder, onion powder, salt, and black pepper. Use your hands or a spoon to mix everything together until well combined. Make sure the spices are evenly distributed throughout the meat. Next, add the shredded cheddar cheese and half of the grated Parmesan cheese to the beef mixture. Stir until the cheese is mixed in thoroughly. This cheesy blend will make your bombs extra delicious!

Step 3: Assemble the Bombs

Now it’s time to assemble your bombs! Open the can of refrigerated biscuit dough and separate it into individual biscuits. Flatten each biscuit into a circle about 4 inches in diameter. This will create a nice pocket for your filling. Place a generous tablespoon of the beef and cheese mixture in the center of each biscuit. Carefully fold the edges of the biscuit over the filling and pinch to seal tightly. Make sure there are no gaps, or the filling might leak out while baking!

Step 4: Bake the Bombs

Once all your bombs are assembled, arrange them seam-side down on a baking sheet lined with parchment paper. This will prevent them from sticking and make cleanup easier. Now, pop the baking sheet into your preheated oven and bake for 15-20 minutes. Keep an eye on them! You want the biscuits to turn golden brown and be cooked through. The aroma will fill your kitchen, making it hard to wait!

Step 5: Add the Garlic Parmesan Topping

After baking, remove the bombs from the oven and let them cool for a few minutes. While they cool, mix the melted butter with garlic salt in a small bowl. Brush this mixture over the tops of the biscuit bombs for a rich, buttery finish. Finally, sprinkle the remaining Parmesan cheese on top for that extra cheesy goodness. If you like, you can also add a sprinkle of chopped fresh parsley for a pop of color and freshness!

Variations of Garlic Parmesan Cheeseburger Bombs Recipe

Vegetarian Option

If you’re looking for a meat-free alternative, try a vegetarian version of Garlic Parmesan Cheeseburger Bombs! Instead of ground beef, use a mix of sautéed vegetables like bell peppers, mushrooms, and zucchini. You can also add black beans or lentils for protein. Season the veggie mixture with garlic powder, onion powder, salt, and pepper just like the original recipe. Then, follow the same steps to assemble and bake your delicious vegetarian bombs. They’ll be just as tasty and satisfying!

Spicy Version

For those who love a little heat, a spicy version of Garlic Parmesan Cheeseburger Bombs is a must-try! Simply add a teaspoon of red pepper flakes to the beef mixture in Step 2. You can also mix in some diced jalapeños or hot sauce for an extra kick. This spicy twist will elevate the flavor and make your bombs a hit at any gathering. Just be sure to have some cooling dipping sauces on hand, like ranch or sour cream, to balance the heat!

Cheese Variations

Cheese lovers can have a blast experimenting with different cheese combinations in their Garlic Parmesan Cheeseburger Bombs. While cheddar and Parmesan are delicious, you can also try using mozzarella for a gooey texture or pepper jack for a spicy flavor. Mixing in some crumbled feta or blue cheese can add a unique twist as well. Feel free to get creative and combine your favorite cheeses to make these bombs even more irresistible!

Cooking Note for Garlic Parmesan Cheeseburger Bombs Recipe

When making Garlic Parmesan Cheeseburger Bombs, a few cooking notes can help ensure your dish turns out perfectly every time. First, always use fresh ingredients. Fresh ground beef and cheese will enhance the flavor and texture of your bombs. If possible, choose high-quality beef for the best taste.

Next, be mindful of the baking time. Ovens can vary, so keep an eye on your bombs as they bake. You want them to be golden brown and cooked through, but not overdone. If you notice they are browning too quickly, you can cover them loosely with aluminum foil to prevent burning.

Additionally, let the bombs cool for a few minutes after baking. This cooling time allows the filling to set slightly, making them easier to handle. If you cut into them too soon, the cheesy filling might ooze out, making a mess.

Lastly, don’t hesitate to experiment with the recipe! Cooking is all about creativity. Feel free to adjust the spices, add different toppings, or even try different types of biscuit dough. Whether you use homemade dough or store-bought, the key is to enjoy the process and have fun in the kitchen!

Serving Suggestions for Garlic Parmesan Cheeseburger Bombs Recipe

Dipping Sauces

When it comes to serving Garlic Parmesan Cheeseburger Bombs, the right dipping sauce can elevate the experience. Here are some delicious options to consider:

  • Ketchup: A classic choice that pairs perfectly with the savory flavors of the bombs. Its sweetness balances the richness of the cheese and beef.
  • Ranch Dressing: Creamy and tangy, ranch dressing adds a refreshing contrast to the warm, cheesy bombs. It’s a favorite among many!
  • Barbecue Sauce: For a smoky twist, serve your bombs with barbecue sauce. The sweet and tangy notes complement the garlic and cheese beautifully.
  • Buffalo Sauce: If you love heat, try buffalo sauce! Its spicy kick will add an exciting flavor to each bite.
  • Honey Mustard: This sweet and tangy sauce is another great option. It adds a unique flavor that pairs well with the savory bombs.

Feel free to mix and match these sauces to find your favorite combination. You can even set up a dipping station with several options for your guests to enjoy!

Side Dishes

To make your meal complete, consider serving Garlic Parmesan Cheeseburger Bombs with some tasty side dishes. Here are a few ideas:

  • French Fries: Crispy fries are a classic side that everyone loves. You can serve them plain or with a sprinkle of seasoning for extra flavor.
  • Salad: A fresh garden salad can balance the richness of the bombs. Toss together some greens, cherry tomatoes, and cucumbers for a light and refreshing side.
  • Coleslaw: Creamy coleslaw adds a crunchy texture and a tangy flavor that pairs well with the bombs.
  • Vegetable Platter: For a healthier option, serve a platter of fresh veggies with a dip. Carrots, celery, and bell peppers are great choices.
  • Potato Wedges: Seasoned potato wedges are another delicious side that complements the flavors of the bombs.

These side dishes not only enhance your meal but also provide a variety of flavors and textures. Enjoy your Garlic Parmesan Cheeseburger Bombs with these tasty accompaniments for a satisfying dining experience!

Tips for Perfect Garlic Parmesan Cheeseburger Bombs Recipe

Ingredient Substitutions

Making Garlic Parmesan Cheeseburger Bombs is all about flexibility! If you find yourself missing an ingredient, don’t worry. Here are some easy substitutions you can try:

  • Ground Beef: If you prefer a leaner option, ground turkey or chicken works well. They provide a lighter flavor while still being delicious.
  • Cheese: While cheddar and Parmesan are fantastic, feel free to swap them out. Mozzarella gives a gooey texture, while pepper jack adds a spicy kick.
  • Biscuit Dough: If you want to make your own dough, a simple homemade biscuit recipe can be used. Alternatively, crescent roll dough can add a different flavor and texture.
  • Herbs and Spices: Don’t hesitate to mix in your favorite herbs! Dried oregano, basil, or even Italian seasoning can enhance the flavor profile.
  • Butter: For a healthier option, you can use olive oil instead of melted butter. It will still give a nice finish to your bombs.

These substitutions allow you to customize the recipe to your taste and dietary needs. Experimenting with different ingredients can lead to exciting new flavors!

Storage Tips

After making your Garlic Parmesan Cheeseburger Bombs, you might have some leftovers. Here’s how to store them properly:

  • Refrigeration: Allow the bombs to cool completely before placing them in an airtight container. They can be stored in the fridge for up to 3 days.
  • Freezing: If you want to keep them longer, you can freeze the bombs. Wrap each one tightly in plastic wrap and place them in a freezer-safe bag. They can last up to 2 months in the freezer.
  • Reheating: To reheat, simply place the bombs in the oven at 350°F for about 10-15 minutes, or until heated through. This will help maintain their crispy texture.

By following these storage tips, you can enjoy your Garlic Parmesan Cheeseburger Bombs even after the initial feast. They make for a quick snack or meal option later on!

Breakdown of Time for Garlic Parmesan Cheeseburger Bombs Recipe

Prep Time

Preparing your Garlic Parmesan Cheeseburger Bombs is a breeze! The prep time for this recipe is approximately 20 minutes. This includes gathering your ingredients, mixing the beef and cheese filling, and assembling the biscuit bombs. If you have everything ready, you’ll be amazed at how quickly you can get started!

Cooking Time

Once your bombs are assembled, it’s time to bake! The cooking time is about 15-20 minutes. During this time, the biscuits will rise and turn golden brown, while the filling cooks to perfection. Keep an eye on them to ensure they don’t overbake. You want that perfect golden crust!

Total Time

In total, you can expect to spend around 35-40 minutes from start to finish. This includes both prep and cooking time. With such a quick turnaround, Garlic Parmesan Cheeseburger Bombs are an excellent choice for a weeknight dinner or a last-minute snack. You’ll have a delicious meal ready in no time!

Nutritional Information for Garlic Parmesan Cheeseburger Bombs Recipe

Calories

Each serving of Garlic Parmesan Cheeseburger Bombs contains approximately 250 calories. This makes them a satisfying option for a meal or snack without going overboard on calories. The combination of ground beef, cheese, and biscuit dough provides a hearty bite that keeps you feeling full and energized.

Protein

These tasty bombs pack a protein punch, offering about 14 grams of protein per serving. The ground beef and cheese contribute significantly to this protein content, making them a great choice for those looking to boost their protein intake. Protein is essential for muscle repair and growth, making these bombs a smart option for active individuals.

Sodium

Each serving contains around 500 milligrams of sodium. While sodium is necessary for bodily functions, it’s important to be mindful of your intake. If you’re watching your sodium levels, consider using low-sodium versions of the ingredients or reducing the amount of added salt. This way, you can still enjoy the delicious flavors of Garlic Parmesan Cheeseburger Bombs while keeping your health in check.

FAQs About Garlic Parmesan Cheeseburger Bombs Recipe

Can I make Garlic Parmesan Cheeseburger Bombs ahead of time?

Absolutely! You can prepare Garlic Parmesan Cheeseburger Bombs ahead of time, making them a convenient option for busy days. To do this, assemble the bombs as directed but do not bake them right away. Instead, place the assembled bombs on a baking sheet and cover them with plastic wrap. You can store them in the refrigerator for up to 24 hours before baking. When you’re ready to enjoy them, simply preheat your oven and bake as instructed. This way, you can have a delicious meal ready in no time!

What can I serve with Garlic Parmesan Cheeseburger Bombs?

Garlic Parmesan Cheeseburger Bombs are versatile and pair well with a variety of sides. You can serve them with classic options like crispy French fries or potato wedges for a hearty meal. A fresh garden salad adds a light touch, balancing the richness of the bombs. For a fun twist, consider offering a vegetable platter with dips. This way, you can create a colorful and appealing spread that everyone will enjoy. Don’t forget to include a selection of dipping sauces to enhance the flavors!

How do I store leftovers of Garlic Parmesan Cheeseburger Bombs?

If you have any leftovers, storing them properly is key to keeping them fresh. Allow the Garlic Parmesan Cheeseburger Bombs to cool completely before placing them in an airtight container. They can be stored in the refrigerator for up to 3 days. If you want to keep them longer, consider freezing them. Wrap each bomb tightly in plastic wrap and place them in a freezer-safe bag. They can last up to 2 months in the freezer. When you’re ready to enjoy them again, simply reheat in the oven at 350°F for about 10-15 minutes until warmed through. This way, you can savor the deliciousness even after the initial feast!

Conclusion on Garlic Parmesan Cheeseburger Bombs Recipe

In conclusion, Garlic Parmesan Cheeseburger Bombs are a delightful and versatile dish that brings joy to any meal. With their savory filling and buttery biscuit exterior, these bombs are sure to impress family and friends alike. Whether you’re hosting a party, enjoying a game day, or simply looking for a quick weeknight dinner, this recipe fits the bill perfectly.

Not only are they easy to prepare, but they also allow for endless customization. From vegetarian options to spicy variations, you can tailor the recipe to suit your taste preferences. Plus, the addition of various dipping sauces and side dishes makes for a fun and interactive dining experience.

As you gather your ingredients and follow the simple steps, remember that cooking is all about creativity and enjoyment. Don’t hesitate to experiment with flavors and ingredients to make this recipe your own. With just a little effort, you can create a dish that’s not only delicious but also brings smiles to the table.

So, why wait? Dive into the world of Garlic Parmesan Cheeseburger Bombs and treat yourself to a scrumptious meal that’s sure to become a favorite in your household. Happy cooking!

La Scala Chopped Salad Recipe is a must-try delight!

A Bite of Memory: How One Salad Brought Me Home

Food has a funny way of transporting us—sometimes across oceans, sometimes across time. For me, it was neither a lavish entrée nor a complex dessert that sparked a vivid return to my childhood kitchen. It was a salad.

I remember sitting at my grandmother’s kitchen table one breezy summer afternoon. The windows were wide open, the sunlight poured in, and the scent of something tangy and herbaceous filled the room. She placed a large wooden bowl in the center of the table, filled with something green and inviting. Chopped lettuce, tiny cubes of meat, creamy cheese, and chickpeas—simple, yet so beautifully balanced. We didn’t know then that it mirrored a dish adored by Hollywood legends. We just knew it felt like home.

Years later, when I stumbled upon the La Scala Chopped Salad, it felt like rediscovering a piece of my past—polished, elevated, but deeply familiar. It’s a dish that resonates not because of complexity, but because of how effortlessly it blends comfort with sophistication. And like all great food, it brings people together.

The Birthplace of a Legend: La Scala in Beverly Hills

The La Scala Chopped Salad isn’t just a viral sensation or a Pinterest darling—it has a real, storied origin that dates back to the 1950s. Created by Chef Jean Leon, the founder of the iconic La Scala restaurant in Beverly Hills, this dish was born out of a desire to serve something that felt refined but was easy to eat.

Legend has it that Jean Leon wanted to make salad more accessible—less clunky, more composed—so he began chopping all the ingredients finely, ensuring every bite would have a perfect mix of textures and flavors. He brought together crunchy lettuce, rich Italian salami, soft mozzarella, and chickpeas, all tossed in a zesty red wine vinaigrette. The result? A salad that didn’t just satisfy—it captivated.

Over time, La Scala became a magnet for the glitterati. From Elizabeth Taylor and Marilyn Monroe to today’s stars like Kim Kardashian and Leonardo DiCaprio, the salad gained a fanbase that spanned generations. It wasn’t just the allure of the restaurant—it was the simplicity and brilliance of the salad that kept people coming back.

Why This Salad Stands the Test of Time

1. Every Bite Is the Perfect Bite

Unlike traditional salads where ingredients often clump or fall to the bottom, this chopped style ensures every forkful delivers a bit of everything—crunchy lettuce, nutty chickpeas, savory salami, and creamy cheese all mingling in that signature vinaigrette. It’s a design that’s both deliberate and delightful.

2. Simplicity Meets Sophistication

There’s no need for obscure ingredients or labor-intensive steps here. This salad is proof that good food doesn’t have to be complicated. With just a handful of quality ingredients and a bit of chopping, you get something restaurant-worthy in under 15 minutes.

3. It’s Flexible Without Losing Its Soul

Though the original recipe is iconic, it’s also endlessly customizable. Whether you want to make it vegetarian, add grilled chicken, or swap cheeses, it’s easy to tweak without losing the essence of what makes it special.

From Beverly Hills to Home Kitchens: Cultural Relevance

In recent years, the La Scala Chopped Salad has had a resurgence thanks to TikTok, Instagram, and food bloggers everywhere. Its fame has evolved from a secret menu staple among Hollywood elites to a must-have lunch for everyday home cooks.

The modern appeal lies in its freshness, its balance, and its nostalgia. People crave comfort, but they also crave ease—and this dish offers both. As more people lean into meal-prepping and at-home gourmet experiences, the La Scala Chopped Salad feels like the best of both worlds.

It’s also become a sort of social media icon. A search for “La Scala Chopped Salad” on TikTok yields thousands of videos, with home cooks adding their own spins—from vegan versions to spicy takes. It’s no longer just a salad. It’s a canvas.

Customizing Your Chopped Salad Experience

Make It Vegetarian

Swap out the salami for roasted red peppers, artichokes, or even marinated tofu. You’ll still get the savory balance without compromising flavor.

Boost the Protein

Add grilled chicken, shrimp, or even hard-boiled eggs for a more filling main course. This salad holds up well to protein-heavy additions.

Switch Up the Cheese

While mozzarella is classic, you can try provolone for a sharper edge or feta for a briny contrast. Fresh mozzarella balls (bocconcini) also add a creamy twist.

Change the Dressing Vibe

Stick with red wine vinaigrette for tradition, or play around with balsamic or a creamy Italian. Even a lemon-Dijon dressing can give it a Mediterranean flair.

Add Some Crunch

Croutons, sunflower seeds, or even crushed pita chips can bring an unexpected textural element that complements the softness of cheese and salami.

Serving Suggestions: Beyond the Salad Bowl

While this chopped salad can easily stand on its own, it also pairs beautifully with:

  • Warm Focaccia or Garlic Bread – Perfect for scooping up leftover dressing
  • Grilled Meats – Think lemon herb chicken or Tuscan-style steak
  • A Crisp Glass of White Wine – Sauvignon Blanc or Pinot Grigio enhances the tanginess of the dressing
  • Roasted Vegetables – Add color and earthiness to the meal with roasted carrots, zucchini, or bell peppers

The Star-Studded Ingredient List

Dressing – The Secret to Tangy Perfection

  • ⅓ cup extra virgin olive oil
  • 3 tablespoons red wine vinegar
  • 2 cloves garlic, minced
  • 3 teaspoons Dijon mustard (or 1 teaspoon dry mustard)
  • ½ teaspoon kosher salt
  • ½ teaspoon black pepper
  • ⅓ cup grated Pecorino Romano cheese (or Parmesan)

Salad – A Crunchy, Savory Delight

  • 1 head iceberg lettuce, shredded (about 5–6 cups)
  • 1 head romaine lettuce, shredded (about 4–5 cups)
  • 1 (15-ounce) can chickpeas, drained and rinsed
  • ¼ lb (4 ounces) Italian salami, thinly sliced
  • 2 cups shredded mozzarella cheese

From Kitchen to Table: Step-by-Step Directions

  1. Whip Up the Dressing
    In a small bowl or jar, combine olive oil, red wine vinegar, minced garlic, Dijon mustard, salt, black pepper, and cheese.
    Whisk or shake until fully emulsified.
  2. Assemble the Base
    In a large bowl, toss together shredded iceberg and romaine lettuce, chickpeas, sliced salami, and shredded mozzarella.
  3. Bring It All Together
    Drizzle the dressing over the salad.
    Toss thoroughly to coat all the ingredients.
    Serve immediately for best flavor and texture.

The Nutrition Snapshot (Per Serving)

  • Calories: 371 kcal
  • Carbohydrates: 13.8g
  • Protein: 24.7g
  • Fat: 24.7g
  • Cholesterol: 36.5mg
  • Sodium: 1216mg
  • Fiber: 4.6g
  • Sugar: 1.6g
  • Vitamin A: 136.5 IU
  • Vitamin C: 1.7mg

Frequently Asked Questions (FAQs)

Can I make the La Scala Chopped Salad ahead of time?

Yes, but with a few caveats. The dressing can be made up to 3 days in advance and stored in the refrigerator. The salad ingredients can be prepped the night before, but for the freshest texture, it’s best to store the chopped lettuce separately from the rest. Toss everything together just before serving.

How long does the salad last once dressed?

Once dressed, the salad is best consumed within 1–2 days. The lettuce will begin to soften from the acidity of the vinaigrette, but the flavor will still be delicious.

Is there a low-sodium version?

Absolutely. Use reduced-sodium or nitrate-free salami, cut back on the cheese, and make your own dressing to control salt levels. You can also add more vegetables to balance out the salty elements.

Can I use canned or dried chickpeas?

Canned chickpeas are most convenient—just drain and rinse. If using dried, cook them thoroughly until soft but not mushy. They add great texture and protein.

What’s the best lettuce to use?

The classic recipe uses a blend of iceberg and romaine. Iceberg adds crunch, while romaine brings a bit of green depth. You can also try butter lettuce or little gems for a softer bite.

What if I don’t eat pork?

You can substitute turkey salami, chicken sausage, or skip the meat altogether and double up on chickpeas or add another protein source like grilled tofu.

Why This Salad Belongs in Your Recipe Rotation

There’s a reason this salad has stood the test of time. It doesn’t rely on trends or fads. Instead, it delivers something deeper: a balance of flavors, an ease of preparation, and a sense of shared history. It feels luxurious without being indulgent, healthy without being restrictive, and above all, satisfying without being heavy.

It’s also a beautiful reminder that good food doesn’t have to be fussy. Sometimes, all it takes is a few fresh ingredients, a sharp knife, and a big bowl.

Conclusion: A Salad That Brings People Together

Whether you’re serving it for a quiet weekday lunch, prepping meals for the week, or setting it out at a summer gathering, the La Scala Chopped Salad brings more than just flavor—it brings connection. With every bite, it carries a whisper of old Hollywood glamour, the warmth of shared meals, and the beauty of simple, intentional cooking.

More than just a recipe, it’s a tradition waiting to be passed on.

Let me know if you want this formatted for a blog post, turned into a printable PDF, or optimized with SEO headings. Happy to help!

Tuscan Sunset Chicken Bake Recipe is a must-try dish!

Introduction to Tuscan Sunset Chicken Bake Recipe

Welcome to the delightful world of the Tuscan Sunset Chicken Bake Recipe! This dish is not just a meal; it’s an experience that brings the flavors of Italy right to your kitchen. With its vibrant colors and rich flavors, this recipe is perfect for family dinners or special occasions. The combination of juicy chicken, fresh vegetables, and melted cheese creates a comforting dish that everyone will love.

What Makes the Tuscan Sunset Chicken Bake Unique?

The Tuscan Sunset Chicken Bake stands out for several reasons. First, it captures the essence of Tuscan cuisine, which is known for its use of fresh, high-quality ingredients. The dish features tender chicken breasts seasoned with aromatic herbs, complemented by the sweetness of cherry tomatoes and the earthiness of baby spinach. The addition of mozzarella and Parmesan cheese adds a creamy texture that ties all the flavors together.

Moreover, this recipe is incredibly versatile. You can easily adjust the ingredients to suit your taste. Whether you prefer a bit of spice or want to make it vegetarian, the Tuscan Sunset Chicken Bake can be customized to fit your needs. Plus, it’s a one-pan meal, making cleanup a breeze!

The Inspiration Behind the Recipe

This recipe draws inspiration from the beautiful landscapes and rich culinary traditions of Tuscany, Italy. The region is famous for its rustic dishes that celebrate seasonal produce and simple cooking techniques. The Tuscan Sunset Chicken Bake embodies this philosophy by using fresh ingredients that are both nutritious and flavorful.

Imagine enjoying this dish while watching the sun set over the rolling hills of Tuscany. The vibrant colors of the tomatoes and spinach mimic the warm hues of a sunset, making it not only a feast for the palate but also for the eyes. This recipe invites you to bring a piece of Tuscany into your home, allowing you to savor the flavors of Italy with every bite.

Ingredients for Tuscan Sunset Chicken Bake Recipe

To create the delicious Tuscan Sunset Chicken Bake, you will need a selection of fresh and flavorful ingredients. Each component plays a vital role in bringing this dish to life. Here’s what you’ll need:

  • 4 boneless, skinless chicken breasts (about 1.5 pounds)
  • 1 teaspoon salt
  • 1/2 teaspoon black pepper
  • 1 teaspoon garlic powder
  • 1 teaspoon Italian seasoning
  • 2 tablespoons olive oil
  • 1 cup cherry tomatoes, halved
  • 1 cup baby spinach
  • 1/2 cup mozzarella cheese, shredded
  • 1/4 cup grated Parmesan cheese
  • 1/4 cup fresh basil, chopped

These ingredients come together to create a dish that is not only tasty but also visually appealing. The chicken provides a hearty base, while the tomatoes and spinach add freshness. The cheeses melt beautifully, creating a creamy topping that enhances the overall flavor. Fresh basil adds a burst of aroma, making each bite a delightful experience.

Feel free to experiment with these ingredients! You can add your favorite vegetables or adjust the seasonings to suit your taste. The beauty of the Tuscan Sunset Chicken Bake is its flexibility, allowing you to make it your own.

Step-by-Step Preparation of Tuscan Sunset Chicken Bake Recipe

Now that you have gathered all the ingredients, it’s time to dive into the preparation of your Tuscan Sunset Chicken Bake. This step-by-step guide will help you create a delicious meal that’s sure to impress. Let’s get started!

Step 1: Prepping the Chicken

First, take your boneless, skinless chicken breasts and rinse them under cold water. Pat them dry with paper towels. This step is important as it helps the seasonings stick better. Next, place the chicken breasts on a cutting board. Using a sharp knife, trim any excess fat. This will ensure a leaner dish.

Once trimmed, season both sides of the chicken breasts with salt, black pepper, garlic powder, and Italian seasoning. Make sure to rub the spices in well. This will enhance the flavor of the chicken as it bakes. After seasoning, set the chicken aside while you prepare the vegetables.

Step 2: Preparing the Vegetables

Now, let’s focus on the vegetables. Start by washing the cherry tomatoes thoroughly. Cut each tomato in half and set them aside in a bowl. Next, take the baby spinach and rinse it under cold water. Spinach can hold dirt, so it’s essential to clean it well. After rinsing, gently pat the spinach dry with a paper towel.

With the tomatoes halved and the spinach cleaned, you’re ready to move on to the next step. These fresh vegetables will add color and nutrition to your dish!

Step 3: Assembling the Dish

Now it’s time to assemble your Tuscan Sunset Chicken Bake! Start by drizzling the olive oil evenly across the bottom of a large baking dish. This will prevent the chicken from sticking and add flavor. Place the seasoned chicken breasts in the center of the dish.

Next, scatter the halved cherry tomatoes and baby spinach around the chicken. Make sure to distribute them evenly. This way, every bite will be packed with flavor. Finally, sprinkle the shredded mozzarella and grated Parmesan cheese over the chicken and vegetables. The cheese will melt beautifully, creating a delicious topping.

Step 4: Baking the Chicken

With everything assembled, it’s time to bake! Preheat your oven to 400°F (200°C) if you haven’t done so already. Once the oven is ready, place the baking dish inside. Bake for 25-30 minutes. You’ll know it’s done when the chicken reaches an internal temperature of 165°F (75°C).

During baking, the chicken will absorb the flavors of the tomatoes and spinach, while the cheese melts into a gooey topping. The aroma will fill your kitchen, making it hard to wait!

Step 5: Final Touches and Serving

After baking, carefully remove the dish from the oven. Let it rest for about 5 minutes. This resting time allows the juices to redistribute, keeping the chicken moist. Before serving, garnish the dish with freshly chopped basil. This adds a pop of color and a burst of fresh flavor.

Now, your Tuscan Sunset Chicken Bake is ready to be enjoyed! Serve it warm and watch as your family and friends savor every bite. This dish is not only delicious but also a beautiful centerpiece for any meal.

Variations of Tuscan Sunset Chicken Bake Recipe

The beauty of the Tuscan Sunset Chicken Bake Recipe lies in its versatility. You can easily adapt it to suit different dietary preferences or simply to mix things up. Here are some exciting variations to consider!

Vegetarian Alternatives

If you’re looking for a vegetarian option, you can replace the chicken with hearty vegetables. Consider using eggplant, zucchini, or portobello mushrooms as the main ingredient. These vegetables can absorb the flavors beautifully and provide a satisfying texture.

To prepare, slice the vegetables into thick pieces and season them just like the chicken. You can also add more colorful veggies, such as bell peppers or asparagus, to enhance the dish. The cooking time may vary slightly, so keep an eye on the vegetables to ensure they are tender but not mushy.

For added protein, consider incorporating chickpeas or cannellini beans. They will not only boost the nutritional value but also add a delightful creaminess to the dish. Top it off with the same mozzarella and Parmesan cheese for that cheesy goodness!

Gluten-Free Options

For those following a gluten-free diet, the Tuscan Sunset Chicken Bake Recipe is naturally gluten-free! However, it’s essential to ensure that all your ingredients are certified gluten-free. This includes checking the labels on your seasonings and cheese.

If you want to add a bit of crunch, consider using gluten-free breadcrumbs mixed with the cheese topping. This will create a delightful crust that adds texture to the dish. Simply mix the breadcrumbs with the mozzarella and Parmesan before sprinkling them over the chicken and vegetables.

Another option is to serve the Tuscan Sunset Chicken Bake with a side of gluten-free pasta or quinoa. This will make for a complete meal that everyone can enjoy, regardless of dietary restrictions.

With these variations, you can enjoy the Tuscan Sunset Chicken Bake in many delightful ways. Whether you choose to go vegetarian or gluten-free, the flavors will still shine through, making it a dish everyone will love!

Cooking Note for Tuscan Sunset Chicken Bake Recipe

When preparing the Tuscan Sunset Chicken Bake, there are a few important cooking notes to keep in mind. These tips will help ensure that your dish turns out perfectly every time, making your cooking experience enjoyable and stress-free.

First, always check the freshness of your ingredients. Fresh chicken, vibrant vegetables, and quality cheeses will significantly enhance the flavor of your dish. If possible, opt for organic or locally sourced produce. This not only supports local farmers but also ensures you’re using the best ingredients available.

Next, consider marinating the chicken for extra flavor. If you have time, let the seasoned chicken sit for at least 30 minutes before baking. This allows the spices to penetrate the meat, resulting in a more flavorful dish. You can even marinate it overnight in the refrigerator for an even deeper taste.

Another key point is to monitor the cooking time closely. Ovens can vary in temperature, so it’s wise to check the chicken a few minutes before the suggested cooking time. Use a meat thermometer to ensure the chicken reaches an internal temperature of 165°F (75°C). This guarantees that the chicken is safe to eat while remaining juicy and tender.

Lastly, don’t skip the resting period after baking. Allowing the chicken to rest for about 5 minutes before serving helps retain its juices. This simple step can make a big difference in the overall texture and flavor of your dish.

By following these cooking notes, you’ll be well on your way to creating a delicious Tuscan Sunset Chicken Bake that will impress your family and friends. Enjoy the process and savor the delightful flavors of this Italian-inspired meal!

Serving Suggestions for Tuscan Sunset Chicken Bake Recipe

Once your Tuscan Sunset Chicken Bake is ready, it’s time to think about how to serve it. This dish is not only a feast for the eyes but also pairs wonderfully with various sides and beverages. Here are some ideal serving suggestions to elevate your meal experience!

Ideal Side Dishes

To complement the rich flavors of the Tuscan Sunset Chicken Bake, consider serving it with a few delightful side dishes. Here are some great options:

  • Garlic Bread: A classic choice, garlic bread is perfect for soaking up the delicious juices from the chicken and vegetables.
  • Roasted Vegetables: A medley of seasonal vegetables, such as zucchini, bell peppers, and carrots, roasted to perfection adds color and nutrition to your meal.
  • Caesar Salad: A crisp Caesar salad with romaine lettuce, croutons, and a tangy dressing provides a refreshing contrast to the warm chicken bake.
  • Quinoa or Rice: Serve the chicken bake over a bed of fluffy quinoa or rice. This adds a hearty element and helps absorb the flavors.
  • Steamed Asparagus: Lightly steamed asparagus drizzled with lemon juice adds a touch of elegance and a burst of freshness.

These side dishes not only enhance the meal but also create a balanced plate that everyone will enjoy. Feel free to mix and match based on your preferences and what you have on hand!

Wine Pairings

Pairing the right wine with your Tuscan Sunset Chicken Bake can elevate your dining experience. Here are some excellent wine options to consider:

  • Sauvignon Blanc: This white wine offers crisp acidity and citrus notes that complement the freshness of the tomatoes and spinach.
  • Chardonnay: A lightly oaked Chardonnay can enhance the creamy texture of the melted cheeses, making it a delightful pairing.
  • Chianti: For red wine lovers, a Chianti is a classic Italian choice. Its fruity and earthy flavors pair beautifully with the savory chicken and herbs.
  • Pinot Grigio: This light and refreshing white wine is perfect for balancing the richness of the dish while enhancing the overall flavors.
  • Rosé: A dry rosé offers a lovely balance of fruitiness and acidity, making it a versatile option for this meal.

Choosing the right wine can enhance the flavors of your Tuscan Sunset Chicken Bake, making your meal even more enjoyable. So, pour a glass and savor the delightful combination of food and drink!

Tips for Perfecting Your Tuscan Sunset Chicken Bake Recipe

To ensure your Tuscan Sunset Chicken Bake turns out perfectly every time, here are some helpful tips. These suggestions will help you avoid common pitfalls and enhance your cooking experience. Let’s dive in!

Common Mistakes to Avoid

Even the best cooks can make mistakes. Here are some common ones to watch out for:

  • Not Preheating the Oven: Always preheat your oven before baking. This ensures even cooking and helps the chicken bake properly.
  • Overcrowding the Dish: Avoid placing too many ingredients in the baking dish. This can lead to uneven cooking. Make sure there’s enough space for the heat to circulate.
  • Skipping the Resting Time: After baking, let the chicken rest for about 5 minutes. This allows the juices to redistribute, keeping the chicken moist and flavorful.
  • Using Cold Ingredients: For best results, let your chicken and vegetables come to room temperature before cooking. This helps them cook evenly.
  • Not Checking the Chicken Temperature: Always use a meat thermometer to check the chicken’s internal temperature. It should reach 165°F (75°C) to be safe to eat.

By avoiding these common mistakes, you’ll be on your way to creating a delicious Tuscan Sunset Chicken Bake that impresses everyone!

Storage Tips

If you have leftovers or want to prepare the dish ahead of time, proper storage is key. Here are some tips to keep your Tuscan Sunset Chicken Bake fresh:

  • Refrigeration: Store any leftovers in an airtight container in the refrigerator. They can last for up to 3 days.
  • Freezing: If you want to freeze the dish, let it cool completely first. Then, wrap it tightly in plastic wrap and aluminum foil. It can be frozen for up to 3 months.
  • Reheating: To reheat, thaw in the refrigerator overnight if frozen. Then, warm it in the oven at 350°F (175°C) until heated through. This helps maintain the texture and flavor.
  • Fresh Garnish: If you plan to store leftovers, wait to add fresh basil until you’re ready to serve. This keeps the basil vibrant and flavorful.

With these storage tips, you can enjoy your Tuscan Sunset Chicken Bake even after the first serving. It’s a great way to savor the flavors of Italy throughout the week!

Breakdown of Time for Tuscan Sunset Chicken Bake Recipe

Understanding the time needed for each step of the Tuscan Sunset Chicken Bake Recipe can help you plan your cooking efficiently. Here’s a detailed breakdown of the time required for preparation and cooking.

Prep Time

The prep time for the Tuscan Sunset Chicken Bake is approximately 15-20 minutes. This includes:

  • Rinsing and drying the chicken breasts.
  • Trimming any excess fat from the chicken.
  • Seasoning the chicken with salt, pepper, garlic powder, and Italian seasoning.
  • Washing and preparing the cherry tomatoes and baby spinach.
  • Assembling the ingredients in the baking dish.

Taking your time during the prep phase ensures that each ingredient is ready to shine in the final dish!

Cooking Time

The cooking time for the Tuscan Sunset Chicken Bake is about 25-30 minutes. During this time, the chicken will bake in the oven at 400°F (200°C). It’s essential to check the internal temperature of the chicken to ensure it reaches 165°F (75°C) for safe consumption. The cooking time may vary slightly based on your oven and the thickness of the chicken breasts.

Total Time

In total, you can expect the entire process, from prep to serving, to take around 40-50 minutes. This includes:

  • 15-20 minutes for preparation.
  • 25-30 minutes for cooking.

This makes the Tuscan Sunset Chicken Bake a quick and easy meal option for busy weeknights or special occasions. With just under an hour, you can create a delicious, hearty dish that brings the flavors of Tuscany to your table!

Nutritional Information for Tuscan Sunset Chicken Bake Recipe

Understanding the nutritional content of your meals is essential for maintaining a balanced diet. The Tuscan Sunset Chicken Bake is not only delicious but also packed with nutrients. Here’s a breakdown of the nutritional information per serving, which serves as a great guide for those mindful of their dietary intake.

Calories

Each serving of the Tuscan Sunset Chicken Bake contains approximately 350 calories. This makes it a satisfying yet light option for dinner. The combination of chicken, vegetables, and cheese provides a hearty meal without excessive calories. It’s perfect for those looking to enjoy a flavorful dish while keeping their calorie count in check.

Protein Content

One of the standout features of this recipe is its high protein content. Each serving offers about 40 grams of protein. This is primarily due to the chicken breasts, which are an excellent source of lean protein. Protein is essential for muscle repair and growth, making this dish a great choice for active individuals or anyone looking to maintain a healthy lifestyle.

Sodium Levels

The sodium content in the Tuscan Sunset Chicken Bake is approximately 600 milligrams per serving. While this is a reasonable amount for a flavorful dish, it’s always wise to be mindful of sodium intake, especially for those with dietary restrictions. You can reduce the sodium levels by using low-sodium chicken broth or cheese if desired. This way, you can enjoy the rich flavors without compromising your health.

Overall, the Tuscan Sunset Chicken Bake is a nutritious option that balances calories, protein, and sodium. It’s a meal that not only satisfies your taste buds but also supports your health goals. Enjoy this delightful dish knowing it’s good for you too!

FAQs about Tuscan Sunset Chicken Bake Recipe

Can I make the Tuscan Sunset Chicken Bake ahead of time?

Absolutely! The Tuscan Sunset Chicken Bake is a great dish to prepare ahead of time. You can assemble the entire dish, cover it with plastic wrap, and store it in the refrigerator for up to 24 hours before baking. This allows the flavors to meld together, making it even tastier when you finally bake it. Just remember to remove it from the fridge about 30 minutes before baking to ensure even cooking. If you prefer, you can also freeze the assembled dish. Just make sure to wrap it tightly to prevent freezer burn. When you’re ready to enjoy it, thaw it in the refrigerator overnight and bake as directed.

What can I substitute for chicken in the Tuscan Sunset Chicken Bake Recipe?

If you’re looking for a substitute for chicken, there are several delicious options! For a vegetarian twist, consider using hearty vegetables like eggplant, zucchini, or portobello mushrooms. These can be seasoned and baked just like the chicken. If you want a protein-rich alternative, try using boneless, skinless turkey breasts or even tofu for a plant-based option. Tofu absorbs flavors well, making it a great choice for this recipe. Just be sure to adjust the cooking time as needed, especially for vegetables, to ensure they are tender and flavorful.

How do I know when the chicken is fully cooked?

The best way to ensure your chicken is fully cooked is by using a meat thermometer. Insert the thermometer into the thickest part of the chicken breast. It should read 165°F (75°C) to be safe for consumption. If you don’t have a thermometer, you can also check for doneness by cutting into the chicken. The meat should be opaque and the juices should run clear, not pink. If you see any pink juices, return the chicken to the oven and continue baking until it reaches the proper temperature. This ensures that your Tuscan Sunset Chicken Bake is both delicious and safe to eat!

Conclusion on Tuscan Sunset Chicken Bake Recipe

In conclusion, the Tuscan Sunset Chicken Bake Recipe is a delightful dish that brings the flavors of Italy right to your table. With its vibrant colors, rich flavors, and simple preparation, it’s perfect for any occasion. Whether you’re hosting a family dinner or enjoying a quiet night in, this recipe is sure to impress.

Not only is it delicious, but it’s also versatile. You can easily customize it to fit your dietary needs or personal preferences. From vegetarian alternatives to gluten-free options, the Tuscan Sunset Chicken Bake can be adapted to suit everyone’s taste. Plus, with the tips and variations provided, you can make this dish your own, ensuring that it remains a staple in your kitchen.

As you savor each bite, you’ll appreciate the combination of juicy chicken, fresh vegetables, and melted cheese. The addition of aromatic herbs and spices elevates the dish, making it a true culinary delight. Remember to pair it with your favorite sides and a glass of wine for a complete dining experience.

So, gather your ingredients, follow the steps, and enjoy the process of creating this beautiful meal. The Tuscan Sunset Chicken Bake is not just about the food; it’s about sharing moments with loved ones and creating lasting memories. Bon appétit!

The Fastest Puff Pastry Appetizer

The best recipes don’t always come from cookbooks or meticulously planned menus. Sometimes, they come from those chaotic, beautiful in-between moments — when you’re hosting on short notice, feeding unexpected guests, or simply craving something warm and flaky without the fuss.

That’s exactly how this puff pastry appetizer came to be.

It was late afternoon on a Saturday. The kitchen was a little messy, the kids were building a blanket fort in the living room, and I had friends texting to say they were dropping by in “just a bit.” I had no plans to cook. No elaborate platters or dips chilling in the fridge. I had puff pastry in the freezer, a few sausages from the breakfast we never finished, and an open jar of tomato sauce from the night before.

Out of necessity and instinct, I rolled out the pastry, spread a bit of tomato sauce, added a sausage, rolled it up, and sliced it into pinwheels. I wasn’t aiming for a masterpiece—just something warm, snackable, and a little satisfying. Twenty minutes later, the house smelled incredible. The rolls were golden, bubbling, and slightly crisp at the edges.

To my surprise, they disappeared faster than anything I had cooked in weeks.

Since then, this quick puff pastry appetizer has become my go-to solution for so many situations. Game nights, potlucks, brunches, lazy dinners, or simply those evenings when I want something comforting but don’t want to spend an hour in the kitchen.

It’s a reminder that sometimes, simplicity is the most delicious ingredient of all.

What Makes This Recipe So Special?

It’s easy to fall in love with any recipe that’s done in 30 minutes and requires almost no prep. But this appetizer goes beyond just being convenient. It’s a masterclass in flavor-to-effort ratio — a low-lift recipe that delivers huge results.

Here’s why it works so well:

  • Minimal ingredients: Just puff pastry, tomato sauce, and sausage — that’s it.
  • Maximum flavor: The buttery richness of the pastry, the tang of the tomato, and the savory sausage work together like magic.
  • Unbelievably fast: It takes longer for the oven to preheat than it does to prepare the dish.
  • Customizable: You can change up the filling to suit your taste, dietary needs, or what’s already in your fridge.
  • Always a crowd-pleaser: Whether served as a snack, side, or main, people love these crispy, golden bites.

It’s proof that food doesn’t have to be complicated to be memorable.

Ingredients

IngredientQuantity
Puff pastry700 g (25 oz), thawed if frozen
Tomato sauce60 g (2.1 oz)
Sausages400 g (14 oz), your favorite type

Directions

  1. Preheat your oven to 375°F (190°C). Line a baking tray with parchment paper.
  2. Roll out the puff pastry sheets on a floured surface if needed.
  3. Spread a thin layer of tomato sauce evenly over the pastry.
  4. Cut sausages to fit the length or width of the pastry sheet and place them on one edge.
  5. Roll the pastry tightly around the sausage, sealing the edges gently.
  6. Slice into bite-sized pieces or keep them as longer rolls.
  7. Place the rolls seam-side down on the baking tray. Optionally, brush with a beaten egg for shine.
  8. Bake for 20–25 minutes or until puffed and golden.
  9. Let cool slightly before serving. Best enjoyed warm.

Nutritional Information (Per Roll — Approx. 12–14 pieces)

NutrientAmount
Calories~210 kcal
Protein6 g
Carbohydrates14 g
Fat14 g
Saturated Fat5 g
Sodium320 mg

Frequently Asked Questions

Do I need to cook the sausages before using them in the pastry?
If you’re using fully cooked sausages (like smoked, pre-cooked, or breakfast-style links), there’s no need to pre-cook. If you’re using raw sausage or ground meat, it’s best to cook it first to ensure it’s safe to eat and doesn’t release too much moisture into the pastry during baking.

What type of sausage works best?
This recipe is very forgiving. You can use anything from smoky kielbasa and spicy chorizo to chicken sausage or even vegetarian options. Just choose a sausage with bold flavor and minimal moisture.

Can I use homemade pastry instead of store-bought puff pastry?
Of course! Homemade puff pastry or even rough puff works wonderfully if you have the time. But store-bought is ideal when speed is your priority.

Can I make this recipe vegetarian or vegan?
Yes. Use plant-based sausage alternatives and vegan puff pastry (many are naturally dairy-free). Swap tomato sauce for pesto, hummus, or roasted red pepper spread for more plant-based variety.

Can I freeze the rolls before baking?
Absolutely. These rolls freeze well both before and after baking. Just assemble them and freeze on a tray until firm, then transfer to a freezer-safe bag. Bake from frozen, adding an extra 5–10 minutes.

Can I serve them cold?
They’re best enjoyed warm, fresh out of the oven, but they’re still delicious at room temperature. For parties or potlucks, they hold up well even after a few hours.

Creative Variations to Try

Once you’ve mastered the basic version, there’s a world of flavor waiting inside that flaky puff pastry. Here are some of our favorite variations:

1. Cheesy Sausage Rolls

Add a sprinkle of shredded cheddar, mozzarella, or gouda over the tomato sauce before rolling. The cheese melts beautifully and adds depth.

2. Italian-Style Rolls

Use Italian sausage and replace the tomato sauce with marinara or pesto. Top with a touch of Parmesan before baking for an extra layer of flavor.

3. Spicy Kick

Add a swipe of hot sauce or spicy harissa under the sausage. For extra fire, sprinkle in crushed red pepper flakes or a slice of jalapeño.

4. Breakfast-Inspired

Use breakfast sausage and add a layer of scrambled egg and cheese. These are perfect for make-ahead brunches.

5. Vegetarian Delight

Use sautéed mushrooms, spinach, or caramelized onions as a filling. A touch of crumbled feta or goat cheese makes them irresistible.

Serving Ideas

This puff pastry appetizer is wonderfully flexible when it comes to serving. It can be casual or dressed up, depending on the occasion:

  • Game day snacks: Serve with a trio of dips — mustard, spicy ketchup, and ranch.
  • Party platters: Arrange on a board with olives, pickles, cheeses, and small sandwiches.
  • Brunch side: Pair with a green salad, soft-boiled eggs, or a fruit platter.
  • Quick lunch: Add a side of soup or a handful of greens, and you’ve got a complete meal.

Serve them fresh from the oven for the best texture, or reheat in the oven to restore that crispiness if making ahead.

Make-Ahead and Storage Tips

To store
Keep leftover baked rolls in an airtight container in the refrigerator for up to 3 days. Reheat in the oven at 350°F (175°C) for 5–8 minutes, or until heated through and crisp.

To freeze
Freeze baked or unbaked rolls on a tray first, then transfer to a freezer-safe container. They’ll keep for up to one month. Bake frozen rolls straight from the freezer — just extend baking time slightly.

To prepare ahead
Assemble the rolls in advance, cover, and refrigerate until you’re ready to bake. Perfect for stress-free entertaining or prepping for busy weekdays.

A Final Thought: Simplicity Wins Every Time

In a world where food can be complicated, curated, and sometimes overwhelming, there’s something refreshing about a recipe like this.

The Fastest Puff Pastry Appetizer isn’t trying to impress with dozens of ingredients or intricate technique. It’s not trying to be viral or trendy. It’s just trying to feed you — well, fast, and deliciously.

And that’s exactly what makes it powerful.

Whether you’re entertaining on the fly, solving the eternal snack dilemma, or just in the mood to bake something warm and comforting, this recipe is here to help. It’s the kind of dish that’s flexible, forgiving, and always welcomed — no matter the time of day or the number of guests.

So keep a sheet of puff pastry in the freezer. Keep your favorite sausage or veggie filling on hand. Because once you know how easy it is to make these, you’ll find yourself turning to them again and again.

And every time someone grabs one and says, “Wait, did you make these yourself?” — you’ll smile, nod, and maybe keep the secret of just how easy they really are.

Spinach and Feta Cheese Puff Pastry Rolls

Some recipes come from cookbooks, others from restaurants or far-off travels. And then there are those that find you in quiet, unexpected moments—moments that don’t ask for perfection, but instead invite simplicity, warmth, and nourishment.

That’s how these Spinach and Cheese Puff Pastry Rolls became a favorite in my home.

It started on a chilly weekend afternoon. I was staring into the fridge, trying to make use of a handful of lingering ingredients: a half-used tub of ricotta, a small bunch of wilting spinach, a leftover puff pastry sheet from a holiday bake, and a wedge of Parmesan I’d been grating over everything for weeks. I wasn’t planning on making anything fancy—just something to fill the house with warmth and the kitchen with the smell of something baking.

As I began mixing the filling—garlicky spinach, soft ricotta, melted cheese—I remembered the way my mother used to fold leftover greens into phyllo dough. Her version was less precise and more instinctive, but it always came out golden and flaky, with steam rising as you pulled it apart.

I rolled the pastry, brushed the top with an egg wash, and sprinkled it with sesame seeds the way she did. The scent that filled the kitchen as they baked was so deeply nostalgic I paused mid-cleanup just to breathe it in.

By the time they were out of the oven, puffed and golden, the family had gathered around without being called. We ate them standing up, pulling them apart with our hands. Not a single one made it to the table.

Since then, these rolls have become a regular fixture in my kitchen—not just for their flavor, but for the quiet joy they bring. They’re the kind of recipe that proves you don’t need complexity to create something meaningful. Just a few ingredients, a warm oven, and the willingness to nourish the ones you love.

Why These Rolls Work Every Time

Whether you’re cooking for a weekend brunch, prepping a lunchbox snack, or looking for a crowd-pleasing appetizer, these spinach and cheese rolls always deliver. Here’s what makes them so reliable—and irresistible:

  • Flaky, buttery layers: Puff pastry brings an unbeatable crispiness without any extra work.
  • Creamy, savory filling: The combination of ricotta, mozzarella, and Parmesan gives depth, richness, and the perfect melt.
  • Wholesome and flavorful: Packed with fresh spinach and garlic, it’s a delicious way to enjoy greens.
  • Versatile: Easily customizable with herbs, spices, or different cheeses.
  • Elegant yet easy: They look like bakery treats but require minimal effort.

They’re one of those rare recipes that hits all the marks: simple ingredients, big flavor, and endless possibilities.

Ingredients

IngredientQuantity
Fresh spinach300 g
Olive oil3 tablespoons
Garlic cloves, minced3
Egg (for filling)1
SaltTo taste
Black pepper, freshly ground½ teaspoon
Ricotta cheese250 g
Mozzarella cheese, shredded½ cup
Parmesan cheese, grated½ cup
Puff pastry sheet1 (thawed if frozen)
Egg + 1 tbsp milk (for egg wash)1 egg
Sesame seeds (optional)For sprinkling

Directions

  1. Prepare the Spinach Filling
    In a skillet over medium heat, add olive oil and sauté minced garlic for 30 seconds. Add chopped spinach and cook until wilted. Season with salt and pepper. Allow to cool slightly.
  2. Mix the Cheesy Filling
    In a large bowl, combine the cooked spinach with ricotta, mozzarella, Parmesan, and one beaten egg. Mix until fully combined.
  3. Assemble the Rolls
    Preheat oven to 375°F (190°C). Roll out the puff pastry sheet on a lightly floured surface. Spread the spinach-cheese filling evenly over the pastry, leaving a small border. Roll tightly into a log.
  4. Slice and Brush
    Slice the log into even rolls (about 1–1.5 inches thick). Place on a parchment-lined baking sheet. Brush the tops with egg wash and sprinkle with sesame seeds if desired.
  5. Bake Until Golden
    Bake for 20–25 minutes or until golden and puffed. Serve warm or at room temperature.

Nutritional Information (Per 1 roll, approx. based on 10 rolls)

NutrientAmount
Calories~180 kcal
Protein6 g
Carbohydrates14 g
Fat11 g
Saturated Fat4 g
Fiber1 g
Sodium220 mg

Frequently Asked Questions

Can I use frozen spinach instead of fresh?
Yes! Frozen spinach works just as well. Be sure to thaw and squeeze out as much moisture as possible before mixing it into the filling to prevent sogginess.

What can I use instead of ricotta cheese?
You can substitute with cottage cheese (drained slightly) or crumbled feta. For a richer taste, you could even use cream cheese, but it may make the filling slightly denser.

Can I prepare them in advance?
Absolutely. You can assemble the rolls and refrigerate them for a few hours before baking. Alternatively, freeze them unbaked and bake directly from frozen, adding a few extra minutes to the cooking time.

Do I have to use puff pastry?
Puff pastry gives the rolls their flaky texture, but you can use phyllo dough or even crescent dough if you prefer. The texture will be different, but still delicious.

Can I make these rolls vegetarian or add more veggies?
They are already vegetarian-friendly, but you can easily add finely chopped mushrooms, sautéed leeks, or grated zucchini (just be sure to remove excess moisture). Herbs like dill, parsley, or thyme also make excellent additions.

What if I don’t have sesame seeds?
No problem! The sesame seeds are optional and mainly add visual appeal and a slight nutty crunch. You can skip them or replace them with poppy seeds, everything bagel seasoning, or even grated cheese.

Serving Suggestions

These spinach and cheese rolls are as flexible in presentation as they are in preparation. Here are a few ways to enjoy them:

As an Appetizer

Serve them warm on a platter with a side of tangy yogurt dip, tzatziki, or spicy tomato sauce.

For Brunch or Breakfast

Pair with fresh fruit, a boiled egg, and coffee for a satisfying morning meal.

As a Side Dish

These rolls complement soups, especially creamy tomato, lentil, or vegetable chowder. They’re also great alongside a fresh green salad.

As a Snack or Picnic Item

Easy to pack and reheat, these rolls are perfect for picnics, potlucks, or on-the-go lunches.

Dressed Up for a Dinner Party

Slice them into bite-sized rounds, plate with microgreens or a balsamic glaze drizzle, and serve them as elegant hors d’oeuvres.

Variations to Try

This recipe is a canvas. Once you’ve made it once, you’ll see how easily it adapts to your taste and pantry:

1. Spinach and Feta Classic

Swap ricotta for crumbled feta and add a pinch of nutmeg for a more Mediterranean twist.

2. Spicy Spinach Rolls

Add a dash of crushed red pepper flakes or diced chili for heat lovers.

3. Mushroom and Herb

Mix in sautéed mushrooms and chopped thyme or rosemary for a woodsy, earthy flavor.

4. Sun-Dried Tomato and Basil

Add chopped sun-dried tomatoes and a handful of fresh basil to the filling for a vibrant Italian-inspired version.

5. Cheddar and Broccoli

Substitute spinach with finely chopped steamed broccoli and add shredded cheddar for a kid-friendly take.

Storage and Reheating Tips

Refrigerate
Store leftovers in an airtight container in the refrigerator for up to 3 days. Reheat in the oven at 350°F (175°C) for 5–7 minutes to restore crispiness.

Freeze Before Baking
Place unbaked rolls on a baking sheet, freeze until firm, then transfer to a freezer-safe bag. Bake from frozen, adding 5–10 extra minutes to the original bake time.

Freeze After Baking
Allow baked rolls to cool completely, wrap individually, and freeze for up to one month. Reheat in the oven, not microwave, for best texture.

A Final Thought: The Power of a Simple Roll

There’s something comforting about a pastry that doesn’t ask for much—no fancy tools, no complicated techniques, just a few honest ingredients rolled into something golden, flaky, and deeply satisfying.

These Spinach and Cheese Puff Pastry Rolls are more than just a snack. They’re a moment. A memory. A quiet celebration of cooking not to impress, but to nourish. They’re the kind of food you share with friends over coffee, tuck into lunchboxes with love, or eat over the sink because you just couldn’t wait.

And maybe, in a world that so often pushes us toward more—more complexity, more steps, more perfection—these little rolls remind us that sometimes, less really is more.

So the next time you need something quick, cozy, and a little bit special, let this recipe be your go-to. Your home will smell like something’s baking. Your table will be filled with smiles. And your heart? Full.

Stay Connected

Get recipes via email: