Philly Cheesesteaks: The Ultimate Comfort Food

There’s something magical about biting into a perfectly made Philly Cheesesteak. The combination of thinly sliced beef, gooey melted cheese, and a soft hoagie roll makes this sandwich an iconic comfort food. Whether you’ve had it in Philadelphia or you’re recreating it at home, the Philly Cheesesteak is a timeless classic that everyone can enjoy.

Making an authentic Philly Cheesesteak at home is easier than you think. With the right ingredients and a few helpful tips, you can enjoy this legendary sandwich in your own kitchen. Ready to bring a slice of Philadelphia to your table? Let’s dive in!

Why You’ll Love Philly Cheesesteaks

  • Mouthwatering Flavor: Juicy steak, caramelized onions, and gooey cheese create the perfect flavor combination.
  • Customizable: Choose your favorite cheese, add toppings, or even switch up the bread.
  • Quick and Easy: With just a few ingredients and steps, you’ll have a restaurant-quality meal in under 30 minutes.
  • Perfect for Any Occasion: Whether it’s game day, dinner, or a family gathering, Philly Cheesesteaks are always a hit.

Ingredients for Philly Cheesesteaks

Here’s what you’ll need to make two mouthwatering Philly Cheesesteaks.

CategoryIngredientQuantity
For the SteakBoneless rib eye steak, skirt steak, or pre-sliced rib eye1 pound (454g)
Kosher salt1 teaspoon
Freshly ground black pepper1/8 teaspoon
Vegetable oil1 tablespoon (15ml)
For the OnionsYellow onion (diced into 1/4-inch pieces)1/2 medium (4 ounces; 114g)
For the CheeseProvolone cheese (thinly sliced)8 slices (6 ounces; 160g)
Parmigiano-Reggiano cheese (optional)2 tablespoons, grated
For the RollsItalian hoagie/sub rolls (split lengthwise but left attached)2 (7 to 8 inches long)

How to Make Philly Cheesesteaks

1. Choose and Prepare Your Steak

  • Start with high-quality boneless rib eye steak, skirt steak, or pre-sliced rib eye.
  • For whole steak, freeze it for 15-20 minutes to make slicing easier. Use a sharp knife to cut the steak into very thin strips or bite-sized pieces.

2. Season the Steak

  • Toss the sliced steak with kosher salt and freshly ground black pepper. Let it rest for a few minutes while you prepare the other ingredients.

3. Prepare the Onions

  • Dice half a medium yellow onion into small 1/4-inch pieces.
  • Heat 1 tablespoon of vegetable oil in a large skillet over medium heat. Add the onions and sauté for 5-7 minutes until softened and caramelized. Remove and set aside.

4. Cook the Steak

  • In the same skillet, increase the heat to medium-high. Add the seasoned steak and cook for 2-3 minutes, stirring occasionally. The steak should be browned on the outside but still tender.

5. Add the Cheese

  • Once the steak is cooked, lower the heat to medium.
  • Spread the steak evenly in the skillet and layer 4 torn slices of provolone cheese over the top. Let it melt slightly before mixing everything together.

6. Toast the Rolls

  • Split the hoagie rolls lengthwise, leaving one side attached. Toast the inside of the rolls in the skillet or oven until lightly crispy.

7. Assemble the Sandwiches

  • Spoon the cheesy steak mixture onto the toasted hoagie rolls. Add caramelized onions on top and layer 1-2 slices of whole provolone cheese over each sandwich.
  • Place the assembled sandwiches under the broiler for 1-2 minutes to melt the cheese and crisp the edges.

8. Serve and Enjoy

  • Serve the sandwiches immediately while the cheese is gooey and the bread is warm. Garnish with a sprinkle of Parmigiano-Reggiano if desired.

Tips for the Best Philly Cheesesteaks

  • Use Thinly Sliced Steak: Freezing the steak briefly makes it easier to slice thinly, which is key for a tender and authentic Philly Cheesesteak.
  • Caramelize the Onions: Take your time with the onions to develop their sweetness and flavor.
  • Cheese Options: While provolone is traditional, you can also use American cheese or Cheez Whiz for a different twist.
  • Don’t Overcook the Steak: Cook it just until browned to keep it tender and juicy.

What Makes a Philly Cheesesteak Authentic?

An authentic Philly Cheesesteak is all about simplicity and quality ingredients. The sandwich typically features thinly sliced rib eye steak, provolone cheese (or Cheez Whiz), caramelized onions, and a soft hoagie roll. Variations may include mushrooms, peppers, or additional toppings, but the focus remains on the steak and cheese.

Nutritional Information

Here’s an approximate nutritional breakdown per sandwich (serves 2):

NutrientAmount
Calories680
Protein45g
Carbohydrates40g
Fat35g
Sodium1020mg

FAQs About Philly Cheesesteaks

1. Can I use a different type of meat?

Yes! While rib eye is traditional, skirt steak or even thinly sliced sirloin can be used as a substitute.

2. What type of bread works best?

Italian hoagie rolls are ideal, but you can also use French baguettes or ciabatta if needed.

3. Can I add mushrooms or peppers?

Absolutely! Sautéed mushrooms or bell peppers are popular additions and add extra flavor.

4. What cheese can I use if I don’t have provolone?

American cheese, Cheez Whiz, or mozzarella are great substitutes.

5. How do I reheat leftovers?

Reheat the steak and cheese mixture in a skillet over low heat. Toast fresh rolls before assembling the sandwiches.

6. Can I make Philly Cheesesteaks in advance?

While best enjoyed fresh, you can prepare the steak and onions ahead of time and reheat them when ready to serve.

Make-Ahead and Storage Tips

  • Prepare in Advance: Slice the steak and dice the onions ahead of time for quicker assembly.
  • Refrigeration: Store cooked steak, onions, and cheese mixture in an airtight container in the refrigerator for up to 3 days.
  • Reheating: Warm the steak and onions in a skillet over medium heat, then assemble fresh sandwiches.

Serving Ideas

Philly Cheesesteaks are filling on their own, but pairing them with simple sides can elevate your meal:

  • French Fries: Crispy fries are the ultimate companion.
  • Coleslaw: A tangy coleslaw provides a refreshing contrast.
  • Pickles: Add some crunch and acidity to balance the rich flavors.

Your Turn to Master Philly Cheesesteaks

Now that you know how to make the perfect Philly Cheesesteak, it’s time to put your skills to the test. With its juicy steak, melted cheese, and crispy toasted bread, this sandwich is sure to become a favorite in your household.

Gather your ingredients, fire up your skillet, and recreate this iconic dish right in your kitchen. Once you’ve taken your first bite, you’ll see why Philly Cheesesteaks have been beloved for generations. Enjoy!

Philly Cheesesteaks: The Ultimate Comfort Food

A Philly Cheesesteak is a classic, comforting sandwich made with thinly sliced rib eye steak, gooey provolone cheese, caramelized onions, and soft toasted hoagie rolls. It’s flavorful, satisfying, and surprisingly easy to recreate at home.
Prep Time 10 minutes
Cook Time 15 minutes
Total Time 25 minutes
Servings: 2
Course: Main Course
Cuisine: American
Calories: 680

Ingredients
  

For the Steak
  • 1 pound 454g boneless rib eye steak, skirt steak, or pre-sliced rib eye
  • 1 teaspoon kosher salt
  • 1/8 teaspoon freshly ground black pepper
  • 1 tablespoon 15ml vegetable oil
For the Onions
  • 1/2 medium yellow onion 4 ounces; 114g, diced into 1/4-inch pieces
For the Cheese
  • 8 thin slices provolone cheese 6 ounces; 160g
  • 2 tablespoons grated Parmigiano-Reggiano cheese optional
For the Rolls
  • 2 Italian hoagie/sub rolls 7-8 inches long, split lengthwise but left attached

Method
 

  1. Prepare the Steak: Slice the steak very thin (partially freezing it for 15-20 minutes helps) and season with salt and pepper.
  2. Cook the Onions: Sauté the diced onions in 1 tablespoon of vegetable oil over medium heat until caramelized, about 5-7 minutes. Remove and set aside.
  3. Cook the Steak: In the same skillet, cook the steak over medium-high heat for 2-3 minutes, stirring occasionally until browned but tender.
  4. Add the Cheese: Lower the heat, spread the steak in the skillet, and top with 4 torn slices of provolone cheese. Let it melt, then stir to combine.
  5. Toast the Rolls: Lightly toast the hoagie rolls in the oven or skillet until the inside is crisp.
  6. Assemble the Sandwiches: Fill the rolls with the steak and cheese mixture, top with caramelized onions, and place a slice of provolone over each sandwich.
  7. Broil (Optional): Place the sandwiches under a broiler for 1-2 minutes to melt the cheese and crisp the edges. Serve hot and enjoy!
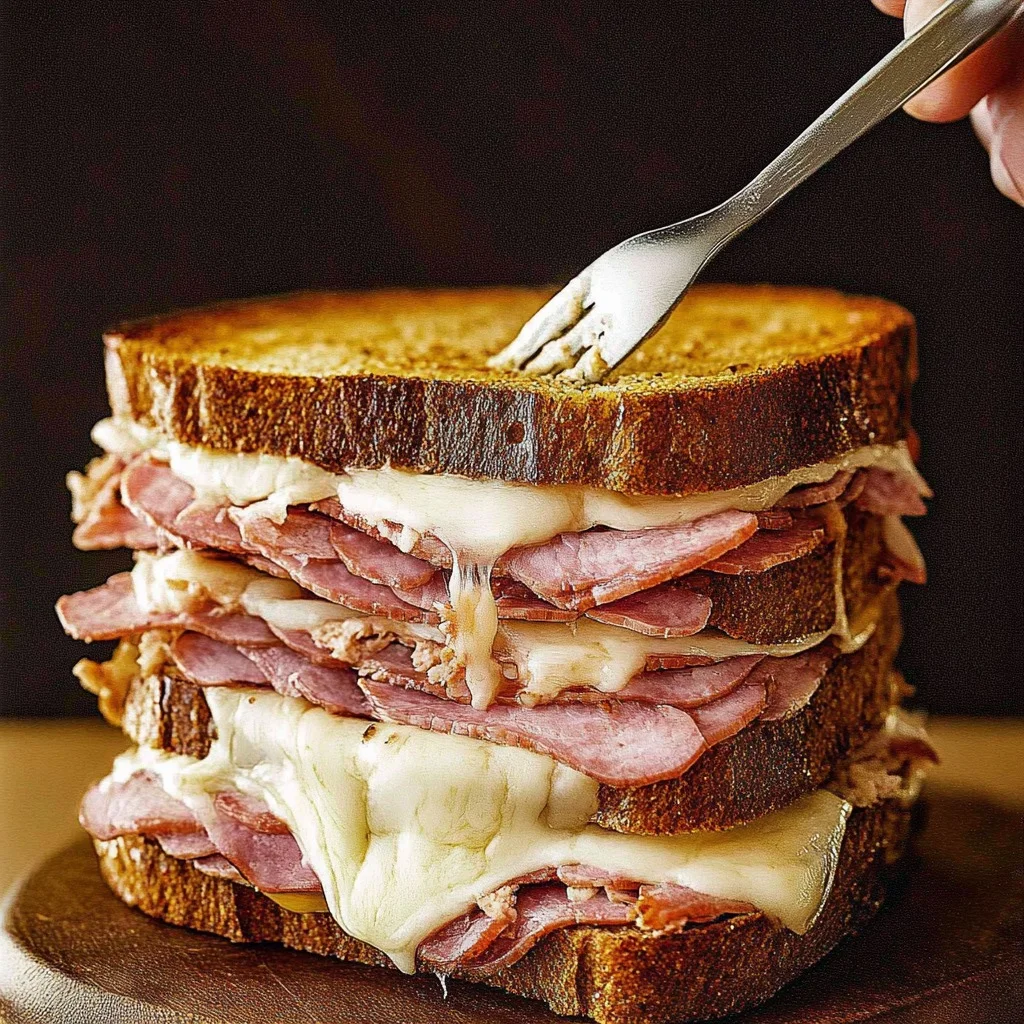
Reuben Sandwich: A Timeless Classic

Imagine biting into a perfectly golden, buttery sandwich packed with savory corned beef, melty Swiss cheese, tangy sauerkraut, and creamy Russian dressing. A Reuben sandwich isn’t just a meal—it’s an experience. Whether you’re enjoying it at a deli, whipping it up at home, or sharing it with friends, the Reuben stands as one of the most iconic sandwiches ever created.

The combination of flavors and textures in a Reuben is truly unmatched. It’s savory, tangy, crispy, and creamy all in one bite. Best of all, it’s surprisingly easy to make in your own kitchen. Ready to create this delicious classic? Let’s dive in!

Why You’ll Love the Reuben Sandwich

  • Iconic Flavor: A perfect blend of salty corned beef, creamy dressing, tangy sauerkraut, and nutty Swiss cheese.
  • Golden, Buttery Bread: Each bite begins with the satisfying crunch of toasted marble rye.
  • Simple Yet Sophisticated: It’s a dish that feels indulgent without being overly complicated.
  • Customizable: Whether you prefer extra cheese, more dressing, or less sauerkraut, the Reuben is easy to tailor to your taste.

Ingredients for the Reuben Sandwich

Here’s everything you need to make the ultimate Reuben, along with a simple recipe for herbed butter to take your sandwich to the next level.

CategoryIngredientQuantity
For the Herbed ButterButter (softened)¼ cup (½ stick, 57 g)
Dried minced garlic½ teaspoon
Dried minced onion½ teaspoon
Sesame seeds½ teaspoon
Poppy seeds¼ teaspoon
Sea salt½ teaspoon
For the Reuben SandwichDeli corned beef1 pound
Marble rye bread1 loaf
Russian dressing1 cup (245 g)
Sauerkraut8 ounces
Swiss cheese12 slices

How to Make a Reuben Sandwich

1. Prepare the Herbed Butter

  • In a small bowl, mix together the softened butter, dried minced garlic, minced onion, sesame seeds, poppy seeds, and sea salt.
  • Stir until well combined. This flavorful butter will give your Reuben sandwich a perfectly golden and crunchy crust.

2. Prep the Ingredients

  • Lay out your marble rye bread slices, corned beef, Swiss cheese, Russian dressing, and sauerkraut.
  • If the sauerkraut is very wet, drain and gently pat it dry with a paper towel. This prevents the bread from getting soggy.

3. Butter the Bread

  • Spread a generous layer of the herbed butter on one side of each slice of bread. This side will be toasted for that irresistible crunch.

4. Assemble the Sandwich

  • On the unbuttered side of the bread, spread about 1 tablespoon of Russian dressing.
  • Layer 2 slices of Swiss cheese, followed by a generous portion of corned beef, about 2 tablespoons of sauerkraut, and another slice of Swiss cheese.
  • Top with another slice of bread, buttered side facing out.

5. Grill the Sandwich

  • Heat a skillet or griddle over medium heat. Place the sandwich in the skillet and cook for 3-4 minutes on each side, or until the bread is golden and crispy, and the cheese is melted.
  • Press the sandwich lightly with a spatula to ensure even cooking and crispiness.

6. Slice and Serve

  • Remove the sandwich from the skillet and let it rest for 1-2 minutes. Slice it in half diagonally and serve warm.
  • Enjoy with pickles, chips, or a side of coleslaw for a complete meal.

Tips for the Perfect Reuben Sandwich

  • Choose High-Quality Corned Beef: Visit your local deli for freshly sliced corned beef, as it makes a huge difference in flavor and texture.
  • Drain the Sauerkraut: Excess liquid can make your sandwich soggy, so make sure to drain and dry the sauerkraut before using.
  • Don’t Skimp on Butter: The herbed butter adds incredible flavor and ensures the bread gets perfectly crispy.
  • Low and Slow: Cook the sandwich over medium heat to ensure the cheese melts without burning the bread.

What is Russian Dressing?

Russian dressing is a tangy, creamy sauce made with mayonnaise, ketchup, horseradish, and spices. It’s the classic choice for a Reuben sandwich, and its slight sweetness balances the saltiness of the corned beef and the tang of the sauerkraut. If you can’t find Russian dressing, Thousand Island dressing makes a good substitute.

Nutritional Information

Here’s an approximate nutritional breakdown per sandwich (serves 4):

NutrientAmount
Calories610
Protein32g
Carbohydrates41g
Fat36g
Sodium1450mg

FAQs About the Reuben Sandwich

1. Can I use a different type of bread?

Yes! While marble rye is traditional, you can use regular rye, sourdough, or even whole-grain bread.

2. Can I make a vegetarian version?

Absolutely. Swap the corned beef for roasted vegetables, tempeh, or a vegetarian deli meat alternative.

3. What’s the difference between Russian dressing and Thousand Island?

Thousand Island is sweeter and includes pickle relish, while Russian dressing has a tangier and spicier flavor profile.

4. Can I toast the sandwich in the oven?

Yes! Assemble the sandwich and bake it at 375°F (190°C) for about 10 minutes, flipping halfway through.

5. How do I keep the bread from burning?

Cook the sandwich on medium heat and check frequently. You can also lower the heat slightly if the bread is browning too quickly.

6. Can I use a panini press?

Definitely! A panini press works great for making Reuben sandwiches and ensures an even, crispy texture.

Make-Ahead and Storage Tips

  • Herbed Butter: Prepare the herbed butter in advance and store it in the refrigerator for up to a week.
  • Russian Dressing: Homemade dressing can be stored in the fridge for up to 5 days.
  • Leftovers: If you have leftover sandwiches, store them in an airtight container in the fridge and reheat in a skillet to maintain crispiness.

Serving Ideas

The Reuben sandwich is hearty on its own, but you can pair it with a variety of sides to create a well-rounded meal:

  • Pickles: Add a crunchy, tangy element to your plate.
  • Potato Chips: The crispiness pairs well with the melty sandwich.
  • Coleslaw: The creamy, tangy flavors complement the Reuben beautifully.
  • Tomato Soup: For a comforting and warm combination.

Your Turn to Master the Reuben Sandwich

Now that you know how to make the perfect Reuben sandwich, it’s time to bring this deli classic into your own kitchen. With its crispy herbed butter crust, savory corned beef, and melty cheese, this sandwich is sure to become a family favorite.

So, grab your ingredients, fire up your skillet, and get ready to create a masterpiece. Once you take your first bite, you’ll understand why the Reuben sandwich has been loved for generations!

Reuben Sandwich: A Timeless Classic

The Reuben sandwich is a delicious classic made with savory corned beef, melty Swiss cheese, tangy sauerkraut, and creamy Russian dressing, all toasted to golden perfection on buttery marble rye bread. It’s a hearty, flavorful meal that’s easy to make and perfect for any occasion.
Prep Time 10 minutes
Cook Time 10 minutes
Total Time 20 minutes
Servings: 4
Course: Main Course
Cuisine: American
Calories: 610

Ingredients
  

For the Herbed Butter
  • ¼ cup ½ stick, 57 g butter, softened
  • ½ tsp dried minced garlic
  • ½ tsp dried minced onion
  • ½ tsp sesame seeds
  • ¼ tsp poppy seeds
  • ½ tsp sea salt
For the Reuben Sandwich
  • 1 pound deli corned beef
  • 1 loaf marble rye bread
  • 1 cup 245 g Russian dressing
  • 8 ounces sauerkraut drained
  • 12 slices Swiss cheese

Method
 

  1. Make the Herbed Butter: Mix softened butter, minced garlic, onion, sesame seeds, poppy seeds, and sea salt in a small bowl until combined.
  2. Prep Ingredients: Lay out bread slices, corned beef, cheese, Russian dressing, and sauerkraut. Drain sauerkraut to avoid soggy bread.
  3. Butter the Bread: Spread herbed butter on one side of each slice of bread. This will be the toasted side.
  4. Assemble the Sandwich: Spread Russian dressing on the unbuttered side of the bread. Add 2 slices of Swiss cheese, corned beef, sauerkraut, and another slice of cheese. Top with another slice of bread, buttered side out.
  5. Grill the Sandwich: Heat a skillet over medium heat. Grill the sandwich for 3-4 minutes on each side until the bread is golden and the cheese is melted.
  6. Serve: Let the sandwich rest for a minute, slice in half, and enjoy with your favorite sides.

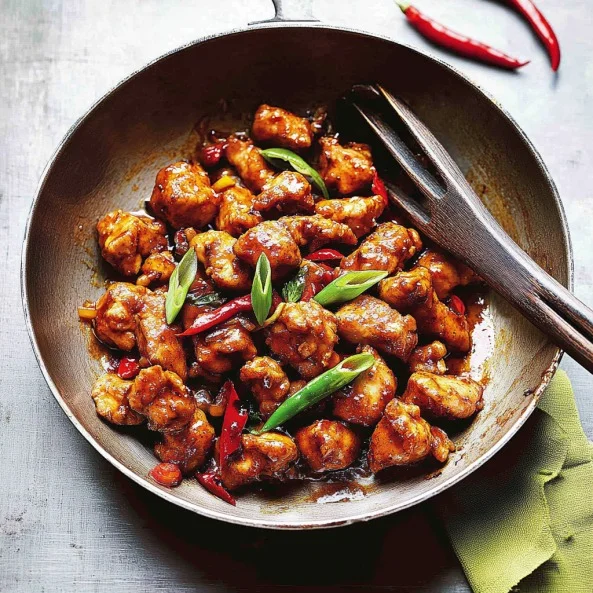
General Tso’s Chicken: A Sweet, Spicy, and Crispy Delight

Have you ever craved a dish that’s crispy, sweet, spicy, and packed with flavor? General Tso’s Chicken is exactly that—a Chinese-American classic loved by millions. This dish is all about crispy chicken coated in a bold, tangy sauce with just the right amount of heat. Whether it’s your favorite takeout or a recipe you’ve been eager to try, making General Tso’s Chicken at home is easier than you think and just as delicious.

With this recipe, you’ll master the art of creating tender chicken bites, a perfectly balanced sauce, and the kind of dish that will leave everyone asking for seconds. Let’s get started!

Why You’ll Love General Tso’s Chicken

  • Perfectly Crispy: Coated in cornstarch and fried to golden perfection.
  • Flavor-Packed Sauce: Sweet, spicy, savory, and tangy all in one bite.
  • Adjustable Heat: Control the spice level to suit your taste.
  • Homemade Better Than Takeout: Fresh, flavorful, and guilt-free.

Ingredients for General Tso’s Chicken

CategoryIngredientQuantity
For the Crispy ChickenDried red chiles10
Hot water (to soak chiles)As needed
Boneless, skinless chicken thighs (diced)10 ½ oz (300 g)
Cornstarch (seasoned with ¼ tsp salt & pepper)1 ¾ cups (210 g)
Fresh ginger (peeled, finely sliced)½ thumb-sized piece
Garlic (finely sliced)2 cloves
Scallions (finely sliced)2
Mild vegetable oil (for frying)As needed
For the General Tso SauceGranulated sugar2 tablespoons
Sriracha sauce1 teaspoon
Sweet chili sauce1 tablespoon
Oyster sauce1 tablespoon
Black rice vinegar½ tablespoon
Light soy sauce1 tablespoon
Dark soy sauce½ teaspoon
Water¼ cup (60 ml)
For the MarinadeSesame oil1 teaspoon
Granulated sugar½ teaspoon
Light soy sauce1 tablespoon
Egg (lightly beaten)1 large
To ServeSliced red chileOptional
Sliced scallionsOptional
Steamed riceAs desired
Flash-fried green vegetablesOptional

How to Make General Tso’s Chicken

1. Soak the Chiles

Place the dried red chiles in hot water and let them soak for 10 minutes to soften. Drain and set aside.

2. Marinate the Chicken

In a bowl, combine sesame oil, granulated sugar, light soy sauce, and the beaten egg. Add the diced chicken thighs, ensuring each piece is coated evenly. Let the chicken marinate for at least 20 minutes.

3. Coat the Chicken

In a shallow dish, mix the seasoned cornstarch with salt and pepper. Dredge the marinated chicken pieces in the cornstarch mixture, ensuring they are fully coated.

4. Fry the Chicken

Heat vegetable oil in a wok or deep skillet over medium-high heat. Fry the coated chicken pieces in small batches for 4-5 minutes, or until golden and crispy. Remove and drain on paper towels.

5. Prepare the Sauce

In a small bowl, mix together sugar, Sriracha, sweet chili sauce, oyster sauce, black rice vinegar, light soy sauce, dark soy sauce, and water. Set aside.

6. Sauté the Aromatics

Remove excess oil from the skillet, leaving about 1 tablespoon. Add the ginger, garlic, and softened red chiles, and sauté for 1-2 minutes until fragrant.

7. Combine Chicken and Sauce

Add the fried chicken back into the skillet and pour the sauce over it. Stir well, ensuring each piece is coated in the sauce. Simmer for 2-3 minutes until the sauce thickens slightly and clings to the chicken.

8. Garnish and Serve

Transfer the chicken to a serving dish, garnish with sliced red chiles and scallions, and serve immediately with steamed rice and green vegetables if desired.

Tips for Success

  • Double-Fry for Extra Crunch: For even crispier chicken, fry the pieces once, let them cool, and fry them a second time.
  • Use Chicken Thighs: These are juicier and more flavorful than chicken breasts.
  • Adjust the Heat: Add more dried chiles or Sriracha if you like it spicier, or reduce them for a milder dish.
  • Serve Fresh: General Tso’s Chicken tastes best when served immediately to preserve its crispy texture.

Nutritional Information

NutrientAmount
Calories420
Protein25g
Carbohydrates40g
Fat16g
Sodium860mg

FAQs About General Tso’s Chicken

1. Can I use chicken breasts instead of thighs?

Yes, you can substitute chicken breasts, but thighs offer better flavor and tenderness.

2. What can I serve with General Tso’s Chicken?

Steamed jasmine rice, fried rice, or stir-fried vegetables pair beautifully with this dish.

3. Can I make this gluten-free?

Absolutely! Replace soy sauce with gluten-free tamari or coconut aminos, and ensure your cornstarch is gluten-free.

4. Can I bake or air-fry the chicken instead of deep-frying?

Yes, you can bake the chicken at 400°F (200°C) for 20-25 minutes or air-fry at 375°F (190°C) for 12-15 minutes.

5. How do I store leftovers?

Store in an airtight container in the refrigerator for up to 2 days. Reheat in a skillet to regain some crispiness.

6. Can I make the sauce ahead of time?

Yes, you can mix the sauce ingredients in advance and refrigerate for up to 3 days.

Your New Favorite Takeout Classic

Making General Tso’s Chicken at home is easier than you might think and so much more satisfying than takeout. This recipe delivers everything you love about the dish—crispy chicken, a bold and flavorful sauce, and the perfect balance of sweet and spicy.

So why wait? Gather your ingredients, heat up your wok, and create this irresistible dish in your own kitchen. Whether it’s a family dinner or a meal to impress friends, General Tso’s Chicken is guaranteed to be a hit!

General Tso’s Chicken: A Sweet, Spicy, and Crispy Delight

General Tso’s Chicken is a Chinese-American favorite featuring crispy chicken coated in a sweet, tangy, and slightly spicy sauce. Perfectly balanced with bold flavors, it’s easy to make at home and is better than takeout.
Prep Time 20 minutes
Cook Time 20 minutes
Total Time 40 minutes
Servings: 4
Course: Main Course
Cuisine: Chinese-American
Calories: 420

Ingredients
  

For the Crispy Chicken
  • 10 dried red chiles
  • Hot water to soak chiles
  • 10 ½ oz 300 g boneless, skinless chicken thighs, diced into 1-inch pieces
  • 1 ¾ cups 210 g cornstarch, seasoned with ¼ tsp salt and pepper
  • ½ thumb-sized piece fresh ginger finely sliced
  • 2 garlic cloves finely sliced
  • 2 scallions finely sliced
  • Mild vegetable oil for frying
For the General Tso Sauce
  • 2 tbsp granulated sugar
  • 1 tsp Sriracha sauce
  • 1 tbsp sweet chili sauce
  • 1 tbsp oyster sauce
  • ½ tbsp black rice vinegar
  • 1 tbsp light soy sauce
  • ½ tsp dark soy sauce
  • ¼ cup 60 ml water
  • For the Marinade
  • 1 tsp sesame oil
  • ½ tsp granulated sugar
  • 1 tbsp light soy sauce
  • 1 large egg lightly beaten
To Serve
  • Sliced red chile
  • Sliced scallions
  • Steamed rice
  • Flash-fried green vegetables optional

Method
 

Soak the Chiles
  1. Place the dried red chiles in hot water for 10 minutes to soften. Drain and set aside.
Marinate the Chicken
  1. Combine sesame oil, sugar, light soy sauce, and the beaten egg in a bowl. Add diced chicken thighs, ensuring they are evenly coated, and let marinate for 20 minutes.
Coat the Chicken
  1. Mix the seasoned cornstarch with salt and pepper. Dredge the marinated chicken pieces in the mixture, ensuring full coverage.
Fry the Chicken
  1. Heat vegetable oil in a wok or skillet over medium-high heat. Fry the coated chicken in batches for 4-5 minutes, or until golden and crispy. Drain on paper towels.
Make the Sauce
  1. In a small bowl, mix sugar, Sriracha, sweet chili sauce, oyster sauce, black rice vinegar, light soy sauce, dark soy sauce, and water. Set aside.
Sauté the Aromatics
  1. Remove excess oil from the skillet, leaving about 1 tablespoon. Add ginger, garlic, and softened red chiles, and sauté for 1-2 minutes until fragrant.
Toss Chicken in Sauce
  1. Return the fried chicken to the skillet and pour the prepared sauce over it. Stir until every piece is evenly coated, then let it simmer for 2-3 minutes.
Garnish and Serve
  1. Garnish with sliced scallions and red chiles. Serve immediately with steamed rice and vegetables if desired.

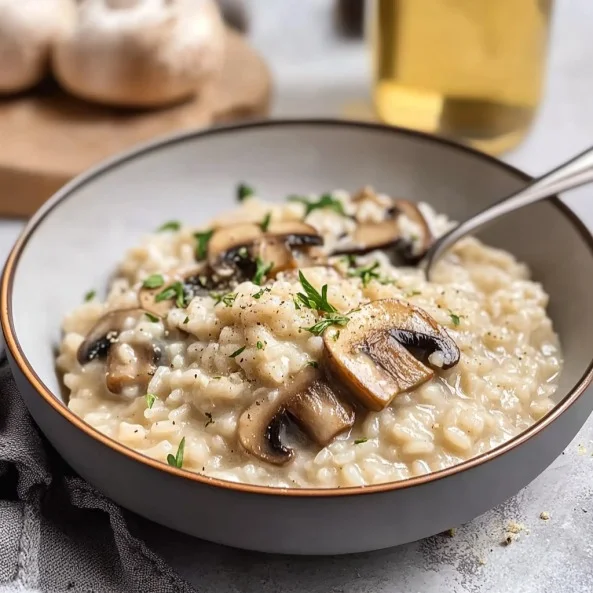
Mushroom Risotto: A Creamy and Delicious Italian Classic

Picture this: a cold evening, your favorite music playing softly in the background, and the comforting aroma of creamy mushroom risotto wafting through your kitchen. There’s something magical about this dish that feels both luxurious and comforting at the same time. Whether you’re cooking for yourself, your family, or hosting a dinner party, mushroom risotto is always a crowd-pleaser.

This creamy Italian rice dish, infused with earthy mushrooms and a splash of wine, is deceptively simple to make. And the best part? You don’t need to be a professional chef to nail this recipe. With a little patience and a few key ingredients, you can create a restaurant-quality dish right at home.

Why You’ll Love Mushroom Risotto

  • Rich and Creamy: Perfectly cooked rice with a velvety texture makes this dish incredibly satisfying.
  • Customizable: Swap ingredients to suit your tastes, such as using different mushrooms or a vegetarian broth.
  • Elegant Yet Simple: Mushroom risotto feels fancy enough for special occasions but is simple enough for a cozy weeknight meal.
  • One-Pan Wonder: Minimal cleanup is required since everything is cooked in a single pot or pan.

Ingredients for Mushroom Risotto

Here’s what you’ll need to make this creamy and flavorful dish:

IngredientQuantity
Chicken stock (or vegetable stock)5 to 6 cups
Butter2 tablespoons
Mushrooms (shiitake, chanterelle, or oyster)2 cups (cleaned, trimmed, cut)
Minced shallot or yellow onion1/3 cup
Risotto rice (e.g., Arborio)1 3/4 cups
Brandy, vermouth, or dry white wine2/3 cup
Parmesan cheese (freshly grated)1/3 cup
Fresh thyme leaves (chopped)1 teaspoon
Kosher salt and freshly ground black pepperTo taste
Fresh parsley or chives (chopped)2 tablespoons

How to Make Mushroom Risotto

1. Gather Your Ingredients

Before you begin, measure and prepare all your ingredients. Chop the mushrooms, mince the shallots or onion, and have your stock warming on the stovetop. Warm broth is crucial for achieving the perfect risotto texture.

2. Sauté the Mushrooms

  • Heat 1 tablespoon of butter in a large skillet or heavy-bottomed pot over medium heat.
  • Add the mushrooms and cook for 5-7 minutes until softened and slightly browned. Season with a pinch of salt and pepper.
  • Remove the mushrooms from the pan and set them aside.

3. Sauté the Shallots

  • In the same pan, melt the remaining tablespoon of butter. Add the minced shallots or onion and sauté for 2-3 minutes until they become translucent and fragrant.

4. Toast the Rice

  • Add the risotto rice to the pan and stir to coat it with the butter and shallots.
  • Cook the rice for 1-2 minutes, stirring frequently, until the edges of the grains become translucent. This step helps the rice absorb the liquid more effectively.

5. Deglaze with Wine

  • Pour in the brandy, vermouth, or dry white wine. Stir constantly until the liquid is mostly absorbed by the rice. This step adds depth and flavor to the dish.

6. Add the Stock Gradually

  • Begin adding the warm stock, one ladleful at a time, stirring frequently. Allow the rice to absorb most of the liquid before adding the next ladle.
  • Continue this process for about 18-20 minutes, or until the rice is tender but still has a slight bite (al dente).

7. Stir in the Mushrooms and Cheese

  • When the rice is cooked, stir the sautéed mushrooms back into the pot.
  • Add the freshly grated Parmesan cheese and chopped thyme leaves. Stir well to combine and melt the cheese.

8. Season to Taste

  • Season the risotto with kosher salt and freshly ground black pepper. Taste and adjust as needed.

9. Garnish and Serve

  • Garnish the risotto with chopped fresh parsley or chives for a pop of color and freshness. Serve immediately while it’s hot and creamy.

Tips for Perfect Mushroom Risotto

  • Use the Right Rice: Arborio, Carnaroli, or Vialone Nano rice varieties work best for risotto because of their high starch content, which creates the creamy texture.
  • Warm the Stock: Always use warm stock to keep the cooking process consistent and avoid cooling the rice.
  • Stir Frequently: Regular stirring helps release the starch from the rice, which creates the creamy texture.
  • Don’t Rush: Risotto requires patience. Add the stock gradually and let the rice absorb it fully before adding more.
  • Fresh Ingredients: Freshly grated Parmesan and high-quality mushrooms make a big difference in flavor.

Nutritional Information

Here’s an approximate nutritional breakdown per serving (serves 4):

NutrientAmount
Calories400
Protein12g
Carbohydrates48g
Fat15g
Sodium650mg

Make-Ahead and Storage Instructions

Make-Ahead Tips

  • While risotto is best served fresh, you can prepare the mushrooms and stock ahead of time. Store them separately in airtight containers in the fridge until ready to use.

Storage

  • Store leftover risotto in an airtight container in the refrigerator for up to 3 days.

Reheating

  • Reheat risotto in a skillet over low heat, adding a splash of stock or water to revive its creamy texture.

Creative Variations of Mushroom Risotto

  • Truffle Risotto: Drizzle truffle oil over the risotto just before serving for an indulgent twist.
  • Vegetable Risotto: Add cooked peas, asparagus, or spinach for added nutrition and flavor.
  • Seafood Risotto: Stir in cooked shrimp or scallops for a luxurious main course.
  • Vegan Option: Use vegetable stock, skip the Parmesan, and add nutritional yeast for a cheesy flavor.

FAQs About Mushroom Risotto

1. Can I make risotto without wine?

Yes! You can skip the wine and substitute an equal amount of additional stock or water. While wine adds depth, the dish will still be delicious without it.

2. What type of mushrooms should I use?

Flavorful mushrooms like shiitake, chanterelle, or oyster work best, but you can also use cremini or portobello mushrooms.

3. How do I prevent risotto from sticking to the pan?

Stir frequently and make sure the pan is well-lubricated with butter or olive oil at the start of cooking.

4. Can I make risotto in advance for a dinner party?

Risotto is best served fresh, but you can cook it 80% of the way, refrigerate it, and finish cooking with stock just before serving.

5. What can I serve with mushroom risotto?

Mushroom risotto pairs well with a fresh green salad, crusty bread, or roasted vegetables. For a protein, try grilled chicken or seared salmon.

6. Is risotto gluten-free?

Yes, risotto rice is naturally gluten-free. Just ensure that your stock and other ingredients are also gluten-free.

Your New Favorite Comfort Dish

Making mushroom risotto at home is more than just cooking—it’s about creating a warm, comforting meal that brings people together. Whether you’re preparing it for a quiet night in or a special gathering, this creamy, flavorful dish will never fail to impress.

So what are you waiting for? Grab your favorite mushrooms, a bottle of wine, and let the magic of risotto-making begin. Your taste buds (and your guests) will thank you for it!

A Creamy and Delicious Italian Classic

This mushroom risotto is the perfect combination of creamy, comforting, and luxurious. Made with tender risotto rice, earthy mushrooms, and a hint of wine, this Italian classic is perfect for any occasion—from weeknight dinners to special gatherings.
Prep Time 10 minutes
Cook Time 30 minutes
Total Time 40 minutes
Servings: 4
Course: Main Course
Cuisine: Italian
Calories: 350

Ingredients
  

  • 5 to 6 cups chicken stock or vegetable stock for a vegetarian option
  • 2 tablespoons butter
  • 2 cups mushrooms shiitake, chanterelle, or oyster, cleaned and cut into pieces
  • 1/3 cup minced shallot or yellow onion
  • 1 3/4 cups Arborio or other risotto rice
  • 2/3 cup brandy vermouth, or dry white wine
  • 1/3 cup freshly grated Parmesan cheese
  • 1 teaspoon fresh thyme chopped
  • Kosher salt and freshly ground black pepper to taste
  • 2 tablespoons fresh parsley or chives chopped

Method
 

  1. Warm the Stock: Heat the chicken or vegetable stock in a pot and keep it warm on low heat throughout the cooking process.
  2. Cook the Mushrooms: Melt 1 tablespoon of butter in a large skillet over medium heat. Add the mushrooms, season with a pinch of salt, and cook for 5-7 minutes until browned. Remove and set aside.
  3. Sauté Shallots: In the same pan, melt the remaining tablespoon of butter. Add the minced shallots or onions and sauté for 2-3 minutes until translucent.
  4. Toast the Rice: Stir the risotto rice into the shallots, coating it with the butter. Cook for 1-2 minutes until the edges of the grains are translucent.
  5. Deglaze with Wine: Pour in the wine, stirring constantly until it is mostly absorbed by the rice.
  6. Add Stock Gradually: Add one ladle of warm stock to the rice, stirring frequently. Let the liquid absorb before adding the next ladle. Repeat this process for about 18-20 minutes, until the rice is tender but still slightly firm (al dente).
  7. Combine Mushrooms and Cheese: Stir the cooked mushrooms back into the risotto. Add the grated Parmesan cheese and thyme, mixing well until the cheese melts.
  8. Season and Serve: Season with salt and freshly ground black pepper to taste. Garnish with parsley or chives and serve immediately.

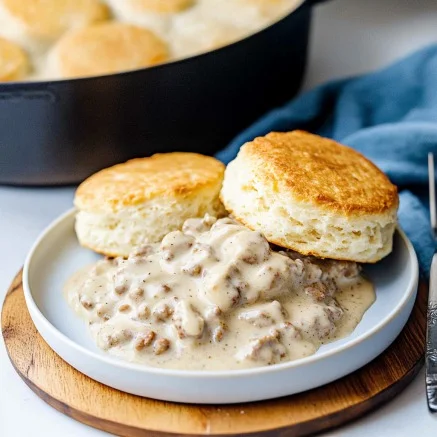
Biscuits and Sausage Gravy: The Perfect Comfort Breakfast

There’s nothing quite like starting your day with a plate of biscuits and sausage gravy. It’s the kind of hearty, soul-warming breakfast that makes you want to slow down and savor every bite. Whether it’s a weekend brunch with your family or a cozy meal on a chilly morning, this classic Southern dish never fails to deliver comfort and satisfaction.

Fluffy, buttery biscuits smothered in creamy sausage gravy—this is a breakfast that feels like a hug on a plate. The best part? You don’t have to be a pro in the kitchen to make it! With just a few simple ingredients and steps, you’ll have this delicious meal on the table in no time.

Why You’ll Love Biscuits and Sausage Gravy

  • Easy to Make: This recipe uses basic ingredients and straightforward steps that anyone can follow.
  • Perfect for Any Occasion: Whether it’s breakfast, brunch, or even “breakfast for dinner,” this dish is always a crowd-pleaser.
  • Customizable: Adjust the spice level or add your favorite herbs to make it your own.
  • Ultimate Comfort Food: Warm, creamy, and satisfying—this meal is the definition of comfort.

Ingredients for Biscuits and Sausage Gravy

Here’s what you’ll need to whip up this classic Southern breakfast:

IngredientQuantity
Ground sausage1 lb
All-purpose flour½ cup
Unsalted butter2 tablespoons
Milk3 ½ cups
Ground black pepper1 teaspoon
Sage1 teaspoon
Red pepper flakes (optional)¼ teaspoon
Salt1 pinch
Homemade buttermilk biscuits12 (or store-bought if desired)

How to Make Biscuits and Sausage Gravy

1. Prepare Your Ingredients

Gather all your ingredients and have them measured out before you begin. This will make the cooking process seamless and stress-free.

2. Cook the Sausage

  • Heat a large skillet over medium heat. Add the ground sausage and cook, breaking it apart with a spatula, until browned and fully cooked (about 6-8 minutes).
  • Remove the cooked sausage from the skillet and set it aside on a plate, leaving the rendered fat in the skillet.

3. Make the Roux

  • Reduce the heat to medium-low. Add the unsalted butter to the skillet with the sausage drippings. Once melted, whisk in the all-purpose flour.
  • Cook the flour and butter mixture (roux) for 1-2 minutes, whisking constantly, until it turns golden and smooth. This step removes the raw taste of the flour and thickens the gravy.

4. Add the Milk

  • Gradually pour in the milk, about ½ cup at a time, whisking continuously to prevent lumps from forming. Once all the milk is added, increase the heat to medium and cook the mixture for 5-7 minutes, whisking occasionally, until it thickens to a creamy consistency.

5. Season the Gravy

  • Stir in the black pepper, sage, red pepper flakes (if using), and a pinch of salt. Adjust the seasoning to taste.

6. Add the Sausage Back In

  • Return the cooked sausage to the skillet, stirring it into the creamy gravy. Let the mixture simmer for 2-3 minutes to allow the flavors to meld together.

7. Serve Over Biscuits

  • Split the warm biscuits in half and place them on plates. Ladle the sausage gravy generously over the biscuits and garnish with a sprinkle of freshly ground black pepper or chopped parsley if desired.

Making Perfect Buttermilk Biscuits

If you want to go the extra mile, try making homemade biscuits to pair with your sausage gravy. They’re surprisingly simple to make and take the dish to the next level!

Basic Buttermilk Biscuit Recipe

  • 2 ½ cups all-purpose flour
  • 1 tablespoon baking powder
  • 1 teaspoon salt
  • ½ cup cold unsalted butter, cubed
  • 1 cup cold buttermilk

Steps

  1. Preheat your oven to 425°F (220°C).
  2. In a large bowl, whisk together the flour, baking powder, and salt.
  3. Cut in the cold butter using a pastry cutter or fork until the mixture resembles coarse crumbs.
  4. Stir in the buttermilk until just combined. Be careful not to overmix.
  5. Turn the dough onto a floured surface, knead gently, and roll out to about 1-inch thickness.
  6. Use a biscuit cutter to cut out rounds and place them on a baking sheet.
  7. Bake for 12-15 minutes, or until the tops are golden brown.

Tips for the Best Biscuits and Sausage Gravy

  • Use Fresh Sausage: High-quality sausage with good seasoning will make all the difference.
  • Whisk Continuously: When adding the milk to the roux, whisking prevents lumps and ensures a smooth gravy.
  • Adjust the Thickness: If the gravy becomes too thick, add a splash of milk to loosen it up.
  • Customize the Heat: Add more red pepper flakes or hot sauce for a spicier gravy.

Nutritional Information

Here’s an approximate breakdown of the nutritional value per serving (1 biscuit with sausage gravy):

NutrientAmount
Calories450
Protein18g
Carbohydrates30g
Fat28g
Sodium850mg

Make-Ahead and Storage Instructions

Make-Ahead Tips

  • The sausage gravy can be made up to 2 days in advance. Store it in an airtight container in the refrigerator.

Reheating

  • Reheat the gravy in a skillet over medium-low heat, stirring frequently. Add a splash of milk to restore its creamy consistency.

Freezing

  • You can freeze sausage gravy for up to 3 months. Let it cool completely, transfer it to a freezer-safe container, and thaw in the fridge overnight before reheating.

Serving Ideas

While biscuits and sausage gravy is a complete meal on its own, you can pair it with other breakfast favorites for a more elaborate spread:

  • Scrambled eggs or omelets
  • Crispy bacon or breakfast sausage links
  • Fresh fruit or a side salad for balance

FAQs About Biscuits and Sausage Gravy

1. Can I use pre-made biscuits?

Yes, store-bought biscuits work perfectly if you’re short on time.

2. How do I make the gravy gluten-free?

Substitute the all-purpose flour with a 1:1 gluten-free flour blend for the roux.

3. What type of sausage is best?

Pork sausage is traditional, but you can use turkey sausage or even plant-based sausage for a lighter option.

4. Can I use a different type of milk?

Yes, you can use whole milk, 2%, or even unsweetened almond milk. Keep in mind that non-dairy options may slightly alter the flavor.

5. How do I prevent the gravy from becoming lumpy?

Whisk continuously when adding the milk to the roux, and make sure to add the milk gradually.

6. Can I add vegetables to the gravy?

Absolutely! Diced mushrooms, onions, or even bell peppers make great additions for extra flavor and texture.

Your New Breakfast Tradition

Biscuits and sausage gravy is more than just a meal—it’s an experience that brings warmth and comfort to any morning. Whether you’re serving it for a weekend brunch or treating yourself to a cozy breakfast, this recipe is sure to impress.

So, what are you waiting for? Grab your ingredients, roll up your sleeves, and get ready to create the ultimate comfort food. You’ll love how easy it is to make, and your taste buds will thank you for every creamy, savory bite!

Biscuits and Sausage Gravy

Biscuits and sausage gravy is the ultimate comfort breakfast. Fluffy, buttery biscuits are topped with a rich, creamy sausage gravy for a meal that’s hearty, satisfying, and easy to make. Whether it’s for a weekend brunch or a quick breakfast-for-dinner, this dish is guaranteed to delight every time!
Prep Time 5 minutes
Cook Time 20 minutes
Total Time 25 minutes
Servings: 6
Course: Breakfast
Cuisine: Southern-inspired
Calories: 450

Ingredients
  

Sausage Gravy
  • 1 lb ground sausage
  • ½ cup all-purpose flour
  • 2 tablespoons unsalted butter
  • 3 ½ cups milk
  • 1 teaspoon ground black pepper
  • 1 teaspoon sage
  • ¼ teaspoon red pepper flakes optional
  • 1 pinch salt
Biscuits
  • 12 homemade buttermilk biscuits or store-bought if preferred

Method
 

  1. Cook the Sausage: Heat a skillet over medium heat and cook the sausage, breaking it up into crumbles, until browned. Remove the sausage and set it aside.
  2. Make the Roux: Add butter to the skillet with the sausage drippings. Once melted, whisk in the flour and cook for 1-2 minutes.
  3. Add the Milk: Slowly whisk in the milk, about ½ cup at a time, until smooth and thickened (5-7 minutes).
  4. Season the Gravy: Stir in the black pepper, sage, red pepper flakes (if using), and a pinch of salt. Adjust seasoning to taste.
  5. Combine with Sausage: Return the cooked sausage to the skillet, stirring it into the gravy. Simmer for 2-3 minutes.
  6. Serve: Split warm biscuits in half and spoon the sausage gravy generously over the top. Enjoy!

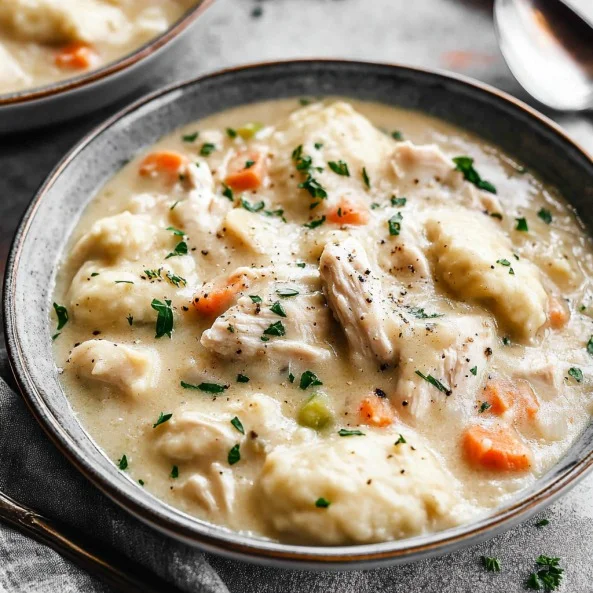
Chicken and Dumplings: The Ultimate Comfort Food Recipe

There’s something about a warm bowl of chicken and dumplings that feels like a hug in a bowl. Whether it’s a chilly winter evening or you’re simply craving something hearty and satisfying, this dish always delivers. It’s the kind of meal that brings people together, warms your soul, and reminds you of the simple joys of home-cooked comfort food.

From the tender chicken and creamy broth to the pillowy dumplings that float on top, every bite of chicken and dumplings is a delightful combination of flavor and texture. Best of all, it’s easier to make than you might think! Whether you’re a seasoned cook or just starting out, this recipe will guide you step-by-step to create a dish your family will love.

Why Chicken and Dumplings is a Beloved Classic

  • Hearty and Filling: It’s a one-pot meal packed with protein, vegetables, and fluffy dumplings.
  • Perfect for Any Season: While it’s a winter favorite, this dish is just as satisfying on a rainy spring day.
  • Family Favorite: A dish that even picky eaters will enjoy, making it great for family dinners.
  • Customizable: You can adapt the recipe to suit your tastes or dietary preferences.

Ingredients for Chicken and Dumplings

Here’s everything you’ll need to make this classic dish. The recipe is divided into two parts: the chicken stew and the dumplings.

Chicken Stew IngredientsQuantity
Olive oil2 tablespoons
Celery, diced2 ribs
Carrots, diced2 large
Yellow onion, chopped1
Garlic, minced1 clove
Unsalted butter5 tablespoons
All-purpose flour⅓ cup
Low-sodium chicken broth6 cups
Chicken bouillon paste (or base)4 teaspoons
Dried thyme¼ teaspoon
Dried sage¼ teaspoon
Dried rosemary¼ teaspoon
Kosher salt1 teaspoon
Black pepper, freshly ground½ teaspoon
Boneless, skinless chicken breasts or thighs1 ½ pounds
Evaporated milk (canned)12 oz
Frozen peas½ cup
Fresh parsley (for garnish)As desired
Dumpling IngredientsQuantity
All-purpose flour1 ⅔ cups
Baking powder1 tablespoon
Kosher salt½ teaspoon
Milk¾ cup
Sour cream¼ cup
Butter, melted2 tablespoons

How to Make Chicken and Dumplings

1. Prepare Your Ingredients

Start by prepping all your ingredients to ensure smooth cooking:

  • Dice the celery, carrots, and onion. Mince the garlic.
  • Cut the chicken into large chunks for even cooking.

2. Sauté the Vegetables

  • Heat 2 tablespoons of olive oil in a large pot or Dutch oven over medium heat.
  • Add the diced celery, carrots, onion, and garlic. Sauté for 5-6 minutes until softened and fragrant.

3. Make the Roux

  • Add the butter to the pot and let it melt. Stir in the flour and cook for 1-2 minutes, whisking constantly.
  • This roux will thicken the broth and create the creamy base for your chicken and dumplings.

4. Add the Broth and Seasonings

  • Gradually pour in the chicken broth while whisking to prevent lumps.
  • Stir in the chicken bouillon paste, dried thyme, sage, rosemary, salt, and pepper. Bring the mixture to a gentle boil.

5. Add the Chicken

  • Place the chicken breasts or thighs into the pot, ensuring they’re submerged in the broth. Reduce the heat to low and let the chicken simmer for 20-25 minutes, or until fully cooked.

6. Shred the Chicken

  • Remove the cooked chicken from the pot and shred it using two forks. Return the shredded chicken to the pot.

7. Add the Evaporated Milk and Peas

  • Pour in the evaporated milk and stir to combine. Add the frozen peas and simmer for an additional 5 minutes.

Making the Dumplings

1. Mix the Dumpling Dough

  • In a medium bowl, combine the flour, baking powder, and salt.
  • Stir in the milk, sour cream, and melted butter until just combined. Be careful not to overmix; the dough should be slightly sticky.

2. Drop the Dumplings

  • Using a spoon or small cookie scoop, drop rounded spoonfuls of the dough onto the surface of the simmering stew. Make sure there’s space between each dumpling, as they will expand as they cook.

3. Simmer the Dumplings

  • Cover the pot with a tight-fitting lid and let the dumplings cook for 15 minutes. Avoid lifting the lid during this time, as the steam is essential for cooking the dumplings.

Finishing Touches

  • Once the dumplings are cooked through and fluffy, garnish the chicken and dumplings with freshly chopped parsley.
  • Serve hot and enjoy the warm, comforting flavors of this classic dish.

Tips for the Best Chicken and Dumplings

  • Use Fresh Herbs: While dried herbs work well, using fresh thyme, rosemary, and sage will add a burst of flavor.
  • Don’t Overmix the Dumpling Dough: Overmixing can make the dumplings dense instead of fluffy.
  • Low and Slow: Simmer the stew on low heat to allow the flavors to develop fully.
  • Add a Kick: For extra flavor, stir in a pinch of cayenne pepper or a dash of hot sauce.

Nutritional Information

Here’s an approximate nutritional breakdown per serving (serves 6):

NutrientAmount
Calories450
Protein32g
Carbohydrates28g
Fat21g
Fiber3g
Sodium950mg

Make-Ahead and Storage Instructions

Make-Ahead Tips

  • The chicken stew can be made a day in advance and stored in the refrigerator. Reheat gently before adding the dumplings.

Storage

  • Refrigeration: Store leftovers in an airtight container in the refrigerator for up to 3 days.
  • Freezing: Freeze the chicken stew (without dumplings) for up to 2 months. Thaw and reheat before adding fresh dumplings.

Reheating

  • Reheat the dish in a pot over medium-low heat, stirring occasionally. Add a splash of broth or milk if the stew has thickened too much.

FAQs About Chicken and Dumplings

1. Can I use rotisserie chicken?

Yes! Using rotisserie chicken is a great time-saving option. Simply shred the cooked chicken and add it to the stew during Step 7.

2. Can I make the dumplings gluten-free?

Absolutely. Replace the all-purpose flour with a 1:1 gluten-free flour blend for both the stew and dumplings.

3. What can I use instead of evaporated milk?

You can substitute evaporated milk with heavy cream, half-and-half, or even whole milk for a lighter option.

4. How do I know when the dumplings are done?

The dumplings are fully cooked when they are fluffy and no longer doughy in the center. You can test one by cutting it in half.

5. Can I add other vegetables?

Of course! Corn, green beans, or mushrooms make great additions to the stew.

6. Can I make this in a slow cooker?

Yes. Cook the stew ingredients (minus the dumplings) in the slow cooker on low for 6-8 hours or high for 3-4 hours. Add the dumplings in the last 30 minutes and cook on high.

Your New Comfort Food Staple

This chicken and dumplings recipe is everything you want in a comfort meal: rich, creamy, hearty, and utterly satisfying. Whether it’s a cold evening or a family dinner, this dish will quickly become a go-to in your kitchen.

So why wait? Gather your ingredients, warm up your pot, and create this delicious classic. You’ll love every spoonful, and so will everyone you share it with!

Chicken and Dumplings: The Ultimate Comfort Food Recipe

Chicken and dumplings is the ultimate comfort food—a creamy, hearty stew packed with tender chicken, vegetables, and fluffy dumplings. This one-pot meal is perfect for cozy family dinners or when you’re craving something warm and satisfying.
Prep Time 15 minutes
Cook Time 40 minutes
Total Time 55 minutes
Servings: 6
Course: Main Course
Cuisine: American
Calories: 450

Ingredients
  

Chicken Stew
  • 2 tablespoons olive oil
  • 2 ribs celery diced
  • 2 large carrots diced
  • 1 yellow onion chopped
  • 1 clove garlic minced
  • 5 tablespoons unsalted butter
  • ⅓ cup all-purpose flour
  • 6 cups low-sodium chicken broth
  • 4 teaspoons chicken bouillon paste or base
  • ¼ teaspoon dried thyme
  • ¼ teaspoon dried sage
  • ¼ teaspoon dried rosemary
  • 1 teaspoon kosher salt
  • ½ teaspoon freshly ground black pepper
  • 1 ½ pounds boneless skinless chicken breasts or thighs
  • 12 oz evaporated milk canned
  • ½ cup frozen peas
  • Fresh parsley for garnish
Dumplings
  • 1 ⅔ cups all-purpose flour
  • 1 tablespoon baking powder
  • ½ teaspoon kosher salt
  • ¾ cup milk
  • ¼ cup sour cream
  • 2 tablespoons butter melted

Method
 

Prepare the Stew
  1. Heat olive oil in a large pot over medium heat. Sauté celery, carrots, onion, and garlic for 5-6 minutes until softened.
  2. Add butter and let it melt, then stir in the flour to create a roux. Cook for 1-2 minutes, whisking constantly.
  3. Slowly pour in the chicken broth while whisking to prevent lumps. Add chicken bouillon, thyme, sage, rosemary, salt, and pepper.
  4. Add the chicken to the pot. Simmer over low heat for 20-25 minutes, or until the chicken is fully cooked.
Shred the Chicken
  1. Remove the chicken from the pot and shred it using two forks.
  2. Return the shredded chicken to the pot and stir in the evaporated milk and frozen peas. Let it simmer while preparing the dumplings.
Make the Dumplings
  1. In a bowl, combine flour, baking powder, and salt. Add milk, sour cream, and melted butter. Stir until just combined (don’t overmix).
  2. Drop spoonfuls of the dough onto the surface of the simmering stew. Leave space between the dumplings.
Cook the Dumplings
  1. Cover the pot with a lid and let the dumplings cook for 15 minutes. Avoid lifting the lid during this time to allow steam to cook the dumplings fully.
Garnish and Serve
  1. Garnish the dish with fresh parsley and serve hot. Enjoy the creamy, comforting flavors of this hearty meal!

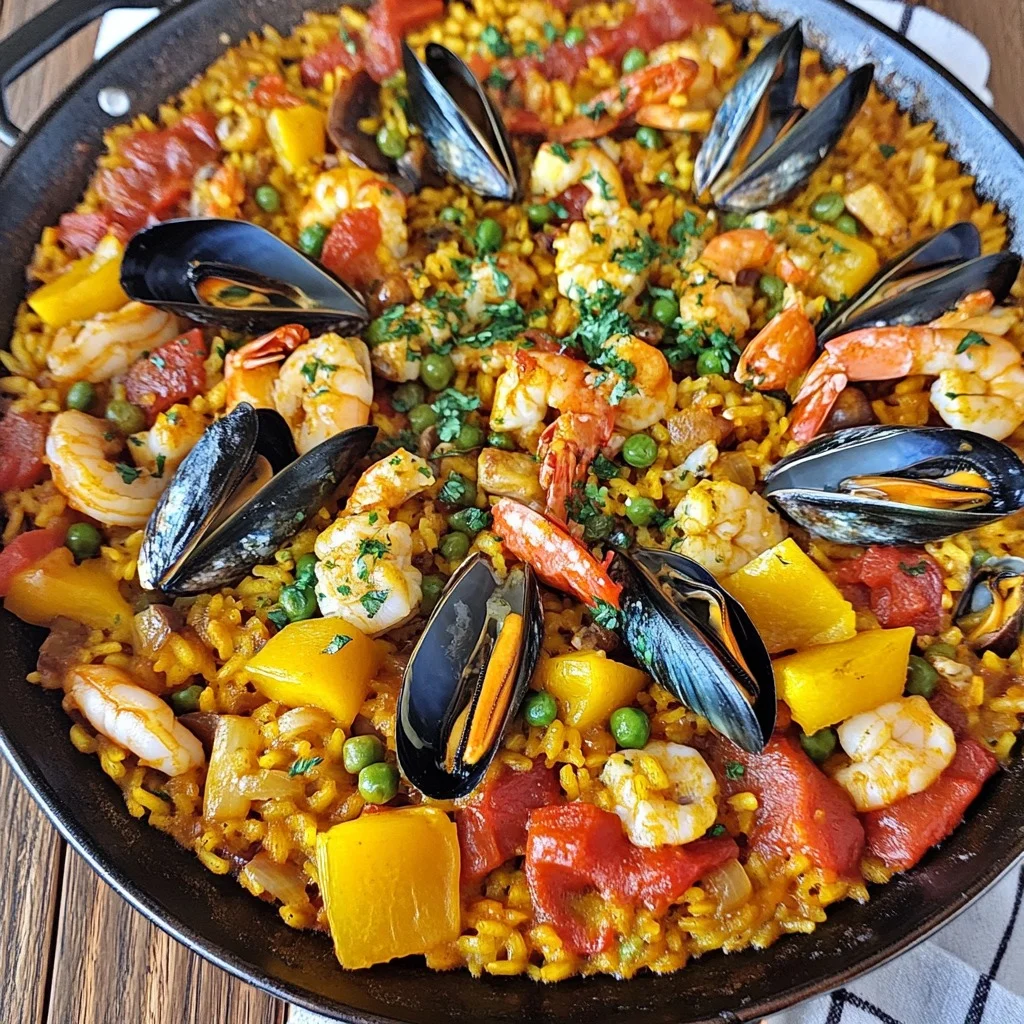
Spanish Seafood Paella: A Taste of Coastal Spain

Imagine the sun setting over a picturesque Spanish coastline, the sound of waves gently lapping against the shore, and the intoxicating aroma of saffron and seafood wafting through the air. That’s the magic of Spanish seafood paella—a dish that brings the vibrant flavors of Spain’s Mediterranean shores right to your table.

Whether you’re hosting a dinner party, celebrating a special occasion, or just craving something extraordinary, this iconic Spanish dish will make your meal unforgettable. With its tender seafood, fragrant saffron-infused rice, and bold Mediterranean flavors, paella is as much an experience as it is a meal.

Let’s dive into everything you need to know to create an authentic Spanish seafood paella in your own kitchen.

Why You’ll Love Spanish Seafood Paella

  • Authentic Flavors: A dish steeped in tradition, bursting with rich and aromatic Mediterranean ingredients.
  • Perfect for Entertaining: A show-stopping centerpiece for family dinners or special gatherings.
  • A One-Pan Meal: All the ingredients come together in one pan, making cleanup a breeze.
  • Customizable: You can adjust the seafood and spice levels to suit your preferences.

Ingredients for Spanish Seafood Paella

Here’s what you’ll need to create this delicious Spanish masterpiece:

IngredientQuantity
Garlic3 cloves (minced)
Onion½ onion (diced)
Red bell pepper½ (diced)
Squid1 tube (cleaned)
Raw jumbo shrimp12 (peeled & deveined)
Fresh mussels8 (cleaned)
Extra virgin olive oil⅓ cup (80 ml)
Tomato sauce½ cup (112 grams)
Sweet smoked Spanish paprika½ tsp (1.3 grams)
Fish broth2 ½ cups (600 ml)
Saffron threads or powder¼ tsp (0.17 grams)
Uncooked round rice1 cup (200 grams)
Lemon wedges2
ParsleyHandful (finely chopped)
Sea salt & black pepperTo taste

How to Make Spanish Seafood Paella

1. Gather and Prepare Your Ingredients

Start by prepping all your ingredients to ensure smooth cooking:

  • Mince the garlic, dice the onion, and chop the red bell pepper.
  • Clean the squid and slice it into rings.
  • Peel and devein the jumbo shrimp.
  • Clean the mussels by scrubbing the shells and removing the beards.

2. Heat the Pan and Infuse the Flavors

  • Heat ⅓ cup of extra virgin olive oil in a large, flat paella pan or skillet over medium heat.
  • Add the minced garlic, diced onion, and red bell pepper. Sauté for 3-4 minutes until softened and fragrant.

3. Build the Base with Tomato Sauce and Spices

  • Stir in ½ cup of tomato sauce and cook for 2 minutes.
  • Add ½ tsp of sweet smoked Spanish paprika and mix it into the vegetables for a smoky depth of flavor.

4. Add the Seafood

  • Add the squid rings to the pan and sauté for 2-3 minutes until slightly firm.
  • Arrange the shrimp and mussels evenly in the pan, ensuring each piece has contact with the base.

5. Incorporate the Rice

  • Pour in 1 cup of uncooked round rice, spreading it evenly across the pan without stirring.
  • This helps create the classic crispy bottom layer, known as “socarrat,” that paella is famous for.

6. Infuse with Saffron and Broth

  • Dissolve ¼ tsp of saffron threads in 2 ½ cups of warm fish broth.
  • Slowly pour the saffron-infused broth into the pan, covering the rice and seafood evenly.

7. Simmer to Perfection

  • Season with sea salt and black pepper to taste.
  • Bring the mixture to a gentle boil, then reduce the heat to low.
  • Simmer uncovered for 15-20 minutes, allowing the rice to absorb the broth and cook through. Avoid stirring to maintain the texture.

8. Let It Rest

  • Once the broth is fully absorbed and the rice is tender, remove the pan from the heat.
  • Cover the paella with a clean kitchen towel and let it rest for 5 minutes.

9. Garnish and Serve

  • Sprinkle freshly chopped parsley over the paella for a pop of color and flavor.
  • Serve with lemon wedges on the side for a zesty finish.

Tips for the Best Spanish Seafood Paella

  • Use Authentic Ingredients: Saffron and smoked paprika are essential for the authentic Spanish flavor.
  • Choose the Right Rice: Use short-grain rice like bomba or Calasparra, which absorbs liquid without becoming mushy.
  • Don’t Overcrowd: Avoid adding too much seafood or rice, which can prevent even cooking.
  • Get the Socarrat: Let the paella cook undisturbed toward the end to develop the crispy bottom layer.
  • Fresh Seafood is Key: Always use the freshest seafood available for the best flavor.

Nutritional Information

Here’s an approximate breakdown of the nutritional value per serving (serves 4):

NutrientAmount
Calories450
Protein28g
Carbohydrates40g
Fat18g
Fiber2g
Sodium800mg

Make-Ahead and Storage Instructions

Make-Ahead Tips

  • You can prepare the garlic, onion, and red bell pepper in advance by chopping them and storing them in airtight containers in the refrigerator.
  • Dissolve the saffron in the fish broth ahead of time and refrigerate until ready to use.

Storage

  • Store leftover paella in an airtight container in the refrigerator for up to 2 days.
  • To reheat, place the paella in a skillet over medium heat with a splash of fish broth to revive its texture.

Creative Variations of Seafood Paella

  • Mixed Paella: Add chicken and chorizo for a heartier variation.
  • Vegetarian Paella: Replace the seafood with artichokes, green beans, and mushrooms.
  • Spicy Paella: Add chili flakes or a splash of hot sauce for a spicy kick.

FAQs About Spanish Seafood Paella

1. What is the best type of pan for paella?

A wide, flat paella pan is ideal for even cooking and achieving the crispy bottom layer, but a large skillet can also work.

2. Can I use chicken broth instead of fish broth?

Yes, but fish broth adds a richer, more authentic flavor to the dish.

3. Can I make paella without saffron?

Saffron is a key ingredient for its distinct aroma and golden color. If unavailable, use turmeric as a substitute, though the flavor will differ.

4. How do I clean mussels?

Scrub the shells under cold water and remove the beards by pulling them away from the hinge of the shell.

5. Can I freeze leftover paella?

While paella is best enjoyed fresh, you can freeze it in an airtight container for up to 1 month. Reheat gently on the stovetop.

6. What can I serve with paella?

Pair paella with a crisp green salad, crusty bread, or a glass of chilled white wine for a complete meal.

Your Culinary Adventure Awaits

Cooking Spanish seafood paella is more than just making dinner—it’s about creating a vibrant, flavorful experience that brings a taste of Spain to your home. With its saffron-infused rice, tender seafood, and bold Mediterranean spices, this dish is sure to impress your family and guests alike.

So what are you waiting for? Gather your ingredients, roll up your sleeves, and dive into the art of paella-making. You’ll love the sense of accomplishment and, of course, the incredible flavors of this iconic Spanish dish!

Spanish Seafood Paella: A Taste of Coastal Spain

Spanish seafood paella is a classic Mediterranean dish that combines saffron-infused rice, tender seafood, and bold Spanish spices for a vibrant, flavorful meal. Whether for a family gathering or a special occasion, this one-pan dish is sure to impress with its authentic taste and stunning presentation.
Prep Time 15 minutes
Cook Time 25 minutes
Total Time 40 minutes
Servings: 4
Course: Main Course
Cuisine: Spanich-Inspired
Calories: 450

Ingredients
  

Seafood Paella Base
  • 3 cloves garlic minced
  • ½ onion diced
  • ½ red bell pepper diced
  • 1 tube squid cleaned and sliced into rings
  • 12 raw jumbo shrimp peeled and deveined
  • 8 fresh mussels cleaned
  • ⅓ cup extra virgin olive oil 80 ml
  • ½ cup tomato sauce 112 grams
  • ½ tsp sweet smoked Spanish paprika 1.3 grams
  • 2 ½ cups fish broth 600 ml
  • ¼ tsp saffron threads or powder 0.17 grams
  • 1 cup uncooked round rice 200 grams
  • 2 lemon wedges
  • Handful of parsley finely chopped
  • Sea salt & black pepper to taste

Method
 

  1. Prepare the Ingredients: Mince the garlic, dice the onion and red bell pepper, clean and slice the squid, peel and devein the shrimp, and clean the mussels.
  2. Cook the Base: Heat olive oil in a large skillet or paella pan over medium heat. Sauté the garlic, onion, and red bell pepper for 3-4 minutes.
  3. Add Tomato Sauce and Spices: Stir in the tomato sauce and smoked paprika, cooking for 2 minutes to develop the flavors.
  4. Cook the Seafood: Add the squid to the pan and sauté for 2-3 minutes. Arrange the shrimp and mussels evenly in the pan.
  5. Add the Rice: Sprinkle the uncooked rice evenly over the pan without stirring.
  6. Infuse with Broth and Saffron: Dissolve saffron in warm fish broth and pour evenly over the rice and seafood. Season with sea salt and black pepper.
  7. Simmer: Bring to a gentle boil, then reduce to low heat. Simmer uncovered for 15-20 minutes until the rice absorbs the broth.
  8. Rest and Serve: Remove from heat, cover with a clean towel, and let the paella rest for 5 minutes. Garnish with parsley and serve with lemon wedges.

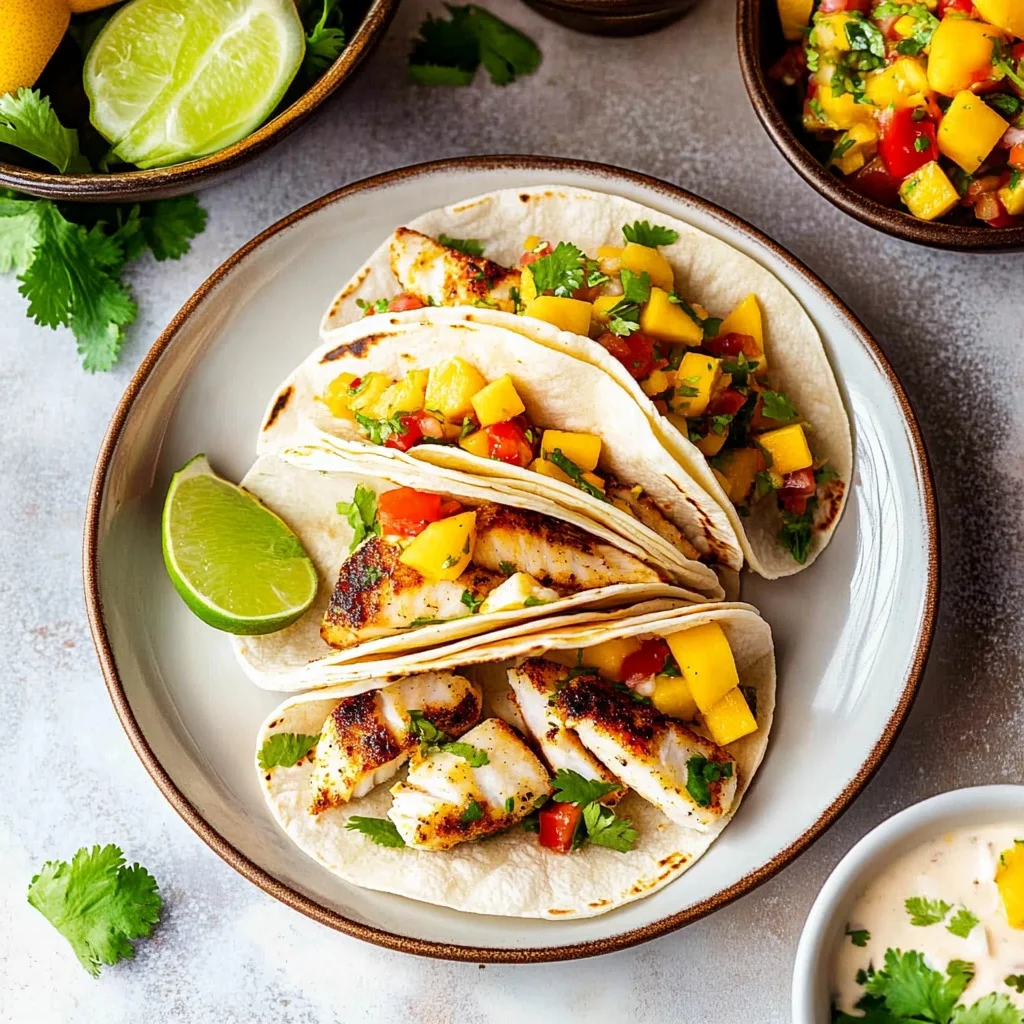
Fish Tacos with Mango Salsa: A Burst of Flavor in Every Bite

Close your eyes for a moment and imagine this: the crunch of a warm corn tortilla, the perfectly seasoned, flaky fish, the sweet and tangy mango salsa dancing on your taste buds, and the creamy tang of lime crema tying it all together. Fish tacos with mango salsa aren’t just a meal—they’re an experience. Whether you’re making dinner for your family, impressing guests, or simply treating yourself, this recipe delivers restaurant-quality flavor right from your kitchen.

These tacos are fresh, vibrant, and perfect for any occasion, from a casual weeknight dinner to a sunny backyard gathering. The combination of flavors and textures creates a dish that’s truly unforgettable. Let’s dive into everything you need to know about crafting the perfect fish tacos with mango salsa.

Why You’ll Fall in Love with This Recipe

  • A Symphony of Flavors: Sweet, spicy, smoky, and creamy—these tacos have it all.
  • Healthy and Wholesome: Packed with fresh ingredients, lean fish, and nutritious mango and peaches.
  • Quick and Easy: Ready in under 30 minutes, making it perfect for busy weeknights.
  • Customizable: Adjust the spice level, swap the fish, or add your favorite toppings.

Ingredients for Fish Tacos with Mango Salsa

Here’s a breakdown of the ingredients you’ll need for the three components of this recipe: the mango salsa, the fish, and the lime crema.

Peach and Mango SalsaQuantity
Diced mango1 cup (about 1 large mango)
Diced peaches1 cup (about 2 peaches)
Diced red bell peppers½ cup
Finely diced red onion¼ cup
Minced jalapeño pepper2 tablespoons
Minced cilantro1 tablespoon
Freshly squeezed lime juice1 tablespoon
Apple cider vinegar1 teaspoon
Salt¼ teaspoon
FishQuantity
Tilapia or other firm white fish1 ½ lb
Chili powder1 teaspoon
Smoked paprika½ teaspoon
Cumin½ teaspoon
Salt and pepperTo taste
Olive oil1 tablespoon
Fresh lime juiceFrom 1 lime
Lime CremaQuantity
Sour cream½ cup
Lime (zested and juiced)½
Garlic (minced)1 small clove
Kosher salt¼ teaspoon

Additional ingredients:

  • 8 corn tortillas (street-cart size or 6-inch, warmed or lightly charred)
  • Optional: avocado slices, lime wedges, extra cilantro for serving

How to Make Fish Tacos with Mango Salsa

1. Prepare the Mango Salsa

The key to a great salsa is fresh ingredients. Dice the mango, peaches, red bell peppers, and red onion into small, even pieces. In a mixing bowl:

  • Combine the diced mango, peaches, red bell peppers, red onion, jalapeño, and cilantro.
  • Add freshly squeezed lime juice, apple cider vinegar, and a pinch of salt. Mix well.
  • Let the salsa sit for 10-15 minutes to allow the flavors to meld together.

2. Season the Fish

  • Pat the fish fillets dry with a paper towel to ensure even seasoning.
  • In a small bowl, mix the chili powder, smoked paprika, cumin, salt, and pepper.
  • Rub the spice mixture evenly over both sides of the fish fillets.

3. Cook the Fish

  • Heat the olive oil in a large skillet over medium-high heat.
  • Add the fish fillets to the hot skillet and cook for 3-4 minutes on each side, depending on the thickness of the fish. The fish is done when it flakes easily with a fork.
  • Squeeze fresh lime juice over the cooked fish and set aside. Use a fork to gently break the fish into bite-sized pieces.

4. Make the Lime Crema

  • In a small bowl, whisk together the sour cream, lime zest, lime juice, minced garlic, and kosher salt.
  • Adjust the consistency with a splash of water if you prefer a thinner crema.

5. Warm the Tortillas

Warm the corn tortillas in a dry skillet over medium heat for 15-20 seconds on each side, or until lightly charred. Keep them warm by wrapping them in a clean kitchen towel.

6. Assemble the Tacos

  • Place a generous portion of fish onto each tortilla.
  • Top with the peach and mango salsa.
  • Drizzle with lime crema.
  • Add optional toppings like avocado slices, fresh cilantro, and a squeeze of lime.

Tips for the Perfect Fish Tacos

  • Choose the Right Fish: Tilapia, cod, mahi-mahi, or halibut work well because they’re firm and hold up during cooking.
  • Fresh is Best: Always use fresh produce for the mango salsa—it makes a huge difference in flavor.
  • Char the Tortillas: Lightly charring the tortillas adds a smoky flavor and helps prevent them from tearing.
  • Control the Heat: Adjust the jalapeño in the salsa or add a dash of hot sauce for extra spice.
  • Make Ahead: Prepare the salsa and lime crema ahead of time to save on prep work.

Nutritional Information

Here’s an approximate nutritional breakdown per serving (2 tacos):

NutrientAmount
Calories350
Protein25g
Carbohydrates20g
Fat18g
Fiber4g
Sodium400mg

Make-Ahead and Storage Instructions

Make-Ahead Tips

  • The mango salsa can be prepared up to a day in advance and stored in an airtight container in the refrigerator.
  • The lime crema can also be made ahead and stored in the fridge for up to 3 days.

Storage

  • Leftovers: Store leftover fish, salsa, and crema separately in airtight containers in the refrigerator.
  • Reheating Fish: Warm the fish gently in a skillet over low heat to prevent it from drying out.

Creative Serving Ideas

  • Taco Bar: Set up a DIY taco bar with additional toppings like shredded cabbage, pickled onions, and hot sauce.
  • Taco Bowls: Skip the tortillas and serve the fish and salsa over a bed of rice or quinoa.
  • Salad Option: Use the fish and salsa as a topping for a fresh green salad with a drizzle of lime crema.

FAQs About Fish Tacos with Mango Salsa

1. Can I use frozen fish?

Yes! Thaw the fish completely and pat it dry before seasoning and cooking.

2. What can I use instead of tilapia?

Other firm white fish like cod, mahi-mahi, halibut, or snapper work just as well.

3. How can I make this dairy-free?

Swap the sour cream in the lime crema for a dairy-free alternative like coconut yogurt.

4. Can I grill the fish instead of pan-frying?

Absolutely! Brush the fish with olive oil and grill over medium heat for 3-4 minutes per side.

5. How do I keep the tortillas from breaking?

Warm them before assembling to make them more pliable. You can also double-layer the tortillas for extra durability.

6. Can I make the salsa spicier?

Add extra jalapeño or even a pinch of cayenne pepper for a spicier salsa.

Your New Favorite Taco Recipe

These fish tacos with mango salsa are more than just a meal—they’re a celebration of fresh, bold flavors and vibrant textures. Perfectly seasoned fish, sweet and tangy mango salsa, and creamy lime crema come together in a way that’s irresistible. Whether you’re serving these tacos at a family dinner, summer BBQ, or taco Tuesday, they’re sure to impress.

So what are you waiting for? Gather your ingredients, and let’s get cooking. Your taste buds are in for a treat!

Fish Tacos with Mango Salsa

These fish tacos with mango salsa are the perfect balance of fresh, bold flavors and vibrant textures. The flaky, seasoned fish, sweet and tangy mango salsa, and creamy lime crema come together in a warm corn tortilla for a meal that’s as delicious as it is memorable.
Prep Time 15 minutes
Cook Time 15 minutes
Total Time 30 minutes
Servings: 4
Course: Main Course
Cuisine: Mexican-inspired
Calories: 350

Ingredients
  

Peach and Mango Salsa
  • 1 cup diced mango about 1 large mango
  • 1 cup diced peaches about 2 peaches
  • ½ cup diced red bell peppers
  • ¼ cup finely diced red onion
  • 2 tablespoons minced jalapeño pepper
  • 1 tablespoon minced cilantro
  • 1 tablespoon freshly squeezed lime juice
  • 1 teaspoon apple cider vinegar
  • ¼ teaspoon salt
Fish
  • 1 ½ lb tilapia or other firm white fish e.g., cod, mahi-mahi, halibut
  • 1 teaspoon chili powder
  • ½ teaspoon smoked paprika
  • ½ teaspoon cumin
  • Salt and pepper to taste
  • 1 tablespoon olive oil
  • Fresh lime juice from 1 lime
Lime Crema
  • ½ cup sour cream
  • ½ lime zested and juiced
  • 1 small clove garlic minced
  • ¼ teaspoon kosher salt
Additional Ingredients
  • 8 corn tortillas street-cart size or 6-inch, warmed or lightly charred
  • Optional: avocado slices lime wedges, extra cilantro for serving

Method
 

  1. Prepare the Mango Salsa: Combine diced mango, peaches, red bell peppers, red onion, jalapeño, cilantro, lime juice, apple cider vinegar, and salt in a bowl. Let it sit for 10-15 minutes to meld flavors.
  2. Season the Fish: Pat the fish fillets dry. Mix chili powder, smoked paprika, cumin, salt, and pepper, then rub onto both sides of the fish.
  3. Cook the Fish: Heat olive oil in a skillet over medium-high heat. Cook the fish for 3-4 minutes per side, or until it flakes easily with a fork. Squeeze lime juice over the fish and flake into bite-sized pieces.
  4. Make the Lime Crema: In a small bowl, whisk together sour cream, lime zest, lime juice, garlic, and kosher salt. Add a splash of water if you prefer a thinner consistency.
  5. Warm the Tortillas: Heat tortillas in a skillet until lightly charred, then wrap them in a clean towel to keep warm.
  6. Assemble the Tacos: Add fish to each tortilla, top with mango salsa, drizzle with lime crema, and add optional toppings like avocado or cilantro.

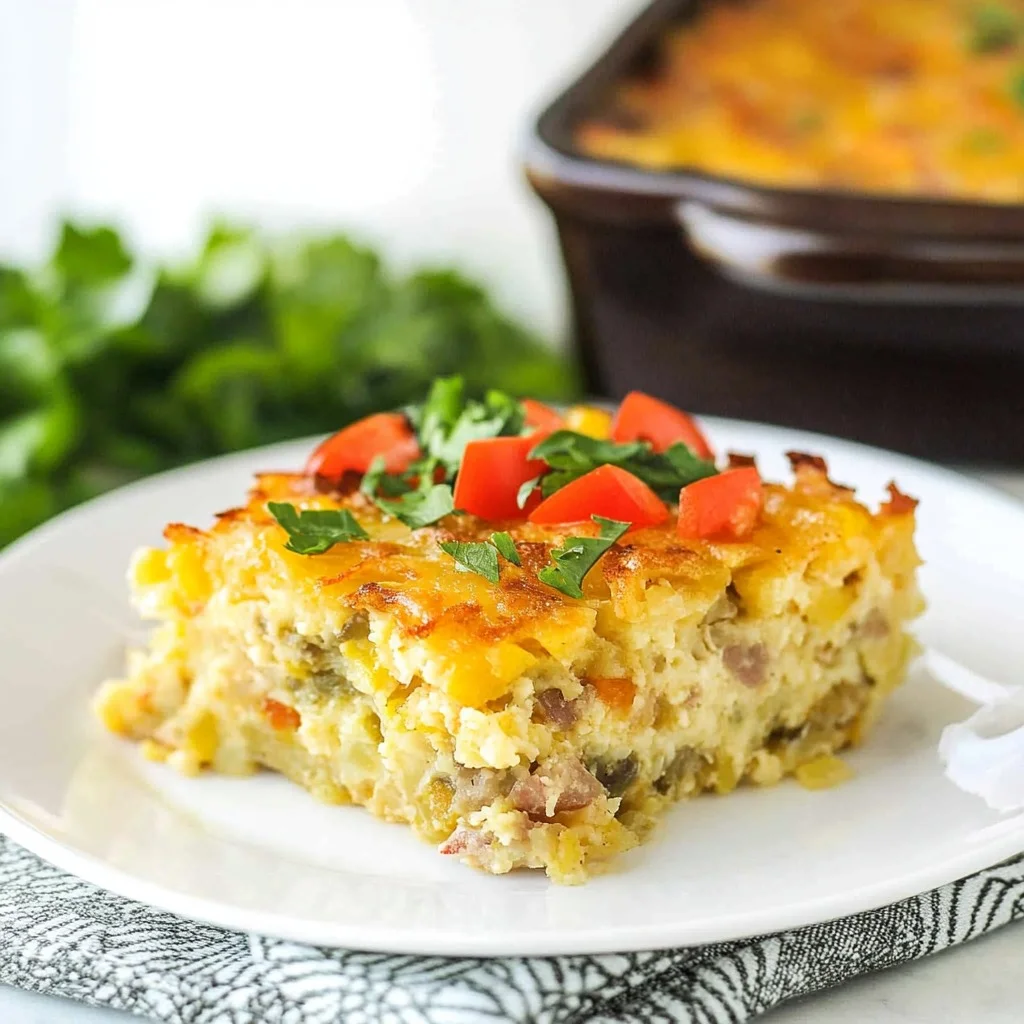
Hashbrown Breakfast Casserole: The Ultimate Morning Comfort Food

Have you ever woken up to the smell of something delicious cooking in the kitchen, something hearty and comforting that makes you excited to start your day? Imagine a warm, cheesy breakfast dish that’s packed with crispy hash browns, savory sausage, and vibrant peppers, all baked to golden perfection. If this sounds like your idea of a perfect morning meal, then a Hashbrown Breakfast Casserole is exactly what you need.

Whether you’re preparing a cozy weekend brunch for your family, hosting a holiday breakfast, or looking for an easy make-ahead dish to kickstart your week, this casserole will quickly become a household favorite. It’s satisfying, simple to make, and customizable for just about any palate. Let’s dive into everything you need to know about this beloved breakfast dish.

Why Hashbrown Breakfast Casserole is a Game-Changer

  • Perfect for All Occasions: Whether it’s a weekday breakfast, holiday brunch, or potluck contribution, this casserole is always a hit.
  • Make-Ahead Convenience: Save time by assembling it the night before and simply baking it in the morning.
  • Customizable Ingredients: Add veggies, swap proteins, or play with different cheeses to suit your taste.
  • Crowd-Pleasing Flavor: Crispy hash browns, savory sausage, melted cheese, and fluffy eggs combine into a dish everyone will love.

Ingredients for Hashbrown Breakfast Casserole

Here’s everything you’ll need to make this mouthwatering casserole. The recipe uses simple, readily available ingredients that pack big flavor.

IngredientQuantity
Shredded hash browns20 oz (thawed)
Sausage (cooked, crumbled, drained)2 lbs
Diced onion1 cup (½ medium onion)
Diced red bell pepper⅔ cup (½ bell pepper)
Diced green bell pepper⅔ cup (½ bell pepper)
Cheddar cheese (divided)3 cups
Eggs8 large
Milk1⅓ cups
Salt1¼ teaspoons
Black pepper¾ teaspoon

How to Make Hashbrown Breakfast Casserole

1. Gather and Prepare Your Ingredients

Start by prepping all your ingredients:

  • Cook the sausage in a skillet until browned. Drain any excess grease and crumble it into small pieces.
  • Dice the onion, red bell pepper, and green bell pepper into small, even-sized chunks.
  • Thaw your shredded hash browns if they’re frozen.

2. Preheat Your Oven

Preheat your oven to 350°F (175°C). Grease a 9×13-inch baking dish with non-stick cooking spray to prevent sticking.

3. Layer the Ingredients

  • Spread the thawed hash browns evenly across the bottom of your prepared baking dish.
  • Sprinkle the cooked sausage over the hash browns, followed by the diced onions and bell peppers.
  • Add 2 cups of shredded cheddar cheese, reserving the remaining 1 cup for the topping.

4. Prepare the Egg Mixture

In a large mixing bowl:

  • Whisk together the eggs, milk, salt, and black pepper until smooth.
  • Pour the egg mixture evenly over the hash brown and sausage layers.

5. Add the Final Topping

Sprinkle the remaining 1 cup of shredded cheddar cheese evenly over the casserole. This creates a cheesy, golden crust when baked.

6. Bake

Place the casserole in the preheated oven and bake for 45-50 minutes. The casserole is ready when the eggs are set, and the top is golden brown. To check, insert a knife into the center—if it comes out clean, you’re good to go.

7. Let It Rest and Serve

Remove the casserole from the oven and let it sit for about 5 minutes before slicing. This helps it set and makes serving easier. Serve warm and enjoy!

Tips for the Perfect Hashbrown Breakfast Casserole

  • Use Fresh Ingredients: Fresh peppers, onions, and sausage elevate the flavor of the dish.
  • Thaw the Hash Browns: Make sure your hash browns are completely thawed to avoid excess moisture in the casserole.
  • Add Extra Veggies: Incorporate spinach, mushrooms, or zucchini for a healthier twist.
  • Spice It Up: Add a pinch of red pepper flakes or some diced jalapeños for a spicy kick.
  • Make It Vegetarian: Replace the sausage with plant-based sausage or additional veggies.

Nutritional Information

Here’s an approximate breakdown of the nutritional value per serving (based on 8 servings):

NutrientAmount
Calories400
Protein25g
Carbohydrates18g
Fat25g
Fiber2g
Calcium250mg

Make-Ahead and Storage Instructions

Make-Ahead Option

This casserole can be fully assembled the night before. Cover it tightly with plastic wrap or foil and refrigerate. In the morning, bake as directed, allowing 10 extra minutes if baking directly from the fridge.

Storage

  • Refrigeration: Leftovers can be stored in an airtight container in the fridge for up to 4 days.
  • Freezing: Slice the casserole into portions, wrap them individually in plastic wrap, and freeze for up to 3 months. Reheat in the oven or microwave for a quick breakfast.

Creative Serving Ideas

  • Holiday Brunch: Serve with fresh fruit, croissants, and mimosas for a festive spread.
  • Quick Weekday Breakfast: Reheat a slice for a protein-packed meal on busy mornings.
  • Potluck Favorite: Double the recipe and bring it to your next potluck—there won’t be leftovers!

FAQs About Hashbrown Breakfast Casserole

1. Can I use other types of cheese?

Yes! Swap cheddar for mozzarella, Monterey Jack, or a combination of your favorites.

2. Can I use bacon instead of sausage?

Absolutely. Cooked and crumbled bacon makes a delicious substitute.

3. How do I prevent the casserole from being soggy?

Make sure your hash browns are fully thawed and pat them dry with a paper towel to remove excess moisture.

4. Can I make this casserole dairy-free?

Yes! Use plant-based milk and dairy-free cheese for a lactose-free version.

5. What’s the best way to reheat leftovers?

Reheat individual portions in the microwave for 1-2 minutes or in the oven at 350°F for about 10 minutes.

6. Can I reduce the calories?

To make it lighter, use turkey sausage, reduced-fat cheese, and egg whites instead of whole eggs.

Your New Go-To Breakfast Dish

This Hashbrown Breakfast Casserole is more than just a meal—it’s a way to bring people together around the table. Whether you’re feeding a crowd or meal-prepping for the week, this dish delivers big on flavor, convenience, and satisfaction. Give it a try, and you’ll find yourself making it again and again.

Now, it’s your turn to whip up this hearty and delicious casserole. You’ll love how easy it is to make and how much joy it brings to your mornings. So grab your ingredients and get cooking—you’ve got a breakfast to remember waiting for you!

Hashbrown Breakfast Casserole: The Ultimate Morning Comfort Food

This Hashbrown Breakfast Casserole combines crispy hash browns, savory sausage, fluffy eggs, and vibrant peppers baked with gooey cheese for the ultimate breakfast or brunch dish.
Prep Time 15 minutes
Cook Time 50 minutes
Total Time 1 hour 5 minutes
Servings: 8
Course: Breakfast
Cuisine: American
Calories: 400

Ingredients
  

  • 20 oz shredded hash browns thawed
  • 2 lbs sausage cooked, crumbled, and drained
  • 1 cup diced onion ½ medium onion
  • ⅔ cup diced red bell pepper ½ bell pepper
  • ⅔ cup diced green bell pepper ½ bell pepper
  • 3 cups cheddar cheese divided
  • 8 large eggs
  • 1⅓ cups milk
  • 1¼ teaspoons salt
  • ¾ teaspoon black pepper

Method
 

  1. Preheat the Oven: Preheat to 350°F (175°C) and grease a 9×13-inch baking dish.
  2. Prepare Ingredients: Cook the sausage until browned and crumble it. Dice onions and peppers, and thaw hash browns.
  3. Layer the Base: Spread the hash browns evenly in the greased baking dish. Top with sausage, onions, peppers, and 2 cups of cheddar cheese.
  4. Whisk the Egg Mixture: In a large bowl, whisk together eggs, milk, salt, and pepper until smooth.
  5. Pour and Top: Pour the egg mixture over the layers in the dish. Sprinkle the remaining 1 cup of cheddar cheese on top.
  6. Bake: Bake for 45-50 minutes until the eggs are set and the top is golden brown. Let it rest for 5 minutes before slicing.

Muffin Breakfast Casserole: A Hearty Start to Your Day

There’s something magical about waking up to the smell of a warm, cheesy breakfast casserole wafting through your kitchen. It’s the kind of breakfast that feels like a hug on a plate—a meal that not only fills your belly but warms your soul. If you’re looking for a wholesome, satisfying way to start your morning, a muffin breakfast casserole is the answer.

This dish combines the fluffiness of English muffins, the savory bite of ham or Canadian bacon, and the richness of eggs and cheese into a single casserole that’s perfect for feeding your family or guests. Whether you’re preparing for a busy weekday morning or a leisurely Sunday brunch, this muffin breakfast casserole will quickly become a household favorite.

Why You’ll Love This Recipe

  • Easy to Prepare: Minimal prep work makes it accessible for busy mornings.
  • Crowd-Pleasing: Great for feeding a group at brunch gatherings or family breakfasts.
  • Make-Ahead Option: Assemble the night before for a stress-free morning.
  • Nutritious and Wholesome: Packed with protein, whole grains, and cheesy goodness.

Ingredients You’ll Need

To make this muffin breakfast casserole, you’ll need just a handful of simple ingredients. Here’s what you’ll need:

IngredientQuantity
Wheat English muffins6
Diced ham or Canadian bacon2 ½ cups
Eggs10
Skim milk2 cups
Plain non-fat Greek yogurt½ cup
Grated parmesan cheese¼ cup
Sharp cheddar cheese, shredded8 ounces
Ground mustard½ teaspoon
Garlic powder½ teaspoon
Salt½ teaspoon
Black pepper¼ teaspoon

Step-By-Step Instructions for the Perfect Muffin Breakfast Casserole

1. Prepare Your Ingredients

The first step in creating your muffin breakfast casserole is to prepare all your ingredients.

  • Slice the English muffins into bite-sized pieces. These will form the base of your casserole.
  • Dice the ham or Canadian bacon into small chunks.
  • Shred the sharp cheddar cheese if it’s not pre-shredded. Freshly grated cheese melts better and offers a richer flavor.

2. Preheat Your Oven

Set your oven to 350°F (175°C) so it’s ready when you are. Grease a 9×13-inch baking dish with non-stick cooking spray to prevent sticking.

3. Assemble the Base

Spread the sliced English muffins evenly across the bottom of your prepared baking dish. Sprinkle the diced ham or Canadian bacon over the muffins to ensure every bite gets a hit of savory flavor.

4. Make the Egg Mixture

In a large mixing bowl:

  • Crack the 10 eggs.
  • Add the skim milk, Greek yogurt, ground mustard, garlic powder, salt, and black pepper.
  • Whisk everything together until smooth and well-combined. The Greek yogurt adds creaminess without extra fat, making the casserole rich and flavorful.

5. Add the Cheese

Stir in the grated parmesan cheese and half of the shredded cheddar cheese into the egg mixture. Save the remaining cheddar for the topping.

6. Pour and Layer

Pour the egg mixture evenly over the muffin and ham layers in your baking dish. Use a spatula to gently press down on the ingredients, ensuring they’re well-soaked in the egg mixture.

7. Top It Off

Sprinkle the remaining cheddar cheese evenly over the top of the casserole. This will create a gooey, golden crust when baked.

8. Bake to Perfection

Place the dish in your preheated oven and bake for 40-50 minutes. The casserole is done when the center is set, and the top is golden brown. To check, insert a knife into the middle—if it comes out clean, your breakfast masterpiece is ready.

Pro Tips for the Best Muffin Breakfast Casserole

  • Use Fresh Ingredients: Fresh eggs and cheese make a big difference in flavor.
  • Customize Your Add-Ins: Add vegetables like bell peppers, spinach, or onions for extra nutrition.
  • Make It Spicy: Sprinkle in some red pepper flakes or diced jalapeños if you like a kick.
  • Let It Rest: Allow the casserole to sit for 5-10 minutes after baking. This helps it set and makes slicing easier.

Make-Ahead and Storage Instructions

Make-Ahead Option

You can assemble the casserole the night before. Simply cover the dish tightly with plastic wrap or foil and refrigerate. The next morning, remove it from the fridge, let it come to room temperature for about 15 minutes, and bake as directed.

Storage Tips

  • Refrigeration: Leftovers can be stored in an airtight container in the refrigerator for up to 4 days.
  • Freezing: For longer storage, cut the casserole into individual portions, wrap them tightly in plastic wrap, and freeze. Reheat in the microwave or oven for a quick breakfast on busy mornings.

Nutritional Information

Here’s a breakdown of the approximate nutritional value per serving (based on 8 servings):

NutrientAmount
Calories290
Protein23g
Carbohydrates16g
Fat14g
Fiber2g
Calcium220mg

This casserole is high in protein and low in fat, making it a balanced choice for breakfast.

Creative Serving Ideas

  • Classic Pairing: Serve with a side of fresh fruit or a simple green salad for a complete meal.
  • On-The-Go Breakfast: Slice it into squares and pack them for a portable breakfast or snack.
  • Brunch Spread: Pair it with mimosas, bagels, and pastries for a crowd-pleasing brunch menu.

FAQs About Muffin Breakfast Casserole

1. Can I use other types of bread instead of English muffins?

Yes, you can substitute English muffins with other bread types like croissants, bagels, or even whole-grain bread for added fiber.

2. How do I make this casserole vegetarian?

Simply replace the ham or Canadian bacon with sautéed vegetables like mushrooms, spinach, or zucchini.

3. Can I use almond milk instead of skim milk?

Absolutely! Unsweetened almond milk or any other milk alternative works just fine.

4. How can I prevent the casserole from becoming soggy?

Ensure the English muffins are slightly toasted before assembling the casserole. This prevents them from soaking up too much liquid.

5. What’s the best way to reheat leftovers?

Reheat individual portions in the microwave for 1-2 minutes or in the oven at 350°F for about 10 minutes.

6. Can I make this casserole gluten-free?

Yes! Simply use gluten-free English muffins or bread as a substitute.

Your Next Breakfast Staple

This muffin breakfast casserole is a game-changer for anyone who wants a hearty, flavorful, and easy breakfast option. Whether you’re hosting brunch or meal-prepping for the week, this dish checks all the boxes. It’s versatile, nutritious, and downright delicious. So, the next time you’re craving something cozy and satisfying, give this recipe a try—you won’t regret it!

Muffin Breakfast Casserole

This muffin breakfast casserole is the ultimate comforting and hearty breakfast. Combining fluffy English muffins, savory ham or Canadian bacon, and creamy eggs topped with gooey cheddar cheese, this dish is perfect for brunch, family breakfasts, or meal prep.
Prep Time 15 minutes
Cook Time 45 minutes
Total Time 1 hour
Servings: 8
Course: Breakfast
Cuisine: American
Calories: 290

Ingredients
  

  • 6 wheat English muffins cut into bite-sized pieces
  • 2 ½ cups diced ham or Canadian bacon
  • 10 large eggs
  • 2 cups skim milk
  • ½ cup plain non-fat Greek yogurt
  • ¼ cup grated parmesan cheese
  • 8 ounces sharp cheddar cheese shredded
  • ½ teaspoon ground mustard
  • ½ teaspoon garlic powder
  • ½ teaspoon salt
  • ¼ teaspoon black pepper

Method
 

  1. Preheat the Oven: Preheat your oven to 350°F (175°C) and grease a 9×13-inch baking dish with non-stick cooking spray.
  2. Prepare Ingredients: Slice the English muffins into bite-sized pieces and dice the ham.
  3. Assemble the Base: Spread English muffins in the baking dish and layer diced ham on top.
  4. Make the Egg Mixture: In a mixing bowl, whisk eggs, skim milk, Greek yogurt, parmesan, ground mustard, garlic powder, salt, and pepper until smooth. Stir in half the shredded cheddar cheese.
  5. Pour Over and Press: Pour the egg mixture over the muffin and ham layers. Gently press everything to soak evenly.
  6. Top It Off: Sprinkle the remaining cheddar cheese over the top.
  7. Bake: Bake for 40-50 minutes until the center is set and the top is golden. Let it rest for 5-10 minutes before slicing and serving.

Stay Connected

Get recipes via email: