Mexican Beef Chile Verde Recipe is a must-try dish!

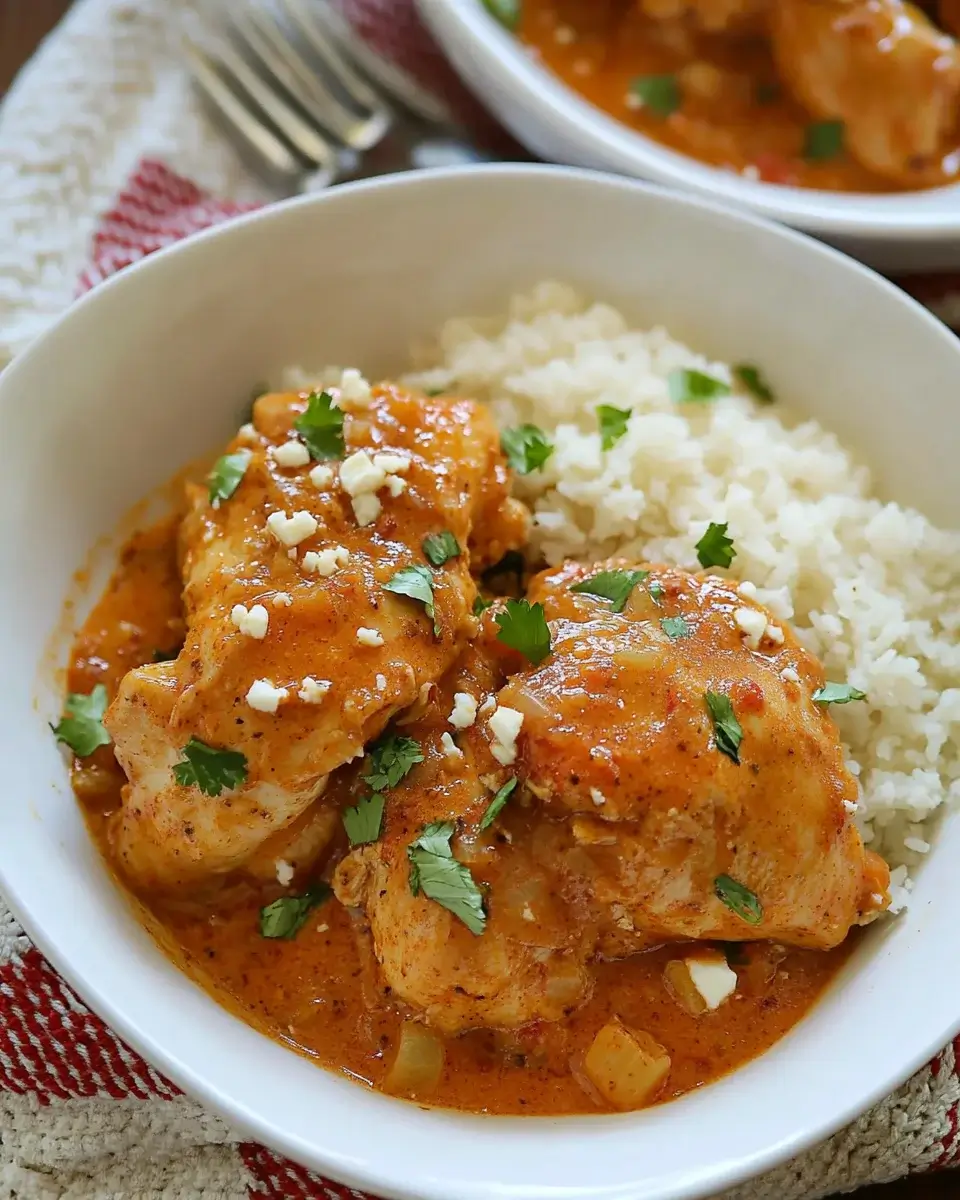
What is Mexican Beef Chile Verde?

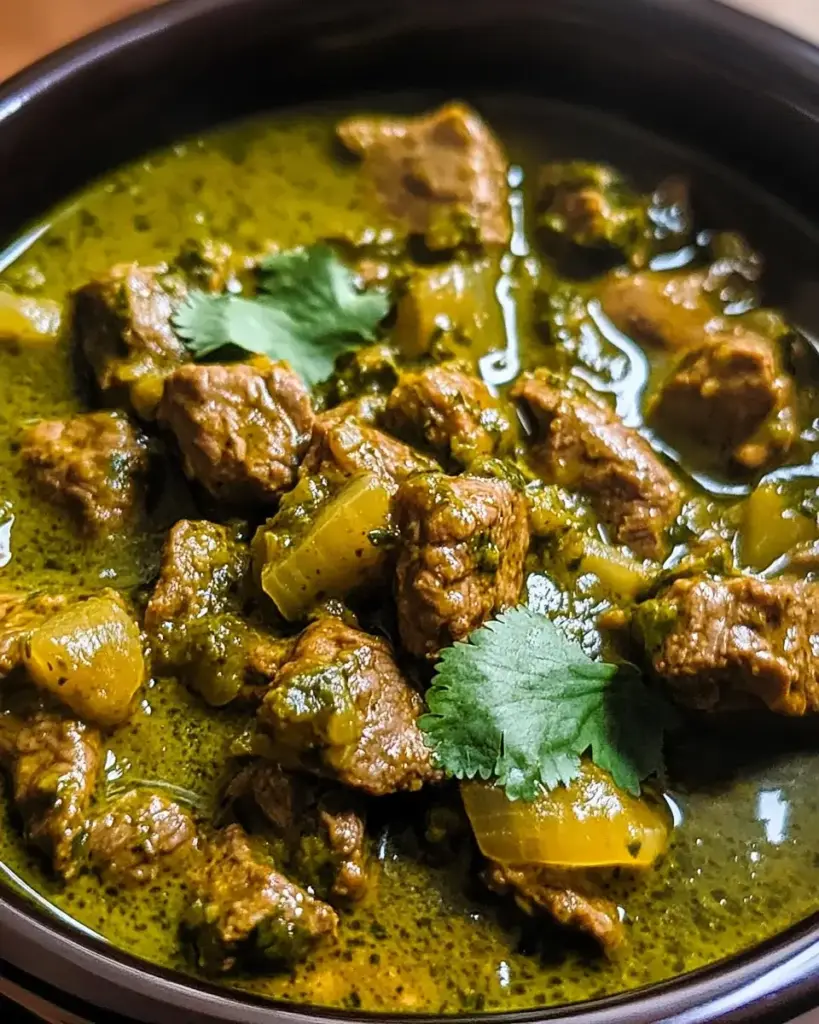
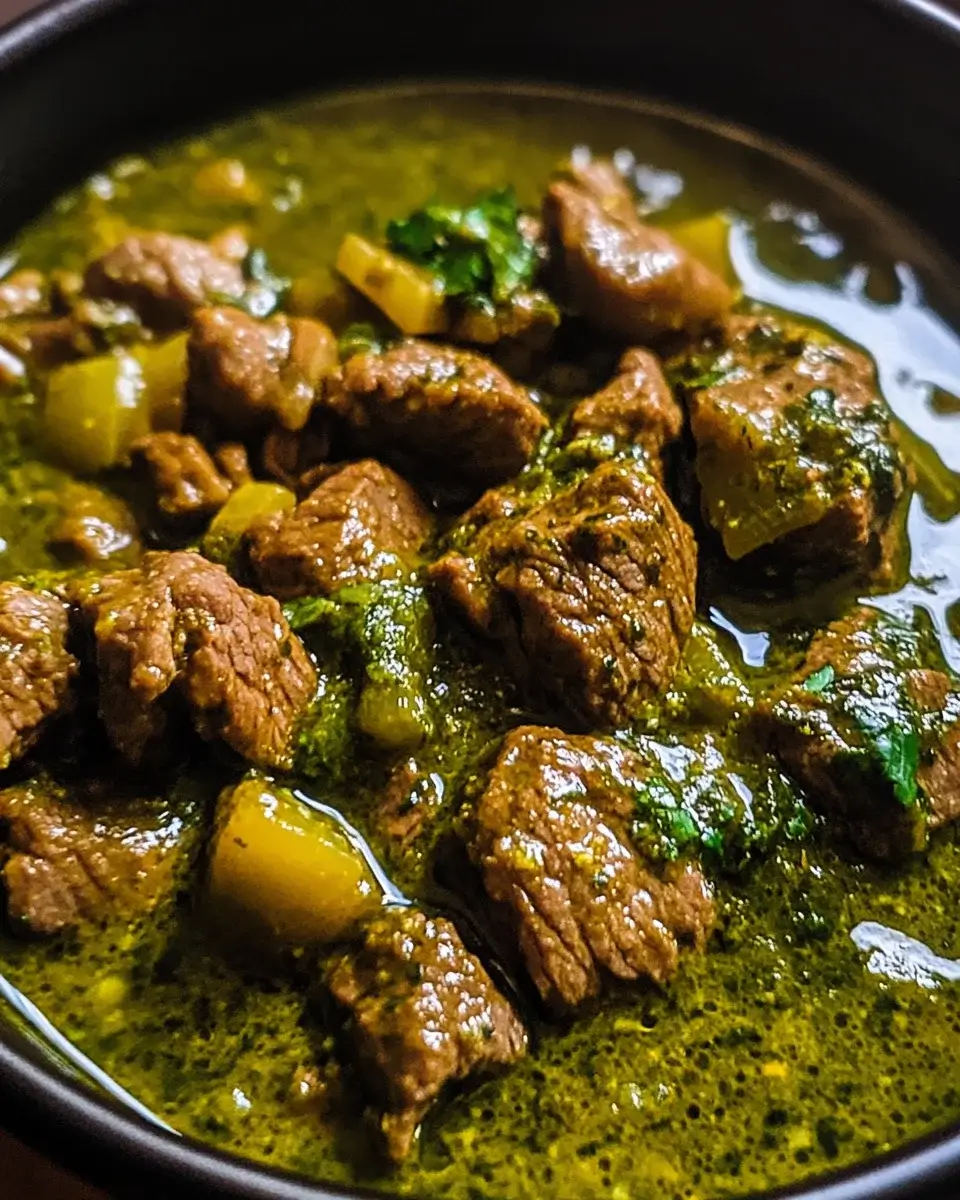
Mexican Beef Chile Verde is a delicious and hearty dish that showcases the vibrant flavors of Mexican cuisine. This recipe features tender beef simmered in a tangy green sauce made from tomatillos, jalapeños, and spices. The result is a comforting meal that is both satisfying and full of flavor. Often served with warm tortillas or over rice, this dish is perfect for family gatherings or cozy dinners at home. The combination of spices and fresh ingredients makes it a favorite among many, and it’s easy to see why!

The Origins of Chile Verde

Chile Verde, which translates to “green chili,” has deep roots in Mexican culinary traditions. It is believed to have originated in the central and southern regions of Mexico, where tomatillos and green chilies are abundant. The dish reflects the rich agricultural heritage of the area, utilizing fresh, local ingredients. Over the years, various regions have put their own spin on Chile Verde, leading to numerous variations. However, the core elements remain the same: tender meat, a zesty green sauce, and a blend of spices that create a mouthwatering experience. Today, Mexican Beef Chile Verde is enjoyed not only in Mexico but also in many parts of the world, bringing a taste of authentic Mexican flavor to dinner tables everywhere.

Ingredients for Mexican Beef Chile Verde Recipe

To create a mouthwatering Mexican Beef Chile Verde, you’ll need a selection of fresh and flavorful ingredients. Each component plays a vital role in building the dish’s rich taste. Here’s what you’ll need:

  • 2 pounds beef chuck: Cut into 1-inch cubes for tenderness.
  • 2 tablespoons olive oil: For browning the beef and adding flavor.
  • 1 medium onion: Chopped to enhance the base of the sauce.
  • 4 cloves garlic: Minced for a fragrant kick.
  • 2 jalapeño peppers: Diced (seeds removed for less heat) to add spice.
  • 2 cups tomatillos: Husked and chopped, providing a tangy flavor.
  • 1 cup chicken broth: To keep the dish moist and flavorful.
  • 1 teaspoon ground cumin: For a warm, earthy taste.
  • 1 teaspoon dried oregano: To add a hint of herbal freshness.
  • Salt and pepper: To taste, enhancing all the flavors.
  • Fresh cilantro: For garnish, adding a pop of color and freshness.
  • Lime wedges: For serving, providing a zesty finish.

These ingredients come together to create a delightful dish that is sure to impress. The combination of beef, tomatillos, and spices results in a savory and satisfying meal. Make sure to gather everything before you start cooking to ensure a smooth preparation process!

Step-by-Step Preparation of Mexican Beef Chile Verde Recipe

Step 1: Preparing the Ingredients

Before you start cooking, it’s essential to prepare all your ingredients. Begin by cutting the beef chuck into 1-inch cubes. This size ensures even cooking and tenderness. Next, chop the onion and mince the garlic. For the jalapeños, dice them finely, removing the seeds if you prefer a milder flavor. Finally, husk and chop the tomatillos. Having everything ready will make the cooking process smoother and more enjoyable!

Step 2: Cooking the Beef

In a large pot or Dutch oven, heat the olive oil over medium-high heat. Once the oil is hot, add the beef cubes. Brown the beef on all sides, which should take about 5-7 minutes. This step is crucial as it locks in the flavors. After browning, remove the beef from the pot and set it aside. This will allow you to build the base of your sauce in the same pot, enhancing the overall taste.

Step 3: Making the Chile Verde Sauce

In the same pot, add the chopped onion. Sauté it until it becomes translucent, which takes about 3-4 minutes. Then, add the minced garlic and diced jalapeños. Cook for an additional 1-2 minutes until the mixture is fragrant. This step creates a flavorful base for your Chile Verde sauce. Next, stir in the chopped tomatillos, chicken broth, ground cumin, and dried oregano. These ingredients will form the heart of your dish, bringing together the vibrant flavors of Mexico.

Step 4: Combining Ingredients

Once your sauce is ready, it’s time to bring everything together. Add the browned beef back into the pot. Season the mixture with salt and pepper to taste. Stir well to ensure that the beef is coated with the sauce. This combination of ingredients will create a rich and savory flavor that is characteristic of Mexican Beef Chile Verde.

Step 5: Simmering the Dish

Now, bring the mixture to a boil. Once boiling, reduce the heat to low. Cover the pot and let it simmer for about 1.5 to 2 hours. This slow cooking process allows the beef to become tender and absorb all the delicious flavors. Stir occasionally, and if the sauce gets too thick, feel free to add more chicken broth. After simmering, taste the dish and adjust the seasoning if needed. Your Mexican Beef Chile Verde is now ready to be served!

Variations of Mexican Beef Chile Verde Recipe

Vegetarian Alternatives

If you’re looking for a vegetarian twist on the classic Mexican Beef Chile Verde, there are plenty of delicious options! Instead of beef, you can use hearty vegetables like zucchini, bell peppers, or mushrooms. These ingredients will absorb the flavors of the sauce beautifully. Another great alternative is to use plant-based proteins such as tofu or tempeh. Simply cube them and sauté them just like you would with the beef. This way, you still get that satisfying texture while keeping the dish meat-free. Don’t forget to add extra beans, like black beans or pinto beans, for added protein and fiber. This vegetarian version is not only healthy but also bursting with flavor!

Different Meat Options

For those who prefer different meats, there are several tasty alternatives to beef in the Mexican Beef Chile Verde recipe. Pork is a popular choice; using pork shoulder or tenderloin can create a rich and flavorful dish. Simply follow the same steps as you would with beef. Chicken is another excellent option. You can use boneless, skinless chicken thighs or breasts, which will cook faster than beef. Just be sure to adjust the cooking time accordingly. For a unique twist, try using turkey or even lamb. Each meat brings its own distinct flavor, allowing you to customize the dish to your liking. No matter which meat you choose, the vibrant green sauce will make it a hit!

Cooking Note for Mexican Beef Chile Verde Recipe

When preparing your Mexican Beef Chile Verde, there are a few important cooking notes to keep in mind. First, the quality of your beef is crucial. Opt for a well-marbled beef chuck, as the fat will render during cooking, making the meat tender and flavorful. If you can, choose grass-fed beef for a richer taste.

Next, don’t rush the browning process. Taking the time to brown the beef properly enhances the overall flavor of the dish. Make sure your pot is hot enough before adding the beef. This step creates a nice crust on the meat, sealing in the juices.

Additionally, feel free to adjust the spice level to suit your taste. If you enjoy a bit more heat, consider adding more jalapeños or even a serrano pepper. On the other hand, if you prefer a milder dish, removing the seeds from the jalapeños is a great way to control the spice.

Lastly, remember that the longer you let the dish simmer, the more the flavors will meld together. If you have the time, letting it cook for a few extra minutes can make a big difference. Just keep an eye on the liquid level and add more broth if necessary. Enjoy the process, and soon you’ll have a delicious pot of Mexican Beef Chile Verde ready to serve!

Serving Suggestions for Mexican Beef Chile Verde Recipe

Pairing with Sides

When it comes to serving Mexican Beef Chile Verde, the right sides can elevate your meal to a whole new level. One popular option is warm tortillas. They are perfect for scooping up the tender beef and flavorful sauce. You can use corn or flour tortillas, depending on your preference. Another great pairing is rice. A fluffy bed of white or brown rice complements the dish beautifully, soaking up the delicious sauce.

If you want to add some crunch, consider serving a fresh salad on the side. A simple green salad with lettuce, tomatoes, and avocado can provide a refreshing contrast to the rich flavors of the Chile Verde. You might also enjoy serving it with Mexican-style rice, which is seasoned with tomatoes and spices, adding an extra layer of flavor.

For a heartier meal, you can include beans. Black beans or pinto beans are excellent choices. They not only add protein but also enhance the overall texture of the dish. You can serve them on the side or mix them into the Chile Verde for a more filling option. No matter what sides you choose, they will surely complement the vibrant flavors of your Mexican Beef Chile Verde!

Garnishing Ideas

Garnishing your Mexican Beef Chile Verde is a fun way to add color and freshness to your dish. Fresh cilantro is a classic choice. Its bright green leaves not only look appealing but also add a burst of flavor. Simply chop some cilantro and sprinkle it over the top just before serving.

Lime wedges are another fantastic garnish. They provide a zesty kick that enhances the flavors of the dish. Squeezing fresh lime juice over the Chile Verde just before eating can brighten up the entire meal. You can also add sliced radishes for a pop of color and a crunchy texture. They offer a nice contrast to the tender beef and sauce.

If you want to get creative, consider adding diced avocado on top. Its creamy texture pairs wonderfully with the spicy sauce. Finally, a dollop of sour cream or Mexican crema can add a rich, cooling element to balance the heat. With these garnishing ideas, your Mexican Beef Chile Verde will not only taste amazing but also look beautiful on the plate!

Tips for Perfecting Your Mexican Beef Chile Verde Recipe

To make your Mexican Beef Chile Verde truly exceptional, consider these helpful tips. They will enhance the flavors and ensure a delightful dining experience for you and your guests.

First, always choose high-quality ingredients. Fresh tomatillos and ripe jalapeños will significantly impact the taste of your dish. When selecting beef, look for cuts with good marbling. This fat will melt during cooking, making the meat tender and juicy.

Next, don’t skip the browning step. Browning the beef creates a rich flavor base. Make sure your pot is hot enough before adding the meat. This will help achieve a nice sear, locking in the juices and enhancing the overall taste.

Another tip is to let the dish simmer longer if you have the time. The longer it cooks, the more the flavors meld together. If you can, let it simmer for up to three hours. Just keep an eye on the liquid level and add more broth if needed.

For those who enjoy a bit of heat, consider adding a pinch of cayenne pepper or a few extra jalapeños. On the other hand, if you prefer a milder flavor, be sure to remove all the seeds from the jalapeños. This simple step can make a big difference in the spice level.

Lastly, don’t forget to taste as you go! Adjust the seasoning to your liking. A little extra salt or a squeeze of lime can elevate the dish. Remember, cooking is all about personal preference, so make it your own!

By following these tips, you’ll be well on your way to creating a delicious Mexican Beef Chile Verde that will impress everyone at your table. Enjoy the cooking process and the wonderful flavors that come together in this classic dish!

Breakdown of Time for Mexican Beef Chile Verde Recipe

Prep Time

Preparing your ingredients is an essential step in making the Mexican Beef Chile Verde. The prep time for this recipe is approximately 20-30 minutes. During this time, you will cut the beef into cubes, chop the onion, mince the garlic, and dice the jalapeños. Additionally, husking and chopping the tomatillos will also take some time. Having everything ready before you start cooking will make the process smoother and more enjoyable!

Cooking Time

The cooking time for Mexican Beef Chile Verde is about 1.5 to 2 hours. This includes browning the beef, sautéing the vegetables, and simmering the dish until the beef is tender. The slow cooking process allows the flavors to meld beautifully, resulting in a rich and savory sauce. Remember to stir occasionally and check the liquid level, adding more broth if necessary.

Total Time

In total, you can expect to spend around 2 to 2.5 hours from start to finish when making Mexican Beef Chile Verde. This includes both the prep and cooking times. While it may seem like a lengthy process, the delicious outcome is well worth the wait. Plus, the aroma of the simmering dish will fill your kitchen, making it a delightful experience for everyone!

Nutritional Information for Mexican Beef Chile Verde Recipe

Calories

When enjoying a serving of Mexican Beef Chile Verde, you can expect to consume approximately 320 calories. This makes it a hearty yet manageable option for a main meal. The balance of protein, fats, and carbohydrates in this dish contributes to its satisfying nature, making it a great choice for those looking for a filling dinner without going overboard on calories.

Protein

Each serving of Mexican Beef Chile Verde packs a protein punch with about 28 grams. This high protein content is primarily due to the beef chuck, which is an excellent source of essential amino acids. Protein is vital for muscle repair and growth, making this dish a great option for active individuals or anyone looking to maintain a balanced diet.

Sodium

The sodium content in Mexican Beef Chile Verde can vary based on the ingredients used, particularly the chicken broth. On average, you can expect around 600-800 mg of sodium per serving. To manage sodium levels, consider using low-sodium chicken broth or adjusting the amount of added salt. This way, you can enjoy the rich flavors of the dish while keeping your sodium intake in check.

FAQs about Mexican Beef Chile Verde Recipe

What can I substitute for beef in the Mexican Beef Chile Verde Recipe?

If you’re looking to switch things up, there are several great substitutes for beef in the Mexican Beef Chile Verde recipe. Pork is a popular choice, especially cuts like pork shoulder or tenderloin. These options will provide a rich flavor similar to beef. Chicken is another excellent alternative. You can use boneless, skinless chicken thighs or breasts, which will cook faster than beef. For a vegetarian option, consider using hearty vegetables like zucchini, bell peppers, or mushrooms. Plant-based proteins like tofu or tempeh also work well. Each substitute will bring its own unique flavor while still allowing you to enjoy the delicious green sauce!

Can I make Mexican Beef Chile Verde Recipe in a slow cooker?

Absolutely! Making Mexican Beef Chile Verde in a slow cooker is a fantastic option. To do this, start by browning the beef in a skillet as directed in the recipe. Then, transfer the browned beef to the slow cooker along with the sautéed onions, garlic, jalapeños, tomatillos, chicken broth, and spices. Set your slow cooker on low for 6-8 hours or on high for 3-4 hours. This method allows the flavors to meld beautifully while the beef becomes incredibly tender. Just remember to check the liquid level occasionally and add more broth if needed. Enjoy the convenience of a slow cooker while still savoring this delicious dish!

How spicy is Mexican Beef Chile Verde Recipe?

The spice level of Mexican Beef Chile Verde can vary based on your preferences. The primary source of heat comes from the jalapeño peppers. If you remove the seeds and membranes, the dish will be milder. However, if you enjoy a bit more heat, you can leave some seeds in or even add a serrano pepper for an extra kick. Overall, the spice level is adjustable, making it suitable for everyone. Feel free to taste as you go and adjust the heat to your liking!

What are the best sides to serve with Mexican Beef Chile Verde Recipe?

When it comes to sides, there are plenty of delicious options to pair with Mexican Beef Chile Verde. Warm tortillas are a classic choice, perfect for scooping up the tender beef and flavorful sauce. Rice, whether white or brown, also complements the dish beautifully, soaking up the savory sauce. For a refreshing contrast, consider serving a simple green salad with lettuce, tomatoes, and avocado. You might also enjoy beans, like black or pinto beans, which add protein and texture. No matter what sides you choose, they will enhance the overall dining experience and make your meal even more enjoyable!

Conclusion on Mexican Beef Chile Verde Recipe

In conclusion, the Mexican Beef Chile Verde recipe is a delightful dish that brings the vibrant flavors of Mexico right to your kitchen. With its tender beef simmered in a tangy green sauce made from tomatillos and jalapeños, this meal is both comforting and satisfying. Whether you’re cooking for a family gathering or a cozy dinner at home, this recipe is sure to impress.

By following the step-by-step preparation, you can create a dish that is rich in flavor and full of nutrients. The versatility of this recipe allows for various adaptations, whether you choose to use different meats or even go vegetarian. Plus, the serving suggestions and garnishing ideas add an extra touch of creativity to your meal.

Remember, cooking is all about enjoying the process and making it your own. Don’t hesitate to experiment with spices and ingredients to suit your taste. With a little patience and love, your Mexican Beef Chile Verde will become a favorite in your household.

So gather your ingredients, roll up your sleeves, and get ready to savor the deliciousness of this classic Mexican dish. Happy cooking!

Paul

Mexican Beef Chile Verde Recipe is a must-try dish!

This hearty Mexican Beef Chile Verde is a bold, flavorful stew that brings together tender chunks of beef, vibrant tomatillos, green chilies, and zesty spices. Slowly simmered to perfection, it’s comforting and versatile—perfect as a main dish, taco filling, or even over rice. Every spoonful is a celebration of earthy heat and rich, savory depth.
Prep Time 20 minutes
Cook Time 2 hours
Total Time 2 hours 20 minutes
Servings: 6 servings
Course: Main Course
Cuisine: Mexican

Ingredients
  

  • 2 pounds beef stew meat such as chuck roast, cut into cubes1 tablespoon olive oil or vegetable oil1 large onion, chopped5 to 6 garlic cloves, minced3 cups tomatillos, husked and quartered4 to 5 medium green chilies (Anaheim, Hatch, or poblano), seeded and chopped1 to 2 jalapeños (seeded for milder heat, unseeded for spicy)2 teaspoons ground cumin1 teaspoon dried oregano (preferably Mexican oregano)1 teaspoon ground coriander½ teaspoon ground black pepper1 teaspoon salt, or to taste4 cups beef broth (halal-certified if needed)1 tablespoon fresh lime juiceOptional garnish: chopped cilantro and/or chopped parsley
  • Serving Suggestions:Warm tortillasCilantro-lime rice or plain white riceCrusty breadUse as taco burrito, or enchilada filling

Method
 

  1. Pat the beef cubes dry with paper towels to ensure good searing.
  2. Heat oil in a large Dutch oven over medium-high heat. Sear beef in batches until browned on all sides, then set aside.
  3. In the same pot, sauté chopped onion for about 5 minutes until translucent.
  4. Add minced garlic and cook for 1 minute more until fragrant.
  5. Stir in the tomatillos, green chilies, and jalapeños. Cook for several minutes until vegetables begin to soften.
  6. Sprinkle in cumin, oregano, coriander, black pepper, and salt. Mix well.
  7. Return the seared beef to the pot. Pour in the beef broth and stir, scraping up any browned bits from the bottom.
  8. Bring mixture to a boil, then reduce heat to low and cover. Simmer for 1.5 to 2 hours until the beef is fork-tender.
  9. Stir in fresh lime juice and adjust seasoning to taste.
  10. Garnish with chopped cilantro or parsley, and serve hot with desired sides.

Notes

  • You can blend the tomatillo mixture before adding the beef if you prefer a smoother sauce.
  • Adjust the number of jalapeños based on your heat preference.
  • This dish tastes even better the next day as the flavors deepen.
  • It freezes well—cool completely before storing in an airtight container.

Slow Cooker Chicken Paprika is a must-try recipe!

Are you looking for a delicious and easy meal that will impress your family and friends? Look no further than Slow Cooker Paprika Chicken! This dish is not only flavorful but also incredibly simple to prepare. With just a few ingredients and minimal effort, you can create a hearty meal that warms the soul.

Slow Cooker Paprika Chicken combines tender chicken thighs with a rich, creamy sauce that is infused with the warm flavors of sweet paprika and garlic. The slow cooking process allows the spices to meld beautifully, resulting in a dish that is both comforting and satisfying. Plus, the use of a slow cooker means you can set it and forget it, making it perfect for busy weeknights or lazy weekends.

This recipe is versatile, too! You can easily adjust the ingredients to suit your taste or dietary needs. Whether you prefer a little kick with some cayenne pepper or a lighter option using Greek yogurt instead of sour cream, the possibilities are endless. So, gather your ingredients and get ready to enjoy a delightful meal that will have everyone asking for seconds!

Ingredients for Slow Cooker Paprika Chicken

To create the mouthwatering Slow Cooker Paprika Chicken, you’ll need a handful of simple ingredients. Each one plays a vital role in building the rich flavors of this dish. Here’s what you’ll need:

  • 2 pounds boneless, skinless chicken thighs: These are perfect for slow cooking, as they become tender and juicy.
  • 1 large onion, chopped: The onion adds sweetness and depth to the dish.
  • 3 cloves garlic, minced: Garlic brings a wonderful aroma and flavor that complements the paprika.
  • 2 tablespoons sweet paprika: This is the star of the show! Sweet paprika gives the dish its signature taste and vibrant color.
  • 1 teaspoon dried thyme: Thyme adds an earthy note that enhances the overall flavor.
  • 1 teaspoon salt: Salt is essential for bringing out the flavors of the other ingredients.
  • ½ teaspoon black pepper: A little black pepper adds a subtle kick.
  • 1 cup chicken broth: This keeps the chicken moist and adds richness to the sauce.
  • 1 cup sour cream: Sour cream gives the dish a creamy texture and tangy flavor.
  • 2 tablespoons olive oil: Olive oil is used for searing the chicken, adding a nice golden crust.
  • 2 tablespoons all-purpose flour: This helps thicken the sauce, making it luscious and satisfying.
  • 1 tablespoon lemon juice: A splash of lemon juice brightens the flavors and balances the richness.
  • Fresh parsley, chopped (for garnish): Parsley adds a pop of color and freshness when serving.

With these ingredients on hand, you’re well on your way to making a delightful Slow Cooker Paprika Chicken that everyone will love. Remember, the quality of your ingredients can make a big difference, so choose fresh and high-quality items whenever possible!

Preparation of Slow Cooker Paprika Chicken

Now that you have gathered all your ingredients, it’s time to prepare your Slow Cooker Paprika Chicken. This process is straightforward and will have your kitchen smelling amazing in no time. Let’s break it down into easy steps.

Step 1: Preparing the Chicken

Start by taking your boneless, skinless chicken thighs and placing them in a large bowl. Next, add the chopped onion and minced garlic. These ingredients will infuse the chicken with flavor as it cooks. Then, sprinkle in the sweet paprika, dried thyme, salt, and black pepper. Mix everything together well, ensuring that each piece of chicken is coated evenly with the spices. This step is crucial for maximizing flavor!

Step 2: Mixing the Paprika Sauce

In a separate small bowl, whisk together the sour cream, all-purpose flour, and lemon juice until smooth. This mixture will create a creamy sauce that enhances the dish’s richness. Make sure there are no lumps, as a smooth sauce will blend better with the chicken. Set this aside for now; you’ll add it later in the cooking process.

Step 3: Combining Ingredients in the Slow Cooker

Next, heat the olive oil in a skillet over medium-high heat. Once hot, add the chicken mixture to the skillet. Sear the chicken for about 3-4 minutes on each side until it’s nicely browned. This step adds a lovely depth of flavor. After browning, transfer the chicken to the slow cooker. Pour the chicken broth over the chicken, ensuring it’s well covered. This broth will keep the chicken moist and flavorful during cooking.

Step 4: Setting the Slow Cooker

Now that everything is in the slow cooker, cover it with the lid. If you’re cooking on low, set the timer for 6-8 hours. For a quicker option, you can cook on high for 3-4 hours. The slow cooking process allows the flavors to meld beautifully, resulting in tender chicken that falls apart with a fork. About 30 minutes before serving, stir in the sour cream mixture you prepared earlier. Cover and let it cook for an additional 30 minutes to thicken the sauce. Your Slow Cooker Paprika Chicken is almost ready!

Variation of Slow Cooker Paprika Chicken

One of the best things about Slow Cooker Paprika Chicken is its versatility. You can easily switch up the ingredients to create different flavors that suit your taste. Let’s explore some alternative ingredients and how to adjust cooking times for these variations.

Alternative Ingredients for Different Flavors

If you want to give your Slow Cooker Paprika Chicken a unique twist, consider these alternative ingredients:

  • Spicy Kick: For those who enjoy a bit of heat, add a pinch of cayenne pepper or red pepper flakes to the chicken mixture. This will give your dish a delightful spicy flavor.
  • Vegetable Boost: You can add chopped bell peppers, carrots, or mushrooms to the slow cooker. These vegetables not only enhance the flavor but also add nutrition and color to your dish.
  • Herb Variations: Instead of dried thyme, try using dried oregano or rosemary. Each herb brings its own unique flavor profile, making your dish even more interesting.
  • Different Creaminess: If you want a lighter option, substitute Greek yogurt for sour cream. This will still give you a creamy texture while reducing calories.

These alternatives can help you customize your Slow Cooker Paprika Chicken to fit your family’s preferences. Feel free to experiment and find the combination that you love the most!

Adjusting Cooking Times for Variations

When you make changes to the ingredients, you may need to adjust the cooking times slightly. Here are some tips:

  • Adding Vegetables: If you add vegetables, they may require a bit more time to cook. If using firmer vegetables like carrots, consider adding them at the beginning with the chicken. Softer vegetables, like bell peppers, can be added in the last hour of cooking.
  • Using Thinner Cuts of Chicken: If you opt for chicken breasts instead of thighs, they may cook faster. Check for doneness after about 3 hours on high or 5 hours on low.
  • Increased Liquid: If you add more liquid (like broth or yogurt), it may take a little longer for the sauce to thicken. Be sure to stir in your thickening agent about 30 minutes before serving, as usual.

By making these adjustments, you can ensure that your Slow Cooker Paprika Chicken turns out perfectly every time, no matter how you choose to customize it!

Cooking Note for Slow Cooker Paprika Chicken

When preparing Slow Cooker Paprika Chicken, there are a few important cooking notes to keep in mind. These tips will help you achieve the best results and ensure that your dish is both delicious and satisfying.

First, always remember to use a good quality slow cooker. A reliable slow cooker will maintain a consistent temperature, which is crucial for even cooking. If your slow cooker runs hot, it may cook the chicken too quickly, leading to dryness. Conversely, if it runs cool, the chicken may not reach a safe temperature in time.

Next, consider the size of your chicken pieces. For even cooking, try to cut the chicken thighs into similar sizes. This way, they will cook at the same rate, ensuring that every piece is tender and flavorful. If you’re using larger pieces, you may need to extend the cooking time slightly.

Another key point is to avoid lifting the lid during cooking. Each time you open the lid, heat escapes, which can increase cooking time. Trust the slow cooker to do its job! If you need to check on the dish, do so quickly and replace the lid promptly.

Lastly, let the chicken rest for a few minutes after cooking. This allows the juices to redistribute, making the chicken even more tender. When serving, be sure to spoon some of the creamy sauce over the chicken for added flavor. This will enhance the overall experience and make your Slow Cooker Paprika Chicken truly irresistible!

By following these cooking notes, you’ll be well on your way to creating a delightful meal that your family will love. Enjoy the process and the wonderful aromas that fill your kitchen!

Serving Suggestions for Slow Cooker Paprika Chicken

Once your Slow Cooker Paprika Chicken is ready, it’s time to think about how to serve it. This dish is not only delicious but also versatile when it comes to pairing it with side dishes. Here are some great serving suggestions that will complement the rich flavors of the chicken.

Best Side Dishes to Pair with Slow Cooker Paprika Chicken

  • Egg Noodles: A classic choice! The soft, chewy texture of egg noodles pairs perfectly with the creamy sauce. Simply cook the noodles according to package instructions and serve them underneath the chicken.
  • Rice: Whether you choose white, brown, or even wild rice, it’s a great base for soaking up the flavorful sauce. Cook the rice separately and serve it alongside or under the chicken.
  • Mashed Potatoes: Creamy mashed potatoes are another fantastic option. They provide a comforting base that complements the dish beautifully. You can even mix in some garlic or herbs for extra flavor.
  • Steamed Vegetables: For a healthier option, serve your chicken with a side of steamed vegetables. Broccoli, green beans, or carrots add color and nutrition to your meal.
  • Crusty Bread: A loaf of fresh, crusty bread is perfect for sopping up the delicious sauce. It adds a nice texture and makes the meal feel complete.

Creative Ways to Serve Leftovers

If you have any leftovers, don’t worry! Slow Cooker Paprika Chicken makes for excellent next-day meals. Here are some creative ideas:

  • Wraps: Use tortillas to create wraps filled with chicken and sauce. Add some fresh greens or cheese for extra flavor.
  • Salads: Chop the chicken and toss it into a salad. The creamy sauce can act as a dressing, making for a hearty and satisfying meal.
  • Stuffed Peppers: Mix the chicken with some cooked rice and stuff it into bell peppers. Bake until the peppers are tender for a delicious twist.
  • Pasta: Toss the chicken and sauce with cooked pasta for a quick and easy meal. Add some grated cheese on top for a delightful finish.

With these serving suggestions, you can enjoy your Slow Cooker Paprika Chicken in various ways. Whether it’s a cozy family dinner or a quick lunch, this dish is sure to please everyone!

Tips for Perfecting Slow Cooker Paprika Chicken

To make your Slow Cooker Paprika Chicken truly exceptional, consider these helpful tips. They will enhance the flavors and ensure a delightful dining experience for you and your loved ones.

Choosing the Right Paprika

The type of paprika you use can significantly impact the flavor of your dish. Sweet paprika is the traditional choice for this recipe, providing a mild and slightly sweet flavor. However, you can experiment with smoked paprika for a deeper, smoky taste. This variation adds a unique twist to your Slow Cooker Paprika Chicken, making it even more delicious. Just remember, a little goes a long way, so start with a small amount and adjust to your taste!

Enhancing Flavor with Additional Spices

While the basic recipe is fantastic, you can elevate the flavor profile by adding a few extra spices. Consider incorporating:

  • Bay Leaves: Adding a couple of bay leaves during cooking can infuse a subtle depth of flavor.
  • Smoked Paprika: As mentioned earlier, this can add a rich, smoky flavor that complements the dish beautifully.
  • Italian Seasoning: A sprinkle of Italian seasoning can introduce a delightful herbaceous note.
  • Fresh Herbs: Adding fresh herbs like thyme or parsley at the end of cooking can brighten the dish and add freshness.

These additional spices can help you customize your Slow Cooker Paprika Chicken to suit your taste preferences. Don’t be afraid to experiment and find the perfect blend that you love!

Breakdown of Time for Slow Cooker Paprika Chicken

Understanding the time needed for each step in preparing Slow Cooker Paprika Chicken is essential for planning your meal. Here’s a detailed breakdown of the time involved, so you can manage your cooking schedule effectively.

Prep Time

The prep time for Slow Cooker Paprika Chicken is relatively short. You’ll spend about 15-20 minutes gathering and preparing your ingredients. This includes chopping the onion, mincing the garlic, and mixing the spices with the chicken. If you have everything ready, you can get started quickly!

Cooking Time

Once you’ve prepared the ingredients, the cooking time is where the magic happens. If you set your slow cooker to low, it will take about 6-8 hours for the chicken to become tender and flavorful. Alternatively, if you’re short on time, cooking on high will take around 3-4 hours. Just remember, the longer you cook it on low, the more the flavors will develop!

Total Time

In total, you can expect to spend about 6 hours and 15 minutes to 8 hours and 20 minutes from start to finish, depending on your cooking method. This includes both prep and cooking time. The beauty of this recipe is that you can set it in the morning and come home to a delicious meal waiting for you!

By knowing the time breakdown, you can plan your day better and enjoy the delightful experience of making Slow Cooker Paprika Chicken without any stress.

Nutritional Information for Slow Cooker Paprika Chicken

Understanding the nutritional content of your meals is essential for maintaining a balanced diet. Slow Cooker Paprika Chicken is not only delicious but also offers a good amount of nutrients. Here’s a breakdown of the key nutritional information per serving:

Calories

350 calories. This makes it a satisfying option for dinner without being overly heavy. The combination of chicken, sour cream, and spices provides a hearty meal that can keep you feeling full and satisfied.

Protein

28 grams of protein per serving, Slow Cooker Paprika Chicken is an excellent source of this essential nutrient. Protein helps build and repair tissues, making it vital for overall health.

Sodium

600 milligrams. While this is a reasonable amount for a flavorful dish, it’s always a good idea to monitor your sodium intake, especially if you are watching your salt consumption. You can reduce sodium by using low-sodium chicken broth or adjusting the salt in the recipe to suit your dietary needs.

Overall, Slow Cooker Paprika Chicken is a nutritious and balanced meal option. With its rich flavors and satisfying ingredients, it’s a dish that can fit well into a healthy eating plan. Enjoy this delightful recipe while being mindful of your nutritional goals!

FAQs about Slow Cooker Paprika Chicken

Can I use frozen chicken for Slow Cooker Paprika Chicken?

Yes, you can use frozen chicken for Slow Cooker Paprika Chicken! However, it’s important to note that cooking times may vary. If you start with frozen chicken, it’s best to cook on high for about 4-5 hours. This ensures that the chicken reaches a safe temperature and cooks thoroughly. Just remember, the texture might be slightly different compared to using fresh chicken, but it will still be delicious!

How can I thicken the sauce in Slow Cooker Paprika Chicken?

If you find that the sauce is too thin for your liking, there are a few easy ways to thicken it. One method is to mix a tablespoon of cornstarch with a little cold water to create a slurry. Stir this mixture into the slow cooker about 30 minutes before serving. Another option is to let the sauce simmer uncovered for the last 30 minutes of cooking. This will allow some of the liquid to evaporate, resulting in a thicker sauce. Either way, you’ll end up with a rich and creamy sauce that’s perfect for serving!

What can I substitute for paprika in Slow Cooker Paprika Chicken?

If you don’t have paprika on hand, there are a few substitutes you can use. Smoked paprika is a great alternative if you want to add a smoky flavor. If you prefer a milder taste, you can use chili powder or a combination of cayenne pepper and sweet paprika. Just be cautious with the amount, as these alternatives can vary in heat. Experimenting with different spices can lead to exciting new flavors in your Slow Cooker Paprika Chicken!

Conclusion on Slow Cooker Paprika Chicken

In conclusion, Slow Cooker Paprika Chicken is a delightful dish that brings warmth and comfort to any table. With its rich flavors and creamy sauce, it’s a meal that can easily become a family favorite. The beauty of this recipe lies in its simplicity and versatility. You can customize it to suit your taste preferences, whether you prefer a spicy kick or a lighter option.

Moreover, the slow cooking method allows the chicken to become incredibly tender while the spices meld together beautifully. This means you can set it and forget it, making it perfect for busy days. Just imagine coming home to the enticing aroma of a home-cooked meal waiting for you!

As you explore this recipe, remember to have fun with it. Don’t hesitate to try different ingredients or serving suggestions. Whether you serve it over egg noodles, rice, or mashed potatoes, each bite is sure to be satisfying. Plus, the leftovers can be transformed into exciting new meals, ensuring nothing goes to waste.

So, gather your ingredients, fire up your slow cooker, and enjoy the process of creating this delicious dish. Your family and friends will surely appreciate the effort, and you’ll love the joy of sharing a hearty meal together. Happy cooking!

Paul

Slow Cooker Chicken Paprika is a must-try recipe!

This Slow Cooker Chicken Paprika is the kind of cozy meal that brings people to the table with its savory aroma and creamy, paprika-spiced sauce. Tender chicken thighs simmer low and slow with onions and a simple sauce before being finished with a touch of sour cream. Serve it over noodles or mashed potatoes for a true comfort food experience.
Prep Time 10 minutes
Servings: 6 servings
Course: Dinner
Cuisine: American, Comfort Food

Ingredients
  

  • 1 medium onion chopped2 ½ pounds boneless skinless chicken thighs or chicken breasts1 (10.5 oz) can cream of chicken soup5 teaspoons paprika (smoked, sweet, or your favorite variety)½ teaspoon kosher salt½ teaspoon ground black pepper1 cup sour creamOptional garnish: chopped parsley or sliced green onionsOptional thickeners:– 1 tablespoon cornstarch mixed with 1 tablespoon water– or ½ teaspoon xanthan gum mixed with ½ teaspoon olive oil

Method
 

  1. Spray the inside of your slow cooker with nonstick spray. Add the chopped onions and chicken thighs (or breasts).
  2. In a small bowl, stir together the cream of chicken soup, paprika, salt, and black pepper. Pour this mixture over the chicken and onions in the slow cooker.
  3. Cover and cook on low for 5 to 7 hours, or until the chicken is fully cooked and the onions are tender.
  4. Once cooked, remove the chicken and keep it warm.
  5. In a bowl, mix 1 cup of the hot liquid from the slow cooker with the sour cream. Stir the sour cream mixture back into the slow cooker.
  6. If you’d like a thicker sauce, stir in your chosen thickener (cornstarch slurry or xanthan gum mixture). Cook uncovered on low for a few more minutes until thickened to your preference.
  7. Return the chicken to the slow cooker and coat it in the sauce, or serve the sauce poured over top.
  8. Serve hot over egg noodles, mashed potatoes, riced cauliflower, or roasted vegetables. Garnish with parsley or green onions if desired.

Notes

  • For extra depth, try using smoked paprika for a subtle smoky flavor.
  • You can substitute chicken breasts if you prefer leaner meat, though thighs offer more flavor and tenderness.
  • This recipe is also great for meal prep—leftovers store beautifully in the fridge for 3–4 days.

Surf and Turf Foil Pack Recipes Make Dinner Easy!

Surf and turf foil pack recipes are a delightful way to enjoy the best of both worlds: succulent seafood and tender meat. These recipes typically combine shrimp and steak, creating a mouthwatering meal that’s packed with flavor. The beauty of foil packs lies in their simplicity. You can easily prepare a complete meal in one package, making cleanup a breeze. Plus, the foil traps steam, ensuring that all the ingredients cook evenly and stay juicy.

Why Choose Foil Pack Cooking?

Foil pack cooking is a fantastic method for several reasons. First, it’s incredibly convenient. You can prepare your ingredients ahead of time and store them in the fridge until you’re ready to cook. This makes it perfect for busy weeknights or weekend gatherings. Second, foil packs are versatile. You can customize them with your favorite proteins, vegetables, and seasonings. This means you can cater to different tastes and dietary preferences.

Moreover, cooking in foil packs helps to lock in flavors. The steam created inside the pack enhances the taste of the ingredients, making every bite delicious. Lastly, foil pack meals are great for outdoor cooking. Whether you’re grilling at a picnic or camping, these packs are easy to transport and cook over an open flame. So, if you’re looking for a fun and tasty way to enjoy a meal, surf and turf foil pack recipes are the way to go!

Ingredients for Surf and Turf Foil Pack Recipes

Essential Ingredients for a Perfect Pack

To create a delicious surf and turf foil pack, you need a few essential ingredients. First, the star proteins are shrimp and steak. Shrimp should be peeled and deveined for easy eating. For the steak, choose cuts like sirloin or ribeye, as they are tender and flavorful. Next, baby potatoes are a must. They cook quickly and add a hearty element to your meal. Corn kernels, whether fresh, frozen, or canned, bring a sweet crunch that complements the proteins beautifully.

Don’t forget the seasonings! Olive oil is crucial for adding moisture and flavor. Garlic, paprika, salt, and black pepper enhance the taste of your ingredients. Finally, dried parsley adds a touch of freshness. These ingredients work together to create a balanced and satisfying meal that everyone will love.

Optional Ingredients to Enhance Flavor

While the essential ingredients are fantastic on their own, you can elevate your surf and turf foil pack with some optional ingredients. For a spicy kick, consider adding red pepper flakes. This will give your dish a delightful heat that many enjoy. You can also experiment with different vegetables. Bell peppers, zucchini, or asparagus can add color and nutrition to your pack.

If you want to add a zesty twist, try including lemon slices or a splash of lemon juice. This brightens the flavors and adds a refreshing element. Additionally, fresh herbs like thyme or rosemary can enhance the aroma and taste of your meal. Feel free to get creative! The beauty of foil packs is that you can mix and match ingredients to suit your taste.

Step-by-Step Preparation of Surf and Turf Foil Pack Recipes

Step 1: Preparing the Protein

Start by preparing your proteins. For the shrimp, ensure they are peeled and deveined. This makes them easy to eat and helps them cook evenly. If you’re using steak, cut it into bite-sized pieces. This allows for quicker cooking and ensures that every piece is tender. Remember, the key to a great surf and turf foil pack is having your proteins ready to go!

Step 2: Selecting and Preparing Vegetables

Next, it’s time to select your vegetables. Baby potatoes are a fantastic choice because they cook quickly and add a nice texture. Halve them to speed up the cooking process. If you’re using corn, you can choose fresh, frozen, or canned. Just make sure to drain canned corn before adding it to your pack. You can also consider adding other vegetables like bell peppers or zucchini for extra flavor and nutrition.

Step 3: Assembling the Foil Pack

Now, let’s assemble your foil pack! Cut four large pieces of aluminum foil, about 12 inches long. Lay one piece of foil flat on a clean surface. Place a portion of the shrimp, steak, halved baby potatoes, and corn in the center of the foil. Make sure to leave enough space around the edges to fold the foil later. Repeat this for the remaining pieces of foil.

Step 4: Seasoning Your Ingredients

Seasoning is crucial for enhancing the flavors of your surf and turf foil pack. Drizzle olive oil over the ingredients in each pack. Then, sprinkle minced garlic, paprika, salt, black pepper, and dried parsley evenly over the mixture. Toss everything gently to ensure all ingredients are well coated with the seasonings. This step is essential for a delicious meal!

Step 5: Sealing the Foil Pack

Once your ingredients are seasoned, it’s time to seal the foil pack. Carefully fold the edges of the foil over the mixture, creating a tight seal. Make sure there are no gaps, as this will help trap steam during cooking. You want to create a little pocket for the ingredients to cook in. This step is vital for keeping everything juicy and flavorful!

Step 6: Cooking the Foil Pack

Finally, it’s time to cook your foil packs! Preheat your grill to medium-high heat. Place the sealed foil packs on the grill and cook for about 15-20 minutes. The cooking time may vary depending on the size of your protein pieces and the heat of your grill. Keep an eye on them to ensure everything cooks evenly. Once done, carefully open the packs, being cautious of the hot steam. Serve your delicious surf and turf foil packs hot and enjoy!

Variation of Surf and Turf Foil Pack Recipes

Different Protein Combinations

While shrimp and steak are the classic choices for surf and turf foil packs, there are many other protein combinations you can try. For instance, chicken is a great alternative. It cooks well and absorbs flavors beautifully. Simply cut the chicken into bite-sized pieces, just like you would with steak. You can also use fish, such as salmon or tilapia, for a lighter option. Fish cooks quickly, so be sure to adjust your cooking time accordingly.

If you’re looking for a unique twist, consider using scallops or lobster. These seafood options add a touch of luxury to your meal. Just remember that cooking times may vary, so keep an eye on them while they’re on the grill. For a plant-based option, tofu is an excellent choice. Firm tofu can be cubed and marinated to soak up flavors, making it a delicious substitute for meat. The key is to choose proteins that complement each other and work well with your chosen seasonings.

Vegetarian Options for Foil Packs

If you want to create a vegetarian version of surf and turf foil packs, the possibilities are endless! Start with a base of hearty vegetables. Consider using portobello mushrooms as a meat substitute. They have a rich flavor and meaty texture that can satisfy even the most devoted carnivores. You can also include a variety of colorful vegetables like bell peppers, zucchini, and asparagus for added nutrition and taste.

For protein, chickpeas or black beans are fantastic options. They are packed with protein and fiber, making your meal filling and nutritious. You can also add quinoa or brown rice for a wholesome grain component. Season your vegetarian foil packs with olive oil, garlic, and your favorite herbs to enhance the flavors. Just like with the traditional recipe, seal the packs tightly and cook them on the grill. This way, you can enjoy a delicious and satisfying meal that everyone will love!

Cooking Note for Surf and Turf Foil Pack Recipes

Tips for Perfect Cooking Times

Getting the cooking time just right is essential for a successful surf and turf foil pack. Generally, cooking on medium-high heat for 15-20 minutes works well. However, several factors can affect this timing. First, the size of your protein pieces matters. Smaller pieces will cook faster, while larger chunks may need extra time. Always check for doneness by cutting into the steak or shrimp to ensure they are cooked through.

Another tip is to preheat your grill properly. A hot grill helps to sear the proteins, locking in flavors and juices. If you’re using a charcoal grill, make sure the coals are glowing red before placing your foil packs on the grill. For gas grills, allow it to heat for about 10-15 minutes. This way, you’ll achieve that perfect char and flavor.

Lastly, consider using a meat thermometer. For steak, the internal temperature should reach 145°F for medium-rare. Shrimp should be opaque and firm when fully cooked. By keeping an eye on these details, you can ensure your surf and turf foil packs turn out perfectly every time!

Adjusting Cooking Times for Different Ingredients

When cooking surf and turf foil packs, it’s important to adjust cooking times based on the ingredients you choose. For example, if you decide to use chicken instead of steak, you’ll need to cook it longer. Chicken should reach an internal temperature of 165°F, which may require an additional 5-10 minutes on the grill.

Similarly, if you opt for fish, like salmon or tilapia, the cooking time will be shorter. Fish typically cooks in about 10-15 minutes, depending on thickness. Always check for flakiness to determine doneness. If you’re adding vegetables that cook quickly, like zucchini or bell peppers, consider adding them halfway through the cooking time. This way, they won’t become mushy and will retain their vibrant colors and crunch.

By being mindful of these adjustments, you can create a perfectly cooked meal that highlights the flavors of each ingredient. Enjoy experimenting with different combinations and cooking times to find your favorite surf and turf foil pack recipe!

Serving Suggestions for Surf and Turf Foil Pack Recipes

Ideal Side Dishes

When it comes to serving your surf and turf foil packs, choosing the right side dishes can elevate your meal. A fresh salad is always a great option. Consider a simple green salad with mixed greens, cherry tomatoes, and a light vinaigrette. This adds a refreshing crunch that complements the rich flavors of the foil pack.

Another excellent side dish is garlic bread. The buttery, garlicky goodness pairs perfectly with the seafood and steak. You can easily make it by spreading butter and minced garlic on slices of bread and toasting them until golden brown.

If you want something heartier, consider serving your foil packs with rice or quinoa. These grains soak up the delicious juices from the pack, making every bite flavorful. You can also add herbs or spices to the rice for an extra kick. For a fun twist, try serving with coleslaw. The creamy texture and tangy flavor balance the savory elements of the meal.

Pairing with Sauces and Dips

To enhance the flavors of your surf and turf foil packs, consider pairing them with delicious sauces and dips. A classic garlic butter sauce is a fantastic choice. Simply melt butter and mix in minced garlic, lemon juice, and fresh herbs. Drizzle this over your foil pack for a rich, savory touch.

If you prefer something with a bit of heat, a spicy aioli can be a great addition. Mix mayonnaise with sriracha or your favorite hot sauce for a creamy, zesty dip. This adds a delightful kick that many will enjoy.

For a lighter option, a tangy chimichurri sauce made with parsley, garlic, vinegar, and olive oil can brighten up the dish. This fresh sauce complements the grilled flavors beautifully. You can also serve your foil packs with a side of tartar sauce, especially if you’re using seafood. The creamy texture and zesty flavor enhance the overall experience.

With these serving suggestions, your surf and turf foil pack meal will be a hit at any gathering. Enjoy the delicious flavors and the ease of cleanup!

Tips for Perfecting Surf and Turf Foil Pack Recipes

Choosing the Right Foil

When it comes to making surf and turf foil packs, the type of foil you use can make a big difference. It’s best to choose heavy-duty aluminum foil. This type is thicker and less likely to tear during cooking. It also holds up better against the heat of the grill. If you only have regular foil, you can double it up for added strength.

Make sure to cut your foil into large enough pieces. Each piece should be about 12 inches long. This allows enough space to fold and seal the pack properly. A well-sealed foil pack traps steam, which helps cook the ingredients evenly. If you’re cooking for a crowd, consider using disposable foil trays. They are sturdy and can hold larger portions, making serving easier.

Lastly, remember to avoid using non-stick foil for grilling. While it may seem convenient, it can cause the steam to escape, leading to uneven cooking. Stick with regular or heavy-duty foil for the best results. With the right foil, your surf and turf foil packs will turn out perfectly every time!

Storage Tips for Leftovers

If you have any leftovers from your surf and turf foil packs, storing them properly is key to keeping them fresh. First, allow the foil packs to cool down to room temperature. Once cooled, transfer the contents to an airtight container. This helps prevent moisture loss and keeps the flavors intact.

Store the leftovers in the refrigerator for up to three days. If you want to keep them longer, consider freezing them. Place the cooled ingredients in a freezer-safe container or bag. Be sure to label it with the date for easy reference. Leftovers can be frozen for up to three months.

When you’re ready to enjoy your leftovers, reheat them in the oven or microwave. If using the oven, cover the dish with foil to retain moisture. Heat until warmed through, usually about 15-20 minutes at 350°F. In the microwave, heat in short intervals, stirring occasionally to ensure even warming.

By following these storage tips, you can enjoy your delicious surf and turf foil pack meals even after the initial feast!

Breakdown of Time for Surf and Turf Foil Pack Recipes

Prep Time

Preparing your surf and turf foil packs is quick and easy. The prep time typically takes about 15-20 minutes. This includes gathering your ingredients, washing and cutting the vegetables, and preparing the proteins. If you have everything ready, you can whip up these delicious packs in no time. To save even more time, consider prepping your ingredients ahead of time. You can chop vegetables and marinate proteins the night before, making the cooking process even smoother.

Cooking Time

The cooking time for surf and turf foil packs is generally around 15-20 minutes on a medium-high grill. This allows the shrimp to become tender and the steak to reach your desired doneness. However, cooking times can vary based on the size of your protein pieces and the heat of your grill. Always check for doneness to ensure everything is cooked perfectly. If you’re using different proteins, like chicken or fish, adjust the cooking time accordingly to avoid overcooking.

Total Time

In total, you can expect to spend about 30-40 minutes from start to finish when making surf and turf foil packs. This includes both prep and cooking time. It’s a fantastic option for a quick weeknight dinner or a fun weekend meal. With minimal cleanup and delicious results, these foil packs are sure to become a favorite in your cooking routine!

Nutritional Information for Surf and Turf Foil Pack Recipes

Calories and Macronutrients

When it comes to enjoying surf and turf foil pack recipes, understanding the nutritional content is essential. A typical serving of this delicious meal contains approximately 450 calories. This makes it a satisfying option without being overly indulgent. The macronutrient breakdown is quite balanced, providing a good mix of protein, fats, and carbohydrates.

In each serving, you can expect around 35 grams of protein. This high protein content comes from the shrimp and steak, making it an excellent choice for those looking to build muscle or maintain a healthy diet. Additionally, the meal contains about 20 grams of fat, primarily from the olive oil and the steak. These healthy fats are beneficial for heart health and help keep you feeling full.

As for carbohydrates, each serving has roughly 30 grams. The baby potatoes and corn contribute to this carbohydrate count, providing energy for your day. Overall, this meal is not only delicious but also offers a well-rounded nutritional profile that can fit into various dietary plans.

Sodium and Other Nutritional Considerations

While enjoying your surf and turf foil packs, it’s important to consider sodium intake. A typical serving contains about 800 milligrams of sodium. This amount can vary based on the seasonings and any additional sauces you may use. If you’re watching your sodium intake, consider using low-sodium options for seasonings or reducing the amount of salt added to the recipe.

Moreover, this meal is rich in essential vitamins and minerals. The vegetables, such as corn and potatoes, provide fiber, which is important for digestive health. They also contain vitamins like vitamin C and potassium, which are vital for overall well-being. By incorporating a variety of vegetables, you can enhance the nutritional value of your foil packs even further.

In summary, surf and turf foil pack recipes offer a delicious and nutritious meal option. With a good balance of macronutrients and essential vitamins, they can be a healthy addition to your meal rotation. Just be mindful of sodium levels, and feel free to customize the ingredients to suit your dietary needs!

FAQs about Surf and Turf Foil Pack Recipes

Can I use frozen ingredients in Surf and Turf Foil Pack Recipes?

Yes, you can use frozen ingredients in your surf and turf foil pack recipes! Frozen shrimp and vegetables are convenient options that can save you time. However, keep in mind that frozen ingredients may require a longer cooking time. To ensure everything cooks evenly, it’s best to thaw the shrimp and vegetables before assembling your foil packs. You can do this by placing them in the refrigerator overnight or running them under cold water for a quick thaw. Just remember to adjust your cooking time accordingly to achieve the perfect meal!

What are the best vegetables to include in Surf and Turf Foil Pack Recipes?

When it comes to choosing vegetables for your surf and turf foil packs, the options are plentiful! Some of the best vegetables to include are baby potatoes, corn, bell peppers, zucchini, and asparagus. Baby potatoes are a great base, as they cook quickly and add heartiness. Corn adds a sweet crunch, while bell peppers and zucchini bring vibrant colors and flavors. Asparagus is another excellent choice, offering a tender texture when cooked. Feel free to mix and match your favorite vegetables to create a delicious and colorful foil pack!

How do I know when my Surf and Turf Foil Pack is done cooking?

Knowing when your surf and turf foil pack is done cooking is crucial for a delicious meal. For shrimp, look for them to turn opaque and firm, which usually takes about 5-7 minutes. For steak, use a meat thermometer to check the internal temperature. For medium-rare, it should reach 145°F. Additionally, ensure that the baby potatoes are tender by piercing them with a fork. If they slide off easily, they are cooked through. Always keep an eye on your foil packs while cooking to ensure everything is perfectly done!

Can I make Surf and Turf Foil Pack Recipes in the oven?

Absolutely! You can make surf and turf foil pack recipes in the oven if you don’t have access to a grill. Preheat your oven to 400°F. Assemble your foil packs as you would for grilling, then place them on a baking sheet. Bake for about 20-25 minutes, or until the shrimp are cooked through and the steak reaches your desired doneness. Just like with grilling, be cautious when opening the foil packs, as hot steam will escape. Enjoy your delicious meal straight from the oven!

Conclusion on Surf and Turf Foil Pack Recipes

Recap of Benefits and Versatility

In conclusion, surf and turf foil pack recipes offer a delightful and convenient way to enjoy a delicious meal. The combination of shrimp and steak creates a mouthwatering experience that is hard to resist. One of the biggest benefits of foil pack cooking is its simplicity. You can prepare everything in advance, making it perfect for busy weeknights or outdoor gatherings.

Moreover, the versatility of these recipes is truly remarkable. You can easily swap out proteins, add different vegetables, or experiment with various seasonings to suit your taste. Whether you prefer chicken, fish, or a vegetarian option, there’s a foil pack recipe for everyone. This adaptability allows you to cater to different dietary preferences and create meals that everyone will love.

Additionally, cooking in foil packs helps to lock in flavors and moisture, ensuring that every bite is juicy and satisfying. The ease of cleanup is another major advantage, as everything cooks in one package. This means less time spent washing dishes and more time enjoying your meal with family and friends.

So, whether you’re grilling in the backyard or baking in the oven, surf and turf foil pack recipes are a fantastic choice. They combine delicious flavors, healthy ingredients, and a fun cooking method that everyone can enjoy. Give them a try, and you’ll see just how easy and tasty mealtime can be!

Paul

Surf and Turf Foil Pack Recipes Make Dinner Easy!

These Surf and Turf Foil Packs are the ultimate all-in-one grilled meal, combining juicy steak, tender shrimp, and sweet corn with bold spices and butter for a flavor-packed summer feast. Whether you’re firing up the grill or baking in the oven, these customizable foil packets make for easy cleanup and unforgettable taste.
Prep Time 10 minutes
Servings: 4 servings
Course: Main Course
Cuisine: American

Ingredients
  

  • ½ pound sirloin steak cut into 1-inch cubes½ pound raw shrimp, deveined and peeled if preferred2 ears corn, each cut into 3 pieces1 cup cherry tomatoes½ small red onion, sliced thin1 lemon, cut into wedges2 teaspoons minced garlic1 tablespoon Old Bay seasoning1 teaspoon dried thyme leaves1 teaspoon ground cumin1 teaspoon black pepper4 tablespoons melted butterFresh parsley, chopped, for garnish

Method
 

  1. Preheat grill to medium-high heat, about 450°F. Alternatively, preheat your oven to 425°F if baking.
  2. Tear off 4 pieces of heavy-duty aluminum foil, each about 12×12 inches. Lightly spray with non-stick cooking spray.
  3. Divide the steak cubes, shrimp, corn segments, cherry tomatoes, red onion slices, and lemon wedges evenly among the foil sheets.
  4. Season each packet with minced garlic, Old Bay seasoning, thyme, cumin, and black pepper. Drizzle with melted butter for rich flavor.
  5. Fold each foil piece securely to create sealed packets, folding edges tightly to trap steam and flavor.
  6. Place packets directly on the grill or in the oven. Cook for 15 to 20 minutes, flipping once halfway through. Steak should reach an internal temp of 130°F for medium doneness, and shrimp should be pink and opaque.
  7. Carefully open the packets (watch for steam!), sprinkle with fresh parsley, and serve with an extra squeeze of grilled lemon.

Notes

  • Feel free to swap in your favorite vegetables like zucchini or bell peppers for added color and crunch.
  • Use pre-cooked shrimp to reduce cook time slightly—just add during the last 10 minutes.
  • To make it a complete meal, serve with crusty bread or steamed rice to soak up all the buttery juices.
  • Great for camping: prep the packets ahead of time and toss them on a campfire grill grate!

Beef and Cheese Chimichangas Recipe is a must-try!

Chimichangas are a delicious Mexican dish that many people love. They are essentially deep-fried burritos, filled with a variety of tasty ingredients. The name “chimichanga” comes from the Spanish word for “thing” or “thingamajig,” which perfectly describes this delightful meal. Traditionally, chimichangas are made with flour tortillas that are filled with meat, beans, cheese, and spices. After being rolled up, they are fried until golden brown and crispy. This cooking method gives them a crunchy exterior while keeping the inside warm and flavorful.

Why You Should Try This Beef and Cheese Chimichangas Recipe

If you’re looking for a comforting and satisfying meal, this Beef and Cheese Chimichangas Recipe is a must-try! Not only is it easy to make, but it also combines rich flavors that everyone will enjoy. The ground beef, combined with melted cheddar cheese and refried beans, creates a hearty filling that is simply irresistible. Plus, frying the chimichangas gives them a delightful crunch that contrasts beautifully with the soft filling.

This recipe is perfect for family dinners, game nights, or even casual gatherings with friends. You can customize it to suit your taste, making it a versatile option for any occasion. Whether you prefer a mild flavor or a spicy kick, this recipe can be adjusted to meet your preferences. So, gather your ingredients and get ready to enjoy a plate of warm, cheesy goodness!

Ingredients for Beef and Cheese Chimichangas Recipe

To create the perfect Beef and Cheese Chimichangas, you’ll need a selection of fresh ingredients. Each component plays a vital role in delivering that rich, savory flavor that makes chimichangas so beloved. Here’s what you’ll need:

  • 1 pound ground beef: This is the main protein source, providing a hearty base for your chimichangas.
  • 1 small onion, chopped: Onions add sweetness and depth to the filling.
  • 2 cloves garlic, minced: Garlic enhances the flavor, giving it a delicious aroma.
  • 1 teaspoon chili powder: This spice adds warmth and a hint of heat.
  • 1 teaspoon cumin: Cumin brings an earthy flavor that complements the beef.
  • 1 teaspoon paprika: Paprika adds a subtle smokiness and vibrant color.
  • Salt and pepper to taste: Essential for seasoning and enhancing all the flavors.
  • 1 cup shredded cheddar cheese: Cheese provides creaminess and richness to the filling.
  • 1 cup refried beans: Beans add texture and help bind the filling together.
  • 4 large flour tortillas: Tortillas are the vessel that holds all the delicious ingredients.
  • Vegetable oil for frying: Oil is necessary for achieving that crispy, golden exterior.
  • Sour cream, for serving: A cool, creamy topping that balances the flavors.
  • Salsa, for serving: Adds a fresh, zesty kick to each bite.

Gather these ingredients before you start cooking. Having everything ready will make the preparation process smooth and enjoyable. With these components, you’re well on your way to making mouthwatering Beef and Cheese Chimichangas!

Step-by-Step Preparation of Beef and Cheese Chimichangas Recipe

Step 1: Preparing the Beef Filling

To start, you’ll want to prepare the beef filling. First, heat a large skillet over medium heat. Once hot, add the ground beef. Cook it until it’s browned, which usually takes about 5-7 minutes. Make sure to break it apart with a spatula as it cooks. This helps it brown evenly. After the beef is cooked, drain any excess fat from the skillet. This step is important to keep your chimichangas from being greasy.

Next, add the chopped onion and minced garlic to the skillet. Sauté them together with the beef for about 3-4 minutes. You want the onion to become translucent and soft. This will add a wonderful flavor to your filling. After that, sprinkle in the chili powder, cumin, paprika, salt, and pepper. Stir everything together and let it cook for another 2 minutes. This allows the spices to release their fragrant aromas, making your kitchen smell amazing!

Step 2: Assembling the Chimichangas

Now that your beef filling is ready, it’s time to assemble the chimichangas. Start by laying a large flour tortilla flat on a clean surface. Spoon about 1/4 of the beef and cheese mixture into the center of the tortilla. Be careful not to overfill it, as this can make rolling difficult.

Next, fold the sides of the tortilla over the filling. Then, roll it up tightly from the bottom to the top. Make sure to tuck in the sides as you roll to keep the filling secure. Repeat this process with the remaining tortillas and filling. You should have four deliciously stuffed chimichangas ready for frying!

Step 3: Frying the Chimichangas

For the next step, you’ll need to fry the chimichangas to achieve that crispy texture. In a large skillet, heat about 1 inch of vegetable oil over medium-high heat. You can test if the oil is hot enough by dropping a small piece of tortilla into it. If it sizzles, you’re ready to go!

Carefully place the chimichangas seam-side down in the hot oil. Fry them for about 3-4 minutes on each side, or until they turn golden brown. It’s important to keep an eye on them to prevent burning. Once they are perfectly crispy, use tongs to remove them from the oil. Place them on paper towels to drain any excess oil.

Step 4: Serving the Chimichangas

Finally, it’s time to serve your delicious Beef and Cheese Chimichangas! Arrange them on a plate and serve them hot. You can add a dollop of sour cream on the side for a creamy contrast. Salsa is also a great addition, providing a fresh and zesty flavor that complements the richness of the chimichangas.

These chimichangas are perfect for sharing with family and friends. Enjoy every bite of this delightful dish, and don’t forget to savor the crispy exterior and cheesy filling!

Variations of Beef and Cheese Chimichangas Recipe

Vegetarian Options

If you’re looking for a meat-free alternative, you can easily make vegetarian chimichangas. Instead of ground beef, use a mix of sautéed vegetables like bell peppers, zucchini, and mushrooms. These veggies add a delightful crunch and flavor to your dish. You can also include black beans or pinto beans for added protein and texture.

To enhance the flavor, season the vegetables with the same spices used in the original recipe, such as chili powder, cumin, and paprika. Don’t forget to mix in plenty of shredded cheese to keep that creamy goodness. This vegetarian version is not only delicious but also packed with nutrients, making it a great option for everyone!

Spicy Beef and Cheese Chimichangas

If you love a bit of heat, consider making spicy beef and cheese chimichangas. To kick up the spice level, add diced jalapeños or serrano peppers to the beef filling. You can also mix in a dash of your favorite hot sauce for an extra kick. This variation is perfect for those who enjoy bold flavors and a little bit of a challenge!

Another option is to use pepper jack cheese instead of cheddar. This cheese has a spicy flavor that pairs wonderfully with the seasoned beef. Just remember to adjust the amount of spices according to your taste. With these spicy additions, your chimichangas will be bursting with flavor and sure to impress anyone who loves a fiery dish!

Cooking Note for Beef and Cheese Chimichangas Recipe

When preparing Beef and Cheese Chimichangas, there are a few important cooking notes to keep in mind. These tips will help ensure that your chimichangas turn out perfectly every time.

First, always use fresh ingredients. Fresh vegetables and quality ground beef will enhance the overall flavor of your dish. If possible, opt for organic or grass-fed beef for a healthier option. Fresh ingredients not only taste better but also contribute to a more vibrant and appealing dish.

Next, be mindful of the oil temperature when frying. If the oil is too hot, the chimichangas may burn on the outside while remaining uncooked on the inside. Conversely, if the oil is not hot enough, the chimichangas will absorb too much oil and become greasy. A good rule of thumb is to maintain the oil temperature between 350°F to 375°F. You can use a kitchen thermometer to check the temperature or test it with a small piece of tortilla.

Additionally, consider using a deep-fryer for a more controlled frying experience. This method allows for even cooking and can help achieve that perfect golden-brown color. If you don’t have a deep-fryer, a large skillet works just fine, but be sure to monitor the cooking closely.

Lastly, let the chimichangas rest for a minute or two after frying. This allows the filling to settle and makes them easier to cut and serve. Enjoying them fresh out of the oil is tempting, but a brief resting period can enhance the overall experience.

By following these cooking notes, you’ll be well on your way to creating delicious Beef and Cheese Chimichangas that are sure to impress your family and friends!

Serving Suggestions for Beef and Cheese Chimichangas Recipe

When it comes to serving your Beef and Cheese Chimichangas, the options are endless! These delicious treats can be enjoyed in various ways, making them perfect for any occasion. Here are some delightful serving suggestions to elevate your meal:

  • Classic Toppings: Serve your chimichangas with a generous dollop of sour cream and a side of fresh salsa. The coolness of the sour cream balances the heat from the spices, while the salsa adds a zesty kick.
  • Guacamole: For an extra layer of flavor, add a side of creamy guacamole. The rich avocado taste pairs wonderfully with the crispy chimichangas, creating a delightful combination.
  • Fresh Cilantro: Sprinkle chopped fresh cilantro over the chimichangas before serving. This herb adds a burst of freshness and enhances the overall flavor profile.
  • Shredded Lettuce and Diced Tomatoes: Create a refreshing salad on the side with shredded lettuce and diced tomatoes. This adds a crunchy texture and a pop of color to your plate.
  • Rice and Beans: Serve your chimichangas alongside a side of Mexican rice and refried beans. This classic combination makes for a hearty and satisfying meal.
  • Hot Sauce: For those who love heat, provide a selection of hot sauces. This allows guests to customize their chimichangas to their preferred spice level.

These serving suggestions not only enhance the flavor of your Beef and Cheese Chimichangas but also make for an appealing presentation. Whether it’s a family dinner or a festive gathering, these ideas will surely impress your guests and make your meal memorable!

Tips for Perfect Beef and Cheese Chimichangas Recipe

Creating the perfect Beef and Cheese Chimichangas requires a bit of attention to detail. Here are some helpful tips to ensure your chimichangas turn out delicious every time:

  • Choose the Right Tortillas: Use large flour tortillas for the best results. They should be soft and pliable, making them easier to roll without tearing. If you can, warm them slightly in the microwave or on a skillet before filling. This will make them more flexible.
  • Don’t Overfill: While it’s tempting to pack in a lot of filling, overfilling can lead to messy chimichangas. Stick to about 1/4 of the filling per tortilla. This will help keep them intact while frying.
  • Seal the Edges: To prevent the filling from leaking out during frying, make sure to seal the edges of the chimichangas well. You can use a little water or egg wash to help them stick together.
  • Maintain Oil Temperature: As mentioned earlier, keeping the oil at the right temperature is crucial. If the oil is too hot, the chimichangas will burn. If it’s too cool, they will absorb too much oil. Use a thermometer for accuracy.
  • Fry in Batches: Avoid overcrowding the skillet when frying. Frying in batches allows for even cooking and ensures that each chimichanga gets that perfect golden-brown color.
  • Let Them Drain: After frying, place the chimichangas on paper towels to drain excess oil. This will help keep them crispy and not greasy.
  • Experiment with Fillings: Feel free to get creative with your fillings! You can add different cheeses, vegetables, or even switch up the spices to suit your taste. The possibilities are endless!
  • Serve Immediately: Chimichangas are best enjoyed fresh and hot. Serve them right after frying for the ultimate crispy experience. If you need to keep them warm, place them in a low oven until ready to serve.

By following these tips, you’ll be well on your way to making perfect Beef and Cheese Chimichangas that are sure to impress your family and friends. Enjoy the process and savor every delicious bite!

Breakdown of Time for Beef and Cheese Chimichangas Recipe

Prep Time

Preparing your Beef and Cheese Chimichangas is a straightforward process. The prep time typically takes about 15-20 minutes. During this time, you will gather all your ingredients, chop the onion, and mince the garlic. Additionally, you will cook the ground beef and mix in the spices. This initial preparation is crucial for ensuring that everything is ready for assembly and cooking.

Cooking Time

The cooking time for the chimichangas is approximately 15-20 minutes. This includes frying the chimichangas until they are golden brown and crispy. If you choose to bake them instead, the cooking time will be around 20-25 minutes at 400°F. Regardless of the method, keep an eye on them to ensure they cook evenly and achieve that perfect texture.

Total Time

In total, you can expect to spend about 30-40 minutes from start to finish when making Beef and Cheese Chimichangas. This includes both the prep and cooking times. With this quick and easy recipe, you can have a delicious meal ready in no time, making it perfect for busy weeknights or spontaneous gatherings!

Nutritional Information for Beef and Cheese Chimichangas Recipe

Calories

When enjoying Beef and Cheese Chimichangas, it’s important to be aware of the calorie content. Each serving contains approximately 450 calories. This makes it a hearty meal option, perfect for satisfying your hunger. However, if you’re watching your calorie intake, consider pairing it with a light salad or fresh vegetables to balance your meal.

Protein

Protein is essential for maintaining muscle health and overall well-being. Each serving of Beef and Cheese Chimichangas provides about 25 grams of protein. The ground beef and cheese contribute significantly to this protein content, making it a great choice for those looking to boost their protein intake. This makes the dish not only delicious but also nutritious!

Sodium

Sodium is another important factor to consider in your diet. Each serving of Beef and Cheese Chimichangas contains around 800 milligrams of sodium. While sodium is necessary for bodily functions, it’s best to consume it in moderation. If you’re concerned about sodium levels, you can use low-sodium beans and cheese to help reduce the overall sodium content in your meal.

FAQs about Beef and Cheese Chimichangas Recipe

Can I make Beef and Cheese Chimichangas ahead of time?

Yes, you can prepare Beef and Cheese Chimichangas ahead of time! To do this, follow the recipe up to the frying step. After assembling the chimichangas, you can place them on a baking sheet and cover them with plastic wrap. Store them in the refrigerator for up to 24 hours. When you’re ready to cook, simply heat the oil and fry them as directed. This makes it easy to enjoy a delicious meal without spending too much time in the kitchen on busy days!

What can I serve with Beef and Cheese Chimichangas?

Beef and Cheese Chimichangas are versatile and can be served with a variety of sides. Some popular options include:

  • Mexican Rice: A flavorful side that complements the chimichangas perfectly.
  • Refried Beans: A classic pairing that adds extra protein and fiber.
  • Fresh Salad: A light salad with lettuce, tomatoes, and avocado can balance the richness of the chimichangas.
  • Guacamole: Creamy guacamole adds a delicious twist and enhances the flavors.
  • Salsa: A zesty salsa can brighten up the dish and add freshness.

Feel free to mix and match these sides to create a well-rounded meal that everyone will enjoy!

How do I store leftover Beef and Cheese Chimichangas?

If you have leftover Beef and Cheese Chimichangas, storing them properly is key to maintaining their taste and texture. Allow the chimichangas to cool completely before storing. Place them in an airtight container and refrigerate for up to 3 days. When you’re ready to enjoy them again, you can reheat them in the oven at 350°F for about 10-15 minutes, or until heated through. This method helps keep the chimichangas crispy. Avoid microwaving them, as this can make them soggy. Enjoy your leftovers just as much as the first time!

Conclusion on Beef and Cheese Chimichangas Recipe

In conclusion, the Beef and Cheese Chimichangas Recipe is a delightful dish that brings together rich flavors and satisfying textures. Whether you’re cooking for a family dinner or hosting friends, these chimichangas are sure to impress. The combination of seasoned ground beef, melted cheese, and crispy tortillas creates a meal that is both comforting and delicious.

Not only is this recipe easy to follow, but it also allows for plenty of customization. You can adjust the spice levels, try different fillings, or even opt for a healthier baked version. The versatility of chimichangas makes them a fantastic choice for any occasion, from casual weeknight dinners to festive gatherings.

As you prepare your Beef and Cheese Chimichangas, remember to enjoy the process. Cooking is not just about the end result; it’s also about the joy of creating something delicious. So gather your ingredients, follow the steps, and savor every bite of your homemade chimichangas!

We hope this recipe inspires you to get into the kitchen and whip up a batch of these tasty treats. Don’t forget to share your chimichanga creations with family and friends. Happy cooking!

Paul

Beef and Cheese Chimichangas Recipe is a must-try!

These Beef and Cheese Chimichangas are crispy, cheesy pockets of pure comfort. Packed with seasoned beef, melted cheese, and a hint of green chiles, they’re fried to golden perfection for a satisfying, restaurant-style Tex-Mex dish you can make right at home. Perfect for weeknight dinners or game-day indulgence!
Prep Time 15 minutes
Cook Time 15 minutes
Total Time 30 minutes
Servings: 8 chimichangas
Course: Main Course
Cuisine: Tex-Mex

Ingredients
  

  • For the Filling:1 lb ground beef1 small onion finely chopped2 cloves garlic, minced1 packet (1 oz) taco seasoning mix½ cup tomato sauce1 can (4 oz) diced green chiles, drained1 cup shredded cheddar cheese or Mexican blend½ cup refried beans (optional)Salt and pepper to taste
  • For the Chimichangas:8 large flour tortillas burrito sizeVegetable oil, for fryingToothpicks, for securing
  • Optional Toppings:Sour creamGuacamoleSalsaShredded lettuceDiced tomatoesChopped cilantro

Method
 

  1. Prepare the Filling:In a large skillet over medium heat, brown the ground beef until fully cooked. Drain excess fat.Add chopped onion and garlic to the beef and sauté for 3–4 minutes until softened.Stir in taco seasoning, tomato sauce, and green chiles. Let simmer for 2–3 minutes.Remove from heat and mix in shredded cheese until melted. Stir in refried beans if using. Let the mixture cool slightly.
  2. Assemble the Chimichangas:Warm tortillas in the microwave or skillet until pliable.Spoon about ¼ cup of filling into the center of each tortilla.Fold the sides inward and roll up tightly burrito-style. Secure with toothpicks to keep them closed during frying.
  3. Fry the Chimichangas:Heat 1 inch of vegetable oil in a deep skillet over medium-high heat until it reaches 350°F (175°C).Carefully place each chimichanga seam-side down in the hot oil.Fry for 2–3 minutes on each side until golden brown and crispy.Remove and place on a paper towel-lined plate. Remove toothpicks before serving.
  4. Garnish and Serve:Top your hot chimichangas with sour cream, guacamole, salsa, shredded lettuce, diced tomatoes, and chopped cilantro as desired.

Notes

  • For a baked alternative, brush the assembled chimichangas with oil and bake at 400°F (200°C) for 20–25 minutes until crispy.
  • Use ground turkey or shredded rotisserie chicken for a protein swap.
  • Make ahead and freeze: assemble and freeze before frying. Fry directly from frozen, adding a few extra minutes.
  • Pair with Spanish rice, refried beans, or a side salad for a complete meal.

No-Bake Biscuit Pudding Cake with Vanilla and Chocolate Custard Cream: A Dessert to Remember

Growing up, the kitchen was always the heart of our home. My mother, a culinary wizard, would often prepare desserts that seemed magical in their simplicity and elegance. Among the many sweet treats that graced our family table, one stands out like a beacon of comfort and nostalgia: the No-Bake Biscuit Pudding Cake with Vanilla and Chocolate Custard Cream.

It wasn’t just the taste that made this dessert special, but the moments shared around the table. I remember sitting on the kitchen counter, watching my mother whip up the creamy custards, layering them over crispy biscuits. The whole house would fill with the warm, sweet aroma as the custard set in the fridge, and we’d eagerly await the moment we could slice into the cool, silky layers. This was our go-to dessert for birthdays, family gatherings, and even lazy Sunday afternoons. It was a dish that required no oven, yet delivered indulgence in every bite.

As I grew older and started making it myself, I realized how easy it was to recreate those cherished memories. The simplicity of the ingredients, the ease of preparation, and the rich flavor combinations made it a perfect recipe to pass down—just as it had been passed down to me. This No-Bake Biscuit Pudding Cake became my personal tribute to the memories of family and love. It’s a dessert that not only fills the stomach but also fills the heart, offering a sense of nostalgia with each forkful.

For me, this dessert represents more than just food. It’s a celebration of the little things in life, the moments that often go unnoticed but are, in reality, the most precious. Whether you’re making it for a special occasion or simply to enjoy during a quiet evening, this No-Bake Biscuit Pudding Cake brings people together. It’s the kind of dessert that turns an ordinary meal into an extraordinary experience—one that will be remembered and savored.

The Magic of No-Bake Desserts: Why This Pudding Cake Is Perfect for Any Occasion

No-bake desserts are a lifesaver in many kitchens. Whether it’s a busy weeknight or a spontaneous gathering with friends, having a dessert that doesn’t require the oven is a true game-changer. The No-Bake Biscuit Pudding Cake with Vanilla and Chocolate Custard Cream is a prime example of how simplicity can lead to extraordinary results. With just a few staple ingredients and minimal effort, you can create a dessert that’s not only delicious but also visually appealing.

One of the best things about no-bake desserts is their versatility. The base for this pudding cake can be tailored to suit your tastes. While the recipe calls for biscuits, you could easily swap them for other types of cookies or even cake layers. The custards themselves are creamy and rich, but they’re also adaptable. You can infuse different flavors into the vanilla custard or add more cocoa powder to the chocolate custard for a more intense flavor. No-bake desserts allow you to experiment and personalize, making them a perfect choice for those who love to get creative in the kitchen.

Additionally, no-bake desserts are perfect for the warmer months when the last thing you want to do is turn on the oven. The No-Bake Biscuit Pudding Cake is served chilled, making it the ideal treat for a hot summer evening, a picnic, or even an afternoon tea. It’s refreshing, light, and indulgent all at once.

Ingredients

IngredientQuantity
For the Vanilla Custard
Chicken egg yolks3
Sugar80g (1/3 cup)
Milk400ml (1 2/3 cups)
Corn starch30g (1/4 cup)
Vanilla extract1 tsp
For the Chocolate Custard
Chicken egg yolks3
Sugar80g (1/3 cup)
Milk400ml (1 2/3 cups)
Corn starch30g (1/4 cup)
Cocoa powder40g (1/3 cup)

Directions

  1. Make the Vanilla Custard: In a medium saucepan, whisk the egg yolks, sugar, corn starch, and vanilla extract together. Gradually add the milk, whisking continuously to prevent lumps. Cook over medium heat, stirring constantly, until the mixture thickens into a smooth custard. Once thickened, remove the saucepan from the heat and set the custard aside to cool.
  2. Make the Chocolate Custard: In another saucepan, combine the egg yolks, sugar, and corn starch. Add the cocoa powder and whisk together until smooth. Gradually pour in the milk, whisking continuously. Cook over medium heat, stirring constantly, until the chocolate custard thickens and becomes smooth. Remove from heat and allow it to cool.
  3. Assemble the Pudding Cake: Arrange a layer of biscuits in the bottom of a serving dish. Pour a generous portion of vanilla custard over the biscuits, spreading it evenly. Add another layer of biscuits on top, followed by the chocolate custard. Smooth the chocolate custard evenly over the biscuits.
  4. Chill and Set: Place the assembled pudding cake in the refrigerator and let it chill for at least 4 hours, or overnight, to allow the custards to set and the biscuits to soften.
  5. Serve and Enjoy: After the pudding cake has set, slice it into squares and serve chilled. Optionally, garnish with fresh berries or a dollop of whipped cream for an extra touch of elegance.

Nutritional Information (Per Serving)

NutrientAmount per Serving
Calories350 kcal
Protein6 g
Carbohydrates45 g
Fat15 g
Fiber2 g
Sugars25 g

Frequently Asked Questions (FAQs)

  1. Can I make this pudding cake ahead of time? Absolutely! In fact, this dessert is best when made in advance. The longer it chills, the more the flavors meld together, and the biscuits soften, allowing the custards to soak in and create a beautifully creamy texture. For best results, prepare it the night before or at least 4 hours before serving.
  2. Can I use a different type of biscuit or cookie? Yes! The beauty of this recipe is in its flexibility. While the traditional choice is a buttery biscuit, you can easily substitute with a variety of other cookies or biscuits. If you want a more intense flavor, consider using a chocolate biscuit or a spice cookie. Just make sure the biscuits are firm enough to hold their structure when layered with custard.
  3. How can I make the dessert dairy-free? If you’re looking to make this pudding cake dairy-free, you can substitute the milk with almond milk, coconut milk, or any other plant-based milk of your choice. For the custards, replace the cream with a coconut-based alternative or a thickened almond milk mixture to maintain the creamy texture.
  4. Can I add fruit to this pudding cake? Yes! Fresh berries such as raspberries, strawberries, or blueberries make a wonderful addition to this dessert. You can layer them between the biscuits or scatter them on top as a garnish. The freshness of the fruit balances out the richness of the custards beautifully.
  5. How do I store leftovers? Leftovers should be covered and stored in the refrigerator. The dessert will keep for up to 3 days, though it is best eaten within 1-2 days for optimal flavor and texture. If you notice that the custard is starting to separate or the biscuits are too soft, give it a quick stir to re-incorporate everything, and it will still taste great.
  6. Can I make this recipe gluten-free? Absolutely! To make this dessert gluten-free, use gluten-free biscuits or cookies. Many gluten-free varieties are available at your local grocery store, or you can make your own at home if you prefer. Just ensure that your custard ingredients are also gluten-free, which they typically are.

Why This Dessert Will Be Your New Favorite

Sometimes, the simplest desserts leave the biggest impression. The No-Bake Biscuit Pudding Cake with Vanilla and Chocolate Custard Cream is a prime example of how a few quality ingredients and a little creativity can result in a dessert that feels like a labor of love without requiring hours in the kitchen. Whether you’re preparing it for a celebration, a casual gathering, or just because you deserve a sweet treat, this dessert will quickly become your go-to.

It’s not just about satisfying a sweet tooth—it’s about creating a moment of joy, something that connects generations, that celebrates family traditions, and that invites you to slow down and enjoy the good things in life. When you make this pudding cake, you’re not just making a dessert—you’re creating a memory. You’re passing on a tradition that can be shared and savored for years to come, just as I did with my family.

Conclusion: A Dessert That Brings People Together

The No-Bake Biscuit Pudding Cake with Vanilla and Chocolate Custard Cream isn’t just a treat—it’s a celebration of simplicity and tradition. It’s a dessert that brings people together, whether you’re enjoying it with family, friends, or even on your own after a long day. With its creamy layers, rich flavors, and minimal preparation time, it’s the perfect sweet ending to any meal.

As I sit down with my family to enjoy this dessert, I’m reminded of the importance of the small moments that make life so special—the laughter shared over a meal, the joy of creating something together, and the sweet satisfaction of a well-loved recipe passed down through generations. This pudding cake is more than just a dessert; it’s a story that’s been told in every home, in every bite, and it will continue to be enjoyed for many years to come.

Whether you’re a novice in the kitchen or an experienced home cook, this recipe is guaranteed to impress. So next time you’re in need of a dessert that will wow your guests and delight your taste buds, remember this No-Bake Biscuit Pudding Cake. It’s the sweet, creamy dessert that never goes out of style.

Amal

No-Bake Biscuit Pudding Cake with Vanilla and Chocolate Custard Cream: A Dessert to Remember

This No-Bake Biscuit Pudding Cake with Vanilla and Chocolate Custard Cream is an indulgent yet easy-to-make dessert perfect for any occasion. Layers of buttery biscuits are soaked in smooth, creamy vanilla and chocolate custards, creating a luxurious treat that requires no oven. It’s a dessert that’s sure to impress and can be made ahead of time, making it ideal for a last-minute gathering or a cozy evening at home.
Prep Time 15 minutes
Cook Time 10 minutes
Total Time 4 hours
Servings: 6 –8 servings
Course: Dessert
Cuisine: American

Ingredients
  

For the Vanilla Custard:
  • 3 egg yolks
  • 80 g 1/3 cup sugar
  • 400 ml 1 2/3 cups milk
  • 30 g 1/4 cup corn starch
  • 1 tsp vanilla extract
For the Chocolate Custard:
  • 3 egg yolks
  • 80 g 1/3 cup sugar
  • 400 ml 1 2/3 cups milk
  • 30 g 1/4 cup corn starch
  • 40 g 1/3 cup cocoa powder
For Assembly:
  • 1 package of biscuits about 250g, any variety you prefer
  • Fresh berries optional, for garnish

Method
 

  1. Make the Vanilla Custard: In a saucepan, whisk together the egg yolks, sugar, corn starch, and vanilla extract. Slowly add the milk, whisking continuously to prevent lumps. Cook over medium heat, stirring constantly, until the custard thickens. Remove from heat and let cool.
  2. Make the Chocolate Custard: In another saucepan, combine the egg yolks, sugar, corn starch, and cocoa powder. Gradually add the milk, whisking to combine. Cook over medium heat, stirring constantly, until the chocolate custard thickens. Remove from heat and let cool.
  3. Assemble the Pudding Cake: In a serving dish, layer the biscuits at the bottom. Pour a generous amount of vanilla custard over the biscuits, smoothing it into an even layer. Add another layer of biscuits on top, then pour the chocolate custard over the biscuits, spreading it evenly.
  4. Chill and Set: Refrigerate the dessert for at least 4 hours, or overnight, to allow the custards to set and the biscuits to soften.
  5. Serve and Garnish: Once set, slice into squares and serve chilled. Optionally, garnish with fresh berries for an extra burst of flavor and color.

Notes

  • Make Ahead: This dessert is best when made ahead of time, allowing the custards to set and the flavors to develop. It can be prepared the day before and refrigerated overnight.
  • Customizable Layers: Feel free to swap the biscuits for cookies or a different type of cake. You can also add fruit between the layers for added freshness.
  • Dairy-Free Option: Use almond milk, coconut milk, or any other non-dairy milk to make this dessert dairy-free.

A Heartwarming Dish for Busy Weeknights

As a busy parent, professional, or simply someone trying to manage the hustle and bustle of daily life, the thought of preparing a nutritious and delicious dinner after a long day can often feel daunting. But I have a secret weapon that has been a lifesaver in my kitchen: the Veggie-Packed Scramble Delight. It’s not just another scramble – it’s a dish filled with warmth, comfort, and vibrant flavors that brings together a balance of fresh vegetables, savory ham, and creamy eggs. It’s a reminder that, even in the rush of life, we can create something wholesome and satisfying.

The first time I made this dish was on a chilly Wednesday evening when I had exactly 30 minutes to make dinner before my children’s extracurricular activities kicked off. I wanted something hearty enough to please their growing appetites, but quick enough to allow me some time to catch my breath. I rummaged through my fridge, grabbing whatever veggies I had left – bell pepper, mushrooms, carrots – and decided to throw them all together in a simple scramble. The result? A family favorite that has become part of our weekly dinner rotation. The vibrant colors, the creamy texture, and the delightful crunch of sautéed vegetables and ham made it clear that this dish was something special. Since that night, I’ve found myself making this Veggie-Packed Scramble Delight when I need a meal that brings joy to the table without taking hours to prepare.

Now, this recipe has become a tradition in our home, often serving as the perfect weeknight dinner that brings us together after a busy day. It’s a simple reminder that we can create something nutritious and delicious in a short amount of time – and it’s a perfect dish for those who want to enjoy comfort food without the heavy feeling afterward.

Why This Dish Works So Well for Busy Weeknights

There’s something about the combination of fluffy scrambled eggs, colorful veggies, and savory ham that makes this dish feel like a complete meal, even when you’re short on time. It’s not just a quick recipe; it’s a well-balanced one, too. Packed with protein, fiber, and vitamins, the Veggie-Packed Scramble Delight delivers everything you need in one hearty, satisfying dish.

The beauty of this recipe is in its flexibility. You can use any vegetables you have on hand, making it an ideal dish for clearing out your fridge. Whether it’s a handful of spinach, some leftover broccoli, or even zucchini, you can easily swap out the ingredients to suit your preferences or whatever happens to be in season. The dish is also highly customizable in terms of seasoning. You can add a dash of your favorite spices or even throw in some chili flakes if you’re craving a little heat. It’s a dish that adapts to your tastes, making it as versatile as it is delicious.

The addition of ham gives the scramble a satisfying, meaty texture, but it can easily be swapped for bacon, sausage, or even a plant-based protein if you’re looking for alternatives. The result is always a flavorful, filling dish that can satisfy even the pickiest eaters in your household. And don’t forget the creamy eggs – they’re the perfect base for all the other ingredients, holding everything together in a comforting, cohesive meal.

Ingredients

IngredientQuantity
Eggs4
Saltto taste
Paprikato taste
Black pepperto taste
Milk100 ml (½ cup)
Cheese50 g (⅓ cup), shredded
Flour130 g (1 cup)
Onion1, finely chopped
Vegetable oilfor frying and greasing
Carrot1, grated
Bell pepper1, diced
Mushrooms150 g (1 cup), chopped
Garlic cloves2, minced
Ham150 g (1 cup), diced
Green onionschopped, for garnish

Directions

  1. Prep Your Ingredients: Start by cracking the eggs into a large mixing bowl. Season with salt, paprika, and black pepper to your taste. Whisk in the milk and shredded cheese, creating a creamy mixture. Set this aside.
  2. Sauté the Veggies: In a large skillet, heat a bit of vegetable oil over medium heat. Add the finely chopped onion, diced bell pepper, and grated carrot. Sauté for about 3-4 minutes until they soften.
  3. Add the Mushrooms and Garlic: Toss in the chopped mushrooms and minced garlic. Stir occasionally, cooking for another 4-5 minutes, until the mushrooms have released their moisture and softened.
  4. Incorporate the Ham: Add the diced ham to the skillet and cook for 2-3 minutes, allowing it to heat through and slightly brown.
  5. Make the Scramble: Pour the egg mixture into the skillet with the veggies and ham. Gently stir the eggs as they cook, allowing them to scramble evenly. Cook for 4-5 minutes until the eggs are fully set but still creamy.
  6. Finishing Touches: Once cooked, transfer the scramble to a serving plate and garnish with chopped green onions.

Nutrients (per serving)

NutrientAmount per Serving
Calories350 kcal
Protein25 g
Carbohydrates15 g
Fat22 g
Fiber3 g
Sugars5 g

Frequently Asked Questions (FAQs)

  1. Can I make this dish ahead of time? Yes! This scramble is great for meal prep. You can cook the veggies, ham, and eggs in advance and store them in the fridge for up to 2 days. When you’re ready to eat, simply reheat in the microwave or on the stove for a few minutes. If you want to keep the eggs from becoming too rubbery when reheating, consider making them slightly undercooked the first time so they don’t overcook when you warm them up later.
  2. Can I make this dish without the ham? Absolutely! The Veggie-Packed Scramble Delight is incredibly flexible. You can skip the ham entirely or replace it with another protein such as cooked chicken, turkey, or even tofu for a vegetarian alternative. If you’re going meat-free, try adding a bit of extra cheese or beans for a protein boost.
  3. How can I make this dish spicier? If you enjoy a bit of heat, you can add chili flakes or diced jalapeños to the sautéed veggies. You could also experiment with hot sauce or spicy sausage as your protein of choice. These additions will give the dish a nice kick without overpowering the flavors.
  4. Can I use frozen vegetables? While fresh vegetables offer the best texture and flavor, frozen vegetables can work as a convenient alternative. If you’re using frozen vegetables, be sure to thaw and drain them before cooking to avoid excess moisture. Some frozen veggies, like peas or mixed vegetable blends, could be perfect additions to the scramble.
  5. Can I substitute the cheese? Yes, you can easily swap the cheese for a dairy-free version if you need to make the dish lactose-free or vegan. Nutritional yeast is a great alternative to add a cheesy flavor without the dairy. If you’re looking for a lighter version, you can use a reduced-fat cheese, or even skip the cheese altogether for a lighter meal.
  6. What can I serve this dish with? The Veggie-Packed Scramble Delight is a complete meal on its own, but it also pairs wonderfully with crusty toast, a side of fresh fruit, or a simple salad. You could even serve it with a small bowl of soup for an extra comforting touch.

How to Make the Veggie-Packed Scramble Delight Your Own

One of the best things about this recipe is its adaptability. If you find yourself craving something with a little more richness, add a dollop of sour cream or a handful of crumbled feta for a tangy twist. If you prefer a more savory profile, try adding fresh herbs like thyme or rosemary, or even a bit of smoked paprika for a deep, earthy flavor. You can also experiment with different kinds of cheese – a sharp cheddar adds a bit of bite, while mozzarella offers a soft, melty texture.

Additionally, feel free to experiment with different cooking methods. If you’re trying to cut down on oil, you could opt for a non-stick pan or even bake the scramble in the oven, especially if you’re making a larger batch. This method gives the eggs a nice golden crust on the top, adding another layer of texture to the dish.

The Nutritional Benefits of the Veggie-Packed Scramble Delight

The Veggie-Packed Scramble Delight is more than just a flavorful dish; it’s also packed with nutrients that fuel your body and keep you feeling energized throughout the day. Eggs are a great source of protein, which is essential for muscle repair and growth. They also provide key vitamins like B12 and riboflavin, which support healthy metabolism and energy production.

The vegetables – bell peppers, carrots, mushrooms, and onions – bring a wealth of vitamins and minerals to the table. Bell peppers, for example, are rich in vitamin C, which boosts your immune system, while carrots provide beta-carotene, which supports healthy vision. Mushrooms are an excellent source of antioxidants and vitamin D, while onions help support heart health with their anti-inflammatory properties.

When you add ham to the mix, you’re also incorporating an excellent source of lean protein and iron, which is essential for oxygen transport throughout your body. Overall, this dish is not only delicious but also provides a balanced array of nutrients, making it a perfect choice for a well-rounded weeknight meal.

Conclusion: A Meal for the Busy and the Hungry

The Veggie-Packed Scramble Delight is more than just a quick meal – it’s a reflection of the idea that we don’t have to compromise on taste or nutrition, even when time is tight. Whether you’re cooking for a busy family or preparing a solo meal, this dish brings together fresh ingredients, savory flavors, and a comforting touch that makes any evening feel special. With its versatility, you can enjoy it time and again, adjusting it to suit your taste and dietary needs.

As someone who has turned to this recipe time and time again, I can attest to its ability to bring warmth and comfort to even the most chaotic of days. So next time you find yourself in need of a quick, nutritious dinner, remember this Veggie-Packed Scramble Delight. It’s a dish that not only fills your belly but also reminds you of the joy in simple, home-cooked meals that bring a sense of calm to a busy life.

Amal

A Heartwarming Dish for Busy Weeknights

This Veggie-Packed Scramble Delight perfect for a busy evening, it’s easy to make and packed with flavors that will make everyone ask for seconds. Plus, it’s versatile – swap out ingredients to suit your taste or what you have on hand. This delightful scramble is the ideal way to enjoy a colorful, protein-packed meal that comes together in under 30 minutes!
Prep Time 10 minutes
Cook Time 15 minutes
Total Time 25 minutes
Servings: 4 –6 servings
Course: Dinner
Cuisine: American

Ingredients
  

  • 4 eggs
  • Salt to taste
  • Paprika to taste
  • Black pepper to taste
  • 100 ml ½ cup milk
  • 50 g ⅓ cup shredded cheese
  • 130 g 1 cup all-purpose flour
  • 1 onion finely chopped
  • Vegetable oil for frying and greasing
  • 1 carrot grated
  • 1 bell pepper diced
  • 150 g 1 cup mushrooms, chopped
  • 2 garlic cloves minced
  • 150 g 1 cup ham, diced
  • Green onions chopped, for garnish

Method
 

  1. Prep the Eggs: Crack the eggs into a large mixing bowl. Add salt, paprika, and black pepper to taste, then whisk in the milk and shredded cheese until well combined. Set the mixture aside.
  2. Sauté the Vegetables: Heat a bit of vegetable oil in a large skillet over medium heat. Add the finely chopped onion, diced bell pepper, and grated carrot. Sauté for 3-4 minutes until softened.
  3. Add the Mushrooms and Garlic: Stir in the chopped mushrooms and minced garlic. Cook for another 4-5 minutes, allowing the mushrooms to soften and release their moisture.
  4. Cook the Ham: Add the diced ham to the skillet and cook for 2-3 minutes, allowing it to heat through and lightly brown.
  5. Scramble the Eggs: Pour the egg mixture into the skillet with the vegetables and ham. Gently stir as the eggs cook, allowing them to scramble evenly. Cook for 4-5 minutes until the eggs are fully set, but still creamy.
  6. Garnish and Serve: Transfer the scramble to a serving plate and garnish with chopped green onions. Serve immediately and enjoy!

Notes

  • Make it your own: Feel free to swap out the vegetables for whatever you have on hand – spinach, zucchini, or even leftover roasted vegetables work great.
  • Protein alternatives: You can use bacon, sausage, or tofu instead of ham to make the dish your own.
  • Storage: If you have leftovers, store the scramble in an airtight container in the fridge for up to 2 days. Reheat gently in the microwave or on the stove.

Hearty Harvest Bowl: Rustic Vegetable & Bean Soup

I still remember the smell of sautéed onions and garlic filling the kitchen on chilly Sunday afternoons. My mother, with a wooden spoon in one hand and a story in the other, would toss whatever vegetables we had into the biggest pot we owned. There were no measurements, no cookbooks, no rules — just instinct and love. That’s how her vegetable soup was made. That’s how this soup was born.

Years later, living on my own and far from those cozy, laughter-filled days, I found myself craving something familiar. I didn’t need complexity. I needed comfort. I opened the pantry and saw beans, tomatoes, and some humble vegetables in the fridge. Within minutes, my kitchen was humming with warmth again. The same sizzle of onions. The same rich aroma. And when I took that first spoonful, it wasn’t just soup. It was home.

This Hearty Harvest Bowl isn’t just a recipe. It’s a return to simplicity. A celebration of nourishing food that doesn’t need fancy ingredients or intricate techniques. It’s the kind of meal that makes you exhale after a long day. And if you’re anything like me, it might just remind you of someone you love.

Why This Soup Works Every Time

One of the most beautiful things about a rustic vegetable soup is that it’s both forgiving and flexible. It doesn’t matter if you don’t have every ingredient — this soup invites creativity, not rigidity. Its roots are peasant food: dishes made from whatever was grown or stored, hearty enough to warm cold hands and fill hungry bellies.

This version leans on canned tomatoes for tang and depth, mushrooms for earthy umami, and creamy white beans for protein and heartiness. Peppercorns add a gentle heat while garlic brings the whole thing to life. A splash of olive oil smooths out the flavors, giving the broth a richness without heaviness.

And let’s talk texture — because this soup has it all. Tender bites of carrots and celery, creamy white beans, toothsome mushrooms, and a broth that brings everything together like an old friend at the table.

Ingredients

IngredientAmount
Onions3, chopped
Carrots2, sliced
Garlic2 cloves, minced
WaterEnough to cover ingredients
Black peppercornsTo taste or a few whole
Olive oil2 tablespoons
Mushrooms (button, cremini, etc.)2 cups, sliced
Celery2 sticks, chopped
Canned chopped tomatoes1 can (400 g / 14 oz)
White beans, drained and rinsed2 cans (approx. 800 g / 28 oz total)
SaltTo taste

Directions

  1. In a large pot, heat olive oil over medium heat. Add onions, carrots, and celery. Sauté for 5–7 minutes until softened.
  2. Add mushrooms and cook until they begin to release their moisture and turn golden.
  3. Stir in the garlic and cook for 1–2 minutes until fragrant.
  4. Add canned tomatoes, drained white beans, and enough water to fully submerge the ingredients.
  5. Add salt and black peppercorns (whole or crushed, depending on preference).
  6. Bring to a boil, then reduce heat and simmer uncovered for 20–25 minutes, stirring occasionally.
  7. Taste and adjust seasoning if needed.
  8. Serve warm with crusty bread or a sprinkle of fresh herbs.

Nutritional Information (per serving, approx. 6 servings)

NutrientAmount
Calories180 kcal
Protein7 g
Fat5 g
Carbohydrates27 g
Fiber8 g
Sugar6 g
SodiumVaries by salt added

Comfort in a Pot: The Soul of the Dish

Food trends may come and go, but some dishes remain timeless. This is one of them. Its appeal lies not in flashy presentation or expensive ingredients, but in its ability to ground us. It invites us to slow down, to nourish ourselves, to share.

There’s something deeply satisfying about making this soup. From the slow sauté of onions to the simmering pot bubbling softly as it thickens with time, the entire process is therapeutic. It’s cooking at its most honest — and it reminds us that wellness can start with one humble bowl.

Nutritional Benefits of Vegetable & Bean Soup

Don’t be fooled by how cozy it tastes — this soup is packed with nutrition:

  • White beans are an excellent source of plant-based protein and fiber, which aid digestion and help you feel fuller longer.
  • Carrots and celery add a dose of vitamin A, C, and antioxidants.
  • Mushrooms are low in calories and offer B-vitamins, selenium, and a unique compound called ergothioneine, which has anti-inflammatory properties.
  • Olive oil contributes healthy fats, while garlic may support immune function.
  • The broth is hydrating, making this soup a great option for cooler months when dehydration sneaks in unnoticed.

Together, these ingredients create a balanced meal that satisfies without heaviness — hearty but never sluggish.

Tips for Perfecting the Soup Every Time

  1. Sauté Low and Slow: Give your onions and garlic time to develop flavor. Don’t rush this step — it builds the foundation of the soup.
  2. Layer Flavors: Add ingredients in stages. Start with aromatics, then mushrooms, then beans and tomatoes. Each layer brings something new to the pot.
  3. Don’t Overcook the Veggies: Celery and carrots should be tender but not mushy. Add them early enough to soften, but not so early they disappear.
  4. Use Good Olive Oil: A high-quality olive oil will elevate the entire dish.
  5. Let It Rest: Soup always tastes better after it sits for a bit. Let it rest off the heat for 10 minutes before serving if you can.

Frequently Asked Questions (FAQs)

Can I use fresh tomatoes instead of canned?

Yes! About 4–5 medium fresh tomatoes, chopped, can be used in place of a can. For a deeper flavor, consider roasting them first or using a tomato paste boost.

What beans work best in this soup?

White beans (cannellini or great northern) work beautifully for their creamy texture. However, you can swap them with chickpeas, red kidney beans, or even lentils depending on what’s in your pantry.

Can I freeze this soup?

Absolutely. This soup freezes well. Let it cool completely before transferring to freezer-safe containers. It can be frozen for up to 3 months. Thaw overnight in the fridge or reheat from frozen over low heat.

How can I make it even heartier?

Add small pasta (like ditalini), cooked brown rice, or a handful of chopped kale or spinach in the last few minutes of cooking.

Is this recipe vegan and gluten-free?

Yes, it’s naturally vegan and gluten-free — just be sure to check your canned products for additives if you have sensitivities.

Can I use vegetable stock instead of water?

Definitely. While water works well and keeps it light, using a rich vegetable broth adds depth and complexity.

What to Serve With It

This soup pairs wonderfully with crusty bread — sourdough or a seeded baguette are perfect choices. A dollop of pesto, a swirl of olive oil, or a sprinkle of nutritional yeast can also elevate the flavor. If you’re craving something creamy, a spoonful of vegan yogurt or crème fraîche on top adds a beautiful contrast.

For a full meal, serve alongside a simple green salad with lemon vinaigrette or roasted root vegetables.

Why You’ll Keep Coming Back to This Soup

It’s easy to love a dish that welcomes variation and celebrates what’s on hand. This soup becomes a new experience each time you make it. Add barley in the winter, fresh herbs in spring, or grilled corn in summer. It adapts, evolves, and always satisfies.

But more than that, it connects us — to tradition, to memory, to nourishment. In a world of fast-paced everything, this soup is slow food made simple. And when the weather is grey or your spirit feels a little off-center, there’s nothing like a warm bowl of something made from scratch to bring you back to yourself.

Conclusion: Stirring Up More Than Just Flavor

Hearty Harvest Bowl: Rustic Vegetable & Bean Soup isn’t just about what’s in the pot — it’s about what it brings to the table. A sense of grounding, a moment of calm, a reminder that the most comforting foods often come from the simplest ingredients. Whether you’re new to plant-based meals or just looking to bring more whole foods into your life, this soup will become a beloved staple.

It’s the kind of recipe you’ll reach for on cold nights and quiet Sundays. You’ll share it with friends, pass it down, and tweak it over time — just as I did, and just as my mother did before me. And maybe, just maybe, you’ll find that this humble bowl becomes part of your story, too.

Amal

Hearty Harvest Bowl: Rustic Vegetable & Bean Soup

This rustic vegetable and bean soup is soul-soothing, hearty, and brimming with nourishing ingredients. Loaded with vegetables, white beans, and aromatic herbs, it’s the perfect comforting meal that tastes like it’s been simmering all day — but is easy enough for a weeknight.
Prep Time 15 minutes
Cook Time 30 minutes
Total Time 45 minutes
Servings: 4 –6 servings
Course: Soup
Cuisine: Mediterranean-Inspired

Ingredients
  

  • 3 onions chopped
  • 2 carrots sliced
  • 2 cloves garlic minced
  • Water enough to cover the ingredients
  • A few whole black peppercorns or ground black pepper to taste
  • 2 tablespoons olive oil
  • 2 cups mushrooms such as button, cremini, or shiitake, sliced
  • 2 sticks celery chopped
  • 1 can 14 oz / 400 g chopped tomatoes
  • 2 cans 28 oz / 800 g total white beans, drained and rinsed
  • Salt to taste

Method
 

  1. Heat olive oil in a large pot over medium heat. Add onions, carrots, and celery. Sauté for 5–7 minutes until vegetables begin to soften.
  2. Stir in the mushrooms and cook for another 5 minutes until they release their moisture and become golden.
  3. Add garlic and cook for 1–2 minutes, stirring constantly.
  4. Pour in the chopped tomatoes and drained white beans. Add enough water to cover all ingredients.
  5. Season with salt and black pepper or a few whole peppercorns. Stir well.
  6. Bring to a boil, then reduce the heat and let simmer for 20–30 minutes until all the vegetables are tender and the flavors are well combined.
  7. Taste and adjust seasoning if needed. Serve warm.

Notes

  • You can swap white beans for chickpeas or lentils.
  • Add a bay leaf or sprig of rosemary for extra depth.
  • For a thicker soup, mash some of the beans after cooking or blend a portion before serving.
  • Excellent served with crusty bread or over rice for a heartier meal.

Golden Garden Patties: A Humble Recipe That Feels Like Home

There’s something universally comforting about potatoes. Whether mashed, roasted, fried, or baked — they have a way of bringing people together. But for me, it’s the crispy potato patty that holds a special place in my memory, especially during those cozy evenings in my grandmother’s kitchen. She never followed recipes, but somehow, every dish felt like a culinary masterpiece. Her potato patties weren’t just food — they were edible expressions of love, and I can still remember the smell of grated potatoes sizzling in a pan as laughter echoed through the house.

We didn’t have much growing up, but we always had potatoes. These golden patties became a symbol of how the simplest ingredients could transform into something delicious and deeply satisfying. The recipe I’m sharing today is a modern twist on that rustic classic. Enhanced with Provençal herbs and fresh parsley, these patties combine the comfort of the past with flavors that feel elevated enough for a dinner party or a weekend brunch.

But above all, they carry the spirit of home-cooked simplicity — a crispy embrace after a long day.

The Versatile Beauty of Potato Patties

Potato patties, or fritters as they’re sometimes called, are more than just a quick dish — they’re a canvas. With endless variations depending on region, culture, and pantry contents, they allow for creativity while always delivering on flavor and texture. This particular version is light and crispy on the outside, soft and herby on the inside, and balanced with just the right amount of seasoning.

The base of grated potatoes and onion provides a naturally sweet and earthy flavor. The addition of a single egg helps bind the mixture, while a combination of starch and flour gives it the perfect structure. Chopped parsley brightens every bite, and the Provençal herb blend adds an aromatic depth that elevates the entire dish.

Whether you serve them as a snack, a side dish, or a vegetarian main course, these golden potato patties adapt seamlessly to every table.

Ingredients

For the Patties:

IngredientAmount
Potatoes (medium, peeled and grated)3
Onion (finely chopped)1
Egg1
Starch1 tablespoon
Flour1 tablespoon
Fresh parsley (chopped)As desired
Provençal herbs1 teaspoon
SaltTo taste
Black pepperTo taste
Vegetable oilFor frying

Directions

  1. Place the grated potatoes in a clean kitchen towel and squeeze out excess moisture.
  2. In a large bowl, combine the potatoes, onion, egg, starch, flour, parsley, Provençal herbs, salt, and black pepper. Mix well until the mixture holds together.
  3. Heat vegetable oil in a frying pan over medium heat.
  4. Scoop small portions of the mixture and shape into patties.
  5. Fry each side for 3–4 minutes or until golden brown and crispy.
  6. Remove from the pan and drain on paper towels.
  7. Serve hot with sour cream, yogurt dip, or fresh salad.

Nutritional Information (Per Serving, Approximate)

NutrientAmount
Calories180 kcal
Protein4 g
Carbohydrates20 g
Fat10 g
Fiber2 g
Sodium220 mg

Why This Recipe Works So Well

1. Quick and Budget-Friendly

All the ingredients are basic pantry staples — potatoes, flour, egg, herbs — and the preparation is straightforward, requiring no special equipment or long prep time. It’s a dish you can whip up when the fridge is nearly empty and still feel like you’re eating something special.

2. Perfect Texture Contrast

Crispy edges and tender centers are the holy grail of fritters. This recipe delivers both, thanks to the careful balance of starch and flour and the simple frying technique that creates that signature golden crust.

3. Naturally Gluten-Free Option

Swap the flour with a gluten-free alternative or use only potato starch, and the patties are easily adaptable to gluten-free diets without sacrificing flavor or structure.

4. Great for Meal Prep

You can make a batch ahead of time and reheat them in the oven or air fryer. They stay crispy, store well in the fridge, and can be frozen for later use.

Serving Ideas That Go Beyond the Basics

Potato patties are delicious on their own, but even better when paired thoughtfully. Here are a few ways to serve them:

  • With Sour Cream or Greek Yogurt: A dollop of creamy tanginess cuts through the richness and complements the herbs beautifully.
  • Topped with a Fried Egg: Elevate them to brunch-worthy status by adding a runny egg on top and some arugula on the side.
  • Layered in a Sandwich: Use them in place of burger patties in a vegetarian sandwich with lettuce, tomato, and a herby aioli.
  • Alongside a Salad: Serve with a crisp cucumber or tomato salad for a light yet satisfying meal.

Common Mistakes to Avoid

  • Not Squeezing the Potatoes Enough: Excess moisture can lead to soggy patties that fall apart. Grated potatoes should be wrung out well in a clean kitchen towel or cheesecloth.
  • Using Too Much Flour: While flour helps with binding, too much can make the patties gummy. Stick to the measurements and add just enough for the mixture to hold together.
  • Overcrowding the Pan: Fry the patties in batches to allow space for even browning and crisping.

Frequently Asked Questions

Can I use sweet potatoes instead of regular potatoes?

Yes! Sweet potatoes work well and add a naturally sweeter flavor. You may need to adjust the amount of flour depending on moisture levels.

What herbs can I use if I don’t have Provençal seasoning?

Provençal herbs typically include thyme, rosemary, oregano, and marjoram. You can use a pinch of any combination of those or substitute Italian seasoning in a pinch.

Can I bake or air fry these instead of pan frying?

Absolutely. For baking, brush the patties with oil and bake at 400°F (200°C) for about 20 minutes, flipping halfway. In the air fryer, cook at 375°F (190°C) for 10–12 minutes until golden.

Are these patties kid-friendly?

Very much so! Kids usually love the crispy texture and mild flavor. You can leave out the chili or reduce pepper if cooking for younger children.

Can I add cheese to the mixture?

Yes, grated cheese like Parmesan or Cheddar can be added for extra flavor. About ¼ cup should do the trick without making the patties too runny.

How long can I store leftovers?

Cooked patties will keep in the refrigerator for 3–4 days. Reheat in the oven or a dry skillet to maintain crispness. You can also freeze them for up to a month — reheat directly from frozen.

Helpful Tips for Success

  • Work Quickly After Grating: Potatoes oxidize fast. Either work quickly or soak them in cold water for a few minutes, then dry thoroughly.
  • Use a Nonstick or Cast Iron Pan: This ensures a good crust and prevents sticking.
  • Customize Freely: Feel free to add grated zucchini, carrots, or even shredded chicken to the mix for variation.
  • Double the Batch: These go quickly — you’ll thank yourself for making extras.

Conclusion: Simple Food, Deep Satisfaction

The beauty of potato patties lies in their simplicity. A humble ingredient like the potato, with the help of a few pantry staples and herbs, becomes something golden, comforting, and deeply satisfying. These patties don’t demand much of your time or energy, yet they deliver so much in flavor, texture, and joy.

They remind us that you don’t need to cook fancy or complicated masterpieces to make something delicious. Sometimes, all you need is a hot pan, a little creativity, and a craving for something crispy and warm.

So the next time you’re standing in your kitchen wondering what to make with what you have on hand, give these golden garden patties a try. You just might find that they become your own version of “home.”

Amal

Golden Garden Patties: A Humble Recipe That Feels Like Home

Crispy, golden, and bursting with herbaceous flavor, these potato patties are a comforting classic made with simple ingredients. They’re the perfect balance of rustic and refined — ideal as a snack, side dish, or light meatless meal.
Prep Time 10 minutes
Cook Time 15 minutes
Total Time 25 minutes
Servings: 8 –10 patties
Course: Snack
Cuisine: European-inspired

Ingredients
  

  • 3 medium potatoes peeled and grated
  • 1 onion finely chopped
  • 1 egg
  • 1 tablespoon starch
  • 1 tablespoon flour
  • Fresh parsley chopped (as desired)
  • 1 teaspoon Provençal herbs
  • Salt to taste
  • Black pepper to taste
  • Vegetable oil for frying

Method
 

  1. Place grated potatoes in a clean towel or cheesecloth and squeeze out any excess moisture.
  2. In a mixing bowl, combine potatoes, onion, egg, starch, flour, parsley, herbs, salt, and pepper. Mix until well incorporated.
  3. Heat vegetable oil in a skillet over medium heat.
  4. Form the mixture into small patties with your hands or a spoon.
  5. Fry patties for 3–4 minutes per side, or until golden and crispy.
  6. Transfer to a paper towel–lined plate to remove excess oil.
  7. Serve warm with sour cream, garlic yogurt sauce, or a light salad.

Notes

  • You can swap Provençal herbs with Italian seasoning or fresh thyme.
  • These patties freeze well! Flash-freeze cooked patties and reheat in a pan or oven.
  • Add shredded cheese or cooked spinach for variety.
  • Great for lunchboxes, meal prep, or using up leftover potatoes.

The Best Holiday Meal I’ve Ever Eaten in 10 Minutes

There’s a kind of magic in holiday food. You can almost taste the laughter in the air, hear the rustle of wrapping paper, and feel the warmth of familiar company—all bundled up into a single, comforting plate. For me, one such plate was not served under candlelight or at a lavishly set table. It came to life on a quiet, unexpected evening when time was scarce, the fridge was nearly bare, and I had just 10 minutes to make dinner before rushing out the door. That’s when this dish was born.

It started with leftover potatoes, some ground meat in the freezer, and vegetables that had been sitting patiently in the crisper. What followed wasn’t just dinner—it was a revelation. As the onions began to caramelize and the potatoes mashed with just a touch of sour cream and egg, the familiar aromas began to swirl around me like a cozy blanket. I hadn’t realized I was recreating something that tasted like the holidays. It had everything: warmth, depth, a hint of spice, and the kind of satisfaction that doesn’t need silver platters or fancy garnishes.

I still call it “The Best Holiday Meal I’ve Ever Eaten in 10 Minutes,” not because of how fast it came together, but because of how it made me feel. It reminded me that good food isn’t about extravagance—it’s about heart. And this recipe is packed with it.

Comfort Meets Convenience: A Weeknight Miracle

The brilliance of this dish lies in its versatility. You can build it out of pantry staples and frozen essentials, yet it tastes like a fully planned holiday dinner. It’s hearty enough to impress guests and quick enough to make after a long workday. The base of fluffy, creamy potatoes acts as the perfect foil for the savory, spice-kissed meat and vegetables layered over the top. The textures and flavors balance beautifully—richness from the meat, brightness from the bell pepper and tomato, and a burst of sweetness from the peas.

In a world where we often chase perfection in the kitchen, this recipe is a humble reminder that great meals don’t have to be complicated. Sometimes, they come together when you least expect them—and that’s part of the magic.

Ingredients

For the Filling:

IngredientAmount
Egg1 large
SaltTo taste
Sour cream1 tablespoon (15 g)
Potatoes4–5 medium, peeled and diced
WaterEnough to boil the potatoes
Olive oil2 tablespoons (30 ml)
Onion1 medium, finely chopped
Garlic2 cloves, minced
Minced meat400 g (14 oz)
Bell pepper1 medium, diced
Frozen green peas100 g (3.5 oz)
Tomato1, diced
Black pepperTo taste
Chili pepperTo taste

Directions

  1. Boil the Potatoes
    In a pot, boil the diced potatoes in salted water until soft. Drain, then mash with the egg, sour cream, and a pinch of salt until smooth. Set aside.
  2. Prepare the Filling
    In a large skillet, heat olive oil over medium heat. Add the chopped onion and garlic and sauté until golden.
  3. Cook the Meat and Veggies
    Add minced meat to the pan and cook until browned. Stir in the bell pepper, green peas, and tomato. Season with salt, black pepper, and chili pepper. Cook until vegetables are tender and mixture is well combined.
  4. Assemble and Serve
    Spoon the mashed potatoes onto plates and top with the warm, flavorful meat mixture. Serve hot — it’s like a holiday hug on a plate.

Nutrition Information (Per Serving)

NutrientAmount
Calories~380 kcal
Protein~22 g
Carbohydrates~25 g
Fat~20 g
Fiber~4 g
Sugars~5 g
Sodium~320 mg

Why This Dish Feels Like a Holiday Every Time

Every culture has its version of a layered, comforting meat and potato dish—whether it’s shepherd’s pie, cottage pie, or pasteles. This version takes inspiration from all of them, while being distinctly simple and accessible. It’s loaded with familiar flavors and textures that resonate across ages and backgrounds.

The combination of ingredients allows for a perfect harmony of flavors:

  • Creamy mashed potatoes that feel indulgent yet grounding
  • Savory minced meat seasoned just right for depth and richness
  • Vegetables like peas, peppers, garlic, and onions for balance and freshness
  • Hints of tomato and chili for brightness and a tiny kick

Whether you serve it in a baking dish, as individual mounds, or spoon it directly from the pan (guilty as charged), the result is the same: satisfying and heartwarming.

Tips for Making It Your Own

While the recipe is quick and straightforward, there’s plenty of room for customization. Here are a few ways to tweak it based on what you have or what you love:

1. Choose Your Meat Wisely

Ground beef, chicken, turkey, or even plant-based meat alternatives work beautifully. If you’re using leaner meats, consider adding a splash of broth or olive oil to maintain moisture.

2. Play With Spices

Go classic with salt and black pepper, or take a bolder route by adding cumin, paprika, coriander, or smoked chili flakes. A pinch of cinnamon can bring a surprisingly warm, Middle Eastern twist.

3. Make It Creamier

Mix in grated cheese with the mashed potatoes or top with shredded cheese and give it a quick broil for a melty finish.

4. Add a Crunchy Element

Toasted breadcrumbs or crushed crackers on top can create a nice contrast in texture—perfect if you’re serving this at a dinner party.

Frequently Asked Questions

Can I make this ahead of time?

Absolutely. You can prepare both the mashed potatoes and the meat-vegetable mixture ahead of time. Just store them separately in airtight containers in the refrigerator for up to 2 days. Reheat gently and assemble just before serving.

Is this dish freezer-friendly?

Yes. Assemble the meal in a baking dish, let it cool, then cover tightly and freeze. When ready to eat, thaw overnight in the fridge and reheat in the oven until hot all the way through.

Can I make it vegetarian?

Definitely! Replace the meat with lentils, mushrooms, or a plant-based ground meat alternative. The vegetables and seasoning stay the same, making it just as flavorful and filling.

What kind of potatoes are best?

Starchy potatoes like Russets yield fluffier mash, while Yukon Golds add a creamy, buttery texture. Use what you love—or what you have on hand.

Can I use leftover mashed potatoes?

Yes, and it’s a great way to reduce food waste. If they’re already seasoned, just reheat and fold in an egg to help bind the layers.

What else can I add to the filling?

Carrots, corn, chopped spinach, zucchini, or even beans are great additions. It’s a wonderfully forgiving recipe that welcomes creativity.

When Fast Feels Like a Feast

What I love most about this dish isn’t just the flavor—it’s what it represents. We all lead busy lives, constantly chasing time, but we still crave connection. This recipe brings those things together. It lets us show love, celebrate comfort, and feed others (and ourselves) something truly satisfying—even when we only have ten minutes to spare.

It’s perfect for weeknights, yes. But it’s also the kind of dish that’s welcomed on a holiday table, nestled among more complex recipes, standing proud as a simple classic. It carries warmth, flavor, and an undercurrent of gratitude—a meal that says, “I’m here, I care, let’s eat.”

Conclusion: Simplicity Is the Soul of Celebration

Sometimes the best meals aren’t the ones that take hours to prepare. They’re the ones that come together effortlessly but linger in memory for much longer. This 10-minute holiday-style meal may not come with silverware and fanfare, but it delivers the essence of comfort, warmth, and celebration.

Whether you’re cooking for yourself after a long day, feeding your family in a rush, or just looking to recreate that holiday feeling without the fuss, this dish is here to deliver. And the best part? You don’t need a holiday to make it—you just need a few good ingredients, a bit of heart, and ten spare minutes.

So go ahead. Make something wonderful.

Amal

The Best Holiday Meal I’ve Ever Eaten in 10 Minutes

This quick and hearty dish tastes like a cozy holiday feast, ready in just 10 minutes. Creamy mashed potatoes and savory minced meat blend with colorful vegetables for a comforting one-pan wonder you’ll want to make all year long.
Prep Time 5 minutes
Cook Time 10 minutes
Total Time 15 minutes
Servings: 4 –6 servings
Course: Main Dish
Cuisine: Comfort Food

Ingredients
  

For the Filling:
  • 1 large egg
  • Salt to taste
  • 1 tablespoon 15 g sour cream
  • 4 –5 medium potatoes peeled and diced
  • Water enough to boil the potatoes
  • 2 tablespoons 30 ml olive oil
  • 1 medium onion finely chopped
  • 2 cloves garlic minced
  • 400 g 14 oz minced meat
  • 1 medium bell pepper diced
  • 100 g 3.5 oz frozen green peas
  • 1 tomato diced
  • Black pepper to taste
  • Chili pepper to taste

Method
 

  1. Boil the diced potatoes in salted water until soft. Drain and mash with the egg, sour cream, and a pinch of salt. Set aside.
  2. In a large skillet, heat olive oil over medium heat. Sauté chopped onion until translucent, then add garlic and cook until fragrant.
  3. Add the minced meat and cook until browned.
  4. Stir in bell pepper, peas, and tomato. Season with salt, black pepper, and chili pepper. Cook for a few minutes until vegetables soften.
  5. Spread the mashed potatoes over the meat mixture or serve them side by side. Garnish with fresh herbs if desired.

Notes

  • You can swap the minced meat for ground turkey, chicken, or a plant-based alternative.
  • Add shredded cheese on top of the mashed potatoes and broil briefly for a golden finish.
  • This dish can be made ahead and reheated—great for meal prep!

Sweet Harmony Crunch: The Magic of Homemade Nougat

I vividly remember the first time I had homemade nougat. It was at a family gathering, a holiday tradition that felt warm with the familiar smells of baking, roasting peanuts, and the comforting hum of conversation. As the adults prepared meals in the kitchen, I found myself in the corner with a bowl of freshly made nougat—crunchy, chewy, and with just the right amount of sweetness. I took one bite, then another, and before I knew it, I had polished off the whole bowl. That moment stuck with me—nougat, in its purest form, wasn’t just candy; it was a memory.

What struck me most about the homemade nougat was the balance between textures. The softness of marshmallows paired with the nutty crunch of peanuts and sesame seeds, and the chewy surprise of dried mango and cranberries, made for an indulgence I hadn’t experienced before. The thought of making it at home seemed like an impossible task, something that belonged in the realm of professional confectioners. But over the years, I realized how easy it was to recreate that same magic in my own kitchen.

Now, whenever I crave a treat that combines nostalgia with a touch of homemade love, I make this nougat. And every time I share it with others, they feel the same sense of wonder that I did all those years ago. This recipe isn’t just about making something sweet—it’s about crafting a memory.

What Makes This Nougat So Special?

Nougat, in its traditional form, is a delightful candy made from sugar, honey, and egg whites, often containing nuts and dried fruits. The texture of nougat is a perfect blend of softness and crunch, making it a favorite treat worldwide. However, making nougat at home can seem like a daunting task, especially when the recipe calls for intricate methods like whipping egg whites or using a candy thermometer.

This homemade nougat recipe, however, is a simplified version that cuts out the complexity without sacrificing flavor or texture. It combines marshmallows, milk powder, nuts, and dried fruits into a treat that’s rich, chewy, and surprisingly easy to make. The addition of black and white sesame seeds provides an unexpected yet delightful crunch, and the dried mango and cranberries add a sweet and tart contrast. This combination of textures and flavors takes nougat to a whole new level.

But beyond the ingredients and textures, what truly sets this homemade nougat apart is the joy of making it yourself. There’s something incredibly rewarding about taking simple ingredients and transforming them into something that’s both satisfying and special. When you make nougat at home, you’re not just cooking—you’re crafting a treat filled with the warmth of your own kitchen and the love you put into it. And that, in essence, is what makes this recipe so special.

Ingredients

IngredientAmount
Peanuts500 g (3 cups)
Black sesame seeds50 g (1/4 cup)
White sesame seeds10 g (2 tsp)
Dried mango, chopped2 pieces
Dried cranberries1 handful
Marshmallows200 g (7 oz)
Milk powder100 g (1 cup)

Directions

  1. Toast the Crunch
    In a dry pan, lightly toast the peanuts, black sesame seeds, and white sesame seeds over medium heat until fragrant. Set aside to cool.
  2. Melt the Base
    In a large nonstick pan, add the marshmallows and heat on low until they start to melt, stirring constantly to prevent burning.
  3. Fold in the Flavor
    Add the milk powder gradually into the melted marshmallows and mix until fully combined into a thick, smooth paste.
  4. Add the Crunchy & Chewy Bits
    Stir in the toasted peanuts and sesame seeds, then quickly fold in the chopped dried mango and cranberries. Work fast—the mixture sets quickly.
  5. Shape the Nougat
    Transfer the nougat to a parchment-lined tray. Use another sheet of parchment on top and press it down evenly into a 1-inch thick slab.
  6. Cool and Cut
    Let the nougat cool completely at room temperature. Once firm, slice into bars or squares and store in an airtight container.

Nutritional Information (Per Serving – approx. 1 square)

NutrientAmount
Calories~180 kcal
Protein6 g
Fat10 g
Carbohydrates17 g
Sugar9 g
Fiber2 g
Calcium40 mg
Iron1 mg

How to Enjoy This Nougat

While you might be tempted to eat this nougat right away (and who could blame you?), there are a variety of ways to enjoy this homemade treat:

1. As a Snack on Its Own

Freshly made nougat is perfect on its own as a midday treat. The combination of crunchy peanuts, crispy sesame seeds, chewy dried fruits, and the soft marshmallow base makes it incredibly satisfying without being overly sweet. It’s a snack that offers balance in every bite.

2. In Gift Baskets

This nougat makes an excellent homemade gift for any occasion. Wrapped up in parchment paper and tied with a ribbon, it looks beautiful in gift baskets for holidays, birthdays, or even just as a thoughtful gesture for friends and family.

3. Paired with Tea or Coffee

Nougat pairs wonderfully with a cup of tea or coffee. The light, chewy texture complements the warm, rich flavors of your favorite hot beverage. Try it with a nice black tea, or even with a cappuccino, for a truly indulgent experience.

4. In Desserts

Use nougat as an ingredient in desserts, like topping cakes or ice cream, or layering it in parfaits. Its sweet, nutty flavor can elevate simple desserts to something extraordinary.

5. For Special Occasions

Nougat is a great addition to holiday celebrations, weddings, or special gatherings. It adds a homemade touch to any event and can be customized to match the occasion—be it with different dried fruits, nuts, or even a touch of chocolate.

Common Mistakes to Avoid When Making Nougat

Though making homemade nougat is fairly simple, there are a few key things to keep in mind to ensure your nougat turns out perfectly every time:

1. Overheating the Marshmallows

The marshmallows are what give the nougat its chewy texture. Make sure you melt them over low heat to avoid burning or browning them, which will affect the flavor.

2. Not Toasting the Peanuts and Sesame Seeds

Toasting the peanuts and sesame seeds brings out their natural flavors and adds a deeper crunch. Don’t skip this step, as it’s key to achieving the perfect texture.

3. Mixing Too Roughly

When incorporating the peanuts, sesame seeds, and dried fruits into the marshmallow mixture, do it gently to avoid deflating the texture. You want the mixture to remain fluffy, so fold the ingredients carefully.

4. Not Letting It Set Long Enough

Allow the nougat to cool and set fully before cutting into it. If you don’t give it enough time to firm up, it could turn out too sticky to handle.

Frequently Asked Questions (FAQs)

Can I use different nuts in this recipe?

Absolutely! You can use cashews, almonds, or even macadamia nuts in place of peanuts. Just make sure to toast them to bring out their flavor.

Can I make this nougat without milk powder?

Milk powder helps give the nougat its soft and creamy texture. If you don’t have milk powder, you can try using a bit of powdered sugar or omit it, but the texture might be slightly different.

How long will this nougat last?

This homemade nougat will stay fresh for up to two weeks if stored in an airtight container at room temperature. It can also be refrigerated to extend its shelf life.

Can I make this nougat vegan or dairy-free?

To make this nougat vegan, you can replace the marshmallows with a vegan version and substitute the milk powder with a dairy-free alternative like coconut milk powder.

How can I make this nougat less sweet?

If you prefer a less sweet nougat, try reducing the amount of marshmallows and using a sugar substitute like stevia or monk fruit. Keep in mind that this may change the texture slightly.

Conclusion: A Sweet Tradition to Share

In the end, this homemade nougat isn’t just about satisfying a sweet tooth—it’s about creating something with your hands, something that holds the essence of care and comfort. Whether you make it for yourself or as a gift for others, every batch is a reminder that the best things in life are the ones we make with love. The combination of crunchy peanuts, aromatic sesame seeds, chewy dried mango, and marshmallows creates a treat that’s far better than anything you can buy from the store. It’s a small act of sweetness that brings joy not just to the person eating it, but to the one making it as well.

So, the next time you’re looking to make something special, skip the store-bought candies and try your hand at this homemade nougat. You’ll be creating more than just a snack—you’ll be crafting a memory that lasts.

Amal

Sweet Harmony Crunch: The Magic of Homemade Nougat

Indulge in this easy homemade nougat, with a perfect blend of crunchy peanuts, nutty sesame seeds, chewy dried mango, and tangy cranberries. All wrapped up in a soft, marshmallow base, this delightful treat is perfect for snacking, gifting, or adding a special touch to any occasion.
Prep Time 15 minutes
Cook Time 10 minutes
Total Time 25 minutes
Servings: 12 -16 bars or squares
Course: Dessert
Cuisine: American

Ingredients
  

  • 500 g 3 cups peanuts
  • 50 g 1/4 cup black sesame seeds
  • 10 g 2 tsp white sesame seeds
  • 2 pieces dried mango chopped
  • 1 handful dried cranberries
  • 200 g 7 oz marshmallows
  • 100 g 1 cup milk powder

Method
 

  1. Toast the Crunch: In a dry pan, lightly toast the peanuts, black sesame seeds, and white sesame seeds over medium heat until fragrant. Set aside to cool.
  2. Melt the Base: In a large nonstick pan, add the marshmallows and heat on low until they begin to melt, stirring constantly to avoid burning.
  3. Mix in the Milk Powder: Gradually stir in the milk powder into the melted marshmallows. Mix until smooth and fully combined into a thick, sticky paste.
  4. Add the Crunchy and Chewy Ingredients: Add the toasted peanuts and sesame seeds to the marshmallow mixture. Quickly fold in the chopped dried mango and cranberries.
  5. Shape the Nougat: Transfer the nougat mixture to a parchment-lined tray. Press it down evenly into a 1-inch thick slab using the back of a spoon or another sheet of parchment paper.
  6. Cool and Cut: Allow the nougat to cool completely at room temperature. Once set, slice into bars or squares and store in an airtight container.

Notes

  • Make sure the marshmallows are fully melted and smooth before adding the milk powder to ensure the nougat mixture is smooth.
  • Be careful when folding in the crunchy ingredients—try to keep the mixture light to preserve the texture.
  • For variation, you can add different dried fruits like apricots or raisins, or even drizzle some chocolate over the top.
  • Store the nougat in an airtight container at room temperature for up to one week.

Stay Connected

Get recipes via email: