A Simple Meal, A Lifetime of Memories: The Heart of Tuna Pasta

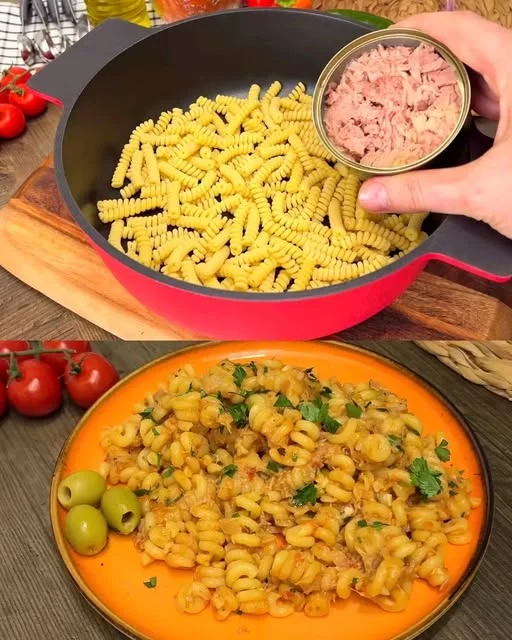
When I think about food that has stood the test of time, I’m immediately brought back to a dish that has always been a constant in my life—the simple yet satisfying combination of tuna and pasta. As a child, my mother would often make this meal when we needed something quick, comforting, and easy to prepare. It wasn’t just about the taste; it was about the experience of sitting down with my family, laughing, and sharing a meal that felt like home.

There’s something deeply emotional about food that ties us to moments, to memories, and to the people we love. This dish was a staple in our kitchen—a reminder of those evenings when we would gather together after a long day, the smell of garlic and onions filling the air. It wasn’t fancy or extravagant, but it was always satisfying, nourishing, and full of heart. Tuna and pasta became one of those meals that connected generations, passed down through family stories and shared laughter.

To this day, every time I make this dish, I’m transported back to those moments. It’s a meal that, though simple, has the ability to evoke nostalgia and warmth. The flavors come together effortlessly, each bite comforting and familiar. This tuna pasta recipe isn’t just food; it’s a connection to my past and the traditions that shaped my love for cooking.

The Allure of Simplicity: Why Tuna Pasta Is Timeless

Tuna and pasta may sound simple, but there’s a beauty in its simplicity. At the core of this dish are a few basic ingredients that, when combined, create something deeply satisfying. The beauty lies in the balance of flavors and textures. The tuna adds a savory, rich taste, while the pasta provides a satisfying base. The onions and garlic bring depth, while the fresh basil and thyme offer an aromatic, herbal lift.

One of the reasons this dish has endured over time is its versatility. It can be easily customized to suit your taste or what’s available in your pantry. Want a little heat? Add chili peppers. Craving a burst of acidity? Toss in some capers or a squeeze of lemon. This dish doesn’t need to be overly complicated to shine—it’s a perfect example of how simple ingredients can come together in a way that feels both familiar and exciting.

The combination of canned tuna and pasta also makes it a practical choice for any busy weeknight or when you’re looking to clear out your pantry. The ingredients are pantry staples, so you don’t need to make a special trip to the grocery store. And yet, despite its humble roots, the dish can feel luxurious and satisfying, especially with a sprinkle of fresh cheese and parsley to finish.

Ingredients

Ingredients
1 can of tuna
Olive oil (for sautéing)
1 onion, chopped
2 cloves of garlic, minced
Chili pepper (optional)
Fresh basil and thymeTo taste
250g pastaAny type of your preference
500 ml water
1 tomato, diced
50g cheese (grated)Preferably Parmesan or mozzarella
Fresh parsleyFor garnish
1 tbsp tomato paste
Capers (optional)For added briny flavor

Directions

  1. Sauté the Aromatics: Heat a tablespoon of olive oil in a large pan over medium heat. Add the chopped onion and cook for about 5 minutes, or until softened. Add the minced garlic and chili pepper (if using) and cook for another minute, allowing the flavors to bloom.
  2. Incorporate Tomato Paste: Stir in the tomato paste, cooking for 2-3 minutes until it darkens slightly and releases its flavors.
  3. Cook the Pasta: Bring 500 ml of water to a boil in a separate pot. Add the pasta and cook according to the package instructions until al dente. Drain the pasta, reserving a bit of the pasta water.
  4. Combine Tuna and Veggies: Add the canned tuna to the pan with the sautéed onion and garlic mixture. Break up the tuna with a spoon. Stir in the diced tomato and cook for a few more minutes until the tomato softens. Add fresh basil and thyme, then season with salt and pepper to taste.
  5. Combine Pasta with Sauce: Add the cooked pasta to the tuna and tomato sauce. If the sauce is too thick, add a little of the reserved pasta water to achieve your desired consistency. Stir well to coat the pasta with the sauce.
  6. Finish with Cheese and Garnish: Sprinkle the grated cheese over the pasta and toss it into the sauce to melt the cheese. Garnish with fresh parsley and, if desired, capers for an extra burst of flavor.

Nutrients

NutrientAmount per Serving
Calories400 kcal
Protein25 g
Carbohydrates45 g
Fat14 g
Fiber3 g
Sugars4 g

The Versatility of Tuna and Pasta: Customizing to Taste

One of the most wonderful aspects of this recipe is its adaptability. While the core ingredients—tuna, pasta, and a few aromatics—remain constant, there are countless ways to personalize this dish based on what you have on hand or what you’re craving. Here are a few ideas for customizing your tuna pasta:

  1. Adding Vegetables
    If you love incorporating more vegetables into your meals, this dish is perfect for experimenting. Consider adding spinach, zucchini, or even mushrooms for added texture and flavor. If you have frozen peas or sweet corn on hand, those work wonderfully as well.
  2. Choosing Different Pasta
    The type of pasta you choose can change the entire dish. While traditional spaghetti is a great option, you could also try penne, fusilli, or farfalle for a fun twist. The shape of the pasta can alter the way the sauce clings, giving each bite a slightly different texture.
  3. Spice It Up
    For those who enjoy a little heat, adding chili pepper (as suggested in the recipe) can really elevate the dish. You can also experiment with red pepper flakes, a dash of hot sauce, or even a sprinkle of smoked paprika for a smoky kick.
  4. Herb Variations
    The fresh basil and thyme in this dish provide a fragrant herbaceous note, but don’t be afraid to experiment with other herbs. Try oregano for an Italian twist, or add rosemary for a deeper, earthy flavor. Fresh parsley is an excellent garnish, adding a pop of color and brightness.
  5. Cheese Choices
    While mozzarella or Parmesan is often the go-to for this recipe, feel free to experiment with other cheeses. A sharp cheddar could add a unique richness, while goat cheese could provide a creamy tang. For an extra indulgent option, a sprinkle of ricotta or a dollop of cream could turn this dish into a creamy, comforting meal.

The Nutritional Benefits of Tuna and Pasta

Though tuna pasta is known for its comfort, it’s also surprisingly nutritious. Packed with protein from the tuna and a good dose of fiber from the pasta (especially if you opt for whole wheat or gluten-free pasta), this dish can keep you feeling full and satisfied without the heaviness that some other comfort foods bring.

Protein
Tuna is an excellent source of lean protein. It’s rich in essential amino acids that help build and repair muscle, making this dish a great post-workout meal. Protein also helps keep you feeling fuller for longer, reducing the chances of overeating or snacking between meals.

Healthy Fats
Though not as high in fat as some other dishes, the olive oil used to sauté the onions and garlic is a heart-healthy fat. Olive oil is a staple of the Mediterranean diet, known for its anti-inflammatory properties and benefits to cardiovascular health.

Carbohydrates
The pasta in this dish provides a source of complex carbohydrates. These carbs are an important part of a balanced diet, providing energy and helping stabilize blood sugar levels. Whole wheat pasta is a great option if you’re looking for additional fiber.

Vitamins and Minerals
The addition of herbs like basil and thyme offers a range of vitamins and minerals, including Vitamin C, Vitamin A, and various antioxidants. These help support your immune system and overall health.

Frequently Asked Questions

Can I use a different type of pasta?
Yes! While traditional pasta works best, you can experiment with various types like whole wheat, gluten-free, or even spiralized zucchini for a low-carb option.

What if I don’t have fresh herbs?
If you don’t have fresh basil or thyme, you can use dried herbs instead. Just be sure to adjust the quantities, as dried herbs are more concentrated in flavor than fresh ones.

Can I make this dish vegetarian?
Yes, you can easily adapt this recipe to be vegetarian by replacing the tuna with sautéed mushrooms or a plant-based protein of your choice.

Can I make this dish ahead of time?
Tuna pasta is best enjoyed fresh, but you can make it ahead of time and store it in the refrigerator for up to 2 days. Reheat it on the stove with a splash of water to keep the sauce from drying out.

What can I serve with tuna pasta?
This dish pairs well with a side salad, garlic bread, or even some roasted vegetables. A light white wine, such as Pinot Grigio, can complement the meal perfectly.

Conclusion: A Meal that Speaks to the Heart

Tuna and pasta may seem like a simple combination, but it’s a meal that carries with it a sense of home and comfort. Its humble origins remind us that sometimes the best meals are the simplest ones, and it’s the little moments we share over these meals that become the most cherished memories. Whether you’re cooking for yourself or sharing it with friends and family, this dish brings people together, one bite at a time.

As I continue to make this dish in my own kitchen, I think about the countless times I’ve shared it with loved ones. It’s more than just a recipe—it’s a piece of my history, my connection to the past, and a tradition I hope to pass on. In a world full of complex recipes and extravagant meals, sometimes it’s the most straightforward dishes, like tuna and pasta, that remind us of the joy found in simplicity. So, whether you’re looking for a quick weeknight meal or a comforting dish that brings back memories, this tuna pasta recipe will always be there to deliver warmth, flavor, and a sense of belonging.

A Journey of Flavor: The Comfort of Cheese and Veggies

There’s something magical about the feeling of comfort food. For me, it’s a dish like this one—cheese, fresh vegetables, and a touch of herbs. It reminds me of weekends spent with my family, gathering around the kitchen to share simple yet delicious meals. Growing up, my mother was the heart of our home. She had an innate talent for creating comforting meals that nourished both body and soul, but she always knew that the simplest dishes could hold the most meaning.

I vividly recall those quiet Saturday mornings when we would all come together in the kitchen. The smell of sizzling butter and sautéing vegetables would fill the air, and I knew that something extraordinary was being made. There was a constant buzz of conversation, but the true magic was in the food—a blend of flavors that seemed so effortless yet somehow perfectly balanced. This dish, with its combination of cheese, peppers, olives, and dill, was one of those family staples. It was so simple, yet every bite seemed to evoke a memory of love and warmth that transcended the meal itself.

Even today, as I prepare this dish in my own kitchen, I feel a sense of nostalgia that transports me back to those moments. The beauty of this recipe is in its simplicity—no complicated techniques, no extravagant ingredients, just fresh, wholesome flavors coming together to create something truly comforting. This dish is more than just food; it is a reminder of family, tradition, and the importance of making time to sit down and share a meal with the people we love.

The Allure of Fresh Ingredients

At the heart of this dish is the combination of fresh vegetables and cheeses. The sweet yellow and red peppers provide a satisfying crunch and sweetness that complement the richness of the cheeses. Mozzarella adds a smooth, mild flavor, while feta brings a sharp, briny contrast. These ingredients aren’t just thrown together—they harmonize beautifully, creating a well-rounded taste that dances on the palate.

The dill, with its bright, herbaceous flavor, acts as a refreshing note that balances the richness of the cheese and the earthiness of the peppers. The olives introduce a slight brininess that enhances the other flavors, rounding out the dish and adding an unexpected depth.

This recipe is the embodiment of how the freshest ingredients, when treated simply, can produce something remarkable. Whether you’re preparing it for a special occasion or just for a quiet dinner at home, this dish’s colorful, vibrant mix of vegetables and cheese provides both comfort and excitement. There’s a reason these ingredients have been used in so many cultures—they bring out the best in each other, creating a dish that is more than the sum of its parts.

Ingredients

Ingredients
2 chicken eggs
50 ml vegetable oil
100 ml milk
5g baking powder
130g flour
1 raw sweet yellow pepper
1 raw sweet red pepper
1 tomato
50g green olives
100g feta cheese
A bunch of dill
100g hard mozzarella cheese
20g butter

Directions

  1. Prepare the Vegetables: Begin by chopping the sweet yellow and red peppers into small cubes. Dice the tomato and slice the green olives into rings. Set all the vegetables aside for easy access.
  2. Make the Batter: In a large bowl, crack the eggs and lightly beat them. Add the vegetable oil and milk to the eggs and mix until smooth. Stir in the flour and baking powder, continuing to mix until you have a smooth batter.
  3. Add the Veggies and Cheese: Gently fold the prepared peppers, diced tomato, sliced olives, and fresh dill into the batter. Crumble the feta cheese and add it to the mixture. Grate the mozzarella cheese and mix it in as well.
  4. Cook the Dish: Heat a pan over medium heat and melt the butter in it. Once the butter has melted, pour the batter into the pan, spreading it evenly. Cook for approximately 5-7 minutes on each side, or until the dish is golden brown and firm to the touch.
  5. Serve and Enjoy: Once cooked through, remove the dish from the pan and slice it into portions. Garnish with extra fresh dill if desired. Serve hot and enjoy this flavorful mix of veggies, cheese, and herbs!

Nutrients

NutrientAmount per Serving
Calories220 kcal
Protein8 g
Carbohydrates18 g
Fat14 g
Fiber2 g
Sugars4 g

Why This Recipe Works: The Perfect Combination of Ingredients

1. Vegetables for Texture and Freshness
The raw sweet yellow and red peppers offer a beautiful balance of sweetness and crunch, providing a satisfying texture contrast to the soft cheeses. The tomato brings juiciness, while the olives add a salty bite that complements the sweetness of the peppers and tomato. This is a combination that works incredibly well on the palate, with each bite providing a new sensation, yet everything feels harmonized.

2. Cheeses for Creaminess and Sharpness
Cheese, especially mozzarella and feta, is the heart of this dish. The mozzarella melts beautifully into the batter, creating pockets of gooey deliciousness. The feta, on the other hand, crumbles and distributes throughout the dish, providing sharp, tangy bites that cut through the richness of the mozzarella and oil. The contrast between the two cheeses creates a dynamic flavor profile that enhances every element in the dish.

3. Herbs for Brightness and Aroma
The dill is the final touch that ties everything together. Its light, aromatic flavor lifts the richness of the cheese and oil, providing a fresh, clean contrast. This herb is not just an afterthought; it brings the whole dish to life. The fragrance of fresh dill adds to the sensory experience, turning this simple dish into something special.

4. Simplicity of Method
Perhaps what makes this dish even more beloved is how simple it is to prepare. There’s no need for complex cooking methods or fancy equipment—just a pan, a few basic ingredients, and a little bit of time. This is a recipe anyone can make, no matter their cooking experience, yet it consistently delivers exceptional results.

Frequently Asked Questions

1. Can I substitute the feta cheese?
Yes! If you’re not a fan of feta or don’t have it on hand, you can substitute it with goat cheese, ricotta, or even cream cheese. Each cheese will bring a different texture and flavor, but the dish will still be delicious. Goat cheese will add a tangy, creamy element, while ricotta will make the dish even more airy and soft.

2. Can I make this dish vegetarian or vegan?
Yes! To make the dish vegetarian, simply omit the butter or substitute it with olive oil. For a vegan version, you can replace the eggs with a plant-based egg substitute and choose vegan versions of mozzarella and feta cheese. The rest of the ingredients will work wonderfully without the dairy.

3. What can I serve this dish with?
This dish pairs beautifully with a light green salad or a side of roasted vegetables. You can also serve it with a creamy soup, like a tomato bisque, to create a comforting meal. If you’re looking for something more substantial, a side of quinoa or couscous would work well to balance the flavors.

4. Can I add other vegetables?
Absolutely! This recipe is incredibly versatile. Feel free to add other vegetables like spinach, zucchini, or mushrooms. You can even try adding some chopped spinach for extra greens or swap out the peppers for some roasted eggplant.

5. How can I store the leftovers?
This dish can be stored in an airtight container in the refrigerator for up to three days. It also reheats well in the microwave or on the stove. Just make sure to reheat it gently so that the cheese doesn’t become too tough or rubbery.

Conclusion: The Comfort of Simplicity

The beauty of this dish lies in its simplicity. It’s not fancy or complex, but it is full of flavor and warmth. It’s the kind of dish that feels like a hug from the inside—comforting, satisfying, and delicious in its own uncomplicated way. Whether you’re making it for a casual weeknight dinner or sharing it with friends at a special gathering, this flavorful mix of vegetables, cheese, and herbs will undoubtedly become a favorite.

As I make this dish in my own kitchen, I’m reminded that cooking doesn’t always have to be elaborate to be meaningful. Sometimes, the most memorable meals are the ones made with love, shared with those we care about, and savored slowly over conversation. This dish will always be more than just a recipe to me; it’s a tradition, a connection to the past, and a reminder of how something simple can be extraordinary. So, next time you’re craving a dish that’s both comforting and full of flavor, look no further than this delicious cheese and veggie medley.

Lemon Yogurt Cake: A Simple Slice of Joy

For many of us, the kitchen is not just a place where meals are made—it’s a space filled with memories. Growing up, baking was a form of therapy for my mother. She would often bake simple cakes, one of our favorites being a lemon yogurt cake. I can still recall the joy of walking into the kitchen and being greeted by the zesty fragrance of lemons and the soft, airy scent of a freshly baked cake. There was always something so comforting about her lemon yogurt cake. It was light, refreshing, and so simple, yet it never failed to satisfy.

That cake became more than just a dessert for me. It symbolized love, tradition, and the care that went into every little detail of family life. The days spent in the kitchen, mixing ingredients and waiting for the cake to rise in the oven, were some of my fondest memories. As I got older, I started baking this cake myself, passing on the tradition and creating new memories with my own family. It was my way of connecting with the past and making new traditions. It reminded me that some of the best things in life are the simplest, and that a good cake, made with love, can make any day a little brighter.

The beauty of this cake is in its simplicity. It doesn’t require any elaborate techniques or expensive ingredients, yet it’s always a crowd-pleaser. The natural yogurt adds moisture, while the lemon zest brings a bright, tangy flavor that makes every bite refreshing. Whether you’re making it for a special occasion or just because you need a little pick-me-up, this lemon yogurt cake will always hit the spot. It’s a reminder that sometimes, it’s the simplest things in life that bring us the most joy.

Why Lemon Yogurt Cake Is So Special

Lemon yogurt cake holds a special place in the hearts of many bakers. It’s a humble recipe that combines basic ingredients like yogurt, lemon, and flour, but the result is a cake that’s light, airy, and bursting with flavor. There’s a reason why this cake is often referred to as the “everyday cake.” It’s the kind of cake that’s perfect for any occasion, from a casual afternoon snack to a dessert at a family gathering.

The combination of yogurt and lemon in this cake is what makes it so unique. The yogurt not only adds moisture, ensuring that the cake is soft and tender, but it also adds a subtle tang that balances the sweetness of the sugar. The lemon zest infuses the cake with a fresh, vibrant flavor that’s both uplifting and comforting. It’s a cake that manages to be both refreshing and satisfying, making it the perfect treat for any time of year.

What makes this cake even more appealing is its versatility. You can enjoy it as is, or you can dress it up with a glaze or frosting, depending on your preferences. You can also add a handful of berries, or perhaps a sprinkle of powdered sugar, to make it even more special. It’s the kind of cake that can easily be adapted to suit your taste, while still maintaining its simplicity and charm.

One of the best aspects of lemon yogurt cake is how quick and easy it is to make. Unlike many other cakes that require a long list of ingredients or complicated techniques, this cake can be whipped up in no time. With just one egg, some basic pantry staples, and a few minutes of your time, you can have a cake that feels like it came straight from the bakery. It’s the ideal choice for anyone looking to bake something delicious without a lot of fuss.

Ingredients

For the Cake
1 egg
A pinch of salt
70g sugar
Grated lemon zest (or 8g vanilla sugar)
70ml oil
125g natural yogurt
2 tablespoons lemon juice
150g flour
8g baking powder

Directions

  1. Combine Wet Ingredients: In a large mixing bowl, whisk together the egg, pinch of salt, and sugar until smooth. Add in the grated lemon zest (or vanilla sugar), oil, yogurt, and lemon juice, mixing until well combined.
  2. Add Dry Ingredients: In a separate bowl, combine the flour and baking powder. Gradually add this dry mixture to the wet ingredients, stirring until just combined and the batter is smooth.
  3. Bake the Cake: Preheat your oven to 180°C (350°F). Pour the batter into a greased or lined cake pan. Bake for 20-25 minutes, or until a toothpick inserted into the center comes out clean.
  4. Cool and Serve: Let the cake cool for a few minutes before removing it from the pan. Slice and enjoy the refreshing, light lemon yogurt cake.

Nutrients

NutrientAmount per Serving
Calories180 kcal
Protein4 g
Carbohydrates26 g
Fat7 g
Fiber1 g
Sugars14 g

Frequently Asked Questions

1. Can I use flavored yogurt instead of plain yogurt? While plain yogurt is ideal for this recipe because it adds a subtle tanginess without overpowering the flavor, you can use flavored yogurt if you prefer. Just be mindful of the flavor you choose, as it will influence the final taste of the cake. For example, using lemon-flavored yogurt can enhance the lemon flavor, while berry-flavored yogurt will add a fruity twist.

2. Can I make this cake gluten-free? Yes, you can easily adapt this cake to be gluten-free by substituting the all-purpose flour with a gluten-free flour blend. Be sure to check the measurements on the gluten-free flour package, as you may need to make slight adjustments to the flour-to-liquid ratio.

3. How can I make this cake more moist? If you prefer an even moister cake, you can add an extra 2 tablespoons of yogurt to the batter or increase the amount of lemon juice slightly. You can also use a little bit of sour cream in place of some of the yogurt for added richness.

4. How can I store this cake? This cake stays fresh for several days when stored in an airtight container at room temperature. If you have any leftovers, you can also store it in the refrigerator for up to five days. You can also freeze slices of the cake for up to a month if you’d like to save some for later.

5. Can I add frosting or glaze to this cake? Absolutely! While the cake is delicious on its own, adding a glaze or frosting can make it even more special. A simple lemon glaze made from powdered sugar and lemon juice is a perfect complement. Alternatively, you can add a cream cheese frosting for a richer flavor.

6. Can I make this cake ahead of time? Yes, this cake can be made ahead of time. It keeps well for a few days, so it’s an excellent option for meal prep or a party. Just be sure to store it properly in an airtight container to keep it fresh.

Tips for Perfecting Your Lemon Yogurt Cake

  1. Room Temperature Ingredients: Ensure that your yogurt and egg are at room temperature before mixing them together. This helps them blend more easily and results in a smoother batter.
  2. Don’t Overmix: When adding the dry ingredients to the wet mixture, stir just until combined. Overmixing the batter can result in a dense cake.
  3. Zest the Lemon Carefully: Be sure to zest the lemon finely, avoiding the white pith underneath the peel, which can be bitter.
  4. Oven Temperature: Make sure your oven is fully preheated before baking the cake to ensure it bakes evenly.
  5. Optional Add-ins: Feel free to experiment with add-ins like poppy seeds, a handful of berries, or even a light dusting of cinnamon to create a flavor variation.

Conclusion: A Cake to Share and Cherish

Lemon yogurt cake is a timeless recipe that continues to bring joy to kitchens across the world. Its simplicity, light texture, and refreshing lemon flavor make it the perfect treat for any occasion. Whether you’re baking it to celebrate a special moment or simply to enjoy a quiet afternoon with a cup of tea, this cake is sure to brighten your day.

The beauty of this recipe is that it’s so much more than just a cake. It’s a connection to memories, a way to share love, and an opportunity to make new traditions. With its quick prep time and minimal ingredients, this cake proves that sometimes the best things in life are the simplest. It’s a reminder that you don’t need complex recipes or intricate techniques to create something truly wonderful. All you need is a little time, a few ingredients, and the desire to create something delicious.

As you bake this cake, take a moment to reflect on the memories it may bring—whether they’re from your own childhood or from a time you shared with loved ones. Let this cake be a part of your tradition, a slice of joy that you pass down to others. In the end, the true magic of lemon yogurt cake lies not only in its flavor but in the way it brings people together, one bite at a time.

Hearty Vegetable Soup: A Bowl of Warmth and Comfort

There’s something incredibly comforting about a bowl of soup. For me, it’s more than just the warmth it provides or the richness of the flavors—it’s a memory, a moment of connection. I remember as a child, walking home from school on cold autumn days, the scent of soup simmering on the stove would greet me before I even opened the door. It wasn’t just any soup. It was my grandmother’s vegetable soup, a simple yet hearty combination of fresh vegetables, flavorful broth, and just the right amount of seasoning.

My grandmother, a woman of few words but infinite love, would make this soup with whatever vegetables she had in the garden. It was never the same twice—always full of surprises and comfort. She would stir the pot slowly, allowing the vegetables to soften, creating an aroma so inviting that it seemed to wrap around you like a warm hug. There was no rush. The slow cooking was part of the process, part of the love that went into every bite.

That soup became more than just a meal for me. It represented family, tradition, and the feeling of being cared for. As the years went by, I started making this soup myself. Though the recipe has evolved, it still carries that same sense of comfort and warmth. It reminds me of home, of simpler times, and of those I love. Every time I make it, I think of my grandmother and the joy she found in feeding those she cared about.

The beauty of vegetable soup lies in its simplicity. It’s a dish that can be adapted to any season, any occasion, and any taste. With just a few fresh ingredients and a slow simmer, it turns into something so much more. It’s a reminder that, sometimes, the best meals don’t need to be complicated; they simply need to be made with care and love. Whether it’s a cold winter evening or a gathering with friends and family, this vegetable soup is sure to warm your heart and nourish your soul.

Why Vegetable Soup Is More Than Just a Meal

At its core, vegetable soup is the embodiment of comfort. It’s a dish that transcends time, geography, and culture. Every culture has its own version, but the essence remains the same: a nourishing, hearty meal made with the freshest seasonal vegetables, rich broth, and a combination of flavors that are both familiar and satisfying. What makes this soup particularly special is its versatility. You can adjust the ingredients to suit your preferences, making it an ideal dish to cook year-round, using whatever vegetables are in season.

But the appeal of vegetable soup is not only its flavor. It’s the ritual of preparing it. The chopping, sautéing, and simmering all create an experience, not just a dish. The kitchen fills with the scent of garlic, onions, and fresh vegetables as they begin to soften and meld together. With each stir, the soup becomes something more, something that grows with time. It’s the kind of meal that you can make in large batches, sharing it with others and knowing that the joy you feel in making it will be shared with everyone who eats it.

In many ways, vegetable soup is a communal dish. Whether you’re cooking for yourself or a crowd, the process of making it can be an act of self-care or a way to show others that you care. It’s the perfect dish to make for a family dinner, a get-together, or even to bring to a friend in need. The warmth and nourishment it provides extend beyond the physical—it touches the heart, reminding us that food has the power to heal and bring us together.

Ingredients

For the Soup
1 onion, chopped
Olive oil for frying
1 celery stalk, chopped
1 carrot, chopped
1 red pepper, chopped
1 green pepper, chopped
2 garlic cloves, minced
1 leek, cleaned and sliced
3 potatoes, peeled and diced
2 tablespoons flour
200ml (1 cup) vegetable broth
1.5 liters (7 cups) vegetable broth
Salt and black pepper to taste
100g (1/2 cup) noodles
Dried parsleyFor garnish

Directions

  1. Sauté the Vegetables: Heat olive oil in a large pot over medium heat. Add the chopped onion, celery, carrot, red pepper, and green pepper. Cook for about 5-7 minutes until the vegetables begin to soften and the onions become translucent.
  2. Add Garlic and Leek: Stir in the minced garlic and sliced leek, and cook for an additional 2-3 minutes until the garlic is fragrant and the leek softens.
  3. Create the Soup Base: Sprinkle the flour over the sautéed vegetables and stir well to combine. Cook for 1-2 minutes to eliminate the raw flour taste.
  4. Add Broth and Potatoes: Gradually pour in the vegetable broth, beginning with the 200ml (1 cup), followed by the remaining 1.5 liters (7 cups). Add the diced potatoes, and bring the soup to a boil.
  5. Simmer the Soup: Once boiling, reduce the heat and let the soup simmer for 20-25 minutes, or until the potatoes are tender.
  6. Add Noodles and Season: Stir in the noodles and cook for another 8-10 minutes, or until the noodles are soft. Season with salt and black pepper to taste.
  7. Serve and Garnish: Once the noodles are cooked, remove the soup from the heat. Ladle the soup into bowls, and garnish with a sprinkle of dried parsley before serving.

Nutrients

NutrientAmount per Serving
Calories150 kcal
Protein4 g
Carbohydrates30 g
Fat2 g
Fiber5 g
Sugars6 g

Frequently Asked Questions

1. Can I use frozen vegetables instead of fresh?

Yes, frozen vegetables can be a great substitute for fresh ingredients in this soup. They’re convenient and often just as nutritious, especially when fresh vegetables are out of season. However, keep in mind that frozen vegetables may soften quicker than fresh ones, so you might want to adjust the cooking time slightly to avoid overcooking them.

2. How can I make this soup vegan or vegetarian?

This vegetable soup is naturally vegan and vegetarian, as it is made entirely from plant-based ingredients. However, if you’re concerned about the broth, make sure you use a vegetable broth that is vegan or vegetarian-friendly. Some store-bought broths may contain animal products like chicken or beef, so check the label to be sure.

3. Can I add protein to the soup?

Yes, you can add protein to the soup if you like. Adding beans, lentils, or even tofu can boost the protein content and make the soup more filling. If you prefer a meat option, shredded chicken or ground turkey can also be incorporated into the soup. Just be sure to adjust the cooking times based on the protein you choose.

4. How can I make the soup thicker?

If you prefer a thicker soup, there are a few options. You can mash some of the cooked vegetables directly in the pot to create a creamier texture. Alternatively, you can blend a portion of the soup using an immersion blender or regular blender. Another option is to add a tablespoon or two of flour or cornstarch to the broth to help thicken it up.

5. Can I store leftovers?

Yes, this vegetable soup stores very well. Allow it to cool completely before transferring it to an airtight container. It will keep in the refrigerator for 3-4 days. You can also freeze it for up to 3 months. When reheating, you may need to add a little extra broth to adjust the consistency, as the soup can thicken after being stored.

6. Can I make this soup in a slow cooker?

Absolutely! To make this soup in a slow cooker, simply add all the ingredients to the crockpot, set it on low, and let it cook for 6-8 hours. The result will be just as delicious, with the added convenience of hands-off cooking. If you’re using noodles, you can add them in the last 30 minutes of cooking to avoid them getting too soft.

Additional Tips and Variations

1. Experiment with Seasonings: One of the great things about vegetable soup is that you can easily tailor it to your taste. Add herbs like thyme, rosemary, or bay leaves for extra depth of flavor. A splash of lemon juice or a dash of hot sauce can also bring a new dimension to the soup.

2. Add Greens: Kale, spinach, or swiss chard are great additions to this soup. Simply chop them up and add them during the last 10-15 minutes of cooking for a burst of color and added nutrients.

3. Make it Creamy: If you prefer a creamy vegetable soup, consider adding a splash of coconut milk, heavy cream, or a dollop of sour cream just before serving. This will create a silky-smooth texture that’s perfect for a comforting winter meal.

4. Spice It Up: For those who enjoy a little heat, consider adding red pepper flakes, chili powder, or even diced jalapeños to the soup. This will give the dish a kick and complement the sweetness of the vegetables.

Conclusion: A Hearty Soup That Brings Comfort and Joy

Vegetable soup is more than just a meal—it’s a tradition, a source of comfort, and a reminder of the simple pleasures in life. Whether you’re cooking for yourself or sharing it with others, the act of making and enjoying this soup is a celebration of care, warmth, and nourishment. As the soup simmers away on the stove, it brings people together, creating a space for connection, conversation, and joy.

This recipe, rooted in the flavors of home, offers a timeless combination of fresh vegetables and savory broth that will never go out of style. It’s versatile, adaptable, and full of heart. So the next time you need a comforting meal, reach for this vegetable soup and let it nourish not only your body but also your soul.

Cheesy Skillet Garlic Bread: A Recipe That Brings Us Together

When I think back to my childhood, one of the most comforting memories I have is sitting at the dinner table, the aroma of garlic bread filling the room as my family gathered together. The bread was always warm, golden, and topped with melted cheese that stretched as we tore off pieces. The buttery, garlicky aroma would bring everyone into the kitchen, and without a word, we’d reach for a slice, savoring every bite. There was something about the simplicity of garlic bread—its crispy exterior, soft interior, and mouthwatering cheese—that made it more than just a side dish. It became a part of family gatherings, a snack during movie nights, and even a treat when we had guests over.

As I grew older, I began experimenting with recipes and making this classic garlic bread myself. One of my favorites became this Cheesy Skillet Garlic Bread, a recipe that takes everything I love about garlic bread and elevates it with a crispy, cheesy topping, all made right in the skillet. This recipe brings the same sense of warmth and togetherness that I experienced growing up. It’s perfect for any occasion, whether you’re having a family meal, celebrating with friends, or enjoying a cozy night in.

The beauty of this recipe lies in its simplicity. While the traditional method of baking garlic bread in the oven is great, cooking it in a skillet on the stovetop adds a delightful crispy texture that makes every bite even more irresistible. The rich, garlicky butter mixture, combined with melty cheese, creates the perfect balance of flavors that can transform any meal into something truly special. And just like the bread I grew up with, it has a way of bringing people together—sharing stories, laughter, and, of course, another piece of bread.

Why Skillet Garlic Bread Is a Game-Changer

Garlic bread is a classic dish that never goes out of style. It’s easy to make, versatile, and incredibly satisfying. The simple combination of bread, butter, garlic, and herbs creates a flavor profile that’s universally loved. However, this skillet version takes it to the next level. The crispy golden crust that forms on the outside of the bread, coupled with the gooey cheese, makes it a mouthwatering treat that’s difficult to resist.

Unlike traditional oven-baked garlic bread, which can sometimes result in uneven cooking or a soft, soggy center, the skillet method ensures that each piece is perfectly crisp and evenly cooked. The heat from the skillet creates a beautiful crust while locking in the flavors. Additionally, by topping the bread with cheese, the dish transforms from a simple side to a main character in any meal.

This skillet garlic bread is versatile enough to pair with pasta, soups, salads, or simply served as a snack on its own. Whether you’re serving it with a hearty pasta dish or using it to mop up sauce from your favorite stew, it’s a perfect companion to so many meals. The addition of cheese not only enhances the flavor but also gives the bread a rich, indulgent quality that makes it a crowd favorite.

Ingredients

For the Dough
1 teaspoon yeast (3 grams)
1 tablespoon sugar (12 grams)
1 tablespoon butter (14 grams)
½ cup lukewarm milk (110 ml)
1 cup all-purpose flour (120 grams)
¼ teaspoon salt (1.5 grams)

Directions

  1. Activate the Yeast: In a small bowl, combine the lukewarm milk, sugar, and yeast. Stir to dissolve the sugar and let the mixture sit for about 5 minutes until it becomes frothy.
  2. Prepare the Dough: In a large mixing bowl, combine the all-purpose flour and salt. Add the yeast mixture and melted butter, then mix to form a dough. Knead the dough for about 5-7 minutes until it becomes smooth and elastic.
  3. Let the Dough Rise: Place the dough in a lightly greased bowl, cover it with a clean cloth, and let it rise for 1-1.5 hours, or until it has doubled in size.
  4. Shape the Dough: Punch down the dough and transfer it to a lightly floured surface. Roll it out into a flat disc shape, large enough to fit your skillet.
  5. Cook the Bread: Heat a skillet over medium heat. Carefully place the dough in the skillet and cook for about 3-4 minutes on one side until lightly golden. Flip the bread over and cook for another 3-4 minutes on the other side.
  6. Prepare the Garlic Butter: While the bread is cooking, melt some butter and mix with garlic. Brush the mixture over the top of the bread as it cooks.
  7. Add Cheese: Once both sides of the bread are golden, sprinkle your favorite shredded cheese on top and cover the skillet for 1-2 minutes, allowing the cheese to melt and become bubbly.
  8. Serve: Remove the skillet from the heat, slice the cheesy garlic bread, and serve immediately.

Nutrients

NutrientAmount per Serving
Calories180 kcal
Protein6 g
Carbohydrates26 g
Fat7 g
Fiber1 g
Sugars2 g

FAQs About Cheesy Skillet Garlic Bread

1. Can I use any type of bread for this recipe?

While this recipe uses a classic all-purpose bread, you can absolutely switch it up depending on your preferences. Baguettes, ciabatta, or even sourdough work wonderfully as alternatives. The key is to choose a bread that has a slightly crusty exterior and a soft interior to hold up well when cooking in the skillet. Avoid soft, airy bread like sandwich bread as it may not crisp up as well.

2. What cheese should I use for the cheesy topping?

Mozzarella cheese is the go-to option for this recipe because of its meltability and mild flavor that pairs perfectly with garlic. However, feel free to get creative with other cheeses. Parmesan adds a sharp, salty contrast to the creamy mozzarella, while cheddar can introduce a richer flavor. A combination of cheeses, such as a blend of mozzarella and cheddar, works beautifully as well.

3. Can I make this recipe without cheese?

Absolutely! If you’re looking for a lighter version of garlic bread, you can easily omit the cheese and enjoy the bread with just the garlic butter mixture. The garlic, butter, and herbs alone provide an incredibly flavorful base. You could also top the bread with fresh herbs like parsley or basil for an added burst of flavor.

4. How do I store leftovers?

Leftovers can be stored in an airtight container at room temperature for up to two days. If you have more than that, you can freeze the bread by wrapping it tightly in plastic wrap and then in foil. To reheat, place the bread on a skillet over low heat until warmed through, or you can pop it in the oven for a few minutes to crisp it back up.

5. Can I prepare the garlic bread ahead of time?

Yes, you can prepare the garlic butter and spread it on the bread ahead of time. Simply assemble the bread and store it in the refrigerator for up to 24 hours before cooking. When ready, heat the skillet and cook the bread as directed, adding cheese and finishing the recipe. This makes it an ideal option for busy weeknights or when hosting guests.

6. Can I add more seasonings to the garlic butter mixture?

Definitely! The garlic butter in this recipe can be customized to suit your taste. You can add dried herbs like oregano, thyme, or rosemary for an herbal twist. For a spicy kick, a pinch of red pepper flakes can give the bread a little heat. Experimenting with different spices allows you to tailor the flavor to your liking.

The Perfect Pairings: What to Serve with Skillet Garlic Bread

While this cheesy garlic bread is fantastic on its own, it pairs beautifully with a wide variety of dishes. Here are some of the best ways to enjoy it:

1. Pasta Dishes: Skillet garlic bread is a classic companion to pasta, especially hearty, sauce-heavy dishes like spaghetti bolognese, lasagna, or penne arrabbiata. The bread acts as a vehicle to scoop up every last drop of delicious sauce.

2. Soups and Stews: This bread is the perfect accompaniment to a steaming bowl of soup or stew. Whether you’re serving a rich tomato soup, a creamy potato leek soup, or a hearty beef stew, the garlic bread will help you savor every bite.

3. Salads: Pair your skillet garlic bread with a fresh green salad. The crunchy, garlicky bread contrasts nicely with the crispness of the salad, creating a perfect balance of textures and flavors.

4. Barbecue: If you’re grilling up some steaks, burgers, or chicken, serve a slice of cheesy garlic bread alongside. The smoky flavors of the barbecue mix wonderfully with the rich, buttery bread.

Conclusion: Bringing People Together One Slice at a Time

Cheesy Skillet Garlic Bread is more than just a side dish—it’s a celebration of flavor, comfort, and togetherness. The process of making this bread, from mixing the dough to watching it cook and melt with cheese in the skillet, is an experience that brings a sense of accomplishment and anticipation. But it’s not just about the recipe. It’s about the people you share it with and the memories you create around the table. Whether it’s a casual family dinner or a festive gathering, this garlic bread has a way of making every meal feel special.

As the cheese melts and the garlic butter crisps up in the skillet, you can’t help but smile. It’s a reminder that food, at its core, is about more than just filling our stomachs. It’s about the warmth, the connection, and the love we share with those we hold dear. So next time you find yourself in need of a comforting meal or a crowd-pleasing snack, turn to this cheesy skillet garlic bread. It’s a dish that brings people together and fills hearts with warmth, one slice at a time.

Cabbage Casserole: A Comforting Classic with a Modern Twist

Growing up, my family would gather around the dinner table, the warm aroma of a freshly baked casserole filling the room. These moments were a mix of laughter, storytelling, and the quiet comfort of food that brought us together. The humble cabbage, often seen as a simple ingredient, had the power to transform into something hearty and delicious when combined with the right flavors. It wasn’t just about the meal itself—it was about the memories created, the love shared, and the joy of savoring a home-cooked dish that made you feel like you were wrapped in a warm blanket.

Over time, I’ve come to realize that these dishes, much like the cabbage casserole, are more than just recipes—they are bridges to nostalgia, traditions, and the love of those who prepare them. This cabbage casserole recipe takes me back to those childhood days, with a little modern twist. It’s a recipe that is both simple and deeply satisfying, perfect for cozy nights or family gatherings. The combination of soft, tender cabbage, mixed with the creaminess of Greek yogurt and the melt-in-your-mouth mozzarella cheese, offers a flavor-packed experience that takes the humble cabbage to new heights.

If you’re looking for a comforting, healthy dish that is easy to make, this cabbage casserole is the answer. It’s packed with nutrients, flavor, and a sense of familiarity that will instantly make you feel at home. Whether you’re preparing it for a family meal or a gathering with friends, this dish brings the kind of warmth and comfort that food is meant to offer.

Why Cabbage Casserole is a Perfect Addition to Your Meals

Cabbage casserole is a unique blend of wholesome ingredients that make it not only delicious but also nutritious. It’s a great way to incorporate more vegetables into your diet without compromising on flavor. The cabbage provides fiber, antioxidants, and vitamins, while the Greek yogurt adds a creamy texture without the heavy calories of traditional creamy sauces. Zucchini and carrots further enhance the dish’s texture and nutritional profile, providing a boost of vitamins and minerals. The addition of mozzarella cheese brings richness and helps bind the casserole together, creating a dish that’s as comforting as it is satisfying.

What makes this casserole even more special is its versatility. You can adapt the recipe to suit various dietary needs or preferences. If you’re looking for a gluten-free option, this recipe naturally fits the bill. You can also easily adjust the seasoning or swap ingredients to suit your taste. For example, if you prefer a tangy kick, you can add some lemon zest or a touch of vinegar to the dish. The beauty of this recipe is its ability to take on different flavors while still remaining true to its comforting essence.

Ingredients

For the Casserole
500 grams cabbage, shredded
Salt, to taste
2 eggs, beaten
1 onion, chopped
1 carrot, grated
2 zucchinis, grated
50 grams Greek yogurt
Black pepper, to taste
Olive oil, for greasing
30 grams Greek yogurt (additional)
50 grams mozzarella cheese, grated
For the Sauce
3 tablespoons Greek yogurt
1 teaspoon mustard
1 clove garlic, minced

Directions

  1. Prepare the Casserole Base: Preheat the oven to 180°C (350°F). Grease a casserole dish with olive oil.
  2. Mix the Cabbage: In a large bowl, combine the shredded cabbage, chopped onion, grated carrot, and grated zucchinis. Add salt and black pepper to taste.
  3. Add Eggs and Yogurt: Beat the eggs and mix them with the Greek yogurt (50 grams). Pour this mixture over the vegetables and toss everything together until well-coated.
  4. Assemble the Casserole: Transfer the vegetable and egg mixture into the prepared casserole dish. Spread evenly. Top with grated mozzarella cheese and additional Greek yogurt (30 grams).
  5. Bake: Bake for about 30-35 minutes or until the top is golden and the casserole is firm.
  6. Prepare the Sauce: While the casserole bakes, combine the Greek yogurt, mustard, and minced garlic in a small bowl. Stir until smooth.
  7. Serve: Once the casserole is ready, drizzle the creamy sauce over the top and serve hot.

Nutrients

NutrientAmount per Serving
Calories180 kcal
Protein8 g
Carbohydrates10 g
Fat12 g
Fiber3 g
Sugars5 g

FAQs About Cabbage Casserole

1. Can I prepare this cabbage casserole ahead of time?

Yes, you can absolutely prepare this casserole ahead of time. In fact, it often tastes even better the next day as the flavors have time to meld together. To do so, assemble the casserole as instructed but without baking it. Cover it tightly with plastic wrap or aluminum foil and refrigerate for up to 24 hours. When you’re ready to bake it, just preheat the oven and cook according to the original instructions. This makes it a great option for meal prepping or for busy weeknights.

2. Can I use a different type of cheese?

While mozzarella is the classic cheese used in this recipe, you can definitely swap it out for other cheeses based on your preferences. Cheddar, Parmesan, or even a combination of cheeses would work beautifully. Keep in mind that different cheeses will bring different flavors, so experiment to find the perfect cheese combination that suits your taste.

3. Is there a way to make this casserole vegan?

Yes, it’s easy to make this cabbage casserole vegan-friendly! To replace the eggs, use a flaxseed meal or chia seed mixture. Combine 1 tablespoon of flaxseed meal or chia seeds with 3 tablespoons of water and let it sit for a few minutes to create an egg-like texture. For the Greek yogurt, you can use a plant-based yogurt such as almond or coconut yogurt. Lastly, replace the mozzarella cheese with a vegan cheese alternative that melts well, or simply skip the cheese if you prefer a lighter version.

4. Can I freeze leftover cabbage casserole?

Absolutely! This casserole freezes wonderfully. After baking, allow it to cool completely before wrapping it tightly in plastic wrap or aluminum foil. Store it in an airtight container or freezer bag for up to 3 months. To reheat, thaw it overnight in the fridge and bake at 180°C (350°F) for 15-20 minutes until heated through. You can also reheat it directly from the freezer, though this may take a little longer.

5. What can I serve this cabbage casserole with?

Cabbage casserole is a hearty dish that pairs well with a variety of sides. You can serve it alongside a fresh green salad for a lighter option or with some roasted potatoes for a more substantial meal. If you want to keep it light, a simple side of sautéed spinach or roasted Brussels sprouts would complement the dish perfectly. For a complete meal, consider serving it with a protein like grilled chicken or a slice of whole-grain bread to scoop up the creamy sauce.

6. Is this cabbage casserole suitable for a low-carb diet?

Yes, this casserole is naturally low in carbs, making it suitable for a low-carb diet. The vegetables provide fiber and essential nutrients without adding excessive carbs, and the Greek yogurt and mozzarella add protein and healthy fats. If you’re looking to reduce carbs even further, you can use less of the root vegetables like carrots or zucchini and focus more on cabbage as the base.

The Nutritional Benefits of Cabbage

Cabbage is often underrated in the vegetable world, but it deserves far more recognition for its impressive health benefits. Rich in fiber, cabbage helps support digestive health, keeps you feeling full longer, and can even aid in weight management. It’s also a great source of Vitamin C, which supports immune function, skin health, and overall wellness. Cabbage is also packed with antioxidants, which help reduce inflammation and protect against chronic diseases.

When combined with the other ingredients in the casserole, cabbage’s benefits are further enhanced. The Greek yogurt adds probiotics, which promote gut health, while the mozzarella cheese contributes calcium and protein, both essential for maintaining strong bones and muscles.

Why This Recipe is More Than Just a Meal

Cabbage casserole, like many family recipes, holds a special place in the heart. It’s the type of dish that not only nourishes the body but also brings people together. The simplicity of the ingredients makes it approachable, yet the flavors come together in such a way that each bite feels satisfying. Whether you’re sharing it with family on a Sunday evening or preparing it for a gathering, this casserole has the power to evoke feelings of warmth and belonging.

As I reflect on the importance of food in our lives, I realize that it’s not just about the sustenance it provides but the memories and experiences that are woven into each dish. This cabbage casserole, with its rich flavors and creamy sauce, is a reminder of the joy that food can bring. It’s a reminder that even the simplest ingredients can create something truly special. And perhaps, just like those childhood dinners, this cabbage casserole will become a tradition in your own family, offering comfort and connection for years to come.

Conclusion: A Dish That Warms the Heart and Soul

In a world that often moves too fast, there’s something truly special about slowing down and enjoying a comforting, home-cooked meal. This cabbage casserole, with its blend of fresh vegetables, creamy yogurt, and savory cheese, is a dish that not only nourishes the body but also nurtures the soul. Whether you’re making it for a quiet dinner at home or sharing it with loved ones, this casserole is a beautiful reminder that food has the power to bring people together, create lasting memories, and provide comfort in the most delicious way possible.

So, next time you find yourself in need of a hearty, nutritious dish, reach for this cabbage casserole recipe. It’s more than just a meal—it’s a connection to the past, a celebration of the present, and a dish that will warm your heart for years to come.

Nutty Apple Energy Bites – A Guilt-Free Sweet Treat

Growing up, my grandmother always had a way of turning simple ingredients into something magical. She believed that the best desserts didn’t need refined sugar, just a little creativity and a handful of wholesome ingredients. One of my fondest memories was watching her mix together apples, nuts, and dried fruits to make a naturally sweet treat that felt indulgent but was actually healthy.

As I got older, I realized that store-bought snacks often contained unnecessary preservatives and excessive sugar. I wanted a homemade alternative that could satisfy my sweet tooth without the guilt. That’s when I rediscovered my grandmother’s method and created these Nutty Apple Energy Bites—a delicious, nutrient-packed dessert made with simple, natural ingredients.

These bites are soft, chewy, and naturally sweetened by apples, apricots, and cranberries. With the crunch of walnuts and almonds, they offer a satisfying texture while providing essential nutrients. Whether you need a quick snack, a post-workout boost, or a light dessert, these energy bites are the perfect solution.

Why You’ll Love This Recipe

1. Naturally Sweet and Sugar-Free

Many desserts rely on added sugars, but this recipe gets its sweetness from nature. Apples, dried apricots, and cranberries provide just the right amount of sweetness without the need for refined sugar.

2. Quick and Easy to Make

With just a few ingredients and a food processor, you can have these energy bites ready in no time. There’s no baking required—just mix, shape, and chill!

3. Packed with Nutrients

Each ingredient brings its own health benefits:

  • Oats provide fiber to keep you full.
  • Walnuts and almonds offer healthy fats and protein.
  • Apples and dried fruits add natural sweetness, vitamins, and antioxidants.

4. Perfect for Any Occasion

These bites are great for:

  • A healthy afternoon snack
  • A quick pre- or post-workout energy boost
  • A light and satisfying dessert
  • A homemade gift for health-conscious friends

Ingredients

IngredientAmount
Oatmeal1 cup
Walnuts1 cup
Dried apricots50 grams
Almonds50 grams
Cranberries1/2 cup
Apples2 (peeled & diced)
Water50 ml
Olive oil2 tablespoons

Directions

Step 1: Prepare the Apples

  1. Peel and dice the apples. In a small pan, heat water and add the apples. Cook for about 5 minutes until soft.

Step 2: Blend the Ingredients

  1. In a food processor, combine the cooked apples, dried apricots, walnuts, almonds, cranberries, and oatmeal. Blend until you achieve a sticky, slightly chunky mixture.

Step 3: Shape the Bites

  1. With slightly wet hands, roll the mixture into small bite-sized balls or press into a flat dish and cut into squares.

Step 4: Chill and Serve

  1. Refrigerate for at least 30 minutes to set. Enjoy as a quick snack or a light dessert!

Nutritional Information

NutrientPer Serving (1 Bite)
Calories~120 kcal
Carbohydrates~15g
Protein~3g
Fat~6g
Fiber~2g
Sugar~7g (natural)

Tips for the Best Nutty Apple Energy Bites

1. Use Soft Dried Fruits

For the best texture, use soft dried apricots and cranberries. If they are too dry, soak them in warm water for 10 minutes before blending.

2. Adjust the Texture

If the mixture is too sticky, add more oats. If it’s too dry, add a bit of extra olive oil or a splash of water.

3. Experiment with Flavors

This recipe is versatile! Try adding:

  • Cinnamon for a warm, spiced flavor
  • Cocoa powder for a chocolaty twist
  • Coconut flakes for extra sweetness

4. Store Them Properly

Keep the energy bites in an airtight container in the refrigerator for up to a week. You can also freeze them for up to a month—just let them sit at room temperature for a few minutes before eating.

Frequently Asked Questions

1. Are These Energy Bites Really Healthy?

Yes! Unlike store-bought snacks, these bites are made with whole, natural ingredients. They contain fiber, healthy fats, and natural sugars, making them a balanced, nutritious choice.

2. Can I Make These Without Nuts?

Absolutely. If you have a nut allergy, you can replace the walnuts and almonds with sunflower seeds or pumpkin seeds for a similar texture and crunch.

3. What Can I Use Instead of Olive Oil?

You can substitute olive oil with coconut oil or almond butter for a slightly different flavor and texture.

4. Can I Make a Crunchier Version?

If you prefer a crunchier texture, try toasting the oats and nuts in a dry pan for a few minutes before blending them. This enhances their flavor and adds a bit of extra crunch.

5. How Many Calories Are in Each Bite?

Each energy bite contains approximately 120 calories, making it a great low-calorie snack or dessert option.

6. Can I Use Fresh Apples Instead of Dried Fruits?

While this recipe uses fresh apples, dried fruits help bind the mixture together. If you replace them entirely, the mixture may be too wet, so you’ll need to adjust by adding more oats.

7. Are These Suitable for Kids?

Yes! These bites are a great way to introduce kids to healthy snacks. They taste like a treat but are full of wholesome ingredients.

Conclusion: A Simple, Satisfying Dessert for All

These Nutty Apple Energy Bites prove that desserts don’t need to be loaded with sugar to be delicious. They are naturally sweet, packed with nutrients, and incredibly easy to make. Whether you’re looking for a healthy snack, a light dessert, or an energy boost, these bites are a perfect choice.

Just like my grandmother used to do, you can make something wonderful with just a few simple ingredients. Try this recipe, experiment with your favorite flavors, and enjoy a dessert that not only tastes great but also nourishes your body.

Golden Garlic Flatbread – A Rustic, Flavorful Classic

There’s something incredibly comforting about the smell of warm garlic bread filling the kitchen. It takes me back to family gatherings, where a simple flatbread would sit at the center of the table, ready to be torn apart and shared. My grandmother would always make her signature garlic flatbread, brushing it with olive oil and sprinkling fresh herbs on top. She never followed a recipe—just instinct, love, and whatever ingredients she had on hand.

Years later, I wanted to recreate that same experience, but with a twist. Instead of traditional flour, I turned to almond flour to make a lighter, low-carb version. What I discovered was a golden, garlicky, and incredibly flavorful flatbread that quickly became a household favorite. It’s crisp on the outside, soft on the inside, and infused with the rich taste of garlic and Parmesan. Whether served as a side, a base for pizza, or enjoyed on its own, this flatbread is the perfect blend of rustic simplicity and bold flavor.

If you love garlic bread but are looking for a healthier, grain-free alternative, this recipe is for you. Let’s dive into what makes this golden garlic flatbread special, along with some useful tips, variations, and frequently asked questions.

Why This Garlic Flatbread Stands Out

1. Low-Carb, Gluten-Free Goodness

This flatbread is made with almond flour, making it naturally gluten-free and lower in carbs than traditional wheat-based flatbreads. It’s a great alternative for those following a keto or low-carb diet while still delivering a satisfying, bread-like texture.

2. Packed with Garlic Flavor

Garlic lovers, rejoice! This flatbread is infused with fresh minced garlic, which deepens in flavor as it cooks. Paired with Parmesan and olive oil, the garlic creates an irresistible combination of rich, savory goodness.

3. Quick and Easy to Make

Unlike traditional bread recipes that require yeast and hours of rising time, this flatbread comes together in just minutes. It doesn’t require any special techniques—just mix, roll, and cook. Whether you bake it or cook it on the stovetop, it’s an effortless way to enjoy homemade bread.

4. Versatile and Customizable

One of the best things about this garlic flatbread is how adaptable it is. You can make it soft or crispy, add herbs and spices for extra flavor, or even use it as a base for mini pizzas. It pairs beautifully with soups, salads, or as an appetizer with dips like hummus or tzatziki.

Ingredients

IngredientAmount
Almond flour1 cup
Large eggs2
Garlic, minced2 cloves
Grated Parmesan cheese1/4 cup
Olive oil2 tablespoons
Baking powder1 teaspoon
Salt1/2 teaspoon
Dried oregano (optional)1/2 teaspoon
Dried basil (optional)1/2 teaspoon
Butter or olive oil for brushing (optional)As needed
Fresh parsley, chopped (optional)For garnish

Directions

Step 1: Prepare the Dough

  1. In a mixing bowl, whisk the eggs, then add almond flour, garlic, Parmesan cheese, olive oil, baking powder, salt, and herbs (if using).
  2. Stir until a thick dough forms.

Step 2: Shape the Flatbread

  1. Place the dough between two sheets of parchment paper and roll it out to about 1/4-inch thickness.
  2. Carefully transfer it to a lightly greased pan or baking sheet.

Step 3: Cook the Flatbread

  1. Heat a pan over medium-low heat and cook the flatbread for about 3–4 minutes per side until golden brown. Alternatively, bake at 350°F (175°C) for 10–12 minutes until firm and slightly crispy.

Step 4: Add Finishing Touches

  1. Brush with melted butter or olive oil for extra richness. Sprinkle with fresh parsley for added freshness.
  2. Serve warm and enjoy!

Nutritional Information

NutrientPer Serving (1 Piece)
Calories~150 kcal
Carbohydrates~3g
Protein~6g
Fat~12g
Fiber~2g
Sugar~1g

Tips for the Best Garlic Flatbread

1. Use Fresh Garlic for Maximum Flavor

While garlic powder can be used in a pinch, fresh minced garlic gives the best flavor. The natural oils in fresh garlic release as the flatbread cooks, creating a deep, aromatic taste.

2. Roll the Dough Evenly

For consistent cooking, roll the dough to an even thickness—about 1/4 inch. If it’s too thick, it may stay doughy in the middle; too thin, and it may become too crispy.

3. Choose the Right Cooking Method

  • Stovetop: Cooking the flatbread in a pan gives it a nice golden crust and a soft, chewy interior.
  • Oven: Baking at 350°F (175°C) creates a slightly crispier texture, perfect for those who prefer a crunchier bite.
  • Air Fryer: For an extra crispy version, air-fry at 350°F for about 8 minutes, flipping halfway through.

4. Brush with Butter or Olive Oil

After cooking, brushing the flatbread with melted butter or olive oil enhances its richness. For a more intense garlic flavor, mix minced garlic with the butter before brushing.

5. Add Herbs for Extra Flavor

Dried oregano and basil add depth, but you can also experiment with rosemary, thyme, or red pepper flakes for a spicy kick.

Frequently Asked Questions

1. Can I Make This Flatbread Without Eggs?

Yes! If you’re vegan or avoiding eggs, you can use a flax egg (1 tablespoon ground flaxseed mixed with 2.5 tablespoons water) as a substitute. It will slightly change the texture, making the flatbread a bit more crumbly.

2. How Do I Store Leftovers?

Store any leftover flatbread in an airtight container at room temperature for up to 2 days. For longer storage, refrigerate it for up to a week or freeze for up to a month. Reheat in a pan or toaster for the best texture.

3. Can I Use Coconut Flour Instead of Almond Flour?

Coconut flour absorbs more liquid and has a different texture, so it’s not a 1:1 substitute. If using coconut flour, reduce the amount to 1/3 cup and add an extra egg to help with binding.

4. Can I Make a Crispy Version of This Flatbread?

Yes! For a crispier flatbread, roll it thinner and bake it at a slightly higher temperature (375°F) for a few extra minutes. You can also air-fry it for a crunchy, cracker-like texture.

5. What Can I Serve with This Flatbread?

This garlic flatbread pairs well with many dishes, including:

  • Dips: Hummus, tzatziki, or spinach-artichoke dip
  • Soups: Tomato soup, creamy mushroom soup, or minestrone
  • Salads: A fresh Greek salad or Caesar salad
  • Toppings: Use it as a base for mini pizzas or top it with avocado and eggs for breakfast

6. Can I Double the Recipe?

Absolutely! If you’re serving a crowd, you can easily double or triple the ingredients. Just make sure to cook in batches to maintain an even texture.

Conclusion: A Flatbread for Every Occasion

Garlic flatbread is more than just a side dish—it’s a warm, flavorful experience that brings people together. Whether you’re looking for a quick and easy bread substitute, a low-carb alternative, or just a way to enjoy the rich flavors of garlic and Parmesan, this recipe is sure to become a favorite.

From my grandmother’s rustic kitchen to modern low-carb adaptations, this flatbread proves that great food doesn’t have to be complicated. It’s simple, versatile, and packed with flavor in every bite. Try it for yourself and experience the magic of homemade garlic flatbread!

Chocolate-Covered Coffee Banana Pops are a must-try!

Introduction to Chocolate-Covered Coffee Banana Pops

Are you looking for a delightful treat that combines the rich flavors of chocolate and coffee with the natural sweetness of bananas? Look no further! Chocolate-Covered Coffee Banana Pops are the perfect snack for any time of the day. These pops are not only delicious but also easy to make, making them a great choice for both kids and adults.

Imagine biting into a creamy banana, perfectly coated in smooth, melted chocolate, with a hint of coffee flavor that awakens your taste buds. This treat is a fantastic way to enjoy a healthy dessert while satisfying your sweet tooth. Plus, they are a fun and creative way to incorporate fruit into your diet.

Whether you’re hosting a party, looking for a quick snack, or simply want to indulge yourself, these Chocolate-Covered Coffee Banana Pops are sure to impress. They are also customizable, allowing you to add your favorite toppings or try different flavor combinations. So, let’s dive into the ingredients and preparation steps to create this delightful treat!

Ingredients for Chocolate-Covered Coffee Banana Pops

To create your own Chocolate-Covered Coffee Banana Pops, you’ll need a few simple ingredients. These items are easy to find and will help you whip up this delicious treat in no time. Here’s what you’ll need:

  • 2 ripe bananas
  • 1 cup dark chocolate chips
  • 1 tablespoon coconut oil
  • 1 teaspoon instant coffee granules
  • 1/4 teaspoon sea salt
  • Popsicle sticks

Each ingredient plays a vital role in creating the perfect balance of flavors. The ripe bananas provide natural sweetness and creaminess, while the dark chocolate chips add a rich, indulgent taste. Coconut oil helps the chocolate melt smoothly and gives a slight tropical flavor. Instant coffee granules enhance the chocolate’s richness, and sea salt brings out all the flavors beautifully.

Gather these ingredients, and you’ll be ready to start making your Chocolate-Covered Coffee Banana Pops. They are not only tasty but also a fun way to enjoy a healthy snack. Now, let’s move on to the preparation steps!

Preparation of Chocolate-Covered Coffee Banana Pops

Now that you have all your ingredients ready, it’s time to prepare your Chocolate-Covered Coffee Banana Pops! This process is simple and fun, making it a great activity for the whole family. Follow these easy steps to create your delicious treats.

Step 1: Gather Your Ingredients

Before you start, make sure you have everything you need. Gather your ripe bananas, dark chocolate chips, coconut oil, instant coffee granules, sea salt, and popsicle sticks. Having everything in one place will make the process smoother and more enjoyable.

Step 2: Prepare the Bananas

First, peel the bananas and cut them in half. This will create the perfect size for your pops. Next, insert a popsicle stick into the cut end of each banana half. This step is crucial, as it allows you to easily dip and enjoy your pops later. Once you’ve done this, place the banana pops on a baking sheet lined with parchment paper. Now, it’s time to freeze them!

Step 3: Melt the Chocolate

In a microwave-safe bowl, combine the dark chocolate chips and coconut oil. Microwave the mixture in 30-second intervals. Be sure to stir in between each interval until the chocolate is completely melted and smooth. This method helps prevent the chocolate from burning, ensuring a perfect coating for your banana pops.

Step 4: Add Coffee Flavor

Once your chocolate is melted, it’s time to enhance the flavor! Stir in the instant coffee granules and sea salt until everything is well combined. The coffee will add a delightful richness to the chocolate, making your pops even more delicious. This step is what truly makes your Chocolate-Covered Coffee Banana Pops stand out!

Step 5: Dip the Bananas

Now comes the fun part! Remove the banana pops from the freezer. Dip each banana half into the melted chocolate mixture, ensuring it is fully coated. Allow any excess chocolate to drip off before placing them back on the baking sheet. This step is essential for achieving that perfect chocolate layer.

Step 6: Freeze the Pops

After dipping, return the chocolate-covered banana pops to the baking sheet. Place them back in the freezer for an additional 30 minutes. This will allow the chocolate to set properly, giving you a deliciously firm coating. Once they’re ready, you can serve them immediately or store them for later!

Variation of Chocolate-Covered Coffee Banana Pops

While the classic Chocolate-Covered Coffee Banana Pops are already a delightful treat, there are many ways to switch things up! You can experiment with alternative coatings and different flavor combinations to create your own unique version. Let’s explore some fun variations that will keep your taste buds excited!

Alternative Coatings

If you want to try something different, consider using various coatings for your banana pops. Here are a few ideas:

  • White Chocolate: Swap dark chocolate for white chocolate for a sweeter, creamier taste. The contrast with the banana is simply divine!
  • Milk Chocolate: For those who prefer a milder flavor, milk chocolate is a great option. It adds a nice sweetness that pairs well with the banana.
  • Yogurt Coating: For a healthier twist, use Greek yogurt. Simply dip the banana pops in yogurt and freeze. This gives a tangy flavor that complements the sweetness of the banana.
  • Nut Butter: Instead of chocolate, try coating the bananas in almond or peanut butter. This adds a nutty flavor and a creamy texture that’s hard to resist!

Different Flavor Combinations

In addition to alternative coatings, you can also play around with flavors. Here are some exciting combinations to consider:

  • Mint Chocolate: Add a few drops of peppermint extract to the melted chocolate for a refreshing minty flavor.
  • Spicy Chocolate: Mix in a pinch of cayenne pepper or chili powder to the chocolate for a surprising kick!
  • Coconut Delight: Add shredded coconut to the melted chocolate or sprinkle it on top after dipping for a tropical twist.
  • Caramel Drizzle: After the chocolate sets, drizzle some caramel sauce over the pops for an extra layer of sweetness.

These variations not only enhance the flavor but also make your Chocolate-Covered Coffee Banana Pops visually appealing. So, don’t hesitate to get creative and make these treats your own!

Cooking Note for Chocolate-Covered Coffee Banana Pops

When making Chocolate-Covered Coffee Banana Pops, a few cooking notes can help ensure your treats turn out perfectly every time. These tips will guide you through the process and enhance your overall experience.

First, choose ripe bananas. They should be yellow with a few brown spots. Ripe bananas are sweeter and creamier, making them ideal for this recipe. If your bananas are too green, they may not have the desired flavor and texture.

Next, when melting the chocolate, be patient. Microwaving in short intervals is key. Stirring between intervals helps prevent overheating. If the chocolate gets too hot, it can seize up and become unusable. If you notice this happening, try adding a little more coconut oil to help smooth it out.

Also, consider using a double boiler if you prefer a stovetop method. This technique allows for gentle heating, reducing the risk of burning the chocolate. Just make sure the bowl doesn’t touch the water, as steam can cause the chocolate to seize.

When dipping the bananas, ensure they are completely coated. This not only enhances the flavor but also helps the chocolate set better. If you want a thicker coating, dip them twice, allowing the first layer to set before dipping again.

Lastly, remember to store your Chocolate-Covered Coffee Banana Pops properly. If you plan to keep them for a while, wrap each pop in plastic wrap before placing them in an airtight container. This will help prevent freezer burn and keep them fresh for longer.

By following these cooking notes, you’ll create delicious Chocolate-Covered Coffee Banana Pops that are sure to impress your family and friends. Enjoy the process and have fun experimenting with different flavors and toppings!

Serving Suggestions for Chocolate-Covered Coffee Banana Pops

Once your Chocolate-Covered Coffee Banana Pops are ready, it’s time to think about how to serve them! These delightful treats can be enjoyed in various ways, making them perfect for any occasion. Here are some serving suggestions to elevate your experience:

  • Party Platter: Arrange the banana pops on a colorful platter for a fun party treat. You can add some fresh fruit, like strawberries or blueberries, around the pops for a vibrant display.
  • Ice Cream Sundae: For a decadent dessert, serve the banana pops alongside a scoop of your favorite ice cream. Drizzle some chocolate or caramel sauce over the top for an extra indulgent touch.
  • Garnish with Toppings: Before serving, sprinkle some crushed nuts, shredded coconut, or colorful sprinkles on top of the chocolate coating. This adds texture and makes the pops visually appealing.
  • On a Stick: Serve the banana pops directly on the popsicle sticks for a fun, handheld treat. This is especially great for kids or outdoor gatherings!
  • With Coffee: Pair your Chocolate-Covered Coffee Banana Pops with a cup of coffee or espresso. The flavors complement each other beautifully, making for a delightful afternoon snack.

These serving suggestions not only enhance the presentation of your Chocolate-Covered Coffee Banana Pops but also make them more enjoyable. Whether you’re hosting a gathering or simply treating yourself, these ideas will surely impress your guests and satisfy your cravings!

Tips for Making the Perfect Chocolate-Covered Coffee Banana Pops

Creating the perfect Chocolate-Covered Coffee Banana Pops is all about attention to detail and a little creativity. Here are some helpful tips to ensure your pops turn out delicious every time. With these tricks, you’ll impress your family and friends with your culinary skills!

First, always use ripe bananas. They should be yellow with a few brown spots. Ripe bananas are sweeter and creamier, making them ideal for this recipe. If your bananas are too green, they may not have the desired flavor and texture.

Next, when melting the chocolate, be patient. Microwaving in short intervals is key. Stirring between intervals helps prevent overheating. If the chocolate gets too hot, it can seize up and become unusable. If you notice this happening, try adding a little more coconut oil to help smooth it out.

Consider using a double boiler if you prefer a stovetop method. This technique allows for gentle heating, reducing the risk of burning the chocolate. Just make sure the bowl doesn’t touch the water, as steam can cause the chocolate to seize.

When dipping the bananas, ensure they are completely coated. This not only enhances the flavor but also helps the chocolate set better. If you want a thicker coating, dip them twice, allowing the first layer to set before dipping again.

For added fun, get creative with toppings! Before the chocolate sets, sprinkle crushed nuts, shredded coconut, or colorful sprinkles on top. This not only adds flavor but also makes your pops visually appealing.

Lastly, remember to store your Chocolate-Covered Coffee Banana Pops properly. If you plan to keep them for a while, wrap each pop in plastic wrap before placing them in an airtight container. This will help prevent freezer burn and keep them fresh for longer.

By following these tips, you’ll create delicious Chocolate-Covered Coffee Banana Pops that are sure to impress your family and friends. Enjoy the process and have fun experimenting with different flavors and toppings!

Breakdown of Time for Chocolate-Covered Coffee Banana Pops

Understanding the time required to make Chocolate-Covered Coffee Banana Pops can help you plan your cooking session better. Here’s a simple breakdown of the time involved in each step of the process. This way, you can enjoy your delicious treats without any rush!

Prep Time

The prep time for Chocolate-Covered Coffee Banana Pops is quite short. You’ll need about 15 minutes to gather your ingredients and prepare the bananas. This includes peeling, cutting, and inserting the popsicle sticks. It’s a quick and easy process that anyone can handle!

Cooking Time

Once your bananas are ready, the cooking time mainly involves melting the chocolate and freezing the pops. Melting the chocolate takes about 5 minutes, depending on your microwave. After dipping the bananas, you’ll need to freeze them for at least 1 hour to ensure they are firm. This step is crucial for achieving that perfect chocolate coating.

Total Time

In total, you can expect to spend around 1 hour and 20 minutes to make your Chocolate-Covered Coffee Banana Pops. This includes 15 minutes of prep time and 1 hour of freezing time. If you want the chocolate to set perfectly, consider adding an extra 30 minutes for a total of 1 hour and 50 minutes. This way, you can enjoy your pops at their best!

With this time breakdown, you can easily fit making these delightful treats into your day. Whether it’s a quick snack or a fun dessert for a gathering, Chocolate-Covered Coffee Banana Pops are worth the wait!

Nutritional Information for Chocolate-Covered Coffee Banana Pops

Understanding the nutritional content of your treats is essential, especially when you want to enjoy them guilt-free. Chocolate-Covered Coffee Banana Pops are not only delicious but also provide a good balance of nutrients. Here’s a breakdown of the nutritional information per serving:

Calories

Each serving of Chocolate-Covered Coffee Banana Pops contains approximately 180 calories. This makes them a satisfying snack without being overly indulgent. The combination of bananas, chocolate, and coffee provides a delightful energy boost, perfect for a mid-afternoon pick-me-up!

Protein

In terms of protein, each serving offers about 2 grams. While this may not seem like a lot, it contributes to your daily intake, especially when combined with other meals throughout the day. The protein content helps keep you feeling full and satisfied after enjoying these tasty pops.

Sodium

When it comes to sodium, Chocolate-Covered Coffee Banana Pops contain around 50 milligrams per serving. This is a relatively low amount, making them a heart-healthy option. The sea salt used in the recipe enhances the flavors without adding excessive sodium, allowing you to enjoy your treat without worry.

Overall, Chocolate-Covered Coffee Banana Pops are a nutritious and delicious snack. They provide a good balance of calories, protein, and sodium, making them a great choice for anyone looking to satisfy their sweet tooth while still being mindful of their health. Enjoy these pops as part of a balanced diet, and feel good about treating yourself!

FAQs about Chocolate-Covered Coffee Banana Pops

Can I use dark chocolate for Chocolate-Covered Coffee Banana Pops?

Absolutely! In fact, dark chocolate is the star ingredient in this recipe. It adds a rich, deep flavor that pairs wonderfully with the sweetness of the bananas. Dark chocolate also contains antioxidants, making your Chocolate-Covered Coffee Banana Pops a healthier treat. If you love the taste of dark chocolate, you’ll enjoy these pops even more!

How long do Chocolate-Covered Coffee Banana Pops last in the freezer?

Chocolate-Covered Coffee Banana Pops can last in the freezer for up to one week. To keep them fresh, store them in an airtight container. If you want to keep them for longer, consider wrapping each pop in plastic wrap before placing them in the container. This will help prevent freezer burn and maintain their delicious flavor!

Can I make Chocolate-Covered Coffee Banana Pops without coffee?

Yes, you can! If you prefer not to use coffee, simply omit the instant coffee granules from the recipe. Your Chocolate-Covered Banana Pops will still be delicious and sweet. You can also experiment with other flavors, such as vanilla extract or almond extract, to add a unique twist to your pops!

What is the best way to store Chocolate-Covered Coffee Banana Pops?

The best way to store your Chocolate-Covered Coffee Banana Pops is in an airtight container in the freezer. If you plan to keep them for a while, wrap each pop in plastic wrap to prevent freezer burn. This will help maintain their taste and texture, ensuring you can enjoy them whenever you like!

Conclusion on Chocolate-Covered Coffee Banana Pops

In conclusion, Chocolate-Covered Coffee Banana Pops are a delightful treat that combines the best of both worlds: the sweetness of ripe bananas and the rich flavors of chocolate and coffee. They are not only easy to make but also offer a fun way to enjoy a healthy snack. Whether you’re preparing them for a party, a family gathering, or just for yourself, these pops are sure to impress.

With their simple ingredients and straightforward preparation, you can whip up a batch in no time. Plus, the variations and creative toppings allow you to customize each pop to suit your taste. From crunchy nuts to colorful sprinkles, the possibilities are endless!

Moreover, the nutritional benefits of these pops make them a guilt-free indulgence. With a balance of calories, protein, and low sodium, you can enjoy them without worry. They provide a quick energy boost, making them perfect for a midday snack or a post-workout treat.

So, why not give these Chocolate-Covered Coffee Banana Pops a try? Gather your ingredients, follow the steps, and enjoy the deliciousness that awaits. You’ll be amazed at how a simple treat can bring so much joy. Happy snacking!

Creamy Tuscan Ravioli is a must-try Italian dish!

Introduction to Creamy Tuscan Ravioli Recipe

Creamy Tuscan Ravioli recipe is a perfect blend of rich cream, fresh vegetables, and tender pasta. This dish is not only delicious but also easy to prepare, making it ideal for both weeknight dinners and special occasions.

Imagine biting into a perfectly cooked ravioli filled with creamy cheese, surrounded by a luscious sauce made from fresh spinach and juicy cherry tomatoes. The combination of flavors is simply irresistible! Plus, this recipe allows for plenty of creativity. You can easily customize it to suit your taste preferences or dietary needs.

Creamy Tuscan Ravioli and discover how to make this delightful dish!

Ingredients for Creamy Tuscan Ravioli Recipe

Creamy Tuscan Ravioli, you’ll need a selection of fresh and flavorful ingredients. Each component plays a vital role in bringing this dish to life. Here’s what you’ll need:

  • 8 ounces refrigerated cheese ravioli: This is the star of the dish. You can choose any cheese-filled ravioli you like.
  • 2 tablespoons olive oil: This adds richness and helps sauté the garlic and vegetables.
  • 3 cloves garlic, minced: Garlic brings a wonderful aroma and flavor to the sauce.
  • 1 cup cherry tomatoes, halved: These sweet tomatoes add a burst of freshness and color.
  • 1 cup fresh spinach: Spinach not only adds nutrition but also a lovely green hue.
  • 1 cup heavy cream: This is the key ingredient for a rich and creamy sauce.
  • 1 teaspoon Italian seasoning: A blend of herbs that enhances the overall flavor.
  • Salt and pepper to taste: Essential for seasoning and balancing flavors.
  • ¼ cup grated Parmesan cheese: This adds a salty, nutty flavor that complements the dish.
  • Fresh basil for garnish (optional): A sprinkle of basil adds a pop of color and freshness.

Creamy Tuscan Ravioli. Each item contributes to the overall taste, making this dish a delightful experience for your taste buds!

Step-by-Step Preparation of Creamy Tuscan Ravioli Recipe

Creamy Tuscan Ravioli. This step-by-step guide will help you create this delicious dish with ease. Let’s get started!

Step 1: Preparing the Ravioli Dough

If you’re feeling adventurous, you can make your own ravioli dough. Start by mixing 2 cups of all-purpose flour with 3 large eggs and a pinch of salt. Knead the dough until it’s smooth and elastic. Wrap it in plastic wrap and let it rest for 30 minutes. This resting time allows the gluten to relax, making it easier to roll out.

Step 2: Making the Filling for Creamy Tuscan Ravioli

While the dough rests, prepare the filling. In a bowl, combine 1 cup of ricotta cheese, ½ cup of grated Parmesan cheese, and a pinch of salt and pepper. You can also add some chopped herbs like basil or parsley for extra flavor. Mix everything until well combined. This creamy filling will be the heart of your ravioli!

Step 3: Assembling the Ravioli

Once your dough has rested, roll it out on a floured surface until it’s thin. Cut the dough into squares or circles, depending on your preference. Place a small spoonful of the filling in the center of each piece. Moisten the edges with water, then fold the dough over to create a pocket. Press the edges firmly to seal. Repeat this process until all the dough and filling are used.

Step 4: Cooking the Ravioli

Bring a large pot of salted water to a boil. Carefully drop the ravioli into the boiling water. Cook them for about 3-4 minutes or until they float to the surface. This indicates they are done. Use a slotted spoon to remove the ravioli and set them aside on a plate. Be gentle to avoid breaking them!

Step 5: Preparing the Creamy Sauce

In a large skillet, heat 2 tablespoons of olive oil over medium heat. Add 3 cloves of minced garlic and sauté for about 1 minute until fragrant. Next, toss in 1 cup of halved cherry tomatoes and cook for 3-4 minutes until they soften. Stir in 1 cup of fresh spinach and let it wilt for about 2 minutes. This colorful mixture will be the base of your creamy sauce.

Step 6: Combining Ravioli with the Sauce

Creamy Tuscan Ravioli is now ready to serve!

Variations of Creamy Tuscan Ravioli Recipe

Creamy Tuscan Ravioli recipe lies in its versatility. You can easily adapt it to suit different dietary preferences or simply to mix things up. Here are some delicious variations to consider:

Vegetarian Options

If you want to keep your dish vegetarian, there are plenty of ways to enhance the flavors without adding meat. Consider incorporating a variety of vegetables. For instance, you can add sautéed mushrooms, zucchini, or bell peppers to the sauce. These veggies not only add texture but also bring a burst of color to your plate.

Creamy Tuscan Ravioli even more delightful!

Protein Additions

If you’re looking to boost the protein content of your meal, adding grilled chicken or shrimp is a fantastic choice. Simply cook the protein separately and toss it into the creamy sauce along with the ravioli. This not only enhances the dish but also makes it more filling.

Creamy Tuscan Ravioli will be a satisfying meal that everyone will love!

Cooking Note for Creamy Tuscan Ravioli Recipe

Creamy Tuscan Ravioli, there are a few important cooking notes to keep in mind. These tips will help ensure that your dish turns out perfectly every time.

First, always check the cooking instructions on the ravioli package. Different brands may have varying cooking times. Cooking them until they are al dente is crucial. This means they should be firm to the bite, as they will continue to cook slightly when combined with the sauce.

Next, when sautéing the garlic, be careful not to burn it. Garlic can turn bitter if overcooked. Just a minute or so is usually enough to release its wonderful aroma. If you notice it starting to brown too quickly, lower the heat.

Additionally, when adding the heavy cream, make sure to stir continuously. This helps to create a smooth and creamy sauce without any lumps. If you prefer a lighter sauce, consider using half-and-half or a dairy-free alternative, as mentioned earlier.

Creamy Tuscan Ravioli truly shine!

By following these cooking notes, you’ll be well on your way to creating a delicious and satisfying meal that everyone will enjoy. Happy cooking!

Serving Suggestions for Creamy Tuscan Ravioli Recipe

Creamy Tuscan Ravioli is ready, it’s time to think about how to serve it. Presentation can elevate your dish and make it even more enjoyable. Here are some delightful serving suggestions to consider:

  • Garnish with Fresh Herbs: A sprinkle of fresh basil or parsley on top adds a pop of color and freshness. It also enhances the overall flavor of the dish.
  • Pair with a Side Salad: A light side salad with mixed greens, cherry tomatoes, and a simple vinaigrette complements the richness of the ravioli. This adds a refreshing contrast to your meal.
  • Serve with Garlic Bread: Warm, crusty garlic bread is perfect for soaking up the creamy sauce. It’s a classic pairing that everyone loves!
  • Wine Pairing: Consider serving your ravioli with a glass of white wine, such as Pinot Grigio or Chardonnay. These wines enhance the flavors of the dish and make for a lovely dining experience.
  • Top with Extra Cheese: For cheese lovers, adding more grated Parmesan or even a sprinkle of mozzarella on top before serving can make the dish even more indulgent.

Creamy Tuscan Ravioli but also create a well-rounded meal that is sure to impress your guests. Enjoy your culinary creation!

Tips for Perfecting Your Creamy Tuscan Ravioli Recipe

Creamy Tuscan Ravioli is all about attention to detail and a few helpful tips. With these suggestions, you can elevate your dish and impress everyone at the dinner table. Let’s explore some essential tips for perfecting your ravioli!

  • Use Fresh Ingredients: Fresh ingredients make a significant difference in flavor. Opt for fresh spinach, ripe cherry tomatoes, and high-quality cheese. The fresher the ingredients, the tastier your Creamy Tuscan Ravioli will be!
  • Don’t Overcook the Ravioli: Keep an eye on the cooking time for the ravioli. Overcooking can lead to mushy pasta. Aim for al dente, which means the ravioli should be firm yet tender.
  • Adjust the Creaminess: If you prefer a lighter sauce, feel free to adjust the amount of heavy cream. You can start with half a cup and add more if needed. This way, you can control the richness of the dish.
  • Experiment with Seasonings: While Italian seasoning is a great base, don’t hesitate to experiment. Add a pinch of red pepper flakes for heat or a squeeze of lemon juice for brightness. These small tweaks can enhance the overall flavor.
  • Let the Sauce Simmer: Allowing the sauce to simmer for a few extra minutes can deepen the flavors. Just be sure to stir occasionally to prevent sticking.
  • Serve Immediately: Ravioli is best enjoyed fresh. Serve it right after combining with the sauce to maintain the perfect texture. If you need to wait, keep it warm on low heat, but avoid prolonged cooking.
  • Store Leftovers Properly: If you have leftovers, store them in an airtight container in the fridge. Reheat gently on the stove with a splash of cream to restore the sauce’s creaminess.

Creamy Tuscan Ravioli. Each step you take will bring you closer to a delicious and satisfying meal that everyone will love!

Breakdown of Time for Creamy Tuscan Ravioli Recipe

Creamy Tuscan Ravioli recipe can help you plan your cooking efficiently. Here’s a breakdown of the time required for preparation and cooking:

Prep Time

The prep time for this delightful dish is approximately 15-20 minutes. This includes gathering your ingredients, chopping the garlic, halving the cherry tomatoes, and washing the spinach. If you decide to make your own ravioli dough and filling, you may need an additional 30 minutes for that process. However, using store-bought ravioli can significantly cut down on your prep time.

Cooking Time

Creamy Tuscan Ravioli is about 15-20 minutes. This includes boiling the ravioli, sautéing the garlic and vegetables, and simmering the creamy sauce. The ravioli typically take around 3-4 minutes to cook, while the sauce requires about 10-15 minutes to prepare and combine with the ravioli.

Total Time

Creamy Tuscan Ravioli a quick and satisfying meal option, perfect for busy weeknights or when you want to impress guests without spending hours in the kitchen. With this time breakdown, you can easily plan your cooking and enjoy a delicious Italian dish in no time!

Nutritional Information for Creamy Tuscan Ravioli Recipe

Creamy Tuscan Ravioli is not only delicious but also provides a good mix of nutrients. Here’s a breakdown of the nutritional information per serving:

Calories

Creamy Tuscan Ravioli contains approximately 400 calories. This makes it a satisfying meal that can fit into a variety of dietary plans. The calorie count comes from the combination of the ravioli, cream, and other ingredients, providing a rich and fulfilling dish.

Protein

In terms of protein, this dish offers about 12 grams per serving. The protein primarily comes from the cheese in the ravioli and the added Parmesan cheese. Protein is essential for muscle repair and growth, making this dish a great option for those looking to maintain a healthy lifestyle.

Sodium

The sodium content in each serving is around 600 milligrams. This amount can vary based on the specific ingredients used, especially if you add salt or use pre-seasoned ravioli. While sodium is necessary for bodily functions, it’s important to monitor your intake, especially if you are watching your salt consumption.

Creamy Tuscan Ravioli is a delicious and nutritious option for dinner. With its balance of calories, protein, and sodium, it can be enjoyed as part of a healthy diet. Just remember to pair it with fresh vegetables or a side salad for a well-rounded meal!

FAQs about Creamy Tuscan Ravioli Recipe

Can I use store-bought ravioli for this recipe?

Creamy Tuscan Ravioli without the hassle of making the dough from scratch. Just choose a high-quality cheese ravioli, and follow the cooking instructions on the package. This way, you can focus on preparing the creamy sauce and enjoy a delightful meal in no time!

What can I substitute for heavy cream in the sauce?

Creamy Tuscan Ravioli rich and flavorful while accommodating different dietary needs.

How can I make this recipe gluten-free?

Creamy Tuscan Ravioli gluten-free, simply use gluten-free ravioli. Many grocery stores offer gluten-free pasta options made from rice, quinoa, or other gluten-free grains. Just ensure that all other ingredients, like sauces and seasonings, are also gluten-free. This way, everyone can enjoy this delicious dish without worry!

Can I freeze the ravioli?

Creamy Tuscan Ravioli whenever you crave it!

Conclusion on Creamy Tuscan Ravioli Recipe

Creamy Tuscan Ravioli recipe is a delightful dish that brings the essence of Italian cuisine right to your table. With its rich flavors and creamy texture, it’s sure to become a favorite among family and friends. Whether you choose to make your own ravioli or opt for store-bought, this recipe is designed to be simple and enjoyable.

As you’ve seen, the versatility of this dish allows for endless variations. You can easily customize it to fit your dietary preferences, whether you’re looking for vegetarian options or adding protein for a heartier meal. The tips and serving suggestions provided will help you create a beautiful presentation that enhances the dining experience.

Creamy Tuscan Ravioli is not just a meal; it’s an experience. So, gather your ingredients, follow the steps, and enjoy the process of cooking this delicious dish.

Creamy Tuscan Ravioli in your kitchen. It’s a wonderful way to share a taste of Italy with your loved ones. Happy cooking, and enjoy every creamy bite!

Stay Connected

Get recipes via email: