Crispy Golden Potato Fritters – A Snack That Brings People Together

There are some recipes that become more than just food—they turn into cherished memories, tied to laughter, warmth, and the joy of sharing a meal with loved ones. For me, potato fritters are one of those recipes.

I can still remember sitting in my grandmother’s kitchen, watching her hands move effortlessly as she grated potatoes with precision. The sound of sizzling oil was like music, a promise of something crispy and golden to come. She always let me mix the ingredients, though she’d joke that I made more of a mess than actual fritters. The smell of frying potatoes and onions filled the air, making it impossible to wait patiently.

When the first batch was finally ready, she would serve them hot, with a side of tangy yogurt or a simple tomato sauce. I’d burn my fingers trying to grab one before they cooled down, and she would laugh, reminding me to be patient. But that was the magic of these fritters—you couldn’t resist them. They were crispy on the outside, soft and flavorful inside, and always, always satisfying.

Now, I make them whenever I need a quick and delicious snack, and every time I do, I think of those moments in my grandmother’s kitchen. Whether I’m serving them at family gatherings, as an afternoon treat, or even as a side dish for dinner, they bring the same warmth and comfort they did back then.

If you love crispy, golden, and savory snacks, this is the recipe for you. Let’s dive into everything you need to know to make the perfect potato fritters, along with tips, variations, and frequently asked questions.

Why You’ll Love This Recipe

  1. Crispy and Delicious – The contrast between the crunchy exterior and the soft, flavorful interior makes these fritters irresistible.
  2. Easy to Make – No fancy ingredients or complicated steps, just a simple, foolproof recipe that anyone can master.
  3. Perfect for Any Occasion – Serve them as an appetizer, snack, or side dish; they’re always a hit.
  4. Endless Customization – Add different spices, cheeses, or vegetables to make them your own.
  5. Great for Sharing – Whether at a party or a casual get-together, these fritters bring people together.

Ingredients

IngredientAmount
Potatoes (peeled, grated)14 oz (400 g)
Onion (finely chopped)2 oz (50 g)
All-purpose flour2 tablespoons
Egg1
Red chili flakes (optional)¼ teaspoon
Ground black pepper⅓ teaspoon
Salt⅔ teaspoon
Vegetable oil (for frying)3 fl oz (80 ml)

Directions

Step 1: Prepare the Potato Mixture

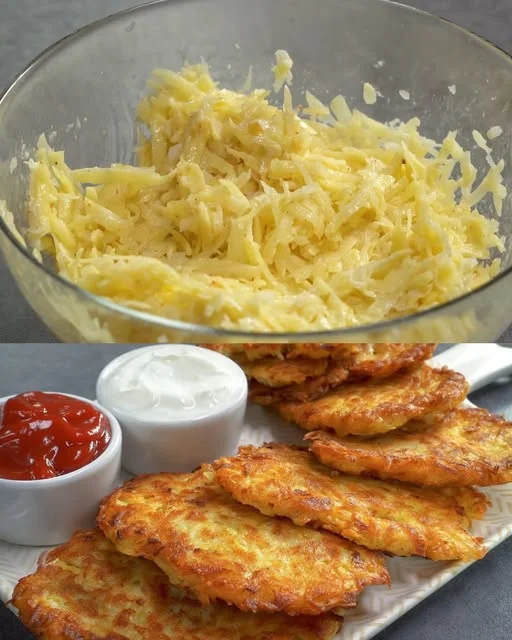
  1. Grate the potatoes and place them in a clean kitchen towel. Squeeze out as much moisture as possible to ensure crispy fritters.
  2. In a mixing bowl, combine the grated potatoes, onion, flour, egg, chili flakes (if using), black pepper, and salt. Stir well until all ingredients are evenly combined.

Step 2: Shape and Fry the Fritters

  1. Heat the vegetable oil in a frying pan over medium heat.
  2. Take small portions of the potato mixture and shape them into flat, round patties.
  3. Carefully place them in the hot oil and fry for 3-4 minutes per side, or until they turn golden brown and crispy.
  4. Remove from the pan and drain on a paper towel to absorb excess oil.

Step 3: Serve and Enjoy

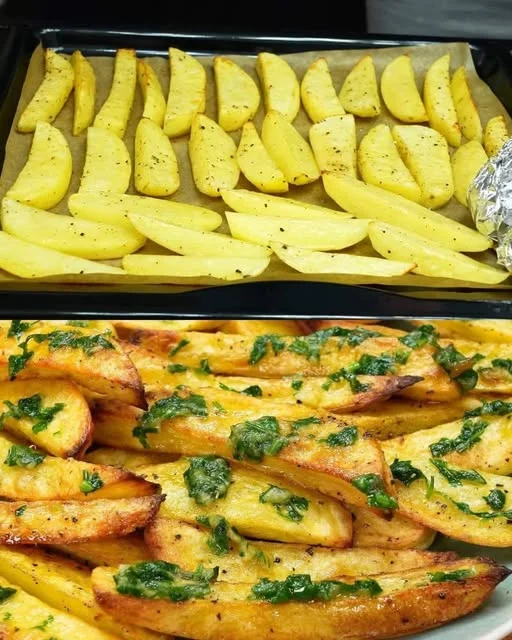
  • Serve the fritters hot and crispy with your favorite dip, such as sour cream, garlic yogurt, or spicy tomato sauce.
  • Sprinkle with fresh herbs for an extra layer of flavor.

Nutritional Information (Per Serving, Approximate)

NutrientAmount
Calories180 kcal
Carbohydrates20g
Protein3g
Fat10g
Fiber2g

The Secret to Perfectly Crispy Fritters

Making potato fritters seems easy, but a few key techniques ensure they come out perfect every time. Here’s what you need to know:

1. Removing Excess Moisture

One of the biggest mistakes when making fritters is not squeezing out enough liquid from the grated potatoes. Too much moisture can lead to soggy, oily fritters instead of crispy ones. After grating the potatoes, use a clean kitchen towel or paper towels to press out as much water as possible.

2. The Right Oil Temperature

Frying at the correct temperature is crucial. If the oil is too cold, the fritters will absorb too much oil and become greasy. If it’s too hot, they will brown too quickly on the outside while remaining raw inside. The ideal frying temperature is 350°F to 375°F (175°C to 190°C). You can test it by dropping a small bit of batter into the oil—if it sizzles and rises immediately, it’s ready.

3. Achieving the Right Texture

The mixture should hold together without being too wet or too dry. If it feels too loose, add a bit more flour. If it’s too thick, a small splash of water or an extra egg can help. The balance of ingredients ensures a fritter that’s light and crispy rather than heavy and dense.

4. Even Cooking

To ensure even cooking, make sure your fritters are of uniform size and thickness. If they’re too thick, they may remain raw in the center. Flatten them slightly before frying to ensure a golden, crispy texture throughout.

5. Draining Properly

Once fried, place the fritters on a paper towel-lined plate to remove excess oil. This step helps maintain their crunchiness without making them too greasy.

Creative Variations to Try

While the classic potato fritter is perfect as it is, you can easily experiment with different flavors and ingredients. Here are some exciting variations:

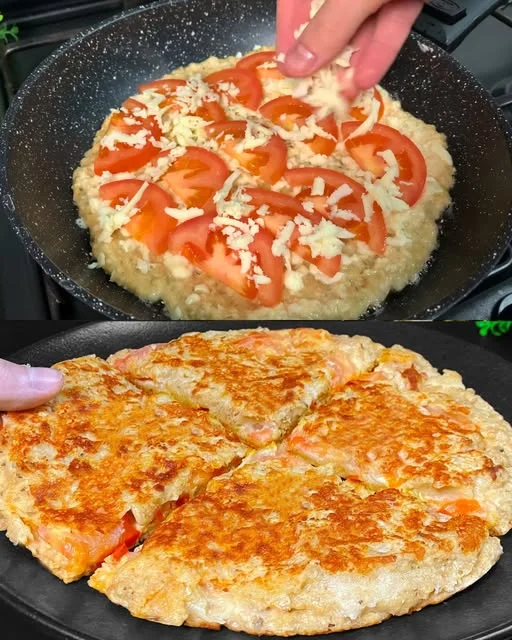
1. Cheesy Potato Fritters

Add ½ cup of shredded cheese (cheddar, mozzarella, or parmesan) to the mixture for a richer, melt-in-your-mouth experience. The cheese creates a gooey center with crispy edges.

2. Herb-Infused Fritters

Mix in fresh herbs like parsley, cilantro, or chives for an extra burst of freshness and aroma.

3. Spicy Kick Fritters

Increase the red chili flakes or add ½ teaspoon of smoked paprika for a bolder, spicier flavor. You can also add finely chopped jalapeños for an extra kick.

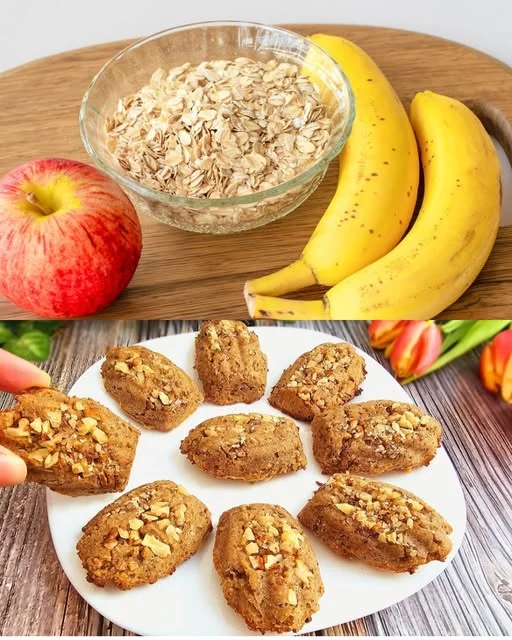
4. Sweet Potato Fritters

Swap regular potatoes for grated sweet potatoes for a slightly sweeter and more nutritious twist. Pair them with a creamy dipping sauce for contrast.

5. Zucchini-Potato Fritters

Combine half grated potatoes and half grated zucchini for a lighter version. Be sure to squeeze out all excess water from the zucchini before mixing.

Frequently Asked Questions

1. Why are my fritters falling apart?

This usually happens if there’s too much moisture in the mixture. Be sure to squeeze out the liquid from the grated potatoes before mixing. Adding an extra tablespoon of flour or another egg can also help bind the mixture.

2. Can I bake these fritters instead of frying?

Yes! To bake, place the shaped fritters on a parchment-lined baking sheet, lightly brush them with oil, and bake at 400°F (200°C) for 20-25 minutes, flipping halfway through for even crispiness.

3. How do I store leftover fritters?

Store them in an airtight container in the refrigerator for up to 3 days. Reheat in an oven or air fryer at 375°F (190°C) for 5-7 minutes to regain their crispiness.

4. Can I freeze potato fritters?

Yes! Freeze the cooked fritters in a single layer on a baking sheet. Once frozen, transfer them to a freezer-safe bag. Reheat directly from frozen in an oven or air fryer for best results.

5. What are the best dips to serve with fritters?

  • Garlic Yogurt Sauce – A simple mix of Greek yogurt, minced garlic, and lemon juice.
  • Spicy Mayo – Blend mayonnaise with hot sauce or sriracha for a creamy, spicy dip.
  • Classic Sour Cream – Cool and tangy, perfect with the crispy fritters.
  • Sweet Chili Sauce – Adds a touch of sweetness and heat for a balanced contrast.

Conclusion – A Recipe Worth Keeping

Potato fritters are more than just a snack—they are a reminder of home, warmth, and the joy of simple, delicious food. Whether you’re making them for a cozy family gathering, as a party appetizer, or just as a quick and satisfying bite, they never fail to impress.

The best part? They are endlessly adaptable. With just a few tweaks, you can make them cheesy, spicy, or even healthier with different vegetables. And no matter how you customize them, they always deliver that perfect crunchy, golden goodness.

So the next time you crave something crispy, flavorful, and comforting, give these fritters a try. And don’t forget to share them—after all, the best food is the kind that brings people together.

Amal

Crispy Golden Potato Fritters – A Snack That Brings People Together

These crispy golden potato fritters are the perfect balance of crunchy on the outside and tender on the inside. Packed with simple ingredients and bursting with flavor, they make a delicious snack, appetizer, or side dish. Serve them with your favorite dipping sauce, and watch them disappear in no time!
Prep Time 15 minutes
Cook Time 25 minutes
Total Time 40 minutes
Servings: 12 fritters
Course: Snack
Cuisine: International

Ingredients
  

  • 14 oz 400 g potatoes, peeled and grated
  • 2 oz 50 g onion, finely chopped
  • 2 tablespoons all-purpose flour
  • 1 egg
  • ¼ teaspoon red chili flakes optional, for a spicy kick
  • teaspoon ground black pepper
  • teaspoon salt
  • 3 fl oz 80 ml vegetable oil, for frying

Method
 

  1. Grate the potatoes and squeeze out excess moisture using a clean kitchen towel or paper towels.
  2. In a mixing bowl, combine the grated potatoes, onion, flour, egg, chili flakes (if using), black pepper, and salt. Mix well until all ingredients are evenly incorporated.
  3. Heat the vegetable oil in a frying pan over medium heat.
  4. Take small portions of the potato mixture and shape them into flat, round patties.
  5. Carefully place them into the hot oil and fry for 3-4 minutes per side, or until golden brown and crispy.
  6. Remove from the pan and drain on a paper towel to remove excess oil.
  7. Serve hot with your favorite dipping sauce, such as sour cream, garlic yogurt, or spicy ketchup.

Notes

  • For extra crispy fritters, ensure you squeeze out as much moisture as possible from the grated potatoes before mixing.
  • If the mixture feels too wet, add a little more flour to help bind the fritters.
  • To make a healthier version, bake the fritters at 400°F (200°C) for 20-25 minutes, flipping halfway through.
  • Leftovers can be stored in an airtight container in the refrigerator for up to 3 days. Reheat in an oven or air fryer to maintain crispiness.

Heavenly Cream Puffs – A Timeless Indulgence

There are some desserts that bring back memories with just one bite. For me, cream puffs are that dessert. I still remember standing on a stool in my grandmother’s kitchen, watching in awe as she skillfully stirred the dough in a worn-out saucepan. The scent of butter filled the air as she piped small mounds onto a baking sheet, her hands steady with years of experience.

She would always let me peek into the oven, but never open it—“Patience,” she’d say, “is the secret ingredient.” When the golden puffs emerged, light as air and crisp on the outside, I could hardly wait for them to cool. She would fill them with freshly whipped cream and dust them with a snowfall of powdered sugar. With the first bite, I felt like I was tasting happiness itself.

Now, as an adult, I make these cream puffs whenever I want to bring a touch of nostalgia into my kitchen. They are simple yet elegant, classic yet versatile. Whether you enjoy them with a rich pastry cream, a light whipped filling, or a decadent chocolate drizzle, cream puffs always feel like a special treat.

In this article, we’ll dive deeper into the history, variations, tips, and frequently asked questions about these delightful pastries.

The Origin of Cream Puffs – A French Classic with a Rich History

Cream puffs, or choux à la crème, have their roots in French pastry, but their history traces back even further. The dough used to make them, known as pâte à choux, was invented in the 16th century by an Italian chef named Pantanelli, who worked for the French court. Over time, French pastry chefs refined the recipe, and by the 18th century, cream puffs had become a staple in French patisseries.

Pâte à choux is unique because it relies on steam rather than a chemical leavening agent like baking powder. The result is a delicate shell that is crisp on the outside and hollow on the inside, perfect for holding a variety of delicious fillings.

Today, cream puffs are enjoyed worldwide and have inspired countless variations, from profiteroles (cream puffs served with chocolate sauce) to eclairs (elongated choux pastries filled with custard and topped with chocolate glaze).

Why You’ll Love This Recipe

  1. Simple Ingredients, Spectacular Results – With just a handful of pantry staples, you can create a bakery-quality dessert at home.
  2. Light, Airy, and Versatile – The crisp shell and creamy filling make for a perfect balance of textures.
  3. Endless Customization – From classic vanilla cream to exotic flavors like matcha or coffee, the possibilities are endless.
  4. Great for Any Occasion – Whether for an afternoon tea, a holiday gathering, or a simple indulgence, cream puffs always impress.

Ingredients

For the Choux Pastry:

IngredientAmount
Water180 grams
Butter90 grams
SaltA pinch
SugarA pinch
Flour130 grams
Eggs3-4

For the Cream Filling:

IngredientAmount
Heavy cream250 grams
Powdered sugar30 grams
Vanilla extract1 teaspoon

For the Chocolate Drizzle (Optional):

IngredientAmount
Dark chocolate100 grams
Heavy cream50 grams

Directions

Step 1: Prepare the Choux Pastry

  1. Preheat your oven to 200°C (400°F) and line a baking sheet with parchment paper.
  2. In a saucepan, combine water, butter, salt, and sugar, and bring to a boil.
  3. Remove from heat and add flour all at once, stirring vigorously until the dough comes together.
  4. Return to low heat and cook for another minute, stirring constantly, until a thin film forms at the bottom of the pan.
  5. Transfer the dough to a mixing bowl and let it cool slightly.
  6. Add the eggs one at a time, mixing well after each addition until the dough is smooth and glossy.

Step 2: Bake the Puffs

  1. Transfer the dough into a piping bag and pipe small mounds onto the prepared baking sheet.
  2. Bake for 20-25 minutes or until golden brown and puffed up. Avoid opening the oven door while baking.
  3. Remove from the oven and let cool completely.

Step 3: Make the Filling

  1. In a chilled bowl, whip heavy cream, powdered sugar, and vanilla extract until stiff peaks form.
  2. Transfer to a piping bag fitted with a small tip.

Step 4: Assemble the Cream Puffs

  1. Slice each puff in half or poke a small hole in the bottom.
  2. Pipe the whipped cream into the puffs.

Step 5: Add the Chocolate Drizzle (Optional)

  1. Melt dark chocolate and heavy cream together until smooth.
  2. Drizzle over the cream puffs for an extra touch of indulgence.

Nutritional Information (Per Cream Puff, Approximate)

NutrientAmount
Calories180 kcal
Carbohydrates15g
Protein3g
Fat12g
Sugar5g

Creative Variations to Try

While the classic whipped cream filling is a favorite, there are many ways to make cream puffs your own.

1. Decadent Pastry Cream Filling

For a richer filling, try crème pâtissière, a thick vanilla custard made with egg yolks, milk, sugar, and cornstarch. This luxurious filling is used in traditional French pastries and pairs beautifully with a dusting of powdered sugar or a drizzle of chocolate.

2. Chocolate Lover’s Dream

Add cocoa powder to your choux pastry for a subtle chocolate flavor, or mix melted chocolate into your whipped cream filling for a double dose of indulgence.

3. Fruity Freshness

Fold fresh fruit purée into whipped cream or pastry cream for a refreshing twist. Raspberry, passion fruit, or mango add a bright contrast to the buttery pastry.

4. Coffee-Infused Elegance

A touch of espresso powder in the filling creates a sophisticated coffee-flavored cream puff, perfect for serving alongside an afternoon cappuccino.

5. Savory Choux Bites

Believe it or not, choux pastry isn’t just for desserts. Omit the sugar, add cheese and herbs, and fill them with cream cheese, smoked salmon, or a savory mousse for a gourmet appetizer.

Expert Tips for Perfect Cream Puffs

Making cream puffs might seem intimidating, but these tips will help ensure success every time:

1. Mastering the Dough (Pâte à Choux)

  • Use precise measurements—choux pastry is delicate and requires accuracy.
  • Cook the flour mixture long enough for the moisture to evaporate, preventing soggy puffs.
  • Add eggs gradually to achieve the perfect dough consistency. It should be smooth, glossy, and thick enough to hold its shape.

2. Baking for the Perfect Rise

  • Never open the oven door too soon—sudden temperature changes can cause deflation.
  • Use a high initial temperature (around 200°C/400°F) to create steam, then reduce the heat slightly to ensure even baking.

3. Filling with Ease

  • Wait until the puffs are completely cool before adding the filling to prevent melting.
  • Use a piping bag for even and professional-looking cream distribution.

Frequently Asked Questions

1. Why did my cream puffs deflate?

Deflation happens when too much moisture remains in the dough. Make sure to cook the flour and butter mixture thoroughly before adding eggs, and avoid underbaking.

2. Can I make cream puffs ahead of time?

Yes! Bake the shells in advance and store them in an airtight container at room temperature for up to 2 days. For longer storage, freeze the baked shells and reheat them briefly in the oven before filling.

3. What’s the best way to store filled cream puffs?

Since they contain fresh cream, filled cream puffs should be stored in the refrigerator and enjoyed within 1-2 days for the best texture.

4. Can I use store-bought whipped cream?

While convenient, homemade whipped cream has a superior taste and texture. If using store-bought, opt for a high-quality, lightly sweetened version.

5. How do I make gluten-free cream puffs?

Substitute gluten-free all-purpose flour in equal amounts. Some brands work better than others, so a bit of experimentation may be needed.

Conclusion – A Classic Worth Mastering

Cream puffs are more than just a dessert—they are a testament to the beauty of simple ingredients coming together to create something magical. Whether you’re making them for a special occasion or just to treat yourself, each bite brings a sense of joy and nostalgia.

The best part? Once you’ve mastered the basic choux pastry, a world of possibilities opens up. From different fillings to creative toppings, you can make them as simple or extravagant as you like.

So the next time you’re in the kitchen, take a moment to enjoy the process. Listen to the butter sizzle, watch the dough transform, and most importantly—have patience. After all, as my grandmother said, patience is the secret ingredient to every great dessert.

Amal

Heavenly Cream Puffs – A Timeless Indulgence

Light, airy, and irresistibly creamy—these homemade cream puffs are the perfect balance of crisp choux pastry and luscious whipped filling. Whether served as a classic dessert or dressed up with chocolate drizzle, they are a delightful treat for any occasion.
Prep Time 15 minutes
Cook Time 25 minutes
Total Time 40 minutes
Servings: 12 cream puffs
Course: Dessert
Cuisine: French-inspired

Ingredients
  

For the Choux Pastry:
  • 180 grams water
  • 90 grams butter
  • A pinch of salt
  • A pinch of sugar
  • 130 grams flour
  • 3-4 eggs
For the Cream Filling:
  • 250 grams heavy cream
  • 30 grams powdered sugar
  • 1 teaspoon vanilla extract
For the Chocolate Drizzle (Optional):
  • 100 grams dark chocolate
  • 50 grams heavy cream

Method
 

  1. Preheat the Oven – Set your oven to 200°C (400°F) and line a baking sheet with parchment paper.
  2. Make the Choux Pastry
  3. In a saucepan over medium heat, bring water, butter, salt, and sugar to a boil.
  4. Remove from heat and add flour, stirring quickly until the dough comes together.
  5. Return to low heat and cook for about 1 minute, stirring constantly, until a thin film forms on the bottom of the pan.
  6. Transfer dough to a mixing bowl and let cool slightly.
  7. Incorporate the Eggs
  8. Add eggs one at a time, mixing well after each addition, until the dough is smooth, glossy, and pipeable.
  9. Pipe and Bake
  10. Transfer the dough to a piping bag and pipe small mounds onto the prepared baking sheet.
  11. Bake for 20-25 minutes until golden and puffed up. Do not open the oven door while baking.
  12. Remove from oven and let cool completely.
  13. Prepare the Filling
  14. In a chilled bowl, whip heavy cream, powdered sugar, and vanilla extract until stiff peaks form.
  15. Transfer to a piping bag.
  16. Fill the Puffs
  17. Slice each puff in half or poke a small hole in the bottom.
  18. Pipe in the whipped cream filling.
  19. Optional: Chocolate Drizzle
  20. Melt dark chocolate and heavy cream together until smooth.
  21. Drizzle over the filled puffs for an extra indulgent touch.

Notes

  • Avoid deflating the puffs by ensuring the dough is cooked properly before adding eggs.
  • For extra crispiness, return filled puffs to a low oven (150°C/300°F) for 5 minutes before serving.
  • Storage: Store unfilled puffs in an airtight container at room temperature for up to 2 days, or freeze for longer shelf life.
  • Serving Suggestion: Dust with powdered sugar or serve with fresh berries for a refreshing twist.

Tuna Melt Pie: A Comforting Classic with a Twist

Tuna melt pie is a delightful fusion of a classic tuna melt sandwich and a savory pie, offering a satisfying meal that is both easy to prepare and packed with flavor. This dish is perfect for weeknight dinners, casual gatherings, or meal prepping, as it can be enjoyed fresh out of the oven or reheated the next day.

With its creamy, cheesy filling and flaky crust, tuna melt pie transforms simple pantry ingredients into a comforting dish that appeals to both kids and adults. Whether you’re a tuna lover or just looking for a new way to enjoy an easy homemade meal, this recipe is sure to become a favorite.

Why You’ll Love This Recipe

  1. Simple and Quick to Make
    Unlike traditional pies that require extensive prep time, tuna melt pie is incredibly easy to assemble. Using a pre-made pie crust significantly cuts down on time, allowing you to have a delicious meal ready in under an hour.
  2. A Budget-Friendly Meal
    Canned tuna is an affordable protein source that is easy to store and use in various recipes. Combined with staple ingredients like eggs, mayonnaise, and cheese, this dish provides a hearty and satisfying meal without breaking the bank.
  3. A Versatile Dish
    This recipe can be easily customized to suit your preferences. Want a little heat? Add some diced jalapeños or a dash of hot sauce. Looking for a healthier version? Use Greek yogurt instead of mayonnaise and swap out the pie crust for a low-carb alternative like a cauliflower crust.
  4. Great for Leftovers
    Tuna melt pie tastes just as good the next day. Simply reheat a slice in the oven or microwave, and you have an easy, no-fuss meal. It also works well for meal prepping, making busy weeknights even more manageable.

Ingredients

IngredientQuantityNotes
Pre-made pie crust1Or homemade
Tuna, drained2 cansPreferably in water
Shredded cheddar cheese1 cupOr more, if desired
Mayonnaise½ cupAdds creaminess
Sour cream½ cupExtra creamy texture
Chopped green onions½ cupFor a fresh kick
Garlic powder½ teaspoonAdds flavor
Black pepper½ teaspoonTo taste
Dijon mustard1 teaspoonFor a little zing
Eggs, beaten2Helps bind everything

Directions

  1. Preheat your oven to 375°F (190°C). Place the pie crust into a pie dish and set aside.
  2. In a mixing bowl, combine the drained tuna, shredded cheddar cheese, mayonnaise, sour cream, chopped green onions, garlic powder, black pepper, and Dijon mustard. Mix well until everything is evenly combined.
  3. Add the beaten eggs to the mixture and stir until fully incorporated. Pour the mixture into the prepared pie crust, spreading it out evenly.
  4. Bake for 30–35 minutes, or until the top is golden and set. Remove from the oven and allow the pie to cool slightly before slicing.
  5. Serve warm and enjoy!

Nutritional Information (Per Serving, Approximate)

NutrientAmount
Calories~350 kcal
Protein~20g
Fat~25g
Carbohydrates~15g
Fiber~1g
Sugar~2g

The Inspiration Behind Tuna Melt Pie

The classic tuna melt sandwich has long been a staple in diners and home kitchens, known for its crispy bread, melted cheese, and creamy tuna filling. This recipe takes those familiar flavors and elevates them by baking them into a savory pie, making it a heartier and more filling meal.

Inspired by quiches and other savory pies, this dish blends the best elements of a tuna melt with the rich, custardy texture of an egg-based pie. The combination of mayonnaise, sour cream, and eggs gives the filling a luscious consistency, while the cheddar cheese provides the perfect melt-in-your-mouth texture.

How to Serve Tuna Melt Pie

Tuna melt pie is incredibly versatile and can be served in different ways depending on the occasion.

  • As a Main Course – Serve a slice with a side of fresh greens, roasted vegetables, or a bowl of soup for a well-balanced meal.
  • For Brunch – This dish makes a great addition to a brunch spread, alongside fruit, toast, and coffee.
  • As a Snack – Enjoy a small slice on its own as a savory snack during the day.
  • For Meal Prep – Make the pie ahead of time and store it in the fridge for easy lunches throughout the week.

Tips for the Best Tuna Melt Pie

  1. Use High-Quality Tuna
    Since tuna is the star ingredient, opt for a good-quality canned tuna, preferably packed in water rather than oil, to avoid excess grease.
  2. Don’t Skip the Cheese
    Cheese is essential for getting that signature tuna melt flavor. Sharp cheddar works best, but feel free to experiment with other cheeses like Swiss or Monterey Jack.
  3. Bake Until Set
    The filling should be firm and slightly golden on top. If the center is still jiggly, let it bake for a few more minutes to ensure it sets properly.
  4. Let It Cool Slightly Before Serving
    Giving the pie a few minutes to cool helps the filling set and makes it easier to slice without falling apart.

Storage and Reheating Instructions

Refrigeration

After baking, allow the pie to cool completely before storing it in an airtight container or covering it with plastic wrap. It will stay fresh in the refrigerator for up to 3 days.

Freezing

If you want to freeze the pie, wrap it tightly in aluminum foil or place it in a freezer-safe container. It can be stored in the freezer for up to 2 months. Thaw it overnight in the refrigerator before reheating.

Reheating

To reheat, warm slices in the oven at 350°F for about 10 minutes or microwave them for 1–2 minutes until heated through.

FAQs About Tuna Melt Pie

1. Can I Make Tuna Melt Pie Without a Crust?

Yes! If you prefer a crustless version, simply grease a pie dish and pour the filling directly into it. Bake as usual, and you’ll have a delicious, low-carb alternative.

2. What Can I Use Instead of Mayonnaise?

If you’re not a fan of mayonnaise, you can substitute it with Greek yogurt, cream cheese, or even mashed avocado for a healthier twist.

3. Can I Add Vegetables to the Pie?

Absolutely! Chopped bell peppers, mushrooms, or spinach make great additions to this dish. Just be sure to sauté any watery vegetables first to prevent the pie from becoming too soggy.

4. How Do I Prevent My Pie from Getting Soggy?

To avoid a soggy crust, make sure to drain the tuna well and consider pre-baking the pie crust for a few minutes before adding the filling.

5. Can I Use a Different Type of Cheese?

Yes! While cheddar is a classic choice, you can experiment with mozzarella, Swiss, or even feta for a unique twist on the recipe.

6. Is This Recipe Kid-Friendly?

Definitely! The creamy, cheesy filling is appealing to kids, and you can easily adjust the seasoning to suit their taste preferences.

Conclusion

Tuna melt pie is a delicious and comforting dish that brings together the best flavors of a classic tuna melt sandwich in a rich, flaky pie. It’s an easy, budget-friendly recipe that works for any meal of the day, from breakfast to dinner. With endless ways to customize it, this dish can be adapted to fit different dietary needs and flavor preferences.

Whether you’re making it for a quick weeknight dinner, a potluck, or meal prep, tuna melt pie is sure to become a household favorite. Give it a try, and enjoy the perfect balance of creamy, cheesy, and savory goodness in every bite.

Amal

Tuna Melt Pie: A Comforting Classic with a Twist

This Tuna Melt Pie is a delicious twist on the classic tuna melt sandwich, combining creamy tuna filling, melted cheddar cheese, and a flaky pie crust. It’s quick to prepare, budget-friendly, and perfect for a comforting meal. Whether served for lunch, dinner, or meal prep, this savory pie will satisfy your cravings with its rich and cheesy flavor.
Prep Time 10 minutes
Cook Time 35 minutes
Total Time 45 minutes
Servings: 6 servings
Course: Main Dish
Cuisine: American

Ingredients
  

  • 1 pre-made pie crust or homemade
  • 2 cans of tuna drained
  • 1 cup shredded cheddar cheese
  • ½ cup mayonnaise
  • ½ cup sour cream
  • ½ cup chopped green onions
  • ½ teaspoon garlic powder
  • ½ teaspoon black pepper
  • 1 teaspoon Dijon mustard
  • 2 eggs beaten

Method
 

  1. Preheat the oven to 375°F (190°C). Place the pie crust in a pie dish and set aside.
  2. In a large bowl, mix the drained tuna, shredded cheddar cheese, mayonnaise, sour cream, chopped green onions, garlic powder, black pepper, and Dijon mustard until well combined.
  3. Add the beaten eggs and stir until fully incorporated.
  4. Pour the mixture into the prepared pie crust, spreading it evenly.
  5. Bake for 30–35 minutes or until the top is golden and the center is set.
  6. Remove from the oven and let it cool for a few minutes before slicing.
  7. Serve warm and enjoy!

Notes

  • For a crustless version, simply grease the pie dish and pour the filling directly into it.
  • Make it spicier by adding a pinch of red pepper flakes or a dash of hot sauce.
  • Customize the cheese by swapping cheddar for Swiss, Monterey Jack, or mozzarella.
  • For extra crunch, sprinkle breadcrumbs on top before baking.
  • Leftovers can be stored in an airtight container in the refrigerator for up to 3 days or frozen for later use.

The Ultimate Fat-Burning Vegetable Soup: Easy, Healthy, and Budget-Friendly

Losing weight doesn’t mean starving yourself or following restrictive diets. The key to healthy weight loss is eating nutritious, filling foods that support metabolism and digestion. This vegetable soup is a perfect example—it’s low in calories, high in fiber, and packed with vitamins and minerals. Plus, it’s budget-friendly and easy to make, making it an excellent addition to any meal plan.

This fat-burning soup is made with simple ingredients like onions, leeks, celery, carrots, red peppers, and zucchini. Each of these vegetables is rich in fiber, antioxidants, and essential nutrients that help boost metabolism, keep you full for longer, and promote overall well-being. Whether you’re looking for a light meal, a detox-friendly dish, or a way to increase your daily vegetable intake, this soup is the perfect choice.

Why This Soup is a Powerful Fat Burner

1. Low in Calories, High in Nutrients

One of the best ways to lose weight is to consume foods that are nutrient-dense but low in calories. This soup is primarily made of vegetables, which are naturally low in calories but high in essential vitamins and minerals. Because it’s broth-based instead of cream-based, it provides a satisfying meal without adding unnecessary fats or sugars.

2. Packed with Fiber for Long-Lasting Fullness

Fiber is crucial for weight loss because it helps regulate digestion and keeps you feeling full for longer. Ingredients like leeks, celery, and carrots are rich in dietary fiber, which slows down digestion and prevents sudden hunger cravings. This means you’re less likely to snack on unhealthy foods between meals.

3. Hydrating and Detoxifying

This soup contains a high percentage of water, which helps keep the body hydrated and supports digestion. Drinking plenty of fluids, especially from natural sources like vegetable-based soups, helps flush out toxins and prevent water retention. Celery and leeks, in particular, have natural diuretic properties that assist in reducing bloating.

4. Supports Digestion and Gut Health

A healthy gut is essential for overall well-being, and this soup is packed with vegetables that promote digestion. Leeks and onions contain prebiotics, which nourish beneficial gut bacteria, while carrots and zucchini provide fiber to aid in smooth digestion. When your digestive system is functioning well, your body can absorb nutrients more efficiently and regulate metabolism effectively.

5. Speeds Up Metabolism

Certain ingredients in this soup, like red peppers, have metabolism-boosting properties. Red peppers contain capsaicin, a compound known to increase calorie burn and fat oxidation. When combined with a diet rich in whole foods and regular physical activity, this soup can help support natural weight loss.

Ingredients

IngredientQuantity
Onion1
Leek1
Celery stalks2
Carrot1
Red pepper1
Zucchini1

Directions

  1. Prepare the Vegetables – Wash and chop all vegetables into small pieces.
  2. Sauté the Base – In a large pot, heat a little olive oil over medium heat. Add the onion, leek, and celery, and sauté for 3-5 minutes until softened.
  3. Add the Remaining Vegetables – Stir in the carrot, red pepper, and zucchini, cooking for another 2 minutes.
  4. Simmer the Soup – Pour in enough water or vegetable broth to cover the vegetables. Bring to a boil, then reduce the heat and let it simmer for 20-25 minutes until all vegetables are tender.
  5. Blend or Serve as Is – For a smooth texture, blend the soup until creamy. If you prefer a chunky soup, serve as is.
  6. Season and Enjoy – Add salt, pepper, and your favorite herbs to taste. Serve warm.

Nutritional Information (Per Serving, Approximate)

NutrientAmount
Calories80 kcal
Carbohydrates15g
Protein2g
Fats1g
Fiber5g
Sugar6g

The Health Benefits of Key Ingredients

Onion: A Natural Metabolism Booster

Onions are rich in antioxidants, particularly quercetin, which has anti-inflammatory and metabolism-boosting properties. They also help regulate blood sugar levels, reducing cravings and preventing energy crashes.

Leek: A Gut-Friendly Superfood

Leeks are part of the allium family, similar to onions and garlic, and contain prebiotic fiber that nourishes beneficial gut bacteria. A healthy gut microbiome is linked to better digestion, improved metabolism, and a stronger immune system.

Celery: A Natural Detoxifier

Celery is often included in detox diets due to its high water content and natural diuretic properties. It helps reduce bloating, flush out toxins, and keep the digestive system functioning smoothly.

Carrot: A Sweet and Nutrient-Dense Vegetable

Carrots add a touch of natural sweetness to this soup while providing a high dose of beta-carotene, which converts to vitamin A in the body. This vitamin is essential for skin health, immune function, and vision. Carrots are also high in fiber, which supports digestion and weight loss.

Red Pepper: A Metabolism-Boosting Ingredient

Red peppers contain capsaicin, which has been shown to increase calorie burn and fat metabolism. They are also packed with vitamin C and antioxidants, which help reduce inflammation and support the immune system.

Zucchini: A Low-Calorie, High-Fiber Addition

Zucchini is an excellent vegetable for weight loss because it’s low in calories and high in water content. It helps keep meals light while still adding fiber and essential nutrients like potassium and vitamin C.

How to Customize This Soup for Different Diets

For a Protein Boost

To make this soup more filling, you can add a source of lean protein such as:

  • Grilled chicken breast
  • White beans or chickpeas
  • Tofu or tempeh for a plant-based option

For a Spicy Kick

If you enjoy a bit of heat, try adding:

  • A pinch of red pepper flakes
  • Fresh or dried chili powder
  • A dash of cayenne pepper

For Extra Flavor

You can enhance the soup’s taste by incorporating fresh herbs and spices such as:

  • Garlic and ginger for added depth and immunity-boosting benefits
  • Fresh parsley or cilantro for a refreshing touch
  • A squeeze of lemon juice to brighten up the flavors

For a Creamy Texture

If you prefer a creamy soup, you can blend half of the soup before serving to create a thicker consistency. You can also add a splash of coconut milk for a dairy-free creamy texture.

Frequently Asked Questions

1. Can I store this soup for later?

Yes! This soup can be stored in an airtight container in the refrigerator for up to 4 days. It can also be frozen for up to 3 months. When reheating, add a little water or broth to maintain the desired consistency.

2. Can I add other vegetables?

Absolutely! Feel free to experiment with additional vegetables like spinach, kale, cabbage, or mushrooms to add more nutrients and flavors.

3. How often can I eat this soup for weight loss?

You can eat this soup daily as part of a balanced diet. It works well as a light lunch or dinner, and you can pair it with a source of protein or whole grains for a more complete meal.

4. Is this soup vegan?

Yes! This soup is naturally vegan, but you can modify it by adding plant-based protein sources like lentils or beans if desired.

5. Does this soup help with bloating?

Yes! The combination of high-fiber vegetables and water content helps with digestion and can reduce bloating, making it a great option for those looking to improve gut health.

6. Can I make this soup in a slow cooker?

Yes, you can prepare this soup in a slow cooker by adding all the ingredients and cooking on low for 6-8 hours or on high for 3-4 hours.

Conclusion: A Simple and Effective Way to Support Weight Loss

This fat-burning vegetable soup is not just a meal—it’s a tool for better health. With its low-calorie, high-fiber ingredients, it supports digestion, boosts metabolism, and keeps you full for longer. Whether you’re trying to lose weight, improve your gut health, or simply eat more vegetables, this soup is an excellent addition to your diet.

It’s easy to prepare, budget-friendly, and completely customizable, allowing you to make it your own by adding protein, spices, or extra veggies. Best of all, it’s a warm and comforting dish that you can enjoy any time of the year.

Try making a batch today and experience the benefits of this powerful, fat-burning vegetable soup!

Amal

The Ultimate Fat-Burning Vegetable Soup: Easy, Healthy, and Budget-Friendly

This nutrient-packed vegetable soup is the perfect meal for those looking to boost their metabolism, stay full for longer, and support healthy digestion. Made with fresh, fiber-rich ingredients, this soup is light, low in calories, and incredibly easy to prepare. Whether you’re looking for a detox-friendly meal or a comforting, budget-friendly dish, this fat-burning soup is the ultimate healthy choice.
Prep Time 10 minutes
Cook Time 25 minutes
Total Time 35 minutes
Servings: 4 servings
Course: Soup
Cuisine: Healthy

Ingredients
  

  • 1 onion
  • 1 leek
  • 2 stalks of celery
  • 1 carrot
  • 1 red pepper
  • 1 zucchini
  • Water or vegetable broth enough to cover vegetables
  • Salt and black pepper to taste
  • Olive oil optional, for sautéing
  • Fresh herbs parsley, thyme, or basil for extra flavor

Method
 

  1. Prepare the Vegetables – Wash and chop all the vegetables into small pieces.
  2. Sauté the Aromatics – In a large pot, heat a little olive oil (if using) over medium heat. Add the onion, leek, and celery, and sauté for about 3-5 minutes until soft and fragrant.
  3. Add the Remaining Vegetables – Stir in the carrot, red pepper, and zucchini, letting them cook for another 2 minutes.
  4. Simmer the Soup – Pour in enough water or vegetable broth to cover the vegetables. Bring to a boil, then reduce the heat and let it simmer for about 20-25 minutes until all the vegetables are tender.
  5. Blend or Serve as Is – For a creamy texture, use a blender or immersion blender to blend the soup until smooth. If you prefer a chunkier soup, serve it as is.
  6. Season and Garnish – Add salt, black pepper, and fresh herbs to taste. Serve warm and enjoy this healthy, metabolism-boosting meal!

Notes

  • For added protein, mix in cooked lentils, beans, or shredded chicken.
  • To enhance the flavor, add a squeeze of lemon juice before serving.
  • This soup can be stored in the refrigerator for up to 4 days or frozen for up to 3 months.
  • If you like a spicy kick, add red pepper flakes or cayenne pepper.

Oatmeal and Tomato Savory Pancake – A Healthy Alternative to Pizza

Who said healthy eating has to be boring? This oatmeal and tomato pancake is a game-changer, offering the delicious flavors of pizza in a nutritious, fiber-packed dish. With a crispy, golden base made from oats, a creamy yogurt blend, and the fresh, tangy taste of tomatoes, this meal is perfect for breakfast, lunch, or even dinner. Whether you’re looking to cut back on refined flour, increase your fiber intake, or simply try something new, this recipe is a must-try.

Unlike traditional pizza, which often contains refined flour, processed cheese, and unhealthy fats, this version uses whole ingredients to deliver a guilt-free experience. Packed with protein from eggs, complex carbs from oats, and healthy fats from avocado oil, this dish is designed to keep you full, energized, and satisfied.

Why This Oatmeal Recipe is a Must-Try

1. A Healthier Alternative to Traditional Pizza

Many people love pizza but want a healthier version that doesn’t compromise on taste. This oatmeal-based pancake delivers all the satisfaction of pizza while using whole, nutritious ingredients. Instead of refined flour, which can spike blood sugar, oats provide slow-releasing energy that keeps you full for longer.

2. Quick and Easy to Make

This recipe requires no complicated steps or special equipment. You can make it in one bowl and cook it in a single pan, making it perfect for busy mornings or quick lunches. It’s faster than ordering takeout and much healthier, too.

3. High in Fiber and Protein

Oats are an excellent source of dietary fiber, which promotes digestive health and helps with weight management. Eggs and yogurt add high-quality protein, making this dish a balanced meal that keeps you full and supports muscle growth and repair.

4. Packed with Vitamins and Antioxidants

Tomatoes are rich in vitamin C, potassium, and lycopene, a powerful antioxidant known for its anti-inflammatory properties. The addition of Provencal herbs not only enhances the flavor but also provides immune-boosting benefits.

5. Naturally Gluten-Free

For those who follow a gluten-free diet, this recipe is a fantastic option. By using oats instead of wheat flour, you get a hearty, satisfying meal without any gluten-related concerns. Just be sure to use certified gluten-free oats if you have sensitivities.

Ingredients

IngredientQuantity
Oatmeal1 cup
Yogurt3 tablespoons
Lemon juice1 teaspoon
Provencal herbs1 teaspoon
Salt1 teaspoon
Eggs2
Tomatoes, diced1-2
Mozzarella cheese, shreddedAs needed
Avocado oil (for frying)As needed

Directions

  1. Prepare the Batter: In a mixing bowl, combine oatmeal, yogurt, lemon juice, Provencal herbs, salt, and eggs. Mix well to form a thick batter. Let it rest for 5-10 minutes to allow the oatmeal to absorb the liquid.
  2. Preheat the Pan: Heat a non-stick pan over medium heat and add a small amount of avocado oil.
  3. Cook the Base: Pour the batter into the pan, spreading it evenly to form a round shape. Cook for 3-4 minutes until the bottom is golden brown.
  4. Add the Toppings: Sprinkle diced tomatoes and shredded mozzarella cheese over the top. Cover the pan with a lid and cook for another 3-5 minutes until the cheese melts and the base is firm.
  5. Serve: Remove from the pan and serve warm. Enjoy this healthy, pizza-inspired dish!

Nutritional Information (Per Serving, Approximate)

NutrientAmount
Calories250 kcal
Carbohydrates30g
Protein12g
Fats10g
Fiber4g
Sugar3g

The Nutritional Benefits of the Key Ingredients

Oatmeal: A Superfood for Sustained Energy

Oats are one of the most nutrient-dense whole grains available. They are rich in fiber, particularly beta-glucan, which helps lower cholesterol, stabilize blood sugar, and promote gut health. Unlike refined carbs, oats provide long-lasting energy without causing energy crashes.

Tomatoes: A Nutrient-Packed Ingredient

Tomatoes add a fresh and tangy flavor while contributing important nutrients such as:

  • Lycopene: A powerful antioxidant that supports heart health and skin protection.
  • Vitamin C: Boosts immunity and aids in collagen production.
  • Potassium: Helps regulate blood pressure and muscle function.

Eggs: A Protein Powerhouse

Eggs are a great source of complete protein, containing all nine essential amino acids. They also provide:

  • Choline: Supports brain health and cognitive function.
  • Healthy Fats: Help absorb fat-soluble vitamins and promote satiety.

Yogurt: Creamy and Gut-Friendly

Yogurt not only enhances the texture of this dish but also adds probiotics, which are beneficial for gut health. It also provides calcium and protein, making the dish more nutritious and filling.

Provencal Herbs: A Flavor Boost with Health Benefits

This blend of thyme, rosemary, oregano, and basil enhances the dish’s taste while offering anti-inflammatory and antimicrobial properties. These herbs also aid digestion and add a Mediterranean flair to the meal.

Avocado Oil: A Heart-Healthy Cooking Choice

Using avocado oil for frying ensures that you’re getting healthy monounsaturated fats, which are known to support heart health and reduce inflammation. Unlike processed oils, avocado oil is stable at high temperatures, making it a great choice for cooking.

Ways to Customize This Recipe

1. Add More Vegetables

To make this dish even more nutrient-dense, try adding diced bell peppers, mushrooms, or spinach. These veggies will complement the tomatoes and increase the fiber and vitamin content.

2. Make it Vegan

For a plant-based version, swap the eggs for a flaxseed or chia seed mixture (1 tablespoon ground flaxseed or chia seeds mixed with 3 tablespoons water per egg). Use dairy-free yogurt and nutritional yeast instead of mozzarella.

3. Spice It Up

If you love bold flavors, add red pepper flakes or a dash of hot sauce for a kick. You can also experiment with different seasonings like garlic powder or smoked paprika.

4. Turn It Into a Wrap

Instead of serving it like a pancake, cook it thinner and use it as a wrap. Fill it with fresh greens, avocado, and extra cheese for a portable, nutritious meal.

5. Make it Crunchy

For a crispier texture, cook it on low heat for a longer time, allowing the edges to crisp up beautifully. You can also sprinkle some crushed nuts or seeds on top before serving.

Frequently Asked Questions

1. Can I make this recipe ahead of time?

Yes! You can prepare the batter in advance and store it in the refrigerator for up to 24 hours. When ready to cook, simply pour and fry as usual.

2. Can I use instant oats instead of rolled oats?

Yes, but keep in mind that instant oats will result in a softer texture. If you prefer a firmer, more structured base, stick with rolled or old-fashioned oats.

3. What’s the best way to store leftovers?

You can store cooked pancakes in an airtight container in the refrigerator for up to three days. Reheat in a pan over low heat or in a toaster oven to maintain crispiness.

4. Can I bake this instead of frying?

Absolutely! Pour the batter into a lightly greased baking dish and bake at 375°F (190°C) for about 15 minutes or until firm and golden brown.

5. Is this recipe suitable for kids?

Yes! This is a great way to introduce kids to healthy, fiber-rich meals. The natural flavors of oats, tomatoes, and cheese make it appealing, while the soft texture makes it easy to eat.

Conclusion: A Delicious and Healthy Alternative to Traditional Pizza

This oatmeal and tomato pancake is a fantastic way to enjoy a healthier, more nutritious version of pizza. It’s quick to make, packed with fiber and protein, and completely customizable to suit your taste. Whether you eat it for breakfast, lunch, or a light dinner, this dish is sure to become a staple in your kitchen.

By using simple, whole-food ingredients, you can create a meal that not only tastes amazing but also nourishes your body. Try this recipe today, and enjoy a flavorful, guilt-free alternative to traditional flour-based pizza!

Amal

Oatmeal and Tomato Savory Pancake – A Healthy Alternative to Pizza

This healthy and delicious oatmeal-based pancake is a fantastic alternative to traditional pizza. Made with simple, wholesome ingredients like oatmeal, eggs, tomatoes, and mozzarella, this dish is high in fiber, protein, and healthy fats. It’s quick to prepare, incredibly satisfying, and perfect for breakfast, lunch, or dinner. The combination of crispy edges, melty cheese, and flavorful herbs makes it a dish you’ll want to eat again and again!
Prep Time 5 minutes
Cook Time 10 minutes
Total Time 15 minutes
Servings: 2 servings
Course: Breakfast
Cuisine: Mediterranean

Ingredients
  

  • 1 cup oatmeal
  • 3 tablespoons yogurt
  • 1 teaspoon lemon juice
  • 1 teaspoon Provencal herbs
  • 1 teaspoon salt
  • 2 eggs
  • 1-2 tomatoes diced
  • Mozzarella cheese shredded
  • Avocado oil for frying

Method
 

  1. Prepare the Batter – In a bowl, mix oatmeal, yogurt, lemon juice, Provencal herbs, salt, and eggs. Let it sit for 5-10 minutes to allow the oats to absorb moisture.
  2. Heat the Pan – Add avocado oil to a non-stick pan and heat over medium heat.
  3. Cook the Pancake – Pour the batter into the pan and spread it evenly to form a round shape. Cook for 3-4 minutes until the edges turn golden brown.
  4. Add Toppings – Sprinkle the diced tomatoes and shredded mozzarella on top. Cover the pan with a lid and cook for another 3-5 minutes until the cheese melts and the pancake is cooked through.
  5. Serve – Remove from the pan and serve warm. Enjoy this healthier, more nutritious alternative to pizza!

Notes

  • You can substitute mozzarella with feta or parmesan for a different flavor.
  • To make it vegan, replace eggs with flaxseed eggs and use plant-based yogurt and cheese.
  • Add extra toppings like olives, spinach, or mushrooms for more variety.
  • Store leftovers in the fridge for up to two days and reheat in a pan before serving.

The Perfect Healthy Oatmeal Recipe: Eat and Lose Weight!

When it comes to healthy eating, few ingredients are as beneficial and versatile as oats. They’re packed with fiber, loaded with essential nutrients, and incredibly filling—making them an excellent choice for weight management. This simple oatmeal recipe takes the benefits of oats to another level by combining them with fruit, nuts, and natural sweeteners to create a delicious, nutritious meal you’ll want to eat multiple times a day.

Unlike store-bought oatmeal products that often contain added sugars and artificial ingredients, this homemade version is made with whole, natural ingredients. It’s perfect for breakfast, a midday snack, or even a healthy dessert. Whether you’re looking to maintain a balanced diet, lose weight, or simply enjoy a nutritious meal, this recipe is a game-changer.

Why This Oatmeal Recipe is Perfect for Weight Loss

1. High in Fiber for Long-Lasting Fullness

One of the main reasons oats are considered a weight-loss-friendly food is their high fiber content. Oats contain soluble fiber, particularly beta-glucan, which slows digestion and increases the feeling of fullness. This means you’re less likely to overeat or snack on unhealthy foods throughout the day.

2. Supports a Healthy Metabolism

Oats provide a steady release of energy, preventing the blood sugar spikes and crashes that lead to cravings. By keeping your metabolism steady, this meal helps the body efficiently use energy and burn fat. The combination of oats, bananas, and apples provides natural carbohydrates that fuel the body without unnecessary sugars or refined grains.

3. Packed with Nutrients Without Extra Calories

Unlike processed breakfast cereals that are high in sugar and low in nutrients, this oatmeal recipe delivers essential vitamins and minerals. Apples are rich in antioxidants and vitamin C, bananas provide potassium for muscle function, and nuts offer healthy fats that support brain and heart health.

4. Naturally Sweetened—No Need for Added Sugar

Many oatmeal products and breakfast options contain high amounts of refined sugar, which can lead to weight gain and other health issues. This recipe gets its natural sweetness from bananas and apples, making it a much healthier alternative to packaged cereals or flavored oatmeal packets.

5. Easy to Prepare and Perfect for Meal Prep

One of the best things about this recipe is how easy it is to make. Whether you prepare a batch for the entire week or make fresh servings daily, it requires minimal effort while providing maximum nutrition. Plus, it’s a versatile recipe—meaning you can customize it with different fruits, nuts, or spices depending on your preferences.

Ingredients

IngredientQuantity
Oat flakes, ground100g (1 cup)
Oat flakes50g (1/2 cup)
Cinnamon1 teaspoon
Apple, chopped1
Banana, mashed1
Coconut oil (or preferred oil)2 tablespoons
Nuts or almonds25g (1/4 cup)

Directions

  1. Preheat the oven to 350°F (175°C) and line a baking tray with parchment paper.
  2. Mix dry ingredients – In a bowl, combine the ground oat flakes, whole oat flakes, and cinnamon.
  3. Prepare wet ingredients – Mash the banana, then mix it with chopped apple and coconut oil.
  4. Combine – Stir the wet ingredients into the dry mixture until well combined. Fold in the nuts or almonds.
  5. Shape and Bake – Form small cookies or spread the mixture into a baking dish for oat bars. Bake for 15-20 minutes until golden brown.
  6. Cool and Serve – Let it cool before serving. Enjoy as a healthy breakfast, snack, or pre-workout meal!

Nutritional Information (Per Serving, Approximate)

NutrientAmount
Calories180 kcal
Carbohydrates27g
Protein4g
Fats7g
Fiber4g
Sugar8g

Health Benefits of the Key Ingredients

Oats: The Ultimate Superfood for Weight Loss

Oats are a powerhouse ingredient with multiple health benefits. They’re naturally gluten-free, packed with fiber, and rich in essential nutrients like manganese, phosphorus, and magnesium. The beta-glucan fiber found in oats is particularly beneficial for lowering cholesterol levels, improving gut health, and stabilizing blood sugar.

Bananas: A Natural Energy Booster

Bananas provide natural sweetness without adding refined sugar. They’re a great source of potassium, which helps regulate fluid balance, muscle contractions, and nerve signals. Bananas also aid digestion due to their high fiber content, keeping your gut healthy and reducing bloating.

Apples: A Low-Calorie, Nutrient-Dense Fruit

Apples are rich in fiber, vitamin C, and antioxidants. They promote gut health by feeding beneficial bacteria, and their high water content helps keep you hydrated. The natural sugars in apples provide a mild sweetness without causing blood sugar spikes.

Nuts: Healthy Fats for Brain and Heart Health

Nuts and almonds add a crunchy texture to this recipe while providing essential healthy fats and protein. These nutrients help keep you full, support brain function, and reduce inflammation. Additionally, nuts contain vitamin E, an important antioxidant that promotes skin health.

Cinnamon: More Than Just a Flavor Enhancer

Cinnamon not only adds warmth and depth to the flavor of this oatmeal but also has health benefits. It is known for its anti-inflammatory properties, ability to stabilize blood sugar levels, and potential to support metabolism. Adding cinnamon to your meals can help control sugar cravings and reduce the risk of insulin resistance.

How to Customize This Recipe for Different Diets

1. Make It Vegan

This recipe is already plant-based, but if you want to enhance its nutritional profile, consider adding chia seeds or flaxseeds. These superfoods add extra fiber, omega-3 fatty acids, and protein, making the dish even more satisfying.

2. Increase the Protein Content

For those looking to boost their protein intake, you can mix in a scoop of plant-based or whey protein powder. Alternatively, adding Greek yogurt as a topping can enhance both the protein content and creaminess of the meal.

3. Low-Carb Version

If you’re following a low-carb diet, you can substitute some of the oats with ground flaxseeds or almond flour. This will reduce the carbohydrate content while still providing a satisfying, fiber-rich meal.

4. Make It Crunchy

For added texture, sprinkle extra nuts, seeds, or shredded coconut on top before serving. This enhances both the flavor and nutritional value of the dish.

5. Add More Fruits

Berries, such as blueberries or raspberries, are great additions to this oatmeal. They are packed with antioxidants, vitamins, and fiber, making them a perfect complement to the other ingredients.

Frequently Asked Questions

1. Can I prepare this oatmeal in advance?

Yes! This oatmeal can be made in large batches and stored in the refrigerator for up to five days. You can eat it cold or reheat it in the microwave or on the stovetop with a splash of plant-based or regular milk.

2. Can I freeze this oatmeal?

Absolutely! You can freeze individual portions and thaw them overnight in the refrigerator. When reheating, just add a little liquid to restore its creamy texture.

3. Is this recipe gluten-free?

Yes, as long as you use certified gluten-free oats, this recipe is completely gluten-free.

4. Can I replace coconut oil with another oil?

Yes, you can use olive oil, almond oil, or any other preferred healthy fat. However, coconut oil adds a slight sweetness and enhances the texture.

5. Can I add honey or maple syrup?

This recipe is naturally sweet due to the banana and apple, but if you prefer extra sweetness, a small drizzle of honey or maple syrup is a great option.

6. Will this recipe keep me full until my next meal?

Yes! Thanks to the high fiber and protein content, this oatmeal will keep you satisfied for hours, making it an ideal breakfast or snack for weight loss and energy maintenance.

Conclusion: A Simple Recipe for a Healthier Lifestyle

This healthy oatmeal recipe is more than just a meal—it’s a step toward better health and weight management. With a perfect balance of fiber, protein, and healthy fats, it keeps you full, provides long-lasting energy, and supports digestion.

Whether you’re trying to lose weight, maintain a balanced diet, or simply enjoy a delicious and nutritious meal, this oatmeal recipe is a fantastic choice. Its versatility allows you to tweak it according to your taste preferences and dietary needs, making it a staple you’ll want to eat multiple times a day.

By incorporating whole, natural ingredients into your diet, you’re not just making a meal—you’re making a positive lifestyle change. Try this recipe today, and experience the benefits of eating well while enjoying every bite!

Amal

The Perfect Healthy Oatmeal Recipe: Eat and Lose Weight!

This healthy oatmeal recipe is packed with fiber, nutrients, and natural sweetness, making it the perfect meal for breakfast, snacks, or a pre-workout boost. With a combination of oats, bananas, apples, and nuts, it provides long-lasting energy while supporting digestion and weight loss. Quick to prepare and incredibly satisfying, you’ll find yourself eating this at least three times a day!
Prep Time 5 minutes
Cook Time 20 minutes
Total Time 25 minutes
Servings: 4 –6 servings
Course: Breakfast
Cuisine: Healthy

Ingredients
  

  • 100 g 1 cup oat flakes, ground
  • 50 g 1/2 cup oat flakes
  • 1 teaspoon cinnamon
  • 1 apple chopped
  • 1 banana mashed
  • 2 tablespoons coconut oil or your favorite oil
  • 25 g 1/4 cup nuts or almonds

Method
 

  1. Preheat the oven to 350°F (175°C) and line a baking tray with parchment paper.
  2. Combine dry ingredients – In a large mixing bowl, add the ground oat flakes, whole oat flakes, and cinnamon. Mix well.
  3. Prepare wet ingredients – Mash the banana, then mix it with the chopped apple and coconut oil.
  4. Combine wet and dry ingredients – Stir the wet ingredients into the dry mixture until everything is well incorporated. Fold in the nuts or almonds.
  5. Shape and Bake – Form small cookies or spread the mixture into a baking dish for oat bars. Bake for 15-20 minutes until golden brown and firm.
  6. Cool and Enjoy – Let them cool before serving. Enjoy as a healthy breakfast, snack, or pre-workout meal.

Notes

  • You can substitute coconut oil with olive oil or almond butter for extra flavor.
  • Add raisins, dried cranberries, or chia seeds for additional texture and nutrients.
  • This recipe can be stored in an airtight container for up to 5 days.
  • Serve with yogurt or a drizzle of honey for extra creaminess.

The Perfect 5-Minute Cake: A Quick and Delicious Treat with Just 1 Egg

Baking doesn’t always have to be time-consuming or complicated. Sometimes, the simplest recipes create the most delightful results. This easy, one-egg cake is proof that you don’t need a long list of ingredients or hours in the kitchen to make something delicious. With a handful of pantry staples and a few minutes of preparation, you can enjoy a light, fluffy, and flavorful cake that’s perfect for any occasion.

This cake is not just quick to make—it’s also incredibly versatile. Whether you’re looking for a sweet breakfast, an afternoon snack, or a simple dessert, this recipe is an excellent go-to option. Plus, it’s a great way to use up a single egg when you don’t have enough for more elaborate baking.

Why This Cake is Perfect for Any Occasion

1. Made with Basic Ingredients

You don’t need any fancy or hard-to-find ingredients for this cake. It’s made with everyday items like flour, sugar, oil, yogurt, and lemon zest, all of which you probably already have in your kitchen. This makes it a fantastic last-minute recipe when you’re craving something sweet but don’t want to go grocery shopping.

2. Quick and Easy to Prepare

One of the best things about this cake is that it comes together in just five minutes. There’s no need for complicated mixing techniques or long resting times—just mix, pour, and bake. In less than 30 minutes, you’ll have a perfectly baked, golden cake ready to enjoy.

3. Soft, Moist, and Full of Flavor

The addition of yogurt and oil keeps this cake incredibly moist and tender. The lemon zest or vanilla sugar enhances the flavor, giving it a fresh and aromatic taste. Every bite is soft and fluffy, making it a wonderful pairing with tea, coffee, or fresh fruit.

4. Perfect for Any Time of the Day

Unlike heavy, sugar-loaded cakes, this recipe is light enough to enjoy at any time. Have it for breakfast with a cup of coffee, as an afternoon snack, or even as a guilt-free dessert after dinner. Because it’s not overly sweet, it satisfies cravings without feeling too indulgent.

Ingredients

IngredientQuantity
Egg1
SaltA pinch
Sugar70g
Grated lemon zest (or vanilla sugar)To taste (or 8g vanilla sugar)
Oil70ml
Natural yogurt125g
Lemon juice2 tablespoons
Flour150g
Baking powder8g

Directions

  1. Preheat the Oven – Set your oven to 350°F (175°C) and grease a small cake pan.
  2. Mix Wet Ingredients – In a bowl, whisk the egg, salt, and sugar until slightly frothy. Add grated lemon zest (or vanilla sugar), oil, yogurt, and lemon juice. Mix well.
  3. Add Dry Ingredients – Sift in the flour and baking powder, then gently fold them into the wet mixture until fully combined. Do not overmix.
  4. Bake the Cake – Pour the batter into the prepared cake pan and bake for 25-30 minutes, or until a toothpick inserted into the center comes out clean.
  5. Cool and Serve – Let the cake cool before removing from the pan. Slice and enjoy!

Nutritional Information (Per Serving, Approximate)

NutrientAmount
Calories180 kcal
Carbohydrates25g
Protein4g
Fats7g
Fiber1g
Sugar10g

Health Benefits of This Simple Cake

While cake is often seen as a treat, this particular recipe offers some nutritional benefits due to its carefully chosen ingredients.

Yogurt for a Soft Texture and Digestive Health

Natural yogurt is one of the key ingredients in this cake. It adds moisture without making the cake heavy, and it provides probiotics, which support gut health. Yogurt also contains calcium, protein, and essential vitamins that contribute to overall well-being.

Lemon for a Natural Flavor Boost

Lemon zest and juice not only add a refreshing citrus flavor but also provide vitamin C and antioxidants. These nutrients help boost immunity and improve skin health, making this cake a slightly healthier alternative to overly processed desserts.

Oil for Moisture Without Butter

Instead of butter, this cake uses oil, which gives it a tender crumb while keeping it dairy-free if needed. Using healthier oils like olive oil or coconut oil can also add beneficial fats to the recipe.

Ways to Customize This Cake

1. Make It Chocolatey

For a chocolate version, add 2 tablespoons of cocoa powder to the batter. You can also mix in chocolate chips or drizzle melted chocolate on top after baking.

2. Add Nuts or Dried Fruit

Chopped almonds, walnuts, or raisins can add texture and extra flavor. Simply fold them into the batter before baking for a delicious twist.

3. Experiment with Spices

A pinch of cinnamon or nutmeg can bring a warm and cozy flavor to the cake, making it perfect for cooler months.

4. Turn It into a Layer Cake

For a more indulgent version, slice the cake in half and spread a layer of jam, cream, or chocolate spread between the layers.

5. Make It Dairy-Free

If you’re avoiding dairy, simply swap out the yogurt for a plant-based alternative like almond or coconut yogurt. The result will still be soft and delicious.

FAQs About This 5-Minute Cake

1. Can I use whole wheat flour instead of all-purpose flour?

Yes, you can substitute whole wheat flour, but keep in mind that it will make the cake slightly denser. If you prefer a lighter texture, try using half whole wheat and half all-purpose flour.

2. Can I double the recipe?

Absolutely! If you want a larger cake, simply double all the ingredients and use a bigger baking dish. You may need to increase the baking time by a few minutes.

3. How should I store this cake?

Once the cake has cooled, store it in an airtight container at room temperature for up to three days. If you want it to last longer, refrigerate it for up to a week or freeze it for up to three months.

4. Can I make this cake without an oven?

Yes! You can bake this cake in a microwave by pouring the batter into a microwave-safe dish and cooking it on high for about 4-5 minutes. You can also cook it in a pan on the stovetop over low heat with a lid on.

5. Is this cake suitable for kids?

Yes, this cake is a great option for kids because it’s not too sweet and contains simple, natural ingredients. You can also add mashed bananas or applesauce for extra nutrients.

6. Can I use honey or maple syrup instead of sugar?

Yes, but keep in mind that liquid sweeteners will slightly alter the texture of the cake. If using honey or maple syrup, reduce the amount of liquid in the recipe slightly.

7. What’s the best way to serve this cake?

This cake is delicious on its own, but you can also serve it with fresh fruit, a dusting of powdered sugar, or a drizzle of honey. It pairs wonderfully with tea, coffee, or a scoop of vanilla ice cream.

Conclusion: A Must-Try Recipe for Quick and Delicious Baking

This 5-minute, one-egg cake is the perfect solution for busy days when you want a homemade treat without the hassle. It’s light, flavorful, and incredibly easy to make, proving that simple ingredients can create something truly delicious.

With its versatility and quick preparation time, this cake is sure to become a staple in your kitchen. Whether you enjoy it plain, with add-ins, or topped with your favorite spread, it’s a fantastic way to satisfy your sweet tooth in a healthier, more effortless way.

So, the next time you have an egg and a few basic ingredients on hand, whip up this cake in just a few minutes and enjoy a soft, moist, and delightful homemade treat!

Amal

The Perfect 5-Minute Cake: A Quick and Delicious Treat with Just 1 Egg

This soft and fluffy one-egg cake is the perfect quick treat for any time of the day. With just a few pantry staples, you can whip up a moist and flavorful cake in just five minutes of prep time. Whether you enjoy it plain, with a dusting of powdered sugar, or topped with fruit, this easy recipe is sure to become a go-to favorite.
Prep Time 5 minutes
Cook Time 30 minutes
Total Time 35 minutes
Servings: 4 –6 servings
Course: Dessert
Cuisine: International

Ingredients
  

For the cake:
  • 1 egg
  • A pinch of salt
  • 70 g sugar
  • Grated lemon zest or 8g vanilla sugar
  • 70 ml oil
  • 125 g natural yogurt
  • 2 tablespoons lemon juice
  • 150 g flour
  • 8 g baking powder

Method
 

  1. Preheat the oven to 350°F (175°C) and grease a small cake pan.
  2. Mix wet ingredients – In a bowl, whisk the egg, salt, and sugar until slightly frothy. Stir in the grated lemon zest (or vanilla sugar), oil, yogurt, and lemon juice until well combined.
  3. Add dry ingredients – Sift in the flour and baking powder, and gently mix until you have a smooth batter. Do not overmix.
  4. Bake – Pour the batter into the prepared cake pan and bake for 25-30 minutes or until a toothpick inserted in the center comes out clean.
  5. Cool & Serve – Let the cake cool before removing from the pan. Serve plain, dusted with powdered sugar, or topped with fruit and enjoy!

Notes

  • You can swap lemon zest for vanilla for a different flavor.
  • For a dairy-free version, use plant-based yogurt.
  • Add chocolate chips, nuts, or dried fruit for variety.
  • Store in an airtight container for up to 3 days at room temperature or refrigerate for up to a week.

The Best Way to Enjoy Spinach, Mushroom & Potato Purée Casserole

Comfort food doesn’t have to be unhealthy, and this Spinach, Mushroom & Potato Purée Casserole proves just that. It’s a creamy, flavorful, and nourishing dish that brings together the heartiness of potatoes, the earthiness of mushrooms, and the rich, leafy goodness of spinach. This casserole is not just delicious but also packed with nutrients, making it an ideal dish for anyone looking for a balanced, satisfying meal.

Why This Casserole Stands Out

A Perfect Balance of Flavors and Textures

One of the best things about this casserole is the contrast between the velvety potato purée and the slightly crisp, savory spinach-mushroom layer. The potatoes create a smooth and creamy base, while the mushrooms add a rich umami taste, and the spinach brings in a fresh, slightly tangy flavor. The combination of these elements makes every bite comforting yet complex.

Nutritious and Wholesome

This dish is packed with essential vitamins and minerals. Potatoes provide energy-boosting carbohydrates and fiber, mushrooms offer antioxidants and immune-boosting properties, and spinach delivers iron, vitamin K, and folate. When combined, they create a powerhouse meal that supports overall health and well-being.

Versatile for Any Occasion

Whether you’re making a cozy weeknight dinner, preparing a side dish for a special occasion, or looking for a meal prep-friendly recipe, this casserole is a fantastic choice. It can be served as a main dish with a simple side salad or as an accompaniment to grilled meats or plant-based proteins.

Health Benefits of the Key Ingredients

Potatoes: More Than Just Comfort Food

Potatoes often get a bad reputation, but they are actually a great source of essential nutrients. They are high in potassium, which helps regulate blood pressure, and they contain fiber, which supports digestion. Potatoes also provide resistant starch, a type of carbohydrate that promotes gut health by feeding beneficial bacteria.

Mushrooms: A Natural Immune Booster

Mushrooms are a nutrient-dense food that offers a variety of health benefits. They contain antioxidants like selenium and ergothioneine, which help protect the body from oxidative stress. Mushrooms are also rich in B vitamins, which support energy production and brain health.

Spinach: A Superfood for Strong Bones and Immunity

Spinach is an excellent source of vitamin K, which is crucial for bone health. It also provides iron, which helps in oxygen transport throughout the body. Additionally, spinach is loaded with antioxidants that help reduce inflammation and support overall immune function.

Ingredients

For the Potato Purée

IngredientQuantity
Potatoes5 large
Butter2-3 tbsp
Whole milkUp to 1 cup
SaltTo taste

For the Spinach & Mushroom Layer

IngredientQuantity
Onion1 large
Olive oil4 tbsp
Spinach500g (1 lb)
Mushrooms300g (2/3 lb)
SaltTo taste
Black pepperTo taste
Red pepper flakesTo taste

Directions

Step 1: Prepare the Potato Purée

  1. Peel and cut the potatoes into chunks.
  2. Boil them in salted water until tender, about 15-20 minutes.
  3. Drain and mash the potatoes while still warm.
  4. Add butter and gradually mix in milk until smooth and creamy. Season with salt to taste.

Step 2: Cook the Spinach & Mushroom Layer

  1. Finely chop the onion and slice the mushrooms.
  2. Heat olive oil in a pan over medium heat and sauté the onion until soft and translucent.
  3. Add mushrooms and cook until they release moisture and turn golden brown.
  4. Stir in the spinach, season with salt, black pepper, and red pepper flakes, and cook until wilted.

Step 3: Assemble the Casserole

  1. Preheat oven to 375°F (190°C).
  2. Spread the potato purée evenly in a baking dish.
  3. Layer the spinach and mushroom mixture on top.
  4. (Optional: Sprinkle cheese or breadcrumbs for extra texture and flavor.)

Step 4: Bake and Serve

  1. Bake for 15-20 minutes until the top is slightly golden.
  2. Serve warm and enjoy this nutritious, comforting dish.

Nutritional Information (Per Serving, Approximate)

NutrientAmount
Calories280 kcal
Carbohydrates35g
Protein6g
Fats14g
Fiber5g
Sodium200mg

Why This Casserole is a Great Choice for Any Diet

Vegetarian-Friendly and Filling

This casserole is naturally vegetarian, making it a great option for those who want a satisfying meat-free meal. The combination of fiber-rich vegetables and creamy potatoes ensures you stay full and energized for hours.

Easy to Make Dairy-Free

If you’re following a dairy-free diet, you can easily substitute the butter with olive oil and use plant-based milk instead of regular milk. These small changes make the dish suitable for vegans while maintaining its creamy and rich texture.

Can Be Made Low-Carb

For those watching their carbohydrate intake, the potato purée can be replaced with mashed cauliflower. This swap lowers the carb content while keeping the dish just as delicious and satisfying.

How to Customize This Casserole

Make it Protein-Rich

If you want to add more protein to this dish, you can incorporate cooked lentils, chickpeas, or shredded chicken into the spinach and mushroom layer. This makes the casserole a more complete meal, perfect for athletes or those looking for muscle recovery support.

Enhance the Flavor with Herbs and Spices

Adding fresh herbs like thyme, rosemary, or oregano can elevate the flavors in this dish. You can also include garlic powder, nutmeg, or smoked paprika for an extra layer of depth.

Add a Crispy Topping

For a bit of crunch, sprinkle some breadcrumbs or grated cheese on top before baking. This creates a golden, crispy crust that adds texture to the casserole.

Frequently Asked Questions

Can I prepare this casserole ahead of time?

Yes! This casserole is perfect for meal prepping. You can assemble it a day in advance and store it in the refrigerator before baking. It can also be made in batches and frozen for later use.

How long does this casserole last in the fridge?

When stored in an airtight container, this casserole can last up to three days in the refrigerator. To reheat, simply place it in the oven at 350°F (175°C) until warmed through.

Can I freeze this casserole?

Yes, this casserole freezes well. To freeze, let it cool completely, then wrap it tightly with plastic wrap or aluminum foil. It can be stored in the freezer for up to three months. When ready to eat, thaw it overnight in the refrigerator before reheating.

What can I serve with this casserole?

This casserole is quite filling on its own, but it pairs well with a fresh side salad, roasted vegetables, or a protein source like grilled fish or tofu. If serving as a side dish, it complements roasted meats and poultry beautifully.

Can I use different types of potatoes?

Absolutely. While russet potatoes provide a fluffy texture, Yukon Gold or red potatoes create a creamier consistency. Experiment with different varieties to see which one you prefer.

Is this dish suitable for children?

Yes! This casserole is a great way to sneak in vegetables for picky eaters. The creamy texture of the potatoes makes it appealing, while the mushrooms and spinach blend seamlessly into the dish.

Conclusion

Spinach, Mushroom & Potato Purée Casserole is a dish that combines nutrition, comfort, and versatility. Whether you’re looking for a healthy vegetarian meal, a side dish for family gatherings, or a meal prep-friendly recipe, this casserole is an excellent choice.

It provides a balanced combination of carbohydrates, fiber, vitamins, and minerals, making it not just delicious but also nourishing. Plus, with easy customization options, you can tailor it to fit your dietary needs and preferences.

Try making this casserole today and enjoy a wholesome, flavorful dish that you’ll want to prepare again and again.

Amal

The Best Way to Enjoy Spinach, Mushroom & Potato Purée Casserole

This Spinach, Mushroom & Potato Purée Casserole is a creamy, comforting, and nutrient-rich dish that is perfect for any meal. The smooth and buttery potato purée creates a delicious base, while the sautéed spinach and mushrooms add depth and earthy flavors. Whether served as a main course or a side dish, this casserole is a satisfying, vegetarian-friendly option that can be easily customized to fit different dietary preferences.
Prep Time 15 minutes
Cook Time 30 minutes
Total Time 45 minutes
Servings: 4 –6 servings
Course: Main Dish
Cuisine: Comfort Food

Ingredients
  

For the Potato Purée:
  • 5 large potatoes
  • 2-3 tbsp butter
  • Up to 1 cup whole milk
  • Salt to taste
For the Spinach & Mushroom Layer:
  • 1 large onion
  • 4 tbsp olive oil
  • 500 g 1 lb spinach
  • 300 g 2/3 lb mushrooms
  • Salt black pepper, and red pepper flakes to taste

Method
 

  1. Prepare the Potato Purée: Peel and chop the potatoes, then boil them in salted water until tender (about 15-20 minutes). Drain and mash them while still warm. Stir in butter and gradually add milk until you reach a creamy consistency. Season with salt.
  2. Cook the Spinach & Mushroom Layer: Chop the onion and slice the mushrooms. In a pan, heat olive oil over medium heat. Sauté the onions until soft, then add the mushrooms. Cook until they release moisture and become golden brown. Add the spinach, season with salt, black pepper, and red pepper flakes, and cook until wilted.
  3. Assemble the Casserole: Preheat the oven to 375°F (190°C). Spread the potato purée evenly in a baking dish. Layer the spinach and mushroom mixture on top. (Optional: Sprinkle with cheese or breadcrumbs for added texture.)
  4. Bake & Serve: Bake for 15-20 minutes until slightly golden on top. Serve warm and enjoy!

Notes

  • To make it dairy-free, use plant-based butter and milk.
  • You can add protein by mixing in cooked lentils, chickpeas, or shredded chicken.
  • For extra flavor, sprinkle grated cheese on top before baking.
  • Leftovers can be stored in the fridge for up to 3 days and reheated before serving.

Eat Day and Night: I Lost Weight Thanks to This Vegetable Soup!

Losing weight doesn’t have to be a struggle filled with restrictive diets and complicated meal plans. Sometimes, the simplest recipes can be the most effective. This vegetable soup is one such recipe—packed with nutrients, easy to prepare, and incredibly satisfying. It provides a warm, comforting meal without unnecessary calories, making it an excellent choice for anyone looking to shed pounds while still enjoying delicious food.

This soup is not just about weight loss; it’s a wholesome meal that nourishes the body and supports overall health. Whether you’re looking for a light dinner, a healthy lunch, or a quick snack, this recipe fits seamlessly into any diet plan.

The Secret to Healthy and Sustainable Weight Loss

Low in Calories but High in Nutrients

One of the biggest obstacles in weight loss is finding meals that are filling but not loaded with calories. This vegetable soup achieves that balance perfectly. The combination of fresh vegetables provides essential vitamins and minerals while keeping the calorie count low. Because it’s broth-based rather than cream-based, it offers a light yet satisfying meal that won’t leave you feeling deprived.

Rich in Fiber for Long-Lasting Fullness

The fiber content in this soup is a game-changer for those trying to lose weight. Vegetables like leeks, carrots, and peppers are packed with dietary fiber, which slows digestion and helps maintain stable blood sugar levels. This means fewer cravings for unhealthy snacks and better portion control throughout the day.

A Natural Detox for the Body

The ingredients in this soup work together to support digestion and detoxification. Garlic, leeks, and celery, for example, contain compounds that help flush out toxins from the body. The high water content of the broth also aids kidney function, helping to remove excess waste and reduce bloating.

Boosts Metabolism with Natural Ingredients

Some of the key ingredients in this soup can actually help speed up metabolism. Garlic, for instance, has been linked to fat-burning properties, while black pepper contains piperine, which is known to improve digestion and enhance the body’s ability to burn calories. When paired with a balanced diet and regular exercise, this soup can be a valuable addition to a weight-loss routine.

Hydrating and Refreshing

Many people underestimate the role of hydration in weight loss. Dehydration can sometimes be mistaken for hunger, leading to unnecessary snacking. This soup, with its high water content, helps keep the body hydrated and provides essential electrolytes that support overall health.

Ingredients

IngredientQuantity
Onion, chopped1
Olive oil for fryingAs needed
Celery stalk, chopped1
Carrot, chopped1
Red pepper, chopped1
Green pepper, chopped1
Garlic cloves, minced2
Leek, cleaned & sliced1
Potatoes, peeled & diced3
Flour2 tablespoons
Vegetable broth200ml (1 cup)
Vegetable broth1.5 liters (7 cups)
Salt and black pepperTo taste
Noodles100g (1/2 cup)
Dried parsleyAs needed

Directions

  1. Heat olive oil in a large pot over medium heat.
  2. Sauté the chopped onion, celery, carrot, red pepper, green pepper, garlic, and leek until softened.
  3. Add the diced potatoes and cook for a few minutes.
  4. Sprinkle in the flour and stir well to coat the vegetables.
  5. Pour in 200ml of vegetable broth while stirring to avoid lumps.
  6. Add the remaining 1.5 liters of vegetable broth. Bring to a boil.
  7. Reduce heat, season with salt and black pepper, and let simmer for 15-20 minutes.
  8. Add the noodles and cook until tender.
  9. Sprinkle with dried parsley before serving.

Nutritional Information (Per Serving)

NutrientAmount (Approx.)
Calories180 kcal
Carbohydrates32g
Protein5g
Fats4g
Fiber5g
Sodium500mg

Why This Soup Works for Any Time of the Day

A Light Yet Satisfying Dinner

Eating a heavy meal before bed can disrupt digestion and lead to weight gain. This soup is the perfect alternative for a late-night meal because it is light, easy to digest, and still filling enough to prevent late-night snacking.

A Nutritious Lunch Option

Many people struggle with lunch choices, often resorting to fast food or processed meals. This soup is a great alternative—it’s quick to prepare in advance and can be packed for work or enjoyed at home. Paired with a small side of whole grains or a salad, it creates a balanced meal that keeps energy levels stable throughout the day.

A Comforting Meal During Cold Weather

There’s nothing better than a warm bowl of soup on a chilly day. This recipe provides all the comfort of a hearty meal without being heavy. The natural sweetness of carrots and peppers, combined with the savory flavors of garlic and leeks, makes it a delicious choice that satisfies cravings while keeping calories in check.

The Health Benefits of Key Ingredients

Carrots: A Powerhouse of Antioxidants

Carrots are an excellent source of beta-carotene, which converts into vitamin A in the body. Vitamin A supports immune function, skin health, and vision. Additionally, carrots provide fiber that promotes digestion and gut health.

Leeks: A Natural Prebiotic for Gut Health

Leeks belong to the same family as onions and garlic and contain prebiotics, which help feed the beneficial bacteria in your gut. A healthy gut microbiome has been linked to better digestion, improved metabolism, and even weight loss.

Peppers: Loaded with Vitamin C

Bell peppers, especially red ones, are packed with vitamin C, which boosts the immune system and supports collagen production for healthy skin. They are also low in calories, making them an excellent addition to any weight-loss meal plan.

Garlic: A Natural Metabolism Booster

Garlic has been used for centuries for its medicinal properties. Studies suggest that it may help reduce fat accumulation by regulating fat cells and improving metabolism. It also has anti-inflammatory and antibacterial properties that support overall health.

Celery: Hydrating and Detoxifying

Celery is often included in detox diets because of its high water content and natural diuretic properties. It helps reduce water retention and bloating while providing essential minerals like potassium and magnesium.

Tips for Making This Soup Even Healthier

Choose Whole-Grain or Alternative Noodles

While traditional noodles are a great addition, switching to whole-grain, lentil, or chickpea-based noodles can increase the protein and fiber content. These options also have a lower glycemic index, which helps prevent blood sugar spikes.

Add More Leafy Greens

Spinach, kale, or Swiss chard can be added towards the end of cooking to boost the soup’s nutritional value. These greens are rich in iron, calcium, and vitamins that support overall health.

Experiment with Herbs and Spices

Adding herbs like thyme, rosemary, or turmeric can enhance the flavor of the soup while providing additional health benefits. Turmeric, in particular, is known for its anti-inflammatory properties and can aid digestion.

Use Homemade Vegetable Broth

While store-bought broth is convenient, making your own at home ensures there are no added preservatives, excess sodium, or artificial flavors. Simply simmer vegetable scraps with water and herbs for a homemade broth that enhances the soup’s flavor naturally.

Frequently Asked Questions

Can I store this soup for later?

Yes, this soup stores well in the refrigerator for up to five days. It can also be frozen in portions for up to three months. Simply reheat on the stove or in the microwave before serving.

Can I make this soup in a slow cooker?

Absolutely. You can add all the ingredients to a slow cooker and let it cook on low for 6-8 hours or on high for 3-4 hours. This method allows the flavors to develop even more.

Can I add protein to this soup?

Yes, adding protein can make this soup even more balanced. You can include cooked beans, lentils, shredded chicken, or tofu for a protein boost without adding excessive calories.

Is this soup suitable for a vegan diet?

Yes, this soup is naturally vegan as long as you use plant-based broth. You can also add plant-based protein sources like chickpeas or quinoa to enhance the nutritional profile.

Will this soup help me lose weight on its own?

While this soup is a great addition to a weight-loss plan, it should be combined with a balanced diet and an active lifestyle for the best results. No single food can cause weight loss, but this soup can definitely support your journey by keeping you full and nourished.

Conclusion

This vegetable soup is more than just a recipe—it’s a tool for better health and sustainable weight loss. It provides essential nutrients, keeps you satisfied, and supports digestion, all while being easy to make and incredibly delicious. Whether you enjoy it as a meal replacement, a healthy lunch, or a light dinner, this soup can be a game-changer in your wellness journey.

By making simple changes like choosing fresh ingredients, adding more fiber, and balancing your meals, you can turn this soup into a staple for long-term health and weight management. Try incorporating it into your routine and experience the benefits of a nourishing, wholesome, and weight-friendly meal.

Amal

Eat Day and Night: I Lost Weight Thanks to This Vegetable Soup!

This hearty and nutritious vegetable soup is packed with fiber-rich ingredients that keep you full and satisfied while supporting your weight-loss journey. Light yet filling, this soup can be enjoyed for lunch, dinner, or even as a snack. Made with fresh vegetables, flavorful herbs, and nourishing broth, it’s the perfect meal to eat day and night without guilt.
Prep Time 15 minutes
Cook Time 30 minutes
Total Time 45 minutes
Servings: 4 -6 servings
Course: Soup
Cuisine: Healthy

Ingredients
  

  • 1 onion chopped
  • Olive oil for frying
  • 1 celery stalk chopped
  • 1 carrot chopped
  • 1 red bell pepper chopped
  • 1 green bell pepper chopped
  • 2 garlic cloves minced
  • 1 leek cleaned and sliced
  • 3 potatoes peeled and diced
  • 2 tablespoons flour
  • 200 ml 1 cup vegetable broth
  • 1.5 liters 7 cups vegetable broth
  • Salt and black pepper to taste
  • 100 g 1/2 cup noodles
  • Dried parsley for garnish

Method
 

  1. Sauté the Vegetables: In a large pot, heat a little olive oil over medium heat. Add the chopped onion, celery, carrot, red pepper, green pepper, garlic, and leek. Cook for about 5 minutes until the vegetables begin to soften.
  2. Add the Potatoes and Flour: Stir in the diced potatoes and cook for another 2 minutes. Sprinkle the flour over the vegetables, stirring well to coat everything evenly.
  3. Add the Broth: Slowly pour in 200ml of vegetable broth while stirring to prevent lumps from forming. Once combined, add the remaining 1.5 liters of broth. Bring the soup to a boil.
  4. Simmer and Season: Reduce the heat to low, season with salt and black pepper, and let the soup simmer for 15-20 minutes or until the potatoes are tender.
  5. Add the Noodles: Stir in the noodles and cook according to the package instructions until they are tender.
  6. Garnish and Serve: Sprinkle dried parsley over the soup before serving. Enjoy warm.

Notes

  • For a low-carb version, replace potatoes with cauliflower and use zucchini noodles instead of regular noodles.
  • This soup can be stored in an airtight container in the refrigerator for up to 4 days. It also freezes well for up to 3 months.
  • Feel free to customize the recipe by adding other vegetables like spinach, zucchini, or mushrooms.
  • To make it protein-rich, add chickpeas, lentils, or shredded chicken.

No-Bake Carrot Bites – A Healthy and Delicious Snack

Finding a snack that is both nutritious and satisfying can be challenging, especially when you want something quick and easy to prepare. These no-bake carrot bites are the perfect solution. They require no baking, come together in minutes, and provide a delicious way to enjoy the natural sweetness of carrots combined with wholesome ingredients.

Packed with fiber, healthy fats, and natural sweetness, these energy bites make a great grab-and-go snack, post-workout boost, or healthy dessert alternative. Whether you’re looking for a nutritious treat for yourself or a healthy snack for kids, these carrot bites check all the boxes.

Why You’ll Love These No-Bake Carrot Bites

These carrot bites are more than just a snack. They offer a perfect combination of taste, texture, and nutrition that makes them a fantastic addition to any meal plan. Here’s why they stand out:

1. No Baking Required

One of the best things about this recipe is that there’s no need to turn on the oven. The ingredients come together easily, and after a short chilling time, the bites are ready to enjoy. This makes them perfect for busy schedules or warm days when you don’t want to heat up the kitchen.

2. Naturally Sweetened and Full of Nutrients

Unlike many store-bought snacks that are loaded with refined sugars, these bites rely on maple syrup and carrots for natural sweetness. They also contain fiber-rich oats and flaxseed, heart-healthy pecans, and protein-packed almond butter.

3. Quick and Easy to Make

With only a few simple ingredients and minimal prep time, these carrot bites are ready in under 30 minutes. There’s no complicated process—just mix, roll, and refrigerate.

4. Perfect for Meal Prep

These bites store well in the fridge, making them an excellent option for meal prepping. You can make a batch at the start of the week and have a ready-to-eat snack whenever you need a quick energy boost.

5. Kid-Friendly and Great for Lunchboxes

Kids love the naturally sweet flavor and soft texture of these bites. They make a fantastic lunchbox treat or after-school snack without the added sugars and artificial ingredients found in many packaged snacks.

Ingredients

IngredientQuantity
Old-fashioned oats (gluten-free)1 ½ cups
Raw pecans, chopped⅓ cup
Flaxseed meal1 tablespoon
Almond butter, well stirred¾ cup
Pure maple syrup3 tablespoons
Ground cinnamon½ teaspoon
Ground nutmeg¼ teaspoon
Packed grated carrot¾ cup

Directions

  1. In a mixing bowl, combine oats, chopped pecans, flaxseed meal, cinnamon, and nutmeg.
  2. Add almond butter, maple syrup, and grated carrots to the dry ingredients. Stir until the mixture is evenly combined.
  3. Use your hands or a spoon to scoop small portions of the mixture and roll them into bite-sized balls.
  4. Place the bites on a baking sheet or plate and refrigerate for 20-30 minutes to firm up.
  5. Enjoy immediately or store in an airtight container in the fridge for up to 1 week.

Nutritional Information (Per Serving, Approx.)

NutrientAmount
Calories120 kcal
Protein3g
Carbohydrates12g
Fats7g
Fiber2g
Sugar5g
Calcium40mg
Iron0.8mg

Health Benefits of No-Bake Carrot Bites

1. Rich in Fiber for Better Digestion

Oats, flaxseed, and carrots provide a great source of dietary fiber, which supports healthy digestion and helps keep you full longer. This makes these bites a satisfying snack that won’t cause energy crashes.

2. Heart-Healthy Ingredients

Pecans and almond butter contain healthy monounsaturated fats, which support heart health by helping to reduce bad cholesterol levels. Additionally, oats contain beta-glucan, a type of soluble fiber that helps improve cholesterol levels.

3. Packed with Vitamins and Antioxidants

Carrots are rich in vitamin A and beta-carotene, which support eye health and boost the immune system. Cinnamon and nutmeg also contain antioxidants that help reduce inflammation in the body.

4. Great for Sustained Energy

With a balanced combination of healthy fats, protein, and complex carbohydrates, these bites provide a steady release of energy, making them an excellent pre-workout snack or mid-afternoon pick-me-up.

Ways to Customize These Carrot Bites

While this recipe is delicious as is, it can easily be adapted to suit different tastes and dietary needs. Here are a few ways to customize the flavor and texture:

1. Add a Crunchy Element

If you love a little crunch, try adding chopped walnuts, sunflower seeds, or pumpkin seeds for extra texture and nutrients.

2. Boost the Protein Content

For an extra protein boost, mix in a scoop of your favorite protein powder or add an extra tablespoon of almond butter.

3. Make It Chocolatey

If you’re a chocolate lover, a handful of dark chocolate chips or a drizzle of melted dark chocolate on top can take these bites to the next level.

4. Experiment with Different Nut Butters

While almond butter provides a mild and creamy flavor, you can substitute it with peanut butter, cashew butter, or sunflower seed butter for a different taste.

5. Spice It Up

Enhance the flavor with additional spices such as ginger, cardamom, or allspice for a more complex and warming taste.

Common Mistakes to Avoid

Even though these bites are simple to make, there are a few things to keep in mind to ensure the best texture and flavor:

1. Not Using Well-Stirred Nut Butter

Natural almond butter tends to separate, so make sure to stir it well before using. Otherwise, the bites may end up too dry or too oily.

2. Not Chilling the Mixture Long Enough

The bites need at least 20-30 minutes in the fridge to firm up. Skipping this step may result in a softer, less stable texture.

3. Using Too Much Liquid

If the mixture seems too wet, add a little more oats or flaxseed meal to absorb excess moisture.

4. Skipping the Grating Step for Carrots

The carrots should be finely grated so they blend well into the mixture. If they’re too chunky, the bites may not hold together as well.

5. Overprocessing the Mixture

If using a food processor, be careful not to blend too much. The goal is to mix everything while maintaining some texture, not to turn it into a paste.

FAQs About No-Bake Carrot Bites

1. How Long Do These Carrot Bites Last?

They can be stored in an airtight container in the fridge for up to one week. If you want to keep them longer, freeze them for up to two months and thaw before eating.

2. Can I Use a Different Sweetener Instead of Maple Syrup?

Yes! You can substitute maple syrup with honey, agave syrup, or date syrup for a different natural sweetness.

3. Can I Make These Nut-Free?

Absolutely! Replace the almond butter with sunflower seed butter and swap the pecans for pumpkin or sunflower seeds for a nut-free version.

4. Can I Use Quick Oats Instead of Old-Fashioned Oats?

Yes, but the texture may be slightly different. Old-fashioned oats provide a bit more chewiness, while quick oats create a softer bite.

5. Are These Bites Suitable for Kids?

Yes! These bites are naturally sweet, nutritious, and easy for kids to eat. Just ensure that any added nuts are finely chopped for younger children.

Conclusion: A Healthy and Delicious Snack for Any Time of Day

No-bake carrot bites are the perfect combination of convenience, nutrition, and flavor. Whether you need a quick breakfast option, a post-workout snack, or a healthy treat to satisfy your sweet tooth, these bites offer a delicious and wholesome alternative to processed snacks.

With their naturally sweet flavor, soft texture, and satisfying crunch from nuts and oats, they are a snack you can feel good about eating. Plus, they’re easy to customize, require minimal ingredients, and store well, making them a fantastic option for meal prep.

Try making a batch today—you might just find yourself reaching for these healthy, energy-boosting bites again and again!

Amal

No-Bake Carrot Bites – A Healthy and Delicious Snack

These no-bake carrot bites are a perfect combination of natural sweetness, crunchy texture, and wholesome ingredients. Made with oats, pecans, almond butter, and fresh grated carrots, they’re packed with fiber, healthy fats, and a touch of spice from cinnamon and nutmeg. Quick to prepare and requiring no baking, these bites are an excellent on-the-go snack, post-workout boost, or healthy treat for any time of the day!
Prep Time 10 minutes
Cook Time 20 minutes
Total Time 30 minutes
Servings: 12 -14 bites
Course: Snack
Cuisine: Healthy

Ingredients
  

  • 1 ½ cups old-fashioned oats gluten-free
  • cup raw pecans chopped
  • 1 tablespoon flaxseed meal
  • ¾ cup almond butter well stirred
  • 3 tablespoons pure maple syrup
  • ½ teaspoon ground cinnamon
  • ¼ teaspoon ground nutmeg
  • ¾ cup packed grated carrot

Method
 

  1. In a large bowl, combine oats, chopped pecans, flaxseed meal, cinnamon, and nutmeg.
  2. Add almond butter, maple syrup, and grated carrots, mixing until the ingredients are fully combined and sticky.
  3. Using your hands or a spoon, scoop small portions of the mixture and roll them into bite-sized balls.
  4. Place the bites on a plate or baking sheet and refrigerate for 20-30 minutes to firm up.
  5. Enjoy immediately or store in an airtight container in the fridge for up to one week.

Notes

  • If the mixture feels too dry, add 1-2 teaspoons of extra almond butter or a little maple syrup.
  • For a nut-free version, replace almond butter with sunflower seed butter and swap pecans for pumpkin seeds.
  • Store in an airtight container in the fridge for up to one week or freeze for up to two months.
  • Customize with dark chocolate chips, shredded coconut, or chia seeds for extra flavor and nutrition.