The Ultimate Guide to Making Delicious Hot Crab Dip

Imagine hosting a gathering where the aroma of melted cheese, delicate crab, and spices fills the air. Your guests crowd around, eagerly dipping crackers and baguette slices into a warm, creamy dish. That’s the magic of Hot Crab Dip. If you’re ready to wow your friends and family with a restaurant-worthy appetizer, you’ve come to the right place. This guide walks you through every detail, from ingredients to serving suggestions, ensuring your dish is a guaranteed hit.

Why Hot Crab Dip is the Ultimate Party Pleaser

Hot Crab Dip has all the elements of a crowd-pleaser: creamy textures, bold flavors, and that irresistible seafood goodness. Whether it’s a cozy game night, a holiday feast, or a casual hangout, this dip fits perfectly into any setting. Plus, it’s simple to make yet impressively decadent—a winning combination!

Ingredients for Hot Crab Dip

To create this flavorful appetizer, gather the following ingredients:

IngredientQuantity
Cream cheese8 ounces
Lemon (juiced)1/2 medium
Sour cream1/2 cup
Mayonnaise1/4 cup
Worcestershire sauce1 tablespoon
Old Bay seasoning1 tablespoon
Dry, ground mustard1 teaspoon
Hot sauce (e.g., Tabasco)1 teaspoon
Garlic powder1/2 teaspoon
Fresh lump crabmeat or claw meat1 pound
Scallions (finely chopped)3 medium
Sharp cheddar cheese (shredded)8 ounces (2 cups)
Fresh parsley (chopped)1/4 medium bunch
Baguette slices, crackers, chips, or vegetablesFor serving

Step-by-Step Instructions for Perfect Hot Crab Dip

Follow these steps to create a creamy, cheesy, and irresistible crab dip:

1. Prep Your Ingredients

  • Cut the cream cheese into smaller pieces for easy melting.
  • Juice half a lemon until you have 1 tablespoon of juice.
  • Chop the scallions finely and shred the cheese if not pre-shredded.

2. Soften the Cream Cheese

Place the cream cheese in a microwave-safe bowl and heat in 15-second intervals until softened, about 45 seconds.

3. Create the Creamy Base

Transfer the softened cream cheese to a large mixing bowl. Using an electric mixer or stand mixer with a paddle attachment, beat the cream cheese on medium-high speed until smooth (about 1 minute).

4. Add Flavor Boosters

Add the lemon juice, sour cream, mayonnaise, Worcestershire sauce, Old Bay seasoning, dry mustard, hot sauce, and garlic powder to the cream cheese. Beat until the mixture is light and fluffy, resembling buttercream frosting (about 3 minutes).

5. Incorporate the Crab and Cheese

Drain the crabmeat thoroughly and pick through it to remove any shell pieces. Add the crabmeat, scallions, and half of the shredded cheese to the creamy base. Gently fold the mixture together using a spatula.

6. Assemble the Dip

Spread the mixture evenly in a 2-quart baking dish or a 10-inch cast-iron skillet. Sprinkle the remaining cheese on top. Cover the dish tightly with aluminum foil.

7. Bake Until Bubbling

Preheat your oven to 375°F. Bake the dip for 20–25 minutes, or until it’s bubbling around the edges and the cheese has melted.

8. Broil for a Golden Finish (Optional)

If you prefer a browned top, uncover the dish and broil on high for 2–4 minutes.

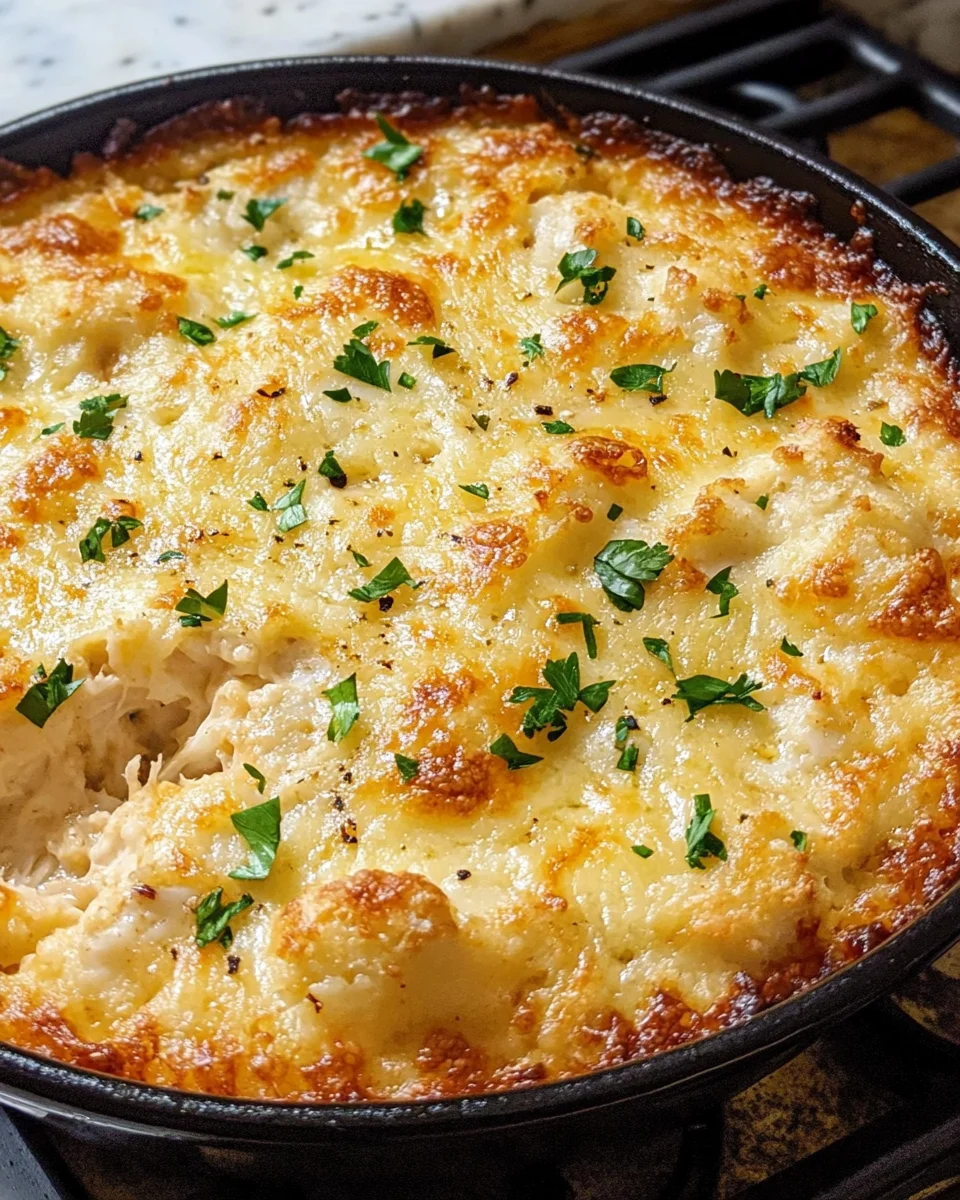
9. Garnish and Serve

Sprinkle the dip with finely chopped parsley. Serve it warm with baguette slices, crackers, chips, or fresh vegetables.

Tips for Perfecting Your Hot Crab Dip

  1. Choose Quality Crabmeat: Fresh lump crabmeat offers the best flavor and texture. If unavailable, high-quality canned crab can work too.
  2. Adjust the Heat: Use more hot sauce or a spicier variety if you want extra kick.
  3. Avoid Overmixing: Gently fold the crabmeat to retain its delicate texture.
  4. Make Ahead: Prepare the dip a day in advance and refrigerate it. Just bake it fresh when you’re ready to serve.

Nutritional Information

NutrientPer Serving (Approx.)
Calories210
Protein14 g
Carbohydrates4 g
Fat16 g
Sodium380 mg

Why You’ll Love This Recipe

Hot Crab Dip combines rich, creamy textures with a savory, slightly tangy flavor profile. The hint of spice balances the sweetness of the crabmeat, while the melted cheese adds pure indulgence. It’s versatile, satisfying, and guaranteed to leave everyone asking for seconds.

Frequently Asked Questions About Hot Crab Dip

1. Can I use canned crabmeat?

Yes, you can use high-quality canned crabmeat if fresh isn’t available. Be sure to drain and pick through it to remove any shells.

2. How do I store leftover dip?

Store leftovers in an airtight container in the refrigerator for up to 3 days. Reheat in the oven at 350°F or in the microwave until warmed through.

3. Can I freeze Hot Crab Dip?

While freezing is possible, the texture may change slightly. If you plan to freeze, do so before baking and store it in a freezer-safe container for up to 2 months.

4. What can I serve with Hot Crab Dip?

Pair it with baguette slices, crackers, tortilla chips, or crunchy vegetables like celery and carrots.

5. Can I substitute the cheese?

Yes! You can experiment with cheeses like Gruyere, Monterey Jack, or Parmesan for different flavors.

6. Is this recipe gluten-free?

The dip itself is gluten-free, but ensure that your serving items (e.g., crackers) are also gluten-free.

Elevate Your Entertaining Game with Hot Crab Dip

You now have all the tools to make a crowd-pleasing Hot Crab Dip that’s guaranteed to impress. With its creamy texture, bold flavors, and easy preparation, this dish is a fantastic addition to any menu. So why wait? Gather your ingredients and get cooking—you’ll have a warm, cheesy appetizer ready to delight your guests in no time!


ating

The Ultimate Guide to Making Delicious Hot Crab Dip

A creamy, cheesy, and irresistible appetizer bursting with the flavors of fresh crab, melted cheese, and zesty spices. Perfect for any occasion, Hot Crab Dip is your go-to dish for impressing guests with minimal effort.
Prep Time 10 minutes
Cook Time 25 minutes
Total Time 35 minutes
Servings: 8 servings
Course: Appetizer
Cuisine: American

Ingredients
  

  • 8 ounces cream cheese
  • Juice of 1/2 medium lemon about 1 tablespoon
  • 1/2 cup sour cream
  • 1/4 cup mayonnaise
  • 1 tablespoon Worcestershire sauce
  • 1 tablespoon Old Bay seasoning
  • 1 teaspoon dry ground mustard
  • 1 teaspoon hot sauce e.g., Tabasco
  • 1/2 teaspoon garlic powder
  • 1 pound fresh lump crabmeat or claw meat
  • 3 medium scallions finely chopped
  • 8 ounces 2 cups sharp cheddar cheese, shredded
  • 1/4 medium bunch fresh parsley chopped
  • Baguette slices crackers, chips, or vegetables (for serving)

Method
 

Prepare Ingredients:
  1. Cut cream cheese into smaller pieces for quick melting.
  2. Juice the lemon until you have 1 tablespoon.
  3. Finely chop scallions and shred cheese if not pre-shredded.
Soften Cream Cheese:
  1. Place cream cheese in a microwave-safe bowl and heat in 15-second intervals until softened (about 45 seconds).
Make the Creamy Base:
  1. In a large mixing bowl, beat softened cream cheese on medium-high speed until smooth (about 1 minute).
  2. Add lemon juice, sour cream, mayonnaise, Worcestershire sauce, Old Bay seasoning, dry mustard, hot sauce, and garlic powder. Beat until light and fluffy (about 3 minutes).
Incorporate Crab and Cheese:
  1. Drain crabmeat and remove any shell pieces.
  2. Gently fold crabmeat, scallions, and half of the shredded cheese into the creamy base using a spatula.
Assemble the Dip:
  1. Spread the mixture evenly in a 2-quart baking dish or 10-inch cast-iron skillet.
  2. Sprinkle remaining cheese on top and cover tightly with aluminum foil.
Bake:
  1. Preheat oven to 375°F.
  2. Bake for 20–25 minutes or until bubbling around the edges and cheese is melted.
Optional Broiling:
  1. For a golden, crispy top, broil uncovered on high for 2–4 minutes.
Garnish and Serve:
  1. Sprinkle with chopped parsley and serve warm with baguette slices, crackers, chips, or vegetables.

Notes

  • Use fresh lump crabmeat for the best flavor. If unavailable, high-quality canned crab works as a substitute.
  • Adjust spice levels by varying the hot sauce amount.
  • Prepare ahead and refrigerate the unbaked dip for up to a day. Bake fresh before serving.

The Ultimate Guide to Cooking Perfect Mexican Red Rice

When you think of Mexican cuisine, one of the staples that undoubtedly comes to mind is Mexican Red Rice. This vibrant, flavorful side dish is a must-have accompaniment to a variety of Mexican meals. It’s warm, aromatic, and irresistibly fluffy. If you’ve ever wondered how to create this culinary masterpiece at home, you’re in for a treat. Let’s dive in and learn how you can whip up this classic dish with ease!

What Makes Mexican Red Rice Special?

Mexican Red Rice stands out for its rich, tomato-infused flavor combined with a hint of spice and fragrant herbs. It’s versatile enough to serve with tacos, enchiladas, or grilled meats. Unlike plain white rice, this dish is a sensory experience, with its bold colors and layers of flavor enhancing any meal it accompanies.

Ingredients for Mexican Red Rice

Here’s what you’ll need to make authentic Mexican Red Rice. The recipe below serves approximately four people.

IngredientQuantity
Olive oil1 1/2 tbsp
Garlic cloves, minced2
White onion, finely chopped1/2 small
Long-grain white rice, uncooked1 cup
Chicken or vegetable broth1 3/4 cups (435 ml)
Tomato paste2 1/2 tbsp
Salt1/4 tsp
Serrano or jalapeño pepper1 whole (optional)
Coriander/cilantro sprig1
Optional garnish: chopped cilantro leavesAs desired

Step-by-Step Instructions

Cooking Mexican Red Rice is easier than you think. Follow these simple steps to achieve perfection:

  1. Prepare the Ingredients
    Chop your onions and mince the garlic cloves. Rinse the rice under cold water until the water runs clear to remove excess starch. This helps the rice cook up fluffy, not sticky.
  2. Sauté the Aromatics
    Heat the olive oil in a large saucepan over medium heat. Add the garlic and stir briefly to release its aroma. Toss in the onions and cook for 4–5 minutes until they turn translucent.
  3. Toast the Rice
    Add the rinsed and drained rice to the pan. Stir for about 2 minutes, allowing the rice to absorb some oil and develop a slightly nutty aroma.
  4. Mix in the Base
    Pour in the broth, add the tomato paste, and sprinkle in the salt. Stir well until the tomato paste dissolves completely.
  5. Add Flavor Enhancers
    Gently place the whole jalapeño or serrano pepper into the mixture. Lay the cilantro sprig on top for added fragrance.
  6. Simmer to Perfection
    Cover the saucepan and bring the mixture to a simmer. Lower the heat to maintain a gentle simmer and cook for 15 minutes, or until the liquid is absorbed.
  7. The Resting Phase
    Remove the pan from heat, but don’t lift the lid yet! Let the rice sit undisturbed for 10 minutes. This crucial step ensures the remaining moisture gets evenly distributed, transforming the rice from sticky to fluffy.
  8. Fluff and Serve
    Use a fork to fluff the rice. Garnish with extra chopped cilantro if desired, and serve hot.

Tips for Perfect Mexican Red Rice

  • Choose the Right Rice: Long-grain white rice works best for this recipe because it stays fluffy and separate. Avoid short-grain varieties.
  • Broth Matters: For a richer flavor, use homemade chicken or vegetable broth.
  • Spice Level: Adjust the heat by using more or less of the serrano/jalapeño pepper, or omit it entirely for a milder version.

Nutritional Information

NutrientPer Serving
Calories210
Protein4 g
Carbohydrates36 g
Fat5 g
Fiber2 g
Sodium310 mg

Why Mexican Red Rice Complements Every Meal

This dish acts as the perfect canvas for bolder flavors. It balances the heat of spicy dishes and adds substance to lighter fare like grilled fish or chicken. The subtle tanginess from the tomato paste and the freshness of cilantro elevate any meal to restaurant-quality.

Common Mistakes to Avoid

  1. Skipping the Rinse: Unwashed rice can lead to clumps due to its surface starch.
  2. Overcooking: Simmer on low heat to prevent burning the bottom layer of rice.
  3. Lifting the Lid Too Soon: This traps steam and disrupts the cooking process.

FAQ About Mexican Red Rice

1. Can I use brown rice instead of white rice?
Yes, but the cooking time and liquid ratio will need adjustment. Brown rice takes longer to cook and requires more broth.

2. How do I store leftovers?
Store cooled rice in an airtight container in the refrigerator for up to 4 days. Reheat it in the microwave or on the stove with a splash of water to restore moisture.

3. Can I freeze Mexican Red Rice?
Absolutely! Place the rice in a freezer-safe container, and it will last for up to 3 months. Thaw in the fridge overnight before reheating.

4. What can I serve with Mexican Red Rice?
It pairs wonderfully with enchiladas, fajitas, grilled shrimp, or even as a filling for burritos.

5. Can I make it vegetarian?
Yes, simply use vegetable broth instead of chicken broth.

6. How do I make it spicier?
Add more serrano or jalapeño peppers, or sprinkle in red chili flakes.

A Simple Yet Elegant Dish for Every Occasion

Now that you’ve mastered the art of making Mexican Red Rice, it’s time to bring a touch of authenticity to your kitchen. Whether you’re hosting a dinner party or looking for a quick and easy side dish for a weeknight meal, this recipe is sure to impress.

Try It Today!

Gather your ingredients and take the first step toward creating this delicious dish. Share it with your loved ones and watch as it becomes a new family favorite.

Mexican Red Rice (Arroz Rojo)

Mexican Red Rice, or Arroz Rojo, is a vibrant and flavorful side dish that complements any Mexican-inspired meal. Made with fragrant spices, rich tomato paste, and fluffy long-grain rice, it’s the perfect addition to tacos, enchiladas, or grilled meats.
Prep Time 8 hours 10 minutes
Cook Time 20 minutes
Total Time 33 minutes
Servings: 4
Course: Side Dish
Cuisine: Mexican

Ingredients
  

For the Rice Base:

1 1/2 tbsp olive oil

2 garlic cloves, minced

1/2 small white onion, finely chopped

1 cup long-grain white rice, rinsed and drained

1 3/4 cups chicken or vegetable broth2

1/2 tbsp tomato paste

1/4 tsp salt

For Flavor Enhancements:

1 whole serrano or jalapeño pepper (optional)

1 sprig fresh cilantro

For Garnish:

Chopped cilantro leaves (optional)

Method
 

Prepare the IngredientsMince the garlic, finely chop the onion, and rinse the rice under cold water until the water runs clear.

Sauté the Aromatics

Heat olive oil in a large saucepan over medium heat.Add garlic and stir briefly until fragrant.Toss in the chopped onion and sauté for 4–5 minutes, or until translucent.

Toast the Rice

Add the rinsed and drained rice to the pan. Stir for about 2 minutes until the rice absorbs some oil and develops a nutty aroma.

Mix in the Base

Pour in the broth, add the tomato paste, and sprinkle in the salt. Stir until the tomato paste dissolves completely.

Add Flavor Enhancers

Place the whole serrano or jalapeño pepper into the mixture and lay the cilantro sprig on top for added fragrance.

Simmer the Rice

Cover the saucepan with a lid and bring the mixture to a gentle simmer.Lower the heat to maintain a gentle simmer and cook for 15 minutes, or until the liquid is absorbed.

Let It Rest

Remove the pan from heat but keep the lid on. Let the rice sit undisturbed for 10 minutes to allow the moisture to distribute evenly.

Fluff and Serve

Use a fork to fluff the rice gently.Garnish with chopped cilantro if desired and serve hot.

    Notes

    • Choose the Right Rice: Long-grain white rice is ideal for this recipe as it remains fluffy and separate.
    • Adjust the Spice Level: Add more serrano or jalapeño peppers for extra heat, or omit them for a milder dish.
    • Don’t Lift the Lid: Avoid removing the lid during cooking or resting to retain steam for fluffy rice.

    Red Velvet Cheesecake Brownies: A Decadent Twist on Two Classics

    Imagine combining the rich, chocolatey flavor of brownies with the creamy, tangy goodness of cheesecake—all infused with the vibrant color and subtle cocoa notes of red velvet. Red Velvet Cheesecake Brownies are a dessert lover’s dream come true. Whether you’re celebrating a special occasion or simply treating yourself, these brownies are sure to impress.

    In this guide, you’ll learn everything about making Red Velvet Cheesecake Brownies, from the ingredients to step-by-step instructions, pro tips, and delicious variations.

    What Are Red Velvet Cheesecake Brownies?

    Red Velvet Cheesecake Brownies are a layered dessert that merges two iconic treats: the fudge-like texture of brownies and the creamy richness of cheesecake. The vibrant red hue of the brownie layer adds a visually stunning touch, making this dessert as beautiful as it is delicious.

    Why You’ll Love Red Velvet Cheesecake Brownies

    • Showstopping Appearance: The bold red and white layers are visually striking.
    • Rich and Creamy Texture: Perfectly balanced with every bite.
    • Easy to Make: Despite their gourmet look, they’re simple to prepare.
    • Perfect for Any Occasion: From holidays to casual gatherings, they’re always a hit.

    Ingredients for Red Velvet Cheesecake Brownies

    Here’s what you’ll need to make these delicious brownies:

    Brownie Layer

    IngredientQuantity
    White Sugar1 cup
    Unsalted Butter (melted)½ cup
    Unsweetened Cocoa Powder¼ cup
    Red Food Coloring1 ounce
    Vanilla Extract1 teaspoon
    Distilled White Vinegar1 teaspoon
    Salt¼ teaspoon
    Eggs (slightly beaten)2 large
    All-Purpose Flour¾ cup

    Cheesecake Filling

    IngredientQuantity
    Cream Cheese1 (8-ounce) package
    White Sugar¼ cup
    Large Egg1
    Vanilla Extract¼ teaspoon

    Step-by-Step Recipe for Red Velvet Cheesecake Brownies

    1. Prepare Your Equipment

    1. Preheat your oven to 350°F (175°C).
    2. Line an 8×8-inch baking dish with parchment paper, leaving a slight overhang for easy removal.

    2. Make the Red Velvet Brownie Layer

    1. In a large mixing bowl, combine the melted butter, sugar, and cocoa powder. Mix until smooth.
    2. Add the red food coloring, vanilla extract, vinegar, and salt. Stir until evenly blended.
    3. Beat in the eggs until fully incorporated.
    4. Gradually fold in the flour, being careful not to overmix. Set aside ¼ cup of the batter for swirling later.

    3. Prepare the Cheesecake Filling

    1. In a separate bowl, beat the cream cheese and sugar until smooth and creamy.
    2. Add the egg and vanilla extract, mixing until just combined.

    4. Assemble the Layers

    1. Spread the red velvet brownie batter evenly into the prepared baking dish.
    2. Pour the cheesecake filling over the brownie layer, smoothing it with a spatula.
    3. Drop spoonfuls of the reserved brownie batter onto the cheesecake layer. Use a toothpick or knife to swirl the two layers together for a marbled effect.

    5. Bake the Brownies

    1. Bake for 30–35 minutes, or until the center is set and a toothpick inserted into the cheesecake layer comes out clean.
    2. Allow the brownies to cool completely in the pan before slicing. For clean cuts, refrigerate for at least an hour before serving.

    Pro Tips for Perfect Red Velvet Cheesecake Brownies

    • Use Gel Food Coloring: It creates a more vibrant red hue without altering the batter’s consistency.
    • Don’t Overmix: Overmixing the brownie batter can lead to dense brownies. Stir just until combined.
    • Chill Before Cutting: Refrigerating the brownies makes slicing easier and creates cleaner layers.
    • Room Temperature Ingredients: Use room temperature cream cheese for a smooth cheesecake layer.

    Delicious Variations of Red Velvet Cheesecake Brownies

    1. Gluten-Free Option

    Substitute the all-purpose flour with a gluten-free flour blend.

    2. Raspberry Swirl

    Add a swirl of raspberry jam to the cheesecake layer for a fruity twist.

    3. Chocolate Chip Topping

    Sprinkle mini chocolate chips over the brownie batter before baking.

    4. Holiday-Themed Brownies

    Use green food coloring instead of red for Christmas or pastel colors for Easter.

    5. Nutty Delight

    Add chopped pecans or walnuts to the brownie layer for extra texture.

    Nutritional Information

    NutrientPer Serving (Approx.)
    Calories250
    Total Fat14g
    Saturated Fat8g
    Cholesterol70mg
    Sodium160mg
    Total Carbohydrates28g
    Sugars20g
    Protein3g

    Why Red Velvet Cheesecake Brownies Are a Must-Try

    These brownies are a delightful fusion of flavor and texture that appeal to all ages. The bold red color and creamy cheesecake layer make them a standout on any dessert table. Plus, their versatility means you can customize them for any occasion, from Valentine’s Day to birthdays and beyond.

    Frequently Asked Questions

    1. Can I make these brownies ahead of time?

    Yes! Red Velvet Cheesecake Brownies taste even better the next day. Store them in the refrigerator for up to 5 days.

    2. Can I freeze these brownies?

    Absolutely. Wrap them tightly in plastic wrap and store in an airtight container in the freezer for up to 3 months.

    3. Do I have to use food coloring?

    No, you can skip the food coloring, but the brownies won’t have the signature red velvet look.

    4. What can I use instead of cream cheese?

    Mascarpone cheese is a great alternative for the cheesecake layer.

    5. How do I prevent cracks in the cheesecake layer?

    Ensure the cream cheese is at room temperature, and avoid overbaking the brownies.

    6. Can I use a larger pan?

    Yes, but the layers will be thinner, and the baking time may need adjustment.

    Final Thoughts

    Making Red Velvet Cheesecake Brownies is a fun and rewarding way to indulge in the best of both worlds. Whether you’re baking for a party, a holiday, or a quiet evening at home, this dessert is guaranteed to impress. With their vibrant color, rich flavor, and creamy texture, these brownies are destined to become a favorite in your recipe collection.

    So, grab your ingredients, preheat your oven, and treat yourself to the magic of Red Velvet Cheesecake Brownies today!


    Recipe Card for Red Velvet Cheesecake Brownies

    Combine the rich, chocolatey goodness of red velvet with the creamy tanginess of cheesecake in these shows topping Red Velvet Cheesecake Brownies. A dessert that’s as beautiful as it is delicious, perfect for any occasion!
    Prep Time 15 minutes
    Cook Time 35 minutes
    Total Time 50 minutes
    Servings: 9
    Course: Dessert
    Cuisine: American

    Ingredients
      

    For the Brownie Layer:

    1 cup white sugar

    1/2 cup unsalted butter, melted

    1/4 cup unsweetened cocoa powder

    1 ounce red food coloring

    1 teaspoon vanilla extract

    1 teaspoon distilled white vinegar

    1/4 teaspoon salt

    2 large eggs, slightly beaten

    3/4 cup all-purpose flour

    For the Cheesecake Filling:1

    (8-ounce) package cream cheese, softened

    1/4 cup white sugar

    1 large egg

    1/4 teaspoon vanilla extract

    Method
     

    1. Prepare Your Equipment:
      Preheat your oven to 350°F (175°C).
      Line an 8×8-inch baking dish with parchment paper, leaving a slight overhang for easy removal.
      Make the Red Velvet Brownie Layer:
      In a large mixing bowl, combine the melted butter, sugar, and cocoa powder. Mix until smooth.
      Add the red food coloring, vanilla extract, vinegar, and salt. Stir until evenly blended.
      Beat in the eggs until fully incorporated.
      Gradually fold in the flour, being careful not to overmix. Reserve 1/4 cup of the batter for swirling.
      Prepare the Cheesecake Filling:
      In a separate bowl, beat the cream cheese and sugar until smooth and creamy.
      Add the egg and vanilla extract, mixing until just combined.
      Assemble the Layers:
      Spread the red velvet brownie batter evenly into the prepared baking dish.
      Pour the cheesecake filling over the brownie layer and smooth it with a spatula.
      Drop spoonfuls of the reserved brownie batter onto the cheesecake layer. Use a toothpick or knife to swirl the two layers together for a marbled effect.
      Bake the Brownies:
      Bake for 30–35 minutes, or until the center is set and a toothpick inserted into the cheesecake layer comes out clean.
      Allow the brownies to cool completely in the pan before slicing. For clean cuts, refrigerate for at least an hour before serving.

    Notes

    • Use gel food coloring for a more vibrant red hue.
    • Avoid overmixing the brownie batter to keep it light and fudgy.
    • Refrigerate the brownies before cutting to achieve clean, distinct layers.
    • Room temperature cream cheese ensures a smooth cheesecake filling.

    Chicken Saltimbocca: A Classic Italian Dish to Delight Your Taste Buds

    If you’ve ever wanted to bring the flavors of an authentic Italian kitchen into your home, Chicken Saltimbocca is the dish for you. Translating to “jumps in the mouth,” this dish lives up to its name with a symphony of savory and aromatic ingredients. It’s an elegant yet simple recipe that makes any dinner feel like a special occasion.

    In this guide, you’ll discover how to make Chicken Saltimbocca step by step, along with tips, variations, and answers to common questions. Get ready to wow your family and friends with this Italian masterpiece!

    What Is Chicken Saltimbocca?

    Chicken Saltimbocca is a traditional Italian dish featuring thin chicken cutlets topped with fresh sage leaves and wrapped in prosciutto. The cutlets are lightly cooked in olive oil and then simmered in a savory sauce made with white wine, chicken broth, and butter. It’s a dish that’s rich in flavor yet surprisingly easy to prepare.

    Why You’ll Love Chicken Saltimbocca

    • Bursting with Flavor: The combination of prosciutto, sage, and buttery sauce creates a dish that’s perfectly balanced.
    • Elegant Yet Simple: It looks impressive but requires minimal effort.
    • Versatile: Serve it with pasta, roasted vegetables, or a crisp salad for a complete meal.
    • Perfect for Entertaining: Your guests will think you’ve been to culinary school!

    Ingredients for Chicken Saltimbocca

    Here’s what you’ll need to make this classic dish:

    IngredientQuantity
    Chicken Cutlets (6 ounces)8
    Salt1 teaspoon
    Black Pepper½ teaspoon
    Fresh Sage Leaves16 large
    Prosciutto16 thin slices
    Olive Oil3 tablespoons
    Dry White Wine1 cup
    Low-Sodium Chicken Broth1 cup
    Butter½ stick (4 tbsp)

    How to Make Chicken Saltimbocca

    1. Prepare the Chicken Cutlets

    1. Place each chicken cutlet between two pieces of plastic wrap and gently pound it with a mallet until about ¼ inch thick. This ensures even cooking.
    2. Season both sides of the cutlets with salt and pepper.

    2. Add Sage and Prosciutto

    1. Lay two sage leaves on one side of each cutlet.
    2. Cover the sage leaves with a slice of prosciutto, pressing gently so it adheres to the chicken.

    3. Cook the Chicken

    1. Heat 2 tablespoons of olive oil in a large skillet over medium heat.
    2. Place the chicken, prosciutto-side down, into the skillet. Cook for 2–3 minutes until the prosciutto is crisp.
    3. Flip the chicken and cook the other side for an additional 2 minutes. Transfer to a plate and keep warm.

    4. Make the Sauce

    1. Deglaze the skillet with 1 cup of dry white wine, scraping up any browned bits.
    2. Add the chicken broth and bring the mixture to a simmer.
    3. Stir in the butter until it melts, creating a rich and glossy sauce.

    5. Combine and Serve

    1. Return the chicken to the skillet, spooning the sauce over each cutlet.
    2. Cook for another 2–3 minutes to heat through.
    3. Serve immediately, drizzled with extra sauce.

    Pro Tips for Perfect Chicken Saltimbocca

    • Choose Quality Prosciutto: The prosciutto is a key flavor component, so opt for high-quality slices.
    • Don’t Skip the Sage: Fresh sage adds a distinctive, earthy aroma that makes this dish authentic.
    • Use Dry Wine: A dry white wine like Sauvignon Blanc or Pinot Grigio works best to balance the richness of the sauce.
    • Keep It Warm: If cooking in batches, keep the chicken warm in a 200°F (95°C) oven while you finish the sauce.

    Delicious Variations of Chicken Saltimbocca

    1. Veal Saltimbocca

    Swap the chicken cutlets for veal to make the classic version of this dish.

    2. Lemon Chicken Saltimbocca

    Add a splash of fresh lemon juice to the sauce for a bright, zesty flavor.

    3. Stuffed Saltimbocca

    Stuff the chicken with mozzarella cheese and spinach before adding the prosciutto for an indulgent twist.

    4. Mushroom Sauce Saltimbocca

    Include sautéed mushrooms in the sauce for an extra layer of umami.

    5. Gluten-Free Saltimbocca

    Skip the flour dredging step if a recipe calls for it, ensuring the dish is gluten-free.

    Nutritional Information

    NutrientPer Serving (Approx.)
    Calories350
    Total Fat20g
    Saturated Fat7g
    Cholesterol120mg
    Sodium800mg
    Total Carbohydrates2g
    Protein35g

    What to Serve with Chicken Saltimbocca

    • Pasta: Fettuccine or spaghetti tossed in olive oil and garlic pairs beautifully.
    • Vegetables: Roasted asparagus or sautéed spinach complement the flavors.
    • Mashed Potatoes: Creamy mashed potatoes soak up the sauce perfectly.
    • Salad: A crisp green salad with a light vinaigrette balances the richness of the dish.

    Frequently Asked Questions

    1. Can I make Chicken Saltimbocca ahead of time?

    Yes! You can prepare the chicken up to the cooking step and refrigerate it. Cook it fresh when you’re ready to serve.

    2. What can I use instead of prosciutto?

    Thinly sliced pancetta or even deli ham can be used as a substitute.

    3. Can I freeze Chicken Saltimbocca?

    It’s best enjoyed fresh, but you can freeze leftovers for up to one month. Reheat gently to preserve the texture.

    4. What’s the best wine for this recipe?

    A dry white wine like Chardonnay, Sauvignon Blanc, or Pinot Grigio works well.

    5. Can I make it without wine?

    Yes, substitute the wine with extra chicken broth and a tablespoon of lemon juice for acidity.

    6. How do I prevent the chicken from overcooking?

    Pound the cutlets evenly and keep an eye on the cooking time to ensure they remain tender.

    Final Thoughts

    Chicken Saltimbocca is a dish that combines elegance and simplicity, making it perfect for both weeknight dinners and special occasions. With its savory flavors and rich sauce, it’s sure to become a favorite in your recipe collection. Now, it’s your turn—gather your ingredients, follow the steps, and enjoy the satisfaction of creating an authentic Italian masterpiece in your own kitchen!


    Recipe Card for Chicken Saltimbocca

    Chicken Saltimbocca is a classic Italian dish that combines tender chicken cutlets, fresh sage, and savory prosciutto in a rich, buttery sauce. Perfect for a quick yet elegant dinner, this recipe will transport your taste buds straight to Italy.
    Prep Time 15 minutes
    Cook Time 20 minutes
    Total Time 35 minutes
    Servings: 4
    Course: Main Course
    Cuisine: Italian

    Ingredients
      

    For the Chicken Saltimbocca:

    8 chicken cutlets (6 ounces each)

    1 teaspoon salt

    1/2 teaspoon black pepper

    16 large fresh sage leaves

    16 thin slices of prosciutto

    3 tablespoons olive oil

    1 cup dry white wine

    1 cup low-sodium chicken broth

    1/2 stick (4 tablespoons) butter

    Method
     

    1. Instructions:
      Prepare the Chicken Cutlets:
      Place each chicken cutlet between two pieces of plastic wrap and gently pound it to about 1/4 inch thick for even cooking.
      Season both sides of the cutlets with salt and pepper.
      Add Sage and Prosciutto:
      Lay two sage leaves on one side of each chicken cutlet.
      Cover the sage leaves with a slice of prosciutto, pressing gently to adhere it to the chicken.
      Cook the Chicken:
      Heat 2 tablespoons of olive oil in a large skillet over medium heat.
      Place the chicken cutlets, prosciutto-side down, into the skillet. Cook for 2–3 minutes until the prosciutto is crisp.
      Flip the chicken and cook the other side for another 2 minutes. Transfer to a plate and keep warm.
      Make the Sauce:
      Deglaze the skillet with the white wine, scraping up any browned bits with a wooden spoon.
      Add the chicken broth and bring the mixture to a simmer.
      Stir in the butter until melted, creating a rich and glossy sauce.
      Combine and Serve:
      Return the chicken cutlets to the skillet, spooning the sauce over each one.
      Cook for an additional 2–3 minutes to heat through.
      Serve immediately, drizzled with extra sauce.

    Notes

    • Opt for high-quality prosciutto for the best flavor.
    • Fresh sage leaves are essential for the dish’s authentic aroma.
    • If cooking in batches, keep the chicken warm in a 200°F (95°C) oven.
    • Use a dry white wine like Sauvignon Blanc or Pinot Grigio for optimal flavor.


    Strawberry Vanilla Pancakes: A Sweet Start to Your Day

    Imagine waking up to the aroma of fresh strawberries and warm vanilla wafting through your kitchen. Strawberry Vanilla Pancakes are more than just a breakfast treat—they’re a way to bring joy and comfort to your morning. Whether you’re cooking for yourself or serving up smiles to your loved ones, these pancakes are a simple yet delicious way to make the day special.

    In this guide, you’ll learn how to create perfectly fluffy Strawberry Vanilla Pancakes from scratch, along with tips, variations, and answers to common questions. Let’s get started!

    What Are Strawberry Vanilla Pancakes?

    Strawberry Vanilla Pancakes are a delightful twist on traditional pancakes, featuring fresh strawberries and a hint of vanilla extract. They combine the tangy sweetness of the fruit with the warm, comforting notes of vanilla for a perfectly balanced flavor. These pancakes are ideal for breakfast, brunch, or even dessert!

    Why You’ll Love Strawberry Vanilla Pancakes

    • Bursting with Flavor: Sweet strawberries and aromatic vanilla make every bite unforgettable.
    • Easy to Make: With basic ingredients and simple steps, these pancakes come together in no time.
    • Perfect for Any Occasion: Whether it’s a lazy Sunday or a celebratory brunch, they fit the bill.
    • Kid-Friendly: Children will love the bright colors and sweet taste.

    Ingredients for Strawberry Vanilla Pancakes

    Here’s what you’ll need to create these heavenly pancakes:

    IngredientQuantity
    All-Purpose Flour1 cup
    Brown Sugar2 tablespoons
    Baking Powder2 teaspoons
    Salt1 teaspoon (or to taste)
    Milk1 cup
    Large Egg1
    Vegetable Oil2 tablespoons
    Vanilla Extract2 tablespoons
    Fresh Strawberries1 cup (chopped)

    Step-by-Step Recipe for Strawberry Vanilla Pancakes

    1. Prepare Your Ingredients

    Before you begin, gather and measure all your ingredients. This helps you stay organized and ensures you don’t miss anything.

    2. Mix the Dry Ingredients

    1. In a large mixing bowl, combine the all-purpose flour, brown sugar, baking powder, and salt.
    2. Whisk the ingredients together until evenly blended.

    3. Combine the Wet Ingredients

    1. In a separate bowl, whisk the milk, egg, vegetable oil, and vanilla extract.
    2. Slowly pour the wet mixture into the dry ingredients, stirring until just combined. Be careful not to overmix; a few lumps are okay.

    4. Fold in the Strawberries

    Gently fold the chopped strawberries into the batter, ensuring they are evenly distributed.

    5. Heat the Pan

    1. Heat a non-stick skillet or griddle over medium heat. Lightly grease with butter or cooking spray.
    2. Test the heat by sprinkling a few drops of water on the surface—they should sizzle.

    6. Cook the Pancakes

    1. Pour about ¼ cup of batter onto the skillet for each pancake.
    2. Cook until bubbles form on the surface and the edges look set (about 2 minutes).
    3. Flip and cook for an additional 1–2 minutes, until golden brown.

    7. Serve and Enjoy

    Serve your Strawberry Vanilla Pancakes warm, topped with maple syrup, whipped cream, or extra strawberries for a beautiful presentation.

    Pro Tips for Perfect Pancakes

    • Fresh Ingredients: Use fresh strawberries for the best flavor and texture.
    • Don’t Overmix: Overmixing the batter can lead to dense pancakes. Stir just until combined.
    • Keep Pancakes Warm: Place cooked pancakes on a baking sheet in a 200°F (95°C) oven while you finish the batch.
    • Even Cooking: Use a ladle or measuring cup to ensure uniform pancake sizes.

    Strawberry Vanilla Pancake Variations

    1. Chocolate Chip Strawberry Pancakes

    Add ½ cup of chocolate chips to the batter for a sweet twist.

    2. Lemon Strawberry Pancakes

    Stir in 1 teaspoon of lemon zest for a zesty, refreshing flavor.

    3. Whole Wheat Strawberry Pancakes

    Replace all-purpose flour with whole wheat flour for a healthier version.

    4. Vegan Strawberry Pancakes

    Substitute milk with almond or oat milk, and use a flaxseed egg instead of a regular egg.

    5. Strawberry Shortcake Pancakes

    Layer the pancakes with whipped cream and sliced strawberries for a dessert-like treat.

    Nutritional Information

    NutrientPer Serving (Approx.)
    Calories220
    Total Fat8g
    Saturated Fat1.5g
    Cholesterol35mg
    Sodium400mg
    Total Carbohydrates32g
    Sugars12g
    Protein5g

    Why Strawberry Vanilla Pancakes Are a Great Choice

    Strawberry Vanilla Pancakes offer a delightful combination of flavors and textures that can brighten any day. They’re easy to customize, packed with wholesome ingredients, and perfect for sharing with loved ones. Plus, they look as good as they taste, making them ideal for Instagram-worthy breakfasts.

    Frequently Asked Questions

    1. Can I use frozen strawberries instead of fresh?

    Yes, but thaw and drain them first to prevent excess moisture from affecting the batter.

    2. How do I store leftover pancakes?

    Place leftovers in an airtight container and refrigerate for up to 3 days. Reheat in the microwave or toaster.

    3. Can I freeze Strawberry Vanilla Pancakes?

    Absolutely! Lay them flat on a baking sheet, freeze until solid, then store in a freezer-safe bag for up to 2 months.

    4. How do I make fluffier pancakes?

    Ensure your baking powder is fresh, and avoid overmixing the batter. Letting the batter rest for 5 minutes before cooking can also help.

    5. What’s the best topping for Strawberry Vanilla Pancakes?

    Classic options include maple syrup, powdered sugar, whipped cream, or extra fresh strawberries. For a decadent twist, try Nutella or cream cheese frosting.

    6. Can I make the batter ahead of time?

    It’s best to use the batter immediately, but you can prepare it up to 1 hour in advance. Stir gently before cooking.

    Final Thoughts

    Making Strawberry Vanilla Pancakes is a simple yet rewarding way to elevate your breakfast game. With fresh ingredients, a touch of creativity, and a few easy steps, you can create a dish that’s as beautiful as it is delicious. So grab your ingredients, heat up your skillet, and get ready to enjoy pancakes that taste like a slice of heaven.


    Recipe Card for Strawberry Vanilla Pancakes

    Start your morning with the delightful flavors of Strawberry Vanilla Pancakes! These fluffy pancakes are packed with fresh strawberries and a touch of vanilla for a sweet and comforting breakfast treat.
    Prep Time 10 minutes
    Cook Time 15 minutes
    Total Time 25 minutes
    Servings: 4
    Course: Breakfast
    Cuisine: American

    Ingredients
      

    For the Pancakes:

    1 cup all-purpose flour

    2 tablespoons brown sugar

    2 teaspoons baking powder

    1 teaspoon salt (or to taste)

    1 cup milk

    1 large egg

    2 tablespoons vegetable oil

    2 teaspoons vanilla extract

    1 cup fresh strawberries, chopped

    Method
     

    1. Prepare Your Ingredients:
      Gather and measure all your ingredients before starting.
      Mix the Dry Ingredients:
      In a large mixing bowl, combine the all-purpose flour, brown sugar, baking powder, and salt.
      Whisk until evenly blended.
      Combine the Wet Ingredients:
      In a separate bowl, whisk together the milk, egg, vegetable oil, and vanilla extract.
      Slowly pour the wet mixture into the dry ingredients, stirring until just combined. Avoid overmixing; a few lumps are fine.
      Fold in the Strawberries:
      Gently fold the chopped strawberries into the batter, ensuring they are evenly distributed.
      Heat the Pan:
      Heat a non-stick skillet or griddle over medium heat and lightly grease with butter or cooking spray.
      Test the heat by sprinkling a few drops of water on the surface—they should sizzle.
      Cook the Pancakes:
      Pour about ¼ cup of batter onto the skillet for each pancake.
      Cook until bubbles form on the surface and the edges look set (approximately 2 minutes).
      Flip and cook for an additional 1–2 minutes, until golden brown.
      Serve and Enjoy:
      Serve your pancakes warm, topped with maple syrup, whipped cream, or extra strawberries for a beautiful presentation.

    Notes

    • Use fresh strawberries for the best flavor and texture.
    • Let the batter rest for 5 minutes before cooking for fluffier pancakes.
    • To keep pancakes warm, place them on a baking sheet in a 200°F (95°C) oven while you finish cooking the batch.


    Lava Cake: A Decadent Dessert for Every Occasion

    Picture this: a rich, chocolate cake that hides a molten center waiting to ooze out with every forkful. If you’ve ever indulged in a Lava Cake, you know exactly how magical it feels to dig into one. It’s more than a dessert; it’s an experience. Whether you’re hosting a fancy dinner party or treating yourself to something special, Lava Cake is a timeless classic that never disappoints.

    In this guide, you’ll learn everything you need to know about crafting the perfect Lava Cake, including tips, tricks, and variations to make it your own. Let’s dive in and bring this chocolatey delight to life!

    What Is Lava Cake?

    Lava Cake, also known as molten chocolate cake, is a combination of a soufflé and a flourless chocolate cake. Its signature feature is the gooey, molten center that makes every bite irresistible. The dish is popular worldwide and is often associated with elegance and indulgence.

    Why You’ll Love Lava Cake

    • Quick and Easy: You can whip it up in under 30 minutes.
    • Minimal Ingredients: You likely already have the essentials in your kitchen.
    • Versatile: Perfect for any celebration or as a midweek treat.
    • Impressive: Looks and tastes like a gourmet dessert without the complicated process.

    Ingredients for Lava Cake

    Here’s a breakdown of the ingredients you’ll need for this recipe:

    IngredientQuantity
    Semisweet Chocolate (chopped)6 ½ (1-ounce) squares
    Butter (cut into 8 pieces)½ cup
    Eggs (room temperature)3
    White Sugar⅓ cup
    All-Purpose Flour2 tablespoons
    Unsweetened Cocoa Powder4 teaspoons
    Salt1 pinch

    How to Make Lava Cake

    1. Prepare Your Equipment

    1. Preheat your oven to 425°F (220°C).
    2. Grease four ramekins (6-ounce size) with butter or cooking spray and lightly dust them with cocoa powder.

    2. Melt the Chocolate and Butter

    1. In a heatproof bowl, combine the finely chopped chocolate and butter pieces.
    2. Melt the mixture using a double boiler or microwave in 20-second intervals, stirring until smooth.

    3. Beat the Eggs and Sugar

    1. In a medium bowl, whisk the eggs and sugar until the mixture becomes pale and slightly frothy. This adds volume to the batter.

    4. Combine the Wet and Dry Ingredients

    1. Gradually mix the melted chocolate into the egg mixture, stirring gently.
    2. Sift in the flour, cocoa powder, and salt, and fold everything together until smooth.

    5. Pour and Bake

    1. Divide the batter evenly among the prepared ramekins.
    2. Place the ramekins on a baking sheet and bake for 12–14 minutes. The edges should be firm, but the center should still jiggle slightly when shaken.

    6. Cool and Serve

    1. Let the cakes rest for 1–2 minutes.
    2. Run a knife around the edges to loosen them, then carefully invert each ramekin onto a plate.
    3. Serve immediately, garnished with powdered sugar, fresh berries, or a scoop of vanilla ice cream.

    Pro Tips for the Perfect Lava Cake

    • Use Quality Chocolate: The chocolate is the star ingredient, so choose high-quality semisweet chocolate for the best flavor.
    • Don’t Overbake: Keep an eye on the oven to ensure the center stays molten.
    • Room-Temperature Eggs: This helps the batter mix more evenly.
    • Prepping Ahead: You can prepare the batter a few hours in advance and refrigerate it. Bring it to room temperature before baking.

    Lava Cake Variations

    1. White Chocolate Lava Cake

    Swap semisweet chocolate with white chocolate for a rich, creamy variation.

    2. Peanut Butter Lava Cake

    Add a spoonful of peanut butter to the center of the batter before baking for a nutty surprise.

    3. Salted Caramel Lava Cake

    Drizzle salted caramel into the batter for a sweet and salty twist.

    4. Raspberry Lava Cake

    Incorporate fresh raspberries or raspberry jam into the center for a fruity kick.

    Nutritional Information

    NutrientPer Serving (Approx.)
    Calories360
    Total Fat23g
    Saturated Fat14g
    Cholesterol140mg
    Sodium50mg
    Total Carbohydrates30g
    Sugars23g
    Protein5g

    Why Lava Cake Is Perfect for Every Occasion

    From romantic dinners to festive celebrations, Lava Cake fits every scenario. Its luxurious texture and rich flavor make it an instant hit. Plus, it’s easy to make in individual servings, adding a personal touch to your dessert game.

    Frequently Asked Questions

    1. Can I make Lava Cake ahead of time?

    Yes, you can prepare the batter and refrigerate it for up to 24 hours. Bake it just before serving for the best results.

    2. What can I use instead of ramekins?

    You can use a muffin tin or oven-safe mugs if you don’t have ramekins.

    3. Can I make Lava Cake without eggs?

    Eggs are crucial for the texture, but you can experiment with substitutes like a flaxseed mixture if necessary.

    4. How do I store leftover Lava Cake?

    Store leftovers in an airtight container in the refrigerator. Reheat in the microwave for about 20 seconds to restore the molten center.

    5. Can I use milk chocolate instead of semisweet chocolate?

    Milk chocolate can be used, but the dessert will be much sweeter. Adjust the sugar accordingly.

    6. How do I know when the Lava Cake is done?

    The edges should be set, but the center should jiggle slightly when you shake the ramekin.

    Final Thoughts

    Making Lava Cake is simpler than it seems, and the results are nothing short of spectacular. With its molten center and rich chocolate flavor, this dessert is a showstopper that you’ll love making (and eating) time and time again.

    Now it’s your turn—grab your ingredients, follow the steps, and create your very own Lava Cake masterpiece.


    Recipe Card for Lava Cake

    Lava Cake is a decadent dessert that combines a rich, chocolatey cake with a molten, gooey center. Perfect for any occasion, this timeless treat is quick to make and irresistibly indulgent.
    Prep Time 10 minutes
    Cook Time 12 minutes
    Total Time 24 minutes
    Course: Dessert
    Cuisine: French-inspired

    Ingredients
      

    For the Lava Cake:

    6 1/2 ounces semisweet chocolate, chopped

    1/2 cup butter, cut into 8 pieces3 eggs, room temperature

    1/3 cup white sugar

    2 tablespoons all-purpose flour

    4 teaspoons unsweetened cocoa powder

    1 pinch salt

    Method
     

    1. Prepare Your Equipment:
      Preheat your oven to 425°F (220°C).
      Grease four 6-ounce ramekins with butter or cooking spray and lightly dust with cocoa powder.
      Melt the Chocolate and Butter:
      Combine the chopped chocolate and butter in a heatproof bowl.
      Melt the mixture using a double boiler or microwave in 20-second intervals, stirring until smooth.
      Beat the Eggs and Sugar:
      In a medium bowl, whisk together the eggs and sugar until pale and slightly frothy.
      Combine the Ingredients:
      Gradually stir the melted chocolate mixture into the egg mixture until well combined.
      Sift in the flour, cocoa powder, and salt, folding gently to create a smooth batter.
      Pour and Bake:
      Divide the batter evenly among the prepared ramekins.
      Place the ramekins on a baking sheet and bake for 12–14 minutes. The edges should be firm, but the center should jiggle slightly.
      Cool and Serve:
      Let the cakes rest for 1–2 minutes.
      Run a knife around the edges to loosen them, then carefully invert each ramekin onto a plate.
      Serve immediately, garnished with powdered sugar, fresh berries, or a scoop of vanilla ice cream.

    Notes

    • Use high-quality chocolate for the best flavor.
    • Avoid overbaking to maintain the gooey center.
    • Batter can be prepared ahead and refrigerated for up to 24 hours. Bring to room temperature before baking.

    Strawberry Pretzel Salad: The Perfect Blend of Sweet and Salty

    If you’re looking for a dessert that’s both nostalgic and unique, Strawberry Pretzel Salad might just be your new favorite treat. This layered dessert combines sweet, salty, and creamy flavors in a way that feels like a hug for your taste buds. Whether you’re preparing it for a family gathering, a potluck, or simply to treat yourself, it’s bound to become a crowd-pleaser.

    But what makes this dish so special? Let’s dive into the delightful world of Strawberry Pretzel Salad, starting with its origins and why it’s loved by so many.

    What Is Strawberry Pretzel Salad?

    Despite its name, this dish isn’t a salad in the traditional sense. It’s a dessert made up of three distinct layers: a crunchy pretzel crust, a creamy middle layer, and a fruity strawberry topping. The combination of flavors and textures makes it irresistibly good.

    Why You’ll Love Strawberry Pretzel Salad

    • Perfect Balance: The saltiness of the pretzel crust contrasts beautifully with the sweetness of the cream cheese layer and strawberry topping.
    • Versatile: It’s ideal for any occasion, from casual get-togethers to festive celebrations.
    • Simple Ingredients: You probably have most of the ingredients in your pantry or fridge.

    Ingredients You’ll Need

    Here’s a breakdown of everything you need to prepare Strawberry Pretzel Salad.

    IngredientQuantity
    Crushed Pretzels2 cups
    Butter (melted)¾ cup
    White Sugar (for crust)3 tablespoons
    Cream Cheese (softened)1 (8-ounce) package
    White Sugar (for filling)1 cup
    Whipped Topping (thawed)1 (8-ounce) container
    Strawberry Jell-O2 (3-ounce) packages
    Boiling Water2 cups
    Frozen Strawberries2 (10-ounce) packages

    How to Make Strawberry Pretzel Salad

    1. Preparing the Pretzel Crust

    1. Preheat your oven to 350°F (175°C).
    2. Crush the pretzels using a rolling pin or food processor until you have 2 cups of crumbs.
    3. In a medium bowl, combine the crushed pretzels, melted butter, and 3 tablespoons of sugar. Mix well.
    4. Press the mixture firmly into the bottom of a 9×13-inch baking dish.
    5. Bake for 10 minutes and let it cool completely.

    2. Creating the Creamy Middle Layer

    1. In a large mixing bowl, beat the softened cream cheese and 1 cup of sugar until smooth.
    2. Gently fold in the whipped topping until evenly combined.
    3. Spread the mixture over the cooled pretzel crust, ensuring it reaches the edges to prevent the strawberry layer from seeping through.

    3. Making the Strawberry Topping

    1. Dissolve the strawberry Jell-O in 2 cups of boiling water. Stir until completely dissolved.
    2. Add the frozen strawberries to the Jell-O mixture and let it cool slightly.
    3. Once the mixture begins to thicken, pour it over the cream cheese layer.

    4. Setting and Serving

    1. Refrigerate the dessert for at least 4 hours, or until fully set.
    2. Slice into squares and serve chilled.

    Pro Tips for the Best Strawberry Pretzel Salad

    • Crust Perfection: Press the crust firmly into the dish to ensure it holds together.
    • Prevent Seepage: Make sure the cream cheese layer completely seals the crust to prevent the Jell-O from leaking through.
    • Chill Time: Don’t rush the refrigeration step; the layers need time to set properly.

    Variations of Strawberry Pretzel Salad

    1. Mixed Berry Version

    Substitute the frozen strawberries and strawberry Jell-O with mixed berries and raspberry Jell-O for a tangy twist.

    2. Tropical Delight

    Try pineapple chunks and pineapple-flavored gelatin for a summery treat.

    3. Low-Sugar Option

    Use sugar-free Jell-O and a sugar substitute for the crust and filling to make a lighter version.

    Nutritional Information

    NutrientPer Serving (Approx.)
    Calories290
    Total Fat18g
    Saturated Fat10g
    Cholesterol40mg
    Sodium230mg
    Total Carbohydrates30g
    Sugars20g
    Protein3g

    Why Strawberry Pretzel Salad Is Perfect for Any Occasion

    Strawberry Pretzel Salad is versatile and appeals to all ages. Its bright red top layer and creamy middle make it visually stunning, while the flavor combination ensures it’s always a hit. It’s perfect for:

    • Holidays: A festive addition to Thanksgiving or Christmas spreads.
    • Potlucks: A guaranteed crowd-pleaser.
    • Birthday Parties: A unique alternative to traditional cake.

    Frequently Asked Questions

    1. Can I make Strawberry Pretzel Salad ahead of time?
    Yes! In fact, it tastes better when made a day in advance, as the flavors have time to meld.

    2. How do I store leftovers?
    Cover the dish tightly with plastic wrap and refrigerate for up to 3 days.

    3. Can I use fresh strawberries instead of frozen?
    Absolutely! Just slice fresh strawberries thinly and use them in place of the frozen ones.

    4. Can I freeze Strawberry Pretzel Salad?
    Freezing is not recommended, as the texture of the creamy layer can change.

    5. What can I use instead of whipped topping?
    You can substitute homemade whipped cream if you prefer a more natural option.

    6. How do I prevent the crust from becoming soggy?
    Ensure the cream cheese layer is spread all the way to the edges to create a barrier between the crust and the Jell-O.

    Final Thoughts

    Making Strawberry Pretzel Salad is a journey of blending contrasting flavors and textures into a harmonious dessert. Whether you’re new to this dish or revisiting an old favorite, it’s sure to bring smiles to everyone who tastes it.

    Now it’s your turn to try this recipe! Gather your ingredients, follow the steps, and enjoy the sweet success of creating a classic dessert loved by all.


    Recipe Card for Strawberry Pretzel Salad

    Strawberry Pretzel Salad is the perfect blend of sweet, salty, and creamy! This layered dessert combines a crunchy pretzel crust, a luscious cream cheese filling, and a fruity strawberry topping. It’s an irresistible treat for any occasion.
    Prep Time 20 minutes
    Cook Time 10 minutes
    Total Time 4 hours 30 minutes
    Servings: 12
    Course: Dessert
    Cuisine: American

    Ingredients
      

    2 cups crushed pretzels

    3/4 cup butter, melted

    3 tablespoons white sugar.

    For the Creamy Filling:

    1 (8-ounce) package cream cheese, softened

    1 cup white sugar

    1 (8-ounce) container whipped topping, thawed

    For the Strawberry Topping:

    2 (3-ounce) packages strawberry Jell-O

    2 cups boiling water

    2 (10-ounce) packages frozen strawberries

    Method
     

    1. Ensure the cream cheese layer completely seals the crust to prevent sogginess.
      For variations, substitute strawberries with mixed berries or tropical fruits.
      Use sugar-free Jell-O and sweeteners for a lighter version.

    How to Make Ground Beef Curry: A Flavorful, Easy-to-Make Dish

    There’s something magical about a steaming bowl of curry. It’s hearty, full of rich spices, and packed with bold flavors that transport you to another world. If you’re looking for a quick and satisfying way to experience that magic, Ground Beef Curry is the perfect recipe for you. It’s simple, budget-friendly, and endlessly customizable, making it a fantastic option for weeknight dinners or casual get-togethers.

    Let’s explore how you can make this delicious dish step by step.

    Why Ground Beef Curry is a Must-Try Recipe

    Imagine tender ground beef simmered with tomatoes, onions, and a fragrant blend of spices. It’s a comforting dish that delivers layers of flavor in every bite. Ground Beef Curry stands out because it’s:

    • Easy to Make: You only need one skillet and under an hour to prepare.
    • Versatile: Serve it with rice, naan, or even over pasta for a fun twist.
    • Customizable: Adjust the spice level, add vegetables, or use plant-based meat for a vegetarian version.

    Ingredients for Ground Beef Curry

    Here’s everything you’ll need to whip up this flavorful dish:

    IngredientQuantity
    Olive oil6 tablespoons
    Small onion, diced1
    Ground beef1 pound
    Medium tomatoes, chopped2
    Curry powder1 tablespoon
    Paprika1 teaspoon
    Salt1 teaspoon
    Black pepper¾ teaspoon
    Chile powder½ teaspoon
    Cayenne pepper¼ teaspoon
    Peas, including liquid (Optional)1 (8.5-ounce) can

    These ingredients combine to create a perfectly spiced curry with just the right balance of heat and savoriness.

    Step-by-Step Instructions for Ground Beef Curry

    Step 1: Sauté the Onion

    1. Heat 6 tablespoons of olive oil in a large skillet over medium heat.
    2. Add the diced onion and sauté until soft and golden, about 5 minutes.

    Step 2: Brown the Ground Beef

    1. Add the ground beef to the skillet.
    2. Cook, breaking it apart with a spoon, until browned and fully cooked through.

    Step 3: Add the Tomatoes and Spices

    1. Stir in the chopped tomatoes, allowing them to soften and release their juices.
    2. Sprinkle in the curry powder, paprika, salt, black pepper, chile powder, and cayenne pepper.
    3. Mix well to coat the beef and tomatoes evenly with the spices.

    Step 4: Simmer the Curry

    1. Reduce the heat to low and let the curry simmer for 10–15 minutes. This allows the flavors to meld together.
    2. If using canned peas, add them (including the liquid) during the last 5 minutes of cooking.

    Step 5: Adjust Seasoning and Serve

    1. Taste the curry and adjust the seasoning as needed.
    2. Serve hot over steamed rice, with naan, or alongside your favorite side dishes.

    Tips for the Perfect Ground Beef Curry

    1. Use Fresh Spices: Fresh, high-quality spices will make a noticeable difference in the flavor of your curry.
    2. Control the Heat: Adjust the cayenne pepper and chile powder to your preferred spice level.
    3. Add Vegetables: Consider adding diced potatoes, carrots, or bell peppers for extra nutrition and texture.
    4. Use a Non-Stick Skillet: This prevents sticking and makes cleanup easier.

    Nutritional Information

    NutrientPer Serving
    Calories320
    Protein20g
    Fat20g
    Carbohydrates12g
    Fiber3g
    Sodium620mg

    This dish is a good source of protein and offers a balance of carbs and fats to keep you satisfied.

    Serving Suggestions for Ground Beef Curry

    Ground Beef Curry pairs beautifully with a variety of sides. Here are some ideas:

    • Rice: Serve over fluffy basmati or jasmine rice for a traditional pairing.
    • Naan Bread: Use naan or roti to scoop up the curry.
    • Salad: A fresh cucumber or green salad adds a refreshing contrast.
    • Quinoa: For a healthier option, pair the curry with quinoa.

    Variations to Try

    1. Vegetarian Version

    Swap the ground beef for plant-based meat or cooked lentils for a vegetarian-friendly option.

    2. Coconut Curry Twist

    Stir in ½ cup of coconut milk during the simmering step for a creamier curry with a hint of sweetness.

    3. Spicy Beef Curry

    Increase the cayenne pepper or add fresh chopped chilies for an extra kick of heat.

    4. Ground Chicken or Turkey Curry

    Use ground chicken or turkey as a leaner alternative to beef.

    Frequently Asked Questions (FAQs)

    1. Can I make Ground Beef Curry ahead of time?

    Yes! Ground Beef Curry tastes even better the next day. Store it in an airtight container in the fridge for up to 3 days.

    2. Can I freeze Ground Beef Curry?

    Absolutely. Let the curry cool completely before transferring it to a freezer-safe container. It can be frozen for up to 3 months.

    3. What’s the best way to reheat this dish?

    Reheat the curry on the stovetop over low heat, adding a splash of water or broth if needed to loosen the sauce.

    4. Can I make this dish less spicy?

    Yes! Reduce or omit the cayenne pepper and chile powder to create a milder version of the curry.

    5. Can I use fresh peas instead of canned?

    Of course. Fresh or frozen peas work well, but you may need to add a bit of water or broth if skipping the liquid from the canned peas.

    6. What other spices can I add?

    Consider adding garam masala, ground coriander, or ground cumin for additional layers of flavor.

    Closing Thoughts and Call to Action

    Ground Beef Curry is a recipe you’ll want to make again and again. It’s quick, easy, and packed with bold flavors that will satisfy any craving for comfort food. Whether you’re feeding your family or looking for a delicious meal prep option, this dish fits the bill perfectly.

    Now it’s your turn! Gather your ingredients, follow these simple steps, and enjoy the delicious results. Share your experience or variations in the comments—we’d love to hear from you!

    How to Make Cheddar Bay Ground Beef Cobbler: The Ultimate Comfort Food

    When life calls for comfort food, few dishes can compete with the warm, hearty goodness of Cheddar Bay Ground Beef Cobbler. This recipe combines the savory flavors of ground beef, rich soups, and melted cheese with the fluffy, cheesy topping of Cheddar Bay Biscuits. It’s a dish that feels like a hug on a plate, perfect for family dinners, potlucks, or a cozy evening at home.

    Let’s dive into how you can make this soul-satisfying meal, step by step.

    Why You’ll Love Cheddar Bay Ground Beef Cobbler

    Picture this: tender ground beef cooked with onions and garlic, smothered in creamy cheddar and mushroom soups, and topped with golden, cheesy biscuits. It’s a dish that brings together comfort, flavor, and a little nostalgia. Whether you’re feeding a crowd or just looking to treat yourself, this recipe delivers every time.

    Ingredients for Cheddar Bay Ground Beef Cobbler

    Here’s what you’ll need to make this indulgent dish:

    For the Filling

    IngredientQuantity
    Lean ground beef1.5 lbs
    Yellow onion, diced1
    Chopped garlic1 tablespoon
    Condensed cheddar soup10.5 oz
    Condensed cream of mushroom soup10.5 oz
    Milk½ cup
    Salt½ teaspoon
    Pepper½ teaspoon
    Shredded cheddar cheese2 cups

    For the Topping

    IngredientQuantity
    Cheddar Bay Biscuit mix1 box
    Shredded cheddar cheese1 cup
    Milk2 cups
    Butter, melted¼ cup
    Fresh chopped parsleyFor garnish

    With these ingredients on hand, you’re ready to create a dish that’s equal parts comforting and delicious.

    Step-by-Step Instructions for Cheddar Bay Ground Beef Cobbler

    Step 1: Prepare the Ground Beef Mixture

    1. Heat a large skillet over medium heat. Add the ground beef and cook until browned, breaking it into crumbles with a wooden spoon.
    2. Add the diced onion and chopped garlic to the skillet. Cook until the onion is soft and translucent, about 3–4 minutes.
    3. Drain any excess grease from the skillet.

    Step 2: Make the Filling Sauce

    1. In the skillet with the ground beef mixture, stir in the condensed cheddar soup, cream of mushroom soup, and ½ cup of milk.
    2. Season the mixture with salt and pepper, stirring until everything is well combined.
    3. Simmer the mixture on low heat for 5 minutes to allow the flavors to meld together.

    Step 3: Transfer to a Baking Dish

    1. Preheat your oven to 375°F (190°C).
    2. Pour the ground beef mixture into a 9×13-inch baking dish, spreading it out evenly.
    3. Sprinkle 2 cups of shredded cheddar cheese over the beef mixture.

    Step 4: Prepare the Biscuit Topping

    1. In a mixing bowl, combine the Cheddar Bay Biscuit mix, 1 cup of shredded cheddar cheese, and 2 cups of milk. Stir until just combined.
    2. Carefully pour or spoon the biscuit batter over the beef mixture in the baking dish, spreading it out evenly.

    Step 5: Bake the Cobbler

    1. Place the baking dish in the preheated oven and bake for 30–35 minutes, or until the biscuit topping is golden brown and cooked through.
    2. Remove from the oven and brush the topping with melted butter for an extra layer of flavor.

    Step 6: Garnish and Serve

    1. Sprinkle fresh chopped parsley over the baked cobbler for a pop of color.
    2. Serve warm and enjoy the delicious combination of flavors and textures.

    Tips for the Best Cheddar Bay Ground Beef Cobbler

    1. Use Fresh Ingredients: Freshly shredded cheese and a good-quality biscuit mix will elevate the flavor.
    2. Don’t Overmix the Batter: Overmixing can make the biscuits dense instead of fluffy.
    3. Customize the Flavors: Add diced bell peppers, mushrooms, or a splash of hot sauce to the beef mixture for extra flavor.
    4. Check for Doneness: Make sure the biscuit topping is fully cooked by inserting a toothpick into the center. If it comes out clean, it’s ready!

    Nutritional Information

    NutrientPer Serving
    Calories480
    Protein28g
    Fat26g
    Carbohydrates35g
    Fiber2g
    Sodium980mg

    This dish is rich and indulgent, making it perfect for a treat-yourself meal or a special occasion.

    Serving Suggestions for Cheddar Bay Ground Beef Cobbler

    1. With a Side Salad: Balance the richness of the cobbler with a fresh green salad tossed in a light vinaigrette.
    2. Pair with Vegetables: Roasted broccoli, green beans, or steamed carrots make excellent side dishes.
    3. Serve with Bread: A slice of crusty bread is perfect for soaking up the cheesy, savory sauce.

    Variations to Try

    1. Spicy Version

    Add chopped jalapeños or a dash of cayenne pepper to the beef mixture for a spicy twist.

    2. Loaded Cobbler

    Incorporate cooked bacon, diced tomatoes, or even corn into the filling for added flavor and texture.

    3. Vegetarian Option

    Replace the ground beef with cooked lentils or plant-based meat for a vegetarian-friendly version.

    Frequently Asked Questions (FAQs)

    1. Can I make this dish ahead of time?

    Yes! Prepare the beef mixture and spread it in the baking dish. Cover and refrigerate for up to 24 hours. When ready to bake, add the biscuit topping and bake as directed.

    2. Can I use a different biscuit mix?

    Absolutely! While Cheddar Bay Biscuit mix adds a unique flavor, any biscuit mix will work.

    3. How do I store leftovers?

    Store leftovers in an airtight container in the refrigerator for up to 3 days. Reheat in the oven or microwave until warmed through.

    4. Can I freeze Cheddar Bay Ground Beef Cobbler?

    Yes, you can freeze this dish before baking. Cover tightly with foil and freeze for up to 2 months. Thaw in the fridge overnight before baking.

    5. Can I use a different type of meat?

    Certainly! Ground turkey, chicken, or even sausage can be used instead of ground beef.

    6. What can I do with leftover biscuit mix?

    Use leftover biscuit mix to make individual biscuits or as a topping for other casseroles.

    Closing Thoughts and Call to Action

    Cheddar Bay Ground Beef Cobbler is more than just a recipe—it’s a celebration of comfort food at its finest. Whether you’re serving it to your family, bringing it to a potluck, or indulging on a quiet evening, this dish is sure to be a hit.

    Now it’s your turn! Gather your ingredients, follow these simple steps, and treat yourself to a delicious homemade meal. Don’t forget to share your experience or variations in the comments below—we’d love to hear from you!

    How to Make Pasta alla Norcina: A Delicious Journey Through Umbrian Cuisine

    Close your eyes and imagine yourself in the heart of Italy, surrounded by rolling hills and medieval towns. The air is filled with the aroma of fresh herbs, savory meats, and creamy sauces. That’s the magic of Umbrian cuisine, and Pasta alla Norcina is one of its shining stars. This dish is rich, comforting, and packed with flavor—a perfect way to bring a little taste of Italy to your table.

    What is Pasta alla Norcina?

    Pasta alla Norcina hails from Norcia, a town in Umbria famous for its high-quality pork and black truffles. This dish traditionally combines fresh sausage, cream, Pecorino Romano, and often a touch of white wine to create a luxurious, hearty meal. It’s a recipe that’s simple yet elegant, perfect for any pasta lover.

    Ingredients for Pasta alla Norcina

    Let’s start with the essentials. Here’s what you’ll need for this mouthwatering recipe:

    IngredientQuantity
    Cremini mushrooms8 ounces
    Medium shallot1
    Garlic cloves, divided4
    Fresh rosemary sprig1
    Pecorino Romano cheese2 ounces (about 1 cup grated)
    Ground pork12 ounces
    Kosher salt2 teaspoons, divided
    Freshly ground black pepper1 teaspoon, divided
    Freshly grated or ground nutmeg1/2 teaspoon, divided
    Dried short pasta (penne, rigatoni, etc.)1 pound
    Olive oil2 tablespoons
    Dry white wine1/2 cup
    Heavy cream1 cup

    With these ingredients, you’re ready to create a dish that’s both flavorful and authentic.

    Step-by-Step Guide to Making Pasta alla Norcina

    Step 1: Prepare the Ingredients

    • Mushrooms: Clean and slice the cremini mushrooms.
    • Shallot and Garlic: Finely dice the shallot and mince two cloves of garlic. Keep the other two cloves whole for later.
    • Cheese: Grate the Pecorino Romano cheese for a sharp, salty flavor.

    Step 2: Cook the Pasta

    Bring a large pot of salted water to a boil and cook your pasta according to the package instructions. Reserve about 1 cup of pasta water before draining.

    Step 3: Sauté the Aromatics

    Heat 2 tablespoons of olive oil in a large skillet over medium heat. Add the minced garlic and shallot, cooking until fragrant, about 2 minutes. Toss in the rosemary sprig for an extra layer of flavor.

    Step 4: Add the Mushrooms

    Add the sliced mushrooms to the skillet, cooking until they’re tender and golden brown. Season with a pinch of salt and pepper, then set aside.

    Step 5: Cook the Pork

    In the same skillet, add the ground pork. Break it up with a wooden spoon and cook until browned. Season with 1 teaspoon of kosher salt, 1/2 teaspoon of pepper, and 1/4 teaspoon of nutmeg.

    Step 6: Deglaze with White Wine

    Pour in 1/2 cup of dry white wine to deglaze the skillet, scraping up any flavorful bits stuck to the bottom. Let the wine reduce by half.

    Step 7: Combine the Ingredients

    Reduce the heat to low and stir in the heavy cream. Return the cooked mushrooms to the skillet and mix well.

    Step 8: Add the Pasta

    Toss the drained pasta into the skillet, coating it thoroughly with the creamy sauce. If needed, add some reserved pasta water to adjust the consistency.

    Step 9: Finish with Cheese

    Sprinkle the grated Pecorino Romano over the pasta and stir until it’s melted and well combined. Remove the rosemary sprig and serve immediately.

    Tips for the Perfect Pasta alla Norcina

    1. Use Fresh Ingredients: Freshly ground nutmeg and grated Pecorino Romano will make a world of difference.
    2. Balance the Sauce: The reserved pasta water is your best friend for achieving the perfect sauce consistency.
    3. Customize the Recipe: Add a touch of truffle oil for a luxurious twist or substitute ground turkey for a lighter version.
    4. Serve Immediately: Pasta alla Norcina is best enjoyed fresh and hot.

    Nutritional Information

    NutrientPer Serving
    Calories650
    Protein28g
    Fat32g
    Carbohydrates58g
    Fiber4g
    Sodium850mg

    This hearty dish offers a balanced mix of protein, carbs, and fat, making it a satisfying meal.

    Variations on Pasta alla Norcina

    1. Vegetarian Version

    Skip the pork and use sautéed mushrooms as the main protein. Add a splash of soy sauce for depth.

    2. Spicy Norcina

    Add red pepper flakes or a drizzle of hot chili oil for a spicy kick.

    3. Truffle Norcina

    Incorporate a touch of truffle oil or shaved black truffles for a luxurious, earthy flavor.

    Frequently Asked Questions (FAQs)

    1. Can I make Pasta alla Norcina ahead of time?

    While it’s best served fresh, you can prepare the sauce ahead of time and reheat it before combining it with freshly cooked pasta.

    2. What type of pasta works best for this recipe?

    Short pasta like penne, rigatoni, or cavatappi is ideal because it holds the sauce well.

    3. Can I substitute the pork?

    Yes, you can use ground turkey, chicken, or even a plant-based alternative.

    4. What wine should I use?

    A dry white wine, such as Pinot Grigio or Sauvignon Blanc, works perfectly.

    5. How do I store leftovers?

    Store in an airtight container in the refrigerator for up to 3 days. Reheat gently on the stove with a splash of water or cream.

    6. Can I make it gluten-free?

    Absolutely! Use your favorite gluten-free pasta to make this dish gluten-free.

    Serving Suggestions for Pasta alla Norcina

    • With Bread: Serve with a side of crusty Italian bread to soak up the creamy sauce.
    • With Salad: Pair with a light arugula or mixed green salad dressed with lemon vinaigrette.
    • With Wine: A glass of dry white wine complements the dish beautifully.

    Closing Thoughts and Call to Action

    Pasta alla Norcina is more than just a dish; it’s a taste of Umbrian tradition and culinary excellence. With its rich flavors and creamy texture, it’s sure to become a favorite in your home.

    Now it’s your turn! Gather your ingredients, follow these steps, and experience the joy of making authentic Pasta alla Norcina. Share your creation or variations in the comments below—we’d love to hear from you!