Stromboli Delight: Craft a Perfect Savory Roll!

Introduction to Stromboli Delight

There’s something magical about the aroma of freshly baked bread wafting through the kitchen. It takes me back to my childhood, where every Sunday, my family would gather around the table, sharing stories and laughter over homemade meals. Today, I want to share a recipe that captures that same warmth: Stromboli Delight. This savory roll is not just a meal; it’s a quick solution for busy days or a delightful dish to impress your loved ones. With gooey cheese, zesty pepperoni, and colorful bell peppers, it’s a feast for both the eyes and the taste buds!

Why You’ll Love This Stromboli Delight

Stromboli Delight is the ultimate crowd-pleaser. It’s easy to whip up, making it perfect for a weeknight dinner or a weekend gathering. The best part? You can customize it to suit your taste. Whether you’re a meat lover or a veggie enthusiast, this savory roll delivers on flavor and satisfaction. Plus, it’s a fantastic way to sneak in some veggies for picky eaters. Who wouldn’t love that?

Ingredients for Stromboli Delight

Gathering the right ingredients is the first step to creating your Stromboli Delight. Here’s what you’ll need:

  • All-purpose flour: The backbone of your dough, providing structure and chewiness.
  • Instant yeast: This little powerhouse helps the dough rise quickly, giving you that fluffy texture.
  • Salt: Essential for flavor, it enhances the overall taste of your savory roll.
  • Warm water: Activates the yeast and brings the dough together. Aim for about 110°F for optimal results.
  • Olive oil: Adds richness and helps keep the dough tender.
  • Marinara sauce: The perfect base for your filling, adding a burst of flavor. Save some for dipping!
  • Shredded mozzarella cheese: Melts beautifully, creating that gooey, cheesy goodness we all crave.
  • Sliced pepperoni: A classic choice for a savory kick, but feel free to swap it out for your favorite meats.
  • Sliced bell peppers: These add color and a sweet crunch. Use any color you like!
  • Grated Parmesan cheese: A sprinkle of this adds a nutty flavor that complements the mozzarella.
  • Italian seasoning: A blend of herbs that brings an authentic Italian flair to your dish.
  • Egg (for egg wash): Gives your Stromboli a beautiful golden finish when baked.

For those looking to mix things up, consider adding sliced jalapeños for heat or substituting pepperoni with cooked sausage or a medley of vegetables for a vegetarian option. The exact quantities for each ingredient can be found at the bottom of the article, ready for printing!

How to Make Stromboli Delight

Creating your own Stromboli Delight is a rewarding experience. Follow these simple steps, and you’ll have a delicious savory roll that’s sure to impress. Let’s dive in!

Step 1: Prepare the Dough

Start by combining the all-purpose flour, instant yeast, and salt in a large bowl. Mix them well to ensure even distribution. Gradually add the warm water and olive oil, stirring until a dough begins to form. Once it’s combined, turn it out onto a floured surface. Knead the dough for about five minutes. You want it smooth and elastic, like a well-loved baseball glove.

Step 2: Let the Dough Rise

Now comes the magic moment! Place your kneaded dough in a greased bowl and cover it with a kitchen towel. This helps keep the warmth in, allowing the yeast to work its wonders. Let it rise in a warm spot for about an hour, or until it doubles in size. This step is crucial; it gives your Stromboli that fluffy texture we all love.

Step 3: Preheat the Oven

While the dough is rising, preheat your oven to 400°F. This ensures that your Stromboli bakes evenly and achieves that perfect golden brown crust. Don’t forget to line a baking sheet with parchment paper. It makes cleanup a breeze and prevents sticking!

Step 4: Roll Out the Dough

Once your dough has risen, it’s time to roll it out. Punch it down gently to release the air, then turn it out onto a floured surface. Roll it into a rectangle about 1/4 inch thick. Keep it even; this helps with even cooking. If it springs back, let it rest for a minute before rolling again.

Step 5: Add the Filling

Spread the marinara sauce evenly over the rolled-out dough, leaving about an inch border around the edges. Layer on the shredded mozzarella, pepperoni, bell peppers, and a sprinkle of Parmesan cheese. Don’t skimp on the toppings; they’re the heart of your Stromboli Delight!

Step 6: Roll and Seal the Stromboli

Starting from one long side, carefully roll the dough into a tight log. Pinch the edges to seal it well, and tuck the ends under to prevent any filling from escaping. This step is key to keeping all that deliciousness inside!

Step 7: Bake the Stromboli

Place your rolled Stromboli seam-side down on the prepared baking sheet. Brush the top with the beaten egg for that beautiful golden finish. Bake it in the preheated oven for 20-25 minutes, or until it’s golden brown and cooked through. Let it cool for about five minutes before slicing. This waiting period is torture, but trust me, it’s worth it!

Tips for Success

  • Use a kitchen scale for precise measurements, especially for flour.
  • Let your dough rise in a warm, draft-free area for best results.
  • Experiment with fillings; try different cheeses or meats for variety.
  • Don’t rush the baking; a golden crust is key to flavor.
  • Allow the Stromboli to cool slightly before slicing to prevent filling from spilling out.

Equipment Needed

  • Mixing bowl: A large bowl for combining ingredients. A pot can work in a pinch.
  • Rolling pin: Essential for rolling out dough. A wine bottle can serve as a substitute.
  • Baking sheet: For baking your Stromboli. A cast-iron skillet is a great alternative.
  • Parchment paper: Helps prevent sticking. Aluminum foil can be used if needed.
  • Kitchen towel: To cover the dough while it rises. Any clean cloth will do!

Variations

  • Spicy Stromboli: Add sliced jalapeños or crushed red pepper flakes for a fiery kick.
  • Vegetarian Delight: Substitute pepperoni with a mix of sautéed mushrooms, spinach, and zucchini for a fresh twist.
  • Cheesy Garlic Stromboli: Incorporate garlic butter into the dough and use a blend of cheeses like cheddar and provolone.
  • BBQ Chicken Stromboli: Swap marinara for BBQ sauce and fill with shredded chicken and red onions for a smoky flavor.
  • Breakfast Stromboli: Fill with scrambled eggs, cheese, and cooked sausage or bacon for a hearty morning option.

Serving Suggestions

  • Side Salad: Pair your Stromboli Delight with a fresh garden salad for a balanced meal.
  • Dipping Sauce: Serve with extra marinara or a zesty ranch dressing for added flavor.
  • Beverage Pairing: Enjoy with a cold beer or a glass of red wine to complement the savory flavors.
  • Presentation: Slice the Stromboli into thick pieces and arrange on a wooden board for a rustic touch.

FAQs about Stromboli Delight

Curious about Stromboli Delight? Here are some common questions I often hear, along with answers to help you master this savory roll.

Can I make Stromboli Delight ahead of time?

Absolutely! You can prepare the dough and filling in advance. Just assemble the Stromboli and refrigerate it until you’re ready to bake. This makes it a fantastic option for meal prep!

What can I use instead of pepperoni?

If pepperoni isn’t your thing, try cooked sausage, salami, or even a mix of sautéed vegetables. The beauty of Stromboli is its versatility!

How do I store leftovers?

Store any leftover Stromboli in an airtight container in the fridge for up to three days. Reheat in the oven for the best texture, or pop it in the microwave for a quick snack.

Can I freeze Stromboli Delight?

Yes! You can freeze the assembled, unbaked Stromboli. Just wrap it tightly in plastic wrap and foil. When you’re ready to enjoy, bake it straight from the freezer, adding a few extra minutes to the cooking time.

What’s the best way to serve Stromboli?

Slice it into thick pieces and serve warm with extra marinara sauce for dipping. It’s perfect for parties, game days, or a cozy family dinner!

Final Thoughts

Stromboli Delight is more than just a recipe; it’s an invitation to gather around the table and share moments with family and friends. The joy of pulling apart that warm, cheesy roll, with its savory filling spilling out, is a memory in the making. Whether you’re enjoying it on a busy weeknight or serving it at a weekend gathering, this dish brings comfort and satisfaction. Plus, the endless variations mean you can make it your own. So roll up your sleeves, embrace the process, and let the deliciousness of Stromboli Delight fill your home with warmth and happiness!

Paul

Stromboli Delight: Craft a Perfect Savory Roll!

Stromboli Delight is a savory roll filled with cheese, pepperoni, and bell peppers, perfect for a delicious meal or snack.
Prep Time 15 minutes
Cook Time 25 minutes
Total Time 1 hour 40 minutes
Servings: 4 servings
Course: Main Dish
Cuisine: Italian
Calories: 350

Ingredients
  

  • 2 cups all-purpose flour
  • 1 teaspoon instant yeast
  • 1 teaspoon salt
  • 3/4 cup warm water about 110°F
  • 1 tablespoon olive oil
  • 1/2 cup marinara sauce plus extra for dipping
  • 1 cup shredded mozzarella cheese
  • 1/2 cup sliced pepperoni
  • 1/2 cup sliced bell peppers any color
  • 1/4 cup grated Parmesan cheese
  • 1 teaspoon Italian seasoning
  • 1 egg beaten, for egg wash

Method
 

  1. In a large bowl, combine the flour, instant yeast, and salt. Gradually add the warm water and olive oil, mixing until a dough forms. Knead the dough on a floured surface for about 5 minutes until smooth.
  2. Place the dough in a greased bowl, cover with a kitchen towel, and let it rise in a warm place for about 1 hour, or until doubled in size.
  3. Preheat your oven to 400°F. Line a baking sheet with parchment paper.
  4. Once the dough has risen, punch it down and roll it out on a floured surface into a rectangle, about 1/4 inch thick.
  5. Spread the marinara sauce evenly over the dough, leaving a 1-inch border around the edges.
  6. Layer the mozzarella cheese, pepperoni, bell peppers, and Parmesan cheese on top of the sauce. Sprinkle with Italian seasoning.
  7. Starting from one long side, carefully roll the dough into a tight log. Pinch the edges to seal and tuck the ends under.
  8. Place the rolled stromboli seam-side down on the prepared baking sheet. Brush the top with the beaten egg for a golden finish.
  9. Bake for 20-25 minutes, or until the stromboli is golden brown and cooked through. Let it cool for 5 minutes before slicing.
  10. Serve warm with extra marinara sauce for dipping.

Notes

  • For a spicy kick, add sliced jalapeños or crushed red pepper flakes to the filling.
  • You can also substitute the pepperoni with cooked sausage or vegetables for a vegetarian option.
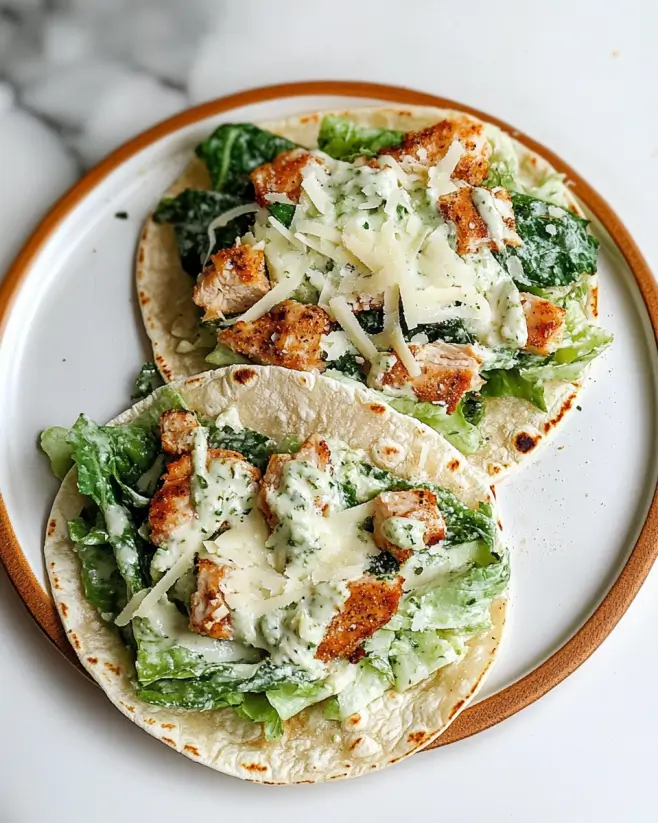
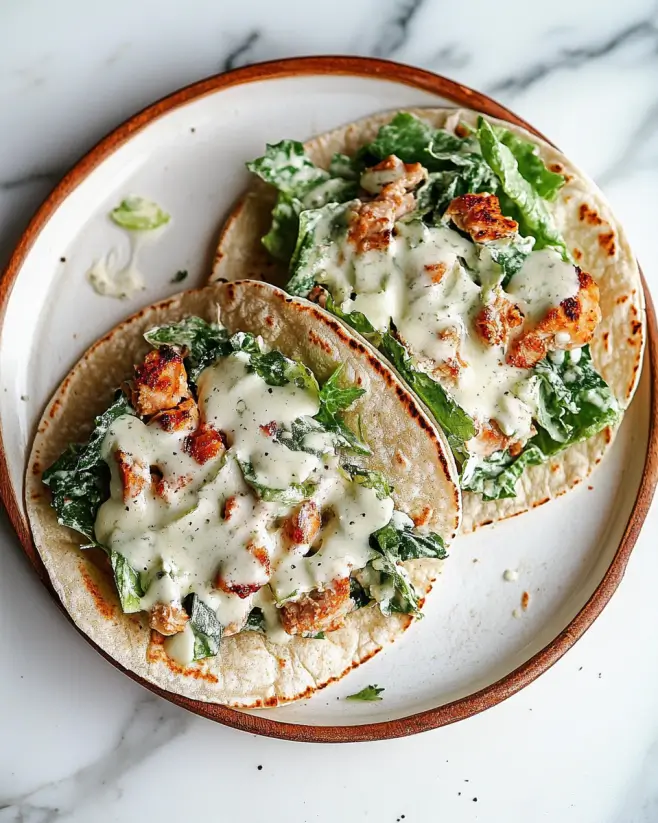
Smash Chicken Caesar Tacos: Easy Recipe to Try Now!

Introduction to Smash Chicken Caesar Tacos

There’s something magical about combining two beloved dishes into one delightful creation. Smash Chicken Caesar Tacos do just that, merging the classic flavors of Caesar salad with the fun of tacos. Whether you’re racing against the clock on a busy weeknight or looking to impress friends at a casual gathering, this recipe is your go-to solution. It’s quick, easy, and packed with flavor, making it perfect for any occasion. Trust me, once you try these tacos, they’ll become a staple in your kitchen, bringing smiles to the table every time.

Why You’ll Love This Smash Chicken Caesar Tacos

These Smash Chicken Caesar Tacos are a game-changer for anyone who loves quick, delicious meals. They come together in just 25 minutes, making them perfect for busy weeknights. The combination of tender, seasoned chicken and creamy Caesar dressing creates a flavor explosion that’s hard to resist. Plus, they’re customizable! You can easily swap ingredients to suit your taste, ensuring everyone at the table leaves happy and satisfied.

Ingredients for Smash Chicken Caesar Tacos

Gathering the right ingredients is the first step to creating these mouthwatering Smash Chicken Caesar Tacos. Here’s what you’ll need:

  • Boneless, skinless chicken breasts: The star of the show! Tender and juicy, they soak up all the flavors beautifully.
  • Olive oil: A must for cooking the chicken. It adds richness and helps achieve that perfect golden-brown sear.
  • Garlic powder: This brings a savory depth to the dish. It’s a quick way to infuse flavor without the fuss of fresh garlic.
  • Onion powder: Another flavor booster that complements the garlic perfectly, adding a subtle sweetness.
  • Italian seasoning: A blend of herbs that enhances the overall taste, giving a nod to classic Italian flavors.
  • Salt and pepper: Essential for seasoning. They elevate the dish, bringing all the flavors together.
  • Caesar dressing: The creamy element that ties everything together. It’s what transforms this taco into a Caesar salad experience.
  • Romaine lettuce: Fresh and crunchy, it adds a nice texture and a burst of color to your tacos.
  • Grated Parmesan cheese: A sprinkle of this adds a salty, nutty flavor that’s simply irresistible.
  • Tortillas: Choose between flour or corn, depending on your preference. They’re the perfect vessel for all that delicious filling.
  • Lemon wedges: A squeeze of lemon at the end brightens the flavors, making each bite even more refreshing.

For those looking to mix things up, consider adding a few dashes of hot sauce for a spicy kick or swapping the chicken for grilled shrimp or tofu for a different protein option. You can find the exact quantities for each ingredient at the bottom of the article, ready for printing!

How to Make Smash Chicken Caesar Tacos

Creating Smash Chicken Caesar Tacos is a straightforward process that anyone can master. Follow these simple steps, and you’ll have a delicious meal ready in no time!

Step 1: Preheat the Skillet

Start by preheating your skillet over medium heat. This step is crucial because it ensures the chicken cooks evenly and develops a nice sear. A hot skillet helps lock in moisture, keeping the chicken juicy and flavorful.

Step 2: Season the Chicken

Next, season your chicken breasts with garlic powder, onion powder, Italian seasoning, salt, and pepper. This seasoning blend is key to infusing flavor into the chicken. Don’t be shy—make sure every inch is coated. The spices will create a delicious crust as the chicken cooks.

Step 3: Cook the Chicken

Place the seasoned chicken in the preheated skillet. Cook for about 6-7 minutes on each side. You want the chicken to be golden brown and cooked through, with no pink in the center. Use a meat thermometer if you have one; the internal temperature should reach 165°F for safety.

Step 4: Shred the Chicken

Once cooked, remove the chicken from the skillet and let it rest for a few minutes. This resting period allows the juices to redistribute. Then, using two forks, shred the chicken into bite-sized pieces. Shredding while it’s warm makes the process easier and ensures a tender texture.

Step 5: Mix with Caesar Dressing

In a large bowl, combine the shredded chicken with Caesar dressing. Mix well to ensure every piece of chicken is coated. This step is essential for flavor; the creamy dressing brings everything together, transforming your chicken into a Caesar-inspired delight.

Step 6: Warm the Tortillas

Warm your tortillas in a dry skillet or microwave until they’re pliable. If using a skillet, heat them for about 30 seconds on each side. This makes them easier to fold and adds a nice warmth that enhances the overall taco experience.

Step 7: Assemble the Tacos

Now it’s time to assemble your tacos! Place a generous amount of the chicken mixture on each tortilla. Top with chopped romaine lettuce and a sprinkle of grated Parmesan cheese. For a beautiful presentation, don’t be afraid to layer the ingredients artfully.

Step 8: Serve with Lemon Wedges

Finally, serve your Smash Chicken Caesar Tacos with lemon wedges on the side. A squeeze of fresh lemon juice brightens the flavors and adds a refreshing zing. Trust me, it’s the perfect finishing touch!

Tips for Success

  • Always preheat your skillet for even cooking.
  • Don’t rush the seasoning; let the chicken soak up those flavors.
  • Use a meat thermometer to ensure perfect doneness.
  • Warm tortillas just before serving for the best texture.
  • Feel free to customize toppings—add avocado or bacon for extra flavor!

Equipment Needed

  • Large skillet: A non-stick skillet works best, but any heavy-bottomed pan will do.
  • Meat thermometer: Optional, but it ensures your chicken is cooked perfectly.
  • Two forks: Essential for shredding the chicken easily.
  • Mixing bowl: For combining the chicken and Caesar dressing.
  • Tongs: Handy for flipping the chicken without mess.

Variations

  • Spicy Smash Chicken Caesar Tacos: Add a few dashes of your favorite hot sauce to the chicken mixture for a fiery kick.
  • Grilled Shrimp Tacos: Swap the chicken for grilled shrimp for a lighter, seafood twist.
  • Vegetarian Option: Use grilled tofu or chickpeas instead of chicken for a hearty plant-based alternative.
  • Whole Wheat Tortillas: Opt for whole wheat tortillas for a healthier, fiber-rich option.
  • Extra Crunch: Add crispy bacon bits or fried onions on top for an added crunch and flavor boost.

Serving Suggestions

  • Side Salad: Pair your tacos with a light side salad for a refreshing contrast.
  • Chips and Salsa: Serve with tortilla chips and your favorite salsa for a crunchy side.
  • Refreshing Drink: Enjoy with a cold beer or a zesty lemonade to complement the flavors.
  • Presentation: Serve on a colorful platter, garnished with extra lemon wedges and parsley for a vibrant look.

FAQs about Smash Chicken Caesar Tacos

Can I make Smash Chicken Caesar Tacos ahead of time?

Absolutely! You can prepare the chicken and mix it with the Caesar dressing in advance. Just store it in the fridge until you’re ready to assemble the tacos. Warm the tortillas just before serving for the best experience.

What can I substitute for Caesar dressing?

If you’re looking for alternatives, ranch dressing works well for a different flavor profile. You could also try a homemade dressing using Greek yogurt, lemon juice, and Parmesan for a lighter option.

Are Smash Chicken Caesar Tacos gluten-free?

Yes, they can be gluten-free! Just make sure to use corn tortillas instead of flour. Always check the labels on your Caesar dressing to ensure it’s gluten-free as well.

How can I make these tacos spicier?

For a spicy kick, add hot sauce to the chicken mixture or sprinkle some crushed red pepper flakes on top before serving. You can also include jalapeños for an extra layer of heat!

Can I use other proteins in this recipe?

Definitely! Feel free to swap the chicken for grilled shrimp, beef, or even chickpeas for a vegetarian option. Each protein will bring its own unique flavor to these delicious Smash Chicken Caesar Tacos.

Final Thoughts

Creating Smash Chicken Caesar Tacos is more than just cooking; it’s about bringing joy to your table. The blend of flavors and textures makes each bite a delightful experience. Whether you’re enjoying them on a busy weeknight or serving them at a gathering, these tacos are sure to impress. They’re quick to prepare, yet they feel special enough for any occasion. Plus, the customizable nature means you can make them your own. So, roll up your sleeves, gather your ingredients, and dive into this delicious adventure. Your taste buds will thank you!

Paul

Smash Chicken Caesar Tacos: Easy Recipe to Try Now!

Smash Chicken Caesar Tacos are a delicious and easy-to-make dish that combines the classic flavors of Caesar salad with the fun of tacos.
Prep Time 10 minutes
Cook Time 15 minutes
Total Time 25 minutes
Servings: 4 servings
Course: Main Dish
Cuisine: Mexican
Calories: 450

Ingredients
  

  • 1 pound boneless skinless chicken breasts
  • 1 tablespoon olive oil
  • 1 teaspoon garlic powder
  • 1 teaspoon onion powder
  • 1 teaspoon Italian seasoning
  • Salt and pepper to taste
  • 1 cup Caesar dressing
  • 1 cup romaine lettuce chopped
  • 1/2 cup grated Parmesan cheese
  • 8 small flour or corn tortillas
  • Lemon wedges for serving

Method
 

  1. Preheat a large skillet over medium heat and add the olive oil.
  2. Season the chicken breasts with garlic powder, onion powder, Italian seasoning, salt, and pepper.
  3. Place the seasoned chicken in the skillet and cook for about 6-7 minutes on each side, or until fully cooked and no longer pink in the center.
  4. Remove the chicken from the skillet and let it rest for a few minutes. Then, using two forks, shred the chicken into bite-sized pieces.
  5. In a large bowl, combine the shredded chicken with the Caesar dressing, mixing well to coat.
  6. Warm the tortillas in a dry skillet or microwave until pliable.
  7. To assemble the tacos, place a generous amount of the chicken mixture on each tortilla. Top with chopped romaine lettuce and a sprinkle of grated Parmesan cheese.
  8. Serve with lemon wedges on the side for an extra burst of flavor.

Notes

  • For a spicier kick, add a few dashes of hot sauce to the chicken mixture.
  • Substitute grilled shrimp or tofu for the chicken for a different protein option.

Raspberry Cream Cheese Danish: A Delightful Recipe to Try!

Introduction to Raspberry Cream Cheese Danish

There’s something magical about the aroma of freshly baked pastries wafting through the kitchen.

The Raspberry Cream Cheese Danish is a delightful treat that brings together the tangy sweetness of raspberries and the creamy richness of cheese, all wrapped in a flaky pastry.

Whether you’re looking for a quick solution for a busy morning or a dish to impress your loved ones at brunch, this recipe fits the bill perfectly.

It’s simple, satisfying, and sure to bring smiles to the table.

Let’s dive into this delicious adventure together!

Why You’ll Love This Raspberry Cream Cheese Danish

This Raspberry Cream Cheese Danish is a game-changer for any home cook.

It’s incredibly easy to whip up, taking just 40 minutes from start to finish.

The combination of tangy raspberries and creamy cheese creates a flavor explosion that’s hard to resist.

Plus, it’s versatile enough to impress guests or satisfy a late-night craving.

Trust me, once you try it, you’ll be hooked!

Ingredients for Raspberry Cream Cheese Danish

Creating the perfect Raspberry Cream Cheese Danish starts with gathering the right ingredients.

Here’s what you’ll need:

  • All-purpose flour: The backbone of your pastry, providing structure and flakiness.
  • Cream cheese: Adds a rich, creamy texture and tangy flavor that pairs beautifully with raspberries.
  • Granulated sugar: Sweetens the filling and balances the tartness of the raspberries.
  • Unsalted butter: Ensures a rich flavor and helps create that flaky pastry texture.
  • Salt: Just a pinch enhances the overall flavor of the danish.
  • Vanilla extract: A splash of this adds warmth and depth to the cream cheese filling.
  • Fresh raspberries: The star of the show! Their tartness complements the creaminess perfectly.
  • Egg (for egg wash): Gives the danishes a beautiful golden color when baked.
  • Powdered sugar (optional): A light dusting on top adds a touch of sweetness and elegance.

Feel free to get creative!

You can swap out raspberries for blueberries or strawberries for a different fruity twist.

Adding a sprinkle of lemon zest to the cream cheese mixture can also brighten the flavors.

For exact measurements, check the bottom of the article where you can find everything available for printing.

How to Make Raspberry Cream Cheese Danish

Creating your own Raspberry Cream Cheese Danish is a rewarding experience.

Let’s break it down into simple steps that will have your kitchen smelling heavenly in no time.

Step 1: Preheat the Oven

Start by preheating your oven to 375°F (190°C).

While it warms up, line a baking sheet with parchment paper.

This will prevent sticking and make cleanup a breeze.

Step 2: Prepare the Dough

In a mixing bowl, combine the all-purpose flour, softened cream cheese, granulated sugar, softened butter, salt, and vanilla extract.

Mix everything together until a dough forms.

It should be soft and slightly sticky, perfect for rolling out.

Step 3: Roll Out the Dough

On a lightly floured surface, roll out the dough into a rectangle about 1/4 inch thick.

Don’t worry about perfection; a rustic look adds charm to your danishes.

Step 4: Cut the Dough

Using a sharp knife or pizza cutter, cut the dough into four equal squares.

This is where the magic begins, as each square will become a delightful pocket of flavor.

Step 5: Fill the Squares

In the center of each square, place a tablespoon of fresh raspberries and a teaspoon of the cream cheese mixture.

If you like, mix the raspberries with a bit of sugar for extra sweetness.

This step is where you can really let your creativity shine!

Step 6: Fold and Seal

Fold the corners of each square towards the center to create a pocket.

Pinch the edges to seal them tightly.

This ensures that all that delicious filling stays inside while baking.

Step 7: Bake the Danishes

Place the danishes on the prepared baking sheet.

Brush the tops with the beaten egg for that golden, glossy finish.

Bake for 20-25 minutes or until they turn a beautiful golden brown.

Step 8: Cool and Dust

Once baked, allow the danishes to cool slightly.

If you’re feeling fancy, dust them with powdered sugar before serving.

This adds a lovely touch and makes them look even more irresistible!

Tips for Success

  • Make sure your cream cheese is softened for easy mixing.
  • Don’t skip the egg wash; it gives your danishes that beautiful golden color.
  • Experiment with different fruits for unique flavor combinations.
  • Keep an eye on the baking time; ovens can vary, and you want them golden, not burnt.
  • Let them cool slightly before dusting with powdered sugar for a perfect finish.

Equipment Needed

  • Mixing bowl: A standard bowl works, but a large one gives you more room to mix.
  • Rolling pin: If you don’t have one, a wine bottle can do the trick!
  • Sharp knife or pizza cutter: Essential for cutting the dough into squares.
  • Baking sheet: A sturdy sheet ensures even baking.
  • Parchment paper: Optional, but it makes cleanup a breeze.

Variations

  • Berry Medley: Swap out raspberries for a mix of blueberries, strawberries, and blackberries for a colorful twist.
  • Citrus Zing: Add a teaspoon of lemon or orange zest to the cream cheese mixture for a refreshing citrus flavor.
  • Nutty Delight: Incorporate chopped nuts like almonds or walnuts into the filling for added crunch and flavor.
  • Vegan Option: Use a plant-based cream cheese and substitute the egg wash with almond milk for a vegan-friendly version.
  • Chocolate Lovers: Drizzle melted chocolate over the cooled danishes for a decadent finish that pairs beautifully with the fruit.

Serving Suggestions

  • Fresh Fruit Salad: Pair your danishes with a light fruit salad for a refreshing contrast.
  • Coffee or Tea: A warm cup of coffee or herbal tea complements the sweetness perfectly.
  • Elegant Plating: Serve on a beautiful platter, dusted with powdered sugar for a touch of elegance.
  • Whipped Cream: A dollop of whipped cream adds a creamy richness that enhances the flavors.

FAQs about Raspberry Cream Cheese Danish

Can I use frozen raspberries instead of fresh?

Absolutely! Frozen raspberries work well in this recipe. Just make sure to thaw and drain them to avoid excess moisture in your danishes.

How do I store leftover danishes?

Store any leftovers in an airtight container at room temperature for up to two days. For longer storage, refrigerate them for up to a week. Just reheat in the oven for a few minutes to regain that fresh-baked taste.

Can I make the dough ahead of time?

Yes! You can prepare the dough a day in advance. Wrap it tightly in plastic wrap and refrigerate. Just let it sit at room temperature for about 15 minutes before rolling it out.

What can I substitute for cream cheese?

If you’re looking for a lighter option, you can use Greek yogurt or ricotta cheese. Both will give you a creamy texture, but the flavor will be slightly different.

Is this Raspberry Cream Cheese Danish suitable for breakfast?

Definitely! This danish makes for a delightful breakfast treat or a sweet addition to brunch. Pair it with coffee, and you’re set for a perfect morning!

Final Thoughts

Baking a Raspberry Cream Cheese Danish is more than just following a recipe; it’s about creating moments of joy.

The delightful combination of tangy raspberries and creamy cheese wrapped in flaky pastry brings a sense of warmth to any gathering.

Whether you’re enjoying them fresh out of the oven or sharing them with friends, these danishes are sure to spark smiles and conversations.

So, roll up your sleeves and embrace the joy of baking.

With each bite, you’ll savor not just the flavors, but the memories made in your kitchen.

Happy baking!

Paul

Raspberry Cream Cheese Danish: A Delightful Recipe to Try!

A delightful Raspberry Cream Cheese Danish recipe that combines the tangy flavor of raspberries with creamy cheese in a flaky pastry.
Prep Time 15 minutes
Cook Time 25 minutes
Total Time 40 minutes
Servings: 4 servings
Course: Dessert
Cuisine: American
Calories: 220

Ingredients
  

  • 1 cup all-purpose flour
  • 1/2 cup cream cheese softened
  • 1/4 cup granulated sugar
  • 1/4 cup unsalted butter softened
  • 1/4 teaspoon salt
  • 1/2 teaspoon vanilla extract
  • 1/2 cup fresh raspberries
  • 1 egg beaten (for egg wash)
  • Powdered sugar for dusting, optional

Method
 

  1. Preheat your oven to 375°F (190°C) and line a baking sheet with parchment paper.
  2. In a mixing bowl, combine the flour, cream cheese, granulated sugar, softened butter, salt, and vanilla extract. Mix until a dough forms.
  3. Roll out the dough on a lightly floured surface into a rectangle about 1/4 inch thick.
  4. Cut the dough into four equal squares.
  5. In the center of each square, place a tablespoon of fresh raspberries and a teaspoon of cream cheese mixture (you can mix the raspberries with a bit of sugar if you prefer).
  6. Fold the corners of each square towards the center to create a pocket, pinching the edges to seal.
  7. Place the danishes on the prepared baking sheet and brush the tops with the beaten egg.
  8. Bake for 20-25 minutes or until golden brown.
  9. Allow to cool slightly before dusting with powdered sugar, if desired.

Notes

  • For a fruity twist, substitute raspberries with blueberries or strawberries.
  • Add a sprinkle of lemon zest to the cream cheese mixture for a refreshing flavor.

Southern-Style Banana Pudding: A Creamy Delight Awaits!

Introduction to Southern-Style Banana Pudding

Growing up in the South, dessert was never just an afterthought; it was a celebration. Southern-Style Banana Pudding was a staple at family gatherings, bringing smiles and sweet memories. This creamy delight layers vanilla wafers, ripe bananas, and rich pudding, topped with fluffy whipped cream. It’s the perfect dish to impress your loved ones or to whip up on a busy day when you crave something comforting. With just a few simple ingredients, you can create a dessert that feels like a warm hug, making every bite a delightful experience.

Why You’ll Love This Southern-Style Banana Pudding

This Southern-Style Banana Pudding is a game-changer for dessert lovers. It’s incredibly easy to make, requiring minimal effort for maximum flavor. The creamy texture and sweet banana goodness will have everyone coming back for seconds. Plus, it’s a crowd-pleaser that fits any occasion, from casual weeknight dinners to festive gatherings. You’ll love how quickly it comes together, leaving you more time to enjoy with family and friends.

Ingredients for Southern-Style Banana Pudding

Gathering the right ingredients is the first step to creating this creamy masterpiece. Here’s what you’ll need:

  • Whole Milk: This forms the base of your pudding, giving it that rich, creamy texture.
  • Heavy Cream: Adds an extra layer of indulgence, making the pudding luxuriously smooth.
  • Granulated Sugar: Sweetens the pudding, balancing the flavors of the bananas and vanilla.
  • Cornstarch: Acts as a thickening agent, ensuring your pudding has the perfect consistency.
  • Salt: Just a pinch enhances the sweetness and rounds out the flavors beautifully.
  • Vanilla Extract: A must-have for that classic flavor, bringing warmth and depth to the pudding.
  • Ripe Bananas: The star of the show! Their natural sweetness and creaminess elevate the dish.
  • Vanilla Wafers: These crunchy cookies add texture and a delightful contrast to the creamy layers.
  • Whipped Cream: Whether store-bought or homemade, it’s the perfect finishing touch for a light, airy topping.

For those looking to mix things up, consider these options:

  • Chocolate Pudding: Add a layer of chocolate pudding for a delicious twist.
  • Graham Crackers or Shortbread Cookies: Swap out the vanilla wafers for a different flavor and texture.

Exact measurements for each ingredient can be found at the bottom of the article, ready for printing!

How to Make Southern-Style Banana Pudding

Creating Southern-Style Banana Pudding is a delightful journey that fills your kitchen with sweet aromas. Follow these simple steps, and you’ll have a creamy dessert that’s sure to impress.

Step 1: Prepare the Pudding Base

Start by grabbing a medium saucepan. Whisk together the whole milk, heavy cream, granulated sugar, cornstarch, and salt over medium heat. Keep stirring until the mixture thickens and bubbles, which should take about 5-7 minutes. This is where the magic happens! The combination of milk and cream creates a rich base that’s simply irresistible.

Once it’s thickened, remove the saucepan from the heat and stir in the vanilla extract. Let the pudding cool for about 10 minutes. This cooling time is crucial; it allows the flavors to meld beautifully, enhancing the overall taste.

Step 2: Layer the Ingredients

Now, it’s time to assemble your masterpiece! Grab a 9×13-inch dish and layer half of the vanilla wafers on the bottom. Next, add half of the sliced bananas on top. Pour half of the creamy pudding over the bananas and wafers, spreading it evenly. This layering technique creates a beautiful presentation and ensures every bite is packed with flavor.

Repeat the process with the remaining vanilla wafers, bananas, and pudding. Don’t be shy; make those layers generous! The more, the merrier when it comes to this Southern classic.

Step 3: Chill and Serve

Spread the whipped cream evenly over the top layer of pudding. This fluffy topping adds a lightness that perfectly complements the rich layers below. Cover the dish with plastic wrap and refrigerate for at least 4 hours, or preferably overnight. This chilling time allows the pudding to set and the flavors to deepen, making each bite a creamy delight.

When you’re ready to serve, simply scoop out portions and enjoy! Each spoonful of this Southern-Style Banana Pudding is a taste of nostalgia, bringing back memories of family gatherings and sweet moments shared.

Tips for Success

  • Use ripe bananas for the best flavor and creaminess.
  • Don’t rush the cooling process; it enhances the pudding’s taste.
  • For a thicker pudding, let it cook a minute longer.
  • Cover the dish with plastic wrap to prevent a skin from forming on the pudding.
  • Feel free to customize with your favorite toppings, like crushed nuts or chocolate shavings!

Equipment Needed

  • Medium Saucepan: Essential for cooking the pudding. A large skillet can work in a pinch.
  • Whisk: Perfect for mixing ingredients smoothly. A fork can also do the job.
  • 9×13-inch Dish: Ideal for layering. Any similar-sized baking dish will suffice.
  • Plastic Wrap: To cover the dish while chilling. A clean kitchen towel can be a good alternative.

Variations

  • Chocolate Banana Pudding: Swap out half of the vanilla pudding for chocolate pudding for a decadent twist.
  • Nutty Banana Pudding: Add chopped pecans or walnuts between the layers for a delightful crunch.
  • Vegan Option: Use almond milk and coconut cream instead of dairy for a plant-based version.
  • Peanut Butter Banana Pudding: Mix in some creamy peanut butter into the pudding for a nutty flavor that pairs perfectly with bananas.
  • Spiced Banana Pudding: Add a pinch of cinnamon or nutmeg to the pudding for a warm, aromatic touch.

Serving Suggestions

  • Pair with a scoop of vanilla ice cream for an extra creamy treat.
  • Serve alongside a slice of warm pecan pie for a Southern-inspired dessert spread.
  • Garnish with fresh mint leaves for a pop of color and freshness.
  • Enjoy with a glass of sweet tea or a rich coffee to balance the sweetness.

FAQs about Southern-Style Banana Pudding

Can I make Southern-Style Banana Pudding ahead of time?

Absolutely! In fact, making it a day in advance allows the flavors to meld beautifully. Just be sure to cover it well to keep it fresh.

How long does Southern-Style Banana Pudding last in the fridge?

This creamy dessert can last up to 3-4 days in the refrigerator. Just keep it covered to maintain its deliciousness!

Can I use other fruits in my banana pudding?

Sure! While bananas are the star, you can add berries or even peaches for a fruity twist. Just remember to adjust the sweetness accordingly.

What can I substitute for vanilla wafers?

If you’re looking for a change, graham crackers or shortbread cookies work wonderfully. They’ll add a different flavor and texture to your Southern-Style Banana Pudding.

Is there a gluten-free option for this recipe?

Yes! You can use gluten-free vanilla wafers or any gluten-free cookies to make this dessert suitable for those with dietary restrictions.

Final Thoughts

Southern-Style Banana Pudding is more than just a dessert; it’s a heartfelt tradition that brings people together. Each layer tells a story, from the creamy pudding to the sweet bananas and crunchy wafers. As you savor each bite, you’ll find yourself transported to family gatherings filled with laughter and love. This recipe is a reminder that simple ingredients can create unforgettable moments. Whether you’re sharing it with friends or enjoying it solo, this creamy delight is sure to bring a smile to your face and warmth to your heart. Dive in and relish the joy it brings!

Paul

Southern-Style Banana Pudding: A Creamy Delight Awaits!

Southern-Style Banana Pudding is a creamy and delicious dessert that layers vanilla wafers, ripe bananas, and a rich pudding, topped with whipped cream.
Prep Time 20 minutes
Cook Time 10 minutes
Total Time 4 hours 30 minutes
Servings: 8 servings
Course: Dessert
Cuisine: Southern
Calories: 320

Ingredients
  

  • 2 cups whole milk
  • 1 cup heavy cream
  • 3/4 cup granulated sugar
  • 1/4 cup cornstarch
  • 1/4 teaspoon salt
  • 1 teaspoon vanilla extract
  • 3 large ripe bananas sliced
  • 1 box 11 ounces vanilla wafers
  • 1 cup whipped cream store-bought or homemade

Method
 

  1. In a medium saucepan, whisk together the milk, heavy cream, sugar, cornstarch, and salt over medium heat. Continue whisking until the mixture thickens and begins to bubble, about 5-7 minutes.
  2. Remove the saucepan from heat and stir in the vanilla extract. Let the pudding cool for about 10 minutes.
  3. In a 9x13-inch dish, layer half of the vanilla wafers on the bottom. Top with half of the sliced bananas. Pour half of the pudding over the bananas and wafers.
  4. Repeat the layers with the remaining vanilla wafers, bananas, and pudding.
  5. Spread the whipped cream evenly over the top layer of pudding.
  6. Cover the dish with plastic wrap and refrigerate for at least 4 hours, preferably overnight, to allow the flavors to meld and the pudding to set.
  7. Serve chilled and enjoy!

Notes

  • For a chocolate twist, add a layer of chocolate pudding between the banana layers.
  • Substitute the vanilla wafers with graham crackers or shortbread cookies for a different flavor and texture.

Oyster Motoyaki: Discover This Irresistible Recipe!

Introduction to Oyster Motoyaki

When I think of comfort food, Oyster Motoyaki always comes to mind. This delightful baked oyster dish is not just a treat for seafood lovers; it’s a quick solution for those busy weeknights when you want something special without spending hours in the kitchen.

The creamy mayonnaise mixture, combined with the rich flavor of oysters, creates a dish that’s sure to impress your loved ones. Whether you’re hosting a casual gathering or simply treating yourself, this recipe is a delicious way to elevate your dining experience. Let’s dive into the world of Oyster Motoyaki!

Why You’ll Love This Oyster Motoyaki

Oyster Motoyaki is a game-changer for any home cook.

It’s incredibly easy to whip up, taking just 27 minutes from start to finish.

The combination of creamy, cheesy goodness with tender oysters creates a flavor explosion that’s hard to resist.

Plus, it’s a fantastic way to impress guests without breaking a sweat.

Trust me, once you try this dish, it’ll become a staple in your kitchen!

Ingredients for Oyster Motoyaki

Creating the perfect Oyster Motoyaki starts with gathering the right ingredients.

Here’s what you’ll need:

  • Large oysters: Fresh, plump oysters are the star of this dish. Look for ones that are tightly closed and smell like the ocean.
  • Mayonnaise: This creamy base adds richness. You can use regular or light mayo, depending on your preference.
  • Soy sauce: A splash of soy sauce brings umami depth. Opt for low-sodium if you’re watching your salt intake.
  • Sake or dry white wine: This adds a hint of acidity. If you don’t have sake, any dry white wine will do.
  • Sesame oil: A little goes a long way in adding a nutty flavor. It’s a key ingredient in many Asian dishes.
  • Sugar: Just a teaspoon balances the savory flavors beautifully.
  • Black pepper: Freshly cracked pepper enhances the overall taste without overpowering the dish.
  • Green onions: These add a fresh, crisp element. Chop them finely for even distribution.
  • Shredded mozzarella cheese: This melty topping creates a delightful texture. Feel free to swap it for a blend of cheddar and parmesan for a different flavor.
  • Panko breadcrumbs: These Japanese-style breadcrumbs add a satisfying crunch. They’re lighter than regular breadcrumbs, making them perfect for this dish.
  • Fresh parsley: A sprinkle of chopped parsley not only adds color but also a fresh finish to your baked oysters.

For exact measurements, check the bottom of the article where you can find everything available for printing.

With these ingredients in hand, you’re ready to embark on your Oyster Motoyaki adventure!

How to Make Oyster Motoyaki

Making Oyster Motoyaki is a straightforward process that yields delicious results.

Follow these simple steps, and you’ll have a mouthwatering dish ready in no time!

Step 1: Preheat the Oven

Start by preheating your oven to 400°F (200°C).

This ensures that your oysters will bake evenly and come out perfectly golden.

Step 2: Prepare the Sauce

In a mixing bowl, combine the mayonnaise, soy sauce, sake, sesame oil, sugar, and black pepper.

Mix well until the sauce is smooth and creamy.

This sauce is the heart of your Oyster Motoyaki, so make sure it’s well blended!

Step 3: Mix in the Green Onions and Cheese

Next, stir in the finely chopped green onions and shredded mozzarella cheese.

This adds a fresh crunch and a melty texture that complements the oysters beautifully.

Make sure everything is evenly combined for the best flavor.

Step 4: Arrange the Oysters

Place the shucked oysters on a baking sheet.

Ensure they’re stable and not tipping over.

This will help keep the sauce from spilling out during baking.

Step 5: Top with Sauce

Spoon a generous amount of the creamy mayonnaise mixture onto each oyster.

Don’t be shy—this is where the flavor really comes from!

Make sure each oyster is well-covered for maximum deliciousness.

Step 6: Add Panko Breadcrumbs

Sprinkle panko breadcrumbs evenly over the top of each oyster.

This adds a delightful crunch that contrasts beautifully with the creamy topping.

Feel free to adjust the amount based on your preference for crunchiness.

Step 7: Bake the Oysters

Now, it’s time to bake!

Place the baking sheet in the preheated oven and bake for about 10-12 minutes.

You’ll know they’re ready when the topping is golden and bubbly.

Step 8: Garnish and Serve

Once baked, remove the oysters from the oven and let them cool slightly.

Garnish with chopped fresh parsley for a pop of color and freshness.

Serve them warm, and watch your guests devour every last bite!

Tips for Success

  • Use fresh oysters for the best flavor and texture.
  • Don’t skip the panko breadcrumbs; they add essential crunch.
  • Experiment with different cheeses for unique flavor profiles.
  • For a spicy twist, mix in sriracha or your favorite hot sauce.
  • Let the oysters cool slightly before serving to avoid burns.
  • Pair with a crisp white wine to enhance the dish.

Equipment Needed

  • Baking sheet: A standard baking sheet works perfectly. If you don’t have one, a shallow dish can do the trick.
  • Mixing bowl: Any medium-sized bowl will suffice for mixing your sauce.
  • Spoon: Use a regular spoon for scooping the sauce onto the oysters.
  • Oven mitts: Essential for safely handling hot trays.

Variations

  • Spicy Oyster Motoyaki: Add a teaspoon of sriracha or your favorite hot sauce to the mayonnaise mixture for a fiery kick.
  • Cheese Blend: Swap out mozzarella for a mix of cheddar and parmesan for a richer flavor profile.
  • Vegetarian Option: Replace oysters with large mushrooms for a delicious, meat-free alternative that still delivers on flavor.
  • Gluten-Free Version: Ensure your panko breadcrumbs are labeled gluten-free, or use crushed gluten-free crackers instead.
  • Herb Infusion: Experiment with different herbs like dill or chives in place of parsley for a unique twist.

Serving Suggestions

  • Pair with a crisp salad: A light green salad with a citrus vinaigrette complements the richness of the oysters.
  • Serve with white wine: A chilled Sauvignon Blanc or a light Pinot Grigio enhances the seafood flavors beautifully.
  • Presentation: Arrange the oysters on a bed of rock salt for an elegant touch.
  • Accompany with crusty bread: Fresh baguette slices are perfect for soaking up any leftover sauce.

FAQs about Oyster Motoyaki

What is Oyster Motoyaki?

Oyster Motoyaki is a delicious baked oyster dish topped with a creamy mayonnaise mixture and cheese. It’s a popular appetizer in Japanese cuisine, perfect for seafood lovers looking for a unique treat.

Can I use frozen oysters for this recipe?

While fresh oysters are ideal for the best flavor and texture, you can use frozen oysters. Just make sure to thaw them completely and drain any excess liquid before preparing your Oyster Motoyaki.

How can I make Oyster Motoyaki spicier?

If you’re craving some heat, simply add a teaspoon of sriracha or your favorite hot sauce to the mayonnaise mixture. This will give your dish a delightful kick without overpowering the other flavors.

What can I serve with Oyster Motoyaki?

Oyster Motoyaki pairs wonderfully with a crisp salad, white wine, or crusty bread. These sides complement the rich flavors of the baked oysters and enhance your dining experience.

Is Oyster Motoyaki gluten-free?

Yes, Oyster Motoyaki can be made gluten-free! Just ensure that your panko breadcrumbs are labeled gluten-free, or substitute them with crushed gluten-free crackers for that satisfying crunch.

Final Thoughts

Oyster Motoyaki is more than just a dish; it’s an experience that brings joy to the table.

The combination of creamy, cheesy goodness with the briny flavor of fresh oysters creates a symphony of taste that’s hard to forget.

Whether you’re enjoying it on a cozy night in or serving it at a gathering, this recipe is sure to impress.

It’s a delightful way to explore Japanese cuisine while indulging in a seafood favorite.

So, roll up your sleeves, gather your ingredients, and let the magic of Oyster Motoyaki transform your next meal into something truly special!

Paul

Oyster Motoyaki: Discover This Irresistible Recipe!

Oyster Motoyaki is a delicious baked oyster dish topped with a creamy mayonnaise mixture and cheese, perfect for seafood lovers.
Prep Time 15 minutes
Cook Time 12 minutes
Total Time 27 minutes
Servings: 4 servings
Course: Appetizer
Cuisine: Japanese
Calories: 250

Ingredients
  

  • 1 dozen large oysters shucked
  • 1/2 cup mayonnaise
  • 1 tablespoon soy sauce
  • 1 tablespoon sake or dry white wine
  • 1 teaspoon sesame oil
  • 1 teaspoon sugar
  • 1/4 teaspoon black pepper
  • 1/4 cup green onions finely chopped
  • 1/4 cup shredded mozzarella cheese
  • 1 tablespoon panko breadcrumbs
  • 1 tablespoon chopped fresh parsley for garnish

Method
 

  1. Preheat your oven to 400°F (200°C).
  2. In a mixing bowl, combine the mayonnaise, soy sauce, sake, sesame oil, sugar, and black pepper. Mix well until smooth.
  3. Stir in the chopped green onions and mozzarella cheese until evenly combined.
  4. Place the shucked oysters on a baking sheet, making sure they are stable and not tipping over.
  5. Spoon a generous amount of the mayonnaise mixture onto each oyster.
  6. Sprinkle panko breadcrumbs evenly over the top of each oyster for added crunch.
  7. Bake in the preheated oven for about 10-12 minutes, or until the topping is golden and bubbly.
  8. Remove from the oven and let cool slightly before serving. Garnish with chopped parsley.

Notes

  • For a spicy kick, add a teaspoon of sriracha or your favorite hot sauce to the mayonnaise mixture.
  • Substitute the mozzarella cheese with a blend of cheddar and parmesan for a different flavor profile.

Rainbow Jello Sugar Cookies: A Colorful Baking Delight!

Introduction to Rainbow Jello Sugar Cookies

There’s something magical about cookies that brings back memories of childhood.

Rainbow Jello Sugar Cookies are not just a treat; they’re a burst of color and flavor that can brighten any day.

Whether you’re looking to impress your loved ones or simply want a quick solution for a busy afternoon, these cookies are the answer.

With their vibrant hues and delightful taste, they’re perfect for parties, family gatherings, or just a cozy night in.

Let’s dive into this fun baking adventure that’s sure to bring smiles all around!

Why You’ll Love This Rainbow Jello Sugar Cookies

These Rainbow Jello Sugar Cookies are a delightful blend of simplicity and fun.

They come together in just about 30 minutes, making them perfect for those busy days when you crave something sweet.

The vibrant colors and fruity flavors will not only please your taste buds but also bring a smile to anyone who sees them.

Plus, they’re a fantastic way to get the kids involved in the kitchen!

Ingredients for Rainbow Jello Sugar Cookies

Creating these Rainbow Jello Sugar Cookies is a breeze with just a handful of ingredients.

Here’s what you’ll need:

  • All-purpose flour: The backbone of any cookie, it gives structure and texture.
  • Baking powder: This leavening agent helps the cookies rise, making them light and fluffy.
  • Baking soda: Another leavening agent that adds a bit of chewiness to the cookies.
  • Salt: Just a pinch enhances the sweetness and balances the flavors.
  • Unsalted butter: Softened butter creates a rich, creamy base for the dough.
  • Granulated sugar: This sweetener adds the perfect amount of sweetness and helps with texture.
  • Large egg: Acts as a binder, bringing all the ingredients together.
  • Vanilla extract: A splash of this adds warmth and depth to the flavor.
  • Flavored Jello: The star of the show! Choose any color and flavor to create a fun twist.
  • Powdered sugar: For rolling the cookie dough balls, giving them a sweet, snowy finish.

Feel free to get creative! You can swap out the Jello flavors for your favorites or even add sprinkles for an extra pop of color.

For exact measurements, check the bottom of the article where you can find everything available for printing.

How to Make Rainbow Jello Sugar Cookies

Baking these Rainbow Jello Sugar Cookies is a delightful journey that’s as colorful as the cookies themselves.

Let’s break it down step by step, ensuring you have all the tips you need for success.

Step 1: Preheat and Prepare

Start by preheating your oven to 350°F.

While it warms up, line a baking sheet with parchment paper.

This will prevent the cookies from sticking and make cleanup a breeze.

Step 2: Mix Dry Ingredients

In a medium bowl, whisk together the all-purpose flour, baking powder, baking soda, and salt.

This step is crucial as it ensures even distribution of the leavening agents.

Set this mixture aside for now; it’ll come into play shortly.

Step 3: Cream Butter and Sugar

In a large mixing bowl, cream the softened butter and granulated sugar together.

You want this mixture to be light and fluffy, which usually takes about 2-3 minutes.

This step is where the magic begins, creating a rich base for your cookies.

Step 4: Combine Wet Ingredients

Next, add the large egg and vanilla extract to the butter-sugar mixture.

Mix until everything is well combined.

The egg acts as a binder, helping to hold your cookies together.

Step 5: Combine Dry and Wet Mixtures

Gradually add the dry ingredients to the wet mixture.

Mix until just combined; overmixing can lead to tough cookies.

You want a soft dough that’s ready for the fun part!

Step 6: Add Jello and Color

Now, divide the dough into two equal portions.

In one portion, add half of the flavored Jello powder and mix until the color is evenly distributed.

Repeat with the remaining Jello powder in the second portion.

You’ll see the dough transform into vibrant hues!

Step 7: Shape the Cookies

Using a tablespoon, scoop out small portions of each colored dough.

Roll them into balls and then coat each ball in powdered sugar.

This gives them a sweet, snowy finish that’s irresistible.

Step 8: Bake the Cookies

Place the dough balls on the prepared baking sheet, spacing them about 2 inches apart.

Flatten each ball slightly with the bottom of a glass or your hand.

Bake in the preheated oven for 10-12 minutes, or until the edges are lightly golden.

Once done, let them cool on the baking sheet for 5 minutes before transferring to a wire rack to cool completely.

And there you have it—colorful, delightful Rainbow Jello Sugar Cookies ready to be enjoyed!

Tips for Success

  • Make sure your butter is softened for easy creaming; it should be at room temperature.
  • Don’t skip the chilling step if you find the dough too sticky; a quick chill can help.
  • Experiment with different Jello flavors for unique taste combinations.
  • For a fun twist, add colorful sprinkles to the dough before baking.
  • Keep an eye on the cookies while baking; they can go from perfect to overdone quickly!

Equipment Needed

  • Baking sheet: A standard sheet works, but a silicone mat can prevent sticking.
  • Parchment paper: Great for easy cleanup; aluminum foil is a good alternative.
  • Mixing bowls: Use any size, but a large bowl is best for creaming.
  • Whisk: A hand whisk or electric mixer will do the job.
  • Measuring cups and spoons: Essential for accuracy; a kitchen scale is a handy alternative.

Variations

  • Different Jello Flavors: Experiment with various Jello flavors like strawberry, lime, or blue raspberry for unique taste profiles.
  • Gluten-Free Option: Substitute all-purpose flour with a gluten-free blend to make these cookies suitable for gluten-sensitive friends.
  • Vegan Twist: Replace the egg with a flaxseed egg (1 tablespoon ground flaxseed mixed with 2.5 tablespoons water) and use vegan butter for a plant-based version.
  • Chocolate Chip Addition: Fold in mini chocolate chips for a delightful chocolatey surprise in every bite.
  • Sprinkle Surprise: Add colorful sprinkles to the dough for an extra festive touch that kids will love!

Serving Suggestions

  • Milk: Serve these cookies with a cold glass of milk for a classic pairing that never disappoints.
  • Ice Cream: Top them with a scoop of vanilla or rainbow sherbet for a fun dessert twist.
  • Presentation: Arrange the cookies on a colorful platter to showcase their vibrant hues.
  • Party Treat: These cookies make a great addition to birthday parties or festive gatherings.

FAQs about Rainbow Jello Sugar Cookies

Can I use sugar-free Jello for these cookies?

Absolutely! Sugar-free Jello works just as well, allowing you to enjoy these colorful cookies with fewer calories. The flavor and color will still shine through!

How should I store leftover cookies?

Store your Rainbow Jello Sugar Cookies in an airtight container at room temperature. They’ll stay fresh for about a week, but I doubt they’ll last that long!

Can I freeze the cookie dough?

Yes, you can freeze the dough! Just wrap it tightly in plastic wrap and store it in a freezer bag. When you’re ready to bake, let it thaw in the fridge overnight before shaping and baking.

What if I don’t have Jello on hand?

No worries! You can substitute the Jello with flavored extracts or even citrus zest for a different twist. Just keep in mind that the color will be less vibrant.

Are these cookies suitable for kids?

Definitely! These Rainbow Jello Sugar Cookies are a hit with kids. They’re fun to make and even more fun to eat, making them a perfect baking project for family time.

Final Thoughts

Baking Rainbow Jello Sugar Cookies is more than just a recipe; it’s an experience filled with laughter and creativity.

The vibrant colors and fruity flavors bring joy to both the kitchen and the table.

Whether you’re sharing them with family or enjoying them solo, each bite is a reminder of the simple pleasures in life.

These cookies are perfect for any occasion, sparking smiles and sweet memories.

So, roll up your sleeves, gather your loved ones, and dive into this colorful baking adventure.

You’ll find that the joy of creating something delicious is just as rewarding as the treat itself!

Paul

Rainbow Jello Sugar Cookies: A Colorful Baking Delight!

Rainbow Jello Sugar Cookies are a colorful and delightful treat that combines the sweetness of sugar cookies with the fun flavors of Jello.
Prep Time 15 minutes
Cook Time 12 minutes
Total Time 27 minutes
Servings: 24 cookies
Course: Dessert
Cuisine: American
Calories: 120

Ingredients
  

  • 2 ¾ cups all-purpose flour
  • 1 teaspoon baking powder
  • ½ teaspoon baking soda
  • ½ teaspoon salt
  • 1 cup unsalted butter softened
  • 1 cup granulated sugar
  • 1 large egg
  • 1 teaspoon vanilla extract
  • 1 3-ounce box of flavored Jello (any color)
  • 1 cup powdered sugar for rolling

Method
 

  1. Preheat your oven to 350°F. Line a baking sheet with parchment paper.
  2. In a medium bowl, whisk together the flour, baking powder, baking soda, and salt. Set aside.
  3. In a large mixing bowl, cream together the softened butter and granulated sugar until light and fluffy, about 2-3 minutes. Add the egg and vanilla extract, mixing until well combined.
  4. Gradually add the dry ingredients to the wet mixture, mixing until just combined. Divide the dough into two equal portions.
  5. In one portion of the dough, add half of the Jello powder and mix until the color is evenly distributed. In the other portion, add the remaining Jello powder and mix until combined.
  6. Using a tablespoon, scoop out small portions of each colored dough and roll them into balls. Roll each ball in powdered sugar until fully coated.
  7. Place the dough balls on the prepared baking sheet, spacing them about 2 inches apart. Flatten each ball slightly with the bottom of a glass or your hand.
  8. Bake in the preheated oven for 10-12 minutes, or until the edges are lightly golden. Remove from the oven and let cool on the baking sheet for 5 minutes before transferring to a wire rack to cool completely.

Notes

  • For a fun twist, try using different flavors of Jello to create a variety of colors and tastes.
  • You can also add sprinkles to the dough for extra texture and color.
  • If you prefer a softer cookie, slightly underbake them for a chewy texture.

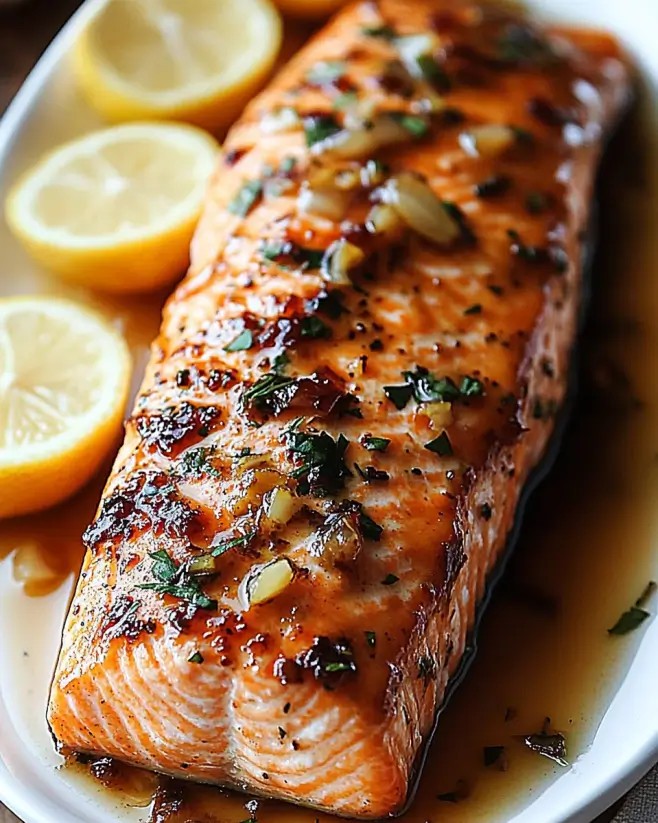
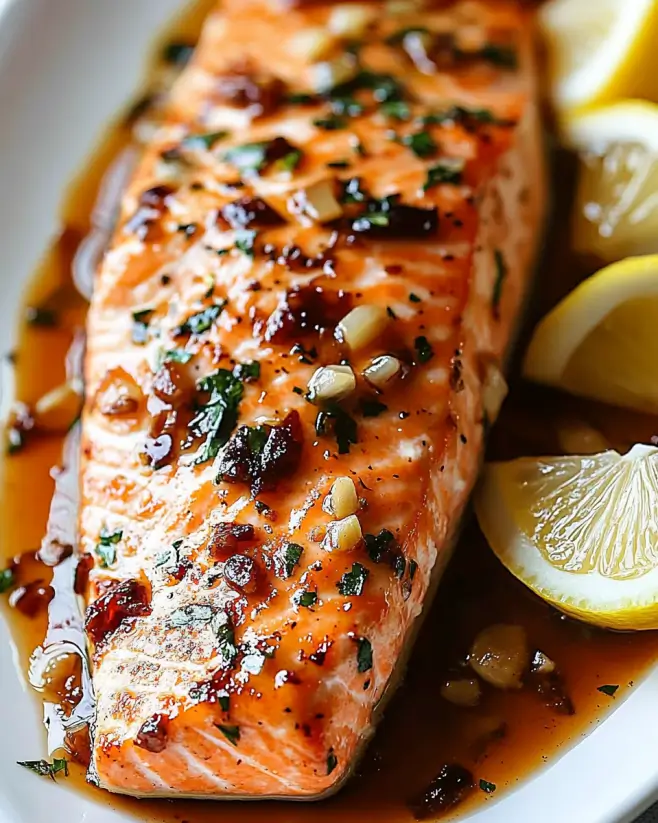
Glazed Brown Sugar Soy Salmon with Garlic and Lemon Cooked to Perfection!

Introduction to Glazed Brown Sugar Soy Salmon with Garlic and Lemon

Cooking has always been a way for me to unwind after a long day. One of my go-to recipes is Glazed Brown Sugar Soy Salmon with Garlic and Lemon. It’s a dish that brings together sweet and savory flavors, making it a crowd-pleaser at the dinner table. Whether you’re looking to impress your family or just want a quick solution for a busy weeknight, this recipe fits the bill perfectly. With just a handful of ingredients and minimal prep time, you can create a meal that feels gourmet without the fuss. Let’s dive into this delicious adventure!

Why You’ll Love This Glazed Brown Sugar Soy Salmon with Garlic and Lemon

This recipe is a game-changer for anyone who craves a delicious meal without spending hours in the kitchen. The combination of brown sugar and soy sauce creates a mouthwatering glaze that caramelizes beautifully as it bakes. Plus, it’s ready in just 25 minutes! Perfect for busy weeknights or impressing guests, this dish is not only easy to make but also bursting with flavor. You’ll be hooked after the first bite!

Ingredients for Glazed Brown Sugar Soy Salmon with Garlic and Lemon

Gathering the right ingredients is the first step to culinary success. For this Glazed Brown Sugar Soy Salmon with Garlic and Lemon, you’ll need a few simple yet flavorful components:

  • Salmon fillets: Fresh salmon is the star of this dish. Look for vibrant, firm fillets for the best flavor.
  • Brown sugar: This adds a rich sweetness that balances the saltiness of the soy sauce. Light or dark brown sugar works well.
  • Soy sauce: A staple in many kitchens, soy sauce brings umami depth. Opt for low-sodium if you’re watching your salt intake.
  • Olive oil: This helps the glaze adhere to the salmon and adds a touch of richness. You can substitute with sesame oil for a nutty flavor.
  • Garlic: Freshly minced garlic infuses the dish with aromatic goodness. It’s a must for that savory kick!
  • Lemon juice: Freshly squeezed lemon juice brightens the dish and enhances the flavors. Bottled juice just won’t cut it here.
  • Lemon zest: This adds a burst of citrus aroma. Grate the outer peel of the lemon for the best results.
  • Black pepper: A pinch of black pepper adds a subtle heat. Feel free to adjust to your taste.
  • Red pepper flakes (optional): If you like a bit of spice, toss in some red pepper flakes for an extra kick.
  • Fresh parsley: Chopped parsley is perfect for garnishing, adding a pop of color and freshness to your dish.

For exact measurements, check the bottom of the article where you can find everything listed for easy printing. Now that you have your ingredients ready, let’s get cooking!

How to Make Glazed Brown Sugar Soy Salmon with Garlic and Lemon

Now that you have your ingredients ready, let’s get into the fun part—cooking! This Glazed Brown Sugar Soy Salmon with Garlic and Lemon is straightforward and rewarding. Follow these steps, and you’ll have a delicious meal in no time.

Step 1: Preheat the Oven

First things first, preheat your oven to 400°F (200°C). This step is crucial because it ensures even cooking. While the oven heats up, line a baking sheet with parchment paper or give it a light spray of cooking oil. This will prevent the salmon from sticking and make cleanup a breeze.

Step 2: Prepare the Glaze

In a small bowl, whisk together the brown sugar, soy sauce, olive oil, minced garlic, lemon juice, lemon zest, black pepper, and red pepper flakes (if you’re feeling spicy). Mix until everything is well combined. The glaze should be thick but pourable. If it’s too thick, add a splash of water to reach the right consistency. This glaze is what makes the salmon shine!

Step 3: Coat the Salmon

Place the salmon fillets on the prepared baking sheet, skin side down. Pour the luscious glaze over the salmon, making sure each fillet is generously coated. Don’t be shy—this glaze is packed with flavor! If you have time, let the salmon marinate for about 15 minutes for an extra flavor boost.

Step 4: Bake the Salmon

Slide the baking sheet into your preheated oven and bake the salmon for 12-15 minutes. Keep an eye on it! You’ll know it’s done when the salmon flakes easily with a fork and has a beautiful caramelized top. If you like a bit of char, you can broil it for the last minute or two, but watch closely to avoid burning.

Step 5: Rest and Serve

Once the salmon is out of the oven, let it rest for a few minutes. This allows the juices to redistribute, making each bite tender and juicy. Drizzle any remaining glaze from the baking sheet over the top for that extra flavor punch. Garnish with chopped fresh parsley for a pop of color and freshness. Serve it up with your favorite sides, and enjoy!

Tips for Success

  • Use fresh salmon for the best flavor and texture.
  • Let the salmon marinate in the glaze for at least 15 minutes if time allows.
  • Keep an eye on the baking time to avoid overcooking.
  • Experiment with different herbs like dill or cilantro for a unique twist.
  • Serve with a squeeze of fresh lemon juice for an extra zing!

Equipment Needed

  • Baking sheet: A standard sheet works, but a rimmed one can catch any glaze drips.
  • Parchment paper: This makes cleanup easy; aluminum foil is a good alternative.
  • Mixing bowl: Any bowl will do, but a whisking bowl is ideal for the glaze.
  • Whisk: A fork can work in a pinch for mixing the glaze.
  • Measuring cups: Essential for accuracy, but eyeballing can work if you’re confident!

Variations

  • Honey Soy Salmon: Swap out brown sugar for honey for a different sweetness and a lovely glaze.
  • Spicy Glazed Salmon: Add more red pepper flakes or a dash of sriracha to the glaze for a fiery kick.
  • Herb-Infused Salmon: Mix in fresh herbs like thyme or rosemary into the glaze for an aromatic twist.
  • Maple Soy Salmon: Use maple syrup instead of brown sugar for a unique flavor profile that’s equally delicious.
  • Vegetarian Option: Substitute salmon with firm tofu, marinating it in the same glaze for a plant-based delight.

Serving Suggestions

  • Pair the salmon with fluffy jasmine rice or quinoa for a hearty meal.
  • Steamed broccoli or asparagus adds a vibrant touch and balances the dish.
  • A crisp green salad with a light vinaigrette complements the rich flavors.
  • Serve with a chilled white wine, like Sauvignon Blanc, for a refreshing sip.
  • Garnish with lemon wedges for an extra burst of citrus when serving.

FAQs about Glazed Brown Sugar Soy Salmon with Garlic and Lemon

Can I use frozen salmon for this recipe?

Absolutely! Just make sure to thaw the salmon completely before cooking. Frozen salmon can still be delicious, but it’s best to marinate it after thawing for optimal flavor.

What can I substitute for soy sauce?

If you’re looking for a gluten-free option, try tamari or coconut aminos. Both provide a similar umami flavor without the gluten.

How do I know when the salmon is done cooking?

The salmon is perfectly cooked when it flakes easily with a fork and has an internal temperature of 145°F (63°C). A meat thermometer can be a handy tool for this!

Can I make the glaze ahead of time?

Yes! You can prepare the glaze a day in advance and store it in the fridge. Just give it a good stir before using it to coat the salmon.

What sides pair well with Glazed Brown Sugar Soy Salmon?

This salmon dish goes wonderfully with steamed vegetables, rice, or a fresh salad. The bright flavors complement a variety of sides, making it versatile for any meal!

Final Thoughts

Cooking Glazed Brown Sugar Soy Salmon with Garlic and Lemon is more than just preparing a meal; it’s about creating a moment. The sweet and savory glaze transforms simple salmon into a dish that feels special, perfect for any occasion. Each bite is a delightful balance of flavors that can brighten even the busiest of days. Whether you’re sharing it with family or enjoying a quiet dinner alone, this recipe brings joy and satisfaction. I hope it becomes a staple in your kitchen, just as it has in mine. Happy cooking!

Paul

Glazed Brown Sugar Soy Salmon with Garlic and Lemon Cooked to Perfection!

A delicious and easy recipe for Glazed Brown Sugar Soy Salmon with Garlic and Lemon, cooked to perfection.
Prep Time 10 minutes
Cook Time 15 minutes
Total Time 25 minutes
Servings: 4 servings
Course: Main Course
Cuisine: Asian
Calories: 320

Ingredients
  

  • 1 pound salmon fillets
  • 1/4 cup brown sugar
  • 1/4 cup soy sauce
  • 2 tablespoons olive oil
  • 4 cloves garlic minced
  • 1 tablespoon fresh lemon juice
  • 1 teaspoon lemon zest
  • 1/2 teaspoon black pepper
  • 1/4 teaspoon red pepper flakes optional
  • Fresh parsley chopped (for garnish)

Method
 

  1. Preheat your oven to 400°F (200°C). Line a baking sheet with parchment paper or lightly grease it with cooking spray.
  2. In a small bowl, whisk together the brown sugar, soy sauce, olive oil, minced garlic, lemon juice, lemon zest, black pepper, and red pepper flakes (if using) until well combined.
  3. Place the salmon fillets on the prepared baking sheet, skin side down. Pour the glaze over the salmon, ensuring each fillet is well coated.
  4. Bake the salmon in the preheated oven for 12-15 minutes, or until the salmon flakes easily with a fork and is cooked through.
  5. Remove the salmon from the oven and let it rest for a few minutes. Drizzle any remaining glaze from the baking sheet over the top before serving.
  6. Garnish with chopped fresh parsley and serve with your choice of sides, such as rice or steamed vegetables.

Notes

  • For a smoky flavor, try grilling the salmon instead of baking it. Preheat your grill and cook the salmon for about 6-8 minutes per side.
  • Add some sliced green onions or sesame seeds as a garnish for extra flavor and texture.

Crispy Beer-Battered Halibut: A Must-Try Recipe Today!

Introduction to Crispy Beer-Battered Halibut

There’s something magical about a plate of crispy beer-battered halibut that takes me back to my childhood. I remember weekends spent at the local fish fry, the aroma of golden fish wafting through the air, making my mouth water. This recipe is not just a quick solution for a busy day; it’s a chance to impress your loved ones with a dish that’s both simple and delicious. With just a few ingredients and a little bit of time, you can create a seafood feast that will have everyone asking for seconds. Let’s dive in!

Why You’ll Love This Crispy Beer-Battered Halibut

This crispy beer-battered halibut is a game-changer for any home cook. It’s incredibly easy to whip up, making it perfect for weeknight dinners or casual gatherings. The light, crunchy batter pairs beautifully with the tender fish, creating a delightful contrast in every bite. Plus, it’s a crowd-pleaser that even picky eaters will love. Trust me, once you try this recipe, it’ll become a staple in your kitchen!

Ingredients for Crispy Beer-Battered Halibut

Gathering the right ingredients is the first step to creating your crispy beer-battered halibut. Here’s what you’ll need:

  • Halibut fillets: Fresh, flaky, and mild, halibut is the star of this dish. You can also use cod or haddock for a different flavor.
  • All-purpose flour: This forms the base of your batter, giving it that essential crunch. It’s versatile and a kitchen staple.
  • Baking powder: A little leavening agent that helps the batter puff up, creating a light texture.
  • Salt: Enhances the flavors of the fish and batter. A must-have in any recipe!
  • Black pepper: Adds a subtle kick to the batter, balancing the flavors perfectly.
  • Cold beer: The secret ingredient! A lager or ale adds flavor and helps create that crispy texture. Feel free to experiment with your favorite brew.
  • Vegetable oil: Essential for frying, it should have a high smoke point. Canola or peanut oil works well.
  • Lemon wedges: A zesty touch to brighten up the dish when served.
  • Tartar sauce: A classic accompaniment that complements the fish beautifully.

For those looking to spice things up, consider adding a teaspoon of paprika or cayenne pepper to the batter for an extra flavor boost. You can find the exact quantities for each ingredient at the bottom of the article, ready for printing!

How to Make Crispy Beer-Battered Halibut

Now that you have your ingredients ready, let’s get cooking! Making crispy beer-battered halibut is straightforward and fun. Follow these simple steps, and you’ll have a delicious dish in no time.

Prepare the Batter

Start by whisking together the all-purpose flour, baking powder, salt, and black pepper in a large bowl. This dry mix is the foundation of your batter. Gradually pour in the cold beer, stirring gently until the batter is smooth. It should be thick enough to coat the fish but not too heavy. Let it rest for about 10 minutes. This resting time allows the flavors to meld and the batter to thicken slightly, ensuring that crispy texture we all love.

Heat the Oil

While the batter is resting, it’s time to heat the oil. In a deep skillet or pot, pour in about 2 inches of vegetable oil. Heat it over medium-high heat until it reaches 350°F. You can use a thermometer for accuracy, but if you don’t have one, drop a small amount of batter into the oil. If it sizzles and rises to the surface, you’re good to go! Be careful not to overcrowd the pot; this will lower the oil temperature and result in soggy fish.

Fry the Halibut

Once the oil is hot, it’s time to fry! Dip each piece of halibut into the batter, letting any excess drip off. Carefully place the battered fish into the hot oil, working in batches. Fry for about 4-5 minutes, turning occasionally until the fish is golden brown and cooked through. Use a slotted spoon to transfer the crispy halibut to a paper towel-lined plate. This will help drain any excess oil, keeping your fish light and crispy.

Serve and Enjoy

Now comes the best part—serving! Plate your crispy beer-battered halibut while it’s still hot. Serve it with lemon wedges for a zesty kick and a side of tartar sauce for dipping. The combination of flavors is simply irresistible. Gather your friends or family around the table, and enjoy this delightful seafood feast together!

Tips for Success

  • Make sure your beer is cold; it helps create a lighter batter.
  • Don’t skip the resting time for the batter; it’s crucial for texture.
  • Use a thermometer to maintain oil temperature for perfect frying.
  • Fry in small batches to avoid overcrowding and sogginess.
  • Experiment with different beers for unique flavor profiles.

Equipment Needed

  • Deep skillet or pot: A heavy-bottomed pot works well if you don’t have a deep fryer.
  • Slotted spoon: Perfect for removing the fish from the oil; a regular spoon can work in a pinch.
  • Whisk: Essential for mixing the batter; a fork can also do the job.
  • Thermometer: Useful for checking oil temperature; a simple drop test can suffice.

Variations

  • Spicy Kick: Add a teaspoon of cayenne pepper or hot sauce to the batter for a fiery twist.
  • Herb-Infused: Mix in fresh herbs like dill or parsley to the batter for a burst of flavor.
  • Gluten-Free Option: Substitute all-purpose flour with a gluten-free flour blend for a celiac-friendly version.
  • Beer Alternatives: Use sparkling water or club soda instead of beer for a non-alcoholic option that still delivers crispiness.
  • Vegetable Variation: Try battering and frying vegetables like zucchini or mushrooms for a delightful vegetarian dish.

Serving Suggestions

  • Classic Sides: Pair your crispy beer-battered halibut with crispy fries or a fresh coleslaw for a traditional touch.
  • Refreshing Drinks: Enjoy with a cold lager or a zesty lemonade to complement the flavors.
  • Presentation: Serve on a wooden board with lemon wedges and tartar sauce in small bowls for a rustic look.

FAQs about Crispy Beer-Battered Halibut

Can I use a different type of fish for this recipe?
Absolutely! While halibut is a fantastic choice, you can easily substitute it with cod or haddock. Both options will give you a deliciously flaky texture that pairs well with the crispy batter.

What type of beer is best for the batter?
A lager or ale works best for this crispy beer-battered halibut. However, feel free to experiment with your favorite brews! Each type of beer will impart a unique flavor to the batter.

How do I store leftovers?
If you have any leftovers (which is rare!), store them in an airtight container in the fridge. To reheat, place them in an oven at 350°F for about 10 minutes to regain that crispy texture.

Can I make the batter ahead of time?
While it’s best to use the batter fresh, you can prepare it a few hours in advance. Just keep it covered in the fridge. Remember to give it a good stir before using, as it may thicken up.

Is this recipe gluten-free?
The original recipe is not gluten-free, but you can easily make it so by substituting all-purpose flour with a gluten-free flour blend. This way, everyone can enjoy the crispy goodness!

Final Thoughts

Cooking crispy beer-battered halibut is more than just a recipe; it’s an experience that brings joy to the table. The satisfying crunch of the batter, paired with the tender fish, creates a delightful harmony that’s hard to resist. Whether you’re sharing it with family or enjoying a quiet night in, this dish has a way of making any meal feel special. Plus, the aroma wafting through your kitchen will have everyone eagerly anticipating dinner. So grab your ingredients, fire up that skillet, and let the magic of crispy beer-battered halibut transform your next meal into a memorable feast!

Paul

Crispy Beer-Battered Halibut: A Must-Try Recipe Today!

A delicious recipe for crispy beer-battered halibut, perfect for a seafood feast.
Prep Time 10 minutes
Cook Time 15 minutes
Total Time 25 minutes
Servings: 4 servings
Course: Main Course
Cuisine: American
Calories: 380

Ingredients
  

  • 1 ½ pounds halibut fillets cut into 1-inch pieces
  • 1 cup all-purpose flour
  • 1 teaspoon baking powder
  • 1 teaspoon salt
  • ½ teaspoon black pepper
  • 1 cup cold beer lager or ale
  • Vegetable oil for frying
  • Lemon wedges for serving
  • Tartar sauce for serving

Method
 

  1. In a large bowl, whisk together the flour, baking powder, salt, and black pepper. Gradually add the cold beer, stirring until the batter is smooth and well combined. Let the batter rest for about 10 minutes.
  2. While the batter rests, heat about 2 inches of vegetable oil in a deep skillet or pot over medium-high heat until it reaches 350°F.
  3. Dip each piece of halibut into the batter, allowing any excess to drip off. Carefully place the battered fish into the hot oil, working in batches to avoid overcrowding.
  4. Fry the halibut for about 4-5 minutes, turning occasionally, until golden brown and cooked through. Use a slotted spoon to transfer the fish to a paper towel-lined plate to drain excess oil.
  5. Serve the crispy beer-battered halibut hot with lemon wedges and tartar sauce on the side.

Notes

  • For extra flavor, add a teaspoon of paprika or cayenne pepper to the batter.
  • Substitute the halibut with cod or haddock for a different taste and texture.

Baked Huevos Rancheros: A Delicious Healthy Twist!

Introduction to Baked Huevos Rancheros

There’s something magical about breakfast that brings back memories of lazy Sunday mornings.

As a kid, I remember the aroma of eggs sizzling in the pan, mingling with the scent of fresh tortillas.

Now, as a passionate home cook, I’ve discovered a delightful twist on a classic: Baked Huevos Rancheros.

This dish is not just a feast for the eyes; it’s a quick solution for busy weekdays or a way to impress your loved ones on the weekend.

With vibrant flavors and a healthy twist, it’s the perfect way to start your day right!

Why You’ll Love This Baked Huevos Rancheros

Baked Huevos Rancheros is a game-changer for breakfast lovers.

It’s incredibly easy to whip up, taking just 30 minutes from start to finish.

The combination of hearty black beans, perfectly baked eggs, and zesty salsa creates a flavor explosion that will wake up your taste buds.

Plus, it’s a healthy option packed with protein and fiber, making it a guilt-free indulgence you can enjoy any day of the week!

Ingredients for Baked Huevos Rancheros

Creating Baked Huevos Rancheros is a breeze with these simple ingredients.

Here’s what you’ll need to bring this vibrant dish to life:

  • Black Beans: The heart of this dish, they add protein and fiber. Canned beans are a time-saver, but feel free to use dried beans if you have the time to soak and cook them.
  • Eggs: Fresh large eggs are essential for that perfect runny yolk. They provide richness and protein, making this dish satisfying.
  • Salsa: Choose your favorite salsa, whether it’s mild or spicy. It adds a burst of flavor and moisture to the dish.
  • Cheddar Cheese: Shredded cheddar melts beautifully, adding creaminess. For a twist, try crumbled feta or cotija cheese for a different flavor profile.
  • Avocado: Diced avocado adds a creamy texture and healthy fats. It’s the perfect finishing touch that elevates the dish.
  • Olive Oil: A splash of olive oil helps to sauté the beans and spices, enhancing their flavors.
  • Ground Cumin: This spice brings warmth and depth to the dish. It’s a staple in Mexican cuisine.
  • Chili Powder: Adds a hint of heat and complexity. Adjust the amount based on your spice preference.
  • Salt and Pepper: Essential for seasoning, they help to bring out the flavors of all the ingredients.
  • Cilantro: Fresh cilantro is a must for garnish. It adds a pop of color and a fresh, herbal note.
  • Corn Tortillas: These are the base for your huevos rancheros. Warm them up to serve alongside the dish, or use them to scoop up the deliciousness!

For exact measurements, check the bottom of the article where you can find everything available for printing.

How to Make Baked Huevos Rancheros

Creating Baked Huevos Rancheros is a straightforward process that will have your kitchen smelling amazing in no time.

Let’s dive into the steps to make this delicious dish!

Step 1: Preheat the Oven

Start by preheating your oven to 375°F.

This step is crucial because it ensures even cooking.

A hot oven helps the eggs set perfectly while keeping the yolks runny, just the way we love them!

Step 2: Prepare the Black Bean Mixture

In a skillet, heat a tablespoon of olive oil over medium heat.

Once the oil is shimmering, add the drained black beans, ground cumin, chili powder, salt, and pepper.

Stir everything together and let it cook for about 5 minutes.

This allows the spices to bloom and the beans to warm through, creating a flavorful base for your dish.

Step 3: Assemble the Dish

Spread the black bean mixture evenly in a baking dish.

Make four small wells in the mixture using the back of a spoon.

These wells are where you’ll crack the eggs, so make sure they’re deep enough to hold them without spilling.

Step 4: Add Salsa and Cheese

Now, pour your favorite salsa over the eggs, letting it cascade down into the wells.

Next, sprinkle a generous amount of shredded cheddar cheese on top.

The cheese will melt beautifully, adding a creamy texture that complements the dish perfectly.

Step 5: Bake to Perfection

Place the baking dish in the preheated oven and bake for 15-20 minutes.

Keep an eye on it! You want the egg whites to be set while the yolks remain runny.

A gentle shake of the dish can help you check for doneness—if the whites jiggle but the yolks don’t, you’re golden!

Step 6: Warm the Tortillas

While the huevos rancheros are baking, warm your corn tortillas.

You can do this in a dry skillet over medium heat for about 30 seconds on each side or pop them in the microwave for a quick warm-up.

Warmed tortillas are essential for scooping up all that deliciousness!

Step 7: Garnish and Serve

Once your dish is out of the oven, let it cool for a minute.

Top it off with diced avocado and a sprinkle of fresh cilantro.

This adds a burst of freshness and color, making your Baked Huevos Rancheros not just tasty but visually appealing too.

Serve it hot with those warm tortillas on the side, and enjoy every bite!

Tips for Success

  • Use fresh ingredients for the best flavor—especially the eggs and salsa.
  • Don’t rush the preheating; it’s key for even cooking.
  • Experiment with different cheeses for unique flavor profiles.
  • For extra spice, add jalapeños to the black bean mixture.
  • Let the dish cool slightly before serving to avoid burns from hot yolks.

Equipment Needed

  • Baking Dish: A 9×9 inch or similar size works well. Any oven-safe dish will do.
  • Skillet: A non-stick skillet is ideal for sautéing the beans. A regular skillet works too.
  • Measuring Cups: Handy for measuring ingredients, but you can eyeball it if you’re confident.
  • Spoon: Use a regular spoon for mixing and creating wells in the bean mixture.

Variations

  • Spicy Huevos Rancheros: Add sliced jalapeños or a dash of hot sauce to the black bean mixture for an extra kick.
  • Cheese Swap: Try using crumbled feta or cotija cheese instead of cheddar for a tangy twist.
  • Vegetable Boost: Incorporate diced bell peppers, onions, or spinach into the black bean mixture for added nutrition and flavor.
  • Meat Lover’s Version: Add cooked chorizo or crumbled sausage to the black bean mixture for a heartier dish.
  • Gluten-Free Option: Serve with corn tortillas or lettuce wraps instead of flour tortillas to keep it gluten-free.

Serving Suggestions

  • Fresh Fruit: Serve with a side of sliced mango or pineapple for a refreshing contrast.
  • Coffee or Tea: Pair with a strong cup of coffee or a soothing herbal tea to complement the flavors.
  • Presentation: Serve on colorful plates and garnish with extra cilantro for a vibrant look.
  • Yogurt: A dollop of Greek yogurt can add creaminess and balance the spice.

FAQs about Baked Huevos Rancheros

Can I make Baked Huevos Rancheros ahead of time?

Absolutely! You can prepare the black bean mixture and assemble the dish a day in advance. Just cover it and store it in the fridge. When you’re ready to bake, simply add the eggs and cheese, then pop it in the oven. It’s a great way to save time on busy mornings!

What can I substitute for black beans?

If black beans aren’t your thing, you can use pinto beans or even refried beans for a different texture. Each option brings its own unique flavor to the dish, so feel free to experiment!

How do I store leftovers?

Leftovers can be stored in an airtight container in the fridge for up to three days. Just reheat in the oven or microwave until warmed through. The flavors will continue to meld, making it even tastier!

Can I use egg substitutes in this recipe?

Yes! If you’re looking for a healthier option, you can use egg whites or a plant-based egg substitute. Just keep in mind that the texture and flavor may vary slightly, but it will still be delicious!

What’s the best way to serve Baked Huevos Rancheros?

Serve it hot with warm corn tortillas on the side. You can also add a dollop of sour cream or Greek yogurt for creaminess, and don’t forget the fresh cilantro for that extra pop of flavor!

Final Thoughts

Baked Huevos Rancheros is more than just a meal; it’s an experience that brings warmth and joy to your breakfast table.

The vibrant colors and bold flavors create a feast for the senses, making every bite a celebration.

Whether you’re enjoying it solo or sharing it with family, this dish has a way of sparking conversation and laughter.

It’s a healthy twist on a classic that fits perfectly into any busy lifestyle.

So, roll up your sleeves, gather your ingredients, and let the magic of Baked Huevos Rancheros brighten your mornings!

Paul

Baked Huevos Rancheros: A Delicious Healthy Twist!

Baked Huevos Rancheros is a delicious and healthy twist on a classic dish, featuring eggs baked over a flavorful black bean mixture and topped with salsa, cheese, and avocado.
Prep Time 10 minutes
Cook Time 20 minutes
Total Time 30 minutes
Servings: 4 servings
Course: Breakfast
Cuisine: Mexican
Calories: 320

Ingredients
  

  • 1 can 15 oz black beans, drained and rinsed
  • 4 large eggs
  • 1 cup salsa your choice of mild or spicy
  • 1 cup shredded cheddar cheese
  • 1 avocado diced
  • 1 tablespoon olive oil
  • 1 teaspoon ground cumin
  • 1 teaspoon chili powder
  • Salt and pepper to taste
  • Fresh cilantro for garnish
  • Corn tortillas 4-6, depending on size

Method
 

  1. Preheat the oven to 375°F.
  2. In a skillet, heat the olive oil over medium heat.
  3. Add the black beans, cumin, chili powder, salt, and pepper. Cook for about 5 minutes, stirring occasionally, until heated through.
  4. Spread the black bean mixture evenly in a baking dish.
  5. Make four small wells in the mixture and crack an egg into each well.
  6. Pour the salsa over the eggs and sprinkle with cheddar cheese.
  7. Bake in the preheated oven for 15-20 minutes, or until the egg whites are set but the yolks are still runny.
  8. While the eggs are baking, warm the corn tortillas in a dry skillet or microwave.
  9. Once baked, remove from the oven and let cool for a minute.
  10. Top with diced avocado and fresh cilantro before serving.

Notes

  • For a spicier kick, add sliced jalapeños to the black bean mixture.
  • You can also substitute the cheddar cheese with crumbled feta or cotija cheese for a different flavor profile.

Creamy Chicken Caesar Pasta Salad: A Delightful Recipe!

Introduction to Creamy Chicken Caesar Pasta Salad

There’s something magical about a dish that combines comfort and freshness, and that’s exactly what you get with Creamy Chicken Caesar Pasta Salad. This recipe is a lifesaver for those busy weeknights when you want something quick yet satisfying. Picture this: tender rotini pasta mingling with juicy chicken, crisp romaine, and a rich Caesar dressing. It’s a delightful meal that not only fills you up but also impresses your loved ones. Whether you’re hosting a casual gathering or just need a refreshing lunch, this pasta salad is your go-to solution.

Why You’ll Love This Creamy Chicken Caesar Pasta Salad

This Creamy Chicken Caesar Pasta Salad is a game-changer for anyone who craves flavor without the fuss. It’s quick to whip up, taking just 25 minutes from start to finish. The combination of tender chicken, vibrant veggies, and creamy dressing creates a taste explosion in every bite. Plus, it’s versatile enough to serve as a main dish or a side, making it perfect for any occasion. You’ll find yourself reaching for this recipe time and again!

Ingredients for Creamy Chicken Caesar Pasta Salad

Gathering the right ingredients is the first step to creating a delicious Creamy Chicken Caesar Pasta Salad. Here’s what you’ll need:

  • Rotini pasta: This spiral-shaped pasta holds onto the dressing beautifully, making every bite flavorful.
  • Cooked chicken breast: Diced chicken adds protein and heartiness, making this salad a satisfying meal.
  • Cherry tomatoes: Their sweetness and juiciness provide a refreshing contrast to the creamy dressing.
  • Romaine lettuce: Crisp and crunchy, it adds a fresh element that balances the richness of the salad.
  • Grated Parmesan cheese: This adds a salty, nutty flavor that enhances the overall taste.
  • Caesar dressing: The star of the show! It brings all the flavors together with its creamy, tangy goodness.
  • Black pepper: A pinch of this adds a subtle kick to the dish.
  • Garlic powder: This gives a hint of savory depth without overpowering the other flavors.
  • Salt: Just a touch to enhance the flavors of the ingredients.
  • Croutons (optional): For those who love a bit of crunch, croutons are a delightful topping.

Feel free to get creative! You can substitute Greek yogurt for half of the Caesar dressing for a lighter version. Adding sliced avocado or diced bell peppers can also elevate the flavor and nutrition. For exact measurements, check the bottom of the article where you can find everything available for printing.

How to Make Creamy Chicken Caesar Pasta Salad

Creating this Creamy Chicken Caesar Pasta Salad is a breeze. Follow these simple steps, and you’ll have a delicious meal ready in no time. Let’s dive in!

Step 1: Cook the Pasta

Start by boiling a large pot of salted water. Add the rotini pasta and cook according to the package instructions until it’s al dente. This usually takes about 8 to 10 minutes. Once done, drain the pasta and rinse it under cold water. This stops the cooking process and cools it down, making it perfect for a salad.

Step 2: Combine Ingredients

In a large mixing bowl, combine the cooled pasta, diced chicken, halved cherry tomatoes, chopped romaine lettuce, and grated Parmesan cheese. This colorful mix not only looks great but also packs a punch of flavor. Make sure to toss everything gently to avoid breaking the pasta.

Step 3: Prepare the Dressing

In a small bowl, whisk together the Caesar dressing, black pepper, garlic powder, and salt. This dressing is the heart of your salad, so make sure it’s well mixed. If you prefer a lighter touch, consider using Greek yogurt in place of some of the dressing. It adds creaminess without the extra calories!

Step 4: Toss and Chill

Pour the dressing over the pasta mixture and toss everything together until it’s evenly coated. This is where the magic happens! For an extra crunch, sprinkle croutons on top. Now, cover the bowl and chill the salad in the refrigerator for at least 30 minutes. This allows the flavors to meld beautifully, making each bite even more delightful.

Tips for Success

  • Always rinse the pasta with cold water after cooking to prevent it from becoming mushy.
  • Use rotini or any pasta shape that holds dressing well for maximum flavor.
  • Let the salad chill for at least 30 minutes to enhance the taste.
  • Feel free to customize with your favorite veggies or proteins.
  • For a creamier texture, add a bit more Caesar dressing just before serving.

Equipment Needed

  • Large pot: For boiling pasta; a deep skillet can work in a pinch.
  • Colander: To drain the pasta; a slotted spoon can also do the job.
  • Mixing bowl: A large bowl for combining ingredients; any big bowl will suffice.
  • Whisk: For mixing the dressing; a fork can be a handy alternative.
  • Measuring cups: To ensure accurate ingredient portions; use any standard cup if needed.

Variations

  • Grilled Chicken: Swap out the cooked chicken for grilled chicken breast for a smoky flavor.
  • Vegetarian Option: Replace chicken with chickpeas or grilled tofu for a hearty vegetarian salad.
  • Spicy Kick: Add sliced jalapeños or a dash of hot sauce to the dressing for some heat.
  • Herb Infusion: Toss in fresh herbs like basil or parsley for an aromatic twist.
  • Gluten-Free Pasta: Use gluten-free rotini to make this dish suitable for gluten-sensitive diets.

Serving Suggestions

  • Pair with a crisp green salad for a refreshing contrast.
  • Serve alongside garlic bread or a warm baguette for a hearty meal.
  • Complement with a chilled glass of white wine or sparkling water.
  • Garnish with extra Parmesan and fresh herbs for a beautiful presentation.

FAQs about Creamy Chicken Caesar Pasta Salad

Got questions about this delicious Creamy Chicken Caesar Pasta Salad? You’re not alone! Here are some common queries that might help you out:

Can I make this salad ahead of time?

Absolutely! This salad is perfect for meal prep. Just make it a few hours in advance or even the night before. The flavors will meld beautifully in the fridge.

How long does Creamy Chicken Caesar Pasta Salad last in the fridge?

Stored in an airtight container, it can last up to 3 days. Just give it a good stir before serving, as the dressing may settle.

Can I use a different type of pasta?

Of course! While rotini is great for holding the dressing, feel free to use penne, fusilli, or any pasta shape you prefer. Just adjust the cooking time as needed.

Is this salad gluten-free?

It can be! Simply swap the rotini for gluten-free pasta, and you’re good to go. This way, everyone can enjoy this creamy delight.

What can I add for extra protein?

If you want to boost the protein content, consider adding bacon bits, chickpeas, or even some hard-boiled eggs. They’ll complement the flavors beautifully!

Final Thoughts

Creating this Creamy Chicken Caesar Pasta Salad is more than just a cooking task; it’s an experience that brings joy to your table. Each bite is a delightful blend of flavors and textures, making it a dish that everyone will love. Whether you’re enjoying it on a sunny picnic or serving it at a family gathering, this salad is sure to impress. Plus, the ease of preparation means you can spend less time in the kitchen and more time with your loved ones. Dive into this recipe, and let the flavors transport you to a place of culinary bliss!

Paul

Creamy Chicken Caesar Pasta Salad: A Delightful Recipe!

A delightful and creamy pasta salad featuring chicken, cherry tomatoes, and romaine lettuce, perfect for a refreshing meal.
Prep Time 15 minutes
Cook Time 10 minutes
Total Time 25 minutes
Servings: 6 servings
Course: Salad
Cuisine: American
Calories: 350

Ingredients
  

  • 12 ounces rotini pasta
  • 1 pound cooked chicken breast diced
  • 1 cup cherry tomatoes halved
  • 1 cup romaine lettuce chopped
  • 1/2 cup grated Parmesan cheese
  • 1/2 cup Caesar dressing
  • 1/4 teaspoon black pepper
  • 1/4 teaspoon garlic powder
  • 1/4 teaspoon salt
  • 1/4 cup croutons optional, for topping

Method
 

  1. Cook the rotini pasta according to package instructions until al dente. Drain and rinse under cold water to cool.
  2. In a large mixing bowl, combine the cooked pasta, diced chicken, cherry tomatoes, romaine lettuce, and grated Parmesan cheese.
  3. In a small bowl, whisk together the Caesar dressing, black pepper, garlic powder, and salt.
  4. Pour the dressing over the pasta mixture and toss until everything is evenly coated.
  5. If desired, sprinkle croutons on top for added crunch.
  6. Chill the salad in the refrigerator for at least 30 minutes before serving to allow the flavors to meld.

Notes

  • For a lighter version, substitute Greek yogurt for half of the Caesar dressing.
  • Add sliced avocado or diced bell peppers for extra flavor and nutrition.