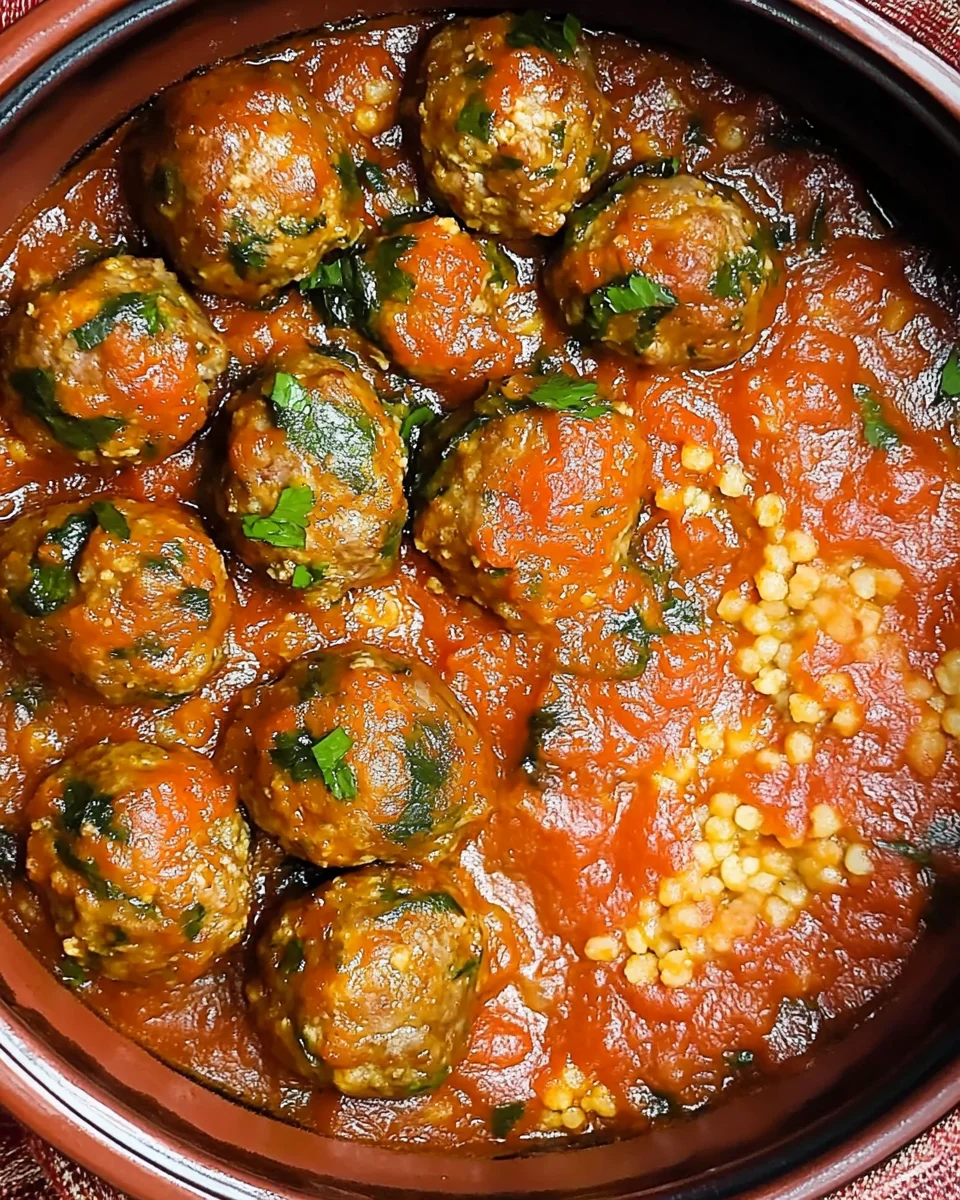
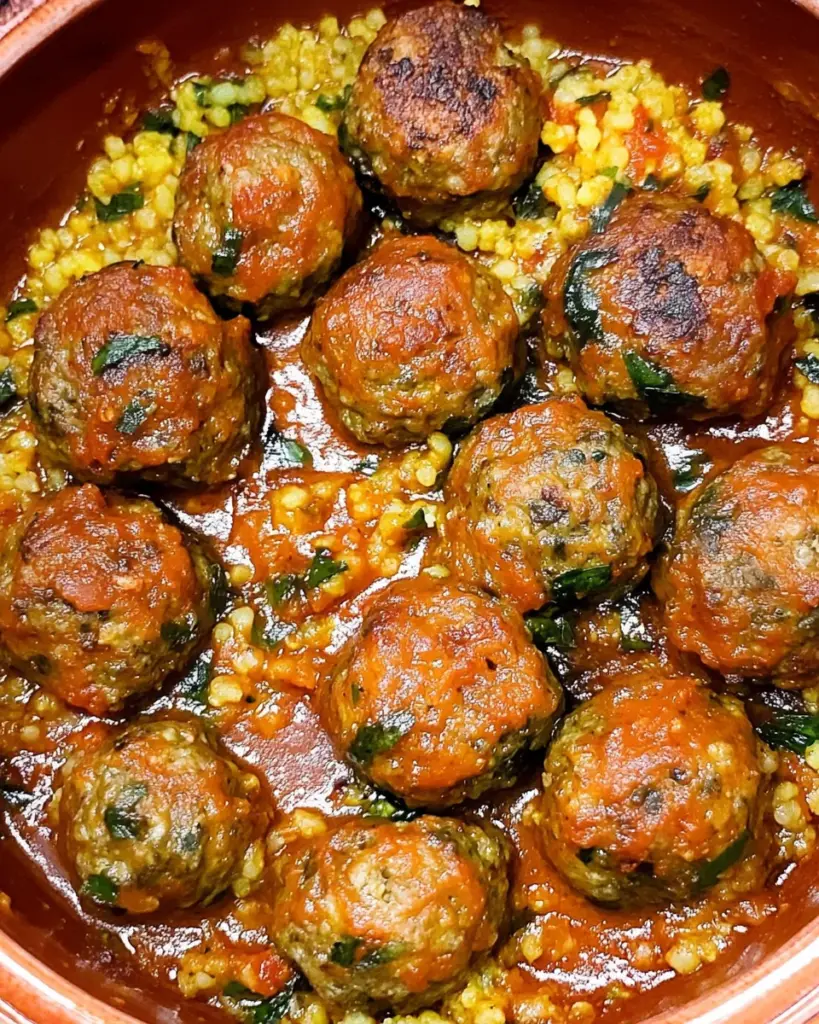
Welcome to the delightful world of Tuscan Chicken Meatballs with Gnocchi! This dish is a perfect blend of flavors that transports you straight to the heart of Italy. Imagine tender chicken meatballs, infused with aromatic herbs, swimming in a rich marinara sauce, all served over soft, pillowy gnocchi. It’s a comforting meal that’s not only delicious but also easy to prepare.
Whether you’re cooking for your family or hosting friends, this recipe is sure to impress. The combination of ground chicken and fresh herbs creates a light yet satisfying meatball. Plus, the addition of gnocchi makes it a hearty dish that everyone will love. With just a few simple ingredients, you can create a meal that feels special without spending hours in the kitchen.
In this article, we’ll guide you through the ingredients, preparation steps, and even some variations to make this dish your own. So, roll up your sleeves and get ready to enjoy a taste of Tuscany right at your dining table!
Ingredients for Tuscan Chicken Meatballs and Gnocchi
To create the mouthwatering Tuscan Chicken Meatballs with Gnocchi, you’ll need a selection of fresh and flavorful ingredients. Each component plays a vital role in bringing this dish to life. Here’s what you’ll need:
- 1 pound ground chicken: This is the star of the dish, providing a lean protein base.
- 1/2 cup grated Parmesan cheese: Adds a rich, savory flavor to the meatballs.
- 1/4 cup breadcrumbs: Helps bind the meatballs together while keeping them tender.
- 1 large egg: Acts as a binding agent, ensuring the meatballs hold their shape.
- 2 cloves garlic, minced: Infuses the meatballs with a delicious aroma and taste.
- 1 teaspoon dried oregano: A classic herb that enhances the Italian flavor profile.
- 1 teaspoon dried basil: Complements the oregano and adds freshness.
- 1/2 teaspoon salt: Essential for seasoning the meatballs.
- 1/4 teaspoon black pepper: Adds a hint of spice to the dish.
- 1/4 cup fresh parsley, chopped: Provides a burst of color and freshness.
- 1 jar (24 ounces) marinara sauce: The perfect sauce to coat the meatballs and gnocchi.
- 1 package (16 ounces) potato gnocchi: Soft and pillowy, these dumplings are a delightful addition.
- 1 cup baby spinach: Adds a nutritious touch and vibrant color.
- 1/2 cup heavy cream: Makes the sauce creamy and rich.
- 1/2 cup shredded mozzarella cheese: Melts beautifully on top for a cheesy finish.
With these ingredients, you’re well on your way to creating a delicious meal that’s sure to please everyone at the table. Gather them up, and let’s move on to the preparation steps!
Preparation of Tuscan Chicken Meatballs and Gnocchi
Now that you have all your ingredients ready, it’s time to dive into the preparation of your Tuscan Chicken Meatballs with Gnocchi. This process is straightforward and fun, making it a great activity for both novice and experienced cooks. Let’s break it down into easy steps!
Step 1: Preparing the Chicken Meatballs
First, grab a large mixing bowl. In this bowl, combine the ground chicken, grated Parmesan cheese, breadcrumbs, and the large egg. Next, add the minced garlic, dried oregano, dried basil, salt, pepper, and chopped parsley. Use your hands to mix everything together until it’s well combined. Don’t overmix, as this can make the meatballs tough. Once mixed, form the mixture into meatballs, about 1 inch in diameter. This size is perfect for cooking evenly and fitting nicely in the sauce.
Step 2: Cooking the Gnocchi
While the meatballs are resting, it’s time to prepare the gnocchi. Bring a large pot of salted water to a boil. Once boiling, add the potato gnocchi. Cook them according to the package instructions, usually just a few minutes until they float to the surface. This indicates they are done. Once cooked, drain the gnocchi and set them aside. They will be added to the slow cooker later, so keep them warm.
Step 3: Combining Ingredients for the Sauce
Now, let’s focus on the marinara sauce. In your slow cooker, pour half of the marinara sauce on the bottom. This layer will help keep the meatballs moist as they cook. Next, carefully place the prepared meatballs on top of the sauce in a single layer. Once the meatballs are arranged, pour the remaining marinara sauce over them. This ensures that every meatball is coated in that delicious sauce, enhancing the flavor.
Step 4: Final Assembly of Tuscan Chicken Meatballs and Gnocchi
Cover the slow cooker and set it to cook on low for 4 hours or on high for 2 hours. About 30 minutes before serving, add the cooked gnocchi and baby spinach to the slow cooker. Gently stir to combine everything, ensuring the gnocchi and spinach are well distributed. In the last 10 minutes of cooking, stir in the heavy cream and sprinkle the shredded mozzarella cheese on top. Cover again and let the cheese melt into a gooey, delicious topping. Once everything is cooked, you’re ready to serve!
Variation of Tuscan Chicken Meatballs and Gnocchi
While the classic Tuscan Chicken Meatballs with Gnocchi is a delightful dish, there are many ways to switch things up! Whether you want to try different flavors or cater to dietary preferences, these variations will keep your meals exciting. Let’s explore some alternative ingredients for the meatballs and different sauces to pair with gnocchi.
Alternative Ingredients for Meatballs
If you’re looking to change the flavor profile of your meatballs, consider these alternatives:
- Ground Turkey: A leaner option, ground turkey offers a similar texture with a slightly different taste. It’s a great substitute for those watching their fat intake.
- Ground Beef: For a heartier flavor, ground beef can be used. It adds richness and pairs well with the marinara sauce.
- Vegetarian Option: For a meatless version, try using lentils or chickpeas. Mash them up and mix with breadcrumbs, egg, and spices to form meatballs.
- Spices and Herbs: Feel free to experiment with different herbs like thyme or rosemary. Adding a pinch of red pepper flakes can give your meatballs a spicy kick!
These alternatives not only change the taste but also allow you to cater to different dietary needs. So, don’t hesitate to get creative!
Different Sauces to Pair with Gnocchi
While marinara sauce is a classic choice, there are many other sauces that can elevate your gnocchi experience:
- Pesto Sauce: A vibrant basil pesto adds a fresh and herby flavor. It’s perfect for a lighter meal.
- Alfredo Sauce: For a creamy twist, try a homemade or store-bought Alfredo sauce. It pairs beautifully with the soft gnocchi.
- Brown Butter Sage Sauce: This simple sauce made with browned butter and fresh sage creates a nutty flavor that complements the gnocchi perfectly.
- Tomato Cream Sauce: Combine marinara with heavy cream for a rich, velvety sauce that’s sure to please.
These sauce options can transform your Tuscan Chicken Meatballs with Gnocchi into a whole new dish. Feel free to mix and match to find your favorite combination!
Cooking Note for Tuscan Chicken Meatballs and Gnocchi
Cooking Tuscan Chicken Meatballs with Gnocchi is a delightful experience, but there are a few important notes to keep in mind to ensure your dish turns out perfectly. These tips will help you navigate the cooking process smoothly and achieve the best flavors.
First, when preparing the meatballs, make sure to handle the mixture gently. Overmixing can lead to tough meatballs. Just combine the ingredients until they are well mixed, and then form them into balls. This will keep them tender and juicy.
Next, if you’re using a slow cooker, remember that cooking times can vary based on the model. If you find that your meatballs are not fully cooked after the suggested time, simply let them cook a bit longer. The meatballs should reach an internal temperature of 165°F (75°C) for safe consumption.
Additionally, when adding the gnocchi and spinach, do so gently. Stir carefully to avoid breaking the gnocchi, which can become mushy if handled too roughly. The spinach will wilt quickly, so adding it towards the end of the cooking time ensures it retains its vibrant color and nutrients.
Lastly, for a richer flavor, consider sautéing the garlic in olive oil before adding it to the meatball mixture. This step enhances the garlic’s sweetness and aroma, giving your meatballs an extra layer of flavor.
By keeping these cooking notes in mind, you’ll create a delicious and satisfying meal that everyone will enjoy. Happy cooking!
Serving Suggestions for Tuscan Chicken Meatballs and Gnocchi
Once your Tuscan Chicken Meatballs with Gnocchi are ready, it’s time to think about how to serve this delightful dish. Presentation can elevate your meal, making it even more enjoyable. Here are some serving suggestions to enhance your dining experience:
- Garnish with Fresh Herbs: A sprinkle of fresh parsley or basil on top of your dish adds a pop of color and freshness. It also enhances the overall flavor.
- Pair with a Side Salad: A light side salad with mixed greens, cherry tomatoes, and a simple vinaigrette complements the richness of the meatballs and gnocchi. It adds a refreshing crunch to your meal.
- Serve with Crusty Bread: A slice of warm, crusty bread is perfect for soaking up the delicious marinara sauce. It’s a classic Italian pairing that everyone loves.
- Offer Grated Cheese: Provide extra grated Parmesan or mozzarella cheese at the table. Guests can sprinkle it on their servings for an added cheesy goodness.
- Wine Pairing: Consider serving a glass of red wine, such as Chianti or Sangiovese. These wines complement the flavors of the dish beautifully.
These serving suggestions not only enhance the visual appeal of your meal but also add layers of flavor and texture. Enjoy your Tuscan Chicken Meatballs with Gnocchi in style, and watch as your family and friends savor every bite!

Tips for Perfecting Tuscan Chicken Meatballs and Gnocchi
Creating the perfect Tuscan Chicken Meatballs with Gnocchi is all about attention to detail. With a few simple tips, you can elevate your dish to restaurant-quality. Here are some helpful suggestions to ensure your meal is a hit every time!
- Use Fresh Ingredients: Whenever possible, opt for fresh herbs and high-quality chicken. Fresh ingredients enhance the flavors and make a noticeable difference in your dish.
- Don’t Skip the Resting Time: After forming the meatballs, let them rest in the fridge for about 30 minutes. This helps them hold their shape better during cooking.
- Adjust Seasoning: Taste your meatball mixture before cooking. If you feel it needs more flavor, don’t hesitate to add a pinch of salt or extra herbs. Remember, seasoning is key!
- Monitor Cooking Time: Keep an eye on the cooking time in your slow cooker. If you’re using a different model, check the meatballs for doneness a bit earlier than suggested.
- Experiment with Cheese: While mozzarella is a classic choice, try mixing in different cheeses like fontina or provolone for a unique flavor twist.
- Make it Ahead: If you’re short on time, prepare the meatballs a day in advance. Store them in the fridge and cook them the next day. This can enhance the flavors as they marinate overnight.
- Serve Immediately: For the best texture, serve the dish right after cooking. Gnocchi can become mushy if left in the sauce for too long.
- Garnish Creatively: Get creative with your garnishes! Besides parsley, consider using lemon zest or a drizzle of balsamic glaze for an extra pop of flavor.
By following these tips, you’ll be well on your way to mastering Tuscan Chicken Meatballs with Gnocchi. Each step you take will bring you closer to a delicious and satisfying meal that everyone will love. Happy cooking!
Breakdown of Time for Tuscan Chicken Meatballs and Gnocchi
Understanding the time required for each step in preparing Tuscan Chicken Meatballs with Gnocchi can help you plan your cooking efficiently. Here’s a simple breakdown of the time you’ll need for preparation and cooking.
Prep Time
The prep time for this delicious dish is approximately 20 to 30 minutes. This includes gathering your ingredients, mixing the meatball mixture, and forming the meatballs. If you choose to sauté the garlic for added flavor, factor in an extra 5 minutes. Taking your time during this step ensures that your meatballs are well-prepared and flavorful.
Cooking Time
Once your meatballs are ready, the cooking time in the slow cooker is about 4 hours on low or 2 hours on high. This slow cooking allows the flavors to meld beautifully, resulting in tender meatballs. Remember to add the gnocchi and spinach about 30 minutes before serving, and stir in the heavy cream and mozzarella cheese during the last 10 minutes of cooking. This timing is crucial for achieving the perfect texture and flavor.
Total Time
In total, you can expect to spend around 4 hours and 30 minutes to 5 hours for the entire process, including both prep and cooking time. This makes it a great option for a weekend meal or a cozy family dinner. With minimal hands-on time, you can enjoy other activities while your Tuscan Chicken Meatballs with Gnocchi cook to perfection!
Nutritional Information for Tuscan Chicken Meatballs and Gnocchi
Understanding the nutritional content of your meals is essential for maintaining a balanced diet. Tuscan Chicken Meatballs with Gnocchi not only offer delightful flavors but also provide a good source of nutrients. Here’s a breakdown of the nutritional information per serving, so you can enjoy this dish while being mindful of your dietary needs.
Calories
Each serving of Tuscan Chicken Meatballs with Gnocchi contains approximately 540 calories. This calorie count includes the meatballs, gnocchi, marinara sauce, and the creamy additions. It’s a satisfying meal that provides energy without being overly heavy. If you’re looking to reduce calories, consider adjusting portion sizes or using less cream and cheese.
Protein
One of the standout features of this dish is its protein content. Each serving provides about 35 grams of protein. The ground chicken and cheese contribute significantly to this number, making it a great option for those looking to increase their protein intake. Protein is essential for muscle repair and overall health, making this meal a nutritious choice.
Sodium
When it comes to sodium, each serving contains around 800 milligrams. This amount can vary based on the marinara sauce used and any additional seasonings. If you’re watching your sodium intake, consider using low-sodium marinara sauce or reducing the amount of added salt in the meatball mixture. Balancing flavors while keeping sodium in check is key to a healthy meal.
Overall, Tuscan Chicken Meatballs with Gnocchi is a well-rounded dish that offers a good balance of calories, protein, and flavor. Enjoy this hearty meal knowing it can fit into a healthy eating plan!
FAQs about Tuscan Chicken Meatballs and Gnocchi
What can I serve with Tuscan Chicken Meatballs and Gnocchi?
When it comes to serving Tuscan Chicken Meatballs with Gnocchi, there are plenty of delicious options to consider. A light side salad is a great choice, as it adds freshness and crunch. You can mix greens with cherry tomatoes, cucumbers, and a simple vinaigrette for a refreshing contrast to the rich meatballs.
Another fantastic option is crusty bread. A warm, crusty loaf is perfect for soaking up the marinara sauce. You might also consider serving roasted vegetables, such as zucchini or bell peppers, to add color and nutrition to your meal. Lastly, a glass of red wine, like Chianti, pairs beautifully with the flavors of this dish, enhancing the overall dining experience.
Can I make Tuscan Chicken Meatballs and Gnocchi ahead of time?
Absolutely! Making Tuscan Chicken Meatballs with Gnocchi ahead of time is a great way to save time on busy days. You can prepare the meatballs and store them in the refrigerator for up to 24 hours before cooking. Just remember to cover them tightly to keep them fresh.
If you want to prepare the entire dish in advance, you can cook the meatballs and gnocchi, then store them in an airtight container in the fridge. When you’re ready to serve, simply reheat everything in the slow cooker or on the stovetop until warmed through. This makes it a convenient option for meal prep or entertaining guests!
How do I store leftovers of Tuscan Chicken Meatballs and Gnocchi?
Storing leftovers of Tuscan Chicken Meatballs with Gnocchi is easy! Allow the dish to cool completely before transferring it to an airtight container. You can store it in the refrigerator for up to 3 days. When reheating, be sure to warm it gently on the stovetop or in the microwave, adding a splash of water or broth if needed to keep it moist.
If you want to keep it longer, consider freezing the leftovers. Place the meatballs and gnocchi in a freezer-safe container, and they can last for up to 3 months. To reheat, thaw overnight in the fridge and then warm it up as mentioned earlier. This way, you can enjoy this delicious meal even on your busiest days!
Are there gluten-free options for Tuscan Chicken Meatballs and Gnocchi?
Yes, there are gluten-free options for Tuscan Chicken Meatballs with Gnocchi! To make the meatballs gluten-free, simply substitute regular breadcrumbs with gluten-free breadcrumbs or crushed gluten-free crackers. This will help bind the meatballs without compromising flavor.
For the gnocchi, look for gluten-free potato gnocchi available in many grocery stores. These alternatives allow you to enjoy this delicious dish without gluten, making it suitable for those with gluten sensitivities or celiac disease. Always check the labels to ensure all ingredients meet your dietary needs!
Conclusion on Tuscan Chicken Meatballs and Gnocchi
In conclusion, Tuscan Chicken Meatballs with Gnocchi is a delightful dish that brings the flavors of Italy right to your kitchen. This recipe is not only easy to prepare but also offers a comforting and satisfying meal for family and friends. The combination of tender chicken meatballs, rich marinara sauce, and soft gnocchi creates a harmonious blend of textures and tastes that everyone will love.
As you’ve seen, there are numerous ways to customize this dish to suit your preferences. Whether you choose to experiment with different meats, sauces, or even add vegetables, the possibilities are endless. This flexibility makes it a fantastic option for any occasion, from casual weeknight dinners to special gatherings.
Moreover, the nutritional benefits of this meal, including its protein content and hearty ingredients, make it a wholesome choice. With careful attention to cooking techniques and ingredient quality, you can create a dish that is both delicious and nourishing.
So, gather your ingredients, follow the steps, and enjoy the process of making Tuscan Chicken Meatballs with Gnocchi. We hope this recipe inspires you to bring a taste of Tuscany into your home. Happy cooking, and bon appétit!
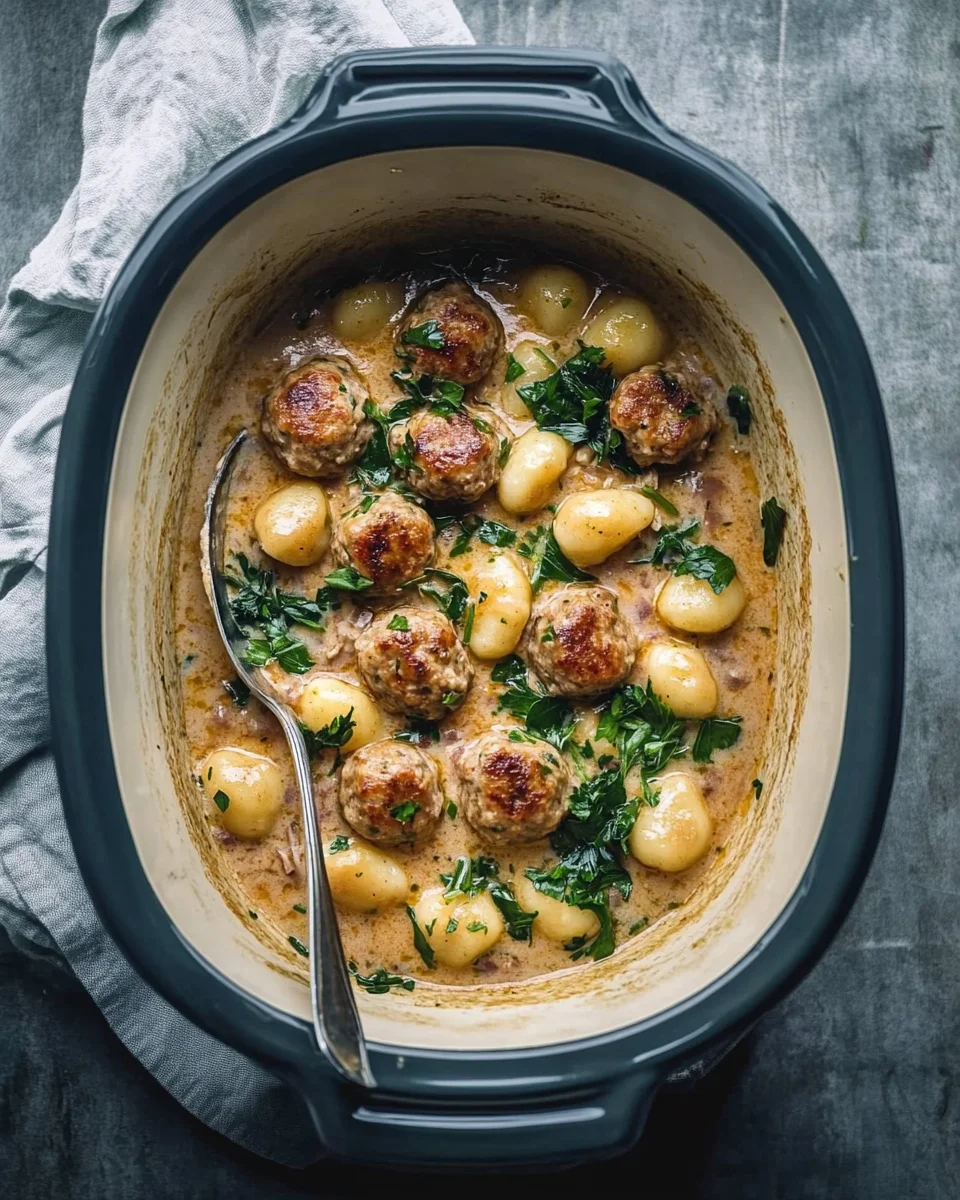
Tuscan Chicken Meatballs with Gnocchi are delicious!
Ingredients
Method
- Prepare the Meatballs:In a food processor, blend onion, garlic, basil, and sun-dried tomatoes into a coarse paste. In a large bowl, combine the paste with ground chicken, egg, seasonings, Parmesan, and breadcrumbs. Mix until well combined. Using oiled hands or a scoop, form into small meatballs.
- Sear the Meatballs:Heat sun-dried tomato oil in a skillet or use your slow cooker’s sauté setting. Brown meatballs on all sides, about 5 minutes total. They don’t need to be fully cooked at this stage.
- Deglaze and Slow Cook:Deglaze the pan with white wine and simmer briefly. Transfer meatballs to the slow cooker. Add chicken broth. Cover and cook on HIGH for 2–3 hours or LOW for 4–5 hours.
- Add Sauce Ingredients:Stir in the cream, chopped sun-dried tomatoes, Parmesan, and gnocchi. Cover and cook on HIGH for an additional 20 minutes, until gnocchi are tender and the sauce thickens.
- Finish with Spinach:Stir in chopped spinach and cook just until wilted. If desired, add a cornstarch slurry to thicken the sauce. Taste and adjust seasoning as needed.
- Serve:Ladle into bowls, sprinkle with more Parmesan, and serve hot!
Notes
- Make the meatballs ahead and freeze for an even quicker meal later.
- Swap gnocchi for cooked pasta stirred in at the end, if desired.
- You can use half-and-half for a lighter sauce, or cashew cream for a dairy-free option.
- Leftovers store well in the fridge for up to 3 days and reheat beautifully.