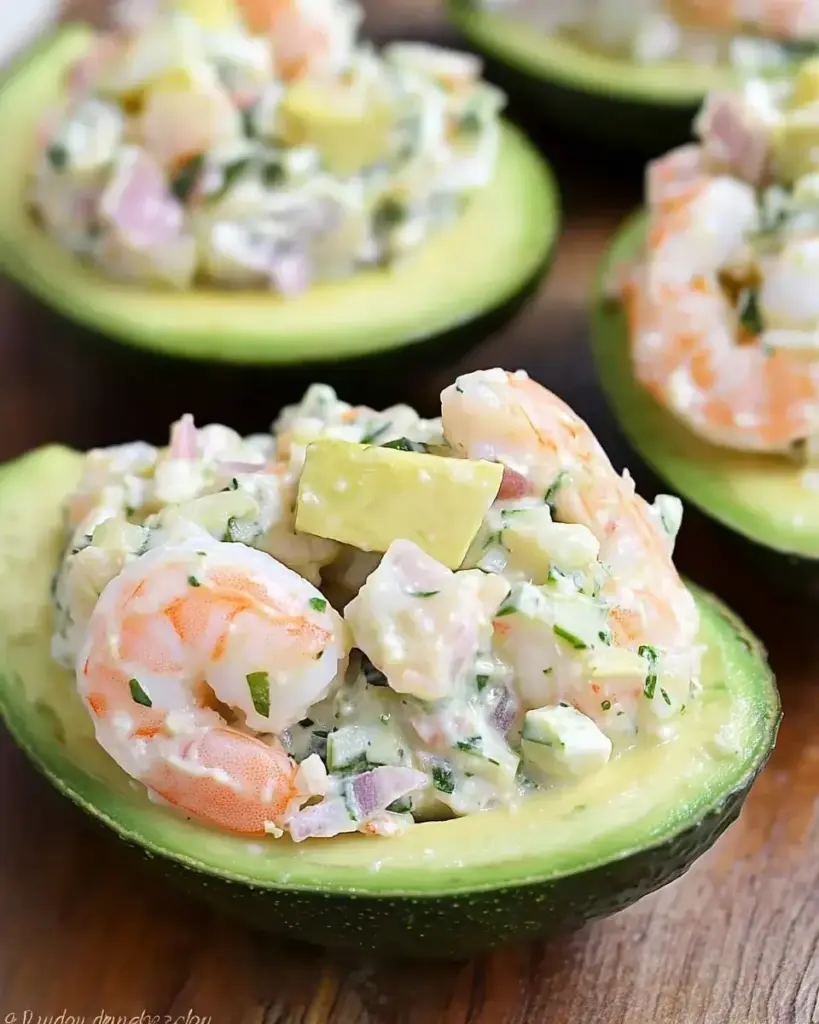
Shrimp Salad Stuffed Avocado: A Creamy Delight!

Introduction to Shrimp Salad Stuffed Avocado

There’s something undeniably satisfying about a meal that looks as good as it tastes. Shrimp Salad Stuffed Avocado is just that—a vibrant dish that’s as pleasing to the eye as it is to the palate. Whether you’re looking for a quick solution for a busy day or a dish to impress your loved ones, this recipe fits the bill perfectly. It’s light, creamy, and packed with flavor, making it an ideal choice for lunch or a refreshing appetizer. Plus, it’s a breeze to whip up, so you can spend less time in the kitchen and more time enjoying your meal.

Why You’ll Love This Shrimp Salad Stuffed Avocado

This Shrimp Salad Stuffed Avocado is a game-changer for anyone who craves deliciousness without the fuss. It’s incredibly easy to prepare, taking just 10 minutes from start to finish. The creamy shrimp salad nestled in a buttery avocado creates a flavor explosion that’s hard to resist. Plus, it’s a healthy option that doesn’t skimp on taste, making it perfect for a light meal or a fancy appetizer.

Ingredients for Shrimp Salad Stuffed Avocado

Gathering the right ingredients is the first step to creating this delightful dish. Here’s what you’ll need for your Shrimp Salad Stuffed Avocado:

  • Ripe avocados: Choose avocados that yield slightly to pressure for the best flavor and texture.
  • Cooked shrimp: Opt for peeled and deveined shrimp, which saves time. You can use fresh or frozen, just ensure they’re cooked through.
  • Diced celery: This adds a satisfying crunch and a fresh taste to the salad.
  • Diced red onion: A touch of sweetness and color, red onion brightens up the dish.
  • Mayonnaise: The creamy base that binds everything together. You can use light mayo or Greek yogurt for a healthier twist.
  • Dijon mustard: A hint of tanginess that elevates the flavor profile.
  • Lemon juice: Freshly squeezed lemon juice adds brightness and balances the richness of the avocado.
  • Garlic powder: For a subtle garlic flavor without the bite of fresh garlic.
  • Salt and pepper: Essential for seasoning, adjust to your taste.
  • Fresh parsley: A sprinkle of parsley not only adds color but also a fresh herbaceous note.

For those looking to spice things up, consider adding a few dashes of hot sauce or diced jalapeños to the shrimp salad mixture. If shrimp isn’t your thing, feel free to substitute it with canned tuna or chicken for a different protein option. You can find the exact quantities for each ingredient at the bottom of the article, ready for printing!

How to Make Shrimp Salad Stuffed Avocado

Creating this Shrimp Salad Stuffed Avocado is as easy as pie, or should I say, as easy as avocado? Follow these simple steps, and you’ll have a delicious dish ready in no time.

Step 1: Prepare the Avocados

Start by cutting the avocados in half lengthwise. Carefully remove the pits—this is where a spoon comes in handy. Use a spoon to scoop out a little bit of the flesh, creating a larger cavity for your shrimp salad. Don’t toss that avocado flesh! You can chop it up and mix it into the salad for extra creaminess or save it for another dish.

Step 2: Mix the Shrimp Salad

In a large mixing bowl, combine the cooked shrimp, diced celery, and diced red onion. Add the mayonnaise, Dijon mustard, lemon juice, and garlic powder. Season with salt and pepper to taste. Mix everything together until the shrimp and veggies are well-coated in that creamy goodness. This is where the magic happens—each bite will be bursting with flavor!

Step 3: Fill the Avocados

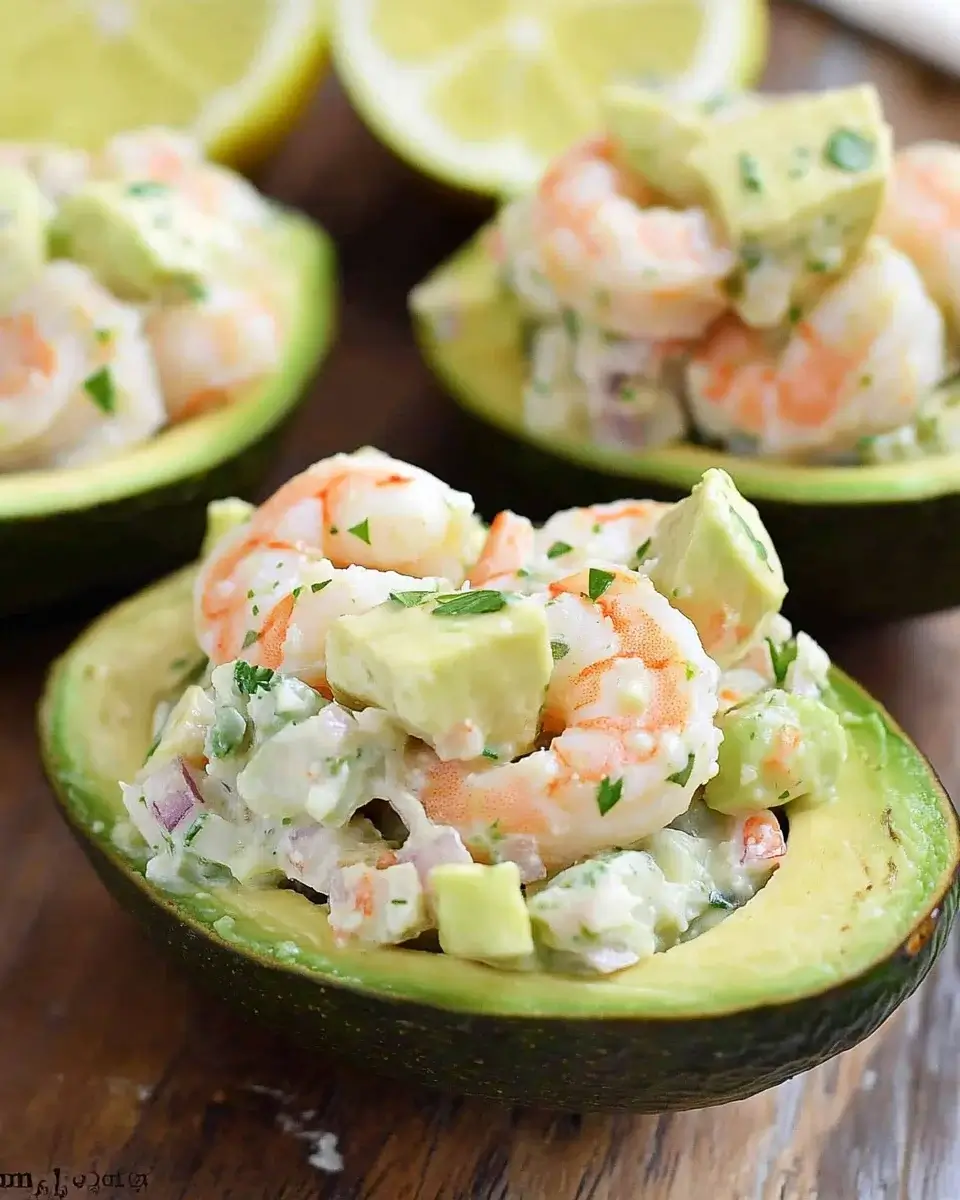
Now comes the fun part! Take your avocado halves and spoon the shrimp salad mixture generously into each half. Don’t be shy—fill them up! The creamy shrimp salad should be heaping over the edges, inviting you to dig in. If you’ve added that extra avocado flesh, fold it into the salad before filling for an even richer taste.

Step 4: Garnish and Serve

To finish, sprinkle some fresh parsley on top for a pop of color and a hint of freshness. You can serve these immediately or chill them in the refrigerator for about 30 minutes. Chilling enhances the flavors and makes for a refreshing bite. Pair your Shrimp Salad Stuffed Avocado with a crisp white wine or a light salad for a complete meal!
Tips for Success

  • Choose avocados that are ripe but not overly soft to avoid mushiness.
  • For a creamier texture, mix in some of the scooped avocado flesh into the shrimp salad.
  • Chill the filled avocados for a refreshing taste, especially on warm days.
  • Experiment with different herbs like dill or cilantro for a unique twist.
  • Make extra shrimp salad to enjoy on crackers or lettuce wraps later!

Equipment Needed

  • Cutting board: A sturdy surface for slicing avocados.
  • Sharp knife: Essential for cutting avocados and chopping ingredients.
  • Spoon: Perfect for scooping out avocado flesh and filling the halves.
  • Mixing bowl: A large bowl for combining the shrimp salad.
  • Measuring cups: Useful for precise ingredient measurements, though you can eyeball it!

Variations

  • Spicy Shrimp Salad: Add diced jalapeños or a few dashes of your favorite hot sauce for a kick.
  • Herbed Delight: Mix in fresh herbs like dill, cilantro, or chives for an aromatic twist.
  • Low-Carb Option: Swap out the mayonnaise for Greek yogurt to cut calories while keeping it creamy.
  • Vegetarian Version: Replace shrimp with chickpeas or black beans for a hearty, plant-based alternative.
  • Fruit Fusion: Toss in diced mango or pineapple for a sweet and tropical flavor contrast.

Serving Suggestions

  • Pair your Shrimp Salad Stuffed Avocado with a light, citrusy side salad for a refreshing contrast.
  • A crisp glass of Sauvignon Blanc complements the dish beautifully.
  • For a fun presentation, serve on a colorful platter with lemon wedges and fresh herbs.

FAQs about Shrimp Salad Stuffed Avocado

Can I use frozen shrimp for this recipe?

Absolutely! Frozen shrimp works perfectly. Just make sure to thaw and cook them according to package instructions before mixing them into your salad.

How long can I store leftover shrimp salad?

Leftover shrimp salad can be stored in an airtight container in the fridge for up to two days. However, I recommend enjoying it fresh for the best flavor and texture.

What can I substitute for shrimp in this recipe?

If shrimp isn’t your thing, you can easily substitute it with canned tuna or shredded chicken. Both options will still give you a delicious and satisfying salad.

Is this dish suitable for meal prep?

Yes! You can prepare the shrimp salad in advance and store it separately from the avocados. Just fill the avocados right before serving to keep them fresh and vibrant.

Can I make this recipe dairy-free?

Definitely! To keep it dairy-free, simply use a dairy-free mayonnaise or Greek yogurt alternative. It will still be creamy and delicious!

Final Thoughts

Creating Shrimp Salad Stuffed Avocado is more than just preparing a meal; it’s about bringing joy to the table. Each bite is a delightful combination of creamy, crunchy, and savory flavors that dance on your palate. This dish is perfect for any occasion, whether it’s a casual lunch or a gathering with friends. Plus, it’s a fantastic way to showcase your culinary skills without spending hours in the kitchen. So, gather your ingredients, embrace the simplicity, and enjoy the satisfaction of serving a dish that’s as beautiful as it is delicious. Your taste buds will thank you!

Paul

Shrimp Salad Stuffed Avocado: A Creamy Delight!

A delicious and creamy shrimp salad served in ripe avocado halves, perfect for a light meal or appetizer.
Prep Time 10 minutes
Total Time 10 minutes
Servings: 4 servings
Course: Salad
Cuisine: American
Calories: 320

Ingredients
  

  • 2 ripe avocados
  • 1 pound cooked shrimp peeled and deveined
  • 1/2 cup diced celery
  • 1/4 cup diced red onion
  • 1/4 cup mayonnaise
  • 1 tablespoon Dijon mustard
  • 1 tablespoon lemon juice
  • 1 teaspoon garlic powder
  • Salt and pepper to taste
  • Fresh parsley for garnish

Method
 

  1. Cut the avocados in half and remove the pits. Scoop out a little bit of the flesh to create a larger cavity for the shrimp salad. Set the avocado halves aside.
  2. In a large bowl, combine the cooked shrimp, diced celery, diced red onion, mayonnaise, Dijon mustard, lemon juice, garlic powder, salt, and pepper. Mix well until all ingredients are evenly coated.
  3. Spoon the shrimp salad mixture into each avocado half, filling them generously.
  4. Garnish with fresh parsley and serve immediately, or chill in the refrigerator for 30 minutes before serving for a refreshing touch.

Notes

  • For a spicy kick, add a few dashes of hot sauce or some diced jalapeños to the shrimp salad mixture.
  • Substitute the shrimp with canned tuna or chicken for a different protein option.
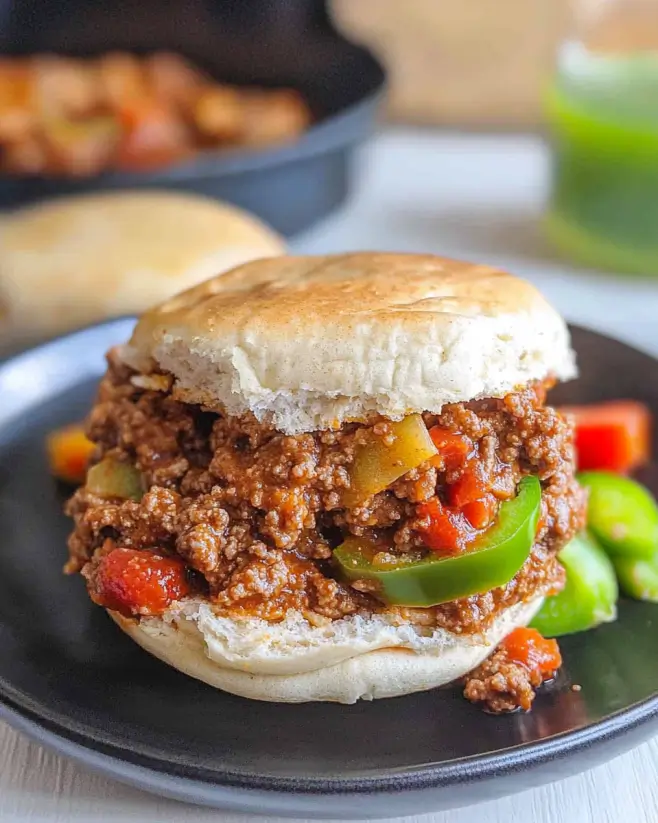
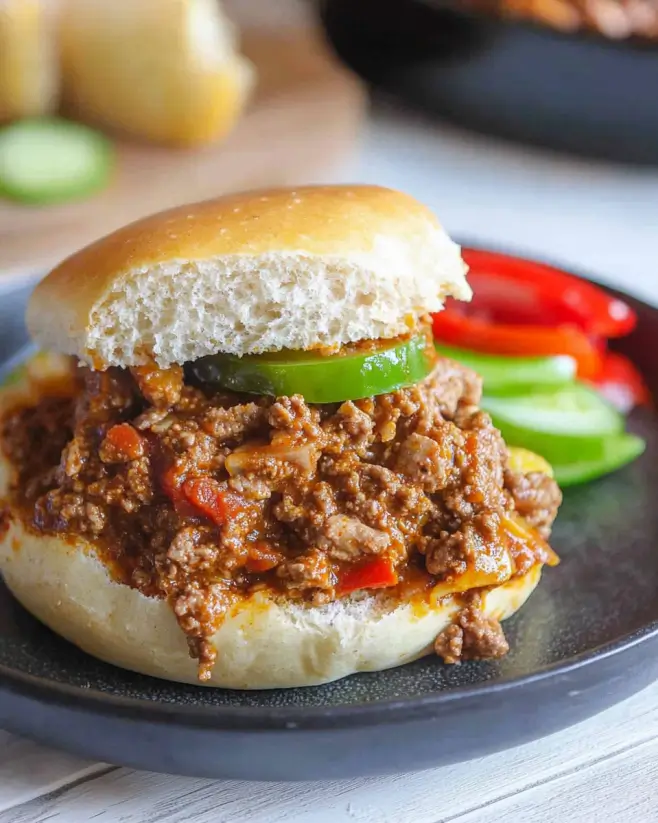
Sloppy Joe Delight: Make This Classic Comfort Food!

Introduction to Sloppy Joe Delight

There’s something undeniably comforting about a plate of Sloppy Joe Delight. It takes me back to my childhood, where the aroma of simmering beef and tangy sauce filled the kitchen, making everyone gather around the table. This dish is not just a meal; it’s a warm hug on a busy day. Whether you’re looking to whip up a quick dinner after a long day at work or impress your friends at a casual gathering, this recipe has you covered. With its simple ingredients and easy preparation, Sloppy Joe Delight is sure to become a favorite in your home.

Why You’ll Love This Sloppy Joe Delight

Sloppy Joe Delight is the ultimate comfort food that checks all the boxes. It’s quick to prepare, taking just 30 minutes from start to finish, making it perfect for busy weeknights. The rich, tangy flavors will have your taste buds dancing, while the hearty ingredients ensure everyone leaves the table satisfied. Plus, it’s versatile—whether you’re feeding a crowd or just yourself, this dish adapts to your needs effortlessly.

Ingredients for Sloppy Joe Delight

Gathering the right ingredients is the first step to creating your Sloppy Joe Delight. Here’s what you’ll need:

  • Ground Beef: The star of the show! You can also use ground turkey for a leaner option.
  • Onion: A medium onion, finely chopped, adds sweetness and depth to the dish.
  • Green Bell Pepper: This adds a nice crunch and a pop of color. Feel free to swap it for red or yellow peppers for a sweeter taste.
  • Garlic: Minced garlic brings a fragrant kick that elevates the flavor profile.
  • Ketchup: The base of our tangy sauce, it provides sweetness and acidity.
  • Worcestershire Sauce: This adds a savory umami flavor that’s hard to resist.
  • Brown Sugar: A touch of sweetness balances the tanginess of the ketchup.
  • Mustard: Whether you choose yellow or Dijon, it adds a zesty note.
  • Chili Powder: This gives a hint of warmth and spice, making the dish more exciting.
  • Salt and Pepper: Essential for seasoning, adjust to your taste.
  • Hamburger Buns: The perfect vessel for your Sloppy Joe mixture. Toast them for added texture!
  • Optional Toppings: Sliced pickles and shredded cheese can take your Sloppy Joe Delight to the next level.

For exact measurements, check the bottom of the article where you can find everything listed for easy printing.

How to Make Sloppy Joe Delight

Now that you have all your ingredients ready, let’s dive into the fun part—making your Sloppy Joe Delight! Follow these simple steps, and you’ll have a delicious meal on the table in no time.

Step 1: Brown the Ground Beef

Start by heating a large skillet over medium heat. Add the ground beef, breaking it apart with a spatula as it cooks. You want it to brown evenly, which should take about 5-7 minutes. If there’s excess fat, drain it off. This step is crucial for a rich flavor in your Sloppy Joe Delight.

Step 2: Sauté the Vegetables

Once the beef is browned, toss in the finely chopped onion, green bell pepper, and minced garlic. Sauté these for about 5 minutes until the vegetables soften. The aroma will be heavenly! This mix adds a nice crunch and depth to your dish.

Step 3: Mix in the Sauce

Now it’s time to bring everything together. Stir in the ketchup, Worcestershire sauce, brown sugar, mustard, chili powder, salt, and pepper. Mix well until everything is combined. The sauce is what makes this Sloppy Joe Delight truly special, so don’t skimp on mixing!

Step 4: Simmer the Mixture

Reduce the heat to low and let the mixture simmer for about 10 minutes. This allows the flavors to meld beautifully. Stir occasionally to prevent sticking. You’ll notice the sauce thickening, which is exactly what you want for that perfect Sloppy Joe texture.

Step 5: Toast the Buns

While your mixture is simmering, it’s time to toast the hamburger buns. You can do this in a separate skillet or under the broiler until they’re golden brown. Toasting adds a delightful crunch that complements the saucy filling perfectly.

Step 6: Assemble Your Sloppy Joe Delight

Now comes the fun part! Spoon the Sloppy Joe mixture generously onto the toasted buns. If you’re feeling adventurous, add sliced pickles and shredded cheese on top. These toppings can elevate your Sloppy Joe Delight to a whole new level!

Step 7: Serve and Enjoy

Serve your Sloppy Joe Delight immediately while it’s hot. Gather your family or friends around the table, and watch as they dig in with smiles. This dish is not just a meal; it’s a moment to share and enjoy together.

Tips for Success

  • Don’t rush the browning of the beef; it adds depth to the flavor.
  • Feel free to customize the veggies—mushrooms or zucchini work great!
  • For extra flavor, let the mixture sit for a few minutes before serving.
  • Use fresh buns for the best texture; stale buns can ruin the experience.
  • Experiment with toppings like jalapeños or avocado for a twist!

Equipment Needed

  • Large Skillet: A non-stick skillet works wonders, but any heavy-bottomed pan will do.
  • Spatula: A sturdy spatula is essential for breaking up the meat and mixing.
  • Measuring Cups and Spoons: Handy for precise ingredient measurements.
  • Toaster or Broiler: For toasting those buns to perfection.

Variations

  • Vegetarian Delight: Swap the ground beef for lentils or a plant-based meat alternative for a hearty vegetarian option.
  • Spicy Kick: Add a splash of hot sauce or a pinch of cayenne pepper to the sauce for an extra layer of heat.
  • BBQ Twist: Mix in some barbecue sauce along with the ketchup for a smoky flavor that’s sure to impress.
  • Cheesy Goodness: Stir in shredded cheese into the mixture before serving for a gooey, melty addition.
  • Southwestern Style: Incorporate black beans and corn for a southwestern flair, and top with avocado slices.

Serving Suggestions

  • Classic Sides: Serve with crispy potato chips or a side of coleslaw for a refreshing crunch.
  • Drink Pairing: A cold root beer or a light lager complements the flavors perfectly.
  • Presentation Tip: Serve on a wooden board with colorful pickles and fresh herbs for a rustic touch.

FAQs about Sloppy Joe Delight

Can I make Sloppy Joe Delight ahead of time?

Absolutely! You can prepare the Sloppy Joe mixture in advance and store it in the fridge for up to three days. Just reheat it on the stove before serving. This makes it a great option for meal prep!

What can I serve with Sloppy Joe Delight?

Sloppy Joe Delight pairs wonderfully with classic sides like potato chips, coleslaw, or even a simple green salad. You can also serve it with sweet potato fries for a delicious twist.

Can I freeze Sloppy Joe Delight?

Yes, you can freeze the Sloppy Joe mixture! Just let it cool completely, then transfer it to an airtight container. It will keep well in the freezer for up to three months. Thaw it overnight in the fridge before reheating.

How can I make Sloppy Joe Delight healthier?

For a healthier version, use ground turkey or a plant-based meat alternative. You can also add more vegetables like carrots or zucchini to boost the nutrition without sacrificing flavor.

What’s the best way to store leftovers?

Store any leftovers in an airtight container in the fridge. They’ll stay fresh for about three days. Just reheat on the stove or in the microwave when you’re ready to enjoy them again!

Final Thoughts

Cooking Sloppy Joe Delight is more than just preparing a meal; it’s about creating memories. The laughter around the table, the smiles as everyone digs in, and the satisfaction of a dish that warms the heart are what make this recipe special. It’s a reminder that comfort food doesn’t have to be complicated. With just a few simple ingredients, you can whip up a dish that brings everyone together. So, whether it’s a weeknight dinner or a weekend gathering, let this Sloppy Joe Delight be your go-to recipe for joy and connection in the kitchen.

Paul

Sloppy Joe Delight: Make This Classic Comfort Food!

Sloppy Joe Delight is a classic comfort food made with ground beef, vegetables, and a tangy sauce, served on toasted hamburger buns.
Prep Time 10 minutes
Cook Time 20 minutes
Total Time 30 minutes
Servings: 4 servings
Course: Main Course
Cuisine: American
Calories: 350

Ingredients
  

  • 1 pound ground beef or ground turkey for a healthier option
  • 1 medium onion finely chopped
  • 1 medium green bell pepper finely chopped
  • 2 cloves garlic minced
  • 1 cup ketchup
  • 2 tablespoons Worcestershire sauce
  • 1 tablespoon brown sugar
  • 1 teaspoon mustard yellow or Dijon
  • 1 teaspoon chili powder
  • Salt and pepper to taste
  • 4 hamburger buns
  • Optional: sliced pickles and shredded cheese for topping

Method
 

  1. In a large skillet over medium heat, brown the ground beef until fully cooked, breaking it apart with a spatula. Drain excess fat if necessary.
  2. Add the chopped onion, green bell pepper, and minced garlic to the skillet. Sauté for about 5 minutes, or until the vegetables are softened.
  3. Stir in the ketchup, Worcestershire sauce, brown sugar, mustard, chili powder, salt, and pepper. Mix well to combine.
  4. Reduce the heat to low and let the mixture simmer for about 10 minutes, stirring occasionally. This allows the flavors to meld together.
  5. While the mixture simmers, lightly toast the hamburger buns in a separate skillet or under the broiler until golden brown.
  6. Once the Sloppy Joe mixture is ready, spoon it generously onto the toasted buns. Top with sliced pickles and shredded cheese if desired.
  7. Serve immediately and enjoy your Sloppy Joe Delight!

Notes

  • For a vegetarian option, substitute the ground beef with lentils or a plant-based meat alternative.
  • Add a splash of hot sauce or a pinch of cayenne pepper for a spicy kick.

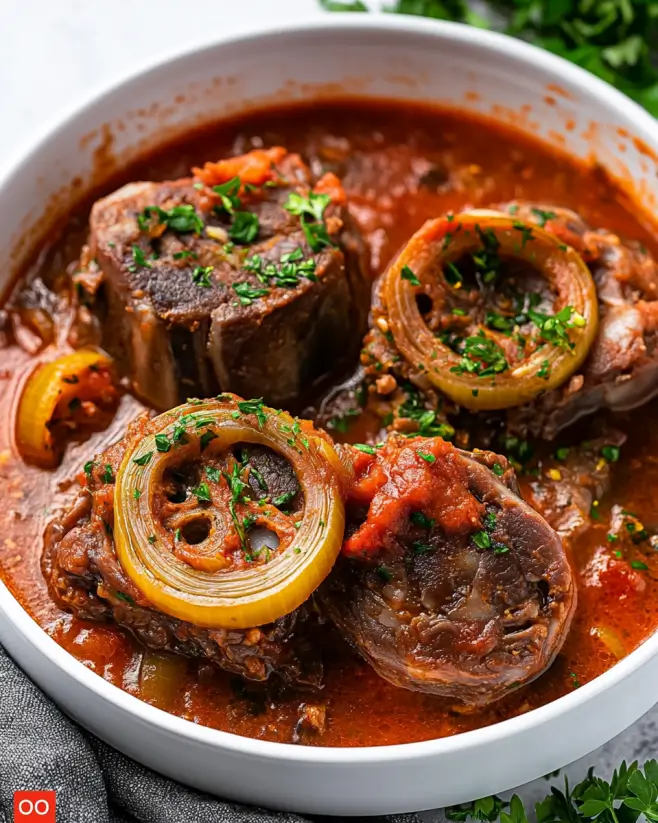
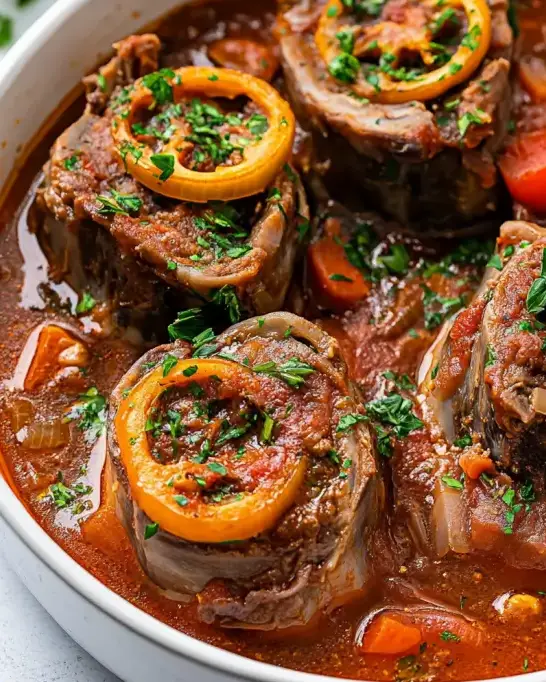
Milanese Osso Buco: A Flavorful Comfort Dish You Need!

Introduction to Milanese Osso Buco

There’s something magical about a dish that warms both the heart and the belly. Milanese Osso Buco is just that—a comforting, flavorful masterpiece that brings a taste of Italy right to your kitchen. Whether you’re looking to impress your loved ones or simply want a satisfying meal after a long day, this slow-cooked delight is your answer. The tender veal shanks simmering in a rich sauce create an aroma that fills your home with warmth. Trust me, once you try this dish, it will become a staple in your culinary repertoire.

Why You’ll Love This Milanese Osso Buco

This Milanese Osso Buco is not just a meal; it’s an experience. The beauty lies in its simplicity—just a few ingredients come together to create a dish that’s bursting with flavor. It’s perfect for busy weeknights or special occasions. Plus, the slow-cooking process means you can set it and forget it, allowing you to focus on what really matters—enjoying time with family and friends while the magic happens in the oven.

Ingredients for Milanese Osso Buco

Gathering the right ingredients is the first step to creating a memorable Milanese Osso Buco. Here’s what you’ll need:

  • Veal shanks: The star of the dish, these meaty cuts are rich and flavorful. Look for pieces that are about 1.5 inches thick for optimal tenderness.
  • All-purpose flour: This helps create a lovely crust on the veal shanks when browned. You can substitute with gluten-free flour if needed.
  • Salt and black pepper: Essential for seasoning, these simple ingredients enhance the natural flavors of the meat.
  • Olive oil: A good quality olive oil adds depth and richness to the dish. It’s perfect for browning the shanks.
  • Onion, carrot, and celery: These aromatic vegetables form the base of the sauce, adding sweetness and complexity. Together, they create a classic mirepoix.
  • Garlic: Minced garlic brings a punch of flavor that complements the other ingredients beautifully.
  • Dry white wine: This adds acidity and depth to the sauce. Choose a wine you enjoy drinking, as it will enhance the overall flavor.
  • Beef broth: A rich broth is crucial for a hearty sauce. You can use homemade or store-bought, but opt for low-sodium if you’re watching your salt intake.
  • Diced tomatoes: These add a touch of sweetness and acidity. Make sure to drain them to avoid excess liquid in your dish.
  • Dried thyme and bay leaf: These herbs infuse the dish with earthy flavors. They’re essential for that authentic Italian taste.
  • Lemon zest: A bright finish that cuts through the richness of the dish, adding a refreshing note.
  • Fresh parsley: Chopped parsley is a lovely garnish that adds color and a fresh flavor to the final dish.

For exact measurements, check the bottom of the article where you can find everything listed for easy printing. Happy cooking!

How to Make Milanese Osso Buco

Creating Milanese Osso Buco is a rewarding journey that fills your kitchen with delightful aromas. Follow these simple steps, and you’ll have a dish that impresses everyone at the table.

Step 1: Preheat the Oven

Start by preheating your oven to 325°F. This temperature is perfect for slow cooking, allowing the flavors to meld beautifully while the veal becomes tender.

Step 2: Prepare the Veal Shanks

Next, pat the veal shanks dry with paper towels. This step is crucial for achieving a nice sear. Season them generously with salt and pepper, then dredge each piece in flour, shaking off any excess. This will help create a delicious crust when you brown them.

Step 3: Brown the Veal Shanks

In a heavy pot or Dutch oven, heat the olive oil over medium-high heat. Once hot, add the veal shanks, browning them on all sides for about 8-10 minutes. This step locks in the flavors and gives the meat a beautiful color. Remove the shanks and set them aside.

Step 4: Sauté the Vegetables

In the same pot, toss in the diced onion, carrot, celery, and minced garlic. Sauté these aromatic vegetables until they soften, about 5 minutes. This mixture, known as mirepoix, forms the flavorful base of your sauce.

Step 5: Deglaze the Pot

Pour in the dry white wine, scraping the bottom of the pot to deglaze. This step is essential as it lifts all those tasty browned bits, adding depth to your sauce. Let it simmer for about 2-3 minutes to reduce slightly.

Step 6: Combine Ingredients

Return the browned veal shanks to the pot. Now, add the beef broth, drained diced tomatoes, dried thyme, and bay leaf. Stir everything together, then season with additional salt and pepper to taste. Bring the mixture to a gentle simmer.

Step 7: Slow Cook in the Oven

Cover the pot with a lid and transfer it to your preheated oven. Let it cook for 2 to 2.5 hours. The slow cooking will make the meat incredibly tender and allow the flavors to develop fully.

Step 8: Finish and Serve

Once the cooking time is up, carefully remove the pot from the oven. Discard the bay leaf, then stir in the lemon zest and chopped parsley. This final touch brightens the dish and adds a fresh flavor. Serve your Milanese Osso Buco hot, and watch everyone enjoy every last bite!

Tips for Success

  • Always pat the veal shanks dry before seasoning to ensure a good sear.
  • Don’t rush the browning process; it adds depth to the flavor.
  • Feel free to add a tablespoon of tomato paste for a richer sauce.
  • For a thicker sauce, reduce it on the stovetop after cooking.
  • Pair with risotto or crusty bread to soak up the delicious sauce.

Equipment Needed

  • Heavy pot or Dutch oven: Essential for even cooking. A slow cooker can be a great alternative.
  • Wooden spoon: Perfect for stirring and scraping the pot.
  • Meat thermometer: Useful for checking doneness, though not necessary for this recipe.
  • Cutting board and knife: For prepping your vegetables and veal shanks.

Variations

  • Herb Variations: Experiment with fresh herbs like rosemary or oregano for a different flavor profile.
  • Vegetable Additions: Add mushrooms or bell peppers for extra texture and taste.
  • Wine Alternatives: Use red wine instead of white for a richer sauce, or opt for a non-alcoholic wine for a family-friendly version.
  • Gluten-Free Option: Substitute all-purpose flour with a gluten-free blend for dredging the veal shanks.
  • Slow Cooker Method: Prepare the dish in a slow cooker for an even more hands-off approach; just follow the same steps and cook on low for 6-8 hours.

Serving Suggestions

  • Risotto: Creamy risotto pairs beautifully, soaking up the rich sauce.
  • Crusty Bread: Serve with a loaf of fresh bread for dipping.
  • Wine: A glass of dry white wine complements the dish perfectly.
  • Garnish: Add extra parsley for a pop of color on the plate.

FAQs about Milanese Osso Buco

What is Milanese Osso Buco?

Milanese Osso Buco is a traditional Italian dish made with veal shanks that are slow-cooked in a rich sauce. The meat becomes incredibly tender, and the marrow in the bone adds a unique flavor and richness to the dish.

Can I use other meats instead of veal?

Absolutely! While veal is traditional, you can substitute with pork or even chicken. Just keep in mind that cooking times may vary depending on the meat you choose.

How do I store leftovers of Milanese Osso Buco?

Store any leftovers in an airtight container in the refrigerator for up to three days. The flavors will continue to develop, making it even tastier the next day!

Can I make Milanese Osso Buco ahead of time?

Yes! This dish is perfect for meal prep. You can prepare it a day in advance and reheat it gently on the stove. Just be sure to add a splash of broth or water to keep it moist.

What should I serve with Milanese Osso Buco?

For a complete meal, serve it with creamy risotto, polenta, or crusty bread to soak up the delicious sauce. A side salad can also add a refreshing touch to balance the richness of the dish.

Final Thoughts

Cooking Milanese Osso Buco is more than just preparing a meal; it’s about creating memories. The rich aroma wafting through your home invites everyone to gather around the table, eager to share in the experience. Each tender bite of veal, infused with the flavors of wine and herbs, transports you to a cozy Italian kitchen. This dish is perfect for both special occasions and casual family dinners. As you savor the last morsels, you’ll realize that the joy of cooking lies not just in the food, but in the love and laughter shared with those you cherish.

Paul

Milanese Osso Buco: A Flavorful Comfort Dish You Need!

Milanese Osso Buco is a flavorful comfort dish made with veal shanks, slow-cooked to perfection in a rich sauce.
Prep Time 20 minutes
Total Time 2 hours 20 minutes
Servings: 4 servings
Course: Main Course
Cuisine: Italian
Calories: 450

Ingredients
  

  • 2 pounds veal shanks cut into 1.5-inch thick slices
  • 1/4 cup all-purpose flour
  • Salt and black pepper to taste
  • 3 tablespoons olive oil
  • 1 medium onion diced
  • 1 medium carrot diced
  • 1 medium celery stalk diced
  • 3 cloves garlic minced
  • 1 cup dry white wine
  • 1 cup beef broth
  • 1 can 14.5 ounces diced tomatoes, drained
  • 1 teaspoon dried thyme
  • 1 bay leaf
  • Zest of 1 lemon
  • 2 tablespoons fresh parsley chopped

Method
 

  1. Preheat your oven to 325°F.
  2. Pat the veal shanks dry with paper towels and season with salt and pepper. Dredge each piece in flour, shaking off the excess.
  3. In a large, heavy pot or Dutch oven, heat the olive oil over medium-high heat. Add the veal shanks and brown on all sides, about 8-10 minutes. Remove the shanks and set aside.
  4. In the same pot, add the onion, carrot, celery, and garlic. Sauté until the vegetables are softened, about 5 minutes.
  5. Pour in the white wine, scraping the bottom of the pot to deglaze. Let it simmer for about 2-3 minutes.
  6. Return the veal shanks to the pot. Add the beef broth, diced tomatoes, thyme, bay leaf, and additional salt and pepper to taste. Bring to a simmer.
  7. Cover the pot and transfer it to the preheated oven. Cook for 2 to 2.5 hours, or until the meat is tender and falling off the bone.
  8. Remove the pot from the oven and discard the bay leaf. Stir in the lemon zest and parsley before serving.

Notes

  • For a richer flavor, consider adding a tablespoon of tomato paste when sautéing the vegetables.
  • If you prefer a thicker sauce, remove the veal shanks once cooked and reduce the sauce on the stovetop for 10-15 minutes before serving.
  • Serve with risotto or crusty bread to soak up the delicious sauce.

Cinnamon Sugar Twists: Discover This Easy Recipe!

Introduction to Cinnamon Sugar Twists

There’s something magical about the aroma of cinnamon wafting through the kitchen. It takes me back to my childhood, where my mom would whip up sweet treats on lazy Sunday afternoons. One of my favorites? Cinnamon Sugar Twists! These delightful bites are not just easy to make; they’re a quick solution for a busy day or a fun way to impress your loved ones. With just a few ingredients and minimal effort, you can create a warm, flaky dessert that’s perfect for any occasion. Trust me, once you try these, they’ll become a staple in your home!

Why You’ll Love This Cinnamon Sugar Twists

These Cinnamon Sugar Twists are the ultimate treat for anyone, especially if you’re short on time. They come together in just 25 minutes, making them perfect for unexpected guests or a cozy family night. The combination of flaky dough and sweet cinnamon sugar creates a flavor explosion that’s hard to resist. Plus, they’re versatile enough to enjoy as a snack, dessert, or even breakfast. Who wouldn’t love that?

Ingredients for Cinnamon Sugar Twists

Gathering the right ingredients is the first step to creating these delightful Cinnamon Sugar Twists. Here’s what you’ll need:

  • Refrigerated crescent roll dough: This flaky dough is the star of the show, providing a buttery base that puffs up beautifully when baked.
  • Granulated sugar: The sweet foundation for our cinnamon sugar mixture, it balances the spice perfectly.
  • Ground cinnamon: This warm spice adds that signature flavor, making each bite feel like a cozy hug.
  • Unsalted butter: Melted and brushed on the dough, it enhances the richness and helps the sugar stick.
  • Vanilla extract: A splash of this adds depth and warmth, elevating the overall flavor profile.
  • Salt: Just a pinch to enhance the sweetness and round out the flavors.

For those looking to mix things up, consider adding a drizzle of icing made from powdered sugar and milk after baking. You can also experiment with spices like nutmeg or cardamom for a unique twist. The exact quantities for each ingredient are listed at the bottom of the article, ready for printing!

How to Make Cinnamon Sugar Twists

Creating these Cinnamon Sugar Twists is a breeze! Follow these simple steps, and you’ll have a delicious treat ready in no time. Let’s dive in!

Step 1: Preheat the Oven

First things first, preheat your oven to 375°F (190°C). This ensures your twists bake evenly and come out perfectly golden. While the oven warms up, line a baking sheet with parchment paper. This will prevent sticking and make cleanup a snap!

Step 2: Prepare the Cinnamon Sugar Mixture

In a small bowl, mix together the granulated sugar and ground cinnamon. This sweet blend is what makes these twists so irresistible. Set it aside for later use, as it will be sprinkled generously on the dough.

Step 3: Unroll the Crescent Roll Dough

Now, it’s time to unroll the crescent roll dough. Carefully separate it into triangles. This step is crucial for easy handling and shaping. The dough should feel soft and pliable, ready to be transformed into something delicious!

Step 4: Brush with Butter and Sprinkle Sugar

Take your melted butter and brush each triangle generously. This not only adds flavor but also helps the cinnamon sugar stick. After that, sprinkle a little of the cinnamon sugar mixture over each triangle. Don’t be shy—this is where the magic happens!

Step 5: Fold and Twist

Next, fold each triangle in half lengthwise to create a smaller triangle. This step gives your twists a nice shape. Then, twist each triangle several times to form a beautiful spiral. The more twists, the more flaky goodness you’ll have!

Step 6: Bake the Twists

Place your twisted dough on the prepared baking sheet. Brush the tops with any remaining melted butter and sprinkle with the rest of the cinnamon sugar. Bake for 12-15 minutes, or until they’re golden brown and your kitchen smells heavenly. Keep an eye on them; you want that perfect golden hue!

Step 7: Cool and Serve

Once baked, allow the twists to cool slightly on the baking sheet. This enhances their flavor and texture. After a few minutes, they’re ready to be devoured! Serve them warm for the best experience.

Tips for Success

  • Make sure your butter is melted but not too hot; it should coat the dough without cooking it.
  • Don’t skimp on the cinnamon sugar—generously sprinkle it for maximum flavor.
  • For extra crunch, let the twists cool on a wire rack after baking.
  • Experiment with different spices to find your favorite flavor combination.
  • Store any leftovers in an airtight container to keep them fresh.

Equipment Needed

  • Baking sheet: A standard baking sheet works perfectly, but a stone or cast iron pan can add extra crispiness.
  • Parchment paper: This helps prevent sticking; aluminum foil can be a substitute if needed.
  • Mixing bowl: Any bowl will do, but a medium-sized one is ideal for mixing the cinnamon sugar.
  • Pastry brush: Use this for butter; a spoon can work in a pinch.

Variations

  • Icing Drizzle: After baking, drizzle a simple icing made from powdered sugar and milk over the twists for an extra sweet touch.
  • Nutty Addition: Add chopped nuts like pecans or walnuts to the cinnamon sugar mixture for a delightful crunch.
  • Chocolate Twist: Incorporate mini chocolate chips into the dough before twisting for a rich, chocolatey flavor.
  • Gluten-Free Option: Use gluten-free crescent roll dough to make these twists suitable for those with dietary restrictions.
  • Spice It Up: Experiment with other spices like cardamom or pumpkin pie spice mixed into the sugar for a unique flavor profile.

Serving Suggestions

  • Pair with Coffee: These twists are perfect alongside a hot cup of coffee or tea for a cozy afternoon treat.
  • Serve with Ice Cream: A scoop of vanilla ice cream on the side adds a delightful contrast to the warm twists.
  • Presentation: Arrange them on a colorful platter, dusted with extra cinnamon sugar for a beautiful display.

FAQs about Cinnamon Sugar Twists

Curious about these delightful treats? Here are some common questions I often hear about Cinnamon Sugar Twists, along with their answers to help you on your baking journey!

Can I make Cinnamon Sugar Twists ahead of time?

Absolutely! You can prepare the twists and keep them in the fridge before baking. Just remember to let them come to room temperature before popping them in the oven for the best results.

What can I use instead of crescent roll dough?

If you’re looking for alternatives, puff pastry works wonderfully! It will give you a flakier texture, but be sure to adjust the baking time as needed.

How do I store leftover Cinnamon Sugar Twists?

Store any leftovers in an airtight container at room temperature. They’re best enjoyed fresh, but they can last for a couple of days. Just reheat them in the oven for a few minutes to regain that crispy texture!

Can I freeze Cinnamon Sugar Twists?

Yes, you can freeze them! Just make sure they’re completely cooled before wrapping them tightly in plastic wrap and placing them in a freezer bag. They can be frozen for up to a month.

What drinks pair well with Cinnamon Sugar Twists?

These twists are fantastic with coffee, tea, or even a glass of milk. The warm spices complement the flavors beautifully, making for a cozy pairing!

Final Thoughts

Making Cinnamon Sugar Twists is more than just baking; it’s about creating moments of joy. The warm, sweet aroma fills your kitchen, inviting everyone to gather around. Each twist is a delightful bite of nostalgia, reminiscent of simpler times. Whether you’re sharing them with family or enjoying them solo, these treats bring a smile to your face. They’re perfect for any occasion, from casual snacks to festive gatherings. So, roll up your sleeves, embrace the mess, and let the magic of cinnamon and sugar transform your day into something special. Happy baking!

Paul

Cinnamon Sugar Twists: Discover This Easy Recipe!

Cinnamon Sugar Twists are a delightful and easy-to-make treat that combines the flavors of cinnamon and sugar with flaky crescent roll dough.
Prep Time 10 minutes
Cook Time 15 minutes
Total Time 25 minutes
Servings: 8 servings
Course: Dessert
Cuisine: American
Calories: 180

Ingredients
  

  • 2 cans 8 oz each refrigerated crescent roll dough
  • 1/2 cup granulated sugar
  • 1 tablespoon ground cinnamon
  • 1/4 cup unsalted butter melted
  • 1/2 teaspoon vanilla extract
  • 1/4 teaspoon salt

Method
 

  1. Preheat your oven to 375°F (190°C). Line a baking sheet with parchment paper.
  2. In a small bowl, mix together the sugar and cinnamon. Set aside.
  3. Unroll the crescent roll dough and separate it into triangles.
  4. Brush each triangle with melted butter and sprinkle with a little of the cinnamon sugar mixture.
  5. Fold each triangle in half lengthwise to create a smaller triangle.
  6. Twist each triangle several times to create a spiral shape and place on the prepared baking sheet.
  7. Brush the tops with remaining melted butter and sprinkle with the remaining cinnamon sugar.
  8. Bake for 12-15 minutes, or until golden brown.
  9. Allow to cool slightly before serving.

Notes

  • For a fun variation, try adding a drizzle of icing made from powdered sugar and milk on top after baking.
  • You can also experiment with different spices, such as nutmeg or cardamom, mixed into the sugar for a unique flavor twist.

Crispy Fried Fish Burgers: A Flavorful Recipe Delight!

Introduction to Crispy Fried Fish Burgers

There’s something magical about a crispy fried fish burger that takes me back to summer days by the shore. The sound of waves crashing, the smell of salt in the air, and the joy of biting into a perfectly fried fish sandwich. Crispy Fried Fish Burgers are not just a meal; they’re a delightful experience. Whether you’re looking for a quick solution for a busy weeknight or a dish to impress your friends at a weekend cookout, this recipe has you covered. With simple ingredients and easy steps, you’ll be savoring every bite in no time!

Why You’ll Love This Crispy Fried Fish Burgers

These Crispy Fried Fish Burgers are a game-changer for any meal. They come together quickly, making them perfect for busy weeknights or spontaneous gatherings. The crunch of the golden-brown fish paired with fresh toppings creates a flavor explosion that’s hard to resist. Plus, they’re versatile! You can customize them to suit your taste, ensuring everyone at the table leaves satisfied. Trust me, once you try them, they’ll become a family favorite!

Ingredients for Crispy Fried Fish Burgers

Gathering the right ingredients is the first step to creating these mouthwatering Crispy Fried Fish Burgers. Here’s what you’ll need:

  • White fish fillets: Cod or tilapia work best for their mild flavor and flaky texture.
  • All-purpose flour: This forms the base of your breading, giving the fish that essential crunch.
  • Garlic powder: A sprinkle adds a savory depth that elevates the flavor profile.
  • Paprika: This spice not only adds color but also a subtle smokiness.
  • Salt: Essential for enhancing all the flavors in your burger.
  • Black pepper: A dash of this brings a bit of heat to balance the dish.
  • Buttermilk: This tenderizes the fish and helps the breading stick beautifully.
  • Breadcrumbs: Panko breadcrumbs are ideal for that extra crunch, but regular ones will work too.
  • Vegetable oil: For frying, choose an oil with a high smoke point, like canola or peanut oil.
  • Hamburger buns: Soft, fresh buns are perfect for holding all the deliciousness together.
  • Lettuce leaves: Crisp lettuce adds freshness and a nice crunch.
  • Tomato slices: Juicy tomatoes bring a burst of flavor and moisture.
  • Tartar sauce: A classic condiment that complements the fish perfectly.

For those looking to mix things up, consider adding a slice of cheese on top of the fish while it’s still hot for an extra layer of flavor. You can also swap the fish for shrimp if you’re in the mood for a seafood twist. Exact quantities for each ingredient can be found at the bottom of the article, ready for printing!

How to Make Crispy Fried Fish Burgers

Now that you have all your ingredients ready, it’s time to dive into the fun part: making these Crispy Fried Fish Burgers! Follow these simple steps, and you’ll be on your way to a delicious meal that will impress everyone at the table.

Step 1: Prepare the Fish

Start by cutting the fish fillets into burger-sized pieces. Aim for about 4 to 6 ounces each, depending on how hearty you want your burgers. Make sure your workspace is clean and organized. A clutter-free area helps keep the process smooth and enjoyable. Trust me, a little prep goes a long way!

Step 2: Set Up the Breading Station

Next, it’s time to create your breading station. In a shallow bowl, mix the all-purpose flour, garlic powder, paprika, salt, and black pepper. This flavorful blend will give your fish that irresistible crunch. In another bowl, pour the buttermilk. And in a third bowl, place the breadcrumbs. If you’re using panko, you’re in for an extra crispy treat!

Step 3: Bread the Fish

Now comes the fun part—bread the fish! Take each piece of fish and dip it into the flour mixture first, coating it evenly. Then, transfer it to the buttermilk, allowing it to soak for a moment. Finally, roll it in the breadcrumbs, pressing gently to ensure a good coating. Repeat this process for all the fish pieces. The more even the coating, the better the crunch!

Step 4: Fry the Fish

Heat about 1 inch of vegetable oil in a large skillet over medium-high heat. You want the oil hot but not smoking. To test if it’s ready, drop a small piece of bread into the oil; if it sizzles, you’re good to go! Carefully add the breaded fish pieces in batches, frying for about 3-4 minutes on each side. Look for that golden-brown color, which means they’re perfectly cooked. Once done, remove them and let them drain on paper towels.

Step 5: Assemble the Burgers

While the fish is cooling, toast your hamburger buns lightly. This adds a nice texture and prevents them from getting soggy. Now, it’s time to assemble! Place a piece of fried fish on the bottom half of each bun. Top it with crisp lettuce, juicy tomato slices, and a generous dollop of tartar sauce. Finally, crown it with the other half of the bun. Serve immediately while hot and crispy for the best experience!

Tips for Success

  • Make sure your oil is hot enough before frying to achieve that perfect crisp.
  • Don’t overcrowd the pan; fry in batches for even cooking.
  • Let the fish rest on paper towels to absorb excess oil.
  • Experiment with spices in the flour for a unique flavor twist.
  • Serve immediately for the best texture and taste.

Equipment Needed

  • Large skillet: A cast-iron skillet works wonders, but any heavy-bottomed pan will do.
  • Shallow bowls: Use these for your breading station; pie plates are a great alternative.
  • Slotted spoon: Perfect for flipping and removing the fish from the oil.
  • Paper towels: Essential for draining excess oil after frying.

Variations

  • Spicy Kick: Add cayenne pepper or hot sauce to the flour mixture for a fiery twist.
  • Herb-Infused: Mix in dried herbs like dill or parsley into the breadcrumbs for an aromatic flavor.
  • Gluten-Free Option: Substitute all-purpose flour with a gluten-free flour blend and use gluten-free breadcrumbs.
  • Fish Swap: Try using salmon or haddock for a different taste and texture.
  • Veggie Version: Replace fish with thick slices of eggplant or zucchini for a delicious vegetarian burger.

Serving Suggestions

  • Classic Sides: Serve with crispy fries or a fresh coleslaw for a perfect pairing.
  • Refreshing Drinks: Pair with a cold beer or a zesty lemonade to complement the flavors.
  • Presentation: Serve on a wooden board with lemon wedges and extra tartar sauce for a rustic touch.

FAQs about Crispy Fried Fish Burgers

Can I use frozen fish fillets for this recipe?

Absolutely! Just make sure to thaw them completely and pat them dry before breading. This helps the coating stick better and ensures a crispy finish.

What type of fish is best for fish burgers?

White fish like cod or tilapia is ideal due to its mild flavor and flaky texture. However, feel free to experiment with other varieties like haddock or even salmon for a richer taste.

How can I make these burgers healthier?

To lighten things up, consider baking the breaded fish instead of frying. Just spray them with a little oil and bake at 400°F until golden brown. You can also use whole grain buns for added nutrition.

Can I prepare the fish ahead of time?

Yes! You can bread the fish and store it in the fridge for a few hours before frying. Just remember to let it come to room temperature before cooking for even frying.

What can I serve with Crispy Fried Fish Burgers?

These burgers pair wonderfully with crispy fries, a fresh salad, or even a tangy coleslaw. A side of pickles or a zesty dipping sauce can also elevate the meal!

Final Thoughts

Creating Crispy Fried Fish Burgers is more than just cooking; it’s about bringing joy to the table. The satisfying crunch of the fish, the freshness of the toppings, and the warmth of the toasted bun come together to create a meal that feels special. Whether you’re sharing them with family or enjoying a quiet night in, these burgers are sure to impress. Plus, the versatility of this recipe means you can make it your own. So, roll up your sleeves, dive into the kitchen, and let the deliciousness unfold. You won’t regret it!

Paul

Crispy Fried Fish Burgers: A Flavorful Recipe Delight!

Crispy Fried Fish Burgers are a delicious and flavorful meal featuring breaded and fried fish fillets served on hamburger buns with fresh toppings.
Prep Time 15 minutes
Cook Time 20 minutes
Total Time 35 minutes
Servings: 4 servings
Course: Main Course
Cuisine: American
Calories: 520

Ingredients
  

  • 1 pound white fish fillets such as cod or tilapia
  • 1 cup all-purpose flour
  • 1 teaspoon garlic powder
  • 1 teaspoon paprika
  • 1 teaspoon salt
  • 1/2 teaspoon black pepper
  • 1 cup buttermilk
  • 1 cup breadcrumbs preferably panko
  • Vegetable oil for frying
  • 4 hamburger buns
  • Lettuce leaves
  • Tomato slices
  • Tartar sauce

Method
 

  1. Cut the fish fillets into burger-sized pieces.
  2. In a shallow bowl, mix the flour, garlic powder, paprika, salt, and black pepper.
  3. In another bowl, pour the buttermilk.
  4. In a third bowl, place the breadcrumbs.
  5. Dip each piece of fish first into the flour mixture, then into the buttermilk, and finally coat it with breadcrumbs.
  6. In a large skillet, heat about 1 inch of vegetable oil over medium-high heat.
  7. Once the oil is hot, carefully add the breaded fish pieces in batches, frying for about 3-4 minutes on each side or until golden brown and cooked through.
  8. Remove and drain on paper towels.
  9. Toast the hamburger buns lightly.
  10. Assemble the burgers by placing a piece of fried fish on the bottom half of each bun, adding lettuce, tomato slices, and a generous dollop of tartar sauce.
  11. Top with the other half of the bun.
  12. Serve immediately while hot and crispy.

Notes

  • For extra crunch, try adding a slice of cheese on top of the fish while it's still hot.
  • You can also substitute the fish with shrimp for a delicious seafood twist.

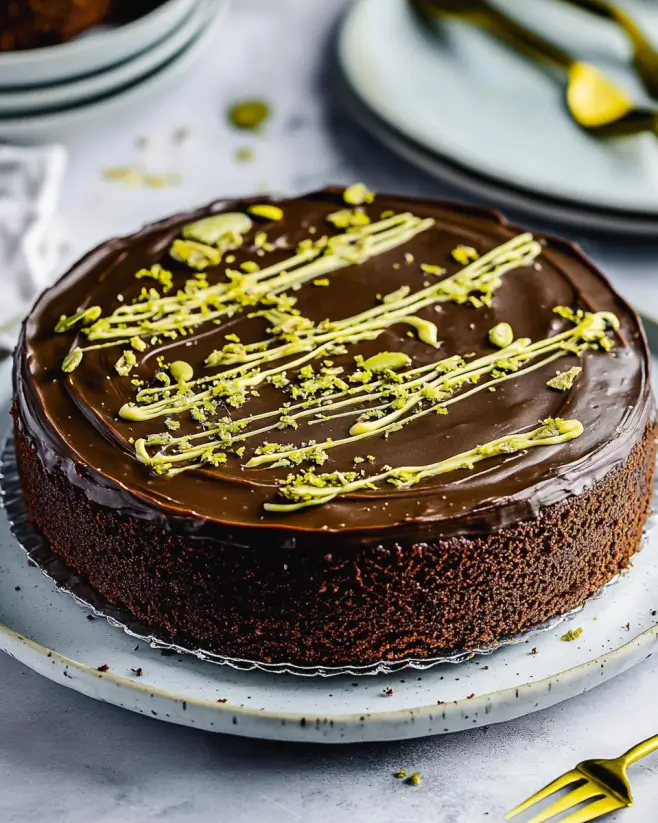
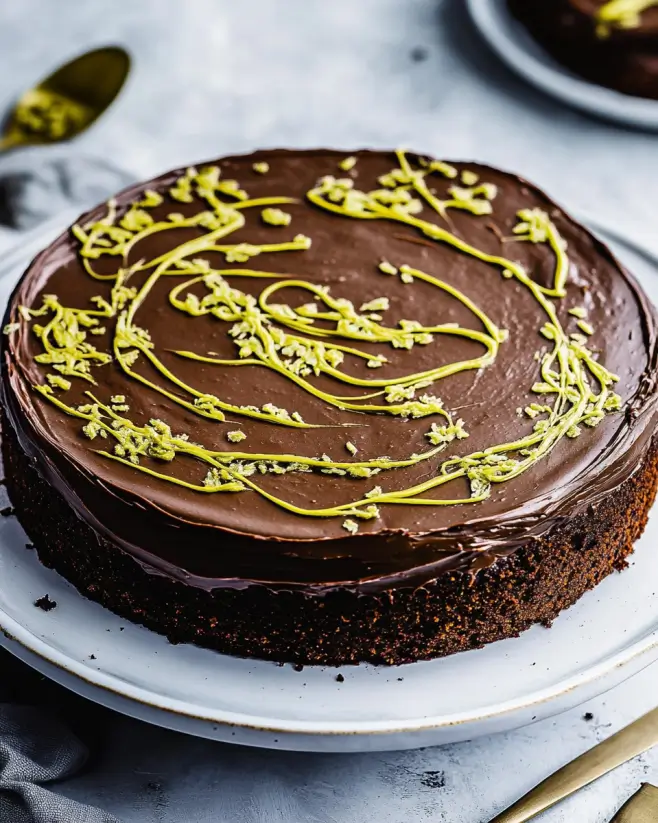
Decadent Chocolate Cake: Uncover the Perfect Recipe!

Introduction to Decadent Chocolate Cake

There’s something magical about a slice of Decadent Chocolate Cake that can instantly brighten your day.

I remember the first time I baked a chocolate cake; the aroma filled my kitchen, wrapping around me like a warm hug.

This recipe is perfect for any occasion, whether you’re celebrating a birthday or just need a sweet treat after a long week.

It’s simple enough for a busy day yet impressive enough to wow your friends and family.

Trust me, once you take that first bite, you’ll understand why this cake is a beloved classic in my home.

Why You’ll Love This Decadent Chocolate Cake

This Decadent Chocolate Cake is a game-changer in the kitchen.

It’s incredibly easy to whip up, making it perfect for those last-minute gatherings or a cozy night in.

The rich, moist texture will have everyone coming back for seconds.

Plus, it’s versatile enough to dress up for special occasions or keep it casual for a family dessert.

You’ll love how quickly it disappears, leaving only sweet memories behind.

Ingredients for Decadent Chocolate Cake

Creating a Decadent Chocolate Cake starts with gathering the right ingredients.

Here’s what you’ll need:

  • All-purpose flour: The backbone of your cake, providing structure and texture.
  • Granulated sugar: Sweetens the cake and helps create that delightful moistness.
  • Unsweetened cocoa powder: This is where the chocolate magic happens, giving your cake its rich flavor.
  • Baking powder and baking soda: These leavening agents ensure your cake rises beautifully.
  • Salt: A pinch enhances the flavors, balancing the sweetness.
  • Large eggs: They bind everything together and add moisture.
  • Whole milk: Contributes to the cake’s richness and helps create a tender crumb.
  • Vegetable oil: Keeps the cake moist and adds a lovely texture.
  • Vanilla extract: A splash of this adds depth and warmth to the flavor profile.
  • Boiling water: This secret ingredient makes the batter thin, resulting in a super moist cake.

For the frosting, you’ll need:

  • Unsalted butter: The base for your frosting, providing creaminess and flavor.
  • Powdered sugar: Sweetens and thickens the frosting to the perfect consistency.
  • Unsweetened cocoa powder: Adds that chocolatey goodness to your frosting.
  • Heavy cream: Makes the frosting fluffy and easy to spread.
  • Vanilla extract: Just like in the cake, it enhances the overall flavor.

Feel free to get creative!

You can add chocolate chips to the batter for an extra chocolatey kick or layer in some raspberry jam for a fruity surprise.

Exact measurements are at the bottom of the article, ready for you to print and take to the kitchen!

How to Make Decadent Chocolate Cake

Baking a Decadent Chocolate Cake is a delightful journey that fills your kitchen with warmth and sweetness.

Let’s dive into the steps that will lead you to chocolate heaven!

Step 1: Preheat and Prepare

Start by preheating your oven to 350°F (175°C).

While it warms up, grab two 9-inch round cake pans.

Grease them with butter or cooking spray, then dust with flour.

This ensures your cake slides out easily after baking.

Step 2: Mix Dry Ingredients

In a large mixing bowl, combine the all-purpose flour, granulated sugar, unsweetened cocoa powder, baking powder, baking soda, and salt.

Whisk them together until they’re well blended.

This step is crucial; it ensures even distribution of the leavening agents for a perfectly risen cake.

Step 3: Combine Wet Ingredients

Now, it’s time to add the wet ingredients.

Crack in the large eggs, pour in the whole milk, vegetable oil, and vanilla extract.

Beat the mixture on medium speed for about 2 minutes until it’s smooth and creamy.

This is where the magic begins!

Step 4: Add Boiling Water

Carefully stir in the boiling water.

This might seem odd, but trust me!

The hot water thins the batter, making it incredibly moist once baked.

Don’t worry; it will look a bit runny, but that’s exactly what you want.

Step 5: Bake the Cake

Pour the batter evenly into your prepared cake pans.

Bake for 30-35 minutes.

To check for doneness, insert a toothpick into the center.

If it comes out clean, your cake is ready to shine!

Step 6: Cool the Cakes

Once baked, let the cakes cool in the pans for about 10 minutes.

Then, gently remove them from the pans and transfer to a wire rack.

Allow them to cool completely before frosting.

This step is key; frosting a warm cake can lead to a melty mess!

Step 7: Make the Frosting

While the cakes cool, let’s whip up that luscious frosting.

In a large bowl, beat the softened unsalted butter until creamy.

Gradually add the powdered sugar and cocoa powder, mixing on low speed until combined.

Then, pour in the heavy cream and vanilla extract.

Beat on high speed for about 3 minutes until it’s fluffy and irresistible.

Step 8: Assemble the Cake

Once your cakes are completely cool, it’s time to assemble.

Place one layer on a serving plate and spread a generous layer of frosting on top.

Carefully place the second layer on top and frost the top and sides of the cake.

Feel free to get creative with your frosting technique; it’s all about making it look as good as it tastes!

Tips for Success

  • Always measure your ingredients accurately for the best results.
  • Use room temperature eggs and milk for a smoother batter.
  • Don’t skip the cooling time; it prevents frosting from melting.
  • For a richer flavor, consider adding a splash of coffee to the batter.
  • Experiment with different frostings, like cream cheese or ganache, for variety.

Equipment Needed

  • Mixing bowls: A large bowl for mixing ingredients; a medium bowl works too.
  • Whisk: Essential for blending dry ingredients; a fork can do in a pinch.
  • Measuring cups and spoons: Accurate measurements are key; use a kitchen scale for precision.
  • 9-inch round cake pans: If you don’t have these, any similar-sized pans will work.
  • Cooling rack: Helps cakes cool evenly; a plate can substitute in a hurry.

Variations

  • Gluten-Free Option: Substitute all-purpose flour with a gluten-free blend for a deliciously moist cake.
  • Vegan Twist: Replace eggs with flaxseed meal and use almond milk instead of whole milk for a plant-based version.
  • Chocolate Chip Delight: Fold in a cup of chocolate chips into the batter for an extra chocolatey experience.
  • Nutty Addition: Add chopped walnuts or pecans to the batter for a delightful crunch.
  • Flavor Infusion: Experiment with different extracts like almond or orange for a unique flavor profile.

Serving Suggestions

  • Pair your Decadent Chocolate Cake with a scoop of vanilla ice cream for a classic combo.
  • Serve with fresh berries to add a pop of color and a hint of tartness.
  • Drizzle with chocolate sauce or caramel for an extra indulgent touch.
  • For drinks, consider a rich coffee or a glass of red wine to complement the flavors.
  • Garnish with chocolate shavings or a dusting of powdered sugar for an elegant presentation.

FAQs about Decadent Chocolate Cake

Can I make this Decadent Chocolate Cake ahead of time?

Absolutely! You can bake the cake a day in advance. Just store it in an airtight container at room temperature. Frost it the day you plan to serve for the best texture.

What can I substitute for eggs in this recipe?

If you’re looking for an egg substitute, try using 1/4 cup of unsweetened applesauce or a flaxseed meal mixture (1 tablespoon of flaxseed meal mixed with 2.5 tablespoons of water). Both work well in this Decadent Chocolate Cake!

How do I store leftover cake?

Store any leftover cake in an airtight container in the refrigerator for up to three days. You can also freeze slices for up to three months. Just wrap them tightly in plastic wrap and foil.

Can I use a different type of frosting?

Definitely! While the chocolate frosting is a classic choice, you can experiment with cream cheese frosting, whipped cream, or even a ganache for a different flavor profile.

What’s the best way to ensure my cake rises perfectly?

Make sure your baking powder and baking soda are fresh. Also, don’t skip the whisking step for the dry ingredients; it helps distribute the leavening agents evenly, ensuring a beautifully risen Decadent Chocolate Cake!

Final Thoughts

Baking this Decadent Chocolate Cake is more than just a recipe; it’s an experience that brings joy to your kitchen.

The rich aroma wafting through the air, the anticipation as you frost the layers, and the smiles that follow with each slice create lasting memories.

Whether it’s a special occasion or a simple weeknight treat, this cake has a way of making everything feel a little more special.

So, roll up your sleeves, gather your ingredients, and let the magic unfold.

Trust me, once you share this cake, it will become a cherished favorite in your home!

Paul

Decadent Chocolate Cake: Uncover the Perfect Recipe!

A rich and moist chocolate cake perfect for any occasion.
Prep Time 20 minutes
Cook Time 35 minutes
Total Time 55 minutes
Servings: 12 servings
Course: Dessert
Cuisine: American
Calories: 450

Ingredients
  

  • 2 cups all-purpose flour
  • 2 cups granulated sugar
  • 3/4 cup unsweetened cocoa powder
  • 1 1/2 teaspoons baking powder
  • 1 1/2 teaspoons baking soda
  • 1 teaspoon salt
  • 2 large eggs
  • 1 cup whole milk
  • 1/2 cup vegetable oil
  • 2 teaspoons vanilla extract
  • 1 cup boiling water
  • 1 cup unsalted butter softened
  • 3 1/2 cups powdered sugar
  • 1/2 cup unsweetened cocoa powder
  • 1/2 cup heavy cream
  • 2 teaspoons vanilla extract

Method
 

  1. Preheat your oven to 350°F (175°C). Grease and flour two 9-inch round cake pans.
  2. In a large mixing bowl, combine the flour, sugar, cocoa powder, baking powder, baking soda, and salt. Whisk until well blended.
  3. Add the eggs, milk, vegetable oil, and vanilla extract to the dry ingredients. Beat on medium speed for 2 minutes until smooth.
  4. Carefully stir in the boiling water until the batter is well combined (the batter will be thin).
  5. Pour the batter evenly into the prepared cake pans. Bake for 30-35 minutes, or until a toothpick inserted in the center comes out clean.
  6. Allow the cakes to cool in the pans for 10 minutes, then remove from pans and transfer to a wire rack to cool completely.
  7. For the frosting, beat the softened butter in a large bowl until creamy. Gradually add the powdered sugar and cocoa powder, mixing on low speed until combined.
  8. Add the heavy cream and vanilla extract, then beat on high speed for 3 minutes until fluffy.
  9. Once the cakes are completely cool, place one layer on a serving plate and spread a layer of frosting on top. Place the second layer on top and frost the top and sides of the cake.
  10. Serve immediately or refrigerate for up to 3 days.

Notes

  • For a richer flavor, add 1 cup of chocolate chips to the batter before baking.
  • Try adding a layer of raspberry or strawberry jam between the cake layers for a fruity twist.

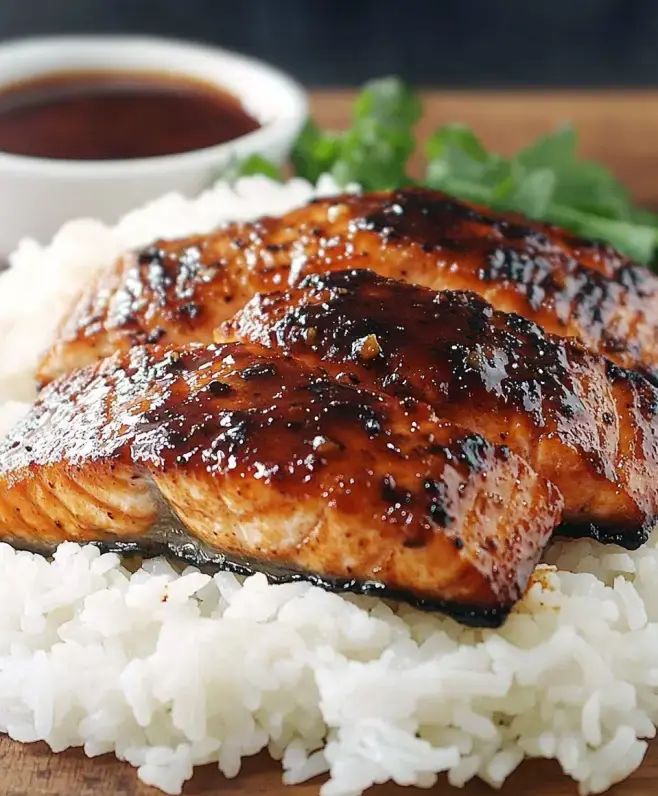
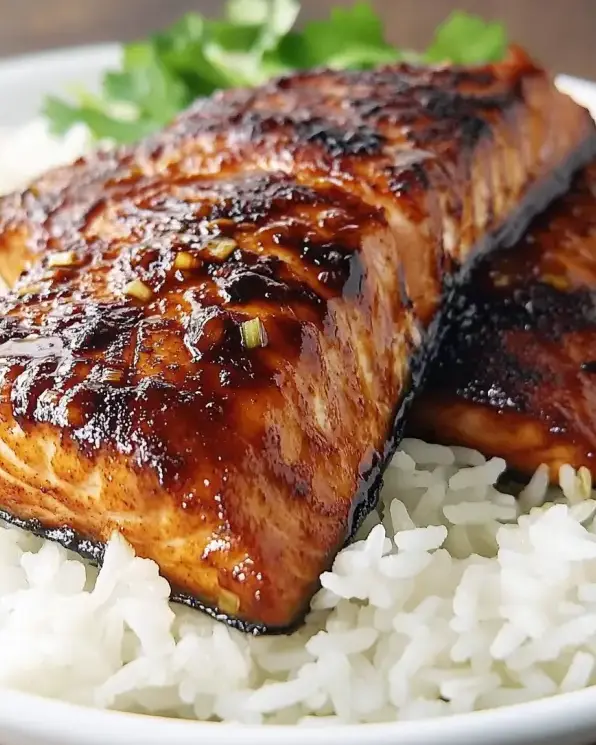
Honey Sriracha Salmon with Rice: A Flavorful Delight!

Introduction to Honey Sriracha Salmon with Rice

Cooking can sometimes feel like a chore, especially after a long day. But let me tell you, Honey Sriracha Salmon with Rice is a game changer! This dish is not just a quick solution for a busy evening; it’s a delightful way to impress your loved ones without spending hours in the kitchen. The sweet and spicy glaze brings the salmon to life, while the fluffy jasmine rice perfectly balances the flavors. Trust me, once you try this recipe, it’ll become a staple in your home. Let’s dive into this culinary adventure together!

Why You’ll Love This Honey Sriracha Salmon with Rice

This Honey Sriracha Salmon with Rice is a culinary delight that checks all the boxes. It’s incredibly easy to whip up, taking just 30 minutes from start to finish. The combination of sweet honey and spicy sriracha creates a flavor explosion that will have your taste buds dancing. Plus, it’s a healthy option packed with protein, making it perfect for a quick weeknight dinner or a special occasion. You’ll love every bite!

Ingredients for Honey Sriracha Salmon with Rice

Gathering the right ingredients is the first step to culinary success. For this Honey Sriracha Salmon with Rice, you’ll need:

  • Salmon fillets: Fresh salmon is the star of this dish, providing rich flavor and healthy fats.
  • Honey: This natural sweetener adds a delightful glaze and balances the heat from the sriracha.
  • Sriracha sauce: A spicy kick that elevates the dish, perfect for those who love a bit of heat.
  • Soy sauce: Adds depth and umami, enhancing the overall flavor profile.
  • Olive oil: Helps to keep the salmon moist while baking and adds a touch of richness.
  • Minced garlic: A must-have for that aromatic punch, bringing warmth to the dish.
  • Minced ginger: Adds a zesty note that complements the sweetness of the honey.
  • Jasmine rice: This fragrant rice is the perfect base, soaking up all the delicious flavors.
  • Water: Essential for cooking the rice to fluffy perfection.
  • Salt and pepper: Simple seasonings that enhance the natural flavors of the ingredients.
  • Green onions: Chopped for garnish, they add a fresh crunch and a pop of color.

For those looking to mix things up, you can substitute salmon with chicken breasts or tofu for a different protein option. If you want an extra spicy kick, feel free to add more sriracha or sprinkle some red pepper flakes on top before serving. Exact quantities for each ingredient can be found at the bottom of the article, ready for printing!

How to Make Honey Sriracha Salmon with Rice

Now that you have all your ingredients ready, let’s get cooking! This Honey Sriracha Salmon with Rice is straightforward and fun to make. Follow these simple steps, and you’ll have a delicious meal on the table in no time.

Step 1: Preheat the Oven

First things first, preheating your oven is crucial. Set it to 400°F (200°C) so it’s hot and ready when your salmon is prepped. This ensures even cooking and helps achieve that perfect flaky texture. While the oven heats up, line a baking sheet with parchment paper or give it a light grease. This makes cleanup a breeze!

Step 2: Prepare the Honey Sriracha Glaze

In a small bowl, whisk together honey, sriracha, soy sauce, olive oil, minced garlic, and ginger. This glaze is the heart of the dish, bringing together sweet and spicy flavors that will elevate your salmon. Make sure everything is well combined; you want that flavor to coat the salmon beautifully.

Step 3: Season the Salmon

Place your salmon fillets on the prepared baking sheet. Season them with a sprinkle of salt and pepper. This simple step enhances the natural flavors of the fish. Now, brush the honey sriracha glaze generously over each fillet. Don’t be shy—this glaze is what makes the dish sing!

Step 4: Bake the Salmon

Slide the baking sheet into your preheated oven and bake the salmon for 12-15 minutes. Keep an eye on it! You’ll know it’s done when the salmon flakes easily with a fork. If you like a bit of caramelization, you can broil it for the last minute or two. Just watch it closely to avoid burning!

Step 5: Cook the Jasmine Rice

While the salmon is baking, it’s time to cook the jasmine rice. Rinse the rice under cold water until the water runs clear. This removes excess starch and helps achieve that fluffy texture. In a medium saucepan, combine the rinsed rice and water. Bring it to a boil, then reduce the heat to low, cover, and let it simmer for about 15 minutes. The rice will absorb all the water and become tender.

Step 6: Fluff and Serve

Once the rice is cooked, fluff it with a fork and let it sit covered for an additional 5 minutes. This step makes it light and airy. To serve, place a generous scoop of jasmine rice on each plate, then top it with the beautifully glazed salmon. Don’t forget to garnish with chopped green onions for that fresh crunch!

Tips for Success

  • Always use fresh salmon for the best flavor and texture.
  • Adjust the sriracha to your spice preference; start with less if you’re unsure.
  • Let the salmon rest for a couple of minutes after baking for juicier results.
  • For extra flavor, marinate the salmon in the glaze for 30 minutes before baking.
  • Keep an eye on the rice; it can go from perfect to mushy quickly!

Equipment Needed

  • Baking sheet: A standard sheet works, but a cast-iron skillet can add a nice sear.
  • Parchment paper: Use it for easy cleanup; aluminum foil is a good alternative.
  • Medium saucepan: Essential for cooking rice; a rice cooker can also do the job.
  • Whisk: For mixing the glaze; a fork can work in a pinch.
  • Measuring spoons: Handy for precise ingredient amounts; eyeballing can work too if you’re confident!

Variations

  • Spicy Honey Sriracha Tofu: Swap out salmon for firm tofu. Marinate the tofu in the honey sriracha glaze for extra flavor before baking.
  • Honey Sriracha Chicken: Use chicken breasts instead of salmon. Adjust the cooking time to ensure the chicken is fully cooked.
  • Vegetable Stir-Fry: Serve the salmon over a bed of sautéed vegetables like bell peppers, broccoli, and snap peas for added nutrition.
  • Quinoa Substitute: Replace jasmine rice with quinoa for a protein-packed alternative that’s gluten-free.
  • Herb Infusion: Add fresh herbs like cilantro or basil to the glaze for a fresh twist on flavor.

Serving Suggestions

  • Steamed Broccoli: A simple side that adds color and nutrients, balancing the meal.
  • Chilled White Wine: A crisp Sauvignon Blanc pairs beautifully with the spicy salmon.
  • Presentation: Serve on a large platter, garnished with lime wedges for a pop of freshness.
  • Sesame Seeds: Sprinkle toasted sesame seeds on top for added crunch and flavor.

FAQs about Honey Sriracha Salmon with Rice

Can I use frozen salmon for this recipe?

Absolutely! Just make sure to thaw the salmon completely before cooking. Frozen salmon can still be delicious, but it may require a few extra minutes in the oven.

What can I substitute for jasmine rice?

If jasmine rice isn’t available, you can use basmati rice or even quinoa for a nutritious twist. Both options will complement the Honey Sriracha Salmon beautifully.

How can I make this dish less spicy?

To tone down the heat, reduce the amount of sriracha in the glaze. You can also add a bit more honey to balance the flavors. A dollop of sour cream on the side can help, too!

Can I prepare the glaze in advance?

Yes! You can mix the honey sriracha glaze ahead of time and store it in the fridge for up to a week. Just give it a good stir before using it on the salmon.

Is this recipe gluten-free?

Yes, this Honey Sriracha Salmon with Rice is gluten-free as long as you use gluten-free soy sauce. It’s a great option for those with dietary restrictions!

Final Thoughts

Cooking Honey Sriracha Salmon with Rice is more than just preparing a meal; it’s about creating a moment. The sweet and spicy flavors dance together, making each bite a delightful experience. This dish is perfect for busy weeknights or when you want to impress guests without breaking a sweat. The aroma fills your kitchen, inviting everyone to gather around the table. Plus, it’s a healthy option that doesn’t skimp on taste. I hope this recipe brings joy to your home, just as it has to mine. Enjoy every delicious moment!

Paul

Honey Sriracha Salmon with Rice: A Flavorful Delight!

A delicious and spicy dish featuring salmon fillets glazed with honey and sriracha, served over fluffy jasmine rice.
Prep Time 10 minutes
Cook Time 20 minutes
Total Time 30 minutes
Servings: 2 servings
Course: Main Course
Cuisine: Asian
Calories: 450

Ingredients
  

  • 2 6-ounce salmon fillets
  • 2 tablespoons honey
  • 2 tablespoons sriracha sauce
  • 1 tablespoon soy sauce
  • 1 tablespoon olive oil
  • 1 teaspoon minced garlic
  • 1 teaspoon minced ginger
  • 1 cup jasmine rice
  • 2 cups water
  • Salt and pepper to taste
  • Green onions chopped (for garnish)

Method
 

  1. Preheat your oven to 400°F (200°C). Line a baking sheet with parchment paper or lightly grease it.
  2. In a small bowl, whisk together honey, sriracha, soy sauce, olive oil, garlic, and ginger until well combined.
  3. Place the salmon fillets on the prepared baking sheet. Season with salt and pepper, then brush the honey sriracha mixture generously over the top of each fillet.
  4. Bake the salmon in the preheated oven for 12-15 minutes, or until the salmon flakes easily with a fork and is cooked through.
  5. While the salmon is baking, rinse the jasmine rice under cold water until the water runs clear. In a medium saucepan, combine the rinsed rice and water. Bring to a boil, then reduce the heat to low, cover, and simmer for 15 minutes or until the rice is tender and the water is absorbed.
  6. Fluff the rice with a fork and let it sit covered for an additional 5 minutes.
  7. Serve the salmon over a bed of jasmine rice and garnish with chopped green onions.

Notes

  • For a spicier kick, add more sriracha to the glaze or sprinkle red pepper flakes on top before serving.
  • You can substitute the salmon with chicken breasts or tofu for a different protein option.

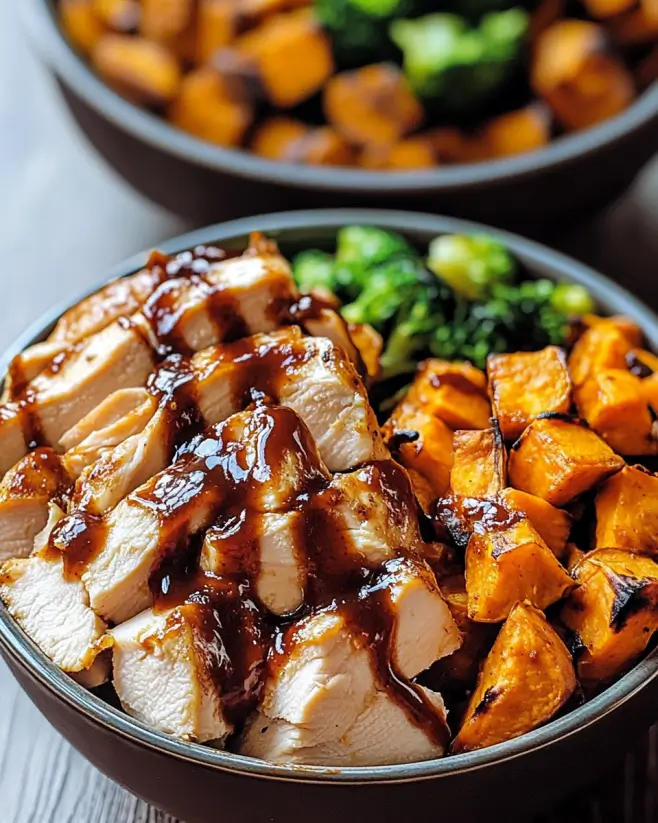
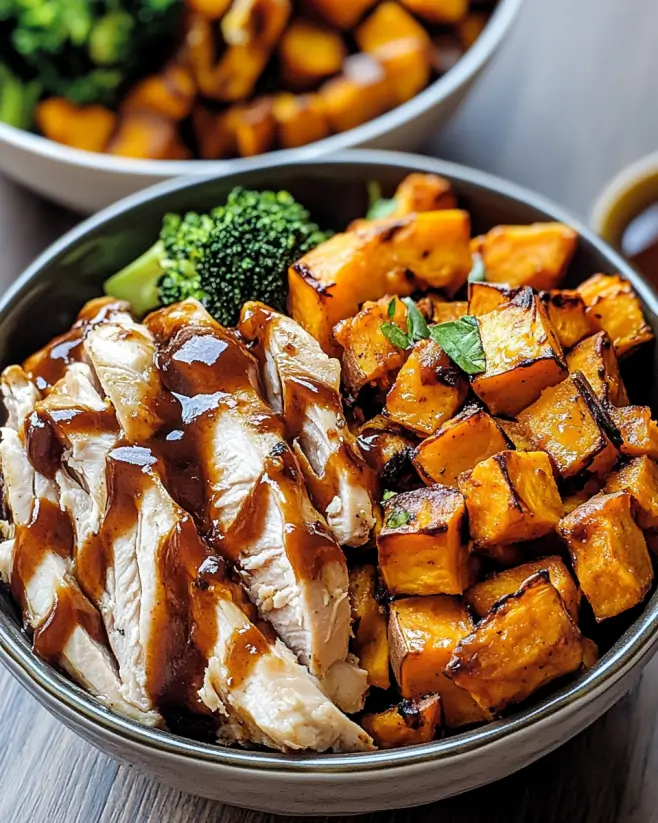
BBQ Chicken and Roasted Sweet Potato Bowls Made Easy!

Introduction to BBQ Chicken and Roasted Sweet Potato Bowls

After a long day, the last thing I want is to spend hours in the kitchen. That’s where BBQ Chicken and Roasted Sweet Potato Bowls come to the rescue! This dish is not just a meal; it’s a celebration of flavors and textures that come together effortlessly. Imagine tender chicken slathered in your favorite BBQ sauce, paired with sweet, caramelized sweet potatoes. It’s a quick solution for busy evenings or a delightful way to impress friends at a casual gathering. Trust me, once you try this recipe, it’ll become a staple in your kitchen!

Why You’ll Love This BBQ Chicken and Roasted Sweet Potato Bowls

These BBQ Chicken and Roasted Sweet Potato Bowls are a game-changer for anyone looking for a quick, delicious meal. They come together in just 45 minutes, making them perfect for busy weeknights. The combination of smoky BBQ chicken and sweet, tender potatoes creates a flavor explosion that’s hard to resist. Plus, they’re customizable! You can easily add your favorite toppings or swap ingredients to suit your taste. What’s not to love?

Ingredients for BBQ Chicken and Roasted Sweet Potato Bowls

Gathering the right ingredients is the first step to creating these mouthwatering BBQ Chicken and Roasted Sweet Potato Bowls. Here’s what you’ll need:

  • Sweet Potatoes: These vibrant orange gems are naturally sweet and packed with nutrients. They add a lovely contrast to the savory chicken.
  • Olive Oil: A drizzle of this liquid gold helps the sweet potatoes roast beautifully, enhancing their flavor and texture.
  • Paprika: This spice brings a smoky warmth to the dish. It’s a must for that extra depth of flavor.
  • Garlic Powder: A sprinkle of garlic powder adds a savory kick that complements the sweetness of the potatoes.
  • Salt and Pepper: Essential seasonings that elevate all the flavors in your bowl. Don’t skip these!
  • Boneless, Skinless Chicken Breasts: The star of the show! Tender and juicy, they soak up the BBQ sauce perfectly.
  • BBQ Sauce: Choose your favorite brand for a burst of flavor. This is where the magic happens!
  • Corn: Whether canned or frozen, corn adds a pop of sweetness and color to your bowls.
  • Black Beans: These protein-packed beauties add heartiness and a nice contrast in texture.
  • Avocado: Creamy and rich, avocado slices bring a luxurious touch to your dish.
  • Cilantro: Fresh cilantro adds a burst of freshness and a hint of brightness.
  • Lime Wedges: A squeeze of lime juice at the end brightens everything up and ties the flavors together.

For those looking to mix things up, consider substituting the chicken with grilled tofu or tempeh for a vegetarian option. You can also add toppings like shredded cheese, sour cream, or jalapeños for an extra kick. Exact quantities for each ingredient can be found at the bottom of the article, ready for printing!

How to Make BBQ Chicken and Roasted Sweet Potato Bowls

Creating BBQ Chicken and Roasted Sweet Potato Bowls is a straightforward process that anyone can master. Follow these simple steps, and you’ll have a delicious meal ready in no time!

Step 1: Preheat the Oven

Start by preheating your oven to 425°F (220°C). This step is crucial because it ensures that your sweet potatoes roast evenly and develop that lovely caramelization. While the oven heats up, line a baking sheet with parchment paper. This makes cleanup a breeze and prevents the sweet potatoes from sticking.

Step 2: Prepare the Sweet Potatoes

Next, grab those sweet potatoes! Peel and dice them into 1-inch cubes for even cooking. In a large bowl, toss the diced sweet potatoes with olive oil, paprika, garlic powder, salt, and pepper. Make sure they’re well-coated; this seasoning will enhance their natural sweetness and flavor.

Step 3: Roast the Sweet Potatoes

Spread the seasoned sweet potatoes in a single layer on the prepared baking sheet. Roast them in the preheated oven for 25-30 minutes. Halfway through, give them a stir to ensure they cook evenly. You’ll know they’re done when they’re tender and slightly caramelized—just the way we like them!

Step 4: Cook the Chicken

While the sweet potatoes are roasting, it’s time to focus on the chicken. Season the boneless, skinless chicken breasts with salt and pepper. Heat a grill pan or skillet over medium-high heat. Cook the chicken for about 6-7 minutes on each side, or until it’s fully cooked and no longer pink in the center. This method keeps the chicken juicy and flavorful.

Step 5: Add BBQ Sauce

Once the chicken is cooked, brush it generously with your favorite BBQ sauce. Let it cook for an additional 2-3 minutes. This step is key! The heat will caramelize the sauce, creating a sticky, delicious coating that elevates the dish.

Step 6: Assemble the Bowls

Now comes the fun part—assembling your bowls! Start by dividing the roasted sweet potatoes, corn, black beans, and sliced chicken among four bowls. Top each bowl with creamy avocado slices, a sprinkle of fresh cilantro, and a squeeze of lime juice. This not only adds flavor but also makes your dish look vibrant and inviting!

Tips for Success

  • Make sure to cut sweet potatoes into uniform pieces for even roasting.
  • Don’t skip the resting time for the chicken; it helps retain juices.
  • Feel free to experiment with different BBQ sauces for unique flavors.
  • Use fresh lime juice for the best flavor; bottled juice can’t compare.
  • Prep ingredients ahead of time to save on cooking time during busy nights.

Equipment Needed

  • Baking Sheet: A standard baking sheet works well; a cast-iron skillet is a great alternative for roasting.
  • Parchment Paper: Use this for easy cleanup; aluminum foil can also do the trick.
  • Grill Pan or Skillet: Any non-stick skillet will suffice for cooking the chicken.
  • Mixing Bowl: A large bowl is essential for tossing the sweet potatoes.
  • Knife and Cutting Board: Sharp knives and a sturdy board make prep a breeze.

Variations

  • Vegetarian Option: Swap the chicken for grilled tofu or tempeh for a hearty plant-based meal.
  • Spicy Kick: Add diced jalapeños or a drizzle of hot sauce to the bowls for an extra layer of heat.
  • Different Proteins: Try using shredded rotisserie chicken or pulled pork for a different flavor profile.
  • Sweet Potato Alternatives: Substitute sweet potatoes with butternut squash or regular potatoes for a twist.
  • Grain Base: Serve the bowls over quinoa or brown rice for added texture and nutrition.

Serving Suggestions

  • Pair your BBQ Chicken and Roasted Sweet Potato Bowls with a crisp green salad for a refreshing contrast.
  • A cold beer or a fruity iced tea complements the smoky flavors beautifully.
  • For presentation, serve in colorful bowls and garnish with extra cilantro and lime wedges.

FAQs about BBQ Chicken and Roasted Sweet Potato Bowls

Can I make BBQ Chicken and Roasted Sweet Potato Bowls ahead of time?

Absolutely! You can prepare the sweet potatoes and chicken in advance. Just store them separately in the fridge. When you’re ready to eat, reheat them and assemble your bowls. This makes for a quick meal on busy days!

What can I substitute for BBQ sauce?

If you’re looking for alternatives, try teriyaki sauce or a homemade honey mustard glaze. Both will add a unique twist to your BBQ Chicken and Roasted Sweet Potato Bowls while keeping them delicious!

How do I store leftovers?

Store any leftovers in an airtight container in the fridge for up to three days. Reheat in the microwave or on the stovetop. Just be careful not to overcook the chicken again!

Can I use other vegetables in this recipe?

Definitely! Feel free to add bell peppers, zucchini, or even broccoli. Just make sure to adjust the roasting time as needed to ensure everything is cooked perfectly.

Is this recipe gluten-free?

Yes! BBQ Chicken and Roasted Sweet Potato Bowls are naturally gluten-free, making them a great option for those with dietary restrictions. Just double-check your BBQ sauce to ensure it’s gluten-free as well.

Final Thoughts

Cooking BBQ Chicken and Roasted Sweet Potato Bowls is more than just preparing a meal; it’s about creating a moment of joy. The aroma of roasting sweet potatoes mingling with smoky BBQ chicken fills your kitchen, making it feel like home. Each bite is a delightful combination of flavors and textures that brings comfort and satisfaction. Whether you’re sharing it with family or enjoying a quiet dinner alone, this dish has a way of brightening your day. So roll up your sleeves, embrace the process, and let this recipe become a cherished part of your culinary repertoire!

Paul

BBQ Chicken and Roasted Sweet Potato Bowls Made Easy!

BBQ Chicken and Roasted Sweet Potato Bowls are a delicious and easy meal that combines tender chicken, roasted sweet potatoes, and fresh toppings for a satisfying dish.
Prep Time 15 minutes
Cook Time 30 minutes
Total Time 45 minutes
Servings: 4 servings
Course: Main Course
Cuisine: American
Calories: 450

Ingredients
  

  • 2 large sweet potatoes peeled and diced into 1-inch cubes
  • 1 tablespoon olive oil
  • 1 teaspoon paprika
  • 1 teaspoon garlic powder
  • Salt and pepper to taste
  • 1 pound boneless skinless chicken breasts
  • 1 cup BBQ sauce your favorite brand
  • 1 cup corn canned or frozen
  • 1 cup black beans drained and rinsed
  • 1 avocado sliced
  • 1/4 cup chopped fresh cilantro
  • Lime wedges for serving

Method
 

  1. Preheat your oven to 425°F (220°C). Line a baking sheet with parchment paper.
  2. In a large bowl, toss the diced sweet potatoes with olive oil, paprika, garlic powder, salt, and pepper until evenly coated. Spread them out in a single layer on the prepared baking sheet.
  3. Roast the sweet potatoes in the preheated oven for 25-30 minutes, or until they are tender and slightly caramelized, stirring halfway through.
  4. While the sweet potatoes are roasting, season the chicken breasts with salt and pepper. Heat a grill pan or skillet over medium-high heat. Cook the chicken for about 6-7 minutes on each side, or until fully cooked and no longer pink in the center.
  5. Once the chicken is cooked, brush it generously with BBQ sauce and let it cook for an additional 2-3 minutes, allowing the sauce to caramelize slightly.
  6. Remove the chicken from the heat and let it rest for a few minutes before slicing it into strips.
  7. To assemble the bowls, divide the roasted sweet potatoes, corn, black beans, and sliced chicken among four bowls. Top with avocado slices, chopped cilantro, and a squeeze of lime juice.
  8. Serve immediately and enjoy!

Notes

  • For a vegetarian option, substitute the chicken with grilled tofu or tempeh.
  • Add your favorite toppings such as shredded cheese, sour cream, or jalapeños for extra flavor.

Crispy Hash Brown Waffles: A Simple Recipe for Perfection!

Introduction to Crispy Hash Brown Waffles

There’s something magical about the aroma of crispy hash brown waffles wafting through the kitchen.

Growing up, Saturday mornings were all about breakfast feasts, and these waffles were a family favorite.

They’re not just a quick solution for a busy day; they’re a delightful way to impress your loved ones.

With just a handful of ingredients, you can whip up a dish that’s both comforting and satisfying.

Whether you’re fueling up for a weekend adventure or treating yourself to a cozy brunch, these crispy hash brown waffles are sure to hit the spot!

Why You’ll Love This Crispy Hash Brown Waffles

Crispy hash brown waffles are the ultimate breakfast game-changer.

They’re incredibly easy to make, taking just 25 minutes from start to finish.

The satisfying crunch paired with fluffy potato goodness is a taste sensation you won’t forget.

Plus, they’re versatile! Top them with anything from sour cream to a fried egg.

This dish is perfect for busy mornings or lazy weekends, making every bite a reason to smile.

Ingredients for Crispy Hash Brown Waffles

Creating crispy hash brown waffles is a breeze with just a few simple ingredients.

Here’s what you’ll need:

  • Russet Potatoes: The star of the show! Their high starch content makes for the crispiest texture.
  • Salt: A must for enhancing flavor. It brings out the natural taste of the potatoes.
  • Black Pepper: Adds a subtle kick. Feel free to adjust based on your spice preference.
  • Garlic Powder: A sprinkle of this brings a savory depth to your waffles.
  • Onion Powder: Complements the garlic and adds a hint of sweetness.
  • Egg: This binds everything together, ensuring your waffles hold their shape.
  • Shredded Cheddar Cheese (optional): For those who love a cheesy twist, this adds richness and flavor.
  • Green Onions (optional): A fresh touch that brightens up the dish and adds a pop of color.
  • Cooking Spray or Oil: Essential for greasing the waffle iron, ensuring your waffles come out easily.

For exact measurements, check the bottom of the article where you can find everything listed for printing.

Feel free to get creative with your ingredients!

How to Make Crispy Hash Brown Waffles

Making crispy hash brown waffles is a straightforward process that yields delicious results.

Follow these simple steps to create a breakfast masterpiece that will have everyone asking for seconds.

Step 1: Preheat the Waffle Iron

Start by preheating your waffle iron according to the manufacturer’s instructions.

This step is crucial for achieving that perfect golden-brown crust.

Don’t forget to lightly grease the iron with cooking spray or oil.

This ensures your waffles won’t stick and come out easily, ready to be devoured.

Step 2: Prepare the Potatoes

Next, it’s time to prepare the russet potatoes.

After grating them, place the shreds in a clean kitchen towel.

Squeeze out as much moisture as possible.

This step is vital for achieving the crispy texture we all crave.

Too much moisture will lead to soggy waffles, and nobody wants that!

Step 3: Mix the Ingredients

In a large bowl, combine the grated potatoes with salt, black pepper, garlic powder, and onion powder.

Add the beaten egg to bind everything together.

If you’re feeling adventurous, fold in the optional cheddar cheese and green onions for an extra flavor boost.

Mix until everything is well combined, and you’re ready to move on!

Step 4: Cook the Waffles

Scoop about 1 cup of the potato mixture into the preheated waffle iron.

Spread it evenly to ensure even cooking.

Close the lid and let it cook for about 8-10 minutes.

Keep an eye on it; you want those waffles to be golden brown and crispy.

Once done, carefully remove them and repeat with the remaining mixture.

Step 5: Serve and Enjoy

Now comes the best part—serving your crispy hash brown waffles!

They’re delicious on their own, but you can elevate them with toppings.

Consider sour cream, applesauce, or even a drizzle of ketchup.

Feel free to get creative!

These waffles are perfect for breakfast, brunch, or even a late-night snack.

Tips for Success

  • Always squeeze out excess moisture from the potatoes for maximum crispiness.
  • Experiment with different cheeses or herbs to customize the flavor.
  • For extra crunch, add a tablespoon of cornstarch to the potato mixture.
  • Keep the waffle iron closed during cooking to ensure even browning.
  • Serve immediately for the best texture; they can lose crispiness if left too long.

Equipment Needed

  • Waffle Iron: Essential for creating those crispy hash brown waffles. A non-stick model works best.
  • Grater: Use a box grater or food processor to shred the potatoes quickly.
  • Mixing Bowl: A large bowl for combining all your ingredients.
  • Kitchen Towel: Handy for squeezing out moisture from the grated potatoes.

Variations

  • Sweet Potato Hash Brown Waffles: Swap out russet potatoes for sweet potatoes for a sweeter, nutrient-packed twist.
  • Herbed Waffles: Add fresh herbs like parsley or chives to the mixture for a burst of flavor.
  • Spicy Kick: Mix in some diced jalapeños or a pinch of cayenne pepper for a spicy version.
  • Cheesy Delight: Experiment with different cheeses like pepper jack or feta for unique flavor profiles.
  • Vegan Option: Replace the egg with a flaxseed meal mixture (1 tablespoon flaxseed meal + 2.5 tablespoons water) for a plant-based version.

Serving Suggestions

  • Fresh Fruit: Serve with a side of mixed berries or sliced bananas for a refreshing contrast.
  • Breakfast Meats: Pair with crispy bacon or sausage links for a hearty meal.
  • Presentation: Stack the waffles high and drizzle with your favorite sauce for a stunning look.
  • Drinks: Complement with a hot cup of coffee or a refreshing orange juice.

FAQs about Crispy Hash Brown Waffles

Can I make crispy hash brown waffles ahead of time?

Absolutely! You can prepare the potato mixture in advance and store it in the fridge for up to 24 hours. Just remember to squeeze out the moisture before cooking for that perfect crispiness.

What can I use instead of russet potatoes?

If you’re looking for alternatives, Yukon Gold potatoes work well too. They have a creamy texture that can still yield deliciously crispy waffles.

How do I store leftover waffles?

Store any leftover crispy hash brown waffles in an airtight container in the fridge for up to three days. To reheat, pop them in the toaster for a quick crisp-up!

Can I freeze these waffles?

Yes! Freeze the cooked waffles in a single layer on a baking sheet, then transfer them to a freezer bag. They can be reheated directly from the freezer in the toaster or oven.

What toppings pair well with crispy hash brown waffles?

The options are endless! Try sour cream, applesauce, or even a fried egg on top. For a savory twist, add avocado or salsa for a delightful kick.

Final Thoughts

Crispy hash brown waffles are more than just a breakfast dish; they’re a celebration of comfort and creativity.

Each bite delivers a satisfying crunch, reminding me of those cherished Saturday mornings spent with family.

This recipe is a canvas for your culinary imagination, inviting you to experiment with flavors and toppings.

Whether you’re sharing them with loved ones or enjoying a quiet moment to yourself, these waffles bring joy to the table.

So, roll up your sleeves, grab those russet potatoes, and let the waffle iron work its magic.

You won’t regret it!

Paul

Crispy Hash Brown Waffles: A Simple Recipe for Perfection!

A simple and delicious recipe for crispy hash brown waffles made from grated russet potatoes, seasoned to perfection.
Prep Time 15 minutes
Cook Time 10 minutes
Total Time 25 minutes
Servings: 4 servings
Course: Breakfast
Cuisine: American
Calories: 180

Ingredients
  

  • 2 large russet potatoes peeled and grated
  • 1 teaspoon salt
  • 1/2 teaspoon black pepper
  • 1/2 teaspoon garlic powder
  • 1/4 teaspoon onion powder
  • 1 large egg beaten
  • 1/4 cup shredded cheddar cheese optional
  • 1/4 cup green onions chopped (optional)
  • Cooking spray or oil for the waffle iron

Method
 

  1. Preheat your waffle iron according to the manufacturer's instructions. Lightly grease it with cooking spray or oil.
  2. Place the grated potatoes in a clean kitchen towel and squeeze out as much moisture as possible. This step is crucial for achieving crispy waffles.
  3. In a large bowl, combine the grated potatoes, salt, black pepper, garlic powder, onion powder, and beaten egg. If using, fold in the cheddar cheese and green onions.
  4. Scoop about 1 cup of the potato mixture into the preheated waffle iron, spreading it evenly. Close the lid and cook for about 8-10 minutes, or until the waffles are golden brown and crispy.
  5. Carefully remove the waffles and repeat with the remaining potato mixture. Serve immediately with your favorite toppings, such as sour cream, applesauce, or ketchup.

Notes

  • For extra crispiness, try adding a tablespoon of cornstarch to the potato mixture.
  • You can also experiment with different cheeses or herbs to customize the flavor.
  • For a heartier version, mix in cooked bacon or sausage before cooking.

Sausage Alfredo Ravioli Lasagna: A Comfort Food Delight

Introduction to Sausage Alfredo Ravioli Lasagna

There’s something magical about a warm, cheesy dish that brings everyone together, and Sausage Alfredo Ravioli Lasagna is just that.

This recipe is a comforting hug on a plate, perfect for those busy weeknights when you want to impress your loved ones without spending hours in the kitchen.

With layers of tender ravioli, savory Italian sausage, and creamy Alfredo sauce, it’s a delightful twist on traditional lasagna.

Whether you’re feeding a crowd or just craving a cozy meal, this dish is sure to become a family favorite. Let’s dive into this delicious adventure!

Why You’ll Love This Sausage Alfredo Ravioli Lasagna

This Sausage Alfredo Ravioli Lasagna is a game-changer for any home cook.

It’s incredibly easy to whip up, making it perfect for those hectic evenings when time is short.

The rich flavors of the sausage and creamy Alfredo sauce create a taste sensation that will have everyone asking for seconds.

Plus, it’s a one-dish wonder, meaning less cleanup and more time to enjoy with family and friends. What’s not to love?

Ingredients for Sausage Alfredo Ravioli Lasagna

Creating the perfect Sausage Alfredo Ravioli Lasagna starts with gathering the right ingredients.

Here’s what you’ll need:

  • Italian sausage: The star of the show! It adds a savory depth to the dish. You can use spicy or mild, depending on your taste.
  • Olive oil: A splash of this liquid gold helps to sauté the sausage and veggies, enhancing the flavors.
  • Onion: Diced onion brings sweetness and aroma, making your kitchen smell divine as it cooks.
  • Garlic: Minced garlic adds a punch of flavor that pairs beautifully with the sausage.
  • Ricotta cheese: This creamy cheese creates a luscious layer in the lasagna, balancing the richness of the sausage.
  • Parmesan cheese: Grated Parmesan adds a nutty flavor and a touch of saltiness to the ricotta mixture.
  • Egg: The egg binds the ricotta and Parmesan together, giving the filling a lovely texture.
  • Italian seasoning: A blend of herbs that brings a taste of Italy to your dish. Feel free to use fresh herbs if you have them!
  • Alfredo sauce: This creamy sauce is the glue that holds everything together, making each bite indulgent.
  • Cheese ravioli: The ravioli adds layers of flavor and texture, making this lasagna unique and satisfying.
  • Shredded mozzarella cheese: Topping the lasagna with mozzarella creates that gooey, melty goodness we all crave.
  • Salt and pepper: Essential for seasoning, these staples enhance all the flavors in your dish.
  • Fresh parsley: A sprinkle of chopped parsley not only adds color but also a fresh finish to your lasagna.

For those looking to lighten things up, consider using turkey sausage and low-fat ricotta.

You can also sneak in some steamed spinach or sautéed mushrooms for added nutrition and flavor.

Exact quantities for each ingredient can be found at the bottom of the article, ready for printing!

How to Make Sausage Alfredo Ravioli Lasagna

Step 1: Cook the Sausage Mixture

Start by heating olive oil in a large skillet over medium heat.

Add the Italian sausage, breaking it apart with a spoon as it cooks.

After about 5-7 minutes, the sausage should be nicely browned.

Next, toss in the diced onion and minced garlic.

Cook until the onion turns translucent, about 3-4 minutes.

Don’t forget to season with salt and pepper to taste.

Once everything is cooked, remove it from the heat and set it aside.

This savory mixture is the heart of your Sausage Alfredo Ravioli Lasagna!

Step 2: Prepare the Ricotta Mixture

In a mixing bowl, combine the ricotta cheese, grated Parmesan cheese, and the egg.

Add the Italian seasoning for that authentic flavor.

Mix everything together until it’s well blended.

This creamy filling will add a delightful texture to your lasagna.

Set this mixture aside while you prepare the layers.

It’s a simple step that makes a big difference!

Step 3: Assemble the Lasagna

Grab a 9×13-inch baking dish and spread a thin layer of Alfredo sauce on the bottom.

Layer half of the cheese ravioli over the sauce, followed by half of the sausage mixture.

Next, dollop half of the ricotta mixture on top and sprinkle with one cup of shredded mozzarella cheese.

Repeat these layers with the remaining ravioli, sausage, and ricotta mixture.

Finish off with the rest of the Alfredo sauce and top it all with the remaining mozzarella.

This layering process creates a beautiful, hearty dish that’s sure to impress!

Step 4: Bake the Lasagna

Preheat your oven to 375°F (190°C) while you finish assembling.

Cover the baking dish with aluminum foil to keep the moisture in.

Bake for 25 minutes, then remove the foil.

Let it bake for an additional 15 minutes until the cheese is bubbly and golden.

The aroma wafting through your kitchen will be irresistible!

Step 5: Serve and Enjoy

Once baked, let the lasagna cool for about 10 minutes before slicing.

This cooling time helps the layers set, making it easier to serve.

Garnish with freshly chopped parsley for a pop of color.

Now, dig in and enjoy every cheesy, savory bite of your Sausage Alfredo Ravioli Lasagna!

Tips for Success

  • Use fresh ingredients for the best flavor—fresh herbs and quality cheese make a difference.
  • Don’t rush the cooling time; it helps the lasagna hold its shape when slicing.
  • Feel free to customize layers with your favorite veggies for added nutrition.
  • For extra creaminess, drizzle a bit more Alfredo sauce on top before serving.
  • Make it ahead of time! It tastes even better the next day after the flavors meld.

Equipment Needed

  • Large skillet: A non-stick skillet works wonders for browning the sausage.
  • Mixing bowl: Any bowl will do, but a large one makes mixing easier.
  • 9×13-inch baking dish: If you don’t have one, a similar-sized casserole dish will work.
  • Aluminum foil: Essential for covering the lasagna while it bakes.
  • Spatula: Perfect for layering and serving your delicious creation.

Variations

  • Vegetarian Option: Swap the Italian sausage for sautéed mushrooms, zucchini, or spinach for a hearty meatless version.
  • Spicy Kick: Use spicy Italian sausage or add red pepper flakes to the ricotta mixture for an extra layer of heat.
  • Gluten-Free: Opt for gluten-free ravioli and ensure your Alfredo sauce is gluten-free to accommodate dietary needs.
  • Herb-Infused: Incorporate fresh basil or oregano into the ricotta mixture for a burst of fresh flavor.
  • Cheesy Delight: Mix in additional cheeses like fontina or gouda for a richer, creamier lasagna.

Serving Suggestions

  • Garlic Bread: Serve with warm, buttery garlic bread for a classic pairing that complements the lasagna.
  • Side Salad: A fresh green salad with a tangy vinaigrette adds a refreshing contrast to the rich flavors.
  • Wine Pairing: Enjoy with a glass of Chianti or a light Pinot Grigio to enhance the meal.
  • Presentation: Garnish with extra parsley and a sprinkle of Parmesan for a beautiful finish.

FAQs about Sausage Alfredo Ravioli Lasagna

Can I make Sausage Alfredo Ravioli Lasagna ahead of time?

Absolutely! You can assemble the lasagna a day in advance and store it in the fridge. Just cover it tightly with foil. When you’re ready to bake, add a few extra minutes to the cooking time.

Can I freeze leftovers of Sausage Alfredo Ravioli Lasagna?

Yes, this dish freezes well! Just slice it into portions, wrap them tightly in plastic wrap, and then place them in an airtight container. It can be frozen for up to three months.

What can I substitute for ricotta cheese?

If you’re not a fan of ricotta, you can use cottage cheese or even a blend of cream cheese and sour cream for a different texture and flavor.

How do I reheat Sausage Alfredo Ravioli Lasagna?

The best way to reheat is in the oven at 350°F (175°C) until warmed through. You can cover it with foil to prevent drying out. Microwave is an option too, but it may not heat evenly.

Can I add vegetables to the lasagna?

Definitely! Adding steamed spinach, sautéed mushrooms, or roasted bell peppers can enhance the flavor and nutrition of your Sausage Alfredo Ravioli Lasagna. Just layer them in with the other ingredients!

Final Thoughts

Sausage Alfredo Ravioli Lasagna is more than just a meal; it’s an experience that brings warmth and joy to the table.

Each layer tells a story, from the savory sausage to the creamy Alfredo sauce, creating a symphony of flavors that dance on your palate.

Whether you’re sharing it with family or enjoying a quiet night in, this dish wraps you in comfort like a favorite blanket.

So, roll up your sleeves and dive into this culinary adventure.

Trust me, every bite will remind you why comfort food holds a special place in our hearts!

Paul

Sausage Alfredo Ravioli Lasagna: A Comfort Food Delight

Sausage Alfredo Ravioli Lasagna is a comforting and delicious dish that combines layers of ravioli, Italian sausage, and creamy Alfredo sauce, topped with melted mozzarella cheese.
Prep Time 20 minutes
Cook Time 40 minutes
Total Time 1 hour
Servings: 6 servings
Course: Main Course
Cuisine: Italian
Calories: 450

Ingredients
  

  • 1 pound Italian sausage casings removed
  • 1 tablespoon olive oil
  • 1 small onion diced
  • 2 cloves garlic minced
  • 1 15-ounce container ricotta cheese
  • 1 cup grated Parmesan cheese
  • 1 large egg
  • 1 teaspoon Italian seasoning
  • 1 25-ounce jar Alfredo sauce
  • 1 16-ounce package refrigerated cheese ravioli
  • 2 cups shredded mozzarella cheese
  • Salt and pepper to taste
  • Fresh parsley chopped (for garnish)

Method
 

  1. In a large skillet, heat olive oil over medium heat. Add the Italian sausage and cook until browned, breaking it apart with a spoon, about 5-7 minutes. Drain excess fat if necessary. Add diced onion and minced garlic, cooking until the onion is translucent, about 3-4 minutes. Season with salt and pepper. Remove from heat and set aside.
  2. In a mixing bowl, combine ricotta cheese, grated Parmesan cheese, egg, and Italian seasoning. Mix until well blended and set aside.
  3. Preheat your oven to 375°F (190°C).
  4. In a 9x13-inch baking dish, spread a thin layer of Alfredo sauce on the bottom. Layer half of the ravioli over the sauce, followed by half of the sausage mixture, and half of the ricotta mixture. Sprinkle with one cup of mozzarella cheese.
  5. Repeat the layers with the remaining ravioli, sausage, ricotta mixture, and top with the remaining Alfredo sauce. Finish with the remaining mozzarella cheese.
  6. Cover the baking dish with aluminum foil and bake for 25 minutes. Remove the foil and bake for an additional 15 minutes, or until the cheese is bubbly and golden.
  7. Let the lasagna cool for 10 minutes before slicing. Garnish with chopped parsley before serving.

Notes

  • For a lighter version, substitute turkey sausage and use low-fat ricotta cheese.
  • Add steamed spinach or sautéed mushrooms between the layers for extra flavor and nutrition.