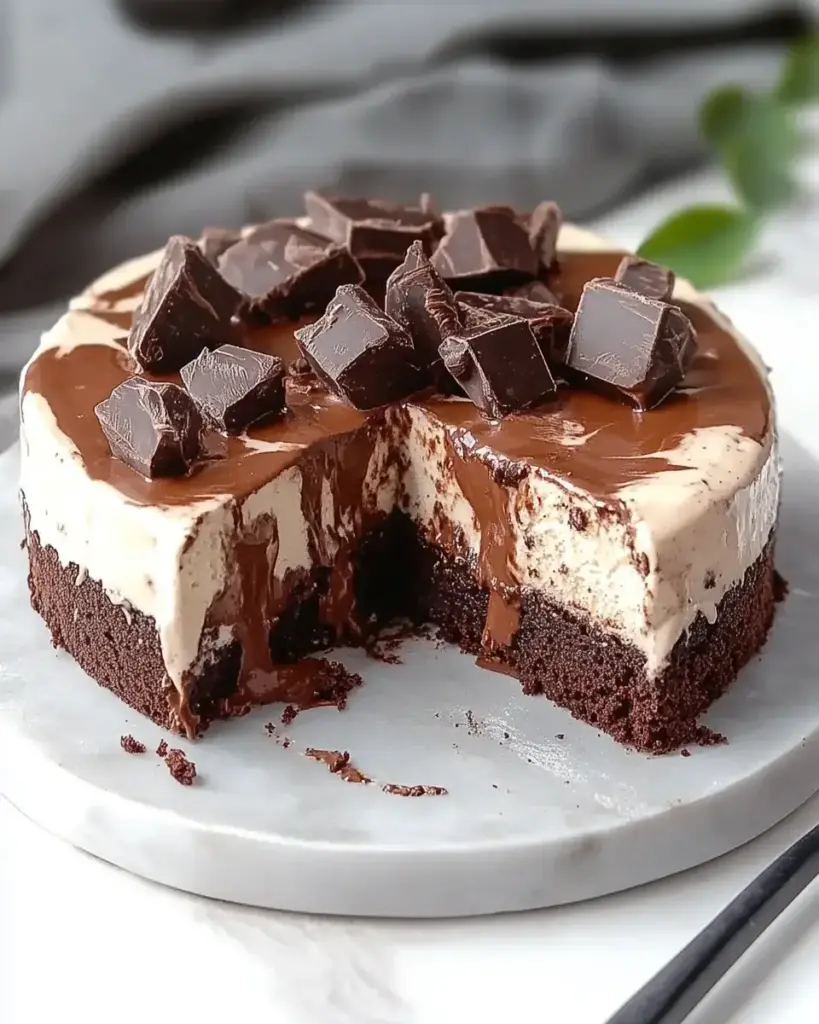
Chocolate Brownie Ice Cream Cake: Indulge in This Delight!

Introduction to Chocolate Brownie Ice Cream Cake

There’s something magical about dessert that brings us all together, isn’t there? The Chocolate Brownie Ice Cream Cake is a delightful treat that combines the rich, fudgy goodness of brownies with the creamy bliss of ice cream. It’s perfect for those busy days when you want to impress your family or friends without spending hours in the kitchen. This cake is not just a dessert; it’s a celebration of flavors and textures that will have everyone asking for seconds. Trust me, once you serve this, you’ll be the hero of the evening!

Why You’ll Love This Chocolate Brownie Ice Cream Cake

This Chocolate Brownie Ice Cream Cake is a dream come true for anyone who loves dessert but craves simplicity. It’s quick to whip up, making it a fantastic choice for last-minute gatherings or family celebrations. The combination of warm, fudgy brownies and cold, creamy ice cream creates a taste sensation that’s hard to resist. Plus, it’s a crowd-pleaser, ensuring smiles all around with every delicious slice!

Ingredients for Chocolate Brownie Ice Cream Cake

Gathering the right ingredients is the first step to creating your Chocolate Brownie Ice Cream Cake. Here’s what you’ll need:

  • Brownie mix: The star of the show! Choose your favorite brand for a rich, chocolatey base.
  • Vegetable oil: This adds moisture to the brownies, ensuring they’re fudgy and delicious.
  • Eggs: Essential for binding the ingredients together and giving the brownies structure.
  • Water: Helps to combine the dry ingredients and create a smooth batter.
  • Vanilla ice cream: The creamy layer that balances the richness of the brownies. Feel free to swap it for chocolate ice cream for an extra indulgent treat!
  • Hot fudge sauce: Drizzled between layers and on top, it adds a decadent touch that’s hard to resist.
  • Whipped cream: A light, fluffy topping that complements the cake beautifully.
  • Chocolate shavings or sprinkles (optional): For a fun, decorative finish that adds a little crunch.

For exact measurements, check the bottom of the article where you can find everything listed for easy printing. Enjoy the process of gathering these ingredients; each one plays a vital role in making this dessert a memorable experience!

How to Make Chocolate Brownie Ice Cream Cake

Creating your own Chocolate Brownie Ice Cream Cake is a fun and rewarding experience. Follow these simple steps, and you’ll have a dessert that’s sure to impress!

Step 1: Preheat and Prepare

Start by preheating your oven to 350°F (175°C). While it warms up, grab a 9-inch round cake pan and grease it well. This will help your brownies come out easily after baking. A little cooking spray or butter works wonders here!

Step 2: Mix the Brownie Batter

In a large mixing bowl, combine the brownie mix, vegetable oil, eggs, and water. Stir until everything is well blended. The batter should be smooth and thick, with no dry spots. This is where the magic begins, so don’t rush it!

Step 3: Bake the Brownies

Pour the brownie batter into your prepared cake pan, spreading it evenly. Bake for 20-25 minutes. To check if they’re done, insert a toothpick into the center. If it comes out clean, you’re good to go! Let the brownies cool completely in the pan.

Step 4: Cool and Slice

Once the brownies are cool, carefully remove them from the pan. Place them on a serving plate and slice the brownie in half horizontally. This creates two layers, perfect for stacking with ice cream!

Step 5: Assemble the Cake

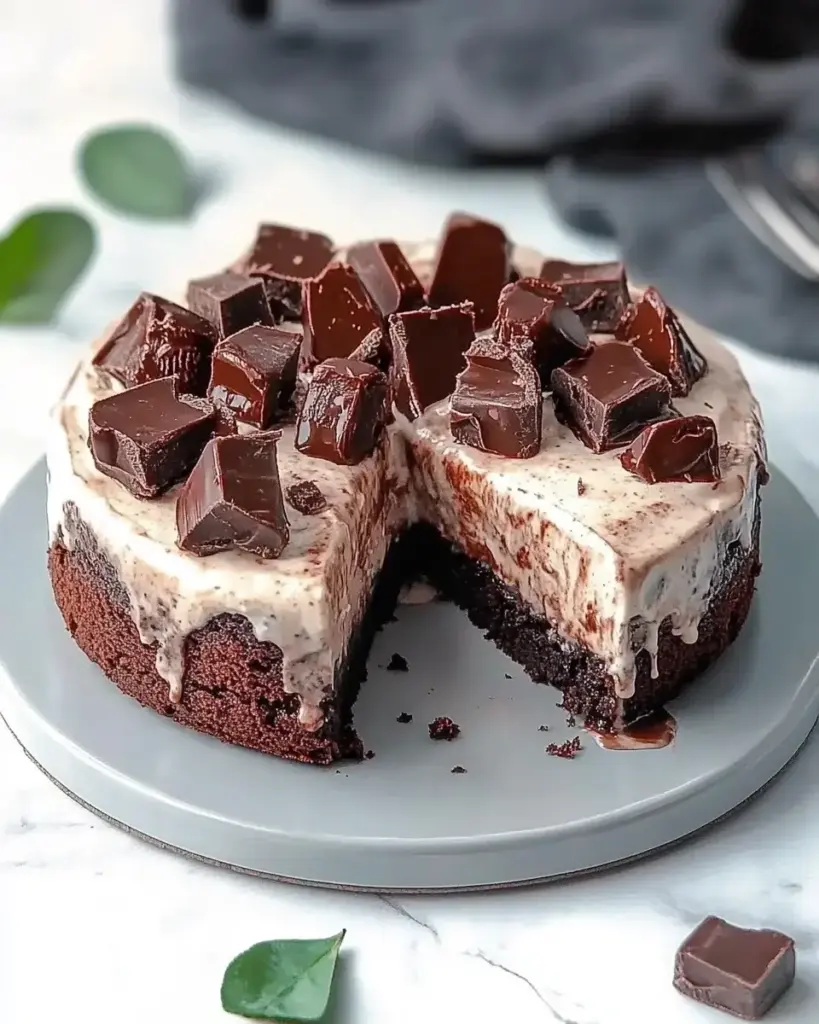
Take one layer of brownie and place it back on the serving plate. Spread half of the softened vanilla ice cream over this layer. Drizzle half of the hot fudge sauce on top of the ice cream. Then, place the second layer of brownie on top and repeat the process with the remaining ice cream and fudge sauce. It’s a delicious layering game!

Step 6: Freeze and Serve

Top the cake with whipped cream and sprinkle chocolate shavings or sprinkles if you like. Now, freeze the cake for at least 2 hours to set. Before serving, let it sit at room temperature for about 10 minutes. This will make slicing easier and enhance the flavors. Enjoy every bite of your homemade masterpiece!
Tips for Success

  • Use a toothpick to check for doneness; it should come out clean for perfect brownies.
  • Let the brownies cool completely before slicing to avoid a messy assembly.
  • Soften the ice cream slightly for easier spreading; it should be creamy but not melted.
  • For added flavor, consider mixing in nuts or candy pieces into the brownie batter.
  • Freeze the cake overnight for the best texture and flavor.

Equipment Needed

  • 9-inch round cake pan: Essential for baking the brownies. A springform pan works too for easy removal.
  • Mixing bowl: A large one for combining ingredients. Any bowl will do, just make sure it’s sturdy.
  • Whisk or spatula: For mixing the batter smoothly. A wooden spoon can also work wonders.
  • Toothpick: Handy for checking brownie doneness. A fork can substitute in a pinch.

Variations

  • Nutty Delight: Add chopped walnuts or pecans to the brownie batter for a crunchy texture and nutty flavor.
  • Mint Chocolate: Incorporate mint chocolate chip ice cream instead of vanilla for a refreshing twist.
  • Fruit Fusion: Layer in fresh strawberries or raspberries between the brownie and ice cream for a fruity burst.
  • Gluten-Free Option: Use a gluten-free brownie mix to make this dessert suitable for those with gluten sensitivities.
  • Vegan Version: Substitute eggs with flaxseed meal and use dairy-free ice cream for a plant-based treat.

Serving Suggestions

  • Pair with a scoop of vanilla or chocolate ice cream for an extra creamy experience.
  • Serve alongside fresh berries for a refreshing contrast to the rich cake.
  • Drizzle additional hot fudge sauce on individual slices for a decadent touch.
  • Garnish with mint leaves for a pop of color and freshness.

FAQs about Chocolate Brownie Ice Cream Cake

As you embark on your journey to create the perfect Chocolate Brownie Ice Cream Cake, you might have a few questions. Here are some common queries that can help you along the way:

Can I use homemade brownies instead of a mix?

Absolutely! If you have a favorite homemade brownie recipe, feel free to use it. Just ensure the texture is fudgy to complement the ice cream.

How long can I store the cake in the freezer?

This cake can be stored in the freezer for up to a week. Just make sure it’s well-wrapped to prevent freezer burn.

Can I make this cake ahead of time?

Yes! This ice cream cake is perfect for making ahead. Just assemble it and freeze it until you’re ready to serve.

What can I substitute for whipped cream?

If you’re looking for alternatives, you can use whipped coconut cream or even a dollop of yogurt for a lighter option.

Is this cake suitable for kids?

Definitely! The combination of brownies and ice cream is a hit with kids. Just keep an eye on the sugar content if you’re serving it to little ones!

Final Thoughts

Creating a Chocolate Brownie Ice Cream Cake is more than just baking; it’s about crafting memories. Each layer tells a story, from the rich, fudgy brownies to the creamy ice cream that melts in your mouth. This dessert is perfect for celebrations or simply to brighten a regular day. The joy on your loved ones’ faces as they take that first bite is priceless. So, roll up your sleeves, gather your ingredients, and dive into this delightful adventure. Trust me, the satisfaction of serving this cake will make you feel like a culinary rock star!

Paul

Chocolate Brownie Ice Cream Cake: Indulge in This Delight!

A delicious and indulgent Chocolate Brownie Ice Cream Cake that combines rich brownie layers with creamy vanilla ice cream and hot fudge sauce.
Prep Time 20 minutes
Cook Time 25 minutes
Total Time 2 hours 45 minutes
Servings: 8 servings
Course: Dessert
Cuisine: American
Calories: 350

Ingredients
  

  • 2 cups brownie mix
  • 1/2 cup vegetable oil
  • 2 large eggs
  • 1/4 cup water
  • 1 quart vanilla ice cream softened
  • 1 cup hot fudge sauce
  • 1 cup whipped cream
  • 1/2 cup chocolate shavings or sprinkles optional

Method
 

  1. Preheat your oven to 350°F (175°C). Grease a 9-inch round cake pan.
  2. In a large mixing bowl, combine the brownie mix, vegetable oil, eggs, and water. Stir until well blended.
  3. Pour the brownie batter into the prepared cake pan and spread it evenly. Bake for 20-25 minutes or until a toothpick inserted in the center comes out clean. Let the brownie cool completely in the pan.
  4. Once the brownie is cool, carefully remove it from the pan and place it on a serving plate. Slice the brownie in half horizontally to create two layers.
  5. Place one layer of brownie back on the serving plate. Spread half of the softened vanilla ice cream over the brownie layer. Drizzle half of the hot fudge sauce over the ice cream.
  6. Place the second layer of brownie on top of the ice cream. Spread the remaining ice cream over the top layer and drizzle with the remaining hot fudge sauce.
  7. Top the cake with whipped cream and sprinkle with chocolate shavings or sprinkles if desired. Freeze the cake for at least 2 hours to set.
  8. Before serving, let the cake sit at room temperature for about 10 minutes to soften slightly. Slice and enjoy!

Notes

  • For a richer flavor, use chocolate ice cream instead of vanilla.
  • Add crushed nuts or your favorite candy pieces between the layers for extra texture and flavor.
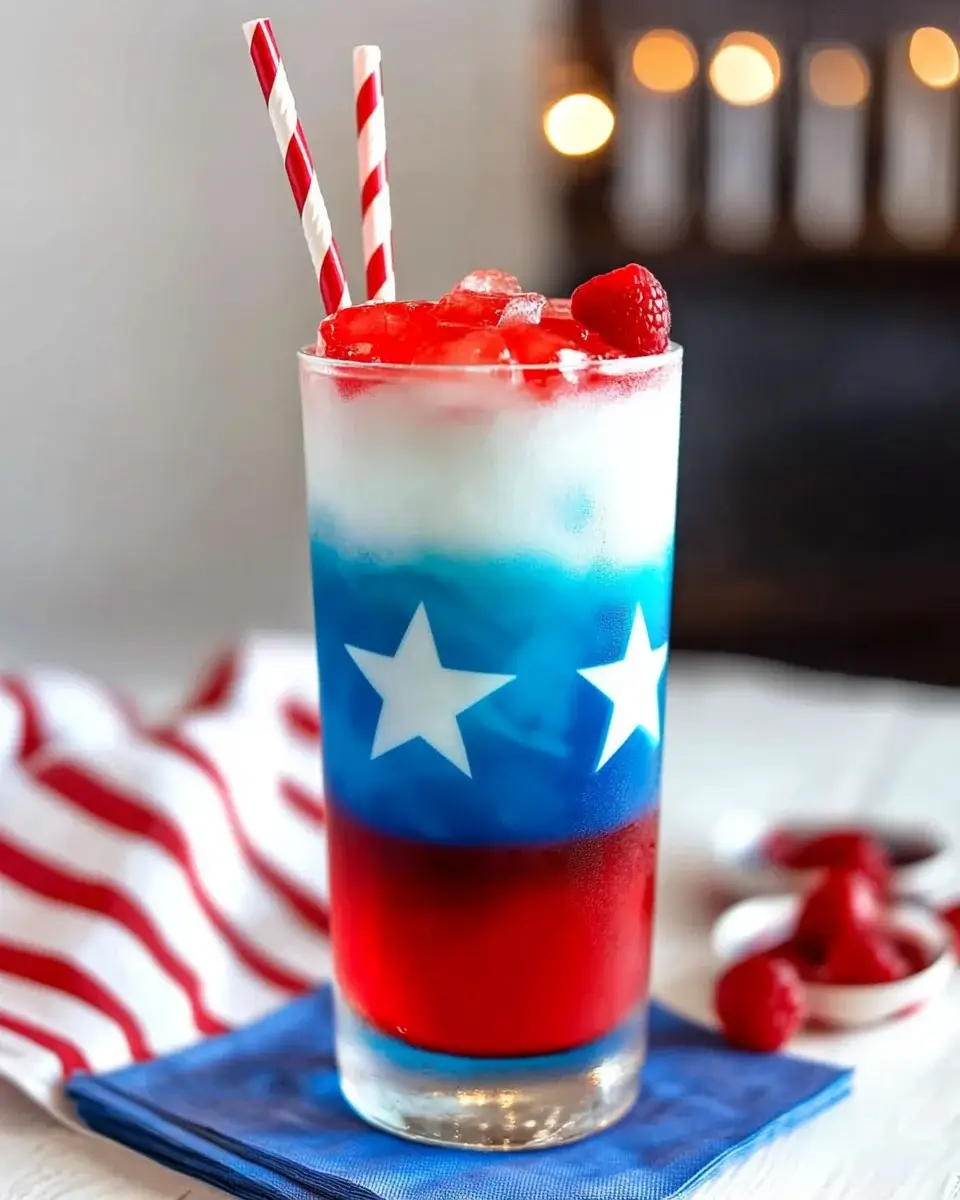
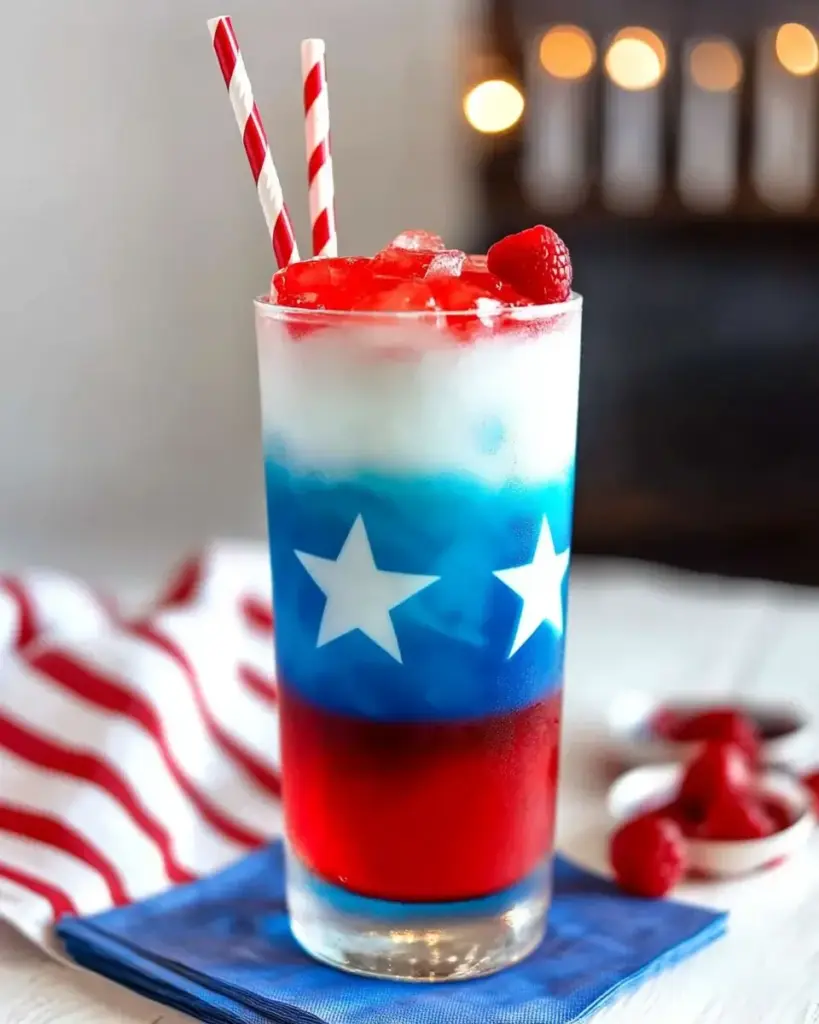
Captain America’s Red, White, and Blue Drink Recipe Awaits!

Introduction to Captain America’s Red, White, and Blue Drink

There’s something magical about a drink that captures the spirit of summer and patriotism all in one glass. Captain America’s Red, White, and Blue Drink is not just a refreshing beverage; it’s a celebration in a cup! Whether you’re hosting a backyard barbecue or just looking to impress your friends on a hot day, this drink is a quick solution that requires minimal effort but delivers maximum flavor. With its vibrant colors and delightful taste, it’s bound to be a hit at any gathering. Let’s dive into this fun and festive recipe!

Why You’ll Love This Captain America’s Red, White, and Blue Drink

This drink is a breeze to whip up, taking just 10 minutes from start to finish. It’s perfect for those busy summer days when you want something refreshing without spending hours in the kitchen. The combination of sweet lemonade, tangy blue sports drink, and creamy coconut creates a flavor explosion that’s as delightful as it is patriotic. Plus, it’s visually stunning, making it a showstopper at any gathering!

Ingredients for Captain America’s Red, White, and Blue Drink

Gathering the right ingredients is half the fun of making Captain America’s Red, White, and Blue Drink. Here’s what you’ll need:

  • Lemonade: This is the base of our drink, providing a sweet and tangy flavor that perfectly balances the other ingredients.
  • Blue sports drink: Think Gatorade or a similar option. It adds a vibrant blue hue and a hint of electrolytes, making it refreshing.
  • Coconut cream: This creamy topping gives the drink its white layer. It adds a tropical twist and a smooth texture. For a lighter option, consider using whipped cream.
  • Fresh strawberries: Sliced strawberries not only add a pop of red but also a burst of natural sweetness. They’re the perfect garnish for this festive drink.
  • Ice cubes: Essential for keeping your drink chilled and refreshing, especially on a hot summer day.

For those looking to mix things up, you can add a splash of sparkling water for some fizz or substitute the coconut cream with a dairy-free alternative for a vegan option. The exact quantities for each ingredient are available at the bottom of the article for easy printing!

How to Make Captain America’s Red, White, and Blue Drink

Creating Captain America’s Red, White, and Blue Drink is as easy as pie, and trust me, it’s just as satisfying! Follow these simple steps, and you’ll have a refreshing, festive drink ready in no time. Let’s get started!

Step 1: Mix the Base

In a large pitcher, combine the lemonade and blue sports drink. Stir gently to mix them together without creating too many bubbles. This step is crucial for keeping the drink smooth and enjoyable. The vibrant blue and sunny yellow will blend beautifully, setting the stage for a patriotic masterpiece!

Step 2: Prepare the Glasses

Grab your favorite glasses and fill them halfway with ice cubes. This will keep your drink chilled and refreshing, especially on those hot summer days. Plus, the ice adds a nice crunch that complements the smoothness of the drink.

Step 3: Pour the Mixture

Now, pour the lemonade and blue sports drink mixture into the glasses, filling them about two-thirds full. Leave some space at the top for the coconut cream. Watching the colors swirl together is like a mini fireworks show in your glass!

Step 4: Add the Cream

Carefully spoon the coconut cream on top of the drink to create a beautiful white layer. This creamy topping not only looks fantastic but also adds a rich texture that balances the sweetness of the lemonade and sports drink. It’s like the icing on the cake!

Step 5: Garnish

To finish off your drink, add a few slices of fresh strawberries on top for a festive red touch. Not only do they look great, but they also add a burst of natural sweetness that enhances the overall flavor. It’s the cherry on top, or in this case, the strawberry!

Step 6: Serve and Enjoy

Serve your Captain America’s Red, White, and Blue Drink immediately for the best experience. Gather your friends and family, and watch their faces light up as they take their first sip. This drink is sure to be a hit at any gathering!

Tips for Success

  • Use chilled ingredients for an extra refreshing drink.
  • Experiment with different fruit garnishes like blueberries or raspberries for added flavor.
  • For a fun twist, try adding a splash of lemon-lime soda for some fizz.
  • Make a larger batch for parties by doubling the ingredients.
  • Don’t rush the layering; take your time to create that stunning visual effect!

Equipment Needed

  • Large pitcher: Essential for mixing your drink. A bowl works too if you’re in a pinch.
  • Measuring cups: For precise ingredient amounts. You can use any cup you have on hand.
  • Spoon: A regular spoon is perfect for stirring and layering the coconut cream.
  • Glasses: Any type of glass will do, but clear ones showcase the drink’s vibrant colors best.

Variations

  • Berry Blast: Swap out the strawberries for a mix of raspberries and blueberries for a berry-infused twist.
  • Frozen Delight: Blend the lemonade and blue sports drink with ice for a slushy version that’s perfect for hot days.
  • Herbal Infusion: Add a splash of mint or basil syrup for a refreshing herbal note that complements the sweetness.
  • Alcoholic Option: For an adult version, mix in a splash of vodka or rum for a festive cocktail.
  • Vegan-Friendly: Use coconut whipped cream instead of coconut cream for a lighter, dairy-free topping.

Serving Suggestions

  • Pair with grilled burgers or hot dogs for a classic summer cookout.
  • Serve alongside a fresh fruit salad to enhance the festive vibe.
  • Consider a colorful table setting with red, white, and blue decorations for added flair.
  • Offer a selection of snacks like chips and salsa for a casual gathering.
  • For a fun twist, serve in mason jars for a rustic touch.

FAQs about Captain America’s Red, White, and Blue Drink

Can I make Captain America’s Red, White, and Blue Drink ahead of time?

While this drink is best served fresh, you can prepare the lemonade and blue sports drink mixture in advance. Just store it in the fridge and add the coconut cream and garnishes right before serving for the best presentation.

Is this drink suitable for kids?

Absolutely! Captain America’s Red, White, and Blue Drink is a fun, non-alcoholic beverage that kids will love. The vibrant colors and sweet flavors make it a hit at birthday parties or family gatherings.

Can I use a different type of sports drink?

Yes! Feel free to experiment with different flavors of sports drinks. Just keep in mind that the color and taste may vary, but it’s all about having fun and creating your own version of this patriotic drink!

How can I make this drink healthier?

If you’re looking to cut down on sugar, consider using a low-sugar lemonade or a sugar-free sports drink. You can also reduce the amount of coconut cream or substitute it with a lighter topping like yogurt.

What’s the best way to store leftovers?

If you have any leftover drink, store it in an airtight container in the fridge. However, the coconut cream may not hold up well, so it’s best to enjoy it fresh!

Final Thoughts

Creating Captain America’s Red, White, and Blue Drink is more than just mixing ingredients; it’s about bringing people together. This vibrant beverage captures the essence of summer celebrations, evoking memories of barbecues, fireworks, and laughter. Each sip is a reminder of the joy that comes from sharing delicious moments with friends and family. Whether you’re toasting to a holiday or simply enjoying a sunny day, this drink adds a festive flair to any occasion. So, gather your loved ones, raise your glasses, and celebrate the spirit of togetherness with this delightful, patriotic treat!

Paul

Captain America’s Red, White, and Blue Drink Recipe Awaits!

A refreshing and festive drink inspired by Captain America, perfect for patriotic celebrations.
Prep Time 10 minutes
Total Time 10 minutes
Servings: 4 servings
Course: Beverage
Cuisine: American
Calories: 150

Ingredients
  

  • 2 cups lemonade
  • 1 cup blue sports drink like Gatorade
  • 1 cup coconut cream
  • 1 cup fresh strawberries sliced
  • Ice cubes

Method
 

  1. In a large pitcher, combine the lemonade and blue sports drink. Stir gently to mix without creating too many bubbles.
  2. Fill glasses halfway with ice cubes.
  3. Pour the lemonade and blue sports drink mixture into the glasses, filling them about two-thirds full.
  4. Carefully spoon the coconut cream on top of the drink to create a white layer.
  5. Garnish each drink with a few slices of fresh strawberries on top for a festive red touch.
  6. Serve immediately and enjoy your patriotic drink!

Notes

  • For a fun twist, add a splash of sparkling water to the drink for some fizz.
  • Substitute the coconut cream with whipped cream for a lighter topping or use a dairy-free alternative for a vegan option.

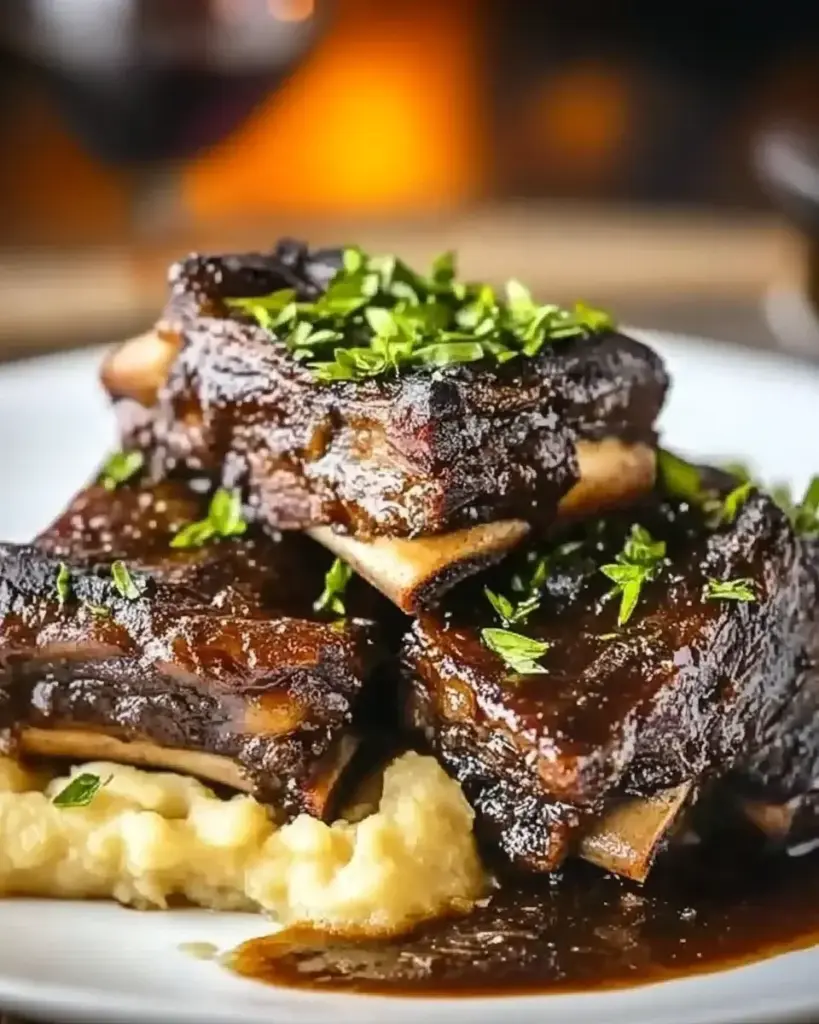
Savory Red Wine Braised Beef Short Ribs You’ll Love!

Introduction to Savory Red Wine Braised Beef Short Ribs

There’s something magical about the aroma of beef short ribs simmering in red wine. It takes me back to family gatherings, where the kitchen buzzed with laughter and the promise of a hearty meal. This Savory Red Wine Braised Beef Short Ribs recipe is not just a dish; it’s an experience. Perfect for impressing your loved ones or simply treating yourself after a long day, these tender, flavorful ribs are a comforting embrace on a plate. With minimal prep and a hands-off cooking method, you’ll find this recipe to be a delightful addition to your culinary repertoire.

Why You’ll Love This Savory Red Wine Braised Beef Short Ribs

This Savory Red Wine Braised Beef Short Ribs recipe is a game-changer for any home cook. It’s incredibly easy to prepare, allowing you to spend more time enjoying the company of friends and family. The slow braising process transforms tough meat into a tender masterpiece, bursting with rich flavors. Plus, the delightful aroma wafting through your home will have everyone eagerly anticipating dinner. Trust me, this dish is a crowd-pleaser!

Ingredients for Savory Red Wine Braised Beef Short Ribs

Gathering the right ingredients is the first step to creating your Savory Red Wine Braised Beef Short Ribs. Each component plays a vital role in building flavor and texture. Here’s what you’ll need:

  • Beef short ribs: The star of the show! These cuts are rich and flavorful, perfect for braising.
  • Olive oil: Used for searing the ribs, it adds a lovely depth of flavor.
  • Onion: Chopped onion brings sweetness and aroma, enhancing the overall dish.
  • Carrots: Diced carrots add a touch of sweetness and color to the mix.
  • Celery: Diced celery contributes a subtle earthiness and crunch.
  • Garlic: Minced garlic infuses the dish with a robust flavor that complements the beef.
  • Red wine: A good quality wine, like Cabernet Sauvignon, is essential for a rich sauce.
  • Beef broth: This adds moisture and depth, making the braising liquid luscious.
  • Tomato paste: A tablespoon of tomato paste enhances the sauce’s richness and adds a hint of acidity.
  • Thyme: Fresh thyme leaves (or dried) bring an aromatic herbal note that pairs beautifully with beef.
  • Bay leaves: These add a subtle layer of flavor during the braising process.
  • Salt and pepper: Essential for seasoning, they help to elevate all the flavors.
  • Chopped fresh parsley: For garnish, it adds a pop of color and freshness to the dish.

For those looking to enhance the flavor even further, consider adding a tablespoon of Worcestershire sauce to the braising liquid. You can find the exact measurements for each ingredient at the bottom of the article, ready for printing!

How to Make Savory Red Wine Braised Beef Short Ribs

Step 1: Preheat and Prepare

Start by preheating your oven to 325°F (160°C). This temperature is perfect for slow braising, allowing the flavors to meld beautifully. While the oven warms up, take your beef short ribs and season them generously with salt and pepper. This simple step enhances the meat’s natural flavors. Make sure to coat all sides evenly. Once seasoned, set the ribs aside and let them come to room temperature. This helps them cook more evenly later on.

Step 2: Sear the Short Ribs

In a large Dutch oven, heat 2 tablespoons of olive oil over medium-high heat. When the oil shimmers, it’s time to add the beef short ribs. Sear them for about 3-4 minutes on each side until they develop a rich, brown crust. This caramelization adds depth to the dish. Don’t rush this step; it’s crucial for flavor. Once browned, carefully remove the ribs from the pot and set them aside. Keep that delicious fond in the pot; it’s packed with flavor!

Step 3: Sauté the Vegetables

With the short ribs resting, it’s time to build the base of your sauce. In the same pot, toss in the chopped onion, diced carrots, and diced celery. Sauté these vegetables for about 5-7 minutes until they soften and become fragrant. The aroma will fill your kitchen, making it hard to resist! After that, add the minced garlic and cook for an additional minute. This step is essential, as garlic adds a punch of flavor that complements the beef beautifully.

Step 4: Deglaze with Red Wine

Now comes the fun part—deglazing! Pour in 2 cups of red wine, scraping the bottom of the pot with a wooden spoon to release all those tasty browned bits. This process adds incredible depth to your sauce. Bring the mixture to a simmer and let it cook for about 5 minutes. This allows the alcohol to cook off, leaving behind a rich, concentrated flavor. The wine will reduce slightly, intensifying the overall taste of your Savory Red Wine Braised Beef Short Ribs.

Step 5: Combine Ingredients

Once the wine has simmered, it’s time to bring everything together. Add 2 cups of beef broth, a tablespoon of tomato paste, fresh thyme, and bay leaves to the pot. Stir well to combine. Then, return the seared short ribs to the pot, ensuring they are mostly submerged in the liquid. This is where the magic happens! The ribs will soak up all those wonderful flavors as they braise.

Step 6: Braise in the Oven

Cover the pot with a lid and carefully transfer it to your preheated oven. Let the short ribs braise for 2.5 to 3 hours. This slow cooking method breaks down the tough fibers in the meat, making it incredibly tender. You’ll know they’re ready when the meat is falling off the bone. The aroma wafting through your home will be nothing short of heavenly, making the wait worthwhile!

Step 7: Serve and Enjoy

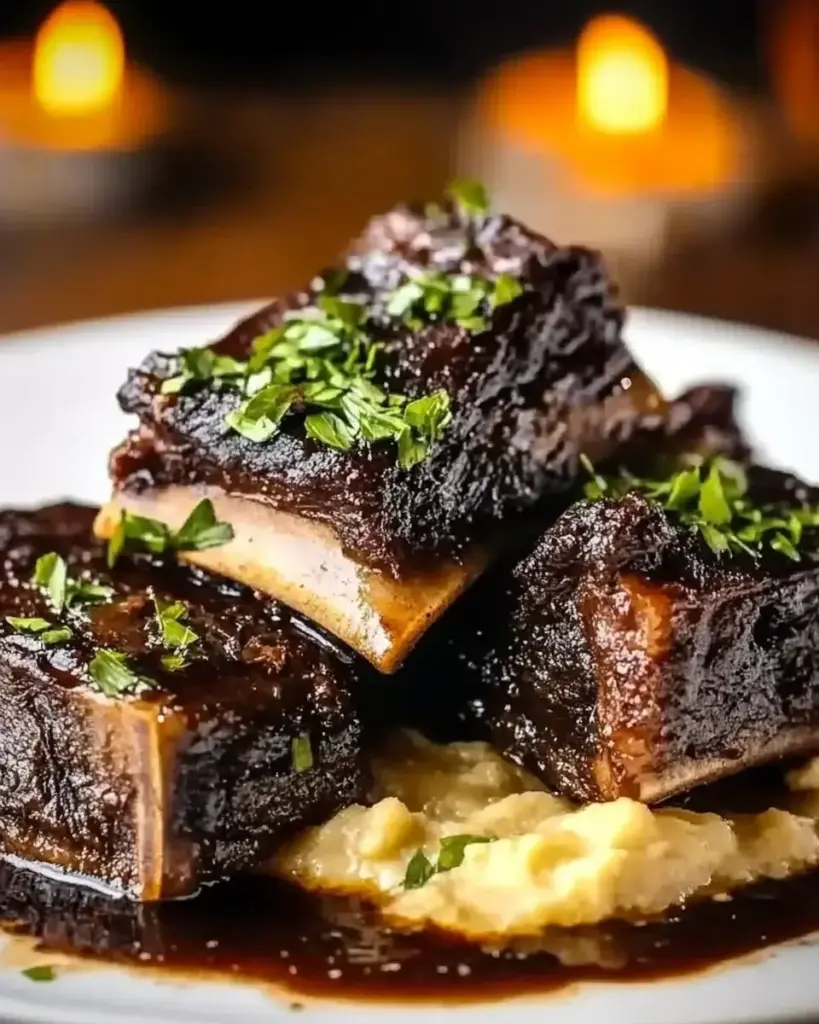
Once the ribs are done, remove the pot from the oven and let it sit for about 10 minutes. This resting period allows the juices to redistribute. Discard the bay leaves and skim off any excess fat from the surface. To serve, plate the short ribs and spoon the luscious braising liquid over the top. Garnish with chopped fresh parsley for a pop of color. Pair with creamy mashed potatoes or polenta for a comforting meal that will impress everyone at the table!

Tips for Success

  • Let the short ribs come to room temperature before cooking for even browning.
  • Don’t rush the searing process; a good crust adds flavor.
  • Use a quality red wine for the best taste; it makes a difference!
  • Feel free to adjust seasoning to your preference; taste as you go.
  • For extra richness, add a splash of balsamic vinegar before serving.

Equipment Needed

  • Dutch oven: Ideal for braising; a heavy pot with a lid works too.
  • Wooden spoon: Perfect for stirring and deglazing; a silicone spatula is a good alternative.
  • Measuring cups: Essential for accuracy; you can use a kitchen scale if preferred.
  • Cutting board: A sturdy surface for chopping vegetables; any clean surface will do.

Variations

  • Spicy Kick: Add a teaspoon of red pepper flakes or a diced jalapeño for a spicy twist.
  • Herb Infusion: Experiment with different herbs like rosemary or oregano for a unique flavor profile.
  • Vegetarian Option: Substitute beef short ribs with hearty mushrooms or jackfruit for a plant-based version.
  • Sweet and Savory: Incorporate a tablespoon of brown sugar or honey to balance the acidity of the wine.
  • Smoky Flavor: Add a few drops of liquid smoke or use smoked paprika for a deeper flavor.

Serving Suggestions

  • Mashed Potatoes: Creamy mashed potatoes are a classic pairing, soaking up the rich sauce beautifully.
  • Polenta: Serve over creamy polenta for a comforting twist.
  • Red Wine: A glass of the same red wine used in cooking complements the meal perfectly.
  • Fresh Salad: A light arugula salad adds a refreshing contrast to the hearty dish.

FAQs about Savory Red Wine Braised Beef Short Ribs

Can I use a different cut of meat for this recipe?
Absolutely! While beef short ribs are ideal for braising, you can substitute with chuck roast or brisket. Just adjust the cooking time as needed, since different cuts may require varying lengths to become tender.

What type of red wine should I use?
A good quality red wine, like Cabernet Sauvignon or Merlot, works best for this Savory Red Wine Braised Beef Short Ribs recipe. Avoid cooking wines, as they often contain added salt and preservatives that can affect the flavor.

Can I make this dish ahead of time?
Yes! In fact, making it a day ahead can enhance the flavors. Just let the dish cool, then refrigerate it. When ready to serve, gently reheat on the stove, adding a splash of broth if needed.

How do I store leftovers?
Store any leftovers in an airtight container in the refrigerator for up to 3 days. You can also freeze them for up to 3 months. Just make sure to thaw in the fridge before reheating.

What can I serve with these short ribs?
These beef short ribs pair wonderfully with creamy mashed potatoes, polenta, or a fresh salad. A glass of the same red wine used in cooking also makes a perfect accompaniment!

Final Thoughts

Cooking Savory Red Wine Braised Beef Short Ribs is more than just preparing a meal; it’s about creating memories. The rich flavors and tender meat bring warmth to any gathering, making it a dish that everyone will rave about. As the aroma fills your home, you’ll find yourself transported to a cozy kitchen filled with laughter and love. Whether it’s a special occasion or a comforting weeknight dinner, this recipe is sure to impress. So roll up your sleeves, pour a glass of wine, and enjoy the delightful journey of cooking these mouthwatering short ribs!

Paul

Savory Red Wine Braised Beef Short Ribs You’ll Love!

A delicious recipe for savory red wine braised beef short ribs that are tender and flavorful.
Prep Time 20 minutes
Total Time 3 hours 20 minutes
Servings: 6 servings
Course: Main Course
Cuisine: American
Calories: 450

Ingredients
  

  • 3 pounds beef short ribs
  • 2 tablespoons olive oil
  • 1 large onion chopped
  • 2 carrots diced
  • 2 celery stalks diced
  • 4 cloves garlic minced
  • 2 cups red wine such as Cabernet Sauvignon
  • 2 cups beef broth
  • 1 tablespoon tomato paste
  • 2 teaspoons fresh thyme leaves or 1 teaspoon dried thyme
  • 2 bay leaves
  • Salt and pepper to taste
  • Chopped fresh parsley for garnish

Method
 

  1. Preheat your oven to 325°F (160°C).
  2. Season the beef short ribs generously with salt and pepper. In a large Dutch oven, heat the olive oil over medium-high heat. Sear the short ribs on all sides until browned, about 3-4 minutes per side. Remove the ribs and set aside.
  3. In the same pot, add the chopped onion, carrots, and celery. Sauté for about 5-7 minutes until the vegetables are softened. Add the minced garlic and cook for an additional minute.
  4. Stir in the red wine, scraping the bottom of the pot to release any browned bits. Bring to a simmer and let it cook for about 5 minutes.
  5. Add the beef broth, tomato paste, thyme, bay leaves, and the seared short ribs back into the pot. Ensure the ribs are mostly submerged in the liquid.
  6. Cover the pot with a lid and transfer it to the preheated oven. Braise for 2.5 to 3 hours, or until the meat is tender and falling off the bone.
  7. Once done, remove the pot from the oven and let it sit for 10 minutes. Discard the bay leaves and skim off any excess fat from the surface.
  8. Serve the short ribs with the braising liquid spooned over the top, garnished with chopped parsley.

Notes

  • For a richer flavor, add a tablespoon of Worcestershire sauce to the braising liquid.
  • Serve the short ribs over creamy mashed potatoes or polenta for a comforting meal.

Hibachi Chicken with Vegetables: A Flavorful Recipe!

Introduction to Hibachi Chicken with Vegetables

There’s something magical about the sizzle of a hot skillet that brings back memories of family dinners and laughter. Hibachi Chicken with Vegetables is not just a meal; it’s a celebration of flavors and a quick solution for those busy weeknights. With tender chicken and vibrant veggies, this dish is perfect for impressing your loved ones or simply treating yourself after a long day. The best part? It comes together in just 30 minutes, making it an ideal choice for anyone looking to whip up something delicious without spending hours in the kitchen.

Why You’ll Love This Hibachi Chicken with Vegetables

This Hibachi Chicken with Vegetables is a game-changer for your dinner routine. It’s quick, taking only 30 minutes from start to finish, which means more time for what really matters. The flavors are bold yet balanced, making every bite a delight. Plus, it’s a one-pan wonder, so cleanup is a breeze. Whether you’re cooking for family or friends, this dish is sure to impress without the stress!

Ingredients for Hibachi Chicken with Vegetables

Gathering the right ingredients is the first step to creating a delicious Hibachi Chicken with Vegetables. Here’s what you’ll need:

  • Boneless, skinless chicken breasts: The star of the dish, providing lean protein that cooks up tender and juicy.
  • Vegetable oil: This helps achieve that perfect sear on the chicken and veggies, enhancing flavor.
  • Garlic powder: A must-have for that aromatic kick, adding depth to the dish.
  • Onion powder: It complements the garlic, bringing a subtle sweetness to the mix.
  • Ground ginger: This adds a warm, zesty note that’s essential in hibachi cooking.
  • Salt and black pepper: Basic seasonings that elevate the overall taste of the dish.
  • Soy sauce: A key ingredient that brings umami and a savory richness to the chicken.
  • Sesame oil: This adds a nutty flavor, making the dish feel authentic and special.
  • Broccoli florets: These add a vibrant green color and a satisfying crunch.
  • Sliced bell peppers: Choose any color for a pop of sweetness and color.
  • Sliced zucchini: This vegetable cooks quickly and adds a lovely texture.
  • Sliced green onions: These provide a fresh, crisp finish to the dish.
  • Sesame seeds (optional): A delightful garnish that adds a bit of crunch and visual appeal.

For those looking to mix things up, consider substituting chicken with shrimp or tofu. Just adjust the cooking time accordingly. You can find the exact quantities for each ingredient at the bottom of the article, ready for printing!

How to Make Hibachi Chicken with Vegetables

Creating Hibachi Chicken with Vegetables is a straightforward process that brings the flavors of Japan right to your kitchen. Follow these simple steps, and you’ll have a delicious meal ready in no time!

Step 1: Marinate the Chicken

Start by placing your bite-sized chicken pieces in a large bowl. Add vegetable oil, garlic powder, onion powder, ground ginger, salt, and black pepper. Toss everything together until the chicken is well-coated. This marinating step is crucial; let it sit for at least 15 minutes. This allows the flavors to penetrate the chicken, making it juicy and flavorful.

Step 2: Cook the Chicken

Heat a large skillet or wok over medium-high heat. Once hot, add the marinated chicken to the skillet. Cook for about 5-7 minutes, stirring occasionally. You want the chicken to turn golden brown and be cooked through. The sizzling sound is music to your ears, signaling that you’re on the right track!

Step 3: Add Sauces

Once the chicken is perfectly cooked, it’s time to elevate the flavor. Pour in the soy sauce and sesame oil, stirring to combine. Let it cook for an additional 2 minutes. This step adds that signature umami flavor that makes hibachi dishes so irresistible.

Step 4: Stir-Fry the Vegetables

Now, it’s time to bring in the veggies! Add the broccoli, bell peppers, and zucchini to the skillet. Stir-fry everything together for about 5 minutes. You want the vegetables to be tender-crisp, retaining their vibrant colors and nutrients. The aroma will fill your kitchen, making it hard to resist!

Step 5: Final Touches

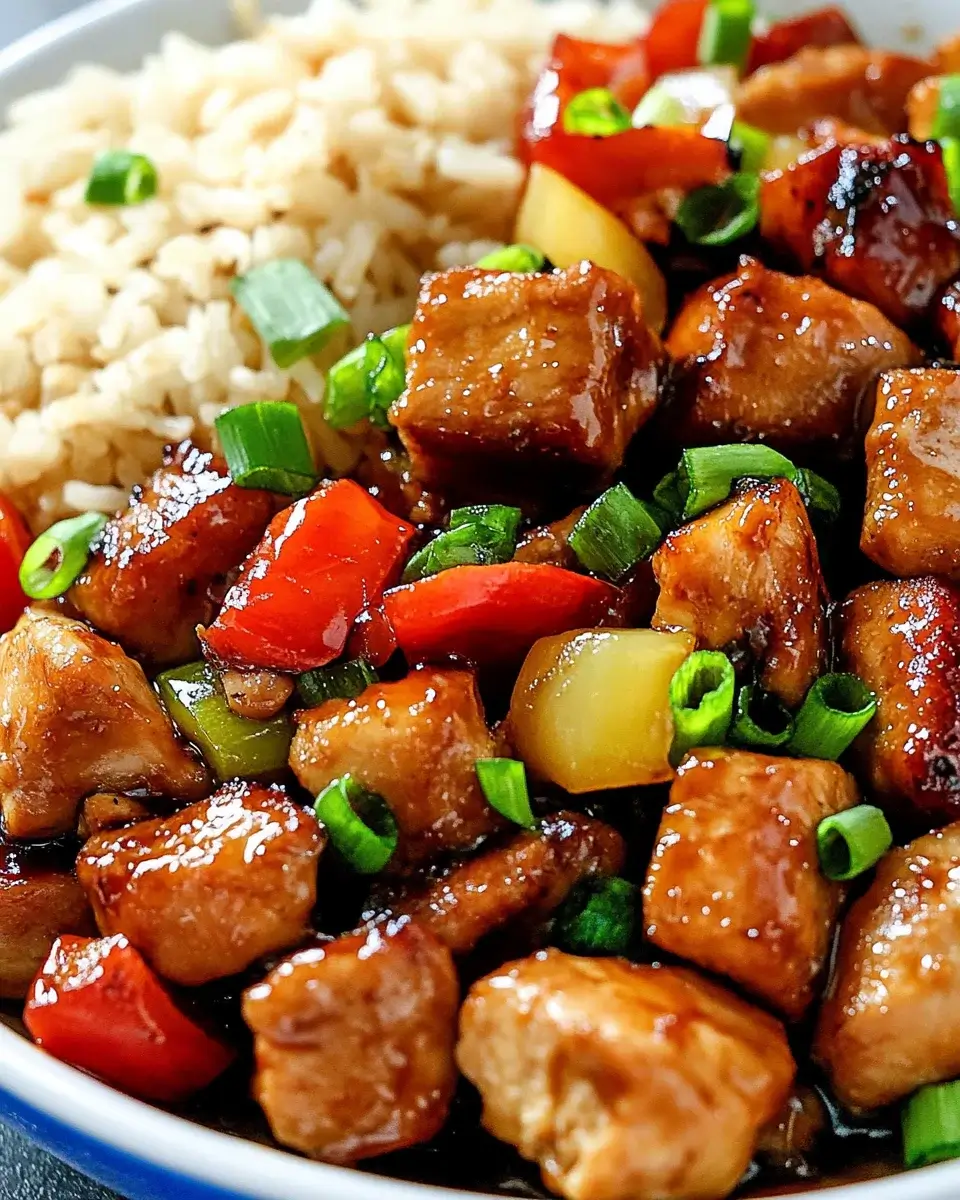
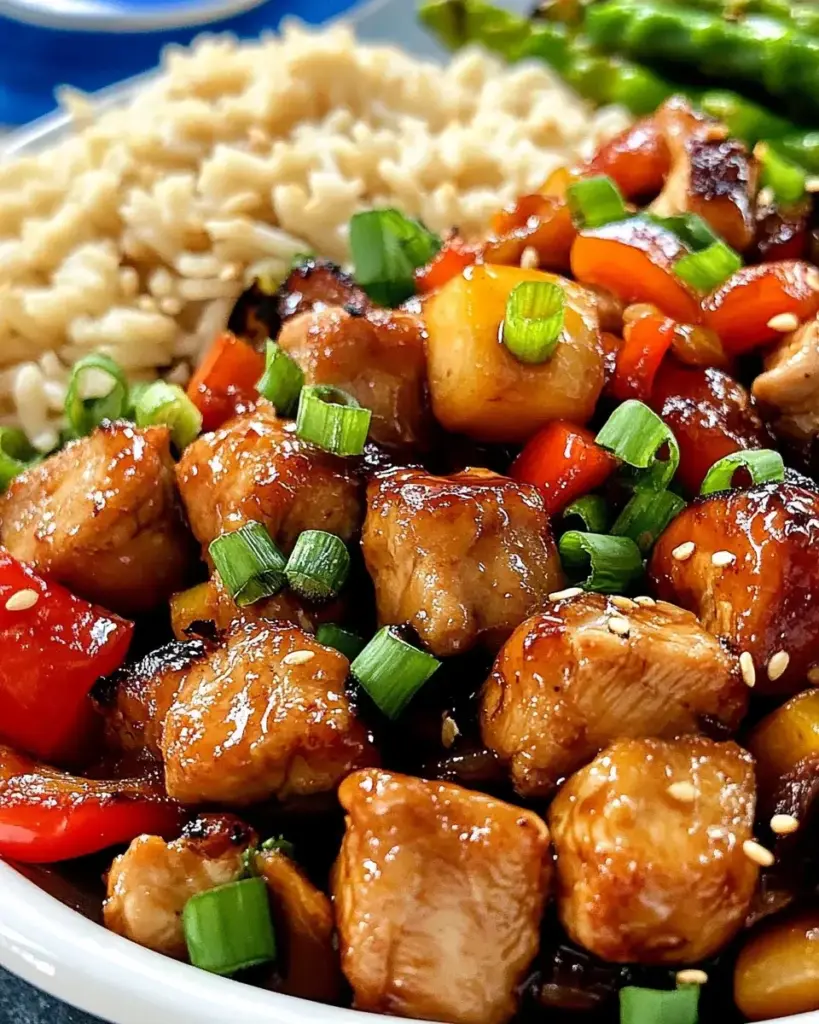
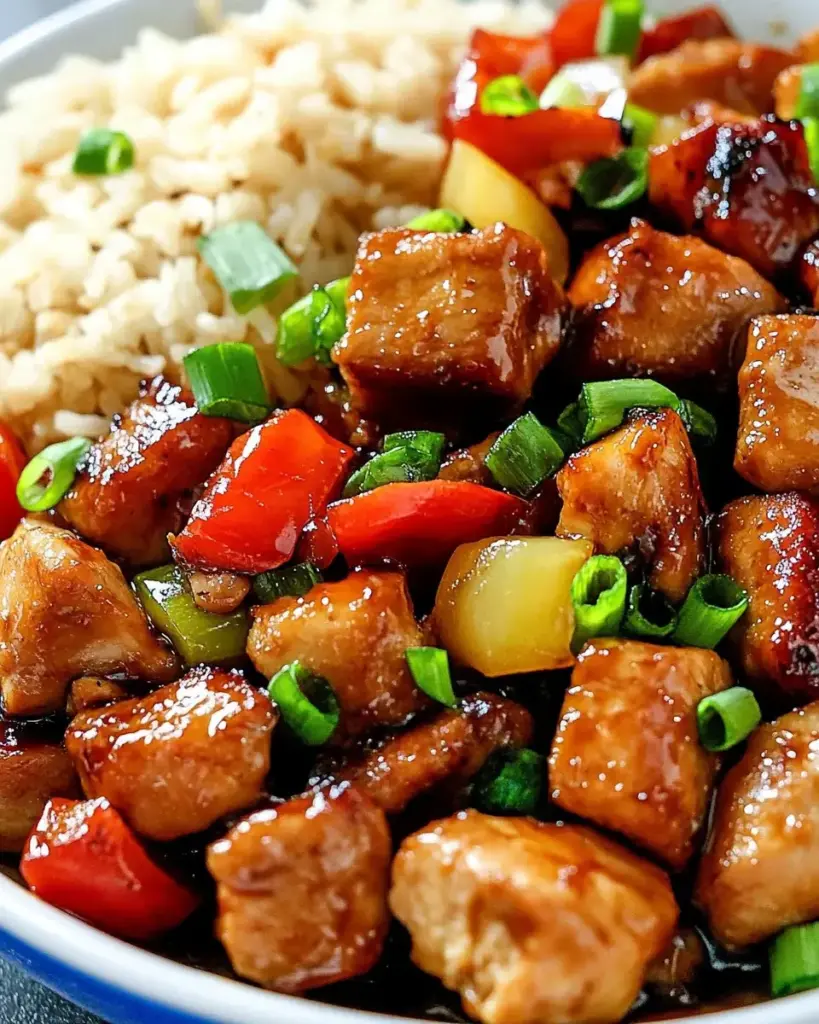
Remove the skillet from heat and stir in the sliced green onions. For an extra touch, sprinkle sesame seeds on top before serving. This adds a delightful crunch and a beautiful finish to your Hibachi Chicken with Vegetables. Now, dig in and enjoy the fruits of your labor!

Tips for Success

  • Prep all your ingredients before starting to cook. This makes the process smoother and more enjoyable.
  • Don’t overcrowd the skillet; cook in batches if necessary to achieve that perfect sear.
  • Feel free to customize the vegetables based on what you have on hand or your personal preferences.
  • For extra flavor, let the chicken marinate longer than 15 minutes if time allows.
  • Keep an eye on the heat; too high can burn the ingredients.

Equipment Needed

  • Large skillet or wok: Essential for stir-frying; a non-stick pan works too.
  • Cutting board: For chopping vegetables and chicken; a sturdy surface is key.
  • Sharp knife: A good knife makes prep quick and easy.
  • Mixing bowl: To marinate the chicken; any large bowl will do.

Variations

  • Spicy Hibachi Chicken: Add a teaspoon of red pepper flakes or a dash of sriracha to the marinade for a fiery kick.
  • Vegetarian Option: Swap the chicken for tofu or tempeh, adjusting the cooking time to ensure they are heated through.
  • Different Vegetables: Experiment with snap peas, carrots, or mushrooms for a unique twist on the classic recipe.
  • Low-Sodium Version: Use low-sodium soy sauce to reduce the sodium content while still enjoying the flavor.
  • Grilled Variation: Grill the chicken and vegetables instead of stir-frying for a smoky flavor that’s perfect for summer.

Serving Suggestions

  • Serve your Hibachi Chicken with a side of steamed jasmine rice or fried rice for a complete meal.
  • A crisp cucumber salad drizzled with rice vinegar complements the dish beautifully.
  • Pair it with a light beer or green tea for a refreshing drink.
  • Garnish with extra green onions and sesame seeds for an appealing presentation.

FAQs about Hibachi Chicken with Vegetables

Can I use frozen chicken for Hibachi Chicken with Vegetables?

Yes, you can use frozen chicken, but make sure to thaw it completely before marinating. This ensures even cooking and better flavor absorption.

What vegetables work best in Hibachi Chicken with Vegetables?

While broccoli, bell peppers, and zucchini are classic choices, feel free to mix in snap peas, carrots, or mushrooms. The key is to use vegetables that stir-fry well and retain their crunch.

How can I make this dish gluten-free?

To make Hibachi Chicken with Vegetables gluten-free, simply use tamari or a gluten-free soy sauce. This way, you can enjoy the same great flavors without the gluten.

Can I prepare Hibachi Chicken with Vegetables ahead of time?

Absolutely! You can marinate the chicken a few hours in advance or even the night before. Just keep it in the fridge until you’re ready to cook.

What can I serve with Hibachi Chicken with Vegetables?

This dish pairs wonderfully with steamed rice, fried rice, or even a light salad. A refreshing drink like green tea or a light beer complements the flavors perfectly.

Final Thoughts

Cooking Hibachi Chicken with Vegetables is more than just preparing a meal; it’s about creating moments. The vibrant colors, enticing aromas, and satisfying crunch of fresh veggies bring joy to the table. This dish is a reminder that delicious food doesn’t have to be complicated. Whether you’re sharing it with family or enjoying a quiet night in, each bite is a celebration of flavor and comfort. So, roll up your sleeves, embrace the sizzle, and let this recipe transform your dinner routine into something special. Trust me, your taste buds will thank you!

Paul

Hibachi Chicken with Vegetables: A Flavorful Recipe!

A flavorful recipe for Hibachi Chicken with Vegetables, featuring tender chicken and a variety of colorful vegetables stir-fried to perfection.
Prep Time 15 minutes
Cook Time 15 minutes
Total Time 30 minutes
Servings: 4 servings
Course: Main Dish
Cuisine: Japanese
Calories: 350

Ingredients
  

  • 2 pounds boneless skinless chicken breasts, cut into bite-sized pieces
  • 2 tablespoons vegetable oil
  • 1 teaspoon garlic powder
  • 1 teaspoon onion powder
  • 1 teaspoon ground ginger
  • 1 teaspoon salt
  • 1/2 teaspoon black pepper
  • 1/4 cup soy sauce
  • 2 tablespoons sesame oil
  • 2 cups broccoli florets
  • 1 cup sliced bell peppers any color
  • 1 cup sliced zucchini
  • 1/2 cup sliced green onions
  • 1 tablespoon sesame seeds optional

Method
 

  1. In a large bowl, combine chicken pieces, vegetable oil, garlic powder, onion powder, ground ginger, salt, and black pepper. Toss to coat the chicken evenly and let marinate for at least 15 minutes.
  2. Heat a large skillet or wok over medium-high heat. Add the marinated chicken and cook for about 5-7 minutes, stirring occasionally, until the chicken is cooked through and golden brown.
  3. Add the soy sauce and sesame oil to the skillet, stirring to combine. Cook for an additional 2 minutes.
  4. Add the broccoli, bell peppers, and zucchini to the skillet. Stir-fry the vegetables with the chicken for about 5 minutes, or until they are tender-crisp.
  5. Remove from heat and stir in the sliced green onions. If desired, sprinkle with sesame seeds before serving.

Notes

  • For a spicy kick, add a teaspoon of red pepper flakes or a dash of sriracha to the marinade.
  • Substitute the chicken with shrimp or tofu for a different protein option, adjusting the cooking time as needed.

Patriotic Cupcakes: Create Delicious Festive Treats!

Introduction to Patriotic Cupcakes

There’s something magical about baking that brings back memories of childhood. I remember gathering in the kitchen with my family, flour dusting our noses, as we whipped up treats for holidays. These Patriotic Cupcakes are a delightful way to celebrate any festive occasion, whether it’s the Fourth of July or Memorial Day. They’re not just easy to make; they’re a quick solution for busy days when you want to impress your loved ones. With vibrant colors and delicious flavors, these cupcakes will surely bring smiles and spark joy at your next gathering.

Why You’ll Love This Patriotic Cupcakes

These Patriotic Cupcakes are a breeze to whip up, making them perfect for any celebration. With just a handful of ingredients and minimal prep time, you can create a stunning dessert that looks as good as it tastes. The combination of fluffy cake and colorful frosting is sure to impress your guests. Plus, they’re versatile enough to adapt for any occasion, ensuring you’ll want to make them again and again!

Ingredients for Patriotic Cupcakes

Gathering the right ingredients is the first step to creating these festive Patriotic Cupcakes. Here’s what you’ll need:

  • All-purpose flour: The backbone of your cupcakes, providing structure and texture.
  • Granulated sugar: Sweetens the batter and helps achieve that delightful fluffiness.
  • Unsalted butter: Adds richness and moisture; make sure it’s softened for easy mixing.
  • Large eggs: They bind the ingredients together and contribute to the cupcakes’ rise.
  • Vanilla extract: A splash of this adds a warm, inviting flavor that enhances the sweetness.
  • Milk: Keeps the batter moist and helps create a tender crumb.
  • Baking powder: The leavening agent that gives your cupcakes that perfect lift.
  • Salt: Just a pinch to balance the sweetness and enhance the flavors.
  • Red and blue food coloring: Essential for creating that patriotic look; feel free to use gel or liquid.
  • Frosting: Choose between store-bought or homemade; it’s the crowning glory of your cupcakes.
  • Sprinkles: Red, white, and blue sprinkles add a festive touch and a bit of crunch.

For those looking to get creative, consider adding a layer of fruit jam between the cupcake layers for an extra burst of flavor. If you prefer a lighter option, whipped cream can be a delightful substitute for frosting. You can find the exact quantities for each ingredient at the bottom of the article, ready for printing!

How to Make Patriotic Cupcakes

Creating these Patriotic Cupcakes is a fun and rewarding experience. Follow these simple steps, and you’ll have a batch of colorful treats ready to impress your friends and family!

Step 1: Preheat and Prepare

Start by preheating your oven to 350°F (175°C). This ensures your cupcakes bake evenly. While the oven warms up, line a muffin tin with cupcake liners. Choose festive colors to match your theme!

Step 2: Cream Butter and Sugar

In a large mixing bowl, cream together the softened butter and granulated sugar until the mixture is light and fluffy. This step is crucial for achieving that airy texture. Next, add the eggs one at a time, mixing well after each addition. Stir in the vanilla extract for that delightful aroma.

Step 3: Combine Dry Ingredients

In a separate bowl, whisk together the all-purpose flour, baking powder, and salt. This helps to evenly distribute the leavening agent, ensuring your cupcakes rise beautifully. Set this bowl aside for the next step.

Step 4: Mix Wet and Dry Ingredients

Now, it’s time to combine the wet and dry ingredients. Gradually add the flour mixture to the butter mixture, alternating with the milk. Start and end with the dry ingredients. Mix until just combined; overmixing can lead to dense cupcakes!

Step 5: Color the Batter

Divide the batter evenly into three bowls. Leave one bowl plain for the white layer. Add red food coloring to the second bowl and blue food coloring to the third. Mix until you achieve vibrant colors. Don’t be shy—go bold!

Step 6: Layer the Batter

Now comes the fun part! Spoon the colored batters into the prepared cupcake liners, layering them to create a striped effect. Start with red, then white, and finish with blue. Fill each liner about two-thirds full to allow room for rising.

Step 7: Bake the Cupcakes

Place the muffin tin in the preheated oven and bake for 18-20 minutes. Keep an eye on them! A toothpick inserted into the center should come out clean. Once baked, let the cupcakes cool in the pan for about 5 minutes before transferring them to a wire rack to cool completely.

Step 8: Frost and Decorate

Once your cupcakes are completely cool, it’s time to frost! Use your favorite frosting—store-bought or homemade. Top each cupcake with a generous swirl and sprinkle with red, white, and blue sprinkles for that festive touch. Your Patriotic Cupcakes are now ready to shine!

Tips for Success

  • Make sure your butter is softened for easy creaming; it should be at room temperature.
  • Don’t overmix the batter; mix until just combined for light, fluffy cupcakes.
  • Use gel food coloring for more vibrant colors without altering the batter’s consistency.
  • Let the cupcakes cool completely before frosting to prevent melting.
  • Experiment with different sprinkles or toppings for a unique twist!

Equipment Needed

  • Muffin tin: Essential for baking your cupcakes; a silicone mold can be a fun alternative.
  • Mixing bowls: Use a set of various sizes; a large bowl is key for mixing.
  • Electric mixer: A hand mixer works well, but a whisk can do the job too.
  • Measuring cups and spoons: Accurate measurements are crucial; consider a kitchen scale for precision.
  • Spatula: Perfect for scraping down the sides of the bowl and frosting your cupcakes.

Variations

  • Chocolate Patriotic Cupcakes: Swap out half of the all-purpose flour for cocoa powder to create a rich chocolate base.
  • Gluten-Free Option: Use a gluten-free all-purpose flour blend to make these cupcakes suitable for those with gluten sensitivities.
  • Fruit-Filled Cupcakes: Add a layer of your favorite fruit jam or fresh berries between the layers for a burst of flavor.
  • Vegan Version: Replace eggs with flaxseed meal mixed with water and use plant-based butter and milk for a vegan-friendly treat.
  • Mini Cupcakes: Adjust baking time and use a mini muffin tin for bite-sized versions that are perfect for parties.

Serving Suggestions

  • Pair your Patriotic Cupcakes with a refreshing lemonade or iced tea for a perfect summer treat.
  • Serve alongside a colorful fruit salad to balance the sweetness.
  • Display them on a festive platter, garnished with fresh berries for an eye-catching presentation.
  • Consider adding themed napkins and plates to enhance the festive atmosphere.

FAQs about Patriotic Cupcakes

Can I make these cupcakes ahead of time?

Absolutely! You can bake the Patriotic Cupcakes a day in advance. Just store them in an airtight container at room temperature. Frost them on the day of your celebration for the best results.

What type of frosting works best?

While any frosting can work, I recommend a classic buttercream for its creamy texture and ability to hold up well. You can also use whipped cream for a lighter option, especially in warmer weather.

Can I use different colors for the cupcakes?

Of course! Feel free to get creative with your color choices. You can use any food coloring to match your theme, whether it’s for a holiday or a birthday party.

How do I store leftover cupcakes?

Store any leftover Patriotic Cupcakes in an airtight container. They’ll stay fresh for up to three days at room temperature or up to a week in the fridge. Just remember to bring them back to room temperature before serving!

Can I make these cupcakes gluten-free?

Yes! Simply substitute the all-purpose flour with a gluten-free flour blend. This way, everyone can enjoy these festive treats without worry!

Final Thoughts

Creating these Patriotic Cupcakes is more than just baking; it’s about bringing people together. The vibrant colors and delightful flavors evoke a sense of celebration, making them perfect for any gathering. Each bite is a reminder of the joy that comes from sharing delicious treats with friends and family. Whether you’re hosting a barbecue or a simple get-together, these cupcakes will surely be the star of the show. So roll up your sleeves, gather your loved ones, and enjoy the sweet moments that come from baking together. Happy baking!

Paul

Patriotic Cupcakes: Create Delicious Festive Treats!

Delicious and festive cupcakes perfect for patriotic celebrations.
Prep Time 20 minutes
Cook Time 20 minutes
Total Time 40 minutes
Servings: 12 cupcakes
Course: Dessert
Cuisine: American
Calories: 210

Ingredients
  

  • 1 ½ cups all-purpose flour
  • 1 cup granulated sugar
  • ½ cup unsalted butter softened
  • 2 large eggs
  • 1 teaspoon vanilla extract
  • ½ cup milk
  • 1 ½ teaspoons baking powder
  • ¼ teaspoon salt
  • Red and blue food coloring
  • 1 cup frosting store-bought or homemade
  • Sprinkles red, white, and blue for decoration

Method
 

  1. Preheat the oven to 350°F (175°C) and line a muffin tin with cupcake liners.
  2. In a large mixing bowl, cream together the softened butter and sugar until light and fluffy. Add the eggs one at a time, mixing well after each addition. Stir in the vanilla extract.
  3. In a separate bowl, whisk together the flour, baking powder, and salt. Gradually add the dry ingredients to the butter mixture, alternating with the milk, and mix until just combined.
  4. Divide the batter evenly into three bowls. Leave one bowl plain, add red food coloring to the second bowl, and blue food coloring to the third bowl. Mix until the desired colors are achieved.
  5. Spoon the colored batters into the prepared cupcake liners, layering them to create a striped effect (red, white, blue). Fill each liner about two-thirds full.
  6. Bake in the preheated oven for 18-20 minutes or until a toothpick inserted into the center comes out clean. Allow the cupcakes to cool in the pan for 5 minutes before transferring them to a wire rack to cool completely.
  7. Once cooled, frost the cupcakes with your choice of frosting and top with red, white, and blue sprinkles.

Notes

  • For a fun twist, try adding a layer of fruit jam between the cupcake layers for extra flavor.
  • You can also substitute the frosting with whipped cream for a lighter option.

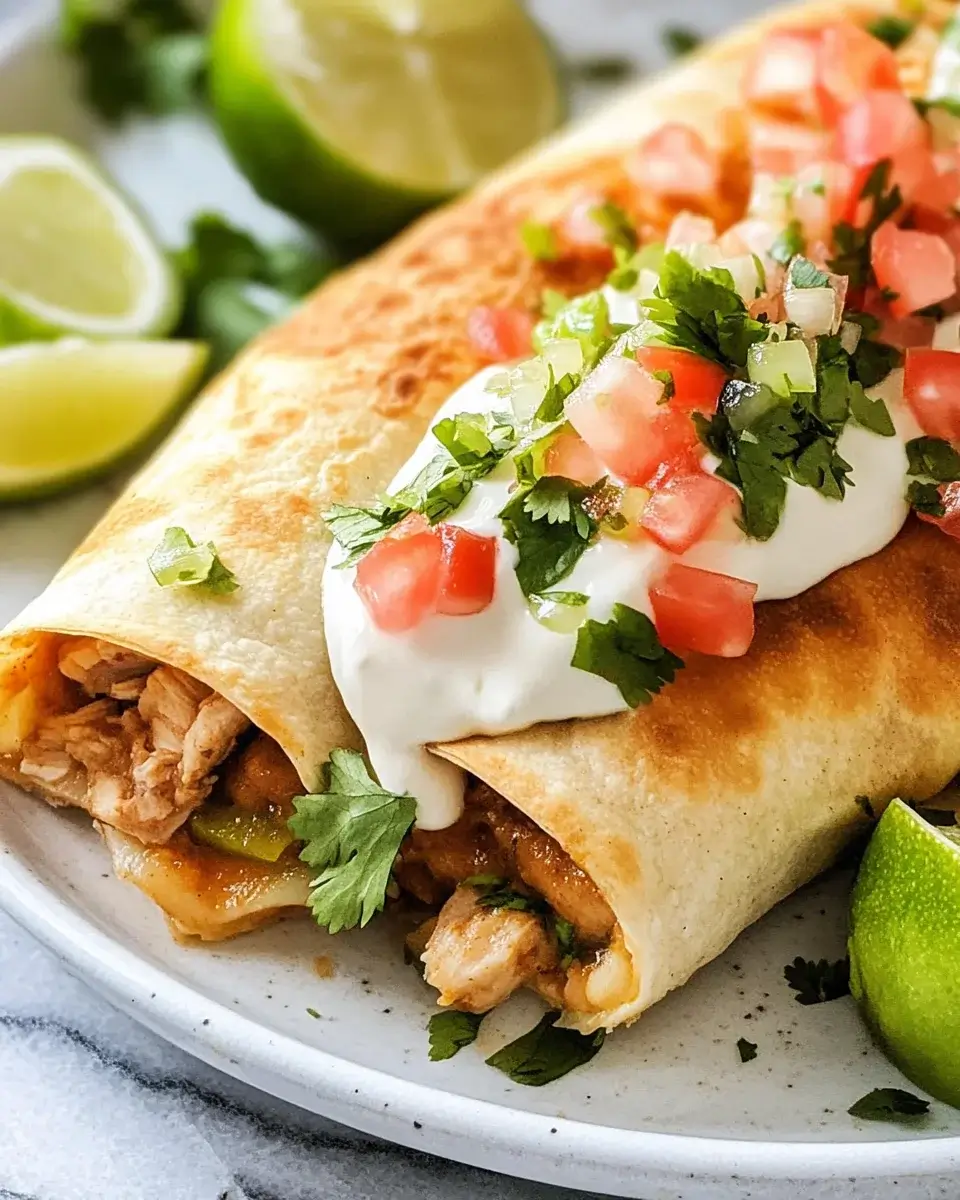
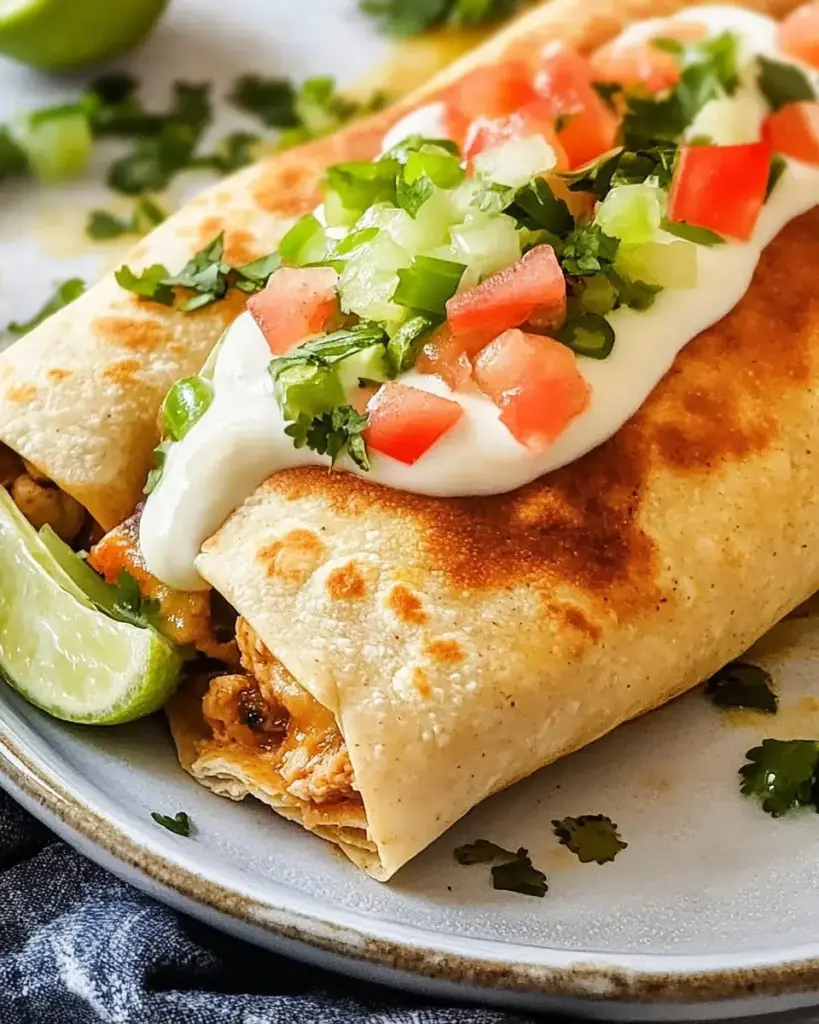
Baked Chicken Chimichangas: Easy and Delicious Recipe!

Introduction to Baked Chicken Chimichangas

There’s something magical about the aroma of baked chicken chimichangas wafting through the kitchen.

These delightful bundles of joy are not just a meal; they’re a warm hug on a plate.

Whether you’re juggling a busy workweek or planning a cozy family dinner, this recipe is your go-to solution.

Filled with tender shredded chicken, black beans, and gooey cheese, they’re easy to whip up and even easier to devour.

Trust me, your loved ones will be asking for seconds, and you’ll feel like a culinary rock star.

Let’s dive into this delicious adventure together!

Why You’ll Love This Baked Chicken Chimichangas

Baked chicken chimichangas are the ultimate weeknight hero.

They come together in just 40 minutes, making them perfect for those hectic evenings.

The combination of flavors is simply irresistible—savory chicken, hearty black beans, and melted cheese wrapped in a crispy tortilla.

Plus, they’re baked, not fried, so you can enjoy a guilt-free indulgence.

Trust me, once you try these, they’ll become a staple in your kitchen!

Ingredients for Baked Chicken Chimichangas

Gathering the right ingredients is the first step to creating these mouthwatering baked chicken chimichangas.

Here’s what you’ll need:

  • Cooked, shredded chicken: This is the star of the show. Use rotisserie chicken for convenience or cook your own for a fresh touch.
  • Black beans: These add a hearty texture and a boost of protein. Rinse them well to remove excess sodium.
  • Corn: Whether frozen or canned, corn brings a sweet crunch that balances the flavors beautifully.
  • Shredded cheese: Cheddar or a Mexican blend works wonders here, melting into gooey perfection.
  • Cumin: This spice adds a warm, earthy flavor that’s essential in Mexican cuisine.
  • Chili powder: A must for that classic Tex-Mex kick. Adjust the amount based on your spice preference.
  • Garlic powder: For a hint of savory goodness without the fuss of fresh garlic.
  • Onion powder: It complements the garlic and enhances the overall flavor profile.
  • Salt and pepper: Simple seasonings that elevate the dish. Don’t skip these!
  • Flour tortillas: Large tortillas are perfect for wrapping up all that delicious filling.
  • Olive oil: A light brush on top helps achieve that golden, crispy finish.
  • Salsa: Serve it on the side for dipping. It adds a fresh, zesty element.
  • Sour cream: A dollop on top is the perfect creamy contrast to the crispy chimichangas.
  • Fresh cilantro: Chopped cilantro adds a burst of freshness and color as a garnish.

Feel free to get creative!

For a spicier kick, toss in some diced jalapeños or a dash of hot sauce.

If you’re looking for a vegetarian option, swap the chicken for sautéed vegetables or shredded beef.

Exact quantities for each ingredient can be found at the bottom of the article, ready for printing!

How to Make Baked Chicken Chimichangas

Creating baked chicken chimichangas is a straightforward process that anyone can master.

With just a few simple steps, you’ll have a delicious meal ready to impress.

Let’s get started!

Step 1: Preheat the Oven

First things first, preheat your oven to 400°F (200°C).

This step is crucial because it ensures your chimichangas bake evenly and achieve that perfect crispy texture.

While the oven heats up, line a baking sheet with parchment paper.

This will prevent sticking and make cleanup a breeze.

Step 2: Prepare the Filling

In a large bowl, combine your cooked, shredded chicken, black beans, corn, and cheese.

Add the cumin, chili powder, garlic powder, onion powder, salt, and pepper.

Mix everything together until well combined.

Even distribution of ingredients is key here; you want every bite to be packed with flavor!

Step 3: Assemble the Chimichangas

Now, grab a tortilla and lay it flat on a clean surface.

Spoon about 1/2 cup of the chicken mixture into the center.

Fold in the sides and roll it up tightly, like a burrito.

Make sure the seam is on the bottom to keep everything secure.

Repeat this process with the remaining tortillas and filling.

Step 4: Bake the Chimichangas

Place the rolled chimichangas seam-side down on your prepared baking sheet.

Brush the tops lightly with olive oil; this will help them turn golden brown and crispy.

Bake in the preheated oven for 20-25 minutes.

Keep an eye on them; you want that beautiful golden color without burning.

Step 5: Serve and Enjoy

Once they’re out of the oven, let them cool for a minute.

Serve your baked chicken chimichangas hot, with salsa and sour cream on the side.

Don’t forget to sprinkle some fresh cilantro on top for that extra pop of flavor and color.

Dig in and enjoy every delicious bite!

Tips for Success

  • Use rotisserie chicken for a quick and easy filling.
  • Don’t overfill the tortillas; it makes rolling tricky.
  • Brush the chimichangas with olive oil for a crispy finish.
  • Experiment with spices to customize the flavor to your liking.
  • Let them cool slightly before serving to avoid burning your mouth!

Equipment Needed

  • Baking sheet: A standard sheet works, but a rimmed one prevents spills.
  • Parchment paper: Use it for easy cleanup; aluminum foil is a good alternative.
  • Mixing bowl: Any large bowl will do for combining ingredients.
  • Spatula: A silicone or wooden spatula helps mix without scratching your bowls.
  • Measuring cups: Essential for portioning ingredients accurately.

Variations

  • Spicy Chicken Chimichangas: Add diced jalapeños or a splash of hot sauce to the filling for an extra kick.
  • Vegetarian Option: Substitute the chicken with sautéed bell peppers, zucchini, and mushrooms for a delicious meat-free version.
  • Cheesy Spinach Chimichangas: Mix in fresh spinach and extra cheese for a creamy, green twist.
  • BBQ Chicken Chimichangas: Replace the spices with your favorite BBQ sauce for a smoky flavor.
  • Gluten-Free Option: Use gluten-free tortillas to make this dish suitable for those with dietary restrictions.

Serving Suggestions

  • Fresh Salad: Pair with a crisp green salad topped with avocado and lime dressing for a refreshing contrast.
  • Rice: Serve alongside cilantro-lime rice for a flavorful side that complements the chimichangas.
  • Drinks: Enjoy with a cold beer or a zesty margarita to elevate your meal.
  • Presentation: Arrange chimichangas on a colorful platter, garnished with lime wedges and extra cilantro for a vibrant touch.

FAQs about Baked Chicken Chimichangas

Can I make baked chicken chimichangas ahead of time?

Absolutely! You can prepare the filling and assemble the chimichangas in advance. Just cover them tightly and store them in the fridge. When you’re ready to bake, simply preheat the oven and pop them in. They may need a few extra minutes to cook through.

What can I use instead of chicken?

If chicken isn’t your thing, no worries! You can substitute it with shredded beef, sautéed vegetables, or even beans for a vegetarian option. The flavor combinations are endless!

How do I store leftovers?

Leftover baked chicken chimichangas can be stored in an airtight container in the fridge for up to three days. Reheat them in the oven for the best texture, or use the microwave if you’re in a hurry.

Can I freeze baked chicken chimichangas?

Yes, you can freeze them! Just make sure they are completely cooled before wrapping them tightly in plastic wrap and then aluminum foil. They can be frozen for up to three months. When ready to eat, bake them straight from the freezer, adding a few extra minutes to the cooking time.

What should I serve with baked chicken chimichangas?

These chimichangas pair wonderfully with salsa, sour cream, and a fresh salad. You can also serve them with rice or beans for a complete meal. Don’t forget a refreshing drink to wash it all down!

Final Thoughts

Baked chicken chimichangas are more than just a meal; they’re a celebration of flavors and memories.

Each bite transports you to a cozy kitchen filled with laughter and warmth.

The joy of sharing these crispy delights with family and friends is unmatched.

Whether it’s a casual weeknight dinner or a gathering, these chimichangas bring everyone together.

With their easy preparation and delicious taste, they’ll quickly become a favorite in your home.

So roll up your sleeves, gather your loved ones, and enjoy the delightful experience of making and savoring baked chicken chimichangas!

Paul

Baked Chicken Chimichangas: Easy and Delicious Recipe!

Baked Chicken Chimichangas are a delicious and easy-to-make dish filled with shredded chicken, black beans, corn, and cheese, baked to golden perfection.
Prep Time 15 minutes
Cook Time 25 minutes
Total Time 40 minutes
Servings: 4 servings
Course: Main Dish
Cuisine: Mexican
Calories: 400

Ingredients
  

  • 2 cups cooked shredded chicken
  • 1 cup black beans drained and rinsed
  • 1 cup corn frozen or canned
  • 1 cup shredded cheese cheddar or Mexican blend
  • 1 teaspoon cumin
  • 1 teaspoon chili powder
  • 1/2 teaspoon garlic powder
  • 1/2 teaspoon onion powder
  • Salt and pepper to taste
  • 4 large flour tortillas
  • 1 tablespoon olive oil
  • 1 cup salsa
  • 1/2 cup sour cream for serving
  • Fresh cilantro chopped (for garnish)

Method
 

  1. Preheat your oven to 400°F (200°C). Line a baking sheet with parchment paper.
  2. In a large bowl, combine the shredded chicken, black beans, corn, cheese, cumin, chili powder, garlic powder, onion powder, salt, and pepper. Mix well until all ingredients are evenly incorporated.
  3. Place a tortilla on a flat surface. Spoon about 1/2 cup of the chicken mixture onto the center of the tortilla. Fold in the sides and roll it up tightly. Repeat with the remaining tortillas and filling.
  4. Place the rolled chimichangas seam-side down on the prepared baking sheet. Brush the tops lightly with olive oil.
  5. Bake in the preheated oven for 20-25 minutes, or until the chimichangas are golden brown and crispy.
  6. Serve hot with salsa and sour cream on the side. Garnish with fresh cilantro if desired.

Notes

  • For a spicier kick, add diced jalapeños or a dash of hot sauce to the chicken mixture.
  • Substitute the chicken with shredded beef or sautéed vegetables for a vegetarian option.

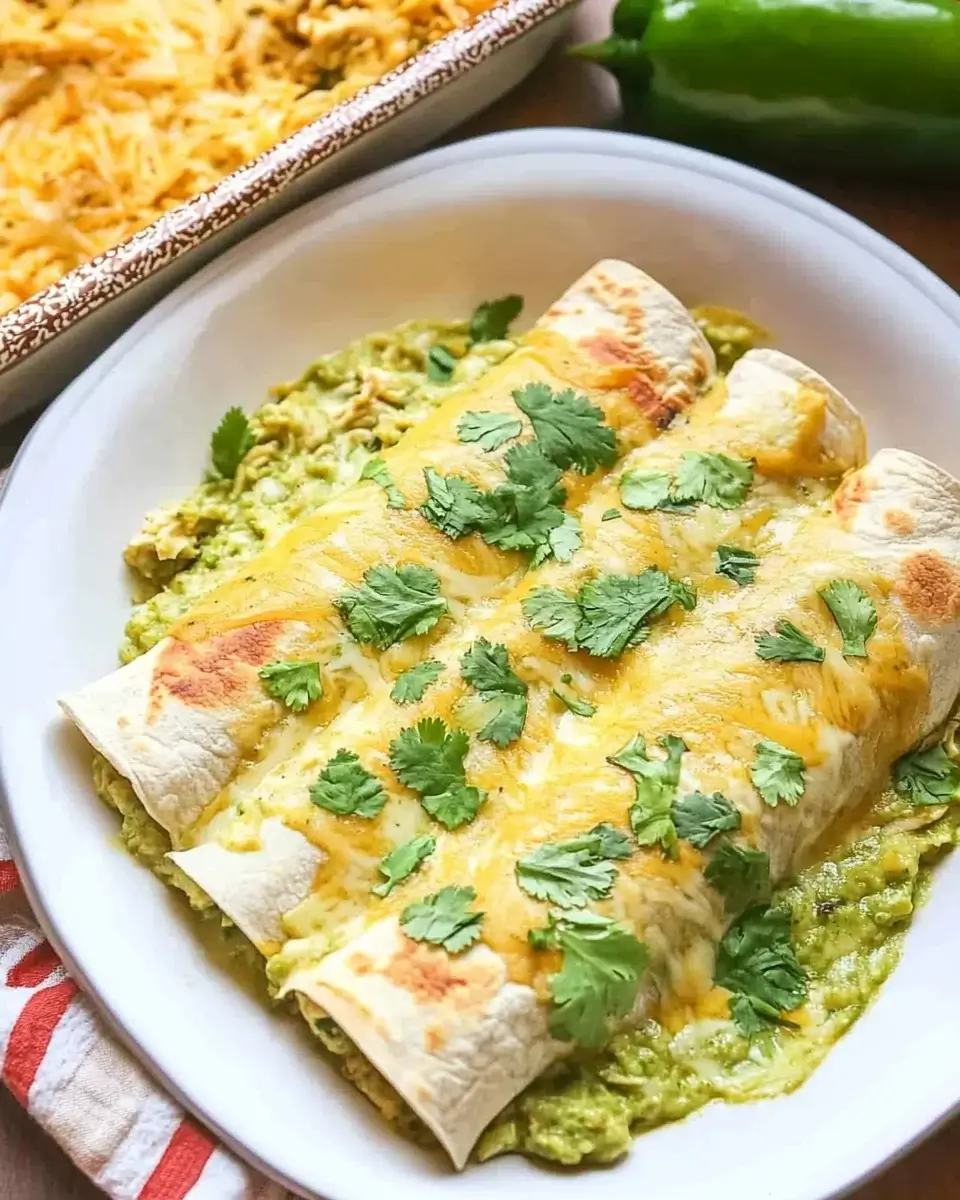
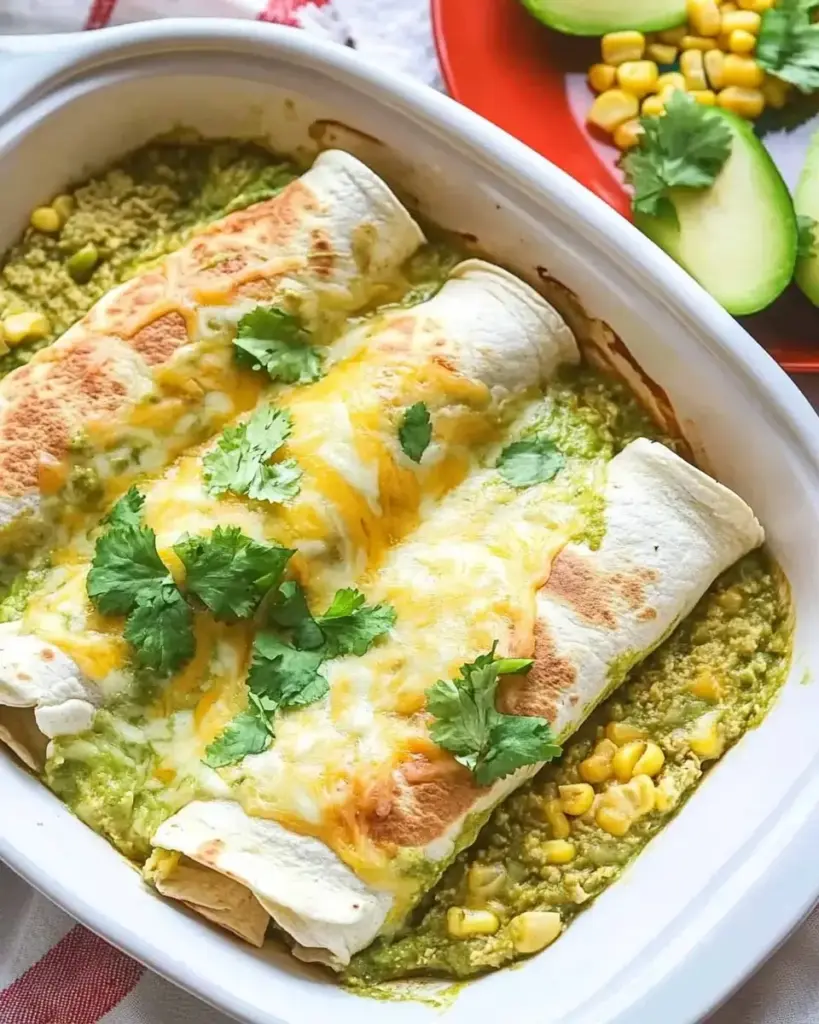
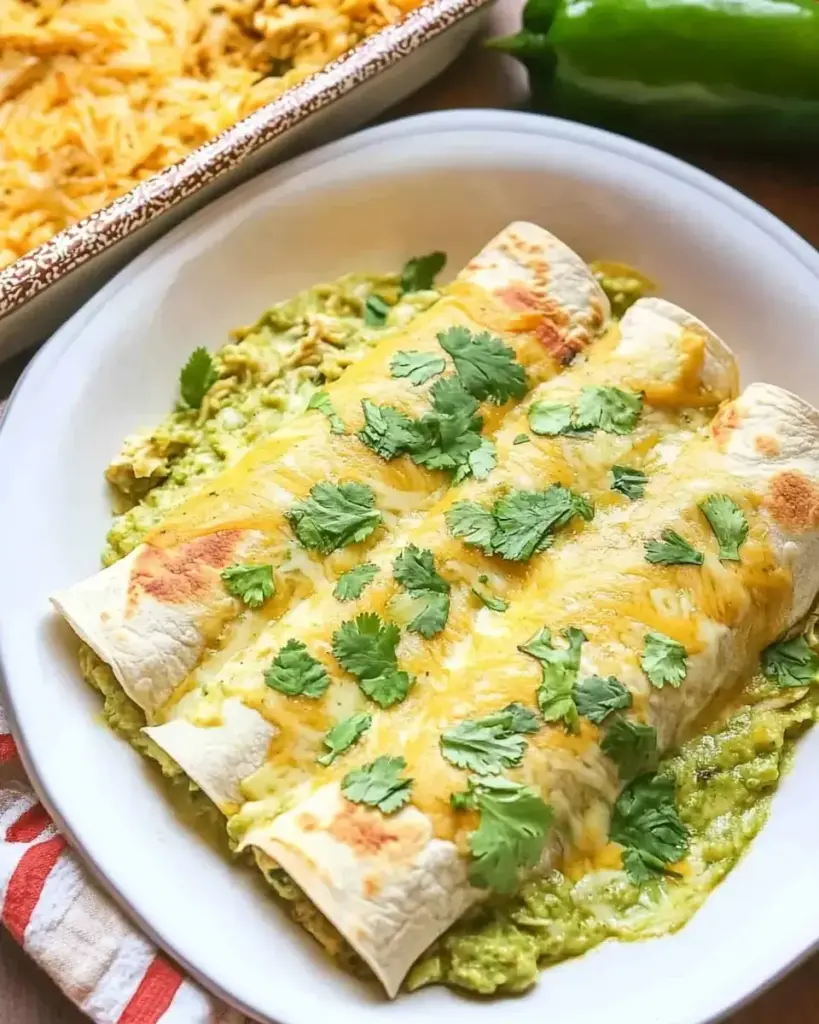
Green Chicken Enchiladas: A Deliciously Easy Recipe!

Introduction to Green Chicken Enchiladas

There’s something magical about the aroma of Green Chicken Enchiladas wafting through the kitchen.

It takes me back to family gatherings where laughter and good food filled the air.

This recipe is a comforting hug on a plate, perfect for those busy weeknights or when you want to impress your loved ones without spending hours in the kitchen.

With just a handful of ingredients and simple steps, you can whip up a delicious meal that warms the heart and satisfies the soul.

Let’s dive into this easy recipe that’s sure to become a favorite!

Why You’ll Love This Green Chicken Enchiladas

These Green Chicken Enchiladas are a game-changer for any home cook.

They come together in just 45 minutes, making them perfect for busy weeknights.

The creamy filling, combined with zesty green enchilada sauce, creates a flavor explosion that will have everyone asking for seconds.

Plus, they’re versatile! You can easily customize them to suit your taste or dietary needs.

Trust me, this dish will quickly become a family favorite!

Ingredients for Green Chicken Enchiladas

Creating mouthwatering Green Chicken Enchiladas starts with gathering the right ingredients.

Here’s what you’ll need:

  • Cooked, shredded chicken: This is the star of the show. Use rotisserie chicken for convenience or cook your own for a fresher taste.
  • Green enchilada sauce: This adds a tangy kick. You can find it canned or make your own if you’re feeling adventurous.
  • Shredded Monterey Jack cheese: Creamy and melty, it brings everything together. Feel free to swap it with cheddar for a sharper flavor.
  • Sour cream: This adds richness and balances the spices. Greek yogurt is a great substitute if you want a healthier option.
  • Corn tortillas: These are the perfect vessel for your filling. Look for fresh ones at your local market for the best flavor.
  • Diced onion: Adds a nice crunch and sweetness. Red or yellow onions work well, depending on your preference.
  • Chopped fresh cilantro: This herb brightens up the dish. If you’re not a fan, parsley can be a good alternative.
  • Ground cumin: A warm spice that enhances the flavor profile. It’s a must-have in Mexican cuisine.
  • Garlic powder: For that aromatic touch. Fresh garlic can be used too, just adjust the amount to taste.
  • Salt and black pepper: Essential for seasoning. Adjust to your liking for the perfect balance.

For those who like a little heat, consider adding diced jalapeños to the chicken mixture.

And if you want to switch things up, shredded beef or black beans can be used instead of chicken.

You can find the exact quantities for each ingredient at the bottom of the article, ready for printing!

How to Make Green Chicken Enchiladas

Making Green Chicken Enchiladas is a straightforward process that anyone can master.

With just a few steps, you’ll have a delicious meal ready to serve.

Let’s break it down step by step!

Step 1: Preheat the Oven

Start by preheating your oven to 350°F (175°C).

This step is crucial because it ensures your enchiladas cook evenly.

A hot oven helps the cheese melt beautifully and gives that golden finish we all love.

Step 2: Prepare the Filling

In a large mixing bowl, combine the cooked, shredded chicken with half a cup of green enchilada sauce, half a cup of shredded cheese, sour cream, diced onion, cilantro, cumin, garlic powder, salt, and black pepper.

Mix everything well until it’s evenly combined.

This ensures every bite is packed with flavor.

Don’t rush this step; a good mix makes all the difference!

Step 3: Warm the Tortillas

Next, warm the corn tortillas in a dry skillet over medium heat for about 30 seconds on each side.

Warming them makes them pliable, preventing them from cracking when you roll them.

This little trick is key to achieving perfectly rolled enchiladas.

Step 4: Assemble the Enchiladas

Now it’s time to fill those tortillas!

Spread a quarter cup of green enchilada sauce on the bottom of a 9×13-inch baking dish.

Take a tortilla, fill it with about a quarter cup of the chicken mixture, and roll it up tightly.

Place the rolled tortilla seam-side down in the baking dish.

Repeat this process until all the tortillas are filled and in the dish.

It’s like wrapping little presents of deliciousness!

Step 5: Bake the Enchiladas

Pour the remaining green enchilada sauce over the top of the rolled tortillas.

Sprinkle the rest of the cheese on top for that gooey goodness.

Cover the dish with aluminum foil and bake for 20 minutes.

After that, remove the foil and bake for an additional 10 minutes, or until the cheese is bubbly and golden.

Keep an eye on them to avoid overcooking.

Let the enchiladas cool for a few minutes before serving.

This helps the flavors settle and makes them easier to serve!

Tips for Success

  • Use rotisserie chicken for a quick and easy filling.
  • Don’t skip warming the tortillas; it prevents cracking.
  • Mix the filling thoroughly for even flavor distribution.
  • Experiment with different cheeses for a unique twist.
  • Let the enchiladas cool slightly before serving to enhance flavors.
  • Garnish with extra cilantro or avocado for a fresh touch.

Equipment Needed

  • 9×13-inch baking dish: A standard size for baking enchiladas. Any oven-safe dish will work.
  • Large mixing bowl: Essential for combining your filling. A sturdy pot can also do the job.
  • Skillet: For warming tortillas. A non-stick pan is ideal.
  • Measuring cups: Helpful for portioning ingredients. You can use your eyes if you’re feeling adventurous!

Variations

  • Spicy Green Chicken Enchiladas: Add diced jalapeños or a splash of hot sauce to the filling for an extra kick.
  • Vegetarian Option: Substitute shredded chicken with black beans, sautéed bell peppers, or roasted vegetables for a hearty meatless meal.
  • Cheesy Spinach Enchiladas: Mix in fresh spinach with the chicken filling for added nutrition and flavor.
  • Gluten-Free Tortillas: Use gluten-free corn tortillas to make this dish suitable for those with gluten sensitivities.
  • Different Sauces: Experiment with red enchilada sauce or a homemade tomatillo sauce for a unique twist on the classic flavor.

Serving Suggestions

  • Fresh Guacamole: A creamy avocado dip pairs perfectly with the enchiladas.
  • Mexican Rice: Serve alongside fluffy rice for a complete meal.
  • Black Beans: A side of seasoned black beans adds protein and flavor.
  • Cold Beverages: Enjoy with a refreshing margarita or iced tea.
  • Garnish: Top with extra cilantro, diced tomatoes, or avocado slices for a vibrant presentation.

FAQs about Green Chicken Enchiladas

Can I make Green Chicken Enchiladas ahead of time?

Absolutely! You can prepare the enchiladas and assemble them in the baking dish. Just cover and refrigerate them for up to 24 hours before baking. When you’re ready, pop them in the oven straight from the fridge, adding a few extra minutes to the baking time.

What can I substitute for chicken in this recipe?

If you’re looking for alternatives, shredded beef or black beans work wonderfully. You can also use sautéed vegetables like bell peppers and zucchini for a vegetarian option. The flavor will still be fantastic!

How do I store leftovers?

Leftover Green Chicken Enchiladas can be stored in an airtight container in the fridge for up to three days. Reheat them in the oven or microwave until warmed through. They make for a quick and satisfying lunch!

Can I freeze Green Chicken Enchiladas?

Yes, you can freeze them! Assemble the enchiladas, but don’t bake them. Wrap the dish tightly with plastic wrap and aluminum foil. They can be frozen for up to three months. When ready to eat, thaw in the fridge overnight and bake as directed.

What toppings go well with Green Chicken Enchiladas?

Top your enchiladas with fresh cilantro, diced tomatoes, or avocado slices for a burst of flavor. A dollop of sour cream or guacamole adds creaminess, while sliced jalapeños can give it a spicy kick!

Final Thoughts

Cooking Green Chicken Enchiladas is more than just preparing a meal; it’s about creating memories.

The joy of gathering around the table, sharing stories, and savoring each bite is what makes this dish special.

With its creamy filling and zesty sauce, it’s a comforting reminder of home.

Whether you’re feeding a hungry family or impressing friends, these enchiladas are sure to delight.

So roll up your sleeves, embrace the process, and enjoy the deliciousness that comes from your kitchen.

Trust me, this recipe will bring smiles and satisfaction to everyone at your table!

Paul

Green Chicken Enchiladas: A Deliciously Easy Recipe!

A delicious and easy recipe for Green Chicken Enchiladas, perfect for a comforting meal.
Prep Time 15 minutes
Cook Time 30 minutes
Total Time 45 minutes
Servings: 4 servings
Course: Main Course
Cuisine: Mexican
Calories: 350

Ingredients
  

  • 2 cups cooked shredded chicken
  • 1 cup green enchilada sauce
  • 1 cup shredded Monterey Jack cheese
  • 1 cup sour cream
  • 8 corn tortillas
  • 1/2 cup diced onion
  • 1/4 cup chopped fresh cilantro
  • 1 teaspoon ground cumin
  • 1/2 teaspoon garlic powder
  • 1/2 teaspoon salt
  • 1/4 teaspoon black pepper

Method
 

  1. Preheat your oven to 350°F (175°C).
  2. In a large mixing bowl, combine the shredded chicken, 1/2 cup of green enchilada sauce, 1/2 cup of shredded cheese, sour cream, diced onion, cilantro, cumin, garlic powder, salt, and black pepper. Mix well until all ingredients are evenly combined.
  3. Warm the corn tortillas in a dry skillet over medium heat for about 30 seconds on each side to make them pliable.
  4. Spread 1/4 cup of green enchilada sauce on the bottom of a 9x13-inch baking dish.
  5. Take a tortilla, fill it with about 1/4 cup of the chicken mixture, and roll it up tightly. Place the rolled tortilla seam-side down in the baking dish. Repeat with the remaining tortillas and filling.
  6. Once all the enchiladas are in the dish, pour the remaining green enchilada sauce over the top and sprinkle with the remaining cheese.
  7. Cover the dish with aluminum foil and bake for 20 minutes. Remove the foil and bake for an additional 10 minutes, or until the cheese is bubbly and golden.
  8. Let the enchiladas cool for a few minutes before serving. Garnish with additional cilantro if desired.

Notes

  • For a spicier kick, add diced jalapeños to the chicken mixture.
  • You can substitute shredded beef or black beans for the chicken for a different flavor profile.

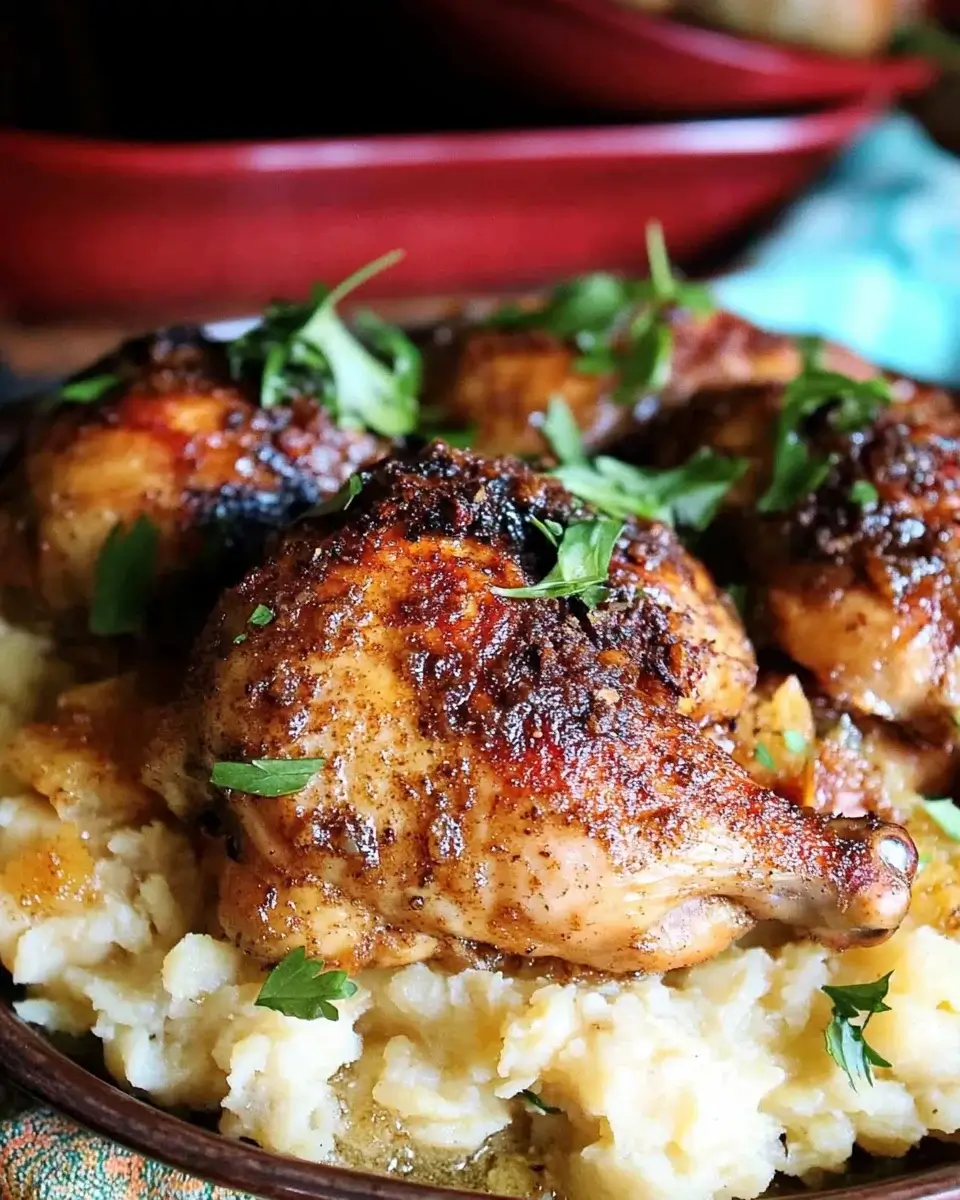
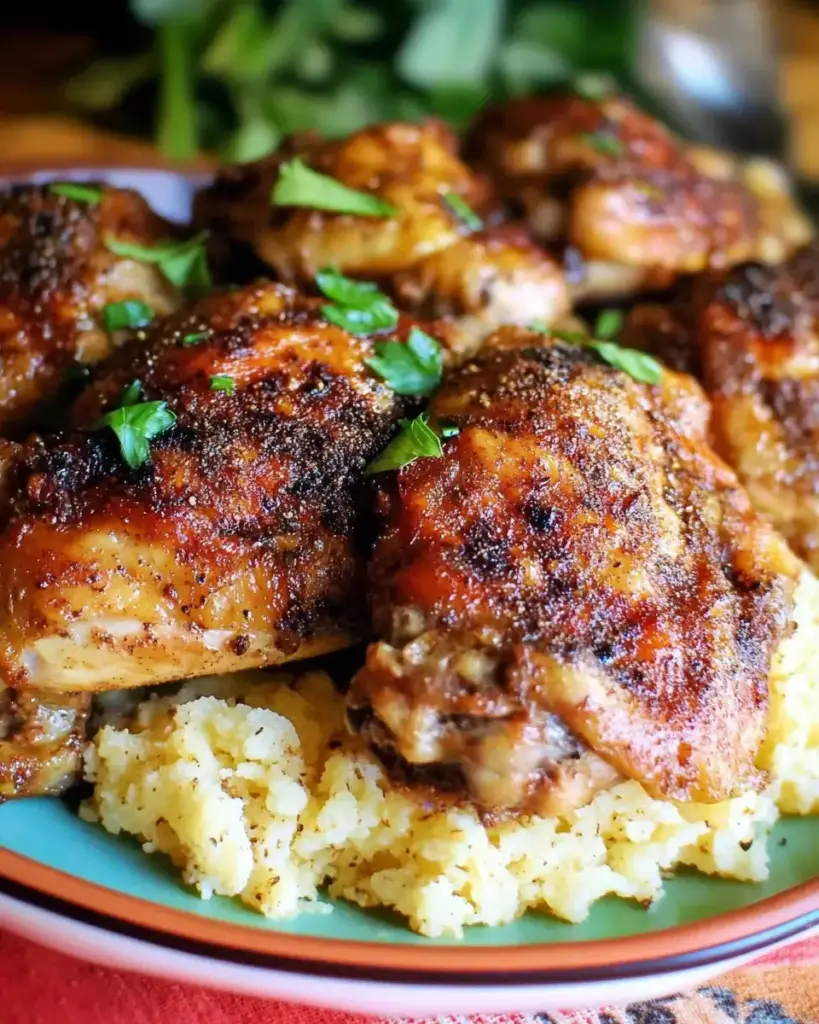
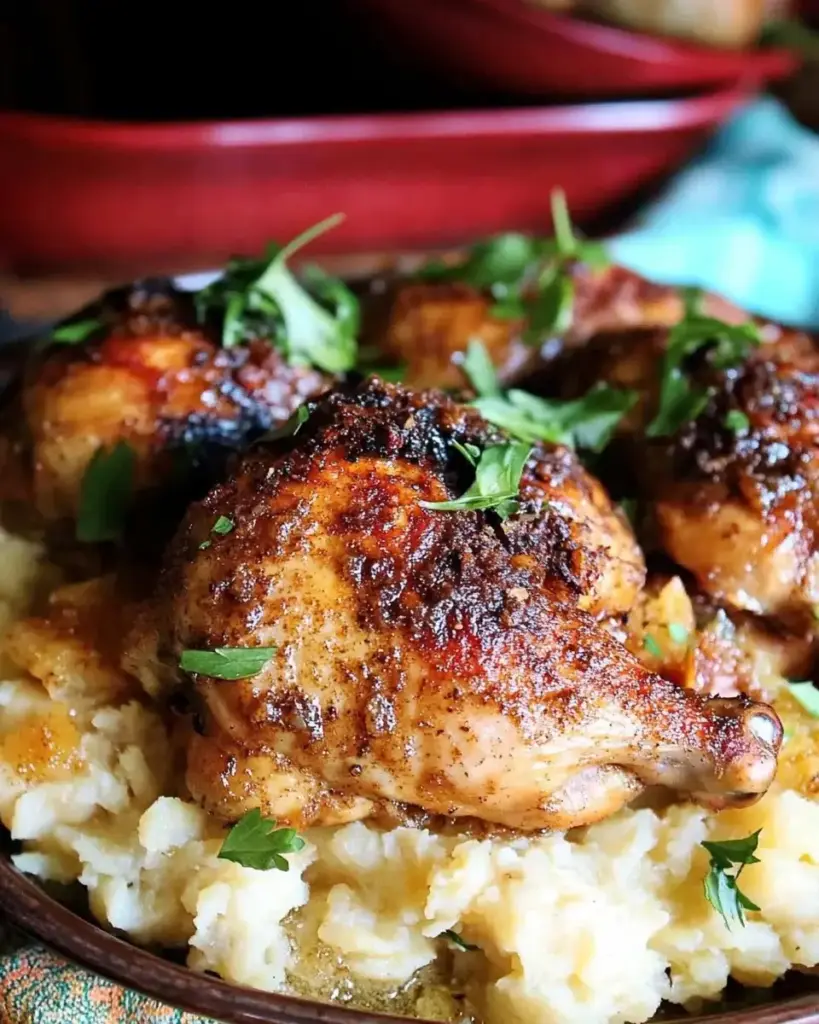
Crispy Brazilian Roasted Chicken: A Flavorful Guide!

Introduction to Crispy Brazilian Roasted Chicken

There’s something magical about the aroma of a chicken roasting in the oven. It takes me back to family gatherings, where laughter and delicious food filled the air. This Crispy Brazilian Roasted Chicken is not just a meal; it’s an experience.

Whether you’re looking for a quick solution for a busy weeknight or a dish to impress your loved ones on the weekend, this recipe has you covered. With its vibrant spices and juicy meat, it’s bound to become a favorite in your home. Let’s dive into this flavorful journey together!

Why You’ll Love This Crispy Brazilian Roasted Chicken

This Crispy Brazilian Roasted Chicken is a game-changer for any home cook.

It’s incredibly easy to prepare, making it perfect for those hectic weeknights.

The blend of spices creates a flavor explosion that will have your taste buds dancing.

Plus, the crispy skin is simply irresistible!

With just a few ingredients and minimal effort, you can serve a dish that feels gourmet.

Your family will be asking for seconds!

Ingredients for Crispy Brazilian Roasted Chicken

To create this mouthwatering Crispy Brazilian Roasted Chicken, you’ll need a handful of simple yet flavorful ingredients.

Here’s what you’ll gather:

  • Whole chicken: A 3-pound bird is ideal for roasting, ensuring juicy meat and crispy skin.
  • Olive oil: This adds moisture and helps the spices adhere to the chicken.
  • Paprika: A key player in giving the chicken its vibrant color and smoky flavor.
  • Garlic powder: For that rich, savory taste that elevates the dish.
  • Onion powder: Adds depth and sweetness to the spice mix.
  • Dried oregano: A classic herb that brings a touch of earthiness.
  • Salt: Essential for enhancing all the flavors in the dish.
  • Black pepper: A must-have for a little kick and warmth.
  • Cayenne pepper: Optional, but it adds a delightful heat if you’re feeling adventurous.
  • Lemon: Freshly squeezed juice brightens the flavors and tenderizes the meat.
  • Garlic cloves: Minced garlic stuffed inside the chicken infuses it with aromatic goodness.
  • Fresh parsley: A sprinkle on top adds a pop of color and freshness before serving.

For exact measurements, check the bottom of the article where you can find everything listed for easy printing.

Feel free to get creative! You can substitute fresh herbs like rosemary or thyme for a different flavor profile. Enjoy the process of making this dish your own!

How to Make Crispy Brazilian Roasted Chicken

Making this Crispy Brazilian Roasted Chicken is a straightforward process that will fill your kitchen with mouthwatering aromas.

Follow these simple steps, and you’ll be on your way to a delicious meal that impresses everyone at the table.

Step 1: Preheat the Oven

Start by preheating your oven to 425°F.

This high temperature is key to achieving that crispy skin we all crave.

While the oven heats up, you can prepare the chicken and spice mixture.

Step 2: Prepare the Spice Mixture

In a small bowl, combine olive oil, paprika, garlic powder, onion powder, oregano, salt, black pepper, and cayenne pepper if you like a bit of heat.

Mix it well until it forms a paste.

This spice blend is what makes the chicken so flavorful, so don’t skip this step!

Step 3: Season the Chicken

Take your cleaned and dried chicken and rub the spice mixture all over it.

Make sure to get under the skin and inside the cavity for maximum flavor.

This is where the magic happens, so don’t be shy!

Step 4: Add Lemon and Garlic

Drizzle the freshly squeezed lemon juice over the seasoned chicken.

Then, stuff the cavity with minced garlic.

This will infuse the chicken with a zesty and aromatic flavor as it roasts.

Step 5: Roast the Chicken

Place the chicken breast-side up in a roasting pan or baking dish.

Roast it in the preheated oven for about 1 hour and 15 minutes.

You’ll know it’s done when the internal temperature reaches 165°F and the skin is golden brown and crispy.

Step 6: Rest and Garnish

Once the chicken is out of the oven, let it rest for 10-15 minutes.

This allows the juices to redistribute, ensuring every bite is juicy.

Before serving, garnish with fresh parsley for a pop of color.

Now, you’re ready to carve and enjoy your Crispy Brazilian Roasted Chicken!

Tips for Success

  • For maximum flavor, marinate the chicken in the spice mixture and lemon juice for a few hours or overnight.
  • Use a meat thermometer to ensure the chicken reaches 165°F for perfect doneness.
  • Let the chicken rest before carving to keep it juicy.
  • Experiment with different herbs to customize the flavor to your liking.
  • Save any leftover chicken for delicious sandwiches or salads!

Equipment Needed

  • Roasting pan: A sturdy pan is essential. If you don’t have one, a baking dish works just fine.
  • Meat thermometer: This ensures your chicken is cooked perfectly. A simple kitchen thermometer will do the trick.
  • Mixing bowl: For combining your spice mixture. Any bowl will work!

Variations

  • Herb-Infused: Swap out the dried oregano for fresh herbs like rosemary or thyme for a fragrant twist.
  • Spicy Kick: Add more cayenne pepper or a dash of hot sauce to the spice mixture for an extra layer of heat.
  • Citrus Burst: Experiment with different citrus fruits like lime or orange juice for a unique flavor profile.
  • Garlic Lovers: Increase the amount of minced garlic or add roasted garlic for a deeper, richer taste.
  • Gluten-Free: This recipe is naturally gluten-free, making it perfect for those with dietary restrictions.

Serving Suggestions

  • Side Dishes: Pair the chicken with roasted vegetables or a fresh green salad for a balanced meal.
  • Starch Options: Serve with fluffy rice or crispy potatoes to soak up the delicious juices.
  • Drink Pairing: A chilled Brazilian caipirinha or a light lager complements the flavors beautifully.
  • Presentation: Carve the chicken and arrange it on a platter, garnished with lemon wedges and parsley for a vibrant look.

FAQs about Crispy Brazilian Roasted Chicken

Can I use a different type of chicken for this recipe?

Absolutely! While a whole chicken is ideal for achieving that crispy skin, you can use chicken parts like thighs or breasts. Just adjust the cooking time accordingly, as smaller pieces will cook faster.

How can I make the chicken even crispier?

For an extra crispy finish, try patting the chicken dry with paper towels before seasoning. You can also broil it for the last few minutes of cooking to enhance the crispiness.

Can I prepare the chicken in advance?

Yes! You can marinate the chicken in the spice mixture and lemon juice a few hours or even overnight. This not only saves time but also allows the flavors to penetrate deeper.

What should I do with leftovers?

Leftover Crispy Brazilian Roasted Chicken is perfect for sandwiches, salads, or even tacos. Just shred the meat and get creative with your favorite recipes!

Is this recipe suitable for meal prep?

Definitely! This dish holds up well in the fridge for a few days. Just reheat it in the oven to maintain that crispy texture. It’s a fantastic option for meal prep!

Final Thoughts

Cooking this Crispy Brazilian Roasted Chicken is more than just preparing a meal; it’s about creating memories.

The tantalizing aroma wafting through your kitchen will draw everyone in, sparking conversations and laughter around the dinner table.

Each bite delivers a burst of flavor, making it a dish that brings joy to both the cook and the diners.

Whether it’s a weeknight dinner or a special occasion, this recipe is sure to impress.

So roll up your sleeves, embrace the process, and enjoy the delightful experience of sharing this delicious chicken with your loved ones!

Paul

Crispy Brazilian Roasted Chicken: A Flavorful Guide!

A flavorful guide to making crispy Brazilian roasted chicken, perfect for any occasion.
Prep Time 15 minutes
Cook Time 1 hour 15 minutes
Total Time 1 hour 30 minutes
Servings: 4 -6 servings
Course: Main Dish
Cuisine: Brazilian
Calories: 350

Ingredients
  

  • 3 pounds whole chicken cleaned and patted dry
  • 1 tablespoon olive oil
  • 1 tablespoon paprika
  • 1 tablespoon garlic powder
  • 1 tablespoon onion powder
  • 1 teaspoon dried oregano
  • 1 teaspoon salt
  • 1 teaspoon black pepper
  • 1 teaspoon cayenne pepper optional for heat
  • 1 lemon juiced
  • 4 cloves garlic minced
  • 1 tablespoon fresh parsley chopped (for garnish)

Method
 

  1. Preheat your oven to 425°F.
  2. In a small bowl, mix together the olive oil, paprika, garlic powder, onion powder, oregano, salt, black pepper, and cayenne pepper (if using).
  3. Rub the spice mixture all over the chicken, making sure to get under the skin and inside the cavity.
  4. Drizzle the lemon juice over the chicken and stuff the cavity with the minced garlic.
  5. Place the chicken breast-side up on a roasting pan or baking dish.
  6. Roast in the preheated oven for 1 hour and 15 minutes, or until the internal temperature reaches 165°F and the skin is crispy and golden brown.
  7. Let the chicken rest for 10-15 minutes before carving. Garnish with fresh parsley before serving.

Notes

  • For extra flavor, marinate the chicken in the spice mixture and lemon juice for a few hours or overnight in the refrigerator.
  • For a variation, try adding fresh herbs like rosemary or thyme to the spice mixture for a different flavor profile.

Grilled Chicken Skewers with Honey Soy Marinade that Impress!

Introduction to Grilled Chicken Skewers with Honey Soy Marinade

There’s something magical about the sizzle of chicken on the grill, especially when it’s marinated in a sweet and savory honey soy sauce.

These Grilled Chicken Skewers with Honey Soy Marinade are not just a meal; they’re a ticket to flavor town.

Whether you’re hosting a weekend barbecue or just looking for a quick solution after a long day, this recipe is your go-to.

With minimal prep and maximum taste, you’ll impress your loved ones without breaking a sweat.

Let’s dive into this culinary adventure that’s sure to become a family favorite!

Why You’ll Love This Grilled Chicken Skewers with Honey Soy Marinade

These Grilled Chicken Skewers with Honey Soy Marinade are a dream come true for busy weeknights.

They come together in a flash, making dinner feel effortless.

The combination of sweet honey and savory soy sauce creates a flavor explosion that will have everyone asking for seconds.

Plus, they’re versatile! You can easily customize them with your favorite veggies or serve them with a variety of sides.

What’s not to love?

Ingredients for Grilled Chicken Skewers with Honey Soy Marinade

Creating these Grilled Chicken Skewers with Honey Soy Marinade is a breeze, especially with the right ingredients.

Here’s what you’ll need:

  • Boneless, skinless chicken thighs: Tender and juicy, they soak up the marinade beautifully. You can also use chicken breasts for a leaner option.
  • Soy sauce: This salty staple adds depth and umami to the marinade. Opt for low-sodium if you’re watching your salt intake.
  • Honey: The sweet counterpart to soy sauce, it caramelizes on the grill, giving the chicken a delightful glaze.
  • Vegetable oil: Helps the marinade cling to the chicken and keeps it moist while grilling.
  • Rice vinegar: A splash of acidity balances the sweetness and enhances the overall flavor.
  • Garlic: Freshly minced, it adds a punch of flavor that elevates the dish.
  • Ground ginger: This spice brings warmth and a hint of spice to the marinade.
  • Black pepper: A simple seasoning that adds a touch of heat.
  • Red pepper flakes (optional): For those who like a little kick, these flakes can spice things up.
  • Wooden or metal skewers: Essential for grilling! If using wooden skewers, soak them in water for 30 minutes to prevent burning.

For exact measurements, check the bottom of the article where you can find everything listed for easy printing.

Gather these ingredients, and you’re on your way to grilling perfection!

How to Make Grilled Chicken Skewers with Honey Soy Marinade

Making these Grilled Chicken Skewers with Honey Soy Marinade is a straightforward process that anyone can master.

Let’s break it down step by step, ensuring you have all the tips you need for grilling success.

Step 1: Prepare the Chicken

Start by cutting the boneless, skinless chicken thighs into 1-inch pieces.

This size ensures even cooking and makes them easy to skewer.

If you prefer chicken breasts, feel free to use those instead.

Just remember, thighs tend to be juicier!

Step 2: Make the Marinade

In a separate bowl, whisk together the soy sauce, honey, vegetable oil, rice vinegar, minced garlic, ground ginger, black pepper, and red pepper flakes if you like a bit of heat.

This marinade is the heart of the dish, so mix it well to combine all those flavors.

The sweet and savory notes will have your taste buds dancing!

Step 3: Marinate the Chicken

Pour the marinade over the chicken pieces in the large bowl.

Toss everything together until the chicken is evenly coated.

Cover the bowl with plastic wrap and let it sit in the fridge for at least 1 hour.

For the best flavor, marinate it for up to 8 hours.

Trust me, the longer, the better!

Step 4: Preheat the Grill

While the chicken is marinating, preheat your grill to medium-high heat.

If you’re using wooden skewers, don’t forget to soak them in water for about 30 minutes.

This prevents them from burning on the grill and ensures your skewers hold together beautifully.

Step 5: Assemble the Skewers

Once the chicken is marinated, it’s time to thread the pieces onto the skewers.

Leave a little space between each piece for even cooking.

If you want to add some color, consider threading on bell peppers, zucchini, or onions.

They’ll add flavor and make your skewers look even more appetizing!

Step 6: Grill the Skewers

Place the skewers on the preheated grill.

Cook them for about 10-12 minutes, turning occasionally.

You’re looking for those beautiful grill marks and an internal temperature of 165°F.

This is where the magic happens!

Step 7: Serve and Enjoy

Once grilled to perfection, remove the skewers from the grill and let them rest for a few minutes.

This helps the juices redistribute, making each bite tender and juicy.

Serve your Grilled Chicken Skewers with your favorite dipping sauce or over a bed of rice or salad.

Enjoy the compliments that come your way!

Tips for Success

  • Marinate the chicken overnight for deeper flavor.
  • Use a meat thermometer to ensure the chicken reaches 165°F.
  • Don’t overcrowd the skewers; space them out for even cooking.
  • Experiment with different vegetables for added color and nutrition.
  • Let the skewers rest after grilling to keep them juicy.

Equipment Needed

  • Grill: A gas or charcoal grill works perfectly for this recipe.
  • Skewers: Use wooden or metal skewers; just soak wooden ones beforehand.
  • Mixing bowls: For marinating and mixing the ingredients.
  • Meat thermometer: To check the chicken’s doneness.

Variations

  • Vegetable Skewers: Add bell peppers, zucchini, or cherry tomatoes for a colorful twist.
  • Spicy Kick: Incorporate sriracha or chili paste into the marinade for an extra layer of heat.
  • Herb Infusion: Mix in fresh herbs like cilantro or basil for a refreshing flavor boost.
  • Gluten-Free Option: Use tamari instead of soy sauce to keep it gluten-free.
  • Fruit Addition: Pineapple or mango chunks can add a sweet and tangy contrast to the savory chicken.

Serving Suggestions

  • Rice: Serve the skewers over a bed of jasmine or brown rice for a hearty meal.
  • Salad: Pair with a fresh cucumber and avocado salad for a refreshing contrast.
  • Dipping Sauce: Offer a side of sweet chili sauce or peanut sauce for extra flavor.
  • Drinks: Enjoy with a cold beer or iced tea to complement the meal.

FAQs about Grilled Chicken Skewers with Honey Soy Marinade

Can I use chicken breasts instead of thighs?

Absolutely! While chicken thighs are juicier, chicken breasts can be used for a leaner option. Just be careful not to overcook them, as they can dry out more easily.

How long should I marinate the chicken?

For the best flavor, marinate the chicken for at least 1 hour. If you have the time, letting it sit overnight will enhance the taste even more!

What can I serve with these skewers?

These Grilled Chicken Skewers with Honey Soy Marinade pair wonderfully with rice, salads, or grilled vegetables. You can also serve them with a tasty dipping sauce for an extra kick.

Can I make these skewers ahead of time?

Yes! You can marinate the chicken a day in advance and store it in the fridge. Just assemble and grill when you’re ready to serve.

What if I don’t have a grill?

No worries! You can cook these skewers in the oven under the broiler or on a stovetop grill pan. Just keep an eye on them to ensure they don’t burn!

Final Thoughts

Cooking these Grilled Chicken Skewers with Honey Soy Marinade is more than just preparing a meal; it’s about creating memories.

The aroma of marinated chicken sizzling on the grill brings back summer nights spent with friends and family.

Each bite is a delightful balance of sweet and savory, making it hard to resist going back for seconds.

Whether you’re impressing guests or enjoying a casual weeknight dinner, this recipe is sure to bring smiles to the table.

So fire up that grill, gather your loved ones, and savor the joy of good food and great company!

Paul

Grilled Chicken Skewers with Honey Soy Marinade that Impress!

Delicious grilled chicken skewers marinated in a sweet and savory honey soy sauce.
Prep Time 10 minutes
Cook Time 12 minutes
Total Time 1 hour 22 minutes
Servings: 4 servings
Course: Main Course
Cuisine: Asian
Calories: 320

Ingredients
  

  • 2 pounds boneless skinless chicken thighs, cut into 1-inch pieces
  • 1/4 cup soy sauce
  • 1/4 cup honey
  • 2 tablespoons vegetable oil
  • 2 tablespoons rice vinegar
  • 3 cloves garlic minced
  • 1 teaspoon ground ginger
  • 1/2 teaspoon black pepper
  • 1/4 teaspoon red pepper flakes optional
  • Wooden or metal skewers

Method
 

  1. Cut the chicken thighs into 1-inch pieces and place them in a large bowl.
  2. In a separate bowl, whisk together the soy sauce, honey, vegetable oil, rice vinegar, minced garlic, ground ginger, black pepper, and red pepper flakes (if using).
  3. Pour the marinade over the chicken and toss to coat evenly.
  4. Cover the bowl with plastic wrap and refrigerate for at least 1 hour, or up to 8 hours for more flavor.
  5. Preheat your grill to medium-high heat. If using wooden skewers, soak them in water for 30 minutes to prevent burning.
  6. Thread the marinated chicken pieces onto the skewers, leaving a little space between each piece for even cooking.
  7. Place the skewers on the grill and cook for 10-12 minutes, turning occasionally, until the chicken is cooked through and has nice grill marks. The internal temperature should reach 165°F.
  8. Remove from the grill and let rest for a few minutes before serving.
  9. Serve the skewers with your favorite dipping sauce or over a bed of rice or salad.

Notes

  • For added flavor, try marinating the chicken overnight.
  • You can substitute chicken thighs with chicken breasts for a leaner option.
  • Add vegetables like bell peppers, zucchini, or onions to the skewers for a colorful and nutritious addition.

Crispy Fried Chicken Tenders that Everyone Will Love!

Introduction to Crispy Fried Chicken Tenders

There’s something undeniably comforting about Crispy Fried Chicken Tenders. They remind me of family gatherings, where laughter and the aroma of fried chicken filled the air. Whether you’re looking for a quick solution for a busy weeknight or a dish to impress your loved ones, these tenders are a surefire hit. The crunch of the coating paired with the juicy chicken inside creates a delightful contrast that everyone will love. Plus, they’re versatile enough to serve with a variety of dipping sauces, making them perfect for any occasion.

Why You’ll Love This Crispy Fried Chicken Tenders

These Crispy Fried Chicken Tenders are not just delicious; they’re incredibly easy to make. In about an hour, you can whip up a meal that satisfies even the pickiest eaters. The combination of spices in the marinade infuses the chicken with flavor, while the crispy coating adds that satisfying crunch. Plus, they’re perfect for meal prep or a fun family dinner, making them a go-to recipe for any occasion.

Ingredients for Crispy Fried Chicken Tenders

Gathering the right ingredients is key to achieving those mouthwatering Crispy Fried Chicken Tenders. Here’s what you’ll need:

  • Chicken tenderloins: The star of the show! These are juicy and tender, perfect for frying.
  • Buttermilk: This adds moisture and a tangy flavor, helping to tenderize the chicken.
  • Garlic powder: A must for that savory depth. It enhances the overall flavor profile.
  • Onion powder: Adds a subtle sweetness and complements the garlic beautifully.
  • Paprika: This gives a lovely color and a hint of smokiness to the tenders.
  • Salt: Essential for bringing out all the flavors in the dish.
  • Black pepper: A dash of heat that balances the other spices.
  • Cayenne pepper (optional): For those who like a kick! Adjust to your spice preference.
  • All-purpose flour: This forms the first layer of the crispy coating.
  • Breadcrumbs (preferably panko): Panko breadcrumbs create an extra crunchy texture that’s hard to resist.
  • Vegetable oil: Used for frying, it should have a high smoke point for best results.

For exact measurements, check the bottom of the article where you can find everything listed for easy printing. Feel free to experiment with spices or even substitute the chicken with turkey or tofu for a different twist!

How to Make Crispy Fried Chicken Tenders

Creating Crispy Fried Chicken Tenders is a straightforward process that yields delicious results. Follow these simple steps, and you’ll have a plateful of golden goodness in no time!

Step 1: Marinate the Chicken

Start by combining buttermilk, garlic powder, onion powder, paprika, salt, black pepper, and cayenne pepper in a large bowl. This marinade is where the magic begins. It tenderizes the chicken and infuses it with flavor. Add the chicken tenderloins, ensuring they’re fully submerged. Cover the bowl and let it chill in the fridge for at least an hour. If you have time, marinating overnight will enhance the taste even more.

Step 2: Prepare the Coating

While the chicken is marinating, it’s time to prepare the coating. In one shallow dish, mix together the all-purpose flour and a pinch of salt. In another dish, place the breadcrumbs. I prefer using panko for that extra crunch, but regular breadcrumbs work too. This two-step coating process is key to achieving that crispy exterior.

Step 3: Dredge the Chicken

Once the chicken has marinated, remove it from the buttermilk, allowing any excess to drip off. Dredge each tenderloin in the flour mixture, shaking off the extra flour. Then, dip it back into the buttermilk before coating it in the breadcrumbs. Press gently to ensure the breadcrumbs stick well. This double-dipping technique is what gives you that irresistible crunch!

Step 4: Fry the Chicken

Heat about an inch of vegetable oil in a large skillet over medium-high heat until it reaches 350°F. Carefully add the chicken tenders in batches, making sure not to overcrowd the pan. Fry them for about 4-5 minutes on each side, or until they turn a beautiful golden brown and are cooked through. The sizzling sound is music to my ears!

Step 5: Drain and Serve

Once cooked, use a slotted spoon to transfer the tenders to a paper towel-lined plate. This helps drain any excess oil, keeping them crispy. Serve your Crispy Fried Chicken Tenders hot, alongside your favorite dipping sauces. Trust me, they won’t last long!

Tips for Success

  • For extra crunch, consider double-dipping the chicken in flour and breadcrumbs.
  • Make sure the oil is hot enough before frying; a drop of batter should sizzle immediately.
  • Don’t overcrowd the pan; fry in batches for even cooking.
  • Let the tenders rest for a minute after frying to maintain their crispiness.
  • Experiment with spices in the flour for unique flavor profiles.

Equipment Needed

  • Large bowl: For marinating the chicken. A mixing bowl works too.
  • Shallow dishes: For the flour and breadcrumb coatings. Pie plates are a great alternative.
  • Skillet: A cast-iron skillet is ideal, but any large frying pan will do.
  • Slotted spoon: For transferring the cooked tenders. Tongs can work in a pinch.
  • Paper towels: To drain excess oil. A wire rack is a great substitute.

Variations

  • Spicy Buffalo Tenders: Toss the cooked tenders in buffalo sauce for a fiery kick.
  • Herb-Infused Tenders: Add dried herbs like thyme or oregano to the flour mixture for a fresh flavor.
  • Gluten-Free Option: Substitute all-purpose flour with almond flour and use gluten-free breadcrumbs.
  • Parmesan Crusted: Mix grated Parmesan cheese into the breadcrumb coating for a cheesy twist.
  • Asian-Inspired: Use soy sauce and ginger in the marinade, and coat with sesame seeds instead of breadcrumbs.

Serving Suggestions

  • Classic Sides: Pair your tenders with crispy French fries or creamy coleslaw for a traditional touch.
  • Dipping Sauces: Serve with honey mustard, ranch, or barbecue sauce for added flavor.
  • Fresh Salad: A light garden salad can balance the richness of the chicken.
  • Presentation: Arrange tenders on a wooden board with sauces in small bowls for a rustic look.

FAQs about Crispy Fried Chicken Tenders

Can I use chicken breasts instead of tenderloins?

Absolutely! Chicken breasts can be cut into strips to create your own tenders. Just remember to adjust the cooking time, as they may take a bit longer to cook through.

How do I keep my chicken tenders crispy after frying?

To maintain that delightful crunch, place the cooked tenders on a wire rack instead of directly on paper towels. This allows air to circulate around them, preventing sogginess.

Can I make these tenders ahead of time?

Yes! You can marinate the chicken a day in advance. Just fry them right before serving for the best texture. Alternatively, you can fry them and reheat in the oven at 375°F for about 10 minutes.

What dipping sauces pair well with these tenders?

These Crispy Fried Chicken Tenders are versatile! They go great with honey mustard, ranch dressing, or a spicy sriracha mayo. Feel free to get creative!

Can I bake these chicken tenders instead of frying?

Yes, you can bake them for a healthier option! Preheat your oven to 400°F, place the coated tenders on a baking sheet, and bake for about 20-25 minutes, flipping halfway through.

Final Thoughts

Making Crispy Fried Chicken Tenders is more than just cooking; it’s about creating memories. The joy of biting into that crunchy exterior, followed by the tender chicken inside, is a simple pleasure that brings people together. Whether it’s a casual weeknight dinner or a gathering with friends, these tenders are sure to impress. Plus, the versatility of flavors and dipping sauces means you can customize them to suit any palate. So roll up your sleeves, gather your loved ones, and enjoy the delightful experience of sharing a plate of homemade goodness. You won’t regret it!

Paul

Crispy Fried Chicken Tenders that Everyone Will Love!

Crispy Fried Chicken Tenders that Everyone Will Love!
Prep Time 1 hour
Cook Time 10 minutes
Total Time 1 hour 10 minutes
Servings: 4 servings
Course: Main Course
Cuisine: American
Calories: 400

Ingredients
  

  • 2 pounds chicken tenderloins
  • 1 cup buttermilk
  • 1 teaspoon garlic powder
  • 1 teaspoon onion powder
  • 1 teaspoon paprika
  • 1 teaspoon salt
  • 1/2 teaspoon black pepper
  • 1/2 teaspoon cayenne pepper optional
  • 1 cup all-purpose flour
  • 1 cup breadcrumbs preferably panko
  • Vegetable oil for frying

Method
 

  1. In a large bowl, combine buttermilk, garlic powder, onion powder, paprika, salt, black pepper, and cayenne pepper (if using). Add the chicken tenderloins and ensure they are fully submerged. Cover and refrigerate for at least 1 hour, or up to overnight for better flavor.
  2. In a shallow dish, mix together the flour and a pinch of salt. In another shallow dish, place the breadcrumbs.
  3. Remove the chicken from the buttermilk marinade, allowing excess to drip off. Dredge each tenderloin in the flour mixture, shaking off any excess, then dip it back into the buttermilk, and finally coat it in the breadcrumbs, pressing gently to adhere.
  4. In a large skillet, heat about 1 inch of vegetable oil over medium-high heat until it reaches 350°F. Carefully add the chicken tenders in batches, making sure not to overcrowd the pan. Fry for about 4-5 minutes on each side or until golden brown and cooked through.
  5. Use a slotted spoon to transfer the cooked tenders to a paper towel-lined plate to drain excess oil.
  6. Serve hot with your favorite dipping sauces.

Notes

  • For extra crunch, double-dip the chicken by repeating the flour and breadcrumb steps.
  • Try adding different spices to the flour mixture, such as Italian seasoning or chili powder, for a unique flavor twist.