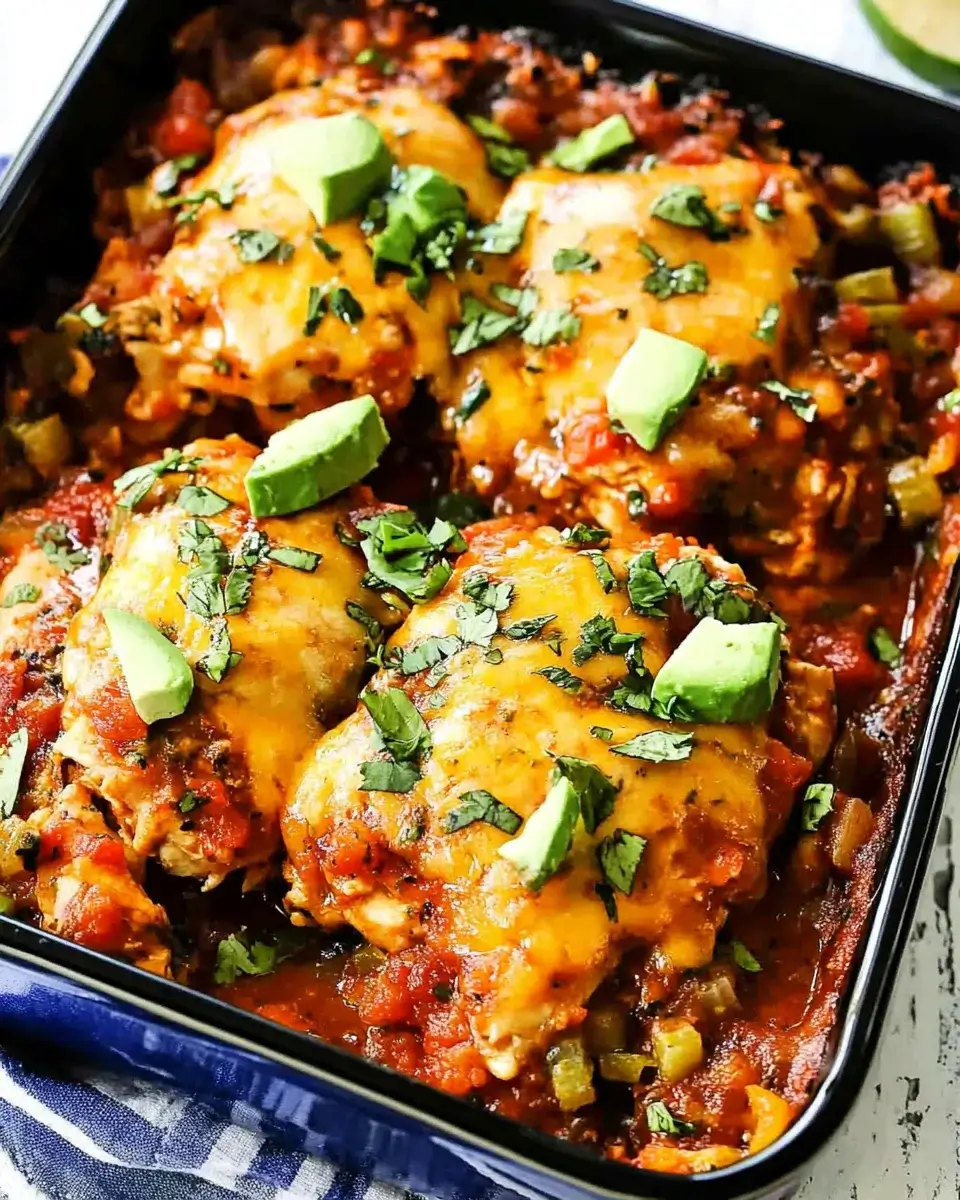
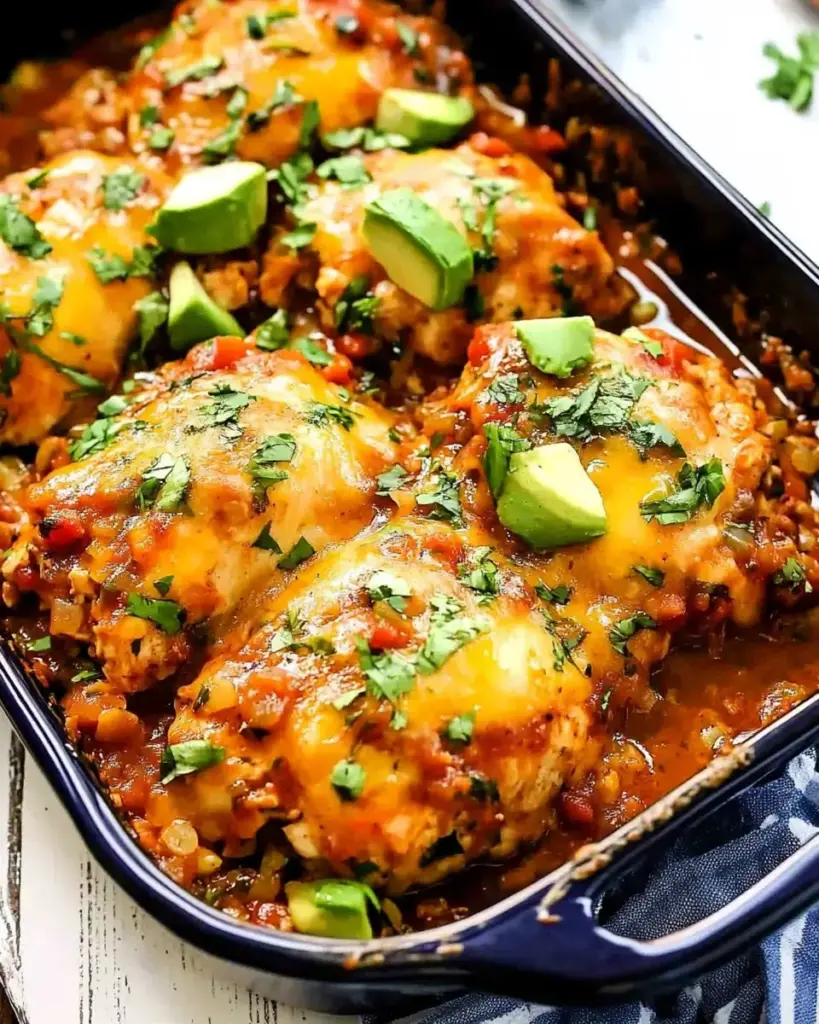
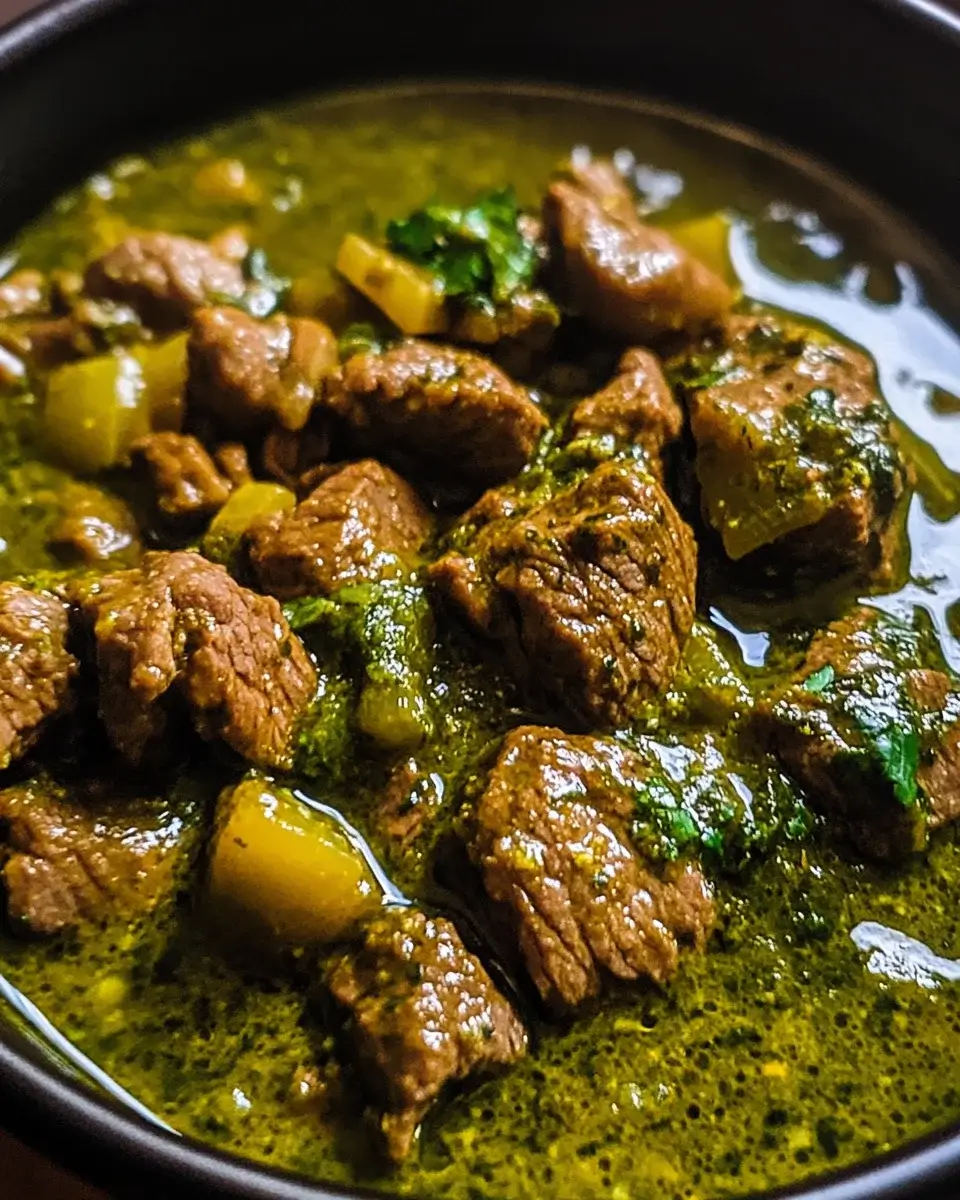
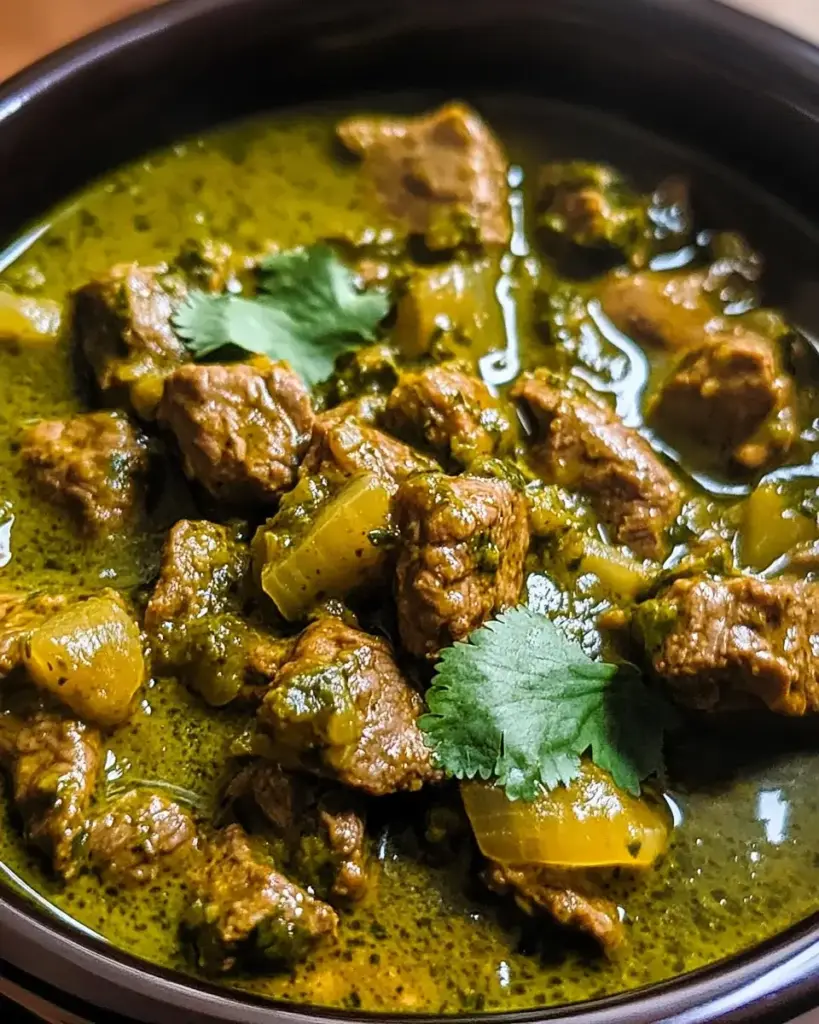
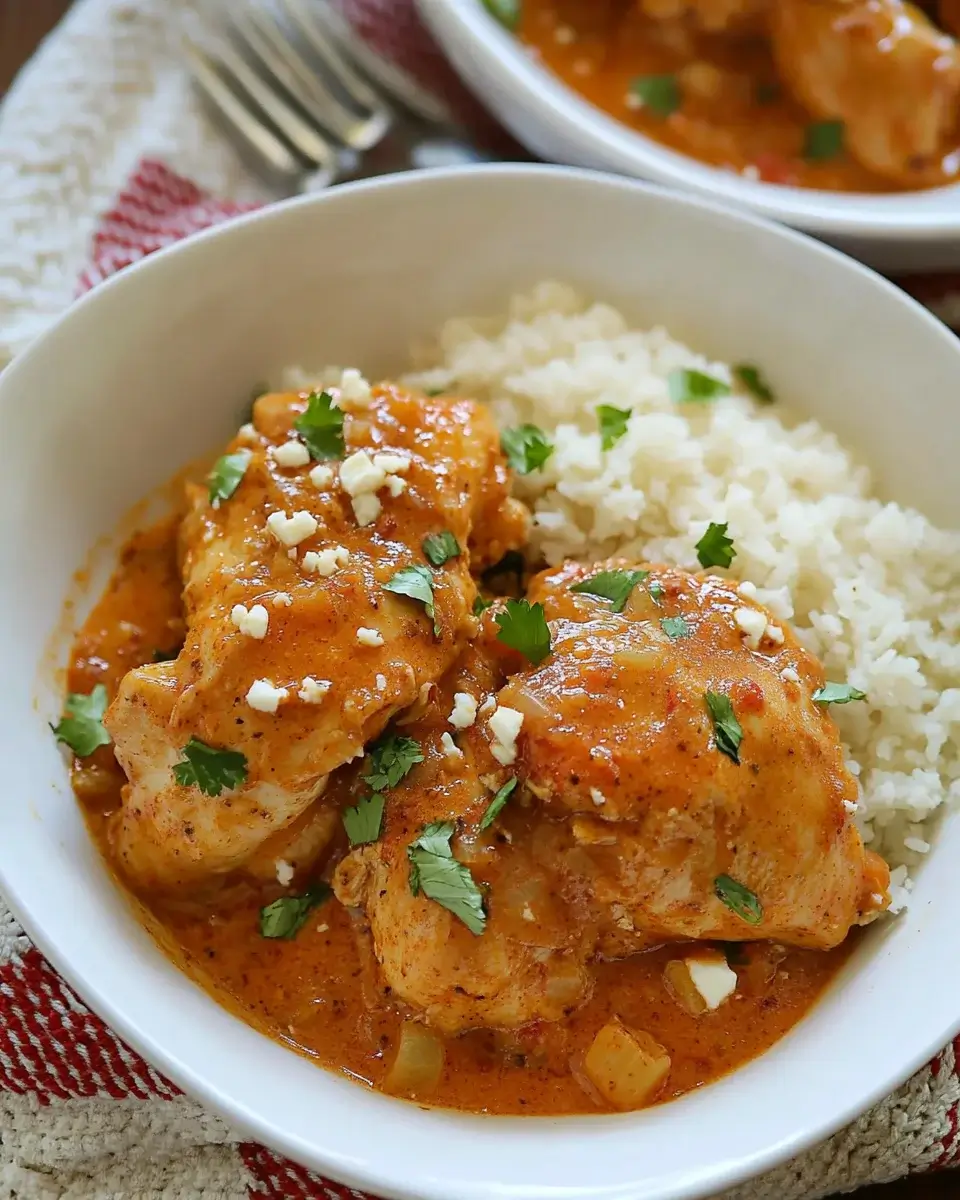
Savory Shredded Chicken Gravy is a must-try recipe!

What is Savory Shredded Chicken Gravy?

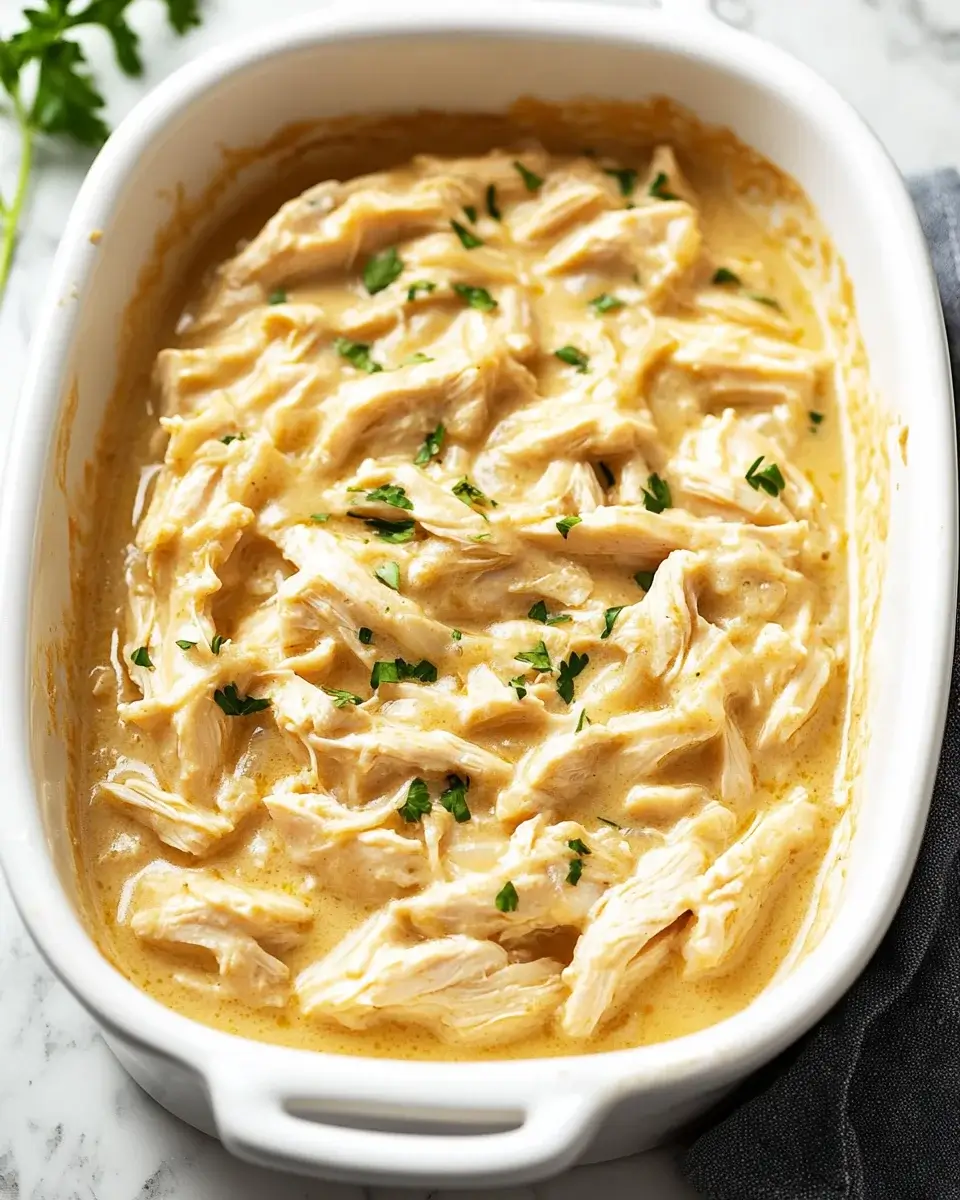
Savory Shredded Chicken Gravy is a delightful dish that combines tender, shredded chicken with a rich, flavorful gravy. This dish is not only comforting but also versatile, making it a favorite for many families. The chicken is seasoned and cooked until juicy, then shredded and mixed with a luscious gravy that enhances its taste. The result is a hearty meal that can be enjoyed in various ways, whether served over rice, mashed potatoes, or in a sandwich.

Why You Should Try This Recipe

There are countless reasons to try this Savory Shredded Chicken Gravy recipe. First, it’s incredibly easy to make, requiring just a few simple ingredients. Even if you’re a beginner in the kitchen, you can whip this up in no time. Second, it’s a crowd-pleaser! With its rich flavors and comforting texture, it’s perfect for family dinners or gatherings with friends.

Moreover, this dish is adaptable. You can customize it to suit your taste preferences. Want a little heat? Add some cayenne pepper! Prefer a creamier texture? Stir in some heavy cream. The possibilities are endless. Plus, it’s a great way to use leftover chicken, making it a practical choice for busy weeknights.

In summary, Savory Shredded Chicken Gravy is not just a meal; it’s an experience. It brings warmth and satisfaction to the table, making it a must-try for anyone looking to enjoy a delicious, homemade dish.

Ingredients for Savory Shredded Chicken Gravy

To create the perfect Savory Shredded Chicken Gravy, you’ll need a handful of simple ingredients. Each one plays a vital role in building the rich flavors and textures that make this dish so delightful. Here’s what you’ll need:

  • 2 pounds boneless, skinless chicken breasts: This is the star of the dish. Choose fresh chicken for the best flavor.
  • 1 teaspoon salt: Enhances the overall taste of the chicken.
  • 1/2 teaspoon black pepper: Adds a subtle kick to the seasoning.
  • 1 teaspoon garlic powder: Brings a savory depth to the dish.
  • 1 teaspoon onion powder: Complements the garlic and adds sweetness.
  • 1 tablespoon olive oil: Used for cooking the chicken, it adds richness.
  • 1 cup chicken broth: This is the base of your gravy, providing moisture and flavor.
  • 1 tablespoon Worcestershire sauce: Adds a tangy, umami flavor that enhances the gravy.
  • 1 tablespoon cornstarch: This will help thicken the gravy to the perfect consistency.
  • 2 tablespoons water: Used to create a slurry with the cornstarch.
  • 1/4 cup heavy cream (optional): For those who prefer a creamier gravy, this is a great addition.
  • Chopped parsley for garnish (optional): Adds a pop of color and freshness to your dish.

Gather these ingredients, and you’re ready to embark on a delicious cooking adventure. Each component contributes to the overall flavor, making your Savory Shredded Chicken Gravy a dish to remember!

Step-by-Step Preparation of Savory Shredded Chicken Gravy

Step 1: Preparing the Chicken

To start, you need to prepare the chicken. First, take your 2 pounds of boneless, skinless chicken breasts. Rinse them under cold water and pat them dry with paper towels. This helps remove any excess moisture. Next, season the chicken with 1 teaspoon of salt, 1/2 teaspoon of black pepper, 1 teaspoon of garlic powder, and 1 teaspoon of onion powder. Make sure to coat the chicken evenly with the spices. This step is crucial as it enhances the flavor of the chicken, making it deliciously savory.

Step 2: Making the Gravy Base

Now, it’s time to cook the chicken. In a large skillet, heat 1 tablespoon of olive oil over medium heat. Once the oil is hot, carefully add the seasoned chicken breasts. Cook them for about 5-7 minutes on each side until they are nicely browned. This browning adds depth to the flavor. After browning, pour in 1 cup of chicken broth and 1 tablespoon of Worcestershire sauce. Bring this mixture to a gentle simmer. Then, reduce the heat to low, cover the skillet, and let it cook for 20-25 minutes. This slow cooking allows the chicken to become tender and juicy.

Step 3: Combining Chicken and Gravy

Once the chicken is cooked through, remove it from the skillet. Use two forks to shred the chicken into bite-sized pieces. This step is fun and easy! After shredding, it’s time to make the gravy thicker. In a small bowl, mix 1 tablespoon of cornstarch with 2 tablespoons of water to create a slurry. Add this slurry to the skillet and stir well. Cook for an additional 2-3 minutes until the gravy thickens. This will give your dish a rich, velvety texture that pairs perfectly with the chicken.

Step 4: Final Touches

If you want a creamier gravy, now is the time to stir in 1/4 cup of heavy cream. This optional step adds a luxurious touch to your dish. Finally, return the shredded chicken to the skillet and mix everything together. Make sure the chicken is well-coated with the gravy. Your Savory Shredded Chicken Gravy is now ready to be served! For an extra pop of color, garnish with chopped parsley if desired. Enjoy this comforting meal hot!

Variations of Savory Shredded Chicken Gravy

Spicy Savory Shredded Chicken Gravy

If you love a little heat in your meals, then the Spicy Savory Shredded Chicken Gravy is perfect for you! To add some spice, simply incorporate a pinch of cayenne pepper or a few dashes of your favorite hot sauce into the seasoning mix. This will give your dish a delightful kick without overpowering the savory flavors. You can also experiment with adding diced jalapeños or crushed red pepper flakes while cooking the chicken. This variation is great for those who enjoy bold flavors and want to spice up their dinner routine.

Creamy Savory Shredded Chicken Gravy

For those who prefer a richer, creamier texture, the Creamy Savory Shredded Chicken Gravy is the way to go. As mentioned earlier, you can stir in 1/4 cup of heavy cream during the final touches. This addition not only enhances the flavor but also gives the gravy a smooth, velvety consistency. If you want to take it a step further, consider adding a splash of white wine or a sprinkle of Parmesan cheese for an extra layer of richness. This creamy version pairs wonderfully with mashed potatoes or pasta, making it a comforting choice for any meal.

Cooking Note for Savory Shredded Chicken Gravy

When preparing Savory Shredded Chicken Gravy, there are a few important cooking notes to keep in mind. These tips will help ensure that your dish turns out perfectly every time.

First, always use fresh chicken for the best flavor. Frozen chicken can work, but it may require longer cooking times. If you choose to use frozen chicken, make sure to thaw it completely before seasoning and cooking. This will help the chicken cook evenly and retain its moisture.

Next, be mindful of the cooking temperature. Cooking the chicken over medium heat allows it to brown nicely without burning. If the heat is too high, the outside may cook too quickly while the inside remains undercooked. Always check the internal temperature of the chicken; it should reach 165°F (75°C) for safe consumption.

Additionally, when making the gravy, stirring frequently is key. This prevents the cornstarch from clumping and ensures a smooth, velvety texture. If you find that your gravy is too thick, you can easily thin it out by adding a little more chicken broth or water until you reach your desired consistency.

Lastly, don’t hesitate to taste and adjust the seasoning. Everyone’s palate is different, so feel free to add more salt, pepper, or Worcestershire sauce to suit your taste. Cooking is all about experimenting and finding what works best for you!

By following these cooking notes, you’ll be well on your way to creating a delicious Savory Shredded Chicken Gravy that your family and friends will love.

Serving Suggestions for Savory Shredded Chicken Gravy

Best Side Dishes to Pair with Savory Shredded Chicken Gravy

When it comes to serving Savory Shredded Chicken Gravy, choosing the right side dishes can elevate your meal to new heights. Here are some fantastic options that complement the rich flavors of the gravy:

  • Mashed Potatoes: Creamy mashed potatoes are a classic pairing. The fluffy texture absorbs the gravy beautifully, making each bite a delight.
  • Rice: Whether you prefer white, brown, or even jasmine rice, it serves as a perfect base for the savory chicken and gravy.
  • Steamed Vegetables: Lightly steamed broccoli, carrots, or green beans add a fresh crunch and balance the richness of the dish.
  • Biscuits: Fluffy biscuits are great for soaking up the gravy. They add a comforting touch to your meal.
  • Coleslaw: A tangy coleslaw can provide a refreshing contrast to the savory flavors, making it a great side option.

These side dishes not only enhance the overall meal but also add variety to your dining experience. Feel free to mix and match based on your preferences and what you have on hand!

Creative Ways to Serve Savory Shredded Chicken Gravy

Looking to get a bit creative with your Savory Shredded Chicken Gravy? Here are some fun and unique serving ideas that will impress your family and friends:

  • Chicken Gravy Sandwich: Serve the shredded chicken and gravy on a toasted bun for a delicious sandwich. Add some pickles or coleslaw for extra flavor.
  • Stuffed Peppers: Use the shredded chicken and gravy as a filling for bell peppers. Bake them until the peppers are tender for a hearty meal.
  • Gravy Bowl: Create a comforting bowl by layering rice or mashed potatoes at the bottom, topped with shredded chicken and gravy, and finished with your favorite veggies.
  • Chicken Gravy Tacos: For a fun twist, use tortillas to make tacos filled with shredded chicken and gravy. Top with avocado, cheese, and salsa for a tasty treat.
  • Savory Chicken Casserole: Mix the shredded chicken with cooked pasta and vegetables, then top with cheese and bake for a comforting casserole.

These creative serving ideas not only make your meal more exciting but also allow you to enjoy Savory Shredded Chicken Gravy in different ways. Get ready to impress your guests with these delicious options!

Tips for Perfecting Savory Shredded Chicken Gravy

To ensure your Savory Shredded Chicken Gravy turns out perfectly every time, consider these helpful tips. Each suggestion will enhance the flavor and texture of your dish, making it a delightful experience for everyone at the table.

First, always season your chicken well. The seasoning is crucial for building flavor. Don’t be shy with the salt and spices! A well-seasoned chicken will make your gravy even more delicious.

Next, let the chicken rest after cooking. Once you remove it from the skillet, allow it to sit for a few minutes before shredding. This resting period helps the juices redistribute, keeping the chicken moist and tender.

When making the gravy, be patient. Allow the mixture to simmer gently after adding the cornstarch slurry. This will help the flavors meld together beautifully. Stir frequently to avoid lumps and ensure a smooth consistency.

If you want to add depth to your gravy, consider using homemade chicken broth. It’s richer and more flavorful than store-bought options. If you’re short on time, however, store-bought broth works just fine!

For a unique twist, try adding herbs like thyme or rosemary to the gravy. Fresh herbs can elevate the dish and add a wonderful aroma. Just remember to remove any stems before serving.

Lastly, taste as you go! Adjust the seasoning to your liking. Everyone has different preferences, so don’t hesitate to add more salt, pepper, or Worcestershire sauce to suit your taste.

By following these tips, you’ll be well on your way to mastering the art of Savory Shredded Chicken Gravy. Enjoy the process and savor the delicious results!

Breakdown of Time for Savory Shredded Chicken Gravy

Prep Time

Preparing Savory Shredded Chicken Gravy is quick and easy. You’ll need about 10-15 minutes to gather your ingredients and season the chicken. This includes rinsing the chicken, patting it dry, and mixing the spices. Having everything ready before you start cooking will make the process smoother and more enjoyable.

Cooking Time

The cooking time for this dish is approximately 30-35 minutes. First, you’ll cook the chicken for about 10-14 minutes on each side until it’s nicely browned. Then, after adding the chicken broth and Worcestershire sauce, let it simmer for 20-25 minutes. This slow cooking allows the chicken to become tender and juicy, ensuring a delicious result.

Total Time

In total, you can expect to spend around 40-50 minutes from start to finish. This includes both the prep and cooking times. With such a manageable time commitment, you can easily fit this delightful dish into your busy schedule. Plus, the end result is a comforting meal that’s well worth the effort!

Nutritional Information for Savory Shredded Chicken Gravy

Calories

When it comes to enjoying Savory Shredded Chicken Gravy, being mindful of calories is important. Each serving contains approximately 250 calories. This makes it a satisfying yet manageable option for those watching their caloric intake. The balance of protein and fat in this dish helps keep you feeling full without overindulging.

Protein

One of the standout features of Savory Shredded Chicken Gravy is its high protein content. Each serving provides about 36 grams of protein. This is excellent for those looking to increase their protein intake, whether for muscle building or simply to feel more satiated. Chicken is a lean source of protein, making it a healthy choice for any meal.

Sodium

While enjoying this delicious dish, it’s also essential to consider sodium levels. Each serving contains around 600 milligrams of sodium. This amount is reasonable for a savory dish, but if you’re watching your sodium intake, you can easily adjust the recipe. Opt for low-sodium chicken broth and reduce the added salt to keep the sodium levels in check without sacrificing flavor.

Overall, Savory Shredded Chicken Gravy is a nutritious option that provides a good balance of calories, protein, and sodium. It’s a meal that not only satisfies your taste buds but also supports your dietary needs. Enjoy it guilt-free as part of a balanced diet!

FAQs about Savory Shredded Chicken Gravy

Can I use frozen chicken for Savory Shredded Chicken Gravy?

Yes, you can use frozen chicken for Savory Shredded Chicken Gravy! However, it’s important to thaw the chicken completely before cooking. This ensures even cooking and helps retain moisture. You can thaw the chicken overnight in the refrigerator or use the defrost setting on your microwave. Once thawed, follow the recipe as usual for delicious results.

How can I thicken Savory Shredded Chicken Gravy?

If you find your gravy is too thin, there are a few easy ways to thicken it. The most common method is to use a cornstarch slurry. Mix 1 tablespoon of cornstarch with 2 tablespoons of cold water, then stir it into the gravy. Cook for a few minutes until it thickens. Alternatively, you can let the gravy simmer uncovered for a bit longer to reduce and thicken naturally. Just remember to stir frequently to prevent sticking!

What can I substitute for chicken in Savory Shredded Chicken Gravy?

If you’re looking for a substitute for chicken, there are several options. You can use turkey breast, which has a similar texture and flavor. For a vegetarian option, consider using jackfruit or mushrooms. Both can be seasoned and cooked in the same way as chicken, providing a hearty alternative. Just adjust the cooking times as needed to ensure everything is cooked through.

How long does Savory Shredded Chicken Gravy last in the fridge?

Savory Shredded Chicken Gravy can last in the fridge for about 3-4 days when stored in an airtight container. To reheat, simply warm it on the stove over low heat or in the microwave until heated through. If you want to keep it longer, consider freezing it. It can be frozen for up to 3 months. Just make sure to let it cool completely before transferring it to a freezer-safe container.

Conclusion on Savory Shredded Chicken Gravy

In conclusion, Savory Shredded Chicken Gravy is a delightful dish that brings comfort and satisfaction to any meal. With its tender chicken and rich gravy, it’s a recipe that’s sure to please everyone at the table. Whether you’re enjoying it over fluffy mashed potatoes, rice, or in a sandwich, the flavors are simply irresistible.

This dish is not only easy to prepare but also highly adaptable. You can customize it to suit your taste, whether you prefer it spicy, creamy, or with a twist of your favorite herbs. The versatility of Savory Shredded Chicken Gravy makes it a fantastic option for busy weeknights or special gatherings.

Moreover, the nutritional benefits of this dish, including its high protein content and reasonable calorie count, make it a smart choice for those looking to maintain a balanced diet. With just a few simple ingredients and steps, you can create a meal that is both delicious and nourishing.

So, why not give this recipe a try? Gather your ingredients, follow the steps, and enjoy the warm, comforting flavors of Savory Shredded Chicken Gravy. It’s a dish that not only fills your stomach but also warms your heart. Happy cooking!
Paul

Savory Shredded Chicken Gravy is a must-try recipe!

This shredded chicken and gravy is the definition of cozy comfort food—juicy chicken breasts smothered in a rich, creamy gravy and slow-baked or slow-cooked to tender perfection. A family-friendly, no-fuss dinner that practically makes itself!
Prep Time 5 minutes
Cook Time 45 minutes
Total Time 50 minutes
Servings: 6 servings
Course: Dinner
Cuisine: American

Ingredients
  

  • 4 boneless skinless chicken breasts
  • 2 cans 10.5 oz each condensed cream of chicken soup
  • 1 packet 1 oz chicken gravy mix
  • Salt and pepper to taste

Method
 

Oven Method:
  1. Preheat oven to 400°F (200°C) and position rack in the center of the oven.
  2. Place chicken breasts in a 9×13-inch casserole dish in a single layer.
  3. In a medium bowl, whisk together the cream of chicken soup and gravy mix until fully combined and smooth.
  4. Pour the mixture over the chicken, spreading it evenly to cover.
  5. Cover the dish tightly with foil (or a lid) to seal in moisture.
  6. Bake for 45 minutes, or until the chicken is fully cooked and shreds easily with a fork.
  7. Remove from the oven, shred the chicken directly in the casserole dish, season with salt and pepper, and mix it all together before serving.
Crockpot Method:
  1. Arrange the chicken breasts in the bottom of a Crockpot.
  2. In a bowl, stir together the cream of chicken soup and gravy mix until smooth.
  3. Pour the mixture over the chicken.
  4. Cover and cook on high for 3–4 hours or low for 7–8 hours.
  5. Once done, shred the chicken directly in the slow cooker, season with salt and pepper, and stir well to coat in the gravy.

Notes

  • Great over mashed potatoes, rice, or biscuits for a full meal.
  • You can use chicken thighs instead of breasts for extra tenderness.
  • Add herbs like thyme or parsley for a flavor boost.
  • Leftovers store well in the fridge for up to 4 days or freeze beautifully for up to 2 months.
  • For a richer gravy, stir in a splash of milk or cream before serving.

Inside-Out Stuffed Pepper Casserole Recipe is delicious!

Are you looking for a delicious and hearty meal that the whole family will love? Look no further than the Inside-Out Stuffed Pepper Casserole Recipe! This dish combines all the flavors of traditional stuffed peppers but in a simpler, casserole form. It’s perfect for busy weeknights or cozy family dinners. With its vibrant colors and rich flavors, this casserole is sure to become a favorite in your home.

What Makes This Recipe Unique?

What sets the Inside-Out Stuffed Pepper Casserole apart is its ease of preparation. Instead of hollowing out individual peppers, you simply dice them and mix them into the casserole. This not only saves time but also allows the flavors to meld beautifully. The combination of ground meat, rice, and spices creates a comforting dish that is both filling and satisfying. Plus, the melted cheddar cheese on top adds a delightful creaminess that everyone will enjoy!

Benefits of Making Inside-Out Stuffed Pepper Casserole

There are many benefits to making this casserole. First, it’s a one-dish meal, which means less cleanup for you! Second, it’s highly customizable. You can easily swap out ingredients based on your family’s preferences or dietary needs. Want to make it vegetarian? Just replace the meat with beans or lentils. Additionally, this casserole is packed with nutrients from the bell peppers and other vegetables, making it a healthy choice for dinner. Lastly, it’s a great way to use up leftover ingredients in your fridge, reducing food waste while creating a delicious meal.

Ingredients for Inside-Out Stuffed Pepper Casserole Recipe

To create the delightful Inside-Out Stuffed Pepper Casserole, you’ll need a variety of fresh ingredients. Each component plays a crucial role in building the flavors and textures of this dish. Here’s what you’ll need:

  • 2 large bell peppers, diced (any color)
  • 1 medium onion, diced
  • 2 cloves garlic, minced
  • 1 pound ground beef or turkey
  • 1 cup uncooked rice (white or brown)
  • 1 can (15 ounces) diced tomatoes, undrained
  • 1 cup beef or vegetable broth
  • 1 teaspoon Italian seasoning
  • 1 teaspoon paprika
  • Salt and pepper to taste
  • 1 cup shredded cheddar cheese
  • Fresh parsley, chopped (for garnish)

These ingredients come together to create a hearty and flavorful casserole. The bell peppers provide a sweet crunch, while the ground meat adds protein. The rice acts as a filling base, soaking up all the delicious juices from the tomatoes and broth. Don’t forget the spices! They elevate the dish, giving it that classic stuffed pepper taste. Finally, the melted cheddar cheese on top brings everything together with its creamy goodness.

Feel free to get creative! You can add extra vegetables or spices to suit your taste. This flexibility makes the Inside-Out Stuffed Pepper Casserole a fantastic choice for any meal.

Step-by-Step Preparation of Inside-Out Stuffed Pepper Casserole Recipe

Now that you have all your ingredients ready, it’s time to dive into the preparation of your Inside-Out Stuffed Pepper Casserole. Follow these simple steps to create a delicious meal that your family will love!

Step 1: Prepping the Vegetables

Start by washing your bell peppers thoroughly. Then, dice them into small pieces. You can choose any color of bell pepper you like—red, green, yellow, or orange. Each adds a unique flavor and color to your dish. Next, peel and dice the onion. Finally, mince the garlic cloves. Having all your vegetables prepped will make the cooking process smoother and quicker.

Step 2: Cooking the Meat

In a large skillet, heat a splash of oil over medium heat. Once hot, add the ground beef or turkey. Cook it for about 5-7 minutes, breaking it apart with a spoon as it browns. Make sure to drain any excess fat to keep your casserole from becoming greasy. This step is crucial as it adds a rich flavor base to your casserole.

Step 3: Combining Ingredients

Once the meat is cooked, it’s time to add the vegetables. Toss in the diced bell peppers, onion, and minced garlic. Sauté everything together for about 5 minutes until the vegetables soften. Then, stir in the uncooked rice, diced tomatoes (with their juice), and broth. Add the Italian seasoning, paprika, salt, and pepper. Bring this mixture to a gentle simmer, allowing the flavors to blend beautifully.

Step 4: Assembling the Casserole

Now that your mixture is ready, transfer it to a greased 9×13 inch baking dish. Spread it out evenly to ensure even cooking. Cover the dish with aluminum foil to keep the moisture in while it bakes. This step is important for cooking the rice thoroughly and keeping the casserole juicy.

Step 5: Baking the Casserole

Place the covered casserole in your preheated oven at 350°F (175°C). Bake it for 30 minutes. After that, carefully remove the foil and give the casserole a good stir. This helps to mix the ingredients and ensures even cooking. Now, sprinkle the shredded cheddar cheese on top. Return the dish to the oven, uncovered, for an additional 10-15 minutes. You’ll know it’s done when the cheese is melted and bubbly, creating a delicious golden crust.

Once baked, let the casserole cool for a few minutes before serving. This allows the flavors to settle and makes it easier to serve. Enjoy your Inside-Out Stuffed Pepper Casserole with family and friends!

Variations of Inside-Out Stuffed Pepper Casserole Recipe

The Inside-Out Stuffed Pepper Casserole is a versatile dish that can easily be adapted to suit different dietary preferences. Whether you’re looking for vegetarian options or gluten-free modifications, there are plenty of ways to make this casserole your own. Let’s explore some delicious variations!

Vegetarian Options

If you want to make a vegetarian version of the Inside-Out Stuffed Pepper Casserole, it’s simple! Start by replacing the ground beef or turkey with black beans, lentils, or even quinoa. These ingredients provide a hearty texture and are packed with protein. You can also add extra vegetables like corn, zucchini, or mushrooms to enhance the flavor and nutrition. For a cheesy touch, consider using a plant-based cheese or simply increase the amount of shredded cheddar cheese on top. This way, you’ll still enjoy that creamy goodness without the meat!

Gluten-Free Modifications

For those who need a gluten-free option, the Inside-Out Stuffed Pepper Casserole can easily accommodate this requirement. First, ensure that the broth you use is gluten-free. Many brands offer gluten-free vegetable or beef broth. Next, swap out the rice for gluten-free grains like quinoa or cauliflower rice. These alternatives not only keep the dish gluten-free but also add unique flavors and textures. Additionally, check the labels on your diced tomatoes and cheese to ensure they are gluten-free. With these simple changes, you can enjoy a delicious and satisfying casserole without any gluten!

These variations make the Inside-Out Stuffed Pepper Casserole a fantastic choice for gatherings or family dinners. Everyone can enjoy a meal that fits their dietary needs while savoring the same great flavors!

Cooking Note for Inside-Out Stuffed Pepper Casserole Recipe

When preparing the Inside-Out Stuffed Pepper Casserole, there are a few important cooking notes to keep in mind. These tips will help ensure that your casserole turns out perfectly every time, making it a delightful dish for any occasion.

First, always preheat your oven before placing the casserole inside. This step is crucial for even cooking. If the oven isn’t hot enough, the rice may not cook properly, leaving you with a crunchy texture instead of the desired softness.

Next, consider the type of rice you use. White rice cooks faster than brown rice, so if you choose brown rice, you may need to increase the baking time slightly. Alternatively, you can pre-cook the brown rice before adding it to the casserole to ensure it’s tender by the time the dish is done.

Another tip is to taste your mixture before transferring it to the baking dish. Adjust the seasoning as needed. Everyone’s palate is different, and you might want to add a pinch more salt or a dash of hot sauce for an extra kick!

Lastly, let the casserole rest for a few minutes after baking. This resting time allows the flavors to meld and makes it easier to serve. If you cut into it too soon, it may fall apart, and you won’t get those beautiful layers of color and texture.

By following these cooking notes, you’ll create a delicious Inside-Out Stuffed Pepper Casserole that’s sure to impress your family and friends. Enjoy the process and the wonderful aromas that will fill your kitchen!

Serving Suggestions for Inside-Out Stuffed Pepper Casserole Recipe

Once your Inside-Out Stuffed Pepper Casserole is baked to perfection, it’s time to serve it up! This dish is not only delicious but also visually appealing, making it a great centerpiece for any meal. Here are some serving suggestions to enhance your dining experience:

  • Garnish with Fresh Herbs: Before serving, sprinkle some freshly chopped parsley or basil on top of the casserole. This adds a pop of color and a burst of fresh flavor that complements the dish beautifully.
  • Pair with a Side Salad: A light side salad can balance the richness of the casserole. Consider a simple green salad with mixed greens, cherry tomatoes, and a light vinaigrette. This adds freshness and crunch to your meal.
  • Serve with Crusty Bread: A slice of crusty bread or garlic bread is perfect for soaking up the delicious juices from the casserole. It’s a comforting addition that everyone will love!
  • Top with Sour Cream or Greek Yogurt: For an extra creamy touch, serve the casserole with a dollop of sour cream or Greek yogurt. This adds a tangy flavor that pairs well with the spices in the dish.
  • Offer Hot Sauce on the Side: If your family enjoys a bit of heat, provide hot sauce or chili flakes on the side. This allows everyone to customize their serving to their spice preference.

These serving suggestions will elevate your Inside-Out Stuffed Pepper Casserole, making it a delightful meal for any occasion. Whether it’s a family dinner or a gathering with friends, this dish is sure to impress!

Tips for Perfecting Your Inside-Out Stuffed Pepper Casserole Recipe

Creating the perfect Inside-Out Stuffed Pepper Casserole is all about attention to detail and a few handy tips. With these suggestions, you can elevate your dish and ensure it turns out delicious every time. Let’s dive into some expert tips that will help you master this recipe!

Choose Fresh Ingredients: Always opt for fresh vegetables and high-quality meat. Fresh bell peppers and onions will enhance the flavor of your casserole. If possible, buy organic produce for the best taste and nutrition.

Don’t Skip the Seasoning: Seasoning is key to a flavorful casserole. Don’t be shy with the spices! Taste your mixture before baking and adjust the seasoning as needed. A little extra Italian seasoning or a pinch of red pepper flakes can make a big difference.

Layering Flavors: For added depth, consider sautéing the garlic and onions before adding the meat. This step allows the flavors to develop fully, creating a more aromatic base for your casserole.

Experiment with Cheese: While cheddar cheese is a classic choice, feel free to mix it up! Try using mozzarella for a gooey texture or pepper jack for a spicy kick. You can even combine different cheeses for a unique flavor profile.

Use Leftovers Wisely: This casserole is a great way to use up leftover vegetables or grains. If you have cooked rice or other veggies in your fridge, toss them in! This not only reduces waste but also adds variety to your dish.

Check for Doneness: Since ovens can vary, keep an eye on your casserole as it bakes. The cheese should be melted and bubbly, and the rice should be tender. If it looks done but the rice isn’t cooked, cover it again and bake for a few more minutes.

Let It Rest: After baking, allow the casserole to rest for about 5-10 minutes before serving. This resting time helps the flavors meld together and makes it easier to cut into neat portions.

By following these tips, you’ll create a mouthwatering Inside-Out Stuffed Pepper Casserole that your family will rave about. Enjoy the cooking process and the delicious results!

Breakdown of Time for Inside-Out Stuffed Pepper Casserole Recipe

Understanding the time needed for each step of the Inside-Out Stuffed Pepper Casserole Recipe can help you plan your cooking efficiently. Here’s a detailed breakdown of the time involved in preparing this delicious dish.

Prep Time

The prep time for this casserole is approximately 15-20 minutes. This includes washing and dicing the bell peppers, onion, and garlic. Additionally, you’ll need time to measure out the rice and gather all your ingredients. Having everything ready before you start cooking will make the process smoother and more enjoyable.

Cooking Time

The cooking time for the Inside-Out Stuffed Pepper Casserole is about 40-45 minutes. This includes:

  • 7 minutes to brown the meat.
  • 5 minutes to sauté the vegetables.
  • 30 minutes of baking covered in the oven.
  • 10-15 minutes of baking uncovered to melt the cheese.

These steps ensure that the casserole is cooked thoroughly and the flavors meld beautifully.

Total Time

In total, you can expect to spend around 55-65 minutes from start to finish. This includes both prep and cooking time. It’s a relatively quick meal for a casserole, making it perfect for busy weeknights or family gatherings. With this time breakdown, you can easily fit the Inside-Out Stuffed Pepper Casserole into your schedule and enjoy a hearty, homemade meal!

Nutritional Information for Inside-Out Stuffed Pepper Casserole Recipe

Understanding the nutritional content of your meals is essential for maintaining a balanced diet. The Inside-Out Stuffed Pepper Casserole is not only delicious but also provides a good mix of nutrients. Here’s a breakdown of the nutritional information per serving:

Calories

Each serving of the Inside-Out Stuffed Pepper Casserole contains approximately 350 calories. This makes it a satisfying meal option without being overly heavy. The combination of protein, carbohydrates, and healthy fats ensures that you feel full and energized after enjoying this dish.

Protein

With about 25 grams of protein per serving, this casserole is a great source of this essential nutrient. The ground beef or turkey contributes significantly to the protein content, making it an excellent choice for those looking to build or maintain muscle. If you opt for vegetarian alternatives like beans or lentils, you’ll still get a hearty dose of protein, keeping the dish nutritious and filling.

Sodium

The sodium content in each serving is around 600 milligrams. While this is a reasonable amount for a casserole, it’s always a good idea to monitor your sodium intake, especially if you’re watching your salt consumption. To reduce sodium levels, consider using low-sodium broth and canned tomatoes. This way, you can enjoy the flavors without compromising your health.

Overall, the Inside-Out Stuffed Pepper Casserole is a well-rounded meal that provides essential nutrients while being easy to prepare. It’s a fantastic option for families looking to enjoy a healthy and hearty dinner together!

FAQs About Inside-Out Stuffed Pepper Casserole Recipe

Can I make Inside-Out Stuffed Pepper Casserole ahead of time?

Absolutely! The Inside-Out Stuffed Pepper Casserole is perfect for meal prep. You can prepare the casserole a day in advance and store it in the refrigerator. Just follow the steps up to the baking point, cover it tightly with foil, and refrigerate. When you’re ready to bake, simply preheat your oven and bake it as directed. You may need to add a few extra minutes to the cooking time since it will be cold from the fridge. This makes it a convenient option for busy weeknights!

What can I substitute for rice in Inside-Out Stuffed Pepper Casserole?

If you’re looking for alternatives to rice, there are several options you can try! Quinoa is a great substitute, as it cooks quickly and adds a nutty flavor. Cauliflower rice is another popular choice, especially for those following a low-carb diet. You can also use couscous or even orzo pasta for a different texture. Just keep in mind that cooking times may vary, so adjust accordingly to ensure everything is cooked perfectly!

How do I store leftovers of Inside-Out Stuffed Pepper Casserole?

Storing leftovers is easy! Allow the casserole to cool completely before transferring it to an airtight container. You can keep it in the refrigerator for up to 3-4 days. If you want to store it for a longer period, consider freezing it. Just make sure to use a freezer-safe container. When you’re ready to enjoy it again, thaw it in the fridge overnight and reheat in the oven or microwave until heated through. This way, you can savor the delicious flavors of your Inside-Out Stuffed Pepper Casserole even after the first serving!

Conclusion on Inside-Out Stuffed Pepper Casserole Recipe

The Inside-Out Stuffed Pepper Casserole is more than just a meal; it’s a delightful experience that brings families together. With its vibrant colors, rich flavors, and comforting textures, this dish is sure to become a staple in your home. Whether you’re enjoying it on a busy weeknight or serving it at a family gathering, it’s a recipe that pleases everyone.

Not only is this casserole easy to prepare, but it also offers endless possibilities for customization. You can adapt it to fit various dietary needs, making it a versatile option for any occasion. From vegetarian alternatives to gluten-free modifications, the Inside-Out Stuffed Pepper Casserole can cater to everyone’s tastes.

As you gather around the table to enjoy this hearty dish, you’ll appreciate the time spent cooking and the love infused into every bite. The combination of fresh ingredients, savory spices, and melted cheese creates a comforting meal that warms the heart and satisfies the appetite.

So, why not give the Inside-Out Stuffed Pepper Casserole a try? With its simple preparation and delicious results, it’s a recipe that you’ll want to make again and again. Enjoy the process, share it with loved ones, and savor the joy of a homemade meal that brings everyone together!

Paul

Inside-Out Stuffed Pepper Casserole Recipe is delicious!

All the hearty, cheesy flavors of classic stuffed peppers—without the fuss! This easy casserole blends seasoned beef, tender peppers, zesty tomatoes, and melty cheddar into one comforting dish perfect for busy weeknights or cozy gatherings.
Prep Time 10 minutes
Cook Time 25 minutes
Total Time 35 minutes
Servings: 8 servings
Course: Dinner
Cuisine: American

Ingredients
  

  • 2 tablespoons butter
  • 3 bell peppers any color, chopped into bite-sized pieces
  • 1/2 yellow onion diced (about 1/2 cup)
  • 1 pound ground beef
  • 1/4 teaspoon Italian seasoning
  • 1 can Ro*tel tomatoes 10 oz
  • 1/2 cup cooked rice leftover rice works well
  • 3 ounces tomato paste about 1/3 cup
  • 1 teaspoon Worcestershire sauce
  • 1/2 cup water
  • 2 cups sharp cheddar cheese shredded

Method
 

  1. Preheat the oven to 350°F (175°C).
  2. In a large oven-safe skillet, melt butter over medium heat. Add chopped bell peppers and diced onion, and sauté for about 5 minutes until slightly softened.
  3. Add ground beef to the skillet. Cook until browned, and vegetables are tender. Drain excess fat if necessary.
  4. Stir in Italian seasoning, Ro*tel tomatoes, cooked rice, tomato paste, Worcestershire sauce, and water. Mix until fully combined and heated through.
  5. Stir in 1 cup of shredded cheddar cheese until melted and incorporated.
  6. If using an oven-safe skillet, sprinkle the remaining cheese on top. Otherwise, transfer mixture to a greased 9×13 baking dish and top with the rest of the cheese.
  7. Bake uncovered for 15 minutes or until the cheese is fully melted and bubbly.
  8. Serve warm and enjoy!

Notes

  • This is a great way to use leftover rice.
  • You can substitute ground turkey or chicken for a leaner version.
  • Add red pepper flakes for a spicy kick.
  • Freezes well—just portion and store in airtight containers.
  • For extra veggies, stir in corn or chopped spinach before baking.

Banoffee Pie Recipe: A Delicious Dessert to Enjoy!

Introduction to Banoffee Pie Recipe

What is Banoffee Pie?

Banoffee pie is a delightful dessert that combines the rich flavors of bananas and toffee. This no-bake pie features a crunchy graham cracker crust, a luscious layer of caramel made from sweetened condensed milk, and a fluffy topping of whipped cream. The combination of sweet, creamy, and crunchy textures makes it a favorite among dessert lovers. Each slice offers a burst of flavor that is both satisfying and indulgent, making it perfect for any occasion.

The Origin of Banoffee Pie

Banoffee pie originated in England in the 1970s. It was created by a couple who owned a restaurant called The Hungry Monk. They wanted to make a dessert that combined bananas and toffee, and thus, the banoffee pie was born. The name itself is a clever blend of “banana” and “toffee.” Since its creation, this pie has gained popularity worldwide, becoming a staple in many dessert menus. Its simple yet delicious ingredients make it easy to prepare, allowing anyone to enjoy this delightful treat at home.

Ingredients for Banoffee Pie Recipe

To create a delicious banoffee pie, you’ll need a few simple ingredients. Each component plays a vital role in achieving the perfect balance of flavors and textures. Here’s what you’ll need:

  • 1 ½ cups graham cracker crumbs
  • ½ cup unsalted butter, melted
  • 1 can (14 ounces) sweetened condensed milk
  • 2 large bananas, sliced
  • 1 cup heavy whipping cream
  • 2 tablespoons powdered sugar
  • 1 teaspoon vanilla extract
  • Chocolate shavings or cocoa powder for garnish (optional)

These ingredients come together to create a delightful dessert that is sure to impress your family and friends. The graham cracker crust provides a crunchy base, while the sweetened condensed milk transforms into a rich caramel filling. The bananas add a fresh, fruity flavor, and the whipped cream topping brings a light, airy finish. Feel free to get creative with your toppings, as chocolate shavings or a sprinkle of cocoa powder can elevate the presentation and taste of your banoffee pie.

Step-by-Step Preparation of Banoffee Pie Recipe

Step 1: Preparing the Base

1 ½ cups of graham cracker crumbs with ½ cup of melted unsalted butter. Mix them well until the crumbs are fully coated. Next, press this mixture firmly into the bottom and up the sides of a 9-inch pie pan. This will form a sturdy crust. Bake it in the preheated oven for about 8-10 minutes or until it turns lightly golden. Once done, remove it from the oven and let it cool completely. This step is crucial as a cool crust will hold the filling better.

Step 2: Making the Toffee Filling

1 can (14 ounces) of sweetened condensed milk. Place the saucepan over medium heat. Stir the milk constantly for about 10-15 minutes. You want it to thicken and turn a lovely caramel color. Be careful not to let it burn, as this can ruin the flavor. Once it reaches the right consistency, pour the caramel into your cooled crust. Spread it evenly with a spatula, ensuring every corner is filled with that sweet goodness.

Step 3: Assembling the Banoffee Pie

2 large bananas and slice them into thin rounds. Layer these banana slices over the caramel filling. Spread them out evenly to ensure every bite has that delicious banana flavor. This fruity layer adds freshness and balances the sweetness of the toffee.

Step 4: Topping the Pie

1 cup of heavy whipping cream, 2 tablespoons of powdered sugar, and 1 teaspoon of vanilla extract. Whip these ingredients together until soft peaks form. This means the cream should hold its shape but still be light and fluffy. Once whipped, spread the cream over the bananas, smoothing it out with a spatula. For an extra touch, you can garnish your pie with chocolate shavings or a dusting of cocoa powder. Finally, chill the pie in the refrigerator for at least 2 hours before serving. This allows the flavors to meld beautifully.

Variations of Banoffee Pie Recipe

Gluten-Free Banoffee Pie Recipe

If you’re looking for a gluten-free option, you can easily adapt the banoffee pie recipe. Instead of using traditional graham crackers, opt for gluten-free graham cracker crumbs or crushed gluten-free cookies. These alternatives will provide the same crunchy texture without the gluten. Follow the same steps for preparing the crust, and you’ll have a delicious gluten-free base ready for your pie. The rest of the ingredients remain the same, ensuring that the rich flavors of caramel, bananas, and whipped cream shine through. This variation allows everyone to enjoy the delightful taste of banoffee pie, regardless of dietary restrictions.

Vegan Banoffee Pie Recipe

For those following a vegan lifestyle, you can still indulge in this scrumptious dessert. Start by replacing the graham cracker crust with a mixture of crushed vegan cookies and coconut oil. This will create a tasty base that is completely plant-based. For the caramel filling, use coconut condensed milk or a homemade version made from coconut milk and sugar. This will give you that rich, sweet flavor without any animal products. When it comes to the whipped cream, opt for coconut cream or a store-bought vegan whipped topping. Assemble your pie just like the traditional recipe, and you’ll have a vegan banoffee pie that is just as delightful and satisfying. Everyone will love this version, and it’s a great way to share the joy of dessert with friends and family!

Cooking Note for Banoffee Pie Recipe

When making your banoffee pie, there are a few important cooking notes to keep in mind. These tips will help ensure that your pie turns out perfectly every time.

First, be patient while making the caramel filling. Stirring constantly is key to achieving that rich, golden color without burning it. If you notice the mixture starting to stick to the bottom of the pan, reduce the heat slightly. This will help prevent any unwanted burnt flavors from developing.

Next, allow your crust to cool completely before adding the caramel. A warm crust can cause the caramel to melt and seep through, making a mess. A well-cooled crust will hold its shape and keep the layers distinct.

When layering the bananas, try to use ripe but firm bananas. Overripe bananas can become mushy and may not hold their shape well. Slicing them evenly will also help with presentation and ensure that each slice of pie has a balanced flavor.

Lastly, chilling the pie is essential. This step allows the flavors to meld together and the whipped cream to set properly. If you’re short on time, aim for at least one hour in the refrigerator, but two hours is ideal for the best results.

By following these cooking notes, you’ll create a banoffee pie that is not only delicious but also visually appealing. Enjoy the process and the delightful outcome!

Serving Suggestions for Banoffee Pie Recipe

Serving banoffee pie is just as delightful as making it! This dessert is perfect for various occasions, from casual family dinners to festive gatherings. Here are some serving suggestions to enhance your banoffee pie experience:

  • Chilled Slices: Serve the pie chilled straight from the refrigerator. This keeps the whipped cream fluffy and the layers intact, making each slice a treat.
  • Accompany with Coffee: Pair your banoffee pie with a cup of freshly brewed coffee or espresso. The rich flavors of the pie complement the bitterness of coffee beautifully.
  • Add Fresh Fruits: Consider serving the pie with a side of fresh berries, like strawberries or raspberries. Their tartness balances the sweetness of the pie.
  • Drizzle with Caramel: For an extra indulgent touch, drizzle some additional caramel sauce over the whipped cream before serving. This adds a beautiful presentation and enhances the flavor.

  • Ice Cream Delight: Serve slices of banoffee pie with a scoop of vanilla or chocolate ice cream. The cold ice cream contrasts nicely with the warm flavors of the pie.
  • Garnish with Mint: A sprig of fresh mint on top of each slice adds a pop of color and a refreshing taste that complements the dessert.

These serving suggestions will not only elevate your banoffee pie but also impress your guests. Whether you keep it simple or add a few extras, this dessert is sure to be a hit!

Tips for Perfecting Your Banoffee Pie Recipe

Creating the perfect banoffee pie is all about attention to detail. Here are some helpful tips to ensure your dessert turns out delicious every time:

  • Use Quality Ingredients: The flavor of your banoffee pie greatly depends on the quality of the ingredients. Choose fresh bananas, high-quality sweetened condensed milk, and real vanilla extract. These small choices can make a big difference in taste.
  • Don’t Rush the Caramel: When making the caramel filling, patience is key. Stir constantly and keep the heat moderate. If you rush this step, you might end up with burnt caramel, which can ruin the pie.
  • Cool the Crust Completely: Allow your graham cracker crust to cool completely before adding the caramel. A warm crust can melt the caramel, leading to a soggy bottom. This step is crucial for a well-structured pie.
  • Layer Bananas Just Before Serving: To prevent the bananas from browning, slice and layer them just before serving. This keeps them fresh and visually appealing. You can also brush them lightly with lemon juice to slow down browning.
  • Whip Cream to Right Consistency: When whipping the cream, stop as soon as soft peaks form. Over-whipping can lead to a grainy texture. You want the cream to be light and fluffy for the best mouthfeel.
  • Chill for Optimal Flavor: After assembling your pie, chill it for at least two hours. This allows the flavors to meld and the whipped cream to set properly. The longer it chills, the better the taste!
  • Experiment with Toppings: Feel free to get creative with your toppings. Try adding crushed nuts, caramel drizzle, or even a sprinkle of sea salt for a gourmet touch. These additions can elevate your banoffee pie to new heights.

By following these tips, you’ll be well on your way to mastering the art of banoffee pie. Each bite will be a delightful experience, filled with rich flavors and textures that everyone will love!

Breakdown of Time for Banoffee Pie Recipe

Prep Time

20-25 minutes. This includes gathering your ingredients, making the crust, and preparing the caramel filling. Make sure to take your time during this stage to ensure everything is done correctly. A well-prepared base and filling will lead to a delicious final product!

Cooking Time

10-15 minutes to bake the crust until it is lightly golden. Additionally, the caramel filling requires around 10-15 minutes of cooking on the stove. So, in total, the cooking time is about 20-30 minutes. Keep an eye on the caramel to prevent it from burning, as this can affect the flavor of your pie.

Total Time

40-55 minutes. However, remember that you will need to chill the pie for at least 2 hours before serving. This chilling time is essential for the flavors to meld and for the whipped cream to set properly. So, while the active time is relatively short, plan for a total of about 2 hours and 40-55 minutes from start to finish before you can enjoy this delicious dessert!

Nutritional Information for Banoffee Pie Recipe

Calories

350 calories. This number can vary slightly based on the specific ingredients used and portion sizes. While this dessert is rich and satisfying, it’s important to enjoy it in moderation, especially if you’re watching your calorie intake.

Protein

3 grams of protein per serving. The protein mainly comes from the heavy whipping cream and the sweetened condensed milk. While it’s not a protein-packed dessert, it does offer a delightful treat that can be enjoyed as part of a balanced diet.

Sodium

150 milligrams of sodium. This amount is relatively moderate, but if you are on a low-sodium diet, it’s wise to keep this in mind. The sodium primarily comes from the butter used in the crust and the sweetened condensed milk. Always check the labels of your ingredients to get the most accurate nutritional information.

FAQs about Banoffee Pie Recipe

Can I make Banoffee Pie in advance?

Yes, you can make banoffee pie in advance! In fact, preparing it a day ahead can enhance the flavors as they meld together. Just be sure to store it in the refrigerator, covered with plastic wrap or in an airtight container. This will keep the pie fresh and prevent it from absorbing any odors from the fridge. However, it’s best to add the banana slices just before serving to keep them from browning. This way, your pie will look and taste its best!

What can I substitute for the bananas in Banoffee Pie?

If you’re not a fan of bananas or want to try something different, there are several delicious substitutes. You can use sliced strawberries, raspberries, or even peaches for a fruity twist. Each fruit will bring its unique flavor to the pie. For a chocolatey version, consider using chocolate mousse or a layer of melted chocolate instead of fruit. Just remember to adjust the sweetness of the caramel filling if you choose a less sweet fruit!

How long does Banoffee Pie last in the fridge?

3-4 days when stored properly. Make sure to cover it well to keep it fresh. However, the bananas may start to brown after a day or two, so it’s best to enjoy the pie within the first couple of days for optimal taste and appearance. If you notice the bananas browning, you can still enjoy the pie, but it may not look as appealing.

Can I use store-bought caramel for the Banoffee Pie Recipe?

Absolutely! Using store-bought caramel can save you time and effort. Just make sure to choose a high-quality caramel sauce for the best flavor. You can layer it directly into the cooled crust instead of making your own caramel filling. This option is perfect for those who want to simplify the recipe without sacrificing taste. Just remember to adjust the sweetness of the pie if the store-bought caramel is particularly sweet!

Conclusion on Banoffee Pie Recipe

In conclusion, the banoffee pie recipe is a delightful treat that brings together the rich flavors of bananas and toffee in a simple yet elegant dessert. Its easy preparation makes it accessible for bakers of all skill levels, allowing anyone to create this indulgent pie at home. Whether you choose to stick to the classic recipe or explore variations like gluten-free or vegan options, the essence of banoffee pie remains the same: a perfect balance of sweetness, creaminess, and crunch.

As you gather your ingredients and follow the steps, remember that the joy of making banoffee pie lies not just in the final product but also in the process. Enjoy the aroma of caramelizing sweetened condensed milk, the satisfaction of whipping cream to perfection, and the anticipation of sharing this delicious dessert with loved ones. Each slice of banoffee pie is a celebration of flavors that can brighten any occasion.

So, whether it’s a family gathering, a birthday party, or simply a treat for yourself, banoffee pie is sure to impress. With its rich history and delightful taste, this dessert has earned its place in the hearts of many. Now that you have the recipe and tips at your fingertips, it’s time to roll up your sleeves and create your own banoffee pie masterpiece. Enjoy every bite!

Paul

Banoffee Pie Recipe: A Delicious Dessert to Enjoy!

This classic British dessert features a buttery graham cracker crust filled with rich homemade toffee, layered with fresh banana slices, and topped with fluffy whipped cream. It’s a delightful combination of flavors and textures that’s sure to impress.
Prep Time 25 minutes
Cook Time 10 minutes
Servings: 8 servings
Course: Dessert
Cuisine: British

Ingredients
  

  • Graham Cracker Crust1½ cups graham cracker crumbs about 13 full sheets3 tablespoons sugar⅛ teaspoon salt½ cup unsalted butter, melted​
  • Toffee Filling¾ cup unsalted butter¾ cup packed dark brown sugar6 tablespoons sweetened condensed milk6 tablespoons heavy whipping cream¾ teaspoon vanilla extract​
  • Banana and Whipped Cream Topping5–6 medium bananas sliced (or about 4 large bananas)1¼ cups cold heavy whipping cream½ cup powdered sugar¾ teaspoon vanilla extractChocolate shavings or toffee bits (optional, for garnish)​

Method
 

  1. Prepare the Crust:Preheat oven to 325°F (163°C). Grease a 9-inch deep-dish pie pan with nonstick spray.In a bowl, combine graham cracker crumbs, sugar, and salt. Add melted butter and stir until the mixture resembles wet sand.Press the mixture evenly into the bottom and up the sides of the prepared pie pan.Bake for 6–8 minutes, then set aside to cool completely.
  2. Make the Toffee Filling:In a large saucepan, melt the butter over medium-low heat. Add brown sugar and cook, stirring constantly, until the sugar dissolves, about 5 minutes.Stir in sweetened condensed milk and heavy cream. Increase heat to medium and bring to a boil. Boil for 5–10 minutes, stirring constantly, until the mixture reaches 220°F (104°C).Remove from heat and stir in vanilla extract. Pour the toffee into the cooled crust and refrigerate for 2–3 hours, or until firm.
  3. Assemble the Pie:Once the toffee layer is firm, arrange the banana slices in two layers over the toffee.In a mixing bowl, whip the heavy cream, powdered sugar, and vanilla extract on high speed until stiff peaks form.Spread the whipped cream over the bananas, ensuring it covers them completely to prevent browning.Garnish with chocolate shavings or toffee bits, if desired.
  4. Serve:Serve the pie immediately or refrigerate until ready to serve. Best enjoyed within 1–2 days.

Notes

  • Toffee Texture: Ensure the brown sugar is fully dissolved before adding the condensed milk and cream to prevent a grainy texture.​
  • Banana Browning: Covering the bananas completely with whipped cream helps prevent them from browning.​
  • Garnish Tips: Use a vegetable peeler to create chocolate shavings from a chocolate bar for an elegant touch.​

Sweet Potato Casserole with Marshmallows is a must-try!

Sweet Potato Casserole with Marshmallows is a delightful dish that brings warmth and comfort to any table. This classic recipe is often a star during holiday gatherings, especially Thanksgiving. Its sweet, creamy texture combined with the gooey marshmallows creates a perfect harmony of flavors. But what makes this dish so special? Let’s dive into its history and discover why you should add it to your menu.

The History of Sweet Potato Casserole with Marshmallows

The origins of Sweet Potato Casserole with Marshmallows can be traced back to the Southern United States. Sweet potatoes have been a staple in American cooking for centuries. However, the addition of marshmallows is a more recent innovation. In the 1910s, a company called Angelus Marshmallows published a recipe that included sweet potatoes and marshmallows. This combination quickly gained popularity, becoming a beloved dish in many households. Over the years, it has evolved, with families adding their own twists and variations, but the essence remains the same: a sweet, comforting casserole that brings people together.

Why You Should Try Sweet Potato Casserole with Marshmallows

There are many reasons to try Sweet Potato Casserole with Marshmallows. First, it’s incredibly easy to make. With just a few simple ingredients, you can create a dish that impresses everyone. Second, the flavors are simply irresistible. The sweetness of the potatoes pairs perfectly with the marshmallows, creating a delightful contrast. Plus, it’s a great way to sneak in some vegetables, making it a bit healthier. Finally, this casserole is versatile. You can customize it with different toppings or ingredients to suit your taste. Whether you’re hosting a holiday dinner or just want a comforting side dish, this casserole is sure to please!

Ingredients for Sweet Potato Casserole with Marshmallows

To create a delicious Sweet Potato Casserole with Marshmallows, you’ll need a few key ingredients. Each component plays a vital role in achieving that perfect blend of flavors and textures. Here’s what you’ll need:

  • 2 pounds sweet potatoes: Peeled and cubed, these are the star of the dish.
  • 1/2 cup granulated sugar: This adds sweetness to the casserole.
  • 1/2 cup brown sugar: Packed brown sugar gives a rich, caramel-like flavor.
  • 1/2 cup milk: This helps create a creamy texture.
  • 1/4 cup unsalted butter: Melted butter adds richness and flavor.
  • 2 large eggs: Eggs help bind the mixture together.
  • 1 teaspoon vanilla extract: This enhances the overall sweetness.
  • 1/2 teaspoon ground cinnamon: A warm spice that complements sweet potatoes.
  • 1/4 teaspoon ground nutmeg: Adds a hint of warmth and depth.
  • 1/4 teaspoon salt: Balances the sweetness of the dish.
  • 2 cups mini marshmallows: These are essential for that gooey topping.

For the streusel topping, gather the following ingredients:

  • 1/2 cup all-purpose flour: This forms the base of the streusel.
  • 1/2 cup brown sugar: Adds sweetness and a chewy texture.
  • 1/4 cup unsalted butter: Softened butter creates a crumbly topping.
  • 1/2 cup chopped pecans (optional): For added crunch and flavor.
  • 1/2 teaspoon ground cinnamon: Enhances the streusel with a warm spice.

With these ingredients on hand, you’re ready to create a delightful Sweet Potato Casserole with Marshmallows that will surely impress your family and friends!

Step-by-Step Preparation of Sweet Potato Casserole with Marshmallows

Now that you have all your ingredients ready, it’s time to dive into the preparation of your Sweet Potato Casserole with Marshmallows. Follow these simple steps to create a dish that will delight everyone at your table.

Step 1: Preparing the Sweet Potatoes

Start by peeling and cubing the sweet potatoes. This makes them easier to cook and mash. Next, place the cubed sweet potatoes in a large pot. Fill the pot with enough salted water to cover the sweet potatoes completely. Bring the water to a boil over medium-high heat. Cook the sweet potatoes for about 15-20 minutes, or until they are tender. You can check their tenderness by poking them with a fork. Once they are soft, drain the water and let them cool for a few minutes.

Step 2: Mixing the Sweet Potato Base

After the sweet potatoes have cooled, it’s time to mash them. Transfer the drained sweet potatoes to a large mixing bowl. Use a potato masher or a fork to mash them until smooth. Then, add the granulated sugar, brown sugar, milk, melted butter, eggs, vanilla extract, ground cinnamon, ground nutmeg, and salt to the bowl. Mix everything together until well combined. The mixture should be creamy and smooth, with no lumps remaining.

Step 3: Creating the Marshmallow Topping

While the sweet potato base is coming together, you can prepare the streusel topping. In a separate bowl, combine the all-purpose flour, brown sugar, softened butter, chopped pecans (if using), and ground cinnamon. Use your fingers or a fork to mix the ingredients until they form a crumbly texture. This topping will add a delightful crunch to your casserole.

Step 4: Assembling the Casserole

Now it’s time to assemble your casserole! Grease a 9×13-inch baking dish with a little butter or cooking spray. Pour the sweet potato mixture into the prepared dish, spreading it evenly. Then, sprinkle the streusel topping over the sweet potato layer. Make sure to cover the entire surface for a delicious crunch in every bite.

Step 5: Baking the Sweet Potato Casserole with Marshmallows

Preheat your oven to 350°F (175°C). Once the oven is ready, place the casserole in the oven and bake for 25 minutes. After this time, remove the casserole from the oven and sprinkle the mini marshmallows evenly on top. Return the casserole to the oven and bake for an additional 10-15 minutes, or until the marshmallows are golden brown and gooey. Once done, let the casserole cool for a few minutes before serving. Enjoy your delicious Sweet Potato Casserole with Marshmallows!

Variation of Sweet Potato Casserole with Marshmallows

While the classic Sweet Potato Casserole with Marshmallows is a beloved dish, there are many ways to put your own spin on it. Whether you want to try different ingredients or toppings, these variations can add a unique twist to your casserole. Let’s explore some alternative ingredients and different toppings that can elevate your dish.

Alternative Ingredients for Sweet Potato Casserole with Marshmallows

Switching up the ingredients can create exciting new flavors in your Sweet Potato Casserole with Marshmallows. Here are some ideas:

  • Maple Syrup: Instead of granulated sugar, use maple syrup for a rich, natural sweetness.
  • Coconut Milk: Substitute regular milk with coconut milk for a tropical twist and creamy texture.
  • Orange Juice: Add a splash of orange juice to the sweet potato mixture for a refreshing citrus flavor.
  • Nutmeg and Ginger: Enhance the spice profile by adding ground ginger along with nutmeg for a warm, cozy taste.
  • Applesauce: Replace some of the butter with applesauce to make the dish a bit lighter and healthier.

These alternative ingredients can help you customize your casserole to suit your taste preferences or dietary needs.

Different Toppings for Sweet Potato Casserole with Marshmallows

The topping is what makes your Sweet Potato Casserole with Marshmallows truly special. Here are some delicious topping ideas:

  • Crushed Graham Crackers: For a s’mores-inspired twist, sprinkle crushed graham crackers on top before baking.
  • Chocolate Chips: Add mini chocolate chips along with or instead of marshmallows for a sweet surprise.
  • Toasted Coconut: Sprinkle toasted coconut flakes on top for a crunchy, tropical flavor.
  • Caramel Drizzle: Drizzle caramel sauce over the marshmallows before serving for an extra layer of sweetness.
  • Chopped Nuts: Use walnuts or almonds for a nutty crunch that complements the sweet potatoes.

These different toppings can transform your casserole into a unique dish that everyone will love. Feel free to mix and match to find your perfect combination!

Cooking Note for Sweet Potato Casserole with Marshmallows

When preparing your Sweet Potato Casserole with Marshmallows, there are a few cooking notes to keep in mind. These tips will help ensure that your casserole turns out perfectly every time. Let’s explore some important points to consider during the cooking process.

First, make sure to choose sweet potatoes that are firm and free from blemishes. Fresh sweet potatoes will provide the best flavor and texture for your casserole. When boiling the sweet potatoes, be careful not to overcook them. Overcooked sweet potatoes can become watery, which may affect the consistency of your casserole.

Next, when mashing the sweet potatoes, aim for a smooth and creamy texture. If you prefer a chunkier casserole, you can leave some small lumps. However, a smooth mixture will blend better with the other ingredients, creating a delightful mouthfeel.

While mixing the sweet potato base, be sure to incorporate all the ingredients thoroughly. This ensures that the flavors are evenly distributed throughout the casserole. If you find the mixture too thick, you can add a little more milk to achieve your desired consistency.

When it comes to baking, keep an eye on the casserole as it cooks. Ovens can vary in temperature, so it’s essential to check for doneness. The marshmallows should be golden brown and slightly puffed when ready. If they start to brown too quickly, you can cover the casserole loosely with aluminum foil to prevent burning.

Lastly, allow the casserole to cool for a few minutes before serving. This will help the layers set and make it easier to serve. Enjoy your Sweet Potato Casserole with Marshmallows as a comforting side dish or a delightful dessert!

Serving Suggestions for Sweet Potato Casserole with Marshmallows

Sweet Potato Casserole with Marshmallows is not just a dish; it’s an experience that can elevate any meal. Whether you’re serving it at a holiday gathering or a casual family dinner, how you present and pair this casserole can make all the difference. Here are some delightful serving suggestions to enhance your dining experience.

First, consider serving the casserole alongside traditional holiday dishes. It pairs wonderfully with:

  • Roast Turkey: The savory flavors of turkey complement the sweetness of the casserole perfectly.
  • Honey Glazed Ham: The sweet and salty combination creates a delicious contrast.
  • Green Bean Almondine: This dish adds a fresh, crunchy element to your meal.
  • Stuffing: A classic pairing that brings together the best of holiday flavors.

For a more casual setting, you can serve Sweet Potato Casserole with Marshmallows as a side dish for:

  • Grilled Chicken: The sweetness of the casserole balances the savory grilled flavors.
  • BBQ Ribs: The rich, smoky taste of ribs pairs well with the sweet and creamy casserole.
  • Vegetable Stir-Fry: A colorful mix of veggies adds a healthy touch to your meal.

Don’t forget about presentation! Serve the casserole in a beautiful dish to make it visually appealing. You can garnish it with:

  • Chopped Fresh Herbs: A sprinkle of parsley or chives adds a pop of color.
  • Extra Mini Marshmallows: Toast a few more marshmallows on top for a fun touch.
  • Drizzle of Maple Syrup: A light drizzle can enhance the sweetness and add shine.

Lastly, consider serving the casserole warm with a scoop of vanilla ice cream or whipped cream for a delightful dessert twist. This sweet treat can be a hit at any gathering, leaving your guests asking for seconds!

Tips for Perfecting Sweet Potato Casserole with Marshmallows

Creating the perfect Sweet Potato Casserole with Marshmallows requires a few helpful tips. These suggestions will ensure that your dish turns out delicious every time. Let’s explore some key points to keep in mind while preparing this delightful casserole.

First, choose the right sweet potatoes. Look for firm, smooth-skinned sweet potatoes without any blemishes. Fresh sweet potatoes will provide the best flavor and texture. If you can, opt for medium-sized ones, as they tend to be sweeter and creamier.

Next, when boiling the sweet potatoes, make sure to cut them into uniform cubes. This helps them cook evenly. Keep an eye on them while boiling; overcooked sweet potatoes can become mushy. Aim for a tender texture that you can easily mash.

When mashing the sweet potatoes, use a potato masher or a hand mixer for a smooth consistency. If you prefer a chunkier texture, you can leave some small lumps. However, a smooth mixture blends better with the other ingredients, creating a delightful mouthfeel.

As you mix the sweet potato base, be sure to incorporate all ingredients thoroughly. This ensures that the flavors meld together beautifully. If the mixture seems too thick, add a splash more milk to achieve your desired creaminess.

For the streusel topping, make sure the butter is softened but not melted. This will help create that perfect crumbly texture. If you’re using nuts, consider toasting them lightly beforehand to enhance their flavor.

When baking, keep an eye on the casserole. Ovens can vary in temperature, so check for doneness. The marshmallows should be golden brown and slightly puffed. If they start to brown too quickly, cover the casserole loosely with aluminum foil to prevent burning.

Lastly, let the casserole cool for a few minutes before serving. This allows the layers to set, making it easier to serve. Enjoy your Sweet Potato Casserole with Marshmallows as a comforting side dish or a delightful dessert!

Breakdown of Time for Sweet Potato Casserole with Marshmallows

Understanding the time needed to prepare and cook your Sweet Potato Casserole with Marshmallows is essential for planning your meal. Here’s a detailed breakdown of the time involved in each step of the process.

Prep Time for Sweet Potato Casserole with Marshmallows

The prep time for this delightful casserole is approximately 30 minutes. This includes:

  • Peeling and cubing the sweet potatoes: About 10 minutes.
  • Boiling the sweet potatoes: Roughly 15-20 minutes, depending on the size of the cubes.
  • Mashing and mixing the ingredients: Around 5-10 minutes.

Overall, you can expect to spend about half an hour getting everything ready before baking.

Cooking Time for Sweet Potato Casserole with Marshmallows

The cooking time for your Sweet Potato Casserole with Marshmallows is about 35-40 minutes. This includes:

  • Baking the casserole: 25 minutes for the initial bake.
  • Adding the marshmallows: An additional 10-15 minutes until they are golden brown.

Keep an eye on the casserole during the last few minutes to ensure the marshmallows don’t burn.

Total Time for Sweet Potato Casserole with Marshmallows

In total, you should plan for about 1 hour and 10 minutes from start to finish. This includes both prep and cooking time. Here’s a quick summary:

  • Prep Time: 30 minutes
  • Cooking Time: 35-40 minutes
  • Total Time: 1 hour and 10 minutes

With this time breakdown, you can easily fit this delicious Sweet Potato Casserole with Marshmallows into your meal planning. Enjoy the process and the delightful results!

Nutritional Information for Sweet Potato Casserole with Marshmallows

Understanding the nutritional content of your Sweet Potato Casserole with Marshmallows can help you make informed choices. This dish is not only delicious but also provides some essential nutrients. Let’s break down the key nutritional components of this delightful casserole.

Calories in Sweet Potato Casserole with Marshmallows

One serving of Sweet Potato Casserole with Marshmallows contains approximately 320 calories. This calorie count comes from the combination of sweet potatoes, sugars, butter, and marshmallows. While it’s a rich dish, it can be enjoyed in moderation as part of a balanced diet. The sweetness and creaminess make it a satisfying treat, especially during festive occasions.

Protein Content in Sweet Potato Casserole with Marshmallows

Each serving of this casserole provides about 4 grams of protein. The protein mainly comes from the eggs and milk used in the recipe. While this isn’t a high-protein dish, it does contribute to your daily intake. Pairing it with a protein-rich main dish, like turkey or chicken, can help create a well-rounded meal.

Sodium Levels in Sweet Potato Casserole with Marshmallows

The sodium content in Sweet Potato Casserole with Marshmallows is relatively low, with approximately 200 milligrams per serving. This is mainly due to the added salt in the sweet potato mixture. Keeping sodium levels in check is important for maintaining heart health, so this casserole can be a good option for those watching their sodium intake. Just be mindful of the other dishes you serve alongside it, as they may contain higher sodium levels.

In summary, Sweet Potato Casserole with Marshmallows is a delicious and comforting dish that can fit into a balanced diet. With its moderate calorie count, low protein content, and reasonable sodium levels, it’s a delightful addition to any meal, especially during the holidays!

FAQs about Sweet Potato Casserole with Marshmallows

Can I make Sweet Potato Casserole with Marshmallows ahead of time?

Yes, you can prepare Sweet Potato Casserole with Marshmallows ahead of time! To do this, follow the recipe up to the point of baking. Once you’ve assembled the casserole, cover it tightly with plastic wrap or aluminum foil and store it in the refrigerator. You can keep it in the fridge for up to 24 hours. When you’re ready to bake, simply remove it from the fridge, let it sit at room temperature for about 30 minutes, and then bake as directed. This makes it a convenient option for holiday gatherings or busy weeknights!

What can I substitute for marshmallows in Sweet Potato Casserole with Marshmallows?

If you’re looking for a substitute for marshmallows in your Sweet Potato Casserole with Marshmallows, there are several options. You can use:

  • Toasted Coconut Flakes: These add a sweet, crunchy texture.
  • Chocolate Chips: Mini chocolate chips can provide a delightful twist.
  • Caramel Sauce: Drizzling caramel on top can give a sweet, gooey finish.
  • Whipped Cream: A dollop of whipped cream can add creaminess without the marshmallows.

Feel free to get creative with your toppings to suit your taste!

How do I store leftover Sweet Potato Casserole with Marshmallows?

Storing leftover Sweet Potato Casserole with Marshmallows is easy! Allow the casserole to cool completely, then cover it tightly with plastic wrap or aluminum foil. You can also transfer it to an airtight container. Store it in the refrigerator for up to 3-4 days. When you’re ready to enjoy it again, simply reheat individual portions in the microwave or warm the entire casserole in the oven at 350°F until heated through. This way, you can savor the deliciousness of your casserole even after the main meal!

Can I use canned sweet potatoes for Sweet Potato Casserole with Marshmallows?

Yes, you can use canned sweet potatoes for your Sweet Potato Casserole with Marshmallows! This can save you time and effort. Just make sure to drain the canned sweet potatoes well before mashing them. You may need to adjust the amount of sugar in the recipe since canned sweet potatoes can be sweeter than fresh ones. Start with less sugar and taste the mixture before adding more. Using canned sweet potatoes can still yield a delicious casserole that everyone will love!

Conclusion on Sweet Potato Casserole with Marshmallows

In conclusion, Sweet Potato Casserole with Marshmallows is more than just a dish; it’s a cherished tradition that brings joy to many tables. Its rich history, delightful flavors, and comforting texture make it a must-try for any occasion. Whether you’re celebrating a holiday or simply enjoying a family dinner, this casserole is sure to impress.

With its easy preparation and endless variations, you can customize this recipe to suit your taste. From adding a splash of orange juice to experimenting with different toppings, the possibilities are endless. Plus, it’s a great way to incorporate nutritious sweet potatoes into your meals, making it a win-win for both flavor and health.

As you gather with loved ones, consider serving this Sweet Potato Casserole with Marshmallows as a centerpiece. Its warm, inviting aroma and beautiful presentation will surely draw everyone in. Remember, the key to a perfect casserole lies in the quality of your ingredients and the love you put into making it.

So, roll up your sleeves, gather your ingredients, and create a dish that will not only satisfy your taste buds but also create lasting memories. Enjoy every bite of this delightful Sweet Potato Casserole with Marshmallows, and share the joy it brings with those around you!

Paul

Sweet Potato Casserole with Marshmallows is a must-try!

This classic Thanksgiving side dish features creamy whipped sweet potatoes topped with a buttery brown sugar streusel and toasted mini marshmallows. It’s a comforting and indulgent addition to any holiday table.
Prep Time 55 minutes
Cook Time 35 minutes
Total Time 1 hour 30 minutes
Servings: 9 servings
Course: Side Dish
Cuisine: American

Ingredients
  

For the Sweet Potato Base:
  • 3 cups mashed sweet potatoes about 3 large sweet potatoes
  • ½ cup sugar
  • 2 large eggs
  • ½ cup melted butter
  • 1 teaspoon vanilla extract
  • cup milk
  • ¼ teaspoon salt
For the Brown Sugar Streusel Topping:
  • cup melted butter
  • ½ cup brown sugar
  • cup all-purpose flour
  • 1 cup chopped pecans
For the Marshmallow Magic:
  • 1 ½ to 2 cups mini marshmallows

Method
 

  1. Bake the Sweet Potatoes: Preheat oven to 400°F (204°C). Place sweet potatoes on a baking sheet and bake for about 45 minutes, or until tender. Larger sweet potatoes may require up to 1 hour.​
  2. Prepare the Filling: Once cool enough to handle, scoop out the flesh of the sweet potatoes into a mixing bowl. Add melted butter, brown sugar, milk, egg, maple syrup, cinnamon, and vanilla extract. Whip until smooth and creamy.​
  3. Make the Streusel: In a separate bowl, combine softened butter, brown sugar, and flour. Mix until crumbly.​
  4. Assemble the Casserole: Preheat oven to 350°F (177°C). Spread the sweet potato mixture evenly in a greased 9×9-inch baking dish. Sprinkle the streusel over the top.​
  5. Bake: Bake for 28–32 minutes, or until the casserole is heated through and the streusel is golden.​
  6. Add Marshmallows: Remove from oven and sprinkle mini marshmallows over the top. Return to oven and bake for an additional 4–5 minutes, or until marshmallows are toasted. For a more toasted top, place under the broiler for 1–2 minutes, watching closely to prevent burning.​

Notes

  • Pan Size: This recipe fills a 9×9-inch baking dish. For a 9×13-inch dish, multiply the recipe by 1.5 or double it.​
  • Make Ahead: The sweet potato filling and streusel can be prepared ahead of time and stored separately in the refrigerator. Assemble and bake when ready to serve.​
  • Variations: For added texture and flavor, consider adding chopped pecans to the streusel topping.​

Baked Salsa Chicken is a quick and tasty dinner option.

Baked Salsa Chicken Recipe is a fantastic choice for busy weeknights or special occasions. This dish combines tender chicken breasts with zesty salsa and melted cheese, creating a mouthwatering meal that everyone will love. Plus, it’s simple to prepare, making it perfect for cooks of all skill levels.

What Makes Baked Salsa Chicken Recipe Special?

What sets this recipe apart is its incredible flavor and versatility. The combination of spices, salsa, and cheese creates a delightful taste that is both savory and satisfying. You can customize it to suit your preferences, whether you like it mild or spicy. Additionally, this dish is packed with protein, making it a healthy option for those looking to maintain a balanced diet.

Baked Salsa Chicken Recipe is its convenience. With just a few ingredients and minimal prep time, you can have a wholesome meal ready in no time. It’s also a one-pan dish, which means less cleanup for you! Serve it with your favorite sides, and you have a complete meal that will impress your family and friends.

In the following sections, we will dive into the ingredients, preparation steps, and variations of this delightful recipe. Get ready to enjoy a flavorful and satisfying dinner that will quickly become a family favorite!

Ingredients for Baked Salsa Chicken Recipe

Baked Salsa Chicken Recipe, you will need a few simple ingredients. These items are easy to find and can be adjusted based on your taste preferences. Here’s what you’ll need:

  • 2 pounds boneless, skinless chicken breasts
  • 1 cup salsa (choose your favorite brand or make your own)
  • 1 cup shredded cheddar cheese
  • 1 teaspoon garlic powder
  • 1 teaspoon onion powder
  • 1 teaspoon cumin
  • 1 teaspoon paprika
  • Salt and pepper to taste
  • Fresh cilantro, chopped (for garnish, optional)

These ingredients come together to create a dish that is not only flavorful but also nutritious. The chicken provides a great source of protein, while the salsa adds a burst of flavor and freshness. The spices enhance the overall taste, making each bite a delight.

Feel free to experiment with different types of salsa. For instance, you can use a fruity salsa for a sweet twist or a spicy salsa for an extra kick. The choice is yours! Now that you have your ingredients ready, let’s move on to the preparation steps to make this delicious meal.

Step-by-Step Preparation of Baked Salsa Chicken Recipe

Baked Salsa Chicken Recipe. Follow these simple steps to create a delicious meal that your family will love!

Step 1: Preheat the Oven

First things first, preheat your oven to 375°F (190°C). This step is crucial as it ensures that your chicken cooks evenly and thoroughly. While the oven heats up, you can move on to the next steps.

Step 2: Prepare the Chicken

Next, take your 2 pounds of boneless, skinless chicken breasts and place them in a large baking dish. Make sure to arrange them in a single layer. This helps the chicken cook evenly. If you have any excess fat on the chicken, feel free to trim it off for a leaner meal.

Step 3: Mix the Salsa

In a small bowl, combine your favorite salsa with the spices. You’ll need 1 teaspoon each of garlic powder, onion powder, cumin, and paprika. Add salt and pepper to taste. Mixing these ingredients together enhances the flavor, making your chicken even more delicious!

Step 4: Assemble the Dish

Now, it’s time to season the chicken. Sprinkle the spice mixture evenly over the chicken breasts. Then, pour the salsa mixture over the seasoned chicken, ensuring that each piece is well-coated. This step is where the magic begins, as the salsa will infuse the chicken with flavor while it bakes.

Step 5: Bake the Chicken

Place the baking dish in the preheated oven and bake for 25-30 minutes. You’ll know the chicken is done when it reaches an internal temperature of 165°F (74°C). This ensures that your chicken is safe to eat and perfectly cooked. The aroma wafting through your kitchen will be irresistible!

Step 6: Serve and Enjoy

Baked Salsa Chicken Recipe!

Variations of Baked Salsa Chicken Recipe

Baked Salsa Chicken Recipe is not only delicious but also highly adaptable. You can easily modify it to suit your taste or dietary preferences. Here are two exciting variations to try out!

Spicy Baked Salsa Chicken Recipe

Spicy Baked Salsa Chicken Recipe, simply choose a hot salsa instead of mild. You can also add diced jalapeños or crushed red pepper flakes to the spice mixture for an extra kick. This variation will tantalize your taste buds and add a fiery twist to the original recipe.

Another fun idea is to top the chicken with sliced fresh jalapeños before baking. This not only enhances the flavor but also adds a vibrant look to your dish. Serve it with a side of cooling sour cream or guacamole to balance the heat. Your family and friends will love this spicy take on a classic!

Vegetarian Baked Salsa Chicken Recipe

Vegetarian Baked Salsa Chicken Recipe is a fantastic choice. Instead of chicken, use hearty vegetables like zucchini, bell peppers, or eggplant. Cut them into thick slices and arrange them in the baking dish just like you would with chicken.

Season the vegetables with the same spices and pour the salsa over them. Bake as directed, but keep an eye on the cooking time, as vegetables may cook faster than chicken. Once the veggies are tender, sprinkle with cheese and return to the oven until melted. This vegetarian version is not only colorful but also packed with nutrients, making it a delightful meal for everyone!

Baked Salsa Chicken Recipe in different ways. Whether you prefer it spicy or vegetarian, you can create a dish that suits your cravings. So, gather your ingredients and get ready to experiment with these exciting twists!

Cooking Note for Baked Salsa Chicken Recipe

Baked Salsa Chicken Recipe, there are a few important cooking notes to keep in mind. These tips will help ensure that your dish turns out perfectly every time, making your cooking experience enjoyable and stress-free.

First, always check the freshness of your chicken. Using fresh, high-quality chicken breasts will enhance the flavor and texture of your dish. If you can, opt for organic or free-range chicken for the best results.

Next, consider marinating the chicken in salsa for a few hours or overnight. This step allows the flavors to penetrate the meat, resulting in a more flavorful dish. If you choose to marinate, reduce the amount of salt in the spice mixture, as the salsa will already contain some salt.

Another tip is to use a meat thermometer to check the internal temperature of the chicken. This ensures that it is cooked through without being dry. Remember, the safe internal temperature for chicken is 165°F (74°C). If you don’t have a thermometer, cut into the thickest part of the chicken to check that the juices run clear.

Lastly, let the chicken rest for a few minutes after baking. This allows the juices to redistribute, making the chicken more tender and juicy. If you cut into it right away, you may lose those delicious juices, resulting in a drier meal.

Baked Salsa Chicken Recipe to new heights. Enjoy the process and savor the delightful flavors that come together in this easy and satisfying dish!

Serving Suggestions for Baked Salsa Chicken Recipe

Baked Salsa Chicken Recipe is ready, it’s time to think about how to serve it. This dish is versatile and pairs well with a variety of sides, making it a complete meal that everyone will enjoy. Here are some delicious serving suggestions to enhance your dining experience:

  • Rice or Quinoa: Serve the chicken over a bed of fluffy rice or quinoa. These grains soak up the flavorful salsa juices, adding a delightful texture to your meal.
  • Fresh Salad: A crisp green salad with mixed greens, cherry tomatoes, and avocado complements the richness of the chicken. Drizzle with a light vinaigrette for a refreshing contrast.
  • Roasted Vegetables: Pair the chicken with a side of roasted vegetables like zucchini, bell peppers, or asparagus. The caramelized flavors of the veggies will enhance the overall taste of your meal.
  • Tortillas: For a fun twist, serve the chicken in warm tortillas. You can create delicious tacos by adding toppings like shredded lettuce, diced tomatoes, and sour cream.
  • Beans: Black beans or pinto beans make a hearty side dish. They add protein and fiber, making your meal even more satisfying.

Baked Salsa Chicken Recipe with fresh cilantro or a squeeze of lime for an extra burst of flavor. These simple additions can elevate your dish and impress your guests.

Baked Salsa Chicken Recipe with your favorite sides, and watch as it becomes a hit at your dinner table!

Tips for Perfecting Your Baked Salsa Chicken Recipe

Baked Salsa Chicken Recipe truly shine, consider these helpful tips. They will guide you in achieving the best flavor and texture, ensuring that every bite is a delight!

First, always season your chicken well. The spices are key to enhancing the flavor. Don’t be shy with the garlic powder, onion powder, cumin, and paprika. A good seasoning will make your chicken burst with flavor!

Next, choose a salsa that you love. The type of salsa you use can dramatically change the taste of the dish. Whether you prefer a mild, medium, or hot salsa, pick one that excites your taste buds. Homemade salsa can also be a great option if you want to control the ingredients.

Another tip is to let the chicken marinate in the salsa for a few hours. This allows the flavors to soak in, making the chicken even more delicious. If you’re short on time, even a quick 30-minute marinade can make a difference.

When baking, use a baking dish that allows for even cooking. A glass or ceramic dish works well, as it retains heat and helps cook the chicken evenly. Avoid overcrowding the dish; if needed, use two dishes to ensure proper cooking.

Don’t forget to check the chicken’s internal temperature. Using a meat thermometer is the best way to ensure it’s cooked perfectly. Remember, the safe internal temperature for chicken is 165°F (74°C). This will help you avoid dry chicken and ensure it’s juicy and tender.

Lastly, let the chicken rest after baking. This step is crucial as it allows the juices to redistribute throughout the meat. If you cut into it right away, you risk losing those flavorful juices, resulting in a drier dish.

Baked Salsa Chicken Recipe to new heights. Enjoy the process, and get ready to impress your family and friends with a meal that’s bursting with flavor!

Breakdown of Time for Baked Salsa Chicken Recipe

Baked Salsa Chicken Recipe is essential for planning your meal. Here’s a simple breakdown of the time required for preparation and cooking. This will help you manage your kitchen time effectively and ensure a delicious dinner is on the table without any stress!

Prep Time

The prep time for this recipe is quite short, making it perfect for busy evenings. You’ll need about 10-15 minutes to gather your ingredients, season the chicken, and mix the salsa. This quick prep time allows you to get started on your meal without spending too long in the kitchen.

Cooking Time

Once your chicken is prepared, the cooking time is approximately 30-37 minutes. This includes 25-30 minutes for the chicken to bake initially and an additional 5-7 minutes for the cheese to melt and become bubbly. During this time, you can relax or prepare your side dishes, making it a great opportunity to multitask!

Total Time

Baked Salsa Chicken Recipe to take about 40-52 minutes from start to finish. This includes both prep and cooking time. With such a quick turnaround, you can enjoy a flavorful and satisfying meal without spending hours in the kitchen. It’s a win-win for everyone!

Breakdown of Time for Baked Salsa Chicken Recipe

Baked Salsa Chicken Recipe is essential for planning your meal. Here’s a simple breakdown of the time required for preparation and cooking. This will help you manage your kitchen time effectively and ensure a delicious dinner is on the table without any stress!

Prep Time

The prep time for this recipe is quite short, making it perfect for busy evenings. You’ll need about 10-15 minutes to gather your ingredients, season the chicken, and mix the salsa. This quick prep time allows you to get started on your meal without spending too long in the kitchen.

Cooking Time

Once your chicken is prepared, the cooking time is approximately 30-37 minutes. This includes 25-30 minutes for the chicken to bake initially and an additional 5-7 minutes for the cheese to melt and become bubbly. During this time, you can relax or prepare your side dishes, making it a great opportunity to multitask!

Total Time

Baked Salsa Chicken Recipe to take about 40-52 minutes from start to finish. This includes both prep and cooking time. With such a quick turnaround, you can enjoy a flavorful and satisfying meal without spending hours in the kitchen. It’s a win-win for everyone!

Nutritional Information for Baked Salsa Chicken Recipe

Baked Salsa Chicken Recipe not only offers great flavor but also provides valuable nutrients. Here’s a breakdown of the key nutritional information for this delicious dish.

Calories

Baked Salsa Chicken Recipe contains approximately 320 calories. This makes it a satisfying option for dinner without being overly heavy. The combination of chicken, salsa, and cheese provides a hearty meal that can keep you feeling full and energized.

Protein

One of the standout features of this recipe is its high protein content. Each serving delivers around 40 grams of protein. This is excellent for muscle repair and growth, making it a great choice for active individuals or anyone looking to increase their protein intake. The chicken is the primary source of protein, ensuring you get a nutritious boost with every bite.

Sodium

Baked Salsa Chicken Recipe while keeping your dietary needs in check.

Baked Salsa Chicken Recipe is not only delicious but also packed with protein and reasonable in calories. It’s a great option for a nutritious meal that can fit into various dietary plans. Enjoy this flavorful dish while reaping its health benefits!

FAQs about Baked Salsa Chicken Recipe

Can I use frozen chicken for the Baked Salsa Chicken Recipe?

Baked Salsa Chicken Recipe. However, it’s important to thaw the chicken first for even cooking. You can thaw it overnight in the refrigerator or use the defrost setting on your microwave. Once thawed, follow the recipe as usual. Just remember that cooking time may vary slightly, so always check the internal temperature to ensure it reaches 165°F (74°C).

What can I serve with Baked Salsa Chicken Recipe?

Baked Salsa Chicken Recipe. Consider pairing it with:

  • Rice or Quinoa: These grains soak up the flavorful salsa juices.
  • Fresh Salad: A crisp salad with mixed greens and avocado adds a refreshing touch.
  • Roasted Vegetables: Caramelized veggies like zucchini or bell peppers complement the dish well.
  • Tortillas: Create tasty tacos with your chicken and favorite toppings.
  • Beans: Black or pinto beans add protein and fiber to your meal.

These sides will enhance your dining experience and make for a well-rounded meal!

How do I store leftovers of Baked Salsa Chicken Recipe?

Baked Salsa Chicken Recipe is easy! Allow the chicken to cool completely before transferring it to an airtight container. You can store it in the refrigerator for up to 3-4 days. If you want to keep it longer, consider freezing it. Wrap the chicken tightly in plastic wrap and then place it in a freezer-safe container. It can last in the freezer for up to 3 months. When ready to eat, thaw it in the refrigerator overnight and reheat in the oven or microwave.

Can I make Baked Salsa Chicken Recipe in advance?

Baked Salsa Chicken Recipe in advance. Simply follow the recipe up to the baking step, then cover the dish and refrigerate it for up to 24 hours. When you’re ready to cook, preheat the oven and bake as directed. If the chicken is cold from the fridge, it may take a few extra minutes to cook through. This makes it a great option for meal prep or entertaining guests!

Conclusion on Baked Salsa Chicken Recipe

Baked Salsa Chicken Recipe is a delightful and versatile dish that brings together the best of flavor and nutrition. With its simple preparation and minimal ingredients, it’s perfect for busy weeknights or special gatherings. The combination of tender chicken, zesty salsa, and melted cheese creates a meal that is sure to please everyone at the table.

Not only is this recipe easy to make, but it also allows for creativity. Whether you prefer it spicy or vegetarian, you can easily adapt the recipe to suit your taste. The serving suggestions provide a variety of options to create a well-rounded meal that is both satisfying and visually appealing.

Baked Salsa Chicken Recipe, remember to follow the tips and cooking notes for the best results. With a little attention to detail, you can elevate this dish to new heights, impressing your family and friends with your culinary skills.

Baked Salsa Chicken Recipe is sure to become a staple in your kitchen, bringing joy and satisfaction to your dining experience. Happy cooking!

Paul

Baked Salsa Chicken is a quick and tasty dinner option.

This one-pan Baked Salsa Chicken is a flavor-packed, fuss-free dinner featuring tender chicken breasts seasoned with bold spices, nestled on a bed of salsa, corn, beans, and rice, then smothered with more salsa and melted cheese. Perfect for busy weeknights, it’s a hearty meal that requires minimal prep and delivers maximum taste.
Prep Time 10 minutes
Cook Time 35 minutes
Total Time 45 minutes
Servings: 6 –8 servings
Course: Main Course
Cuisine: Mexican-inspired

Ingredients
  

  • Chicken:4 small boneless skinless chicken breasts (about 24 oz) or 2 large breasts halved1 tablespoon melted butter or olive oil1½ teaspoons chili powder1 teaspoon ground cumin1 teaspoon garlic powder½ teaspoon onion powder½ teaspoon smoked paprika½ teaspoon dried oregano½ teaspoon saltFreshly ground black pepper, to taste​
  • Base Layer:1 15 oz can black beans, drained and rinsed1 (15 oz) can corn, drained1 (15 oz) can fire-roasted tomatoes, drained (optional, if not using chunky salsa)2 cups cooked rice1 (4 oz) can diced green chiles1 cup salsa (chunky preferred)Salt and pepper, to taste​
  • Topping:½ cup salsa1 cup shredded Mexican cheese blend or cheese of choice​
  • Optional Garnishes:Sour creamChopped fresh cilantroDiced avocadoSliced jalapeñosLime wedges​

Method
 

  1. Preheat Oven: Set oven to 375°F (190°C).​
  2. Prepare Chicken: Pat chicken dry. Drizzle with melted butter or olive oil. In a small bowl, mix chili powder, cumin, garlic powder, onion powder, smoked paprika, oregano, salt, and pepper. Rub the spice mixture evenly over both sides of the chicken breasts.
  3. Assemble Base Layer: In a 9×13-inch baking dish, combine black beans, corn, fire-roasted tomatoes (if using), cooked rice, green chiles, and 1 cup of salsa. Stir until well mixed. Season with salt and pepper to taste, then spread the mixture evenly in the dish.
  4. Add Chicken and Salsa: Place the seasoned chicken breasts on top of the rice mixture. Spoon the remaining ½ cup of salsa over the chicken.​
  5. Bake: Cover the dish with foil and bake for 30 minutes, or until the chicken reaches an internal temperature of 165°F (74°C).​
  6. Add Cheese: Remove the foil and sprinkle shredded cheese over the chicken. Return to the oven and bake, uncovered, for an additional 5 minutes, or until the cheese is melted and bubbly.​
  7. Serve: Garnish with sour cream, chopped cilantro, diced avocado, sliced jalapeños, and lime wedges as desired. Serve hot.​

Notes

  • Chicken Thickness: For even cooking, pound thicker chicken breasts to an even thickness or slice large breasts in half horizontally.
  • Salsa Choice: The flavor and heat level of the dish will depend on the salsa used. Choose mild, medium, or hot salsa according to your preference.
  • Rice: Use any cooked rice you have on hand—white, brown, or even cauliflower rice for a low-carb option.
  • Make Ahead: Assemble the dish up to the baking step, cover, and refrigerate for up to 24 hours. When ready to bake, add an extra 5–10 minutes to the baking time.

Jalapeño Popper Chicken Taquitos Recipe is a must-try!

What are Jalapeño Popper Chicken Taquitos?

Jalapeño Popper Chicken Taquitos are a delightful twist on traditional taquitos. They combine the creamy goodness of jalapeño poppers with the convenience of rolled tortillas. Each taquito is filled with a savory mixture of shredded chicken, cream cheese, cheddar cheese, and jalapeños. This tasty filling is then wrapped in a soft tortilla and fried until golden brown and crispy. The result is a delicious snack or meal that packs a punch of flavor in every bite!

Why You’ll Love This Recipe

There are many reasons to love this Jalapeño Popper Chicken Taquitos recipe. First, it’s incredibly easy to make, making it perfect for busy weeknights or casual gatherings. The combination of creamy cheese and spicy jalapeños creates a mouthwatering flavor that everyone will enjoy. Plus, these taquitos are versatile! You can serve them as an appetizer, a main dish, or even as a fun party snack. With just a few simple ingredients, you can whip up a batch that will impress your family and friends.

Additionally, this recipe allows for customization. You can adjust the spice level to suit your taste or even try different fillings. Whether you’re a fan of spicy foods or prefer milder flavors, these taquitos can be tailored to your liking. So, gather your ingredients and get ready to enjoy a delicious treat that’s sure to become a favorite in your home!

Ingredients for Jalapeño Popper Chicken Taquitos Recipe

To create the perfect Jalapeño Popper Chicken Taquitos, you’ll need a few simple ingredients. Each component plays a vital role in delivering that delicious flavor and texture. Here’s what you’ll need:

  • 2 cups shredded cooked chicken: This is the main protein source. You can use rotisserie chicken for convenience.
  • 1 cup cream cheese, softened: Cream cheese adds a rich, creamy texture that binds the filling together.
  • 1 cup shredded cheddar cheese: Cheddar cheese brings a sharp flavor that complements the other ingredients.
  • 1/2 cup diced jalapeños: You can use fresh or pickled jalapeños, depending on your spice preference.
  • 1 teaspoon garlic powder: This adds a savory depth to the filling.
  • 1 teaspoon onion powder: Onion powder enhances the overall flavor profile.
  • 1/2 teaspoon salt: Salt is essential for bringing out the flavors in the filling.
  • 1/4 teaspoon black pepper: A little black pepper adds a hint of spice.
  • 8 small flour tortillas: These will wrap around the filling, creating the taquito shape.
  • Cooking spray or oil for frying: This is used to achieve that crispy, golden exterior.

With these ingredients on hand, you’re ready to embark on your culinary adventure. Each item contributes to the overall taste and texture of the taquitos, ensuring a delightful experience with every bite. So, gather your ingredients and let’s move on to the next step!

Step-by-Step Preparation of Jalapeño Popper Chicken Taquitos Recipe

Step 1: Prepare the Filling

To kick off your Jalapeño Popper Chicken Taquitos, start by preparing the filling. In a large mixing bowl, combine the shredded cooked chicken, softened cream cheese, and shredded cheddar cheese. Next, add the diced jalapeños, garlic powder, onion powder, salt, and black pepper. Use a fork or spatula to mix everything together until it’s well combined. The mixture should be creamy and packed with flavor. This filling is the heart of your taquitos, so make sure it’s mixed thoroughly!

Step 2: Assemble the Taquitos

Now that your filling is ready, it’s time to assemble the taquitos. Lay a tortilla flat on a clean surface. Spoon about 2-3 tablespoons of the chicken mixture onto the center of the tortilla. Be careful not to overfill, as this can make rolling difficult. Next, roll the tortilla tightly around the filling, tucking in the sides as you go. This will help keep the filling secure inside. Repeat this process with the remaining tortillas and filling until you have a delicious batch of taquitos ready to cook!

Step 3: Cook the Taquitos

With your taquitos assembled, it’s time to cook them to perfection. Preheat a large skillet over medium heat and lightly coat it with cooking spray or oil. Once the skillet is hot, place the taquitos seam-side down in the skillet. Cook them for about 3-4 minutes on each side, or until they turn golden brown and crispy. This step is crucial for achieving that delightful crunch! Once cooked, remove the taquitos from the skillet and place them on a paper towel-lined plate to absorb any excess oil. Now, they’re ready to be served!

Variation of Jalapeño Popper Chicken Taquitos Recipe

Vegetarian Option

If you’re looking for a vegetarian twist on the Jalapeño Popper Chicken Taquitos, you’re in luck! You can easily substitute the chicken with a variety of delicious ingredients. Consider using black beans, corn, or even sautéed vegetables like bell peppers and zucchini. For the filling, mix 2 cups of black beans (drained and rinsed) with 1 cup of cream cheese, 1 cup of shredded cheddar cheese, and the same spices as the original recipe. You can also add diced bell peppers for extra flavor and texture. This vegetarian option is just as creamy and satisfying, making it a great choice for meatless meals!

Spicy Twist

If you love heat, why not amp up the spice level in your Jalapeño Popper Chicken Taquitos? To create a spicy twist, you can add more jalapeños to the filling or include diced serrano peppers for an extra kick. Another fun idea is to mix in some spicy pepper jack cheese instead of regular cheddar. For those who enjoy a smoky flavor, consider adding a teaspoon of smoked paprika to the filling. This spicy version will surely satisfy your cravings for bold flavors and heat, making your taquitos even more exciting!

Cooking Note for Jalapeño Popper Chicken Taquitos Recipe

When preparing your Jalapeño Popper Chicken Taquitos, there are a few important cooking notes to keep in mind. These tips will help ensure that your taquitos turn out perfectly crispy and delicious every time.

First, make sure your oil or cooking spray is evenly distributed in the skillet. This helps achieve that golden-brown color and crispy texture that everyone loves. If you’re using oil, opt for a high smoke point oil, like canola or vegetable oil, to prevent burning.

Next, avoid overcrowding the skillet. Cooking too many taquitos at once can lower the temperature of the oil, resulting in soggy taquitos instead of crispy ones. It’s best to cook them in batches, giving each taquito enough space to fry evenly.

Additionally, keep an eye on the cooking time. Every stove is different, so you may need to adjust the heat slightly. If the taquitos are browning too quickly, lower the heat to ensure they cook through without burning. On the other hand, if they’re taking too long, you can increase the heat slightly.

Lastly, let the taquitos rest on a paper towel-lined plate after frying. This step is crucial for absorbing any excess oil, keeping them crispy and light. Enjoy your freshly made Jalapeño Popper Chicken Taquitos while they’re warm for the best flavor and texture!

Serving Suggestions for Jalapeño Popper Chicken Taquitos Recipe

Dipping Sauces

When it comes to serving your Jalapeño Popper Chicken Taquitos, the right dipping sauces can elevate the experience. Here are some delicious options to consider:

  • Salsa: A classic choice, salsa adds a fresh and zesty flavor. You can choose mild or spicy salsa, depending on your preference.
  • Ranch Dressing: Creamy ranch dressing pairs perfectly with the spicy taquitos. Its coolness balances the heat from the jalapeños.
  • Guacamole: For a rich and creamy dip, serve your taquitos with guacamole. The avocado adds a delightful creaminess that complements the flavors.
  • Chipotle Sauce: If you enjoy a smoky flavor, a chipotle sauce can add a nice kick. It’s perfect for those who love a bit of heat!

Feel free to mix and match these sauces to find your favorite combination. Each dip brings its own unique flavor, making your taquitos even more enjoyable!

Side Dishes

To create a complete meal, consider serving your Jalapeño Popper Chicken Taquitos with some tasty side dishes. Here are a few ideas:

  • Mexican Rice: Fluffy Mexican rice is a great side that complements the flavors of the taquitos. It’s filling and adds a nice texture.
  • Refried Beans: Creamy refried beans are a classic side dish that pairs well with taquitos. They add protein and richness to your meal.
  • Coleslaw: A refreshing coleslaw can provide a crunchy contrast to the crispy taquitos. The coolness of the slaw balances the heat perfectly.
  • Grilled Corn: Sweet grilled corn on the cob is a delightful addition. It adds a touch of sweetness that complements the spicy flavors.

These side dishes not only enhance your meal but also make it more colorful and appealing. Enjoy your Jalapeño Popper Chicken Taquitos with these delicious accompaniments for a satisfying dining experience!

Tips for Perfect Jalapeño Popper Chicken Taquitos Recipe

Creating the perfect Jalapeño Popper Chicken Taquitos is all about attention to detail. Here are some helpful tips to ensure your taquitos turn out crispy, flavorful, and utterly delicious!

  • Use Fresh Ingredients: Fresh ingredients make a big difference in flavor. Opt for fresh jalapeños and high-quality cheeses for the best results. Freshness enhances the overall taste of your taquitos.
  • Don’t Overfill: While it’s tempting to add more filling, overfilling can lead to messy taquitos. Stick to 2-3 tablespoons of filling per tortilla to ensure they roll up easily and cook evenly.
  • Warm Tortillas: If you’re using flour tortillas, warm them slightly before filling. This makes them more pliable and less likely to crack when rolling. You can warm them in a microwave or on a skillet for a few seconds.
  • Fry in Batches: To achieve that perfect crispy texture, fry your taquitos in small batches. This prevents overcrowding in the skillet, allowing each taquito to cook evenly and become golden brown.
  • Experiment with Cheese: While cheddar cheese is a classic choice, feel free to experiment with different cheeses. Pepper jack, mozzarella, or even a blend of cheeses can add unique flavors to your taquitos.
  • Let Them Rest: After frying, let your taquitos rest on a paper towel-lined plate. This helps absorb excess oil and keeps them crispy. Enjoy them warm for the best taste!
  • Customize the Spice Level: Adjust the amount of jalapeños based on your spice preference. If you love heat, add more jalapeños or even some hot sauce to the filling for an extra kick!
  • Serve Immediately: Taquitos are best enjoyed fresh and hot. Serve them right after cooking for the ultimate crispy experience. If you need to keep them warm, place them in a low oven until ready to serve.

By following these tips, you’ll be well on your way to making the perfect Jalapeño Popper Chicken Taquitos. Each bite will be bursting with flavor and crunch, making them a hit at any gathering!

Breakdown of Time for Jalapeño Popper Chicken Taquitos Recipe

Prep Time

The prep time for your Jalapeño Popper Chicken Taquitos is quite short, making this recipe perfect for busy days. You’ll need about 15 minutes to gather your ingredients and prepare the filling. This includes shredding the chicken, mixing the cheeses, and adding the spices. If you use rotisserie chicken, it can save you even more time!

Cooking Time

Once your taquitos are assembled, the cooking time is approximately 10-12 minutes. This includes frying them in batches until they are golden brown and crispy. Keep an eye on them to ensure they cook evenly. Remember, cooking in small batches helps achieve that perfect crunch!

Total Time

In total, you can expect to spend around 25-30 minutes from start to finish. This quick preparation and cooking time make these Jalapeño Popper Chicken Taquitos a fantastic option for a weeknight dinner or a fun snack for gatherings. With just a little time and effort, you’ll have a delicious dish ready to enjoy!

Nutritional Information for Jalapeño Popper Chicken Taquitos Recipe

Calories

Each serving of Jalapeño Popper Chicken Taquitos contains approximately 350 calories. This makes them a satisfying option for a meal or snack without going overboard on calories. The combination of chicken, cheese, and jalapeños provides a hearty dish that can keep you feeling full and energized.

Protein

These taquitos are a great source of protein, offering about 22 grams per serving. The shredded chicken and cheese contribute significantly to the protein content, making this recipe a smart choice for those looking to boost their protein intake. Protein is essential for muscle repair and growth, making these taquitos a delicious post-workout treat!

Sodium

Each serving contains around 600 mg of sodium. While sodium is necessary for bodily functions, it’s important to monitor your intake. If you’re watching your sodium levels, consider using low-sodium chicken or cheese options. This way, you can enjoy your Jalapeño Popper Chicken Taquitos while keeping your health goals in mind.

FAQs about Jalapeño Popper Chicken Taquitos Recipe

Can I make Jalapeño Popper Chicken Taquitos ahead of time?

Absolutely! You can prepare the filling for your Jalapeño Popper Chicken Taquitos ahead of time. Simply mix all the ingredients and store the filling in an airtight container in the refrigerator. This can be done a day in advance. When you’re ready to cook, just assemble the taquitos and fry them as directed. If you want to make the taquitos entirely ahead of time, you can also assemble them and freeze them before frying. Just make sure to separate them with parchment paper to prevent sticking. When you’re ready to enjoy, fry them straight from the freezer, adding a couple of extra minutes to the cooking time.

What can I substitute for chicken in this recipe?

If you’re looking for a substitute for chicken, there are several delicious options! For a vegetarian version, you can use black beans, lentils, or even quinoa. These ingredients provide a hearty texture and are packed with protein. If you prefer a meat alternative, shredded turkey or even pulled pork can work well. Just ensure that the substitute you choose complements the creamy filling and spices. This flexibility allows you to customize the recipe to fit your dietary preferences while still enjoying the same great flavors!

How do I store leftover Jalapeño Popper Chicken Taquitos?

Storing leftover Jalapeño Popper Chicken Taquitos is easy! Allow them to cool completely before placing them in an airtight container. You can store them in the refrigerator for up to 3 days. If you want to keep them longer, consider freezing them. Wrap each taquito in plastic wrap and then place them in a freezer-safe bag or container. They can be frozen for up to 2 months. When you’re ready to eat, reheat them in the oven at 350°F (175°C) for about 10-15 minutes, or until heated through. This will help maintain their crispy texture!

Conclusion on Jalapeño Popper Chicken Taquitos Recipe

In conclusion, the Jalapeño Popper Chicken Taquitos recipe is a fantastic way to enjoy a delicious and satisfying meal or snack. With its creamy filling and crispy exterior, this dish is sure to please everyone at your table. Whether you’re hosting a party, enjoying a family dinner, or simply craving a tasty treat, these taquitos are a perfect choice.

Not only are they easy to prepare, but they also offer plenty of room for customization. You can adjust the spice level, try different fillings, or even switch up the cheeses to suit your taste. The versatility of this recipe makes it a go-to option for any occasion. Plus, with the right dipping sauces and side dishes, you can create a complete meal that’s both colorful and flavorful.

So, gather your ingredients and get ready to whip up a batch of these delightful Jalapeño Popper Chicken Taquitos. They’re not just a dish; they’re an experience filled with flavor and fun. Enjoy every crispy bite, and don’t forget to share with family and friends. Happy cooking!

Paul

Jalapeño Popper Chicken Taquitos Recipe is a must-try!

Get ready for a flavor-packed fusion of two favorites—jalapeño poppers and crispy taquitos! These Jalapeño Popper Chicken Taquitos are filled with creamy, cheesy chicken, smoky bacon, and just the right amount of heat, then baked, air-fried, or pan-fried to golden perfection. Perfect as a party snack, appetizer, or dinner with a twist.
Prep Time 15 minutes
Cook Time 15 minutes
Total Time 30 minutes
Servings: 16 taquitos
Course: Appetizer
Cuisine: American-Mexican Fusion

Ingredients
  

  • Filling
  • 2 cups shredded rotisserie chicken or any cooked chicken
  • 8 oz cream cheese room temperature
  • ½ cup cheddar cheese shredded
  • ½ cup Monterey Jack cheese shredded
  • 8 slices bacon cooked and chopped
  • 4 jalapeño peppers seeds removed and finely diced
  • 2 green onions thinly sliced
  • 2 cloves garlic minced
  • ½ tsp salt
  • ¼ tsp black pepper
  • Taquitos
  • 16 corn or flour tortillas
  • 2 tbsp oil or cooking spray
  • Toppings & Dips Optional
  • Ranch dressing
  • Sour cream
  • Salsa
  • Diced avocado
  • Hot sauce
  • Cilantro shredded cheese, sliced jalapeños (for garnish)

Method
 

  1. Preheat oven or air fryer to 350°F. If using the oven, line a baking sheet with foil or parchment paper.
  2. In a large mixing bowl, combine shredded chicken, cream cheese, cheddar, Monterey Jack, bacon, jalapeños, green onions, garlic, salt, and pepper. Mix until fully incorporated and creamy.
  3. Lay out tortillas and spoon 2 to 3 tablespoons of filling across the center of each. Roll tightly and place seam-side down on the prepared baking sheet or air fryer basket.
Choose your cooking method:
  1. Oven-BakedBrush or spray taquitos lightly with oil. Bake at 350°F for 10 to 15 minutes until golden and crisp. Optional: Broil for 2 to 3 minutes for extra crunch.
  2. Air FryerLightly coat with oil or spray. Air fry in batches at 350°F for 6 to 8 minutes or until crispy and golden.
  3. Pan-FriedHeat 2 tablespoons of oil in a skillet over medium heat. Place taquitos seam-side down and fry for 2 to 3 minutes per side until crisp. Keep warm in a low oven until serving.
  4. Serve warm with your choice of toppings or dips like ranch, sour cream, salsa, or avocado.

Notes

  • To soften tortillas for rolling, microwave them for 20–30 seconds wrapped in a damp paper towel.
  • Adjust jalapeños to control the spice level—use fewer or swap for mild green chiles if needed.
  • These freeze well before baking—just thaw slightly and cook as directed when ready.
  • For a vegetarian twist, try black beans or roasted veggies in place of chicken.

“Pan-Seared Scallops with Butternut Squash Purée delight!”

Pan-Seared Scallops with Butternut Squash Purée. This dish combines the delicate flavor of scallops with the sweet, creamy texture of butternut squash. It’s a culinary masterpiece that’s not only delicious but also visually stunning. Whether you’re hosting a dinner party or enjoying a cozy meal at home, this recipe is sure to elevate your dining experience.

What Makes Pan-Seared Scallops with Butternut Squash Purée Special?

What sets this dish apart is its balance of flavors and textures. The scallops are seared to perfection, creating a golden crust that locks in their natural sweetness. Meanwhile, the butternut squash purée adds a rich, velvety base that complements the scallops beautifully. The addition of pomegranate seeds and quince slaw introduces a refreshing crunch and a burst of color, making each bite a delightful experience. This dish is not just a meal; it’s a celebration of seasonal ingredients and culinary creativity.

The Perfect Dish for Any Occasion

Pan-Seared Scallops with Butternut Squash Purée fits the bill. Its elegant presentation makes it ideal for entertaining guests, while the straightforward preparation allows you to whip it up on a busy evening. Plus, the nutritional benefits of the ingredients make it a wholesome choice for health-conscious diners. With its combination of sophistication and simplicity, this dish is perfect for anyone looking to impress without the stress.

Ingredients for Pan-Seared Scallops with Butternut Squash Purée

Pan-Seared Scallops with Butternut Squash Purée, you’ll need a selection of fresh ingredients that come together to form a harmonious dish. Here’s what you’ll need:

  • 1 pound sea scallops: Make sure they are cleaned and patted dry for the best sear.
  • 2 tablespoons olive oil: This will help achieve that perfect golden crust on the scallops.
  • Salt and pepper: To taste, enhancing the natural flavors of the scallops.
  • 1 medium butternut squash: Peeled and cubed, about 4 cups, for a creamy purée.
  • 1 cup vegetable broth: This adds depth to the butternut squash purée.
  • 1 tablespoon maple syrup: For a touch of sweetness in the purée.
  • 1 teaspoon cinnamon: This spice adds warmth and enhances the flavor of the squash.
  • 1 cup pomegranate seeds: These provide a burst of color and a refreshing crunch.
  • 1 medium quince: Cored and thinly sliced, or substitute with a firm apple for a similar texture.
  • 2 cups shredded green cabbage: This forms the base of the slaw.
  • 1 tablespoon apple cider vinegar: For a tangy kick in the slaw.
  • 1 tablespoon honey: To balance the acidity of the vinegar.
  • 1 tablespoon lemon juice: Freshly squeezed for brightness in the slaw.

Pan-Seared Scallops with Butternut Squash Purée.

Step-by-Step Preparation of Pan-Seared Scallops with Butternut Squash Purée

Pan-Seared Scallops with Butternut Squash Purée. This step-by-step guide will help you create a dish that’s not only delicious but also visually appealing. Let’s get started!

Step 1: Preparing the Butternut Squash Purée

First, you’ll want to focus on the butternut squash purée. Begin by placing the cubed butternut squash in a large pot. Pour in the vegetable broth, ensuring the squash is well-covered. Bring the mixture to a boil over medium-high heat. Once boiling, reduce the heat to a simmer. Cook the squash until it’s tender, which should take about 15-20 minutes. You can check for tenderness by piercing a cube with a fork; it should slide in easily.

After the squash is tender, drain any excess broth. Return the squash to the pot and add the maple syrup, cinnamon, and a pinch of salt. Using an immersion blender or a regular blender, purée the mixture until it’s smooth and creamy. Keep the purée warm on low heat while you prepare the scallops.

Step 2: Searing the Scallops

Next, it’s time to sear the scallops. Start by heating the olive oil in a large skillet over medium-high heat. While the oil heats, season the cleaned and dried scallops with salt and pepper. Once the oil is hot and shimmering, carefully add the scallops to the skillet. Make sure not to overcrowd the pan; this ensures they sear properly.

Cook the scallops for about 2-3 minutes on one side without moving them. You want to achieve a beautiful golden crust. Once they are golden, flip them over and cook for another 2-3 minutes. The scallops should be opaque and firm to the touch when done. Remove them from the skillet and set aside on a plate.

Step 3: Combining Flavors for the Perfect Dish

Now that both the purée and scallops are ready, it’s time to bring everything together. Start by plating the dish. Spoon a generous amount of the warm butternut squash purée onto each plate. This will serve as the base for your scallops. Next, place the perfectly seared scallops on top of the purée.

Pan-Seared Scallops with Butternut Squash Purée!

Variations of Pan-Seared Scallops with Butternut Squash Purée

Pan-Seared Scallops with Butternut Squash Purée is a delightful dish on its own, there are many ways to enhance and customize it. By experimenting with alternative ingredients and cooking techniques, you can create a unique version that suits your taste. Let’s explore some exciting variations!

Alternative Ingredients to Enhance Your Dish

Switching up ingredients can bring new life to your dish. Here are some ideas:

  • Different Squash: Instead of butternut squash, try using acorn squash or pumpkin. Each will provide a distinct flavor and texture.
  • Herbs and Spices: Add fresh herbs like thyme or rosemary to the purée for an aromatic twist. A pinch of nutmeg can also enhance the sweetness of the squash.
  • Fruits: For the slaw, consider using sliced pears or apples instead of quince. They will add a different sweetness and crunch.
  • Nuts: Toasted walnuts or pecans can be sprinkled on top of the slaw for added texture and flavor.
  • Vinegars: Experiment with different vinegars, such as balsamic or rice vinegar, to give the slaw a unique tang.

Pan-Seared Scallops with Butternut Squash Purée and make it your own!

Different Cooking Techniques for Scallops

While searing is a popular method for cooking scallops, there are other techniques you can try:

  • Grilling: For a smoky flavor, grill the scallops instead of searing them. Just be sure to use skewers or a grill basket to prevent them from falling through the grates.
  • Baking: Bake the scallops in the oven with a drizzle of olive oil and herbs for a hands-off approach. Bake at 400°F for about 10-12 minutes.
  • Broiling: Broil the scallops for a quick and easy cooking method. Place them on a baking sheet and broil for 2-3 minutes on each side.
  • Poaching: For a delicate texture, poach the scallops in a flavorful broth or white wine. This method keeps them tender and moist.

Pan-Seared Scallops with Butternut Squash Purée. Enjoy the process of experimenting and finding your favorite version!

Cooking Note for Pan-Seared Scallops with Butternut Squash Purée

Pan-Seared Scallops with Butternut Squash Purée.

First, ensure your scallops are completely dry before cooking. Pat them down with a paper towel to remove any moisture. This step is crucial because moisture can prevent the scallops from searing properly, leading to a less desirable texture. A good sear creates a beautiful crust that enhances the flavor.

Next, use a heavy skillet, preferably cast iron or stainless steel. These materials retain heat well, allowing for an even sear. Preheat the skillet until it’s hot, but not smoking. You can test the heat by adding a drop of water; if it sizzles and evaporates quickly, the pan is ready.

When adding the scallops to the skillet, make sure to leave space between each one. Overcrowding the pan can lower the temperature, resulting in steaming rather than searing. If you have many scallops, consider cooking them in batches.

Lastly, avoid flipping the scallops too soon. Let them cook undisturbed for 2-3 minutes on one side. This allows the crust to form. Once they are golden brown, flip them gently and cook for another 2-3 minutes. The scallops should be opaque and firm when done.

Pan-Seared Scallops with Butternut Squash Purée turns out perfectly every time. Enjoy the process and the delicious results!

Serving Suggestions for Pan-Seared Scallops with Butternut Squash Purée

Pan-Seared Scallops with Butternut Squash Purée, it’s time to think about how to serve it. The right sides and presentation can elevate your dish even further. Here are some suggestions to make your meal truly memorable.

Ideal Pairings with Sides and Wines

Choosing the right sides can enhance the flavors of your scallops and purée. Here are some excellent options:

  • Roasted Vegetables: A medley of roasted seasonal vegetables, such as Brussels sprouts, carrots, or asparagus, adds color and nutrition to your plate.
  • Quinoa or Rice: A light quinoa salad or a side of fluffy rice can complement the dish without overpowering it. Consider adding herbs or lemon zest for extra flavor.
  • Garlic Mashed Potatoes: Creamy mashed potatoes with a hint of garlic can provide a comforting contrast to the scallops and purée.
  • Wine Pairing: A crisp white wine, such as Sauvignon Blanc or Chardonnay, pairs beautifully with scallops. The acidity in the wine balances the richness of the dish.

These pairings not only enhance the meal but also create a well-rounded dining experience that your guests will love.

Presentation Tips for a Stunning Plate

Pan-Seared Scallops with Butternut Squash Purée. Here are some tips to make your dish visually appealing:

  • Use a Wide Plate: A wide, shallow plate allows you to spread the purée and arrange the scallops beautifully.
  • Layering: Start with a generous spoonful of butternut squash purée. Place the scallops on top, and then add the pomegranate quince slaw either on the side or on top for a pop of color.
  • Garnish: Consider garnishing with fresh herbs, such as parsley or microgreens, for an elegant touch. A drizzle of balsamic reduction can also add a sophisticated flair.
  • Color Contrast: Aim for a balance of colors on the plate. The bright orange of the purée, the golden scallops, and the vibrant slaw create an eye-catching dish.

By following these presentation tips, you’ll create a stunning plate that not only tastes amazing but also looks like a work of art. Your guests will be impressed before they even take their first bite!

Tips for Perfecting Pan-Seared Scallops with Butternut Squash Purée

Pan-Seared Scallops with Butternut Squash Purée can be a delightful experience, but there are a few common pitfalls to watch out for. By avoiding these mistakes and following expert tips, you can ensure your dish turns out perfectly every time. Let’s dive into some helpful advice!

Common Mistakes to Avoid

Even seasoned cooks can make mistakes when preparing scallops. Here are some common errors to steer clear of:

  • Not Drying the Scallops: Moisture is the enemy of a good sear. Always pat your scallops dry with a paper towel before cooking. This helps achieve that beautiful golden crust.
  • Overcrowding the Pan: Cooking too many scallops at once can lower the pan’s temperature. This leads to steaming instead of searing. Cook in batches if necessary.
  • Flipping Too Soon: Resist the urge to flip the scallops too early. Let them cook undisturbed for 2-3 minutes on one side to develop a nice crust.
  • Using Low Heat: Scallops need a hot pan to sear properly. If the heat is too low, they will not brown well. Make sure your skillet is hot before adding the scallops.
  • Overcooking: Scallops cook quickly. They should be opaque and firm but not rubbery. Keep an eye on them to avoid overcooking.

By avoiding these common mistakes, you’ll be on your way to creating a delicious dish that impresses everyone!

Expert Tips for Cooking Scallops

Pan-Seared Scallops with Butternut Squash Purée:

  • Choose Quality Scallops: Fresh, high-quality scallops make a big difference. Look for dry-packed scallops, which are not treated with preservatives.
  • Season Generously: Don’t be shy with salt and pepper. Seasoning enhances the natural flavors of the scallops.
  • Use a Heavy Skillet: A cast iron or stainless steel skillet retains heat well, ensuring an even sear. Preheat it properly before adding oil.
  • Let Them Rest: After cooking, let the scallops rest for a minute. This allows the juices to redistribute, keeping them tender.
  • Experiment with Flavors: Try adding garlic, herbs, or citrus zest to the oil while cooking for an extra layer of flavor.

Pan-Seared Scallops with Butternut Squash Purée that will leave your guests raving!

Breakdown of Time for Pan-Seared Scallops with Butternut Squash Purée

Pan-Seared Scallops with Butternut Squash Purée can help you plan your cooking efficiently. Here’s a breakdown of the time you’ll need for preparation and cooking.

Prep Time

The prep time for this dish is approximately 20 minutes. During this time, you will:

  • Clean and pat dry the scallops.
  • Peeled and cube the butternut squash.
  • Slice the quince (or apple) and shred the cabbage.
  • Measure out all the ingredients for the purée and slaw.

Having everything ready before you start cooking will make the process smoother and more enjoyable.

Cooking Time

Pan-Seared Scallops with Butternut Squash Purée is about 30 minutes. This includes:

  • Cooking the butternut squash until tender, which takes about 15-20 minutes.
  • Preparing the slaw, which can be done while the squash cooks, taking about 5-10 minutes.
  • Searing the scallops, which will take around 6-8 minutes total (2-3 minutes per side).

By multitasking during the cooking phase, you can maximize efficiency and keep everything on track.

Total Time

In total, you can expect to spend about 50 minutes from start to finish. This includes both prep and cooking times. Here’s a quick summary:

  • Prep Time: 20 minutes
  • Cooking Time: 30 minutes
  • Total Time: 50 minutes

Pan-Seared Scallops with Butternut Squash Purée a manageable dish to prepare, even on a busy evening. With a little planning, you’ll have a delicious meal ready to impress in no time!

Nutritional Information for Pan-Seared Scallops with Butternut Squash Purée

Pan-Seared Scallops with Butternut Squash Purée not only delights the palate but also offers a range of health benefits. Let’s take a closer look at the calories and macronutrients in this dish.

Calories and Macronutrients

Pan-Seared Scallops with Butternut Squash Purée provides a nutritious balance of calories and macronutrients:

  • Calories: 320
  • Net Carbohydrates: 25g
  • Protein: 24g
  • Fat: 14g

This dish is a great source of protein, thanks to the scallops, which are low in fat and high in essential nutrients. The butternut squash adds healthy carbohydrates and fiber, making it a wholesome choice for any meal.

Health Benefits of the Ingredients

Pan-Seared Scallops with Butternut Squash Purée offer numerous health benefits:

  • Sea Scallops: Rich in protein, scallops are low in calories and contain important vitamins and minerals, including vitamin B12, selenium, and zinc. These nutrients support immune function and energy production.
  • Butternut Squash: This vibrant squash is packed with vitamins A and C, which are vital for eye health and immune support. It also contains antioxidants that help fight inflammation.
  • Pomegranate Seeds: Known for their antioxidant properties, pomegranate seeds can help reduce inflammation and improve heart health. They are also a good source of vitamin C and fiber.
  • Quince: This fruit is high in dietary fiber and vitamin C, promoting digestive health and boosting the immune system.
  • Cabbage: A cruciferous vegetable, cabbage is low in calories and high in fiber. It contains compounds that may help reduce the risk of certain cancers.

Pan-Seared Scallops with Butternut Squash Purée not only satisfies your taste buds but also supports your overall health. Enjoy this dish knowing you’re making a delicious and nutritious choice!

FAQs about Pan-Seared Scallops with Butternut Squash Purée

How do I know when scallops are cooked properly?

Knowing when scallops are cooked just right is key to enjoying their delicate flavor. The best way to tell is by looking at their color and texture. Properly cooked scallops should be opaque and firm to the touch. They should have a beautiful golden crust on the outside, while the inside remains tender. If you cut one open, it should be white or slightly translucent, not raw or mushy. Remember, scallops cook quickly, so keep an eye on them to avoid overcooking!

Can I make the butternut squash purée in advance?

Absolutely! Making the butternut squash purée in advance is a great time-saver. You can prepare it a day ahead and store it in an airtight container in the refrigerator. When you’re ready to serve, simply reheat it on the stove over low heat, stirring occasionally. If the purée thickens too much, you can add a splash of vegetable broth or water to reach your desired consistency. This way, you can focus on searing the scallops and assembling your dish when it’s time to eat!

What are some good side dishes to serve with scallops?

Pan-Seared Scallops with Butternut Squash Purée can enhance the overall meal experience. Here are some delicious options:

  • Roasted Asparagus: The slight bitterness of asparagus complements the sweetness of the scallops and purée.
  • Garlic Mashed Potatoes: Creamy mashed potatoes provide a comforting contrast to the dish.
  • Quinoa Salad: A light quinoa salad with herbs and lemon adds freshness and texture.
  • Steamed Broccoli: This adds a pop of color and is a nutritious addition to your plate.
  • Herbed Rice: Fluffy rice with fresh herbs can soak up the flavors of the purée beautifully.

These side dishes not only complement the scallops but also create a well-rounded meal that’s sure to impress your guests!

Conclusion on Pan-Seared Scallops with Butternut Squash Purée

Recap of the Dish’s Appeal

Pan-Seared Scallops with Butternut Squash Purée is a dish that beautifully combines elegance and flavor. The tender, golden scallops paired with the creamy, sweet butternut squash purée create a delightful contrast that excites the palate. The addition of pomegranate seeds and quince slaw not only enhances the dish’s visual appeal but also adds a refreshing crunch. This dish is perfect for any occasion, whether you’re celebrating a special event or simply enjoying a cozy dinner at home. Its nutritional benefits make it a wholesome choice, ensuring that you can indulge without guilt.

Encouragement to Try the Recipe

Pan-Seared Scallops with Butternut Squash Purée, it’s time to roll up your sleeves and give it a try! Don’t be intimidated by the cooking process; with the step-by-step instructions and helpful tips provided, you’ll be well on your way to creating a stunning dish that will impress your family and friends. Remember, cooking is all about experimenting and having fun. So, gather your ingredients, unleash your creativity, and enjoy the delightful experience of making this exquisite meal. Bon appétit!

Paul

“Pan-Seared Scallops with Butternut Squash Purée delight!”

This elegant dish pairs caramelized pan-seared scallops with a velvety roasted butternut squash purée and a tangy, crunchy slaw made with pomegranate, cabbage, mint, and hazelnuts. Balanced with sweet quince vinaigrette and fresh lemon, it’s a restaurant-quality plate made right at home.
Prep Time 25 minutes
Cook Time 45 minutes
Total Time 1 hour 10 minutes
Servings: 4 servings
Course: Main Course
Cuisine: Modern American

Ingredients
  

  • For the Butternut Squash Purée1 butternut squash about 3 pounds, seeded and halved4 tablespoons unsalted butter, divided2 to 4 sprigs fresh herbs such as thyme or rosemary4 garlic cloves, crushedFlaky sea salt, to tasteFreshly cracked black pepper, to taste
  • For the Pomegranate-Quince Slaw2 tablespoons quince paste2 tablespoons minced shallot1 tablespoon apple cider vinegar2 to 3 tablespoons olive oil2 cups thinly sliced cabbage purple and savoy¼ cup pomegranate seeds¼ cup toasted chopped hazelnutsHandful of fresh mint, choppedZest of 1 lemon
  • For the Pan-Seared Scallops8 large sea scallops cleaned and patted dryFlaky sea salt, to tasteFreshly cracked black pepper, to taste2 teaspoons olive oil3 tablespoons unsalted butterLemon juice, to taste

Method
 

  1. Roast the Butternut SquashPreheat oven to 425°F. Line a roasting pan with foil and place squash halves cut-side up. Add 2 tablespoons butter, garlic cloves, fresh herbs, salt, pepper, and a light drizzle of olive oil. Roast for 45 to 60 minutes until squash is fork-tender. Let cool slightly, then scoop out the flesh along with the softened garlic. Blend until smooth. Stir in the remaining butter and adjust seasoning to taste.
  2. Prepare the Quince VinaigretteIn a small bowl, mix quince paste with 1 tablespoon hot water until smooth. Whisk in shallot, apple cider vinegar, and olive oil until emulsified.
  3. Make the SlawIn a mixing bowl, combine the sliced cabbage, pomegranate seeds, hazelnuts, mint, and lemon zest. Toss gently with the quince vinaigrette, adding a little at a time to avoid overdressing.
  4. Sear the ScallopsHeat a skillet over high heat. Season scallops on both sides with salt and pepper. Add olive oil and sear scallops for about 2 minutes per side until golden brown. After flipping, add butter and a squeeze of lemon juice. Let butter brown slightly while basting the scallops.
  5. Plate and ServeSpoon a generous amount of butternut squash purée onto each plate. Top with seared scallops and finish with a heap of the pomegranate slaw. Drizzle any extra vinaigrette around the plate for added flavor.

Notes

  • For the smoothest purée, blend squash while still warm and add butter in small increments.
  • Be sure scallops are completely dry before searing for a proper golden crust.
  • Substitute quince paste with fig or apricot jam in the vinaigrette if unavailable.
  • This dish works beautifully as a plated dinner or holiday appetizer when served in smaller portions.

Chocolate-Covered Strawberry Brownies are a must-try!

Introduction to Chocolate-Covered Strawberry Brownies Recipe

Chocolate-Covered Strawberry Brownies Recipe is the perfect treat for any occasion. Whether it’s a birthday party, a family gathering, or just a cozy night in, these brownies will surely impress your guests and satisfy your sweet tooth.

The Perfect Dessert for Any Occasion

Imagine biting into a fudgy brownie, only to discover a burst of juicy strawberries inside. This dessert is not just about taste; it’s also about presentation. The glossy chocolate topping adds a touch of elegance, making it a showstopper on any dessert table. Plus, it’s easy to make, so you won’t spend hours in the kitchen.

These brownies are versatile too! You can serve them warm with a scoop of vanilla ice cream or enjoy them chilled. They are perfect for sharing with friends or indulging in a quiet moment by yourself. With just a few simple ingredients, you can create a dessert that feels special and indulgent.

So, gather your ingredients and get ready to whip up a batch of these delicious chocolate-covered strawberry brownies. Your taste buds will thank you!

Ingredients for Chocolate-Covered Strawberry Brownies Recipe

Chocolate-Covered Strawberry Brownies Recipe, you’ll need a few simple ingredients. Each component plays a vital role in achieving that perfect balance of flavors and textures. Here’s what you’ll need:

  • 1 cup unsalted butter, melted
  • 2 cups granulated sugar
  • 4 large eggs
  • 1 teaspoon vanilla extract
  • 1 cup all-purpose flour
  • 1 cup unsweetened cocoa powder
  • 1/2 teaspoon salt
  • 1 cup chocolate chips
  • 1 cup fresh strawberries, hulled and sliced
  • 1 cup semi-sweet chocolate chips (for topping)
  • 1 tablespoon coconut oil (for topping)

These ingredients are easy to find at your local grocery store. The combination of melted butter and sugar creates a rich base, while the cocoa powder gives the brownies their deep chocolate flavor. Fresh strawberries add a fruity twist, making each bite a delightful surprise.

For the topping, semi-sweet chocolate chips mixed with coconut oil create a smooth, glossy finish that enhances the overall presentation. This dessert is not only delicious but also visually appealing, making it a great choice for any gathering.

Now that you have your ingredients ready, let’s move on to the next step: preparing the brownie batter!

Step-by-Step Preparation of Chocolate-Covered Strawberry Brownies Recipe

Chocolate-Covered Strawberry Brownies Recipe. Follow these simple steps to create a delicious dessert that will wow your friends and family!

Step 1: Preheat the Oven and Prepare the Baking Dish

First things first, preheat your oven to 350°F (175°C). This ensures that your brownies bake evenly. While the oven is heating up, grab a 9×13-inch baking pan. Grease it lightly with butter or cooking spray. Then, line the bottom with parchment paper. This makes it super easy to lift the brownies out later. You’ll be glad you did!

Step 2: Make the Brownie Batter

In a large mixing bowl, combine the melted butter and granulated sugar. Use a whisk or a spatula to mix them together until they are well blended. Next, add the eggs one at a time, mixing well after each addition. This helps to create a smooth batter. Don’t forget to stir in the vanilla extract for that extra flavor!

In another bowl, whisk together the all-purpose flour, cocoa powder, and salt. Gradually add this dry mixture to the wet ingredients. Mix until just combined; be careful not to overmix. Finally, fold in the chocolate chips. This will give your brownies a delightful chocolatey surprise in every bite!

Step 3: Bake the Brownies

Now it’s time to bake! Pour half of the brownie batter into your prepared baking pan. Spread it evenly across the bottom. Next, layer the sliced strawberries over the batter. This is where the magic happens! Pour the remaining brownie batter on top, spreading it to cover the strawberries completely.

Place the pan in the preheated oven and bake for 25-30 minutes. To check if they are done, insert a toothpick into the center. If it comes out with a few moist crumbs, your brownies are ready! Once baked, allow them to cool completely in the pan on a wire rack. This step is crucial for achieving the perfect texture.

Step 4: Prepare the Chocolate-Covered Strawberries

While your brownies are cooling, let’s prepare the chocolate topping. In a microwave-safe bowl, combine the semi-sweet chocolate chips and coconut oil. Microwave the mixture in 30-second intervals, stirring in between until it’s melted and smooth. This will create a glossy chocolate that will beautifully drizzle over your brownies.

Step 5: Assemble the Chocolate-Covered Strawberry Brownies

Once the brownies are completely cool, it’s time to assemble! Drizzle the melted chocolate over the brownies, making sure to cover them evenly. Let the chocolate set for about 30 minutes. This will give your brownies a stunning finish and make them even more delicious. After the chocolate has set, cut the brownies into squares and serve!

Chocolate-Covered Strawberry Brownies Recipe. Enjoy every bite of this delightful treat!

Variation of Chocolate-Covered Strawberry Brownies Recipe

Chocolate-Covered Strawberry Brownies Recipe is already a crowd-pleaser, there are many ways to switch things up! You can easily customize this dessert to suit your taste or to impress your guests with unique flavors. Here are some alternative toppings and flavors to consider:

Alternative Toppings and Flavors

  • Nutty Delight: Add chopped nuts like walnuts or pecans to the brownie batter for a crunchy texture. You can also sprinkle some on top after drizzling the chocolate.
  • Fruity Twist: Instead of strawberries, try using raspberries or blueberries. These berries pair wonderfully with chocolate and add a different fruity flavor.
  • Minty Fresh: Incorporate a few drops of peppermint extract into the brownie batter. This will give your brownies a refreshing minty taste that complements the chocolate.
  • Caramel Drizzle: For a decadent touch, drizzle caramel sauce over the chocolate topping. The combination of chocolate and caramel is simply irresistible!
  • Spicy Kick: Add a pinch of cayenne pepper or chili powder to the brownie batter for a surprising spicy kick. This will create a unique flavor profile that chocolate lovers will enjoy.
  • White Chocolate Topping: Swap out the semi-sweet chocolate chips for white chocolate chips. This will give your brownies a sweeter, creamier finish.

Chocolate-Covered Strawberry Brownies Recipe. The possibilities are endless, and experimenting with flavors can lead to delightful surprises!

Cooking Note for Chocolate-Covered Strawberry Brownies Recipe

Chocolate-Covered Strawberry Brownies Recipe. Here are some essential cooking notes to keep in mind:

  • Room Temperature Ingredients: For the best results, ensure that your eggs and butter are at room temperature. This helps create a smoother batter and ensures even mixing.
  • Measuring Ingredients: Accurate measurements are crucial in baking. Use a kitchen scale for precise measurements, especially for flour and sugar. If you’re using cups, spoon the flour into the cup and level it off with a knife.
  • Don’t Overmix: When combining the wet and dry ingredients, mix until just combined. Overmixing can lead to dense brownies. A few lumps are perfectly fine!
  • Check for Doneness: Every oven is different. Start checking your brownies a few minutes before the suggested baking time. A toothpick should come out with a few moist crumbs, not wet batter.
  • Cooling Time: Allow the brownies to cool completely in the pan before cutting. This helps them set and makes it easier to achieve clean cuts.
  • Storage Tips: If you have leftovers, store them in an airtight container at room temperature for up to three days. For longer storage, you can freeze them for up to three months. Just make sure to wrap them well!

Chocolate-Covered Strawberry Brownies Recipe turns out perfectly every time. Happy baking!

Serving Suggestions for Chocolate-Covered Strawberry Brownies Recipe

Chocolate-Covered Strawberry Brownies Recipe, it’s time to think about how to serve them! Presentation can elevate your dessert experience, making it even more enjoyable. Here are some delightful serving suggestions to consider:

  • Warm with Ice Cream: Serve the brownies warm, topped with a scoop of vanilla or strawberry ice cream. The contrast of warm brownies and cold ice cream is simply heavenly!
  • Garnish with Fresh Berries: Add a few fresh strawberries or raspberries on the side for a pop of color and freshness. This not only enhances the presentation but also complements the flavors.
  • Drizzle with Caramel Sauce: For an extra indulgent treat, drizzle some caramel sauce over the brownies before serving. This adds a sweet touch that pairs beautifully with chocolate.
  • Dust with Powdered Sugar: A light dusting of powdered sugar can make your brownies look elegant. It’s a simple way to add a touch of sophistication to your dessert.
  • Serve with Whipped Cream: A dollop of freshly whipped cream on top of each brownie can add a creamy texture that balances the rich chocolate flavor.
  • Chocolate-Covered Strawberries on Top: For a fun twist, place a few chocolate-covered strawberries on top of the brownies. This not only looks stunning but also enhances the chocolate-strawberry theme.

Chocolate-Covered Strawberry Brownies Recipe will surely impress everyone. Enjoy every delicious bite!

Tips for Perfecting Your Chocolate-Covered Strawberry Brownies Recipe

Chocolate-Covered Strawberry Brownies Recipe truly exceptional, consider these helpful tips. They will guide you in achieving the best flavor and texture, ensuring your brownies are a hit every time!

  • Use Quality Ingredients: The better the ingredients, the better your brownies will taste. Opt for high-quality cocoa powder and chocolate chips for a richer flavor.
  • Don’t Skip the Cooling: Allow your brownies to cool completely before cutting. This helps them set properly and makes for cleaner, more appealing squares.
  • Experiment with Flavors: Don’t hesitate to try different flavor combinations. Adding a hint of espresso powder or a splash of almond extract can elevate the taste.
  • Check for Doneness: Remember, every oven is different. Keep an eye on your brownies as they bake. A toothpick should come out with a few moist crumbs, not wet batter.
  • Store Properly: To keep your brownies fresh, store them in an airtight container. They can last up to three days at room temperature or longer in the freezer.
  • Get Creative with Toppings: Feel free to add your favorite toppings. Chopped nuts, sprinkles, or even a drizzle of peanut butter can add a fun twist!

Chocolate-Covered Strawberry Brownies Recipe. Each batch will be delicious and sure to impress your family and friends!

Breakdown of Time for Chocolate-Covered Strawberry Brownies Recipe

Chocolate-Covered Strawberry Brownies Recipe can help you plan your baking session better. Here’s a simple breakdown of the time required for preparation, cooking, and cooling:

Prep Time

Getting everything ready is the first step. The prep time for this recipe is about 15-20 minutes. This includes gathering your ingredients, measuring them out, and preparing your baking pan.

Cooking Time

Once your brownies are in the oven, they will need about 25-30 minutes to bake. Keep an eye on them as they approach the end of the baking time. Remember, a toothpick should come out with a few moist crumbs when they are done!

Total Time

In total, you can expect to spend around 1 hour to 1 hour and 15 minutes from start to finish. This includes prep time, cooking time, and the cooling period before you can drizzle the chocolate topping. Patience is key, but the delicious results are worth the wait!

Chocolate-Covered Strawberry Brownies Recipe into your schedule. Happy baking!

Breakdown of Time for Chocolate-Covered Strawberry Brownies Recipe

Chocolate-Covered Strawberry Brownies Recipe can help you plan your baking session better. Here’s a simple breakdown of the time required for preparation, cooking, and cooling:

Prep Time

Getting everything ready is the first step. The prep time for this recipe is about 15-20 minutes. This includes gathering your ingredients, measuring them out, and preparing your baking pan. Make sure to have everything within reach to make the process smooth and enjoyable!

Cooking Time

Once your brownies are in the oven, they will need about 25-30 minutes to bake. Keep an eye on them as they approach the end of the baking time. Remember, a toothpick should come out with a few moist crumbs when they are done! This is the moment when the delicious aroma fills your kitchen, making it hard to wait!

Total Time

Chocolate-Covered Strawberry Brownies Recipe.

Nutritional Information for Chocolate-Covered Strawberry Brownies Recipe

Chocolate-Covered Strawberry Brownies Recipe can help you enjoy this delicious treat while keeping track of your dietary needs. Here’s a breakdown of the key nutritional components per serving:

Calories

Each brownie contains approximately 290 calories. This makes them a satisfying dessert option without being overly indulgent. Enjoying one or two brownies can fit nicely into a balanced diet, especially when paired with fresh fruit or a scoop of ice cream.

Protein

These brownies provide about 3 grams of protein per serving. While they are not a significant source of protein, the addition of eggs and chocolate chips contributes to this amount. Pairing your brownies with a protein-rich snack, like a glass of milk or yogurt, can enhance your overall protein intake.

Sodium

The sodium content in each brownie is around 150 milligrams. This is relatively low, making these brownies a heart-friendly dessert option. However, if you are watching your sodium intake, be mindful of any additional toppings or accompaniments you may add.

Chocolate-Covered Strawberry Brownies Recipe guilt-free. Remember, moderation is key, and these brownies can be a delightful part of a balanced diet!

FAQs about Chocolate-Covered Strawberry Brownies Recipe

Can I use frozen strawberries for the Chocolate-Covered Strawberry Brownies Recipe?

Chocolate-Covered Strawberry Brownies Recipe.

How do I store leftover Chocolate-Covered Strawberry Brownies?

Chocolate-Covered Strawberry Brownies Recipe even after a few weeks!

Can I make the brownies ahead of time?

Absolutely! You can prepare the brownies a day in advance. Just bake them, let them cool completely, and then store them in an airtight container. When you’re ready to serve, drizzle the chocolate topping and let it set. This makes it easy to have a delicious dessert ready for any occasion!

What can I substitute for chocolate in the Chocolate-Covered Strawberry Brownies Recipe?

Chocolate-Covered Strawberry Brownies Recipe, but it can still be delicious!

Conclusion on Chocolate-Covered Strawberry Brownies Recipe

Chocolate-Covered Strawberry Brownies Recipe is a delightful treat that combines the rich flavors of chocolate with the freshness of strawberries. This dessert is not only easy to make but also offers endless possibilities for customization. Whether you stick to the classic recipe or experiment with different toppings and flavors, you’re sure to create a dessert that will impress everyone.

These brownies are perfect for any occasion, from birthday parties to casual family gatherings. Their fudgy texture and fruity surprise make them a favorite among both kids and adults. Plus, with the added chocolate drizzle, they look as good as they taste!

Chocolate-Covered Strawberry Brownies.

Happy baking, and may your kitchen be filled with the sweet aroma of chocolate and strawberries!

Paul

Chocolate-Covered Strawberry Brownies are a must-try!

These Chocolate-Covered Strawberry Brownies are a luscious twist on two dessert favorites. Fudgy brownies form the rich foundation, topped with sweet fresh strawberries and finished with a silky layer of chocolate ganache. It’s indulgent, eye-catching, and the perfect treat for holidays, date nights, or anytime you want something extra special.
Prep Time 20 minutes
Cook Time 30 minutes
Total Time 1 hour 50 minutes
Servings: 12 servings
Course: Dessert
Cuisine: American

Ingredients
  

  • For the Brownie Base:1 cup unsalted butter 2 sticks2 cups granulated sugar4 large eggs1 teaspoon vanilla extract1 cup all-purpose flour1 cup unsweetened cocoa powder½ teaspoon salt1 teaspoon baking powder
  • For the Strawberry Layer:1 pint fresh strawberries hulled and halved
  • For the Chocolate Ganache:1 cup semi-sweet chocolate chips½ cup heavy cream

Method
 

  1. Prepare the Brownie Base:Preheat oven to 350°F (175°C). Line a 9×13-inch baking pan with parchment paper, leaving some overhang for easy lifting.In a large microwave-safe bowl, melt the butter. Whisk in the sugar until combined. Add eggs and vanilla, whisking until the mixture is smooth.In another bowl, sift together flour, cocoa powder, salt, and baking powder. Gradually add the dry ingredients to the wet, mixing until just combined.Spread the batter evenly into the prepared pan. Bake for 25–30 minutes or until a toothpick inserted comes out with moist crumbs. Let the brownies cool completely in the pan.
  2. Add the Strawberry Layer:Once the brownies are cooled, arrange the halved strawberries cut-side down in an even layer over the top.
  3. Make the Ganache:In a microwave-safe bowl, combine the chocolate chips and heavy cream. Microwave in 30-second intervals, stirring between each, until smooth and glossy.
  4. Assemble and Chill:Pour the ganache over the strawberries, using a spatula to spread it evenly. Chill the pan in the fridge for at least 1 hour or until the ganache is set.Once set, lift the brownies out using the parchment paper, cut into squares, and serve.

Notes

  • Use ripe, firm strawberries for the best structure and flavor.
  • For easier slicing, dip a knife in warm water between cuts.
  • Store leftovers in the fridge for up to 3 days.
  • You can swap the ganache with white chocolate or dark chocolate for a flavor twist.

Mexican Beef Chile Verde Recipe is a must-try dish!

What is Mexican Beef Chile Verde?

Mexican Beef Chile Verde is a delicious and hearty dish that showcases the vibrant flavors of Mexican cuisine. This recipe features tender beef simmered in a tangy green sauce made from tomatillos, jalapeños, and spices. The result is a comforting meal that is both satisfying and full of flavor. Often served with warm tortillas or over rice, this dish is perfect for family gatherings or cozy dinners at home. The combination of spices and fresh ingredients makes it a favorite among many, and it’s easy to see why!

The Origins of Chile Verde

Chile Verde, which translates to “green chili,” has deep roots in Mexican culinary traditions. It is believed to have originated in the central and southern regions of Mexico, where tomatillos and green chilies are abundant. The dish reflects the rich agricultural heritage of the area, utilizing fresh, local ingredients. Over the years, various regions have put their own spin on Chile Verde, leading to numerous variations. However, the core elements remain the same: tender meat, a zesty green sauce, and a blend of spices that create a mouthwatering experience. Today, Mexican Beef Chile Verde is enjoyed not only in Mexico but also in many parts of the world, bringing a taste of authentic Mexican flavor to dinner tables everywhere.

Ingredients for Mexican Beef Chile Verde Recipe

To create a mouthwatering Mexican Beef Chile Verde, you’ll need a selection of fresh and flavorful ingredients. Each component plays a vital role in building the dish’s rich taste. Here’s what you’ll need:

  • 2 pounds beef chuck: Cut into 1-inch cubes for tenderness.
  • 2 tablespoons olive oil: For browning the beef and adding flavor.
  • 1 medium onion: Chopped to enhance the base of the sauce.
  • 4 cloves garlic: Minced for a fragrant kick.
  • 2 jalapeño peppers: Diced (seeds removed for less heat) to add spice.
  • 2 cups tomatillos: Husked and chopped, providing a tangy flavor.
  • 1 cup chicken broth: To keep the dish moist and flavorful.
  • 1 teaspoon ground cumin: For a warm, earthy taste.
  • 1 teaspoon dried oregano: To add a hint of herbal freshness.
  • Salt and pepper: To taste, enhancing all the flavors.
  • Fresh cilantro: For garnish, adding a pop of color and freshness.
  • Lime wedges: For serving, providing a zesty finish.

These ingredients come together to create a delightful dish that is sure to impress. The combination of beef, tomatillos, and spices results in a savory and satisfying meal. Make sure to gather everything before you start cooking to ensure a smooth preparation process!

Step-by-Step Preparation of Mexican Beef Chile Verde Recipe

Step 1: Preparing the Ingredients

Before you start cooking, it’s essential to prepare all your ingredients. Begin by cutting the beef chuck into 1-inch cubes. This size ensures even cooking and tenderness. Next, chop the onion and mince the garlic. For the jalapeños, dice them finely, removing the seeds if you prefer a milder flavor. Finally, husk and chop the tomatillos. Having everything ready will make the cooking process smoother and more enjoyable!

Step 2: Cooking the Beef

In a large pot or Dutch oven, heat the olive oil over medium-high heat. Once the oil is hot, add the beef cubes. Brown the beef on all sides, which should take about 5-7 minutes. This step is crucial as it locks in the flavors. After browning, remove the beef from the pot and set it aside. This will allow you to build the base of your sauce in the same pot, enhancing the overall taste.

Step 3: Making the Chile Verde Sauce

In the same pot, add the chopped onion. Sauté it until it becomes translucent, which takes about 3-4 minutes. Then, add the minced garlic and diced jalapeños. Cook for an additional 1-2 minutes until the mixture is fragrant. This step creates a flavorful base for your Chile Verde sauce. Next, stir in the chopped tomatillos, chicken broth, ground cumin, and dried oregano. These ingredients will form the heart of your dish, bringing together the vibrant flavors of Mexico.

Step 4: Combining Ingredients

Once your sauce is ready, it’s time to bring everything together. Add the browned beef back into the pot. Season the mixture with salt and pepper to taste. Stir well to ensure that the beef is coated with the sauce. This combination of ingredients will create a rich and savory flavor that is characteristic of Mexican Beef Chile Verde.

Step 5: Simmering the Dish

Now, bring the mixture to a boil. Once boiling, reduce the heat to low. Cover the pot and let it simmer for about 1.5 to 2 hours. This slow cooking process allows the beef to become tender and absorb all the delicious flavors. Stir occasionally, and if the sauce gets too thick, feel free to add more chicken broth. After simmering, taste the dish and adjust the seasoning if needed. Your Mexican Beef Chile Verde is now ready to be served!

Variations of Mexican Beef Chile Verde Recipe

Vegetarian Alternatives

If you’re looking for a vegetarian twist on the classic Mexican Beef Chile Verde, there are plenty of delicious options! Instead of beef, you can use hearty vegetables like zucchini, bell peppers, or mushrooms. These ingredients will absorb the flavors of the sauce beautifully. Another great alternative is to use plant-based proteins such as tofu or tempeh. Simply cube them and sauté them just like you would with the beef. This way, you still get that satisfying texture while keeping the dish meat-free. Don’t forget to add extra beans, like black beans or pinto beans, for added protein and fiber. This vegetarian version is not only healthy but also bursting with flavor!

Different Meat Options

For those who prefer different meats, there are several tasty alternatives to beef in the Mexican Beef Chile Verde recipe. Pork is a popular choice; using pork shoulder or tenderloin can create a rich and flavorful dish. Simply follow the same steps as you would with beef. Chicken is another excellent option. You can use boneless, skinless chicken thighs or breasts, which will cook faster than beef. Just be sure to adjust the cooking time accordingly. For a unique twist, try using turkey or even lamb. Each meat brings its own distinct flavor, allowing you to customize the dish to your liking. No matter which meat you choose, the vibrant green sauce will make it a hit!

Cooking Note for Mexican Beef Chile Verde Recipe

When preparing your Mexican Beef Chile Verde, there are a few important cooking notes to keep in mind. First, the quality of your beef is crucial. Opt for a well-marbled beef chuck, as the fat will render during cooking, making the meat tender and flavorful. If you can, choose grass-fed beef for a richer taste.

Next, don’t rush the browning process. Taking the time to brown the beef properly enhances the overall flavor of the dish. Make sure your pot is hot enough before adding the beef. This step creates a nice crust on the meat, sealing in the juices.

Additionally, feel free to adjust the spice level to suit your taste. If you enjoy a bit more heat, consider adding more jalapeños or even a serrano pepper. On the other hand, if you prefer a milder dish, removing the seeds from the jalapeños is a great way to control the spice.

Lastly, remember that the longer you let the dish simmer, the more the flavors will meld together. If you have the time, letting it cook for a few extra minutes can make a big difference. Just keep an eye on the liquid level and add more broth if necessary. Enjoy the process, and soon you’ll have a delicious pot of Mexican Beef Chile Verde ready to serve!

Serving Suggestions for Mexican Beef Chile Verde Recipe

Pairing with Sides

When it comes to serving Mexican Beef Chile Verde, the right sides can elevate your meal to a whole new level. One popular option is warm tortillas. They are perfect for scooping up the tender beef and flavorful sauce. You can use corn or flour tortillas, depending on your preference. Another great pairing is rice. A fluffy bed of white or brown rice complements the dish beautifully, soaking up the delicious sauce.

If you want to add some crunch, consider serving a fresh salad on the side. A simple green salad with lettuce, tomatoes, and avocado can provide a refreshing contrast to the rich flavors of the Chile Verde. You might also enjoy serving it with Mexican-style rice, which is seasoned with tomatoes and spices, adding an extra layer of flavor.

For a heartier meal, you can include beans. Black beans or pinto beans are excellent choices. They not only add protein but also enhance the overall texture of the dish. You can serve them on the side or mix them into the Chile Verde for a more filling option. No matter what sides you choose, they will surely complement the vibrant flavors of your Mexican Beef Chile Verde!

Garnishing Ideas

Garnishing your Mexican Beef Chile Verde is a fun way to add color and freshness to your dish. Fresh cilantro is a classic choice. Its bright green leaves not only look appealing but also add a burst of flavor. Simply chop some cilantro and sprinkle it over the top just before serving.

Lime wedges are another fantastic garnish. They provide a zesty kick that enhances the flavors of the dish. Squeezing fresh lime juice over the Chile Verde just before eating can brighten up the entire meal. You can also add sliced radishes for a pop of color and a crunchy texture. They offer a nice contrast to the tender beef and sauce.

If you want to get creative, consider adding diced avocado on top. Its creamy texture pairs wonderfully with the spicy sauce. Finally, a dollop of sour cream or Mexican crema can add a rich, cooling element to balance the heat. With these garnishing ideas, your Mexican Beef Chile Verde will not only taste amazing but also look beautiful on the plate!

Tips for Perfecting Your Mexican Beef Chile Verde Recipe

To make your Mexican Beef Chile Verde truly exceptional, consider these helpful tips. They will enhance the flavors and ensure a delightful dining experience for you and your guests.

First, always choose high-quality ingredients. Fresh tomatillos and ripe jalapeños will significantly impact the taste of your dish. When selecting beef, look for cuts with good marbling. This fat will melt during cooking, making the meat tender and juicy.

Next, don’t skip the browning step. Browning the beef creates a rich flavor base. Make sure your pot is hot enough before adding the meat. This will help achieve a nice sear, locking in the juices and enhancing the overall taste.

Another tip is to let the dish simmer longer if you have the time. The longer it cooks, the more the flavors meld together. If you can, let it simmer for up to three hours. Just keep an eye on the liquid level and add more broth if needed.

For those who enjoy a bit of heat, consider adding a pinch of cayenne pepper or a few extra jalapeños. On the other hand, if you prefer a milder flavor, be sure to remove all the seeds from the jalapeños. This simple step can make a big difference in the spice level.

Lastly, don’t forget to taste as you go! Adjust the seasoning to your liking. A little extra salt or a squeeze of lime can elevate the dish. Remember, cooking is all about personal preference, so make it your own!

By following these tips, you’ll be well on your way to creating a delicious Mexican Beef Chile Verde that will impress everyone at your table. Enjoy the cooking process and the wonderful flavors that come together in this classic dish!

Breakdown of Time for Mexican Beef Chile Verde Recipe

Prep Time

Preparing your ingredients is an essential step in making the Mexican Beef Chile Verde. The prep time for this recipe is approximately 20-30 minutes. During this time, you will cut the beef into cubes, chop the onion, mince the garlic, and dice the jalapeños. Additionally, husking and chopping the tomatillos will also take some time. Having everything ready before you start cooking will make the process smoother and more enjoyable!

Cooking Time

The cooking time for Mexican Beef Chile Verde is about 1.5 to 2 hours. This includes browning the beef, sautéing the vegetables, and simmering the dish until the beef is tender. The slow cooking process allows the flavors to meld beautifully, resulting in a rich and savory sauce. Remember to stir occasionally and check the liquid level, adding more broth if necessary.

Total Time

In total, you can expect to spend around 2 to 2.5 hours from start to finish when making Mexican Beef Chile Verde. This includes both the prep and cooking times. While it may seem like a lengthy process, the delicious outcome is well worth the wait. Plus, the aroma of the simmering dish will fill your kitchen, making it a delightful experience for everyone!

Nutritional Information for Mexican Beef Chile Verde Recipe

Calories

When enjoying a serving of Mexican Beef Chile Verde, you can expect to consume approximately 320 calories. This makes it a hearty yet manageable option for a main meal. The balance of protein, fats, and carbohydrates in this dish contributes to its satisfying nature, making it a great choice for those looking for a filling dinner without going overboard on calories.

Protein

Each serving of Mexican Beef Chile Verde packs a protein punch with about 28 grams. This high protein content is primarily due to the beef chuck, which is an excellent source of essential amino acids. Protein is vital for muscle repair and growth, making this dish a great option for active individuals or anyone looking to maintain a balanced diet.

Sodium

The sodium content in Mexican Beef Chile Verde can vary based on the ingredients used, particularly the chicken broth. On average, you can expect around 600-800 mg of sodium per serving. To manage sodium levels, consider using low-sodium chicken broth or adjusting the amount of added salt. This way, you can enjoy the rich flavors of the dish while keeping your sodium intake in check.

FAQs about Mexican Beef Chile Verde Recipe

What can I substitute for beef in the Mexican Beef Chile Verde Recipe?

If you’re looking to switch things up, there are several great substitutes for beef in the Mexican Beef Chile Verde recipe. Pork is a popular choice, especially cuts like pork shoulder or tenderloin. These options will provide a rich flavor similar to beef. Chicken is another excellent alternative. You can use boneless, skinless chicken thighs or breasts, which will cook faster than beef. For a vegetarian option, consider using hearty vegetables like zucchini, bell peppers, or mushrooms. Plant-based proteins like tofu or tempeh also work well. Each substitute will bring its own unique flavor while still allowing you to enjoy the delicious green sauce!

Can I make Mexican Beef Chile Verde Recipe in a slow cooker?

Absolutely! Making Mexican Beef Chile Verde in a slow cooker is a fantastic option. To do this, start by browning the beef in a skillet as directed in the recipe. Then, transfer the browned beef to the slow cooker along with the sautéed onions, garlic, jalapeños, tomatillos, chicken broth, and spices. Set your slow cooker on low for 6-8 hours or on high for 3-4 hours. This method allows the flavors to meld beautifully while the beef becomes incredibly tender. Just remember to check the liquid level occasionally and add more broth if needed. Enjoy the convenience of a slow cooker while still savoring this delicious dish!

How spicy is Mexican Beef Chile Verde Recipe?

The spice level of Mexican Beef Chile Verde can vary based on your preferences. The primary source of heat comes from the jalapeño peppers. If you remove the seeds and membranes, the dish will be milder. However, if you enjoy a bit more heat, you can leave some seeds in or even add a serrano pepper for an extra kick. Overall, the spice level is adjustable, making it suitable for everyone. Feel free to taste as you go and adjust the heat to your liking!

What are the best sides to serve with Mexican Beef Chile Verde Recipe?

When it comes to sides, there are plenty of delicious options to pair with Mexican Beef Chile Verde. Warm tortillas are a classic choice, perfect for scooping up the tender beef and flavorful sauce. Rice, whether white or brown, also complements the dish beautifully, soaking up the savory sauce. For a refreshing contrast, consider serving a simple green salad with lettuce, tomatoes, and avocado. You might also enjoy beans, like black or pinto beans, which add protein and texture. No matter what sides you choose, they will enhance the overall dining experience and make your meal even more enjoyable!

Conclusion on Mexican Beef Chile Verde Recipe

In conclusion, the Mexican Beef Chile Verde recipe is a delightful dish that brings the vibrant flavors of Mexico right to your kitchen. With its tender beef simmered in a tangy green sauce made from tomatillos and jalapeños, this meal is both comforting and satisfying. Whether you’re cooking for a family gathering or a cozy dinner at home, this recipe is sure to impress.

By following the step-by-step preparation, you can create a dish that is rich in flavor and full of nutrients. The versatility of this recipe allows for various adaptations, whether you choose to use different meats or even go vegetarian. Plus, the serving suggestions and garnishing ideas add an extra touch of creativity to your meal.

Remember, cooking is all about enjoying the process and making it your own. Don’t hesitate to experiment with spices and ingredients to suit your taste. With a little patience and love, your Mexican Beef Chile Verde will become a favorite in your household.

So gather your ingredients, roll up your sleeves, and get ready to savor the deliciousness of this classic Mexican dish. Happy cooking!

Paul

Mexican Beef Chile Verde Recipe is a must-try dish!

This hearty Mexican Beef Chile Verde is a bold, flavorful stew that brings together tender chunks of beef, vibrant tomatillos, green chilies, and zesty spices. Slowly simmered to perfection, it’s comforting and versatile—perfect as a main dish, taco filling, or even over rice. Every spoonful is a celebration of earthy heat and rich, savory depth.
Prep Time 20 minutes
Cook Time 2 hours
Total Time 2 hours 20 minutes
Servings: 6 servings
Course: Main Course
Cuisine: Mexican

Ingredients
  

  • 2 pounds beef stew meat such as chuck roast, cut into cubes1 tablespoon olive oil or vegetable oil1 large onion, chopped5 to 6 garlic cloves, minced3 cups tomatillos, husked and quartered4 to 5 medium green chilies (Anaheim, Hatch, or poblano), seeded and chopped1 to 2 jalapeños (seeded for milder heat, unseeded for spicy)2 teaspoons ground cumin1 teaspoon dried oregano (preferably Mexican oregano)1 teaspoon ground coriander½ teaspoon ground black pepper1 teaspoon salt, or to taste4 cups beef broth (halal-certified if needed)1 tablespoon fresh lime juiceOptional garnish: chopped cilantro and/or chopped parsley
  • Serving Suggestions:Warm tortillasCilantro-lime rice or plain white riceCrusty breadUse as taco burrito, or enchilada filling

Method
 

  1. Pat the beef cubes dry with paper towels to ensure good searing.
  2. Heat oil in a large Dutch oven over medium-high heat. Sear beef in batches until browned on all sides, then set aside.
  3. In the same pot, sauté chopped onion for about 5 minutes until translucent.
  4. Add minced garlic and cook for 1 minute more until fragrant.
  5. Stir in the tomatillos, green chilies, and jalapeños. Cook for several minutes until vegetables begin to soften.
  6. Sprinkle in cumin, oregano, coriander, black pepper, and salt. Mix well.
  7. Return the seared beef to the pot. Pour in the beef broth and stir, scraping up any browned bits from the bottom.
  8. Bring mixture to a boil, then reduce heat to low and cover. Simmer for 1.5 to 2 hours until the beef is fork-tender.
  9. Stir in fresh lime juice and adjust seasoning to taste.
  10. Garnish with chopped cilantro or parsley, and serve hot with desired sides.

Notes

  • You can blend the tomatillo mixture before adding the beef if you prefer a smoother sauce.
  • Adjust the number of jalapeños based on your heat preference.
  • This dish tastes even better the next day as the flavors deepen.
  • It freezes well—cool completely before storing in an airtight container.

Slow Cooker Chicken Paprika is a must-try recipe!

Are you looking for a delicious and easy meal that will impress your family and friends? Look no further than Slow Cooker Paprika Chicken! This dish is not only flavorful but also incredibly simple to prepare. With just a few ingredients and minimal effort, you can create a hearty meal that warms the soul.

Slow Cooker Paprika Chicken combines tender chicken thighs with a rich, creamy sauce that is infused with the warm flavors of sweet paprika and garlic. The slow cooking process allows the spices to meld beautifully, resulting in a dish that is both comforting and satisfying. Plus, the use of a slow cooker means you can set it and forget it, making it perfect for busy weeknights or lazy weekends.

This recipe is versatile, too! You can easily adjust the ingredients to suit your taste or dietary needs. Whether you prefer a little kick with some cayenne pepper or a lighter option using Greek yogurt instead of sour cream, the possibilities are endless. So, gather your ingredients and get ready to enjoy a delightful meal that will have everyone asking for seconds!

Ingredients for Slow Cooker Paprika Chicken

To create the mouthwatering Slow Cooker Paprika Chicken, you’ll need a handful of simple ingredients. Each one plays a vital role in building the rich flavors of this dish. Here’s what you’ll need:

  • 2 pounds boneless, skinless chicken thighs: These are perfect for slow cooking, as they become tender and juicy.
  • 1 large onion, chopped: The onion adds sweetness and depth to the dish.
  • 3 cloves garlic, minced: Garlic brings a wonderful aroma and flavor that complements the paprika.
  • 2 tablespoons sweet paprika: This is the star of the show! Sweet paprika gives the dish its signature taste and vibrant color.
  • 1 teaspoon dried thyme: Thyme adds an earthy note that enhances the overall flavor.
  • 1 teaspoon salt: Salt is essential for bringing out the flavors of the other ingredients.
  • ½ teaspoon black pepper: A little black pepper adds a subtle kick.
  • 1 cup chicken broth: This keeps the chicken moist and adds richness to the sauce.
  • 1 cup sour cream: Sour cream gives the dish a creamy texture and tangy flavor.
  • 2 tablespoons olive oil: Olive oil is used for searing the chicken, adding a nice golden crust.
  • 2 tablespoons all-purpose flour: This helps thicken the sauce, making it luscious and satisfying.
  • 1 tablespoon lemon juice: A splash of lemon juice brightens the flavors and balances the richness.
  • Fresh parsley, chopped (for garnish): Parsley adds a pop of color and freshness when serving.

With these ingredients on hand, you’re well on your way to making a delightful Slow Cooker Paprika Chicken that everyone will love. Remember, the quality of your ingredients can make a big difference, so choose fresh and high-quality items whenever possible!

Preparation of Slow Cooker Paprika Chicken

Now that you have gathered all your ingredients, it’s time to prepare your Slow Cooker Paprika Chicken. This process is straightforward and will have your kitchen smelling amazing in no time. Let’s break it down into easy steps.

Step 1: Preparing the Chicken

Start by taking your boneless, skinless chicken thighs and placing them in a large bowl. Next, add the chopped onion and minced garlic. These ingredients will infuse the chicken with flavor as it cooks. Then, sprinkle in the sweet paprika, dried thyme, salt, and black pepper. Mix everything together well, ensuring that each piece of chicken is coated evenly with the spices. This step is crucial for maximizing flavor!

Step 2: Mixing the Paprika Sauce

In a separate small bowl, whisk together the sour cream, all-purpose flour, and lemon juice until smooth. This mixture will create a creamy sauce that enhances the dish’s richness. Make sure there are no lumps, as a smooth sauce will blend better with the chicken. Set this aside for now; you’ll add it later in the cooking process.

Step 3: Combining Ingredients in the Slow Cooker

Next, heat the olive oil in a skillet over medium-high heat. Once hot, add the chicken mixture to the skillet. Sear the chicken for about 3-4 minutes on each side until it’s nicely browned. This step adds a lovely depth of flavor. After browning, transfer the chicken to the slow cooker. Pour the chicken broth over the chicken, ensuring it’s well covered. This broth will keep the chicken moist and flavorful during cooking.

Step 4: Setting the Slow Cooker

Now that everything is in the slow cooker, cover it with the lid. If you’re cooking on low, set the timer for 6-8 hours. For a quicker option, you can cook on high for 3-4 hours. The slow cooking process allows the flavors to meld beautifully, resulting in tender chicken that falls apart with a fork. About 30 minutes before serving, stir in the sour cream mixture you prepared earlier. Cover and let it cook for an additional 30 minutes to thicken the sauce. Your Slow Cooker Paprika Chicken is almost ready!

Variation of Slow Cooker Paprika Chicken

One of the best things about Slow Cooker Paprika Chicken is its versatility. You can easily switch up the ingredients to create different flavors that suit your taste. Let’s explore some alternative ingredients and how to adjust cooking times for these variations.

Alternative Ingredients for Different Flavors

If you want to give your Slow Cooker Paprika Chicken a unique twist, consider these alternative ingredients:

  • Spicy Kick: For those who enjoy a bit of heat, add a pinch of cayenne pepper or red pepper flakes to the chicken mixture. This will give your dish a delightful spicy flavor.
  • Vegetable Boost: You can add chopped bell peppers, carrots, or mushrooms to the slow cooker. These vegetables not only enhance the flavor but also add nutrition and color to your dish.
  • Herb Variations: Instead of dried thyme, try using dried oregano or rosemary. Each herb brings its own unique flavor profile, making your dish even more interesting.
  • Different Creaminess: If you want a lighter option, substitute Greek yogurt for sour cream. This will still give you a creamy texture while reducing calories.

These alternatives can help you customize your Slow Cooker Paprika Chicken to fit your family’s preferences. Feel free to experiment and find the combination that you love the most!

Adjusting Cooking Times for Variations

When you make changes to the ingredients, you may need to adjust the cooking times slightly. Here are some tips:

  • Adding Vegetables: If you add vegetables, they may require a bit more time to cook. If using firmer vegetables like carrots, consider adding them at the beginning with the chicken. Softer vegetables, like bell peppers, can be added in the last hour of cooking.
  • Using Thinner Cuts of Chicken: If you opt for chicken breasts instead of thighs, they may cook faster. Check for doneness after about 3 hours on high or 5 hours on low.
  • Increased Liquid: If you add more liquid (like broth or yogurt), it may take a little longer for the sauce to thicken. Be sure to stir in your thickening agent about 30 minutes before serving, as usual.

By making these adjustments, you can ensure that your Slow Cooker Paprika Chicken turns out perfectly every time, no matter how you choose to customize it!

Cooking Note for Slow Cooker Paprika Chicken

When preparing Slow Cooker Paprika Chicken, there are a few important cooking notes to keep in mind. These tips will help you achieve the best results and ensure that your dish is both delicious and satisfying.

First, always remember to use a good quality slow cooker. A reliable slow cooker will maintain a consistent temperature, which is crucial for even cooking. If your slow cooker runs hot, it may cook the chicken too quickly, leading to dryness. Conversely, if it runs cool, the chicken may not reach a safe temperature in time.

Next, consider the size of your chicken pieces. For even cooking, try to cut the chicken thighs into similar sizes. This way, they will cook at the same rate, ensuring that every piece is tender and flavorful. If you’re using larger pieces, you may need to extend the cooking time slightly.

Another key point is to avoid lifting the lid during cooking. Each time you open the lid, heat escapes, which can increase cooking time. Trust the slow cooker to do its job! If you need to check on the dish, do so quickly and replace the lid promptly.

Lastly, let the chicken rest for a few minutes after cooking. This allows the juices to redistribute, making the chicken even more tender. When serving, be sure to spoon some of the creamy sauce over the chicken for added flavor. This will enhance the overall experience and make your Slow Cooker Paprika Chicken truly irresistible!

By following these cooking notes, you’ll be well on your way to creating a delightful meal that your family will love. Enjoy the process and the wonderful aromas that fill your kitchen!

Serving Suggestions for Slow Cooker Paprika Chicken

Once your Slow Cooker Paprika Chicken is ready, it’s time to think about how to serve it. This dish is not only delicious but also versatile when it comes to pairing it with side dishes. Here are some great serving suggestions that will complement the rich flavors of the chicken.

Best Side Dishes to Pair with Slow Cooker Paprika Chicken

  • Egg Noodles: A classic choice! The soft, chewy texture of egg noodles pairs perfectly with the creamy sauce. Simply cook the noodles according to package instructions and serve them underneath the chicken.
  • Rice: Whether you choose white, brown, or even wild rice, it’s a great base for soaking up the flavorful sauce. Cook the rice separately and serve it alongside or under the chicken.
  • Mashed Potatoes: Creamy mashed potatoes are another fantastic option. They provide a comforting base that complements the dish beautifully. You can even mix in some garlic or herbs for extra flavor.
  • Steamed Vegetables: For a healthier option, serve your chicken with a side of steamed vegetables. Broccoli, green beans, or carrots add color and nutrition to your meal.
  • Crusty Bread: A loaf of fresh, crusty bread is perfect for sopping up the delicious sauce. It adds a nice texture and makes the meal feel complete.

Creative Ways to Serve Leftovers

If you have any leftovers, don’t worry! Slow Cooker Paprika Chicken makes for excellent next-day meals. Here are some creative ideas:

  • Wraps: Use tortillas to create wraps filled with chicken and sauce. Add some fresh greens or cheese for extra flavor.
  • Salads: Chop the chicken and toss it into a salad. The creamy sauce can act as a dressing, making for a hearty and satisfying meal.
  • Stuffed Peppers: Mix the chicken with some cooked rice and stuff it into bell peppers. Bake until the peppers are tender for a delicious twist.
  • Pasta: Toss the chicken and sauce with cooked pasta for a quick and easy meal. Add some grated cheese on top for a delightful finish.

With these serving suggestions, you can enjoy your Slow Cooker Paprika Chicken in various ways. Whether it’s a cozy family dinner or a quick lunch, this dish is sure to please everyone!

Tips for Perfecting Slow Cooker Paprika Chicken

To make your Slow Cooker Paprika Chicken truly exceptional, consider these helpful tips. They will enhance the flavors and ensure a delightful dining experience for you and your loved ones.

Choosing the Right Paprika

The type of paprika you use can significantly impact the flavor of your dish. Sweet paprika is the traditional choice for this recipe, providing a mild and slightly sweet flavor. However, you can experiment with smoked paprika for a deeper, smoky taste. This variation adds a unique twist to your Slow Cooker Paprika Chicken, making it even more delicious. Just remember, a little goes a long way, so start with a small amount and adjust to your taste!

Enhancing Flavor with Additional Spices

While the basic recipe is fantastic, you can elevate the flavor profile by adding a few extra spices. Consider incorporating:

  • Bay Leaves: Adding a couple of bay leaves during cooking can infuse a subtle depth of flavor.
  • Smoked Paprika: As mentioned earlier, this can add a rich, smoky flavor that complements the dish beautifully.
  • Italian Seasoning: A sprinkle of Italian seasoning can introduce a delightful herbaceous note.
  • Fresh Herbs: Adding fresh herbs like thyme or parsley at the end of cooking can brighten the dish and add freshness.

These additional spices can help you customize your Slow Cooker Paprika Chicken to suit your taste preferences. Don’t be afraid to experiment and find the perfect blend that you love!

Tips for Perfecting Slow Cooker Paprika Chicken

To make your Slow Cooker Paprika Chicken truly exceptional, consider these helpful tips. They will enhance the flavors and ensure a delightful dining experience for you and your loved ones.

Choosing the Right Paprika

The type of paprika you use can significantly impact the flavor of your dish. Sweet paprika is the traditional choice for this recipe, providing a mild and slightly sweet flavor. However, you can experiment with smoked paprika for a deeper, smoky taste. This variation adds a unique twist to your Slow Cooker Paprika Chicken, making it even more delicious. Just remember, a little goes a long way, so start with a small amount and adjust to your taste!

Enhancing Flavor with Additional Spices

While the basic recipe is fantastic, you can elevate the flavor profile by adding a few extra spices. Consider incorporating:

  • Bay Leaves: Adding a couple of bay leaves during cooking can infuse a subtle depth of flavor.
  • Smoked Paprika: As mentioned earlier, this can add a rich, smoky flavor that complements the dish beautifully.
  • Italian Seasoning: A sprinkle of Italian seasoning can introduce a delightful herbaceous note.
  • Fresh Herbs: Adding fresh herbs like thyme or parsley at the end of cooking can brighten the dish and add freshness.

These additional spices can help you customize your Slow Cooker Paprika Chicken to suit your taste preferences. Don’t be afraid to experiment and find the perfect blend that you love!

Breakdown of Time for Slow Cooker Paprika Chicken

Understanding the time needed for each step in preparing Slow Cooker Paprika Chicken is essential for planning your meal. Here’s a detailed breakdown of the time involved, so you can manage your cooking schedule effectively.

Prep Time

The prep time for Slow Cooker Paprika Chicken is relatively short. You’ll spend about 15-20 minutes gathering and preparing your ingredients. This includes chopping the onion, mincing the garlic, and mixing the spices with the chicken. If you have everything ready, you can get started quickly!

Cooking Time

Once you’ve prepared the ingredients, the cooking time is where the magic happens. If you set your slow cooker to low, it will take about 6-8 hours for the chicken to become tender and flavorful. Alternatively, if you’re short on time, cooking on high will take around 3-4 hours. Just remember, the longer you cook it on low, the more the flavors will develop!

Total Time

In total, you can expect to spend about 6 hours and 15 minutes to 8 hours and 20 minutes from start to finish, depending on your cooking method. This includes both prep and cooking time. The beauty of this recipe is that you can set it in the morning and come home to a delicious meal waiting for you!

By knowing the time breakdown, you can plan your day better and enjoy the delightful experience of making Slow Cooker Paprika Chicken without any stress.

Nutritional Information for Slow Cooker Paprika Chicken

Understanding the nutritional content of your meals is essential for maintaining a balanced diet. Slow Cooker Paprika Chicken is not only delicious but also offers a good amount of nutrients. Here’s a breakdown of the key nutritional information per serving:

Calories

350 calories. This makes it a satisfying option for dinner without being overly heavy. The combination of chicken, sour cream, and spices provides a hearty meal that can keep you feeling full and satisfied.

Protein

28 grams of protein per serving, Slow Cooker Paprika Chicken is an excellent source of this essential nutrient. Protein helps build and repair tissues, making it vital for overall health.

Sodium

600 milligrams. While this is a reasonable amount for a flavorful dish, it’s always a good idea to monitor your sodium intake, especially if you are watching your salt consumption. You can reduce sodium by using low-sodium chicken broth or adjusting the salt in the recipe to suit your dietary needs.

Overall, Slow Cooker Paprika Chicken is a nutritious and balanced meal option. With its rich flavors and satisfying ingredients, it’s a dish that can fit well into a healthy eating plan. Enjoy this delightful recipe while being mindful of your nutritional goals!

FAQs about Slow Cooker Paprika Chicken

Can I use frozen chicken for Slow Cooker Paprika Chicken?

Yes, you can use frozen chicken for Slow Cooker Paprika Chicken! However, it’s important to note that cooking times may vary. If you start with frozen chicken, it’s best to cook on high for about 4-5 hours. This ensures that the chicken reaches a safe temperature and cooks thoroughly. Just remember, the texture might be slightly different compared to using fresh chicken, but it will still be delicious!

How can I thicken the sauce in Slow Cooker Paprika Chicken?

If you find that the sauce is too thin for your liking, there are a few easy ways to thicken it. One method is to mix a tablespoon of cornstarch with a little cold water to create a slurry. Stir this mixture into the slow cooker about 30 minutes before serving. Another option is to let the sauce simmer uncovered for the last 30 minutes of cooking. This will allow some of the liquid to evaporate, resulting in a thicker sauce. Either way, you’ll end up with a rich and creamy sauce that’s perfect for serving!

What can I substitute for paprika in Slow Cooker Paprika Chicken?

If you don’t have paprika on hand, there are a few substitutes you can use. Smoked paprika is a great alternative if you want to add a smoky flavor. If you prefer a milder taste, you can use chili powder or a combination of cayenne pepper and sweet paprika. Just be cautious with the amount, as these alternatives can vary in heat. Experimenting with different spices can lead to exciting new flavors in your Slow Cooker Paprika Chicken!

Conclusion on Slow Cooker Paprika Chicken

In conclusion, Slow Cooker Paprika Chicken is a delightful dish that brings warmth and comfort to any table. With its rich flavors and creamy sauce, it’s a meal that can easily become a family favorite. The beauty of this recipe lies in its simplicity and versatility. You can customize it to suit your taste preferences, whether you prefer a spicy kick or a lighter option.

Moreover, the slow cooking method allows the chicken to become incredibly tender while the spices meld together beautifully. This means you can set it and forget it, making it perfect for busy days. Just imagine coming home to the enticing aroma of a home-cooked meal waiting for you!

As you explore this recipe, remember to have fun with it. Don’t hesitate to try different ingredients or serving suggestions. Whether you serve it over egg noodles, rice, or mashed potatoes, each bite is sure to be satisfying. Plus, the leftovers can be transformed into exciting new meals, ensuring nothing goes to waste.

So, gather your ingredients, fire up your slow cooker, and enjoy the process of creating this delicious dish. Your family and friends will surely appreciate the effort, and you’ll love the joy of sharing a hearty meal together. Happy cooking!

Paul

Slow Cooker Chicken Paprika is a must-try recipe!

This Slow Cooker Chicken Paprika is the kind of cozy meal that brings people to the table with its savory aroma and creamy, paprika-spiced sauce. Tender chicken thighs simmer low and slow with onions and a simple sauce before being finished with a touch of sour cream. Serve it over noodles or mashed potatoes for a true comfort food experience.
Prep Time 10 minutes
Servings: 6 servings
Course: Dinner
Cuisine: American, Comfort Food

Ingredients
  

  • 1 medium onion chopped2 ½ pounds boneless skinless chicken thighs or chicken breasts1 (10.5 oz) can cream of chicken soup5 teaspoons paprika (smoked, sweet, or your favorite variety)½ teaspoon kosher salt½ teaspoon ground black pepper1 cup sour creamOptional garnish: chopped parsley or sliced green onionsOptional thickeners:– 1 tablespoon cornstarch mixed with 1 tablespoon water– or ½ teaspoon xanthan gum mixed with ½ teaspoon olive oil

Method
 

  1. Spray the inside of your slow cooker with nonstick spray. Add the chopped onions and chicken thighs (or breasts).
  2. In a small bowl, stir together the cream of chicken soup, paprika, salt, and black pepper. Pour this mixture over the chicken and onions in the slow cooker.
  3. Cover and cook on low for 5 to 7 hours, or until the chicken is fully cooked and the onions are tender.
  4. Once cooked, remove the chicken and keep it warm.
  5. In a bowl, mix 1 cup of the hot liquid from the slow cooker with the sour cream. Stir the sour cream mixture back into the slow cooker.
  6. If you’d like a thicker sauce, stir in your chosen thickener (cornstarch slurry or xanthan gum mixture). Cook uncovered on low for a few more minutes until thickened to your preference.
  7. Return the chicken to the slow cooker and coat it in the sauce, or serve the sauce poured over top.
  8. Serve hot over egg noodles, mashed potatoes, riced cauliflower, or roasted vegetables. Garnish with parsley or green onions if desired.

Notes

  • For extra depth, try using smoked paprika for a subtle smoky flavor.
  • You can substitute chicken breasts if you prefer leaner meat, though thighs offer more flavor and tenderness.
  • This recipe is also great for meal prep—leftovers store beautifully in the fridge for 3–4 days.