Surf and Turf Foil Pack Recipes Make Dinner Easy!

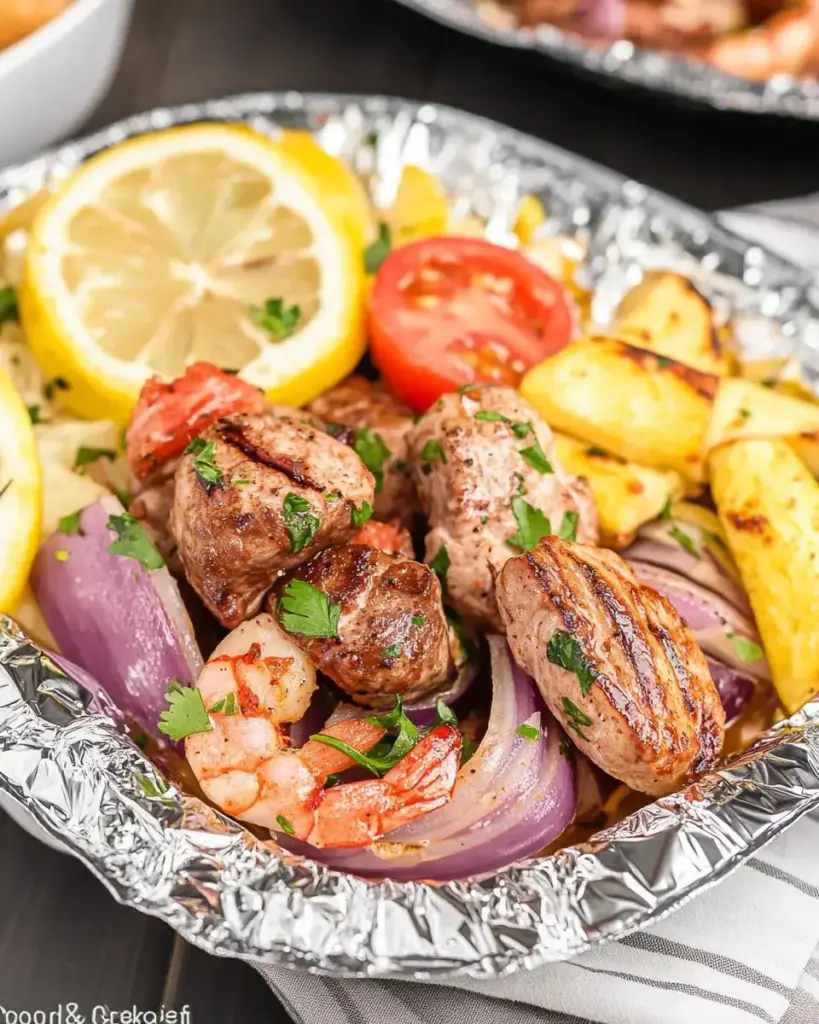
Surf and turf foil pack recipes are a delightful way to enjoy the best of both worlds: succulent seafood and tender meat. These recipes typically combine shrimp and steak, creating a mouthwatering meal that’s packed with flavor. The beauty of foil packs lies in their simplicity. You can easily prepare a complete meal in one package, making cleanup a breeze. Plus, the foil traps steam, ensuring that all the ingredients cook evenly and stay juicy.

Why Choose Foil Pack Cooking?

Foil pack cooking is a fantastic method for several reasons. First, it’s incredibly convenient. You can prepare your ingredients ahead of time and store them in the fridge until you’re ready to cook. This makes it perfect for busy weeknights or weekend gatherings. Second, foil packs are versatile. You can customize them with your favorite proteins, vegetables, and seasonings. This means you can cater to different tastes and dietary preferences.

Moreover, cooking in foil packs helps to lock in flavors. The steam created inside the pack enhances the taste of the ingredients, making every bite delicious. Lastly, foil pack meals are great for outdoor cooking. Whether you’re grilling at a picnic or camping, these packs are easy to transport and cook over an open flame. So, if you’re looking for a fun and tasty way to enjoy a meal, surf and turf foil pack recipes are the way to go!

Ingredients for Surf and Turf Foil Pack Recipes

Essential Ingredients for a Perfect Pack

To create a delicious surf and turf foil pack, you need a few essential ingredients. First, the star proteins are shrimp and steak. Shrimp should be peeled and deveined for easy eating. For the steak, choose cuts like sirloin or ribeye, as they are tender and flavorful. Next, baby potatoes are a must. They cook quickly and add a hearty element to your meal. Corn kernels, whether fresh, frozen, or canned, bring a sweet crunch that complements the proteins beautifully.

Don’t forget the seasonings! Olive oil is crucial for adding moisture and flavor. Garlic, paprika, salt, and black pepper enhance the taste of your ingredients. Finally, dried parsley adds a touch of freshness. These ingredients work together to create a balanced and satisfying meal that everyone will love.

Optional Ingredients to Enhance Flavor

While the essential ingredients are fantastic on their own, you can elevate your surf and turf foil pack with some optional ingredients. For a spicy kick, consider adding red pepper flakes. This will give your dish a delightful heat that many enjoy. You can also experiment with different vegetables. Bell peppers, zucchini, or asparagus can add color and nutrition to your pack.

If you want to add a zesty twist, try including lemon slices or a splash of lemon juice. This brightens the flavors and adds a refreshing element. Additionally, fresh herbs like thyme or rosemary can enhance the aroma and taste of your meal. Feel free to get creative! The beauty of foil packs is that you can mix and match ingredients to suit your taste.

Step-by-Step Preparation of Surf and Turf Foil Pack Recipes

Step 1: Preparing the Protein

Start by preparing your proteins. For the shrimp, ensure they are peeled and deveined. This makes them easy to eat and helps them cook evenly. If you’re using steak, cut it into bite-sized pieces. This allows for quicker cooking and ensures that every piece is tender. Remember, the key to a great surf and turf foil pack is having your proteins ready to go!

Step 2: Selecting and Preparing Vegetables

Next, it’s time to select your vegetables. Baby potatoes are a fantastic choice because they cook quickly and add a nice texture. Halve them to speed up the cooking process. If you’re using corn, you can choose fresh, frozen, or canned. Just make sure to drain canned corn before adding it to your pack. You can also consider adding other vegetables like bell peppers or zucchini for extra flavor and nutrition.

Step 3: Assembling the Foil Pack

Now, let’s assemble your foil pack! Cut four large pieces of aluminum foil, about 12 inches long. Lay one piece of foil flat on a clean surface. Place a portion of the shrimp, steak, halved baby potatoes, and corn in the center of the foil. Make sure to leave enough space around the edges to fold the foil later. Repeat this for the remaining pieces of foil.

Step 4: Seasoning Your Ingredients

Seasoning is crucial for enhancing the flavors of your surf and turf foil pack. Drizzle olive oil over the ingredients in each pack. Then, sprinkle minced garlic, paprika, salt, black pepper, and dried parsley evenly over the mixture. Toss everything gently to ensure all ingredients are well coated with the seasonings. This step is essential for a delicious meal!

Step 5: Sealing the Foil Pack

Once your ingredients are seasoned, it’s time to seal the foil pack. Carefully fold the edges of the foil over the mixture, creating a tight seal. Make sure there are no gaps, as this will help trap steam during cooking. You want to create a little pocket for the ingredients to cook in. This step is vital for keeping everything juicy and flavorful!

Step 6: Cooking the Foil Pack

Finally, it’s time to cook your foil packs! Preheat your grill to medium-high heat. Place the sealed foil packs on the grill and cook for about 15-20 minutes. The cooking time may vary depending on the size of your protein pieces and the heat of your grill. Keep an eye on them to ensure everything cooks evenly. Once done, carefully open the packs, being cautious of the hot steam. Serve your delicious surf and turf foil packs hot and enjoy!

Variation of Surf and Turf Foil Pack Recipes

Different Protein Combinations

While shrimp and steak are the classic choices for surf and turf foil packs, there are many other protein combinations you can try. For instance, chicken is a great alternative. It cooks well and absorbs flavors beautifully. Simply cut the chicken into bite-sized pieces, just like you would with steak. You can also use fish, such as salmon or tilapia, for a lighter option. Fish cooks quickly, so be sure to adjust your cooking time accordingly.

If you’re looking for a unique twist, consider using scallops or lobster. These seafood options add a touch of luxury to your meal. Just remember that cooking times may vary, so keep an eye on them while they’re on the grill. For a plant-based option, tofu is an excellent choice. Firm tofu can be cubed and marinated to soak up flavors, making it a delicious substitute for meat. The key is to choose proteins that complement each other and work well with your chosen seasonings.

Vegetarian Options for Foil Packs

If you want to create a vegetarian version of surf and turf foil packs, the possibilities are endless! Start with a base of hearty vegetables. Consider using portobello mushrooms as a meat substitute. They have a rich flavor and meaty texture that can satisfy even the most devoted carnivores. You can also include a variety of colorful vegetables like bell peppers, zucchini, and asparagus for added nutrition and taste.

For protein, chickpeas or black beans are fantastic options. They are packed with protein and fiber, making your meal filling and nutritious. You can also add quinoa or brown rice for a wholesome grain component. Season your vegetarian foil packs with olive oil, garlic, and your favorite herbs to enhance the flavors. Just like with the traditional recipe, seal the packs tightly and cook them on the grill. This way, you can enjoy a delicious and satisfying meal that everyone will love!

Cooking Note for Surf and Turf Foil Pack Recipes

Tips for Perfect Cooking Times

Getting the cooking time just right is essential for a successful surf and turf foil pack. Generally, cooking on medium-high heat for 15-20 minutes works well. However, several factors can affect this timing. First, the size of your protein pieces matters. Smaller pieces will cook faster, while larger chunks may need extra time. Always check for doneness by cutting into the steak or shrimp to ensure they are cooked through.

Another tip is to preheat your grill properly. A hot grill helps to sear the proteins, locking in flavors and juices. If you’re using a charcoal grill, make sure the coals are glowing red before placing your foil packs on the grill. For gas grills, allow it to heat for about 10-15 minutes. This way, you’ll achieve that perfect char and flavor.

Lastly, consider using a meat thermometer. For steak, the internal temperature should reach 145°F for medium-rare. Shrimp should be opaque and firm when fully cooked. By keeping an eye on these details, you can ensure your surf and turf foil packs turn out perfectly every time!

Adjusting Cooking Times for Different Ingredients

When cooking surf and turf foil packs, it’s important to adjust cooking times based on the ingredients you choose. For example, if you decide to use chicken instead of steak, you’ll need to cook it longer. Chicken should reach an internal temperature of 165°F, which may require an additional 5-10 minutes on the grill.

Similarly, if you opt for fish, like salmon or tilapia, the cooking time will be shorter. Fish typically cooks in about 10-15 minutes, depending on thickness. Always check for flakiness to determine doneness. If you’re adding vegetables that cook quickly, like zucchini or bell peppers, consider adding them halfway through the cooking time. This way, they won’t become mushy and will retain their vibrant colors and crunch.

By being mindful of these adjustments, you can create a perfectly cooked meal that highlights the flavors of each ingredient. Enjoy experimenting with different combinations and cooking times to find your favorite surf and turf foil pack recipe!

Serving Suggestions for Surf and Turf Foil Pack Recipes

Ideal Side Dishes

When it comes to serving your surf and turf foil packs, choosing the right side dishes can elevate your meal. A fresh salad is always a great option. Consider a simple green salad with mixed greens, cherry tomatoes, and a light vinaigrette. This adds a refreshing crunch that complements the rich flavors of the foil pack.

Another excellent side dish is garlic bread. The buttery, garlicky goodness pairs perfectly with the seafood and steak. You can easily make it by spreading butter and minced garlic on slices of bread and toasting them until golden brown.

If you want something heartier, consider serving your foil packs with rice or quinoa. These grains soak up the delicious juices from the pack, making every bite flavorful. You can also add herbs or spices to the rice for an extra kick. For a fun twist, try serving with coleslaw. The creamy texture and tangy flavor balance the savory elements of the meal.

Pairing with Sauces and Dips

To enhance the flavors of your surf and turf foil packs, consider pairing them with delicious sauces and dips. A classic garlic butter sauce is a fantastic choice. Simply melt butter and mix in minced garlic, lemon juice, and fresh herbs. Drizzle this over your foil pack for a rich, savory touch.

If you prefer something with a bit of heat, a spicy aioli can be a great addition. Mix mayonnaise with sriracha or your favorite hot sauce for a creamy, zesty dip. This adds a delightful kick that many will enjoy.

For a lighter option, a tangy chimichurri sauce made with parsley, garlic, vinegar, and olive oil can brighten up the dish. This fresh sauce complements the grilled flavors beautifully. You can also serve your foil packs with a side of tartar sauce, especially if you’re using seafood. The creamy texture and zesty flavor enhance the overall experience.

With these serving suggestions, your surf and turf foil pack meal will be a hit at any gathering. Enjoy the delicious flavors and the ease of cleanup!
Tips for Perfecting Surf and Turf Foil Pack Recipes

Choosing the Right Foil

When it comes to making surf and turf foil packs, the type of foil you use can make a big difference. It’s best to choose heavy-duty aluminum foil. This type is thicker and less likely to tear during cooking. It also holds up better against the heat of the grill. If you only have regular foil, you can double it up for added strength.

Make sure to cut your foil into large enough pieces. Each piece should be about 12 inches long. This allows enough space to fold and seal the pack properly. A well-sealed foil pack traps steam, which helps cook the ingredients evenly. If you’re cooking for a crowd, consider using disposable foil trays. They are sturdy and can hold larger portions, making serving easier.

Lastly, remember to avoid using non-stick foil for grilling. While it may seem convenient, it can cause the steam to escape, leading to uneven cooking. Stick with regular or heavy-duty foil for the best results. With the right foil, your surf and turf foil packs will turn out perfectly every time!

Storage Tips for Leftovers

If you have any leftovers from your surf and turf foil packs, storing them properly is key to keeping them fresh. First, allow the foil packs to cool down to room temperature. Once cooled, transfer the contents to an airtight container. This helps prevent moisture loss and keeps the flavors intact.

Store the leftovers in the refrigerator for up to three days. If you want to keep them longer, consider freezing them. Place the cooled ingredients in a freezer-safe container or bag. Be sure to label it with the date for easy reference. Leftovers can be frozen for up to three months.

When you’re ready to enjoy your leftovers, reheat them in the oven or microwave. If using the oven, cover the dish with foil to retain moisture. Heat until warmed through, usually about 15-20 minutes at 350°F. In the microwave, heat in short intervals, stirring occasionally to ensure even warming.

By following these storage tips, you can enjoy your delicious surf and turf foil pack meals even after the initial feast!

Breakdown of Time for Surf and Turf Foil Pack Recipes

Prep Time

Preparing your surf and turf foil packs is quick and easy. The prep time typically takes about 15-20 minutes. This includes gathering your ingredients, washing and cutting the vegetables, and preparing the proteins. If you have everything ready, you can whip up these delicious packs in no time. To save even more time, consider prepping your ingredients ahead of time. You can chop vegetables and marinate proteins the night before, making the cooking process even smoother.

Cooking Time

The cooking time for surf and turf foil packs is generally around 15-20 minutes on a medium-high grill. This allows the shrimp to become tender and the steak to reach your desired doneness. However, cooking times can vary based on the size of your protein pieces and the heat of your grill. Always check for doneness to ensure everything is cooked perfectly. If you’re using different proteins, like chicken or fish, adjust the cooking time accordingly to avoid overcooking.

Total Time

In total, you can expect to spend about 30-40 minutes from start to finish when making surf and turf foil packs. This includes both prep and cooking time. It’s a fantastic option for a quick weeknight dinner or a fun weekend meal. With minimal cleanup and delicious results, these foil packs are sure to become a favorite in your cooking routine!

Nutritional Information for Surf and Turf Foil Pack Recipes

Calories and Macronutrients

When it comes to enjoying surf and turf foil pack recipes, understanding the nutritional content is essential. A typical serving of this delicious meal contains approximately 450 calories. This makes it a satisfying option without being overly indulgent. The macronutrient breakdown is quite balanced, providing a good mix of protein, fats, and carbohydrates.

In each serving, you can expect around 35 grams of protein. This high protein content comes from the shrimp and steak, making it an excellent choice for those looking to build muscle or maintain a healthy diet. Additionally, the meal contains about 20 grams of fat, primarily from the olive oil and the steak. These healthy fats are beneficial for heart health and help keep you feeling full.

As for carbohydrates, each serving has roughly 30 grams. The baby potatoes and corn contribute to this carbohydrate count, providing energy for your day. Overall, this meal is not only delicious but also offers a well-rounded nutritional profile that can fit into various dietary plans.

Sodium and Other Nutritional Considerations

While enjoying your surf and turf foil packs, it’s important to consider sodium intake. A typical serving contains about 800 milligrams of sodium. This amount can vary based on the seasonings and any additional sauces you may use. If you’re watching your sodium intake, consider using low-sodium options for seasonings or reducing the amount of salt added to the recipe.

Moreover, this meal is rich in essential vitamins and minerals. The vegetables, such as corn and potatoes, provide fiber, which is important for digestive health. They also contain vitamins like vitamin C and potassium, which are vital for overall well-being. By incorporating a variety of vegetables, you can enhance the nutritional value of your foil packs even further.

In summary, surf and turf foil pack recipes offer a delicious and nutritious meal option. With a good balance of macronutrients and essential vitamins, they can be a healthy addition to your meal rotation. Just be mindful of sodium levels, and feel free to customize the ingredients to suit your dietary needs!

FAQs about Surf and Turf Foil Pack Recipes

Can I use frozen ingredients in Surf and Turf Foil Pack Recipes?

Yes, you can use frozen ingredients in your surf and turf foil pack recipes! Frozen shrimp and vegetables are convenient options that can save you time. However, keep in mind that frozen ingredients may require a longer cooking time. To ensure everything cooks evenly, it’s best to thaw the shrimp and vegetables before assembling your foil packs. You can do this by placing them in the refrigerator overnight or running them under cold water for a quick thaw. Just remember to adjust your cooking time accordingly to achieve the perfect meal!

What are the best vegetables to include in Surf and Turf Foil Pack Recipes?

When it comes to choosing vegetables for your surf and turf foil packs, the options are plentiful! Some of the best vegetables to include are baby potatoes, corn, bell peppers, zucchini, and asparagus. Baby potatoes are a great base, as they cook quickly and add heartiness. Corn adds a sweet crunch, while bell peppers and zucchini bring vibrant colors and flavors. Asparagus is another excellent choice, offering a tender texture when cooked. Feel free to mix and match your favorite vegetables to create a delicious and colorful foil pack!

How do I know when my Surf and Turf Foil Pack is done cooking?

Knowing when your surf and turf foil pack is done cooking is crucial for a delicious meal. For shrimp, look for them to turn opaque and firm, which usually takes about 5-7 minutes. For steak, use a meat thermometer to check the internal temperature. For medium-rare, it should reach 145°F. Additionally, ensure that the baby potatoes are tender by piercing them with a fork. If they slide off easily, they are cooked through. Always keep an eye on your foil packs while cooking to ensure everything is perfectly done!

Can I make Surf and Turf Foil Pack Recipes in the oven?

Absolutely! You can make surf and turf foil pack recipes in the oven if you don’t have access to a grill. Preheat your oven to 400°F. Assemble your foil packs as you would for grilling, then place them on a baking sheet. Bake for about 20-25 minutes, or until the shrimp are cooked through and the steak reaches your desired doneness. Just like with grilling, be cautious when opening the foil packs, as hot steam will escape. Enjoy your delicious meal straight from the oven!

Conclusion on Surf and Turf Foil Pack Recipes

Recap of Benefits and Versatility

In conclusion, surf and turf foil pack recipes offer a delightful and convenient way to enjoy a delicious meal. The combination of shrimp and steak creates a mouthwatering experience that is hard to resist. One of the biggest benefits of foil pack cooking is its simplicity. You can prepare everything in advance, making it perfect for busy weeknights or outdoor gatherings.

Moreover, the versatility of these recipes is truly remarkable. You can easily swap out proteins, add different vegetables, or experiment with various seasonings to suit your taste. Whether you prefer chicken, fish, or a vegetarian option, there’s a foil pack recipe for everyone. This adaptability allows you to cater to different dietary preferences and create meals that everyone will love.

Additionally, cooking in foil packs helps to lock in flavors and moisture, ensuring that every bite is juicy and satisfying. The ease of cleanup is another major advantage, as everything cooks in one package. This means less time spent washing dishes and more time enjoying your meal with family and friends.

So, whether you’re grilling in the backyard or baking in the oven, surf and turf foil pack recipes are a fantastic choice. They combine delicious flavors, healthy ingredients, and a fun cooking method that everyone can enjoy. Give them a try, and you’ll see just how easy and tasty mealtime can be!
Paul

Surf and Turf Foil Pack Recipes Make Dinner Easy!

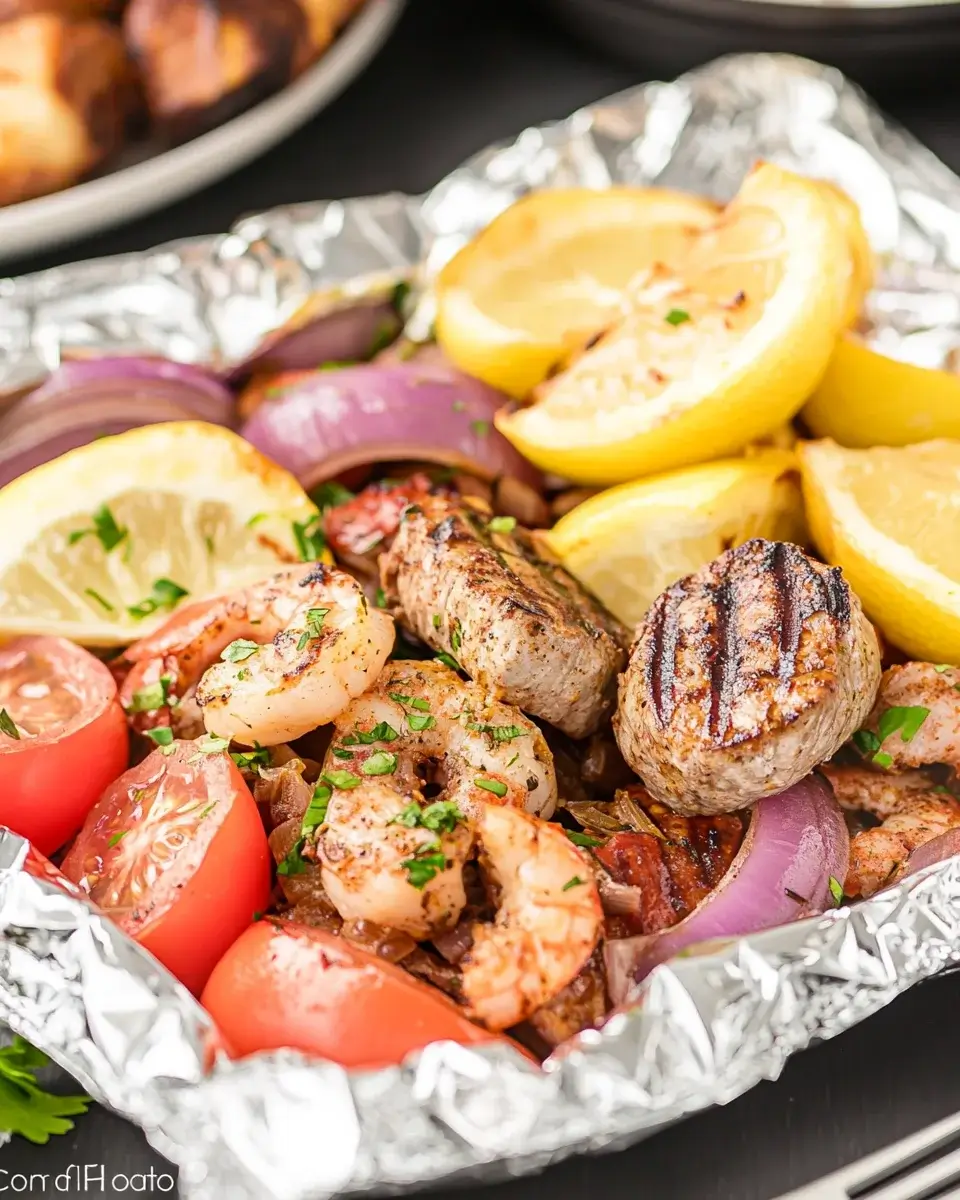
These Surf and Turf Foil Packs are the ultimate all-in-one grilled meal, combining juicy steak, tender shrimp, and sweet corn with bold spices and butter for a flavor-packed summer feast. Whether you’re firing up the grill or baking in the oven, these customizable foil packets make for easy cleanup and unforgettable taste.
Prep Time 10 minutes
Servings: 4 servings
Course: Main Course
Cuisine: American

Ingredients
  

  • ½ pound sirloin steak cut into 1-inch cubes½ pound raw shrimp, deveined and peeled if preferred2 ears corn, each cut into 3 pieces1 cup cherry tomatoes½ small red onion, sliced thin1 lemon, cut into wedges2 teaspoons minced garlic1 tablespoon Old Bay seasoning1 teaspoon dried thyme leaves1 teaspoon ground cumin1 teaspoon black pepper4 tablespoons melted butterFresh parsley, chopped, for garnish

Method
 

  1. Preheat grill to medium-high heat, about 450°F. Alternatively, preheat your oven to 425°F if baking.
  2. Tear off 4 pieces of heavy-duty aluminum foil, each about 12×12 inches. Lightly spray with non-stick cooking spray.
  3. Divide the steak cubes, shrimp, corn segments, cherry tomatoes, red onion slices, and lemon wedges evenly among the foil sheets.
  4. Season each packet with minced garlic, Old Bay seasoning, thyme, cumin, and black pepper. Drizzle with melted butter for rich flavor.
  5. Fold each foil piece securely to create sealed packets, folding edges tightly to trap steam and flavor.
  6. Place packets directly on the grill or in the oven. Cook for 15 to 20 minutes, flipping once halfway through. Steak should reach an internal temp of 130°F for medium doneness, and shrimp should be pink and opaque.
  7. Carefully open the packets (watch for steam!), sprinkle with fresh parsley, and serve with an extra squeeze of grilled lemon.

Notes

  • Feel free to swap in your favorite vegetables like zucchini or bell peppers for added color and crunch.
  • Use pre-cooked shrimp to reduce cook time slightly—just add during the last 10 minutes.
  • To make it a complete meal, serve with crusty bread or steamed rice to soak up all the buttery juices.
  • Great for camping: prep the packets ahead of time and toss them on a campfire grill grate!

Beef and Cheese Chimichangas Recipe is a must-try!

Chimichangas are a delicious Mexican dish that many people love. They are essentially deep-fried burritos, filled with a variety of tasty ingredients. The name “chimichanga” comes from the Spanish word for “thing” or “thingamajig,” which perfectly describes this delightful meal. Traditionally, chimichangas are made with flour tortillas that are filled with meat, beans, cheese, and spices. After being rolled up, they are fried until golden brown and crispy. This cooking method gives them a crunchy exterior while keeping the inside warm and flavorful.

Why You Should Try This Beef and Cheese Chimichangas Recipe

If you’re looking for a comforting and satisfying meal, this Beef and Cheese Chimichangas Recipe is a must-try! Not only is it easy to make, but it also combines rich flavors that everyone will enjoy. The ground beef, combined with melted cheddar cheese and refried beans, creates a hearty filling that is simply irresistible. Plus, frying the chimichangas gives them a delightful crunch that contrasts beautifully with the soft filling.

This recipe is perfect for family dinners, game nights, or even casual gatherings with friends. You can customize it to suit your taste, making it a versatile option for any occasion. Whether you prefer a mild flavor or a spicy kick, this recipe can be adjusted to meet your preferences. So, gather your ingredients and get ready to enjoy a plate of warm, cheesy goodness!

Ingredients for Beef and Cheese Chimichangas Recipe

To create the perfect Beef and Cheese Chimichangas, you’ll need a selection of fresh ingredients. Each component plays a vital role in delivering that rich, savory flavor that makes chimichangas so beloved. Here’s what you’ll need:

  • 1 pound ground beef: This is the main protein source, providing a hearty base for your chimichangas.
  • 1 small onion, chopped: Onions add sweetness and depth to the filling.
  • 2 cloves garlic, minced: Garlic enhances the flavor, giving it a delicious aroma.
  • 1 teaspoon chili powder: This spice adds warmth and a hint of heat.
  • 1 teaspoon cumin: Cumin brings an earthy flavor that complements the beef.
  • 1 teaspoon paprika: Paprika adds a subtle smokiness and vibrant color.
  • Salt and pepper to taste: Essential for seasoning and enhancing all the flavors.
  • 1 cup shredded cheddar cheese: Cheese provides creaminess and richness to the filling.
  • 1 cup refried beans: Beans add texture and help bind the filling together.
  • 4 large flour tortillas: Tortillas are the vessel that holds all the delicious ingredients.
  • Vegetable oil for frying: Oil is necessary for achieving that crispy, golden exterior.
  • Sour cream, for serving: A cool, creamy topping that balances the flavors.
  • Salsa, for serving: Adds a fresh, zesty kick to each bite.

Gather these ingredients before you start cooking. Having everything ready will make the preparation process smooth and enjoyable. With these components, you’re well on your way to making mouthwatering Beef and Cheese Chimichangas!

Step-by-Step Preparation of Beef and Cheese Chimichangas Recipe

Step 1: Preparing the Beef Filling

To start, you’ll want to prepare the beef filling. First, heat a large skillet over medium heat. Once hot, add the ground beef. Cook it until it’s browned, which usually takes about 5-7 minutes. Make sure to break it apart with a spatula as it cooks. This helps it brown evenly. After the beef is cooked, drain any excess fat from the skillet. This step is important to keep your chimichangas from being greasy.

Next, add the chopped onion and minced garlic to the skillet. Sauté them together with the beef for about 3-4 minutes. You want the onion to become translucent and soft. This will add a wonderful flavor to your filling. After that, sprinkle in the chili powder, cumin, paprika, salt, and pepper. Stir everything together and let it cook for another 2 minutes. This allows the spices to release their fragrant aromas, making your kitchen smell amazing!

Step 2: Assembling the Chimichangas

Now that your beef filling is ready, it’s time to assemble the chimichangas. Start by laying a large flour tortilla flat on a clean surface. Spoon about 1/4 of the beef and cheese mixture into the center of the tortilla. Be careful not to overfill it, as this can make rolling difficult.

Next, fold the sides of the tortilla over the filling. Then, roll it up tightly from the bottom to the top. Make sure to tuck in the sides as you roll to keep the filling secure. Repeat this process with the remaining tortillas and filling. You should have four deliciously stuffed chimichangas ready for frying!

Step 3: Frying the Chimichangas

For the next step, you’ll need to fry the chimichangas to achieve that crispy texture. In a large skillet, heat about 1 inch of vegetable oil over medium-high heat. You can test if the oil is hot enough by dropping a small piece of tortilla into it. If it sizzles, you’re ready to go!

Carefully place the chimichangas seam-side down in the hot oil. Fry them for about 3-4 minutes on each side, or until they turn golden brown. It’s important to keep an eye on them to prevent burning. Once they are perfectly crispy, use tongs to remove them from the oil. Place them on paper towels to drain any excess oil.

Step 4: Serving the Chimichangas

Finally, it’s time to serve your delicious Beef and Cheese Chimichangas! Arrange them on a plate and serve them hot. You can add a dollop of sour cream on the side for a creamy contrast. Salsa is also a great addition, providing a fresh and zesty flavor that complements the richness of the chimichangas.

These chimichangas are perfect for sharing with family and friends. Enjoy every bite of this delightful dish, and don’t forget to savor the crispy exterior and cheesy filling!

Variations of Beef and Cheese Chimichangas Recipe

Vegetarian Options

If you’re looking for a meat-free alternative, you can easily make vegetarian chimichangas. Instead of ground beef, use a mix of sautéed vegetables like bell peppers, zucchini, and mushrooms. These veggies add a delightful crunch and flavor to your dish. You can also include black beans or pinto beans for added protein and texture.

To enhance the flavor, season the vegetables with the same spices used in the original recipe, such as chili powder, cumin, and paprika. Don’t forget to mix in plenty of shredded cheese to keep that creamy goodness. This vegetarian version is not only delicious but also packed with nutrients, making it a great option for everyone!

Spicy Beef and Cheese Chimichangas

If you love a bit of heat, consider making spicy beef and cheese chimichangas. To kick up the spice level, add diced jalapeños or serrano peppers to the beef filling. You can also mix in a dash of your favorite hot sauce for an extra kick. This variation is perfect for those who enjoy bold flavors and a little bit of a challenge!

Another option is to use pepper jack cheese instead of cheddar. This cheese has a spicy flavor that pairs wonderfully with the seasoned beef. Just remember to adjust the amount of spices according to your taste. With these spicy additions, your chimichangas will be bursting with flavor and sure to impress anyone who loves a fiery dish!

Cooking Note for Beef and Cheese Chimichangas Recipe

When preparing Beef and Cheese Chimichangas, there are a few important cooking notes to keep in mind. These tips will help ensure that your chimichangas turn out perfectly every time.

First, always use fresh ingredients. Fresh vegetables and quality ground beef will enhance the overall flavor of your dish. If possible, opt for organic or grass-fed beef for a healthier option. Fresh ingredients not only taste better but also contribute to a more vibrant and appealing dish.

Next, be mindful of the oil temperature when frying. If the oil is too hot, the chimichangas may burn on the outside while remaining uncooked on the inside. Conversely, if the oil is not hot enough, the chimichangas will absorb too much oil and become greasy. A good rule of thumb is to maintain the oil temperature between 350°F to 375°F. You can use a kitchen thermometer to check the temperature or test it with a small piece of tortilla.

Additionally, consider using a deep-fryer for a more controlled frying experience. This method allows for even cooking and can help achieve that perfect golden-brown color. If you don’t have a deep-fryer, a large skillet works just fine, but be sure to monitor the cooking closely.

Lastly, let the chimichangas rest for a minute or two after frying. This allows the filling to settle and makes them easier to cut and serve. Enjoying them fresh out of the oil is tempting, but a brief resting period can enhance the overall experience.

By following these cooking notes, you’ll be well on your way to creating delicious Beef and Cheese Chimichangas that are sure to impress your family and friends!

Serving Suggestions for Beef and Cheese Chimichangas Recipe

When it comes to serving your Beef and Cheese Chimichangas, the options are endless! These delicious treats can be enjoyed in various ways, making them perfect for any occasion. Here are some delightful serving suggestions to elevate your meal:

  • Classic Toppings: Serve your chimichangas with a generous dollop of sour cream and a side of fresh salsa. The coolness of the sour cream balances the heat from the spices, while the salsa adds a zesty kick.
  • Guacamole: For an extra layer of flavor, add a side of creamy guacamole. The rich avocado taste pairs wonderfully with the crispy chimichangas, creating a delightful combination.
  • Fresh Cilantro: Sprinkle chopped fresh cilantro over the chimichangas before serving. This herb adds a burst of freshness and enhances the overall flavor profile.
  • Shredded Lettuce and Diced Tomatoes: Create a refreshing salad on the side with shredded lettuce and diced tomatoes. This adds a crunchy texture and a pop of color to your plate.
  • Rice and Beans: Serve your chimichangas alongside a side of Mexican rice and refried beans. This classic combination makes for a hearty and satisfying meal.
  • Hot Sauce: For those who love heat, provide a selection of hot sauces. This allows guests to customize their chimichangas to their preferred spice level.

These serving suggestions not only enhance the flavor of your Beef and Cheese Chimichangas but also make for an appealing presentation. Whether it’s a family dinner or a festive gathering, these ideas will surely impress your guests and make your meal memorable!

Tips for Perfect Beef and Cheese Chimichangas Recipe

Creating the perfect Beef and Cheese Chimichangas requires a bit of attention to detail. Here are some helpful tips to ensure your chimichangas turn out delicious every time:

  • Choose the Right Tortillas: Use large flour tortillas for the best results. They should be soft and pliable, making them easier to roll without tearing. If you can, warm them slightly in the microwave or on a skillet before filling. This will make them more flexible.
  • Don’t Overfill: While it’s tempting to pack in a lot of filling, overfilling can lead to messy chimichangas. Stick to about 1/4 of the filling per tortilla. This will help keep them intact while frying.
  • Seal the Edges: To prevent the filling from leaking out during frying, make sure to seal the edges of the chimichangas well. You can use a little water or egg wash to help them stick together.
  • Maintain Oil Temperature: As mentioned earlier, keeping the oil at the right temperature is crucial. If the oil is too hot, the chimichangas will burn. If it’s too cool, they will absorb too much oil. Use a thermometer for accuracy.
  • Fry in Batches: Avoid overcrowding the skillet when frying. Frying in batches allows for even cooking and ensures that each chimichanga gets that perfect golden-brown color.
  • Let Them Drain: After frying, place the chimichangas on paper towels to drain excess oil. This will help keep them crispy and not greasy.
  • Experiment with Fillings: Feel free to get creative with your fillings! You can add different cheeses, vegetables, or even switch up the spices to suit your taste. The possibilities are endless!
  • Serve Immediately: Chimichangas are best enjoyed fresh and hot. Serve them right after frying for the ultimate crispy experience. If you need to keep them warm, place them in a low oven until ready to serve.

By following these tips, you’ll be well on your way to making perfect Beef and Cheese Chimichangas that are sure to impress your family and friends. Enjoy the process and savor every delicious bite!

Breakdown of Time for Beef and Cheese Chimichangas Recipe

Prep Time

Preparing your Beef and Cheese Chimichangas is a straightforward process. The prep time typically takes about 15-20 minutes. During this time, you will gather all your ingredients, chop the onion, and mince the garlic. Additionally, you will cook the ground beef and mix in the spices. This initial preparation is crucial for ensuring that everything is ready for assembly and cooking.

Cooking Time

The cooking time for the chimichangas is approximately 15-20 minutes. This includes frying the chimichangas until they are golden brown and crispy. If you choose to bake them instead, the cooking time will be around 20-25 minutes at 400°F. Regardless of the method, keep an eye on them to ensure they cook evenly and achieve that perfect texture.

Total Time

In total, you can expect to spend about 30-40 minutes from start to finish when making Beef and Cheese Chimichangas. This includes both the prep and cooking times. With this quick and easy recipe, you can have a delicious meal ready in no time, making it perfect for busy weeknights or spontaneous gatherings!

Nutritional Information for Beef and Cheese Chimichangas Recipe

Calories

When enjoying Beef and Cheese Chimichangas, it’s important to be aware of the calorie content. Each serving contains approximately 450 calories. This makes it a hearty meal option, perfect for satisfying your hunger. However, if you’re watching your calorie intake, consider pairing it with a light salad or fresh vegetables to balance your meal.

Protein

Protein is essential for maintaining muscle health and overall well-being. Each serving of Beef and Cheese Chimichangas provides about 25 grams of protein. The ground beef and cheese contribute significantly to this protein content, making it a great choice for those looking to boost their protein intake. This makes the dish not only delicious but also nutritious!

Sodium

Sodium is another important factor to consider in your diet. Each serving of Beef and Cheese Chimichangas contains around 800 milligrams of sodium. While sodium is necessary for bodily functions, it’s best to consume it in moderation. If you’re concerned about sodium levels, you can use low-sodium beans and cheese to help reduce the overall sodium content in your meal.

FAQs about Beef and Cheese Chimichangas Recipe

Can I make Beef and Cheese Chimichangas ahead of time?

Yes, you can prepare Beef and Cheese Chimichangas ahead of time! To do this, follow the recipe up to the frying step. After assembling the chimichangas, you can place them on a baking sheet and cover them with plastic wrap. Store them in the refrigerator for up to 24 hours. When you’re ready to cook, simply heat the oil and fry them as directed. This makes it easy to enjoy a delicious meal without spending too much time in the kitchen on busy days!

What can I serve with Beef and Cheese Chimichangas?

Beef and Cheese Chimichangas are versatile and can be served with a variety of sides. Some popular options include:

  • Mexican Rice: A flavorful side that complements the chimichangas perfectly.
  • Refried Beans: A classic pairing that adds extra protein and fiber.
  • Fresh Salad: A light salad with lettuce, tomatoes, and avocado can balance the richness of the chimichangas.
  • Guacamole: Creamy guacamole adds a delicious twist and enhances the flavors.
  • Salsa: A zesty salsa can brighten up the dish and add freshness.

Feel free to mix and match these sides to create a well-rounded meal that everyone will enjoy!

How do I store leftover Beef and Cheese Chimichangas?

If you have leftover Beef and Cheese Chimichangas, storing them properly is key to maintaining their taste and texture. Allow the chimichangas to cool completely before storing. Place them in an airtight container and refrigerate for up to 3 days. When you’re ready to enjoy them again, you can reheat them in the oven at 350°F for about 10-15 minutes, or until heated through. This method helps keep the chimichangas crispy. Avoid microwaving them, as this can make them soggy. Enjoy your leftovers just as much as the first time!

Conclusion on Beef and Cheese Chimichangas Recipe

In conclusion, the Beef and Cheese Chimichangas Recipe is a delightful dish that brings together rich flavors and satisfying textures. Whether you’re cooking for a family dinner or hosting friends, these chimichangas are sure to impress. The combination of seasoned ground beef, melted cheese, and crispy tortillas creates a meal that is both comforting and delicious.

Not only is this recipe easy to follow, but it also allows for plenty of customization. You can adjust the spice levels, try different fillings, or even opt for a healthier baked version. The versatility of chimichangas makes them a fantastic choice for any occasion, from casual weeknight dinners to festive gatherings.

As you prepare your Beef and Cheese Chimichangas, remember to enjoy the process. Cooking is not just about the end result; it’s also about the joy of creating something delicious. So gather your ingredients, follow the steps, and savor every bite of your homemade chimichangas!

We hope this recipe inspires you to get into the kitchen and whip up a batch of these tasty treats. Don’t forget to share your chimichanga creations with family and friends. Happy cooking!

Paul

Beef and Cheese Chimichangas Recipe is a must-try!

These Beef and Cheese Chimichangas are crispy, cheesy pockets of pure comfort. Packed with seasoned beef, melted cheese, and a hint of green chiles, they’re fried to golden perfection for a satisfying, restaurant-style Tex-Mex dish you can make right at home. Perfect for weeknight dinners or game-day indulgence!
Prep Time 15 minutes
Cook Time 15 minutes
Total Time 30 minutes
Servings: 8 chimichangas
Course: Main Course
Cuisine: Tex-Mex

Ingredients
  

  • For the Filling:1 lb ground beef1 small onion finely chopped2 cloves garlic, minced1 packet (1 oz) taco seasoning mix½ cup tomato sauce1 can (4 oz) diced green chiles, drained1 cup shredded cheddar cheese or Mexican blend½ cup refried beans (optional)Salt and pepper to taste
  • For the Chimichangas:8 large flour tortillas burrito sizeVegetable oil, for fryingToothpicks, for securing
  • Optional Toppings:Sour creamGuacamoleSalsaShredded lettuceDiced tomatoesChopped cilantro

Method
 

  1. Prepare the Filling:In a large skillet over medium heat, brown the ground beef until fully cooked. Drain excess fat.Add chopped onion and garlic to the beef and sauté for 3–4 minutes until softened.Stir in taco seasoning, tomato sauce, and green chiles. Let simmer for 2–3 minutes.Remove from heat and mix in shredded cheese until melted. Stir in refried beans if using. Let the mixture cool slightly.
  2. Assemble the Chimichangas:Warm tortillas in the microwave or skillet until pliable.Spoon about ¼ cup of filling into the center of each tortilla.Fold the sides inward and roll up tightly burrito-style. Secure with toothpicks to keep them closed during frying.
  3. Fry the Chimichangas:Heat 1 inch of vegetable oil in a deep skillet over medium-high heat until it reaches 350°F (175°C).Carefully place each chimichanga seam-side down in the hot oil.Fry for 2–3 minutes on each side until golden brown and crispy.Remove and place on a paper towel-lined plate. Remove toothpicks before serving.
  4. Garnish and Serve:Top your hot chimichangas with sour cream, guacamole, salsa, shredded lettuce, diced tomatoes, and chopped cilantro as desired.

Notes

  • For a baked alternative, brush the assembled chimichangas with oil and bake at 400°F (200°C) for 20–25 minutes until crispy.
  • Use ground turkey or shredded rotisserie chicken for a protein swap.
  • Make ahead and freeze: assemble and freeze before frying. Fry directly from frozen, adding a few extra minutes.
  • Pair with Spanish rice, refried beans, or a side salad for a complete meal.

Butterfinger Balls Recipe: A Quick and Easy Delight

Introduction to Butterfinger Balls Recipe

What are Butterfinger Balls?

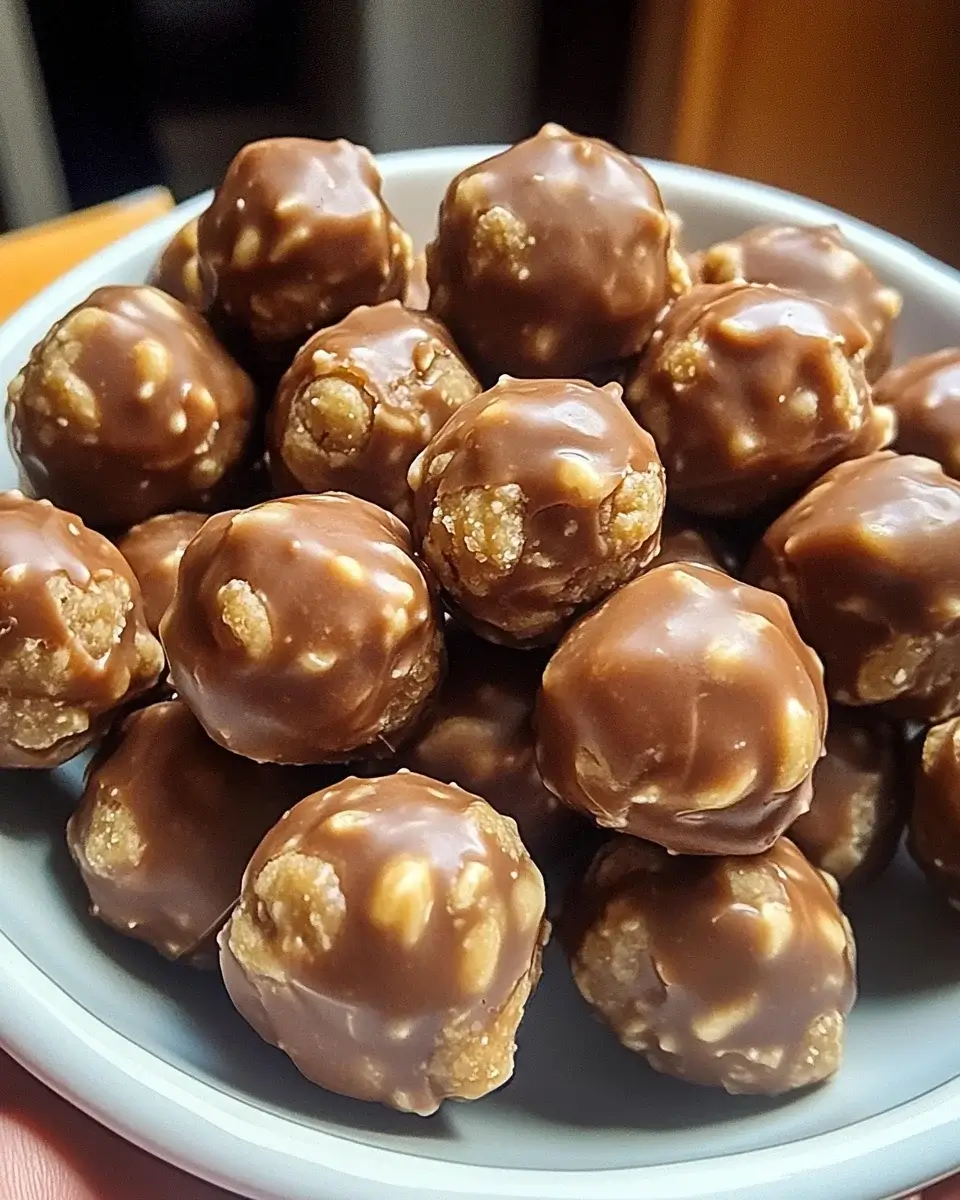
Butterfinger Balls are delightful treats that combine the rich flavors of creamy peanut butter and crunchy Butterfinger candy bars. These no-bake snacks are rolled into bite-sized balls, coated in smooth chocolate, and are perfect for satisfying your sweet tooth. Each bite offers a wonderful mix of textures, from the creamy center to the crispy candy bits, making them a favorite among both kids and adults. They are easy to make and require minimal ingredients, making them a go-to recipe for parties, holidays, or just a fun afternoon treat.

Why You Should Try This Butterfinger Balls Recipe

If you’re looking for a quick and delicious dessert, this Butterfinger Balls recipe is a must-try! Not only is it simple to prepare, but it also requires no baking, which means less mess in the kitchen. The combination of peanut butter and Butterfinger bars creates a flavor explosion that is hard to resist. Plus, you can customize the recipe by adding your favorite candy bars or nuts for a unique twist. Whether you’re hosting a gathering or just want a sweet snack, these treats are sure to impress. So, roll up your sleeves and get ready to indulge in a delightful treat that everyone will love!

Ingredients for Butterfinger Balls Recipe

To create these scrumptious Butterfinger Balls, you’ll need a few simple ingredients that are likely already in your pantry. Here’s what you’ll need:

  • 1 cup creamy peanut butter
  • 1 cup powdered sugar
  • 1 cup crushed Butterfinger candy bars (about 4 full-size bars)
  • 1 teaspoon vanilla extract
  • 1 ½ cups milk chocolate chips
  • 1 tablespoon vegetable oil

These ingredients come together to form a deliciously sweet and crunchy treat. The creamy peanut butter provides a rich base, while the crushed Butterfinger bars add that signature crunch and flavor. The powdered sugar helps bind everything together, making it easy to roll into balls. Finally, the melted chocolate coating adds a smooth finish that perfectly complements the filling.

Feel free to get creative! You can add chopped peanuts for extra crunch or swap out the Butterfinger bars for your favorite candy bars. This flexibility allows you to tailor the recipe to your taste, making it even more enjoyable. Gather these ingredients, and let’s move on to the next step in making your Butterfinger Balls!

Step-by-Step Preparation of Butterfinger Balls Recipe

Step 1: Gather Your Ingredients

Before you start making your Butterfinger Balls, it’s important to gather all your ingredients. This will make the process smoother and more enjoyable. Make sure you have:

  • 1 cup creamy peanut butter
  • 1 cup powdered sugar
  • 1 cup crushed Butterfinger candy bars (about 4 full-size bars)
  • 1 teaspoon vanilla extract
  • 1 ½ cups milk chocolate chips
  • 1 tablespoon vegetable oil

Having everything ready will help you stay organized. Plus, it’s always fun to see all the ingredients laid out, waiting to be transformed into a delicious treat!

Step 2: Prepare the Butterfinger Mixture

Now that you have your ingredients, it’s time to make the Butterfinger mixture. In a mixing bowl, combine the creamy peanut butter, powdered sugar, crushed Butterfinger bars, and vanilla extract. Use a spatula or a wooden spoon to mix everything together. Keep stirring until the mixture is well combined and forms a dough-like consistency. This step is crucial, as it ensures that all the flavors blend perfectly. The sweet aroma of peanut butter and candy will fill your kitchen, making it hard to resist tasting!

Step 3: Form the Balls

Once your mixture is ready, it’s time to shape it into balls. Using your hands, take a small amount of the mixture and roll it into a ball about 1 inch in diameter. Place each ball on a parchment-lined baking sheet. This step can be a bit messy, but that’s part of the fun! You should end up with about 12 balls, depending on how big you make them. If you find the mixture sticking to your hands, a little dusting of powdered sugar can help.

Step 4: Chill the Butterfinger Balls

After forming the balls, it’s important to chill them. Place the baking sheet in the refrigerator for about 30 minutes. Chilling helps the balls firm up, making them easier to coat in chocolate later. While you wait, you can clean up your workspace or even sneak a taste of the leftover mixture—just be careful, it’s addictive!

Step 5: Coat the Balls in Chocolate

Once the Butterfinger Balls are chilled, it’s time for the best part—coating them in chocolate! In a microwave-safe bowl, combine the milk chocolate chips and vegetable oil. Melt them together in 30-second intervals, stirring in between until the mixture is smooth and creamy. This will create a lovely chocolate coating. Now, take each chilled ball and dip it into the melted chocolate, allowing any excess to drip off. Return the coated balls to the baking sheet. Repeat this process until all the balls are covered in chocolate. The sight of these shiny treats will make your mouth water!

Variation of Butterfinger Balls Recipe

Alternative Coatings for Butterfinger Balls

If you want to switch things up, there are plenty of alternative coatings for your Butterfinger Balls. While the classic milk chocolate coating is delicious, you can experiment with different types of chocolate for a unique twist. For instance, try using dark chocolate for a richer flavor. The slight bitterness of dark chocolate pairs wonderfully with the sweetness of the filling.

Another option is white chocolate, which adds a creamy sweetness that contrasts nicely with the crunchy Butterfinger bits. You can also sprinkle crushed nuts, like almonds or peanuts, on top of the chocolate coating for added texture and flavor. If you’re feeling adventurous, consider using colored candy melts for a fun and festive look. This is especially great for parties or holidays!

Flavor Variations to Try

Don’t hesitate to get creative with the flavors in your Butterfinger Balls! While the original recipe is fantastic, you can easily customize it to suit your taste. For a different flavor profile, try adding a pinch of sea salt to the peanut butter mixture. This will enhance the sweetness and create a delightful contrast.

You can also mix in other types of candy bars, like Snickers or Reese’s, to create a new flavor experience. If you love coconut, consider adding shredded coconut to the mixture for a tropical twist. For a hint of spice, a dash of cinnamon or even a splash of maple syrup can elevate the flavor. The possibilities are endless, so feel free to experiment and find your favorite combination!

Cooking Note for Butterfinger Balls Recipe

When making Butterfinger Balls, there are a few cooking notes to keep in mind to ensure your treats turn out perfectly. First, make sure to use creamy peanut butter for the best texture. Chunky peanut butter can make it difficult to roll the mixture into smooth balls. If you prefer a crunchier texture, consider adding chopped peanuts to the mixture, but keep in mind that this will change the overall consistency.

Additionally, when melting the chocolate, be patient. Melting in 30-second intervals helps prevent the chocolate from burning. Stirring in between is crucial, as it allows the heat to distribute evenly. If you find the chocolate too thick, adding a little more vegetable oil can help achieve a smoother consistency for dipping.

Lastly, remember that chilling the balls is essential. This step not only helps them hold their shape but also makes the chocolate coating process easier. If you’re in a hurry, you can place the baking sheet in the freezer for about 15 minutes instead of the refrigerator. Just be sure to keep an eye on them to avoid freezing!

By following these cooking notes, you’ll create delicious Butterfinger Balls that are sure to impress your family and friends. Enjoy the process and have fun making these delightful treats!

Serving Suggestions for Butterfinger Balls Recipe

Once your Butterfinger Balls are ready, it’s time to think about how to serve them! These treats are not only delicious but also versatile, making them perfect for various occasions. Here are some fun serving suggestions to elevate your Butterfinger Balls experience:

  • Party Platter: Arrange the Butterfinger Balls on a decorative platter. You can add some colorful sprinkles or drizzle extra melted chocolate on top for a festive touch. This makes for an eye-catching centerpiece at any gathering.
  • Gift Treats: Package the Butterfinger Balls in small treat bags or boxes. Tie them with a ribbon for a sweet homemade gift. They make great presents for birthdays, holidays, or just to show someone you care.
  • Ice Cream Topping: Crumble some Butterfinger Balls over a scoop of vanilla or chocolate ice cream. This adds a delightful crunch and flavor that will take your dessert to the next level.
  • Snack Time: Serve the Butterfinger Balls as a quick snack for kids after school or as a sweet treat during movie night. They are easy to grab and enjoy, making them a perfect on-the-go option.
  • Holiday Treats: For special occasions like Halloween or Christmas, consider decorating the Butterfinger Balls with themed toppings. Use colored chocolate melts or edible glitter to match the holiday spirit.

These serving suggestions will not only enhance the presentation of your Butterfinger Balls but also make them more enjoyable for everyone. Whether you’re hosting a party or simply indulging at home, these treats are sure to be a hit!

Tips for Perfecting Your Butterfinger Balls Recipe

Creating the perfect Butterfinger Balls is all about attention to detail and a few handy tips. Here are some suggestions to help you achieve the best results:

  • Use Room Temperature Ingredients: Make sure your peanut butter is at room temperature. This makes it easier to mix with the powdered sugar and other ingredients, resulting in a smoother dough.
  • Measure Accurately: For the best outcome, measure your ingredients carefully. Too much or too little of any ingredient can affect the texture and flavor of your Butterfinger Balls.
  • Chill Between Steps: Don’t skip the chilling steps! Chilling the mixture before rolling and after coating helps the balls maintain their shape and ensures the chocolate coating sets properly.
  • Experiment with Dipping Techniques: When dipping the balls in chocolate, try using a fork or a toothpick for better control. This can help you achieve an even coating and make it easier to handle the balls.
  • Customize Your Coating: Feel free to add toppings to the chocolate coating. Sprinkles, crushed nuts, or even a drizzle of white chocolate can add a fun twist to your Butterfinger Balls.
  • Store Properly: To keep your Butterfinger Balls fresh, store them in an airtight container in the refrigerator. This will help maintain their texture and flavor for up to a week.
  • Get Creative: Don’t hesitate to try different candy bars or mix-ins. The beauty of this recipe is its versatility, so let your imagination run wild!

By following these tips, you’ll be well on your way to making the most delicious Butterfinger Balls. Enjoy the process and share your tasty creations with friends and family!

Breakdown of Time for Butterfinger Balls Recipe

Prep Time

The prep time for making Butterfinger Balls is quite short, making this recipe perfect for those who are short on time. You’ll need about 15 minutes to gather your ingredients and prepare the mixture. This includes mixing the peanut butter, powdered sugar, crushed Butterfinger bars, and vanilla extract until well combined. It’s a quick and easy process that anyone can manage!

Cooking Time

Since Butterfinger Balls are a no-bake treat, the cooking time is minimal. The only time you’ll spend cooking is when you melt the chocolate chips and vegetable oil together. This should take about 2-3 minutes in the microwave, depending on your microwave’s power. Just remember to melt in 30-second intervals and stir in between to avoid burning the chocolate.

Total Time

In total, you can expect to spend about 1 hour on this Butterfinger Balls recipe. This includes the 15 minutes of prep time, 30 minutes of chilling time for the balls, and an additional 15 minutes for the chocolate coating to set. It’s a quick and delightful treat that you can whip up in no time, making it perfect for last-minute gatherings or a sweet snack at home!

Nutritional Information for Butterfinger Balls Recipe

Calories in Butterfinger Balls

When indulging in Butterfinger Balls, it’s good to know the calorie content. Each serving contains approximately 180 calories. This makes them a sweet treat that can fit into your daily calorie allowance without too much guilt. However, moderation is key! Enjoying one or two Butterfinger Balls can satisfy your sweet tooth while keeping your calorie intake in check.

Protein Content

Butterfinger Balls also provide a decent amount of protein. Each serving contains about 4 grams of protein. The creamy peanut butter is the main source of this protein, contributing to the overall nutritional value of the treat. While they are not a primary source of protein, they can still be a fun way to add a little extra to your diet, especially when enjoyed as a snack after a workout or during the day.

Sodium Levels

In terms of sodium, Butterfinger Balls are relatively low. Each serving contains around 100 milligrams of sodium. This is a reasonable amount, especially considering that many snacks can be much higher in sodium. Keeping an eye on sodium levels is important for maintaining a healthy diet, and these treats can be enjoyed without significantly impacting your daily intake.

FAQs about Butterfinger Balls Recipe

Can I make Butterfinger Balls ahead of time?

Absolutely! Butterfinger Balls are perfect for making ahead of time. You can prepare them a day or two in advance and store them in the refrigerator. This makes them a great option for parties or gatherings. Just remember to let them chill properly after coating them in chocolate. This way, they’ll be ready to serve when you need them!

How should I store Butterfinger Balls?

To keep your Butterfinger Balls fresh, store them in an airtight container. Place them in the refrigerator, where they can last for up to one week. If you want to keep them for a longer period, you can freeze them. Just make sure to separate the balls with parchment paper to prevent them from sticking together. When you’re ready to enjoy them, simply thaw them in the fridge for a few hours.

Can I use different types of chocolate for coating?

Yes, you can definitely use different types of chocolate for coating your Butterfinger Balls! While milk chocolate is the classic choice, dark chocolate and white chocolate are also delicious options. Each type of chocolate will give a unique flavor to the treats. Feel free to experiment and find your favorite chocolate coating!

Are Butterfinger Balls gluten-free?

Yes, Butterfinger Balls can be gluten-free! The main ingredients in this recipe, such as peanut butter, powdered sugar, and chocolate, are naturally gluten-free. However, it’s important to check the labels of the specific products you use, especially the chocolate chips and Butterfinger bars, to ensure they are certified gluten-free. This way, you can enjoy these treats without any worries!

Conclusion on Butterfinger Balls Recipe

In conclusion, the Butterfinger Balls recipe is a delightful and easy treat that everyone can enjoy. With just a few simple ingredients, you can create a sweet snack that combines the rich flavors of peanut butter and Butterfinger candy bars. Whether you’re making them for a party, a holiday gathering, or just for yourself, these no-bake treats are sure to impress.

Not only are they quick to prepare, but they also offer endless possibilities for customization. You can experiment with different coatings, flavors, and mix-ins to create your own unique version of Butterfinger Balls. Plus, they are perfect for sharing with friends and family, making them a great addition to any occasion.

So, gather your ingredients, roll up your sleeves, and get ready to indulge in these scrumptious treats. With their creamy center and crunchy coating, Butterfinger Balls are bound to become a favorite in your household. Enjoy making and sharing them, and don’t forget to savor every delicious bite!

Paul

Butterfinger Balls Recipe: A Quick and Easy Delight

These Butterfinger Balls are a no-bake dream come true! Packed with creamy peanut butter, sweet crushed Butterfingers, and a touch of graham cracker crunch, each bite is dipped in smooth chocolate and topped with a festive finish. Perfect for parties, holiday trays, or just because—these rich, crave-worthy treats come together fast and store beautifully!
Prep Time 20 minutes
Total Time 50 minutes
Servings: 24 balls
Course: Candy, Dessert
Cuisine: American

Ingredients
  

  • 4 tablespoons butter softened
  • 1 teaspoon vanilla extract
  • 1 cup peanut butter avoid all-natural varieties that separate
  • 1 cup powdered sugar
  • ¾ cup graham cracker crumbs
  • ½ cup crushed Butterfinger bars
  • 8 ounces chocolate bark or chocolate chips for coating
  • Optional: extra crushed Butterfinger bars festive sprinkles, coarse sea salt for topping

Method
 

  1. Mix the Base:In a large bowl, use a hand or stand mixer to cream together the peanut butter and softened butter until smooth. Add vanilla extract and mix until combined.
  2. Add Sweetness and Crunch:Gradually mix in the powdered sugar at low speed, scraping the sides of the bowl as needed. Fold in graham cracker crumbs and crushed Butterfingers until the mixture is evenly combined.
  3. Form the Balls:Line a baking sheet with parchment paper. Scoop about 1 to 1½ tablespoons of the dough and roll into balls. Place them spaced apart on the sheet.
  4. Chill to Set:Freeze the formed balls for 30 minutes or until completely firm.
  5. Melt the Chocolate:In a microwave-safe bowl, melt the chocolate bark or chips in 30-second intervals at 50% power, stirring between bursts until smooth. Be careful not to overheat.
  6. Dip and Decorate:Dip each chilled ball in the melted chocolate—either fully or halfway. Immediately top with additional crushed Butterfingers, sea salt, or sprinkles before the chocolate sets.
  7. Let Them Set:Allow the chocolate coating to harden completely before serving or storing.

Notes

  • Use regular peanut butter (like Jif or Skippy) for best consistency.
  • For a deeper chocolate flavor, use dark chocolate chips or bark.
  • These freeze beautifully—great for make-ahead treats during holidays or special occasions.
  • Try dipping only halfway for a two-tone look or drizzle extra chocolate over the tops once set.

Spicy Brazilian Coconut Chicken is a must-try recipe!

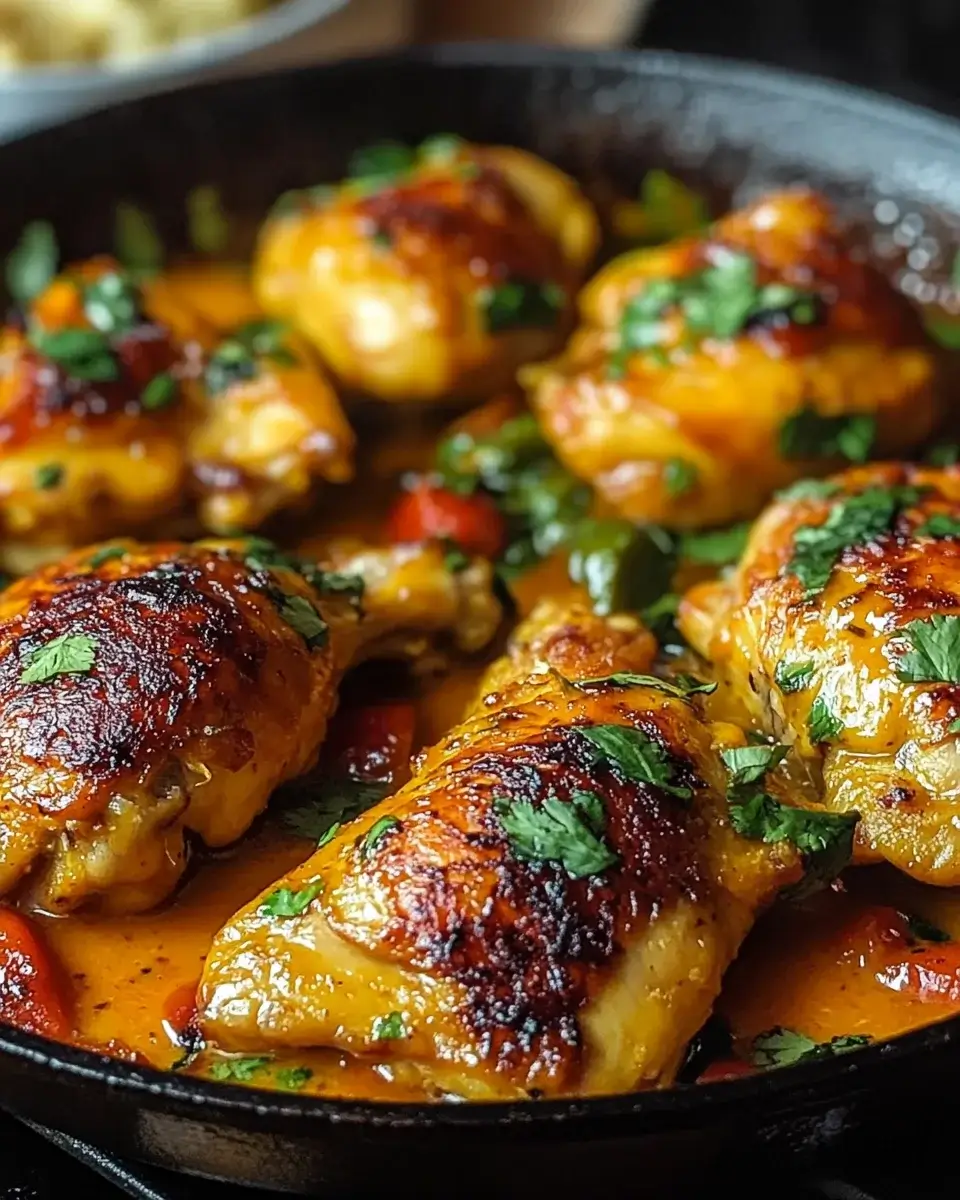
Spicy Brazilian Coconut Chicken is not just a meal; it’s an experience that transports you to the heart of Brazil with every bite. This recipe is perfect for those who love a little heat and a lot of flavor.

What Makes This Recipe Unique?

Spicy Brazilian Coconut Chicken apart is its unique blend of ingredients. The creamy coconut milk pairs beautifully with the bold red curry paste, creating a sauce that is both rich and aromatic. The addition of fresh ginger and garlic adds depth, while the lime juice brightens the dish, making it refreshing. Each ingredient plays a vital role, ensuring that every mouthful is bursting with flavor.

Moreover, this recipe is versatile. You can easily adjust the spice levels to suit your taste. Whether you prefer a mild dish or something that packs a punch, this recipe can be tailored to your liking. Plus, it’s simple to prepare, making it a great option for both weeknight dinners and special occasions.

The Cultural Significance of Brazilian Cuisine

Brazilian cuisine is a melting pot of flavors, influenced by indigenous, African, and Portuguese cultures. Each region of Brazil has its own culinary traditions, showcasing a variety of ingredients and cooking techniques. The use of coconut milk is particularly prominent in the northeastern part of Brazil, where it is often combined with spices and seafood.

Spicy Brazilian Coconut Chicken, you’re not just making a meal; you’re celebrating the rich heritage of Brazil. This dish reflects the country’s love for bold flavors and communal dining. Sharing a meal like this with family and friends is a cherished tradition in Brazilian culture, making it a perfect dish for gatherings.

So, roll up your sleeves and get ready to create a dish that’s not only delicious but also steeped in cultural significance. Let’s explore the ingredients that will bring this vibrant recipe to life!

Ingredients for Spicy Brazilian Coconut Chicken Recipe

Spicy Brazilian Coconut Chicken, you’ll need a selection of fresh and flavorful ingredients. Each component contributes to the dish’s unique taste and texture. Here’s what you’ll need:

  • 2 pounds boneless, skinless chicken thighs: These are juicy and tender, perfect for soaking up the delicious sauce.
  • 1 tablespoon olive oil: This helps to sauté the onions and adds a rich flavor.
  • 1 medium onion, diced: Onions provide a sweet and savory base for the dish.
  • 4 cloves garlic, minced: Garlic adds a wonderful aroma and depth of flavor.
  • 1 tablespoon fresh ginger, grated: Ginger brings a warm, spicy note that complements the coconut.
  • 1 can (14 ounces) coconut milk: This is the star ingredient, giving the dish its creamy texture.
  • 1 tablespoon red curry paste: This adds a kick of heat and a burst of flavor.
  • 1 tablespoon soy sauce: Soy sauce enhances the umami flavor in the dish.
  • 1 tablespoon lime juice: Lime juice brightens the flavors and adds a refreshing zing.
  • 1 teaspoon salt: Salt is essential for bringing out the flavors of the other ingredients.
  • 1 teaspoon black pepper: This adds a subtle heat and depth.
  • 1 teaspoon paprika: Paprika gives a mild sweetness and a beautiful color.
  • 1/2 teaspoon cayenne pepper: Adjust this to taste for your desired spice level.
  • 1/4 cup fresh cilantro, chopped: Cilantro is used for garnish, adding a fresh touch.
  • Lime wedges: Serve these on the side for an extra burst of flavor.

Gathering these ingredients will set you on the path to creating a delicious meal that’s sure to impress. Now that you have everything you need, let’s move on to the step-by-step preparation of this delightful dish!

Step-by-Step Preparation of Spicy Brazilian Coconut Chicken Recipe

Spicy Brazilian Coconut Chicken is straightforward and fun. Follow these steps to create a dish that’s bursting with flavor.

Step 1: Marinating the Chicken

Start by marinating the chicken thighs. In a bowl, combine the chicken with salt, black pepper, and paprika. This simple seasoning will enhance the chicken’s natural flavors. Let it sit for about 15 minutes. This step is crucial as it allows the spices to penetrate the meat, making it more flavorful.

Step 2: Preparing the Coconut Sauce

While the chicken is marinating, you can prepare the coconut sauce. In a separate bowl, whisk together the coconut milk, red curry paste, soy sauce, lime juice, and cayenne pepper. This mixture will create a creamy and spicy sauce that will coat the chicken beautifully. Make sure to mix it well until the curry paste is fully dissolved. The aroma will be irresistible!

Step 3: Cooking the Chicken

Next, heat the olive oil in a large skillet over medium heat. Once hot, add the diced onion and sauté until it becomes translucent, about 5 minutes. Then, stir in the minced garlic and grated ginger, cooking for an additional 1-2 minutes until fragrant. Now, add the marinated chicken thighs to the skillet. Cook them for about 5-7 minutes, turning occasionally until they are browned on all sides.

Step 4: Combining Ingredients

Once the chicken is browned, it’s time to combine everything. Pour the prepared coconut sauce over the chicken in the skillet. Stir gently to ensure the chicken is well coated with the sauce. Bring the mixture to a simmer, then reduce the heat to low. Cover the skillet and let it cook for 25-30 minutes. This slow cooking allows the chicken to become tender and absorb all the delicious flavors.

Step 5: Final Touches

Spicy Brazilian Coconut Chicken is now ready to be enjoyed!

Variations of Spicy Brazilian Coconut Chicken Recipe

Spicy Brazilian Coconut Chicken is a versatile dish that can be easily adapted to suit different dietary preferences and spice tolerances. Here are some exciting variations to consider!

Vegetarian Alternatives

If you’re looking for a vegetarian option, you can easily substitute the chicken with firm tofu or chickpeas. Tofu absorbs flavors well, making it a great choice for this recipe. Simply press the tofu to remove excess moisture, then cut it into cubes. Sauté the tofu in the skillet until golden brown before adding the coconut sauce. Alternatively, canned chickpeas can be added directly to the sauce, making for a hearty and protein-rich meal. Both options will still deliver that creamy, spicy goodness that defines this dish.

Adjusting Spice Levels

Spicy Brazilian Coconut Chicken according to their taste!

Cooking Note for Spicy Brazilian Coconut Chicken Recipe

Spicy Brazilian Coconut Chicken, there are a few cooking notes to keep in mind to ensure the best results. These tips will help you achieve a dish that is not only delicious but also visually appealing and satisfying.

First, always use fresh ingredients whenever possible. Fresh garlic, ginger, and cilantro will enhance the flavors significantly. Dried spices can be used, but fresh ingredients bring a vibrant taste that is hard to replicate.

Next, pay attention to the cooking time. Chicken thighs are forgiving, but overcooking can lead to dryness. Aim for a tender texture by checking the chicken for doneness. It should reach an internal temperature of 165°F (75°C). Using a meat thermometer can help you avoid any guesswork.

Additionally, if you prefer a thicker sauce, you can let the coconut sauce simmer uncovered for a few extra minutes. This will allow some of the liquid to evaporate, resulting in a richer, creamier sauce. Just be sure to stir occasionally to prevent sticking.

Lastly, don’t forget to taste as you go! Adjust the seasoning to your liking. If you find the sauce too spicy, a little extra coconut milk can help mellow it out. On the other hand, if you want more heat, a dash of hot sauce or additional cayenne pepper can do the trick.

Spicy Brazilian Coconut Chicken that will impress your family and friends!

Serving Suggestions for Spicy Brazilian Coconut Chicken Recipe

Spicy Brazilian Coconut Chicken is ready, it’s time to think about how to serve it. The right side dishes and beverages can elevate your meal, making it even more enjoyable. Here are some fantastic serving suggestions to complement this flavorful dish.

Ideal Side Dishes

When it comes to side dishes, you want something that balances the rich and spicy flavors of the chicken. Here are a few ideas:

  • Steamed Rice: A classic choice, white or brown rice absorbs the delicious coconut sauce beautifully. You can also try jasmine or basmati rice for a fragrant twist.
  • Quinoa: This protein-packed grain is a great alternative to rice. It adds a nutty flavor and pairs well with the spices in the chicken.
  • Roasted Vegetables: A mix of seasonal vegetables like bell peppers, zucchini, and carrots can add color and nutrition to your plate. Roasting brings out their natural sweetness.
  • Green Salad: A fresh salad with mixed greens, avocado, and a light vinaigrette can provide a refreshing contrast to the rich chicken. Consider adding some sliced radishes for crunch!
  • Plantains: Fried or baked plantains add a sweet and savory element that complements the spicy chicken perfectly. Their creamy texture is a delightful addition.

Pairing with Beverages

Spicy Brazilian Coconut Chicken:

  • Coconut Water: For a refreshing non-alcoholic option, coconut water is a perfect match. It’s hydrating and complements the coconut flavor in the dish.
  • White Wine: A chilled Sauvignon Blanc or a light Pinot Grigio can balance the spices and enhance the meal’s flavors. Look for wines with citrus notes to match the lime juice.
  • Beer: A light lager or a wheat beer can be a great choice. These beers are refreshing and can help cool down the heat from the spices.
  • Caipirinha: This traditional Brazilian cocktail made with cachaça, lime, and sugar is a fun way to celebrate the dish’s cultural roots. Its sweetness balances the spiciness beautifully.

Spicy Brazilian Coconut Chicken will be a hit at any gathering. Enjoy the vibrant flavors and the joy of sharing a delicious meal!

Tips for Perfecting Your Spicy Brazilian Coconut Chicken Recipe

Spicy Brazilian Coconut Chicken turns out perfectly every time, here are some helpful tips. These insights will help you avoid common pitfalls and make the most of your cooking experience.

Common Mistakes to Avoid

Even the best cooks can make mistakes. Here are a few common ones to watch out for:

  • Overcooking the Chicken: Chicken thighs are forgiving, but overcooking can lead to dryness. Always check for doneness with a meat thermometer. Aim for an internal temperature of 165°F (75°C).
  • Skipping the Marinade: Marinating the chicken is essential for flavor. Don’t rush this step! Letting the chicken sit with the spices for at least 15 minutes makes a big difference.
  • Not Tasting as You Go: Always taste your dish while cooking. This allows you to adjust the seasoning and spice levels to your preference. If it’s too spicy, add a bit more coconut milk!
  • Using Low-Quality Ingredients: Fresh ingredients make a world of difference. Opt for fresh garlic, ginger, and cilantro for the best flavor. Avoid using expired spices, as they lose potency over time.
  • Rushing the Cooking Process: Allow the chicken to simmer gently. This slow cooking helps the flavors meld together beautifully. Don’t be tempted to turn up the heat to speed things along!

Storage Tips

Spicy Brazilian Coconut Chicken ahead of time, here are some storage tips:

  • Refrigeration: Store any leftovers in an airtight container in the refrigerator. They will stay fresh for up to 3 days. Reheat gently on the stove or in the microwave.
  • Freezing: You can freeze the chicken for up to 3 months. Make sure to let it cool completely before transferring it to a freezer-safe container. Thaw in the refrigerator overnight before reheating.
  • Reheating: When reheating, add a splash of coconut milk or water to keep the sauce creamy. Heat on low to avoid overcooking the chicken.
  • Meal Prep: This dish is great for meal prep! Cook a larger batch and portion it out for easy lunches or dinners throughout the week.

Spicy Brazilian Coconut Chicken. Enjoy the process and the delicious results!

Breakdown of Time for Spicy Brazilian Coconut Chicken Recipe

Spicy Brazilian Coconut Chicken recipe is essential for planning your meal. Here’s a detailed breakdown of the time you’ll need for preparation and cooking.

Prep Time

The prep time for this dish is approximately 20 minutes. This includes gathering your ingredients, marinating the chicken, and preparing the coconut sauce. Taking your time during this stage ensures that everything is ready for a smooth cooking process. Remember, a well-prepared kitchen makes for a more enjoyable cooking experience!

Cooking Time

Spicy Brazilian Coconut Chicken is about 30-35 minutes. This includes browning the chicken and allowing it to simmer in the flavorful coconut sauce. The slow cooking allows the chicken to become tender and absorb all the delicious flavors from the sauce. Patience is key here, as it enhances the overall taste of the dish.

Total Time

Spicy Brazilian Coconut Chicken is worth every minute spent in the kitchen!

Nutritional Information for Spicy Brazilian Coconut Chicken Recipe

Spicy Brazilian Coconut Chicken not only delights your taste buds but also provides a good source of nutrients. Here’s a breakdown of the nutritional information per serving:

Calories

Spicy Brazilian Coconut Chicken contains approximately 350 calories. This makes it a satisfying meal option without being overly heavy. The combination of chicken and coconut milk provides a good balance of energy, making it perfect for lunch or dinner.

Protein

With about 28 grams of protein per serving, this dish is an excellent choice for those looking to increase their protein intake. Chicken thighs are a great source of lean protein, which is essential for muscle repair and overall health. Pairing this dish with a side of quinoa or rice can further enhance your protein intake.

Sodium

The sodium content in each serving is around 800 milligrams. While this is a reasonable amount for a flavorful dish, it’s important to be mindful of your overall sodium intake throughout the day. If you’re watching your sodium levels, consider using low-sodium soy sauce or reducing the amount of added salt in the recipe.

Spicy Brazilian Coconut Chicken is not only delicious but also provides a good balance of calories, protein, and sodium. Enjoy this dish as part of a well-rounded diet, and feel good about the nutritious ingredients you’re incorporating into your meals!

FAQs about Spicy Brazilian Coconut Chicken Recipe

Spicy Brazilian Coconut Chicken, you may have some questions. Here are some frequently asked questions that can help you navigate the cooking process and enjoy this delightful dish even more!

Can I make this recipe ahead of time?

Spicy Brazilian Coconut Chicken can be made ahead of time, making it a great option for meal planning. You can prepare the dish and store it in an airtight container in the refrigerator for up to three days. The flavors will continue to develop, making it even tastier when reheated. Just be sure to reheat it gently on the stove or in the microwave, adding a splash of coconut milk if needed to keep the sauce creamy.

What can I substitute for coconut milk?

Spicy Brazilian Coconut Chicken.

Is this recipe suitable for meal prep?

Spicy Brazilian Coconut Chicken can be cooked in larger batches and portioned out for lunches or dinners throughout the week. Store the chicken in individual containers with your choice of side dishes, such as rice or quinoa. This makes it easy to grab a healthy meal on busy days. Just remember to refrigerate or freeze the portions promptly to maintain freshness.

How can I make it less spicy?

Spicy Brazilian Coconut Chicken. First, you can reduce or omit the cayenne pepper in the recipe. Additionally, using a milder red curry paste can help lower the heat level. If you find the dish too spicy after cooking, adding a bit more coconut milk can help mellow the flavors. You can also serve the chicken with a side of yogurt or sour cream, which can cool down the heat when enjoyed together.

Spicy Brazilian Coconut Chicken experience. Enjoy cooking and savoring this delicious dish!

Conclusion on Spicy Brazilian Coconut Chicken Recipe

Spicy Brazilian Coconut Chicken is a delightful dish that brings together the vibrant flavors of Brazil in a simple yet satisfying way. With its creamy coconut sauce and aromatic spices, this recipe is sure to become a favorite in your household. Whether you’re cooking for a special occasion or a cozy weeknight dinner, this dish offers a taste of adventure that everyone will enjoy.

As you’ve seen, the preparation is straightforward, making it accessible for cooks of all skill levels. The ability to customize the spice levels and substitute ingredients means that you can tailor the dish to suit your preferences. Plus, with the option for vegetarian alternatives, there’s something for everyone at the table.

Remember to take your time during the cooking process. Allow the flavors to meld and the chicken to become tender. The result will be a meal that not only satisfies your hunger but also warms your heart. Serve it with your favorite sides and beverages, and you’ll create a dining experience that feels both special and comforting.

Spicy Brazilian Coconut Chicken awaits you, ready to fill your kitchen with enticing aromas and your table with joy. Enjoy every bite and the wonderful memories you’ll create while sharing this dish with family and friends!

Paul

Spicy Brazilian Coconut Chicken is a must-try recipe!

This Spicy Brazilian Coconut Chicken is a fiery, tropical-inspired dish that blends tender seared chicken with creamy coconut milk, vibrant peppers, and bold spices. It’s rich, colorful, and loaded with warming flavors, making it a perfect one-skillet weeknight dinner that’s both comforting and exotic. Serve with rice or crusty bread to soak up every last drop of sauce!
Prep Time 15 minutes
Cook Time 30 minutes
Total Time 45 minutes
Servings: 4 servings
Course: Main Dish
Cuisine: Brazilian, Fusion

Ingredients
  

For the Chicken:
  • 1 pound boneless skinless chicken thighs or breasts, cut into bite-sized pieces
  • 1 tablespoon olive oil
  • Salt and black pepper to taste
For the Veggies:
  • 1 large onion finely chopped
  • 3 cloves garlic minced
  • 1 red bell pepper sliced
  • 1 yellow bell pepper sliced
For the Coconut Sauce:
  • 1 can 14 oz coconut milk
  • 1 can 14.5 oz diced tomatoes, drained
  • 1 tablespoon tomato paste
  • 1 teaspoon ground cumin
  • 1 teaspoon ground coriander
  • 1 teaspoon paprika
  • ½ teaspoon cayenne pepper adjust to taste
For Garnish:
  • Fresh cilantro chopped
  • Lime wedges for serving

Method
 

  1. Sear the Chicken:Season the chicken pieces with salt and pepper. In a large skillet, heat olive oil over medium-high heat. Sear the chicken for about 5–7 minutes until golden brown. Remove from skillet and set aside.
  2. Cook the Aromatics:In the same skillet, add chopped onion and sauté for 3–4 minutes until translucent. Add garlic and cook for 1 minute more. Stir in the red and yellow bell peppers and cook for another 5 minutes until softened.
  3. Build the Sauce:Sprinkle in cumin, coriander, paprika, and cayenne pepper. Stir and cook for 1–2 minutes until fragrant. Add tomato paste and cook for another minute.
  4. Simmer It All Together:Pour in the coconut milk and drained diced tomatoes. Stir to combine. Return the browned chicken to the skillet and coat in the sauce. Reduce heat to medium-low and let simmer uncovered for 15–20 minutes, until chicken is fully cooked and the sauce is slightly thickened.
  5. Garnish and Serve:Remove from heat and garnish with chopped fresh cilantro. Serve hot with lime wedges over rice, quinoa, or with crusty bread.

Notes

  • Adjust Heat: Reduce cayenne pepper or omit it entirely for a milder version.
  • Add More Veggies: Feel free to add spinach or mushrooms for extra nutrition.
  • Make It Creamier: Stir in a splash of cream or more coconut milk for a richer sauce.
  • Storage: Leftovers keep well in the fridge for 3–4 days and can be frozen for up to 2 months.

Hawaiian Shoyu Chicken Recipe is a must-try dish!

Hawaiian Shoyu Chicken is a delightful dish that brings the flavors of the islands right to your kitchen. This recipe features tender, juicy chicken thighs marinated in a savory blend of soy sauce, brown sugar, and spices. The result is a sweet and salty flavor that is simply irresistible. The chicken is baked to perfection, allowing the marinade to caramelize and create a delicious glaze. It’s a dish that not only satisfies your taste buds but also fills your home with a wonderful aroma.

The Cultural Significance of Hawaiian Shoyu Chicken

This dish is more than just a meal; it represents the rich culinary heritage of Hawaii. Shoyu, which means soy sauce in Japanese, reflects the influence of Asian cultures on Hawaiian cuisine. The combination of flavors in Hawaiian Shoyu Chicken showcases the island’s unique blend of traditions. Families often gather to enjoy this dish during special occasions and celebrations, making it a staple in many Hawaiian households. Sharing a plate of Hawaiian Shoyu Chicken is a way to connect with loved ones and celebrate the spirit of aloha.

Ingredients for Hawaiian Shoyu Chicken Recipe

To create the mouthwatering Hawaiian Shoyu Chicken, you’ll need a few simple yet flavorful ingredients. Each component plays a vital role in achieving that perfect balance of sweet and savory. Here’s what you’ll need:

  • 2 pounds bone-in chicken thighs, skin-on: The chicken thighs provide rich flavor and tenderness.
  • 1 cup soy sauce: This is the base of the marinade, giving the dish its signature umami taste.
  • 1/2 cup brown sugar: Adds sweetness and helps create a beautiful glaze.
  • 1/4 cup rice vinegar: This ingredient adds a touch of acidity, balancing the sweetness of the sugar.
  • 1/4 cup water: Helps to dilute the marinade for even coating.
  • 4 cloves garlic, minced: Garlic brings a wonderful aroma and depth of flavor.
  • 1 tablespoon fresh ginger, grated: Ginger adds a warm, spicy note that complements the other flavors.
  • 1/2 teaspoon black pepper: A pinch of black pepper enhances the overall taste.
  • 1/2 teaspoon sesame oil: This oil adds a nutty flavor that rounds out the dish.
  • 2 green onions, sliced (for garnish): Fresh green onions add a pop of color and freshness.
  • Sesame seeds (for garnish): These seeds provide a delightful crunch and visual appeal.

Gathering these ingredients is the first step toward making a delicious Hawaiian Shoyu Chicken. Each item contributes to the dish’s unique flavor profile, ensuring a delightful dining experience for you and your loved ones.

Step-by-Step Preparation of Hawaiian Shoyu Chicken Recipe

Step 1: Marinating the Chicken

Marinating the chicken is a crucial step in this Hawaiian Shoyu Chicken recipe. Start by whisking together the soy sauce, brown sugar, rice vinegar, water, minced garlic, grated ginger, black pepper, and sesame oil in a large bowl. Make sure the sugar dissolves completely. Once your marinade is ready, add the bone-in chicken thighs. Ensure each piece is well coated with the marinade. Cover the bowl with plastic wrap and refrigerate it for at least one hour. For the best flavor, let it marinate overnight. This allows the chicken to absorb all those delicious flavors.

Step 2: Cooking the Chicken

After marinating, it’s time to cook the chicken. Preheat your oven to 375°F (190°C). While the oven heats up, take the chicken out of the marinade. Place the chicken thighs in a baking dish, skin side up. Make sure they are arranged in a single layer for even cooking. Don’t forget to reserve the marinade for later use. Bake the chicken in the preheated oven for about 30 minutes. This initial cooking time helps to lock in the moisture and flavor.

Step 3: Preparing the Sauce

While the chicken is baking, you can prepare the sauce. Pour the reserved marinade into a saucepan and bring it to a boil over medium-high heat. Once it reaches a boil, reduce the heat and let it simmer for about 10 minutes. This simmering process thickens the sauce and intensifies the flavors. Keep an eye on it to prevent burning. The result will be a rich, flavorful sauce that will enhance your chicken.

Step 4: Combining Ingredients

After the chicken has baked for 30 minutes, it’s time to add the sauce. Brush the thickened marinade generously over the chicken thighs. This step adds an extra layer of flavor and helps create a beautiful glaze. Return the chicken to the oven for an additional 15-20 minutes. Make sure the chicken reaches an internal temperature of 165°F (75°C) to ensure it’s fully cooked. The skin should be golden brown and crispy, making it even more appetizing.

Step 5: Serving the Dish

Once the chicken is cooked, remove it from the oven and let it rest for about 5 minutes. This resting period allows the juices to redistribute, keeping the chicken moist. To serve, place the chicken on a platter and garnish it with sliced green onions and sesame seeds. These garnishes not only add color but also a fresh crunch. Serve your Hawaiian Shoyu Chicken with steamed rice or grilled vegetables for a complete meal. Enjoy the delightful flavors and the smiles it brings to your table!

Variations of Hawaiian Shoyu Chicken Recipe

Alternative Ingredients

While the traditional Hawaiian Shoyu Chicken recipe is delicious as is, you can easily customize it to suit your taste. Here are some alternative ingredients you might consider:

  • Chicken Breasts: If you prefer leaner meat, swap the thighs for boneless, skinless chicken breasts. Just remember to adjust the cooking time, as breasts cook faster.
  • Honey or Maple Syrup: For a different sweetener, try using honey or maple syrup instead of brown sugar. This will add a unique flavor twist.
  • Apple Cider Vinegar: If you don’t have rice vinegar, apple cider vinegar can be a great substitute. It adds a fruity note to the marinade.
  • Fresh Herbs: Adding fresh herbs like cilantro or basil can enhance the dish’s freshness. Sprinkle them on top just before serving.
  • Vegetables: You can also add vegetables like bell peppers or snap peas to the baking dish. They will soak up the marinade and add color to your meal.

These alternative ingredients can help you create a Hawaiian Shoyu Chicken that fits your preferences while still delivering that delightful flavor.

Cooking Methods

There are several ways to cook Hawaiian Shoyu Chicken, each offering a unique taste and texture. Here are some popular cooking methods:

  • Grilling: For a smoky flavor, grill the marinated chicken thighs over medium heat. This method gives the chicken a nice char and enhances the overall taste.
  • Slow Cooking: If you have more time, consider using a slow cooker. Place the marinated chicken in the slow cooker and cook on low for 6-8 hours. The result will be incredibly tender chicken that falls off the bone.
  • Stovetop: You can also cook the chicken in a skillet on the stovetop. Heat some oil in a pan, add the chicken, and cook until browned on both sides. Then, pour in the marinade and simmer until cooked through.

Each cooking method brings out different flavors and textures, allowing you to enjoy Hawaiian Shoyu Chicken in various ways. Feel free to experiment and find your favorite!

Cooking Note for Hawaiian Shoyu Chicken Recipe

When preparing Hawaiian Shoyu Chicken, there are a few important cooking notes to keep in mind. These tips will help ensure that your dish turns out perfectly every time.

First, always use bone-in, skin-on chicken thighs for the best flavor and moisture. The bones add richness, while the skin helps to keep the chicken juicy during cooking. If you choose to use boneless or skinless chicken, be aware that the cooking time may need to be adjusted to prevent drying out.

Next, marinating the chicken is essential. The longer you marinate, the more flavorful your chicken will be. If you have the time, aim for an overnight soak. This allows the flavors to penetrate deeply into the meat, resulting in a more delicious dish.

When baking, make sure to arrange the chicken thighs in a single layer in the baking dish. This ensures even cooking and allows the skin to crisp up nicely. If the chicken is crowded, it may steam instead of bake, leading to a less desirable texture.

Lastly, always check the internal temperature of the chicken. Using a meat thermometer is the best way to ensure it reaches 165°F (75°C). This guarantees that the chicken is safe to eat and perfectly cooked. Letting the chicken rest for a few minutes after baking is also crucial. This resting time allows the juices to redistribute, making each bite tender and juicy.

By following these cooking notes, you’ll be well on your way to creating a mouthwatering Hawaiian Shoyu Chicken that will impress your family and friends!

Serving Suggestions for Hawaiian Shoyu Chicken Recipe

When it comes to serving Hawaiian Shoyu Chicken, the options are as delightful as the dish itself. This flavorful chicken pairs beautifully with a variety of sides, enhancing your dining experience. Here are some serving suggestions to consider:

  • Steamed Rice: A classic choice, steamed white or brown rice is perfect for soaking up the delicious sauce. The rice balances the savory flavors of the chicken, making each bite satisfying.
  • Grilled Vegetables: Add a healthy touch by serving the chicken alongside grilled vegetables. Bell peppers, zucchini, and asparagus are great options. Their smoky flavor complements the sweetness of the chicken.
  • Coleslaw: A refreshing coleslaw can provide a crunchy contrast to the tender chicken. The crispness of cabbage and carrots, dressed in a tangy vinaigrette, adds a nice balance to the meal.
  • Pineapple Salsa: For a tropical twist, consider a pineapple salsa. The sweetness of the pineapple, combined with lime juice and cilantro, brightens the dish and adds a burst of flavor.
  • Macaroni Salad: A Hawaiian favorite, macaroni salad is a creamy side that pairs well with the savory chicken. Its rich texture complements the dish perfectly.

Don’t forget to garnish your Hawaiian Shoyu Chicken with sliced green onions and sesame seeds before serving. This not only adds visual appeal but also enhances the flavor profile. Whether you’re hosting a family dinner or a casual gathering, these serving suggestions will elevate your meal and impress your guests. Enjoy the delightful combination of flavors and the spirit of aloha at your table!

Tips for Perfecting Your Hawaiian Shoyu Chicken Recipe

To make your Hawaiian Shoyu Chicken truly unforgettable, consider these helpful tips. Each suggestion will enhance the flavor and texture of your dish, ensuring a delightful experience for everyone at the table.

  • Use Fresh Ingredients: Fresh garlic and ginger can significantly elevate the flavor of your marinade. Opt for fresh over powdered versions whenever possible. The vibrant taste of fresh ingredients will make your dish stand out.
  • Adjust Sweetness: If you prefer a sweeter chicken, feel free to increase the amount of brown sugar or honey in the marinade. Conversely, if you like it less sweet, reduce the sugar. Tailor the recipe to your taste!
  • Marinate Longer: For the best flavor, marinate the chicken overnight. This allows the flavors to penetrate deeply, resulting in a more flavorful dish. If you’re short on time, aim for at least 1 hour.
  • Don’t Skip the Resting Time: After baking, let the chicken rest for about 5 minutes before serving. This resting period allows the juices to redistribute, making the chicken more tender and juicy.
  • Experiment with Garnishes: While green onions and sesame seeds are traditional garnishes, feel free to get creative! Chopped cilantro, crushed peanuts, or even a drizzle of chili oil can add a unique twist to your dish.
  • Serve with a Side of Aloha: Hawaiian Shoyu Chicken is best enjoyed with a warm smile and good company. Share the meal with family and friends to truly embrace the spirit of aloha.

By following these tips, you’ll be well on your way to mastering the art of Hawaiian Shoyu Chicken. Each bite will be bursting with flavor, making it a dish everyone will love. Enjoy the process and the delicious results!

Breakdown of Time for Hawaiian Shoyu Chicken Recipe

Prep Time

The prep time for Hawaiian Shoyu Chicken is quite manageable. You’ll spend about 15 minutes gathering and measuring your ingredients. Then, whisking together the marinade and coating the chicken will take another 10 minutes. In total, you can expect to spend around 25 minutes on preparation. However, remember that marinating the chicken is essential for flavor, so plan to let it sit for at least 1 hour, or ideally overnight.

Cooking Time

Once your chicken is marinated, the cooking time is straightforward. Preheating the oven will take about 10 minutes. After that, the chicken needs to bake for 30 minutes initially. Then, you’ll brush it with the thickened marinade and return it to the oven for an additional 15-20 minutes. In total, the cooking time is approximately 55-60 minutes, including the preheating time.

Total Time

When you combine the prep time and cooking time, the total time for making Hawaiian Shoyu Chicken is around 1 hour and 20 minutes, not including the marinating time. If you choose to marinate overnight, you can prepare the chicken in just over an hour the next day. This makes it a great option for a weeknight dinner or a special occasion. With a little planning, you can enjoy this delicious dish with minimal fuss!

Nutritional Information for Hawaiian Shoyu Chicken Recipe

Calories

When enjoying Hawaiian Shoyu Chicken, it’s good to be aware of its caloric content. Each serving contains approximately 360 calories. This makes it a satisfying option for a meal without being overly heavy. The balance of flavors and nutrients in this dish ensures that you can enjoy a delicious meal while keeping your calorie intake in check.

Protein

Protein is an essential part of any diet, and Hawaiian Shoyu Chicken delivers on this front. Each serving provides about 25 grams of protein. This high protein content is primarily due to the chicken thighs, which are a great source of lean protein. Including protein in your meals helps to keep you feeling full and supports muscle health, making this dish a nutritious choice for any occasion.

Sodium

While Hawaiian Shoyu Chicken is flavorful, it’s important to consider its sodium content. Each serving contains around 1,200 milligrams of sodium. This is largely due to the soy sauce used in the marinade. If you’re watching your sodium intake, you can opt for low-sodium soy sauce to reduce the overall sodium level. Balancing this dish with fresh vegetables or a side of rice can also help manage sodium consumption while still enjoying the rich flavors of this Hawaiian classic.

FAQs about Hawaiian Shoyu Chicken Recipe

Can I use other types of chicken for this recipe?

Absolutely! While the recipe calls for bone-in, skin-on chicken thighs, you can use other types of chicken. Boneless, skinless chicken breasts are a great alternative if you prefer leaner meat. Just remember to adjust the cooking time, as breasts cook faster than thighs. You can also use chicken drumsticks or wings for a fun twist. Each type of chicken will bring its own unique flavor and texture to the dish, so feel free to experiment!

How long should I marinate the chicken?

For the best flavor, marinate the chicken for at least 1 hour. However, if you have the time, letting it sit overnight is ideal. This longer marinating time allows the chicken to absorb all the delicious flavors from the marinade, resulting in a more flavorful dish. Just be sure to keep it covered in the refrigerator while marinating to ensure food safety.

What can I serve with Hawaiian Shoyu Chicken?

Hawaiian Shoyu Chicken pairs wonderfully with a variety of sides. Steamed rice is a classic choice, as it soaks up the savory sauce beautifully. You can also serve it with grilled vegetables for a healthy touch or a refreshing coleslaw for some crunch. For a tropical twist, consider adding pineapple salsa or macaroni salad. These sides will complement the flavors of the chicken and create a well-rounded meal that everyone will enjoy!

Can I make Hawaiian Shoyu Chicken in advance?

Yes, you can make Hawaiian Shoyu Chicken in advance! You can marinate the chicken a day ahead and store it in the refrigerator. When you’re ready to cook, simply follow the baking instructions. If you have leftovers, they can be stored in an airtight container in the fridge for up to 3 days. Reheat gently in the oven or microwave before serving. This makes it a convenient option for meal prep or busy weeknights!

Conclusion on Hawaiian Shoyu Chicken Recipe

In conclusion, the Hawaiian Shoyu Chicken recipe is a delightful way to bring the flavors of Hawaii into your home. This dish is not only easy to prepare but also offers a wonderful balance of sweet and savory tastes that will please any palate. The marinated chicken, baked to perfection, creates a mouthwatering experience that is sure to impress family and friends alike.

As you explore this recipe, remember that the key to success lies in the marination process. Allowing the chicken to soak in the flavorful marinade enhances its taste and tenderness. Additionally, feel free to experiment with alternative ingredients and cooking methods to make the dish your own. Whether you choose to grill, slow cook, or bake, each method brings a unique twist to this classic recipe.

Serving Hawaiian Shoyu Chicken with a variety of sides can elevate your meal even further. From steamed rice to grilled vegetables, the options are endless. Don’t forget to garnish with fresh green onions and sesame seeds for that extra touch of flavor and presentation.

Finally, this dish is not just about the food; it’s about sharing moments with loved ones. The spirit of aloha is captured in every bite, making it a perfect choice for gatherings and celebrations. So, gather your ingredients, follow the steps, and enjoy the deliciousness of Hawaiian Shoyu Chicken. Your taste buds will thank you!

Paul

Hawaiian Shoyu Chicken Recipe is a must-try dish!

This Hawaiian Shoyu Chicken is a sweet and savory island-style dish that’s finger-licking good! Made with juicy bone-in chicken thighs marinated in a soy, ginger, and garlic glaze, then oven-baked until sticky and caramelized, this easy recipe captures the heart of Hawaiian comfort food. Serve it over fluffy rice or with grilled pineapple for a tropical weeknight dinner that brings serious flavor.
Prep Time 10 minutes
Cook Time 35 minutes
Total Time 45 minutes
Servings: 4 servings
Course: Main Dish
Cuisine: Hawaiian

Ingredients
  

  • 5 chicken thighs bone-in and skin-on
  • 3 tablespoons low-sodium soy sauce
  • 2 tablespoons water
  • ¼ cup packed brown sugar
  • 2 cloves garlic minced
  • 1 tablespoon fresh ginger minced
  • ½ yellow onion minced
  • ¼ teaspoon crushed red pepper flakes

Method
 

  1. Marinate the Chicken:In a large bowl or resealable plastic bag, combine the soy sauce, water, brown sugar, garlic, ginger, onion, and red pepper flakes. Add the chicken thighs and turn to coat. Cover and marinate in the refrigerator overnight for best flavor (or at least 2 hours).
  2. Prepare to Bake:Preheat the oven to 375°F (190°C). Transfer the marinated chicken to a baking dish and pour the leftover marinade over the top.
  3. Bake Until Tender:Bake for 30 to 35 minutes, or until the internal temperature of the chicken reaches 165°F (74°C) and the sauce has thickened into a sticky glaze.
  4. Garnish and Serve:Plate the chicken and spoon over the thickened glaze. Garnish with chopped green onions or sesame seeds, if desired. Serve hot with white rice, grilled pineapple, or a fresh green salad.

Notes

  • Marinate Overnight: For maximum flavor, let the chicken sit overnight in the marinade. The longer it soaks, the deeper the taste.
  • Use Boneless Thighs: You can substitute boneless thighs for quicker cooking—reduce the bake time to around 25 minutes.
  • Grill Option: This chicken can also be grilled for a slightly smoky flavor—just brush it with the thickened marinade as it cooks.
  • Make It Spicier: Add extra red pepper flakes or a dash of sriracha to bring up the heat level.

Jamaican Brown Stew Chicken Recipe is a must-try dish!

Jamaican Brown Stew Chicken is more than just a meal; it’s a celebration of flavors and culture. This dish is a staple in Jamaican households, known for its rich, savory taste and vibrant colors. The combination of spices, fresh vegetables, and tender chicken creates a delightful experience for your taste buds. Whether you’re enjoying it at a family gathering or a cozy dinner at home, this recipe brings warmth and joy to the table.

What Makes Jamaican Brown Stew Chicken Unique?

What sets Jamaican Brown Stew Chicken apart from other chicken dishes? It’s all about the marinade and cooking method. The chicken is seasoned with a blend of spices, including garlic, thyme, and allspice, which infuse it with deep flavors. The browning process adds a beautiful color and enhances the taste, making each bite irresistible.

Another unique aspect is the use of Scotch bonnet pepper. This pepper adds a distinct heat that is characteristic of Jamaican cuisine. However, you can control the spice level by adjusting how long you leave the pepper in the stew. The addition of vegetables like bell peppers and carrots not only adds nutrition but also a pop of color, making the dish visually appealing.

In essence, Jamaican Brown Stew Chicken is a perfect blend of spices, heat, and comfort. It’s a dish that tells a story of tradition and love, making it a must-try for anyone looking to explore Caribbean flavors. So, let’s dive into the ingredients and get started on this delicious journey!

Ingredients for Jamaican Brown Stew Chicken Recipe

To create the perfect Jamaican Brown Stew Chicken, you’ll need a variety of fresh ingredients that come together to create a symphony of flavors. Here’s what you’ll need:

  • 2 pounds chicken pieces (bone-in, skin-on preferred for extra flavor)
  • 1 teaspoon salt
  • 1 teaspoon black pepper
  • 1 teaspoon garlic powder
  • 1 teaspoon onion powder
  • 1 teaspoon paprika
  • 1 teaspoon dried thyme
  • 1 tablespoon vegetable oil
  • 1 medium onion, sliced
  • 2 cloves garlic, minced
  • 1 bell pepper, sliced (any color for a vibrant look)
  • 1 carrot, sliced
  • 2 green onions, chopped
  • 1 Scotch bonnet pepper (whole, for that authentic heat)
  • 1 can (14 ounces) diced tomatoes
  • 1 cup chicken broth
  • 2 tablespoons soy sauce
  • 1 tablespoon brown sugar
  • 1 tablespoon vinegar (white or apple cider)
  • 1 teaspoon allspice
  • Fresh parsley for garnish (optional)

These ingredients not only provide flavor but also contribute to the dish’s nutritional value. The chicken serves as a great source of protein, while the vegetables add essential vitamins and minerals. The spices, especially the Scotch bonnet pepper, give the dish its signature kick, making it a delightful experience for your palate.

Now that you have your ingredients ready, let’s move on to the step-by-step preparation of this mouthwatering Jamaican Brown Stew Chicken!

Step-by-Step Preparation of Jamaican Brown Stew Chicken Recipe

Now that you have gathered all your ingredients, it’s time to dive into the cooking process. Each step is crucial for achieving that authentic Jamaican flavor. Follow along as we break down the preparation into easy-to-follow steps!

Step 1: Marinating the Chicken

First things first, marinating the chicken is essential. In a large bowl, combine the chicken pieces with salt, black pepper, garlic powder, onion powder, paprika, and dried thyme. Make sure every piece is well-coated with the spices. This step allows the chicken to absorb all those wonderful flavors. For the best results, let it marinate for at least 30 minutes. However, if you have time, marinating overnight in the refrigerator will deepen the flavor even more.

Step 2: Browning the Chicken

Next, heat the vegetable oil in a large skillet or Dutch oven over medium-high heat. Once the oil is hot, carefully add the marinated chicken pieces. Brown them on all sides for about 5-7 minutes. This step is important as it locks in the juices and adds a beautiful golden color. After browning, remove the chicken from the skillet and set it aside. This will help build layers of flavor in your stew.

Step 3: Sautéing the Vegetables

In the same skillet, it’s time to sauté the vegetables. Add the sliced onion, minced garlic, bell pepper, and carrot. Sauté these for about 5 minutes until they soften. The aroma will fill your kitchen, making it hard to resist! This step not only enhances the flavor but also adds a lovely texture to the dish.

Step 4: Combining Ingredients

Now, return the browned chicken to the skillet. It’s time to bring everything together! Add the whole Scotch bonnet pepper, diced tomatoes, chicken broth, soy sauce, brown sugar, vinegar, and allspice. Stir everything to combine well. The mixture should look vibrant and inviting. This is where the magic happens, as all the flavors meld together.

Step 5: Simmering the Stew

Bring the mixture to a boil, then reduce the heat to low. Cover the skillet and let it simmer for 30-40 minutes. This slow cooking allows the chicken to become tender and soak up all the delicious flavors. Stir occasionally and check if you need to add more broth to prevent sticking. Once the chicken is cooked through, you can remove the Scotch bonnet pepper if you prefer a milder heat.

And there you have it! Your Jamaican Brown Stew Chicken is almost ready to serve. The rich aroma and colorful presentation will surely impress your family and friends. Let’s explore some variations to make this dish even more exciting!

Variations of Jamaican Brown Stew Chicken Recipe

While the traditional Jamaican Brown Stew Chicken is a beloved classic, there are many ways to put a twist on this dish. Whether you want to try different proteins or explore vegetarian options, these variations will keep your meals exciting and flavorful. Let’s take a closer look!

Alternative Proteins

If you’re looking to switch things up, consider using alternative proteins. Here are a few options:

  • Pork: Substitute chicken with pork shoulder or pork chops. The cooking time may vary, so ensure the pork is tender before serving.
  • Beef: Use beef stew meat for a heartier version. Brown the beef just like the chicken and follow the same steps for a delicious twist.
  • Fish: For a lighter option, try using firm fish like snapper or tilapia. Cook the fish for a shorter time to prevent it from breaking apart.

These alternative proteins can bring new flavors and textures to your Jamaican Brown Stew. Each option offers a unique taste while still capturing the essence of the original recipe.

Vegetarian Options

For those who prefer a plant-based meal, there are fantastic vegetarian options to consider. Here are some ideas:

  • Firm Tofu: Replace chicken with firm tofu. Cut it into cubes and marinate just like the chicken. Sauté until golden before adding to the stew.
  • Tempeh: Tempeh is another great substitute. It has a nutty flavor and a firm texture that holds up well in stews.
  • Vegetable Medley: Use a mix of your favorite vegetables, such as zucchini, eggplant, and mushrooms. This will create a colorful and nutritious dish.

These vegetarian variations not only cater to different dietary preferences but also allow you to enjoy the rich flavors of Jamaican cuisine without meat. Feel free to experiment with spices and ingredients to make it your own!

Cooking Note for Jamaican Brown Stew Chicken Recipe

When preparing Jamaican Brown Stew Chicken, there are a few important cooking notes to keep in mind. These tips will help you achieve the best results and ensure that your dish is bursting with flavor.

First, always choose high-quality chicken. Bone-in, skin-on pieces are recommended for their rich flavor and moisture. The bones add depth to the stew, while the skin helps to keep the chicken juicy during cooking.

Next, marinating the chicken is crucial. The longer you let it sit with the spices, the more flavorful it will be. If you can, marinate overnight. This allows the spices to penetrate the meat, resulting in a more delicious dish.

When browning the chicken, make sure not to overcrowd the skillet. If you add too many pieces at once, the chicken will steam instead of brown. This can prevent that beautiful golden color and rich flavor from developing. Brown the chicken in batches if necessary.

As you sauté the vegetables, keep an eye on the heat. You want them to soften without burning. Stirring frequently will help achieve the perfect texture and flavor.

Lastly, don’t rush the simmering process. Allowing the stew to cook slowly helps the flavors meld together beautifully. Stir occasionally and check the liquid level. If it looks too thick, add a splash of chicken broth to keep it from sticking.

By following these cooking notes, you’ll create a Jamaican Brown Stew Chicken that is not only delicious but also a true representation of this beloved dish. Enjoy the process and the wonderful aromas that fill your kitchen!

Serving Suggestions for Jamaican Brown Stew Chicken Recipe

Once your Jamaican Brown Stew Chicken is ready, it’s time to think about how to serve it. This dish is not only flavorful but also versatile, making it a great centerpiece for any meal. Here are some delightful serving suggestions to enhance your dining experience:

  • Rice and Peas: A classic pairing! Serve your stew over a bed of rice and peas. The creamy coconut milk and tender beans complement the savory chicken perfectly.
  • Fried Plantains: Sweet fried plantains add a lovely contrast to the spicy stew. Their sweetness balances the heat from the Scotch bonnet pepper.
  • Coleslaw: A refreshing coleslaw can provide a crunchy texture and a cool contrast to the warm stew. Use a tangy dressing to brighten the flavors.
  • Steamed Vegetables: For a healthier option, serve with a side of steamed vegetables. Broccoli, carrots, and green beans work well and add color to your plate.
  • Flatbreads: Consider serving with warm flatbreads or roti. They are perfect for scooping up the delicious sauce and chicken.

Don’t forget to garnish your Jamaican Brown Stew Chicken with fresh parsley or chopped green onions before serving. This adds a pop of color and freshness to the dish. You can also provide extra Scotch bonnet pepper on the side for those who enjoy an extra kick!

With these serving suggestions, your Jamaican Brown Stew Chicken will not only taste amazing but also look inviting on the table. Enjoy sharing this delightful dish with family and friends, and watch as they savor every bite!

Tips for Perfecting Jamaican Brown Stew Chicken Recipe

To truly master the art of making Jamaican Brown Stew Chicken, a few tips can elevate your dish from good to great. These simple yet effective suggestions will help you achieve the best flavor and texture, ensuring that your stew is a hit every time. Let’s explore some key tips!

First, always use fresh ingredients. Fresh herbs, spices, and vegetables make a significant difference in flavor. For instance, using fresh thyme instead of dried can enhance the aroma and taste of your stew. Similarly, fresh garlic and onions will provide a more robust flavor profile.

Next, don’t skip the marinating step. Marinating the chicken not only infuses it with flavor but also helps to tenderize the meat. If you can, let it marinate overnight. This extra time allows the spices to penetrate deeply, resulting in a more flavorful dish.

When browning the chicken, ensure your skillet is hot enough. A hot skillet will create a nice sear, locking in the juices and adding depth to the flavor. If the chicken sticks to the pan, it’s a sign that it’s not ready to be flipped yet. Patience is key!

Another important tip is to adjust the heat level to your preference. The Scotch bonnet pepper adds a unique heat, but you can control it by how long you leave it in the stew. For a milder flavor, remove it after 10-15 minutes of cooking. If you love spice, feel free to leave it in for the entire simmering time.

Lastly, taste as you go! This is crucial in cooking. As the stew simmers, take a moment to taste it. You can adjust the seasoning by adding more salt, pepper, or even a splash of vinegar for acidity. This will help you achieve a balanced flavor that suits your palate.

By following these tips, you’ll be well on your way to creating a delicious Jamaican Brown Stew Chicken that will impress everyone at your table. Enjoy the cooking process and the delightful aromas that fill your kitchen!

Breakdown of Time for Jamaican Brown Stew Chicken Recipe

Understanding the time required for each step in the Jamaican Brown Stew Chicken recipe can help you plan your cooking efficiently. Here’s a breakdown of the time you’ll need for preparation and cooking:

Prep Time

The prep time for this delicious dish is approximately 40 minutes. This includes:

  • Marinating the Chicken: 30 minutes (or overnight for deeper flavor)
  • Chopping Vegetables: 10 minutes

While marinating, you can use the time to prepare your vegetables and gather all the ingredients. This will make the cooking process smoother and more enjoyable.

Cooking Time

The cooking time for Jamaican Brown Stew Chicken is about 40-50 minutes. This includes:

  • Browning the Chicken: 5-7 minutes
  • Sautéing the Vegetables: 5 minutes
  • Simmering the Stew: 30-40 minutes

During the simmering phase, the chicken becomes tender and absorbs all the wonderful flavors from the spices and vegetables.

Total Time

In total, you can expect to spend around 1 hour and 20 minutes to 1 hour and 30 minutes on this recipe, including both prep and cooking time. If you choose to marinate the chicken overnight, the total time will be longer, but the hands-on cooking time remains the same.

With this time breakdown, you can easily plan your cooking session. Whether you’re preparing a family meal or hosting friends, knowing how long each step takes will help you serve a delicious Jamaican Brown Stew Chicken with confidence!

Nutritional Information for Jamaican Brown Stew Chicken Recipe

Understanding the nutritional content of your meals is essential for maintaining a balanced diet. Jamaican Brown Stew Chicken is not only delicious but also packed with nutrients. Here’s a breakdown of the key nutritional information per serving:

Calories

350 calories. This makes it a satisfying meal that can fit into various dietary plans. The combination of chicken, vegetables, and spices provides a hearty dish without excessive calories.

Protein

28 grams of protein per serving. The chicken serves as an excellent source of high-quality protein, making this dish a great option for those looking to increase their protein intake.

Sodium

600 milligrams per serving. This amount can vary based on the soy sauce and chicken broth used. If you’re watching your sodium intake, consider using low-sodium soy sauce and broth to keep the flavor while reducing the salt content.

Overall, Jamaican Brown Stew Chicken is a nutritious choice that provides a good balance of calories, protein, and essential nutrients. Enjoy this flavorful dish while being mindful of your dietary needs!

FAQs about Jamaican Brown Stew Chicken Recipe

What is the best way to store leftover Jamaican Brown Stew Chicken?

Storing leftover Jamaican Brown Stew Chicken is simple! First, let the stew cool down to room temperature. Then, transfer it to an airtight container. You can keep it in the refrigerator for up to 3-4 days. If you want to store it for a longer period, consider freezing it. Place the stew in a freezer-safe container or bag, and it can last for up to 3 months. When you’re ready to enjoy it again, simply thaw it in the refrigerator overnight and reheat on the stove or in the microwave.

Can I make Jamaican Brown Stew Chicken in advance?

Absolutely! Making Jamaican Brown Stew Chicken in advance is a great idea. In fact, the flavors often improve after sitting for a day. You can prepare the stew a day or two ahead of time and store it in the refrigerator. Just reheat it gently on the stove before serving. If you’re planning to freeze it, make sure to cool it completely before freezing. This way, you can enjoy a delicious homemade meal without the hassle of cooking from scratch on busy days!

What sides pair well with Jamaican Brown Stew Chicken?

Jamaican Brown Stew Chicken is versatile and pairs well with various sides. Here are some popular options:

  • Rice and Peas: This classic combination is a must-try! The creamy coconut rice complements the savory stew perfectly.
  • Fried Plantains: Sweet fried plantains add a delightful contrast to the spicy chicken.
  • Coleslaw: A refreshing coleslaw provides a crunchy texture and balances the flavors of the stew.
  • Steamed Vegetables: Broccoli, carrots, and green beans make for a healthy and colorful side.
  • Flatbreads: Warm flatbreads or roti are perfect for scooping up the delicious sauce.

These sides not only enhance the meal but also create a beautiful presentation on your table!

How spicy is Jamaican Brown Stew Chicken?

The spice level of Jamaican Brown Stew Chicken can vary based on how you use the Scotch bonnet pepper. This pepper is known for its heat, so if you leave it whole in the stew, it will impart a moderate level of spice. If you prefer a milder flavor, you can remove the pepper after 10-15 minutes of cooking. Alternatively, if you love heat, feel free to leave it in for the entire simmering time. Adjusting the amount of pepper and cooking time allows you to customize the spice level to your liking!

Conclusion on Jamaican Brown Stew Chicken Recipe

In conclusion, Jamaican Brown Stew Chicken is a delightful dish that brings together rich flavors, vibrant colors, and a touch of Caribbean culture. This recipe is not just about cooking; it’s about creating a memorable experience for you and your loved ones. The combination of marinated chicken, fresh vegetables, and aromatic spices creates a meal that is both comforting and satisfying.

As you prepare this dish, remember that the key lies in the marination and the slow simmering process. These steps allow the flavors to meld beautifully, resulting in tender chicken that is bursting with taste. Whether you choose to stick to the traditional recipe or explore the various variations, each bite will transport you to the sunny shores of Jamaica.

Moreover, the versatility of Jamaican Brown Stew Chicken makes it suitable for any occasion. Whether it’s a family dinner, a festive gathering, or a cozy night in, this dish is sure to impress. Pair it with your favorite sides, and you have a complete meal that everyone will love.

So, gather your ingredients, roll up your sleeves, and embark on this culinary adventure. Enjoy the process, savor the aromas, and most importantly, share the joy of Jamaican Brown Stew Chicken with those around you. Happy cooking!

Paul

Jamaican Brown Stew Chicken Recipe is a must-try dish!

Bring the soul of the Caribbean to your kitchen with this rich and savory Jamaican Brown Stew Chicken. Marinated in bold spices, then braised until tender in a luscious brown gravy with bell peppers and a hint of Scotch bonnet heat, this one-pot wonder is a comforting, flavor-packed dish perfect for weeknight dinners or special occasions.
Prep Time 15 minutes
Cook Time 1 hour
Total Time 1 hour 15 minutes
Servings: 6 servings
Course: Main Dish
Cuisine: Caribbean, Jamaican

Ingredients
  

For the Chicken Marinade:
  • 3 pounds bone-in chicken thighs and/or drumsticks skin-on or skinless
  • 1 cup chopped onion
  • ½ cup sliced scallions white and green parts
  • 6 cloves garlic minced or grated
  • 1 tablespoon finely minced fresh ginger
  • 1 tablespoon packed brown sugar light or dark
  • 2 teaspoons browning sauce store-bought or homemade
  • teaspoons kosher salt
  • 1 teaspoon paprika
  • ½ teaspoon ground Jamaican allspice
  • ½ teaspoon dried thyme
  • ½ teaspoon ground black pepper
  • 2 bay leaves
For the Brown Stew:
  • 2 tablespoons canola or vegetable oil
  • 2 cups chicken broth or stock
  • 1 red orange, or yellow bell pepper, thinly sliced
  • 1 whole Scotch bonnet or habanero pepper left whole, not cut
  • ¼ cup ketchup

Method
 

  1. Marinate the Chicken:In a large mixing bowl or plastic bag, combine chicken with onion, scallions, garlic, ginger, brown sugar, browning sauce, salt, paprika, allspice, thyme, black pepper, and bay leaves. Toss to coat evenly. Cover and refrigerate for at least 1 hour, or preferably overnight.
  2. Prep for Cooking:Remove chicken from the fridge and allow to sit at room temperature for about 10 minutes. Scrape off most of the marinade (but save it for later).
  3. Brown the Chicken:In a large Dutch oven or heavy-bottomed pot, heat oil over medium-high heat. Brown the chicken on both sides for about 2–3 minutes per side until golden brown. Remove and set aside. Discard any excess fat, leaving about 2 tablespoons in the pot.
  4. Deglaze and Build the Sauce:Add the reserved marinade to the pot and sauté for 1–2 minutes until fragrant. Pour in the chicken broth, scraping up any brown bits. Stir in the sliced bell pepper, whole Scotch bonnet or habanero pepper, and ketchup.
  5. Simmer and Stew:Return the browned chicken to the pot, ensuring it is mostly submerged. Stir to coat, bring to a boil, then reduce heat to low. Cover and simmer for 45 minutes, flipping the chicken occasionally. For a thicker sauce, simmer uncovered for an additional 10–15 minutes.
  6. Final Seasoning:Remove bay leaves and the whole Scotch bonnet pepper before serving. Taste and adjust seasoning if needed. Serve hot with white rice, Jamaican rice and peas, or coconut rice.

Notes

  • Scotch Bonnet Substitute: If you can’t find Scotch bonnet, use habanero for similar heat—or omit it for a milder version.
  • Make It Thicker: Simmering uncovered at the end will help the sauce reduce and intensify the flavors.
  • Marinate Overnight: The longer the chicken marinates, the deeper the flavor—don’t skip it if you want authenticity!
  • Serving Tip: This dish is traditionally served with rice and peas, plantains, or steamed cabbage for a full Jamaican meal experience.

Caprese Stuffed Ground Chicken Recipe is a must-try!

What is Caprese Stuffed Ground Chicken?

Caprese Stuffed Ground Chicken is a delightful dish that combines the classic flavors of a Caprese salad with the heartiness of ground chicken. This recipe features juicy chicken patties filled with fresh ingredients like cherry tomatoes, mozzarella, and basil. The result is a flavorful meal that is both satisfying and healthy.

This dish is perfect for family dinners or gatherings with friends. It’s easy to prepare and can be on your table in no time. The combination of fresh ingredients not only makes it delicious but also adds a vibrant touch to your plate. Plus, it’s a great way to sneak in some extra veggies!

Whether you’re a seasoned cook or just starting out, this Caprese Stuffed Ground Chicken recipe is simple to follow. With just a few steps, you can create a meal that impresses everyone. So, let’s dive into the ingredients and get cooking!

Ingredients for Caprese Stuffed Ground Chicken Recipe

To create the delicious Caprese Stuffed Ground Chicken, you’ll need a few fresh ingredients. Here’s a complete list to help you gather everything you need:

  • 1 pound ground chicken: This is the main protein for your dish. Ground chicken is lean and cooks quickly.
  • 1 cup cherry tomatoes, halved: These sweet tomatoes add a burst of flavor and color.
  • 1 cup fresh mozzarella balls, halved: Creamy mozzarella brings a delightful texture and taste.
  • 1/2 cup fresh basil leaves, chopped: Basil adds a fragrant, herbal note that complements the other ingredients.
  • 2 cloves garlic, minced: Garlic enhances the overall flavor with its aromatic qualities.
  • 1 teaspoon dried oregano: This herb adds a warm, earthy flavor to the chicken.
  • 1 teaspoon salt: Salt is essential for bringing out the flavors in your dish.
  • 1/2 teaspoon black pepper: A little pepper adds a hint of spice.
  • 2 tablespoons balsamic glaze: This sweet and tangy glaze is drizzled on top for a finishing touch.
  • 1 tablespoon olive oil: Olive oil is used for cooking the patties and adds richness.

These ingredients come together to create a mouthwatering meal that is sure to please everyone at the table. Make sure to use fresh ingredients for the best flavor. Now that you have everything ready, let’s move on to the preparation steps!

Step-by-Step Preparation of Caprese Stuffed Ground Chicken Recipe

Step 1: Preparing the Ground Chicken Mixture

To start, grab a large mixing bowl. Add the pound of ground chicken to the bowl. Next, toss in the minced garlic, dried oregano, salt, and black pepper. Using your hands or a spoon, mix everything together until well combined. Make sure the spices are evenly distributed throughout the chicken. This step is crucial as it sets the flavor base for your patties. Once mixed, you can move on to the next step!

Step 2: Making the Caprese Filling

Now, let’s prepare the delicious Caprese filling. In a separate bowl, combine the halved cherry tomatoes, mozzarella balls, and chopped basil leaves. Gently stir the mixture to ensure the ingredients are well mixed. This filling is what makes your stuffed chicken so special. The fresh tomatoes and mozzarella will melt beautifully, creating a delightful surprise inside each patty. Once your filling is ready, it’s time to stuff the chicken!

Step 3: Stuffing the Chicken

Take the ground chicken mixture and divide it into four equal portions. Shape each portion into a patty, making sure they are about the same size. Now, create a small indentation in the center of each patty. Spoon a generous amount of the Caprese filling into the indentation. Carefully fold the edges of the patty over the filling to seal it. Make sure there are no gaps, as this will keep the filling from leaking out during cooking. Repeat this process for all the patties. Your stuffed chicken is almost ready!

Step 4: Cooking the Stuffed Chicken

Heat the olive oil in an oven-safe skillet over medium heat. Once the oil is hot, gently place the stuffed patties in the skillet. Cook them for about 4-5 minutes on each side until they are nicely browned. This step adds a lovely color and flavor to the chicken. After browning, drizzle the balsamic glaze over the patties. Then, transfer the skillet to your preheated oven. Bake for 15-20 minutes, or until the internal temperature reaches 165°F. This ensures your chicken is fully cooked and safe to eat. Once done, let the patties rest for a few minutes before serving. Enjoy your delicious Caprese Stuffed Ground Chicken!

Variations of Caprese Stuffed Ground Chicken Recipe

Alternative Fillings for Caprese Stuffed Ground Chicken

If you want to mix things up, there are plenty of alternative fillings you can try for your Caprese Stuffed Ground Chicken. Here are a few ideas:

  • Spinach and Feta: Swap out the tomatoes and mozzarella for fresh spinach and crumbled feta cheese. This combination adds a Mediterranean twist to your dish.
  • Pesto and Sun-Dried Tomatoes: Use pesto sauce instead of garlic and oregano, and add chopped sun-dried tomatoes for a burst of flavor.
  • Mushroom and Swiss: Sauté some mushrooms and mix them with Swiss cheese for a rich, earthy filling that pairs well with chicken.
  • Roasted Red Peppers and Goat Cheese: For a tangy flavor, try roasted red peppers with creamy goat cheese. This combination is sure to impress!

Feel free to get creative! You can mix and match ingredients based on your preferences. The key is to maintain a balance of flavors and textures. Each variation will give your Caprese Stuffed Ground Chicken a unique twist, making it a versatile dish for any occasion.

Different Cooking Methods for Caprese Stuffed Ground Chicken

While the oven method is popular, there are other cooking techniques you can use to prepare your Caprese Stuffed Ground Chicken. Here are a few options:

  • Grilling: For a smoky flavor, grill the stuffed patties on a barbecue. Just make sure to keep an eye on them to prevent flare-ups.
  • Air Frying: If you have an air fryer, this is a great option! Cook the stuffed patties at 375°F for about 12-15 minutes, flipping halfway through.
  • Slow Cooking: For a hands-off approach, place the stuffed patties in a slow cooker with some marinara sauce. Cook on low for 4-6 hours for tender, flavorful chicken.
  • Pan-Frying: Instead of baking, you can pan-fry the patties in a skillet until cooked through. This method gives a crispy exterior while keeping the inside juicy.

Each cooking method brings out different flavors and textures in the chicken. Choose the one that best fits your cooking style and enjoy a delicious meal!

Cooking Note for Caprese Stuffed Ground Chicken Recipe

When preparing your Caprese Stuffed Ground Chicken, there are a few important cooking notes to keep in mind. These tips will help ensure that your dish turns out perfectly every time.

First, always check the freshness of your ingredients. Fresh basil, ripe cherry tomatoes, and high-quality mozzarella will enhance the overall flavor of your dish. Using fresh ingredients not only improves taste but also adds nutritional value.

Next, be mindful of the cooking temperature. Ground chicken should be cooked to an internal temperature of 165°F to ensure it is safe to eat. Using a meat thermometer can help you accurately check the temperature without cutting into the patties.

Additionally, if you find that your patties are falling apart while cooking, consider adding a binding agent. A beaten egg or some breadcrumbs can help hold the mixture together, making it easier to handle.

Lastly, let the stuffed chicken rest for a few minutes after cooking. This allows the juices to redistribute, making each bite tender and juicy. It also gives the balsamic glaze a moment to set, enhancing the flavor profile of your dish.

By following these cooking notes, you’ll create a delicious Caprese Stuffed Ground Chicken that is sure to impress your family and friends!

Serving Suggestions for Caprese Stuffed Ground Chicken Recipe

Once your Caprese Stuffed Ground Chicken is ready, it’s time to think about how to serve it. This dish is not only delicious but also visually appealing, making it perfect for any occasion. Here are some serving suggestions to elevate your meal:

  • Fresh Salad: Pair your stuffed chicken with a light salad. A simple arugula or mixed greens salad with a lemon vinaigrette complements the flavors beautifully.
  • Garlic Bread: Serve with warm garlic bread on the side. The crispy texture and buttery flavor make a delightful addition to the meal.
  • Roasted Vegetables: Consider roasting seasonal vegetables like zucchini, bell peppers, or asparagus. Their natural sweetness pairs well with the savory chicken.
  • Pasta: A side of pasta tossed in olive oil and garlic can be a hearty accompaniment. You can also add some cherry tomatoes and basil for a cohesive flavor.
  • Quinoa or Rice: For a healthy option, serve the stuffed chicken over a bed of quinoa or brown rice. This adds a nutritious element to your plate.
  • Caprese Salad: For a true Caprese experience, serve a side of Caprese salad with fresh mozzarella, tomatoes, and basil drizzled with balsamic glaze.

Don’t forget to drizzle a little extra balsamic glaze over the stuffed chicken before serving. This adds a beautiful finish and enhances the dish’s flavor. With these serving suggestions, your Caprese Stuffed Ground Chicken will be a hit at any dinner table!

Tips for Perfecting Your Caprese Stuffed Ground Chicken Recipe

To make your Caprese Stuffed Ground Chicken truly shine, consider these helpful tips. They will ensure that your dish is not only delicious but also visually appealing and satisfying.

  • Use Fresh Ingredients: Always opt for fresh basil, ripe cherry tomatoes, and high-quality mozzarella. Fresh ingredients enhance the flavor and nutritional value of your dish.
  • Don’t Overmix: When combining the ground chicken with spices, mix just until combined. Overmixing can lead to tough patties. You want them to be tender and juicy!
  • Chill the Mixture: If you have time, chill the stuffed patties in the refrigerator for about 30 minutes before cooking. This helps them hold their shape better during cooking.
  • Experiment with Seasonings: Feel free to add your favorite herbs and spices to the ground chicken mixture. A pinch of red pepper flakes can add a nice kick!
  • Check for Doneness: Use a meat thermometer to ensure the internal temperature reaches 165°F. This guarantees that your chicken is safe to eat and perfectly cooked.
  • Let It Rest: After cooking, let the stuffed chicken rest for a few minutes. This allows the juices to redistribute, making each bite more flavorful and juicy.
  • Presentation Matters: When serving, slice the stuffed chicken in half to reveal the colorful filling. This not only looks great but also showcases the delicious ingredients inside.
  • Pair with the Right Sauce: Consider serving your Caprese Stuffed Ground Chicken with a side of marinara or pesto sauce for dipping. This adds an extra layer of flavor.

By following these tips, you’ll elevate your Caprese Stuffed Ground Chicken to a whole new level. Your family and friends will be impressed with your culinary skills, and you’ll enjoy a delightful meal every time!

Breakdown of Time for Caprese Stuffed Ground Chicken Recipe

Prep Time

Preparing your Caprese Stuffed Ground Chicken is quick and easy! The prep time for this recipe is approximately 15-20 minutes. During this time, you will gather all your ingredients, mix the ground chicken with spices, and prepare the delicious Caprese filling. This step is essential for ensuring that everything is ready for cooking. So, take your time to chop the tomatoes, basil, and mozzarella, as fresh ingredients make all the difference!

Cooking Time

Once your ingredients are prepped, the cooking time is about 25-30 minutes. This includes browning the stuffed patties in the skillet for about 8-10 minutes and then baking them in the oven for 15-20 minutes. The combination of these cooking methods ensures that your chicken is perfectly cooked and full of flavor. Remember to check the internal temperature to ensure it reaches 165°F for safe consumption.

Total Time

In total, you can expect to spend around 45-50 minutes from start to finish. This includes both prep and cooking time. With such a quick turnaround, you can enjoy a delicious and healthy meal without spending hours in the kitchen. Whether it’s a weeknight dinner or a special occasion, this Caprese Stuffed Ground Chicken recipe is a fantastic choice that fits into your busy schedule!

Nutritional Information for Caprese Stuffed Ground Chicken Recipe

Calories

When it comes to enjoying a delicious meal, knowing the calorie content can help you make informed choices. Each serving of the Caprese Stuffed Ground Chicken contains approximately 320 calories. This makes it a satisfying option that won’t weigh you down. The balance of protein and healthy fats in this dish provides energy while keeping you feeling full and satisfied.

Protein

Protein is an essential nutrient that supports muscle growth and repair. In this recipe, each serving boasts an impressive 34 grams of protein. Ground chicken is a lean source of protein, making it a great choice for those looking to maintain or build muscle. Pairing it with fresh ingredients like mozzarella and basil not only enhances the flavor but also adds nutritional value to your meal.

Sodium

Monitoring sodium intake is important for maintaining heart health. Each serving of the Caprese Stuffed Ground Chicken contains about 600 milligrams of sodium. This amount is reasonable for a flavorful dish, especially considering the use of salt and balsamic glaze. If you’re watching your sodium levels, you can easily adjust the recipe by using low-sodium options for the glaze or reducing the added salt.

Overall, this Caprese Stuffed Ground Chicken recipe is a nutritious choice that fits well into a balanced diet. With its combination of protein, healthy fats, and fresh ingredients, it’s a meal that you can feel good about serving to your family and friends!

FAQs about Caprese Stuffed Ground Chicken Recipe

Can I use turkey instead of chicken for this recipe?

Absolutely! You can use ground turkey instead of ground chicken for this Caprese Stuffed Ground Chicken recipe. Turkey is a lean protein option that works well in this dish. Just keep in mind that turkey may have a slightly different flavor and texture. However, it will still be delicious when combined with the fresh ingredients like tomatoes, mozzarella, and basil. Feel free to make the swap and enjoy a tasty meal!

What can I serve with Caprese Stuffed Ground Chicken?

There are many delightful options to serve alongside your Caprese Stuffed Ground Chicken. A fresh salad, like arugula or mixed greens, pairs beautifully with the flavors of the dish. You can also consider serving garlic bread for a comforting touch. Roasted vegetables or a side of pasta tossed in olive oil and garlic can complement the meal nicely. For a healthy option, quinoa or brown rice works well too. Don’t forget to drizzle some extra balsamic glaze over the chicken for added flavor!

How do I store leftovers of Caprese Stuffed Ground Chicken?

Storing leftovers of your Caprese Stuffed Ground Chicken is easy! Allow the chicken to cool completely before placing it in an airtight container. You can store it in the refrigerator for up to 3-4 days. If you want to keep it longer, consider freezing the stuffed chicken. Wrap each patty tightly in plastic wrap and then place them in a freezer-safe bag. They can be frozen for up to 3 months. When you’re ready to enjoy them again, simply thaw in the refrigerator overnight and reheat in the oven or microwave until warmed through.

Conclusion on Caprese Stuffed Ground Chicken Recipe

In conclusion, the Caprese Stuffed Ground Chicken recipe is a fantastic way to enjoy a healthy and flavorful meal. With its combination of fresh ingredients and simple preparation, this dish is perfect for any occasion. Whether you’re cooking for your family on a busy weeknight or impressing guests at a dinner party, this recipe is sure to be a hit.

The juicy ground chicken, paired with the vibrant flavors of cherry tomatoes, creamy mozzarella, and fragrant basil, creates a delightful experience for your taste buds. Plus, the versatility of this recipe allows you to experiment with different fillings and cooking methods, making it a staple in your kitchen.

Remember to use fresh ingredients for the best flavor and nutritional value. With just a few tips and tricks, you can elevate your Caprese Stuffed Ground Chicken to new heights. So, gather your ingredients, follow the steps, and enjoy a delicious meal that everyone will love!

We hope you give this recipe a try and share it with your loved ones. Happy cooking!

Paul

Caprese Stuffed Ground Chicken Recipe is a must-try!

This Ground Chicken Caprese skillet is a quick and flavorful one-pan meal that brings together the savory richness of seasoned ground chicken, gooey mozzarella, and sweet blistered cherry tomatoes. Finished with fresh basil and a drizzle of balsamic glaze, it’s a 15-minute masterpiece perfect for busy weeknights or casual entertaining.
Prep Time 5 minutes
Cook Time 10 minutes
Total Time 15 minutes
Servings: 4 –6 servings
Course: Main Dish
Cuisine: Italian-American

Ingredients
  

  • 1 tablespoon olive oil
  • ½ cup diced onion
  • 1 tablespoon chopped garlic
  • 2 pounds ground chicken
  • 1 teaspoon kosher salt
  • ½ teaspoon dried oregano
  • ½ teaspoon dried basil
  • ½ teaspoon dried parsley
  • 8 ounces tomato sauce or marinara
  • 1 tablespoon balsamic vinegar
  • 8 ounces mozzarella pearls or torn fresh mozzarella
  • 10 ounces cherry tomatoes halved
  • Fresh chopped basil for garnish
  • Balsamic glaze for garnish
  • Grated parmesan cheese for garnish

Method
 

  1. Preheat Oven:Set your oven to 500°F to prepare for broiling.
  2. Cook Aromatics:Heat olive oil in a large oven-safe skillet over medium heat. Add the diced onion and sauté for about 5 minutes until softened. Stir in chopped garlic and cook for an additional minute.
  3. Brown the Chicken:Add ground chicken to the skillet. Break it apart with a spoon and cook until fully browned and cooked through. Drain any excess liquid if necessary.
  4. Season and Simmer:Sprinkle in salt, oregano, basil, and parsley. Stir well. Add tomato sauce and balsamic vinegar, mixing to combine everything evenly.
  5. Add Toppings:Scatter mozzarella pearls and halved cherry tomatoes across the top of the ground chicken mixture.
  6. Bake Until Bubbling:Transfer the skillet to the preheated oven. Bake for 7–8 minutes until the cheese is melted and the tomatoes are blistered.
  7. Finish and Serve:Remove from oven and top with freshly chopped basil, a generous drizzle of balsamic glaze, and grated parmesan. Serve hot straight from the skillet or over pasta, rice, or toasted bread.

Notes

  • This dish is low-carb as-is and can be served without pasta.
  • Try adding baby spinach or arugula for extra greens.
  • Mozzarella pearls melt quickly, but torn fresh mozzarella works just as well.
  • Balsamic glaze adds a sweet-savory finish—don’t skip it!
  • Leftovers reheat well and are great in a wrap or sandwich.

Matcha Green Tea Pound Cake is a must-try dessert!

Introduction to Matcha Pound Cake Recipe

What is Matcha?

Matcha is a special type of green tea that comes from Japan. Unlike regular green tea, matcha is made from finely ground tea leaves. This means you get all the nutrients from the leaves, making it a superfood! It has a vibrant green color and a unique, earthy flavor. Many people enjoy matcha for its health benefits, which include boosting energy and improving focus. Plus, it’s rich in antioxidants, which are great for your body. When used in baking, like in our matcha pound cake recipe, it adds a lovely color and a delicious taste.

The Origin of Pound Cake

Pound cake has a long and interesting history. It dates back to the 1700s in Europe. The name “pound cake” comes from the original recipe, which called for a pound each of flour, butter, sugar, and eggs. This simple recipe made it easy for anyone to remember. Over time, bakers started to add different flavors and ingredients, leading to many variations. Today, pound cake is loved around the world for its rich, buttery flavor and dense texture. Our matcha pound cake recipe takes this classic dessert and gives it a modern twist with the addition of matcha, making it both tasty and visually appealing.

Ingredients for Matcha Pound Cake Recipe

To create a delightful matcha pound cake, you will need a few simple ingredients. Each one plays a vital role in achieving the perfect texture and flavor. Here’s what you’ll need:

  • 2 cups all-purpose flour: This is the base of your cake, providing structure.
  • 1 teaspoon baking powder: This helps the cake rise, making it light and fluffy.
  • 1/2 teaspoon salt: A pinch of salt enhances the flavors in the cake.
  • 1 tablespoon matcha green tea powder: This gives the cake its beautiful green color and unique flavor.
  • 1 cup unsalted butter, softened: Butter adds richness and moisture to the cake.
  • 1 1/2 cups granulated sugar: Sugar sweetens the cake and helps with its texture.
  • 4 large eggs: Eggs provide structure and moisture, making the cake tender.
  • 1 teaspoon vanilla extract: This adds a lovely aroma and flavor to the cake.
  • 1/2 cup milk: Milk keeps the cake moist and adds a bit of richness.

These ingredients come together to create a delicious matcha pound cake that is sure to impress your family and friends. Feel free to experiment with the ingredients, like substituting half of the all-purpose flour with almond flour for a lighter texture. You can also add a citrus twist by incorporating the zest of a lemon or orange into the batter. The possibilities are endless!

Step-by-Step Preparation of Matcha Pound Cake Recipe

Step 1: Preheat the Oven

First things first, preheat your oven to 350°F (175°C). This step is crucial because it ensures that your cake bakes evenly. A hot oven helps the cake rise properly, giving it that lovely fluffy texture we all love. While the oven heats up, you can move on to the next steps.

Step 2: Prepare the Baking Pan

Next, grab a 9×5-inch loaf pan. Grease it with some butter or cooking spray, then dust it with flour. This will prevent the cake from sticking to the pan. You want to make sure that when it’s time to serve, your beautiful matcha pound cake comes out easily. A well-prepared pan is key to a successful bake!

Step 3: Mix Dry Ingredients

In a medium bowl, whisk together the all-purpose flour, baking powder, salt, and matcha green tea powder. Mixing these dry ingredients first helps to evenly distribute the baking powder and matcha. This way, every bite of your cake will have that delightful matcha flavor. Set this bowl aside for now.

Step 4: Cream Butter and Sugar

Now, in a large bowl, cream the softened unsalted butter and granulated sugar together. Use an electric mixer on medium speed for about 3-5 minutes. You want the mixture to become light and fluffy. This step is important because it incorporates air into the batter, making your cake rise beautifully.

Step 5: Incorporate Eggs

Once your butter and sugar are fluffy, it’s time to add the eggs. Add them one at a time, mixing well after each addition. This ensures that each egg is fully incorporated before adding the next. Don’t forget to add the teaspoon of vanilla extract at this stage for that lovely aroma!

Step 6: Combine Dry and Wet Ingredients

Now, it’s time to bring everything together. Gradually add the dry mixture to the wet mixture. Alternate this with the milk, starting and ending with the flour mixture. Mix until just combined. Be careful not to overmix, as this can make your cake dense. You want a smooth batter, but a few lumps are okay!

Step 7: Add Matcha

Even though you’ve already added matcha in the dry ingredients, you can enhance its flavor by gently folding in a little extra matcha powder at this stage if you like. This will give your cake a more vibrant green color and a stronger matcha taste. Just be sure to mix it in gently.

Step 8: Bake the Cake

Pour the batter into your prepared loaf pan. Smooth the top with a spatula for an even bake. Place the pan in the preheated oven and bake for 60-70 minutes. To check if it’s done, insert a toothpick into the center. If it comes out clean, your cake is ready!

Step 9: Cool and Serve

Once baked, allow the cake to cool in the pan for about 10 minutes. This helps it set and makes it easier to remove. After that, transfer the cake to a wire rack to cool completely. Once cooled, slice it up and enjoy your delicious matcha pound cake!

Variations of Matcha Pound Cake Recipe

Adding Citrus Zest

If you want to give your matcha pound cake a refreshing twist, consider adding citrus zest. The zest of a lemon or orange can brighten the flavor of the cake. Simply grate the outer peel of the fruit and mix it into the batter during the wet ingredient stage. This addition not only enhances the taste but also adds a lovely aroma. The citrus notes pair beautifully with the earthy flavor of matcha, creating a delightful balance. Plus, it makes your cake even more appealing to the senses!

Incorporating Nuts or Chocolate Chips

Another fun way to customize your matcha pound cake is by incorporating nuts or chocolate chips. Chopped walnuts, almonds, or pecans can add a nice crunch and nutty flavor. Simply fold in about half a cup of your chosen nuts into the batter before pouring it into the loaf pan. If you’re a chocolate lover, consider adding chocolate chips instead. Dark chocolate chips can create a rich contrast to the matcha, making each bite a delightful surprise. Just remember to adjust the sugar slightly if you add sweet chocolate chips to keep the balance right!

Cooking Note for Matcha Pound Cake Recipe

When baking your matcha pound cake, there are a few important cooking notes to keep in mind. These tips will help ensure that your cake turns out perfectly every time.

  • Use Room Temperature Ingredients: For the best results, make sure your butter, eggs, and milk are at room temperature. This helps them blend together smoothly, creating a uniform batter.
  • Measure Ingredients Accurately: Baking is a science, so measuring your ingredients accurately is crucial. Use a kitchen scale for precise measurements, especially for flour and sugar.
  • Don’t Overmix: When combining the wet and dry ingredients, mix until just combined. Overmixing can lead to a dense cake, which is not what you want for a light and fluffy pound cake.
  • Check for Doneness: Ovens can vary in temperature, so keep an eye on your cake as it bakes. Start checking for doneness a few minutes before the recommended baking time. A toothpick inserted into the center should come out clean or with a few moist crumbs.
  • Cool Properly: Allow the cake to cool in the pan for about 10 minutes before transferring it to a wire rack. This helps prevent it from breaking apart. Cooling completely before slicing is also important for the best texture.

By following these cooking notes, you’ll be well on your way to creating a delicious matcha pound cake that everyone will love. Happy baking!

Serving Suggestions for Matcha Pound Cake Recipe

Pairing with Tea or Coffee

One of the best ways to enjoy your matcha pound cake is by pairing it with a warm cup of tea or coffee. The earthy flavor of matcha complements the rich notes of coffee beautifully. A light green tea, like jasmine or sencha, can enhance the matcha experience, creating a harmonious blend of flavors. If you prefer coffee, a smooth latte or cappuccino works wonders. The creaminess of the milk in these drinks balances the cake’s sweetness, making each bite even more delightful. So, brew your favorite beverage and savor the moment with a slice of matcha pound cake!

Serving with Fresh Fruits

Fresh fruits are another fantastic way to elevate your matcha pound cake. Slices of strawberries, blueberries, or raspberries add a burst of color and freshness. The natural sweetness and acidity of the fruits contrast nicely with the dense, buttery cake. You can serve the fruits on the side or even top the cake with them for a beautiful presentation. For an extra touch, consider drizzling a bit of honey or a light glaze over the fruits. This not only enhances the flavor but also makes your dessert look stunning. Enjoying matcha pound cake with fresh fruits is a delightful way to celebrate the flavors of the season!

Tips for Perfecting Your Matcha Pound Cake Recipe

Choosing the Right Matcha

When it comes to making a delicious matcha pound cake, the quality of your matcha green tea powder is essential. Not all matcha is created equal, and choosing the right one can make a big difference in flavor and color. Here are some tips to help you select the best matcha:

  • Look for Culinary Grade Matcha: For baking, culinary grade matcha is perfect. It’s less expensive than ceremonial grade but still offers great flavor and color.
  • Check the Color: High-quality matcha should have a vibrant green color. Dull or yellowish matcha may indicate lower quality.
  • Smell the Matcha: Fresh matcha has a sweet, grassy aroma. If it smells stale or bitter, it’s best to choose another brand.
  • Read Reviews: Before purchasing, check online reviews or ask friends for recommendations. This can help you find a reliable brand.

By choosing the right matcha, you’ll enhance the flavor and appearance of your matcha pound cake, making it even more enjoyable for everyone!

Storage Tips

To keep your matcha pound cake fresh and delicious, proper storage is key. Here are some helpful tips:

  • Cool Completely: Always allow your cake to cool completely before storing it. This prevents moisture buildup, which can make the cake soggy.
  • Wrap It Up: Use plastic wrap or aluminum foil to tightly wrap the cake. This helps keep it moist and prevents it from absorbing odors from the fridge.
  • Store in an Airtight Container: If you prefer, you can place the wrapped cake in an airtight container. This adds an extra layer of protection against air exposure.
  • Refrigerate or Freeze: For longer storage, you can refrigerate the cake for up to a week. If you want to keep it for a longer time, consider freezing it. Just make sure to wrap it well to prevent freezer burn.

Following these storage tips will help maintain the deliciousness of your matcha pound cake, allowing you to enjoy it for days to come!

Breakdown of Time for Matcha Pound Cake Recipe

Prep Time

Preparing your matcha pound cake is a breeze! The prep time typically takes about 20-30 minutes. This includes gathering your ingredients, measuring them out, and mixing everything together. Make sure to take your time during this stage to ensure everything is well-prepared. A little extra care now will lead to a delicious cake later!

Cooking Time

Once your batter is ready, it’s time to bake! The cooking time for your matcha pound cake is approximately 60-70 minutes. Keep an eye on it as it bakes, and remember to check for doneness with a toothpick. If it comes out clean, your cake is ready to be enjoyed!

Total Time

In total, you can expect to spend about 80-100 minutes from start to finish. This includes both prep and cooking time. Once your cake is baked, don’t forget to allow it to cool for about 10 minutes in the pan before transferring it to a wire rack. After that, let it cool completely before slicing. The wait will be worth it when you take that first delicious bite of your matcha pound cake!

Nutritional Information for Matcha Pound Cake Recipe

Calories

When enjoying a slice of matcha pound cake, it’s good to know what you’re consuming. Each serving contains approximately 250 calories. This makes it a delightful treat that can fit into a balanced diet. While it’s not a low-calorie dessert, the unique flavors and health benefits of matcha make it a worthwhile indulgence. Remember, moderation is key, and savoring each bite can make your experience even more enjoyable!

Protein

In terms of protein, each slice of matcha pound cake provides about 4 grams. While this isn’t a high-protein dessert, it does contribute to your daily intake. The eggs and butter in the recipe help provide this protein content. Pairing your cake with a protein-rich beverage, like a glass of milk or a protein shake, can enhance your overall nutrition while enjoying this delicious treat.

Sodium

For those watching their sodium intake, each serving of matcha pound cake contains around 150 milligrams of sodium. This is a moderate amount, especially considering that most people consume much more sodium in their daily diets. The salt in the recipe helps to enhance the flavors of the cake without making it overly salty. If you’re concerned about sodium, you can always adjust the amount of salt used in the recipe to suit your dietary needs.

FAQs about Matcha Pound Cake Recipe

Can I use regular green tea instead of matcha?

While you might be tempted to use regular green tea, it’s not a great substitute for matcha in this recipe. Matcha is finely ground and has a unique flavor that regular green tea lacks. Using matcha gives your pound cake its vibrant color and distinct taste. If you want that rich matcha experience, stick with matcha green tea powder for the best results!

How do I store leftover matcha pound cake?

Storing your leftover matcha pound cake is easy! First, make sure it’s completely cooled. Then, wrap it tightly in plastic wrap or aluminum foil. This helps keep it fresh and moist. You can also place it in an airtight container for extra protection. If you want to keep it longer, consider refrigerating it for up to a week or freezing it for a few months. Just remember to thaw it in the fridge before enjoying it again!

Can I make this recipe gluten-free?

Yes, you can make a gluten-free version of matcha pound cake! To do this, simply substitute the all-purpose flour with a gluten-free flour blend. Make sure the blend you choose is suitable for baking. You might also want to add a bit of xanthan gum to help with the texture. This way, you can enjoy a delicious matcha pound cake without gluten!

What can I substitute for butter in the matcha pound cake recipe?

If you need a butter substitute, there are several options! You can use coconut oil, which adds a subtle flavor and keeps the cake moist. Another option is unsweetened applesauce, which can make the cake lighter. If you prefer a dairy-free option, try using a plant-based butter or margarine. Just remember that each substitute may slightly change the flavor and texture of your cake, so choose one that fits your taste!

Conclusion on Matcha Pound Cake Recipe

In conclusion, the matcha pound cake recipe is a delightful way to enjoy the unique flavors of matcha while indulging in a classic dessert. This cake is not only visually appealing with its vibrant green hue, but it also offers a rich, buttery taste that is sure to please anyone who takes a bite. Whether you’re baking for a special occasion or simply treating yourself, this recipe is easy to follow and yields delicious results.

By incorporating matcha, you’re not just adding flavor; you’re also introducing a host of health benefits. The antioxidants found in matcha can help boost your energy and improve your overall well-being. Plus, with the option to customize your cake with citrus zest or nuts, you can make it your own. Each variation adds a personal touch, making it a versatile dessert for any palate.

As you embark on your baking journey, remember the tips and tricks shared throughout this article. From choosing the right matcha to proper storage methods, these insights will help you create the perfect matcha pound cake every time. So, gather your ingredients, preheat that oven, and get ready to enjoy a slice of this delightful treat. Happy baking!

Paul

Matcha Green Tea Pound Cake is a must-try dessert!

Earthy, elegant, and irresistibly moist—this Matcha Pound Cake is a tea-lover’s dream. Made with premium green tea powder and rich butter, it delivers a tender crumb, balanced sweetness, and a stunning natural hue in every slice. Perfect for pairing with a cup of green tea or gifting as a refined treat.
Prep Time 15 minutes
Cook Time 1 hour
Total Time 1 hour 15 minutes
Servings: 10 slices
Course: Dessert
Cuisine: Japanese-Inspired / Western Fusion

Ingredients
  

  • 245 grams cake flour
  • 1 tablespoon matcha powder
  • ¼ teaspoon salt
  • 1 teaspoon baking powder
  • 285 grams granulated sugar
  • 255 grams unsalted butter softened
  • 4 large eggs plus 2 egg yolks total 266 grams
  • 60 milliliters milk
  • 1 teaspoon vanilla extract

Method
 

  1. Preheat oven to 150°C (300°F). Line a 9×5-inch loaf pan with parchment paper and set aside.
  2. In a small bowl, whisk together the eggs, milk, and vanilla extract until well combined.
  3. In a large mixing bowl, sift the cake flour, matcha powder, salt, and baking powder. Add the sugar and whisk until evenly combined.
  4. Add the softened butter to the flour mixture and beat with a paddle attachment or hand mixer until the mixture becomes light and fluffy. Scrape the bowl to ensure everything is incorporated.
  5. Slowly add the egg mixture in three separate additions, mixing on low speed and scraping the bowl between each. Mix just until smooth.
  6. Pour the batter into the prepared loaf pan and smooth the top.
  7. Bake for 60 to 65 minutes, or until a toothpick inserted into the center comes out clean.
  8. Let the cake cool in the pan for 10 minutes before transferring to a wire rack to cool completely.

Notes

  • Use high-quality matcha for vibrant color and flavor—ceremonial or premium culinary grade is best.
  • For a more intense matcha flavor, replace 1 teaspoon of flour with an additional teaspoon of matcha powder.
  • This pound cake can be stored at room temperature for 2–3 days or wrapped and frozen for up to 2 months.
  • Serve plain or with a dusting of powdered sugar, white chocolate glaze, or whipped cream.

Crispy Shrimp Balls Recipe: A Delicious Snack Idea!

What Are Crispy Shrimp Balls?

Crispy shrimp balls are delightful bite-sized treats made from fresh shrimp and a mix of flavorful ingredients. These savory morsels are typically deep-fried until golden brown, creating a crunchy exterior that perfectly contrasts with the tender shrimp inside. The combination of herbs, spices, and seasonings adds a burst of flavor, making them a popular choice for appetizers or snacks. Whether served at a party or enjoyed as a family meal, crispy shrimp balls are sure to impress everyone at the table.

Why You Should Try This Crispy Shrimp Balls Recipe

There are many reasons to try this crispy shrimp balls recipe. First, it’s simple and quick to prepare, making it perfect for both novice cooks and seasoned chefs. The ingredients are easy to find, and the cooking process is straightforward. Plus, you can customize the recipe to suit your taste. Want a little heat? Add more red pepper flakes! Prefer a milder flavor? Skip the spice altogether. This flexibility allows you to create a dish that everyone will love.

Moreover, crispy shrimp balls are not just delicious; they are also nutritious. Packed with protein and low in carbs, they make a satisfying snack without the guilt. You can even bake them for a healthier option, which still delivers on taste. So, gather your ingredients and get ready to enjoy a delightful culinary experience with this crispy shrimp balls recipe!

Ingredients for Crispy Shrimp Balls Recipe

To create the perfect crispy shrimp balls, you’ll need a selection of fresh ingredients that come together to form a delicious treat. Here’s what you’ll need:

  • 1 pound raw shrimp: Make sure they are peeled and deveined for the best texture.
  • 1 cup breadcrumbs: This will give your shrimp balls that delightful crunch.
  • 1/2 cup green onions: Finely chopped, these add a fresh flavor.
  • 1/4 cup fresh cilantro: Chopped, for a burst of herbal goodness.
  • 2 cloves garlic: Minced, to enhance the overall taste.
  • 1 teaspoon ginger: Grated, for a hint of warmth and spice.
  • 1 teaspoon salt: To season the mixture perfectly.
  • 1/2 teaspoon black pepper: For a touch of mild heat.
  • 1/2 teaspoon red pepper flakes: Optional, for those who enjoy a spicy kick.
  • 1 large egg: This helps bind the ingredients together.
  • Vegetable oil: For frying, ensuring your shrimp balls are crispy and golden.

These ingredients come together to create a delightful flavor profile that is both savory and satisfying. Feel free to adjust the quantities based on your preferences. For instance, if you love cilantro, add a bit more! The beauty of this crispy shrimp balls recipe lies in its versatility.

Step-by-Step Preparation of Crispy Shrimp Balls Recipe

Step 1: Preparing the Shrimp

To start, you need to prepare the shrimp. First, ensure that your shrimp are raw, peeled, and deveined. This step is crucial for achieving the best texture. If you have whole shrimp, simply remove the shells and tails. Then, rinse them under cold water to clean. Pat them dry with a paper towel. This will help the mixture stick together better later on. Once your shrimp are ready, you can move on to the next step!

Step 2: Mixing the Ingredients

Now it’s time to mix everything together! In a food processor, combine the prepared shrimp, breadcrumbs, green onions, cilantro, garlic, ginger, salt, black pepper, and red pepper flakes if you’re using them. Pulse the mixture until it’s well combined but still slightly chunky. This texture is important for the final product. You want to maintain some shrimp pieces for that delightful bite. Once mixed, transfer the mixture to a bowl.

Step 3: Forming the Balls

After mixing, it’s time to form the shrimp balls. Add the large egg to the shrimp mixture and stir until fully incorporated. This will help bind the ingredients together. Now, using your hands, take a small amount of the mixture and roll it into a ball about 1 inch in diameter. Make sure to pack it tightly so they hold their shape while cooking. Repeat this process until all the mixture is used up. You should have a nice batch of shrimp balls ready for frying!

Step 4: Coating the Shrimp Balls

While not necessary, you can add an extra layer of crunch by coating the shrimp balls. To do this, simply roll each ball in additional breadcrumbs before frying. This step will give your crispy shrimp balls an even crunchier exterior. If you prefer a lighter version, you can skip this step. Either way, your shrimp balls will still be delicious!

Step 5: Frying the Shrimp Balls

Now comes the exciting part—frying! Heat about 2 inches of vegetable oil in a deep pot over medium heat. You want the oil to reach 350°F for the best frying results. Carefully drop the shrimp balls into the hot oil in batches. Fry them for about 3-4 minutes or until they turn golden brown and are cooked through. Use a slotted spoon to remove the shrimp balls from the oil and drain them on paper towels. This will help absorb any excess oil, keeping your shrimp balls crispy and light!

Variations of Crispy Shrimp Balls Recipe

Spicy Crispy Shrimp Balls

If you love a little heat, then spicy crispy shrimp balls are the perfect variation for you! To make them, simply increase the amount of red pepper flakes in the original recipe. You can also add a dash of hot sauce or a teaspoon of sriracha to the mixture for an extra kick. Another great option is to include finely chopped jalapeños or other hot peppers. This will not only enhance the flavor but also add a delightful crunch. Serve these spicy shrimp balls with a cooling dipping sauce, like ranch or yogurt-based sauce, to balance the heat. Your guests will love the fiery twist!

Baked Crispy Shrimp Balls

For a healthier alternative, try baking your crispy shrimp balls instead of frying them. Preheat your oven to 400°F. After forming the shrimp balls, place them on a baking sheet lined with parchment paper. Lightly spray or brush them with vegetable oil to help them crisp up in the oven. Bake for about 20-25 minutes, flipping them halfway through to ensure even cooking. The result will be deliciously crispy shrimp balls with less oil. This baked version is perfect for those who want to enjoy the same great taste while keeping it lighter. Pair them with a zesty dipping sauce for a delightful snack!

Cooking Note for Crispy Shrimp Balls Recipe

When preparing crispy shrimp balls, there are a few important cooking notes to keep in mind. First, ensure that your oil is at the right temperature before frying. If the oil is too hot, the outside will burn while the inside remains raw. Conversely, if the oil is not hot enough, the shrimp balls will absorb too much oil and become greasy. A thermometer can be a handy tool to achieve the perfect frying temperature of 350°F.

Additionally, avoid overcrowding the pot when frying. Frying too many shrimp balls at once can lower the oil temperature, leading to uneven cooking. Instead, fry them in small batches. This will help maintain that crispy texture you desire.

Another tip is to let the shrimp balls rest on paper towels after frying. This step is crucial as it allows excess oil to drain off, keeping your shrimp balls light and crispy. If you want to keep them warm while frying the remaining batches, place them on a baking sheet in a low oven (around 200°F) until ready to serve.

Lastly, feel free to experiment with different herbs and spices in your shrimp mixture. Adding a pinch of lime zest or a splash of soy sauce can elevate the flavor profile. Cooking is all about creativity, so don’t hesitate to make this crispy shrimp balls recipe your own!

Serving Suggestions for Crispy Shrimp Balls Recipe

Once your crispy shrimp balls are perfectly cooked, it’s time to think about how to serve them. These delightful bites are versatile and can be enjoyed in many ways. Here are some serving suggestions to elevate your dining experience:

  • With Dipping Sauces: One of the best ways to enjoy crispy shrimp balls is with a variety of dipping sauces. Consider serving them with sweet chili sauce for a touch of sweetness, or a tangy soy sauce for a savory kick. You can also try a creamy garlic aioli or a zesty lemon herb sauce to complement the flavors.
  • As an Appetizer: Serve crispy shrimp balls as a starter at your next gathering. Arrange them on a platter with toothpicks for easy serving. This makes them perfect for parties, game days, or family gatherings. Guests will love grabbing these tasty bites!
  • On a Salad: For a lighter meal, place crispy shrimp balls on a bed of mixed greens. Add some sliced cucumbers, cherry tomatoes, and avocado for a refreshing salad. Drizzle with a light vinaigrette or your favorite dressing to enhance the flavors.
  • In a Wrap: Create a delicious wrap by placing crispy shrimp balls in a tortilla with fresh veggies, like lettuce, carrots, and bell peppers. Add a drizzle of sauce or a spread of hummus for extra flavor. This makes for a fun and filling lunch option!
  • With Rice or Noodles: Pair crispy shrimp balls with steamed rice or noodles for a complete meal. You can toss them in a stir-fry with vegetables and a savory sauce for a delightful dish that’s both satisfying and nutritious.

These serving suggestions not only enhance the flavor of your crispy shrimp balls but also make them a versatile dish suitable for any occasion. Whether you’re hosting a party or enjoying a quiet dinner at home, these ideas will surely impress your family and friends!

Tips for Perfect Crispy Shrimp Balls Recipe

Creating the perfect crispy shrimp balls requires a few handy tips to ensure they turn out delicious every time. Here are some essential tips to help you achieve that ideal texture and flavor:

  • Use Fresh Shrimp: Always opt for fresh shrimp when making this recipe. Fresh shrimp not only taste better but also provide a firmer texture. If using frozen shrimp, make sure to thaw them completely and pat them dry before mixing.
  • Don’t Overmix: When combining the ingredients in the food processor, be careful not to overmix. You want the mixture to be well combined but still slightly chunky. This will give your shrimp balls a nice bite and prevent them from becoming mushy.
  • Chill the Mixture: After mixing, refrigerate the shrimp mixture for at least 30 minutes. Chilling helps the mixture firm up, making it easier to shape into balls. It also helps the flavors meld together, enhancing the overall taste.
  • Check Oil Temperature: Use a thermometer to ensure your oil is at the right temperature (350°F) before frying. This is crucial for achieving that crispy exterior. If you don’t have a thermometer, you can test the oil by dropping a small piece of the mixture in; if it sizzles and rises to the surface, the oil is ready.
  • Fry in Batches: Avoid overcrowding the pot when frying. Frying too many shrimp balls at once can lower the oil temperature, resulting in greasy balls. Fry them in small batches to maintain that perfect crispiness.
  • Drain Properly: After frying, let the shrimp balls drain on paper towels. This step is essential to remove excess oil, keeping your shrimp balls light and crispy. If you want to keep them warm, place them in a low oven while you finish frying the rest.
  • Experiment with Flavors: Don’t hesitate to get creative! Add different herbs, spices, or even a splash of citrus juice to the mixture. This can elevate the flavor profile and make your crispy shrimp balls unique.
  • Serve Immediately: For the best taste and texture, serve your crispy shrimp balls right after frying. They are at their crispiest when fresh out of the oil. If you need to prepare them in advance, consider baking them instead for a healthier option.

By following these tips, you’ll be well on your way to making perfect crispy shrimp balls that are sure to impress your family and friends. Enjoy the process and happy cooking!

Breakdown of Time for Crispy Shrimp Balls Recipe

Prep Time

The prep time for this crispy shrimp balls recipe is approximately 15-20 minutes. This includes gathering your ingredients, preparing the shrimp, and mixing everything together. If you choose to chill the mixture for better texture, add an additional 30 minutes to this time. This step is essential for achieving the perfect consistency when forming the balls.

Cooking Time

Once your shrimp mixture is ready, the cooking time will take about 10-15 minutes. This includes heating the oil and frying the shrimp balls in batches. Each batch will take around 3-4 minutes to cook until they are golden brown and crispy. Remember, frying in small batches helps maintain the oil temperature, ensuring even cooking.

Total Time

In total, you can expect the entire process to take about 55-65 minutes, including prep and cooking time. If you include the chilling time, the total will be around 1 hour and 25 minutes. This makes it a quick and enjoyable recipe to prepare, perfect for a weeknight dinner or a fun gathering with friends and family!

Nutritional Information for Crispy Shrimp Balls Recipe

Calories

Each serving of crispy shrimp balls contains approximately 250 calories. This makes them a satisfying snack or appetizer without being overly heavy. The balance of protein and healthy fats contributes to the overall calorie count, allowing you to enjoy these delicious bites without guilt. If you’re watching your calorie intake, consider serving smaller portions or pairing them with a light salad.

Protein

One of the standout features of this crispy shrimp balls recipe is its protein content. Each serving provides around 20 grams of protein. This high protein content is beneficial for muscle repair and growth, making these shrimp balls a great option for those looking to maintain a healthy diet. The shrimp itself is a lean source of protein, which helps keep you feeling full and satisfied.

Sodium

In terms of sodium, each serving contains approximately 600 milligrams. This amount is relatively moderate, but it’s essential to be mindful if you are on a low-sodium diet. You can reduce the sodium content by using low-sodium soy sauce or omitting added salt in the recipe. Additionally, fresh herbs and spices can enhance flavor without the need for extra salt, making your crispy shrimp balls both tasty and healthier.

FAQs About Crispy Shrimp Balls Recipe

Can I use frozen shrimp for this recipe?

Yes, you can use frozen shrimp for this crispy shrimp balls recipe! Just make sure to thaw them completely before using. To do this, place the frozen shrimp in the refrigerator overnight or run them under cold water for a quicker thaw. After thawing, be sure to pat them dry with a paper towel. This step is important as it helps the mixture hold together better. Using frozen shrimp can be a convenient option, especially if fresh shrimp are not available.

How do I store leftover crispy shrimp balls?

If you have any leftover crispy shrimp balls, store them in an airtight container in the refrigerator. They can last for up to 2 days. To keep them crispy, avoid stacking them on top of each other. Instead, place a layer of paper towels between layers to absorb moisture. When you’re ready to enjoy them again, reheat in the oven at 350°F for about 10 minutes. This will help restore their crispiness. Avoid microwaving, as this can make them soggy.

What dipping sauces pair well with crispy shrimp balls?

Crispy shrimp balls are delicious on their own, but they taste even better with dipping sauces! Here are some great options:

  • Sweet Chili Sauce: This sauce adds a sweet and spicy kick that complements the shrimp perfectly.
  • Garlic Aioli: A creamy garlic aioli provides a rich flavor that pairs well with the crispy texture.
  • Soy Sauce: A classic choice, soy sauce adds a savory touch that enhances the shrimp’s natural flavor.
  • Spicy Mayo: Mix mayonnaise with sriracha for a creamy and spicy dip that your guests will love.
  • Lemon Herb Sauce: A zesty lemon herb sauce can brighten up the dish and add freshness.

Feel free to mix and match these sauces to find your favorite combination!

Can I make crispy shrimp balls in advance?

Yes, you can prepare crispy shrimp balls in advance! To do this, follow the recipe up to the frying step. Once you’ve formed the balls, place them on a baking sheet lined with parchment paper and freeze them for about 1-2 hours. Once frozen, transfer the shrimp balls to an airtight container or freezer bag. They can be stored in the freezer for up to 2 months. When you’re ready to cook them, simply fry them straight from the freezer, adding a minute or two to the cooking time. This way, you can enjoy fresh crispy shrimp balls whenever you want!

Conclusion on Crispy Shrimp Balls Recipe

In conclusion, the crispy shrimp balls recipe is a delightful addition to any meal or gathering. With its simple preparation and delicious flavor, it’s no wonder this dish has become a favorite among many. The combination of fresh shrimp, herbs, and spices creates a mouthwatering treat that is both satisfying and nutritious.

Whether you choose to fry or bake them, these shrimp balls offer versatility that can cater to various tastes and dietary preferences. You can easily adjust the spice level or even substitute shrimp with other seafood, making it a customizable dish for everyone to enjoy. Plus, serving them with a variety of dipping sauces adds an extra layer of fun and flavor.

As you embark on your culinary journey with this crispy shrimp balls recipe, remember to embrace creativity. Experiment with different ingredients and flavors to make this dish your own. With a little practice, you’ll master the art of making crispy shrimp balls that will impress your family and friends.

So, gather your ingredients, follow the steps, and enjoy the delightful experience of cooking and sharing these crispy shrimp balls. They are sure to become a beloved staple in your kitchen, perfect for any occasion. Happy cooking!

Paul

Crispy Shrimp Balls Recipe: A Delicious Snack Idea!

Crispy on the outside, juicy and savory on the inside—these Golden Shrimp Balls are the ultimate bite-sized seafood snack. Infused with garlic, ginger, and a touch of sesame, they’re quick to make and even quicker to disappear. Serve them as a party appetizer or weeknight treat with your favorite dipping sauce.
Prep Time 15 minutes
Cook Time 10 minutes
Total Time 25 minutes
Servings: 20 –25 shrimp balls
Course: Appetizer / Snack
Cuisine: Asian-Inspired / Seafood

Ingredients
  

  • 1 lb raw shrimp peeled and deveined
  • ½ cup panko breadcrumbs
  • 1 egg beaten
  • ¼ cup green onions finely chopped
  • 2 cloves garlic minced
  • 1 tablespoon fresh ginger grated
  • 1 tablespoon soy sauce
  • 1 teaspoon sesame oil
  • ½ teaspoon salt
  • ½ teaspoon black pepper
  • ¼ cup chopped cilantro optional
  • 1 tablespoon cornstarch optional, for extra binding
  • Vegetable oil for frying

Method
 

  1. Roughly chop the shrimp with a knife or pulse in a food processor until finely minced but not pasty.
  2. In a large bowl, combine the chopped shrimp with breadcrumbs, egg, green onions, garlic, ginger, soy sauce, sesame oil, salt, and pepper. Mix well.
  3. If the mixture feels too wet, stir in cornstarch to help bind.
  4. With slightly wet hands, shape the mixture into 1 to 1.5-inch balls. You should get around 20 to 25 balls.
  5. Heat about ½ inch of vegetable oil in a skillet over medium-high heat. Once hot, fry the shrimp balls in batches for 3–4 minutes per side until golden brown and cooked through.
  6. Remove and place on a paper towel-lined plate to drain excess oil.
  7. Garnish with cilantro or sesame seeds if desired. Serve hot with dipping sauces like sweet chili sauce, soy sauce, or lemon garlic aioli.

Notes

  • Do not overprocess the shrimp if using a food processor—texture is key!
  • These shrimp balls can also be baked at 400°F (200°C) for 12–15 minutes, flipping halfway through, for a lighter option.
  • To freeze, shape the raw shrimp balls and freeze on a tray before transferring to a freezer bag. Cook from frozen by adding a few extra minutes to the cooking time.
  • Great for party platters, bento boxes, or as a main dish with steamed rice and vegetables.

Crispy Air Fryer Salmon is a quick, tasty delight!

Crispy Air Fryer Salmon Recipe is here to save the day. This recipe not only delivers a delightful crunch but also keeps the salmon moist and flavorful. With just a few simple ingredients, you can whip up a meal that impresses your family and friends.

Why Choose Air Fryer for Salmon?

Using an air fryer for salmon is a game-changer. First, it cooks the fish evenly, ensuring that every bite is tender and juicy. Second, the air fryer circulates hot air around the salmon, creating a crispy exterior without the need for excessive oil. This method is healthier than traditional frying, making it a great choice for those who want to enjoy delicious food without the guilt.

Moreover, air fryers are incredibly convenient. They preheat quickly and cook faster than conventional ovens. This means you can have a tasty dinner on the table in no time. Plus, cleanup is a breeze! Most air fryer baskets are non-stick and dishwasher safe, making post-meal chores less of a hassle.

Benefits of the Crispy Air Fryer Salmon Recipe

Crispy Air Fryer Salmon Recipe offers numerous benefits. First and foremost, it’s packed with protein, making it a perfect choice for a healthy diet. Each serving contains about 34 grams of protein, which is essential for muscle repair and growth.

Additionally, this recipe is low in carbohydrates, making it suitable for various dietary preferences, including keto and paleo diets. The use of fresh ingredients, like lemon and herbs, adds flavor without unnecessary calories. You can also customize the seasoning to suit your taste, making it versatile for any palate.

Finally, this recipe is perfect for busy weeknights or special occasions. It’s quick, easy, and sure to impress. So, let’s dive into the ingredients and get started on this delightful dish!

Ingredients for the Crispy Air Fryer Salmon Recipe

Crispy Air Fryer Salmon Recipe, you will need a few simple ingredients. These items are easy to find and will help you achieve that perfect crispy texture while keeping the salmon moist and flavorful. Here’s what you’ll need:

  • 1 pound salmon fillets (skin-on or skinless)
  • 2 tablespoons olive oil
  • 1 teaspoon garlic powder
  • 1 teaspoon paprika
  • 1 teaspoon dried oregano
  • 1 teaspoon salt
  • ½ teaspoon black pepper
  • 1 lemon, sliced

These ingredients come together to create a deliciously seasoned salmon that is sure to please everyone at the table. The olive oil helps the spices stick to the fish while also adding healthy fats. Garlic powder and paprika provide a wonderful flavor, while oregano adds a hint of earthiness. The salt and pepper enhance the overall taste, and the lemon slices add a refreshing touch.

Feel free to adjust the quantities based on your preferences. If you love garlic, add a bit more garlic powder. If you prefer a spicier kick, consider adding a pinch of cayenne pepper. The beauty of this recipe lies in its flexibility, allowing you to make it your own!

Step-by-Step Preparation of the Crispy Air Fryer Salmon Recipe

Crispy Air Fryer Salmon Recipe. Follow these simple steps to ensure your salmon turns out perfectly every time. Let’s get started!

Step 1: Preparing the Salmon

First, take your salmon fillets out of the packaging. If they are frozen, make sure to thaw them completely. Pat the salmon dry with paper towels. This step is crucial because removing excess moisture helps achieve that crispy texture. If you’re using skin-on fillets, place them skin side down on your work surface. This will help the skin crisp up nicely during cooking.

Step 2: Seasoning the Salmon

Next, it’s time to season your salmon. In a small bowl, mix together the olive oil, garlic powder, paprika, oregano, salt, and black pepper. Use a brush or your hands to evenly coat the salmon fillets with this flavorful mixture. Make sure to cover all sides, as this will enhance the taste. If you want to add a touch of sweetness, consider drizzling a little honey or maple syrup over the fillets at this stage.

Step 3: Preheating the Air Fryer

Before cooking, preheat your air fryer to 400°F. Preheating is essential as it helps the salmon cook evenly and achieve that desired crispiness. Most air fryers heat up quickly, so this step won’t take long. While the air fryer is preheating, you can prepare the lemon slices to place on top of the salmon.

Step 4: Cooking the Salmon

Once the air fryer is ready, place the seasoned salmon fillets in the basket. If your fillets have skin, make sure they are skin side down. Arrange the lemon slices on top of the salmon for added flavor. Cook the salmon for 8-10 minutes, depending on the thickness of the fillets. For extra crispiness, you can cook for an additional 1-2 minutes. Keep an eye on it to avoid overcooking.

Step 5: Checking for Doneness

After the cooking time is up, it’s time to check if your salmon is done. The fish should flake easily with a fork and have an internal temperature of 145°F. If it’s not quite there, you can return it to the air fryer for another minute or two. Once cooked, let the salmon rest for a few minutes before serving. This allows the juices to redistribute, making it even more delicious!

Now that you’ve prepared your crispy air fryer salmon, you’re ready to enjoy a delightful meal. Let’s explore some variations and serving suggestions to elevate your dining experience!

Variations of the Crispy Air Fryer Salmon Recipe

Crispy Air Fryer Salmon Recipe is not only delicious but also versatile. You can easily switch up the flavors to keep things exciting. Here are some variations to consider that will enhance your salmon experience.

Different Seasoning Options

One of the best things about cooking salmon is the variety of seasonings you can use. If you want to try something different, consider these options:

  • Lemon Dill: Replace the oregano with fresh or dried dill. Add lemon zest for an extra citrusy kick.
  • Spicy Cajun: Use Cajun seasoning instead of the garlic powder and paprika. This will give your salmon a nice heat.
  • Asian-Inspired: Swap the olive oil for sesame oil and add soy sauce, ginger, and green onions for a unique twist.
  • Herb Blend: Mix in fresh herbs like parsley, thyme, or basil for a garden-fresh flavor.

Feel free to experiment with different spices and herbs. The key is to find combinations that you enjoy. Each variation can bring a new taste to your crispy salmon!

Cooking with Marinades

Marinating your salmon before cooking can add depth to the flavor. Here are a couple of easy marinade ideas:

  • Honey Soy Marinade: Combine 2 tablespoons of soy sauce, 1 tablespoon of honey, and 1 teaspoon of minced garlic. Marinate the salmon for 30 minutes before cooking.
  • Mustard Maple Marinade: Mix 2 tablespoons of Dijon mustard with 1 tablespoon of maple syrup. Let the salmon soak in this mixture for about 20 minutes.

After marinating, simply follow the same cooking steps as before. The result will be a flavorful, crispy salmon that’s sure to impress!

Crispy Air Fryer Salmon Recipe in many delightful ways. Now, let’s move on to some cooking notes to ensure your salmon turns out perfectly every time.

Cooking Note for the Crispy Air Fryer Salmon Recipe

Crispy Air Fryer Salmon Recipe, a few cooking notes can help you achieve the best results. These tips will ensure that your salmon is not only delicious but also cooked to perfection.

First, always choose fresh salmon when possible. Fresh fish has a better flavor and texture compared to frozen options. If you do use frozen salmon, make sure to thaw it completely before cooking. This will help it cook evenly and prevent any rubbery texture.

Next, consider the thickness of your salmon fillets. Thicker fillets will require a longer cooking time, while thinner ones will cook faster. If you’re unsure, it’s always a good idea to check the internal temperature. Salmon should reach an internal temperature of 145°F to be safe for consumption.

Another important note is to avoid overcrowding the air fryer basket. If you place too many fillets at once, they may not cook evenly. Instead, cook in batches if necessary. This will allow the hot air to circulate properly, giving you that crispy exterior you desire.

Lastly, let your salmon rest for a few minutes after cooking. This resting period allows the juices to redistribute throughout the fish, making it more flavorful and moist. Trust us, this small step can make a big difference in your final dish!

Crispy Air Fryer Salmon Recipe. Now, let’s explore some serving suggestions to complement your delicious salmon dish!

Serving Suggestions for the Crispy Air Fryer Salmon Recipe

Crispy Air Fryer Salmon Recipe, it’s time to think about how to serve it. Pairing your salmon with the right side dishes and sauces can elevate your meal to a whole new level. Here are some delightful suggestions to consider!

Pairing with Side Dishes

Choosing the right side dishes can enhance the flavors of your salmon. Here are some tasty options:

  • Roasted Vegetables: A mix of seasonal vegetables like asparagus, broccoli, or bell peppers roasted in the air fryer complements the salmon beautifully. The slight char adds a wonderful flavor.
  • Quinoa Salad: A light quinoa salad with cherry tomatoes, cucumber, and a lemon vinaigrette pairs well with the richness of the salmon.
  • Garlic Mashed Potatoes: Creamy mashed potatoes with a hint of garlic provide a comforting side that balances the crispy salmon.
  • Steamed Rice: Fluffy white or brown rice can soak up the juices from the salmon, making each bite delicious.

Feel free to mix and match these sides based on your preferences. The goal is to create a balanced plate that complements the flavors of the crispy salmon.

Serving with Sauces

Crispy Air Fryer Salmon Recipe to the next level. Here are some sauce ideas that pair perfectly:

  • Lemon Butter Sauce: A simple sauce made with melted butter, lemon juice, and fresh herbs adds a rich, zesty flavor to the salmon.
  • Tartar Sauce: A classic choice, tartar sauce provides a creamy and tangy contrast to the crispy fish.
  • Chimichurri: This vibrant sauce made with parsley, garlic, vinegar, and olive oil adds a fresh and zesty kick.
  • Honey Mustard Glaze: A mix of honey and Dijon mustard drizzled over the salmon can enhance its sweetness and flavor.

These sauces not only add flavor but also create a beautiful presentation. Choose one or two to serve alongside your salmon for a delightful dining experience.

Crispy Air Fryer Salmon Recipe will shine on the dinner table. Now, let’s move on to some tips for perfecting this delicious dish!

Tips for Perfecting the Crispy Air Fryer Salmon Recipe

Crispy Air Fryer Salmon Recipe, a few tips can help you achieve the best results. These insights will ensure that your salmon is not only delicious but also perfectly cooked every time. Let’s dive into some essential tips!

Choosing the Right Salmon

When it comes to salmon, quality matters. Opt for fresh, wild-caught salmon whenever possible. Wild salmon tends to have a richer flavor and firmer texture compared to farmed varieties. If you can’t find fresh salmon, frozen salmon is a good alternative. Just make sure to thaw it completely before cooking.

Look for fillets that are bright in color and have a moist appearance. Avoid any that look dull or have brown spots. If you’re unsure, ask your fishmonger for recommendations. They can guide you to the best options available.

Additionally, consider the cut of salmon. Salmon fillets come in various cuts, such as center-cut or tail-end. Center-cut fillets are thicker and cook more evenly, while tail-end pieces are thinner and may cook faster. Choose based on your preference and cooking time.

Ensuring Crispiness

Crispy Air Fryer Salmon Recipe. Here are some tips to ensure your salmon comes out crispy every time:

  • Pat Dry: Always pat your salmon dry with paper towels before seasoning. Removing excess moisture is crucial for crispiness.
  • Use Enough Oil: Don’t skimp on the olive oil. It helps the seasoning stick and promotes browning. A light brush or drizzle is all you need.
  • Preheat the Air Fryer: Preheating your air fryer is essential. It ensures that the salmon starts cooking immediately, helping to create that crispy texture.
  • Avoid Overcrowding: Cook in batches if necessary. Overcrowding the basket can trap steam and prevent the salmon from crisping up.
  • Check for Doneness: Keep an eye on the cooking time. If your salmon is thick, it may need a bit longer. For extra crispiness, you can add a minute or two to the cooking time.

Crispy Air Fryer Salmon Recipe. Now, let’s break down the time needed for this delicious dish!

Tips for Perfecting the Crispy Air Fryer Salmon Recipe

Crispy Air Fryer Salmon Recipe, a few tips can help you achieve the best results. These insights will ensure that your salmon is not only delicious but also perfectly cooked every time. Let’s dive into some essential tips!

Choosing the Right Salmon

When it comes to salmon, quality matters. Opt for fresh, wild-caught salmon whenever possible. Wild salmon tends to have a richer flavor and firmer texture compared to farmed varieties. If you can’t find fresh salmon, frozen salmon is a good alternative. Just make sure to thaw it completely before cooking.

Look for fillets that are bright in color and have a moist appearance. Avoid any that look dull or have brown spots. If you’re unsure, ask your fishmonger for recommendations. They can guide you to the best options available.

Additionally, consider the cut of salmon. Salmon fillets come in various cuts, such as center-cut or tail-end. Center-cut fillets are thicker and cook more evenly, while tail-end pieces are thinner and may cook faster. Choose based on your preference and cooking time.

Ensuring Crispiness

Crispy Air Fryer Salmon Recipe. Here are some tips to ensure your salmon comes out crispy every time:

  • Pat Dry: Always pat your salmon dry with paper towels before seasoning. Removing excess moisture is crucial for crispiness.
  • Use Enough Oil: Don’t skimp on the olive oil. It helps the seasoning stick and promotes browning. A light brush or drizzle is all you need.
  • Preheat the Air Fryer: Preheating your air fryer is essential. It ensures that the salmon starts cooking immediately, helping to create that crispy texture.
  • Avoid Overcrowding: Cook in batches if necessary. Overcrowding the basket can trap steam and prevent the salmon from crisping up.
  • Check for Doneness: Keep an eye on the cooking time. If your salmon is thick, it may need a bit longer. For extra crispiness, you can add a minute or two to the cooking time.

Crispy Air Fryer Salmon Recipe. Now, let’s break down the time needed for this delicious dish!

Breakdown of Time for the Crispy Air Fryer Salmon Recipe

Crispy Air Fryer Salmon Recipe is essential for planning your meal. Here’s a simple breakdown of the time required for preparation and cooking. This will help you manage your kitchen time effectively and ensure that your salmon is ready to serve when you want it.

Prep Time

The prep time for this recipe is quite short. You’ll need about 10-15 minutes to gather your ingredients and prepare the salmon. This includes:

  • Thawing the salmon if it’s frozen.
  • Patting the salmon dry.
  • Mixing the seasoning and applying it to the fillets.
  • Prepping the lemon slices.

With everything ready, you’ll be set to move on to the cooking stage!

Cooking Time

Crispy Air Fryer Salmon Recipe is approximately 8-10 minutes. This can vary slightly based on the thickness of your salmon fillets. Here’s a quick overview:

  • Cook for 8-10 minutes at 400°F.
  • If you prefer extra crispiness, you can add an additional 1-2 minutes.

Always check for doneness to ensure your salmon is perfectly cooked.

Total Time

In total, you can expect the entire process to take about 20-25 minutes. This includes both prep and cooking time. Here’s a quick summary:

  • Prep Time: 10-15 minutes
  • Cooking Time: 8-10 minutes
  • Total Time: 20-25 minutes

Crispy Air Fryer Salmon Recipe an excellent choice for busy weeknights or when you want to impress guests without spending hours in the kitchen. Now that you know the timing, let’s dive into the nutritional information for this delightful dish!

Nutritional Information for the Crispy Air Fryer Salmon Recipe

Crispy Air Fryer Salmon Recipe is essential for those who are health-conscious or following specific dietary plans. This dish is not only delicious but also packed with nutrients that can benefit your overall health. Let’s break down the key nutritional components of this recipe.

Calories

Crispy Air Fryer Salmon Recipe contains approximately 320 calories. This makes it a satisfying yet light option for dinner. The calorie count is primarily derived from the healthy fats in the salmon and olive oil, which provide energy while also being beneficial for heart health.

Protein

One of the standout features of this recipe is its high protein content. Each serving offers about 34 grams of protein. Protein is essential for muscle repair, growth, and overall body function. Including salmon in your diet can help you meet your daily protein needs while enjoying a tasty meal.

Sodium

Crispy Air Fryer Salmon Recipe is around 500 milligrams per serving. This amount is reasonable, especially considering that salmon is naturally low in sodium. However, if you are watching your sodium intake, you can adjust the salt in the seasoning mix to suit your dietary needs. Using fresh herbs and spices can also enhance flavor without adding extra sodium.

Crispy Air Fryer Salmon Recipe is a nutritious choice that fits well into a balanced diet. With its combination of healthy fats, high protein, and moderate calorie content, it’s a meal you can feel good about serving to your family and friends. Now, let’s address some frequently asked questions about this delightful dish!

FAQs about the Crispy Air Fryer Salmon Recipe

How do I know when the salmon is done?

Knowing when your salmon is perfectly cooked is essential for a delicious meal. The best way to check is by using a fork. Gently flake the salmon with a fork; if it flakes easily, it’s done! Additionally, the internal temperature should reach 145°F. If you don’t have a thermometer, just keep an eye on the color. Cooked salmon will change from a translucent pink to a more opaque color. If it still looks raw in the center, give it another minute or two in the air fryer.

Can I use frozen salmon for this recipe?

Crispy Air Fryer Salmon Recipe. However, it’s important to thaw it completely before cooking. You can do this by placing the salmon in the refrigerator overnight or using the defrost setting on your microwave. Once thawed, pat it dry and follow the recipe as usual. Just remember that cooking times may vary slightly, so keep an eye on it to ensure it cooks evenly.

What can I serve with crispy air fryer salmon?

Crispy Air Fryer Salmon. Consider pairing it with roasted vegetables, a light quinoa salad, or creamy garlic mashed potatoes. Steamed rice or a fresh green salad also make great accompaniments. The key is to choose sides that complement the flavors of the salmon while providing a balanced meal. Feel free to mix and match based on your preferences!

How do I store leftovers of the crispy air fryer salmon?

Crispy Air Fryer Salmon Recipe, storing them properly is important to maintain freshness. Allow the salmon to cool completely, then place it in an airtight container. You can store it in the refrigerator for up to 3 days. If you want to keep it longer, consider freezing it. Wrap the salmon tightly in plastic wrap and then place it in a freezer-safe bag. It can last up to 3 months in the freezer. When ready to eat, thaw it in the refrigerator overnight and reheat in the air fryer for a few minutes to regain that crispy texture.

Conclusion on the Crispy Air Fryer Salmon Recipe

Crispy Air Fryer Salmon Recipe is a fantastic way to enjoy a healthy and delicious meal without spending hours in the kitchen. With its simple ingredients and quick cooking time, this recipe is perfect for busy weeknights or special occasions. The air fryer not only ensures a crispy exterior but also keeps the salmon moist and flavorful, making it a favorite among seafood lovers.

By following the steps outlined in this article, you can create a dish that is not only nutritious but also packed with flavor. The versatility of this recipe allows you to experiment with different seasonings and marinades, ensuring that you never get bored. Whether you choose to serve it with roasted vegetables, a refreshing salad, or a zesty sauce, your crispy salmon will surely impress your family and friends.

Remember, the key to perfecting this dish lies in choosing high-quality salmon, ensuring proper seasoning, and monitoring the cooking time. With a little practice, you’ll master the art of making crispy air fryer salmon that is both satisfying and healthy.

Crispy Air Fryer Salmon Recipe brings to your table!

Paul

Crispy Air Fryer Salmon is a quick, tasty delight!

This golden-glazed salmon is a 15-minute flavor bomb. Sweet honey, tangy Dijon, and savory soy come together in an irresistibly sticky glaze that caramelizes beautifully in the air fryer. It’s healthy, fast, and packed with bold, satisfying flavor.
Prep Time 5 minutes
Cook Time 10 minutes
Total Time 15 minutes
Servings: 4 servings
Course: Main Course
Cuisine: American / Healthy

Ingredients
  

  • 4 salmon fillets about 6 oz each
  • 2 tablespoons honey or a keto honey substitute
  • tablespoons Dijon mustard
  • 2 tablespoons olive oil
  • 1 tablespoon low sodium soy sauce or Tamari/Coconut Aminos for gluten-free
  • 1 teaspoon garlic powder
  • Salt and pepper to taste

Method
 

  1. Preheat the air fryer to 400°F (200°C) and lightly spray the basket with oil to prevent sticking.
  2. Pat the salmon fillets dry with paper towels to remove excess moisture—this helps achieve a crisper exterior.
  3. In a small bowl, whisk together honey, Dijon mustard, olive oil, soy sauce, and garlic powder until well combined.
  4. Season the salmon with salt and pepper, then brush both sides generously with the prepared glaze.
  5. Place the salmon fillets skin-side down in the air fryer basket in a single layer.
  6. Air fry for 8 to 10 minutes, or until the internal temperature reaches 145°F (63°C) and the edges are slightly crispy.
  7. Serve immediately with your choice of side—steamed vegetables, salad, or mashed cauliflower work wonderfully.

Notes

  • Cooking time may vary slightly depending on the thickness of your salmon fillets—check for doneness around the 8-minute mark.
  • For a spicy twist, add a pinch of red pepper flakes to the glaze.
  • Leftovers can be stored in the fridge for up to 2 days and reheated in the air fryer or a skillet over medium heat.
  • You can also bake this recipe at 400°F for about 12–15 minutes if you don’t have an air fryer.