Shepherd’s Pie Tater Tot Casserole is a must-try dish!

What is Shepherd’s Pie Tater Tot Casserole?

Shepherd’s Pie Tater Tot Casserole is a delightful twist on the classic shepherd’s pie. This comforting dish combines seasoned ground meat, mixed vegetables, and creamy mashed potatoes, all topped with crispy tater tots. It’s a hearty meal that brings together flavors and textures in a way that will please everyone at the table. The tater tots add a fun crunch, making it a favorite among kids and adults alike.

Why You Should Try This Recipe

There are many reasons to try this Shepherd’s Pie Tater Tot Casserole Recipe. First, it’s incredibly easy to prepare, making it perfect for busy weeknights. You can whip it up in under an hour, and it serves six, so it’s great for families or gatherings. Second, the combination of flavors is simply irresistible. The savory meat and vegetables pair perfectly with the creamy mashed potatoes and crispy tater tots.

Moreover, this recipe is versatile. You can easily customize it to suit your dietary preferences. Whether you want to use ground turkey for a lighter option or swap out the tater tots for a healthier alternative, the possibilities are endless. Plus, it’s a fantastic way to sneak in some veggies, making it a nutritious choice for your family.

In short, this Shepherd’s Pie Tater Tot Casserole is not just a meal; it’s an experience. It brings warmth and comfort to your dining table, making it a must-try for anyone who loves delicious, home-cooked food.

Ingredients for Shepherd’s Pie Tater Tot Casserole Recipe

To create a delicious Shepherd’s Pie Tater Tot Casserole, you’ll need a variety of ingredients that come together to make this dish truly special. Here’s a list of what you’ll need:

  • 1 pound ground beef or lamb
  • 1 medium onion, diced
  • 2 cloves garlic, minced
  • 2 cups mixed vegetables (frozen peas, carrots, and corn)
  • 1 tablespoon Worcestershire sauce
  • 1 teaspoon dried thyme
  • 1 teaspoon salt
  • 1/2 teaspoon black pepper
  • 1 cup beef broth
  • 2 cups mashed potatoes (prepared from scratch or store-bought)
  • 32 ounces frozen tater tots
  • 1 cup shredded cheddar cheese

These ingredients are not only easy to find but also work together to create a comforting and satisfying meal. The ground meat provides protein, while the mixed vegetables add essential nutrients. The mashed potatoes and tater tots bring a creamy and crunchy texture that makes every bite enjoyable.

For those looking to make adjustments, consider using ground turkey or chicken for a lighter option. You can also swap regular potatoes for sweet potatoes to add a unique flavor and extra vitamins. With these ingredients, you’re well on your way to making a delightful Shepherd’s Pie Tater Tot Casserole that everyone will love!

Step-by-Step Preparation of Shepherd’s Pie Tater Tot Casserole Recipe

Step 1: Preheat the Oven

400°F. This ensures that your casserole will bake evenly and turn out perfectly crispy on top. While the oven heats up, you can prepare the other ingredients.

Step 2: Prepare the Meat Mixture

1 pound of ground beef or lamb. Cook it until it’s browned, which should take about 5-7 minutes. Make sure to drain any excess fat to keep your dish from becoming greasy. This step is crucial for a delicious and healthy casserole.

Step 3: Cook the Vegetables

1 medium diced onion and 2 cloves minced garlic to the skillet. Cook these until the onion becomes translucent, which will take about 3-4 minutes. The aroma of the garlic and onion will fill your kitchen, making it hard to resist!

2 cups of mixed vegetables, which can include frozen peas, carrots, and corn. This adds color and nutrition to your dish. Cook everything together for a few minutes, allowing the flavors to blend.

Step 4: Combine Ingredients

1 tablespoon of Worcestershire sauce, 1 teaspoon of dried thyme, 1 teaspoon of salt, and 1/2 teaspoon of black pepper. Then, add 1 cup of beef broth to the mixture. Stir everything well and let it simmer for about 5 minutes. This will help the flavors meld together beautifully.

Step 5: Layer the Casserole

9×13 inch baking dish. This will be the base of your casserole, so make sure it’s spread out nicely.

2 cups of mashed potatoes over the meat mixture. Use a spatula to smooth it out evenly. This creamy layer is what makes the casserole so comforting and delicious!

Step 6: Add Tater Tots

32 ounces of frozen tater tots and arrange them in a single layer on top of the mashed potatoes. This crispy topping will give your casserole a delightful crunch. Make sure to cover the entire surface for an even bake.

Step 7: Bake the Casserole

25-30 minutes, or until the tater tots are golden brown and crispy. Once it’s done, remove it from the oven and sprinkle 1 cup of shredded cheddar cheese on top. Return it to the oven for an additional 5 minutes, or until the cheese is melted and bubbly.

5 minutes before serving. This will help it set and make it easier to serve. Enjoy your delicious Shepherd’s Pie Tater Tot Casserole!

Variations of Shepherd’s Pie Tater Tot Casserole Recipe

Vegetarian Options

1 pound of lentils or chopped mushrooms for a hearty texture. These ingredients provide protein and a rich flavor that complements the dish beautifully.

zucchini, bell peppers, or spinach. These veggies not only add color but also boost the nutritional value of your casserole. For the broth, use vegetable broth instead of beef broth to keep it vegetarian-friendly. This way, you can enjoy a delicious and satisfying meal without any meat!

Gluten-Free Alternatives

For those who need a gluten-free option, making Shepherd’s Pie Tater Tot Casserole is still very much possible. Start by ensuring that your tater tots are gluten-free. Many brands offer gluten-free varieties, so check the packaging before purchasing.

When it comes to the meat mixture, you can use ground beef, lamb, or turkey, as they are naturally gluten-free. However, if you want to add a little extra flavor, consider using gluten-free Worcestershire sauce. This small change will keep your dish safe for those with gluten sensitivities.

Lastly, if you prefer a thicker sauce, you can thicken the beef broth with a gluten-free cornstarch slurry. Just mix a tablespoon of cornstarch with cold water, then stir it into the broth while it simmers. This will give your casserole a nice, hearty texture without any gluten!

Cooking Note for Shepherd’s Pie Tater Tot Casserole Recipe

When preparing your Shepherd’s Pie Tater Tot Casserole, there are a few cooking notes to keep in mind to ensure the best results. First, always use fresh ingredients whenever possible. Fresh vegetables and quality meat can significantly enhance the flavor of your dish. If you opt for frozen vegetables, make sure they are thawed and drained to avoid excess moisture in the casserole.

Another important tip is to adjust the seasoning to your taste. Everyone has different preferences, so feel free to add more herbs or spices if you like a bolder flavor. For instance, a pinch of cayenne pepper can add a nice kick, while fresh herbs like parsley or chives can brighten the dish.

Additionally, if you’re using store-bought mashed potatoes, check the ingredients for any additives. Homemade mashed potatoes are often creamier and more flavorful, but if you’re short on time, a good quality store-bought option will work just fine.

Lastly, remember that the baking time may vary depending on your oven. Keep an eye on the casserole as it bakes. You want the tater tots to be golden brown and crispy, and the cheese to be melted and bubbly. If you find that the tater tots are browning too quickly, you can cover the casserole with aluminum foil to prevent burning while allowing the inside to cook through.

By following these cooking notes, you’ll create a delicious Shepherd’s Pie Tater Tot Casserole that’s sure to impress your family and friends!

Serving Suggestions for Shepherd’s Pie Tater Tot Casserole Recipe

When it comes to serving your Shepherd’s Pie Tater Tot Casserole, presentation and pairing can elevate the meal to a whole new level. Here are some delightful serving suggestions to consider:

  • Garnish with Fresh Herbs: A sprinkle of fresh parsley or chives on top of the casserole adds a pop of color and freshness. It also enhances the flavor, making each bite even more enjoyable.
  • Serve with a Side Salad: A crisp green salad pairs wonderfully with the rich flavors of the casserole. Consider a simple mixed greens salad with a light vinaigrette to balance the meal.
  • Accompany with Bread: Serve warm, crusty bread or dinner rolls on the side. This is perfect for soaking up any delicious juices from the casserole.
  • Offer Condiments: Some people enjoy adding a dollop of sour cream or a drizzle of hot sauce to their servings. These condiments can add a nice touch of creaminess or heat, depending on your preference.
  • Pair with a Beverage: A glass of red wine or a light beer can complement the hearty flavors of the casserole. For a non-alcoholic option, consider sparkling water with a slice of lemon for a refreshing touch.

These serving suggestions not only enhance the dining experience but also allow you to customize the meal to suit your guests’ tastes. Whether it’s a family dinner or a gathering with friends, your Shepherd’s Pie Tater Tot Casserole will surely be a hit!

Paul

Shepherd’s Pie Tater Tot Casserole is a must-try dish!

This hearty, layered Tater Tot Casserole is a savory, satisfying hug in every bite — with a rich ground beef and corn base, a creamy layer of mashed potatoes, and a crispy, cheesy tater tot topping. It’s the ultimate comfort food that brings together crunchy, creamy, and cozy all in one dish.
Prep Time 20 minutes
Cook Time 35 minutes
Total Time 55 minutes
Servings: 6 –8 servings
Course: Casserole
Cuisine: American

Ingredients
  

For the Beef Layer:
  • 1 lb lean ground beef or ground turkey
  • 1 cup diced yellow onions
  • 12 oz canned corn with liquid
  • 1/2 cup water
  • 0.87 oz packet beef gravy mix
  • 1/2 teaspoon salt
  • 1/2 teaspoon black pepper
  • 1/2 tablespoon onion powder
  • 1/2 tablespoon garlic powder
For the Mashed Potato Layer:
  • 1 1/2 cups water
  • 2 tablespoons margarine or butter
  • 4 oz instant mashed potato mix
  • 1/2 cup milk
For the Topping:
  • 28 oz frozen tater tots
  • 2 cups shredded cheese blend cheddar + mozzarella recommended

Method
 

  1. Preheat oven to 425°F (220°C) and grease a 9×13-inch baking dish.
  2. Cook the beef: In a skillet over medium heat, brown the ground beef. Add diced onions and sauté until soft.
  3. Add flavor: Stir in canned corn (with liquid), water, beef gravy mix, salt, pepper, onion powder, and garlic powder. Simmer for a few minutes, then pour the mixture evenly into the prepared baking dish.
  4. Prepare mashed potatoes: Bring water and butter to a boil. Remove from heat and stir in instant mashed potato mix and milk until smooth. Spread the mashed potatoes gently over the beef layer.
  5. Add tater tots: Arrange the frozen tater tots in a single layer on top of the mashed potatoes.
  6. Bake: Bake uncovered for 30 minutes, or until tater tots are golden and crispy.
  7. Cheesy finish: Sprinkle the shredded cheese over the tots and bake an additional 4–6 minutes, until melted and bubbly.
  8. Cool and serve: Let the casserole rest for a few minutes before slicing and serving.

Notes

  • Customizable Veggies: Try adding peas, carrots, or green beans to the beef mixture.
  • Make Ahead: Assemble the entire casserole and refrigerate for up to 24 hours before baking.
  • Storage: Store leftovers in an airtight container in the fridge for up to 4 days.
  • Freezer-Friendly: Freeze unbaked casserole tightly wrapped for up to 2 months. Thaw overnight before baking.

Tips for Perfect Shepherd’s Pie Tater Tot Casserole Recipe

Creating the perfect Shepherd’s Pie Tater Tot Casserole is all about attention to detail. Here are some helpful tips to ensure your dish turns out delicious every time:

  • Choose Quality Meat: Whether you use beef, lamb, or turkey, opt for high-quality ground meat. Fresh meat enhances the flavor and texture of your casserole.
  • Season Generously: Don’t be shy with the seasonings! Adjust the salt, pepper, and herbs to your taste. A little extra thyme or a dash of garlic powder can elevate the dish.
  • Use Homemade Mashed Potatoes: If time allows, make your mashed potatoes from scratch. They tend to be creamier and more flavorful than store-bought versions.
  • Don’t Overcrowd the Tater Tots: When placing the tater tots on top, ensure they are in a single layer. This allows them to crisp up nicely during baking.
  • Check for Doneness: Keep an eye on the casserole as it bakes. If the tater tots are browning too quickly, cover the dish with foil to prevent burning.
  • Let it Rest: After baking, let the casserole sit for about 5 minutes before serving. This helps it set and makes it easier to cut and serve.
  • Experiment with Toppings: Feel free to get creative with toppings! Try adding crushed chips, breadcrumbs, or even a sprinkle of paprika for added flavor and texture.
  • Store Properly: If you have leftovers, store them in an airtight container in the fridge. This casserole reheats well, making it perfect for quick meals later.

By following these tips, you’ll create a Shepherd’s Pie Tater Tot Casserole that’s not only tasty but also visually appealing. Enjoy the process and the delicious results!

Breakdown of Time for Shepherd’s Pie Tater Tot Casserole Recipe

Prep Time

15-20 minutes gathering your ingredients and preparing them. This includes chopping the onion, mincing the garlic, and measuring out your mixed vegetables. If you’re using store-bought mashed potatoes, this will save you some time as well!

Cooking Time

30-35 minutes. This includes browning the meat, cooking the vegetables, and baking the casserole. The baking time is crucial for achieving that perfect golden-brown tater tot topping. Make sure to keep an eye on it during the last few minutes to ensure it doesn’t overcook.

Total Time

45-55 minutes from start to finish. This makes it a quick and easy meal option for busy weeknights or family gatherings. With just under an hour, you can have a delicious, hearty Shepherd’s Pie Tater Tot Casserole ready to serve!

Nutritional Information for Shepherd’s Pie Tater Tot Casserole Recipe

Calories

450 calories. This makes it a satisfying option for dinner without going overboard on calories. The combination of protein, carbohydrates, and fats in this dish provides a balanced meal that can keep you feeling full and energized.

Protein

25 grams of protein per serving. This protein primarily comes from the ground beef or lamb, making it a great choice for those looking to increase their protein intake. If you opt for ground turkey or chicken, the protein content remains similar, ensuring you still get a healthy dose of this vital nutrient.

Sodium

800 milligrams of sodium. This amount can vary based on the specific ingredients you use, such as the type of broth or the brand of tater tots. To reduce sodium levels, consider using low-sodium broth and checking the labels on your tater tots. This way, you can enjoy your casserole while keeping your sodium intake in check.

Nutritional Information for Shepherd’s Pie Tater Tot Casserole Recipe

Calories

450 calories. This makes it a satisfying option for dinner without going overboard on calories. The combination of protein, carbohydrates, and fats in this dish provides a balanced meal that can keep you feeling full and energized.

Protein

25 grams of protein per serving. This protein primarily comes from the ground beef or lamb, making it a great choice for those looking to increase their protein intake. If you opt for ground turkey or chicken, the protein content remains similar, ensuring you still get a healthy dose of this vital nutrient.

Sodium

800 milligrams of sodium. This amount can vary based on the specific ingredients you use, such as the type of broth or the brand of tater tots. To reduce sodium levels, consider using low-sodium broth and checking the labels on your tater tots. This way, you can enjoy your casserole while keeping your sodium intake in check.

FAQs about Shepherd’s Pie Tater Tot Casserole Recipe

Can I make Shepherd’s Pie Tater Tot Casserole ahead of time?

Absolutely! You can prepare your Shepherd’s Pie Tater Tot Casserole ahead of time. Simply follow the recipe up to the point of baking. Once you’ve layered the ingredients in the baking dish, cover it tightly with plastic wrap or aluminum foil. You can store it in the refrigerator for up to 24 hours before baking. When you’re ready to bake, just remove the cover and pop it in the oven. You may need to add a few extra minutes to the baking time if it’s coming straight from the fridge.

What can I substitute for Tater Tots in this recipe?

If you want to switch things up, there are several tasty alternatives to tater tots. You can use frozen hash browns, which will give a similar texture and flavor. Another option is to use homemade potato wedges or even a layer of crispy breadcrumbs for a different crunch. If you’re looking for a healthier choice, consider using roasted sweet potatoes or cauliflower tots. These substitutes can add a unique twist to your Shepherd’s Pie Tater Tot Casserole!

How do I store leftovers of Shepherd’s Pie Tater Tot Casserole?

Storing leftovers is easy! Allow the casserole to cool completely before transferring it to an airtight container. You can keep it in the refrigerator for up to 3-4 days. When you’re ready to enjoy it again, simply reheat individual portions in the microwave or warm the entire casserole in the oven at 350°F until heated through. If you find the top is getting too brown, cover it with foil while reheating.

Can I freeze Shepherd’s Pie Tater Tot Casserole?

Yes, you can freeze Shepherd’s Pie Tater Tot Casserole! To do this, prepare the casserole as directed but do not bake it. Instead, cover it tightly with plastic wrap and then aluminum foil to prevent freezer burn. It can be stored in the freezer for up to 3 months. When you’re ready to bake it, thaw it in the refrigerator overnight and then bake as directed. This makes for a convenient meal option for busy days!

Conclusion on Shepherd’s Pie Tater Tot Casserole Recipe

In conclusion, the Shepherd’s Pie Tater Tot Casserole is a delightful dish that combines comfort and flavor in every bite. This recipe is not only easy to prepare but also offers a wonderful way to bring family and friends together around the dinner table. With its layers of seasoned meat, mixed vegetables, creamy mashed potatoes, and crispy tater tots, it’s a meal that satisfies both the palate and the heart.

Whether you’re looking for a quick weeknight dinner or a dish to impress guests, this casserole fits the bill perfectly. Plus, its versatility allows you to customize it to suit your dietary needs or personal preferences. From vegetarian options to gluten-free alternatives, there’s a version of this casserole for everyone!

As you explore this recipe, remember to have fun with it. Experiment with different ingredients, toppings, and seasonings to make it your own. The joy of cooking comes from creativity, and this Shepherd’s Pie Tater Tot Casserole is a fantastic canvas for your culinary imagination.

So, gather your ingredients, preheat that oven, and get ready to enjoy a hearty meal that will warm your soul. Your family will love it, and you might just find it becoming a regular feature on your dinner menu. Happy cooking!
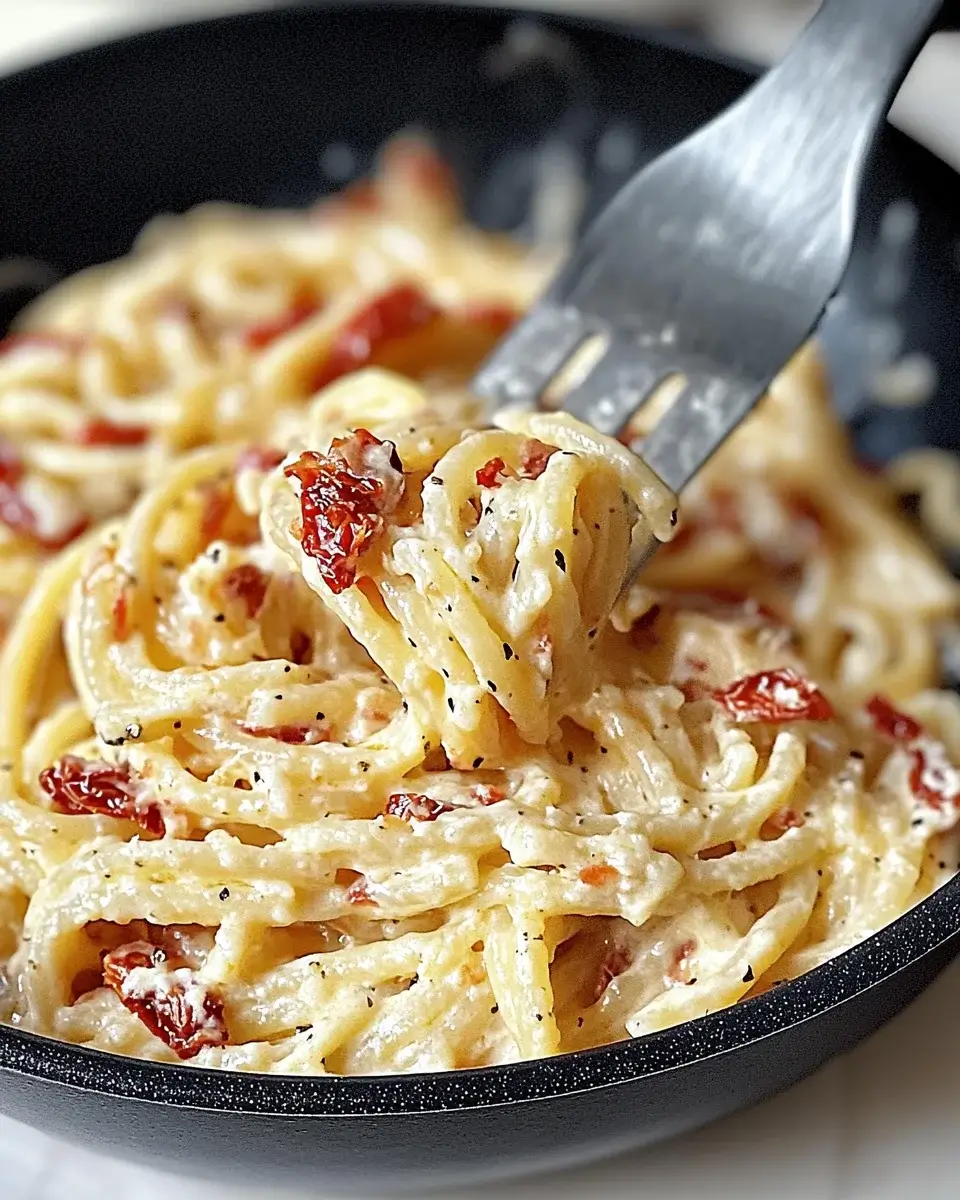
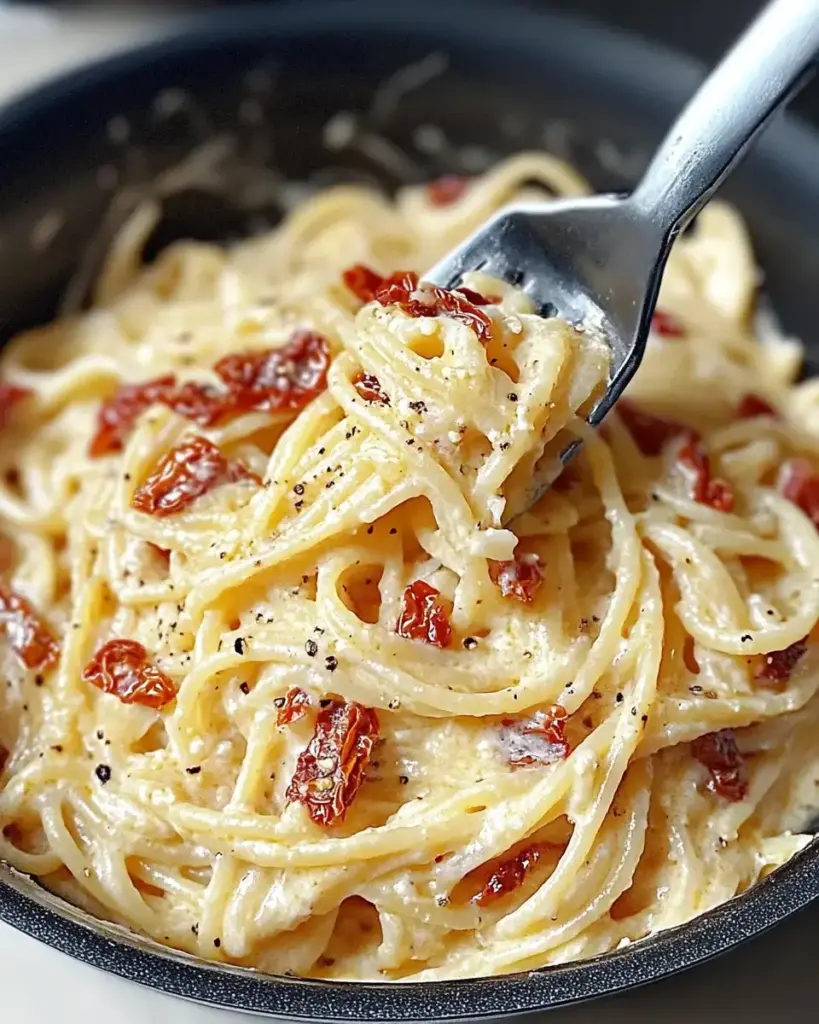
One-Pan Sun-Dried Tomato Pasta Recipe is a must-try!

One-Pan Sun-Dried Tomato Pasta Recipe is here to save the day. This delightful dish combines the rich flavors of sun-dried tomatoes with creamy sauce and fresh spinach, all cooked in one pan. It’s perfect for busy weeknights or when you want to impress guests without spending hours in the kitchen.

What Makes One-Pan Sun-Dried Tomato Pasta Recipe Special?

What sets this recipe apart is its simplicity and flavor. First, it’s a one-pan wonder, meaning you can cook everything in a single skillet. This not only saves time but also reduces the number of dishes you need to wash afterward. Second, the combination of sun-dried tomatoes and heavy cream creates a rich, savory sauce that coats the pasta beautifully.

Moreover, the addition of fresh spinach adds a pop of color and nutrients, making this dish not just tasty but also healthy. You can easily customize it to suit your dietary needs, whether you prefer vegetarian options or want to add protein. With just a few ingredients and simple steps, you can whip up a meal that feels gourmet.

So, gather your ingredients and get ready to enjoy a comforting bowl of One-Pan Sun-Dried Tomato Pasta. It’s a dish that promises to delight your taste buds and leave you feeling satisfied!

Ingredients for One-Pan Sun-Dried Tomato Pasta Recipe

One-Pan Sun-Dried Tomato Pasta Recipe, you’ll need a few key ingredients. Each component plays a vital role in building the flavors and textures of this dish. Here’s what you’ll need:

  • 8 ounces penne pasta: This pasta shape holds the sauce well and provides a satisfying bite.
  • 1 cup sun-dried tomatoes, chopped: Use those packed in oil for extra flavor. Drain them before adding.
  • 3 cloves garlic, minced: Fresh garlic adds a wonderful aroma and depth to the dish.
  • 4 cups vegetable broth: This serves as the cooking liquid, infusing the pasta with flavor.
  • 1 teaspoon Italian seasoning: A blend of herbs that enhances the overall taste.
  • 1/2 teaspoon red pepper flakes (optional): For a little heat, adjust according to your spice preference.
  • 1 cup heavy cream: This creates a rich and creamy sauce that binds everything together.
  • 1 cup fresh spinach, chopped: Adds color, nutrients, and a fresh taste.
  • 1/2 cup grated Parmesan cheese: This cheese adds a savory, salty flavor that complements the dish.
  • Salt and pepper to taste: Essential for seasoning and enhancing the flavors.
  • Fresh basil leaves for garnish (optional): A lovely touch that adds freshness and visual appeal.

One-Pan Sun-Dried Tomato Pasta Recipe. So, let’s get cooking!

Step-by-Step Preparation of One-Pan Sun-Dried Tomato Pasta Recipe

One-Pan Sun-Dried Tomato Pasta Recipe is straightforward and fun to make. Follow these simple steps to create a delicious meal that everyone will love!

Step 1: Gather Your Ingredients

Before you start cooking, make sure you have everything you need. Gather your penne pasta, sun-dried tomatoes, garlic, vegetable broth, Italian seasoning, red pepper flakes, heavy cream, spinach, Parmesan cheese, salt, pepper, and fresh basil. Having everything in one place will make the cooking process smoother and more enjoyable.

Step 2: Prepare the Base

In a large skillet or saucepan, combine the penne pasta, chopped sun-dried tomatoes, and minced garlic. Pour in the vegetable broth and sprinkle in the Italian seasoning. If you like a bit of heat, add the red pepper flakes. Stir everything together to mix the ingredients well. This base will create a flavorful foundation for your pasta.

Step 3: Add the Pasta

Once your base is ready, bring the mixture to a boil over medium-high heat. It’s important to keep an eye on it, as you want it to boil evenly. When it reaches a rolling boil, reduce the heat to medium-low. Cover the skillet with a lid and let it simmer. This will cook the pasta and allow it to absorb all those wonderful flavors.

Step 4: Incorporate Sun-Dried Tomatoes

As the pasta cooks, the sun-dried tomatoes will infuse their rich flavor into the dish. Stir occasionally to ensure the pasta doesn’t stick to the bottom of the pan. Cook for about 10-12 minutes, or until the pasta is al dente and most of the liquid has been absorbed. This step is crucial for achieving the perfect texture.

Step 5: Simmer and Stir

After the pasta is cooked, it’s time to add the finishing touches. Stir in the heavy cream and chopped spinach. The cream will create a luscious sauce, while the spinach adds a fresh, vibrant color. Cook for an additional 2-3 minutes, just until the spinach wilts and the sauce is heated through. This is where the magic happens!

Step 6: Finish with Cheese and Herbs

One-Pan Sun-Dried Tomato Pasta Recipe is now ready to be enjoyed!

Variations of One-Pan Sun-Dried Tomato Pasta Recipe

One-Pan Sun-Dried Tomato Pasta Recipe is incredibly versatile. You can easily adapt it to suit different dietary preferences and tastes. Here are some exciting variations to consider:

Vegetarian Options

If you want to keep your meal vegetarian, there are plenty of ways to enhance the dish. You can add roasted vegetables like zucchini, bell peppers, or mushrooms. These veggies not only add flavor but also boost the nutritional value. Another great option is to toss in some artichoke hearts or olives for a Mediterranean twist. These additions will make your pasta even more colorful and delicious!

Protein Additions

For those looking to increase their protein intake, consider adding cooked chicken, shrimp, or even sausage. Simply sauté the protein of your choice in the skillet before adding the pasta and other ingredients. This will infuse the dish with extra flavor. If you prefer plant-based protein, try adding chickpeas or lentils. They blend well with the creamy sauce and make the meal hearty.

Gluten-Free Alternatives

One-Pan Sun-Dried Tomato Pasta Recipe without the gluten!

One-Pan Sun-Dried Tomato Pasta Recipe can adapt to meet your needs. Enjoy experimenting with different ingredients to create your perfect pasta dish!

Cooking Note for One-Pan Sun-Dried Tomato Pasta Recipe

One-Pan Sun-Dried Tomato Pasta Recipe, there are a few important cooking notes to keep in mind. These tips will help ensure that your dish turns out perfectly every time.

First, always check the cooking time for your pasta. Different brands and types of pasta may require varying cooking times. For penne, the typical cooking time is around 10-12 minutes. However, it’s best to taste the pasta a minute or two before the suggested time to ensure it’s al dente. This means it should be firm to the bite but not hard.

Next, be mindful of the heat level. When you first bring the mixture to a boil, use medium-high heat. Once boiling, reduce the heat to medium-low to allow the pasta to simmer gently. This helps the pasta cook evenly and absorb the flavors from the broth and sun-dried tomatoes.

Additionally, stirring occasionally is key. This prevents the pasta from sticking to the bottom of the pan and ensures that all ingredients are well combined. If you notice that the liquid is evaporating too quickly, feel free to add a splash more vegetable broth. This will keep the pasta moist and flavorful.

One-Pan Sun-Dried Tomato Pasta Recipe truly shine. With these cooking notes in mind, you’re set for a delicious meal!

Serving Suggestions for One-Pan Sun-Dried Tomato Pasta Recipe

One-Pan Sun-Dried Tomato Pasta Recipe, it’s time to think about how to serve it. The right sides and drinks can enhance your meal and create a delightful dining experience. Here are some fantastic serving suggestions to consider.

Pairing with Sides

When it comes to sides, you want to complement the rich flavors of your pasta. Here are a few ideas:

  • Garlic Bread: A classic choice! The crispy, buttery garlic bread pairs perfectly with the creamy pasta. It’s great for soaking up any leftover sauce.
  • Mixed Green Salad: A fresh salad with a light vinaigrette can balance the richness of the pasta. Consider adding cherry tomatoes, cucumbers, and a sprinkle of feta cheese.
  • Roasted Vegetables: Roasted asparagus, zucchini, or bell peppers add color and nutrition. Their natural sweetness complements the savory pasta beautifully.
  • Bruschetta: This Italian appetizer made with toasted bread, tomatoes, and basil is a delightful starter. It’s fresh and light, making it a great way to begin your meal.

One-Pan Sun-Dried Tomato Pasta Recipe for a well-rounded meal.

Ideal Wine Pairings

Pairing the right wine with your pasta can elevate the flavors even more. Here are some excellent wine options:

  • Chardonnay: A creamy Chardonnay complements the heavy cream in the pasta. Its buttery notes enhance the dish’s richness.
  • Sauvignon Blanc: This white wine offers a crisp and refreshing contrast. Its acidity balances the creaminess of the sauce.
  • Pinot Grigio: Light and fruity, Pinot Grigio is another great choice. It pairs well with the sun-dried tomatoes and fresh spinach.
  • Chianti: If you prefer red wine, Chianti is a fantastic option. Its acidity and herbal notes match the Italian flavors in the dish.

One-Pan Sun-Dried Tomato Pasta Recipe beautifully.

Tips for Perfecting One-Pan Sun-Dried Tomato Pasta Recipe

One-Pan Sun-Dried Tomato Pasta Recipe even better, consider these helpful tips. They cover ingredient substitutions and storage methods to ensure your dish is always delicious and convenient.

Ingredient Substitutions

Sometimes, you may not have all the ingredients on hand. No worries! Here are some easy substitutions:

  • Pasta: If you don’t have penne, feel free to use any pasta shape you like. Fusilli, farfalle, or even spaghetti work well.
  • Sun-Dried Tomatoes: If you can’t find sun-dried tomatoes, you can use fresh tomatoes. Just chop them up and add them to the dish. You may need to cook them a bit longer to soften.
  • Heavy Cream: For a lighter option, substitute half of the heavy cream with low-fat milk or a dairy-free alternative like almond or coconut milk.
  • Vegetable Broth: Chicken broth can be used instead of vegetable broth for a richer flavor. If you want a vegetarian option, stick with vegetable broth.
  • Parmesan Cheese: If you’re out of Parmesan, try using Pecorino Romano or nutritional yeast for a dairy-free option.

These substitutions can help you whip up a tasty meal without a trip to the store. Feel free to get creative and adjust the recipe to your liking!

Storage Tips

One-Pan Sun-Dried Tomato Pasta Recipe, you may have leftovers. Here’s how to store them properly:

  • Refrigeration: Allow the pasta to cool completely before transferring it to an airtight container. It can be stored in the fridge for up to 3 days.
  • Freezing: If you want to keep it longer, you can freeze the pasta. Place it in a freezer-safe container or bag, and it will last for up to 2 months. Just remember to label it with the date!
  • Reheating: To reheat, add a splash of vegetable broth or water to the pasta. This will help loosen the sauce and prevent it from drying out. Heat it in a skillet over medium heat until warmed through.

One-Pan Sun-Dried Tomato Pasta Recipe even after the first serving. It’s a great way to save time and enjoy a delicious meal later!

Breakdown of Time for One-Pan Sun-Dried Tomato Pasta Recipe

One-Pan Sun-Dried Tomato Pasta Recipe can help you plan your meal better. Here’s a quick breakdown of the time involved in preparing and cooking this delicious dish.

Prep Time

The prep time for this recipe is quite short. You’ll need about 10 minutes to gather and prepare your ingredients. This includes chopping the sun-dried tomatoes, mincing the garlic, and measuring out the vegetable broth and spices. Having everything ready will make the cooking process smoother and more enjoyable.

Cooking Time

Once you start cooking, the total cooking time is approximately 15-20 minutes. This includes:

  • Bringing the mixture to a boil (about 5 minutes).
  • Simmering the pasta until al dente (10-12 minutes).
  • Adding the cream and spinach, then cooking for an additional 2-3 minutes.

So, in total, you can expect to spend around 15-20 minutes cooking your pasta dish.

Total Time

One-Pan Sun-Dried Tomato Pasta Recipe is about 25-30 minutes. This makes it a perfect option for a quick weeknight dinner or a last-minute meal for guests. With just half an hour, you can serve a delicious, homemade pasta dish that everyone will love!

Nutritional Information for One-Pan Sun-Dried Tomato Pasta Recipe

One-Pan Sun-Dried Tomato Pasta Recipe not only delights your taste buds but also provides valuable nutrients. Here’s a breakdown of the key nutritional information for this delicious dish.

Calories

One-Pan Sun-Dried Tomato Pasta Recipe contains approximately 480 calories. This makes it a satisfying meal that can fit into a variety of dietary plans. The calorie count comes from the combination of pasta, cream, and cheese, which provide energy and flavor. If you’re looking to reduce calories, consider using low-fat alternatives or adjusting portion sizes.

Protein Content

This recipe offers about 15 grams of protein per serving. The protein primarily comes from the heavy cream and Parmesan cheese. If you want to boost the protein content, you can add cooked chicken, shrimp, or plant-based proteins like chickpeas. These additions will not only enhance the flavor but also make the dish more filling.

Sodium Levels

One-Pan Sun-Dried Tomato Pasta Recipe is around 800 milligrams per serving. This amount can vary based on the type of vegetable broth and cheese used. If you’re watching your sodium intake, opt for low-sodium broth and cheese. Additionally, you can adjust the salt added during cooking to keep the sodium levels in check.

One-Pan Sun-Dried Tomato Pasta Recipe while aligning it with your dietary goals. It’s a delicious and nutritious option for any meal!

FAQs about One-Pan Sun-Dried Tomato Pasta Recipe

Can I use fresh tomatoes instead of sun-dried tomatoes?

Yes, you can use fresh tomatoes in place of sun-dried tomatoes! However, keep in mind that fresh tomatoes have a different flavor and moisture content. To use fresh tomatoes, chop them into small pieces and add them to the skillet along with the pasta and broth. You may need to cook them a bit longer to soften and release their juices. This will help create a delicious sauce, but the taste will be lighter compared to using sun-dried tomatoes.

How can I make this recipe vegan?

One-Pan Sun-Dried Tomato Pasta Recipe vegan is easy! Start by substituting the heavy cream with a plant-based alternative, such as coconut milk or cashew cream. For the cheese, you can use nutritional yeast for a cheesy flavor or a vegan cheese substitute. Ensure that your vegetable broth is also vegan-friendly. With these simple swaps, you can enjoy a creamy and satisfying vegan pasta dish!

What type of pasta works best for this recipe?

Penne pasta is a great choice for this recipe because its shape holds the sauce well. However, you can use other pasta shapes if you prefer. Fusilli, farfalle, or even spaghetti work nicely too. Just remember to adjust the cooking time according to the type of pasta you choose. The key is to select a pasta that you enjoy and that will complement the creamy sauce.

Can I prepare this dish in advance?

One-Pan Sun-Dried Tomato Pasta Recipe in advance! To do this, cook the pasta as directed, but stop just before adding the cream and spinach. Allow the dish to cool, then store it in an airtight container in the refrigerator for up to 3 days. When you’re ready to serve, reheat the pasta in a skillet over medium heat, adding the cream and spinach at that time. This way, you can enjoy a quick and delicious meal without the hassle of cooking from scratch!

Conclusion on One-Pan Sun-Dried Tomato Pasta Recipe

One-Pan Sun-Dried Tomato Pasta Recipe is a delightful dish that combines convenience with rich flavors. It’s perfect for busy weeknights or when you want to impress your family and friends without spending hours in the kitchen. With just a few simple ingredients and easy steps, you can create a meal that is both satisfying and nutritious.

This recipe not only showcases the deliciousness of sun-dried tomatoes but also allows for endless customization. Whether you prefer it vegetarian, packed with protein, or gluten-free, you can easily adapt it to fit your dietary needs. The creamy sauce, fresh spinach, and savory cheese come together to create a comforting dish that everyone will love.

Moreover, the quick preparation and cooking time make it an ideal choice for those who want a homemade meal without the fuss. With a total time of about 25-30 minutes, you can serve a gourmet-style pasta dish that feels special yet is incredibly easy to make.

One-Pan Sun-Dried Tomato Pasta Recipe a try? Gather your ingredients, follow the steps, and enjoy a delicious meal that will surely become a favorite in your household. Happy cooking!

Paul

One-Pan Sun-Dried Tomato Pasta Recipe is a must-try!

This one-pan sun-dried tomato pasta is a creamy, comforting dish bursting with garlicky goodness and rich tomato flavor. Made in under 30 minutes with pantry staples, it’s perfect for busy weeknights and cozy dinners alike.
Prep Time 5 minutes
Cook Time 15 minutes
Total Time 20 minutes
Servings: 4 servings
Course: Main Dish
Cuisine: Italian-inspired

Ingredients
  

  • 3 tablespoons butter
  • 3 cloves garlic minced
  • 2 cups chicken stock or bone broth
  • 1/2 cup half and half or whole milk, room temperature
  • 1 jar 8 oz sun-dried tomatoes, drained of oil
  • 8 oz angel hair pasta
  • 1/3 cup grated Parmesan cheese
  • 2 tablespoons cream cheese optional, softened
  • 1 teaspoon Italian seasoning
  • 1/2 teaspoon freshly cracked black pepper
  • 1/4 teaspoon salt
  • 1/2 teaspoon red pepper flakes optional

Method
 

  1. In a large skillet over medium-low heat, melt the butter. Add minced garlic and sauté for about 1 minute, just until fragrant.
  2. Stir in the chicken stock, sun-dried tomatoes, Italian seasoning, pepper, and salt. Pour in the half and half gradually while stirring. Bring the mixture to a gentle boil.
  3. Add the angel hair pasta to the skillet. Let it sit in the liquid for 30 seconds to soften, then gently stir to fully submerge.
  4. Simmer for about 5 minutes, stirring occasionally to prevent sticking. If using, stir in cream cheese until fully melted and incorporated.
  5. Add Parmesan cheese and stir until melted and the sauce is creamy. Taste and adjust seasonings. If the sauce becomes too thick, add a splash of broth or half and half to loosen it.
  6. Serve immediately, optionally garnished with extra cheese or herbs.

Notes

  • Pasta Tip: Angel hair cooks quickly — keep a close eye on it to avoid overcooking.
  • Dairy-Free Option: Use a plant-based milk and omit the cheeses, or replace with dairy-free alternatives.
  • Protein Add-In: Add grilled chicken, shrimp, or white beans to make it a complete meal.
  • Make It Spicy: Increase the red pepper flakes or stir in a dash of hot sauce for extra heat.
  • Storage: Store leftovers in an airtight container in the fridge for up to 3 days. Reheat gently with a splash of broth or milk.

Croissant Cookie Delight Recipe is a must-try treat!

Introduction to Croissant Cookie Delight Recipe

Welcome to the delightful world of the Croissant Cookie Delight Recipe! This unique treat combines the flaky goodness of croissants with the chewy texture of cookies. Imagine biting into a cookie that has the buttery layers of a croissant, all while being packed with chocolate chips and nuts. It’s a match made in dessert heaven!

What Makes the Croissant Cookie Delight Unique?

The Croissant Cookie Delight stands out for several reasons. First, it uses mini croissants, which adds a delightful twist to the traditional cookie. The croissants bring a light, airy texture that contrasts beautifully with the rich, buttery cookie base. Additionally, the combination of chocolate chips and nuts enhances the flavor profile, making each bite a delightful experience. This recipe is perfect for those who love to experiment with flavors and textures in their baking.

The Origin of Croissant Cookie Delight

The Croissant Cookie Delight is a modern creation that reflects the growing trend of fusion desserts. While croissants have their roots in Austria, they became popular in France, where they were perfected into the flaky pastries we know today. Cookies, on the other hand, have a long history that dates back to ancient times. By merging these two beloved treats, bakers have created a new dessert that pays homage to both traditions. This recipe is not just a treat; it’s a celebration of culinary creativity!

Ingredients for Croissant Cookie Delight Recipe

To create the delicious Croissant Cookie Delight, you’ll need a few simple ingredients. Each component plays a vital role in achieving that perfect balance of flavors and textures. Here’s what you’ll need:

  • 2 cups all-purpose flour
  • 1/2 teaspoon baking soda
  • 1/2 teaspoon salt
  • 1 cup unsalted butter, softened (2 sticks)
  • 1 cup granulated sugar
  • 1/2 cup packed brown sugar
  • 2 large eggs
  • 1 teaspoon vanilla extract
  • 1 cup chocolate chips
  • 1 cup chopped pecans or walnuts (optional)
  • 1 cup mini croissants, chopped

These ingredients come together to create a cookie that is both rich and satisfying. The unsalted butter provides a creamy base, while the sugars add sweetness and depth. The mini croissants are the star of the show, giving the cookies their unique texture. Feel free to customize your cookie by adding your favorite nuts or even swapping out the chocolate chips for dried fruit. The possibilities are endless!

Step-by-Step Preparation of Croissant Cookie Delight Recipe

Now that you have all your ingredients ready, it’s time to dive into the fun part: making the Croissant Cookie Delight! Follow these simple steps to create your delicious cookies. Each step is designed to ensure that your cookies turn out perfectly every time.

Step 1: Preparing the Dough

Start by preheating your oven to 350°F. This ensures that your cookies bake evenly. Next, grab a medium bowl and whisk together the all-purpose flour, baking soda, and salt. This mixture is essential for the structure of your cookies. Set it aside for now.

In a large mixing bowl, cream together the softened unsalted butter, granulated sugar, and brown sugar. Use an electric mixer for about 2-3 minutes until the mixture is light and fluffy. This step is crucial as it incorporates air into the dough, making your cookies soft and tender.

Once your butter and sugars are well combined, add the eggs one at a time. Mix well after each addition to ensure everything is blended smoothly. Finally, stir in the vanilla extract for that lovely aroma and flavor.

Now, gradually add the dry ingredients to the wet mixture. Mix until just combined; over-mixing can lead to tough cookies. Gently fold in the chocolate chips, chopped nuts (if using), and the chopped mini croissants. This is where the magic happens, as the croissants add a unique texture to your dough!

Step 2: Shaping the Cookies

With your dough ready, it’s time to shape the cookies. Use a tablespoon to scoop out portions of dough. Roll each portion into a ball and place them on the prepared baking sheet. Make sure to space them about 2 inches apart. This allows room for the cookies to spread while baking.

If you want to make your cookies look extra special, you can slightly flatten each ball with your fingers. This will give them a nice, rustic appearance. Plus, it helps them bake evenly!

Step 3: Baking the Croissant Cookies

Now, it’s time to bake! Place the baking sheet in the preheated oven and bake for 12-15 minutes. Keep an eye on them; you want the edges to turn golden brown while the centers remain soft. The aroma of baking cookies will fill your kitchen, making it hard to wait!

Once they’re done, remove the baking sheet from the oven. Let the cookies cool on the sheet for about 5 minutes. This allows them to set before transferring them to a wire rack.

Step 4: Cooling and Serving

After the cookies have cooled for a few minutes, carefully transfer them to a wire rack. This step is important as it prevents them from becoming soggy. Allow the cookies to cool completely before serving. They are best enjoyed fresh but can be stored in an airtight container for a few days.

Now that you’ve mastered the preparation of the Croissant Cookie Delight, you’re ready to impress your family and friends with this unique treat. Enjoy every bite of your delicious creation!

Variations of Croissant Cookie Delight Recipe

While the classic Croissant Cookie Delight is already a treat, there are many fun variations you can try! Each version brings its own unique twist, allowing you to customize the flavors to suit your taste. Here are two delightful variations to consider:

Chocolate Chip Croissant Cookie Delight

If you’re a chocolate lover, this variation is for you! The Chocolate Chip Croissant Cookie Delight takes the original recipe and amps up the chocolate flavor. To make this version, simply increase the amount of chocolate chips to 1.5 cups. You can also mix in different types of chocolate, like dark or white chocolate, for a fun surprise in every bite. The gooey chocolate combined with the flaky croissant pieces creates a rich and indulgent cookie that’s hard to resist!

Nutty Croissant Cookie Delight

For those who enjoy a bit of crunch, the Nutty Croissant Cookie Delight is a fantastic option. In this variation, you can add 1 cup of chopped pecans or walnuts to the dough. The nuts not only add texture but also enhance the flavor profile of the cookies. If you want to take it a step further, consider toasting the nuts before adding them to the dough. This will bring out their natural oils and deepen their flavor, making your cookies even more delicious!

Feel free to mix and match these variations or even create your own! The beauty of the Croissant Cookie Delight Recipe is its versatility. Whether you prefer chocolatey, nutty, or a combination of both, there’s a perfect cookie waiting for you to discover!

Cooking Note for Croissant Cookie Delight Recipe

When it comes to baking the Croissant Cookie Delight, a few tips can help you achieve the best results. First, always ensure your ingredients are at room temperature. This includes the butter and eggs. Room temperature ingredients blend more easily, resulting in a smoother dough.

Next, be mindful of your oven temperature. Ovens can vary, so it’s a good idea to use an oven thermometer to check accuracy. If your oven runs hot, your cookies may bake too quickly, leading to a dry texture. Conversely, if it’s too cool, they may spread too much and lose their shape.

Another important note is to avoid over-mixing the dough. Once you add the dry ingredients, mix just until combined. Over-mixing can develop gluten, making your cookies tough instead of tender. Remember, a few lumps are perfectly fine!

Lastly, if you want to enhance the flavor, consider adding a sprinkle of sea salt on top of the cookies before baking. This small touch can elevate the sweetness and create a delightful contrast. Enjoy the process, and don’t hesitate to experiment with different ingredients to make this recipe your own!

Serving Suggestions for Croissant Cookie Delight Recipe

Once your Croissant Cookie Delight is baked and cooled, it’s time to think about how to serve these delicious treats. Presentation and pairing can elevate your cookie experience, making it even more enjoyable for you and your guests. Here are some delightful serving suggestions to consider.

Pairing with Beverages

Choosing the right beverage can enhance the flavors of your Croissant Cookie Delight. Here are a few pairing ideas:

  • Coffee: A warm cup of coffee complements the buttery richness of the cookies. The slight bitterness of coffee balances the sweetness perfectly.
  • Tea: A fragrant herbal tea, like chamomile or mint, can provide a refreshing contrast to the cookies. The lightness of tea allows the cookie flavors to shine.
  • Milk: For a classic pairing, serve your cookies with a glass of cold milk. The creaminess of milk pairs wonderfully with the chocolate and buttery notes.
  • Hot Chocolate: If you’re in the mood for something indulgent, a cup of hot chocolate can be a delightful treat. The rich chocolate flavor will enhance the chocolate chips in the cookies.

Feel free to experiment with different beverages to find your perfect match. Each pairing can create a unique tasting experience!

Presentation Ideas

How you present your Croissant Cookie Delight can make a big difference. Here are some creative ideas to impress your guests:

  • Cookie Platter: Arrange your cookies on a beautiful platter. You can add some fresh fruits, like strawberries or raspberries, for a pop of color and freshness.
  • Decorative Jars: Place the cookies in clear glass jars tied with a ribbon. This not only looks charming but also keeps the cookies fresh.
  • Serving with Dips: Consider serving your cookies with a side of chocolate or caramel sauce for dipping. This adds an interactive element to your dessert.
  • Cookie Stacks: Stack a few cookies on top of each other and secure them with a toothpick. This creates a fun and whimsical presentation.

With these serving suggestions, your Croissant Cookie Delight will not only taste amazing but also look stunning. Enjoy sharing these delightful cookies with family and friends!

Tips for Perfecting Your Croissant Cookie Delight Recipe

To ensure your Croissant Cookie Delight turns out perfectly every time, consider these helpful tips. Each suggestion is designed to enhance your baking experience and improve the final result. Let’s dive into some expert advice!

First, always measure your ingredients accurately. Using a kitchen scale can help you get precise measurements, especially for flour. Too much flour can lead to dry cookies, while too little can make them too gooey. Remember, baking is a science!

Next, don’t skip the creaming step. Creaming the butter and sugars together until light and fluffy is crucial. This process incorporates air into the mixture, resulting in a lighter cookie. Take your time with this step for the best texture.

When adding the chocolate chips and nuts, fold them in gently. This helps maintain the airiness of the dough. Over-mixing can deflate the mixture, leading to denser cookies. A gentle touch goes a long way!

Another tip is to chill your dough for about 30 minutes before baking. Chilling helps the cookies hold their shape and prevents excessive spreading. It also enhances the flavors as they meld together during the resting period.

Keep an eye on your cookies while they bake. Ovens can vary, so check them a minute or two before the suggested baking time. You want the edges to be golden brown, while the centers should look slightly underbaked. They will continue to cook as they cool.

Lastly, store your cookies properly. To keep them fresh, place them in an airtight container at room temperature. If you want to keep them longer, consider freezing them. Just make sure to separate layers with parchment paper to prevent sticking.

By following these tips, you’ll be well on your way to mastering the Croissant Cookie Delight Recipe. Happy baking!

Breakdown of Time for Croissant Cookie Delight Recipe

Understanding the time needed for each step of the Croissant Cookie Delight Recipe can help you plan your baking session better. Here’s a simple breakdown of the time required for preparation, cooking, and the total time needed to enjoy these delicious cookies.

Prep Time

The prep time for the Croissant Cookie Delight is approximately 20-25 minutes. This includes gathering your ingredients, measuring them accurately, and mixing the dough. Make sure to set aside enough time to cream the butter and sugars properly, as this step is crucial for achieving the right texture.

Cooking Time

Once your dough is ready, the cooking time is about 12-15 minutes. Keep an eye on the cookies as they bake, ensuring the edges turn golden brown while the centers remain soft. Remember, every oven is different, so checking a minute or two early can help you avoid overbaking.

Total Time

In total, you can expect to spend around 35-40 minutes from start to finish. This includes both prep and cooking time. After baking, allow an additional 5 minutes for the cookies to cool on the baking sheet before transferring them to a wire rack. With this timeline, you’ll be enjoying your Croissant Cookie Delight in no time!

Nutritional Information for Croissant Cookie Delight Recipe

Understanding the nutritional content of your Croissant Cookie Delight is essential for making informed choices. This delightful treat not only satisfies your sweet tooth but also provides a balance of nutrients. Here’s a breakdown of the nutritional information per serving, based on a total of 24 cookies.

Calories

Each Croissant Cookie Delight contains approximately 210 calories. This calorie count includes the rich ingredients like butter and sugars, which contribute to the overall energy content. While enjoying these cookies, it’s good to be mindful of portion sizes, especially if you’re watching your calorie intake.

Protein

In terms of protein, each cookie offers about 2 grams. The protein comes primarily from the eggs and nuts (if added). While this isn’t a high-protein treat, it does provide a small boost, making it a delightful snack option when paired with a protein-rich beverage like milk.

Sodium

The sodium content in each cookie is around 100 milligrams. This amount is relatively low, especially considering the delicious flavors packed into each bite. However, if you’re watching your sodium intake, you might want to keep this in mind, especially if you choose to add salted nuts or sprinkle sea salt on top before baking.

Overall, the Croissant Cookie Delight Recipe offers a tasty balance of flavors and textures while providing a reasonable nutritional profile. Enjoy these cookies as an occasional treat, and feel free to share them with friends and family!

FAQs about Croissant Cookie Delight Recipe

Can I make Croissant Cookie Delight ahead of time?

Absolutely! You can prepare the dough for your Croissant Cookie Delight ahead of time. After mixing the dough, simply wrap it tightly in plastic wrap and refrigerate it for up to 2 days. When you’re ready to bake, scoop out the desired amount of dough and let it sit at room temperature for about 10-15 minutes before baking. This will help the cookies bake evenly and maintain their delightful texture.

What can I substitute for butter in the Croissant Cookie Delight Recipe?

If you’re looking for a butter substitute, there are several options you can try. For a dairy-free version, you can use coconut oil or a plant-based butter alternative. Both options will provide a similar richness to your cookies. If you prefer a healthier option, unsweetened applesauce or mashed bananas can also work, but keep in mind that they may alter the flavor and texture slightly. Experimenting with these substitutes can lead to delicious results!

How do I store leftover Croissant Cookie Delight?

To keep your leftover Croissant Cookie Delight fresh, store them in an airtight container at room temperature. This will help maintain their chewy texture and prevent them from becoming stale. If you want to keep them for a longer period, consider freezing the cookies. Place them in a freezer-safe bag or container, separating layers with parchment paper to avoid sticking. When you’re ready to enjoy them, simply thaw at room temperature or warm them in the oven for a few minutes.

Conclusion on Croissant Cookie Delight Recipe

In conclusion, the Croissant Cookie Delight Recipe is a delightful fusion of textures and flavors that brings joy to any baking occasion. This unique treat combines the flaky goodness of croissants with the chewy satisfaction of cookies, creating a dessert that is both comforting and indulgent. Whether you’re baking for a special event or simply treating yourself, these cookies are sure to impress.

With simple ingredients and straightforward steps, anyone can master this recipe. The versatility of the Croissant Cookie Delight allows for endless variations, whether you prefer extra chocolate, nuts, or even dried fruits. Each bite offers a delightful surprise, making it a fun experience for both bakers and eaters alike.

As you embark on your baking journey, remember to enjoy the process. Baking is not just about the final product; it’s about the joy of creating something delicious. Share your Croissant Cookie Delight with family and friends, and watch their faces light up with delight. With this recipe in your repertoire, you’ll always have a crowd-pleaser on hand.

So, gather your ingredients, preheat your oven, and get ready to bake some unforgettable cookies. The Croissant Cookie Delight is waiting to be enjoyed, and we can’t wait for you to experience the magic of this delightful treat!

Paul

Croissant Cookie Delight Recipe is a must-try treat!

A viral dessert mashup you didn’t know you needed—crispy, buttery croissants stuffed with gooey chocolate chip cookie dough, baked to golden perfection. The Crookie is an irresistible combination of flaky pastry and chewy cookie bliss with a touch of sea salt and melted chocolate. Serve warm for maximum swoon!
Prep Time 10 minutes
Cook Time 15 minutes
Total Time 25 minutes
Servings: 4 servings
Course: Dessert
Cuisine: Fusion / Viral-Inspired

Ingredients
  

  • Croissants preferably day-old for easy slicing
  • Chocolate chip cookie dough store-bought or homemade
  • Dark chocolate roughly chopped (optional but highly recommended)
  • Sea salt for sprinkling (optional)
  • Icing sugar for dusting (optional)

Method
 

  1. Preheat the Oven:Preheat your oven to 350°F (180°C) or 160°C fan.
  2. Prepare the Croissants:Using a serrated knife, carefully slice each croissant lengthwise, like a sandwich, but don’t cut all the way through.
  3. Stuff with Cookie Dough:Fill the inside of each croissant with room temperature cookie dough. Add any extra dough on top for a more indulgent finish.
  4. Add Dark Chocolate (Optional):Tuck a few chunks of dark chocolate inside and press some onto the top for extra richness and meltiness.
  5. Bake:Place the stuffed croissants on a lined baking tray and bake for 12–15 minutes, or until the cookie dough is golden and just set.
  6. Finish and Serve:Drizzle with melted chocolate, sprinkle with sea salt, and dust with icing sugar if desired. Serve warm while gooey!

Notes

  • Use croissants that are at least half a day old—they slice and hold their shape better.
  • Homemade cookie dough gives you better flavor control, but store-bought works well too.
  • Add chopped nuts, caramel chips, or peanut butter chips to mix it up.
  • Best enjoyed fresh from the oven, but can be reheated in a toaster oven for a quick dessert fix.

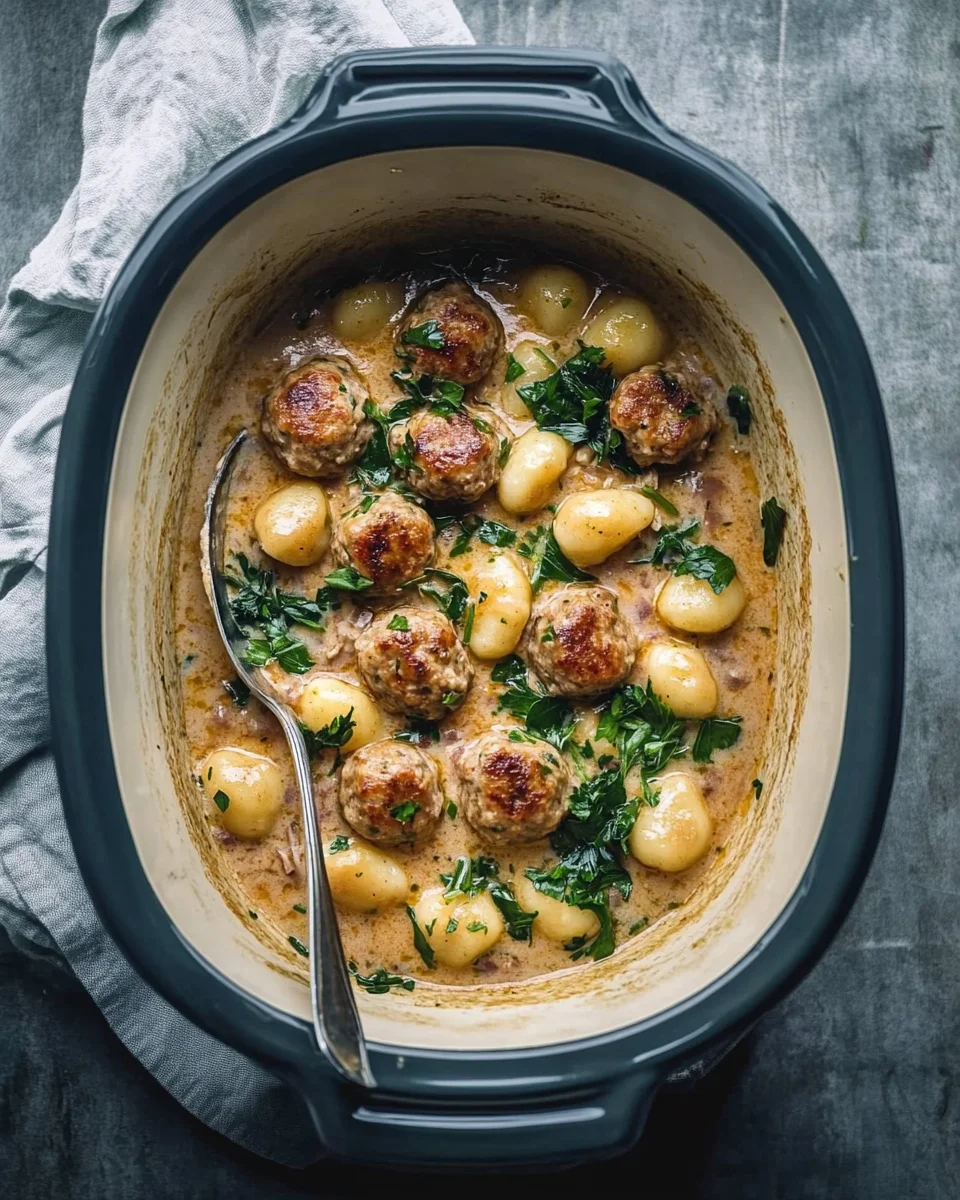
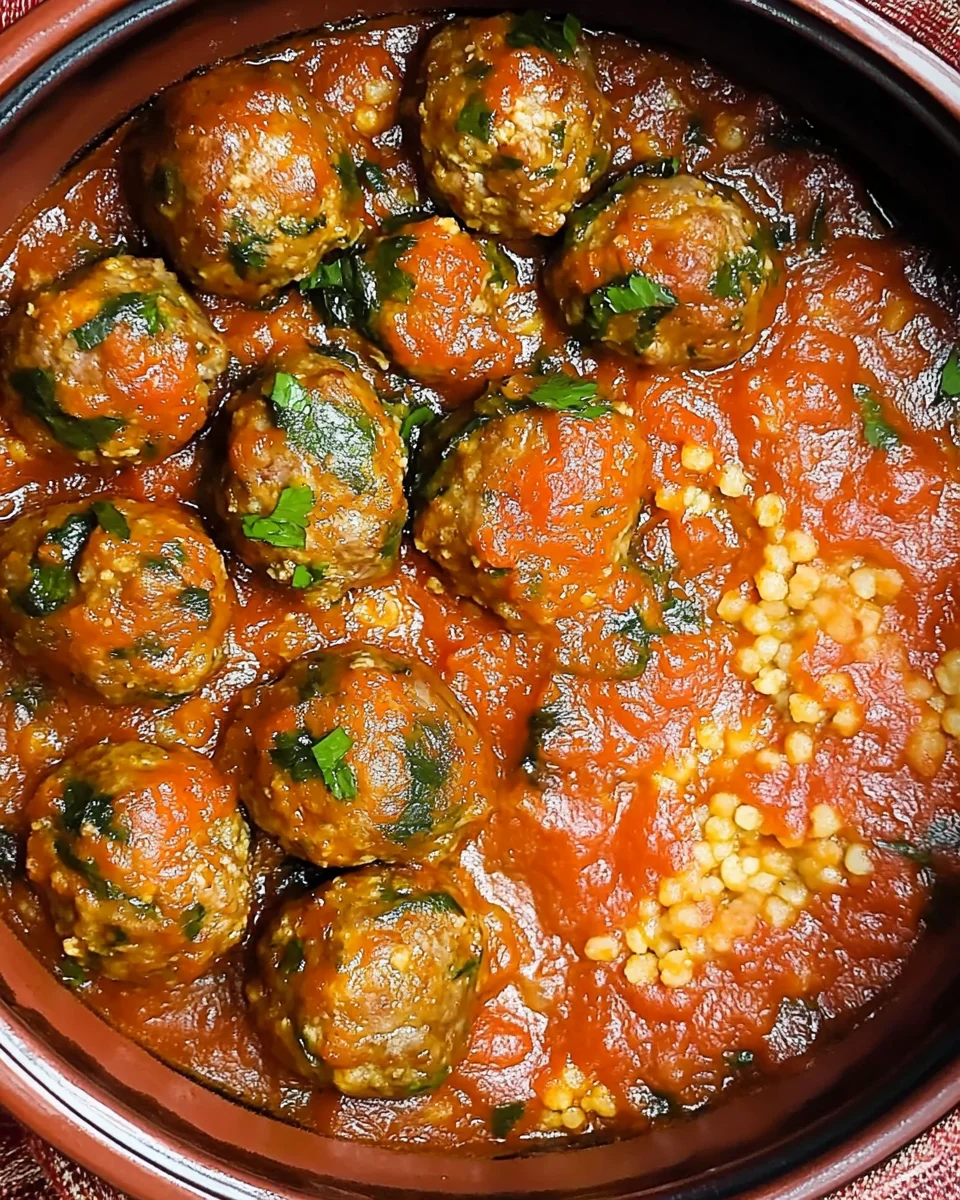
Tuscan Chicken Meatballs with Gnocchi are delicious!

Welcome to the delightful world of Tuscan Chicken Meatballs with Gnocchi! This dish is a perfect blend of flavors that transports you straight to the heart of Italy. Imagine tender chicken meatballs, infused with aromatic herbs, swimming in a rich marinara sauce, all served over soft, pillowy gnocchi. It’s a comforting meal that’s not only delicious but also easy to prepare.

Whether you’re cooking for your family or hosting friends, this recipe is sure to impress. The combination of ground chicken and fresh herbs creates a light yet satisfying meatball. Plus, the addition of gnocchi makes it a hearty dish that everyone will love. With just a few simple ingredients, you can create a meal that feels special without spending hours in the kitchen.

In this article, we’ll guide you through the ingredients, preparation steps, and even some variations to make this dish your own. So, roll up your sleeves and get ready to enjoy a taste of Tuscany right at your dining table!

Ingredients for Tuscan Chicken Meatballs and Gnocchi

To create the mouthwatering Tuscan Chicken Meatballs with Gnocchi, you’ll need a selection of fresh and flavorful ingredients. Each component plays a vital role in bringing this dish to life. Here’s what you’ll need:

  • 1 pound ground chicken: This is the star of the dish, providing a lean protein base.
  • 1/2 cup grated Parmesan cheese: Adds a rich, savory flavor to the meatballs.
  • 1/4 cup breadcrumbs: Helps bind the meatballs together while keeping them tender.
  • 1 large egg: Acts as a binding agent, ensuring the meatballs hold their shape.
  • 2 cloves garlic, minced: Infuses the meatballs with a delicious aroma and taste.
  • 1 teaspoon dried oregano: A classic herb that enhances the Italian flavor profile.
  • 1 teaspoon dried basil: Complements the oregano and adds freshness.
  • 1/2 teaspoon salt: Essential for seasoning the meatballs.
  • 1/4 teaspoon black pepper: Adds a hint of spice to the dish.
  • 1/4 cup fresh parsley, chopped: Provides a burst of color and freshness.
  • 1 jar (24 ounces) marinara sauce: The perfect sauce to coat the meatballs and gnocchi.
  • 1 package (16 ounces) potato gnocchi: Soft and pillowy, these dumplings are a delightful addition.
  • 1 cup baby spinach: Adds a nutritious touch and vibrant color.
  • 1/2 cup heavy cream: Makes the sauce creamy and rich.
  • 1/2 cup shredded mozzarella cheese: Melts beautifully on top for a cheesy finish.

With these ingredients, you’re well on your way to creating a delicious meal that’s sure to please everyone at the table. Gather them up, and let’s move on to the preparation steps!

Preparation of Tuscan Chicken Meatballs and Gnocchi

Now that you have all your ingredients ready, it’s time to dive into the preparation of your Tuscan Chicken Meatballs with Gnocchi. This process is straightforward and fun, making it a great activity for both novice and experienced cooks. Let’s break it down into easy steps!

Step 1: Preparing the Chicken Meatballs

First, grab a large mixing bowl. In this bowl, combine the ground chicken, grated Parmesan cheese, breadcrumbs, and the large egg. Next, add the minced garlic, dried oregano, dried basil, salt, pepper, and chopped parsley. Use your hands to mix everything together until it’s well combined. Don’t overmix, as this can make the meatballs tough. Once mixed, form the mixture into meatballs, about 1 inch in diameter. This size is perfect for cooking evenly and fitting nicely in the sauce.

Step 2: Cooking the Gnocchi

While the meatballs are resting, it’s time to prepare the gnocchi. Bring a large pot of salted water to a boil. Once boiling, add the potato gnocchi. Cook them according to the package instructions, usually just a few minutes until they float to the surface. This indicates they are done. Once cooked, drain the gnocchi and set them aside. They will be added to the slow cooker later, so keep them warm.

Step 3: Combining Ingredients for the Sauce

Now, let’s focus on the marinara sauce. In your slow cooker, pour half of the marinara sauce on the bottom. This layer will help keep the meatballs moist as they cook. Next, carefully place the prepared meatballs on top of the sauce in a single layer. Once the meatballs are arranged, pour the remaining marinara sauce over them. This ensures that every meatball is coated in that delicious sauce, enhancing the flavor.

Step 4: Final Assembly of Tuscan Chicken Meatballs and Gnocchi

Cover the slow cooker and set it to cook on low for 4 hours or on high for 2 hours. About 30 minutes before serving, add the cooked gnocchi and baby spinach to the slow cooker. Gently stir to combine everything, ensuring the gnocchi and spinach are well distributed. In the last 10 minutes of cooking, stir in the heavy cream and sprinkle the shredded mozzarella cheese on top. Cover again and let the cheese melt into a gooey, delicious topping. Once everything is cooked, you’re ready to serve!

Variation of Tuscan Chicken Meatballs and Gnocchi

While the classic Tuscan Chicken Meatballs with Gnocchi is a delightful dish, there are many ways to switch things up! Whether you want to try different flavors or cater to dietary preferences, these variations will keep your meals exciting. Let’s explore some alternative ingredients for the meatballs and different sauces to pair with gnocchi.

Alternative Ingredients for Meatballs

If you’re looking to change the flavor profile of your meatballs, consider these alternatives:

  • Ground Turkey: A leaner option, ground turkey offers a similar texture with a slightly different taste. It’s a great substitute for those watching their fat intake.
  • Ground Beef: For a heartier flavor, ground beef can be used. It adds richness and pairs well with the marinara sauce.
  • Vegetarian Option: For a meatless version, try using lentils or chickpeas. Mash them up and mix with breadcrumbs, egg, and spices to form meatballs.
  • Spices and Herbs: Feel free to experiment with different herbs like thyme or rosemary. Adding a pinch of red pepper flakes can give your meatballs a spicy kick!

These alternatives not only change the taste but also allow you to cater to different dietary needs. So, don’t hesitate to get creative!

Different Sauces to Pair with Gnocchi

While marinara sauce is a classic choice, there are many other sauces that can elevate your gnocchi experience:

  • Pesto Sauce: A vibrant basil pesto adds a fresh and herby flavor. It’s perfect for a lighter meal.
  • Alfredo Sauce: For a creamy twist, try a homemade or store-bought Alfredo sauce. It pairs beautifully with the soft gnocchi.
  • Brown Butter Sage Sauce: This simple sauce made with browned butter and fresh sage creates a nutty flavor that complements the gnocchi perfectly.
  • Tomato Cream Sauce: Combine marinara with heavy cream for a rich, velvety sauce that’s sure to please.

These sauce options can transform your Tuscan Chicken Meatballs with Gnocchi into a whole new dish. Feel free to mix and match to find your favorite combination!

Cooking Note for Tuscan Chicken Meatballs and Gnocchi

Cooking Tuscan Chicken Meatballs with Gnocchi is a delightful experience, but there are a few important notes to keep in mind to ensure your dish turns out perfectly. These tips will help you navigate the cooking process smoothly and achieve the best flavors.

First, when preparing the meatballs, make sure to handle the mixture gently. Overmixing can lead to tough meatballs. Just combine the ingredients until they are well mixed, and then form them into balls. This will keep them tender and juicy.

Next, if you’re using a slow cooker, remember that cooking times can vary based on the model. If you find that your meatballs are not fully cooked after the suggested time, simply let them cook a bit longer. The meatballs should reach an internal temperature of 165°F (75°C) for safe consumption.

Additionally, when adding the gnocchi and spinach, do so gently. Stir carefully to avoid breaking the gnocchi, which can become mushy if handled too roughly. The spinach will wilt quickly, so adding it towards the end of the cooking time ensures it retains its vibrant color and nutrients.

Lastly, for a richer flavor, consider sautéing the garlic in olive oil before adding it to the meatball mixture. This step enhances the garlic’s sweetness and aroma, giving your meatballs an extra layer of flavor.

By keeping these cooking notes in mind, you’ll create a delicious and satisfying meal that everyone will enjoy. Happy cooking!

Serving Suggestions for Tuscan Chicken Meatballs and Gnocchi

Once your Tuscan Chicken Meatballs with Gnocchi are ready, it’s time to think about how to serve this delightful dish. Presentation can elevate your meal, making it even more enjoyable. Here are some serving suggestions to enhance your dining experience:

  • Garnish with Fresh Herbs: A sprinkle of fresh parsley or basil on top of your dish adds a pop of color and freshness. It also enhances the overall flavor.
  • Pair with a Side Salad: A light side salad with mixed greens, cherry tomatoes, and a simple vinaigrette complements the richness of the meatballs and gnocchi. It adds a refreshing crunch to your meal.
  • Serve with Crusty Bread: A slice of warm, crusty bread is perfect for soaking up the delicious marinara sauce. It’s a classic Italian pairing that everyone loves.
  • Offer Grated Cheese: Provide extra grated Parmesan or mozzarella cheese at the table. Guests can sprinkle it on their servings for an added cheesy goodness.
  • Wine Pairing: Consider serving a glass of red wine, such as Chianti or Sangiovese. These wines complement the flavors of the dish beautifully.

These serving suggestions not only enhance the visual appeal of your meal but also add layers of flavor and texture. Enjoy your Tuscan Chicken Meatballs with Gnocchi in style, and watch as your family and friends savor every bite!

Tips for Perfecting Tuscan Chicken Meatballs and Gnocchi

Creating the perfect Tuscan Chicken Meatballs with Gnocchi is all about attention to detail. With a few simple tips, you can elevate your dish to restaurant-quality. Here are some helpful suggestions to ensure your meal is a hit every time!

  • Use Fresh Ingredients: Whenever possible, opt for fresh herbs and high-quality chicken. Fresh ingredients enhance the flavors and make a noticeable difference in your dish.
  • Don’t Skip the Resting Time: After forming the meatballs, let them rest in the fridge for about 30 minutes. This helps them hold their shape better during cooking.
  • Adjust Seasoning: Taste your meatball mixture before cooking. If you feel it needs more flavor, don’t hesitate to add a pinch of salt or extra herbs. Remember, seasoning is key!
  • Monitor Cooking Time: Keep an eye on the cooking time in your slow cooker. If you’re using a different model, check the meatballs for doneness a bit earlier than suggested.
  • Experiment with Cheese: While mozzarella is a classic choice, try mixing in different cheeses like fontina or provolone for a unique flavor twist.
  • Make it Ahead: If you’re short on time, prepare the meatballs a day in advance. Store them in the fridge and cook them the next day. This can enhance the flavors as they marinate overnight.
  • Serve Immediately: For the best texture, serve the dish right after cooking. Gnocchi can become mushy if left in the sauce for too long.
  • Garnish Creatively: Get creative with your garnishes! Besides parsley, consider using lemon zest or a drizzle of balsamic glaze for an extra pop of flavor.

By following these tips, you’ll be well on your way to mastering Tuscan Chicken Meatballs with Gnocchi. Each step you take will bring you closer to a delicious and satisfying meal that everyone will love. Happy cooking!

Breakdown of Time for Tuscan Chicken Meatballs and Gnocchi

Understanding the time required for each step in preparing Tuscan Chicken Meatballs with Gnocchi can help you plan your cooking efficiently. Here’s a simple breakdown of the time you’ll need for preparation and cooking.

Prep Time

The prep time for this delicious dish is approximately 20 to 30 minutes. This includes gathering your ingredients, mixing the meatball mixture, and forming the meatballs. If you choose to sauté the garlic for added flavor, factor in an extra 5 minutes. Taking your time during this step ensures that your meatballs are well-prepared and flavorful.

Cooking Time

Once your meatballs are ready, the cooking time in the slow cooker is about 4 hours on low or 2 hours on high. This slow cooking allows the flavors to meld beautifully, resulting in tender meatballs. Remember to add the gnocchi and spinach about 30 minutes before serving, and stir in the heavy cream and mozzarella cheese during the last 10 minutes of cooking. This timing is crucial for achieving the perfect texture and flavor.

Total Time

In total, you can expect to spend around 4 hours and 30 minutes to 5 hours for the entire process, including both prep and cooking time. This makes it a great option for a weekend meal or a cozy family dinner. With minimal hands-on time, you can enjoy other activities while your Tuscan Chicken Meatballs with Gnocchi cook to perfection!

Nutritional Information for Tuscan Chicken Meatballs and Gnocchi

Understanding the nutritional content of your meals is essential for maintaining a balanced diet. Tuscan Chicken Meatballs with Gnocchi not only offer delightful flavors but also provide a good source of nutrients. Here’s a breakdown of the nutritional information per serving, so you can enjoy this dish while being mindful of your dietary needs.

Calories

Each serving of Tuscan Chicken Meatballs with Gnocchi contains approximately 540 calories. This calorie count includes the meatballs, gnocchi, marinara sauce, and the creamy additions. It’s a satisfying meal that provides energy without being overly heavy. If you’re looking to reduce calories, consider adjusting portion sizes or using less cream and cheese.

Protein

One of the standout features of this dish is its protein content. Each serving provides about 35 grams of protein. The ground chicken and cheese contribute significantly to this number, making it a great option for those looking to increase their protein intake. Protein is essential for muscle repair and overall health, making this meal a nutritious choice.

Sodium

When it comes to sodium, each serving contains around 800 milligrams. This amount can vary based on the marinara sauce used and any additional seasonings. If you’re watching your sodium intake, consider using low-sodium marinara sauce or reducing the amount of added salt in the meatball mixture. Balancing flavors while keeping sodium in check is key to a healthy meal.

Overall, Tuscan Chicken Meatballs with Gnocchi is a well-rounded dish that offers a good balance of calories, protein, and flavor. Enjoy this hearty meal knowing it can fit into a healthy eating plan!

FAQs about Tuscan Chicken Meatballs and Gnocchi

What can I serve with Tuscan Chicken Meatballs and Gnocchi?

When it comes to serving Tuscan Chicken Meatballs with Gnocchi, there are plenty of delicious options to consider. A light side salad is a great choice, as it adds freshness and crunch. You can mix greens with cherry tomatoes, cucumbers, and a simple vinaigrette for a refreshing contrast to the rich meatballs.

Another fantastic option is crusty bread. A warm, crusty loaf is perfect for soaking up the marinara sauce. You might also consider serving roasted vegetables, such as zucchini or bell peppers, to add color and nutrition to your meal. Lastly, a glass of red wine, like Chianti, pairs beautifully with the flavors of this dish, enhancing the overall dining experience.

Can I make Tuscan Chicken Meatballs and Gnocchi ahead of time?

Absolutely! Making Tuscan Chicken Meatballs with Gnocchi ahead of time is a great way to save time on busy days. You can prepare the meatballs and store them in the refrigerator for up to 24 hours before cooking. Just remember to cover them tightly to keep them fresh.

If you want to prepare the entire dish in advance, you can cook the meatballs and gnocchi, then store them in an airtight container in the fridge. When you’re ready to serve, simply reheat everything in the slow cooker or on the stovetop until warmed through. This makes it a convenient option for meal prep or entertaining guests!

How do I store leftovers of Tuscan Chicken Meatballs and Gnocchi?

Storing leftovers of Tuscan Chicken Meatballs with Gnocchi is easy! Allow the dish to cool completely before transferring it to an airtight container. You can store it in the refrigerator for up to 3 days. When reheating, be sure to warm it gently on the stovetop or in the microwave, adding a splash of water or broth if needed to keep it moist.

If you want to keep it longer, consider freezing the leftovers. Place the meatballs and gnocchi in a freezer-safe container, and they can last for up to 3 months. To reheat, thaw overnight in the fridge and then warm it up as mentioned earlier. This way, you can enjoy this delicious meal even on your busiest days!

Are there gluten-free options for Tuscan Chicken Meatballs and Gnocchi?

Yes, there are gluten-free options for Tuscan Chicken Meatballs with Gnocchi! To make the meatballs gluten-free, simply substitute regular breadcrumbs with gluten-free breadcrumbs or crushed gluten-free crackers. This will help bind the meatballs without compromising flavor.

For the gnocchi, look for gluten-free potato gnocchi available in many grocery stores. These alternatives allow you to enjoy this delicious dish without gluten, making it suitable for those with gluten sensitivities or celiac disease. Always check the labels to ensure all ingredients meet your dietary needs!

Conclusion on Tuscan Chicken Meatballs and Gnocchi

In conclusion, Tuscan Chicken Meatballs with Gnocchi is a delightful dish that brings the flavors of Italy right to your kitchen. This recipe is not only easy to prepare but also offers a comforting and satisfying meal for family and friends. The combination of tender chicken meatballs, rich marinara sauce, and soft gnocchi creates a harmonious blend of textures and tastes that everyone will love.

As you’ve seen, there are numerous ways to customize this dish to suit your preferences. Whether you choose to experiment with different meats, sauces, or even add vegetables, the possibilities are endless. This flexibility makes it a fantastic option for any occasion, from casual weeknight dinners to special gatherings.

Moreover, the nutritional benefits of this meal, including its protein content and hearty ingredients, make it a wholesome choice. With careful attention to cooking techniques and ingredient quality, you can create a dish that is both delicious and nourishing.

So, gather your ingredients, follow the steps, and enjoy the process of making Tuscan Chicken Meatballs with Gnocchi. We hope this recipe inspires you to bring a taste of Tuscany into your home. Happy cooking, and bon appétit!

Paul

Tuscan Chicken Meatballs with Gnocchi are delicious!

Tender chicken meatballs simmered in a creamy Tuscan-style sauce with sun-dried tomatoes, baby spinach, and pillowy gnocchi—this slow cooker dinner is hearty, comforting, and bursting with Italian-inspired flavor. Perfect for busy nights when you still want something cozy and homemade!
Prep Time 20 minutes
Cook Time 3 hours 30 minutes
Total Time 3 hours 50 minutes
Servings: 6 servings
Course: Dinner
Cuisine: Italian-inspired

Ingredients
  

For the Chicken Meatballs:
  • 1 pound ground chicken or turkey
  • ½ cup sun-dried tomatoes drained (reserve the oil)
  • 1 onion roughly chopped
  • 3 garlic cloves
  • A handful of fresh basil leaves
  • 1 large egg
  • 1 teaspoon Italian seasoning
  • 1 teaspoon garlic powder
  • ½ teaspoon ground black pepper
  • 3 tablespoons grated Parmesan cheese
  • ½ cup Panko breadcrumbs add more if needed for consistency
  • 2 tablespoons reserved sun-dried tomato oil or olive oil
For the Tuscan Sauce and Gnocchi:
  • ¼ cup dry white wine
  • 2 cups chicken broth
  • ½ cup chopped sun-dried tomatoes
  • ½ cup heavy cream or half-and-half
  • 3 tablespoons grated Parmesan plus more for serving
  • 17.5 ounces fresh potato gnocchi
  • 7 ounces baby spinach roughly chopped
  • Cornstarch slurry optional, for thickening

Method
 

  1. Prepare the Meatballs:In a food processor, blend onion, garlic, basil, and sun-dried tomatoes into a coarse paste. In a large bowl, combine the paste with ground chicken, egg, seasonings, Parmesan, and breadcrumbs. Mix until well combined. Using oiled hands or a scoop, form into small meatballs.
  2. Sear the Meatballs:Heat sun-dried tomato oil in a skillet or use your slow cooker’s sauté setting. Brown meatballs on all sides, about 5 minutes total. They don’t need to be fully cooked at this stage.
  3. Deglaze and Slow Cook:Deglaze the pan with white wine and simmer briefly. Transfer meatballs to the slow cooker. Add chicken broth. Cover and cook on HIGH for 2–3 hours or LOW for 4–5 hours.
  4. Add Sauce Ingredients:Stir in the cream, chopped sun-dried tomatoes, Parmesan, and gnocchi. Cover and cook on HIGH for an additional 20 minutes, until gnocchi are tender and the sauce thickens.
  5. Finish with Spinach:Stir in chopped spinach and cook just until wilted. If desired, add a cornstarch slurry to thicken the sauce. Taste and adjust seasoning as needed.
  6. Serve:Ladle into bowls, sprinkle with more Parmesan, and serve hot!

Notes

  • Make the meatballs ahead and freeze for an even quicker meal later.
  • Swap gnocchi for cooked pasta stirred in at the end, if desired.
  • You can use half-and-half for a lighter sauce, or cashew cream for a dairy-free option.
  • Leftovers store well in the fridge for up to 3 days and reheat beautifully.

Vegetable Stir-Fry Recipe: Quick and Healthy Delight!

What is a Vegetable Stir-Fry Recipe?

A vegetable stir-fry recipe is a quick and easy way to prepare a colorful mix of fresh vegetables. This cooking method involves frying vegetables in a small amount of oil over high heat while stirring constantly. The result is a delicious dish that retains the vibrant colors and nutrients of the vegetables. You can customize your stir-fry with various ingredients, making it a versatile option for any meal. Whether you’re a seasoned chef or a beginner, this recipe is perfect for anyone looking to enjoy a healthy and tasty dish.

Benefits of Making a Vegetable Stir-Fry Recipe at Home

Making a vegetable stir-fry recipe at home comes with numerous benefits. First, it allows you to control the ingredients, ensuring you use fresh and healthy options. You can choose organic vegetables and adjust the seasonings to suit your taste. Additionally, cooking at home is often more economical than dining out. You can prepare a large batch and enjoy leftovers, saving both time and money.

Another advantage is the speed of preparation. A vegetable stir-fry can be ready in under 30 minutes, making it an ideal choice for busy weeknights. Plus, it’s a great way to incorporate more vegetables into your diet. With a variety of colors and textures, a stir-fry is not only nutritious but also visually appealing. So, gather your ingredients and get ready to whip up a delightful vegetable stir-fry!

Ingredients for Vegetable Stir-Fry Recipe

To create a delicious vegetable stir-fry recipe, you’ll need a variety of fresh ingredients. Here’s a list of what you’ll need:

  • 2 tablespoons vegetable oil
  • 1 cup broccoli florets
  • 1 cup bell peppers, sliced (any color)
  • 1 cup snap peas
  • 1 cup carrots, julienned
  • 1 cup mushrooms, sliced
  • 3 cloves garlic, minced
  • 1 tablespoon fresh ginger, minced
  • 3 tablespoons soy sauce
  • 1 tablespoon sesame oil
  • 1 teaspoon cornstarch mixed with 1 tablespoon water
  • Salt and pepper to taste
  • 2 green onions, sliced (for garnish)
  • Sesame seeds (for garnish)

These ingredients come together to create a vibrant and flavorful dish. The combination of fresh vegetables not only adds color but also provides essential nutrients. You can easily find these ingredients at your local grocery store or farmer’s market. Remember, the fresher the vegetables, the better your stir-fry will taste!

Feel free to adjust the quantities based on your preferences or the number of servings you need. The beauty of a vegetable stir-fry recipe is its flexibility. You can mix and match vegetables to suit your taste or what you have on hand. Now that you have your ingredients ready, let’s move on to the preparation steps!

Step-by-Step Preparation of Vegetable Stir-Fry Recipe

Step 1: Preparing Your Vegetables

Before you start cooking, it’s essential to prepare your vegetables properly. Begin by washing all your fresh produce under cold water. This step ensures that any dirt or pesticides are removed. Next, chop the vegetables into bite-sized pieces. For instance, cut the broccoli into small florets, slice the bell peppers, and julienne the carrots. The key is to make sure all the pieces are similar in size. This way, they will cook evenly. Once your vegetables are prepped, set them aside. You’re now ready to move on to the next step!

Step 2: Choosing the Right Oil for Your Vegetable Stir-Fry Recipe

Choosing the right oil is crucial for a successful vegetable stir-fry recipe. Vegetable oil is a popular choice because it has a high smoke point, making it perfect for high-heat cooking. However, you can also use oils like canola or peanut oil. These oils not only withstand high temperatures but also add a subtle flavor to your dish. Pour 2 tablespoons of your chosen oil into a large skillet or wok. Heat it over medium-high heat until it shimmers. This indicates that the oil is hot enough for cooking.

Step 3: Cooking the Vegetables in Your Vegetable Stir-Fry Recipe

Now it’s time to cook your vegetables! Start by adding the broccoli and carrots to the hot oil. Stir-fry them for about 3 minutes. This initial cooking time allows these denser vegetables to soften slightly. After that, add the bell peppers, snap peas, and mushrooms. Continue to stir-fry for another 3-4 minutes. You want all the vegetables to be tender-crisp, meaning they should still have a bit of crunch. Stirring constantly helps to prevent burning and ensures even cooking.

Step 4: Adding Sauces and Seasonings to Your Vegetable Stir-Fry Recipe

Once your vegetables are cooked to perfection, it’s time to add flavor! Stir in the minced garlic and ginger, cooking for an additional minute until fragrant. Then, pour in the soy sauce and sesame oil. These ingredients will coat the vegetables beautifully, enhancing their taste. To thicken the sauce, add the cornstarch mixture. Stir constantly until the sauce thickens slightly. Finally, season with salt and pepper to taste. Your vegetable stir-fry is now ready to be served!

Variation of Vegetable Stir-Fry Recipe

Different Vegetable Combinations for Your Vegetable Stir-Fry Recipe

One of the best things about a vegetable stir-fry recipe is its versatility. You can mix and match various vegetables to create a dish that suits your taste. For instance, if you want to add a bit of sweetness, consider including bell peppers or sweet corn. If you prefer a more earthy flavor, mushrooms and zucchini are excellent choices. You can also try adding leafy greens like spinach or bok choy for extra nutrition.

Here are some popular vegetable combinations to inspire your next stir-fry:

  • Broccoli, carrots, and bell peppers
  • Snow peas, mushrooms, and baby corn
  • Cauliflower, green beans, and red onions
  • Asparagus, zucchini, and snap peas

Feel free to experiment with seasonal vegetables. This way, you can enjoy the freshest flavors while keeping your meals exciting. Remember, the key is to choose vegetables that cook at similar rates to ensure even cooking. So, gather your favorites and get ready to create a colorful stir-fry!

Protein Additions to Enhance Your Vegetable Stir-Fry Recipe

To make your vegetable stir-fry recipe even more satisfying, consider adding a source of protein. This addition not only boosts the nutritional value but also makes the dish more filling. There are several options to choose from, depending on your dietary preferences.

For a vegetarian option, tofu is a fantastic choice. It absorbs flavors well and adds a nice texture. Simply cube the tofu and add it to the skillet after the vegetables have cooked for a few minutes. If you prefer meat, chicken, beef, or shrimp can be great additions. Just make sure to cook the protein first before adding the vegetables to ensure everything is cooked through.

Here are some protein options to consider:

  • Firm tofu, cubed
  • Chicken breast, sliced thinly
  • Shrimp, peeled and deveined
  • Beef strips, marinated

By incorporating protein, you can create a well-rounded meal that satisfies your hunger and nourishes your body. So, don’t hesitate to get creative with your stir-fry!

Cooking Note for Vegetable Stir-Fry Recipe

When preparing a vegetable stir-fry recipe, there are a few important cooking notes to keep in mind. These tips will help you achieve the best results and ensure your dish is both delicious and visually appealing.

First, always use a large skillet or wok. This allows for better heat distribution and gives you enough space to stir the vegetables without overcrowding. Overcrowding can lead to steaming instead of stir-frying, which may result in soggy vegetables.

Next, make sure your ingredients are prepped and ready before you start cooking. Stir-frying is a quick process, and having everything on hand will help you work efficiently. Chop your vegetables and measure out your sauces beforehand to avoid any delays.

Another key point is to keep the heat high throughout the cooking process. A hot pan is essential for achieving that perfect tender-crisp texture. If the heat is too low, the vegetables may release moisture and become mushy.

Lastly, remember to stir constantly. This technique not only prevents burning but also ensures that all the vegetables cook evenly. Use a spatula or wooden spoon to toss the ingredients around the pan, allowing them to absorb the flavors of the sauces.

By following these cooking notes, you’ll create a vibrant and tasty vegetable stir-fry recipe that everyone will love. Enjoy the process and have fun experimenting with different flavors and textures!

Serving Suggestions for Vegetable Stir-Fry Recipe

Once your vegetable stir-fry recipe is ready, it’s time to think about how to serve it. This dish is not only delicious but also visually appealing, making it a great centerpiece for any meal. Here are some serving suggestions to enhance your dining experience:

  • Over Rice or Noodles: Serve your stir-fry over a bed of steamed rice or cooked noodles. Jasmine rice, brown rice, or even quinoa can complement the flavors beautifully. For noodles, consider using rice noodles, soba, or even whole wheat spaghetti for a twist.
  • As a Side Dish: If you’re serving a larger meal, your vegetable stir-fry can be a delightful side dish. Pair it with grilled chicken, fish, or tofu for a balanced plate. The vibrant colors of the stir-fry will add a pop to your table.
  • In Lettuce Wraps: For a fun and healthy option, serve the stir-fry in crisp lettuce leaves. This makes for a great appetizer or light meal. Just spoon the stir-fry into the leaves and enjoy!
  • With a Sprinkle of Fresh Herbs: Enhance the flavor by garnishing your stir-fry with fresh herbs like cilantro or basil. These herbs add a fresh touch and elevate the dish’s aroma.
  • With a Side of Dipping Sauce: Consider serving a small bowl of soy sauce or a spicy chili sauce on the side. This allows guests to customize their flavor experience, adding an extra kick if desired.

Remember, presentation matters! Use colorful plates or bowls to showcase the vibrant hues of your vegetable stir-fry. A well-presented dish not only looks appetizing but also makes the meal more enjoyable. So, get creative with your serving ideas and enjoy your delicious vegetable stir-fry recipe!

Tips for Perfecting Your Vegetable Stir-Fry Recipe

Perfecting your vegetable stir-fry recipe is all about technique and attention to detail. Here are some valuable tips to help you create a dish that’s not only delicious but also visually stunning.

  • Use Fresh Ingredients: Fresh vegetables make a world of difference in flavor and texture. Always choose seasonal produce for the best taste. Look for vibrant colors and firm textures when selecting your ingredients.
  • Cut Uniformly: Ensure all vegetables are cut into similar sizes. This helps them cook evenly, preventing some from becoming mushy while others remain raw. Aim for bite-sized pieces for easy eating.
  • Preheat Your Pan: Always preheat your skillet or wok before adding oil. A hot pan is essential for achieving that perfect stir-fry texture. It helps to sear the vegetables quickly, locking in their flavors.
  • Don’t Overcrowd the Pan: If you add too many vegetables at once, they will steam instead of fry. Cook in batches if necessary. This ensures each piece gets the right amount of heat and retains its crunch.
  • Keep It Moving: Stir constantly while cooking. This prevents burning and ensures that all vegetables are evenly coated with the sauce. Use a spatula or wooden spoon to toss everything around the pan.
  • Season at the Right Time: Add sauces and seasonings towards the end of cooking. This allows the flavors to meld without losing their potency. A quick toss in the sauce just before serving enhances the taste.
  • Experiment with Flavors: Don’t hesitate to try different sauces or spices. Adding a splash of rice vinegar or a sprinkle of chili flakes can elevate your dish. Explore various flavor profiles to find your favorite combination.
  • Garnish for Appeal: A simple garnish can make your stir-fry look restaurant-worthy. Fresh herbs, sesame seeds, or sliced green onions add a pop of color and a burst of flavor. It’s the finishing touch that impresses!

By following these tips, you’ll be well on your way to mastering your vegetable stir-fry recipe. Enjoy the process, and don’t be afraid to get creative in the kitchen!

Breakdown of Time for Vegetable Stir-Fry Recipe

Prep Time for Vegetable Stir-Fry Recipe

Preparing your ingredients is a crucial step in making a vegetable stir-fry recipe. The prep time typically takes about 10 to 15 minutes. During this time, you will wash, chop, and measure all your vegetables and sauces. Having everything ready before you start cooking will make the process smoother and more enjoyable. Remember, the key to a successful stir-fry is to have all your ingredients prepped and within reach!

Cooking Time for Vegetable Stir-Fry Recipe

The cooking time for your vegetable stir-fry recipe is relatively quick, usually around 10 to 15 minutes. This includes heating the oil, stir-frying the vegetables, and adding sauces. The high heat allows the vegetables to cook quickly while retaining their crunch and vibrant colors. Stir-frying is a fast-paced cooking method, so be prepared to keep stirring and tossing your ingredients to ensure even cooking.

Total Time for Vegetable Stir-Fry Recipe

In total, you can expect to spend about 20 to 30 minutes from start to finish when making a vegetable stir-fry recipe. This includes both prep and cooking times. It’s a fantastic option for busy weeknights when you want a healthy meal without spending hours in the kitchen. With just a little bit of time, you can enjoy a delicious and nutritious dish that’s sure to please everyone at the table!

Nutritional Information for Vegetable Stir-Fry Recipe

Calories in Vegetable Stir-Fry Recipe

When it comes to healthy eating, knowing the calorie content of your meals is essential. A serving of this vegetable stir-fry recipe contains approximately 150 calories. This makes it a great option for those looking to maintain or lose weight while still enjoying a flavorful dish. The low-calorie count is primarily due to the abundance of fresh vegetables, which are naturally low in calories but high in nutrients.

Protein Content in Vegetable Stir-Fry Recipe

Protein is an important part of a balanced diet, and this vegetable stir-fry recipe provides about 4 grams of protein per serving. While this may seem low, you can easily boost the protein content by adding ingredients like tofu, chicken, or shrimp. These additions not only enhance the flavor but also make the dish more filling. If you choose to include protein, be sure to adjust the overall nutritional values accordingly.

Sodium Levels in Vegetable Stir-Fry Recipe

Sodium is another important factor to consider in your diet. This vegetable stir-fry recipe contains around 600 milligrams of sodium per serving, primarily from the soy sauce. If you’re watching your sodium intake, you can opt for low-sodium soy sauce or reduce the amount used in the recipe. This way, you can enjoy the flavors without compromising your health goals. Always remember to balance your meals with fresh ingredients to keep sodium levels in check.

FAQs about Vegetable Stir-Fry Recipe

Can I use frozen vegetables in a Vegetable Stir-Fry Recipe?

Yes, you can definitely use frozen vegetables in your vegetable stir-fry recipe! Frozen vegetables are often picked at their peak freshness and flash-frozen, which helps retain their nutrients. They can be a convenient option, especially when fresh produce is not available. However, keep in mind that frozen vegetables may release more moisture during cooking. To avoid a soggy stir-fry, make sure to cook them on high heat and stir frequently. You might also want to add them to the pan later in the cooking process to ensure they don’t overcook.

What is the best sauce for a Vegetable Stir-Fry Recipe?

The best sauce for a vegetable stir-fry recipe often depends on your personal taste. A classic choice is soy sauce, which adds a savory umami flavor. You can also experiment with other sauces like teriyaki, oyster sauce, or hoisin sauce for different flavor profiles. If you prefer a bit of heat, consider adding chili sauce or sriracha. For a lighter option, a mix of vegetable broth and cornstarch can create a flavorful sauce without being too heavy. Feel free to mix and match sauces to find your perfect combination!

How do I make my Vegetable Stir-Fry Recipe more flavorful?

To enhance the flavor of your vegetable stir-fry recipe, consider adding aromatics like garlic, ginger, and onions. These ingredients provide a wonderful base for your dish. Additionally, using fresh herbs like basil or cilantro as a garnish can elevate the taste. You can also incorporate spices such as sesame seeds, crushed red pepper, or five-spice powder for an extra kick. Lastly, don’t forget to taste and adjust the seasoning as you cook. A splash of rice vinegar or a squeeze of lime juice can brighten the flavors beautifully!

Is a Vegetable Stir-Fry Recipe healthy?

Absolutely! A vegetable stir-fry recipe is a healthy option packed with nutrients. It’s loaded with vitamins, minerals, and fiber from the variety of vegetables used. Stir-frying also requires minimal oil, making it a low-calorie cooking method. By choosing fresh, colorful vegetables and controlling the amount of sauce, you can create a nutritious meal that supports a balanced diet. Plus, you can easily customize the recipe to fit your dietary needs by adding protein or whole grains. Overall, a vegetable stir-fry is a delicious way to enjoy healthy eating!

Conclusion on Vegetable Stir-Fry Recipe

In conclusion, a vegetable stir-fry recipe is not just a meal; it’s an experience that brings together vibrant colors, fresh flavors, and essential nutrients. This dish is perfect for anyone looking to enjoy a quick, healthy, and delicious option. With its versatility, you can easily customize it to suit your taste preferences or dietary needs. Whether you’re a busy professional, a parent, or a student, this recipe fits seamlessly into any lifestyle.

By following the steps outlined in this article, you can create a delightful stir-fry that will impress your family and friends. Remember to use fresh ingredients, experiment with different vegetables, and add your favorite protein for a well-rounded meal. The cooking process is quick, allowing you to enjoy a homemade dish in under 30 minutes!

Moreover, the health benefits of a vegetable stir-fry are significant. It’s a fantastic way to increase your vegetable intake while keeping calories low. With the right balance of flavors and textures, you can create a dish that is not only nutritious but also satisfying. So, gather your ingredients, fire up your skillet, and get ready to enjoy a delicious vegetable stir-fry recipe that will leave you feeling great!

Don’t forget to share your creations with friends and family. Cooking together can be a fun and rewarding experience. Happy cooking!

Paul

Vegetable Stir-Fry Recipe: Quick and Healthy Delight!

A colorful celebration of fresh produce, this veggie-loaded stir fry comes together fast with a sweet and savory garlic-ginger sauce that clings to every bite. It’s vibrant, satisfying, and perfect for Meatless Monday or any night you need a quick, healthy meal on the table in 30 minutes or less!
Prep Time 10 minutes
Cook Time 15 minutes
Total Time 25 minutes
Servings: 6 servings
Course: Dinner, Main Course
Cuisine: Asian-inspired

Ingredients
  

Vegetables:
  • 1 tablespoon vegetable oil
  • 1 cup sliced crimini mushrooms
  • 2 cups broccoli florets
  • 1 15 oz can baby corn, drained (optional)
  • 1 red bell pepper thinly sliced
  • 4 ounces snap peas
  • 1 cup sliced zucchini
  • 1 cup peeled thinly sliced carrots
For the Sauce:
  • ½ cup low-sodium soy sauce or tamari
  • 1 tablespoon toasted sesame oil
  • 4 cloves garlic minced
  • 2 teaspoons freshly grated ginger
  • ¼ cup brown sugar or honey
  • Pinch red pepper flakes optional
To Thicken:
  • 2 tablespoons cornstarch or arrowroot starch
  • ½ cup cold water
For Garnish:
  • ¼ cup thinly sliced green onions

Method
 

  1. Heat the Oil:In a large skillet or wok, heat the vegetable oil over medium-high heat until shimmering.
  2. Sauté the Veggies:Add the mushrooms, broccoli, baby corn, bell pepper, snap peas, zucchini, and carrots. Stir frequently and cook for 5–6 minutes, until the vegetables are bright and tender-crisp.
  3. Make the Sauce:In a small bowl, whisk together soy sauce, sesame oil, garlic, ginger, brown sugar (or honey), and red pepper flakes if using. In another small bowl, dissolve the cornstarch in the cold water to form a slurry.
  4. Combine Sauce and Veggies:Stir the cornstarch slurry into the sauce, then pour the sauce over the cooked vegetables in the skillet. Toss to coat everything evenly.
  5. Thicken and Finish:Bring the mixture to a gentle simmer and cook for another 5 minutes, until the sauce thickens and the vegetables are fully coated and tender.
  6. Serve:Remove from heat and top with sliced green onions. Serve immediately as-is or over rice or noodles.

Notes

  • Make it a meal by adding baked tofu, edamame, or tempeh.
  • For extra flavor, toss in a splash of rice vinegar or lime juice just before serving.
  • This recipe is naturally vegan and can be made gluten-free with tamari instead of soy sauce.
  • Great for meal prep—store leftovers in an airtight container for up to 3 days.

French Onion Chicken Rice Recipe is a must-try dish!

Introduction to French Onion Chicken Rice Recipe

Are you looking for a comforting and delicious meal that’s easy to prepare? Look no further than the French Onion Chicken Rice Recipe! This dish combines the rich flavors of caramelized onions, tender chicken, and creamy rice, creating a delightful experience for your taste buds. It’s perfect for family dinners or cozy nights in.

The beauty of this recipe lies in its simplicity. With just a handful of ingredients, you can whip up a hearty meal that feels gourmet. The savory notes from the onions and the creamy texture of the sauce make this dish a standout. Plus, it’s a one-pan wonder, which means less cleanup for you!

Whether you’re a seasoned cook or a beginner in the kitchen, this French Onion Chicken Rice Recipe is straightforward and rewarding. It’s not just about the taste; it’s about the joy of cooking and sharing a meal with loved ones. So, roll up your sleeves and get ready to impress your family and friends with this delightful dish!

Let’s dive into the ingredients and get started on this culinary adventure!

Ingredients for French Onion Chicken Rice Recipe

To create the mouthwatering French Onion Chicken Rice Recipe, you’ll need a selection of fresh ingredients. Each component plays a vital role in building the rich flavors that make this dish so special. Here’s what you’ll need:

  • 2 tablespoons olive oil
  • 4 boneless, skinless chicken breasts (about 1.5 pounds)
  • 1 teaspoon salt
  • 1/2 teaspoon black pepper
  • 1 large onion, thinly sliced
  • 2 cloves garlic, minced
  • 1 cup low-sodium chicken broth
  • 1 cup heavy cream
  • 1 tablespoon Worcestershire sauce
  • 1 teaspoon dried thyme
  • 1 cup long-grain white rice
  • 1 cup shredded Gruyère cheese (or Swiss cheese)
  • Fresh parsley, chopped (for garnish)

These ingredients come together to create a dish that is not only satisfying but also packed with flavor. The olive oil helps to sear the chicken, while the onions and garlic provide a sweet and savory base. The combination of chicken broth and heavy cream creates a luscious sauce that coats the rice beautifully. Finally, the Gruyère cheese adds a creamy, melty finish that ties everything together.

Now that you have your ingredients ready, let’s move on to the step-by-step preparation of this delightful French Onion Chicken Rice Recipe!

Step-by-Step Preparation of French Onion Chicken Rice Recipe

Now that you have gathered all your ingredients, it’s time to dive into the cooking process! This step-by-step guide will help you create the perfect French Onion Chicken Rice Recipe. Follow along, and soon you’ll have a delicious meal ready to serve!

Step 1: Preparing the Chicken for French Onion Chicken Rice Recipe

Start by heating 2 tablespoons of olive oil in a large skillet over medium heat. While the oil warms up, season the 4 boneless, skinless chicken breasts with 1 teaspoon of salt and 1/2 teaspoon of black pepper. Once the oil is hot, carefully place the chicken breasts in the skillet. Cook them for about 5-6 minutes on each side. You want them to be golden brown and fully cooked through. After cooking, remove the chicken from the skillet and set it aside on a plate.

Step 2: Sautéing the Onions in French Onion Chicken Rice Recipe

In the same skillet, add the thinly sliced large onion. Cook the onions over medium heat, stirring occasionally. This process will take about 10-12 minutes. You want the onions to become caramelized and golden brown, which brings out their natural sweetness. Once they are ready, add 2 cloves of minced garlic to the skillet. Cook for an additional 1-2 minutes until the garlic becomes fragrant. This step adds a wonderful aroma to your dish!

Step 3: Combining Ingredients in French Onion Chicken Rice Recipe

Next, it’s time to bring everything together! Pour in 1 cup of low-sodium chicken broth, 1 cup of heavy cream, 1 tablespoon of Worcestershire sauce, and 1 teaspoon of dried thyme into the skillet. Stir the mixture well to combine all the flavors. Allow it to come to a gentle simmer. This creamy sauce will be the heart of your dish!

Step 4: Cooking the Rice in French Onion Chicken Rice Recipe

Now, add 1 cup of long-grain white rice to the skillet. Stir it well to ensure the rice is evenly distributed in the liquid. After that, return the cooked chicken to the skillet, nestling it into the rice mixture. Cover the skillet with a lid and reduce the heat to low. Let it cook for about 20-25 minutes. During this time, the rice will absorb most of the liquid and become tender.

Step 5: Finalizing the Dish in French Onion Chicken Rice Recipe

Once the rice is cooked, remove the skillet from the heat. Sprinkle 1 cup of shredded Gruyère cheese over the top. Cover the skillet again and let it sit for about 5 minutes. This will allow the cheese to melt beautifully. Finally, garnish your dish with freshly chopped parsley before serving. Your French Onion Chicken Rice Recipe is now ready to be enjoyed!

Variations of French Onion Chicken Rice Recipe

While the classic French Onion Chicken Rice Recipe is already a crowd-pleaser, there are many ways to put a unique spin on it. These variations can cater to different tastes and dietary preferences, making this dish even more versatile. Here are some exciting ideas to try:

  • Mushroom Medley: Add a variety of mushrooms, such as cremini or shiitake, to the onions while sautéing. This will enhance the umami flavor and add a delightful texture to the dish.
  • Vegetarian Option: Replace the chicken with hearty vegetables like zucchini, bell peppers, or eggplant. Use vegetable broth instead of chicken broth for a fully vegetarian meal.
  • Spicy Kick: For those who enjoy a bit of heat, add red pepper flakes or diced jalapeños to the onion mixture. This will give your dish a spicy twist that pairs well with the creamy sauce.
  • Herb Infusion: Experiment with different herbs like rosemary or basil instead of thyme. Fresh herbs can elevate the flavor profile and add a fresh aroma to the dish.
  • Cheese Variations: While Gruyère is a fantastic choice, feel free to mix it up! Try using sharp cheddar, creamy mozzarella, or even a sprinkle of blue cheese for a bold flavor.
  • Quinoa Substitute: For a healthier grain option, swap out the rice for quinoa. This will add more protein and fiber to your meal while keeping it delicious.

These variations not only keep the French Onion Chicken Rice Recipe exciting but also allow you to cater to different dietary needs. Feel free to mix and match these ideas to create a dish that suits your taste. Now that you have some creative options, let’s move on to a cooking note that will help you achieve the best results!

Cooking Note for French Onion Chicken Rice Recipe

Cooking is an art, and every great dish requires a little attention to detail. When preparing the French Onion Chicken Rice Recipe, there are a few key points to keep in mind to ensure your meal turns out perfectly every time. Here are some helpful tips to enhance your cooking experience:

  • Use Fresh Ingredients: Fresh ingredients make a significant difference in flavor. Opt for fresh herbs, high-quality chicken, and ripe onions. This will elevate the taste of your dish.
  • Monitor Heat Levels: Cooking over medium heat is crucial for caramelizing onions. If the heat is too high, the onions may burn instead of caramelizing. Patience is key here!
  • Deglaze the Pan: After cooking the chicken, consider deglazing the pan with a splash of white wine or chicken broth. This will lift the flavorful bits stuck to the bottom, adding depth to your sauce.
  • Check Rice Doneness: Different brands of rice may require varying cooking times. Check the rice for doneness a few minutes before the suggested time to avoid overcooking.
  • Let It Rest: After cooking, allow the dish to rest for a few minutes before serving. This helps the flavors meld together and makes for a more enjoyable eating experience.
  • Adjust Seasoning: Taste your dish before serving. You may want to add a pinch more salt or pepper to suit your preference. Remember, seasoning can make or break a dish!

By following these cooking notes, you’ll be well on your way to mastering the French Onion Chicken Rice Recipe. Each step is designed to bring out the best flavors and textures, ensuring a delightful meal for you and your loved ones. Now that you’re equipped with these tips, let’s explore some serving suggestions to make your dish even more appealing!

Serving Suggestions for French Onion Chicken Rice Recipe

Once your French Onion Chicken Rice Recipe is ready, it’s time to think about how to serve it. Presentation can elevate your meal, making it even more enjoyable. Here are some delightful serving suggestions to enhance your dining experience:

  • Garnish with Fresh Herbs: A sprinkle of freshly chopped parsley not only adds a pop of color but also a burst of freshness. You can also use chives or thyme for an extra touch of flavor.
  • Pair with a Side Salad: A light side salad with mixed greens, cherry tomatoes, and a simple vinaigrette complements the richness of the chicken and rice. It adds a refreshing contrast to the meal.
  • Serve with Crusty Bread: A slice of warm, crusty bread is perfect for soaking up the creamy sauce. Consider serving a baguette or sourdough for a delightful crunch.
  • Offer a Cheese Platter: If you’re hosting a dinner, consider serving a small cheese platter alongside. Include a variety of cheeses, crackers, and fruits to create a lovely appetizer before the main course.
  • Wine Pairing: A glass of white wine, such as Chardonnay or Sauvignon Blanc, pairs beautifully with the flavors of the dish. The acidity in the wine balances the creaminess of the sauce.
  • Individual Portions: For a more elegant presentation, serve the French Onion Chicken Rice in individual ramekins. This adds a personal touch and makes it feel like a special occasion.

These serving suggestions will not only enhance the visual appeal of your French Onion Chicken Rice Recipe but also create a well-rounded dining experience. Whether it’s a family dinner or a gathering with friends, these ideas will surely impress your guests. Now that you have some great serving options, let’s move on to tips for perfecting this delicious dish!

Tips for Perfecting French Onion Chicken Rice Recipe

To truly master the French Onion Chicken Rice Recipe, a few extra tips can make all the difference. These insights will help you elevate your dish, ensuring it’s not just good, but absolutely fantastic. Here are some essential tips to keep in mind:

  • Choose the Right Chicken: Opt for high-quality chicken breasts. Organic or free-range chicken can enhance the flavor and texture of your dish. The better the chicken, the better the overall taste!
  • Caramelize the Onions Slowly: Take your time when caramelizing the onions. Cooking them slowly over medium heat allows their natural sugars to develop, resulting in a rich, sweet flavor. Don’t rush this step!
  • Experiment with Broth: While low-sodium chicken broth is great, feel free to experiment with homemade broth for a deeper flavor. You can also mix in a bit of beef broth for a unique twist.
  • Use a Lid: When cooking the rice, keeping the lid on the skillet helps trap steam. This ensures the rice cooks evenly and absorbs all the delicious flavors from the sauce.
  • Let the Cheese Shine: When adding cheese, consider mixing different types for a more complex flavor. A combination of Gruyère and Parmesan can create a delightful cheesy crust.
  • Adjust Creaminess: If you prefer a lighter dish, you can reduce the amount of heavy cream. Substitute with half-and-half or even Greek yogurt for a healthier option without sacrificing flavor.
  • Serve Hot: This dish is best enjoyed hot and fresh. If you need to reheat leftovers, do so gently on the stove with a splash of broth to maintain creaminess.

By incorporating these tips, you’ll be well on your way to perfecting the French Onion Chicken Rice Recipe. Each suggestion is designed to enhance the flavors and textures, making your meal even more enjoyable. Now that you’re equipped with these expert tips, let’s break down the time needed for this delightful dish!

Breakdown of Time for French Onion Chicken Rice Recipe

Understanding the time commitment for the French Onion Chicken Rice Recipe can help you plan your cooking session better. Here’s a detailed breakdown of the time needed for preparation and cooking, so you can enjoy this delicious meal without any surprises!

Prep Time for French Onion Chicken Rice Recipe

The prep time for this delightful dish is approximately 15-20 minutes. During this time, you will gather all your ingredients, slice the onions, mince the garlic, and season the chicken. Having everything ready before you start cooking will make the process smoother and more enjoyable.

Cooking Time for French Onion Chicken Rice Recipe

The cooking time for the French Onion Chicken Rice Recipe is about 30-35 minutes. This includes:

  • Cooking the chicken: 12 minutes
  • Sautéing the onions and garlic: 15 minutes
  • Simmering the rice and chicken together: 25 minutes

Each step is essential for developing the rich flavors that make this dish so special. Be sure to keep an eye on the cooking times to ensure everything turns out perfectly!

Total Time for French Onion Chicken Rice Recipe

In total, you can expect to spend around 45-55 minutes from start to finish. This includes both prep and cooking times. With this timeframe, you can easily whip up a delicious meal that will impress your family and friends. So, roll up your sleeves and get ready to enjoy a wonderful dining experience with your French Onion Chicken Rice Recipe!

Nutritional Information for French Onion Chicken Rice Recipe

Understanding the nutritional content of your meals is essential for maintaining a balanced diet. The French Onion Chicken Rice Recipe not only delights your taste buds but also provides a good mix of nutrients. Here’s a closer look at the nutritional information for this delicious dish:

Calories in French Onion Chicken Rice Recipe

Each serving of the French Onion Chicken Rice Recipe contains approximately 550 calories. This calorie count includes the chicken, rice, and creamy sauce, making it a hearty meal. While it’s a bit higher in calories, it’s packed with flavor and satisfaction, perfect for a fulfilling dinner.

Protein Content in French Onion Chicken Rice Recipe

Protein is an essential nutrient for building and repairing tissues. In this recipe, you’ll find about 40 grams of protein per serving. The chicken breasts are the primary source of protein, making this dish a great option for those looking to increase their protein intake. It’s especially beneficial for active individuals and those looking to maintain muscle mass.

Sodium Levels in French Onion Chicken Rice Recipe

When it comes to sodium, each serving contains around 800 milligrams. This level is moderate, especially considering the use of low-sodium chicken broth. However, if you’re watching your sodium intake, you can further reduce it by using homemade broth or adjusting the amount of added salt. Always remember to taste your dish before serving to ensure it meets your dietary needs.

Overall, the French Onion Chicken Rice Recipe offers a balanced mix of calories, protein, and sodium. It’s a delicious option for a family meal, providing nourishment and satisfaction. Now that you’re aware of the nutritional aspects, let’s move on to some frequently asked questions about this delightful dish!

FAQs about French Onion Chicken Rice Recipe

What can I substitute for rice in French Onion Chicken Rice Recipe?

If you’re looking for alternatives to rice in the French Onion Chicken Rice Recipe, there are several options to consider. Quinoa is a fantastic substitute, offering a nutty flavor and added protein. You can also use cauliflower rice for a low-carb option, which will absorb the flavors beautifully. Another great choice is orzo pasta, which adds a different texture while still being hearty. Feel free to experiment with these substitutes to find the one that suits your taste best!

Can I make French Onion Chicken Rice Recipe ahead of time?

Absolutely! The French Onion Chicken Rice Recipe can be made ahead of time, making it a great option for meal prep. You can prepare the dish up to the point of adding the cheese. Once it’s cooled, store it in an airtight container in the refrigerator for up to 3 days. When you’re ready to serve, simply reheat it on the stove, adding a splash of broth if needed, and then sprinkle the cheese on top to melt before serving.

How do I store leftovers of French Onion Chicken Rice Recipe?

Storing leftovers of the French Onion Chicken Rice Recipe is easy! Allow the dish to cool completely, then transfer it to an airtight container. It can be stored in the refrigerator for up to 3 days. If you want to keep it longer, consider freezing it. Place the cooled dish in a freezer-safe container, and it can last for up to 2 months. When you’re ready to enjoy it again, thaw it in the refrigerator overnight and reheat on the stove or in the microwave.

Is French Onion Chicken Rice Recipe suitable for meal prep?

Yes, the French Onion Chicken Rice Recipe is perfect for meal prep! It’s a one-pan dish that can be easily divided into individual portions. Prepare a batch at the beginning of the week, and you’ll have delicious, ready-to-eat meals for busy days. Just remember to store it in separate containers for easy access. This way, you can enjoy a hearty and satisfying meal without the hassle of cooking every day!

Conclusion on French Onion Chicken Rice Recipe

In conclusion, the French Onion Chicken Rice Recipe is a delightful dish that brings together rich flavors and comforting textures. With its creamy sauce, tender chicken, and perfectly cooked rice, it’s a meal that can satisfy even the pickiest eaters. Whether you’re cooking for a family dinner or a cozy night in, this recipe is sure to impress.

Not only is it easy to prepare, but it also allows for plenty of creativity. You can customize it with various ingredients and flavors, making it a versatile option for any occasion. From adding mushrooms to experimenting with different cheeses, the possibilities are endless!

Moreover, the nutritional benefits of this dish make it a wholesome choice. With a good balance of protein, carbohydrates, and fats, it provides the energy needed for a busy day. Plus, it’s a great way to enjoy a hearty meal without spending hours in the kitchen.

So, why not give the French Onion Chicken Rice Recipe a try? Gather your ingredients, follow the steps, and enjoy the wonderful aroma that fills your kitchen. Your family and friends will surely appreciate the effort, and you’ll be rewarded with smiles and satisfied appetites. Happy cooking!

Paul

French Onion Chicken Rice Recipe is a must-try dish!

Inspired by the deep, comforting flavors of French onion soup, this creamy chicken and rice casserole is packed with caramelized onions, Gruyère cheese, tender chicken, and savory herbs. It’s a cozy, crowd-pleasing one-dish meal that feels fancy but is easy enough for a weeknight.
Prep Time 20 minutes
Cook Time 45 minutes
Total Time 1 hour 5 minutes
Servings: 6 –8 servings
Course: Casserole, Dinner
Cuisine: American / French-inspired

Ingredients
  

  • 3 tablespoons butter divided
  • 3 tablespoons extra virgin olive oil divided
  • 3 pounds sweet onions about 4 large, halved and thickly sliced
  • 1 tablespoon minced garlic
  • teaspoons kosher salt
  • ½ teaspoon freshly ground black pepper
  • 1 teaspoon dried tarragon
  • 1 teaspoon dried thyme
  • cup brandy or white wine
  • 1 tablespoon Worcestershire sauce
  • 8 ounces button mushrooms sliced
  • cups uncooked white rice
  • 2 cups baby spinach packed
  • 3 cups chicken stock
  • 1 cup heavy cream
  • 3 –4 cups cooked chicken torn into bite-sized pieces
  • 4 ounces Gruyère cheese shredded

Method
 

  1. Caramelize the Onions:In a large pot or skillet, heat 2 tablespoons of butter and 2 tablespoons of olive oil over medium heat. Add sliced onions and cook, stirring occasionally, for about 15 minutes until they begin to caramelize and soften.
  2. Add Aromatics and Deglaze:Stir in garlic, salt, pepper, tarragon, and thyme. Cook for 1 minute, then add brandy (or white wine) and Worcestershire sauce. Simmer until most of the liquid evaporates.
  3. Cook the Mushrooms:In a separate pan, heat the remaining 1 tablespoon of butter and 1 tablespoon of olive oil. Sauté sliced mushrooms until golden brown. Add them to the onion mixture.
  4. Combine with Rice and Spinach:Stir in the uncooked rice and baby spinach. Once the spinach wilts slightly, add chicken stock and heavy cream. Bring to a gentle simmer.
  5. Add Chicken and Transfer:Fold in the cooked chicken and mix everything until well combined. Transfer mixture into a buttered 9×13-inch baking dish.
  6. Top and Bake:Sprinkle shredded Gruyère cheese evenly over the top. Cover with foil and bake at 375°F (190°C) for 30 minutes. Remove foil and bake for an additional 10–15 minutes, or until bubbling and golden on top.

Notes

  • For best flavor, take your time with the onions—deep caramelization makes all the difference.
  • Swap Gruyère for Swiss or provolone if needed, though Gruyère offers the best nutty flavor.
  • Rotisserie chicken is a great shortcut for this recipe.
  • This dish can be prepped ahead and refrigerated. Just add an extra 10 minutes to the baking time if cooking from cold.
  • Leftovers store well and taste even better the next day.

Creamy Beef and Shells Recipe for a Family Delight

Creamy Beef and Shells Recipe is a delightful dish that combines tender pasta shells with savory ground beef in a rich, creamy sauce. This recipe is not only easy to prepare but also packed with flavor, making it a perfect choice for busy weeknights or cozy weekends.

Imagine a warm bowl of pasta, enveloped in a luscious cheese sauce, with hints of Italian seasoning and juicy tomatoes. It’s a dish that brings everyone together at the dinner table. Plus, it’s versatile! You can easily customize it to suit your taste or dietary needs. Whether you want to add extra veggies or swap out the beef for a lighter protein, this recipe has got you covered.

Creamy Beef and Shells Recipe. You’ll also find helpful tips to make your cooking experience even better. So, roll up your sleeves and get ready to create a meal that will warm your heart and satisfy your taste buds!

Ingredients for Creamy Beef and Shells Recipe

Creamy Beef and Shells Recipe, you will need a selection of simple yet flavorful ingredients. Here’s what you’ll need:

  • 1 pound ground beef: This is the star of the dish, providing rich flavor and protein.
  • 1 medium onion, diced: Adds sweetness and depth to the dish.
  • 2 cloves garlic, minced: Infuses the meal with aromatic goodness.
  • 1 teaspoon salt: Enhances the overall flavor.
  • 1/2 teaspoon black pepper: Adds a touch of heat.
  • 1 teaspoon Italian seasoning: Brings a classic Italian flavor profile.
  • 1 can (15 ounces) diced tomatoes, undrained: Provides moisture and a burst of freshness.
  • 1 cup beef broth: Adds richness and depth to the sauce.
  • 8 ounces medium pasta shells: Perfect for holding the creamy sauce.
  • 1 cup heavy cream: Creates a luscious, creamy texture.
  • 1 cup shredded cheddar cheese: Melts beautifully, adding flavor and creaminess.
  • 1/4 cup chopped fresh parsley (optional): For a pop of color and freshness.

Creamy Beef and Shells Recipe.

Step-by-Step Preparation of Creamy Beef and Shells Recipe

Creamy Beef and Shells Recipe, it’s time to dive into the cooking process. Follow these simple steps to create a delicious meal that your family will love!

Step 1: Preparing the Ingredients

Before you start cooking, it’s important to prepare your ingredients. Begin by dicing the onion and mincing the garlic. This will help them cook evenly and release their flavors. Next, measure out the spices, diced tomatoes, and beef broth. Having everything ready will make the cooking process smooth and enjoyable.

Step 2: Cooking the Beef

In a large skillet, heat over medium heat. Add the ground beef and cook it until it’s browned, which should take about 5-7 minutes. Make sure to break it apart with a spatula as it cooks. Once the beef is fully cooked, drain any excess fat. This step is crucial to keep your dish from becoming greasy.

Step 3: Boiling the Shell Pasta

While the beef is cooking, you can prepare the pasta. In a separate pot, bring water to a boil. Add a pinch of salt to the water for flavor. Once boiling, add the medium pasta shells and cook according to the package instructions, usually around 8-10 minutes. You want them to be al dente, which means they should be firm to the bite. Drain the pasta and set it aside.

Step 4: Combining Ingredients for Creamy Sauce

After draining the beef, return it to the skillet. Add the diced onion and minced garlic to the beef. Cook for about 3-4 minutes until the onion becomes translucent. Then, stir in the salt, black pepper, and Italian seasoning. Next, pour in the diced tomatoes and beef broth. Bring this mixture to a gentle simmer, allowing the flavors to meld together.

Step 5: Mixing Everything Together

Once the sauce is simmering, it’s time to add the cooked pasta shells. Stir them into the skillet, ensuring they are well coated with the sauce. Reduce the heat to low and pour in the heavy cream and shredded cheddar cheese. Stir continuously until the cheese melts and the sauce becomes creamy, which should take about 2-3 minutes. If you like, sprinkle some chopped parsley on top for a fresh touch before serving.

Creamy Beef and Shells Recipe is ready to be enjoyed. This dish is not only comforting but also a great way to bring everyone together for a hearty meal.

Variations of Creamy Beef and Shells Recipe

Creamy Beef and Shells Recipe is a fantastic base that allows for plenty of creativity. You can easily modify it to suit your taste or dietary preferences. Here are some delicious variations to consider:

Adding Vegetables to the Creamy Beef and Shells Recipe

Creamy Beef and Shells Recipe not only boosts nutrition but also adds vibrant colors and flavors. Here are some great options:

  • Spinach: Fresh or frozen spinach can be added during the last few minutes of cooking. It wilts quickly and adds a lovely green color.
  • Bell Peppers: Diced bell peppers can be sautéed with the onion and garlic. They add sweetness and crunch.
  • Mushrooms: Sliced mushrooms can be cooked with the beef for an earthy flavor. They also absorb the creamy sauce beautifully.
  • Zucchini: Diced zucchini can be added to the skillet. It cooks quickly and adds a nice texture.

Feel free to mix and match these vegetables based on what you have on hand. This way, you can create a colorful and nutritious dish that everyone will enjoy!

Alternative Proteins in Creamy Beef and Shells Recipe

Creamy Beef and Shells Recipe. Here are some tasty substitutes:

  • Ground Turkey: A leaner option, ground turkey works well in this recipe. It has a mild flavor that pairs nicely with the creamy sauce.
  • Ground Chicken: Similar to turkey, ground chicken is another healthy alternative. It’s light and absorbs flavors well.
  • Plant-Based Crumbles: For a vegetarian option, try using plant-based meat substitutes. They provide a similar texture and flavor.
  • Shredded Chicken: If you have leftover rotisserie chicken, shred it and mix it in for a quick and easy meal.

Creamy Beef and Shells Recipe!

Cooking Note for Creamy Beef and Shells Recipe

Creamy Beef and Shells Recipe, there are a few important cooking notes to keep in mind. These tips will help ensure that your dish turns out perfectly every time.

First, always use a large skillet for cooking the beef and sauce. A spacious pan allows for even cooking and prevents overcrowding, which can lead to uneven browning. If your skillet is too small, consider cooking the beef in batches.

Next, when adding the heavy cream and cheese, make sure to lower the heat. High temperatures can cause the cream to curdle, resulting in a less-than-desirable texture. Stir gently and continuously to create a smooth, creamy sauce.

Additionally, taste your sauce before serving. Adjust the seasoning as needed. You might want to add a pinch more salt or a dash of pepper to enhance the flavors. Remember, everyone’s taste buds are different, so feel free to customize it to your liking!

Lastly, if you find the sauce too thick, you can thin it out with a splash of beef broth or water. This will help achieve the desired consistency without sacrificing flavor. On the other hand, if the sauce is too thin, let it simmer for a few extra minutes to thicken up.

Creamy Beef and Shells Recipe. Enjoy the process and the delicious results!

Serving Suggestions for Creamy Beef and Shells Recipe

Creamy Beef and Shells Recipe is ready, it’s time to think about how to serve it. Presentation can elevate your meal, making it even more enjoyable. Here are some delightful serving suggestions to consider:

  • Garnish with Fresh Herbs: A sprinkle of chopped fresh parsley or basil on top adds a pop of color and freshness. It also enhances the dish’s aroma, making it more inviting.
  • Pair with a Side Salad: A crisp green salad complements the creamy pasta beautifully. Consider a simple mix of lettuce, cherry tomatoes, and cucumbers, dressed with a light vinaigrette.
  • Serve with Garlic Bread: Warm, buttery garlic bread is a classic side that pairs perfectly with the rich flavors of the Creamy Beef and Shells Recipe. It’s great for soaking up any leftover sauce!
  • Offer Grated Cheese: Set out a bowl of extra shredded cheddar or Parmesan cheese for guests to sprinkle on top. This adds an extra layer of flavor and creaminess.
  • Include a Vegetable Side: Steamed or roasted vegetables, such as broccoli or green beans, can add nutrition and balance to the meal. Their vibrant colors will make your plate more appealing.

Creamy Beef and Shells Recipe.

Tips for Perfecting Your Creamy Beef and Shells Recipe

Creamy Beef and Shells Recipe truly shine, consider these helpful tips. They will guide you in achieving the best flavor and texture, ensuring that every bite is delicious!

  • Use Fresh Ingredients: Whenever possible, opt for fresh vegetables and herbs. Fresh ingredients enhance the flavor and nutritional value of your dish. For instance, fresh garlic and onions will provide a more robust taste compared to dried versions.
  • Don’t Overcook the Pasta: When boiling the pasta shells, be sure to follow the package instructions closely. Cooking them al dente is key, as they will continue to cook slightly when mixed with the sauce. Overcooked pasta can become mushy and lose its appealing texture.
  • Experiment with Cheese: While cheddar cheese is a classic choice, feel free to experiment with other types of cheese. Cream cheese, mozzarella, or even a blend of Italian cheeses can add unique flavors to your Creamy Beef and Shells Recipe.
  • Adjust the Creaminess: If you prefer a lighter dish, you can reduce the amount of heavy cream or substitute it with half-and-half or milk. This will still give you a creamy texture without being too rich.
  • Let It Rest: After cooking, allow the dish to sit for a few minutes before serving. This resting time helps the flavors meld together and makes it easier to serve. Plus, it allows the sauce to thicken slightly.
  • Store Leftovers Properly: If you have leftovers, store them in an airtight container in the refrigerator. This will keep your Creamy Beef and Shells Recipe fresh for up to three days. Reheat gently on the stove or in the microwave, adding a splash of broth if needed to loosen the sauce.

Creamy Beef and Shells Recipe. Each time you make it, you’ll discover new ways to enhance the flavors and textures, making it a family favorite for years to come!

Breakdown of Time for Creamy Beef and Shells Recipe

Creamy Beef and Shells Recipe can help you plan your cooking efficiently. Here’s a simple breakdown of the time required for preparation and cooking:

Prep Time

The prep time for this delicious dish is quite short. You’ll need about 10-15 minutes to gather and prepare your ingredients. This includes dicing the onion, mincing the garlic, and measuring out your spices and liquids. Having everything ready will make the cooking process smoother and more enjoyable.

Cooking Time

Once you start cooking, the total cooking time is approximately 20-25 minutes. This includes browning the ground beef, sautéing the onion and garlic, simmering the sauce, and cooking the pasta. Each step is quick, allowing you to create a hearty meal in no time!

Total Time

Creamy Beef and Shells Recipe a perfect option for busy weeknights when you want a satisfying meal without spending hours in the kitchen. With just a little time and effort, you’ll have a delicious dish ready to serve!

Nutritional Information for Creamy Beef and Shells Recipe

Creamy Beef and Shells Recipe not only satisfies your taste buds but also provides valuable nutrients. Here’s a breakdown of the nutritional information per serving:

Calories

Creamy Beef and Shells Recipe contains approximately 550 calories. This makes it a hearty meal that can keep you full and satisfied. The combination of ground beef, pasta, and creamy sauce contributes to the calorie count, providing energy for your day.

Protein

With about 30 grams of protein per serving, this dish is a great source of this essential nutrient. Protein is vital for building and repairing tissues, making it especially important for growing children and active adults. The ground beef and cheddar cheese in the recipe are excellent protein sources, helping you feel full longer.

Sodium

Creamy Beef and Shells Recipe is approximately 800 milligrams per serving. While sodium is necessary for bodily functions, it’s important to monitor your intake. If you’re watching your sodium levels, consider using low-sodium beef broth and reducing the added salt in the recipe. This way, you can enjoy the flavors without compromising your health.

Creamy Beef and Shells Recipe while being aware of its impact on your diet. Remember, balance is key, and this dish can fit nicely into a well-rounded meal plan!

FAQs about Creamy Beef and Shells Recipe

Can I make Creamy Beef and Shells Recipe ahead of time?

Creamy Beef and Shells Recipe can be made ahead of time, making it a great option for meal prep. To do this, simply follow the recipe up to the point of mixing in the heavy cream and cheese. Once you’ve combined everything, let it cool completely before transferring it to an airtight container. You can store it in the refrigerator for up to 2-3 days. When you’re ready to serve, reheat it gently on the stove over low heat, adding a splash of beef broth or water to loosen the sauce if needed. This way, you can enjoy a delicious meal with minimal effort!

What can I substitute for beef in Creamy Beef and Shells Recipe?

Creamy Beef and Shells Recipe, there are several tasty options. Ground turkey or ground chicken are excellent substitutes that provide a lighter option while still being flavorful. For a vegetarian twist, consider using plant-based crumbles, which mimic the texture of ground meat. You can also use shredded rotisserie chicken if you have leftovers. Each of these alternatives will work well with the creamy sauce, allowing you to customize the dish to fit your dietary preferences.

How do I store leftovers of Creamy Beef and Shells Recipe?

Creamy Beef and Shells Recipe is simple! Allow the dish to cool to room temperature, then transfer it to an airtight container. Store it in the refrigerator, where it will stay fresh for up to 3 days. When you’re ready to enjoy the leftovers, reheat them on the stove over low heat, stirring occasionally. If the sauce has thickened, add a little beef broth or water to achieve your desired consistency. You can also reheat it in the microwave, but be sure to cover it to prevent splatters. Enjoy your delicious meal again!

Conclusion on Creamy Beef and Shells Recipe

Creamy Beef and Shells Recipe is a delightful dish that brings comfort and satisfaction to any meal. With its rich flavors and creamy texture, it’s no wonder this recipe has become a family favorite. The combination of ground beef, tender pasta shells, and a luscious cheese sauce creates a hearty meal that is both filling and delicious.

Not only is this recipe easy to prepare, but it also offers plenty of room for customization. Whether you choose to add vegetables for extra nutrition or swap out the beef for a lighter protein, the possibilities are endless. This versatility makes it a great option for various dietary preferences and occasions.

Creamy Beef and Shells Recipe, remember to enjoy the process. Cooking is not just about the final dish; it’s about the love and care you put into each step. Gather your family around the table, share stories, and create lasting memories over a warm bowl of this comforting meal.

So, roll up your sleeves, gather your ingredients, and get ready to whip up a dish that will surely impress. With the tips and variations provided, you can make this recipe your own. Happy cooking, and enjoy every creamy, cheesy bite!

Paul

Creamy Beef and Shells Recipe for a Family Delight

This cozy, family-friendly pasta dish is everything comfort food should be—savory, creamy, and full of rich tomato flavor. Tender pasta shells are tossed in a luscious sauce made with ground beef, beef stock, tomato sauce, and melted cheddar cheese for the ultimate skillet dinner ready in just 30 minutes!
Prep Time 10 minutes
Cook Time 20 minutes
Total Time 30 minutes
Servings: 4 servings
Course: Dinner
Cuisine: American

Ingredients
  

  • 1 pound lean ground beef
  • 8 ounces medium pasta shells
  • 1 tablespoon olive oil
  • 3 cloves garlic minced
  • ½ small yellow onion finely diced
  • 1 teaspoon Italian seasoning
  • 1 tablespoon tomato paste
  • 2 cups beef stock
  • 1 15 oz can tomato sauce
  • ½ cup heavy cream or half and half
  • cups shredded cheddar cheese
Optional Add-Ins:
  • Chopped zucchini or bell peppers
  • Mushrooms
  • Shredded pepper jack or Monterey jack cheese
  • Fresh parsley for garnish
  • Vegan swaps: plant-based ground “beef” and cashew cream

Method
 

  1. Cook the Pasta:Bring a large pot of salted water to a boil. Add the pasta shells and cook until al dente, about 8–10 minutes. Drain and set aside.
  2. Sauté the Aromatics:In a large skillet, heat olive oil over medium heat. Add the diced onion and cook for about 3 minutes until softened. Add ground beef and cook until browned and fully cooked, breaking it up as it cooks.
  3. Add Seasoning and Garlic:Stir in the garlic and Italian seasoning. Cook for 1 minute until fragrant.
  4. Build the Sauce:Stir in tomato paste, beef stock, and tomato sauce. Simmer uncovered for 6–8 minutes until slightly thickened.
  5. Make it Creamy:Reduce heat to low. Stir in the heavy cream and shredded cheddar cheese. Mix until the cheese is fully melted and the sauce is smooth.
  6. Combine Pasta and Sauce:Add the cooked pasta shells to the skillet. Stir to coat the pasta in the sauce. Let sit for 5–10 minutes to allow the flavors to meld.
  7. Serve and Enjoy:Serve warm, topped with extra cheese or fresh parsley if desired.

Notes

  • Want a bit of spice? Add a pinch of red pepper flakes when sautéing the garlic.
  • For a veggie boost, stir in spinach, mushrooms, or chopped bell peppers.
  • Use any short pasta shape like rotini or penne if you don’t have shells on hand.
  • This meal stores well—great for meal prep and easy weeknight reheating.

Chai Spiced Cake is a delightful dessert to enjoy!

Introduction to Chai Spiced Cake

Chai Spiced Cake is a delightful treat that brings the warm, comforting flavors of chai tea into a moist and fluffy cake. This cake is perfect for any occasion, whether it’s a cozy afternoon tea or a festive celebration. The blend of spices, including cinnamon, ginger, and cardamom, creates a rich aroma that fills your kitchen as it bakes. Each bite offers a unique taste experience, making it a favorite among spice lovers.

What makes this cake truly special is its versatility. You can enjoy it plain, or dress it up with a luscious frosting. The addition of brewed chai tea enhances the flavor, making it even more aromatic and delicious. Plus, it’s easy to make, which is a bonus for both novice and experienced bakers alike.

In this article, we will guide you through the ingredients, preparation steps, and variations of Chai Spiced Cake. You’ll also find helpful tips to ensure your cake turns out perfectly every time. So, let’s dive into the world of chai spices and discover how to create this scrumptious cake that will surely impress your family and friends!

Ingredients for Chai Spiced Cake

To create a delicious Chai Spiced Cake, you will need a variety of ingredients that come together to form a delightful blend of flavors. Here’s what you’ll need:

  • 2 cups all-purpose flour
  • 1 ½ teaspoons baking powder
  • 1 teaspoon baking soda
  • ½ teaspoon salt
  • 1 tablespoon ground cinnamon
  • 1 teaspoon ground ginger
  • 1 teaspoon ground cardamom
  • ½ teaspoon ground cloves
  • ½ teaspoon ground black pepper
  • 1 cup unsalted butter, softened
  • 1 ½ cups granulated sugar
  • 4 large eggs
  • 1 teaspoon vanilla extract
  • 1 cup buttermilk
  • 1 cup brewed chai tea, cooled

These ingredients work together to create a cake that is not only flavorful but also moist and tender. The spices are the stars of the show, giving the cake its signature chai flavor. The combination of butter and sugar adds richness, while the buttermilk and chai tea keep the cake moist. Make sure to gather all these ingredients before you start baking, as it will make the process smoother and more enjoyable!

Preparation of Chai Spiced Cake

Now that you have all your ingredients ready, it’s time to prepare your Chai Spiced Cake. Follow these simple steps to create a delicious cake that will fill your home with delightful aromas.

Step 1: Preheat the Oven

First things first, preheat your oven to 350°F (175°C). This step is crucial as it ensures that your cake bakes evenly. While the oven is heating up, take a moment to grease and flour two 9-inch round cake pans. This will help your cake come out easily once it’s baked.

Step 2: Prepare the Cake Batter

In a medium bowl, whisk together the dry ingredients. Combine 2 cups of all-purpose flour, 1 ½ teaspoons of baking powder, 1 teaspoon of baking soda, and ½ teaspoon of salt. Then, add the spices: 1 tablespoon of ground cinnamon, 1 teaspoon of ground ginger, 1 teaspoon of ground cardamom, ½ teaspoon of ground cloves, and ½ teaspoon of ground black pepper. Mix these ingredients well and set the bowl aside.

Next, in a large mixing bowl, cream together 1 cup of softened unsalted butter and 1 ½ cups of granulated sugar. Beat them together until the mixture is light and fluffy, which should take about 3-4 minutes. This step is important as it incorporates air into the batter, making your cake light and airy.

Now, add 4 large eggs to the butter mixture, one at a time. Make sure to mix well after each addition. Stir in 1 teaspoon of vanilla extract for added flavor. Gradually add the dry ingredient mixture to the butter mixture, alternating with 1 cup of buttermilk and 1 cup of cooled brewed chai tea. Start and end with the dry ingredients, mixing until just combined. Be careful not to overmix, as this can make your cake dense.

Step 3: Bake the Chai Spiced Cake

Once your batter is ready, divide it evenly between the two prepared cake pans. Smooth the tops with a spatula to ensure even baking. Place the pans in the preheated oven and bake for 25-30 minutes. To check if your cakes are done, insert a toothpick into the center. If it comes out clean, your cakes are ready!

Step 4: Cool the Cake

After baking, allow the cakes to cool in the pans for about 10 minutes. This will make it easier to remove them without breaking. Then, carefully transfer the cakes to wire racks to cool completely. Cooling is an important step, as it helps the cake set and makes it easier to frost later.

Now that your Chai Spiced Cake is prepared, you can look forward to enjoying a slice of this delightful treat. The warm spices and moist texture will surely impress everyone who tries it!

Variation of Chai Spiced Cake

Chai Spiced Cake is a versatile dessert that can be adapted to suit various dietary needs. Whether you’re gluten-free or vegan, you can still enjoy this delicious cake. Here are two popular variations that maintain the delightful flavors of the original recipe.

Gluten-Free Chai Spiced Cake

If you or someone you know is gluten-sensitive, you can easily make a gluten-free version of Chai Spiced Cake. To do this, simply replace the all-purpose flour with a gluten-free flour blend. Look for a blend that includes xanthan gum, as this will help mimic the texture of traditional flour.

Here’s how to adjust the recipe:

  • Use 2 cups of gluten-free all-purpose flour blend.
  • Ensure that your baking powder and baking soda are gluten-free.
  • Follow the same preparation steps as the original recipe.

This gluten-free Chai Spiced Cake will still be moist and flavorful, thanks to the spices and the addition of buttermilk and chai tea. Your guests won’t even notice the difference!

Vegan Chai Spiced Cake

For those following a vegan diet, you can create a delicious vegan version of Chai Spiced Cake without sacrificing flavor. The key is to replace the eggs and dairy with plant-based alternatives.

Here’s how to modify the recipe:

  • Substitute the 4 large eggs with 1 cup of unsweetened applesauce or 1 cup of mashed bananas.
  • Replace the 1 cup of unsalted butter with 1 cup of coconut oil or vegan butter.
  • Use almond milk or soy milk instead of buttermilk. You can make a vegan buttermilk by adding 1 tablespoon of vinegar to 1 cup of plant-based milk and letting it sit for 5 minutes.

Follow the same preparation steps as the original recipe, and you’ll have a delightful vegan Chai Spiced Cake that everyone can enjoy. The spices will still shine through, making it a perfect treat for any occasion!

These variations ensure that everyone can savor the warm, comforting flavors of Chai Spiced Cake, regardless of dietary preferences. So, whether you choose the gluten-free or vegan option, you’re in for a treat!

Cooking Note for Chai Spiced Cake

When baking a Chai Spiced Cake, there are a few important cooking notes to keep in mind. These tips will help you achieve the best results and ensure your cake turns out perfectly every time.

First, always measure your ingredients accurately. Baking is a science, and even a small difference in measurements can affect the outcome. Use measuring cups and spoons for dry ingredients and a liquid measuring cup for wet ingredients. This will help you maintain the right balance of flavors and textures.

Next, make sure your butter is softened but not melted. Softened butter should be at room temperature, allowing it to cream well with the sugar. This step is crucial for creating a light and fluffy cake. If your butter is too cold, it won’t mix properly, and if it’s melted, your cake may turn out dense.

Additionally, be mindful of the mixing process. When combining the dry and wet ingredients, mix until just combined. Overmixing can lead to a tough cake, which is not what you want. A few lumps are perfectly fine!

Lastly, keep an eye on your baking time. Ovens can vary, so start checking your cake a few minutes before the recommended baking time. Insert a toothpick into the center; if it comes out clean or with a few crumbs, your cake is done. If it’s still wet, give it a few more minutes.

By following these cooking notes, you’ll set yourself up for success in making a delicious Chai Spiced Cake. Enjoy the process, and don’t forget to savor the delightful aroma that fills your kitchen as it bakes!

Serving Suggestions for Chai Spiced Cake

Once your Chai Spiced Cake is baked and cooled, it’s time to think about how to serve this delightful treat. The warm spices and moist texture make it a versatile dessert that pairs well with various accompaniments. Here are some serving suggestions to elevate your cake experience:

  • Frosting Options: A cream cheese frosting is a fantastic choice. You can add a hint of vanilla and a sprinkle of chai spices to complement the cake’s flavors. Alternatively, a simple vanilla buttercream or a light whipped cream can also work beautifully.
  • Fresh Fruits: Serve slices of Chai Spiced Cake with fresh fruits like sliced apples, pears, or berries. The natural sweetness and acidity of the fruits balance the spices perfectly.
  • Ice Cream: A scoop of vanilla or cinnamon ice cream on the side can add a creamy texture that contrasts nicely with the cake. For a fun twist, try chai-flavored ice cream if you can find it!
  • Chai Tea: Pair your cake with a warm cup of chai tea. This will enhance the chai flavors and create a cozy atmosphere, perfect for a tea party or a relaxing afternoon.
  • Nuts and Seeds: Sprinkle some chopped nuts, like walnuts or pecans, on top of the frosting or serve them on the side. They add a delightful crunch and extra flavor.
  • Drizzle of Honey or Maple Syrup: A light drizzle of honey or maple syrup can add a touch of sweetness and enhance the overall flavor profile of the cake.

These serving suggestions not only enhance the taste of your Chai Spiced Cake but also make it visually appealing. Whether you’re hosting a gathering or enjoying a quiet moment at home, these ideas will surely impress your guests and make your cake the star of the show!

Tips for Perfecting Your Chai Spiced Cake

To ensure your Chai Spiced Cake turns out perfectly every time, consider these helpful tips. They will guide you through the baking process and help you achieve a cake that is moist, flavorful, and beautifully textured.

First, always use fresh spices. The flavor of your cake relies heavily on the spices used. If your spices have been sitting in the pantry for a while, they may have lost their potency. Freshly ground spices will give your cake a vibrant flavor that truly shines.

Next, room temperature ingredients are key. Make sure your eggs, butter, and buttermilk are at room temperature before you start mixing. This helps create a smooth batter and ensures even baking. If you forget to take them out in advance, you can warm the eggs in a bowl of warm water for a few minutes.

Another important tip is to avoid overmixing the batter. Once you combine the wet and dry ingredients, mix just until everything is incorporated. Overmixing can lead to a dense cake, which is not what you want. A few lumps are perfectly fine!

Additionally, consider using a kitchen scale for precise measurements. Weighing your ingredients can lead to more consistent results, especially when it comes to flour. Too much flour can make your cake dry, while too little can make it too wet.

When it comes to baking, always check for doneness a few minutes early. Ovens can vary in temperature, so start checking your cake around the 25-minute mark. Insert a toothpick into the center; if it comes out clean or with a few crumbs, your cake is ready.

Lastly, let your cake cool completely before frosting. This prevents the frosting from melting and sliding off. If you’re in a hurry, you can place the cakes in the refrigerator for a short time to speed up the cooling process.

By following these tips, you’ll be well on your way to creating a delicious Chai Spiced Cake that will impress everyone. Happy baking!

Breakdown of Time for Chai Spiced Cake

Understanding the time required for each step in making your Chai Spiced Cake can help you plan better. Here’s a simple breakdown of the time you’ll need for preparation, cooking, and the total time involved in creating this delightful dessert.

Prep Time

The prep time for your Chai Spiced Cake is approximately 20-25 minutes. This includes gathering all your ingredients, measuring them accurately, and mixing the batter. Taking your time during this step ensures that everything is ready for a smooth baking process. Remember, a well-prepared kitchen makes for a more enjoyable baking experience!

Cooking Time

Once your batter is ready, the cooking time is about 25-30 minutes. This is the time it takes for your cakes to bake in the preheated oven. Keep an eye on them, and check for doneness a few minutes before the timer goes off. A toothpick inserted into the center should come out clean or with a few crumbs for the perfect bake.

Total Time

In total, you can expect to spend around 50-55 minutes from start to finish. This includes both prep and cooking time. Once your cakes are baked, don’t forget to allow for cooling time before frosting. This will ensure that your Chai Spiced Cake is ready to be enjoyed at its best!

Nutritional Information for Chai Spiced Cake

Understanding the nutritional content of your Chai Spiced Cake can help you enjoy it mindfully. Here’s a breakdown of the key nutritional information per serving, so you can savor each slice with knowledge of what you’re indulging in.

Calories

Each serving of Chai Spiced Cake contains approximately 290 calories. This makes it a delightful treat that can fit into a balanced diet. The calories come from a combination of ingredients, including butter, sugar, and flour, which contribute to the cake’s rich flavor and moist texture.

Protein

In terms of protein, each slice offers about 4 grams. While this may not seem like a lot, it does provide a small boost to your daily protein intake. The eggs and buttermilk in the recipe are the primary sources of protein, helping to create a satisfying dessert that can be enjoyed in moderation.

Sodium

The sodium content in each serving of Chai Spiced Cake is around 200 milligrams. This amount is relatively low, making it a suitable option for those watching their sodium intake. The salt used in the recipe helps to enhance the flavors of the spices, creating a well-balanced cake.

Overall, Chai Spiced Cake is a delicious dessert that can be enjoyed as part of a balanced diet. With its warm spices and comforting flavors, it’s a treat that brings joy without overwhelming your nutritional goals. Enjoy your cake, and remember that moderation is key!

FAQs about Chai Spiced Cake

What spices are typically used in Chai Spiced Cake?

Chai Spiced Cake is known for its warm and aromatic spices that create a delightful flavor profile. The typical spices used in this cake include:

  • Cinnamon: Adds warmth and sweetness.
  • Ginger: Provides a zesty kick.
  • Cardamom: Offers a unique floral note.
  • Cloves: Contributes a rich, earthy flavor.
  • Black Pepper: Adds a subtle heat.

These spices work together to create the signature chai flavor that makes this cake so special. Feel free to adjust the spice levels to suit your taste!

Can I make Chai Spiced Cake ahead of time?

Absolutely! Chai Spiced Cake can be made ahead of time, making it a great option for parties or gatherings. You can bake the cake a day or two in advance. Just make sure to store it properly. Allow the cake to cool completely, then wrap it tightly in plastic wrap or store it in an airtight container. This will help keep it fresh and moist until you’re ready to serve.

How should I store Chai Spiced Cake?

To store your Chai Spiced Cake, follow these simple steps:

  • If the cake is frosted, keep it in the refrigerator to prevent the frosting from melting.
  • If it’s unfrosted, you can store it at room temperature in an airtight container for up to 3 days.
  • For longer storage, consider freezing the cake. Wrap it tightly in plastic wrap and then in aluminum foil. It can be frozen for up to 3 months.

When you’re ready to enjoy a slice, simply thaw it in the refrigerator overnight or at room temperature for a few hours.

What can I serve with Chai Spiced Cake?

Chai Spiced Cake pairs wonderfully with a variety of accompaniments. Here are some delicious options:

  • Frosting: Cream cheese frosting or vanilla buttercream enhances the cake’s flavors.
  • Fresh Fruits: Sliced apples, pears, or berries add a refreshing contrast.
  • Ice Cream: A scoop of vanilla or chai-flavored ice cream makes for a delightful treat.
  • Chai Tea: Enjoy a warm cup of chai tea alongside your cake for a cozy experience.
  • Nuts: Chopped walnuts or pecans can add a nice crunch.

These serving suggestions will elevate your Chai Spiced Cake experience, making it even more enjoyable for you and your guests!

Conclusion on Chai Spiced Cake

In conclusion, Chai Spiced Cake is more than just a dessert; it’s a delightful experience that brings warmth and comfort to any occasion. With its rich blend of spices and moist texture, this cake is sure to become a favorite in your baking repertoire. Whether you enjoy it plain, with frosting, or paired with fresh fruits, each bite is a celebration of flavor.

As you explore the variations of this cake, such as gluten-free and vegan options, you’ll find that everyone can enjoy its deliciousness. The versatility of Chai Spiced Cake makes it perfect for gatherings, celebrations, or simply a cozy afternoon treat. Plus, with the helpful tips and serving suggestions provided, you can create a memorable dessert that will impress your family and friends.

So, gather your ingredients, preheat your oven, and embark on this baking adventure. The delightful aroma of spices will fill your kitchen, and soon enough, you’ll be savoring a slice of this scrumptious Chai Spiced Cake. Happy baking, and enjoy every moment of this delicious journey!

Paul

Chai Spiced Cake is a delightful dessert to enjoy!

This Brown Sugar Chai Cake is warm, cozy, and packed with bold spices like cinnamon, cardamom, and cloves. Paired with a silky cream cheese frosting, it’s the ultimate fall-and-winter dessert—but honestly, you’ll want it all year long. Perfect for celebrations or whenever you need a sweet spiced hug in cake form.
Prep Time 30 minutes
Cook Time 40 minutes
Total Time 1 hour 10 minutes
Servings: 12 slices
Course: Dessert
Cuisine: American

Ingredients
  

  • For the Chai Cake:3 1/4 cups all-purpose flour1 1/2 cups dark brown sugar1 tablespoon plus 3/4 teaspoon baking powder1 teaspoon kosher salt1 tablespoon cinnamon2 teaspoons cardamom1 teaspoon ginger1 teaspoon allspice1 teaspoon nutmeg1 teaspoon cloves10 tablespoons unsalted butter room temperature1/2 cup neutral oil (canola, vegetable, or light-tasting olive oil)1 1/4 cups whole milk, room temperature2 large eggs, room temperature1 tablespoon vanilla extract
  • For the Cream Cheese Frosting:16 tablespoons unsalted butter room temperature12 ounces cold cream cheese3 cups powdered sugar, sifted

Method
 

  1. Preheat Oven and Prepare PansPreheat your oven to 325°F (163°C). Grease and line two 9-inch round cake pans with parchment paper. If using cake strips, soak them in ice water.
  2. Mix Dry Ingredients with ButterIn the bowl of a stand mixer fitted with the paddle attachment, combine the flour, brown sugar, baking powder, salt, and all the chai spices. Cube the butter and add it to the bowl. Mix on low speed until the mixture resembles wet sand.
  3. Add Wet IngredientsPour in the oil, milk, eggs, and vanilla extract. Mix until just combined—be careful not to overmix.
  4. Divide and BakeDivide the batter evenly between the prepared pans. Wrap cake strips around the pans if using. Bake for 35 to 40 minutes or until a toothpick inserted in the center comes out clean. Cool the cakes on wire racks. For easier frosting, wrap the cooled cakes in plastic wrap and freeze until ready to use.
  5. Make the FrostingIn a clean stand mixer bowl, beat the room temperature butter and cold cream cheese on high until smooth and fluffy. Reduce to low speed and gradually add the sifted powdered sugar. Increase speed and beat until smooth and creamy.
  6. Assemble the CakePlace the first cake layer on a stand or serving plate. Spread frosting evenly on top. Add the second layer and frost the top and sides of the cake. Leave the sides semi-naked if desired. Decorate with cinnamon sticks, star anise, or a light cinnamon dusting.

Notes

  • Chilling the cake layers helps with smooth, clean frosting application.
  • For a stronger chai flavor, you can steep chai tea in the milk before adding it to the batter.
  • Store leftovers in the fridge for up to 5 days. Bring to room temperature before serving for best texture.
  • This recipe makes a beautiful layer cake but can also be adapted into cupcakes—just adjust the bake time to about 20–22 minutes.

“Moroccan Meatballs with Couscous: A Flavorful Delight”

Moroccan meatballs with couscous. This dish is not just a meal; it’s an experience filled with rich flavors and vibrant aromas. Imagine sinking your teeth into tender, spiced meatballs, perfectly paired with fluffy couscous. It’s a combination that brings warmth and comfort to any table.

Moroccan meatballs, known as “Kefta,” are traditionally made with ground beef or lamb, mixed with a variety of spices and fresh herbs. These ingredients create a symphony of flavors that dance on your palate. The addition of couscous, a staple in Moroccan cooking, makes this dish even more special. Couscous is light, fluffy, and absorbs the delicious juices from the meatballs, making every bite a delight.

This dish is perfect for family dinners, gatherings, or even a cozy night in. It’s easy to prepare and can be customized to suit your taste. Whether you prefer it mild or with a spicy kick, Moroccan meatballs with couscous can be adjusted to your liking. Plus, it’s a great way to introduce your family to new flavors and culinary traditions.

In this article, we will guide you through the ingredients, preparation steps, and variations of this fantastic dish. So, roll up your sleeves and get ready to embark on a culinary adventure that will transport you straight to the heart of Morocco!

Ingredients for Moroccan Meatballs with Couscous

Moroccan meatballs with couscous, you will need a variety of fresh ingredients. Each component plays a vital role in building the rich flavors that define this dish. Here’s a complete list of what you’ll need:

  • 1 pound ground beef or lamb
  • 1 small onion, finely chopped
  • 2 cloves garlic, minced
  • 1/4 cup fresh parsley, chopped
  • 1/4 cup fresh cilantro, chopped
  • 1 teaspoon ground cumin
  • 1 teaspoon ground coriander
  • 1/2 teaspoon ground cinnamon
  • 1/2 teaspoon paprika
  • 1/2 teaspoon cayenne pepper (adjust to taste)
  • 1 teaspoon salt
  • 1/2 teaspoon black pepper
  • 1 large egg
  • 1/2 cup breadcrumbs
  • 2 tablespoons olive oil (for frying)
  • 1 cup couscous
  • 1 1/4 cups chicken or vegetable broth
  • 1/2 cup raisins (optional)
  • 1/4 cup slivered almonds (optional)

These ingredients come together to create a dish that is not only flavorful but also satisfying. The combination of spices like cumin, coriander, and cinnamon gives the meatballs their signature Moroccan taste. Meanwhile, the couscous serves as a perfect base, soaking up all the delicious juices from the meatballs.

Feel free to adjust the ingredients based on your preferences. For instance, if you want a vegetarian option, you can substitute the meat with lentils or chickpeas. The spices can also be modified to suit your taste. Now that you have your ingredients ready, let’s move on to the preparation steps!

Step-by-Step Preparation of Moroccan Meatballs with Couscous

Moroccan meatballs with couscous. This step-by-step guide will help you create a delicious meal that is sure to impress your family and friends. Let’s get started!

Step 1: Preparing the Meatball Mixture

First, take a large bowl and combine the ground beef or lamb with the finely chopped onion and minced garlic. These ingredients add moisture and flavor to the meatballs. Next, sprinkle in the fresh parsley and cilantro. These herbs not only enhance the taste but also add a lovely color to your dish.

Now, it’s time to add the spices! Mix in the ground cumin, ground coriander, ground cinnamon, paprika, cayenne pepper, salt, and black pepper. Each spice contributes to the unique Moroccan flavor profile. Finally, crack in the large egg and add the breadcrumbs. The egg helps bind everything together, while the breadcrumbs give the meatballs a nice texture.

Using your hands, mix everything until well combined. Make sure all the ingredients are evenly distributed. This step is crucial for ensuring that every meatball is packed with flavor!

Step 2: Shaping the Meatballs

Once your mixture is ready, it’s time to shape the meatballs. Take a small amount of the mixture, about the size of a golf ball, and roll it between your palms to form a ball. Aim for about 1 inch in diameter. This size ensures that they cook evenly and are easy to eat.

Place the shaped meatballs on a plate or a baking sheet. Make sure to leave some space between them to prevent sticking. You can also refrigerate them for about 15 minutes if you want them to firm up a bit before cooking.

Step 3: Cooking the Meatballs

Now, let’s cook those delicious meatballs! Heat the olive oil in a large skillet over medium heat. Once the oil is hot, carefully add the meatballs in batches. Avoid overcrowding the pan, as this can cause them to steam instead of brown.

Cook the meatballs for about 8-10 minutes, turning them occasionally to ensure they are browned on all sides. The goal is to achieve a nice golden crust while keeping the inside juicy and tender. Once cooked, remove the meatballs from the skillet and set them aside on a plate.

Step 4: Preparing the Couscous

While the meatballs are cooking, you can prepare the couscous. In a separate pot, bring the chicken or vegetable broth to a boil. Once boiling, remove the pot from heat and stir in the couscous. Cover the pot with a lid and let it sit for about 5 minutes. This allows the couscous to absorb the broth and become fluffy.

After 5 minutes, use a fork to fluff the couscous gently. If you’re adding raisins or slivered almonds, now is the time to stir them in. These ingredients add a delightful sweetness and crunch to the dish.

Step 5: Combining Meatballs and Couscous

Finally, it’s time to bring everything together! Serve the cooked meatballs over a generous bed of fluffy couscous. You can garnish with additional parsley or cilantro for a fresh touch. This presentation not only looks beautiful but also enhances the flavors of the dish.

Moroccan meatballs with couscous are ready to be enjoyed. This dish is perfect for sharing and will surely become a favorite in your household.

Variations of Moroccan Meatballs with Couscous

Moroccan meatballs with couscous recipe is delicious, there are many ways to customize it to suit your dietary preferences or to simply try something new. Here are some exciting variations that you can explore!

Vegetarian Alternatives

If you’re looking for a vegetarian option, you can easily swap out the meat for plant-based ingredients. One popular choice is to use lentils. Cooked lentils can be mixed with the same spices and herbs to create a hearty meatball alternative. Another option is to use chickpeas. Simply mash them and combine with the spices, breadcrumbs, and egg (or a flax egg for a vegan version).

For a unique twist, consider using grated vegetables like zucchini or carrots. These not only add flavor but also moisture to the meatballs. You can also incorporate quinoa or bulgur wheat for added texture and nutrition. These vegetarian alternatives are not only healthy but also packed with flavor, making them a delightful addition to your table.

Different Spice Blends

Moroccan meatballs with couscous lies in its versatility. You can experiment with different spice blends to create a unique flavor profile. For instance, try adding ras el hanout, a traditional Moroccan spice mix that includes a variety of spices like cardamom, nutmeg, and turmeric. This will give your meatballs a warm, aromatic flavor.

If you prefer a smokier taste, consider adding smoked paprika or chipotle powder. These spices will add depth and a hint of heat to your dish. You can also play around with fresh herbs like mint or dill for a refreshing twist. The possibilities are endless, and each variation can bring a new experience to your dining table!

Cooking Note for Moroccan Meatballs with Couscous

Moroccan meatballs with couscous, there are a few important cooking notes to keep in mind. These tips will help ensure that your dish turns out perfectly every time, enhancing both flavor and texture.

First, always use fresh ingredients. Fresh herbs like parsley and cilantro not only add vibrant color but also elevate the overall taste of the meatballs. Fresh spices are more potent than older ones, so check your spice cabinet before you start cooking. If your spices have been sitting for a while, consider replacing them for the best flavor.

Next, pay attention to the cooking temperature. When frying the meatballs, medium heat is ideal. If the heat is too high, the outside may burn while the inside remains undercooked. Conversely, if the heat is too low, the meatballs may not brown properly, resulting in a less appealing texture. A good rule of thumb is to aim for a golden-brown crust, which indicates that they are cooked through.

Additionally, don’t skip the resting time for the meatballs after cooking. Allowing them to rest for a few minutes helps the juices redistribute, making them even more tender and flavorful. This small step can make a big difference in the final dish.

Lastly, when preparing couscous, remember that the broth you use can greatly influence the flavor. Using homemade broth or a high-quality store-bought option will enhance the taste of the couscous. If you want to add more depth, consider infusing the broth with spices or herbs before adding the couscous.

Moroccan meatballs with couscous that is sure to impress. Enjoy the process and savor the delightful flavors that come together in this wonderful dish!

Serving Suggestions for Moroccan Meatballs with Couscous

Moroccan meatballs with couscous, presentation is key! A well-plated dish not only looks appealing but also enhances the dining experience. Here are some delightful serving suggestions to elevate your meal:

  • Garnish with Fresh Herbs: After plating, sprinkle some additional chopped parsley or cilantro on top of the meatballs. This adds a pop of color and freshness, making the dish visually appealing.
  • Accompany with a Side Salad: A light salad made with mixed greens, cherry tomatoes, and a lemon vinaigrette pairs wonderfully with the rich flavors of the meatballs. The crispness of the salad balances the dish perfectly.
  • Serve with Yogurt Sauce: A cool yogurt sauce can complement the spices in the meatballs. Simply mix plain yogurt with a squeeze of lemon juice, minced garlic, and a pinch of salt. Drizzle this over the meatballs for a refreshing touch.
  • Include Pita Bread: Warm pita bread is a great addition to the meal. It can be used to scoop up the meatballs and couscous, adding a fun, interactive element to your dining experience.
  • Offer a Variety of Dips: Consider serving a selection of dips, such as hummus or baba ganoush, alongside the meatballs. These dips can add different flavors and textures, making the meal even more enjoyable.

Moroccan meatballs with couscous with a glass of mint tea or a light, fruity wine. The refreshing notes of mint tea complement the spices beautifully, while a chilled white wine can enhance the overall flavor profile.

With these serving suggestions, your Moroccan meatballs with couscous will not only taste amazing but also look stunning on the table. Enjoy sharing this delightful dish with family and friends!

Tips for Perfect Moroccan Meatballs with Couscous

Moroccan meatballs with couscous is all about attention to detail. With a few simple tips, you can elevate your dish and impress everyone at the table. Here are some essential tips to ensure your meatballs turn out delicious every time:

  • Choose Quality Meat: Opt for fresh ground beef or lamb. The quality of the meat greatly affects the flavor and texture of your meatballs. If possible, buy from a trusted butcher for the best results.
  • Don’t Overmix: When combining the ingredients for the meatballs, mix just until everything is combined. Overmixing can lead to tough meatballs. A gentle hand will keep them tender and juicy.
  • Chill the Mixture: After preparing the meatball mixture, consider chilling it in the refrigerator for about 30 minutes. This helps the flavors meld together and makes it easier to shape the meatballs.
  • Use a Meat Thermometer: To ensure your meatballs are cooked through, use a meat thermometer. The internal temperature should reach 160°F (70°C) for beef and 165°F (74°C) for lamb. This guarantees they are safe to eat while remaining juicy.
  • Experiment with Herbs: While parsley and cilantro are traditional, feel free to experiment with other herbs. Fresh mint or dill can add a unique twist to your meatballs, enhancing the overall flavor.
  • Adjust Spice Levels: If you enjoy a bit of heat, don’t hesitate to adjust the cayenne pepper or add other spicy ingredients. Taste the mixture before cooking to find the perfect balance for your palate.
  • Let the Couscous Rest: After cooking the couscous, let it sit covered for a few minutes before fluffing. This allows it to absorb any remaining liquid and results in a light, fluffy texture.
  • Serve Immediately: For the best experience, serve the meatballs and couscous right after cooking. This ensures that the meatballs are warm and the couscous is fluffy, making for a delightful meal.

Moroccan meatballs with couscous that are not only flavorful but also visually appealing. Enjoy the process and the delicious results!

Breakdown of Time for Moroccan Meatballs with Couscous

Moroccan meatballs with couscous can help you plan your cooking session effectively. Here’s a detailed breakdown of the time needed for each step, ensuring you can enjoy this delicious dish without any rush.

Prep Time

The prep time for this delightful dish is approximately 20-30 minutes. This includes gathering all your ingredients, chopping the onion, garlic, and herbs, and mixing the meatball ingredients together. If you choose to chill the meatball mixture for better texture, add an extra 30 minutes to this time. This step is optional but can enhance the flavor and ease of shaping the meatballs.

Cooking Time

Moroccan meatballs with couscous takes about 20-25 minutes. This includes frying the meatballs until they are golden brown and cooking the couscous in broth. The meatballs typically take around 8-10 minutes to cook, while the couscous requires about 5 minutes to absorb the broth and become fluffy. If you are adding optional ingredients like raisins or almonds, factor in a couple of extra minutes for mixing.

Total Time

In total, you can expect to spend about 40-55 minutes from start to finish. This includes both prep and cooking times. If you decide to chill the meatball mixture, the total time may extend to around 1 hour and 25 minutes. Regardless of the time, the end result is a flavorful and satisfying meal that is well worth the effort!

Moroccan meatballs with couscous. Happy cooking!

Nutritional Information for Moroccan Meatballs with Couscous

Moroccan meatballs with couscous dish not only delights your taste buds but also provides a good mix of nutrients. Here’s a breakdown of the nutritional information per serving, helping you make informed choices while enjoying this delicious meal.

Calories

Moroccan meatballs with couscous contains approximately 450 calories. This calorie count includes the meatballs, couscous, and any optional ingredients like raisins and slivered almonds. The combination of protein from the meat and carbohydrates from the couscous makes it a satisfying meal that can keep you energized throughout the day.

Protein

Protein is a vital nutrient for building and repairing tissues in our bodies. In this dish, you can expect around 25 grams of protein per serving. The ground beef or lamb provides a rich source of protein, which is essential for muscle health and overall well-being. Pairing the meatballs with couscous adds a complete protein profile, making this dish a nutritious choice.

Sodium

Moroccan meatballs with couscous contains approximately 800 milligrams. This amount can vary based on the type of broth used and the added salt in the recipe. While sodium is necessary for bodily functions, it’s important to monitor your intake. If you’re watching your sodium levels, consider using low-sodium broth or reducing the added salt in the recipe.

Moroccan meatballs with couscous is a well-rounded dish that offers a good balance of calories, protein, and flavor. Enjoy this meal as part of a healthy diet, and feel free to adjust the ingredients to meet your nutritional needs!

FAQs about Moroccan Meatballs with Couscous

What can I serve with Moroccan meatballs?

Moroccan meatballs with couscous, there are plenty of delicious options to consider. A fresh salad, such as a simple cucumber and tomato salad, pairs wonderfully with the rich flavors of the meatballs. You can also serve a side of roasted vegetables for added nutrition and color. For a refreshing touch, consider a yogurt sauce or tzatziki, which complements the spices beautifully. Additionally, warm pita bread or flatbreads can be a fun way to enjoy the meal, allowing everyone to scoop up the meatballs and couscous. These sides not only enhance the meal but also create a delightful dining experience.

Can I make Moroccan meatballs ahead of time?

Moroccan meatballs with couscous ahead of time, making it a convenient option for busy days. To do this, shape the meatballs and store them in the refrigerator for up to 24 hours before cooking. You can also cook the meatballs in advance and reheat them when ready to serve. Just be sure to store them in an airtight container. The couscous can be made ahead as well, but it’s best to prepare it fresh to maintain its fluffy texture. If you do make it ahead, reheat it gently with a splash of broth to keep it moist.

What type of meat is best for Moroccan meatballs?

Moroccan meatballs with couscous, ground beef and lamb are the most traditional choices. Both meats provide rich flavor and moisture, making them ideal for meatballs. If you prefer a leaner option, ground turkey or chicken can also work well. These alternatives will yield a lighter dish while still being delicious. Ultimately, the best meat depends on your personal preference and dietary needs. Feel free to experiment with different types to find your favorite!

How do I store leftovers of Moroccan meatballs with couscous?

Moroccan meatballs with couscous is simple! Allow the dish to cool completely before transferring it to an airtight container. You can store the meatballs and couscous together or separately, depending on your preference. In the refrigerator, they will last for about 3-4 days. If you want to keep them longer, consider freezing the meatballs. They can be frozen for up to 3 months. When ready to enjoy, simply thaw in the refrigerator overnight and reheat in the oven or on the stovetop. This way, you can savor the delightful flavors of Moroccan cuisine even on busy days!

Conclusion on Moroccan Meatballs with Couscous

Moroccan meatballs with couscous is a dish that beautifully combines rich flavors, vibrant spices, and wholesome ingredients. This delightful meal not only satisfies your taste buds but also brings a touch of Moroccan culture to your dining table. Whether you’re cooking for family or entertaining friends, this dish is sure to impress.

From the tender meatballs infused with aromatic spices to the fluffy couscous that soaks up all the delicious juices, every bite is a celebration of flavor. Plus, the versatility of this recipe allows you to customize it to suit your preferences, whether you choose to go vegetarian or experiment with different spice blends.

As you prepare this dish, remember the tips and variations shared throughout the article. They will help you create a meal that is not only delicious but also visually appealing. Don’t hesitate to get creative with your serving suggestions, as they can elevate the dining experience even further.

Moroccan meatballs with couscous, you’re not just making a meal; you’re creating memories filled with warmth and flavor. Happy cooking!

Paul

“Moroccan Meatballs with Couscous: A Flavorful Delight”

This Moroccan Meatball Tagine is comfort food with deep, fragrant soul. Juicy meatballs simmer in a spiced tomato sauce and are optionally crowned with silky eggs for a rich, satisfying finish. Serve with crusty bread or fluffy couscous for a cozy, flavor-packed meal straight from North Africa.
Prep Time 20 minutes
Cook Time 45 minutes
Total Time 1 hour 5 minutes
Servings: 4 servings
Course: Main Course
Cuisine: Moroccan / North African

Ingredients
  

  • For the Moroccan Meatballs:1 pound ground lamb or ground beef1/4 onion grated2 tablespoons chopped fresh parsley2 tablespoons chopped fresh cilantro1 teaspoon paprika1/2 teaspoon cumin powder1 teaspoon coriander powder1 teaspoon salt1/2 teaspoon black pepper1/4 teaspoon turmeric1/4 teaspoon cinnamon1/2 teaspoon ginger powder (optional)2 garlic cloves, grated
  • For the Tagine Sauce:2 1/2 tablespoons olive oil1 large onion diced3 garlic cloves, finely chopped1 1/2 teaspoons paprika1/4 teaspoon turmeric1/4 teaspoon cinnamon1/2 teaspoon black pepper1/2 teaspoon cumin1 teaspoon coriander1/4 teaspoon ginger powder or 1 teaspoon grated fresh ginger (optional)1/4 teaspoon cayenne pepperSalt, to taste1 tablespoon tomato paste1 1/2 cups grated tomatoes2 tablespoons chopped fresh parsley2 tablespoons chopped fresh cilantro1/4 cup water3 to 4 eggs (optional)

Method
 

  1. Make the MeatballsIn a large bowl, combine all meatball ingredients. Mix gently with your hands until just combined. Form into 1 1/4-inch balls and refrigerate while you prepare the sauce.
  2. Start the SauceIn a skillet or tagine over medium-high heat, heat the olive oil. Sauté the diced onion until golden, about 5–7 minutes. Add garlic and cook for another minute.
  3. Spice the BaseIn a small bowl, combine all the dry spices for the sauce. Stir them into the onion mixture. Add the tomato paste and cook for another minute to deepen the flavor.
  4. Simmer the SauceAdd the grated tomatoes, parsley, cilantro, salt, and water. Stir to combine. Simmer over medium-low heat for 25–30 minutes, stirring occasionally.
  5. Add the MeatballsGently place the chilled meatballs into the sauce. Cover and simmer for 10–15 minutes, turning them once or twice to coat and cook evenly.
  6. Add Eggs (Optional)Make small wells in the sauce and crack an egg into each one. Cover and cook another 10–15 minutes, until the egg whites are set but the yolks remain soft.
  7. ServeGarnish with more chopped parsley or cilantro. Serve hot with crusty bread, couscous, or rice. Add green olives for a briny depth if desired.

Notes

  • This dish is traditionally made in a tagine but works just as well in a deep skillet with a lid.
  • You can make the meatballs ahead and freeze them raw for quick meal prep later.
  • Don’t skip the fresh herbs—they are key to the dish’s flavor!
  • Grated fresh tomatoes give the best texture, but canned crushed tomatoes work in a pinch.

Cilantro Orange Chicken with Rice and Beans is delicious!

Cilantro Orange Chicken with Rice and Beans Recipe. This dish is not just a meal; it’s an experience that brings together vibrant flavors and wholesome ingredients. Imagine tender chicken thighs infused with the zesty brightness of orange juice, complemented by the earthy notes of black beans and the freshness of cilantro. It’s a perfect harmony of taste that will surely impress your family and friends.

What Makes Cilantro Orange Chicken with Rice and Beans Special?

What sets this dish apart is its unique blend of flavors. The sweetness of honey and the tanginess of orange juice create a delicious sauce that coats the chicken beautifully. Each bite is a burst of flavor, making it a favorite for both kids and adults. Additionally, the combination of rice and beans provides a hearty base, ensuring that everyone leaves the table satisfied.

Moreover, this recipe is incredibly versatile. You can easily adjust the spice levels or swap out ingredients to suit your taste. Whether you’re looking for a quick weeknight dinner or a dish to impress guests, this recipe fits the bill. Plus, it’s packed with nutrients, making it a healthy choice for any meal.

So, roll up your sleeves and get ready to create a dish that’s not only delicious but also brings a touch of sunshine to your dinner table. Let’s dive into the ingredients you’ll need to make this scrumptious meal!

Ingredients for Cilantro Orange Chicken with Rice and Beans Recipe

Cilantro Orange Chicken with Rice and Beans Recipe, you’ll need a selection of fresh and flavorful ingredients. Each component plays a vital role in bringing this dish to life. Here’s what you’ll need:

  • 1 pound boneless, skinless chicken thighs
  • 1 teaspoon salt
  • 1 teaspoon black pepper
  • 1 tablespoon olive oil
  • 1 cup orange juice (freshly squeezed if possible)
  • 2 tablespoons honey
  • 2 cloves garlic, minced
  • 1 teaspoon ground cumin
  • 1 teaspoon chili powder
  • 1 cup cooked white rice
  • 1 can (15 ounces) black beans, drained and rinsed
  • 1 cup fresh cilantro, chopped
  • 1 lime, cut into wedges

These ingredients come together to create a dish that is not only delicious but also visually appealing. The vibrant colors of the orange juice, cilantro, and lime add a fresh touch to your plate. Plus, the combination of protein from the chicken and fiber from the beans makes this meal both satisfying and nutritious.

For those who want to enhance the flavor even further, consider marinating the chicken in the orange juice mixture for at least 30 minutes before cooking. This step allows the chicken to absorb all the wonderful flavors, making it even more delicious. Now that you have your ingredients ready, let’s move on to the step-by-step preparation of this delightful dish!

Step-by-Step Preparation of Cilantro Orange Chicken with Rice and Beans Recipe

Cilantro Orange Chicken with Rice and Beans Recipe. Each step is simple and straightforward, ensuring that you can create this delicious dish with ease. Let’s get started!

Step 1: Marinating the Chicken

To kick things off, marinating the chicken is a crucial step. This process enhances the flavor and tenderness of the meat. In a bowl, combine the orange juice, honey, minced garlic, cumin, and chili powder. Mix well to create a flavorful marinade.

Next, add the chicken thighs to the marinade, ensuring they are fully coated. Cover the bowl with plastic wrap and let it sit in the refrigerator for at least 30 minutes. If you have more time, marinating for a few hours will deepen the flavors even more. This step is essential for achieving that juicy, flavorful chicken!

Step 2: Preparing the Rice and Beans

While the chicken is marinating, you can prepare the rice and beans. If you haven’t cooked the rice yet, now is the perfect time. Follow the package instructions to cook 1 cup of white rice. Once cooked, set it aside and keep it warm.

For the black beans, take a separate pot and add the drained and rinsed beans. Heat them over low heat until warmed through. Stir in half of the chopped cilantro and season with salt to taste. This will add a lovely flavor to the beans, making them a perfect side for your chicken.

Step 3: Cooking the Chicken

Once the chicken has marinated, it’s time to cook it. Heat 1 tablespoon of olive oil in a large skillet over medium-high heat. Carefully add the marinated chicken thighs to the skillet. Cook for about 5-7 minutes on each side, or until they are golden brown and cooked through. The aroma will be irresistible!

After the chicken is cooked, pour the remaining marinade over the chicken in the skillet. Reduce the heat to medium and let it simmer for about 5-10 minutes. This allows the sauce to thicken slightly and coat the chicken beautifully.

Step 4: Combining Flavors

Now that your chicken is cooked and the sauce is thickened, it’s time to bring everything together. On each plate, place a generous scoop of the cooked white rice. Top it with the cilantro orange chicken, ensuring to drizzle some of that delicious sauce over the top.

Next, add a serving of the seasoned black beans alongside the rice. Finally, garnish your dish with the remaining chopped cilantro and lime wedges. The vibrant colors and fresh aromas will make your meal look as good as it tastes!

Cilantro Orange Chicken with Rice and Beans Recipe that is sure to impress. Now, let’s explore some variations you can try to make this dish even more exciting!

Variations of Cilantro Orange Chicken with Rice and Beans Recipe

Cilantro Orange Chicken with Rice and Beans Recipe is already a delightful dish, there are many ways to switch things up! Whether you want to try different proteins or explore vegetarian options, these variations will keep your meals exciting and flavorful. Let’s dive into some alternatives you can consider!

Alternative Proteins to Use

If you’re looking to change the protein in this recipe, there are several delicious options. Here are a few alternatives:

  • Turkey Thighs: Similar in texture to chicken, turkey thighs can be a great substitute. They will absorb the marinade well and provide a slightly different flavor.
  • Pork Tenderloin: For a richer taste, try using pork tenderloin. Slice it into medallions and follow the same cooking steps for a savory twist.
  • Tofu: For a plant-based option, firm tofu works wonderfully. Press it to remove excess moisture, then marinate and cook it just like the chicken.
  • Fish: White fish like tilapia or cod can also be used. They cook quickly and will soak up the orange marinade beautifully.

Each of these proteins will bring a unique flavor to your dish while still allowing you to enjoy the vibrant sauce and sides. Feel free to experiment and find your favorite!

Vegetarian Options for Cilantro Orange Chicken with Rice and Beans

Cilantro Orange Chicken with Rice and Beans Recipe, you’re in luck! Here are some tasty ideas:

  • Chickpeas: Use canned or cooked chickpeas as a protein source. They are hearty and will absorb the marinade well, making them a satisfying alternative.
  • Quinoa: Instead of chicken, cook quinoa and mix it with the orange sauce. This grain is packed with protein and adds a nutty flavor.
  • Vegetable Medley: Sauté a mix of your favorite vegetables, such as bell peppers, zucchini, and carrots. Toss them in the marinade for a colorful and nutritious dish.
  • Cauliflower: Roasted cauliflower florets can be a great substitute. They have a lovely texture and will soak up the flavors of the sauce.

Cilantro Orange Chicken with Rice and Beans Recipe fresh and exciting every time you make it!

Cooking Note for Cilantro Orange Chicken with Rice and Beans Recipe

Cilantro Orange Chicken with Rice and Beans Recipe, there are a few cooking notes to keep in mind to ensure your dish turns out perfectly every time. These tips will help you enhance the flavors and achieve the best texture for your chicken and sides.

First, always use fresh ingredients whenever possible. Freshly squeezed orange juice will provide a brighter flavor compared to bottled juice. The same goes for the cilantro; fresh herbs can elevate the taste of your dish significantly.

Next, pay attention to the cooking temperature. Cooking the chicken on medium-high heat allows it to brown nicely while keeping it juicy inside. If the heat is too high, the outside may cook too quickly, leaving the inside undercooked. Conversely, cooking on too low a heat can result in dry chicken.

Additionally, don’t skip the marinating step! Allowing the chicken to soak in the marinade for at least 30 minutes will infuse it with flavor. If you have time, marinating overnight in the refrigerator can yield even better results.

When it comes to the rice, consider using jasmine or basmati rice for a fragrant touch. These varieties add a lovely aroma and pair well with the flavors of the dish. If you prefer brown rice, it can be used as a healthier alternative, but remember it will require a longer cooking time.

Lastly, feel free to adjust the seasoning to your taste. If you enjoy a bit of heat, add some diced jalapeños or a pinch of cayenne pepper to the marinade. This will give your dish an extra kick that many will love!

Cilantro Orange Chicken with Rice and Beans Recipe that everyone will enjoy. Happy cooking!

Serving Suggestions for Cilantro Orange Chicken with Rice and Beans Recipe

Cilantro Orange Chicken with Rice and Beans Recipe, it’s time to think about how to serve it. The presentation can elevate your meal, making it even more enjoyable. Here are some ideal side dishes and garnishing tips to enhance your dining experience.

Ideal Side Dishes

While the chicken, rice, and beans are filling, adding a few side dishes can create a well-rounded meal. Here are some great options:

  • Grilled Vegetables: A mix of grilled zucchini, bell peppers, and asparagus adds color and nutrition. The smoky flavor complements the chicken beautifully.
  • Avocado Salad: A fresh salad with diced avocado, tomatoes, and red onion drizzled with lime juice provides a creamy contrast to the dish.
  • Coleslaw: A crunchy coleslaw with a tangy dressing can add a refreshing crunch that balances the flavors of the chicken.
  • Plantains: Fried or baked plantains offer a sweet and savory element that pairs well with the citrusy chicken.

These side dishes not only enhance the meal but also add variety to your plate. Feel free to mix and match based on your preferences and what you have on hand!

Garnishing Tips

Garnishing your dish can make it visually appealing and add extra flavor. Here are some simple yet effective garnishing tips:

  • Fresh Cilantro: Sprinkle additional chopped cilantro over the chicken just before serving. This adds a pop of color and freshness.
  • Lime Wedges: Serve lime wedges on the side. A squeeze of lime juice over the chicken enhances the flavors and adds brightness.
  • Chili Flakes: For those who enjoy a bit of heat, a sprinkle of chili flakes can add a nice kick and a touch of color.
  • Sesame Seeds: Toasted sesame seeds can add a nutty flavor and a crunchy texture, making your dish even more delightful.

Cilantro Orange Chicken with Rice and Beans Recipe with these thoughtful touches!

Tips for Perfecting Your Cilantro Orange Chicken with Rice and Beans Recipe

Cilantro Orange Chicken with Rice and Beans Recipe, a few tips can help you elevate your dish to the next level. These simple yet effective suggestions will ensure that your meal is bursting with flavor and perfectly cooked every time. Let’s explore some key tips!

First, consider the marinating time. While 30 minutes is great, letting the chicken marinate for a few hours or even overnight will deepen the flavors. The longer the chicken sits in the marinade, the more it absorbs the delicious orange and spice notes.

Next, pay attention to the cooking method. When cooking the chicken, make sure not to overcrowd the skillet. If the pan is too full, the chicken will steam instead of sear, preventing that lovely golden-brown crust. Cook in batches if necessary to achieve that perfect texture.

Another important tip is to use a meat thermometer. Chicken should reach an internal temperature of 165°F (75°C) to ensure it’s fully cooked. This will help you avoid undercooked or overcooked chicken, keeping it juicy and tender.

For the rice, consider adding a bit of flavor while cooking. You can use chicken broth instead of water for cooking the rice. This adds an extra layer of taste that complements the chicken beautifully.

Don’t forget about seasoning! Taste your black beans as they heat up. A pinch of cumin or a dash of hot sauce can enhance their flavor. Adjust the seasoning to your liking, ensuring every component of the dish is well-seasoned.

Lastly, presentation matters! When serving, layer the rice, beans, and chicken thoughtfully. A well-presented dish not only looks appealing but also makes the meal feel special. Use colorful garnishes like lime wedges and fresh cilantro to brighten up the plate.

Cilantro Orange Chicken with Rice and Beans Recipe that will impress everyone at your table. Happy cooking!

Breakdown of Time for Cilantro Orange Chicken with Rice and Beans Recipe

Cilantro Orange Chicken with Rice and Beans Recipe can help you plan your cooking efficiently. Here’s a breakdown of the time required for preparation and cooking, ensuring you can enjoy this delicious meal without any rush.

Prep Time

The prep time for this recipe is approximately 15-20 minutes. This includes gathering all your ingredients, marinating the chicken, and preparing the rice and beans. If you choose to marinate the chicken for longer, you can set it aside in the refrigerator while you prepare the other components. This step is crucial for enhancing the flavor of the chicken.

Cooking Time

Cilantro Orange Chicken with Rice and Beans Recipe is about 20-25 minutes. This includes cooking the chicken in the skillet and warming the black beans. The chicken will take around 10-14 minutes to cook through, while the beans only need a few minutes to heat up. During this time, you can also cook the rice if you haven’t done so already.

Total Time

In total, you can expect the entire process to take about 40-45 minutes. This includes both prep and cooking time. If you marinate the chicken for a longer period, the total time will increase accordingly. However, the extra time spent marinating will be well worth it for the enhanced flavor!

Cilantro Orange Chicken with Rice and Beans Recipe without feeling rushed. Happy cooking!

Nutritional Information for Cilantro Orange Chicken with Rice and Beans Recipe

Cilantro Orange Chicken with Rice and Beans Recipe not only delights your taste buds but also provides a good mix of nutrients. Here’s a closer look at the nutritional information per serving:

Calories

Each serving of this delicious dish contains approximately 400 calories. This makes it a satisfying option for lunch or dinner without overwhelming your daily caloric intake. The combination of chicken, rice, and beans ensures that you’re getting a hearty meal that keeps you full and energized.

Protein Content

Protein is vital for muscle repair and overall health. In this recipe, you’ll find about 28 grams of protein per serving. The chicken thighs are an excellent source of lean protein, while the black beans contribute additional protein and fiber. This makes the dish a great choice for those looking to increase their protein intake.

Sodium Levels

When it comes to sodium, this recipe contains approximately 600 milligrams per serving. While this is a reasonable amount, it’s always a good idea to monitor your sodium intake, especially if you’re watching your salt consumption. You can reduce sodium levels by using low-sodium black beans and adjusting the salt added during cooking.

Cilantro Orange Chicken with Rice and Beans Recipe is a nutritious and balanced meal option. It provides a good mix of calories, protein, and essential nutrients, making it a fantastic choice for any day of the week. Enjoy this flavorful dish while also taking care of your health!

FAQs about Cilantro Orange Chicken with Rice and Beans Recipe

Can I use frozen chicken for this recipe?

Cilantro Orange Chicken with Rice and Beans Recipe. However, it’s important to thaw the chicken completely before marinating and cooking. You can thaw it overnight in the refrigerator or use the defrost setting on your microwave. Once thawed, follow the marinating and cooking steps as usual. Just ensure the chicken reaches an internal temperature of 165°F (75°C) for safe consumption.

What can I substitute for cilantro?

If you’re not a fan of cilantro or have an allergy, there are several great substitutes. Fresh parsley is a popular alternative that provides a similar freshness without the strong flavor of cilantro. You can also use basil or mint for a different twist. If you prefer a milder herb, chives can work well too. Just remember to adjust the amount based on your taste preferences!

How can I make this dish spicier?

Cilantro Orange Chicken with Rice and Beans Recipe, consider incorporating diced jalapeños or serrano peppers into the marinade. You can also add a pinch of cayenne pepper or red pepper flakes to the sauce while it simmers. For an extra kick, serve the dish with a side of hot sauce or sliced fresh chili peppers. Adjust the spice level to suit your taste!

Can I prepare the rice and beans in advance?

Cilantro Orange Chicken with Rice and Beans Recipe on a busy weeknight!

FAQs about Cilantro Orange Chicken with Rice and Beans Recipe

Can I use frozen chicken for this recipe?

Cilantro Orange Chicken with Rice and Beans Recipe. However, it’s important to thaw the chicken completely before marinating and cooking. You can thaw it overnight in the refrigerator or use the defrost setting on your microwave. Once thawed, follow the marinating and cooking steps as usual. Just ensure the chicken reaches an internal temperature of 165°F (75°C) for safe consumption.

What can I substitute for cilantro?

If you’re not a fan of cilantro or have an allergy, there are several great substitutes. Fresh parsley is a popular alternative that provides a similar freshness without the strong flavor of cilantro. You can also use basil or mint for a different twist. If you prefer a milder herb, chives can work well too. Just remember to adjust the amount based on your taste preferences!

How can I make this dish spicier?

Cilantro Orange Chicken with Rice and Beans Recipe, consider incorporating diced jalapeños or serrano peppers into the marinade. You can also add a pinch of cayenne pepper or red pepper flakes to the sauce while it simmers. For an extra kick, serve the dish with a side of hot sauce or sliced fresh chili peppers. Adjust the spice level to suit your taste!

Can I prepare the rice and beans in advance?

Cilantro Orange Chicken with Rice and Beans Recipe on a busy weeknight!

Conclusion on Cilantro Orange Chicken with Rice and Beans Recipe

Cilantro Orange Chicken with Rice and Beans Recipe is a delightful dish that brings together vibrant flavors and wholesome ingredients. This recipe not only satisfies your taste buds but also provides a nutritious meal that is perfect for any occasion. Whether you’re cooking for your family on a busy weeknight or impressing guests at a dinner party, this dish is sure to be a hit.

With its easy preparation and versatility, you can customize the recipe to suit your preferences. From alternative proteins to vegetarian options, the possibilities are endless. Plus, the combination of tender chicken, zesty orange sauce, and hearty rice and beans creates a satisfying meal that everyone will enjoy.

Remember to take your time with the marinating process, as it enhances the flavors and tenderness of the chicken. Don’t hesitate to experiment with different side dishes and garnishes to elevate your dining experience. With a little creativity, you can make this dish your own!

Cilantro Orange Chicken with Rice and Beans Recipe that will brighten your table and warm your heart. Happy cooking!

Paul

Cilantro Orange Chicken with Rice and Beans is delicious!

Sweet, tangy, and full of zesty flair—this Cilantro Orange Chicken is marinated in a bright citrus-herb sauce, then broiled to golden perfection. Paired with rice, beans, and juicy tropical fruit, it’s a weeknight dinner that tastes like sunshine on a plate.
Prep Time 15 minutes
Cook Time 12 minutes
Total Time 27 minutes
Servings: 4 servings
Course: Main Dish
Cuisine: Latin-Inspired / Fusion

Ingredients
  

  • For the Cilantro Orange Sauce:1/4 to 1/2 cup finely chopped cilantro2 garlic cloves gratedJuice of 2 oranges (about 4 to 5 tablespoons)Zest of 1 orange (optional)3 tablespoons brown sugar3 tablespoons avocado oil2 tablespoons white vinegar1 1/2 teaspoons salt
  • For the Chicken:1.25 pounds boneless skinless chicken thighs, cut into bite-sized piecesWood or metal skewers (optional)
  • Optional for Serving:1 pouch 8.8 oz of yellow rice (store-bought or homemade)1 can (14 oz) black beans or refried beans1 to 2 cups diced pineapple, mango, or avocado

Method
 

  1. Prep the SkewersIf using wooden skewers, soak them in water for 20–30 minutes. Preheat your oven broiler and position a rack 6 inches from the heat. Line a baking sheet with parchment or foil.
  2. Make the SauceIn a bowl, whisk together the cilantro, garlic, orange juice and zest, brown sugar, avocado oil, vinegar, and salt. Set aside half of the sauce for later use.
  3. Marinate the ChickenToss the chicken pieces with the remaining half of the sauce in a bowl. Thread onto skewers or place directly on the lined baking sheet. Optionally sprinkle with a bit more salt.
  4. Broil the ChickenBroil for about 12 minutes or until the chicken is cooked through and golden on the edges.
  5. Make a Tropical Salsa (Optional)Mix some of the reserved sauce with diced pineapple, mango, or avocado for a fresh and juicy topping.
  6. ServeBrush the cooked chicken with the remaining sauce. Serve warm with yellow rice, beans, and fruit salsa if desired.

Notes

  • You can grill the chicken instead of broiling—just cook over medium-high heat until nicely charred and fully cooked.
  • The sauce also works great on shrimp or tofu for a vegetarian/seafood twist.
  • Adjust sweetness by using more or less brown sugar depending on your taste.
  • If making ahead, keep components separate and assemble just before serving.